

Page 1
FRANÇAIS
Guide de l’utilisateur du
MMBB0360104 (1.0) G User Guide
User Guide
ENGLISH
Page 2

Bluetooth QD ID B015810
Page 3
User Guide
- English
This document is the user guide for the LG IQ
All rights for this document are reserved by LG Electronics. Copying,
modifying and distributing this document without the consent of LG
TM/MC
Windows Smartphone.
Electronics are prohibited.
Page 4

Contents
Introduction 8
For Your Safety 9
TM/MC
LG IQ
Features 17
Phone Components
Touch Key Guidelines 19
Getting Started 20
How to change the screen
LG S-class UI Tutorial
LG home screen 21
Installing the SIM Card and Battery 22
Charging the Battery 23
Charging Mode 24
Disconnecting the Charger 25
How to Use a MicroSD Memory Card (Optional)
Turn the Device On 27
Turn the LG IQ
Go to sleep mode
TM/MC
on/off
Volume keys 28
Calibrate the touch screen
Taking a look at LG IQ
TM/MC
’s home screen 29
Using the Multitasking function 30
Contents
2
Page 5

Using the LG Menu 31
Indicators 32
Customizing the LGIdles screen 34
Using the Start Menu 35
Editing the Today Screen
Changing the Language
Contacts 40
Overview of Contacts
Searching for a contact
Adding a new contact
To Create a Contact 41
To Change Contact Information
Call 37
Call History
Make a call
Making a Call from your phone
Making a Call from your contacts 38
Making a Call from History
Answering and rejecting a call
In-call options 39
To Find a Contact 42
To Copy a SIM Contact to Handset
Sending Messages 43
Entering texts 45
Using text input method
Entering Text on your device using the Keypad 46
Contents
3
Page 6

Contents
Entering Text on your device in portrait view 47
Full QWERTY
The Half QWERTY 48
Accessing symbols
Accessing numbers
CAPS key
FN key
Entering the text with XT9 mode 49
Email 50
About Email
Set up a Personal Email
Set up Corporate Wireless Email 51
Send an Email
Messaging 52
Managing Messages
Downloading Messages 53
To Reply to or Forward a Message
Music Player 54
Adding Music to your Handset 55
Using your Alarm 59
Using the RSS Reader 60
Weather
Using your Calculator
Contents
4
Page 7

Tip calculator 61
Taking photos and recording 68
Using your Stopwatch
Wireless Manager 62
Configuring Wi-Fi Connection Settings 63
Changing your Phone Settings 64
Using the Screen Outputs
Displaying the Today screen
Using Bluetooth 65
Using TTY 66
TTY Mode
Connecting TTY Equipment and a Terminal 67
Before taking a picture 69
After taking a photo 70
Before taking records 71
After recording the video clip 72
Photo Album 73
My Multimedia 74
To Copy a Picture or Video Clip to Your device 75
FM Radio
FM Radio 76
Contents
5
Page 8

Contents
To Set Sound & Notifications on Actions 77
Navigation Sensor
Task Manager 78
Voice command
Voice Command Settings 79
Internet Sharing 80
Activesync 81
Setting up Windows Vista™ 82
Setting up Windows XP 83
Synchronizing Information 84
Synchronizing via Bluetooth 86
Synchronizing Music, Video, and Pictures 87
Touch Feedback 88
Screen
Button
Sensors 89
Accelerometer Sensor
Auto Luminous Control Sensor
Proximity Sensor
IM 90
Sign in
Switching between Communities 91
Change Status
Contact List
Conversations 92
Contents
6
Page 9

Office Mobile 93
Excel Mobile
PowerPoint Mobile 95
Word Mobile
OneNote Mobile
Mobile Zip
Reset the Device 101
To perform a soft reset
To perform a hard reset
Accessories 103
To view mobile zip 96
To navigate menus
To extract Archive/Archives 98
To Rename an Item or Archive 99
To Open an Archive from File Explorer
To Copy or Move an Item or Archive
To Add Files/Folder to zip archive
To Associate Mobile Zip with other files 100
Safety Guidelines 104
TIA Safety Information
Safety Information 108
FDA Consumer Update 111
10 Driver Safety Tips 118
Contents
7
Page 10
Introduction
Congratulations on your purchase of the advanced and compact LG IQ
designed to operate with the latest digital mobile communication technology.
This user guide contains important information on the use and operation of this phone. Please read all
the information carefully for optimal performance and to prevent any damage to or misuse of the phone.
Any changes or modifications not expressly approved in this user guide could void your warranty for this
equipment.
TM/MC
Windows Smartphone,
Introduction
8
Page 11

For Your Safety
Important Information
This user guide contains important information on the use and operation of this phone. Please read all
the information carefully for optimal performance and to prevent any damage to or misuse of the phone.
Any changes or modifications not expressly approved in this user guide could void your warranty for this
equipment.
Before You Start
Safety Instructions
WARNING!
humidity, such as the bathroom, swimming pool, etc.
Always store your phone away from heat.
Never store your phone in settings that may expose it to temperatures less than 32°F or greater than
104°F, such as outside during extreme weather conditions or in your car on a hot day. Exposure to
excessive cold or heat will result in malfunction, damage and/or catastrophic failure.
Be careful when using your phone near other electronic devices. RF emissions from your mobile phone
may affect nearby inadequately shielded electronic equipment. You should consult with manufacturers of
any personal medical devices such as pacemakers and hearing aids to determine if they are susceptible
to interference from your mobile phone.
Turn off your phone in medical facilities and gas stations. Never place your phone in a microwave oven as
this will cause the battery to explode.
IMPORTANT!
To reduce the possibility of electric shock, do not expose your phone to areas of high
Please read the TIA SAFETY INFORMATION on page 102 before using your phone.
For Your Safety
9
Page 12

For Your Safety
Safety Information
Read these simple guidelines. Breaking the rules may be dangerous or illegal. Further detailed
information is given in this user guide.
v
v
v
v
v
v
v
v
v
v
v
v
v
v
For Your Safety
v
v
Never use an unapproved battery since this could damage the phone and/or battery and could cause
the battery to explode.
Never place your phone in a microwave oven as it will cause the battery to explode.
Do not dispose of your battery by fire or with hazardous or flammable materials.
Make sure that no sharp-edged items come into contact with the battery. There is a risk of this causing
a fire.
Store the battery in a place out of reach of children.
Be careful that children do not swallow any parts such as rubber plugs (earphone, phone connection
parts, etc.). This could cause asphyxiation or suffocation.
Unplug the power cord and charger during lightning storms to avoid electric shock or fire.
When riding in a car, do not leave your phone or set up the hands-free kit near to the air bag. If
wireless equipment is improperly installed and the air bag is activated, you may be seriously injured.
Do not use a hand-held phone while driving.
Do not use the phone in areas where its use is prohibited. (For example: in aircraft).
Do not expose the battery charger or adapter to direct sunlight or use it in places with high humidity,
such as bathrooms.
Never store your phone in temperatures less than- 4°F or greater than 122°F.
Do not use harsh chemicals(such as alcohol, benzene, thinners, etc.) or detergents to clean your
phone. There is a risk of this causing a fire.
Do not drop, strike, or shake your phone severely. Such actions may harm the internal circuit boards of
the phone.
Do not use your phone in highly explosive areas as the phone may generate sparks.
Do not damage the power cord by bending, twisting, pulling, or heating. Do not use the plug if it is
loose as it may cause a fire or electric shock.
10
Page 13

v
Do not place any heavy items on the power cord. Do not allow the power cord to be crimped as it may
cause fire or electric shock.
v
Do not handle the phone with wet hands while it is being charged. It may cause an electric shock or
seriously damage your phone.
v
Do not dissemble the phone.
v
Do not place or answer calls while charging the phone as it may short-circuit the phone and/or cause
electric shock or fire.
v
Only use the batteries, antennas, and chargers provided by LG. The warranty will not apply to products
provided by other suppliers.
v
Only authorized personnel should service the phone and its accessories. Faulty installation or service
may result in accidents and consequently invalidate the warranty.
v
Do not hold or let the antenna come in contact with your body during a call.
v
Emergency calls can be made only within a service area. For an emergency call, make sure that you
are within a service area and that the phone is turned on.
v
Use accessories, such as earphones and headsets, with caution. Ensure that cables are tucked away
safely and do not touch the antenna unnecessarily.
Memory card information and care
v
If damage cannot be fixed, format the memory card.
v
The memory card cannot be used for recording copyright-protected data.
v
Do not write forcefully on the memo area.
v
Carry and store the memory card in its case.
v
Do not allow the memory card to get wet.
v
Do not leave the memory card in an extremely hot location.
v
Do not disassemble or modify the memory card.
For Your Safety
11
Page 14

For Your Safety
FCC RF Exposure Information
WARNING!
In August 1996, the Federal Communications Commission (FCC) of the United States, with its action
in Report and Order FCC 96-326, adopted an updated safety standard for human exposure to radio
frequency (RF) electromagnetic energy emitted by FCC regulated transmitters.
Those guidelines are consistent with the safety standard previously set by both U.S. and international
standards bodies.
The design of this phone complies with the FCC guidelines and these international standards.
CAUTION!
Use only the supplied and approved antenna. Use of unauthorized antennas or modifications could impair
call quality, damage the phone, void your warranty and/or result in violation of FCC regulations. Do not
use the phone with a damaged antenna. If a damaged antenna comes into contact with skin, minor burns
may result. Contact your local dealer for a replacement antenna.
Read this information before operating the phone.
Body-worn Operation
This device was tested for typical body-worn operations with the back of the phone kept 0.79 inches (2
cm) between the user’s body and the back of the phone. To comply with FCC RF exposure requirements,
a minimum separation distance of 0.79 inches (2 cm) must be maintained between the user’s body
and the back of the phone. Third-party belt-clips, holsters, and similar accessories containing metallic
components should not be used. Body-worn accessories that cannot maintain 0.79 inches(2 cm)
separation distance between the user’s body and the back of the phone, and that have not been tested for
typical body-worn operations may not comply with FCC RF exposure limits and should be avoided.
Vehicle Mounted External Antenna (optional, if available)
For Your Safety
A minimum separation distance of 8 inches (20 cm) must be maintained between the user/bystander and
the vehicle mounted external antenna to satisfy FCC RF exposure requirements. For more information
about RF exposure, visit the FCC website at www.fcc.gov
12
Page 15

FCC Part 15 Class B Compliance
This device and its accessories comply with part 15 of FCC rules. Operation is subject to the following
two conditions: (1) This device and its accessories may not cause harmful interference, and (2) this
device and its accessories must accept any interference received, including interference that may cause
undesired operation.
Cautions for Battery
v
Do not dissemble.
v
Do not short-circuit.
v
Do not expose to high temperature: 60°C (140°F).]
v
Do not incinerate.
Battery Disposal
v
Please dispose of your battery properly or bring to your local wireless carrier for recycling.
v
Do not dispose of your battery in fire or with hazardous or flammable materials.
Adapter (Charger) Cautions
v
Using the wrong battery charger could damage your phone and void your warranty.
v
The adapter or battery charger is intended for indoor use only.
Do not expose the adapter or battery charger to direct sunlight or use it in places with high humidity, such
as the bathroom.
Avoiding damage to your hearing
v
Damage to your hearing can occur if you are exposed to loud sound for long periods of time. Therefore,
we recommend that you do not turn on or off the handset close to your ear. We also recommend that
music and call volumes are set to a reasonable level.
v
If you are listening to music whilst out and about, please ensure that the volume is at a reasonable
level so that you are aware of your surroundings. This is particularly imperative when attempting to
cross the street.
For Your Safety
13
Page 16

For Your Safety
Part 15.21 statement
Modifications not expressly approved by the manufacturer could void the user’s authority to operate the
equipment under FCC rules.
Part 15.105 statement
This equipment has been tested and found to comply with the limits for a class B digital device, pursuant
to Part 15 of the FCC Rules. These limits are designed to provide reasonable protection against harmful
interference in a residential installation. This equipment generates uses and can radiate radio frequency
energy and, if not installed and used in accordance with the instructions, may cause harmful interference
to radio communications.
However, there is no guarantee that interference will not occur in a particular installation. If this
equipment does cause harmful interference or affects television reception, which can be determined by
turning the equipment off and on, the user is encouraged to try to correct the interference by one or more
of the following measures:
v
Reorient or relocate the receiving antenna.
v
Increase the separation between the equipment and receiver.
v
Connect the equipment into an outlet on a circuit different to the outlet to which the receiver is
connected.
v
Consult the dealer or an experienced radio/TV technician for help.
For Your Safety
14
Page 17

Consumer Information on SAR (Specifi c Absorption Rate)
This Model Phone Meets the Government’s Requirements for Exposure to Radio Waves. Your wireless
phone is a radio transmitter and receiver. It is designed and manufactured not to exceed the emission
limits for exposure to radio frequency (RF) energy set by the Federal Communications Commission (FCC)
of the U.S. Government. These limits are part of comprehensive guidelines and establish permitted levels
of RF energy for the general population. The guidelines are based on standards that were developed by
independent scientific organizations through periodic and thorough evaluation of scientific studies. The
standards include a substantial safety margin designed to assure the safety of all persons, regardless of
age and health.
The exposure standard for wireless mobile phones employs a unit of measurement known as the Specific
Absorption Rate, or SAR. The SAR limit set by the FCC is 1.6 W/kg.* Tests for SAR are conducted using
standard operating positions specified by the FCC with the phone transmitting at its highest certified
power level in all tested frequency bands. Although SAR is determined at the highest certified power
level, the actual SAR level of the phone while operating can be well below the maximum value. Because
the phone is designed to operate at multiple power levels to use only the power required to reach the
network, in general, the closer you are to a wireless base station antenna, the lower the power output.
Before a phone model is available for sale to the public, it must be tested and certified to the FCC that
it does not exceed the limit established by the government-adopted requirement for safe exposure.
The tests are performed in positions and locations (e.g., at the ear and worn on the body) as required
by the FCC for each model. The highest SAR value for LG IQ
ear is 0.64 W/kg and when worn on the body, as described in this user’s manual, is 0.87 W/kg. (Bodyworn measurements differ among phones models, depending upon available accessories and FCC
requirements.) While there may be differences between SAR levels of various phones and at various
positions, they all meet the government requirement for safe exposure.
TM/MC
phone when tested for use at the
The FCC has granted an Equipment Authorization for this model phone with all reported SAR levels
evaluated as in compliance with the FCC RF emission guidelines. SAR information on this model phone
is on file with the FCC and can be found under the Display Grant section of http://www.fcc.gov/oet/fccid
after searching on FCC ID: BEJGW825.
For Your Safety
15
Page 18

For Your Safety
Additional information on Specific Absorption Rates (SAR) can be found on the Cellular
Telecommunications Industry Association (CTIA) website at http://http://www.ctia.org/ * In the United
States and Canada, the SAR
limit for mobile phones used by the public is 1.6 watts/kg (W/kg) averaged over one gram of tissue. The
standard incorporates a substantial margin of safety to give additional protection for the public and to
account for any variations in measurements.
For Your Safety
16
Page 19

LG IQ
TM/MC
Features
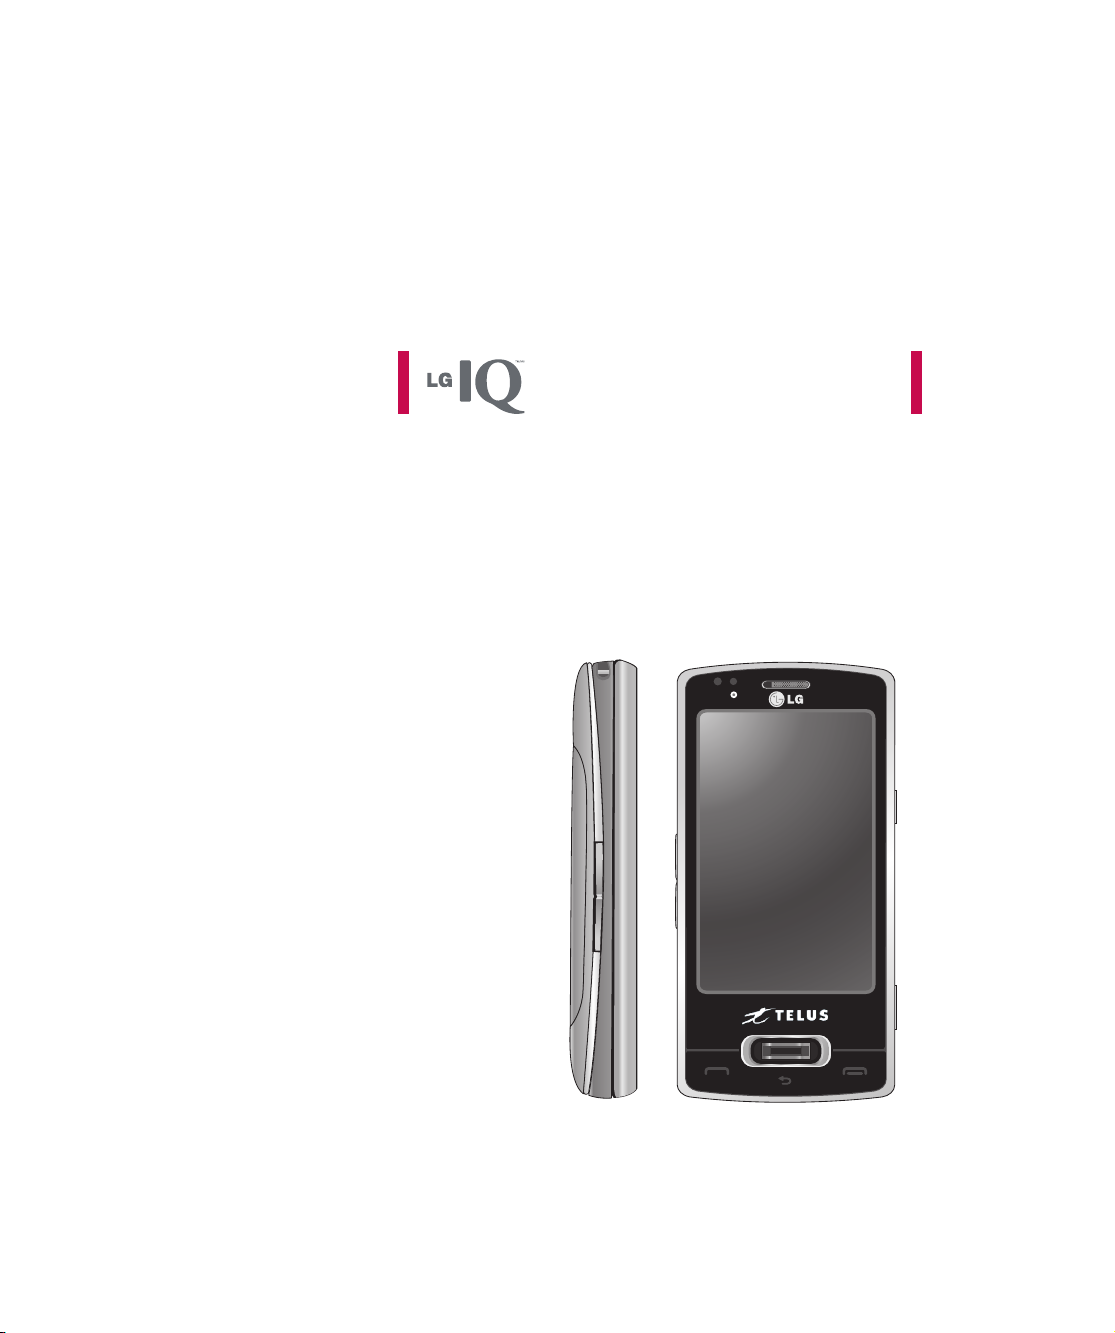
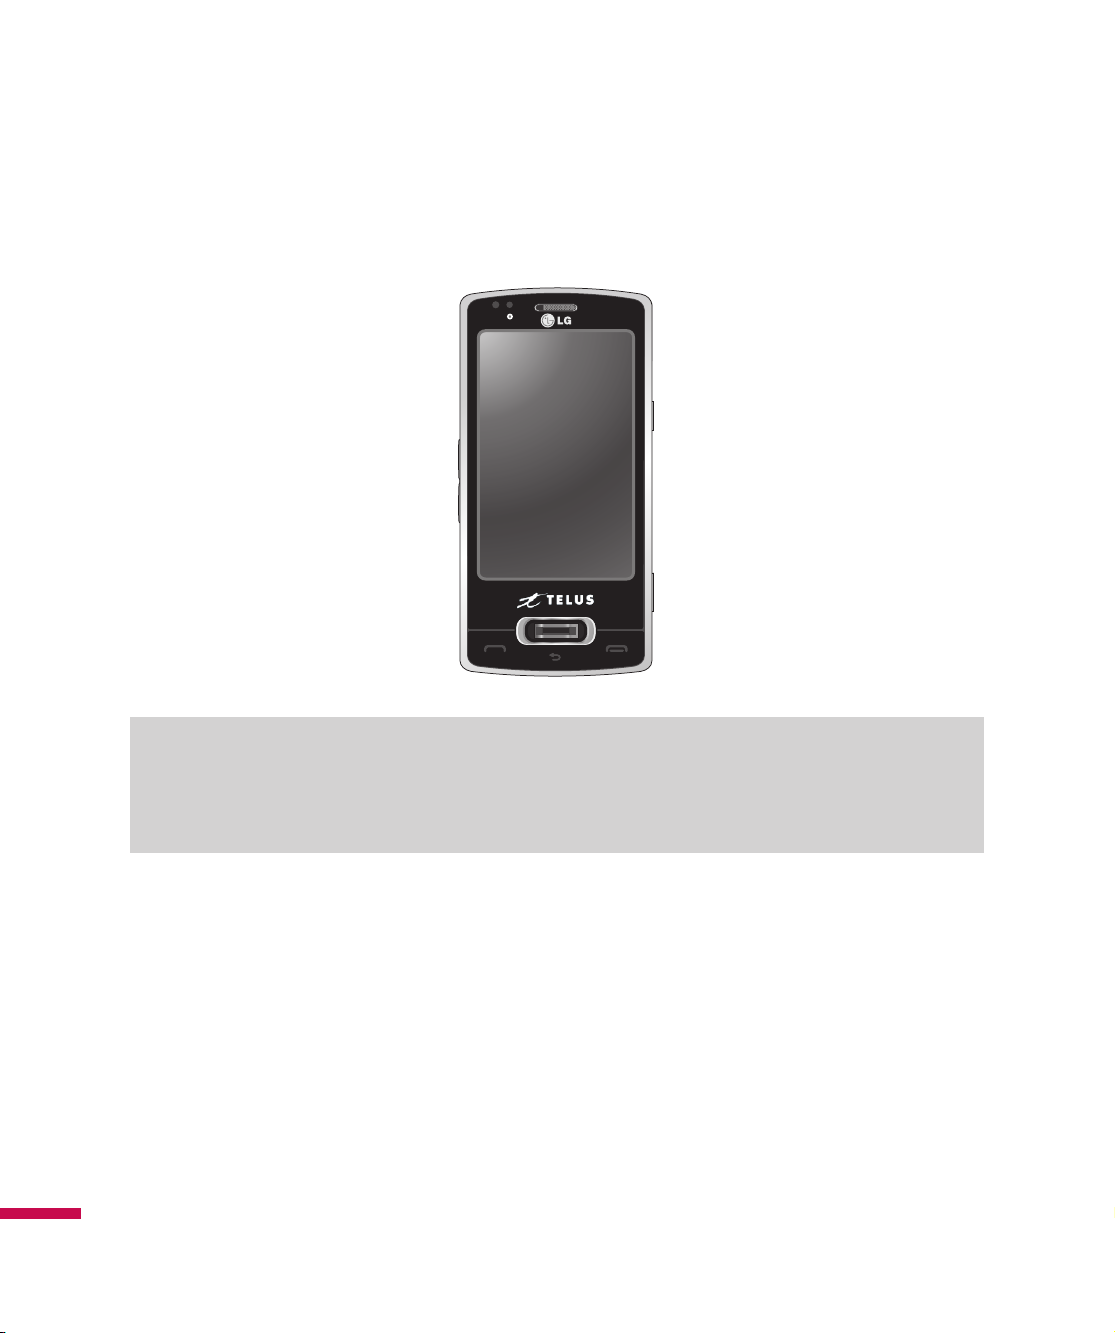
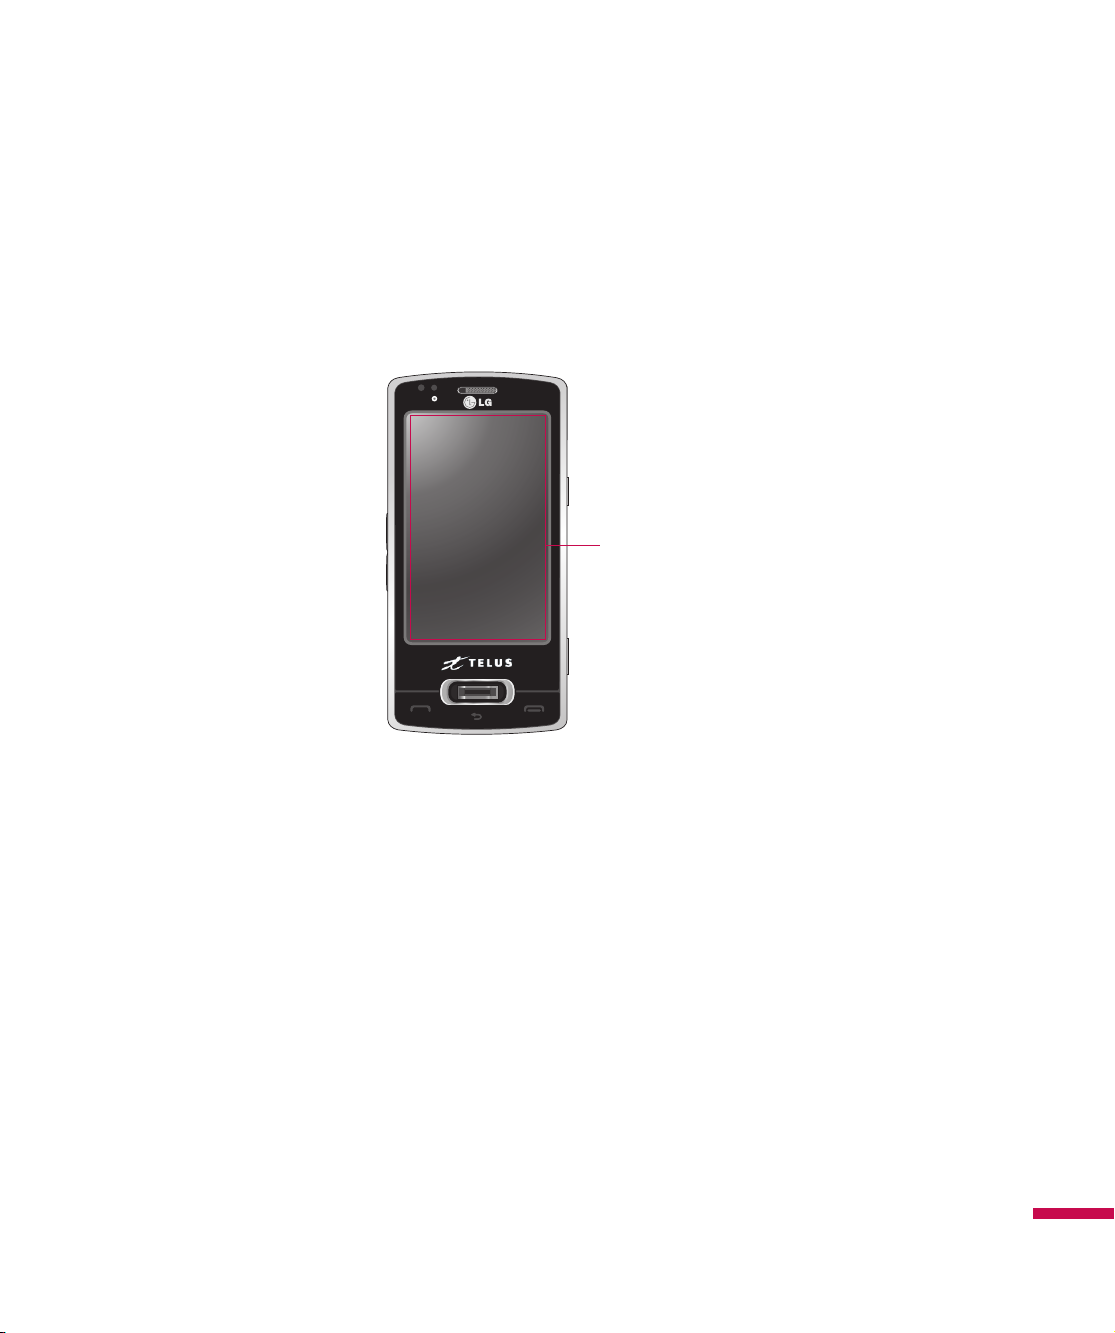
Phone Components
<Front of Device>
Hands-free Connector/
Charger/Cable Connector
Proximity Sensor
Touch Screen
Dials phone numbers and
an
swers incoming calls.
Send Key
Dials phone numbers and
a
swers incoming calls.
n
Stylus Connector Slot
Power/End Key
Ends or rejects a call.
Earpiece
Used to listen to the caller’s voice.
Fingerprint Navigation sensor
Scrolls right and left or up and down to
navigate through the menu.
End Key
Use to end a call.
Back button
Goes back to the previous menu. Long
press to activate voice command.
<Left> <Right>
MicroSD Card Slot
Volume Keys
v
When the screen is idle:
Volume of key tone
v
During a call:
volume of the earpiece
Multitasking Key
Camera key
Press this key to activate camera.
LG IQ
TM/MC
Features
17
Page 20
LG IQ
TM/MC
Features
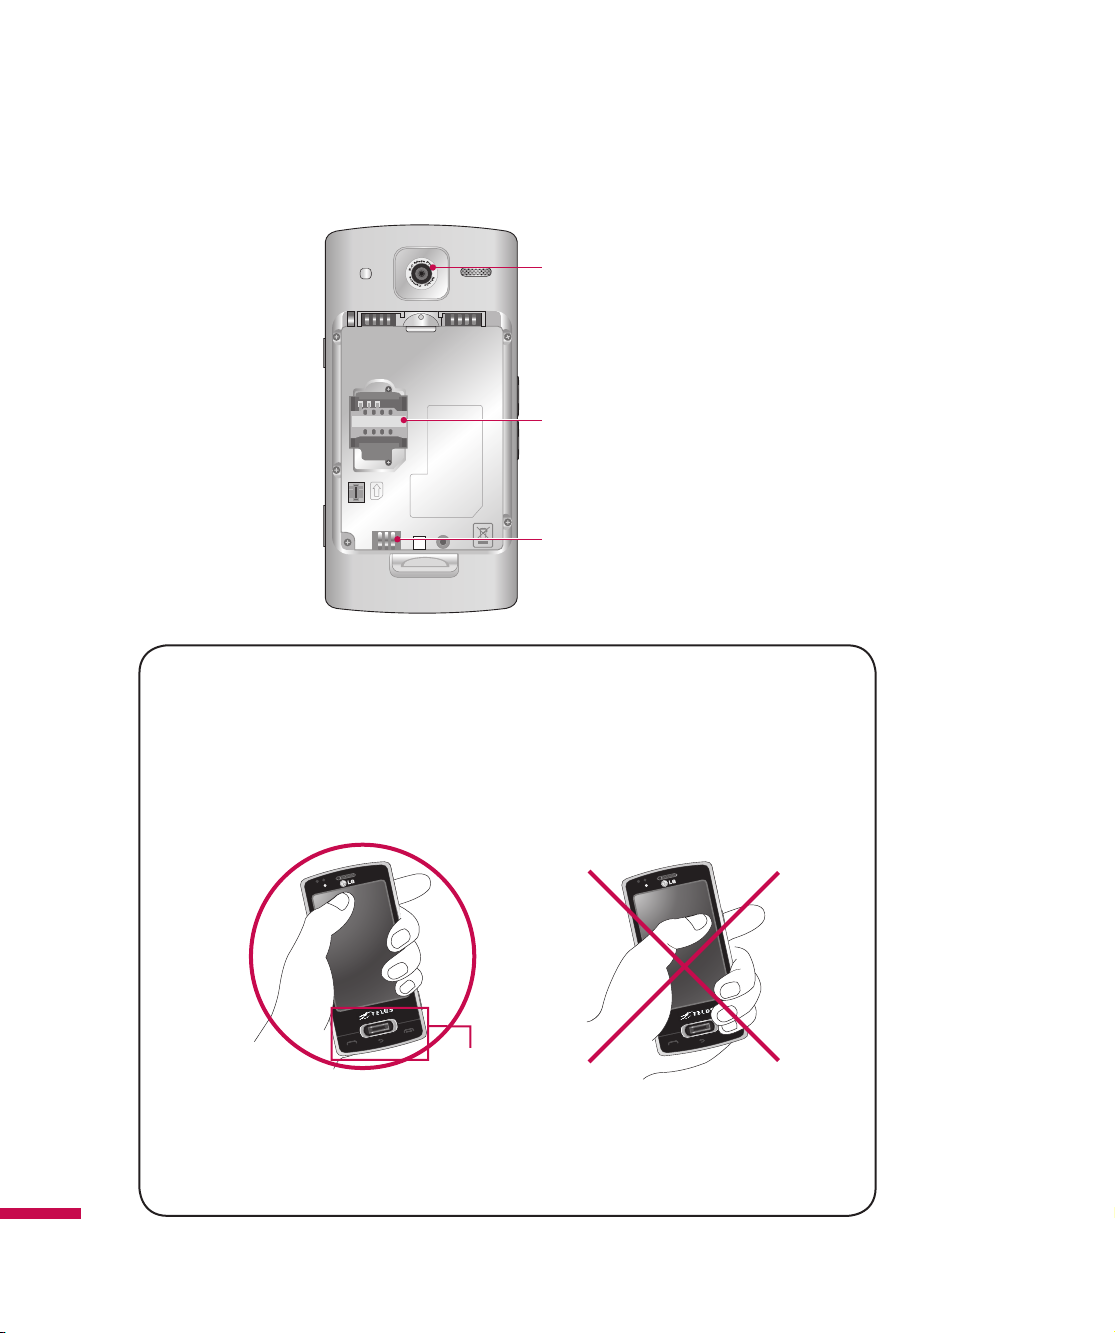
External Camera Lens
SIM card slot
Battery Terminals
LG IQ
TM/MC
Features
18
How to hold your LG IQ
For better RF antenna sensitivity, LG suggest that you hold the handset as
shown in the figure below.
Please do not cover the RF antenna area with your hand during a call and when
using a Bluetooth connection. It may adversely affect speech quality.
TM/MC
RF antenna
Page 21
Touch Key Guidelines
v
This product’s keys on the LCD screen are touch keys.
v
Be sure to read “Cautions for Touch Keys” before using this product.
1.
Make sure your hands are clean and dry.
v
Remove all moisture from your hands or the touch keys in a humid environment.
Touch keypad
2.
You do not need to press hard on the touch keys to make them work. Do not subject the product to
severe impact, as this may damage the touch key sensors.
3.
Use the tip of your finger to press exactly on the touch key you want, being careful not to touch any
other keys.
4.
Touch keys may not work normally if a mobile phone case or plastic cover is covering them.
5.
Keep the metal or other conductive materials away from the surface of the touch keys. Contact with
these materials may result in an error.
6.
This phone allows to use a pen or a stylus to select the Menu. You can also use your finger to select the
Menu.
However, using the tip of your finger may not press the key correctly.
7.
Touch keys may not be activated properly in hot and humid environments.
Touch Key Guidelines
19
Page 22

Getting Started
How to change the screen
When turning on the phone, you can see the LG Home screen as a default. On the Today screen, you
can see the important and recent information.
LG S-class UI Tutorial
This is the video tutorial showing you how to access and use the phone menus, such as Contacts
and Messaging. It plays automatically or not every time you turn on the device depending on the
user’s setting. If you want to see the movie again, tap the Up arrow on the LGIDLE screen, and then
select LG S-class UI Tutorial.
Note
v
If you change the default setting to LGIdles, you can start LG S-class UI Tutorial.
Getting Started
20
Page 23

LG home screen
Drag and click what you need on any of the LG home screens. Change the screen mode by dragging
side to side on the home screen. There are three types of the home screens.
There are shortcut icons for some menus at the bottom of the home screen, allowing you to access
the menu directly from the home screen. You can also access to LG Menu by tapping Start on the
upper-left corner of the screen.
Getting Started
21
Page 24

Getting Started
Installing the SIM Card and Battery
1. Installing the SIM card
Your SIM card contains your phone number, service details and contacts and must be inserted into your
handset. If your SIM card is removed, your handset becomes unusable (except for emergency calls
depending on which country you are in at the time) until a valid SIM card is inserted. Always disconnect
the charger and other accessories from your handset before inserting or removing your SIM card. Slide
the SIM card into the SIM card holder. Make sure that the SIM card is properly inserted and the gold
contact area on the card is facing downwards. To remove the SIM card, press down lightly and pull it
gently outwards.
Note
v
The metal contact of the SIM card can easily be damaged by scratches. Pay special attention to the SIM
card while handling. Follow the instructions supplied with the SIM card.
Getting Started
22
To remove the SIM cadTo insert the SIM card
Page 25
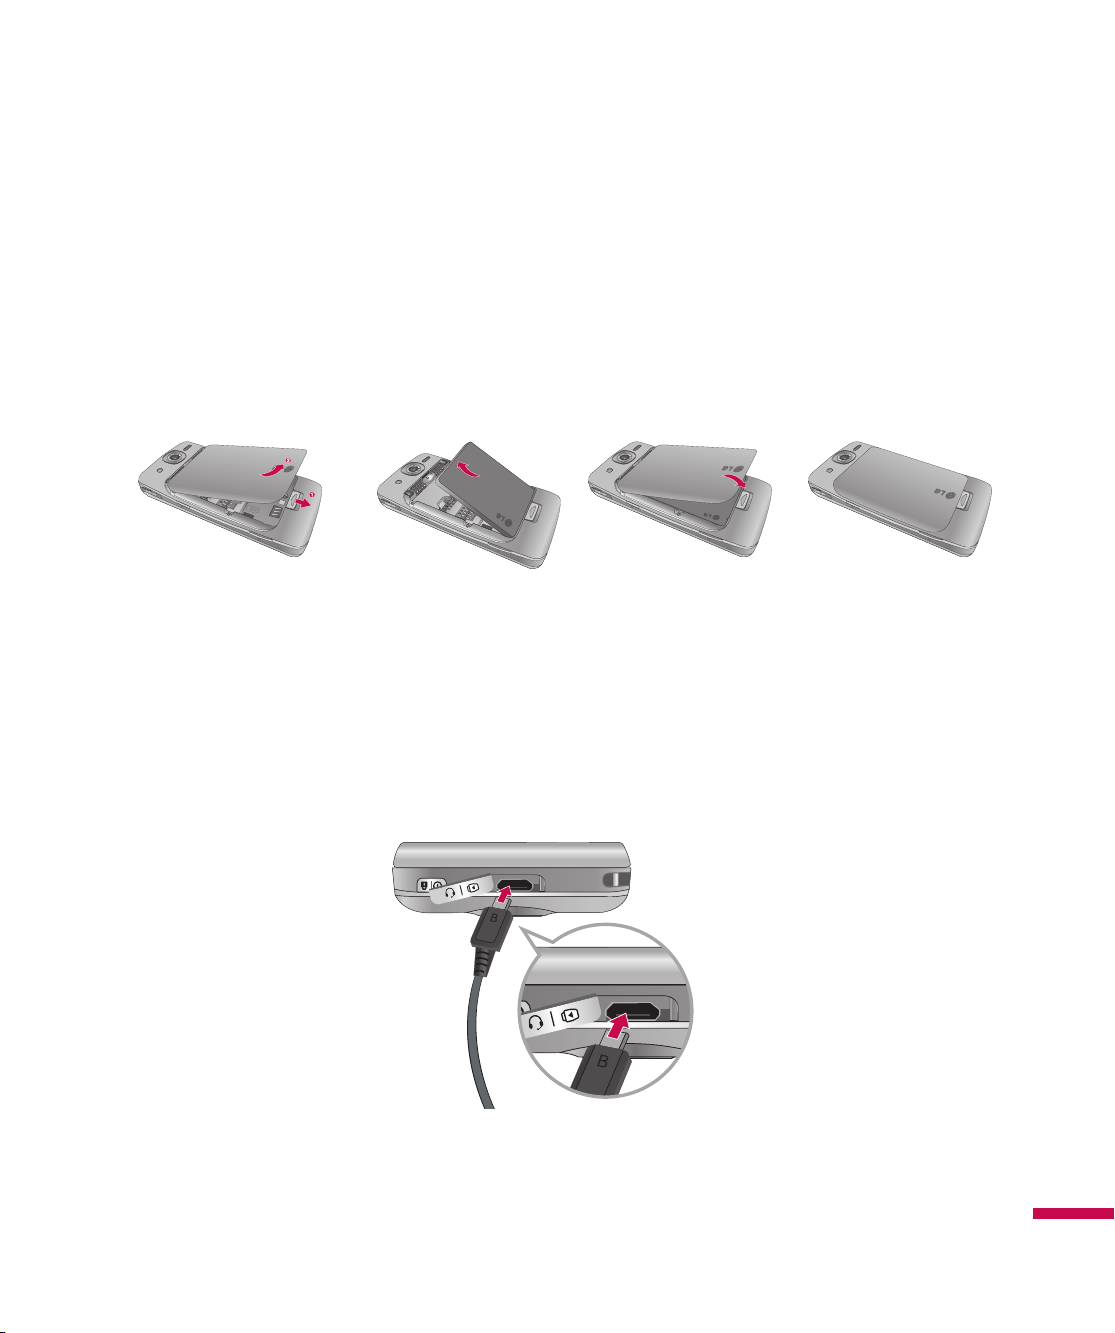
2. Installing the battery.
Insert the left side of the battery into the bottom edge of the battery compartment first.
Ensure that the battery contacts align with the phone’s terminals. Press the right side of the battery down
until it clicks into place. Finally, place the battery cover on the phone as shown below.
Charging the Battery
Before connecting the charger to the phone, you must first check if the battery is installed.
Getting Started
23
Page 26

Getting Started
Charging Mode
1.
When you charge your phone, the phone’s LED next to the earpiece of your phone turns to red and
displays a charging animation.
2.
When the phone is fully charged, the LED turns to green. The ‘Battery full’ notification appears on the
screen.
3.
If you press and hold the Power key for approx. 2 seconds in charging mode, the phone is turned on.
4.
When the battery is completely discharged, the red LED blinks and the phone cannot be turned on. As
soon as the charged power reaches 1% (after a few minutes), the LED stops blinking and the charging
animation is displayed. Then you can turn the phone on.
CAUTION!
• When you charge a fully discharged battery, it may take over a minute for the display to respond.
This is not a malfunction but completely normal.
(If using a USB cable, it may take over 10 minutes.)
• Do not force the connector as this may damage the phone and/or the charger.
• If you use the charger out of your own country, use an attachment plug adaptor for the proper
configuration.
• Do not remove your battery or the SIM card while charging.
• There is risk of explosion if the battery is replaced by an incorrect type. Dispose of used batteries
according to the manufacturer's instructions.
• Recommend the travel adapter for charging.
WARNING
• Unplug the charger from the mains and the phone during lightning storms to avoid electric shock or
Getting Started
fire.
• Make sure that no sharp-edged items such as animal teeth or nails come into contact with the
battery. This may cause a fire.
24
Page 27
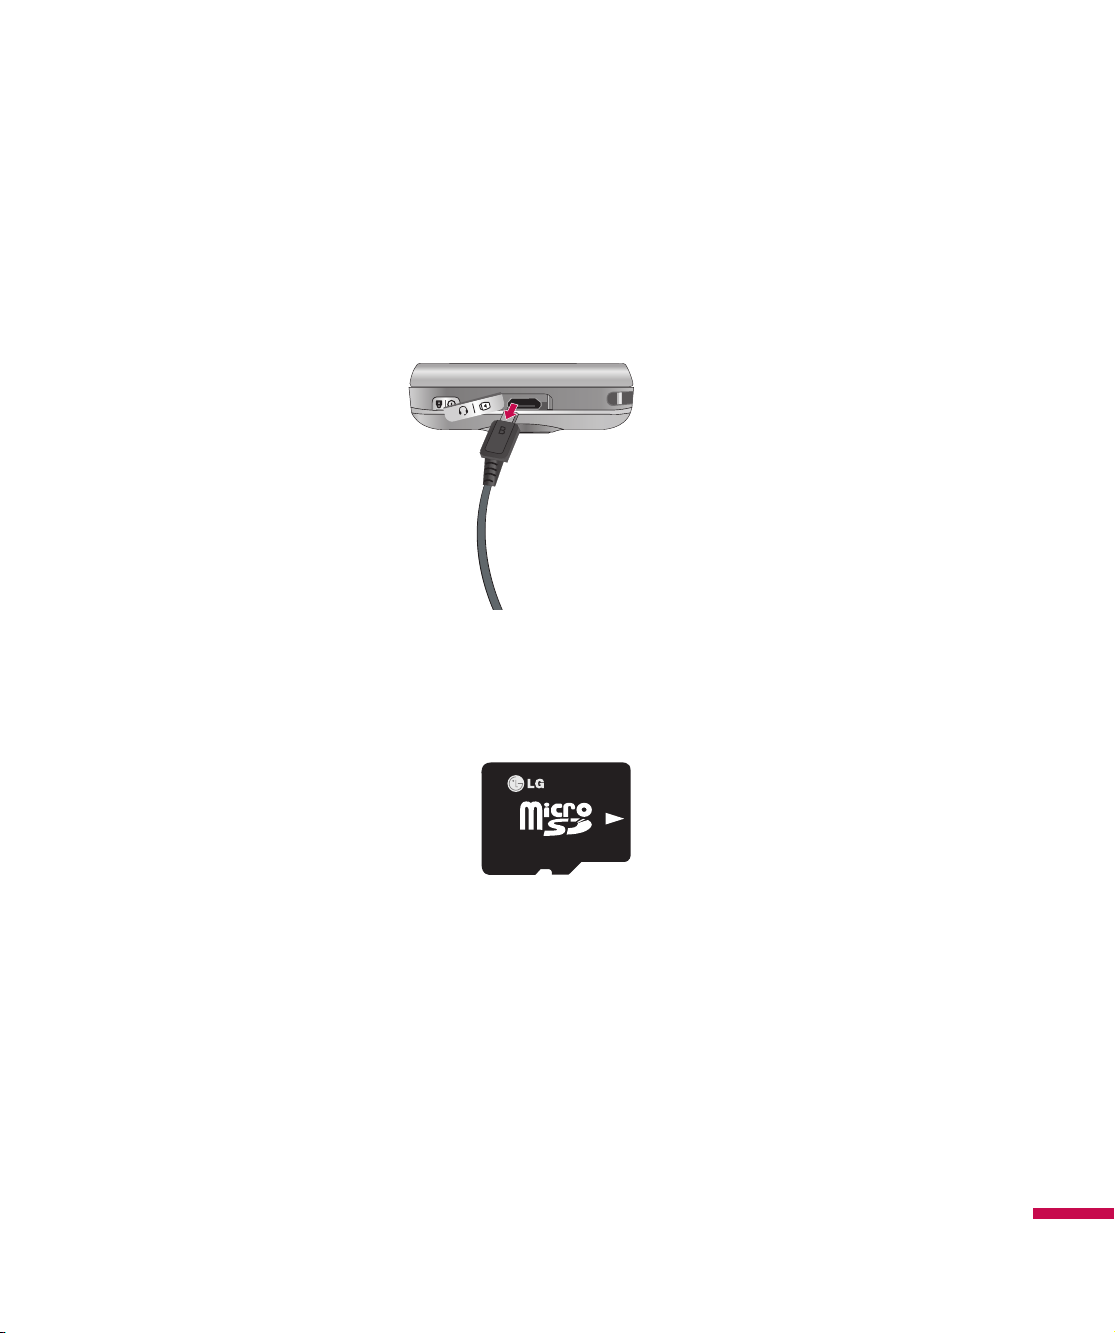
Disconnecting the Charger
Disconnect the travel adapter from the phone as shown in the diagram below. Make sure you pull the
plug, not the cord.
How to Use a MicroSD Memory Card (Optional)
<MicroSD memory card>
Getting Started
25
Page 28
Getting Started
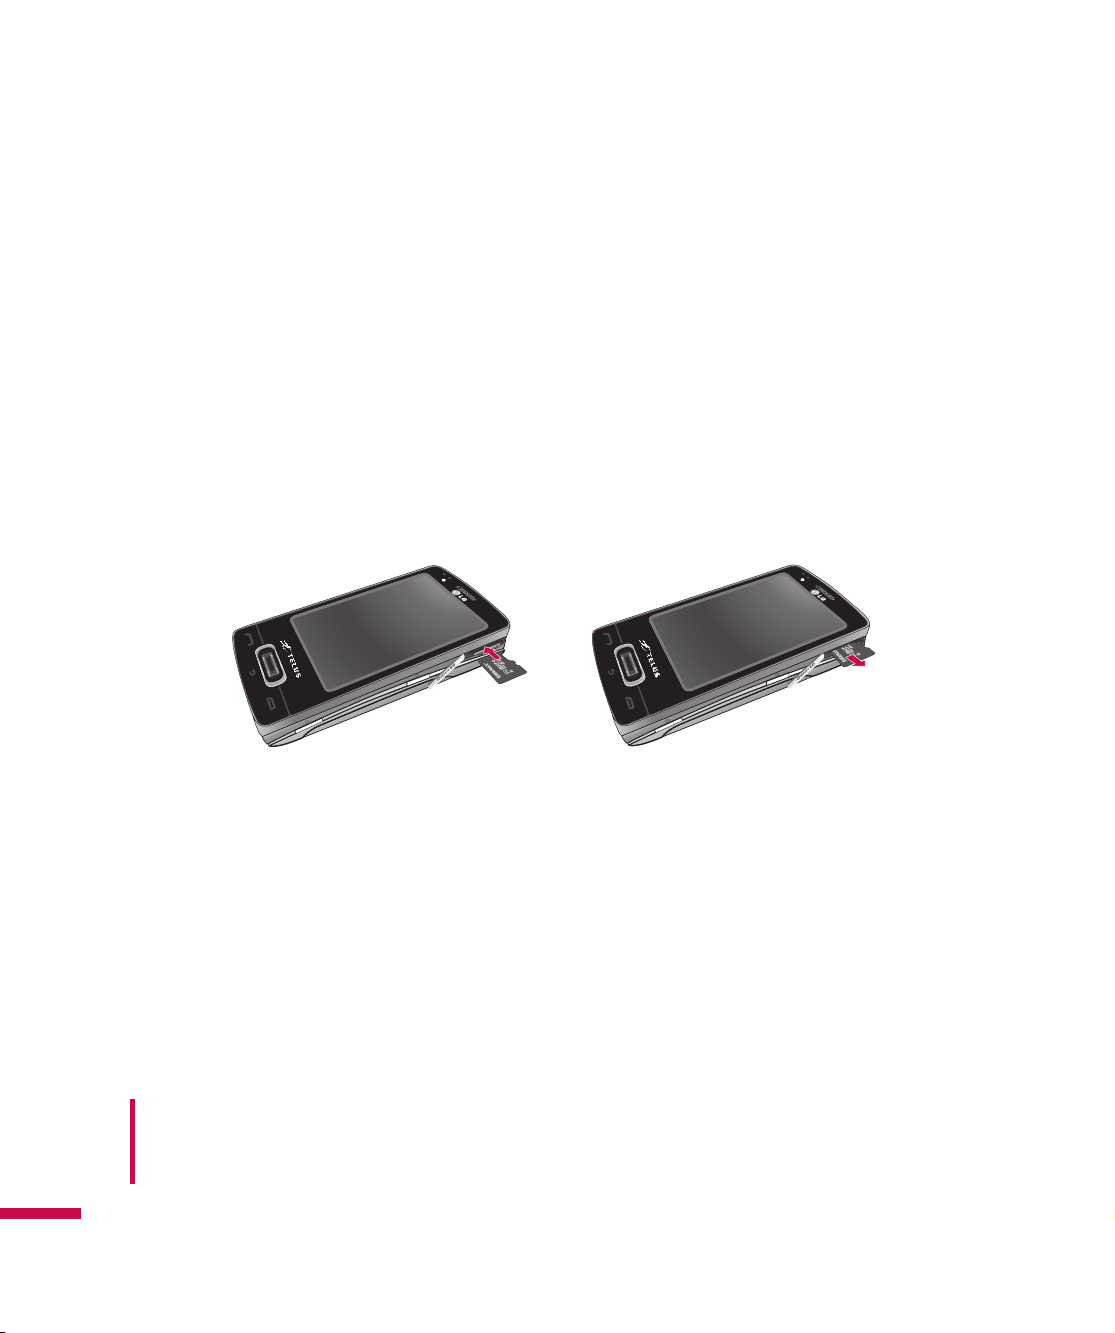
<How to insert a microSD memory card>
1.
Lift the plastic cover which protects the microSD slot.
2.
Insert the memory card into the slot with the metal contacts facing down. Do not force the memory
card into the slot, if the card does not slide in easily, please check that the card is being inserted in the
correct way or if there is a foreign object in the slot.
3.
Once inserted, push the memory card until you hear '
engaged.
4.
Close the plastic slot protection.
5.
Do not remove the memory card when reading and writing to the memory card.
Click'
, meaning that the card has been correctly
Attention:
v
Avoid using the microSD memory card when the battery is low.
v
When you save data to the card, wait for the operation to complete before removing the card.
v
The card is designed to fit easily into the slot.
v
Do not bend the card or force it into the slot.
v
Do not insert any memory cards other than microSD.
Supports up to 32 GB microSD. For more information on the microSD, please refer to the memory card
Getting Started
instruction manual.
WARNING
• Do not insert or remove memory card when the phone is switched on, as this may damage memory
card.
26
Page 29
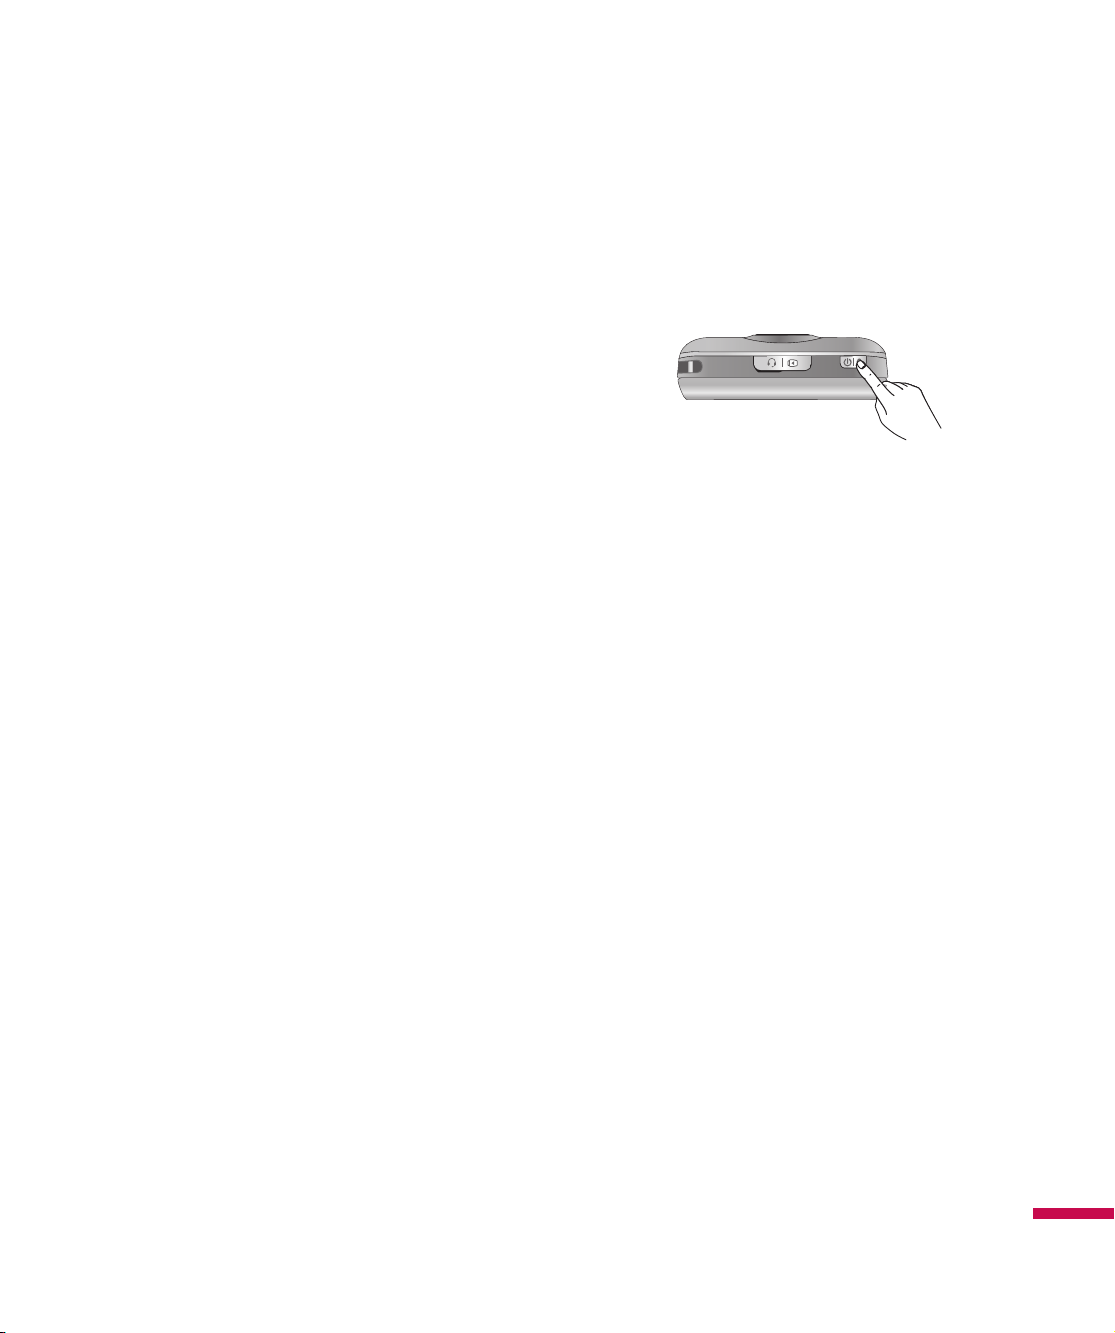
Turn the Device On
<Top of Device>
Turn the LG IQ
Press and hold the power key on the top right of the phone for a few seconds to turn the LG IQ
off.
TM/MC
on/off
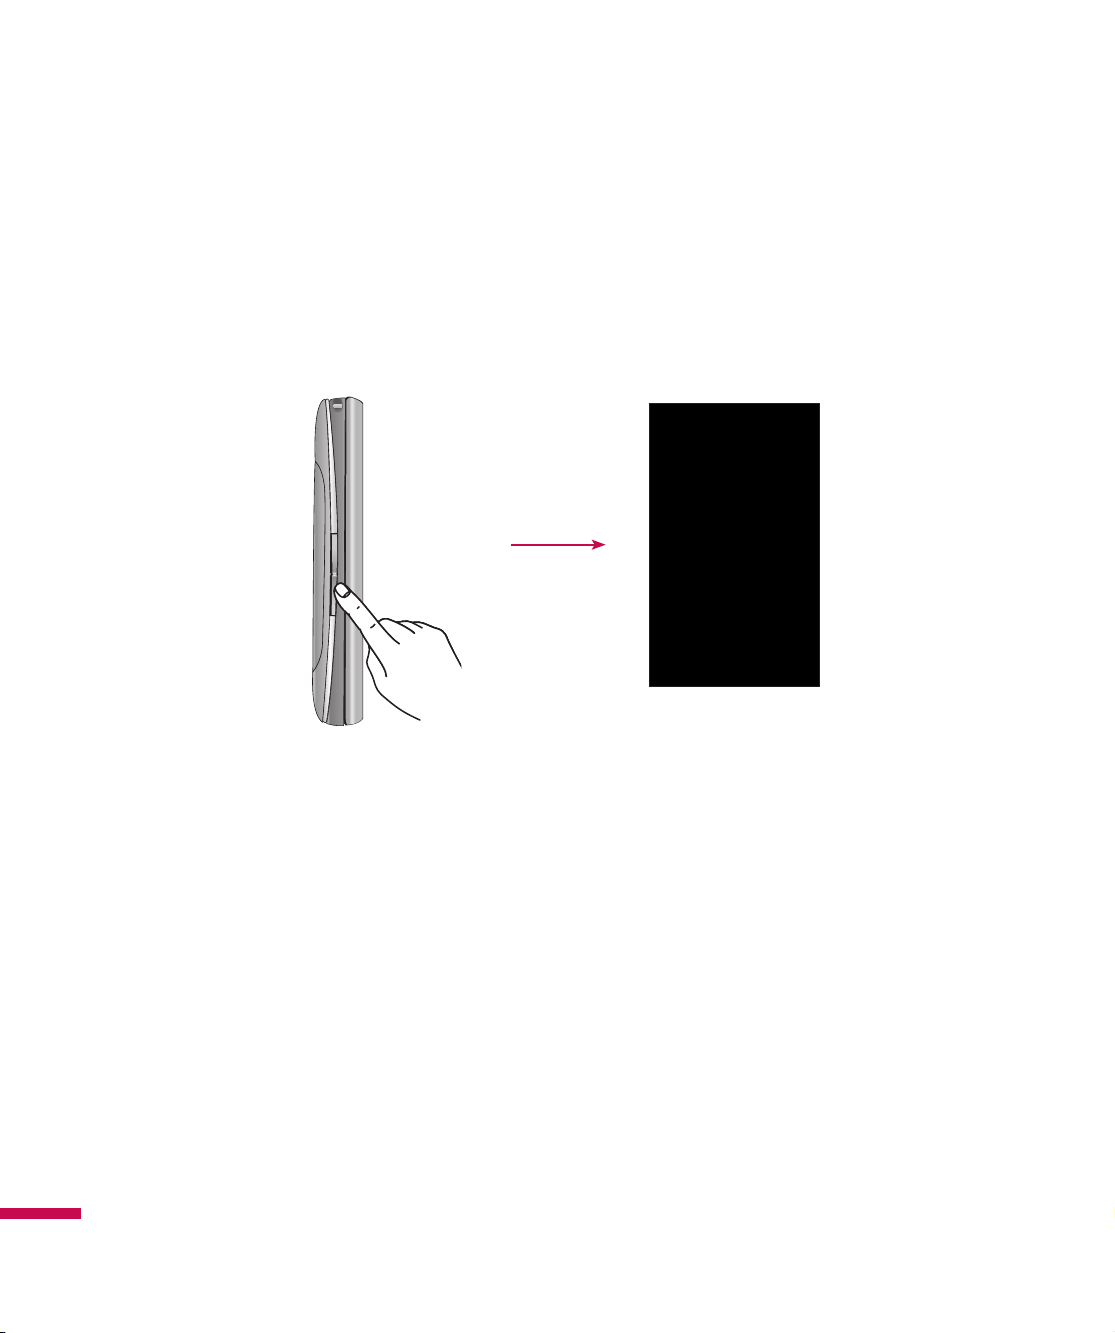
Go to sleep mode
Press the power key lightly to go to sleep mode. The screen display is turned off in sleep mode.
TM/MC
on or
Getting Started
27
Page 30
Getting Started
Volume keys
When the screen is idle:
During a call:
When playing a track:
Earpiece volume
Key tone volume
Sound volume
Calibrate the touch screen
28
Calibrating the device screen involves tapping the center of a cross with the stylus as it moves around the
screen. This process ensures that when you tap the screen with your stylus, the tapped item is activated.
If your device does not accurately respond to screen taps, follow these steps to re-calibrate it:
1.
Tap
Start > Settings > System > Screen
2.
On the Alignment tab, tap the Align Screen button, and follow the instructions on the screen. After
calibration is completed, Align screen reappears. Click OK on upper right corner to return to the home
screen
.
Page 31

Taking a look at LG IQ
Tap to go to Wireless Manager menu such as Wi-Fi,
Bluetooth, Phone, Data Connection, etc.
TM/MC
’s home screen
Tap to go to alarm menu.
By tapping this button, you can view other functions.
Wireless Manager:
Connection on or off.
Flight Mode:
plane.
Ringtone & Alerts:
home screen. You can choose from Normal, Vibrate All, Silent All,
Outdoor or Automatic.
Themes & Wallpapers:
Turn the Wi-Fi, Bluetooth, Phone, and Data
Set to ON to turn off the phone before getting on the
Change the notification setting right from the
Change the phone theme or wallpaper.
29
Page 32

When you slide up the LG IQ
the screen shown on the left appears. From there you
can easily access the main functions such as Instant
Messaging, Internet Explorer, Search, Schedules, Write
New Message, Message Inbox, Setup E-mail and E-mail
Inbox.
TM/MC
into Landscape mode
Using the Multitasking function
You can press the Multitasking Key to go directly to the Multitasking menu. From here you can view the
applications that are currently running and access or end them with one touch. If you touch Menu, you
can go Task Manager directly.
30
Page 33

Using the LG Menu
Tap to access the LG Menu. There are features related Communications, Multimedia, Applications,
and Settings in the LG Menu.
You can access the desired menu
directly from the home screen using the
menu icons on the bottom of the screen.
You find further menus by sliding your
finger to left or right. Press and hold
each menu icon, then you can see the
picture below.
By dragging the icons up and down or
to the right or left, you can rearrange
the menus and set the lay out of them
as you like.
31
Page 34

Indicators
The following are some of the status icons that you may see on your device.
Icon Description
Bluetooth Hands-Free connection established
Bluetooth Hands-Free channel opened
Bluetooth High Quality Audio channel opened
Remaining battery life
Battery is very low
Battery charging
Sound on
Sound off
Ringer in vibration mode
Connection is active
Connection is not active
Synchronization in progress
Synchronization error
Maximum signal strength
No signal
Bluetooth service is active
No phone service
Searching for phone service
Voice call in progress
Calls are forwarded
Call on hold
32
Missed call or rejected call
Page 35

Icon Description
GPRS (General Packet Radio Services) available
EDGE (Enhanced Data Rates For Global Evolution) available
H
WCDMA or HSDPA available
New email or text messages
There are more notifications. Tap the icon to view all.
SIM is not inserted. You can not use Network service without SIM.
Wi-Fi status
33
Page 36

Customizing the LGIdles screen
The Today screen displays important information, such as upcoming appointments and status indicators.
You can tap a section on the screen to open the associated program.
v
To access the Today screen, tap
Start > Settings > Today > Items> LGIdles
.
You can select the item you want to appear on the LGIdles screen. To change its position, tap
Move Down
Check the
phone after the specified length of time has elapsed, the screen switches to the Today screen.
. If you want to customize the further task and appointment information by tapping.
Today timeout
and select the number of hours from the drop down list. If you don’t use your
Move Up
or
34
Page 37

Using the Start Menu
The Start menu, located at the top left corner of the Today screen, displays a list of programs. It allows
you to open a screen and switch from one program to another. You can start a program by scrolling
through the programs list and tap a program.
Editing the Today Screen
1.
Tap to open the Today screen.
2.
Tap to start a program.
3.
Scroll down to view and select more programs that are installed in your device.
4.
Tap to change device settings.
5.
Tap to see a Help topic for the current screen.
6.
Tab and hold an item to move to the top.
Changing the Language
1.
Tap
Start
menu.
2.
Tap
Settings
3.
Select Change
-
System
Language
menu.
to change the language of phone.
35
Page 38

Note
If you activate this function, all data and applications will be reset.
36
This phone supports English and French; the default language is French. Therefore, if you reset the setting
despite you use French in phone, the English will be set as default language.
Page 39

Call
You can use easily with smart dial feature. If you press any one or more buttons on the keypad, the
screen displays the phone number or the names in Contacts or Call History starting with the number(s) or
characters you enter. For the names, the screen displays contact names that include those characters, not
only starting with the characters you enter. You can then select the number you want to call.
You can also make international or emergency calls.
Note
v
If you tap a wrong number, tap the Back arrow ( ) to erase individual numbers one at a time. To
delete all the numbers, tap and hold the Back arrow.
Call History
Your phone saves the missed calls, received calls, All Calls, Missed, Outgoing, Incoming, call lengths and
cost records in the Call history menu. You can check the most recent dialed, received or missed calls.
Tap the LG Menu > Call History in Communication tab
Make a call
Making a Call from your phone
1.
On the Home screen, press the Send button to open the keypad.
2.
Key in the number using the keypad and tap the Send hard key or the Send button on the screen.
To delete a digit, press the clear key on the keypad.
3.
To end the call, press the End hard key or the End button.
37
Page 40

Making a Call from your contacts
1.
Tap LG Menu > LG Contacts or tap LG Contacts in the right bottom of the home screen to go into the LG
Contacts menu.
2.
Scroll to the contact you want to call.
3.
Tap next to the contact.
Making a Call from History
You can view all calls you recently dialed, received or missed by tapping Call History on the left bottom of
the home screen.
When you tap the call you want to view, the screen shows the time and date you received or made a call
and the duration of that call.
Answering and rejecting a call
When your phone rings, press the Send hard key or tap the Answer button on the screen.
38
To reject an incoming call, press the End hard key or tap
reject
button on the screen.
Page 41

In-call options
Speaker -
Mute -
to cannot hear you.
Hold -
Menu -
Keypad -
numbered options, when dialing call centers or other automated telephone
services.
Touch
Touch to turn the microphone off so the person you are talking
Touch
Choose from a list of further in-call options.
- You can end the call.
- Search your contacts during a call.
- Invite a 3rd person into the call.
Touch to open a numerical keypad for navigating menus with
to turn the speaker phone on. Touch again to turn off.
to put a call on hold.
39
Page 42

Contacts
Tap the
LG Menu > LG Contacts in the Communication tab
Overview of Contacts
Contacts is your address book and the information storage for the people and business you communicate
with. You can store phone numbers, email addresses, home addresses, and any other information that
relates to a contact, such as a birthday or an anniversary date. You can also add a picture or assign a ring
tone to a contact.
From the contact list, you can quickly communicate with people. Tap a contact in the list for a summary of
contact information. From there, you can call, send a message, etc.
Searching for a contact
1.
Select LG Contacts to open the address book.
2.
Scroll the contact list and find the one you are looking for or touch on the top of the list and enter the
contact name using the keypad.
You can also view the contacts in 4 categories such as Contacts, Groups, Favourites, and Recently
Viewed by tapping the box on top of the screen (the default setting is Contacts).
3.
Select the contact you want, then the options appear on the screen. Choose what you would do from
the Voice call, Send Message, Blog, Send Vcard, Edit, Change Storage, and Delete by touching the
menu function bar.
40
Adding a new contact
Select LG Contacts to open the address book. Tap New Contacts and enter the new contact information
such as Name, Company, Displayed Name Type, etc. You can also choose whether to save the contact to
Handset or USIM and add picture ID for the contact.
Page 43

To Create a Contact
1.
Tap
LG Menu > LG Contacts
2.
Tap
New Contacts
3.
Tap
Save To
4.
Enter contact detail.
5.
When finished, tap
and choose from Handset or USIM.
and enter the contact information.
Save
in the
Communication
tab.
.
Tip
v
If someone who is not in your list of contacts calls you or sends you a message, you can create a
contact from Call History by tapping
Menu
contact by message, tap
message.
and
Menu > Save to Contacts
Menu > Save to Contacts after opened the message
. If you want to save the unknown
To Change Contact Information
1.
Tap
LG Menu > LG Contacts
2.
Choose the contact from the list.
3.
Tap
Menu > Edit
and enter the changes.
in the
Communication
tab.
from the
4.
When finished, tap
Save
.
41
Page 44

To Find a Contact
There are several ways to find a contact when your contact list is long.
1.
Tap
LG Menu > LG Contacts
2.
In the contact list, do any of the following:
v
In Name view, the contacts are listed in alphabetical order. To switch to Name view (default), tap
Menu
>
View by Name in the contact menu
v
To see a summary of information about a contact, tap the contact. From there you can also make a call
or send a message, etc.
v
You can also see a list of available actions for a contact by tapping and holding the contact's name on
the list.
v
To see a list of contacts employed by a specific company, tap
the company name.
in the
Communication
tab.
.
Menu > View by Company
. Then, tap
To Copy a SIM Contact to Handset
If you have saved contacts on your SIM card, you can copy them into Contacts on your device several or
all.
1.
Tap
LG Menu > LG Contacts
in the
Communication
tab
42
2.
Tap
Menu > Change Storage > Copy to Handset. Then, all contacts saved in your SIM card appear
on the list.
3.
Check the contact to copy to your handset one by one or tap
All.
You can also copy Contacts on your device to your SIM card by selecting
Note
v
When tried to Copy To SIM, it may show the Pop Up:”Part of data may be deleted. Continue”.
Menu
and choose from Search or Select
Copy To SIM in step 2 above
.
Page 45

Sending Messages Tap
Communication tab.
Touch
To
1.
tapping .
Multiple contacts can be added. When you are finished, touch the message box below to start
composing the message text.
After entering the text, tap OK, and then tap Send SMS on the top of the screen to send the
message. When you are entering the text, you can add text templates, emoticons, or name and
number by touching Menu at the lower right of the message and then selecting Insert Text.
to enter the recipient. You can simply type the numbers or open your contacts or favourites by
If you add an image, video, or Sound file to an SMS, the
SMS automatically converts into an MMS message, and
you will be It would be charged accordingly.
By tapping Insert on the upper right side of the message
box, you can select Existing image, New image, Existing
video, New video, Existing sound, New sound and others.
LG Menu > Messaging or Write New Message in
You could add the recipient as CC or BCC by tapping Menu
> Add >Cc or Bcc, tap Add. You can save the message in
Drafts or cancel writing.
43
Page 46

WARNING
• The 160-character limit may vary from country to country depending on how the SMS is coded.
Note
v
You can add new contacts up to 10.
v
You can see Business card and Schedules using tap Menu>View objects in MMS View.
44
Page 47

Entering texts
Using text input method
You are available to the various input methods on the screen, including Block Recognizer, Keyboard,
Letter Recognizer, Transcriber and XT9 Keypad. The Input Panel icon appears on the menu bar to indicate
which input method is currently selected. The Input Selector arrow (shown at the right side of the Input
Panel icon) opens a list of available input methods.
Transcriber is a
handwriting recognition
program that allows you
to write in cursive, block
letters, or a combination
of both. Transcriber works
transparently in the
background of programs,
recognizing words with
its integrated dictionary.
To enter text, symbols, and
numbers, you can either type
using the QWERTY Keyboard
to type ABC characters or the
standard on-screen Keyboard.
When Transcriber is turned
on, it interprets stylus
movement anywhere on
the screen as handwriting
input.
45
Page 48

Entering Text on your device using the Keypad
: When you press once,
it helps you to use the upper
character, such as special
characters and numbers on
each button. Press and hold
the FN button if you want
to keep typing in the upper
characters.
: When you press this button once, it acts as a Shift
button. Press and hold this button if you want to use the
Shift function continuously.
46
Page 49

Entering Text on your device in portrait view (XT9 Keypad is default.)
<Full QWERTY(Default mode)> <Half QWERTY>
With the XT9 keypad, you can enter text by tapping the keys displayed on the screen. This is the most
common
way to enter text, with word prediction function in Qwerty mode on the portrait screen.
v
The XT9 Keypad is available when text entry is possible.
v
Enter letters by tapping the keys labeled with the letters desired.
Full QWERTY
In portrait, the Full QWERTY mode lets you enter characters by tapping the key labeled with the desired
letter.
47
Page 50

The Half QWERTY
In the Half QWERTY mode on the portrait screen, a single tap will display the first letter of the key you
touched. A quick second tap will result in the second letter on the key being displayed.
Tap FN and DEL key to switch between Full QWERTY and Half QWERTY.
Accessing symbols
The symbol mode enables you to enter various symbols or special characters.
Full (Half) QWERTY:
enter additional symbols.
Tap FN and choose what you would like to enter. Or tap FN and the space key to
Accessing numbers
Full Qwerty:
Half Qwerty:
Tap FN to enter just one number. Tap and hold FN to enter numbers continuously.
Tap XT9 On/123 once.
CAPS key
Tap shortly to activate uppercase mode for just one character. Tap and hold CAPS key to enter Uppercase
letters continuously.
FN key
Tap briefly to change the position of upper/ below characters.
48
Page 51

Entering the text with XT9 mode
If you set XT9 keypad is ON, you can enter the text with XT9 mode. XT9 mode uses a built-in dictionary
to recognise your words based on the key sequences you touch. Simply touch the number key associated
with the letter you want to enter, and the dictionary will predict the word you want to use.
49
Page 52

Email Tap the
LG Menu > Email in Communication tab
About Email
Your Windows powered smartphone can connect to:
• Personal email accounts from internet service providers (ISP) like Yahoo!, AOL or Hotmail. Personal
email accounts can be wirelessly synchronized with your LG IQ
• Corporate email accounts from IT managed servers like Microsoft® Exchange Server or IBM Lotus
Domino. Corporate email accounts can be wirelessly synchronized with your smartphone. To set up
corporate wireless email on your smartphone, you can use IT managed set up with Microsoft® Direct
Push.
TM/MC
.
Set up a Personal Email
1.
Tap
Setup E-mail
2.
Type E-mail address and password, and then tap Next in the right bottom of the screen.
Note
Select the Save password check box if you want to save your password so that you do not need to
enter it again.
from Email menu.
50
3.
Check the box of [Try to get e-mail settings automatically from the Internet] if you want to set up the
auto receive settings and tap Next.
4.
Choose Internet e-mail as your e-mail provider and tap Next.
5.
Tap and type Your name (the name you want displayed when you send e-mail) and Account display
name, then tap Next.
6.
Tap and type your Incoming mail server and choose Account type, then tap Next.
7.
Tap and type your User name and Password, then tap Next.
Page 53

8.
Tap and type Outgoing (SMTP) mail server, then tap Next
9.
When you mark the box of [Outgoing server requires authentication], it activates and tap Next.
10.
After successfully registering, you can choose the update interval of Automatic Send/Receive of your
email.
Set up Corporate Wireless Email
To set up corporate wireless email on your LG IQ
and support for Microsoft Direct Push. Microsoft Direct Push provides wireless access to your corporate
email, contacts, calendar, and tasks for Microsoft Exchange Server. Activate an appropriate enterprise
data plan for your Telus account before using Microsoft Direct Push.
TM/MC
, contact your IT administrator for setup instructions
Send an Email
1.
Select
Write New Message
2.
In the To field, perform one of the following actions:
- Enter an email address
- Enter a contact name
3.
Tap the Subject field and type the subject.
in the Communication tab and select your email provider
4.
Type the text in the message box. To edit your email such as adding files or Message Options, tap
Menu and select the option you want to use.
5.
Once you have finished, tap send on the left bottom of the screen.
51
Page 54

Messaging
This menu includes functions related to text messages, MMS and email. You can send and receive text
messages, MMS, Outlook Email and Internet Email through an Internet Service Provider (ISP). You can
also access email from work using a VPN connection.
Managing Messages
v
When you select Email menu in the Communication tab, you can view your accounts including
Messages and email.
v
After selecting one of your accounts, you can choose message box by tapping the arrow on the left
upper side of the screen. You can view Messages, Outlook Email folders and other accounts folders
here as well.
1. Inbox:
2. Outbox:
3. Sent Items:
4. Drafts:
5. Deleted Items:
View received messages. Select a message to view.
The Outbox is temporary storage place for messages waiting to be sent. Failed messages are
also placed in Outbox.
Show the messages you sent (Message/email).
View saved messages. Selected messages can be edited.
View deleted items.
Note
Tap
Deleted Items.
the upper right bar and then you can sort messages by Inbox, Outbox, Sent Items, Drafts,
52
Page 55

Downloading Messages
The manner in which you download messages depends on the type of account you have:
• To receive e-mail for an Outlook E-mail account, begin synchronization with Exchange Server through
ActiveSync.
• To send and receive email for an email account that you have with an Internet Service Provider (ISP),
download messages through a remote email server.
• Text messages are automatically received when your phone is turned on. When your phone is turned
off, messages are held by your service provider until the next time your phone is turned on.
To Reply to or Forward a Message
1.
Open the received message and tap
2.
Enter your response. To quickly add common messages, tap
in the Text Templates list > select Insert button on the right side of the text
message.
3.
Tap
Send
.
Tip
To see more header information.
Reply
, or
Menu
>
Reply, Reply All or Forward.
Menu > Text Templates > Select a Text
and tap a desired
Note
v
You will be alerted when you have received messages. They will be stored in the Inbox.
v
In the Inbox, you can identify each message by icons.
v
If the phone shows ‘No space for SIM message’, you have to delete some messages from the
Inbox.
v
If the phone displays ‘No space for message’, you can make space of each repository by deleting
messages, media and applications.
*
SIM message
SIM message means the message stored on the SIM card. You can copy this message to the phone.
53
Page 56

Music Player Tap the
Allows you to use Windows Media Player. You can play digital audio and video files that are stored on
your device or on a network.
If you tap Menu on the right side, you can check menus as below.
v
New Playlist:
make the playlists up to 100.
v
Add to Playlist:
v
Delete Playlist:
v
Send:
Send the song via Message, E-mail or Bluetooth.
v
Move/ Copy:
v
Delete:
v
Visualiser:
v
Sort by:
Create personal playlists by choosing songs from the All Songs menu.You can
Add new song to playlist.
Delete the song from playlist.
Move or copy the song between folder or memory.
Delete a playlist.
Sets the visualizer to change music’s loudness and frequency spectrum in the music.
Sort the song or list by name or date.
LG Menu > Music Player in the Multimedia tab
54
Note
Copyrights of music files may be protected by copyright and intellectual property laws. Therefore, it may
be required to obtain necessary permissions or licenses before you can reproduce or copy the materials.
In some countries, national law prohibits copying of copyrighted materials for personal archive as well.
Prior to downloading or copying the files, please ensure that you adhere to the applicable laws and laws of
corresponding countries or regions regarding the Terms of Use of materials.
Page 57

Adding Music to your Handset
Before You Get Started
To transfer music from your PC to your device, you will need the following:
• Windows Media Player 10 or above
• Windows XP Service Pack 2
• Music on your PC in one of these formats: WMA, MP3, 3GA, AAC, AMR, MID, MIDI, WAV,
MP3D, MP3DRM, or M4A
• microSD card
• USB data cable
*MicroSD card is optional.
Adding Music to your Handset
Music files can be added to your handset by using one or more of the
following methods:
• Download music and ringtones over the network directly to your device by using the shopping for music
feature.
• From your existing digital media collection through Windows Media Player®.
• From music stores through the applicable music client.
55
Page 58

Transferring Music using Windows Media Player
A USB cable, microSD card, and a current version of the Windows Media Player are required for this
procedure.
1.
Open Windows Media Player on your computer (version 10.0 or higher).
2.
Use the USB adapter cable to connect the handset to the target PC.
3.
Mobile Device will be shown on the computer screen.
4.
From within the Windows Media Player application, click on the Sync tab. Previously downloaded
songs are then listed on the left side of the application if Windows Media Player 11 is installed.
5.
Choose the destination location for the media files.
Note
If there are no items present in the playlist, click the Edit Playlist button and begin adding the music files
from among the various media categories.
6.
Select the songs you want and right click to add to ‘Sync List’ to synchronize to your handset.
7.
Tap the Start Sync at the lower right corner of the application to download the selected songs to your
handset. Do not unplug the handset during this process.
8.
It is now safe to unplug the USB connector from the handset.
56
Page 59

Transferring a Playlist to the handset
1.
Open Windows Media Player on your computer (version 10.0 or higher).
2.
Use the USB adapter cable to connect the handset to the target PC.
3.
Mobile Device will be shown on the computer screen.
4.
From within the Windows Media Player application, click on the Library tab.
5.
From the left side of the Library tab, click on All Music. The right side of the page is then populated with
all of the songs which the player has previously found.
6.
Right click on the song entry and select Add to. > Additional Playlists.
7.
From the Add to Playlist dialog, click the New button and type in a unique playlist name.
8.
Click OK when you are done entering the new playlist name. The new Windows Media playlist is then
displayed within the My Playlist section of the Library tab (left side).
9.
Drag and drop the newly created playlist from the My playlist section to the phone Music Sync Player
listed just above it. Click "Start Sync".
Note
If there are no items present in the playlist, click the Edit Playlist button and begin adding the music files
from among the various media categories.
10.
It is now safe to unplug the USB connector from the handset.
57
Page 60

Note
1.
If you connect your handset with a specific USB Hub on your PC, the Music Sync service will not work.
So we recommend direct USB Connection to your PC, not using a HUB.
2.
Do not disconnect during transfer. Check if your PC is running Windows XP and Windows Media Player
10 or later. If your PC is running Windows XP and Windows Media Player 9, please download WMP10 or
WMP11 by visiting Microsoft site.
3.
If you have connected your handset to the PC, and are trying to send a file using Music Sync, but
the function is not working properly, please check the following:
A. Check the length of the file you are transmitting.
B. Check whether license of the file you are transmitting has expired.
C. Check whether the file you are transmitting is the right format for your phone (MP3, WMA,
AAC).
4.
If you transfer files as shown below, the transferred files will not show in a third party application
or in Windows Media Player.
A. Transmit a file by directly inserting external memory into a PC.
5.
When you have transferred files with the Music Sync feature and you want to delete them from
your phone, you should connect the phone to your PC again with Music Sync to delete them. Even
if you have deleted files transferred with the Music Sync feature as shown below, delete them
again with Music Sync. Otherwise you will not be able to transfer files identical to the deleted
files.
58
A. Deleted a file using Windows Explorer on a PC.
B. Deleted a file by directly inserting external memory into a PC.
C. Deleted a file using the delete function on the phone.
Page 61

Using your Alarm Ta p
Choose New Alarm, and then use your fingers to set the time on the clock.
1.
2.
Select Repeat, and then choose the days on which to repeat the alarm.
3.
Tab Sound/Vibration, and then choose the type of alarm: Always Sound & Vibrate, Always
Sound, Always Vibrate, and so on.
4.
Tap Save.
5.
Choose Quick Alarm, and then drag the hand to set the time.
6.
Tap to choose On or Off.
LG Menu > Applications > Alarm
if you see this icon, you
can set Windows Alarm
On or Off.
59
Page 62

Using the RSS Reader Ta p
RSS (Really Simple Syndication) is a family of web feed formats used to publish frequently updated
content, such as blog entries, news headlines or podcasts. An RSS document, called a feed, web feed
or channel, contains either a summary of content from an associated website or its full text. The user
subscribes to a feed by entering its link into the reader. The reader checks the user’s subscribed feeds
regularly for new content and downloads any updates that it finds.
LG Menu > RSS Reader in the Communication tab
Weather Tap
Check today’s weather and the weather forecast in any city you choose.
Note
v
This function may incur additional data transfer fees from your provider.
Using your Calculator Tap
Touch the number keys to enter numbers.
1.
2.
For simple calculations, touch the function you require (+, –, x or ÷), followed by =.
3.
For more complex calculations, touch on the upper right of the screen and choose between sin, cos,
tan, log, ln, etc.
LG Menu > Weather in the Applications tab
LG Menu > Calculator in the Applications tab
60
Page 63

Tip calculator Tap
This feature allows you to quickly and easily calculate the tip amount based on the total bill as well as the
split of the total bill based on the number of people.
v
Bill -
Type the bill amount.
v
Tip(%) -
v
Split -
Type the percentage of the tip
Enter the number of people.
LG Menu > Tip Calculator in the Applications tab
Using your Stopwatch Tap
This menu allows you to record the elapsed time of an event. The duration of an individual lap time and
the total time can be displayed.
1.
To start timing, tap Start. The running time is displayed as HH.MM.SS.hh (hours, minutes, seconds and
hundredths of a second).
2.
During timing, you can record an individual lap time by tapping Lap. Up to 99 lap times can be recorded.
3.
You can stop and resume timing by tapping Stop or Resume.
4.
To reset the stopwatch, tap Stop and Reset.
5.
You can see the recorded lap times on the lap time list.
LG Menu > Stopwatch in the Applications tab
61
Page 64

Wireless Manager
Wireless Manager allows you to manage Wi-Fi Internet and Bluetooth connections on your device. It
allows the phone to connect local wireless networks, or access the Internet wirelessly. Wi- Fi is faster
and has a greater range than Bluetooth wireless technology.
Note
The charge between using a data plan to access the internet and using Wi-Fi is different. Please contact
your network operator for further information.
v
Touch the Up arrow in the Today home screen and select Wireless Manager.
v
Touch ON right side of Wi-Fi option or touch More Settings on the bottom of the screen and tap Wi-Fi to
turn on Wi-Fi.
A bubble window pops up and shows new network detected.
v
You can select the network that you are permitted to access and tap OK.
v
Then select The Internet to have an Internet service and tap Connect.
Note
If your Wi-Fi service provider or network administrator sets WEP encryption for network security, you
should fill in WEP key in the pop-up window. If WEP encryption is not set, this pop-up window is not shown.
If you don’t know the key, you need to ask it to your Wi-Fi service provider or network administrator.
62
If Wi-Fi connection is finished, you can see the connection name (SSID) in the Wireless Manager.
To turn off Wi-Fi, touch OFF right side of Wi-Fi option in the Wireless Manager.
Page 65

Configuring Wi-Fi Connection Settings
Note
Before you set the WLAN configuration, you need to ask your WLAN service provider or your network
administrator for the IP settings.
v
Tap
Start > Settings > Connections > Wi-Fi.
v
Tap
Network Adaptor
v
If you tap Use specific IP address, you need to fill in IP address,
Subnet mask and Default gateway assigned by your
WLAN service provider or network administrator.
v
Fill in IP address, Subnet mask, and Default gateway.
v
Tap Name Servers.
v
Fill in DNS and Alt DNS, WINS and Alt WINS, if necessary.
Note
To prevent from the possible data loss of your phone, WLAN automatically ends when the battery almost
runs out at the level of below five percent.
tab and select
Broadcom 802.11 DHD Network
.
63
Page 66

Changing your Phone Settings Tap
LG Menu > Settings > Phone Settings
Enjoy the freedom of adapting the LG IQ
Date & Time Ringtone & Alerts Themes & Wallpapers Power Lock -
Set the status of lock mode.
Fonts Memory Manager -
an external memory card which you may need to purchase separately. You can use memory manager to
determine how each memory is used and see how much space is available.
Adjust your date and time settings or choose whether to notify when time is updated.
Choose your ringtone from Normal, Vibrate, Silent, Outdoor and Automatic.
Choose the Theme and the Wallpaper.
Set up the Power settings for Battery and External.
Adjust the text size to see more content or increase the readability in many programs.
Your LG IQ
TM/MC
Using the Screen Outputs Tap
Pico Projector (Sold separately) TV Out-
holding camera key while TV Out is on.
Allows you to set TV Out to ON or OFF. You can see this screen at any time with pressing and
TM/MC
to your own preferences.
has three available memories: the phone itself, the SIM Card and
LG Menu > Settings > Screen Output
It projects LG IQ
TM/MC
’s home screen to the screen or wall.
64
Displaying the Today screen Tap
Settings tab
Checked items appear on the Today screen. If you check
items except
Windows Default
since you can access them on the screen.
LG Menu > Homescreen Layout in the
LGIdles
, you don't need to check other
Page 67

Using Bluetooth Tap
Bluetooth enables compatible mobile devices, peripherals and computers that are in close proximity
to communicate directly with each other without wires. This handset supports built-in Bluetooth
connectivity, which makes it possible to connect them with compatible Bluetooth headsets, computer
applications and so on.
Note
v
If you use
v
When you receive data from another Bluetooth device, the phone requests a confirmation. After
confirming the transfer, the file will be copied to your phone.
Bluetooth must be turned on to use this feature.
There are three tabs for Bluetooth; Settings, My devices and Accessories.
1. Settings
Go to
Bluetooth > Settings > Add a device
Go to
Bluetooth > Settings > Disable Bluetooth
Go to
Bluetooth > Settings > Advanced…
PC Sync via Bluetooth
LG Menu > Settings > Bluetooth
, you can exchange data within the phonebook.
to setup a new bluetooth device.
to turn off Bluetooth.
to set up additional options.
2. My Devices:
3. Accessories
Go to
Bluetooth > Accessories > Print Images
Go to
Bluetooth > Accessories > PC Remote Control
Go to
Bluetooth > Accessories > Networking Manager
Go to
Bluetooth > Accessories > Business Card Exchange
Go to
Bluetooth > Accessories > BT Send Object
Audio, Ring Tones, Images, Videos, Outlook Email, Contacts and Tasks
Note
v
If you want your phone can be searched by other BT device, change discoverability setting like below. Go
to Bluetooth -> Settings -> Not Discoverable to Always Visible or Visible for 60 seconds.
Allows you to see information and properties of current connected device.
to lay out and print pictures from your handheld.
to remotely control a PC with this device.
to network with other Bluetooth deices.
to send and receive business cards.
to send objects such as
Notes, Calendar Items,
to a
Bluetooth device.
65
Page 68

Using TTY
Allows you to attach a TTY device enabling you to communicate with parties also using a TTY device.
A phone with TTY support is able to translate typed characters to voice. Voice can also be translated into
characters and then displayed on the TTY.
Tap the LG Menu > Settings > TTY
TTY Mode (Tele Type Writer)
TTY modes are as follows:
Menu User Feature
TTY Full
TTY+Talk
TTY+Hear
1. TTY Full:
- Users who cannot talk and hear may send and receive a text message through TTY equipment.
2. TTY Talk:
- Users who can talk but cannot hear can receive a text message and send voice messages through
TTY equipment.
3. TTY Hear:
- Users who can hear but cannot talk can send a text message and receive voice messages through
TTY equipment.
4. TTY Off:
- Users send and receive without TTY equipment.
For the hearing-/
speech impaired
For the hearing
impaired
For the speech
impaired
can talk
audible
can talk
audible
Transmission/Receiving
Mode
text message transmission,
text message reception
voice transmission, text
message reception
text message transmission,
voice reception
When making
communications with a
normal terminal
operator required
operator required
operator required
66
Page 69

Connecting TTY Equipment and a Terminal
1.
Connect a TTY cable to the TTY connection on the terminal. (the TTY connection location is the same as
that used for a hands-free ear socket)
2.
Enter the TTY menu and set up the desired TTY mode. (For a TTY mode, see above)
3.
After setting a TTY mode, check the LCD screen of the phone for the TTY icon.
4.
Connect the TTY equipment to the power source and turn it on.
5.
Make a phone connection to the desired number.
6.
When a connection is made, use the TTY equipment to type in and send a text message or send a voice
message.
7.
The voice or text message from the receiver end appears on the TTY equipment display.
67
Page 70

Taking photos and recording Tap
or Press and hold the camera button on the right side of the phone for a while to go to the
Camera menu
Holding the phone horizontally, point the lens towards the subject you want to take a picture of.
1.
2.
Press the camera button on the right side of the phone or tap the camera button on the screen.
LG Menu > Camera in the Multimedia tab,
68
Page 71

Before taking a picture
To see the setting menu, you need to tap the screen once. These setting options disappear automatically
after a while if you do not work.
Back
Camera mode
Photo Album
Brightness - Adjust the brightness.
Macro/Auto
Flash light - Choose from Auto/Always Off/Always On
Settings - Adjust camera settings such as Reset Settings/Image Size/Scene Mode/
Color Effect/White Balance/Timer/Shot Mode/Preview Style/ISO/Image Quality/
Memory In Use/Hide Icons/Shutter Sound/Grid View.
69
Page 72

After taking a photo
Rename - Edit the file name.
Use As - Use as Wallpaper and Contact Image.
Send - Send Via Message, Email, Bluetooth
Back
Delete
Back to the camera
Photo album
70
Page 73

Before taking records
To see the setting menu, you need to tap the screen once.
Brightness - Adjust the brightness.
Flash light - Choose from Always On/Always Off
Recording mode - Choose from Auto, Portrait, Landscape and
Sports.
Back
Video mode
Photo Album
Settings - Adjust recording settings such as Reset Settings/
Video Size/Scene Mode/Color Effect/White Balance/Video
Quality/Duration/Memory in Use/Voice/Hide Icons.
71
Page 74

After recording the video clip
Rename - Edit the filename
Send - Send Via Message, Email and
Bluetooth
Play - Replay the recorded video clip
Back
Delete
Record - Return to record mode
Photo Album
72
Page 75

Photo Album Tap
Note
v
Tap Menu to delete or sort the files or see Slide show.
LG Menu > Multimedia > Photo Album
Tap to choose one from Photo Album,
Favorites, Pictures only, and Videos only.
73
Page 76

My Multimedia Tap
You can view the files including Audio files and Pictures stored in Handset and Memory Card and also
how much the storage is being used. The Pictures and Videos program collects, organizes, and sorts
images and video clips in the following formats on your device.
File Type File Extensions
Image BMP, JPG
Video WMV, MP4, 3GP
Audio AAC ,MP4,3GP,3G2,3GA,MP3,WMA
You can view the pictures as a slide show, beam them, send them via email, edit them, or set them as the
background on the T
oday screen.
LG Menu > Multimedia > My Multimedia
,M4A ,AMR ,MID
74
Page 77

To Copy a Picture or Video Clip to Your device
You can copy pictures from your PC and view them on your device.
v
Copy the pictures from your PC or a storage card to the My Pictures folder on your device.
Note
v
You can also copy pictures from your PC to your device using a memory card. Insert the memory card
into the memory card slot on your device, and then copy the pictures from your PC to the folder you
created on the memory card.
FM Radio Ta p
Your LG IQ
TM/MC
LG Menu > FM Radio in Multimedia tab
has a built-in FM radio feature so you can tune into your favorite stations and listen on
the move.
Note
v
You will need to attach your headphones to listen to the radio. Insert them into the headphone socket.
You can tune your phone to radio stations by searching for them manually or automatically. They will
then be saved to specific channel numbers, so you don’t have to keep re-tuning. You can store up to 30
channels on your phone.
To set the listening options, tap Menu in the FM Radio screen and choose one you would like to set such
as Scan and Alarm etc.
75
Page 78

FM Radio
You can search radio stations and enjoy listening to the radio.
Note
v
To improve the radio reception, extend the headset cord which functions as the FM antenna.
v
You cannot use the FM radio without the headset.
1.
In order to save/add a station, tap the 123ch button on the FM Radio screen then tap Menu and tap
Add....
2.
After presetting the radio channels, you can listen to all the preset channels by tapping the left or right
arrow.
3.
You can access the following option menus tapping
v
Scan:
If you tap Scan, the radio channels are set automatically. To save the current channel,
tap Stop->Menu->Save preset.
v
Mute:
You can turn off the sound by selecting this option.
v
Preset Scan:
v
Save preset:
You can choose whether to erase the existing presets before scanning for new stations.
You can set the channel that you use frequently and assign the Shortcut key. This can be
found in preset list.
Menu
:
76
v
Presets:
v
Alarm:
v
Options:
Note
v
View the entire presets list.
Choose a preset from the lists to use as an alarm. Check the [Enable Alarm] box to set up.
Allows you to enable RDS and switch Alternative Frequency.
Enable RDS:
Displays the received data message from the radio station on the screen.
Page 79

To Set Sound & Notifications on Actions
1.
Tap
Start > Settings > Sounds & Notifications.
2.
On the Sounds tab, choose how you want to be notified by selecting the appropriate drop-down boxes.
3.
On the Notifications tab, in Event, tap an event name and choose how you want to be notified by
selecting the appropriate drop-down boxes. You can choose from several options, such as a special
sound, a message, a flashing light.
4.
On the Vibrations tab, choose how you want to be notified by vibrations for screen taps.
Navigation Sensor Tap
You can adjust Motion Sensitivity and Turbo Scrolling Speed for Navigation Sensor.
Navigation Sensor is commonly used as below:
1.
In camera mode, you can zoom in and out by touching the Navigation Sensor.
2.
You can lock the LG IQ
(Go to LG Menu > Phone Settings > Lock > Unlock device with Navigation Sensor)
3.
In Start Menu, icons can be navigated by touching Navigation Sensor.
Note
v
Register over two fingerprints to activate this function properly.
v
Enter PIN after pressing Emergency call button in lock screen when your fingerprint is not recognized.
TM/MC
LG Menu > Settings > Navigation Sensor
by recognizing your fingerprint.
77
Page 80

Task Manager
In most cases, programs automatically close to free needed memory, however, you can close programs
manually, if you prefer.
1.
Tap
Start > Task Manager.
2.
You can check the running programs list on Application column including the Memory and CPU
information for each program.
3.
You can end the programs manually by tapping
End Task in the left bottom of the screen
.
Voice command
Voice command is the function whereby your phone’s voice recognition engine identifies the voice of the
user and carries out the requested commands. When the user operates the voice command function,
there are possible commands; call <name or number>, Listen voicemail, missed calls, messages and
time, date and so on.
Tap Start > Settings > Personal> Voice Command
78
Allows you to see options for
chosen item of the list.
Allows you to choose the
Notification Options
Page 81

Voice Command Settings
• Calendar options
- Enable/ Disable: Announces to remind the calendar.
• Media options
- Enable/ Disable: Announces the album, artist, genre of music.
• Message options
- Enable/ Disable/ High priority: Announces to arrive a new message.
• Phone options
- Confirm when calling by name
- Confirm when calling by number
- Announce incoming calls
79
Page 82

Internet Sharing
Note
v
ActiveSync software version 4.5 or higher is required.
v
Connect the USB cable to the PC.
v
Tap
Start > Internet Sharing.
v
Set PC Connection to USB or Bluetooth PAN
v
Set Network Connection to proper APN
80
v
Tap Connect in the bottom line
v
Data connection indicator (G/E/3G) is displayed when PDP activation is performed successfully.
Note
v
Operating System on your PC is required Windows XP SP2 or later.
Page 83

Activesync
ActiveSync synchronizes information on your device with information on your PC, such as Outlook
content. ActiveSync can also synchronize over a cellular network with Microsoft Exchange Server, if your
company or service provider is running Microsoft Exchange Server with Exchange ActiveSync. When you
synchronize, ActiveSync compares the information on your device with the information on your PC and/or
Exchange Server and updates all locations with the most recent information.
With ActiveSync, you can:
v
Synchronize information, such as Outlook Email, Contacts, Calendar, or Tasks information on your
device with your PC, as well as pictures, video, and music.
v
Synchronize Outlook Email, Contacts, Calendar appointments, and Tasks on your device directly with
Exchange Server so that you can stay up to date even when your PC is turned off.
v
Exchange files between your device and your PC without synchronizing.
v
Select which types of information are synchronized and specify how much information is
synchronized. For example, you can choose how many weeks of past Calendar appointments to
synchronize.
Before you can synchronize information with a PC, first, you must install ActiveSync on your PC.
And then you create a synchronization relationship between your device and the PC.
You can install ActiveSync from the Getting Started disc that comes with your device.
Once you have installed ActiveSync and set up a synchronization relationship, ActiveSync on the PC
recognizes your device when you connect it, and automatically transfers the synchronization settings you
specified on your device.
You may be able to synchronize your device with Exchange Server through your company or wireless
service provider. If you plan to do so, obtain email address, Exchange Server address, user name,
password, and domain name from your administrator before starting the Sync Setup Wizard.
81
Page 84

Setting up Windows Vista™
Microsoft Windows Phone® Device Center is the replacement for Microsoft® ActiveSync® on
Windows Vista™.
Note
v
Some versions of Windows Vista come with Windows Device Center already installed. If Windows
Device Center is not available on your Windows Vista, you can install it from the Getting Started Disc
that came with your device.
Set up synchronization in Windows Device Center
When you connect your device to your PC and start Windows Device Center for the first time, you are
asked to create a Windows partnership with your device. Follow the steps below to create a partnership.
v
Connect your device to your PC. Windows Device Center configures itself and then opens.
v
On the license agreement screen, click
v
On the Windows Device Center’s Home screen, click
Note
Accept
.
Set up your device
.
82
v
Choose
updates, and explore your device but not sync Outlook information.
v
Select the items you want to synchronize, and then click Next.
v
Enter a device name and click
Connect without setting up your device
Set Up
. When you finish the setup wizard, Windows Device Center
if you only want to transfer media files, check for
synchronizes your device automatically. Notice that Outlook emails and other information will appear
on your device after synchronization.
Page 85

Use Windows Device Center
To open Windows Device Center, click
Windows Vista computer. On Windows Device Center, you can do the following:
v
Click
Mobile Device Settings
v
When you click
import
, a wizard guides you to tag and transfer photos from your device to the Photo Gallery on your
Windows Vista PC.
v
Click
Pictures, Music and Video > Add media to your device from Windows Media Player
to synchronize music and video files using Windows Media™ Player. For more information, see
“Windows Media® Player Mobile” in Chapter 11.
v
Click
File Management > Browse the contents of your device
your device.
Pictures, Music and Video
Start > All Programs > Windows Device Center
to change synchronization settings.
> ___
new pictures/video clips are available for
to view documents and files from
on your
Setting up Windows XP
If you are using Windows XP the Getting Started CD that comes with your device contains Microsoft
ActiveSync 4.5 or later. Follow the steps below to install and set up ActiveSync on Windows XP.
v
Insert the Getting Started CD into the CD drive of your PC.
v
Select
Setup and Installation
v
After installation is completed, connect your device to your PC using the sync cable.
- Connect the smaller end of the USB cable to your LG IQ
and follow the on-screen instructions to install ActiveSync.
TM/MC
.
- Connect the larger end of the USB cable to the USB port on your computer.
v
The Synchronization Setup Wizard automatically starts and guides you to create a synchronization
relationship. Click
v
To synchronize your device with your computer, clear the Synchronize directly with a server running
Microsoft Exchange Server check box, and then click
Next
to proceed.
Next
.
83
Page 86

v
Select the information types that you want to synchronize, and then click
Click Finish.
When you finish the wizard, ActiveSync synchronizes your device automatically.
Next
.
Synchronizing Information
When you connect your device to the PC using a USB or a Bluetooth connection, ActiveSync will
immediately synchronize. While the device is connected, ActiveSync synchronizes every time you make a
change on either the PC or the device.
Synchronizing Outlook information
If you have set up a synchronization relationship between your device and the PC, synchronization
keeps Outlook information up-to-date on both computers. ActiveSync synchronizes a limited amount of
information by default to save storage space on your device. You can change the amount of information
synchronized for a given information type in Settings for the information type.
You can set up your device to synchronize with more than one PC or with a combination of one or more
PCs and Exchange Server. When synchronizing with multiple computers, the items that you synchronize
will appear on all of the computers with which they are synchronized.
For example, if you have set up synchronization with two PCs (PC1 and PC2), which have different items,
and you synchronize Contacts and Calendar on the device with both computers, the result is as follows:
84
Location New state
PC1
PC2
Device
All Outlook contacts and calendar appointments that were on PC2 are now also on PC1.
All Outlook contacts and calendar appointments that were on PC1 are now also on PC2.
All Outlook contacts and calendar appointments from both PC1 and PC2 are on the
device.
Page 87

To start and stop synchronization
v
To synchronize Outlook information and other local information on the PC, including media files,
connect your device to the PC using Bluetooth or a cable.
v
If you are synchronizing directly with Exchange Server, you can use the PC connection to the network
that is “Desktop Pass-through”, or you can synchronize without connecting to the PC over a cellular
network.
v
In ActiveSync, tap Sync. To end synchronization before it completes, tap Stop. To change which
information is synchronized
1.
In ActiveSync on the device, tap
2.
Do one or both of the following:
v
Select the check box for any items you want to synchronize. If you cannot select a check box, you
might have to clear the check box for the same information type elsewhere in the list.
v
Clear the check box for any items you want to stop synchronizing.
3.
To stop synchronizing with one PC completely, tap the PC and tap Delete.
Note
Outlook email can be synchronized with only one computer. To change available synchronization settings,
select the type of information and tap Settings.
Menu > Options
.
To synchronize directly with Exchange Server
You can set up synchronization with Exchange Server on your device, if it is available to you through your
company or wireless service provider. However, you should first ask your administrator for the following
information and then carry on with the steps: email address, Exchange Server address, user name,
password, and domain name.
85
Page 88

1.
In ActiveSync on the device, tap
with Exchange Server, this will say
2.
Enter email address, and tap
3.
In Server address, enter the address of the server running Exchange Server, select the check box if this
Server requires an encrypted (SSL) connection. And tap
4.
Enter user name, password, and domain, and tap
synchronization conflicts, tap Advanced.
5.
Select the check boxes for the types of information items that you want to synchronize with Exchange
Server.
6.
To change available synchronization settings, select the type of information, and tap
7.
Tap
Finish
.
Menu > Configure Server
Add Server Source
Next
.
Next
. If you have not yet set up synchronization
.
Next
.
. To change the rules for resolving
Settings
.
Synchronizing via Bluetooth
You can connect your device to the PC to synchronize using Bluetooth.
To synchronize with a PC via Bluetooth
1.
First, check “Allow connections to one of the following” of the ActiveSync connections Settings menu
on your PC.
Select the proper COM port.
86
If there are no available connections, then you should first make a Bluetooth pairing.
2.
Select the ActiveSync via Bluetooth item in Bluetooth connection wizard (Bluetooth Settings ->
Bluetooth Manager -> new -> ActiveSync via Bluetooth).
Page 89

Synchronizing Music, Video, and Pictures
If you want to carry your music or other digital media with you along while you travel, ActiveSync works
with Windows Media Player to synchronize music, video, and pictures.
Other than selecting the Media information type in ActiveSync to be synchronized, all media
synchronization settings must be set in Windows Media Player. Before media can be synchronized, you
must do the following:
v
Install Windows Media Player Version 10 on the PC.
v
Connect your device to the PC with a USB cable. If the device is currently connected using Bluetooth,
you must end that connection before media can be synchronized.
v
Insert a storage card into your device (32 MB or larger is recommended).
v
Set up a sync partnership between the storage card and Windows Media Player.
Change Media synchronization settings
Once you select the Media information type in ActiveSync to be synchronized, any of your favorite music,
video, and picture files in Windows Media Player playlists can be synchronized. All you have to do is set
up synchronization in Windows Media Player for those media files.
To set up a sync relationship with a storage card
1.
Open Windows Media Player.
2.
Click the
3.
Select the storage card.
4.
Click
For information about using Windows Media Player on the device, see Chapter
Sync
tab.
Set up Sync
.
8.
87
Page 90

Touch Feedback Tap
1.
Tap
LG Menu > Touch Feedback
You can set touch feedback for Screen and Button.
LG Menu > Touch Feedback in the Settings tab
in the
Settings
tab
Screen
You can select whether to set Vibration mode to ON or OFF. If you set ON, screen vibrates when tapped.
You can also choose Vibration Type and Vibration Strength. To set up Sound Type and Sound Tone, you
need to set Sound to ON.
Button
Only Sound options are available for the Button tab.
88
Page 91

Sensors Tap
LG Menu > Sensors in the Settings tab
Accelerometer Sensor
If you set On, rotation sensor automatically perceives the orientation of your device and decides the
direction of screen display; Portrait or Landscape. You can also set the phone to vibrate when the screen
display is switched.
Note
v
This function does not work when some programs are being launched.
Auto Luminous Control Sensor
If you set On, LCD backlight brightness is automatically adjusted based on the exterior light.
Proximity Sensor
Once the feature is turned On, the LCD will automatically turn off when in close proximity to your face,
during a call.
This function allows you to save power and prevents you from unintentionally activating features during
a call.
The LCD backlight comes back on when you are far enough away from the sensor.
This function automatically turns off the LCD when you are close to the sensor and turns on when you
move away.
WARNING
• Do not cover the protection film on proximity sensor of LCD. It can be caused the malfunction of
sensor.
89
Page 92

IM
The Instant Messaging feature can only be used with the support of the network operator or communities
such as Windows Live Messenger.
For Instant Messaging users, a valid User ID and Password will be required in order to login and exchange
messages as well as checking the online status.
The menu items below might not appear since not all IM communities support the various options. Also
the menu strings may appear differently based on the selected IM communities. The keywords such as
User ID, Login and Contact will be used as general terms in IM menus according to the currently selected
LG Menu > Messenger Icon, communities such as AIM, Windows Live and Yahoo! Messenger.
Sign in
1.
Select the community.
2.
Type your user name and password. For Windows Live messenger, you will also need to enter the
respective domain name. e.g.: xyz@hotmail.com
Note
If you do not have a community user name, you will need to create one on the community website
using your desktop internet browser.
90
3.
Tap sign in.
Note
To avoid typing your user name and password each time you log in, select the Save Password check
box. To set your device to sign in to the community automatically each time you start the device,
select Auto Sign In.
Page 93

Switching between Communities
You can sign in to all of the communities at the same time.
All of the enabled communities are displayed on the top as tabs.
Change Status
Tap Menu on the Contact List screen, choose the option My Status and then select the desired status
Online, Appear offline, Out to lunch, In a call, Away, Be right back, Busy (This can change depending on
your IM provider.)
Contact List
The Contact list displays your individual contacts/buddies in a tree list view. The online contacts are
displayed under their respective group names and all the offline contacts are displayed under a separate
group called Offline.
To collapse or expand a group, select the group using the navigation keys and press the left softkey
Collapse/Expand
v
Add a Contact:
the next screen enter the User ID of the desired contact and click the left softkey
v
Block:
On the Contact list screen, highlight a contact and click the right softkey Menu and choose
Block. A confirmation screen will be displayed, select the Yes softkey to confirm the action. (Block
option is only available for Windows Live and AIM)
v
Delete:
v
Refresh Contact List:
choose the
v
Contact info:
Contact Info.
.
On the Contact list screen click the right softkey
Select the contact, click the right softkey
To get the updated presence information, click on the right softkey
Refresh Contact List
Select the contact using the keys, click the right softkey Menu and choose the option
option.
Menu
and choose the option
Menu
and choose
Add
Delete
Add Contact
.
.
Menu
. On
and
91
Page 94

Conversations
Conversations for each community appear under the conversation group (the first group) on the Contact
list screen.
To start a new conversation, select the desired contact on the Contact list screen and press the right
softkey
softkey
Send
. A conversation screen would open, type the message and press Enter or click the left
Send
to send the message.
To end a conversation, press the right softkey Menu on the conversation screen and choose
Conversation
Note
Exiting the application will not sign you out and you will continue to receive messages. You will be
notified of new message via a pop up.
option.
End
92
Page 95

Office Mobile Tap
Start Menu > Office Mobile
Excel Mobile
Excel Mobile makes it easy for you to open and edit Excel workbooks and templates created on your PC.
You can also create new workbooks and templates on your device.
Note
v
Work in full-screen mode to see as much of your workbook as possible.
Tap View > Zoom and select percentage so that you can easily read the worksheet.
Unsupported features in Excel Mobile
Excel Mobile does not fully support some features such as formulas and cell comments. Some data and
formatting may be lost when you save the workbook on your device. Note the following Excel Mobile
formatting considerations:
v
Alignment. Horizontal, vertical, and wrap-text attributes remain the same, but vertical text appears
horizontal.
v
Borders. Appear as a single line.
v
Cell patterns. Patterns applied to cells are removed.
v
Fonts and font sizes. Fonts not supported by your device are mapped to the closest font available. The
original font is listed on your device. When the workbook is opened in Excel on your PC again, the data
is displayed in the original font.
v
Number formats. Numbers formatted using the Microsoft Excel 2007 Version 6.1 conditional formatting
feature are displayed in Number format.
93
Page 96

v
Formulas and functions. If an Excel file contains a function that is not supported by Excel Mobile, the
function is removed, and only the returned value of the function appears. The following formulas are
also converted to values: formulas entered as an array or containing an array argument, for example,
=SUM ({1; 2; 3; 4}); formulas containing external link references or an intersection range reference; and
formulas containing references past row 16384 are replaced with #REF!
v
Protection settings. Most worksheet and workbook protection features are disabled but not removed.
However, support for password protection has been removed. Workbooks that are password-protected
or workbooks in which one or more worksheets are password-protected cannot be opened. You must
remove the password protection in Excel on the PC and then synchronize to open the file on the device.
v
Zoom settings. Are not retained. Excel supports a per worksheet zoom setting, while the Excel Mobile
zoom setting is applied to the entire workbook.
v
Worksheet names. Names that reference worksheets within the same workbook are displayed
accurately, but names that refer to other workbooks, arrays, for example, = {1; 2; 3; 4}, array formulas,
or intersection ranges are removed from the name list. If a name is removed from the list, it is left in
formulas and functions, causing those formulas to be resolved as “#NAME?” All hidden names are not
hidden.
v
AutoFilter settings Are removed. However, you can use the AutoFilter command in Excel Mobile to
perform similar functions.
If you have an AutoFilter applied to a worksheet that causes rows to be hidden, the rows remain hidden
when the file is opened in Excel Mobile. Use the Unhide command to display the hidden rows.
94
v
Chart formatting. All charts will be saved the way they are shown in Excel Mobile. Unsupported
chart types are changed to one of these supported types: Column, Bar, Line, Pie, Scatter, and Area.
Background colors, gridlines, data labels, trend lines, shadows, 3D effects, secondary axes, and
logarithmic scales are turned off.
v
Worksheet features. The following features are not supported in Excel Mobile and are removed or
modified when a workbook is opened on the device: hidden sheets are not hidden; VBA modules,
macro sheets, and dialog sheets are removed and replaced with a place holder sheet; text boxes,
drawing objects, pictures, lists, conditional formats, and controls are removed; pivot table data is
converted to values.
Page 97

PowerPoint Mobile
With PowerPoint Mobile, you can open and view slide show presentations created on your PC in *.ppt
and *.pps format with PowerPoint '97 and later.
Many presentation elements built into the slide shows such as slide transitions and animations will play
back on the device. If the presentation is set up as a timed slide show, one slide will advance to the next
automatically. Links to URLs are also supported.
PowerPoint features not supported on the device include:
v
Notes. Notes written for slides will not be visible.
v
Rearranging or editing slides. PowerPoint Mobile is a viewer only.
v
File formats. Files created in *.ppt format earlier than PowerPoint '97 and HTML files in *.htm and
*.mht formats are not supported.
Word Mobile
Word Mobile
be opened and edited on your device. You can also create and edit documents and templates in Word
Mobile and save them as *.docx and *.dotx, *.rtf, *.txt, and *.dot files.
You can have only one document open at a time. When you open the second document, the first one is
saved and closed automatically.
When you close a newly created document, it is automatically named after the first several words in the
document and placed in the Word Mobile document list. You can easily rename the document with a
more meaningful name and move it to another folder or a storage card.
is a streamlined version of Microsoft Word. Word documents created on your PC can
OneNote Mobile
Mobile Zip
Mobile Zip is a comprehensive archiving tool for viewing and extracting of a wide range of archiving
formats.
95
Page 98

To view mobile zip
Mobile Zip’s display consists of views, menus and dialogs.
There are five views and numerous dialogs to facilitate settings
and data input. The
where you learn and set some basic features of the application.
It consists of options to set default dialog in password input dialog.
To navigate menus
There are four types of menus in Mobile Zip:
•
Main Menu
Main Menu is a dynamic menu. It provides commands to access views, password manager and
other dynamic commands.
•
Shortcut Menu
Main Menu or through tap-and-hold action from within the folder view. Shortcut menu provides
commands to support file operation for the selected items within the folder or archive.
Home View
is clearly visible throughout the application. It is accessible using the right softkey.
is accessible from the folder view either using the related command in the
is used mainly as startup page
96
•
To Next Folder
main menu to activate it or tap and hold on the icon of the tab bar. This shortcut menu is to facilitate
fast file operation from folder to folder.
•
Toolbar Menus
navigate folders and sort the items within II.2. Creating Zip Archive
In the selected folder, select an item or items, tap and hold on the selected item or items, when the
shortcut menu appears scroll down to select:
is another shortcut menu available only in folder view. Use the related command in the
is clearly visible at the top bar of folder view. These menus are designed to help user
Page 99

•
Add to archive ...
to set password, name and type.
•
Open, Open External, Add to Archive, Add to default.zip, Compress
and E-mail, Comp. to default.zip and...
directly to the named archive without password.
•
Compress and Email...
items into an archive with options to set password, name and type and
then send via email the output archive.
•
Comp. to ‘name.zip’ and Email...
to the named archive and send via email the output archives.
Alternatively you can select some files and tap and hold on the tab icon
at the bottom and then select
This action will archive the selected items and send it to the other folder.
command, if you want to add archive with options
command, if you want to add
command, if you want to compress the selected
command, if you want to compress
add archive to next folder.
Fig.8. Sort By Toolbar Menu
97
Page 100

To extract Archive/Archives
In the selected folder view, tap and hold on the selected archive/archives. On the folder shortcut context
menu, select:
•
Extract...
to set destination folder, set password, select extraction behavior, and etc.
•
Extract Here
archive/archives in this folder.
•
Extract to ‘name folder’
of the selected archive/archives into the named folder.
Alternatively you can tap and hold on the tab icon at the bottom and
select
This action will extract the content of the archive to the other folder.
command to extract the selected archive/archives with option
command to simply extract the content of the selected
command to simply extract the content
Extract to Next Folder
to extract the content to next folder.
98
 Loading...