

Page 1

OWNER’S MANUAL
MICROWAVE OVEN
"CONVECTION"
Please read this owner’s manual thoroughly before operating.
MJ396****
(optional, please check model specification)
MFL69666603_00
www.lg.com
Page 2

CONTENTS
2
How the Microwave Function Works
Microwaves are a form of energy similar to radio,
television waves, and ordinary daylight. Normally,
microwaves spread outwards as they travel
through the atmosphere and disappear without
effect.
This oven, however, has a magnetron that is
designed to make use of the energy in microwaves.
Electricity, supplied to the magnetron tube, is used
to create microwave energy.
These microwaves enter the cooking area through
openings inside the oven. A tray is located inside
the oven. Microwaves cannot pass through metal
walls of the oven, but they can penetrate such
materials as glass, porcelain and paper, the
materials out of which microwave-safe cooking
dishes are constructed.
Microwaves do not heat cookware, though cooking
vessels will eventually get hot from the heat
generated by the food.
A very safe appliance
Your Microwave oven, is one of the safest
of all home appliances. When the door
is opened, the oven automatically stops
producing microwaves. Microwave energy is
converted completely to heat when it enters
food, leaving no “left over” energy to harm you
when you eat your food.
CONTENTS
3 IMPORTANT SAFETY INSTRUCTIONS
8 BEFORE USE
8 Unpacking & Installing
10 Control Panel (for Steam chef)
10 Display Picto
11 Control Panel (for Crispy tray)
11 Display Picto
12 Setting Clock
12 Quick Start
12 More/Less
12 Energy Saving
13 HOW TO USE
13 Timed Cooking
13 Microwave Power Levels
14 Grill Cooking
14 Grill Combi. Cooking
15 Convection taeherP
15 Convection Cooking
16 Convection Combi. Cooking
16 Child Lock
17 Inverter Cook
17 Inverter Cook Menu Instructions
20 Roast & Bake
20 Roast & Bake Menu Instructions
22 Slow Cook & Warm
Slow Cook & Warm Menu Instructions
23
24 Healthy Fry & Steam
24 Healthy Fry & Steam Menu Instructions
Healthy Fry (for Crispy tray)
27
Healthy Fry Menu Instructions
27
29 Inverter Defrost
29 Inverter Defrost Menu Instructions
30 MICROWAVE-SAFE UTENSILS
31 FOOD CHARACTERISTICS &
MICROWAVE COOKING
33 TO CLEAN YOUR OVEN
33 USING THE SMART DIAGNOSIS™
FUNCTION
34 QUESTIONS & ANSWERS
35 TECHNICAL SPECIFICATIONS
36 MAFF
37 GUARANTEE
Page 3
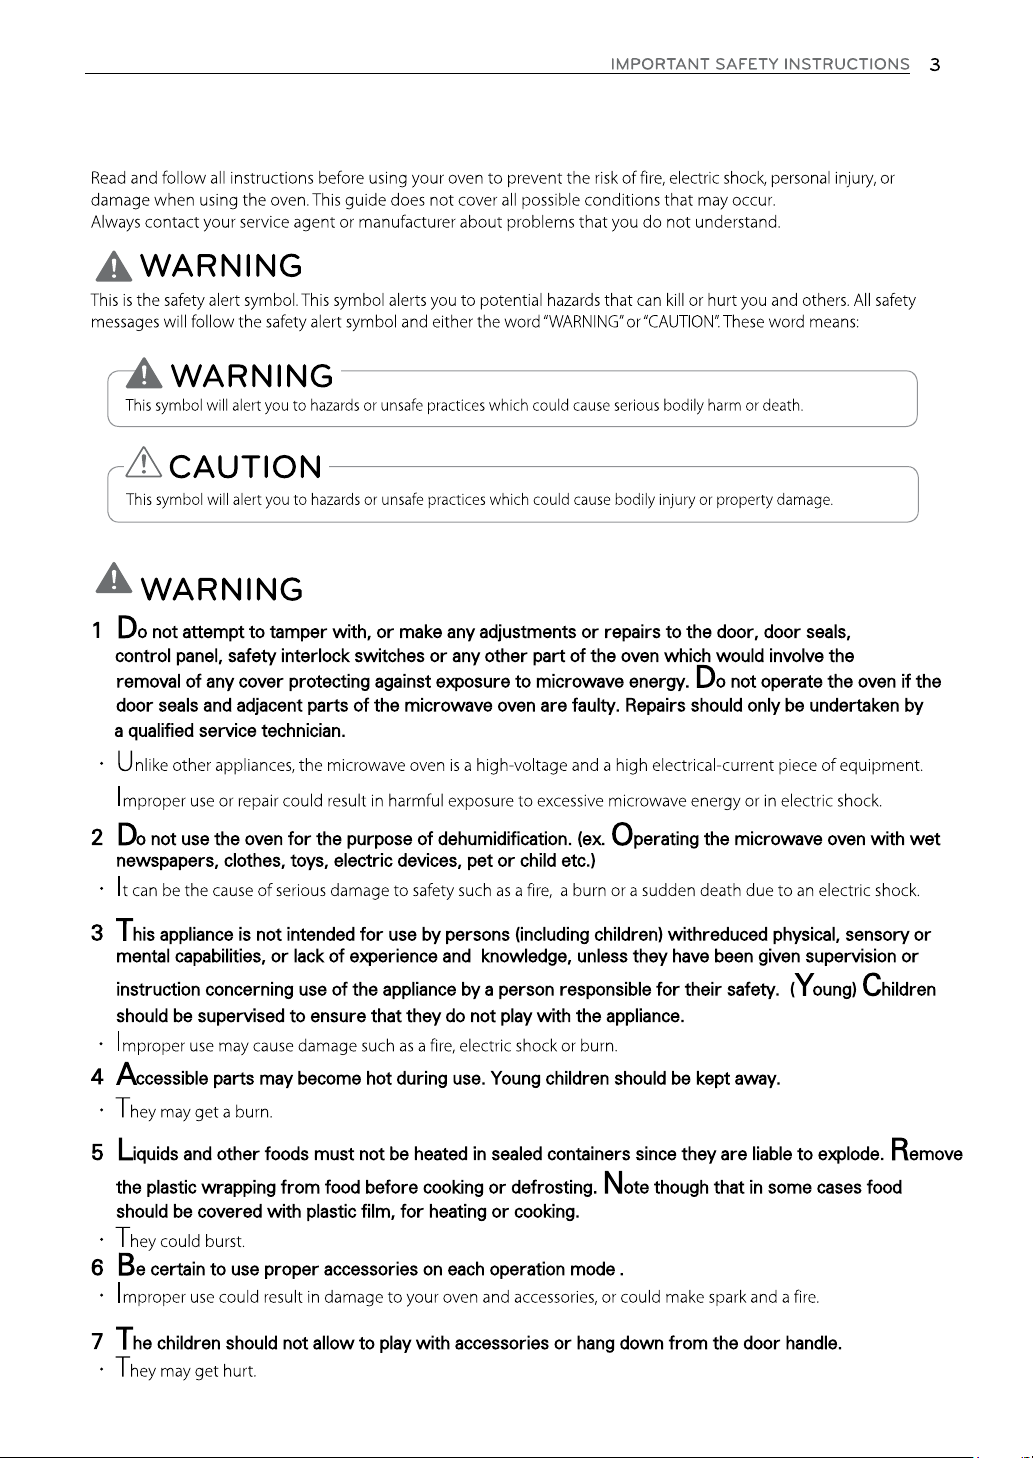
IMPORTANT SAFETY INSTRUCTIONS
READ CAREFULLY AND KEEP FOR FUTURE REFERENCE
Page 4
4
Page 5
5
-
Page 6
6
his model doesn't provide a temperature probe.
T
S
Farm houses;
By clients in hotels, motels and other residential environments;
Bed and breakfast type environments.
Page 7

7
36
Caution, hot surface
When the symbol is used, It means that the surfaces are liable to get hot during use.
37
Do not place an object(a book, a box, etc.) on the product. The product may overheat or catch fire or the
object may fall, causing injury to persons.
Page 8

BEFORE USE
8
BEFORE USE
Unpacking & Installing
By following the basic steps on these two pages you will be able to quickly check that your oven is operating
correctly. Please pay particular attention to the guidelines on where to install your oven. When unpacking
your oven make sure you remove all accessories and packing materials. Check to make sure that your oven
has not been damaged during shipping.
SHAFT
GLASS TRAY
ROTATING
RING
High rack
Low rack
STEAMER
(Steam Chef)
Steam cover
Steam plate
Steam water bowl
(Crisp tray)
CRISP TRAY
(Healthy Fry)
Crisp tray
Mica Sheet
Mica Sheet
*Do Not Remove
Mica Sheet
NOTE
Do not remove the cavity Mica Sheet (silver plate) inside of oven.
•
The Mica plate is there to protect the microwave components from food spatters.
Method to use Accessories As per Mode
Microwave Grill Convection Grill combi Conv combi
Glass tray O O O O O
High rack - O O O O
Low rack - O O O O
Crisp tray O O O O O
Steamer O - - - -
Caution: Use accessories in accordance with cooking guides! O Acceptable
- Not Acceptable
NOTE
• Be certain to use proper accessories on each operation mode .
• Improper use could result in damage to your oven and accessories, or could make spark and a fire.
2 Place the oven on the level location of your choice with more
than 85cm height but make sure there is at least 20 cm of
space on the top and 20 cm at the rear & left & right for
proper ventilation. The front of the oven should be at
least 8 cm from the edge of the surface to prevent tipping.
An exhaust outlet is located on bottom or side of the oven.
Blocking the outlet can damage the oven.
If you use the microwave oven in an enclosed space or
cupboard, The air flow for cooling the product could be
worse. It may result in lower performance and reduced
service life. If possible, please use the microwave oven
in the counter top condition.
Page 9
BEFORE USE
NOTE
• THIS OVEN SHOULD NOT BE USED FOR COMMERCIAL CATERING PURPOSES.
3 Plug your oven into a standard household socket. Make sure your oven is the only appliance connected
to the socket.
If your oven does not operate properly, unplug it from the
electrical socket and then plug it back in.
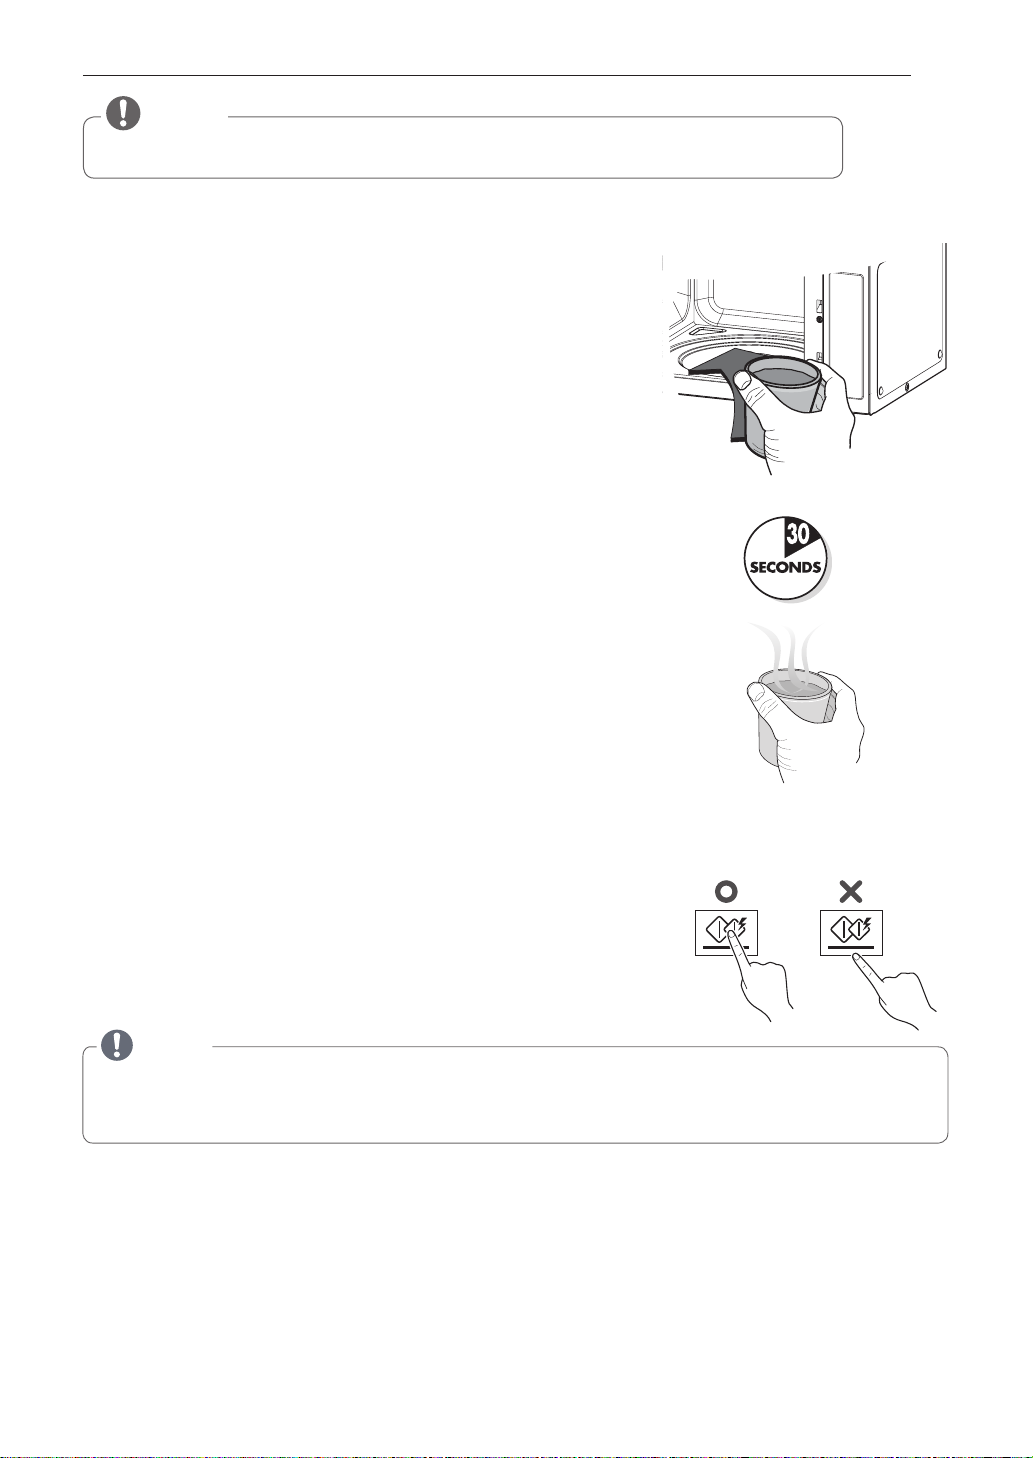
4 Open your oven door by pulling the door handle.
Place the rotating ring inside the oven and place the
glass tray on top.
5 Fill a microwave safe container with 300 ml (1/2 pint) of water.
Place on the glass tray and close the oven door.
If you have any doubts about what type of container to use
please refer to Microwave-safe utensils.
6 Press the STOP/CLEAR button, and press the START/ENTER
button one time to set 30 seconds of cooking time.
9
7 The DISPLAY will count down from 30 seconds.
When it reaches 0 it will sound BEEPS. Open the oven door and
test the temperature of the water.
If your oven is operating the water should be warm.
Be careful when removing the container it may be hot.
YOUR OVEN IS NOW INSTALLED
8 The contents of feeding bottles and baby food jars shall be stirred or shaken and the temperature
checked before consumption in order to avoid burns.
9
Button recognition may be hampered in the following circumstances:
• Only the outside area of the button is pressed.
•
The button is pushed using a nail or the tip of the finger.
NOTE
Do not use rubber gloves or disposable gloves.
When wiping the touch control panel with a wet towel, remove moisture from the touch control panel
when finished.
The setting of the cooking time should be shorter than common microwave ovens (700 W, 800 W) due to
10
the relatively high output power of the product. Excessive heating with the product may cause moisture
on the door.
All of the recipes in this book give a range of cooking times. In general, you will find that the food remains
11
under-cooked at the lower end of the time range, and you may sometimes want to cook your food beyond
the maximum time given, according to personal preference. The governing philosophy of this book is that
it is best for a recipe to be conservative in giving cooking times because overcooked food is ruined for good.
Page 10
BEFORE USE
10
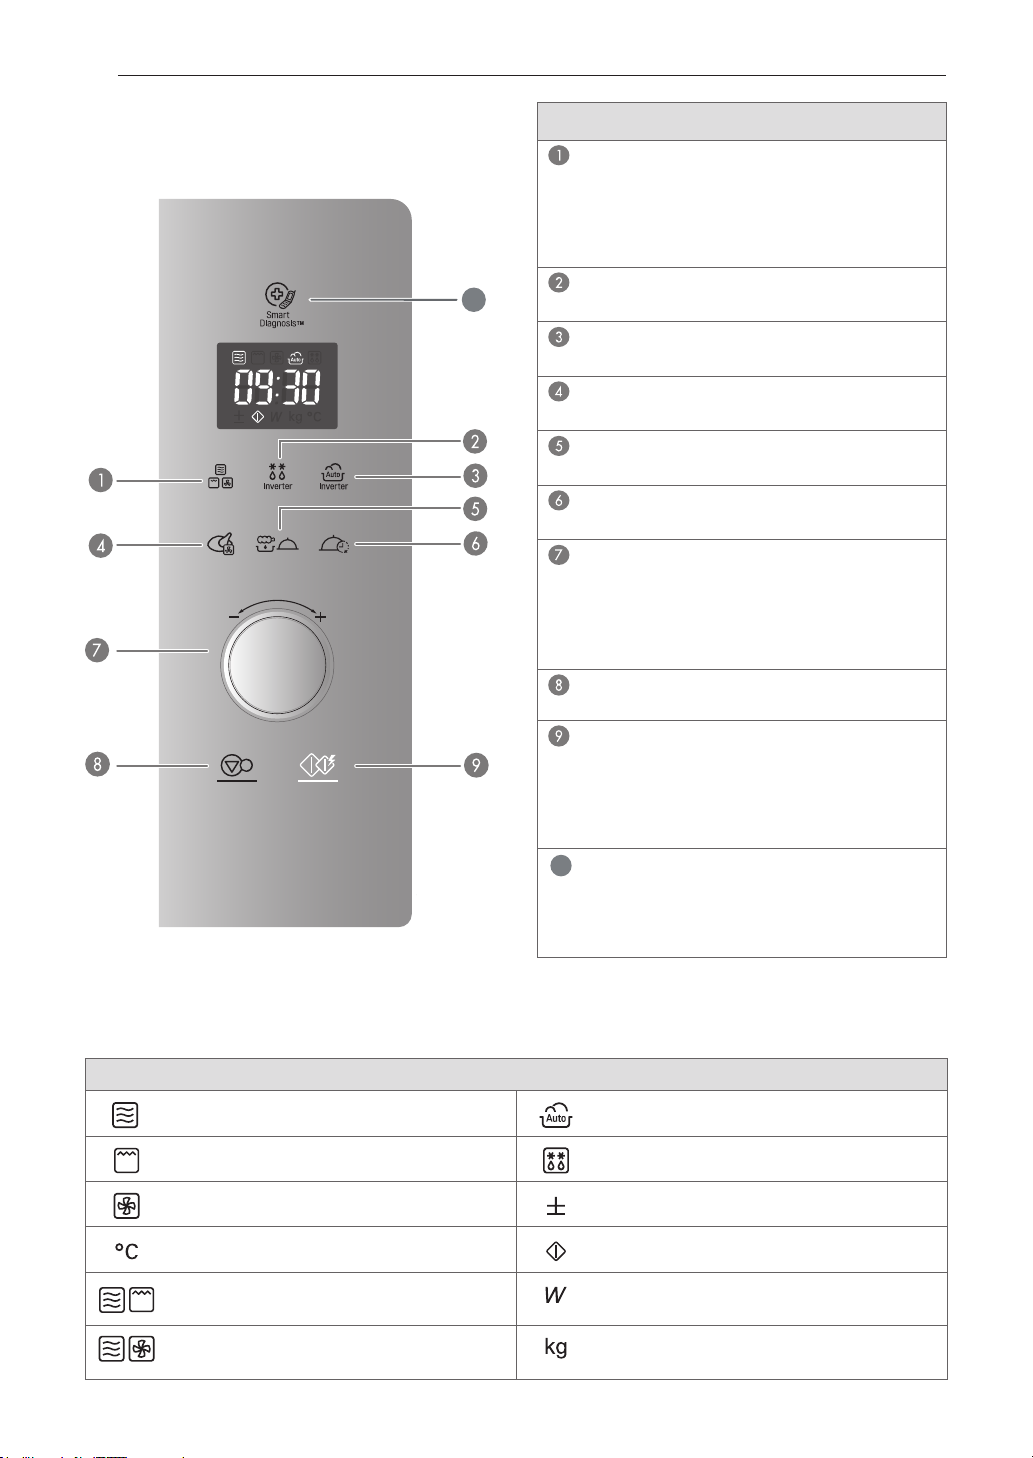
CONTROL PANEL
FOR STEAM CHEF
10
Part
COOK MODE
See page 13 “Microwave”
See page 14 “Grill”
See page 14 “Grill Combi(Microwave + Grill)”
See page 15 “Convection”
See page 16 “Conv Combi(Microwave + Conv)”
INVERTER DEFROST
See page 29 "Inverter Defrost”
INVERTER COOK
See page 17 “Inverter cook”
ROAST & BAKE
See page 20 “Roast & Bake”
HEALTHY FRY & STEAM
See page 24 “Healthy Fry & Steam”
SLOW COOK & WARM
See page 22 “Slow Cook & Warm”
DIAL (MORE / LESS)
• Set cooking time, temperature and power level.
• While cooking with auto and manual
function, you can increase or decrease the
cooking time at any point by turning the
dial (except defrost mode).
STOP / CLEAR
• Stop over and clear all entries except time of day.
START/ENTER
• In order to start cooking which is selected,
press button one time.
• The quick start feature allows you to set 30
seconds intervals of HIGH power cooking
with a press of the START/ENTER button.
SMART DIAGNOSIS
10
Hold the mouthpiece of a phone up to this icon
when directed by a service centre personnel.
This will help diagnose problems with the
microwave oven during service call.
DISPLAY PICTO
Icon
When operate Microwave,
Show up the icon on the display.
When operate Grill,
Show up the icon on the display.
When operate Convection,
Show up the icon on the display.
When you can set Conv. Temperature,
Show up the icon on the display.
When operate Grill Combi,
Show up the icon on the display.
when operate Convection Combi,
Show up the icon on the display.
When operate Microwave,
Show up the icon on the display.
When operate Microwave,
Show up the icon on the display.
When you can set More/Less,
Show up the icon on the display.
When you can Cook Start,
Show up the icon on the display.
When you can set Output Power,
Show up the icon on the display.
When you can set Weight,
Show up the icon on the display.
Page 11

BEFORE USE
11
CONTROL PANEL
FOR CRISPY TRAY
10
Part
COOK MODE
See page 13 “Microwave”
See page 14 “Grill”
See page 14 “Grill Combi(Microwave + Grill)”
See page 15 “Convection”
See page 16 “Conv Combi(Microwave + Conv)”
INVERTER DEFROST
See page 29 "Inverter Defrost”
INVERTER COOK
See page 17 “Inverter cook”
ROAST & BAKE
See page 20 “Roast & Bake”
HEALTHY FRY
See page 27 "Healthy Fry”
SLOW COOK & WARM
See page 22 “Slow Cook & Warm”
DIAL (MORE / LESS)
• Set cooking time, temperature and power level.
• While cooking with auto and manual
function, you can increase or decrease the
cooking time at any point by turning the
dial (except defrost mode).
STOP / CLEAR
• Stop over and clear all entries except time of day.
START/ENTER
• In order to start cooking which is selected,
press button one time.
• The quick start feature allows you to set 30
seconds intervals of HIGH power cooking
with a press of the START/ENTER button.
SMART DIAGNOSIS
10
Hold the mouthpiece of a phone up to this icon
when directed by a service centre personnel.
This will help diagnose problems with the
microwave oven during service call.
DISPLAY PICTO
Icon
When operate Microwave,
Show up the icon on the display.
When operate Grill,
Show up the icon on the display.
When operate Convection,
Show up the icon on the display.
When you can set Conv. Temperature,
Show up the icon on the display.
When operate Grill Combi,
Show up the icon on the display.
when operate Convection Combi,
Show up the icon on the display.
When operate Microwave,
Show up the icon on the display.
When operate Microwave,
Show up the icon on the display.
When you can set More/Less,
Show up the icon on the display.
When you can Cook Start,
Show up the icon on the display.
When you can set Output Power,
Show up the icon on the display.
When you can set Weight,
Show up the icon on the display.
Page 12

12
ESU EROFEB
SETTING CLOCK
when power resumes after a power interruption,
the numbers in the display reset to '12H'.
Example: To set 11:11 .
sserP .1 START/ENTER
the 12Hr clock display. (If you
wish to have a 24H clock
display, simply turn the DIAL
to select ’24H’ before following
next steps)
eht nruT .2 DIAL until display
shows ’11:’.
3. Press START/ENTER.
eht nruT .4 DIAL to change the
minutes until the display shows
‘11:11’.
5. Press START/ENTER.
MORE/LESS
By turning the Dial, TIMED COOK program can
be adjusted to cook food for a longer or shorter
time. Turning the dial will increase 10 seconds or
decrease 10 seconds to the cooking time each
time. The max time possible will be 99 min 59 sec.
Example:To adjust the Inverter Cook
(ex. 0.3kg chicken nuggets) cooking time for a
longer time, or for a shorter time
sserP .1 STOP/CLEAR.
sserP .2 INVERTER COOK
‘1’ will show in the display.
eht nruT .3 DIAL until display
shows ‘1-3’.
sserP .4 START/ENTER.
Turn the DIAL until display
shows ‘0.3 kg’.
once.
NOTE
•
If you want to set clock again or change options,
you need to unplug and reconnect.
•
If you don’t want to use clock mode,
Press STOP/CLEAR button, after plugging in your oven.
QUICK START
The QUICK START feature allows you to set 30
seconds intervals of HIGH power cooking with
a touch of the START/ENTER.
Example: Set 2 minutes of cooking on high
power
Press the START/ENTER button four times
The oven will start before you have finished
the fourth press.
During QUICK START cooking, you can extend
the cooking time up to 99 minutes 59 seconds by
repeatedly pressing the START/ENTER button.
Press STOP/CLEAR.
1.
2.
Select 2 minutes
high power.
on
sserP .5 START/ENTER.
eht nruT .6 DIAL.
The cooking time will
increase or decrease
by 10 seconds.
NOTE
If you find that your food is over or undercooked
•
when using the preset COOK program, you can
increase or decrease the cooking time by turning
the
You can lengthen or shorten the cooking time
•
(except defrost mode) at any point turning the
DIAL
DIAL
.
.
ENERGY SAVING
Energy saving means save energy by turning off
the display. This feature only operates when the
Microwave Oven standby and the display will go out.
NOTE
•
When using clock mode, the display will remain on.
Page 13

HOW TO USE
13
HOW TO USE
TIMED COOKING (MANUAL
COOKING)
This function allows you to cook food for a desired
time. There are 5 power levels available. The
example below shows how to set power 900 W for
the desired time.
Example: To cook food on Power 900 W for 5
minutes 30 seconds
1. Press STOP/CLEAR.
sserP .2 COOK MODE until display
shows '1100 W'.
(1st time 1100 W appears in the
display. This is to tell you that the
oven is set on 1100 W unless a
different power setting is chosen.)
eht nruT .3 DIAL until display
shows ‘900 W’.
4. Press START/ENTER.
eht nruT .5 DIAL until display
shows ‘5:30’.
6. Press START/ENTER.
MICROWAVE POWER LEVELS
over cooking. The adjacent table will give you
some idea of which foods are prepared at each of
the various power levels.
• level rewop eht swohs trahc tnecajda ehT
settings for your oven.
MICROWAVE POWER LEVEL CHART
Power
Level
High
1100 W
900 W
700 W
400 W
200 W
• Boiling water.
• Browning ground beef.
•
•
vegetables.
•
•
•
•
•
• Cooking cakes and breads.
• Melting chocolate.
• Cooking veal.
•
•
•
•
•
Taking chill out of fruit.
•
• Softening butter.
•
warm.
• Softening butter and cream cheese.
Use
.ydnac gnikaM
.taem fo stuc rednet gnikooC
.selbategev & ,atsap ,ecir gnitaeheR
.ylkciuq sdoof deraperp gnitaeheR
.sehciwdnas gnitaeheR
.dratsuc dna sgniddup gnikooC
.doofaes dna yrtluop ,taem gniwahT
.taem fo stuc rednet ssel gnikooC
.tsaor dna spohc krop gnikooC
.sehsid eseehc dna klim ,gge gnikooC
sehsid niam dna seloressac gnipeeK
When cooking is complete, Tip will sound. The
word End shows in the display window. ‘End’
remains in the display and Tip will sound every
minute until the door is opened, or any button is
pressed.
NOTE:
If you do not select the power level, the oven
will operate at power HIGH. To set HI-POWER
cooking, skip step 3 above.
NOTE
• Do not use following accessories.
HIHG RACK
LOW RACK
Page 14

HOW TO USE
14
GRILL COOKING
This feature will allow you to brown and crisp food
quickly.
Always use gloves when removing food and
accessories after cooking as the oven &
accessories will be very hot.
Example: Use Grill to cook food for 5 minutes 30
seconds
1. Press STOP/CLEAR.
2. Press COOK MODE
until display shows ‘GrIL’.
3. Press START/ENTER.
4. Turn the
shows ‘5:30’ .
5. Press START/ENTER.
until display
DIAL
GRILL COMBI. COOKING
Your oven has a combination cooking feature
which allows you to cook food with heater and
microwave.
Example: Programme your oven with micro power
330 W and grill for a cooking time of 25 minutes
1. Press STOP/CLEAR.
2. Press COOK MODE until
display shows 'GC-1'.
3. Turn the DIAL until display
shows ‘GC-2’.
4. Press START/ENTER.
5. Turn the DIAL until display
shows ‘25:00’.
CAUTION
Always use oven gloves when removing the food
•
and accessories after cooking as the oven &
accessories will be very hot.
NOTE
• This feature will allow you to brown and crispy food
quickly.
• For the best result use the following accessories.
• Do not use the following accessories.
HIGH RACK STEAMER
6. Press START/ENTER.
When cooking you can turn the
DIAL to increase or decrease
the cooking time.
Be careful when removing your
food as the container will be
hot!
NOTE
• Your oven has a combination cooking feature which
allows you to cook food with Heater and Microwave.
This generally means it takes less time to cook your
food.
• You can set three kinds of micro power level
(220W, 330 W, and 440 W) in grill combi mode.
• For the best result use the following accessories.
• Do not use the following accessories.
HIGH RACK STEAMER
Page 15

HOW TO USE
15
CONVECTION PREHEAT
This feature will allow you to brown and crisp food
quickly.
Always use gloves when removing food and
accessories after cooking as the oven &
accessories will be very hot.
Example: To preheat the oven to a temperature of
200 °C.
1. Press STOP/CLEAR.
2. Press COOK MODE until
display shows ‘180 °C’.
3. Turn the DIAL until display
shows ‘200 °C’.
4. Press START/ENTER for
CONVECTION COOKING
The metal tray or metal rack must be used during
convection cooking.
Example: To cook some food at a temperature of
200 °C for 50 minutes.
1. Press STOP/CLEAR.
2. Press COOK MODE until
display shows ‘180 °C’.
3. Turn the DIAL until display
shows ‘200 °C’.
4. Press START/ENTER for
5. Turn the DIAL until display
shows ‘50:00’.
5. Press START/ENTER.
Preheating will be started with
displaying ‘60 °C’.It will show
up the temperature.
NOTE
•The convection oven has a temperature range of
40~200 °C.
•The oven has a ferment function at the oven
temperature of 40 °C. You may wait until the
oven is cool because you cannot use a ferment
function if the oven temperature is over 40 °C.
•Your oven will take a few minutes to reach the
selected temperature.
•Once it has reached correct temperature, your
oven will BEEP to let you know that it has reached
the correct temperature.
•Then place your food in your oven and to start
cooking.
6. Press START/ENTER.
When cooking you can turn the
DIAL to increase or decrease
the cooking time.
CAUTION
•Always use oven gloves when removing the food
and accessories after cooking as the oven &
accessories will be very hot.
NOTE
If you do not set a temperature your oven will
•
automatically select 180 °C, the cooking
temperature can be changed by turning the DIAL.
•
If you need more than 200 degrees for following
your cooking recipe or package direction, add the
time at 200 degrees for your preference.
•For the best result please use
the following accessories.
LOW RACK
Page 16

16
ESU OT WOH
CONVECTION COMBI.
COOKING
In the following example, show you how to program
your oven at a microwave power of 330 W and at
a convection temperature of 200 °C for a cooking
time of 25 minutes.
Example: To cook food at a comvection combi.
mode for 25 minutes.
sserP .1 STOP/CLEAR.
sserP .2 COOK MODE untily
display shows ‘CC-1’.
eht nruT .3 DIAL until display
shows ‘CC-2’.
sserP .4 START/ENTER.
Turn the DIAL until display
shows ‘200 °C’.
CHILD LOCK
This is a unique safety feature that prevents
unwanted oven operations. Once the CHILD LOCK
is set, no cooking can take place.
To set the child lock
sserP .1 STOP/CLEAR.
dloh dna sserP .2
STOP/CLEAR until ‘Loc’
appears in the display and tip
are heard.
If the time of day was already
set, the time of day will appear
on the display window after
1sec.
If the CHILD LOCK was already set and you touch
another pad, the word Loc shows in the display.
You can cancel the CHILD LOCK according to
below procedure.
To cancel the child lock
sserP .5 START/ENTER.
Turn the DIAL until display
shows ‘25:00’ .
sserP .6 START/ENTER.
When cooking you can turn the
DIAL to increase or decrease
the cooking time.
Be careful when removing your
food as the container will be
hot!
CAUTION
•Always use oven gloves when removing the food
and accessories after cooking as the oven &
accessories will be very hot.
NOTE
• You can set three kinds of micro power level
(CC-1: 220 W, CC-2: 330 W, CC-3: 440 W).
• For the best result use the following accessories.
• Do not use the following accessories.
Press and hold
STOP/CLEAR until ‘Loc’
disappears in the display.
After the CHILD LOCK is turned off, the oven will
operate normally.
LOW RACK
STEAMER
Page 17

HOW TO USE
INVERTER COOK
Your oven’s menu has been preprogrammed to automatically cook food. Tell the oven what you want and
how many items there are. Then let your microwave oven cook your selections.
17
Example: To cook 0.3 kg Cheese Sticks, simply
follow the step below
sserP .1 STOP/CLEAR.
sserP .2 INVERTER COOK
until display shows ‘1’.
eht nruT .3 DIAL until display
shows ‘1-2’.
shows ‘0.3 kg’.
INVERTER COOK MENU INSTRUCTIONS
Code Menu
1-1 Baguette/
Croissant
1-2 Cheese
Sticks
1-3 Chicken
Nuggets
1-4 Frozen
Lasagna
1-5 Frozen Pizza
(Thick)
1-6 Frozen Pizza
(Thin)
1-7 Salmon
Fillets
1-8 Shrimps 0.2 - 0.4 kg Frozen 1. Brush shrimps with oil and season as desired.
Weight
Limit
0.1 - 0.3 kg
(50 - 100 g/
piece)
0.2 - 0.4 kg Frozen 1. Brush cheese sticks with oil.
0.2 - 0.3 kg Frozen
0.5 kg Frozen 1. Remove thick-crust pizza from all packaging.
0.2 - 0.4 kg Frozen 1. Remove all packaging.
0.2 - 0.6 kg Frozen
Initial
Temperature
Instructions Utensil
menu and weight, press start.
Choose the menu and weight, press start.
3.
continue cooking.
1. Place chicken nuggets on the Crispy tray on the
High rack. Choose the menu and weight, press start.
continue cooking.
start.
After cooking, stand covered for 2 minutes.
Choose the menu, press start.
Choose the menu and weight, press start.
1. Choose salmon fillets of 200 g and 2,5 cm thick each.
Choose the menu and weight, press start.
continue cooking.
Choose the menu and weight, press start.
continue cooking.
sserP .4 START/ENTER.
eht nruT .5 DIAL until display
sserP .6 START/ENTER.
eht esoohC .kcar woL eht no daerb nezorf ecalP .1nezorF
.kcar hgiH eht no yart ypsirC eht no doof ecalP .2
ot trats sserp dna revo doof nrut ,PEEB nehW
ot trats sserp dna revo doof nrut ,PEEB nehW .2
evomer dna notrac retuo morf yart evomeR .1nezorFgk 3.0
sserp ,unem eht esoohC .kcar woL eht no doof ecalP .2
.kcar woL eht no yart ypsirC eht no doof ecalP .2
.kcar woL eht no yart ypsirC eht no doof ecalP .2
.kcar hgiH eht no yart ypsirC eht no doof ecalP .2
ot trats sserp dna revo doof nrut ,PEEB nehW .3
.kcar hgiH eht no yart ypsirC eht no doof ecalP .2
ot trats sserp dna revo doof nrut ,PEEB nehW .3
Low rack
Crispy tray
on the High
rack
Crispy tray
on the High
rack
Low rack
Crispy tray
on the Low
rack
Crispy tray
on the Low
rack
Crispy tray
on the High
rack
Crispy tray
on the High
rack
Page 18

HOW TO USE
18
Code Menu
2-1 Apple Tart 1 Room
2-2 Lamb Chops 0.2 - 0.6 kg Refrigerated 1. Choose lamb chops of 100 - 150 g weight and 1.5 - 2.0
2-3 Lasagna 1 Room
Weight
Limit
Initial
Temperature
Instructions Utensil
Ingredients
1 short crust pastry dough
5 apples
20 g sugar
2 tablespoons liquid honey
1.
and put in the Crisp tray. Trim edges, leaving little
overhang. Prick with a fork and set aside.
2. Chop 2 1/2 apples and place in a frying pan with sugar.
Simmer until apple is soft. Cut remaining apples into 5
mm slices.
3. Spread cooked apples onto dough and arrange sliced
apples in spiraling rosettes over the entire surface.
Finally spread honey on the top of apples.
4. Place the Crisp tray on the Low rack. Choose the menu,
press start.
5. After cooking, remove from the oven and let them cool.
cm thickness each. Season with salt and pepper or as
desired.
2. Place food on the High rack on a drip dish. Choose the
menu and weight, press start.
3. When BEEP, turn food over and press start to continue
cooking.
Ingredients
9 lasagna sheets
500 g spaghetti sauce
600 g cheese sauce
300 g grated mozzarella cheese
30 g grated parmesan cheese
For Cheese sauce :
60 g butter
Crispy tray
on the Low
rack
High rack
on a drip
dish
26 x 17 cm
baking dish
on the
Low rack
Pinch ground nutmeg
500 ml milk
20 g grated parmesan cheese
1. Melt butter in small saucepan.
nutmeg, stirring until smooth.
2. Gradually add milk and stir until it boils and
thickens.
3. Reduce heat and add parmesan cheese.
Stir until cheese melts well.
1. Cook lasagna sheets according to package directions
and drain.
2. Spread about 125 g spaghetti sauce in a 26 x17 cm
baking dish.
3. Layer 3 lasagna sheets, 300 g cheese sauce, 125 g
spaghetti sauce, 100 g mozzarella cheese. Repeat
layering.
4. Finally layer remaining lasagna sheets, spread 125 g
spaghetti sauce, sprinkle with 100 g mozzarella cheese
and 30 g parmesan cheese.
5. Place baking dish on the Low rack. Choose the menu
and weight, press start.
2-4 Pork Chops 0.2 - 0.6 kg Refrigerated 1. Choose Pork chops of 200 g weight and 2.5 cm
thickness each. Season with salt and pepper or as
desired.
2. Place food on the High rack on a drip dish. Choose the
menu and weight, press start.
3. When BEEP, turn food over and press start to continue
cooking.
High rack
on a drip
dish
Page 19

HOW TO USE
19
Code Menu
2-5 Potato Gratin 1.5 kg Room
2-6 Ratatouille 1.5 kg Room
2-7 Rice/Pasta 0.1 - 0.3 kg Room
2-8 Stuffed
Zucchini
Weight
Limit
Initial
Temperature
Room1.2 kg
Instructions Utensil
Ingredients
1 kg potatoes
1 clove garlic
20 g butter
300 g cream
100 g grated cheese
Nutmeg, salt and pepper to taste
1. Peel and wash potatoes then cut into 5 mm slices. Rub inside of
a baking dish with garlic clove and butter.
2. Place half of potatoes in the baking dish and season. Fill with
remaining potatoes and season as desired. Then pour cream
and cheese over the top.
3. Place the baking dish on the Low rack. Choose the menu,
press start.
Ingredients
1 onion, cut into chunks
1 eggplant, cut into chunks
1 zucchini, cut into chunks
1 colored sweet pepper, cut into chunks
3 tomatoes, chopped
1 tablespoon tomato paste
2 garlic cloves, crushed
1 tablespoon fresh greens, chopped
2 tablespoons vinegar
1 teaspoon sugar
Salt and pepper to taste
1. Add all ingredients in a deep and large bowl and mix well.
Cover with plastic wrap and vent.
2. Place food in the oven. Choose the menu, press start. Stir at
least twice during cooking.
Ingredients for rice
Rice 100 g 200 g 300 g
Butter, melted 30 g 40 g 50 g
Onion, grated 50 g 75 g 100 g
Chicken stock or water 250 ml 500 ml 750 ml
Salt To taste
1. Add rice, melted butter and onion in a deep and large
microwave-safe bowl(3 L) and mix well. Pour boiling chicken
stock or water and add salt. Cover with plastic wrap and vent.
2. Place food in the oven. Choose the menu and weight, press
start.
3. After cooking, stir and stand covered for 5 - 10 minutes if
needed.
Ingredients for rice
Pasta 100 g 200 g 300 g
Water 400 ml 800 ml 1000 ml
Salt To taste
1. Place pasta and boiling water with salt in a deep and large
microwave-safe bowl(3 L). Cover with plastic wrap and vent.
2. Place food in the oven. Choose the menu and weight, press
start.
3. After cooking, Rinse pasta with cold water.
Ingredients
4 round zucchinis of about 200 g each
500 g ground beef
2 tablespoons olive oil
Salt and pepper to taste
1. Cut tops off zucchini to form hats and seed them, taking care
20 x 20 cm
baking dish
on the
Low rack
Microwave-
safe bowl
Microwave-
safe bowl
Crisp tray
on the Low
rack
replace hat.
2. Place stuffed zucchini on the Crisp tray on the Low rack and
drizzle with olive oil. Choose the menu, press start.
Page 20

HOW TO USE
20
ROAST & BAKE
Your oven’s menu has been preprogrammed to automatically cook food. Tell the oven what you want and
how many items there are. Then let your microwave oven cook your selections.
ylpmis ,feeB tsaoR gk 0.1 kooc oT :elpmaxE
follow the step below.
4. Press START/ENTER.
1. Press STOP/CLEAR.
eht nruT .5 DIAL until
display shows ‘1.0 kg’.
sserP .2 ROAST & BAKE
once. ‘1’ will show in the
display.
sserP .6 START/ENTER.
eht nruT .3 DIAL until
display shows ‘4’.
When cooking you can
increase or decrease the
cooking time by turning
the DIAL.
ROAST & BAKE MENU INSTRUCTIONS
Code Menu
1 Baked
Potatoes
2 Cookies 1 Room
Weight
Limit
0.2 - 1.0 kg
(180 - 220 g/
each)
Temperature
Initial
Room 1. Wash potatoes and dry with a paper towel.
2. Pierce each potato 8 times with a fork.
weight, press start.
for 5 minutes.
Ingredients
80 g brown sugar
80 g butter, softened
1 egg, lightly beaten
1/2 teaspoon baking powder
1/2 teaspoon baking soda
100 g mini chocolate chips
chocolate chips and mix well.
Low rack covered with an aluminum foil.
Cookies should be spaced 2 cm apart.
Choose the menu, press start.
cool.
Instructions Utensil
.rettub denetfos dna ragus nworb xiM .1
Low rack
dna unem eht esoohC .kcar woL eht no doof ecalP .3
liof munimula na htiw derevoc dnats ,gnikooc retfA .4
High rack
+
Low rack
dna kcar hgiH eht otno noopselbat yb hguod porD .2
.nevo eht ni kcar woL dna kcar hgiH eht ecalP .3
meht tel dna nevo eht morf evomer ,gnikooc retfA .4
Page 21

HOW TO USE
21
Code Menu
3 Fresh Pizza 1 Room
4 Roast Beef sa nosaes dna lio ro rettub detlem htiw feeb hsurB .1detaregirfeRgk 5.1 - 5.0
5 Roast
Chicken
6 Roast Pork sa nosaes dna lio ro rettub detlem htiw krop hsurB .1detaregirfeRgk 5.1 - 5.0
Weight
Limit
Temperature
Initial
Instructions Utensil
Ingredients
Dough:
1 teaspoon active dry yeast
1/3 teaspoon salt
1 teaspoon sugar
70 ml warm water
1 teaspoon extra-virgin olive oil, plus
little for coating
Topping:
3 tablespoons pizza sauce
30 g sausage, sliced
1/2 onion, sliced
2 fresh mushrooms, sliced
1/2 fresh pepper
100 g shredded mozzarella cheese
bowl.
elastic dough.
Spread pizza sauce. Top with toppings and cheese.
.kcar woL eht no yart ypsirC eht ecalP .4
Choose the menu and weight, press start.
desired.
.hsid pird a no kcar woL eht no doof ecalP .2
Choose the menu and weight, press start.
revo doof nrut dna seciuj niard ,PEEB nehW .3
immediately. And then press start to continue
cooking.
for 10 minutes.
as desired.
rack on a drip dish. Choose the menu and weight,
press start.
revo doof nrut dna seciuj niard ,PEEB nehW .3
immediately. And then press start to continue
cooking.
for 10 minutes.
desired.
.hsid pird a no kcar woL eht no doof ecalP .2
Choose the menu and weight, press start.
revo doof nrut dna seciuj niard ,PEEB nehW .3
immediately. And then press start to continue
cooking.
for 10 minutes.
Crispy tray
on the Low
gnixim egral a ni hguoD rof stneidergnI lla enibmoC .1
dna htooms ekam ot rexim cirtcele na htiw daenK .2
.yart ypsirC eht no hguod ecalp dna tuo hguod lloR .3
Low rack on
a drip dish
liof munimula na htiw derevoc dnats ,gnikooc retfA .4
nosaes dna lio ro rettub detlem htiw nekcihc hsurB .1detaregirfeRgk 8.1 - 8.0
Low rack on
a drip dish
woL eht no nwod edis-tsaerb nekcihc elohw ecalP .2
liof munimula na htiw derevoc dnats ,gnikooc retfA .4
Low rack on
a drip dish
liof munimula na htiw derevoc dnats ,gnikooc retfA .4
rack
Page 22

22
HOW TO USE
Code Menu
7 Roast
Vegetables
8 Small Cakes 1 Room
Weight
Limit
0.2 - 0.3 kg Room
Temperature
Initial
Instructions Utensil
Ingredients
Eggplants, cut into 1-2 cm thickness
Zucchinis, cut into 1-2 cm thickness
Onions, cut into wedges
Sweet peppers, cut in half lengthwise and
discard seeds
Whole cherry tomatoes
Mushrooms, cut in half
season as desired.
.kcar hgiH no yart ypsirC eht no doof ecalP .2
Choose the menu and weight, press start.
3. When BEEP, turn food over and press start to
continue cooking.
Ingredients
120 g sugar
120 g butter, softened
2 egg, lightly beaten
1 teaspoon baking powder
(50 mm base X 30 mm height)
Crispy tray
on the High
rack
sna lio ro rettub detlem htiw selbategev hsurB .1
cups on the
Crispy tray
on the Low
rack
sgge dda yllaudarG .rettub denetfos dna ragus xiM .1
SLOW COOK & WARM
Example : To show how to cook Food dry
1. Press STOP/CLEAR.
sserP .2 SLOW COOK &
WARM
until display shows ‘2’.
3. T urn the DIAL until
display shows ‘60 °C’.
4. P ress START/ENTER.
‘10:00’ will show in the
display.
with batter. (25~30 g per each)
2.
rack. Choose the menu, press start.
meht tel dna nevo eht morf evomer ,gnikooc retfA .3
cool.
4. T urn the DIAL until
display shows ‘5h00’.
sserP .5 START/ENTER.
When cooking you can
increase or decrease the
cooking time by turning
the DIAL.
Page 23

HOW TO USE
SLOW COOK & WARM MENU INSTRUCTIONS
Function Range Step Default Instructions Utensil
Cook
Dry
wolS .1
(HIGH) /
doo F .2
130 °C
110 °C
(LOW)
40 °C
~
90 °C
- 130 °C
(HIGH)
10 °C 70 °C
This function maintains a relatively low temperature compared to other
cooking methods(such as baking, boiling and frying) for many hours allowing
unattended cooking of pot roast, stew and other suitable dishes.
110 °C (LOW) Setting
The low setting gently simmers food for an extended period of time without
overcooking or burning. No stirring is required when using this setting.
130 °C (HIGH) Setting
The high setting will cook food in approximately half the time required for
the low setting. Some foods may boil when cooked on the high setting, so it
may be necessary to add extra liquid.
distribution.
Searing and browning before slow cooking is not necessary, but this will help
Slow cook guide
Traditional
cooking time
35 to 60 minutes 6 to 9 hrs 3 to 4 hrs 4 to 6 hrs 2 to 3 hrs
1 to 3 hours 8 to 9 hrs 4 to 6 hrs 5 to 6 hrs 3 to 4 hrs
Slow cooker cooking time
(without searing)
110 °C(Low) 130 °C(High) 110 °C(Low) 130 °C(High)
Slow cooker cooking time
(with searing)
With this function, you can dry fruit, veggies, and beef into healthy and
nutritional snacks and tasty jerky without chemicals and preservatives. Place
baking paper on tray and spread food into a single layer.
Food dry guide
Food type Preparation Set temp Time Use
Bananas Slice into 5~6 mm
thick
Figs Remove stems and
halve
Kiwi Peel, slice into
8~12 mm thick
Mangos Remove skin, slice
into 6~10 mm thick
Pineapple Peel, core, slice into
8~12 mm thick
Tomatoes Wash and slice 6mm
circles
Mushroom Clean with soft brush
or cloth. Don’t wash
Beef jerky Marinate sliced
meats (5~6 mm
thick)in store-bought
or your own recipe
for 6 to 8hours in the
refrigerator
70 °C 5~8hrs Snacks, baby food,
granola, cookies and
banana bread
70 °C 8~9hrs Fillings, cakes,
puddings, breads and
cookies
70 °C 5~8 hrs Snacks
70 °C 6~9 hrs Snacks, cereals,
baked goods
70 °C 6~9 hrs Snacks, baked
goods, baked granola
70 °C 6~9 hrs Soups, stews, paste
or sauce
60 °C 4~8 hrs Rehydrate for
soups, meat dishes,
omelettes or frying
80 °C 6~9 hrs Snack
Heatproof
glass
dish with
cover on
turntable
Heatproof
glass
dish with
cover on
turntable
23
3. P roof
4. Keep
Warm
40 °C 40 °C
80 °C
-
10 °C 70 °C
70 °C
60 °C
How to make yogurt
• Pour a 1000 ml milk into a proper heat-resistant bowl with cover.
• ot nwod looc neht dna )C° 07~06 ot pu( erutarepmet reporp ot ti lioB
about 40 °C
• Add 150 ml natural yogurt into a bowl and stir well.
• Place covered bowl in the oven.
• Choose the menu, and set cook time 5~8 hours.
How to raise yeast dough
• gnikab htiw revoc dna lwob tnatsiser-taeh reporp a ni hguod eht ecalP
wrap or damp cloth.
• Place the bowl in the oven.
• hguod eht litnu setunim 04 tuoba ot emit kooc tes dna ,unem eht esoohC
has doubled in volume.
Heat from the top and bottom elements are used to maintain set
temperature. You can use this function to keep food warm until ready
to serve.
Metal tray
on Low
rack
Heatproof
glass dish
on Low rack
Page 24

HOW TO USE
24
HEALTHY FRY & STEAM
Your oven’s menu has been preprogrammed to automatically cook food. Tell the oven what you want and
how many items there are. Then let your microwave oven cook your selections.
For Steamchef model
Example: To cook 0.6 kg Prawns,
simply follow the step below
1.Press STOP/CLEAR.
2. Press HEALTHY FRY
& STEAM
until display
3. Turn the DIAL
shows ‘2-8’.
4. Press START/ENTER.
5. Turn the DIAL until display
shows ‘0.6 kg’.
shows ‘2’.
6. Press START/ENTER.
HEALTHY FRY & STEAM MENU INSTRUCTIONS
Code Menu
1-1 Chicken /
Schnitzel
1-2 Chicken
Wings
Weight
Limit
0.2 - 0.6 kg Refrigerated
0.2 - 0.6 kg Refrigerated 1. Brush chicken wings with melted butter or oil
Initial
Temperature
Instructions Utensil
Ingredients
Chicken breasts of 150 - 200 g each
2 eggs, lightly beaten
Salt and pepper to taste
1. Season chicken breasts with salt and pepper or
brush chicken schnitzel with oil.
2. Place food on the Crispy tray on the High rack.
Choose the menu and weight, press start.
3. When BEEP, turn food over and press start to
continue cooking.
and season as desired.
2. Place food on the Crispy tray on the High rack.
Choose the menu and weight, press start.
3. When BEEP, turn food over and press start to
continue cooking.
Crispy tray on
the High rack
Crispy tray on
the High rack
Page 25

HOW TO USE
25
Code Menu
1-3 Cutlet 0.2-0.4 kg Refrigerated
1-4 Fish
Schnizel
Weight
Limit
0.2 - 0.6 kg Refrigerated
Initial
Temperature
Instructions Utensil
Ingredients
500 g lean grouond lamb or beef
500 g small potatoes, cooked and mashed
3 eggs, lightly beaten
2 tablespoons chopped parsley
Salt and pepper to taste
With meat mixture, make balls about 4-5 cm
diameter
and shape balls into ovals about 1 cm thick each.
Brush cutlet with oil.
Choose the menu and weight, press start.
continue cooking.
Ingredients
2 eggs, lightly beaten
Salt and pepper to taste
1.
Crispy tray on
the High rack
.yelsrap dna snoino ,sgge ,seotatop ,taem xiM .1
.kcar hgiH eht no yart ypsirC eht no doof ecalP .2
ot trats sserp dna revo doof nrut ,PEEB nehW .3
Crispy tray on
the High rack
1-5 French
Fries
1-6 Hamburgers 0.2 - 0.4 kg Refrigerated
1-7 Sausages 0.2 - 0.6 kg Refrigerated
1-8 Wedge
Potatoes
Choose the menu and weight, press start.
continue cooking.
tray on the High rack. For the best results, cook
in a single layer. Choose the menu and weight,
press start.
Brush hamburgers with oil.
Place food on the Crispy tray on the High rack.
2.
Choose the menu and weight, press start.
continue cooking.
1. Remove all packaging and slit on the surface.
Place food on the Crispy tray on the High rack.
2.
Choose the menu and weight, press start.
continue cooking.
Place food on the Crispy tray on the High rack.
2.
Choose the menu and weight, press start.
continue cooking.
ot trats sserp dna revo doof nrut ,PEEB nehW .3
ot trats sserp dna revo doof nrut ,PEEB nehW .3
.kcar hgiH eht no yart ypsirC eht no doof ecalP .2
ot trats sserp dna revo doof nrut ,PEEB nehW .3
ypsirC eht no tuo stcudorp otatop nezorf daerpS .1nezorRgk 3.0 - 1.0
Crispy tray on
the High rack
.hcae kciht mc 1 dna g 001 fo sregrubmah esoohC .1
Crispy tray on
the High rack
Crispy tray on
the High rack
.ecafrus eht no tils dna gnigakcap lla evomeR .1mooRgk 4.0 - 2.0
Crispy tray on
the High rack
ot trats sserp dna revo doof nrut ,PEEB nehW .3
Page 26

HOW TO USE
26
Code Menu
2-1 Broccoli/ 0.2 - 0.6 kg Room
2-2 Carrot 0.2 - 0.6 kg Room Same as above
2-3 Chicken
Breasts
2-4 Eggs 2 - 9 ea Refrigerated
2-5 Fish
Fillets
2-6 Green
Beans
2-7 Mussels 0.2 - 0.6 kg Refrigerated 1. Wash mussels and discard any broken shell or
2-8 Prawns 0.2 - 0.6 kg Refrigerated Same as above
Weight
Limit
0.2-0.6 kg Refrigerated Same as above
0.2 - 0.6 kg Refrigerated Same as above
0.1 - 0.3 kg Room
Initial
Temperature
Instructions Utensil
1. Wash vegetabloes and cut into similar sized
pieces.
Pour 300 ml tap water into the steam water bowl.
2.
Place the steam plate on the steam water bowl. Place
prepared food on the steam plate in a single layer.
Cover with steam cover.
3. Place the steam bowl in the oven. Choose the
menu and weight, press start.
- Under 5 mm thickness
- Under 2.5 cm thickness
Same as above
- Under 2.5 cm thickness
Same as above
dead mussels.
Pour 300 ml tap water into the steam water bowl.
2.
Place the steam plate on the steam water bowl. Place
prepared food on the steam plate in a single layer.
Cover with steam cover.
3. Place the steam bowl in the oven. Choose the
menu and weight, press start.
- Under 20 cm length
Steam water
bowl
Steam plate
Steam cover
Steam water
bowl
Steam plate
Steam cover
Steam water
bowl
Steam plate
Steam cover
Steam water
bowl
Steam plate
Steam cover
Steam water
bowl
Steam plate
Steam cover
Steam water
bowl
Steam plate
Steam cover
Steam water
bowl
Steam plate
Steam cover
Steam water
bowl
Steam plate
Steam cover
CAUTION
1. Always use oven gloves when removing a STEAMER from the oven. It’s very hot.
2. Do not put a hot STEAMER on a glass table or a place that may melt after cooking.
Always make sure a pad or tray is used.
3. When you use this Steamer, pour at least 300 ml water before use. If the amount of
water is less than 300ml, it may cause incomplete cooking, or may cause a re or fatal
damage to the product.
4. Be careful when you move the STEAMER with water.
5. When you use the STEAMER, the steam cover and Steam water bowl should be set
perfectly right. Eggs or chestnuts will explode if the steam cover and steam water bowl
are not set.
6. Never use this STEAMER with a product from a dierent model. It may cause re or fatal
damage to the product.
Steam cover
Steam plate
Steam water bowl
(Crisp tray)
Page 27

HOW TO USE
HEALTHY FRY
Your oven’s menu has been preprogrammed to automatically cook food. Tell the oven what you want and
how many items there are. Then let your microwave oven cook your selections.
For Crispy tray model
Example: To cook 0.4 kg Chicken wings,
simply follow the step below
1.Press STOP/CLEAR.
2. Press HEALTHY FRY.
‘1’ will show in the display.
3. Turn the DIAL until display
shows ‘2’.
4. Press START/ENTER.
5. Turn the DIAL until display
shows ‘0.4 kg’.
27
6. Press START/ENTER.
HEALTHY FRY MENU INSTRUCTIONS
Code Menu
1 Chicken /
Schnitzel
2 Chicken
Wings
Weight
Limit
0.2 - 0.6 kg Refrigerated
0.2 - 0.6 kg Refrigerated 1. Brush chicken wings with melted butter or oil
Initial
Temperature
Ingredients
Chicken breasts of 150 - 200 g each
2 eggs, lightly beaten
Salt and pepper to taste
1. Season chicken breasts with salt and pepper or
brush chicken schnitzel with oil.
2. Place food on the Crispy tray on the High rack.
Choose the menu and weight, press start.
3. When BEEP, turn food over and press start to
continue cooking.
and season as desired.
2. Place food on the Crispy tray on the High rack.
Choose the menu and weight, press start.
3. When BEEP, turn food over and press start to
continue cooking.
Instructions Utensil
Crispy tray on
the High rack
Crispy tray on
the High rack
Page 28

HOW TO USE
28
Code Menu
3 Cutlet 0.2-0.4 kg Refrigerated
4 Fish
Schnizel
Weight
Limit
0.2 - 0.6 kg Refrigerated
Initial
Temperature
Instructions Utensil
Ingredients
500 g lean grouond lamb or beef
500 g small potatoes, cooked and mashed
3 eggs, lightly beaten
2 tablespoons chopped parsley
Salt and pepper to taste
1. Mix meat, potatoes, eggs, onions and parsley.
With meat mixture, make balls about 4-5 cm
diameter
and shape balls into ovals about 1 cm thick each.
Brush cutlet with oil.
2. Place food on the Crispy tray on the High rack.
Choose the menu and weight, press start.
3. When BEEP, turn food over and press start to
continue cooking.
Ingredients
2 eggs, lightly beaten
Salt and pepper to taste
1.
Crispy tray on
the High rack
Crispy tray on
the High rack
5 French
Fries
6 Hamburgers 0.2 - 0.4 kg Refrigerated
7 Sausages 0.2 - 0.6 kg Refrigerated
8 Wedge
Potatoes
Choose the menu and weight, press start.
continue cooking.
tray on the High rack. For the best results, cook
in a single layer. Choose the menu and weight,
press start.
Brush hamburgers with oil.
Place food on the Crispy tray on the High rack.
2.
Choose the menu and weight, press start.
continue cooking.
1. Remove all packaging and slit on the surface.
Place food on the Crispy tray on the High rack.
2.
Choose the menu and weight, press start.
continue cooking.
Place food on the Crispy tray on the High rack.
2.
Choose the menu and weight, press start.
continue cooking.
ot trats sserp dna revo doof nrut ,PEEB nehW .3
ot trats sserp dna revo doof nrut ,PEEB nehW .3
.kcar hgiH eht no yart ypsirC eht no doof ecalP .2
ot trats sserp dna revo doof nrut ,PEEB nehW .3
ypsirC eht no tuo stcudorp otatop nezorf daerpS .1nezorRgk 3.0 - 1.0
Crispy tray on
the High rack
.hcae kciht mc 1 dna g 001 fo sregrubmah esoohC .1
Crispy tray on
the High rack
Crispy tray on
the High rack
.ecafrus eht no tils dna gnigakcap lla evomeR .1mooRgk 4.0 - 2.0
Crispy tray on
the High rack
ot trats sserp dna revo doof nrut ,PEEB nehW .3
Page 29

HOW TO USE
29
INVERTER DEFROST
Four defrost sequences are preset in the oven.
The INVERTER DEFROST feature provides you
with the best defrosting method for frozen foods.
The cooking guide will show you which defrost
sequence is recommended for the food you are
defrosting.
For added convenience, the INVERTER DEFROST
includes a built-in beep mechanism that reminds
you to check, turn over, separate, or rearrange
to get the best defrost results. Four different
defrosting leve is are provided.
(MEAT /POULTRY / FISH / BREAD)
Example: To defrost 1.2 kg of meat
1. Press STOP/CLEAR.
TSORFED RETREVNI sserP .2
until display shows ‘dEF1’.
sserP .3
START/ENTER.
‘0.1 kg’ will show in the
display.
shows ‘1.2 kg’ .
Defrosting starts.
press
At beep, open the door and remove any portions
that have thawed and turn.
START/ENTER
•
Remove fish, shellfish, meat,
its original wrapping paper or plastic package.
Otherwise, the wrap will hold steam and juice
close to the foods, which can cause the outer
surface of the foods to cook.
• Place foods in a shallow container or on a
microwave roasting rack to catch drippings.
• Food should still be somewhat icy in the center
when removed from the oven.
START/ENTER
t
eht nruT .4 DIAL until display
sserP .5 START/ENTER.
and poultry from
button,
press
• The length of defrosting time varies according to
how solidly the food is frozen.
• The shape of the package affects how quickly
food will defrost. Shallow packages will defrost
more quickly than a deep block.
• Depending on the shape of the food can be
defrosted more or less.
INVERTER DEFROST
MENU INSTRUCTIONS
Category
MEAT
)dEF1(
0.1 - 4.0 kg
POULTRY
)2dEF(
0.1 - 4.0 kg
FISH
)3dEF(
0.1 - 4.0 kg
BREAD
)4dEF(
0.1 - 0.5 kg
Beef
Ground beef, Round steak,
Cubes for stew, Tenderloin steak,
Pot roast, Rib roast, Rump roast,
Chuck roast, Hamburger patty
Lamb
Chops, Rolled roast
Pork
Chops
Spareribs, Country-style ribs.
Rolled roast, Sausage
Veal
Cutlets (0.5 kg, 20 mm thick)
Turn food over at beep.
After defrosting, let stand for 5 - 15
minutes.
Poultry
Whole, Cut-up, Breast (boneless)
Cornish Hens
Whole
Turkey
Breast
Turn food over at beep.
After defrosting, let stand for 30 - 60
minutes.
Fish
Fillets, Whole Steaks
Shellfish
Crab meat, Lobster tails, Shrimp,
Scallops
Turn food over at beep.
After defrosting, let stand for 5 - 10
minutes.
Sliced bread, Buns, Baguette, etc.
Separate slices and place between
paper towel or flat plate.
Turn food over at beep.
After defrosting, let stand for
1-2 minutes.
Food to be Defrosted
, Hot dogs,
Page 30

30
MICROWAVE-SAFE UTENSILS
MICROWAVE-SAFE UTENSILS
Page 31

FOOD CHARACTERISTICS & MICROWAVE COOKING
31
FOOD CHARACTERISTICS & MICROWAVE COOKING
Page 32

FOOD CHARACTERISTICS & MICROWAVE COOKING
32
FOOD CHARACTERISTICS & MICROWAVE COOKING
Page 33

TO CLEAN YOUR OVEN / USING THE SMART DIAGNOSIS™ FUNCTION
TO CLEAN YOUR OVEN
33
STOP/CLEAR
USING THE SMART DIAGNOSIS™ FUNCTION
Use this function if you need an accurate diagnosis by an LG Electronics service centre when the product malfunctions
or fails. Use this function only to contact the service representative, not during normal operation.
1.
When instructed to do so by the call centre, hold the mouthpiece of your phone over the Smart Diagnosis™ logo on
the controller.
NOTE
Do not touch any other buttons.
•
2.
With the door closed, press and continue to hold the STOP/Clear button for 3 seconds so that 'Loc' appears
on the display. Continue to hold the STOP/Clear button for a further 5 seconds until '5' appears in the display.
(so, the STOP/Clear button will need to be held for 8 seconds continuously).
A tone will then emit from behind the Smart Diagnosis symbol.
3.
4.
Once the countdown is over and the tones have stopped, resume your conversation with the call center agent,
who will then be able to assist you in using the information transmitted for analysis.
NOTE
•
For best results, do not move the phone while the tones are being transmitted.
•
If the call center agent is not able to get an accurate recording of the data, you may be asked to try again.
Max
10 mm
Page 34

34
QUESTIONS & ANSWERS
After cooking is complete, the fan may operate to cool the oven.
The display will show 'Cool'. If you open the door or press once
STOP/CLEAR before the cooking time is complete, the remaining
cooking time will show on the display. This is not a malfunction.
When operating the microwave oven, If you use a product such as radio, TV, wireless LAN, Bluetooth, medical equipment,
wireless equipment etc. Using the same frequency as the microwave oven, the product may receive interference from
these products. This interference does not indicate a problem of the microwave or the product and is not a malfunction.
Therefore, it is safe to use. However, medical equipment may receive interference as well, so use caution when using
medical equipment near the product.
Page 35

TECHNICAL SPECIFICATIONS
TECHNICAL SPECIFICATIONS
MJ396****
Power Input 230 V~ 50 Hz
Microwave Output Power. Max. 1100 watt (IEC60705 rating standard)
Microwave Frequency 2450 MHz
Outside Dimension 547 mm(W) X 327 mm(H) X 536 mm(D)
Microwave
Power Consumption
Grill 950 watt
Convection 1850 watt
Grill Combi. 1450 watt
Convection Combi. 1900 watt
* In 1100 W and 900 W, output power will gradually be reduced to avoid overheating.
Disposal of your old appliance
1 This crossed-out wheeled bin symbol indicates that waste electrical and electronic products (WEEE)
should be disposed of separately from the municipal waste stream.
2 Old electrical products can contain hazardous substances so correct disposal of your old appliance
will help prevent potential negative consequences for the environment and human health.
Your old appliance may contain reusable parts that could be used to repair other products, and other
valuable materials that can be recycled to conserve limited resources.
3 You can take your appliance either to the shop where you purchased the product, or contact your local
government waste office for details of your nearest authorised WEEE collection point. For the most up
to date information for your country please see www.lg.com/global/recycling
1350 watt
35
Microwave Frequency : 2450 MHz +/- 50 MHz (Group 2 / Class B) **
Group 2 equipment: group 2 contains all ISM RF equipment in which radio-frequency energy in the
frequency range 9 kHz to 400 GHz is intentionally generated and used or only used, in the form of
electromagnetic
Class B equipment is equipment suitable for use in domestic establishments and in establishments
directly connected to a low voltage power supply network which supplies buildings used for
domestic purposes.
You can download a owner's manual at http://www.lg.com
Page 36

MAFF
36
MAFF
REHEATING COOKED CHILLED FOODS
This microwave oven has been tested and labelled to the Ministry of Agriculture Fisheries and Food (MAFF)
agreement, concerning the reheating of cooked chilled food.
The heating category represents the oven’s ability to heat small quantities of food (approx. 350 g), it does
not represent the oven’s general performance. The category (from the letter A to E) will help you to reheat small
quantities of food such as microwavable ready meals. The greater the heating category of the oven, the less
heating time that is required.
Displayed on the food packages will be the cooking times for each of the BAND categories.
For example A may be 10 minutes. B may be 9 minutes etc depending on the food type.
Denotes the microwave oven
Three wavy lines denotes oven
te sted in compliance with the
agreement.
1100W
output power
This category links with the
heating times given on food.
Page 37

GUARANTEE
GUARANTEE
TECHNOLOGY WITH THE HUMAN TOUCH
LG ELECTRONICS U.K. LTD. WILL PROVIDE THE FOLLOWING SERVICES INORDER TO
EXPEDITE THIS GUARANTEE.
1. A ll faulty components which fail due to defective manufacturing will be replaced free of charge for a period of 12
months from the original date of purchase.
LG electronics equipment, for a period of 12 months from the original date of purchase. These claims must be made in
accordance with the published scale of service charges and relevant claims procedure.
PLEASE NOTE:
A. The dealer may restrict the guarantee to the original purchaser.
B.
apparatus, or if non standard components are used or if the serial number of the apparatus is removed, defaced,
misused, or altered.
C. A ny claims made under guarantee must be directed to the dealer from whom the equipment was originally
purchased. The dealer may, before carrying out service under guarantee, require a receipted account as evidence of
the date of purchase.
E. A erial alignment and consumer control adjustments are not covered by this guarantee.
37
siht fo riaper eht ni dedivorp ruobal yna rof desrubmier eb lliw tcudorp eht dlos ohw )tnegA ecivreS sih ro( relaed eh T .2
.esu ni nrow ro detsuahxe emoceb yeht fi seirettab ecalper ot detagilbo ton si relaed ruoy taht tuo tniop ylluftcepser eW .D
REQUIREMENTS TO MAINTAIN WARRANTY COVERAGE:
RETAIN YOUR RECEIPT TO PROVE DATE OF PURCHASE. A COPY OFYOUR RECEIPT MUST BE SURRENDERED AT
THE TIME GUARANTEE SERVICE IS PROVED.
PRODUCT REGISTRATION CARD:
It is helpful to complete at least, your name, address, phone, model & serial numbers and return it.
This will enable LG Electronics to assist you in the future should you lose your receipt, your units stolen, or should
To obtain information or assistance:
Call 01753 500470 Monday-Friday 9:00 am ~ 4:30 pm
MODEL SERIAL #* DATE OF PURCHASE
* Please complete for your own record.
purchased.
Page 38

 Loading...