How it Works
Log In / Sign Up
Buy Points
How it Works
FAQ
Contact Us
Questions and Suggestions
Users
LG
Loading...
M
Minibeam PA1000W
Minibeam PH550
Minibeam Pro PF1500
Minibeam Pro PF1500G
Minibeam PW1000
Minibeam PW1500
Minibeam PW800
Minibeam UST
2
MINISD VX9800
MJ07PC
9
MJ1281BP
MJ1466APR
MJ2886BFUM
2
MJ2886BWUM
4
MJ3281BC
11
MJ3281BCG
3
MJ3281BCS
4
MJ3281BF
MJ3281BP
4
MJ3281BPG
2
MJ3281BQ
2
MJ3281BS
2
MJ3281C
5
MJ3281CBS
5
MJ3281CG
2
MJ3281CS
2
MJ3282BCG
MJ3282BF
MJ3283BC
MJ3283BCG
2
MJ3283BG
2
MJ3283BKG
2
MJ3283CG
2
MJ3284CS
MJ3286BFUM
2
MJ3286BRUS
2
MJ3286SFU
2
MJ328 Series
2
MJ3294BAB
8
MJ3294BG
2
MJ3296BFT
3
MJ3881BC
4
MJ3881BCS
MJ3881BF
MJ3881BP
3
MJ3882BF
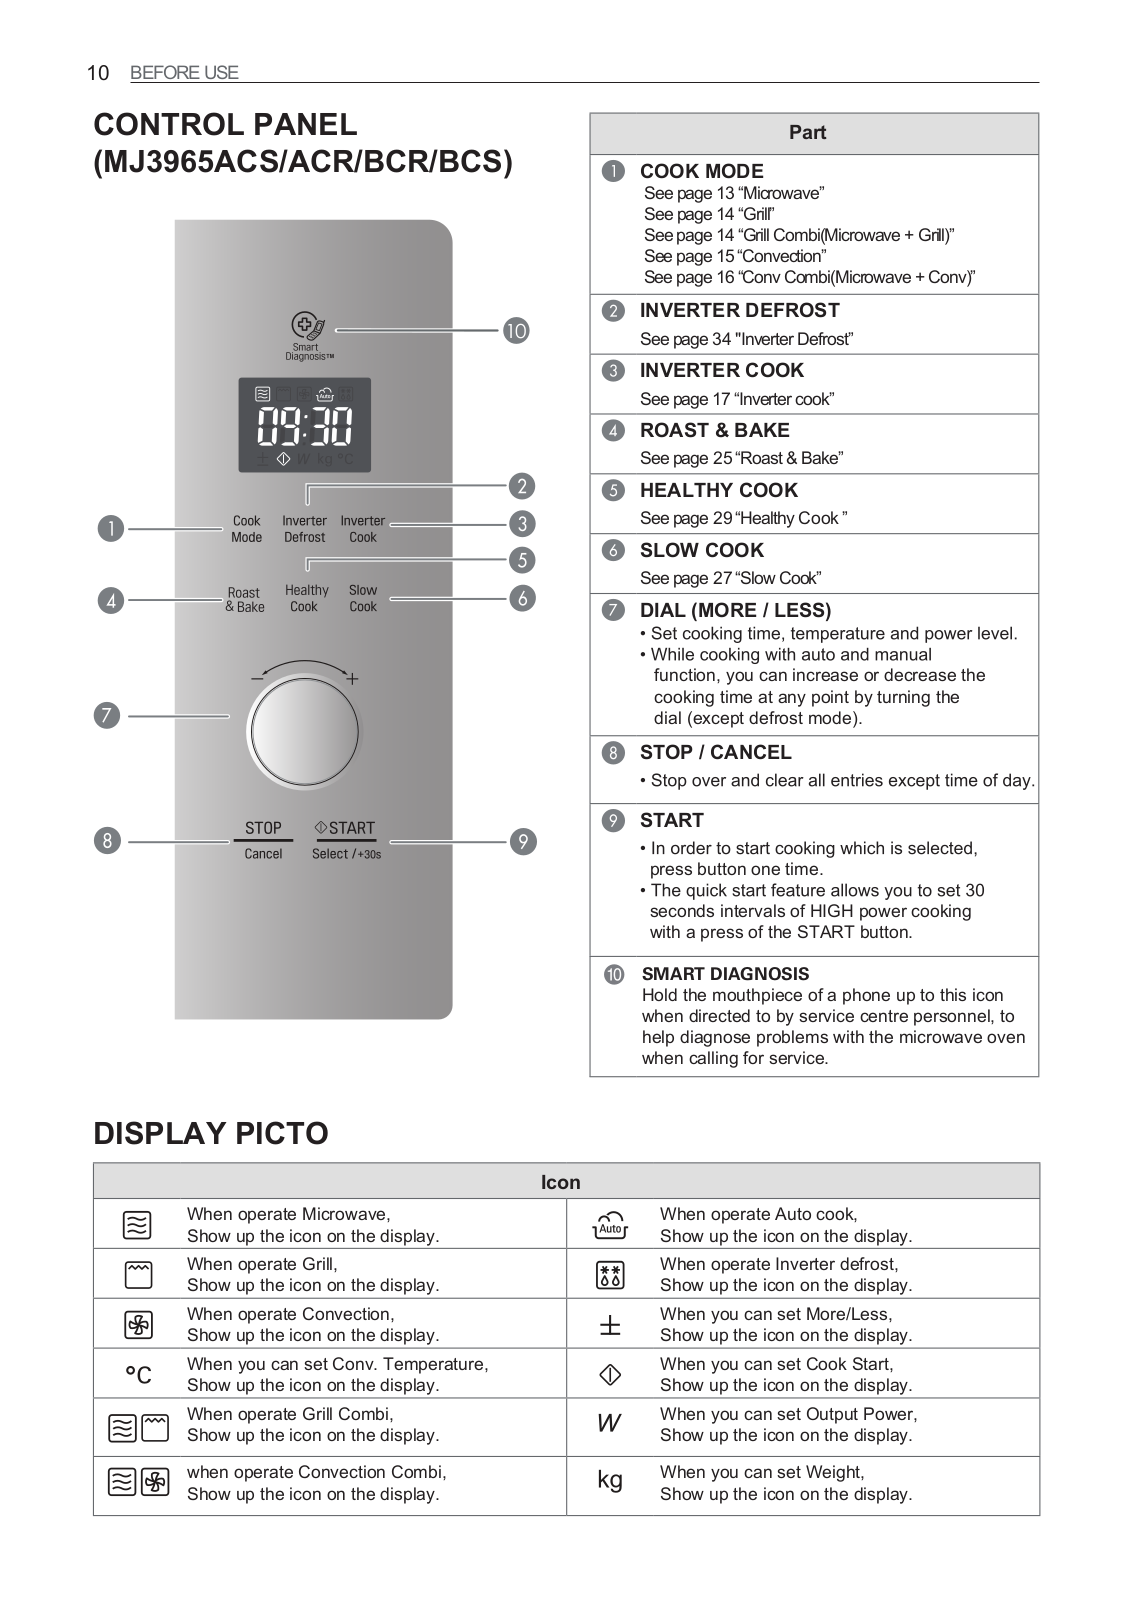
MJ3965ACR
2
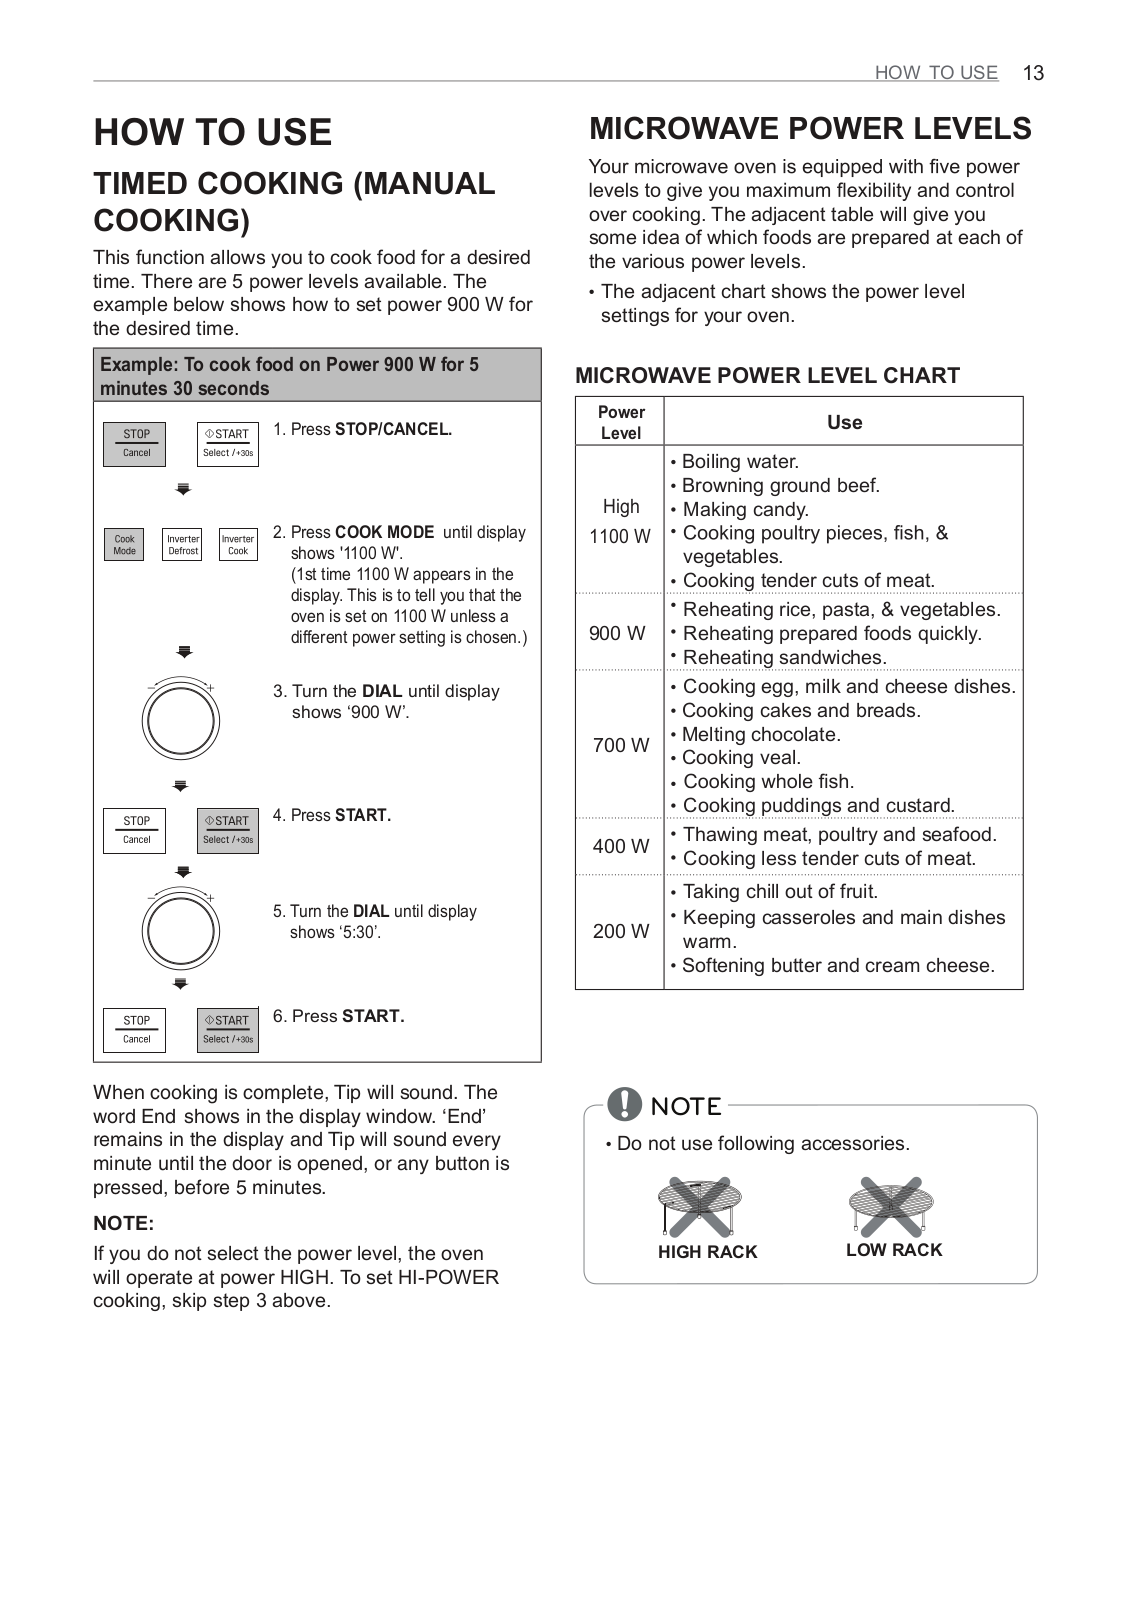
MJ3965ACS
7
MJ3965ACT
MJ3965ACW
2
MJ3965AIS
3
MJ3965BCR
2
MJ3965BCS
2
MJ3965BGS
MJ3965BIB
2
MJ3965BIH
MJ3965BIS
4
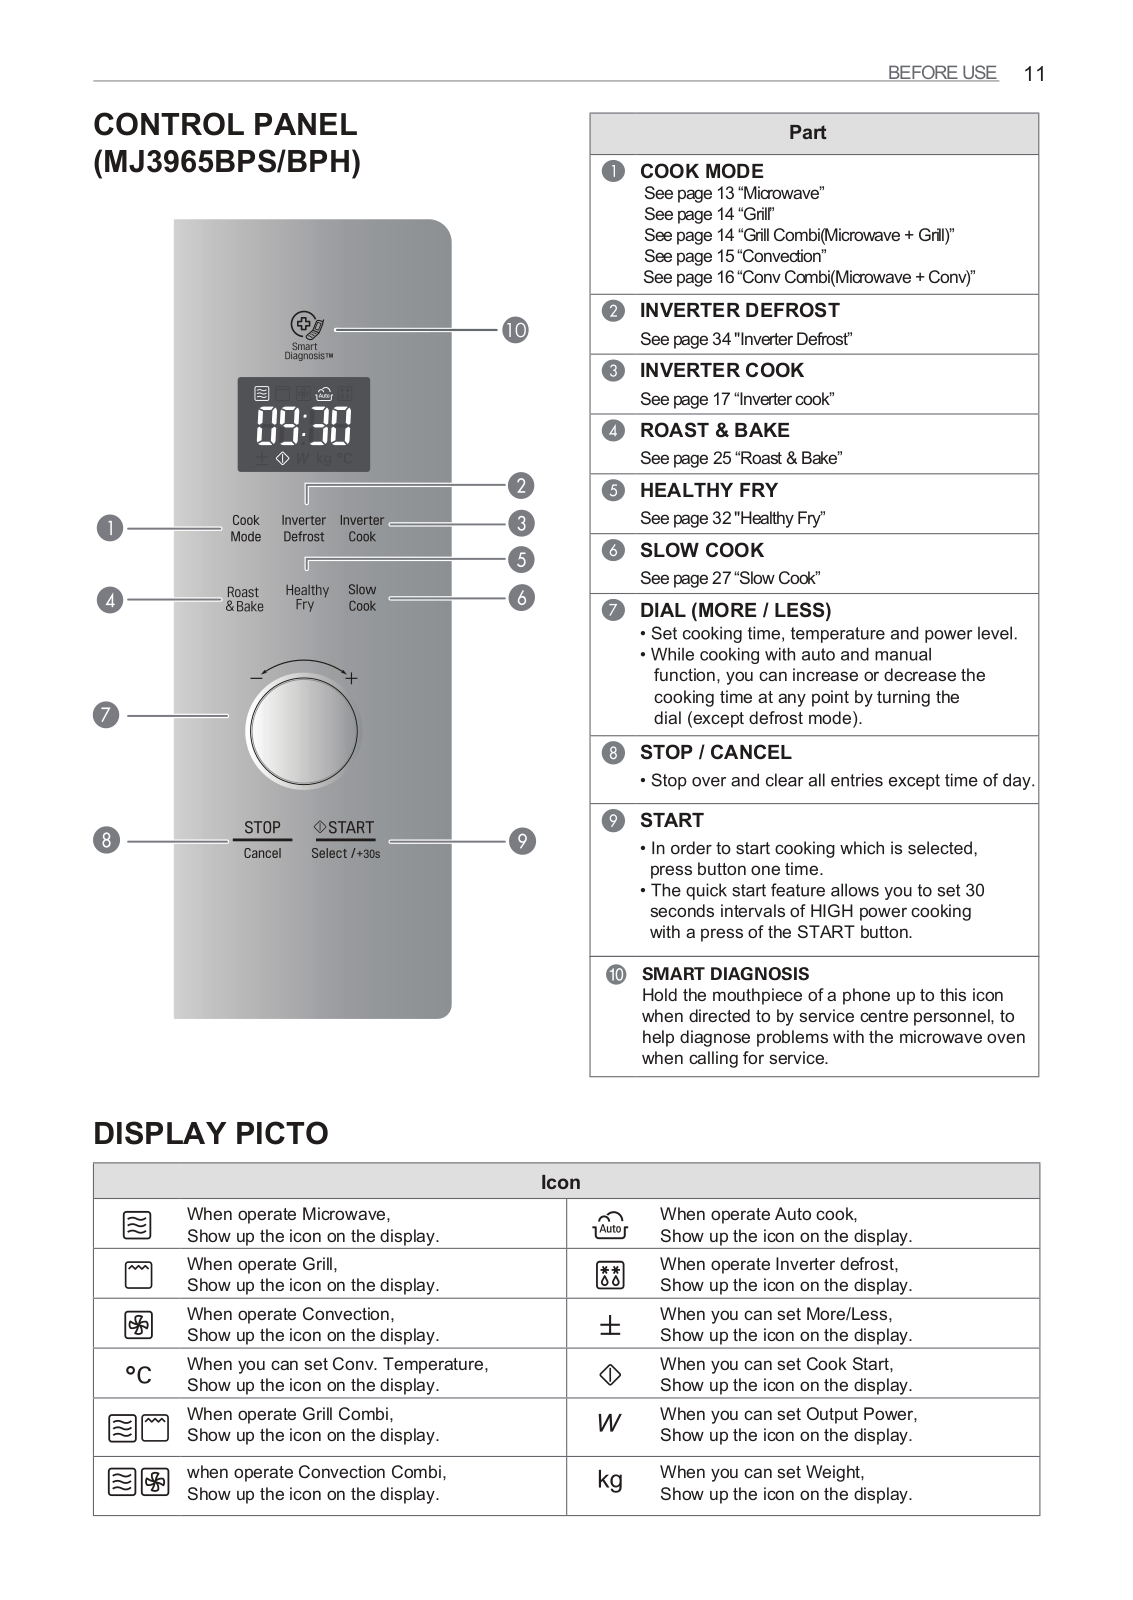
MJ3965BPH
4
MJ3965BPS
4
MJ3965BQS
MJ3966ABS
3
MJ3966ACT
MJ3966ASS
MJ3966AWS
MJ9250NB
MJ9270NB
MJ9280NS
MJ9286NB
2
MJ-9296NB
MJ 9482S
MJ-9880NS
2
MJ9886NB
MJEN286UF
MJEN286UH
MJEN326PK
2
MJEN326SF
2
MJEN326TL
2
MJEN326UH
2
MJL1302A
MJL1302AG
MJL3281A
MJL3281AG
MJL4281A
MJL4281AG
MJL4302A
MJL4302AG
MJW1302A
MJW1302AG
MJW3281A
MJW3281AG
MK1195XGB
MK1195XGQ
MK2030F
2
MK2030NBD
MK2030NST
ML-03JA
ML-041A
3
ML-041B
ML-041G
ML-042A
Loading...
Loading...
Nothing found
MJ3965ACS
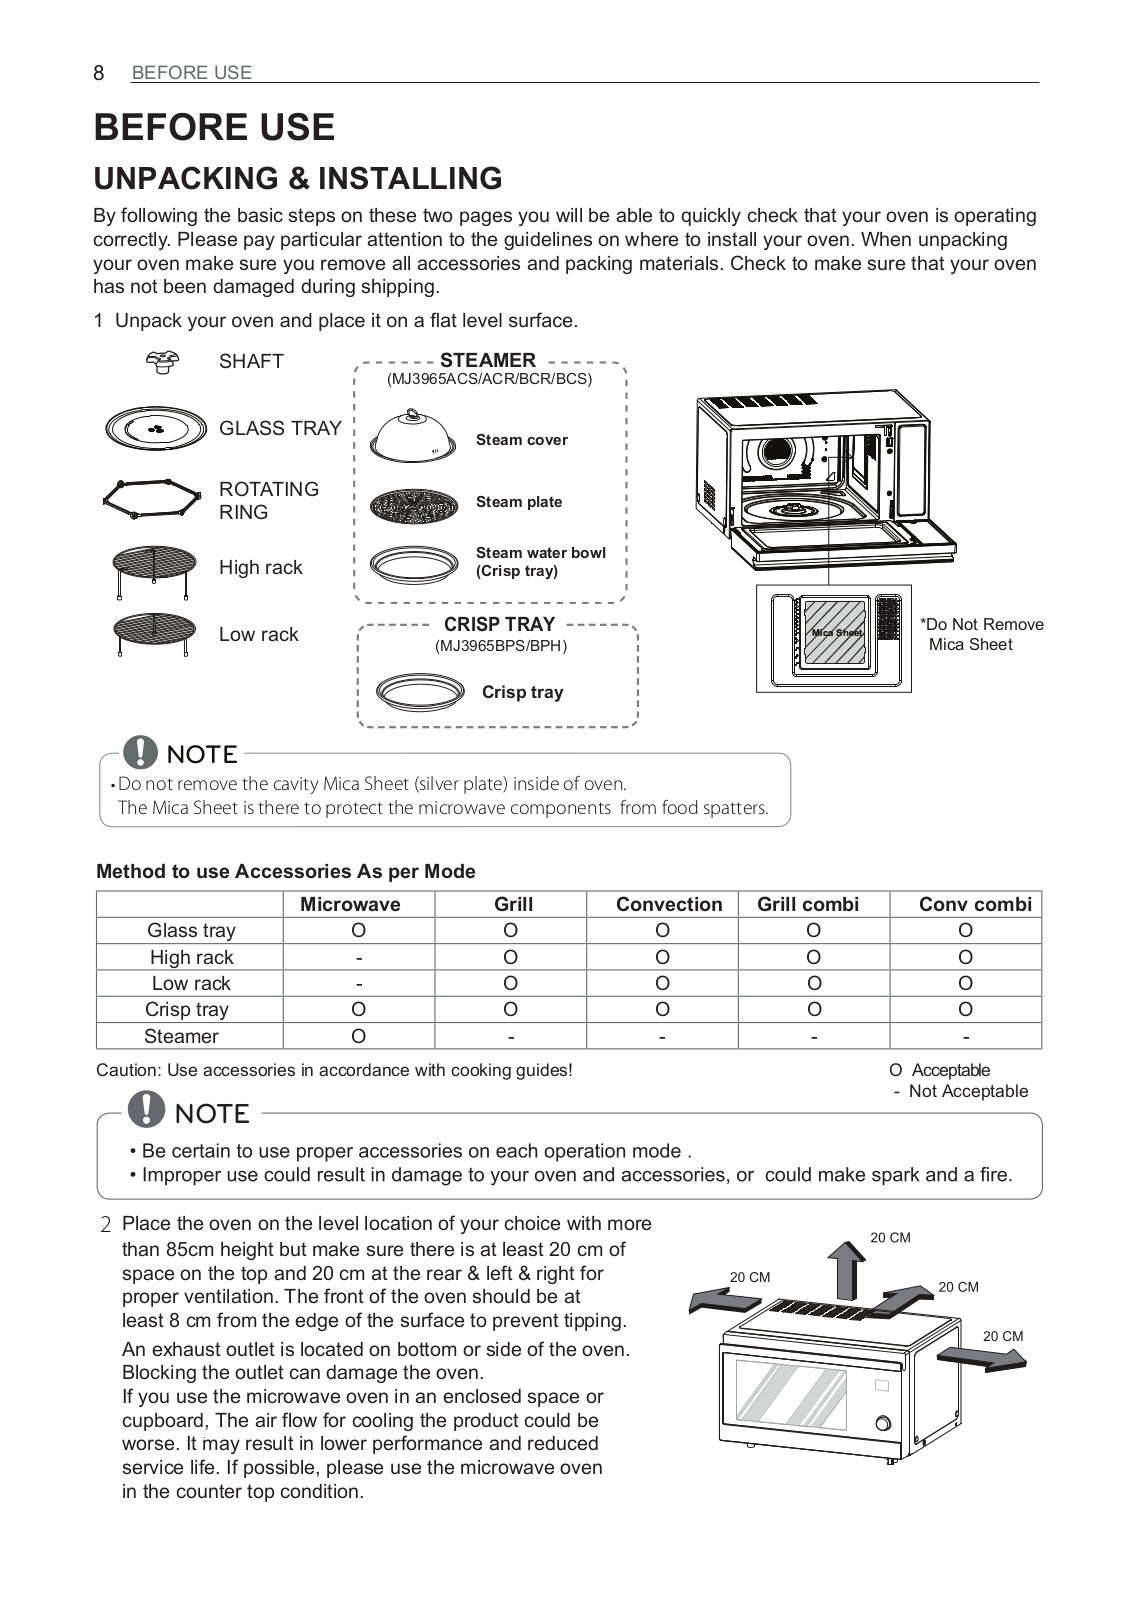
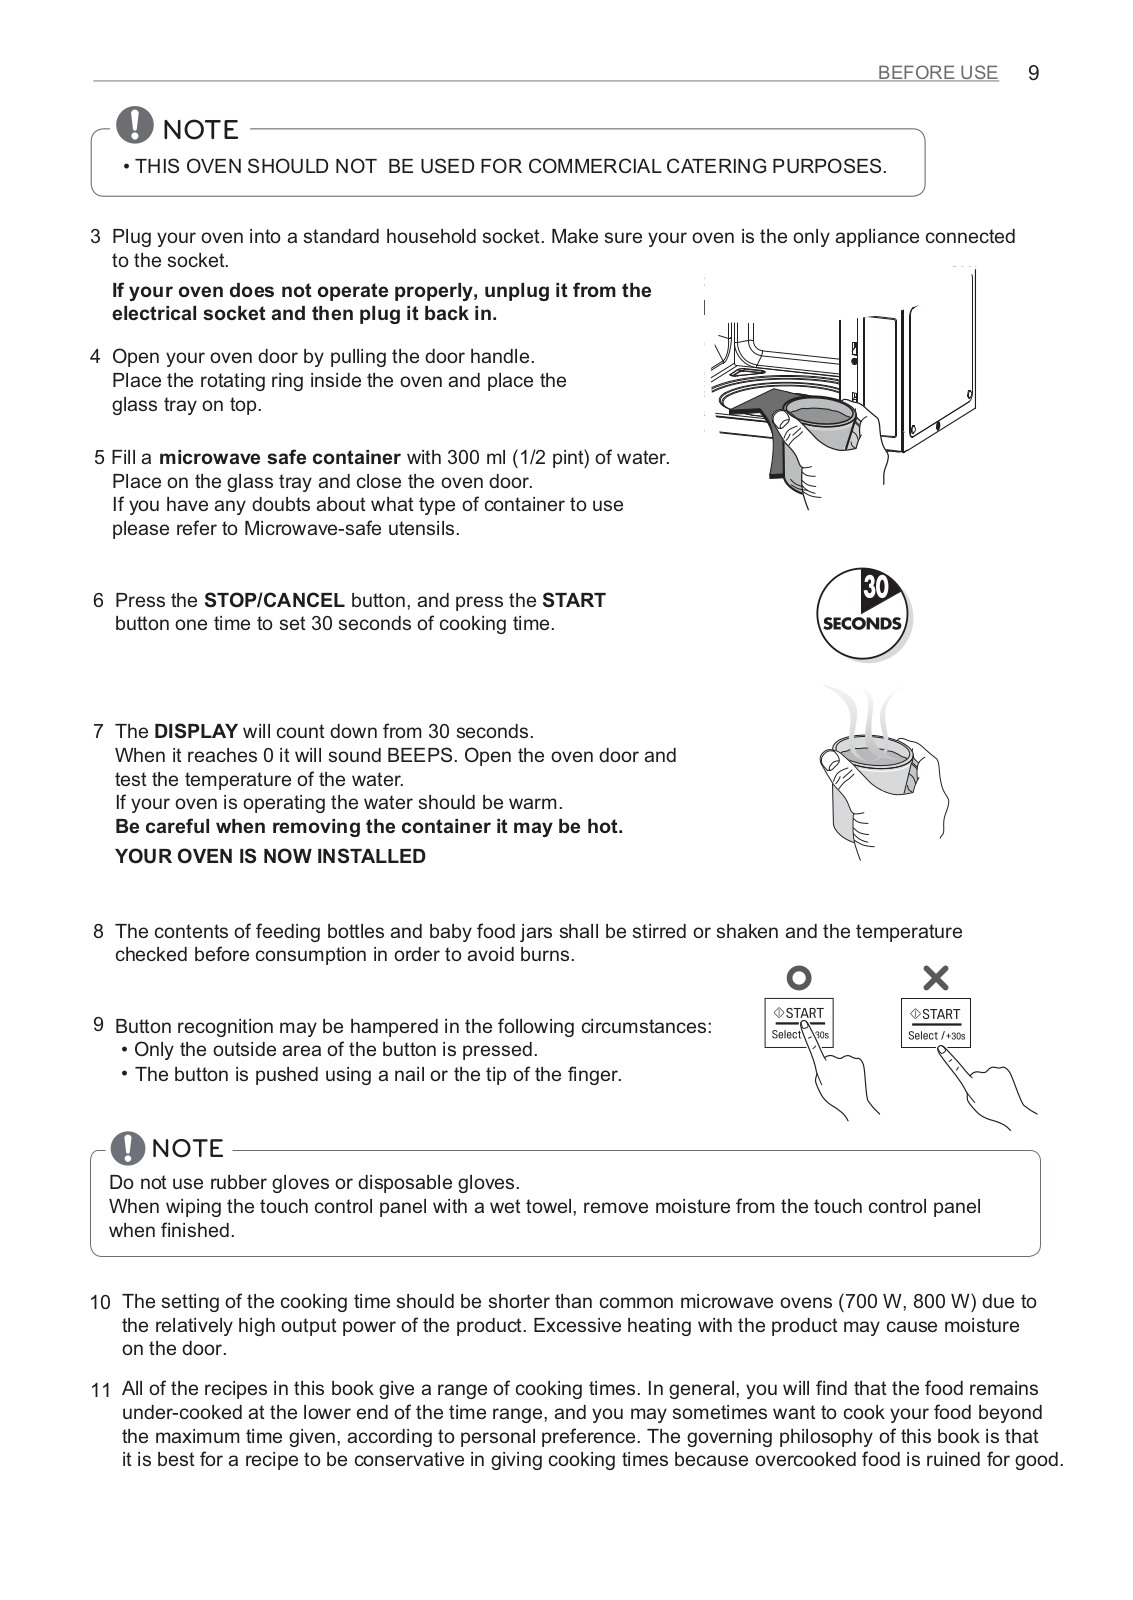
operation manual
36 pgs
12.42 Mb
0
User manual
38 pgs
18.39 Mb
0
Instruction manual
70 pgs
23.55 Mb
0
Owner’s Manual
41 pgs
6.05 Mb
0
Owner’s Manual [ar]
79 pgs
16.7 Mb
0
Owner’s Manual [fr]
119 pgs
34.01 Mb
0
User Manual [it]
140 pgs
53.14 Mb
0
Table of contents
Loading...
LG MJ3965ACS Owner’s Manual
...
LG Owner’s Manual
Download
Specifications and Main Features
Frequently Asked Questions
User Manual
Download
Loading...
+
28
hidden pages
Unhide
You need points to download manuals.
1 point = 1 manual.
You can buy points or you can get point for every manual you upload.
Buy points
Upload your manuals
 Loading...