

Page 1

Page 2

Table of Contents
Features . . . . . . . . . . . . . . . . . . . . . . . . 5
Important safety instructions . . . . . . . 6
CAUTION . . . . . . . . . . . . . . . . . . . . . . . . . . . . 8
Warning . . . . . . . . . . . . . . . . . . . . . . . . . . . . . 10
Caution . . . . . . . . . . . . . . . . . . . . . . . . . . . . . 10
Industry Canada requirement . . . . . . . . . . . . 10
FCC COMPLIANCE STATEMENT . . . . . . . . 10
FCC Warning. . . . . . . . . . . . . . . . . . . . . . . . . 11
Disposal of your old appliance . . . . . . . . . . . 11
Package contents . . . . . . . . . . . . . . . . 12
Connecting the neck strap. . . . . . . . . . . . . . . 12
Name of each component . . . . . . . . . 13
Front/Rear view. . . . . . . . . . . . . . . . . . . . . . . 13
Side/Rear view . . . . . . . . . . . . . . . . . . . . . . . 13
Installing software . . . . . . . . . . . . . . . 14
Before installing the operating program . . . . 14
LG Media Center . . . . . . . . . . . . . . . . . . . . . 14
LG Lyrics Center . . . . . . . . . . . . . . . . . . . . . 16
Installing and running firmware updater . . . . 18
Installing Win98SE Device Driver . . . . . . . . . 21
Installation of the Music Therapy . . . . . . . . . 24
Connecting to the PC . . . . . . . . . . . . . 25
Using the removeble storage device . . . . . . . 25
Replacing firmware . . . . . . . . . . . . . . . 26
Upgrading Firmware. . . . . . . . . . . . . . . . . . . . 26
Installation and connection . . . . . . . . 27
Battery Info. . . . . . . . . . . . . . . . . . . . . . . . . . . 27
Inserting battery . . . . . . . . . . . . . . . . . . . . . . . 27
Connecting the player to the PC . . . . . . . . . . 27
Disconnecting the player from the PC . . . . . . 28
Basic operation . . . . . . . . . . . . . . . . . . 29
Turning on/off the power . . . . . . . . . . . . . . . . 29
Lock feature . . . . . . . . . . . . . . . . . . . . . . . . . . 29
Volume control . . . . . . . . . . . . . . . . . . . . . . . . 29
Home menu screen . . . . . . . . . . . . . . . . . . . . 30
Playing music files . . . . . . . . . . . . . . . 31
Music playing screen . . . . . . . . . . . . . . . . . . . 31
Play . . . . . . . . . . . . . . . . . . . . . . . . . . . . . . . . 31
Pause. . . . . . . . . . . . . . . . . . . . . . . . . . . . . . . 31
Playing mode . . . . . . . . . . . . . . . . . . . . . . . . . 32
Speed search of the play list . . . . . . . . . . . . . 32
To search the next or previous music file . . . 32
2
Page 3

Table of Contents
Playback time information . . . . . . . . . . . . . . . 32
A-B Repeat . . . . . . . . . . . . . . . . . . . . . . . . . . 33
Bookmark feature . . . . . . . . . . . . . . . . . . . . . 33
Playing the music list. . . . . . . . . . . . . . . . . . . 33
Playing the recording list . . . . . . . . . . . . . . . . 34
File error . . . . . . . . . . . . . . . . . . . . . . . . . . . . 34
Music therapy . . . . . . . . . . . . . . . . . . . . . . . . 34
FM radio reception (Option) . . . . . . . 35
FM radio reception screen. . . . . . . . . . . . . . . 35
Listening to the FM radio . . . . . . . . . . . . . . . 35
Preset/Non Preset Mode. . . . . . . . . . . . . . . . 35
Searching the FM radio stations . . . . . . . . . . 36
Storing FM radio frequencies . . . . . . . . . . . . 36
Deleting channels . . . . . . . . . . . . . . . . . . . . . 37
Set/Cancel Mute . . . . . . . . . . . . . . . . . . . . . . 37
Stereo/Mono switching . . . . . . . . . . . . . . . . . 37
Recording FM radio broadcasting . . . . . . . . . 38
Listening to the radio recorded file . . . . . . . . 38
Recording . . . . . . . . . . . . . . . . . . . . . . 39
Recording screen . . . . . . . . . . . . . . . . . . . . . 39
Voice and hold. . . . . . . . . . . . . . . . . . . . . . . . 39
Listening to the voide recorded file . . . . . . . . 40
External Input . . . . . . . . . . . . . . . . . . . 41
Connecting to an external device. . . . . . . . . . 41
Recording through an external device . . . . . . 41
Playback of external recorded file . . . . . . . . . 42
Setting lower features . . . . . . . . . . . . 43
Setup mode screen . . . . . . . . . . . . . . . . . . . . 43
Operating Setup feature. . . . . . . . . . . . . . . . . 44
Playing mode . . . . . . . . . . . . . . . . . . . . . . . . . 44
Sound effect. . . . . . . . . . . . . . . . . . . . . . . . . . 44
Screen layout . . . . . . . . . . . . . . . . . . . . . . . . . 45
Radio (Option) . . . . . . . . . . . . . . . . . . . . . . . . 45
Record . . . . . . . . . . . . . . . . . . . . . . . . . . . . . . 46
Time . . . . . . . . . . . . . . . . . . . . . . . . . . . . . . . . 46
General setting. . . . . . . . . . . . . . . . . . . . . . . . 46
Running Recovery . . . . . . . . . . . . . . . . . . . . . 47
Using the application program . . . . . 49
LG Media Center . . . . . . . . . . . . . . . . . . . . . . 49
Auto Firmware updating. . . . . . . . . . . . . . . . . 49
LG Lyrics Center . . . . . . . . . . . . . . . . . . . . . . 50
View the manual. . . . . . . . . . . . . . . . . . . . . . . 50
Installation of the Adobe Acrobat Reader . . . 50
Troubleshooting . . . . . . . . . . . . . . . . . 51
3
Page 4

Table of Contents
Specifications . . . . . . . . . . . . . . . . . . . 52
Supported File Spec . . . . . . . . . . . . . . . . . . . 53
http://www.lge.com . . . . . . . . . . . . . . . . . . . . 55
4
Page 5

Features
Removable disk
You can copy and store files on the Windows Explorer.
LGE FM 12 with sliding USB connect is convenient to
connect to PC without separate USB cable.
Support USB 2.0 full speed
The user can download files at a fast speed.
Encoding
Through Line-in port of the player, the user can encode
music to the MP3 player format.
FM reception (See on the page 12
'Options By Model')
With auto frequency selection feature, the user can
conveniently listen to FM radio broadcasting.
Text viewer
The text viewer feature is convenient for listening to
music or studying a foreign language.
Firmware upgrading
You can upgrade your firmware to the newest one.
Music therapy
The music therapy feature helps user refresh, sleep
better, and concentrate better with music with special
functions or good for health.
The music therapy feature may not be provided de-
pending on the product model.
DRM feature
What is the DRM? The DRM refers to the technologies
and services that prevent unauthorized use of the digital contents and that protect the related parties of the
intellectual property rights.
This product supports Portable Device DRM(PDDRM).
The DRM-enabled music file is encrypted so that ed-
iting the ID3 tag and lyrics is impossible.
5
Page 6
Important safety instructions
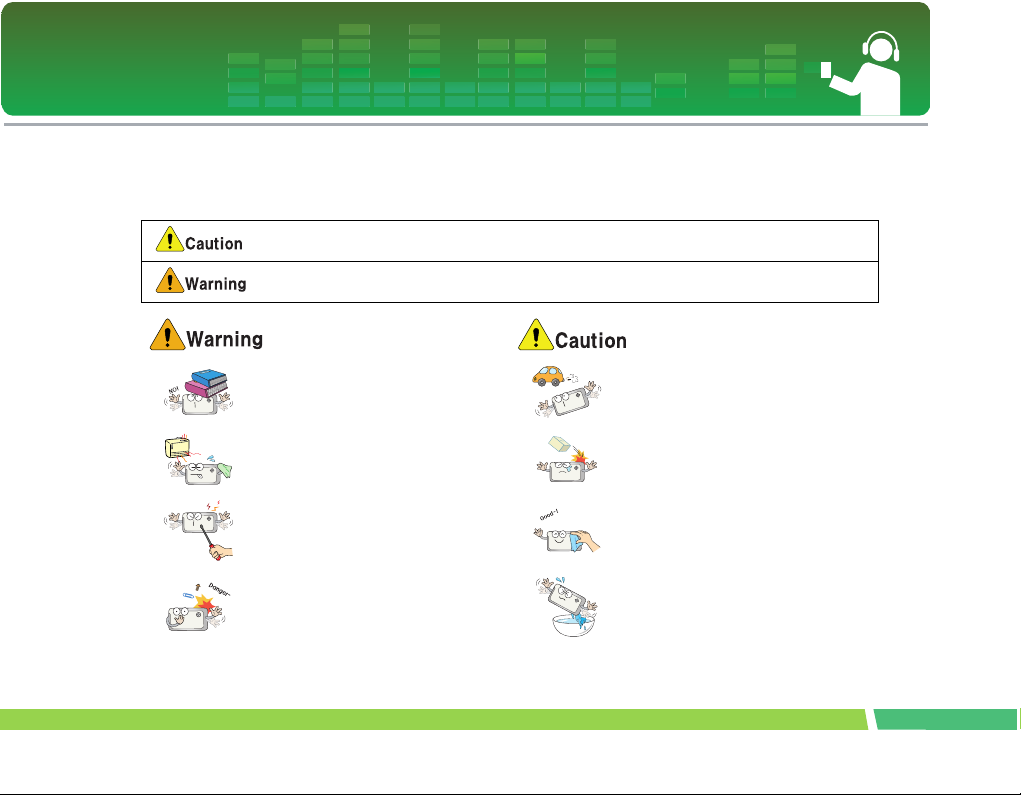
Please follow the safety instructions closely to reduce the risk of accidents or damage to equipment.
Safety instructions are divided into Warning and Attention.
Keep this manual in an easily accessible place.
Not following the instruction may result in a light accident or damage.
Not following the instruction may result in death or serious injury.
Do not place an object on the product. Do not use this product while driving.
Keep this product away fro m heat.
Do not disassemble, repair, or remodel the
product.
Keep your computing enviro nment clean and
free of dust.
Do not drop an object or give shock on the
product.
Clean the Player with soft cloth.
Do not operate the Player near water, dust, or
soot.
6
Page 7
Important safety instructions
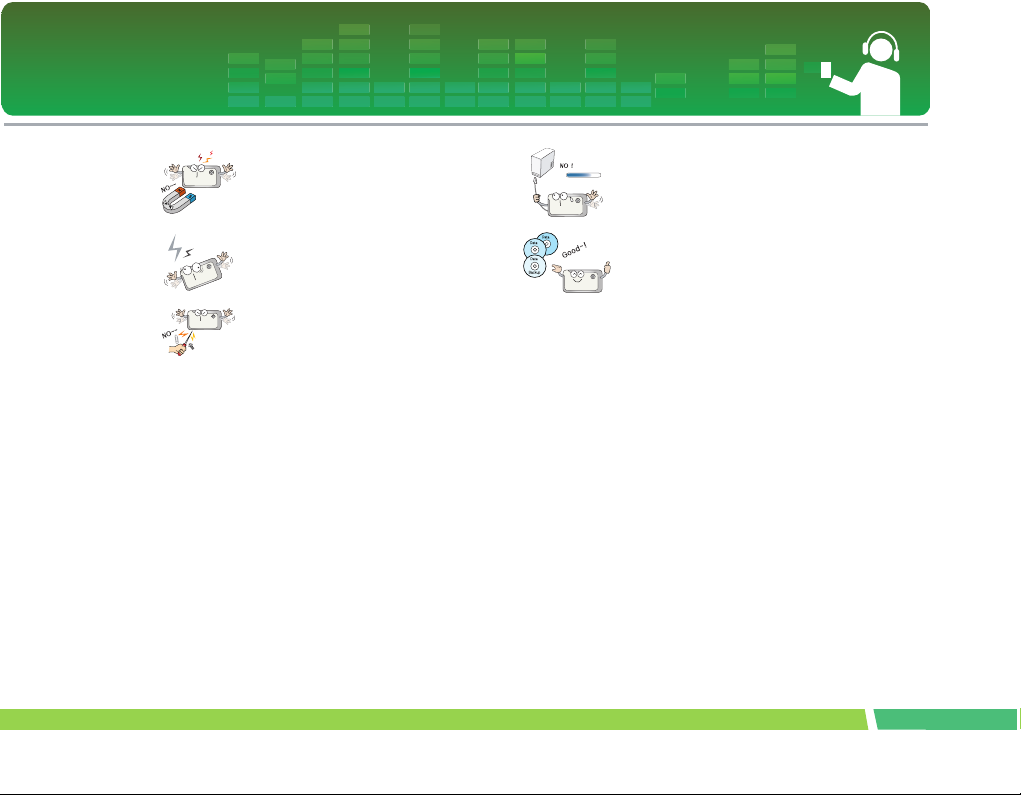
Do not place the player near a magnet or
within the magnetic field.
Note that the player may malfunction in an
electrostatic environment.
Do not insert a metallic object (coins or hair
pins, etc.) or flammable objects in the product.
Do not drop such objects on the product
either.
Do not use the earphones loud while walking,
especially on the crosswalks.
Stop using earphones or lower the volume
when you have ringing in your ears.
Careful that headphones or earphones do not
slip into the subway doors or automatic doors.
Do not disconnect the USB cable. Do not turn
off the player while the USB cable is connected. Otherwise, the data may get lost.
Back up important data. (Note that the manufacturer is not responsible for the loss of
major data caused by the user's mistake.)
Listening to the music loud for a long time
may compromise your hearing ability.
Do not use earphones while riding bicycles
and motor cycles or driving a car.
Check the volume before using a headph one.
If headphones are used at high volume for
more than 30 minutes, it may result in noiseinduced hearing damage.
7
Page 8

Important safety instructions
5 .
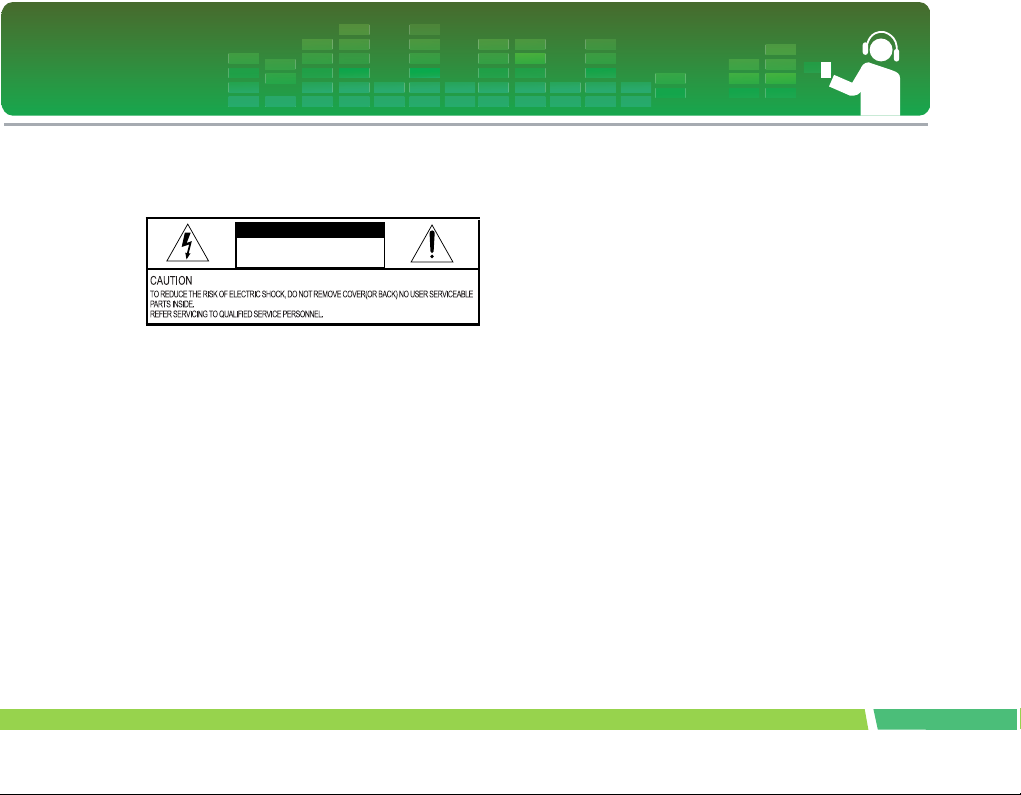
CAUTION
PLEASE READ AND OBSERVE ALL WARNINGS
AND INSTRUCTIONS IN THIS OWNER MANUAL
AND THOSE MARKED ON THE UNIT. RETAIN THIS
BOOKLET FOR FUTURE REFERENCE.
This set has been designed and manufactured to
assure personal safety. Improper use can result in
electric shock or fire hazard. The safeguards incorporated in this unit will protect you if you observe
the following procedures for installation, use, and
servicing. This unit does not contain any parts that
can be repaired by the user.
DO NOT REMOVE THE CABINET COVER, OR YOU
MAY BE EXPOSED TO DANGEROUS VOLTAGE.REFER SERVICING TO QUALIFIED SERVICE
PERSONNEL ONLY.
1.
Read these instructions.
- All these safety and operating instructions should be
read before the product is operated.
2 .
Keep these instructions.
- The safety, operating and use instructions should be
retained for future reference.
3 .
Heed all warnings.
- All warnings on the product and in the operating
instructions should be adhered to.
4 .
Follow all instructions.
- All operating and use instructions should be followed.
Do not use this apparatus near water.
- For example:near a bath tub, wash bowl, kitchen sink,
laundry tub, in a wet basement; or near a swimming
pool; and like.
6 .
Clean only with dry cloth.
- Unplug this product from the wall outlet before cleaning. Do not use liquid cleaners.
7 .
Do not block any ventilation openings. Install in
accordance with the manufactureris instructions.
- Slots and openings in the cabinet are provided for ventilation and to ensure reliable operation of the product
and to protect it from over-heating.
- The openings should never be blocked by placing the
product on a bed, sofa, rug or other similar surface.This product should not be placed in a built-in
installation such as a bookcase or rack unless proper
ventilation is provided or the manufacturer instructions
have been adhered to.
- Important Safety Instructions
8 .
Do not install near any heat sources such as
radiators, heat registers, stoves, or other apparatus (including amplifiers) that produce heat.
9 .
Do not defeat the safety purpose of the polarized or grounding-type plug. A polarized plug
has two blades with one wider than the other.A
grounding type plug has two blades and a third
grounding prong. The wide blade or the third
prong are provided for your safety.
8
Page 9
Important safety instructions
- If the provided plug does not fit into your outlet, consult
an electrician for replacement of the obsolete outlet.
10 .
Protect the power cord from being walked on
or pinched particularly at plugs, convenience
receptacles, and the point where they exit from
the apparatus.
11 .
Only use attachments/accessories specified
by the manufacturer.
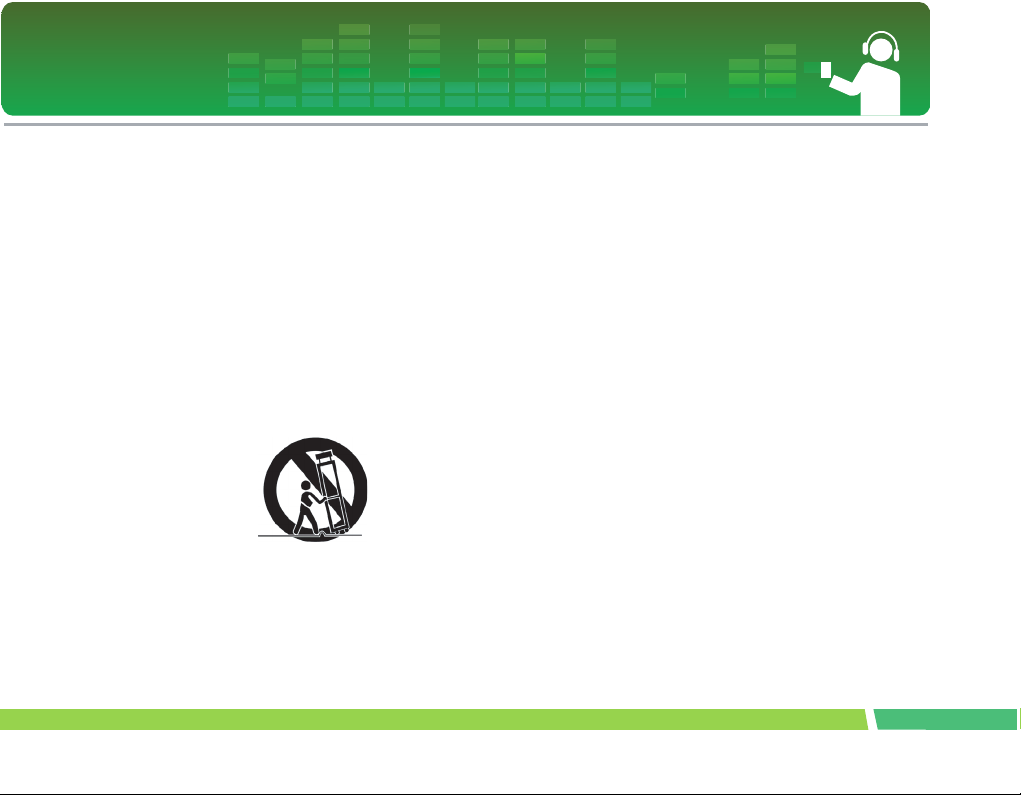
12 .
Use only with the cart, stand, tripod, bracket,
or table specified by the manufacturer, or sold
with apparatus.
- When a cart is used, use caution when moving the
cart/apparatus combination to avoid injury from tip
over.
13 .
Unplug this apparatus during lightning storms
or when unused for long periods of time.
14 .
Refer all servicing to qualified service personnel.
Servicing is required when the apparatus has been
damaged in any way, such as power- supply cord
or plug is damaged, liquid has been spilled or
objects have fallen into the apparatus, the apparatus has been exposed to rain or moisture, does not
operate normally, or has been dropped.
9
Page 10
Important safety instructions
Warning
- To reduce the risk of fire or electric shock, do not expose this aappliance to rain or moisture.
WAR NING
RISK OF ELECTRIC SHOCK
DO NO T OPEN
Caution
- The appliance is not intended for use by young children or infirm persons without supervision.
- Young Children should be supervised to ensure that
they do not play appliance.
- Use of controls or adjustments or performance of procedures other than those specified herein may
Industry Canada requirement
- This Class B digital apparatus complies with Canadian
ICES-003.
- Cet appareil numérique de la classe B est conforme
qa la norme à NMB-003 du Canada.
FCC COMPLIANCE STATEMENT
This equipment has been tested and found to comply
with the limits for a Class B digital device, pursuant to
Part 15 of FCC Rules. These limits are designed to
provide reasonable protection against harmful interference in a residential installation. This equipment
generates, uses, and can radiate radio frequency energy and, if not installed and used inaccordance with
the instructions, may cause harmful interference to radio communications. However, there is no guarantee
that interference will not occur in a particular installation. If this equipment does cause harmful interference
to radio or television reception, which can be determined by turning the equipment off and on, the user is
encouraged to try to correct the interference by one or
more of the following measures:
- Reorient or relocate the receiving antenna.
- Increase the separation between the equipment and
receiver.
- Connect the equipment into an outlet on a circuit different from that to which the receiver is connected.
- Consult the dealer or an Authorized Service Center for
help.
10
Page 11

Important safety instructions
FCC Warning
- Changes or modifications not expressly approved by
the party responsible for compliance could void the
user's authority to operate the equipment.
- This MP3 PLAYER is for use only with UL listed personal computers that have installation instructions
detailing user installation of card cage accessory.
Disposal of your old appliance
1.
When this crossed-out wheeled bin symbol is
attached to a product it means the product is
covered by the European Directive 2002/96/
EC.
2 .
All electrical and electronic products should be
disposed of separately from the municipal
waste stream via designated collection facili-
ties appointed by the government or the local
authorities.
3 .
The correct disposal of your old appliance will
help prevent potential negative consequences
for the environment and human health.
4 .
For more detailed information about disposal
of your old appliance, please contact your city
office, waste disposal service or the shop
where you purchased the product.
- The lithium battery contains lithium and can explode if
it is not properly handled of disposed of.
- Replace only with a battery of the type recommended
by LG.
- Caution: Danger of explosion if battery is incorrectly
replaced. Replace only with the same or equivalent
type recommended by LG. Dispose of used batteries
according to the manufacturer's instructions.
11
Page 12
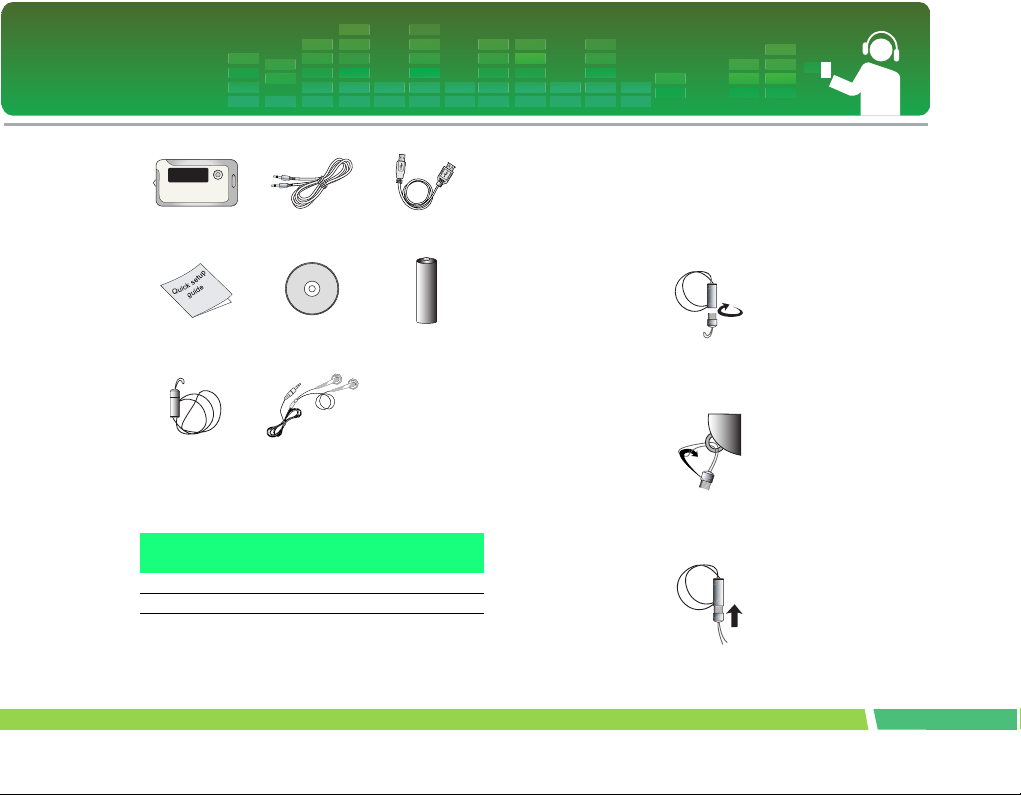
Package contents
Main body Line-in cable USB cable
Connecting the neck strap
To connect the neck strap to the unit
1.
Turn the lower part of neck strap in the direction of arrows and detach it from the upper
part.
Quick setup guide Software CD
Neck strap Earphones
- Contents of the product are subject to change without
prior notice for functional improvement.
•
Options By Model
Model Names FM Voice Recording
MF-FM12S O O O
MF-FM12E X O O
Battery
(AAA-type 1EU)
Line-
in
2 .
Put a neck strap string into the ring of the main
unit and put the lower part into the string as
arrow shows.
3 .
When the main unit and neck strap are connected, attach the lower part of neck strap to
the upper part by inserting and turning.
12
Page 13
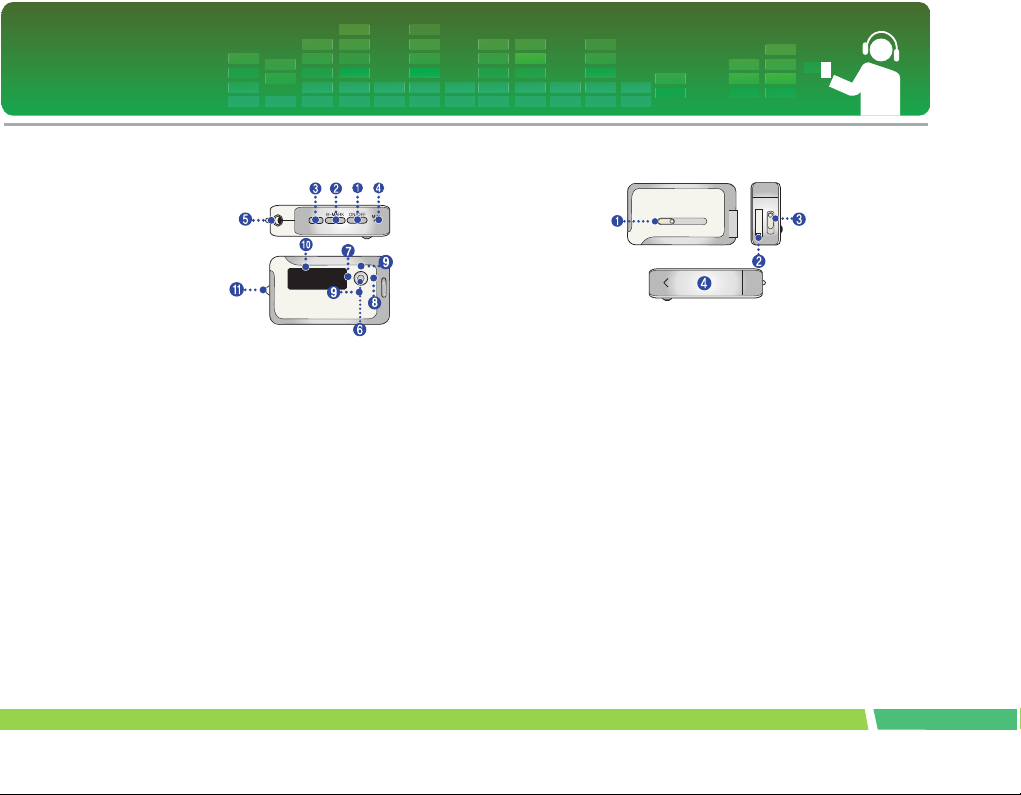
Name of each component
Front/Rear view
1.
ON/OFF/PLAY/PAUSE
2 .
B-MARK (Bookmark)/Repeat
3 .
REC
4 .
MIC (microphone)
5 .
Earphones connector
6 .
MENU/ Select button
- Goes to Home menu (upon pressing the button for two
seconds or longer.)
7 .
REW / Search button
8 .
FF / Search button
9 .
Volum e C on tr ol
10 .
Display
11 .
Neck strap holder
Side/Rear view
1.
Sliding USB bar
2 .
USB connector
3 .
HOLD
4 .
Battery Cover
13
Page 14
Installing software
Before installing the operating program
Check the specifications of your PC before using
LG portable Flash MP3 Player.
Minimum system requirements
- CD ROM Drive
- Pentium 3 or higher level CPU / 128MB or larger memory
- 100MB or larger hard disk space, 800 X 600 mode
- Hi-color (16 bit) or higher level vide card, Sound card
LG Media Center
•
Windows 2000 : Windows Media Player 9 or higher /
Direct X 8.1 or higher / Internet Explorer 6.0 or higher
•
Windows XP : Windows Media Player 10 or higher /
Internet Explorer 6.0 or higher
- Windows Media Player or Internet Explorer will be
automatically installed during installation of the LG
Media Center. Internet Explorer is only installed on an
internet enabled PC.
LG Lyrics Center
- Windows 98SE / ME / 2000 / XP
Music therapy
- Windows 98SE / ME / 2000 / XP, Windows Media
Player 9 or higher
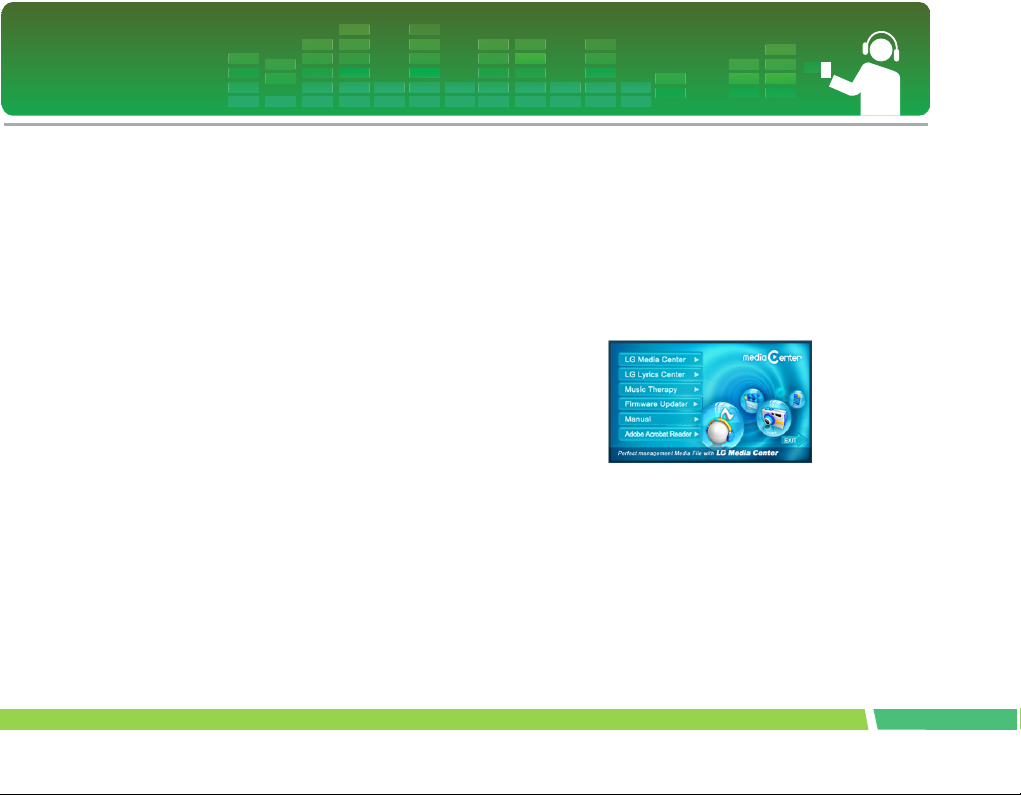
LG Media Center
1.
Insert the operation program CD into the CD
ROM.
2 .
Select the LG Media Center.
3 .
Follow the displayed instructions.
4 .
Read the License Agreement. Select the
checkbox, and click on [Next] button.
14
Page 15
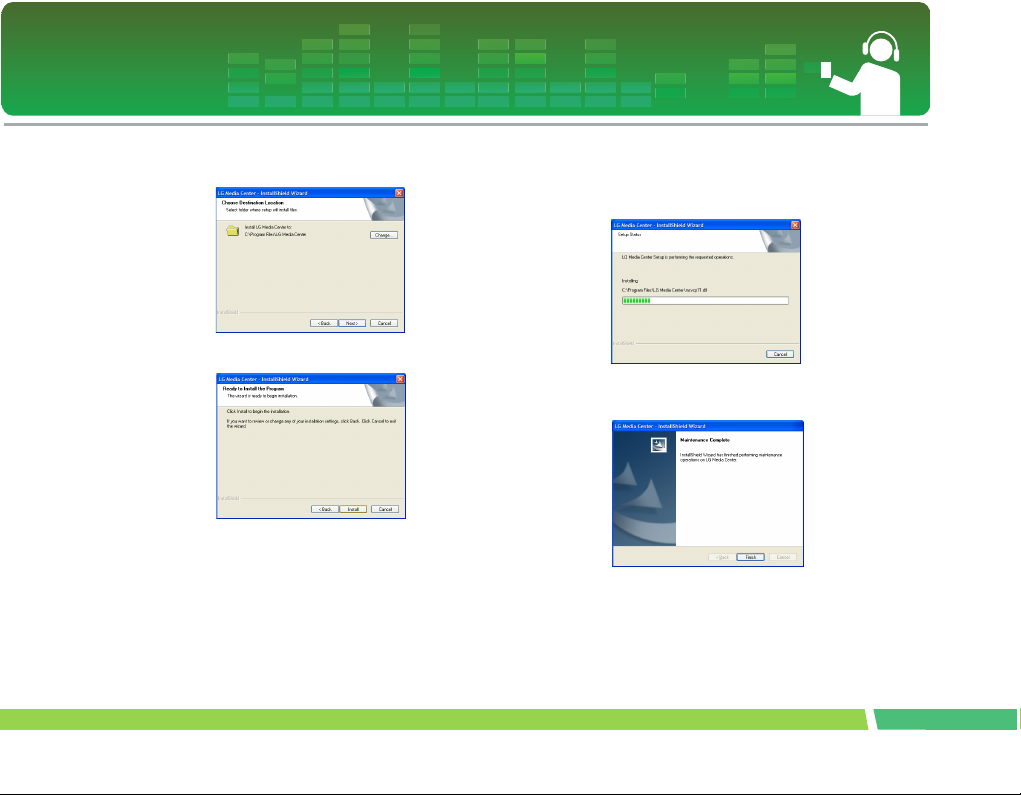
Installing software
5 .
Select the installation path, and click on [Next]
button.
6 .
Click on [Install] button to start installation.
7 .
During installation of the LG Media Center, the
user can install the Windows Media Player and
the Internet Explorer for the operating environment.
8 .
After finishing the installation, click on [Finish]
button.
9 .
Click on Start > All Programs > LG Media Center to start the program.
15
Page 16
Installing software
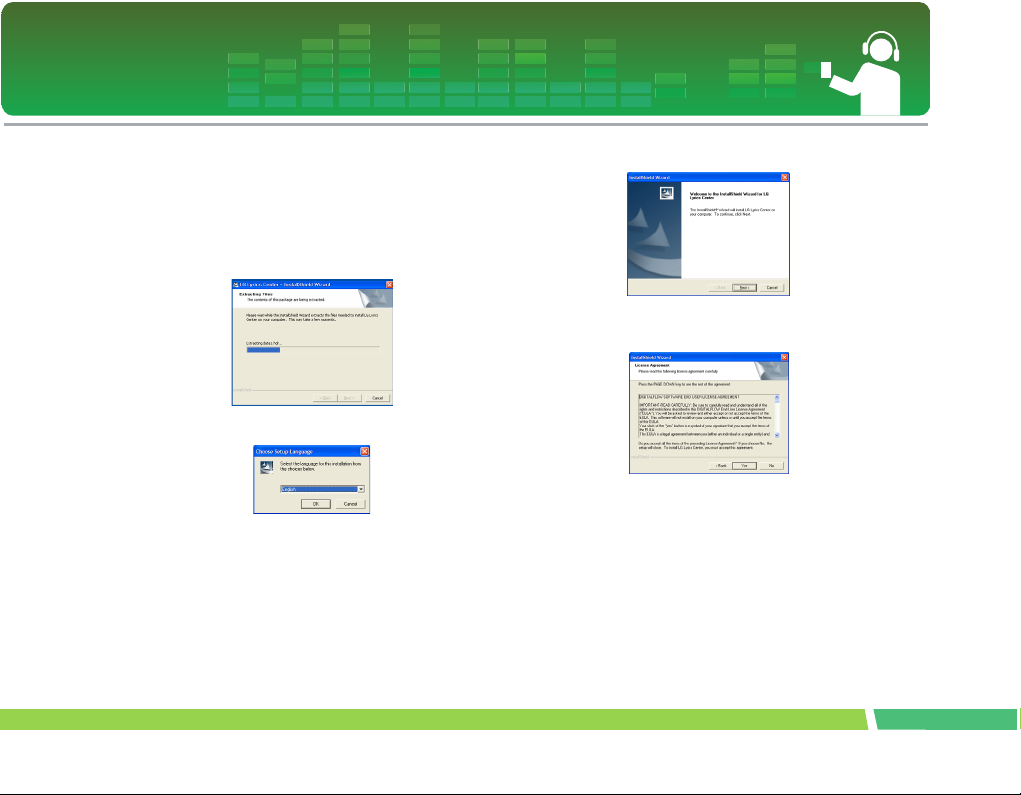
LG Lyrics Center
1.
Insert the operation program CD into the CD
ROM.
2 .
Select the LG Lyrics Center.
3 .
Follow the displayed instructions.
4 .
Select the language and click on [OK] button.
5 .
Click on [Next] button.
6 .
Read the License Agreement, and select the
checkbox.
16
Page 17

Installing software
7 .
Select the installation path, and click on [Next]
button.
8 .
Program installation will start.
9 .
Click on [Yes] button.
10 .
Windows media format installation screen will
appear. Click on [Yes] button.
17
Page 18

Installing software
11 .
Click on [OK] button to finish installation of the
program.
12 .
Click on Start > All programs > LG Lyrics Center to start the program.
Installing and running firmware updater
Before the initial use of MP3 player, install first the
firmware updater to your PC. The user can update
the firmware for addition and change of features of
the player and for functional improvement.
3Do not connect MP3 player to the PC when updating
firmware.
3You must backup your data before updating your firm-
ware. We do not take any responsibilities for data loss
if you do not backup.
1.
Insert the installation CD-ROM into you CDROM drive.
2 .
Run the firmware updater.
3 .
Installshield wizard starts. Click [Next].
18
Page 19

Installing software
4 .
Read the License Agreement. Select the
checkbox, and click on [Next] button.
5 .
Select the installation path, and click on [Next]
button.
6 .
Click on [Install] button to start installation.
19
Page 20

Installing software
7 .
After finishing the installation, click on [Finish]
button.
3You may need to restart the computer, depending on
your system environment.
8 .
Select [Start]>[All Programs]>[LGE FM12 MP3
Player]>[Firmware Download]
9 .
Connect the mp3 player to a USB port on your
computer.
10 .
Check the current firmware version, when the
LGE MP3 Firmware download window
appears.
11 .
If you want to format, check 'Format data area'
in the download option.
3All files will be deleted from the player. Back up your
data before executing this option.
3We recommend the "format data area".
12 .
Click [Start] to run the firmware updater.
3Make sure your connection is solid while updating. It
may result in the data loss or damage to the player.
13 .
When the update finishes, remove the USB
connector by 'saftely removing hardware'.
14 .
Check the updated firmware version.
20
Page 21

Installing software
Installing Win98SE Device Driver
1.
Insert the installation CD-ROM into you CDROM drive.
2 .
When you run the firmware updater, the driver
for windows 98SE will be also installed.
3 .
Reboot the PC, and connect the MP3 player to
the USB port.
4 .
The installed device driver can be used as a
portable disk in the Windows Explorer.
5 .
Check the installation status in System Properties as shown below.
In case the player is not recognized automatically on Win98SE.
1.
Connect the player to computer.
2 .
Select the LGE FM 12 in the system properties
and click [Properties].
21
Page 22

Installing software
3 .
Click the [Reinstall Driver].
4 .
Update Device Dirver Wizard appears. Click
[Next].
5 .
Select the Search for the best driver for your
device and click [Next].
6 .
Locate the folder where the installation files
are stored and click [Next].
22
Page 23

Installing software
7 .
When the installation is complete, click [Next].
8 .
The installed device driver can be used as a
removeble storage disk in the Windows
Explorer.
9 .
Check the installation status in System Properties as shown below.
23
Page 24

Installing software
Installation of the Music Therapy
The music therapy helps user refresh, sleep better,
and concentrate better with music with special
functions or good for health.
1.
Insert the operating program CD into the drive.
2 .
Select Music Therapy.
3 .
After the program is installed, a shortcut icon
will be created under Start > All Programs >
Music Therapy.
4 .
Connect the MP3 player to the USB port of the
PC.
5 .
Click on Download button. Then, the therapy
music file will be downloaded to the MP3
player.
Music Therapy files will refresh the user.
24
Page 25

Connecting to the PC
Using the removeble storage device
1.
Connect one end of the USB cable to the USB
port of the PC and the other to the USB port of
the player.
3Check whether both ends of the cable are correctly
plugged in.
2 .
Check whether a new drive has been added in
the Windows Explorer in the PC.
The drive name may differ depending on the OS.
3 .
Drag the file you want to copy to the remov-
able disk.
3Disconnecting the USB cable while the file is being
copied may cause malfunctioning of the player.
25
Page 26

Replacing firmware
Upgrading Firmware
Updating firmware manually.
3Do not connect MP3 player to the PC when updating
firmware.
1.
Check the model number at the company website, and download the latest version.
- http://www.lge.com > Support > Download > Software
2 .
Decompress the downloaded files. Then,
setup file will be displayed.
3 .
Click setup file to start the Installshield wizard.
If you have the previous version installed, it installs the
new version after deleting the previous version automatically.
4 .
Click [Next].
5 .
Read the License Agreement. Select the
checkbox, and click on [Next] button.
6 .
Select the installation path, and click on [Next]
button.
7 .
Click on [Install] button to start installation.
8 .
After finishing the installation, click on [Finish]
button.
9 .
Select Start > All Programs > LGE FM12 MP3
Player > Firmware Download to start the program.
26
Page 27

Installation and connection
Battery Info
This product dose not come with an AC adapter.
- Playback time: Max 18 hrs (In the case of MP3
128Kbps/44.1KHz, EQ Normal, Volume 15 and alkaline battery)
- When the battery is almost used up, icon will
appear.
- When the battery is at a certain level, icon will be
displayed for two seconds and the player will be turned
off.
Inserting battery
1.
Open the battery cover by sliding it down.
2 .
Insert one AAA-type battery with +/- aligned.
3 .
Close the battery cover.
Notice
3Remove battery when not used for long.
3When battery leaked, clean the chamber and replace it
with new one.
Connecting the player to the PC
1.
Press and push sliding USB button in arrow
direction to expose USB connector and insert
the connector to USB port of the PC.
2 .
When the cable is connected, the following will
be displayed on the LCD
3 .
In case of a correct connection, the icon
will be displayed on the taskbar of the PC.
The icon shapes on the task bar may differ depending
on the operating environment of the PC.
27
Page 28

Installation and connection
3 .
Disconnecting the player from the PC
This feature is to safely remove the player from the
PC after uploading or downloading the files.
1.
Double-click on Remove Hardware icon
on the taskbar of the PC.
2 .
Click on [Stop] button when the window
appears.
Click on [OK] button.
4 .
After a message that the large-capacity USB
storage can be safely removed is displayed,
remove the player from the PC.
3If the USB cable is disconnected while the player is
connected to the PC to store or delete the file, the data
may get lost.
28
Page 29

Basic operation
Turning on/off the power
1.
Press ON/OFF button for more than 1 second
to turn on, and repeat it to turn off for more
than 3 seconds.
It may take time to load upon rebuilding.
Lock feature
This feature is to lock all feature buttons to prevent
malfunctioning of the player.
1.
Push button in arrow directions to lock
the player.
- Upon locked status, will be displayed on the LCD.
Upon pressing of each button, will appear for two
seconds and disappear.
2 .
Push button to the opposite direction
of the arrow key and unlock the device.
- icon will appear and then disappear.
Volume control
1.
Control the volume by moving the volume control button to the direction of + or -.
- The volume level can be adjusted by 31 steps. (Min:00
~ Max:30)
- Pressing and holding the button will increase or
decrease the volume gradually.
- The default volume is 15.
If you leave the display for three seconds, the Volume
will disappear.
Volume automatically resets to 20 when restarted if
your player's volume level has been set to higher than
21.
29
Page 30

Basic operation
Home menu screen
1.
Press and hold MENU button to open home
menu.
2 .
Press FF/REW button to select the mode.
3 .
Press MENU button to display the selected
mode.
- The initial screen consists of total five modes.
- Home menu appears if MENU button is pressed for
longer than 2 seconds during Play / Stop mode.
30
Page 31

Playing music files
Music playing screen
1.
Play/Pause display
2 .
Song Information
3 .
Volume display
4 .
Play mode display
5 .
Playback time (upon playing)
6 .
Song play order display
7 .
EQ
8 .
Bookmark/A-B (Repeat)
9 .
Sleep Mode
10 .
Battery status
Play
1.
Press and hold MENU button to open home
menu.
2 .
Push FF/REW button to select the [Music]
mode.
3 .
Pressing MENU button will open Music Play
screen.
4 .
Press PLAY/PAUSE button to play the music
files.
Pause
1.
Press PLAY/PAUSE button once to pause
while playing.
- Even in Pause/Stop status, song information can be
displayed.
31
Page 32

Playing music files
2 .
Press PLAY/PAUSE button again to resume
playing.
Playing mode
1.
Press REC button shortly while paused or
while playing back.
2 .
Upon each pressing, the Play mode will
change.
Description GUI feature
Play all
Repeat all
Random repeat
Repeat One
Play Folder
Folder repeat
Folder Random
Repeat
Plays all songs.
Repeats all songs.
Randomly repeats all songs.
Repeats one song.
Play all songs in a folder.
Repeat all songs in a folder.
Randomly repeat all songs in a folder.
Speed search of the play list
1.
Push FF/REW button for two seconds or
longer to fast search.
- You may play a song by jumping to a particular point.
To search the next or previous music file
1.
Push FF/REW button shortly to search the
next or previous music file.
2 .
Push FF/REW button shortly to the left five
seconds after playing starts. Then, the current
song will play from the beginning.
Playback time information
1.
Press REC button for two seconds or longer
while paused or while playing back.
32
Page 33

Playing music files
2 .
You can press the button to flip between playback time mode and remaining time mode.
A-B Repeat
A-B Repeat feature is only applicable to a song
which is being played.
1.
Press B-MARK button shortly to set the starting point during playing.
- icon will appear on the display.
2 .
To select the ending point, shortly press B-
MARK button again.
- icon will appear on the display, and the selected
node will be repeated.
3 .
To cancel the feature, shortly press B-MARK
button again.
Bookmark feature
1.
Press B-MARK button for two seconds or
longer to set the Bookmark.
- icon will appear.
The user cannot use the A-B Repeat feature when the
Bookmark feature is set.
2 .
Press B-MARK button shortly while listening to
another song or another part of the song.
- It automatically searches the bookmarked point and
plays.
3 .
To cancel the bookmark, press B-MARK button
for two seconds or longer.
- icon will disappear.
Playing the music list
The user can easily search or play files using the
browser.
1.
Press MENU button shortly in the music mode.
Then, the browser screen will appear.
33
Page 34

Playing music files
2 .
Go to the item using Vol +/- button in the
browser screen, and press MENU, PLAY/
PAUSE, or push FF button shortly.
- Press MENU button for two seconds or longer to go to
Home menu.
Playing the recording list
1.
Press MENU button shortly in the music mode.
2 .
Choose a folder among FM, LINE-IN, or
VOICE folders.
3 .
Navigate to the file you want to play in a particular folder and play it by pressing MENU or
PLAY/PAUSE or push FF button.
- F001.MP3: Radio recording file format
- V001.MP3: Voice recorded file format
- E001.MP3: External record file format
Maximum number of files to play
- You can play up to 400 files.
Maxium number of folders to be created
- You can create up to 50 folders.
When the files or folders exceed the above limit, the
file or folder exceeding the limit don't appear in the
list.
File error
When you select a file which cannot be played, the
following message will be displayed.
Music therapy
1.
Press MENU button shortly while the player is
playing the music or pausing.
2 .
Press button to navigate to the Music Therapy
folder and shortly press PLAY/PAUSE or push
FF button.
3 .
Select the file, and press MENU, PLAY/
PAUSE or push FF button to play.
- Sound sleeping music: To help the user sleep sound
- Concentration music: To help use to focus better
- Refreshing music: To help user relieve and take a rest
- Vitalizing music: To vitalize and energize the user
See page 24 to reinstall the Music Therapy file.
34
Page 35

FM radio reception (Option)
2 .
FM radio reception screen
1.
Channel display (only in Preset mode)
2 .
Mono/Stereo display
3 .
FM radio frequency display
4 .
Volume Information
5 .
Sleep mode
6 .
Battery status
Listening to the FM radio
1.
Press MENU button to select [Radio] mode.
Press MENU button to display the FM radio
reception screen.
Preset/Non Preset Mode
1.
Press MENU button shortly while listening to
the radio.
- Preset mode is set.
- Preset mode: When the existing radio channels are
already set, it is called 'preset mode'.
- display appears.
2 .
Shortly press the MENU button once again.
- Non-Preset mode is set.
- Non-Preset mode: When the existing radio channels
are not already set, it is called 'Non-preset mode'.
- display disappears.
3 .
No Preset channels are stored when MENU
button is pressed in Non-Preset mode.
- will appear and then disappear.
35
Page 36

FM radio reception (Option)
Searching the FM radio stations
Manually searching the FM radio stations
1.
In Non-Preset mode, shortly pushing FF/REW
button increase/decrease the frequencies by
0.05 MHz.
2 .
In Preset mode, shortly pushing FF/REW button will increase/decrease the frequencies by 1
preset.
Automatically searching the broadcasting
stations
1.
In Non-Preset mode, push FF/REW button for
longer than 2 seconds to find the available
radio station automatically.
2 .
To cancel the automatic search, push REW
button during Forward search and push FF
button during Rewind search.
Reception may be weak in some areas.
Earphones function as an antenna. Earphones of oth-
er manufacturers do not guarantee optimal perfor-
mance.
Storing FM radio frequencies
Automatic channel setting
1.
Press REC button for two seconds or longer to
search and store radio channels in Non-Preset
mode.
- icon will appear and the channels will be stored.
In an area with weak reception, the detected channels
may be less than 20.
2 .
Press REW button to stop automatic search.
Maually channel setting
1.
In a Non-Preset mode, select a frequency to
store as a Preset channel and press and hold
B-MARK button.
2 .
When a browser screen appears, select a
channel with Vol +/- button and press MENU
button shortly.
36
Page 37

FM radio reception (Option)
3 .
When a message appears that "Save as a
CH", select Yes and shortly press the MENU
button.
4 .
Stored channels can be scanned in a browser
screen.
Deleting channels
1.
While listening to the radio, press B-MARK
button for 2 seconds or longer to delete the
current channel.
2 .
When a message appears that "Delete this
CH", select Yes and shortly press the MENU
button.
- When a channel is deleted, we can still receive other
channels. When there is no channel left, icon will
blink.
Set/Cancel Mute
1.
Press PLAY/PAUSE button during listening to
radio to mute the sound.
- icon will appear and the sound will become mute.
2 .
Press any button to cancel the Mute.
- icon will disappear.
Stereo/Mono switching
Shortly press the B-MARK button.
- Press the button to toggle between and
.
37
Page 38

FM radio reception (Option)
3 .
Recording FM radio broadcasting
1.
Press REC button to start recording while listening to the radio.
By pressing PLAY/PAUSE button again, the
user can resume recording.
4 .
Press REC button shortly again to end recording.
- icon will appear and then disappear.
- icon will appear.
- Files will be stored in FM folder in a format
'F001.MP3'.
If the memory is not enough to record, [Memory full
not record] will appear. In this case, delete the files
and secure the memory space.
2 .
Press PLAY/PAUSE button to pause record-
ing.
- icon will appear.
Listening to the radio recorded file
1.
Press and hold the MENU button to select the
music mode.
2 .
Press MENU button shortly while in music
mode.
3 .
Select the FM folder from the browser menu.
4 .
Choose a recording file you want to hear and
shortly press the MENU, PLAY/PAUSE or
push FF button.
- Files will be stored in FM folder in a format
'F001.MP3'.
38
Page 39

Recording
Recording screen
1.
Recorded time display
2 .
Recording progress display
3 .
Recorded file name display
4 .
Recording quality display
5 .
Sleep mode
6 .
Battery status
7 .
Recording Status Display
Voice and hold
1.
Press MENU button to open home menu.
2 .
Push FF/REW button to select the [Voice]
mode.
3 .
Press MENU button in [Voice] mode.
4 .
Press REC button to start recording.
- icon will appear, and then recording will start.
- The recorded files will be stored in VOICE folder in
V001.MP3 format.
If the memory is not enough to record, [Memory full
not record] will appear. Then, the data will be automatically stored and recording will stop.
The higher the quality is, the shorter the recording
time is.
5 .
To stop recording, press REC button again.
- icon will appear and then disappear.
39
Page 40

Recording
Listening to the voide recorded file
1.
Press and hold the MENU button to select the
music mode.
2 .
Press MENU button shortly in music mode.
3 .
Select the VOICE folder from the browser
menu.
4 .
Choose a recording file you want to hear and
shortly press the MENU, PLAY/PAUSE or
push FF button.
- Files will be stored in V001.MP3 format.
40
Page 41

External Input
Connecting to an external device
1.
Connect the Line-in cable to the line-out port of
the external device and to the line-in port of the
MP3 player.
Recording through an external device
1.
Press and hold the MENU button to open
home menu.
2 .
Push FF/REW button to select [line-in] mode.
3 .
Press MENU button shortly in the [Line-in]
mode.
4 .
Press REC button to start recording.
- icon will appear, and then recording will start.
- The recorded files will be stored in LINE-IN folder in
E001.MP3 format.
If the memory capacity is not enough, [Memory full not
record] message will appear. The file will be automatically stored and the recording will stop.
When encoding files, set the volume of Line-in prop-
erly.
If the volume is too high or too low, the quality of en-
coded files might turn out to be bad.
- The higher the quality is, the shorter the recording time
is.
5 .
To stop recording, press REC button again.
- icon will appear and then disappear.
41
Page 42

External Input
Recording
quality
96 Kbps About 11.5 hours
128 Kbps About 8.5 hours
192 Kbps About 5.5 hours
Maximum recording time (for 512
MB storage product)
Playback of external recorded file
1.
Press and hold MENU button to select the
music mode.
2 .
Press MENU button shortly while in music
mode.
3 .
Select the LINE-IN folder from the browser
menu.
4 .
Choose a recording file you want to hear and
shortly press the MENU, PLAY/PAUSE or
push FF button.
- Files will be stored in E001.MP3 format.
42
Page 43

Setting lower features
Setup mode screen
43
Page 44

Setting lower features
Operating Setup feature
1.
Press MENU button to open home menu.
2 .
Push FF/REW button to select the [Setting]
mode.
3 .
Press MENU button shortly to display the sub
menu.
- Push FF/REW button to navigate between menus.
- Press MENU button to display the lower feature setting screen.
- Push REW button to go to the upper menu without setting the feature in the sub menu.
- Press MENU button for two seconds or longer to go to
Home menu.
- Press MENU button shortly to go to the upper menu
after setting the feature.
Playing mode
You can select the play mode you want.
Description GUI feature
Play all
Repeat all
Random repeat
Repeat One
Play Folder
Folder repeat
Folder Random
Repeat
Plays all songs.
Repeats all songs.
Randomly repeats all songs.
Repeats one song.
Play all songs in a folder.
Repeat all songs in a folder.
Randomly repeat all songs in a folder.
Sound effect
EQ: The user can set the sound effect.
AUTO EQ, NORMAL, XBass, ROCK, POP, JAZZ,
CLASSICAL, DANCE, HIPHOP/RAP, R&B/SOUL,
LIVE
- NORMAL : Basic sound quality with no sound effect.
44
Page 45

Setting lower features
- XBass : Powerful sound with excellent dynamics.
- ROCK : Strong but smooth sound.
- POP : Realistic sound with enhanced mid-range frequency.
- JAZZ : Sweet and feeble sound.
- CLASSICAL : Detailed sound with enhanced midrange frequency.
- DANCE : well-balanced sound between high and low
frequencies
- HIPHOP/RAP : Sound with enhanced low and high
frequency
- R&B/SOUL : Detailed sound with enhanced high frequency
- LIVE : Realistic sound with enhanced mid-range and
high frequency
Screen layout
ID3 tag: Displays information of the music file.
- The user can select [On] or [Off].
- In case the user selects [On], the artist and the title of
the ID3 tag will be displayed.
View Lyrics: Displays the lyrics of the music file.
- The user can select [On] or [Off].
- You can view the lyrics only if the files include lyrics.
Contrast: The user can select the brightness of the
lighting.
- The user can set between 0 and 9.
Backlight : The user can set the lighting time.
- The user can select 5 Sec, 10 Sec, 30 Sec, 1 MIN, or
On.
The light will not be turned off upon display of lyrics
during the music is played.
Language: The user can set the language.
- English, Japanese, Traditional Chinese, Simplified
Chinese, Korean, Russian, French, Portuguese, German, Spanish.
- Select Home > Setting > Display > Language to
change the language setting.
Radio (Option)
45
Page 46

Setting lower features
Reception area: The user can set the reception
area.
- The user can select [Japan] or [Others].
Record
Recording quality: The user can set the quality of
the recorded file.
- The user can set 96Kbps, 128Kbps, up to 192Kbps.
Time
Auto power off: The player will be automatically
turned off when the user does not use the function
for a certain time while the player is not playing or
recording a file.
- The user can select Off, 30 SEC, 1 MIN, 5 MIN, or 10
MIN.
The Automatic Off feature does not function in the ra-
dio mode.
Sleep reservation: When the defined time passes,
the player will be automatically turned off.
- The user can select Off, 10 MIN, 30 MIN, 1 Hour, or 2
Hours.
If the user sets the sleep reservation, the player will
automatically store files and turn off at the reserved
time.
After the player is turned off at the reserved time, the
sleep reservation will be automatically cancelled.
General setting
Fade in: The user can gradually increase the volume to protect ears.
- The user can select [On] or [Off].
Initialize setting: The user can initialize the setting
of the player.
- The user can select Yes or No.
46
Page 47

Setting lower features
System info : The user can check product information.
- The firmware version, the remaining memory space,
and the total memory capacity are displayed.
Running Recovery
3Running a recovery will result in a total loss of data.
Make sure to always back up important data. We do not
take any responsibilities for data loss. Remove the battery to reset the system for the followings happens.
Run a recovery at the same symptoms since then.
- PC and player is not recognized properly
- Text appears broken and somewhat unreadable
onscreen.
- Player does not work
- You cannot download or upload files
1.
Select Start > All Programs > LGE FM12 MP3
Player > Firmware download.
2 .
When the screen below appears, connect the
mp3 player to the USB port of the PC while
pressing the PLAY/PAUSE button.
3 .
Release the PLAY/PAUSE button when the
device is recognized properly as seen in the
progress bar completion status.
47
Page 48

Setting lower features
4 .
To format the device, check the "Format data
area" in the download option when the update
screen appears.
3All files will be deleted from the player. Please back up
your data before executing this option.
- We recommend the "format data area".
5 .
Click [Start] to run the Recovery.
6 .
Use the MP3 player when the recovery fin-
ishes.
48
Page 49

Using the application program
LG Media Center
The LG Media Center program is an integrated data
management program development for users to
more conveniently use the Flash MP3 player.
Features of the LG Media Center
- With the Media Library, the user can efficiently manage music files and download them to the MP3 player.
- Downloaded files are stored in a folder hierarchically.
Music > Artist > *.mp3
- You can create folder (50 folders maximum).
- To disable folder hierarchy, select No Hierarchy in the
Synchronization > Enable hierarchy menu item.
Music > *.mp3
Auto Firmware updating
Connect the player to the PC where the LG Media
Center is installed to download a new version of
firmware.
Functions only in the Internet-connected PC.
1.
Connect one end of the USB cable to the USB
port of the PC with the LG Media Center
installed and the other to the USB port of the
player.
2 .
Check whether a new drive has been added in
the Windows Explorer in the PC.
3 .
The LG Media Center will compare the firmware versions of the player and the server. If it
detects a new firmware version, it asks the
user whether to update the version.
4 .
Check the current firmware version, when the
LGE MP3 Firmware download window
appears.
5 .
If you want to format, check 'Format data area'
in the download option.
3All files will be deleted from the player. Please back up
your data before executing this option.
- We recommend the "format data area".
6 .
Click [Start] to run the firmware updater.
3Make sure your connection is solid while updating. It
may result in the data loss or damage to the player.
49
Page 50

Using the application program
7 .
When the update finishes, remove the USB
connector by 'safely removing hardware'.
8 .
Turn on the MP3 player, and check the
updated version of firmware.
LG Lyrics Center
The LG Lyrics Center program can automatically/
manually store the lyrics in the music file. It also
can download/upload mp3 files to/from the portable device and control the volume.
The user can store lyrics of the several songs at
the same time. Stored files will be connected without requiring a separate program or tool, and can
be downloaded to a large-capacity storage. The
user can make volumes of several MP3 files same.
- A Windows Explorer-like UI providing maximum convenience for users.
- Before you download lyrics, you must check the model
number and make sync with PC to enable lyrics to be
displayed properly.
Run the program, and click on F1 Help. The user can
view the Help menu.
View the manual
PDF document The user needs the Adobe Acrobat
Reader to read the manual.
Installation of the Adobe Acrobat Reader
Click on Acrobat Reader for installation.
- Read the user manual.
50
Page 51

Troubleshooting
Q :
The player is not turned on.
A :Check whether the battery is remaining.
Q :
The screen is blur.
A :Avoid direct sun rays and adjust the brightness.
A :Check the LCD brightness.
Q :
The button does not function.
A :Check whether the Hold feature is active.
Q :
The noise is severe during listening to the
radio, and the reception is poor.
A :As the earphones function as an antenna, make sure
it has any damage.
A :Change the directions of the player and the ear-
phones gradually.
Q :
After the firmware is updated, the player
is not normally functioning.
A :Back up the data, and format the player.
Q :
Sometimes files get downloaded but
sometimes they don't.
A :Make sure the USB port is operational.
Q :
Downloaded file or folder does not
appear.
A :The maximum number of files or folder this player can
play are 400 and 50 respectively. The file or folder
exceeding the limit don't appear in the list. Delete
some music files or folders to see the files which are
not previously listed.
51
Page 52

Specifications
Typ e Item Specifications
Memory
PC
General specifications
Audio
FM radio (Option)
Power supply Battery AAA-sized battery (DC 1.5V)
Playback time Maximum 18 hours (for 128Kbps/44.1 KHz, EQ normal, Vol 15)
Files Audio MP3 / WMA / WAV
Display Display Mono (Negative)
Capacity 256MB / 512MB / 1GB
File system FAT12 / FAT16 / FAT32
OS for MP3 Player Device Win98SE / ME / 2000 / XP
OS for LG Media Center Win2000 / XP
OS for LG Lyrics Center Win98SE / ME / 2000 / XP
Interface USB2.0 Full Speed
Dimensions 58(W) X 36(H) X 17.5(D)
Weight 27g (with battery) / *Depends on t he product model.
Operating temperature -5 C + 45 C
Frequency response 20Hz ~ 20kHz
Signal-to-noise ratio 90dB
Channel seperation 33dB (1kHz)
Maximum output
Frequency range 76.0~108.0MHz
Signal-to-noise ratio 38dB (Mono)
Channel seperation 25dB (1kHz)
Antenna Earphones antenna
7.5mW + 7.5mW
52
Page 53

Specifications
Supported File Spec
MP3 Decoder
- Support MP3 decoding including Variable Bit
Rate(VBR)
- : Support both Stereo and Mono
- (s) : Only Stereo
- (m) : Only Mono
53
Page 54

Specifications
MP3 Encoder
- 44.1KHz, (96Kbps, 128Kbps, 192Kbps) Spec
54
Page 55

Specifications
WMA Decoder
- Ver 4x, 7, 8 ( ) Ver 9 ( ) (ASF not supported)
WAV Decoder
http://www.lge.com
Information related to the product is available at
this site.
- By updating the firmware, the user can improve the
performance of the product.
55
Page 56

 Loading...