


SPORTS MP3 PLAYER
OWNER’S MANUAL
MODEL: MF-FD150TB/TN/TS
MF-FD150EB/EN/ES
Please read this manual carefully before
operating your set.
Retain it for future reference.
Designs and specifications are subject to
change without notice for improvement.
The working life of this product is 7 years
since the date of purchase.
Important Safety Instructions
3
Contents
2
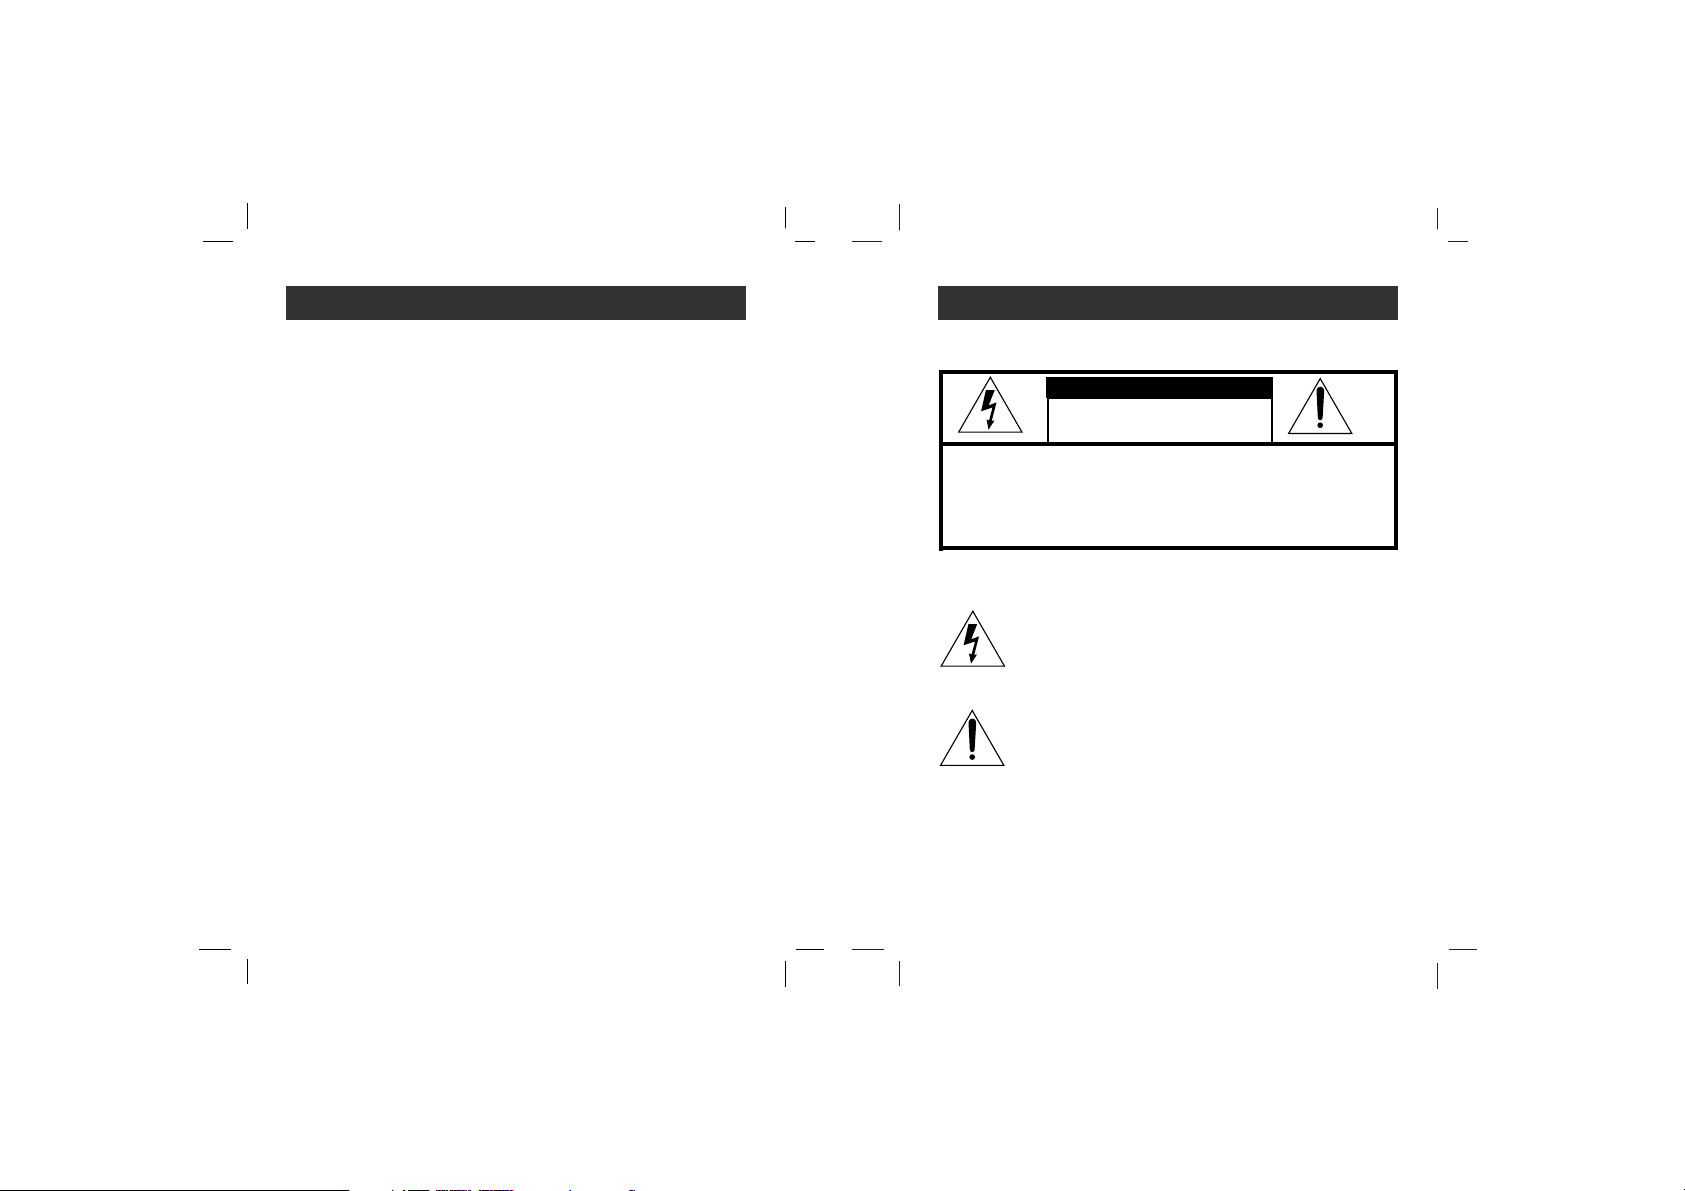
To reduce the risk of fire or electric shock, do not expose
this appliance to rain or moisture.
CAUTION
TO REDUCE THE RISK OF ELECTRIC SHOCK, DO NOT
REMOVE COVER (OR BACK) NO USER SERVICEABLE
PARTS INSIDE.
REFER SERVICING TO QUALIFIED SERVICE PERSONNEL.
RISK OF ELECTRIC SHOCK
DO NOT OPEN
WARNING
Important Safety Instructions . .3
Precautions . . . . . . . . . . . . . . . .4
Battery Life . . . . . . . . . . . . . . . . . .4
Player features and controls . .5-9
Accessories . . . . . . . . . . . . . . . . .5
Top/ Front/ Bottom Panel . . . . . . .6
Rear Panel/ Side Panel . . . . . . . . .
7
LCD . . . . . . . . . . . . . . . . . . . . . . .8
To install Battery . . . . . . . . . . . . . .9
System Requirements . . . . . . .10
Operation Circumstances . . . . . .10
What is “MP3 Player”? . . . .11-12
What is “WMA”? . . . . . . . . . . .12
How to use your MP3 Player . .13
Installing Software . . . . . . .14-15
To install Automatically . . . . . . . .14
To install Manually . . . . . . . . . . .15
Connecting Data In/Out Cable .16
Using MP3 Explorer . . . . . .17-37
Using MP3 Explorer . . . . . . . .17-18
To format memory . . . . . . . . .19-21
To download files . . . . . . . . . .22-25
To upload files . . . . . . . . . . . .26-27
To delete the files on MP3
Explorer . . . . . . . . . . . . . . . . .28-30
Firmware Upgrade (OS update) .
31-33
To check version information . . . .34
MP3 Explorer update . . . . . . .35-36
To select MP3 Explorer menu
language . . . . . . . . . . . . . . . . . .37
Before Operation . . . . . . . .38-39
Power on/off . . . . . . . . . . . . . . . .38
To use Earphone . . . . . . . . . . . ..38
Hold Function . . . . . . . . . . . . . . .39
To adjust Volume . . . . . . . . . . . .39
Basic Operation . . . . . . . . .40-41
To play files . . . . . . . . . . . . . . . .40
To pause files . . . . . . . . . . . . . . .40
To stop files . . . . . . . . . . . . . . . .40
To skip the files . . . . . . . . . . . . . .41
To play rewind search or fast
forward search the files . . . . . . . .41
Advanced Operation . . . . . .42-50
Book Mark Function . . . . . . . . . .42
Local Repeat Function . . . . . . . .42
To select the MENU . . . . . . . . . .43
EQUALIZE Function . . . . . . . . . .43
PLAY MODE Function . . . . . . . .44
To select the menu language . . .45
BACKLIGHT Function . . . . . . . . .45
CONTRAST Function . . . . . . . . .46
POWER SAVING Function . . . . .46
To delete files on the MP3 Player
.47
To check memory and version
information . . . . . . . . . . . . . . . . .48
COUNTER Function . . . . . . .48-49
RETURN Function . . . . . . . . . . .50
Voice Recording . . . . . . . . . . . . .50
Radio Operation . . . . . . . . .51-54
Auto memory . . . . . . . . . . . . . . .51
Listening to the radio frequency .51
Presetting the radio frequency . .52
Erasing a preset radio frequency .53
Radio recording . . . . . . . . . . . . .54
Troubleshooting . . . . . . . . . . . .54
Specifications . . . . . . . . . . . . .55
The lightning flash with arrowhead within an equilateral
triangle is intended to alert the user to the presence
of uninsulated “dangerous voltage” within the product’s
enclosure of sufficient magnitude to constitute a risk
to persons.
The exclamation point within an equilateral triangle is
intended to alert the user to the presence of important
operating and maintenance (servicing) instructions in
the literature accompanying the appliance.
The graphical symbols marked on the bottom or back of the
set mean the following:
To avoid electrical shock; do not open the cabinet. Refer
servicing to qualified personnel.Shock hazard-do not open.
CAUTION
Use of controls or adjustments or performance of procedures
other than those specified herein may result in hazardous
radiation exposure.
Player features and controls
5
Precautions
4
• If you plan not to use the main unit for a long time, remove the
battery to avoid any damage caused by battery leakage and
corrosion.
• Avoid listening to the main unit while driving or operating any
motorized vehicle.
• Do not use the main unit in places which are extremely hot,
cold dusty or humid.
• Unlock the HOLD switch before operating.
• Do not drop it while using this product.
Battery MP3/WMA Playback
Alkaline battery (1EA) About 10 hours
For preventing the electrostatic discharge during use, refer to
below conditions.
• If it is possible, please avoid operating this device under dry
condition.
• When this device stops during normal operation, please
replace the battery.
Battery life maybe different according to the using condition,
manufacture corporation and production years and months.
Charge the rechargeable battery or replace the battery with a
new one in the following situations.
The “ ” indicator appears.
“Low Battery” appears about 1 second in the LCD and then
disappears.
The operation buttons do not work.
To save the battery life (
if you will not use the COUNTER
function), cancel the COUNTER function.
Battery Life
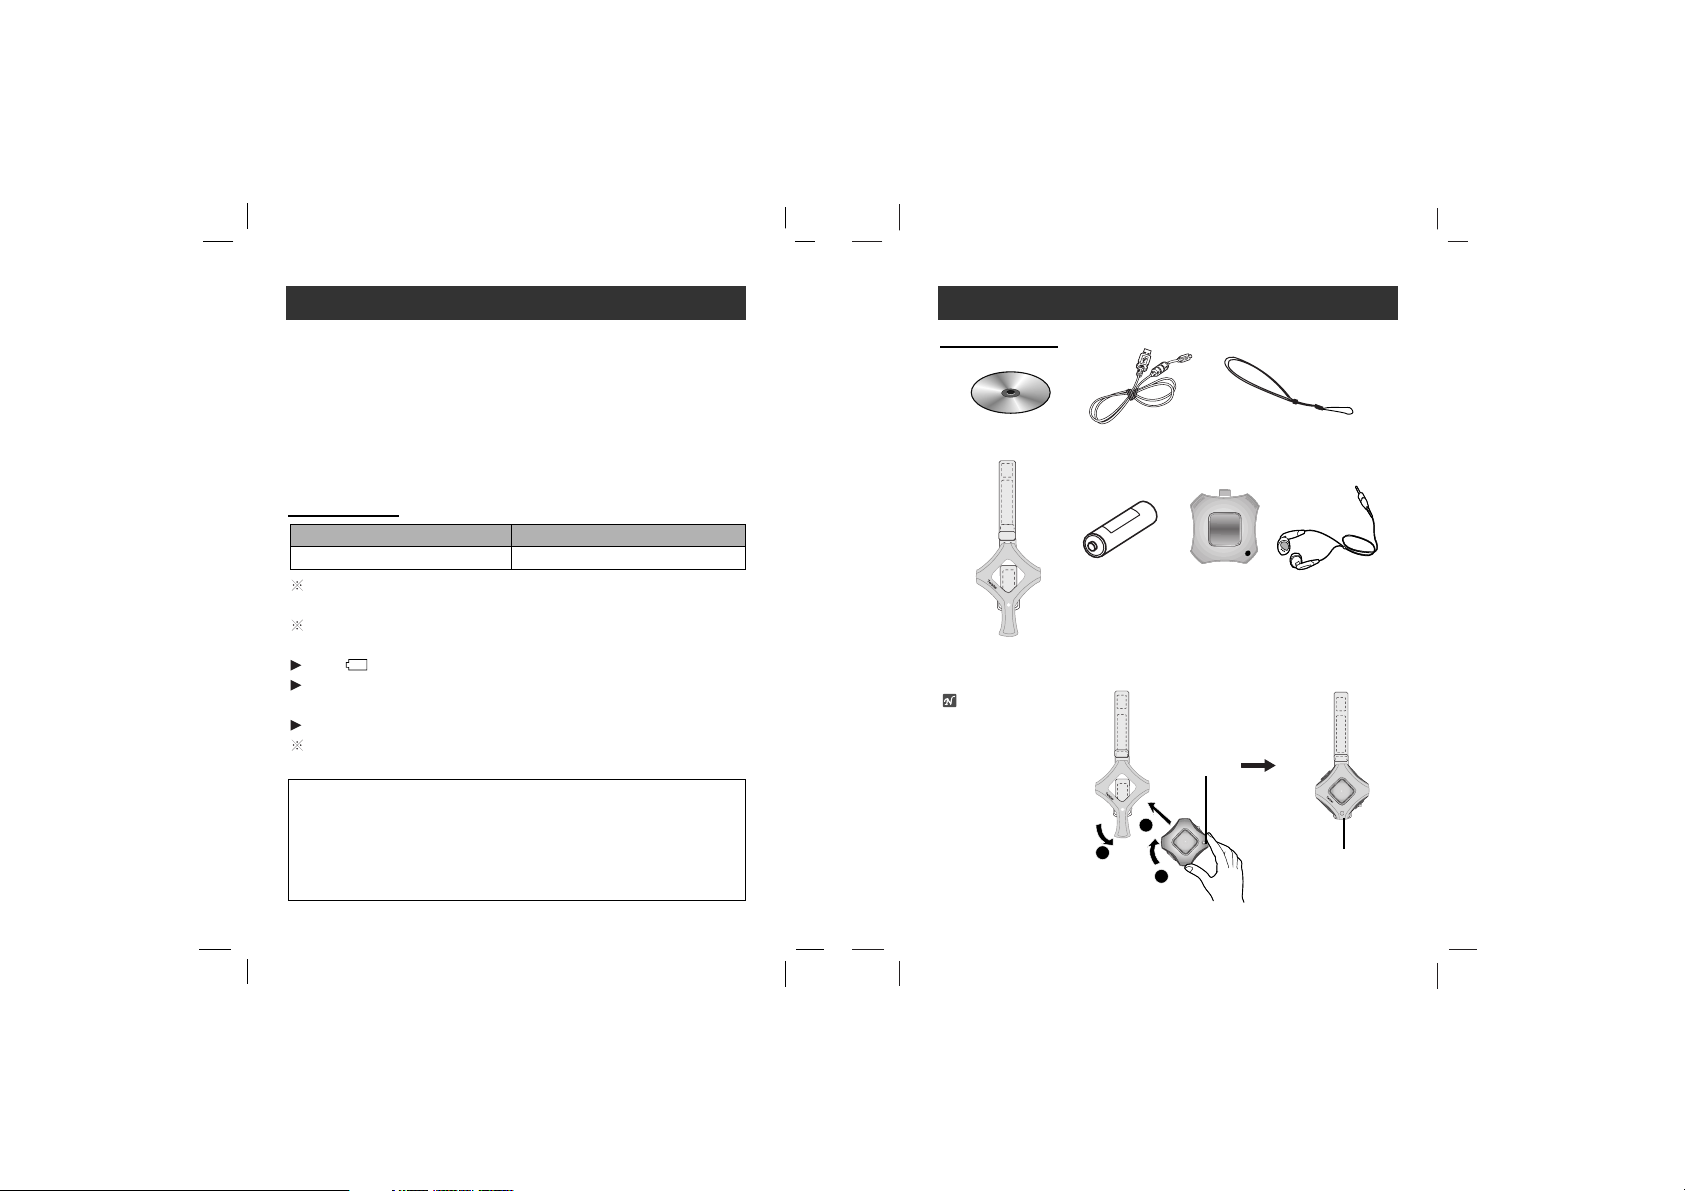
Accessories
Installation CD
Data In/Out cable
Earphone
Battery (AAA size)
Arm Band
Carrying case
Necklace
1
2
3
Note
When you use the arm
band, follow the procedure right.
PLAY/PAUSE/
STOP button
PLAY/PAUSE/
STOP button
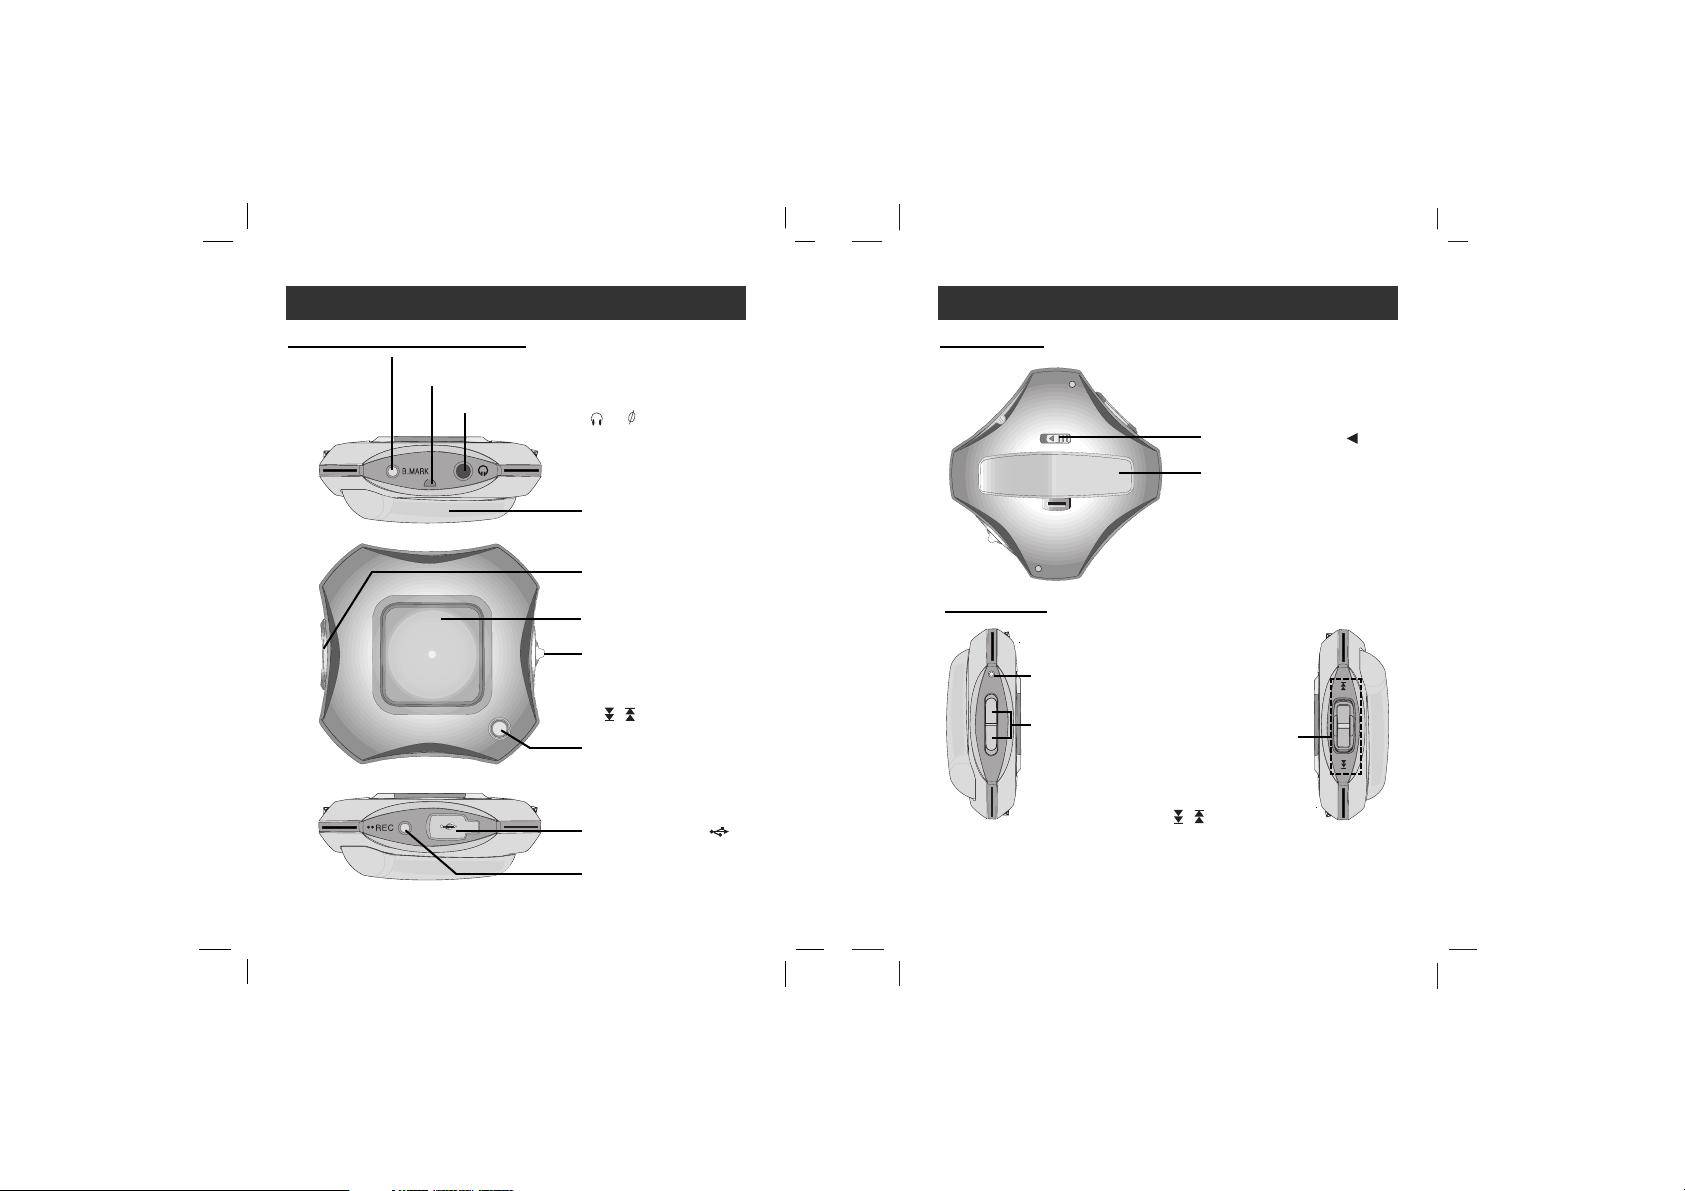
Player features and controls
7
Player features and controls
6
Rear PanelTop/ Front/ Bottom Panel
PLAY/PAUSE/STOP
button (Power on/off)
LCD
Earphone Jack ( ) : 3.5mm
Book Mark (B.MARK) button (Tuner preset memory)
• Record (REC) button
• Counter on/off
USB Connector ( )
•
MENU Dial (FM/MP3
function selection)
• SKIP/SEARCH
( / ) Dial
Necklace connector
+
Hold Switch (HOLD )
Battery Cover
Side Panel
Volume (-/+)
button
Microphone (MIC)
•
MENU Dial
(FM/MP3 function
selection)
• SKIP/SEARCH
( / ) Dial
Battery cover
Volume (-/+) button
+
MIC
+
VOL.
-
Player features and controls
9
To install Battery
11
Open the battery cover.
22
Insert the battery.
Make sure to match the + and - on the batteries to the
marks inside the battery compartment.
33
Close the battery cover.
Notes
• Improper use of batteries may cause battery leakage and
corrosion.
• If battery leakage occurs, wipe the battery liquid from the
battery compartment, then insert new battery.
Player features and controls
8
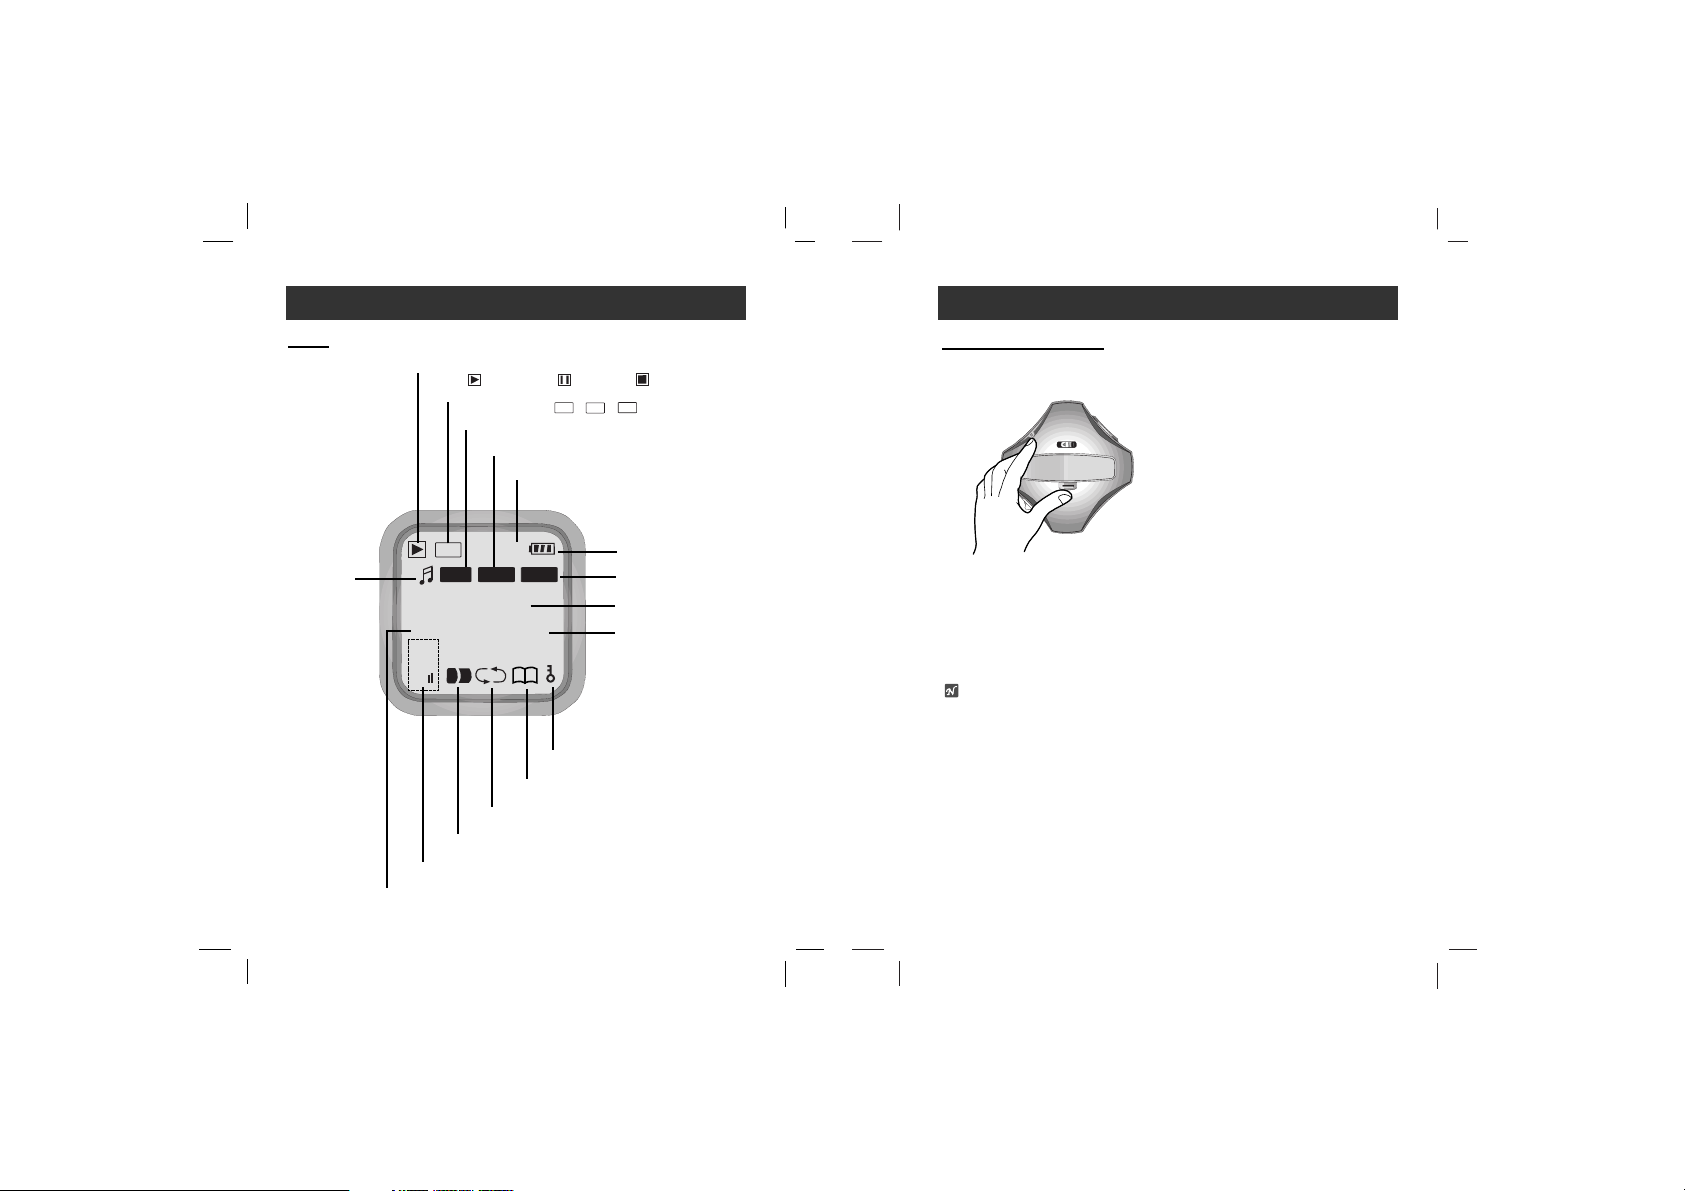
LCD
LIVE
JAZZ
ROCK
Play ( ), Pause ( ), Stop ( )
LIVE
JAZZ
ROCK
LIVE
ROCK
LIVE
Counter unit ( , , )
LIVE
JAZZ
ROCK
LIVE
ROCK
LIVE
STEP
File type (MP3,WMA,WAV)
Equalize (X-LIVE, JAZZ, ROCK, FLAT)
Counter number
Battery indicator
Bit - rate
File information
File playing time
Current track/ Total track
Volume level
Local repeat indicator
Repeat play indicator
Book mark indicator
HOLD indicator
Program
CALO
DIST
STEP
MP3
X-LIVE
WITHOUT
12/14
17
B
A
Vol
01: 12
1
40
128k

What is “MP3 Player”?
11
MP3 Player is a palm size audio device that uses no moving
parts for playback and lets you enjoy high quality sound that
uses MPEG1 Layer 3 compression method for quality internet
audio.
MP3 Player is a portable digital audio Player that plays MP3
files without requiring the use of tapes or CDs.
MP3 is a well known, high quality digital audio format. MP3 files
can be compressed up to 12 times the original wave file size.
You can get thousands of MP3 files without leaving your home
or waiting in long lines in record stores. Just download the files
legally from anywhere in the world through your internet connection. You may have to pay for the downloaded MP3 files to
the MP3 provider. The files can then be transferred to your player and listened to on your home stereo, in your car, on the
beach, or any where you wish to go! Also, you can make your
own CD quality MP3 files from CD or WAV making use of the
MP3 encoder software.
MP3 Player takes advantage of MP3’s small data size
and CD quality sound.
System Requirements
10
Your MP3 Player needs the minimal system requirements
for your computer.
• OS : Windows 98 / Windows ME / Windows 2000 / Windows XP
You can update the MP3 Explorer software for Windows 98/
SE/ME/2000/XP available etc. from an internet website by LG
Electronics Inc. Refer to the following sample contact procedure;
http://www.lge.com Support
Select Your COUNTRY
Product Support Device Driver
• CPU : At least Pentium - 133MHz
• Memory : At least 32MB (32MB above is recommended.)
• HDD Space : At least 100MB
• Video Card : 640 x 480 Mode,
At least High Color(16bit)
• USB Port
• CD-ROM Driver
Note
What is USB?
• USB : Universal Serial Bus.
• USB stands for Universal Serial Bus.
• It is a new interface based on the new concept between PC
and peripherals.
• The maximum bandwidth is12 Mbps and a maximum of 127
USB devices can be connected to a single PC.
Operation Circumstances
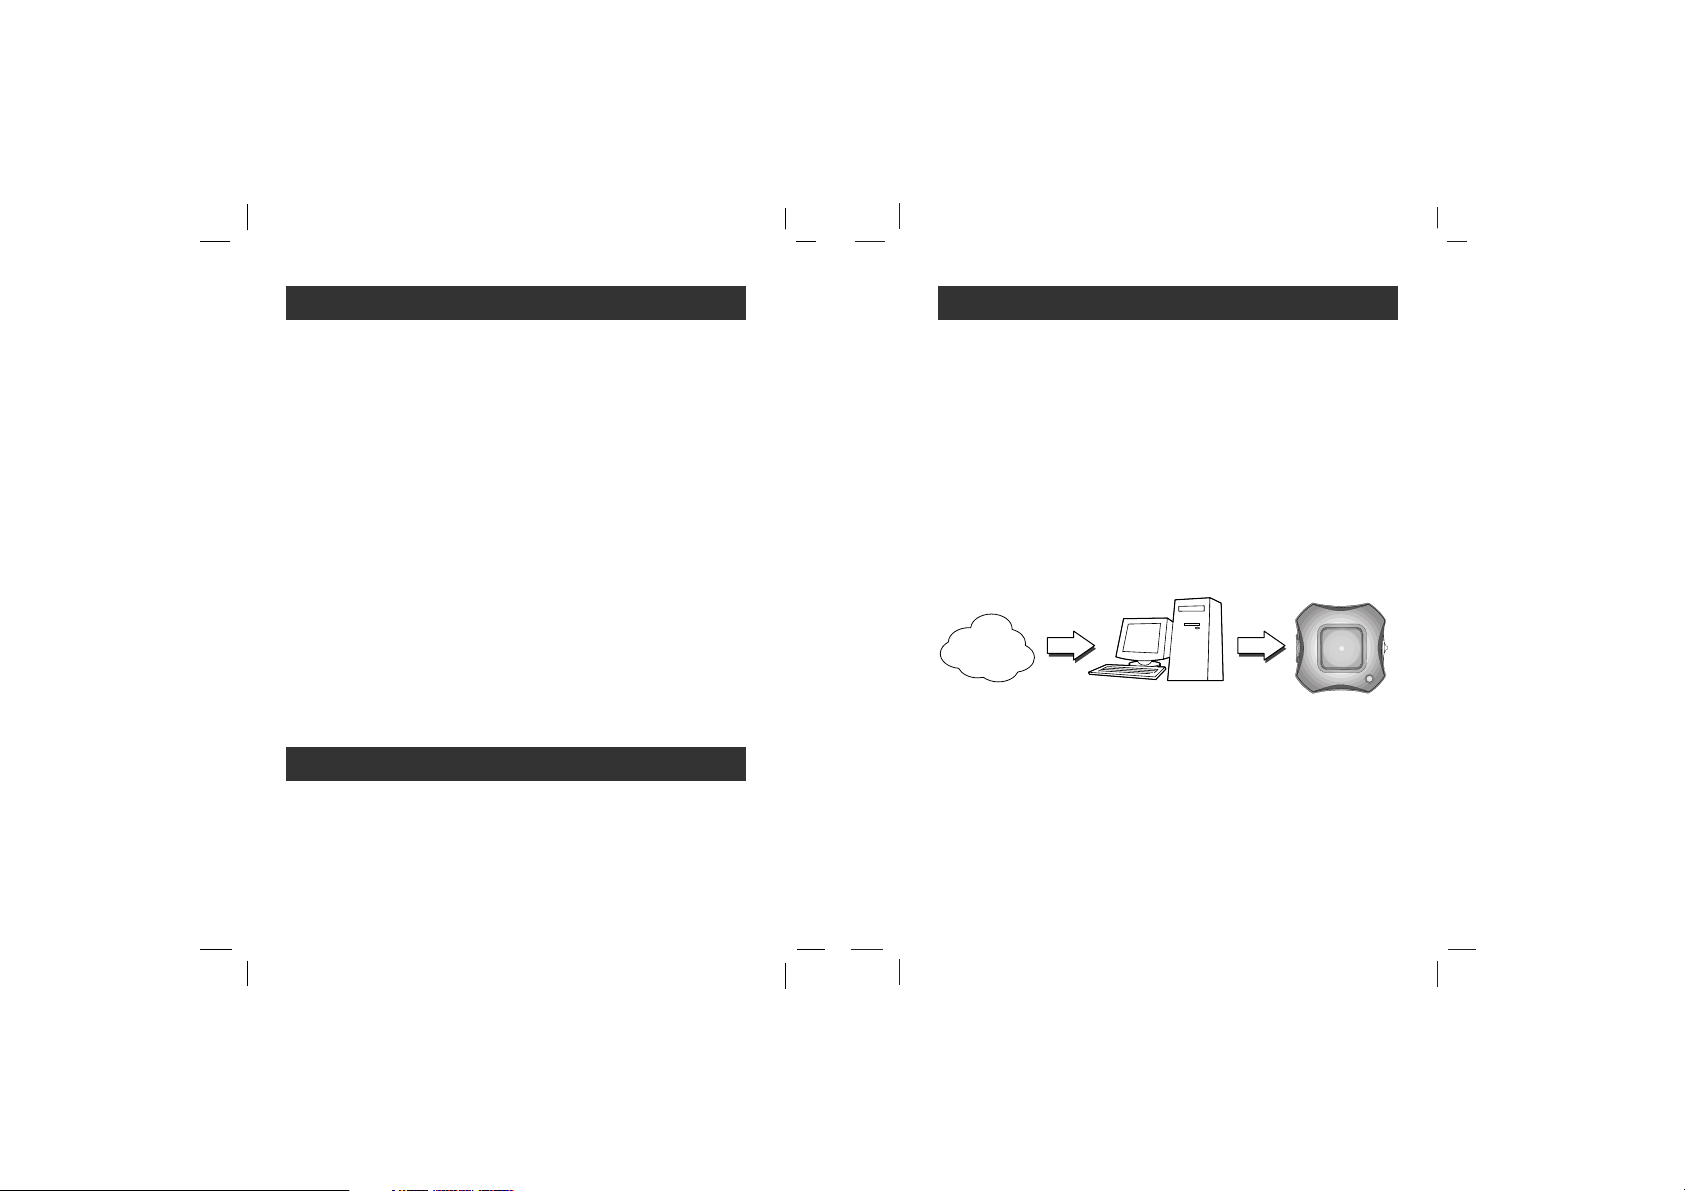
How to use your MP3
Player
13
MP3 or
WMA file
MP3 Player
Internet
MP3 or
WMA file
Yo u ’ll need to have MP3 files stored on your computer, a data
In/Out cable and your MP3 Player.
Using the MP3 Explorer software, select the MP3 files you wish
to transfer from your PC to the MP3 Player.
You can transfer songs from your PC to your MP3 Player via
your USB port with a data In/Out Cable. Also, you can transfer
data from your MP3 Player to your PC!
A benefit of using MP3 Player for storage of data, windows documents, etc. is that when transferring large data from PC to PC,
you can carry an equivalent of more than 40 floppy disks! A
floppy diskette can carry only 1.44MB of data, but you can carry
up to 248 Mega Bytes of data using your MP3 Player.
What is “MP3 Player”?
12
11
New generation Digital Audio Player that does not require
tapes or CDs.
22
Pure sound guaranteed while handling, exercising and jogging.
33
Multimedia communication audio player through PC, network
and Internet.
44
Data storage device when transferring large data from PC to
PC.
55
Enjoy CD quality sound while listening to MP3 files any where.
66
You can get thousands of songs at a fraction of CD prices
from various MP3 Internet providers via the innovative Try &
Buy program without leaving home! You can buy only one
song at a time, no more buying a CD for the one or two
songs you want.
77
You can select your own favorite songs, and change the
order of songs whenever you like.
88
MP3 Player has no moving parts and will not skip since it
does not require physical movement such as rotating Tapes
or CDs.
• WMA (Windows Media Audio code) is the highest quality in
terms of a sound and music. WMA provides all type of the
best sounds from 8kHz to 48 kHz.
• WMA files can be compressed up to 30% the original MP3 file
size and can sound as good as an MP3 file.
What is “WMA”?
Installing Software
15
To Install Manually
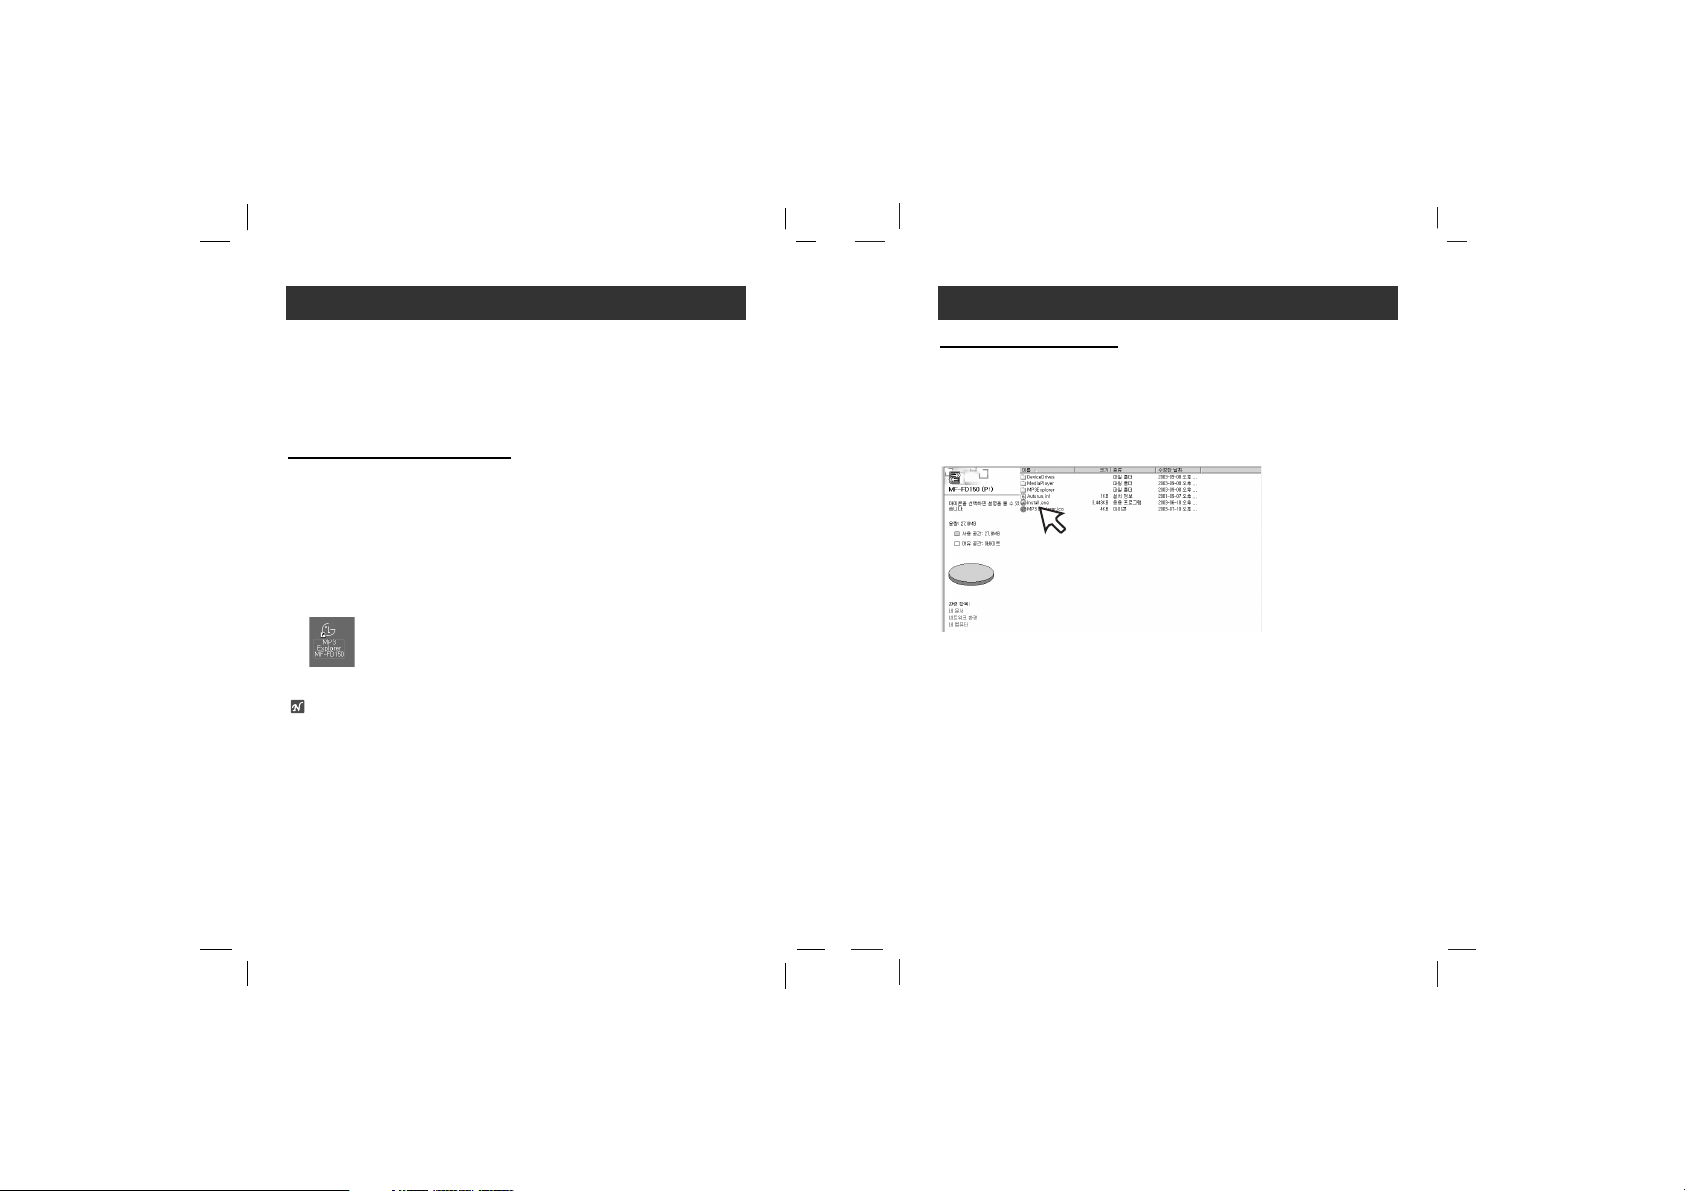
The installation of MP3-Explorer software is completed and the
“MP3 Explorer MF-FD150” icon is created on the Windows
desktop. Double-click the “MP3 Explorer MF-FD150” icon in the
Windows desktop.
If automatic installing is not runned, try manual installing as per
the following description.
Insert the software CD into drive D:\ (CD ROM drive).
Search for the ‘install.exe’ file in CD ROM and double-click
the file. Continue installing as per the direction of dialog boxes.
Installing Software
14
The MP3-Explorer is the communication software that allows
your computer to share information with your MP3 Player. In
order for your MP3 Player to work properly, The MP3 Explorer
software must be installed correctly under Windows.
To install Automatically
11
Insert the software CD into drive D:\ (CD ROM drive).
22
Select the language you want and then continue installation as directed in the dialog boxes.
The install will be runed automatically.
33
After the install is finished, double-click the “MP3
Explorer MF-FD150” icon in the Windows desktop.
Note
When you install the supplied software CD, don’t connect the
supplied Data In/Out cable to a PC from your MP3 Player.
After you install the software CD, connect the supplied Data
In/Out cable to a PC from your MP3 Player.
Using MP3 Explorer
The MP3-Explorer is the software that interacts with the MP3
Player and a PC. MP3 files or any data files can be downloaded
to the MP3 Player or vice versa.
Double-click the “MP3 Explorer MF-FD150” icon on the
Windows desktop to open the MP3-Explorer program.
The following figure describes the MP3-Explorer program.
The various features are explained below.
Note
Before The MP3-Explorer don’t operate, connect the Data In/Out
cable to MP3 Player and PC.
Using MP3 Explorer
17
1 2 3 4 5 6
7
8
9101112
13
14
15
2
1
Connecting Data In/Out Cable
16
To complete setup, you should connect the supplied Data
In/Out cable to a PC from your MP3 Player.
MP3 Player
DATA
In/Out terminal
USB PORT
Data In/Out
cable
Compare the two ends of the cable.
Connect one end with the USB port on the back of your PC and
then plug the other end into the Data In/Out terminal of your
MP3 Player.
To connect your MP3 Player to a PC

To format memory
This function deletes all files existing on the file list window of
MP3 Player.
11
Click “FORMAT” icon.
22
Click “Yes” icon.
1
Using MP3 Explorer
19
2
Using MP3 Explorer
18
Using MP3 Explorer
1
“Add” - Adds the file list window of MP3 Player to a
downloading file.
2
“Upload” - This will allow you to copy the selected file on the
MP3 Player.
3
“Delete” - Deletes the selected item.
(The files PC folder window are not deleted.)
4
“Format” - Deletes all files existing on the file list window of
MP3 Player.
5
“Refresh” - Refreshes the contents of the current page.
6
“Cancel” - Cancel the selected item.
7
Displays the file types (All files, Audio files, Document files,
Image files).
8
File list window of PC.
9
“Transfer(F6)” - Downloads the selected file on the PC onto
the file list window of MP3 Player.
10
Displays the total and available space of the MP3 Player.
11
The file list window of MP3 Player.
12
PC folder window.
13
Moves to upper folder.
14
Moves to Root directory.
15
Creates a new folder in the the file list window of MP3
Player.

Using MP3 Explorer
21
Notes
• Before formatting the internal memory, connect the Data
In/Out cable to MP3 Player and PC.
• Don’t remove the Data In/Out cable while formatting or downloading a files.
44
44
All file is deleted.
Using MP3 Explorer
20
33
33
The MP3 Player displays the process of file formatting.

Using MP3 Explorer
23
Ready to transfer
22
Click the “ Add” or “ ” icon.
“Ready to transfer” appears.
22
Using MP3 Explorer
22
To download files
Before downing files to your MP3 Player and connect the MP3
Player to PC using the Data In/Out cable.
11
Select file(s) to download.
11
22

55
55
The selected file has been downloaded.
Now you can listen to music with the MP3 Player after
removing the USB cable.
Notes
• Do not remove the Data In/Out cable while downloading files.
• If the MP3 Player does not work normally, remove battery on
Player and insert it again.
• Even if the capacity of the MP3 Player is enough, the MP3
Player will not downloaded. Because the file name is long.
- Delete the unnecessary file.
Using MP3 Explorer
25
Using MP3 Explorer
24
44
33
Click the “ Transfer(F6)” icon.
44
The MP3 Player displays the process of file downloading.
33

Using MP3 Explorer
27
33
33
The selected file has been uploaded.
Note
MP3 and WMA files are not available to upload.
Using MP3 Explorer
26
To upload files
11
Select file(s) to upload.
22
Click the “ Upload” or “ ” icon.
11
22
22

Using MP3 Explorer
29
33
33
Click “ OK”.
Using MP3 Explorer
28
To delete the files on MP3 Explorer
11
Select the file(s) to delete.
22
Click the “ Delete” icon.
11
22

Using MP3 Explorer
31
Firmware Upgrade (OS update)
This function shows how to upgrade to the new version.
11
Click “Edit” “OS update”.
11
Using MP3 Explorer
30
44
44
The selected file has been deleted.

Using MP3 Explorer
33
33
Click “ OK”.
The MP3 Player is upgraded to the new version and then the
OS update screen is closed automatically).
33
Using MP3 Explorer
32
22
Click “ Start”.
22
Cancel
Cancel

Using MP3 Explorer
35
MP3 Explorer update
It means updating necessary files used by Explorer program.
11
Click “View” “Explorer Update”.
22
Click “Update”.
11
22
Using MP3 Explorer
34
To check version information
You can check OS version and Explorer version information.
11
Click “About Explorer” “About MP3 Explorer MFFD150”.
11
5.001

Using MP3 Explorer
37
To select MP3 Explorer menu language
11
Click “View” “Language”.
22
Select the menu language by moving the mouse.
11
22
Using MP3 Explorer
36
33
Click “ OK”.
33
Cancel

Before Operation
39
Hold Function
• This function locks the main unit to prevent it from operating
when you accidentally press a button.
• Unlock it before operating.
• If you set the Hold Switch (HOLD ) on the main unit to lock
position and press a button in lock position, the “”appears
in the LCD.
To adjust Volume
• You can adjust the volume by pressing volume (-/+) button.
• The volume level can be adjusted by 30 steps.
For your reference
According to volume level, the icon change as below.
Volume
Level
Icon
MIN-4 5-10 11-16 17-22 23-28 29-MAX
+
+
HOLD
HOLD
UNLOCK
LOCK
Before Operation
38
Power on/off
• To turn on, press the PLAY/
PAUSE/STOP button.
• To turn off, press the
PLAY/PAUSE/STOP button for
more than 1.5 seconds on the
stop mode.
To use Earphone
• Connect the earphone connector to the earphone jack.
PLAY/PAUSE/STOP button
Vol
Vol
Vol
Vol
Vol
Vol

To skip the files
To skip the next file
• Press down briefly the SKIP/SEARCH ( ) dial on the main
unit to select the next file.
To skip the previous file
• Press up briefly the SKIP/SEARCH ( ) dial on the main unit
within 5 seconds of playing time.
To return the beginning of the current file
• Press up briefly the SKIP/SEARCH ( ) dial on the main unit
after 5 seconds of playing time.
To play rewind search or fast forward search
the files
• Press up or down for more than 2 seconds the SKIP/
SEARCH ( / ) dial during file playback.
Basic Operation
41
Basic Operation
40
To play files
11
Press
PLAY/PAUSE/STOP
button to turn on.
22
Control SKIP/SEARCH ( / ) Dial up and down to select
a file you want.
33
Press PLAY/PAUSE/STOP button to play a file.
To pause files
Press
PLAY/PAUSE/STOP button briefly
during file playback.
To stop files
Press
PLAY/PAUSE/STOP button
for more than 1 second dur-
ing file playback.
PLAY/PAUSE/STOP
button
SKIP/SEARCH
( / ) Dial

To select the MENU
You can choose 11 fixed menu by pressing the MENU Dial.
11
Press the
MENU Dial
.
22
Select the menu you want by pressing SKIP/SEARCH
( / ) Dial up or down.
33
Press the
MENU Dial
to activate selected menu.
44
Select the function you want to operate by pressing
SKIP/SEARCH ( / ) Dial up or down, and then press
the
MENU Dial
again.
Note
: If you don’t press any buttons within about 5 seconds
in the menu, it will return to the previous screen.
EQUALIZE Function
• You can choose between 4 fixed sound mode.
• The operational process refers to “To select the MENU”.
•
The Equalizer Function is not available to the FM TUNER mode.
Advanced Operation
43
Equalize
Playmode
Language
Backlight
Contrast
Power saving
Erase
About
Counter
Counter set
RETURN
Playmode
Language
Backlight
Contrast
X-LIVE
JAZZ
ROCK
FLAT
Equalize
Powerful realism with strong
sound quality.
Sweet sound with soft feeling.
Tender sound with powerful
feeling.
Standard and natural sound.
Advanced Operation
42
Book Mark Function
If you set Book Mark function during file playing, you can
search the setting point of the track automatically.
11
Select the setting point you want during file playing, press and
hold the Book Mark (B.MARK) button for about 2 seconds.
“”appears in the LCD.
22
Press Book Mark (B.MARK) button briefly once during
other file playing.
Automatically, the player searches and plays from the setting point.
33
To cancel
Book Mark function, press
the Book Mark
(B.MARK) button for about 2 seconds
.
“”disappears in the LCD.
Local Repeat Function
You can set local repeat by pressing Book Mark (B.MARK) button.
If you select local repeat ending point within 3 seconds, after
setting the local repeat starting point, it is not operated.
11
To select the local repeat starting point you want during file
playing, press Book Mark (B.MARK) button briefly once.
“”appears in the LCD.
22
To select the local repeat ending point you want during
file playing, press the button again.
“”appears in the LCD.
33
To cancel
local repeat function, press
the Book Mark
(B.MARK) button
.
“”disappears in the LCD.
Note
The Book Mark and Local Repeat Function is not available to
the FM TUNER mode.
A
B
B
A
B
A
B
A

Advanced Operation
45
To select the menu language
11
Press the
MENU Dial
.
22
Select the “Language” menu by pressing SKIP/SEARCH
( / ) dial up or down and then press the MENU Dial again.
33
Select the language you want to operate by pressing SKIP/
SEARCH ( / ) dial and then press the MENU Dial again.
The selected language will be appeared in the LCD.
BACKLIGHT Function
• Whenever any button is pressed, the LCD becomes bright.
• This function can set time of brightness displayed in the LCD.
• The operational process refers to “To select the MENU”.
• If you don’t set it, select the “Backlight
Disable” as the LCD on the right.
MAX: 20 seconds
Advanced Operation
44
MODE
Disable
Repeat
Repeat All
Random
Random All
LCD
RND
RND
RND
DESCRIPTION
Repeat mode is cancelled.
Plays
repeatedly the current selected
file.
Plays
repeatedly all file.
Plays
randomly once.
Plays
randomly continuously.
PLAY MODE Function
You can choose between 4 fixed repeat mode.
11
Press the MENU Dial.
22
Select the “Playmode” menu by pressing SKIP/SEARCH
( / ) dial up or down and then press the
MENU Dial
again.
33
Select the mode you want to operate by pressing
SKIP/SEARCH ( / ) dial and then press the
MENU Dial
again.
Note
The PLAY MODE Function is not available to the FM TUNER mode
.
Equalize
Playmode
Language
Backlight
Contrast
Disable
Repeat
Repeat All
Random
Random All
Equalize
Playmode
Language
Backlight
Contrast
English
Korean
Japanese
Chinese
Chinese
Russian
1
A
RND
R
Equalize
Playmode
Language
Backlight
Contrast
Backlight
Turn off
5 Seconds
Backlight
Disable

Advanced Operation
47
To delete files on the MP3 Player
11
Press the
MENU Dial
.
22
Select the “Erase” menu by pressing SKIP/SEARCH
( / ) dial up or down.
33
Select the “File erase” and then press the MENU Dial again.
44
Select a file you want to delete by pressing SKIP/
SEARCH ( / ) dial.
44
Select “YES” by pressing Volume (-/+) button and press
the
MENU Dial
.
The selected file is deleted.
Note
The file is not deleted in the TUNER or MP3 file playback mode.
Advanced Operation
46
CONTRAST Function
This function can adjust lightly or darkly the LCD by pressing
SKIP/SEARCH ( / ) dial up or down in the “Contrast” menu.
POWER SAVING Function
• If you don’t press any buttons on the pause or stop mode, the
power will be turned off temporally.
• This function can set the conservation of electricity time to
save battery
by pressing SKIP/SEARCH ( / ) dial up or down
in the “Power saving” menu
.
Equalize
MAX: 30 minutes
Playmode
Language
Backlight
Contrast
Power saving
Erase
About
Counter
Counter set
File erase
Preset erase
RETURN
Power saving
Erase
About
Counter
Counter set
Power saving
Power off
10 minute
WITHOUT YOU
WITHOUT YOU

Advanced Operation
49
33
Select the “Counter set” menu by pressing SKIP/SEARCH
( / ) dial up or down and then press the MENU Dial.
44
Select the Age, Sex, Weight and Stride by using Volume (-
/+) button and SKIP/SEARCH ( / ) dial and then press
the
MENU Dial
.
Note
COUNTER Function ON/OFF
- Repeatedly press record (REC) button for more than 1
seconds.
Advanced Operation
48
To check memory and version information
You can check the memory and version information in the
“About” menu.
COUNTER Function
Whenever you walk step by step, it measures the number with
the unit.
You select the COUNTER function by pressing for more than 1
seconds the
Book Mark (B.MARK) button on the MP3 mode.
11
Press the
MENU Dial.
22
Select the “Counter” menu by pressing SKIP/SEARCH
( / ) dial up or down.
Note
For this model, the Counter only operates with it worn around
the waist. (Accurate measuring is not done when wearing a
neck race, portable arm band.)
Power saving
Erase
About
Counter
Counter set
Set info
Power saving
Erase
About
Counter
Counter set
Step
Calorie
Distance
Cancel
Power saving
Erase
About
Counter
Counter set
Age
Sex
Weight
Stride
22
W
45
50

Radio
Operation
51
You can preset 20 stations on the radio.
Auto memory
All available radio stations with sufficient signal strength will be
stored automatically.
- Press the
Book Mark (B.MARK) button for more than 1 second
during FM receiving.
Listening to the radio frequency
11
Press the MENU Dial for more than 1 second on stop mode.
22
Press the
Book Mark (B.MARK) button once or twice briefly
.
MONO ( )
STEREO ( )
Advanced Operation
50
RETURN Function
To move to previous menu, select the “RETURN” menu.
Voice Recording
11
Press record (REC) button briefly twice on stop mode.
22
Start the voice recording to the Microphone (MIC) on the
main unit.
33
To stop the voice recording, press PLAY/PAUSE/STOP button.
The voice recording is completed
.
For your reference
Note
If the “Device Full” appears in the LCD, delete the files to save
voice recording available hour.
Voice Recording
Available hour
MF-FD150TB/TN/TS : About 8 hour
MF-FD150EB/EN/ES : About 16 hour
Voice record indicator
Record playing time
Record remaining time
Current frequency
Next frequency
(Press once briefly.)
Previous frequency
(Press twice briefly.)

53
Erasing a preset radio frequency
11
Press the MENU Dial during FM receiving.
22
Select the “Erase” menu by pressing SKIP/SEARCH
( / ) dial up or down.
33
Select the “Preset erase” and then press the MENU Dial
again.
44
Select “YES” by pressing Volume (-/+) button and press
the
MENU Dial
.
The preset radio station is erased.
Radio
Operation
52
Presetting the radio frequency
11
Press and hold SKIP/SEARCH ( / ) dial up or down until
the frequency indication starts to change, then release.
To tune to a weak
frequency
, press SKIP/SEARCH ( / ) dial
up or down briefly and repeatedly until optimal reception found.
22
Repeat step
11
if necessary until you find the desired
radio
frequency
.
33
Press
PLAY/PAUSE/STOP
button.
A preset number will be stored in the LCD.
44
Repeat steps 1 to 4 to store other
frequency
.
To recall preset numbers
Press the
Book Mark (B.MARK) button briefly and repeatedly.
Preset number
Radio
Operation
Power saving
Erase
About
Counter
Counter set
File erase
Preset erase
RETURN

Specifications
55
MF-FD150TB/TN/TS: 128 MB
MF-FD150EB/EN/ES: 256 MB
AAA type (1EA)
66x66x22mm
35g (without battery)
1.5V DC
55dB
10mW (R:5mW, L:5mW)
55/80 (No Filter/JIS-A Filter)
40/40 (1kHz/10kHz)
Alkaline AAA size battery 1EA
65-74 MHz, 87.5-108 MHz
(Step : 50KHz)
40 dB
25 dB
Earphone Antenna
Radio
Operation
54
Radio recording
• Press the Record (REC) button twice briefly during FM
receiving.
•
To stop the voice recording, press
PLAY/PAUSE/STOP
button.
The radio recording is completed
.
Note
If the “Device Full” appears in the LCD, delete the files to save
radio vecording available hour.
Radio record indicator
Record playing time
Record remaining time
Troubleshooting
1. The MP3 Player does not work or nothing is displayed on
the LCD.
- Check the capacity of the memory.
- Check the polarity (+ and -) of the battery.
2. The buttons are not working.
- Check if the Hold Switch is on.
- There is no battery or the battery is fully consumed.
3. The files can not be downloaded.
- Check the connection between the USB port of your PC
and the USB cable.
Memory Capacity
Battery
Dimensions (WxHxD)
Weight
Operating Voltage
Dynamic Range
Earphone Output Power
S/N Ratio
Channel Separation
Power Source
FM TUNER
Frequency Range
S/N Ratio
Channel Separation
Antenna

P/NO:3834RL0002A
 Loading...