

LG metroPCS MN180 User Manual

Table of Contents
1
Table of Contents
Table of Contents 1
Phone Overview 2
Menus Overview 3
Getting Started with Your
Phone 4
The Battery 4
Installing the Battery 4
Removing the Battery 4
Charging the Battery 5
Entering and Editing
Information 6
Text Input 6
Key Functions 6
Phone Menus 7
Safety 15
TIA Safety Information 15
Antenna Care 15
Phone Operation 15
Tips on Efficient Operation 15
Driving 15
Electronic Devices 16
Pacemakers 16
Persons with pacemakers: 16
Hearing Aids 16
Consumer Information on
SAR 17
Limited Warranty
Statement 20
Phone Overview
2
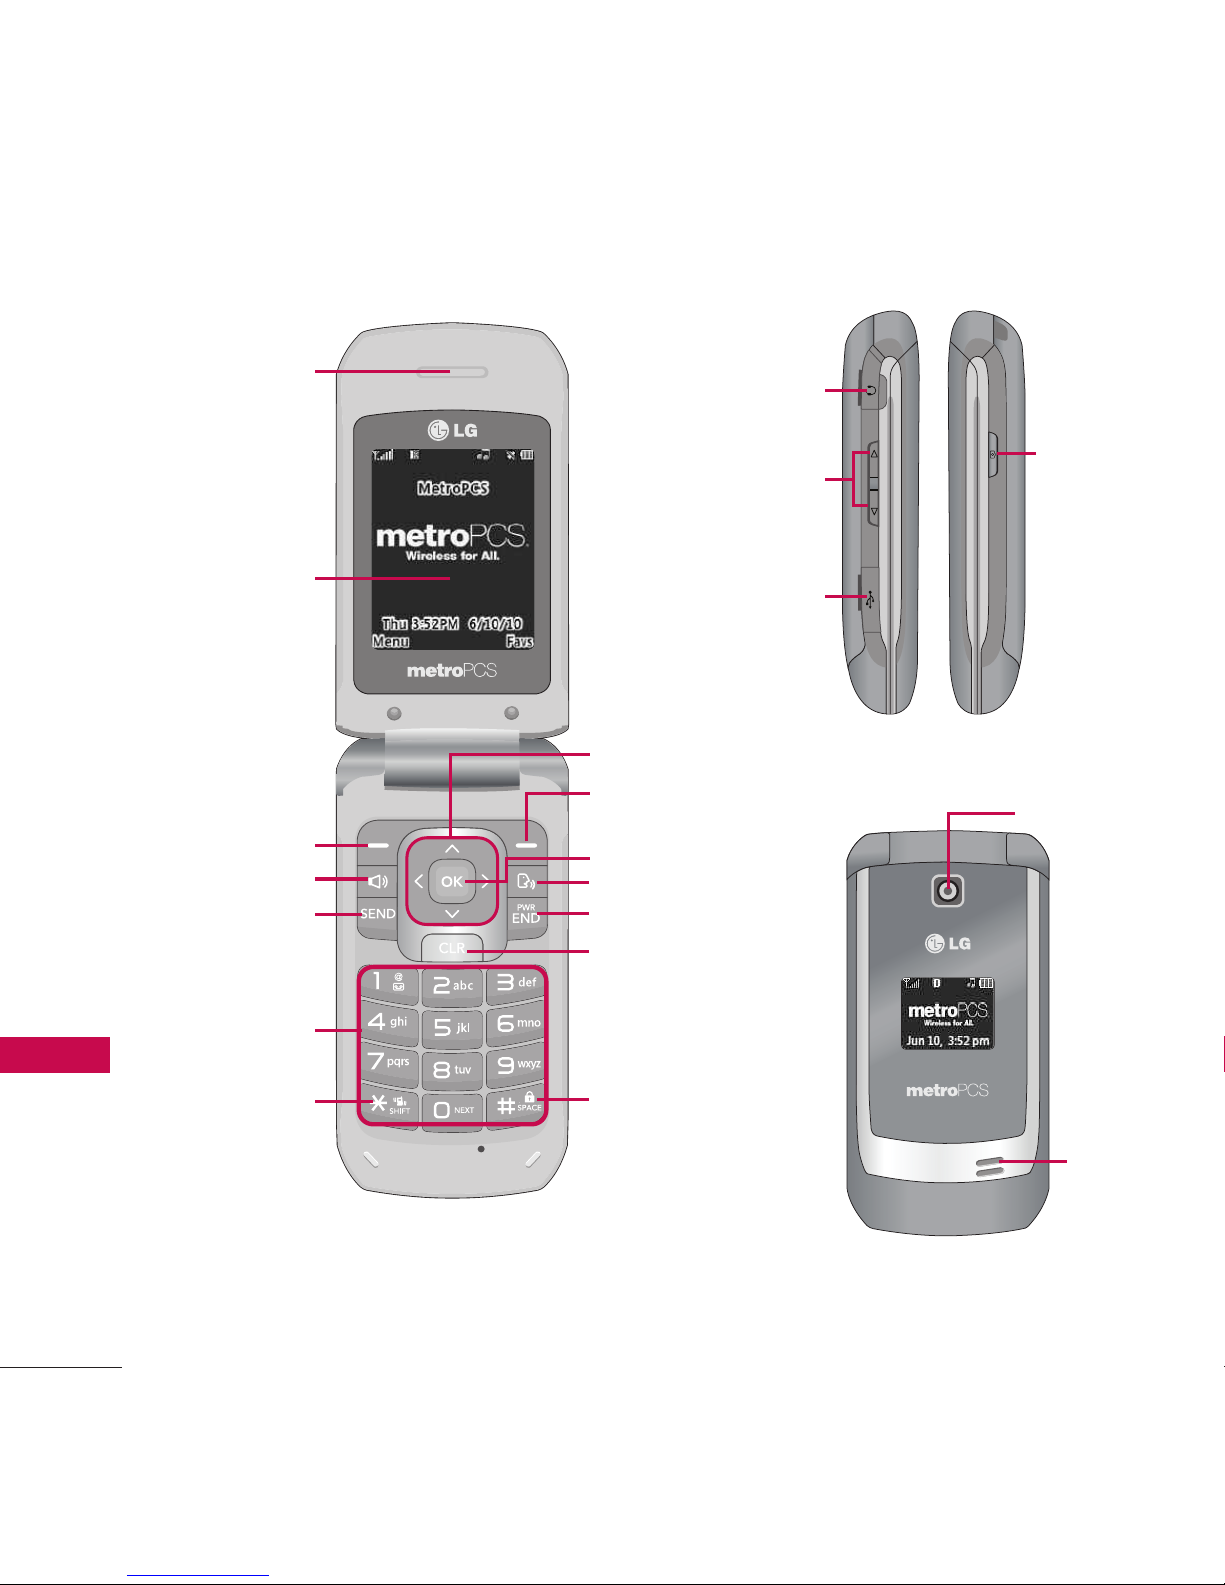
Phone Overview
Earpiece
LCD Screen
Left Soft Key
Headset Jack
Camera Key
Camera Lens
Speaker
Charger/
Accessory Port
Volume Keys
Navigation Keys
OK Key
Voice Command
PWR/END Key
Lock Mode Key
CLR Key
Favorites/
Right Soft Key
SEND Key
Alphanumeric
Keypad
Vibrate Only
Key
Speakerphone Key

Menus Overview
3
Menus Overview
Messaging
1. New Text Message
2. New Picture
Message
3. Email
4. IM
5. Inbox
6. Outbox
5. Drafts
6. Voicemail
9. Web Message
0. Templates
*. Settings
#.Delete All
Call History
1. Missed Calls
2. Received Calls
3. Dialed Calls
4. All Calls
5. Call Timer
6. Data Counter
Contacts
1. New Contact
2. Contact List
3. Favorites
4. Groups
5. Metro411
6. Speed Dials
7. My vCard
@metro App
Store
MetroWEB
Multimedia
1. Take Photo
2. Record Voice
3. Images
4. Audios
Voice Command
1. Start Command
2. Command Mode
3. Announce Alert
4. Train Word
5. Best Match
My Schedule
1. Calendar
2. Notepad
3. Alarm Clock
My Menu
Bluetooth
1. Paired Devices
2. Power
3. My Visibility
4. My Bluetooth Info
Tools
1. Ez Tip Calc
2. Calculator
3. World Clock
4. Stopwatch
5. Unit Converter
Settings
1. Sound
2. Display
3. Security
4. Call Settings
5. System
6. Memory
7. Phone Info
The Battery
The phone comes with a
rechargeable battery. The battery
charge level is shown at the top
right of the LCD screens when
the phone is on.
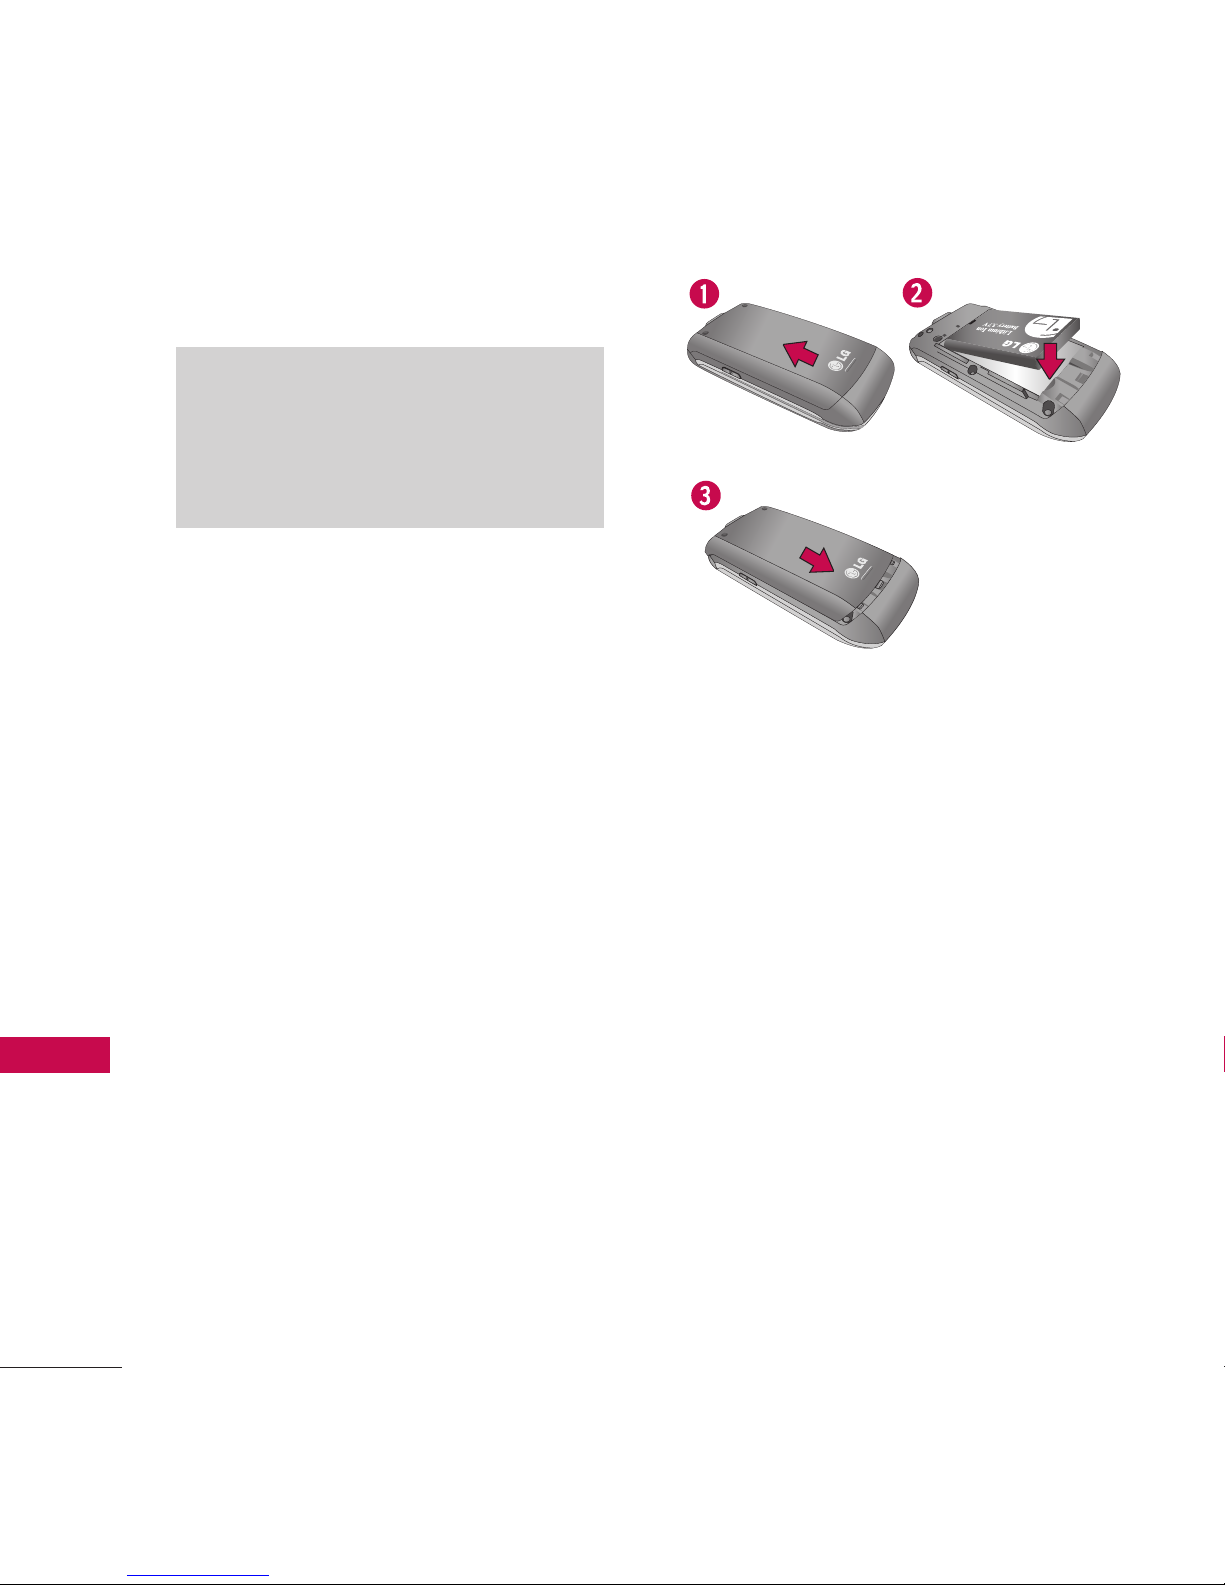
Installing the Battery
Remove the battery cover by
pressing down below the LG logo
and sliding the cover up (see
figure 1). Insert the top of the
battery into the battery
compartment, making sure to
align the battery contacts with
the phone terminals, and push
the battery down until it clicks
into place (2). Align the battery
cover then slide it downward
until it clicks into place (3).
Removing the Battery
Turn the phone off. Slide the
battery cover upward to remove
it. Remove the battery from the
battery compartment by lifting
the bottom of the battery using
the fingertip cutout.
Note
It is important to fully charge the
battery before initial use of the
phone.
Getting Started with Your Phone
4
Getting Started with Your Phone
5
Getting Started with Your Phone
Charging the Battery
Use the charger provided with
your phone. To charge your
phone:
Warning! Use only the charger
provided with the phone. Using
any charger other than the one
included with the MN180 may
damage your phone or battery.
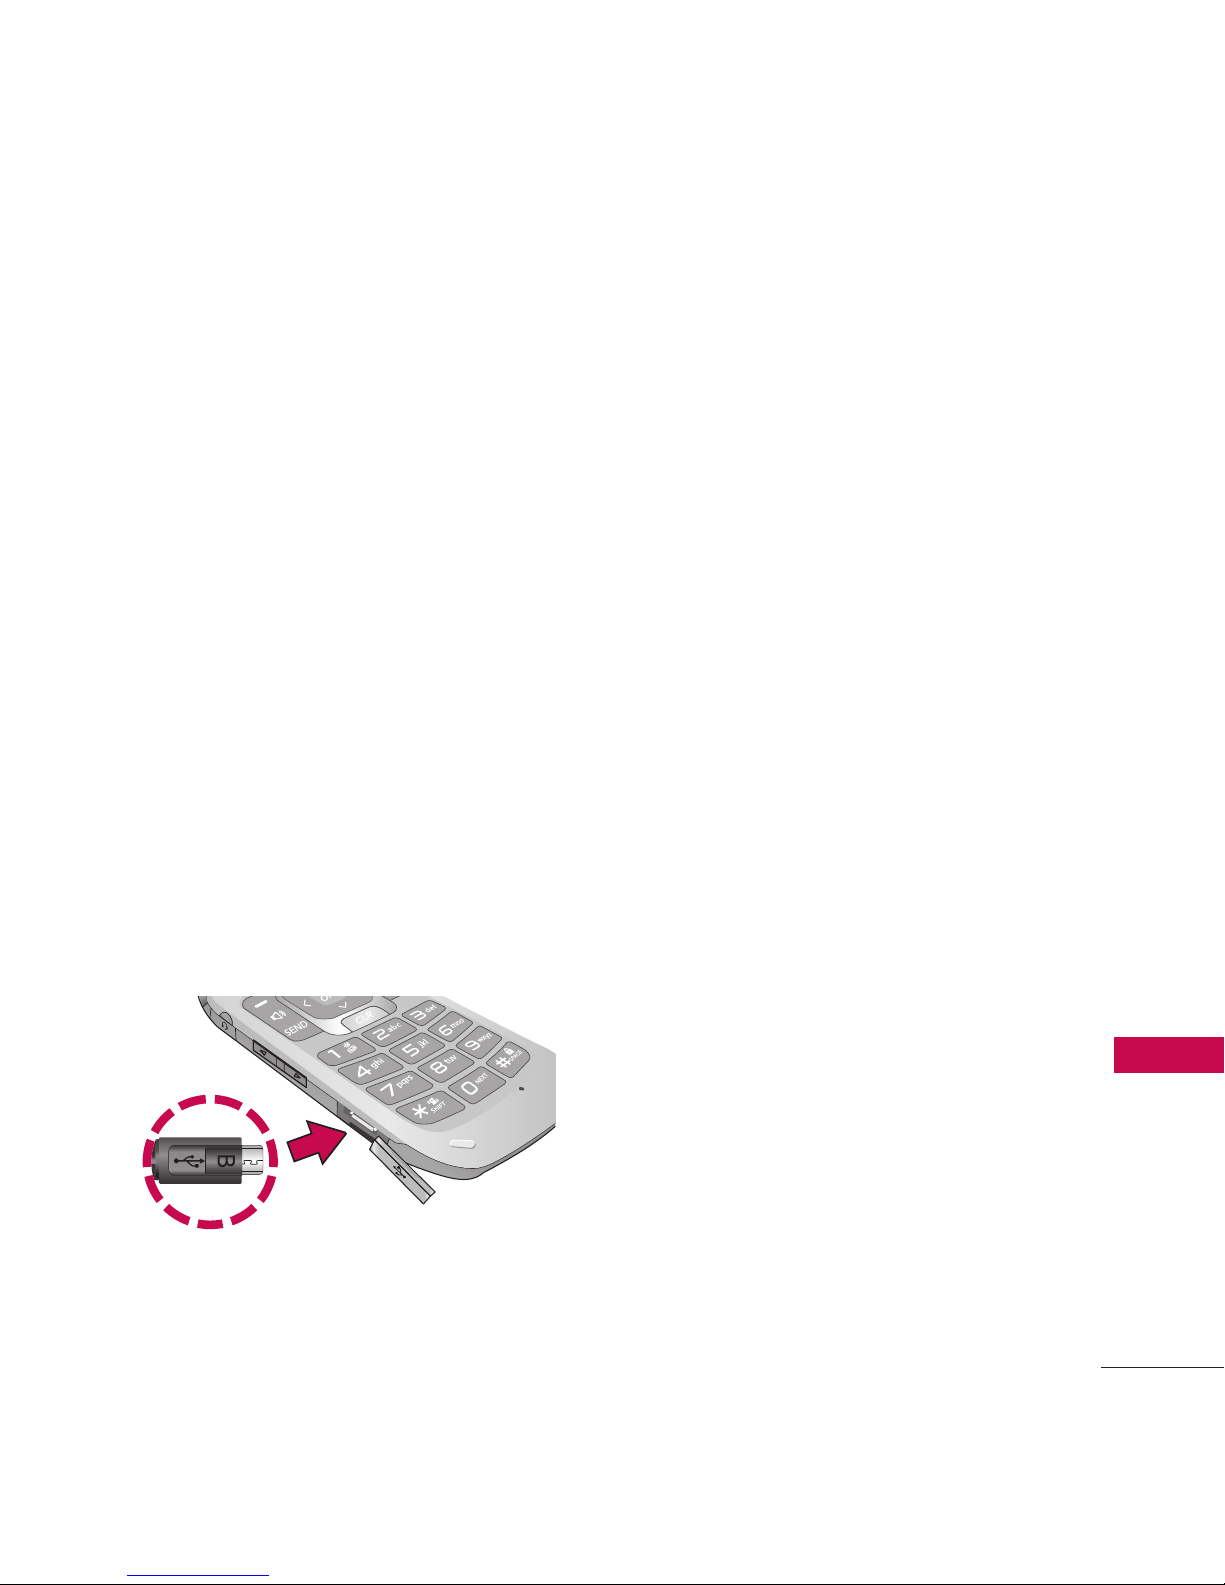
1. Gently uncover the
charger/accessory port, then
plug the end of the adapter
into the phone’s charger port
and the other end into an
electrical outlet.
The charge time varies
depending upon the battery
level.
Notice
Please make sure that the 'B' Side faces up
before inserting a charger or data cable into
the charger port of y
our phone.

6
Text Input
While entering text, the following
options are available:
Key Functions
Left Soft Key:
Press to change the text
input mode to one of the
following:
T9Word: T9WORD/
T9Word/ T9word
Abc: ABC/ Abc/ abc
123
Symbols
Shift Key
: Press to change
the text capitalization.
T9Word
: T9Word ->
T9WORD -> T9word
Abc : Abc -> ABC -> abc
Next: In T9word mode,
press to select the next
matching word.
Space: Press to complete
a word and insert a space.
Clear: Press to delete a
single space or character.
Press and hold to delete
all of the message.
Punctuation: Press to
enter punctuation marks
or some of the available
special characters.
Entering and Editing Information
Entering and Editing Information
7
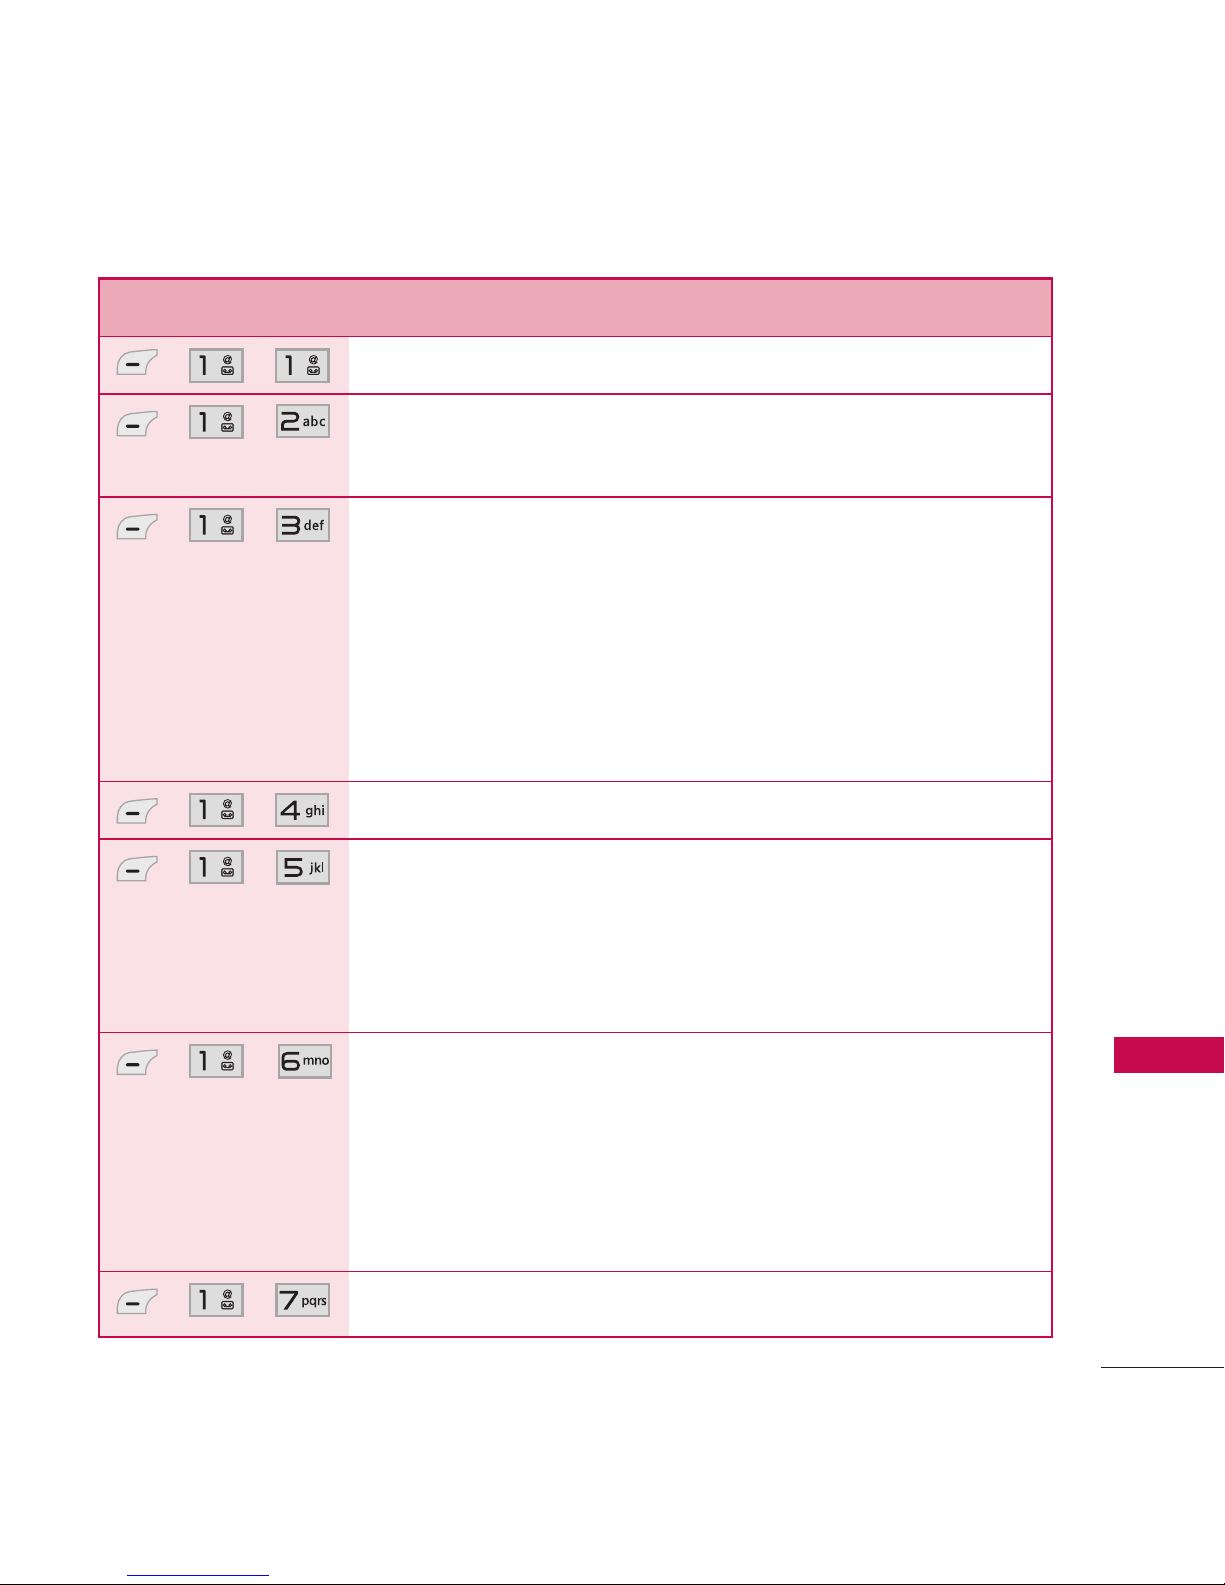
Phone Menus
Phone Menus
Menu Description
, ,
Allows you to send text and e-mail messages.
, ,
Allows you to send messages with text, images,
and audio clips.
, ,
Allows you to send an email via your favorite email
provider. Don't miss an important email. Thanks to
Email, you can get your emails on your phone,
while you're on the go. Email works with many
providers, including Yahoo! Mail, AOL Mail,
Hotmail and more.
, ,
Allows you to send and receive Instant Messages.
, ,
Use this menu to view received messages. Up to
700 messages (500 SMS, 100 MMS, and 100
MMS notification messages) can be stored in this
folder.
, ,
View the contents of sent messages and verify
whether the transmission was successful or not (if
verification is supported by network). Up to 100
sent messages(50 SMS + 50 MMS) can be stored
in the Outbox folder.
, ,
This folder contains saved message drafts.

8
Phone Menus
Phone Menus
Menu Description
, ,
Allows you to hear new voice messages recorded in
your voice mail box. Your phone will alert you
when you receive a new voice message.
, ,
Allows you to view any received web messages or
alerts.
, ,
Allows you to display, edit, and add templates.
These templates allow you to reduce manual text
input into messages.
, ,
Allows you to configure settings for Messaging.
, ,
Allows you to erase the messages stored in your
Inbox, Sent, or Drafts folders. You can also erase
all messages at the same time.
, ,
Allows you to view the most recent missed calls;
up to 40 entries.
, ,
Allows you to view the most recent received calls;
up to 40 entries.
, ,
Allows you to view the most recent dialed calls; up
to 40 entries.
, ,
Allows you to view a list of the most recently
missed, received and dialed calls.
 Loading...