

Page 1

MC-7880PSR
Page 2

Page 3

Contents / fo"k; lwph
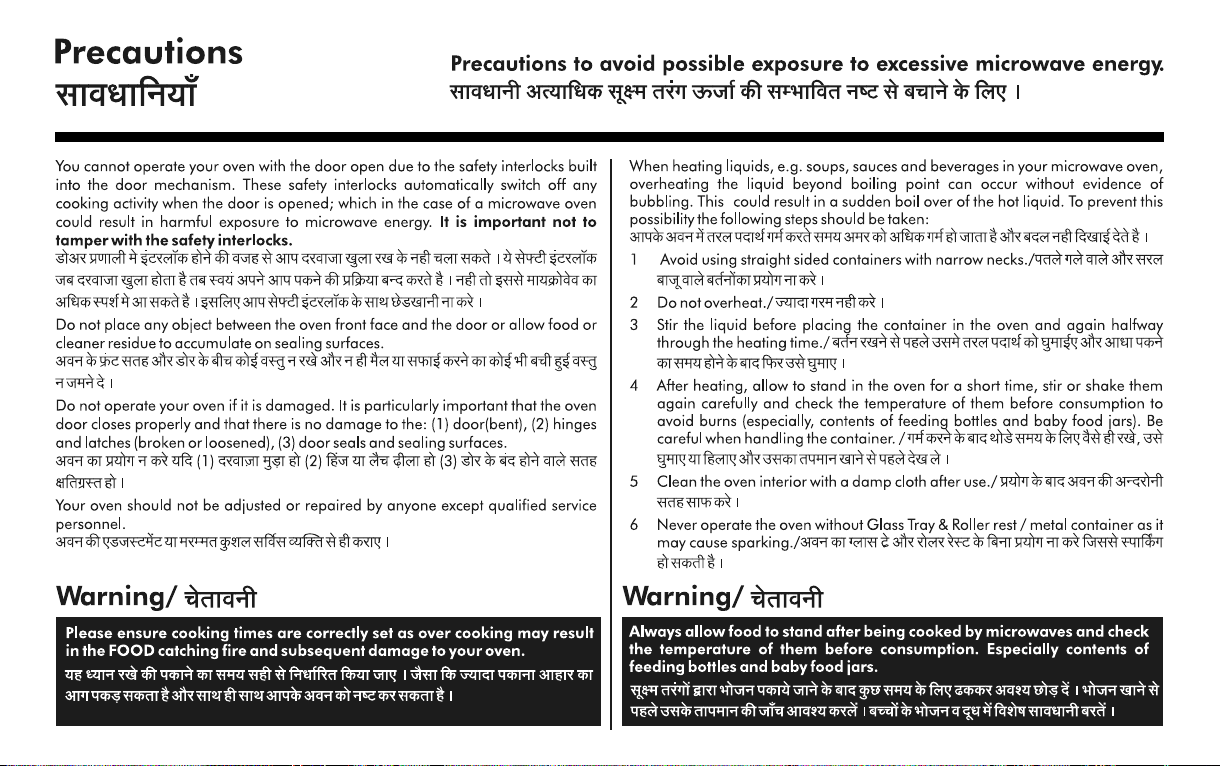
Precautions / lko/kfu;ka
Safety Precautions / lqj{kk lko/kfu;ka
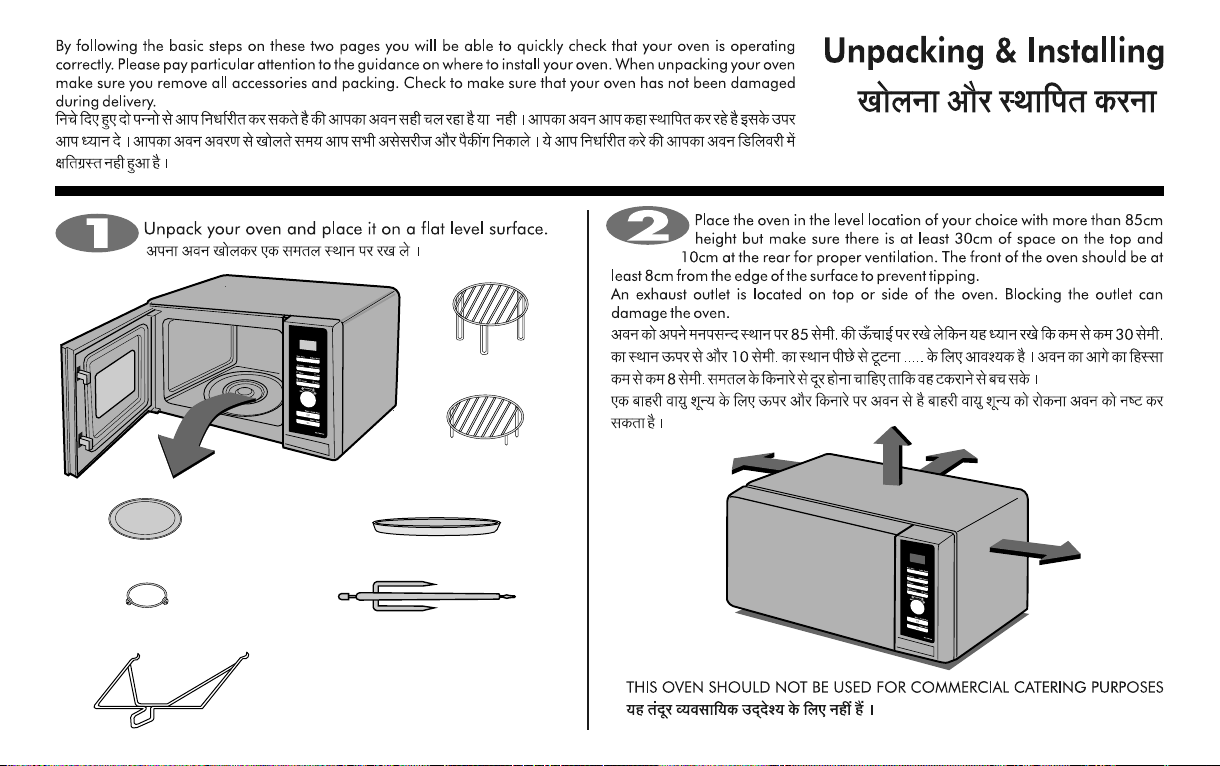
Unpacking & Installing / [kksyuk vkSj LFkkfir djuk
Child Lock / pkbYM ykWd
Quick Start / fDod LVkVZ
Micro Power Cooking / ekbØks ikoj dqfdax
Micro Power Level / ekbØks ikoj Lrj
Grill Cooking / fxzy dqfdax
Grill Combination Cooking / fxzy dkWEchus'ku dqfdax
Convection Combination Cooking / dUoSD'ku dkWEchus'ku dqfdax
Convection Preheat / dUoSD'ku izhghV
Convection Cooking / dUoSD'ku dqfdax
Various Cook Functions / fofHkUUk dqd dk;Ziz.kkfy;ka
Rotisserie / jksVsljh
NUTRI CARE
Health Plus / gSYFk Iyl
Continental Menu / dkWUVhusUVy ehuw
Soup / lwi
INDIAN RASOI
Indian Cuisine / Hkkjrh; O;atu
Tandoor Se / ranwj ls
Sweets Corner / LohV dkWuZj
Chatpat Corner / pViV dkWuZj
24 HOUR
Breakfast / czsdQkLV
Child's Favourite / cPpksa dh euilan
Bakery / csdjh
UTILITY CORNER
Utility Corner / lqfo/kk dkWuZj
Important Safety Instructions / egRoiw.kZ lqj{kk funsZ'k
Technical Specifications / Two recipes for starter
uofl[kq, ds fy, nks O;atu
3
4-5
6
7-8
9
10
11
12
13
14
15
16
17
18
18
20-23
24-26
27-29
31-36
37-41
42-44
45-46
48-51
52-54
55-58
60
61-62
63
3
Page 4
4
Page 5
5
Page 6

Safety Precautions
lqj{kk lko/kkfu;k¡
ªEither use earth or use exclusive 230V socket with earth.
vFkZ dk bLrseky djsa ;k vFkZ ds lkFk fof'k"V 230V dk lkWdsV bLrseky djsaA
ªDo not bend power cord forcefully or break.
ikoj dksMZ dks cyiwoZd u eksM+sa vkSj u gh rksM+saA
ªDo not pull out power cord.
ikoj dksMZ dks [khaps ughaA
ªDo not use several power plug in one socket at the same time.
,d le; esa cgqr lkjs ikoj Iyx ,d lkWdsV esa ,d lkFk bLrseky u djsaA
ªDo not plug in or pull out power cord with wet hand.
Hkhxs gq, gkFkksa ls Iyx u gh yxk,a vkSj u gh fudkysaA
ªDo not spray water inside and outside of microwave oven.
ekbØksoso vksou ds vUnj vkSj ckgj dh vksj ikuh u fNM+dsaA
ªPlug out power cord during cleaning or maintenance of set.
vksou dh lQkbZ ;k ejEer ds nkSjku ikoj dksMZ dks ckgj fudky ysaA
ªDo not heat up the food more than necessary.
[kkus dks vko';drk ls vf/kd xeZ u djsaA
ªDo not use microwave oven other than cooking or sterilization such as
cloth drying etc.
ekbØksoso vksou dk [kkuk idkus ;k LVsjhykbts'ku ds vfrfjDr bLrseky u djsa tSls
diM+ksa dks lq[kkuk bR;kfnA
ªDo not insert pin or steel wire etc. into inside/out side of case.
ds'k ds vUnj ;k ckgj fiu vFkok LVhy dh rkj u MkysaA
ªPlease be careful during taking the food since high temp. water or soup
may be overflow to cause burn.
[kkuk fudkyrs le; lko/kku cjrsa D;ksafd mPp rki dk ikuh ;k lwi Nyd dj tyk
ldrk gSA
ªDo not plug in power cord when socket hole is loose or plug is damaged.
lkWdsV gksy <hyk gksus ;k Iyx fo{kr gksus ij ikoj dksMZ u yxk,aA
ªDo not use oven while some foreign material is attached on the door.
tc njokts ij dksbZ cká inkFkZ yxk gks rks vksou dks bLrseky u djsaA
ªDo not place the water container on the set.
vksou ds Åij ikuh dk crZu u j[ksaA
ªDo not place heavy things on the set & do not cover the set with cloth while
using.
lSV ds Åij Hkkjh pht u j[ksa vkSj bLrseky djrs le; lSV dks diM+s ls u <dsaA
ªDo not install the set in the damp space or water sputtering area.
lSV dks xhys LFkku ij ;k tgka ikuh ds NhaVs iM+ jgs gksa] u yxk,aA
ªDo not let children hang onto oven door.
cPpksa dks vksou ds njokts ij u yVdus nsaA
ªDo not heat the unpeeled fruit or bottle with lid.
fcuk fNys gq, Qy ;k <Ddu yxh gqbZ cksry xeZ u djsaA
ªDo not hold food or accessories as soon as cooking is over.
[kkuk idus ds rqjUr ckn [kkus ;k lgk;d midj.kksa dks u idM+saA
ªPlug out oven if it is not used for long duration.
;fn vksou yEch vof/k ds fy, bLrseky ugh gksuk gS rks Iyx ckgj fudky nsaA
ªInstall microwave oven in the well ventilated, flat place.
ekbØksoso vksou dks goknkj vkSj lery LFkku ij gh yxk,aA
There is danger of blast if covered bottle, sealed food, egg, and chestnut etc.
are cooked inside oven.
cUn cksry] lhYM [kkuk] v.Ms ;k dktw bR;kfn dks vksou esa idkus ij QVus dk [krjk gSA
6
Page 7
HIGH RACK / ^gkbZ* jSd
LOW RACK / yks jSd
GLASS TRAY / dk¡p dh Vªs
ROTATING RING / jksVsfVax fjax
MULTI COOK TAWA / eYVh dqd rok
ROTESSERIE BAR / jksVsljh ckj
ROTESSERIE BAR HANDLE /
jksVsljh ckj gSfUMy
7
Page 8
8
Page 9
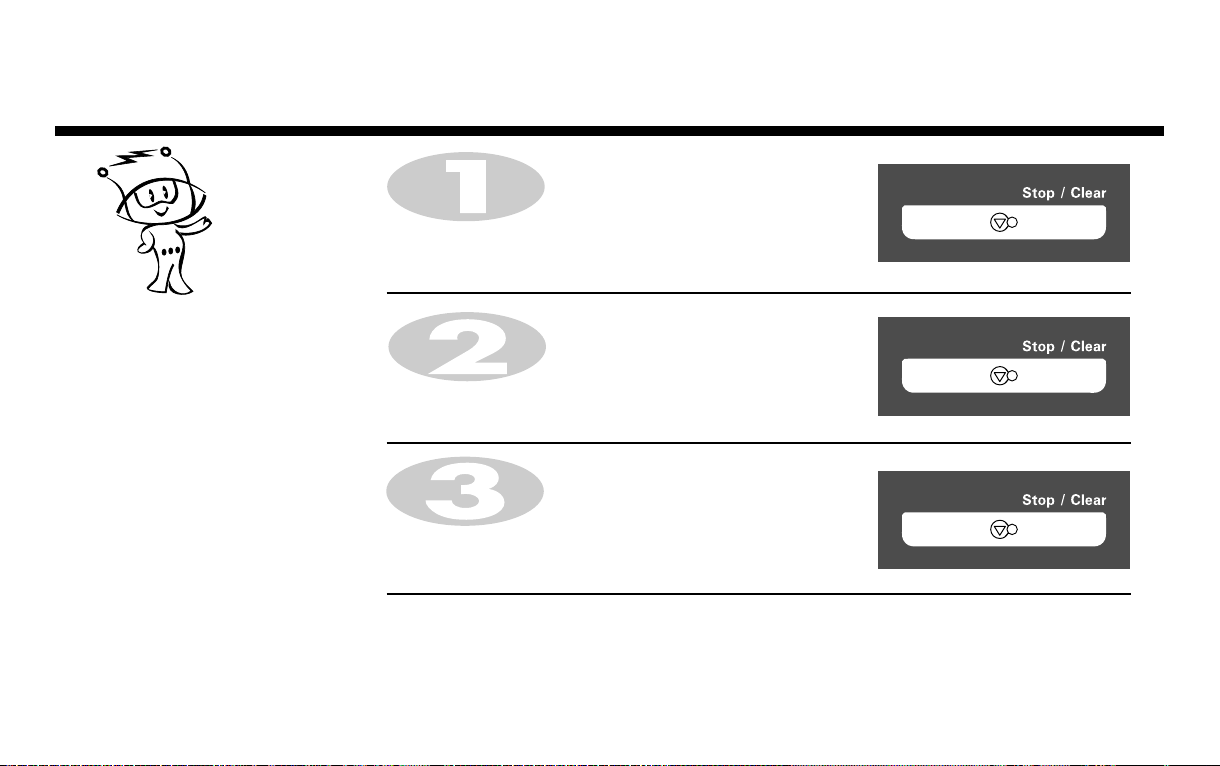
Press STOP/CLEAR.
STOP/CLEAR nck;saA
Child Lock
pkbYM ykWd
Your oven has a safety feature that
prevents accidental running of the oven.
Once the child lock is set, you will be
unable to use any functions and no
cooking can take place.
However your child can still open the
oven door.
vkids vou esa fo'ks"k lqj{kk O;oLFkk gS
tks vou dks vutkus esa pyus ugha
nsrhA ^pkbYM ykWd* yxkus ij vou
pkyw gh ugha gksxkA ijUrq cPpk ckgjh
}kj vo'; [kksy ik;sxkA
Press and hold STOP/CLEAR until “L” appears on the display and BEEP
sounds. / STOP/CLEAR
cVu rc rd nck dj j[ksa tc rd ^fMLIys iSuy*
ij “L” u vk tk;s vkSj ^chi* u lqukbZ nsA
The CHILD LOCK is now set. /
To cancel CHILD LOCK press and hold STOP/CLEARuntil “L” disappears.
You will hear BEEP when it’s released. / ;fn ?kM+h dh ^lSfVax* dh gqbZ gS rks
vc ^pkbYM ykWd* yx x;k gSA
^iSuy* ij le; vn`'; gks tk;sxkA
9
Page 10
Quick Start
fDod LVkVZ
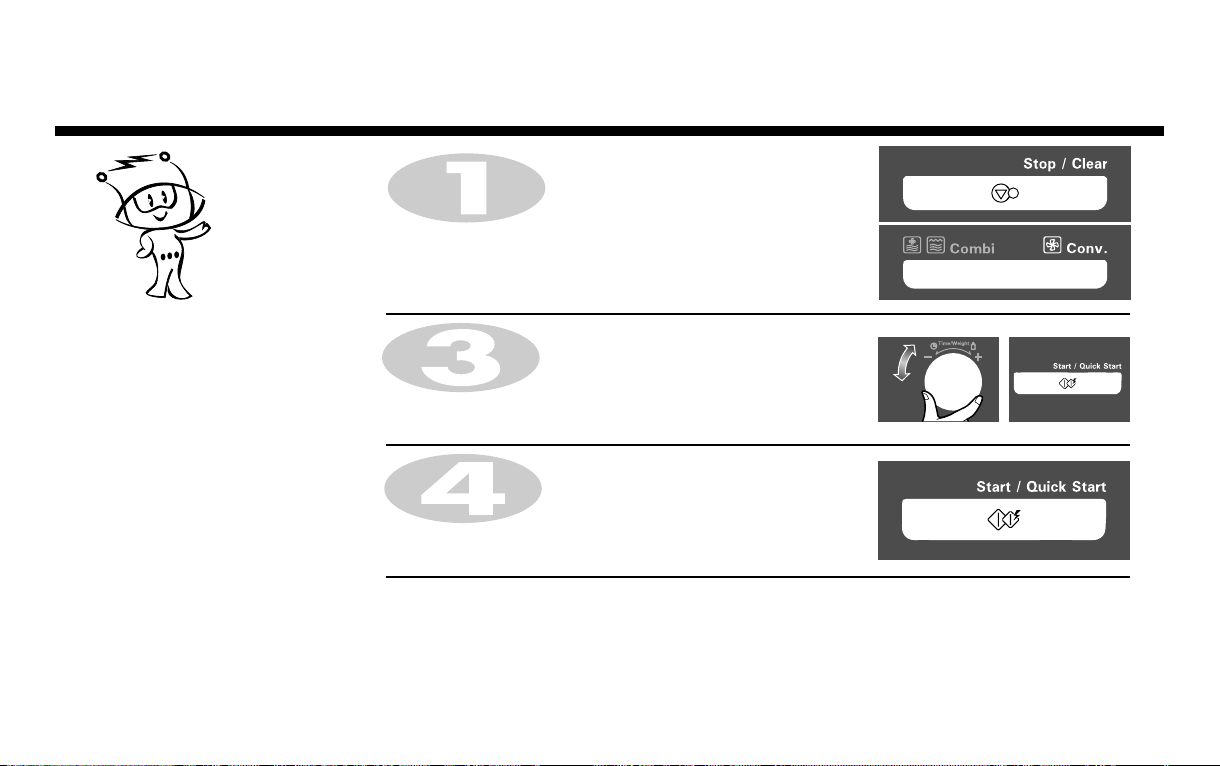
In the following example I will show you how to set 2 minutes of cooking on high power.
fuEufyf[kr mnkgj.k esa n'kkZ;k x;k gS fd mPp ikoj Lrj ij [kkuk cukus ds fy, feuV dSls lSV djrs gSaA2
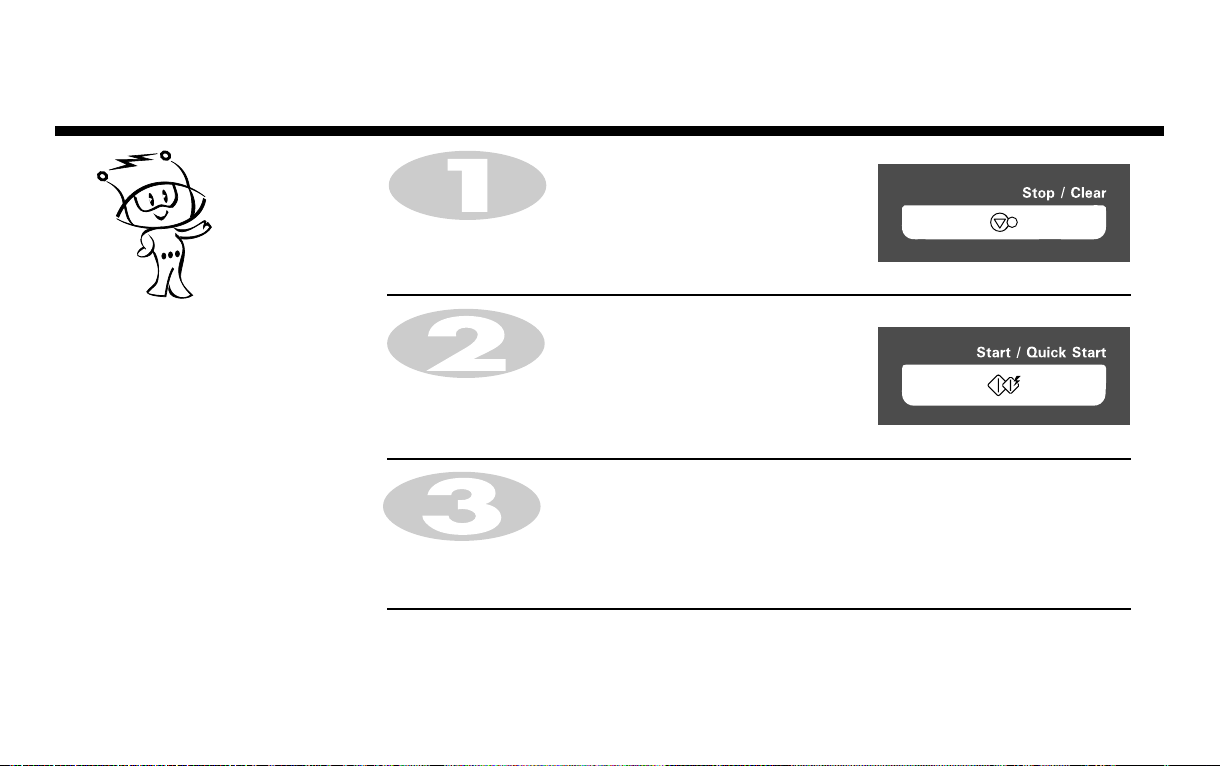
Press STOP/CLEAR.
STOP/CLEAR nck,aA
The QUICK START feature allows you to
set 30 seconds intervals of HIGH power
cooking with a touch of the QUICK
START button.
fDod LVkVZ cVu nck dj 30 lSds.M ds
vUrjky esa gkbZ ikoj ij Hkkstu idk
ldrs gSaA
10
Press QUICK START four times to select 2 minutes on HIGH power.
Your oven will start before you have finished the fourth press.
mPp ikoj Lrj ij feuV pquus ds fy, pkj ckj nck,aA
2 QUICK START
pkSFkh nkc iwjk gksus ls igys vkidk vksou pkyw gks tk;sxkA
During QUICK START cooking, you can extend the cooking time up to 99 minutes 59 seconds by repeatedly
pressing the QUICK START button or by using DIAL.
QUICK START QUICK START DIAL
idkus dk le; feuV lSdsaM rd c<+k ldrs gSa
dqfdax ds nkSjku vki cVu dks ckjEckj nckdj ;k dk bLrseky djds
99 59
Page 11
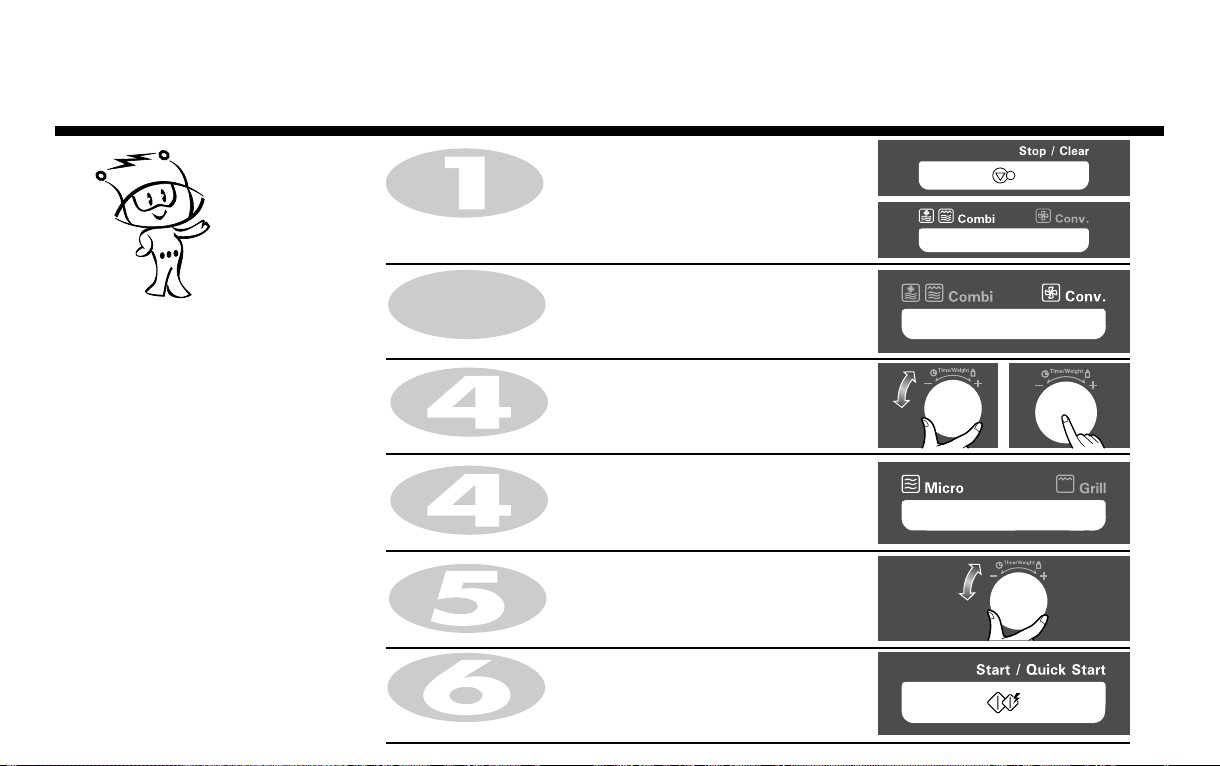
In the following example I will show you how to cook some food on 720W(80%) power for 5 minutes and 30
seconds.
fuEu mnkgj.k esa n'kkZ;k x;k gS fd feuV vkSj lSdsaM ds fy, ikoj Lrj ij [kkuk dSls idkrs gSaA5 30 720W(80%)
Make sure that you have correctly installed your oven as described
earlier in this book.
fuf'pr dj ysa fd vkius viuk vksou bl iqfLrdk esa crk;s vuqlkj yxk;k gSA
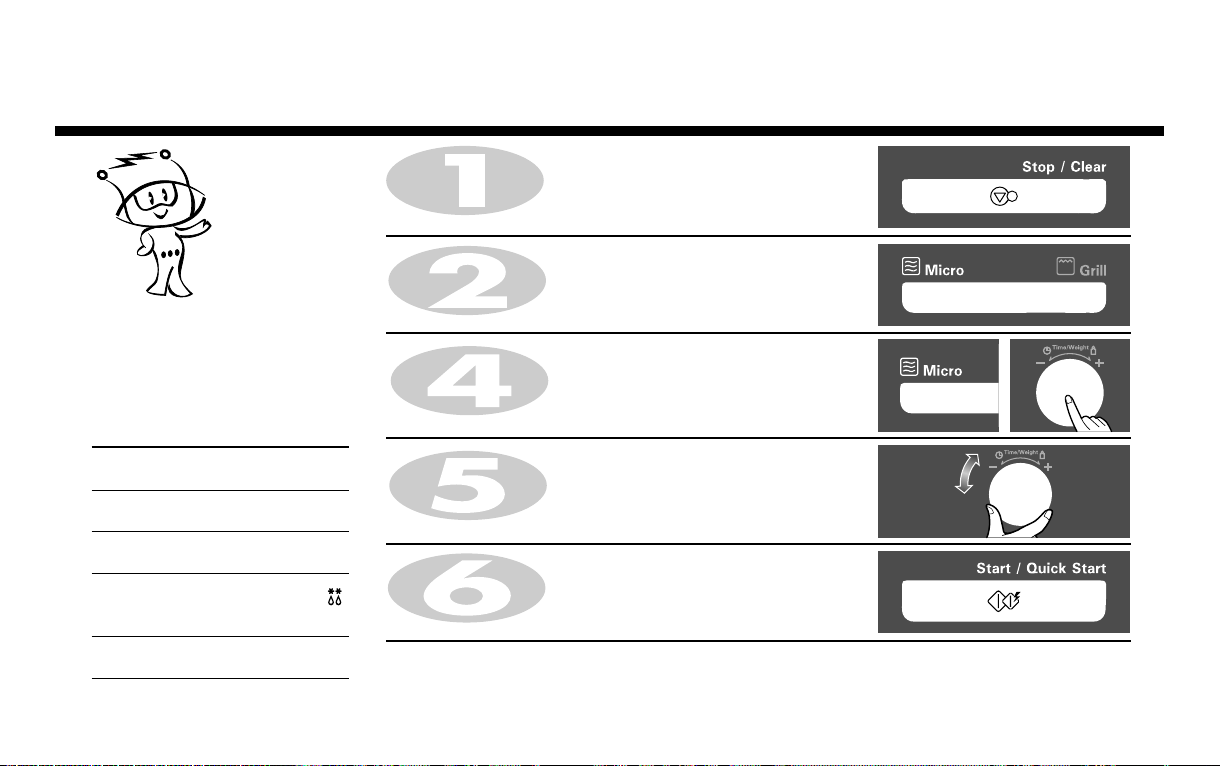
Press STOP/CLEAR. / STOP/CLEAR nck,aA
Press MICRO.
MICRO nck,aA
Your oven has five microwave Power
settings.
vkids vou esa 5 ikoj Lrj gSaA
Press MICRO until display shows “720W”.
MICRO rc rd tc rd fMlIys “720W” u n'kkZ,Anck,a
Micro Power Cooking
ekbØks ikoj dqfdax
Power Level
ikoj Lrj
HIGH
mPpre
MEDIUM HIGH
e/;e mPp
MEDIUM
e/;e
DEFROST
(MEDIUM LOW)
e/;e U;wu
LOW
U;wure
%
100%
80%
60%
40%
20%
Power Output
ikoj ek=kk
900W(max.)
720W
540W
360W( )
180W
Turn DIAL until display shows “5:30”.
DIAL rc rd ?kqek,a tc rd fMlIys “5:30” u n'kkZ,A
Press START. / START nck,aA
When cooking you can increase or decrease cooking time by turning
DIAL.
[kkuk idkrs le; ?kqekdj vki [kkuk idkus dk le; c<+k ;k ?kVk ldrs gSaDIAL
11
Page 12

Micro Power Level
ekbØks ikoj Lrj
Your microwave oven is equipped with 5 power levels to give you maximum flexibility and control over cooking.
The table below shows the examples of food and their recommended cooking power levels for use with this
microwave oven.
vkidk ekbØksoso vou 5 ikoj Lrjksa ls ySl gS rkfd Hkkstu vkids vuqdwy o bPNkuqlkj id ldsA
uhps nh xbZ lkj.kh esa [kk| inkFkks± ds uke o Hkkstu idkus ds mi;qä ikoj Lrj fn;s tk jgs gSaA
12
POWER LEVEL
ikoj Lrj
HIGH * Boil Water / ikuh mckyuk
mPpre
MEDIUM * Reheating(Liquid) / Hkkstu nksckjk xeZ djuk ¼rjy½
HIGH * Roast meat and poultry / ek¡l o eqxkZ Hkwuuk
e/;e mPp
MEDIUM * Reheating(Mashed potato, Plated meal, Ready meal)
e/;e
DEFROST
(MEDIUM LOW)
fMÝkWLV ¼e/;e U;wu½
LOW * Soften butter & cheese / eD[ku o pht+ dks uje djuk
U;wure
* Cook poultry pieces, fish, vegetables / eqxkZ] eNyh o
lfCt;k¡ idkuk
* Cook tender cuts of meat / ek¡l ds ueZ VqdM+s idkuk
* Cook mushrooms and shellfish / e'k:e o [kksy okyh
eNyh idkuk
Hkkstu nksckjk xeZ djuk ¼elys gq, vkyw] IysV esa j[kk gqvk
[kkuk] rS;kkj [kkuk½
* Cook custard / dLVMZ idkuk
* Prepare rice, soup / pkoy o lwi idkuk
* All thawing / lHkh [kk| inkFkks± dks lkekU; rkieku ij ykuk
* Melt butter and chocolate / pkWdysV o eD[ku fi?kyuk
* Cook less tender cuts of meat /
* Soften ice cream / vkblØhe dks uje djuk
* Raise yeast dough / vkVs esa [kehj mBkuk
USE
iz;ksx ikoj Lrj (%) ikoj ek=kk
ek¡l ds de uje VqdM+s idkuk
POWER
LEVEL (%)
100%
80%
60%
40%
20%
POWER OUTPUT
900W(max)
720W
540W
360W( )
180W
Page 13
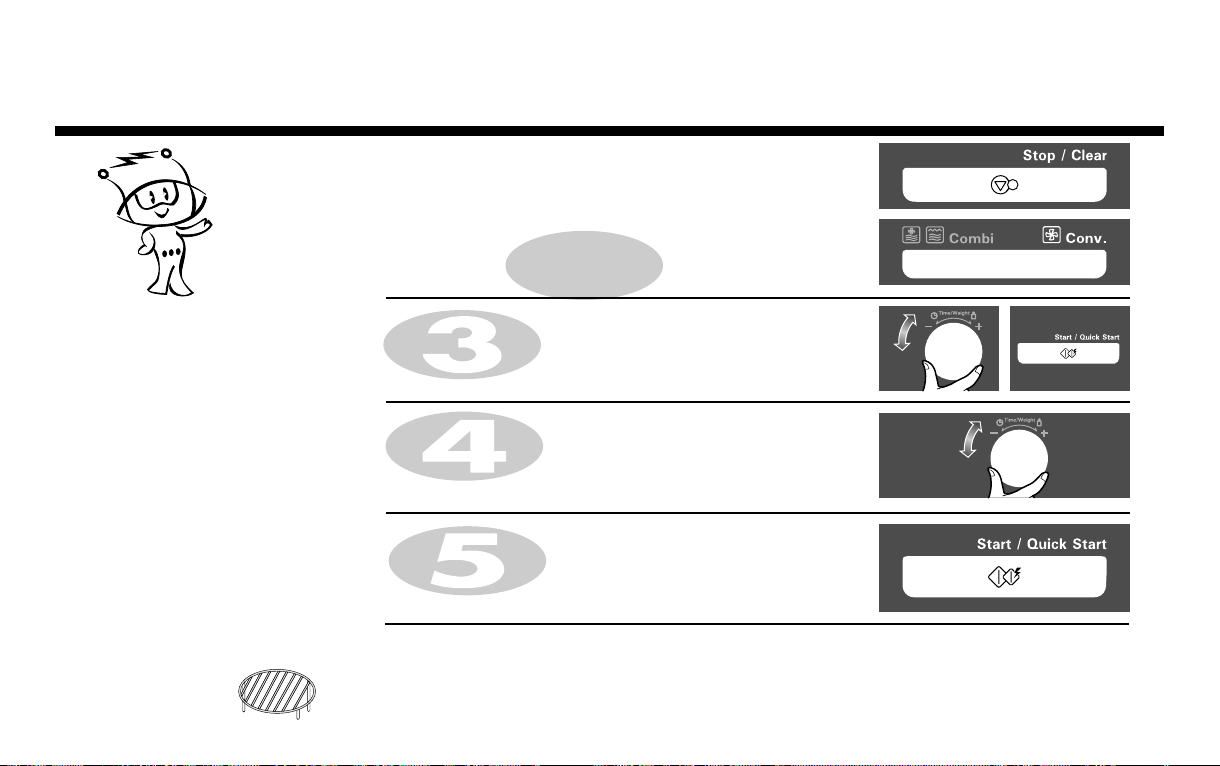
In the following example I will show you how to use the grill to cook some food for 12 minutes and 30 seconds.
fuEu mnkgj.k esa n'kkZ;k x;k gS fd feuV vkSj lSdsaM ds fy, [kkuk idkus esa fxzy dk bLrseky dSls fd;k tkrk gSA12 30
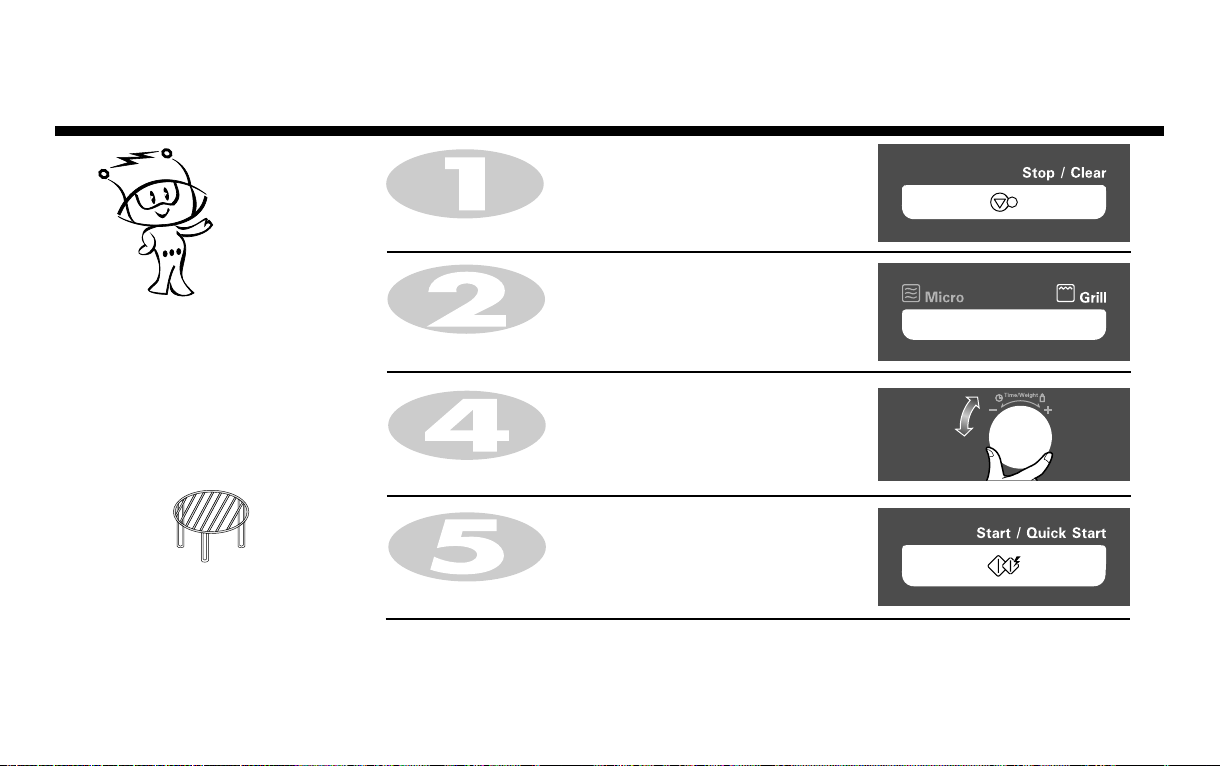
Press STOP/CLEAR. / STOP/CLEAR nck,aA
Press GRILL. / GRILL nck,aA
This feature will allow you to brown and
crisp food quickly.
;g lqfo/kk [kkus dks 'kh?kzrk ls Hkwjk vkSj
dqjdqjk djus esa enn djrk gSA
The rack must be used during grill
cooking.
Turn DIAL until display shows “12:30”.
DIAL “12:30”dks tc rd ?kqek,a tc rd fMlIys u n'kkZ,A
fxzy dqfdax ds nkSjku jSd dk iz;ksx
vo'; djuk pkfg,A
Press START. / START nck,aA
When cooking you can increase or decrease cooking time by turning
DIAL.
[kkuk idkrs le; ?kqekdj vki [kkuk idkus dk le; c<+k ;k ?kVk ldrs gSaDIAL
Grill Cooking
fxzy dqfdax
13
Page 14

Grill Combination Cooking
fxzy dkWEchus'ku dqfdax
In the following example I will show you how to programme your oven with micro power 180W(20%) and
grill for a cooking time of 25 minutes.
fuEu mnkgj.k esa n'kkZ;k x;k gS fd feuV ds fy, [kkuk idkus esa ekbØks ikoj vkSj fxzy ls
vius vksou dks dSls lSV djsaA
Press STOP/CLEAR. / STOP/CLEAR nck,aA
Press COMBI. / COMBI nck,aA
25 180W(20%)
Your oven has a combination cooking
feature which allows you to cook food
with heater and microwave at the same
time or alternately. This generally means
it takes less time to cook your food.
vkids vou esa ;g lqfoèkk bl fy;s iznku dh xbZ
gS rkfd vki blds iz;ksx ls Hkkstu dks ghVj o
ekbØksoso }kjk ,d gh le; esa ckjh ckjh ls idk
ldsaA lkekU;r% bldk vFkZ gksrk gS fd Hkkstu
idus esa yxus okys le; dh cprA
You can set three kinds of micro power
level (20%, 40% and 60%) in combi mode.
vki dkWEch eksM esa rhu izdkj ds ekbØks ikoj
Lrj ( 20%, 40% vkSj 60%) pqu ldrs gSaA
14
Press GRILL. / GRILL nck,aA
Press MICRO until display shows “180W”.
MICRO nck,a “180W”rc rd tc rd fMlIys u n'kkZ,A
Press DIAL for power confirmation. / ikoj fuf'prrk ds fy, DIAL nck,aA
Turn DIAL until display shows “25:00”.
DIAL “25:00”rc rd ?kqek,a tc rd fMlIys u n'kkZ,A
Press START. / START nck,aA
When cooking you can increase or decrease cooking time by turning DIAL.
[kkuk idkrs le; ?kqekdj vki [kkuk idkus dk le; c<+k ;k ?kVk ldrs gSaDIAL
Be careful when removing your food because the container will be hot!
[kkuk fudkyrs le; lko/kkuh j[ksa D;ksafd ml le; crZu xeZ gksxkA
Page 15
In the following example I will show you how to programme your oven with micro
power 540W ( 60%) and at a convection temperature 200 °C for a cooking time of
25 m inutes.
fuEu mnkgj.k esa n'kkZ;k x;k gS fd vksou dks feuV ds dqfdax le; ds fy, ekbØks
ikoj vkSj dUoSD'ku rkieku 200°C ds lkFk dSls lSV djsaA
540W ( 60%)
The oven has a temperature range of
100°C ~ 230°C. (180°C is automatically
available when convection combination
mode is selected.)
vksou esa rd rkieku
100°C ~ 230°C
25
Press STOP/CLEAR. / STOP/CLEAR nck,aA
Press COMBI. / COMBI nck,aA
Press CONV. / CONV nck,aA
Turn DIAL until display shows “200°C”.
DIAL “200°C”rc rd ?kqek,a tc rd fMlIys u n'kkZ,A
lhek gksrh gSA dUoSD'ku dkWfEcus'ku eksM
pquus ij rkieku Lor% gh
miyC/k gks tkrk gSA
You can set three kinds of micro power
level (20%, 40% and 60%) in combi mode.
180°C
Press MICRO until display shows “540W”.
MICRO nck,a “540W”rc rd tc rd fMlIys u n'kkZ,A
vki dkWEch eksM esa rhu izdkj ds ekbØks
ikoj Lrj (20%, 40% vkSj 60%) pqu
ldrs gSaA
Turn DIAL until display shows “25:00”.
DIAL “25:00”rc rd ?kqek,a tc rd fMlIys u n'kkZ,A
Convection Combination Cooking
dUoSD'ku dkWEchus'ku dqfdax
Press START. / START nck,aA
When cooking you can increase or decrease cooking time by turning DIAL.
[kkuk idkrs le; ?kqekdj vki [kkuk idkus dk le; c<+k ;k ?kVk ldrs gSaDIAL
Be careful when removing your food because the container will be hot!
[kkuk fudkyrs le; lko/kkuh j[ksa D;ksafd ml le; crZu xeZ gksxkA
15
Page 16
Convection Prehat
dUoSD'ku izhghV
The convection oven has a temperature range of 40°C and
100°C~230°C (180°C is automatically available when
convection mode is selected).
40°C 100°C ~ 230°C
vksou esa vkSj rd rkieku lhek gksrh
gSA dUoSD'ku eksM pquus ij rkieku Lor% gh miyC/k
gks tkrk gSA
Your oven will take a few minutes to reach the selected
temperature.
vkidk vksou pqus gq, rkieku rd igq¡pus esa dqN feuVksa
dk le; ysxkA
Once it has reached correct temperature, y our oven will BEEP
to let you know that it h as reached the correct temperature.
Then place your food in your oven: then t ell your oven to start
cooking.
,d ckj lgh rkieku ij igq¡pus ij vkidk vksou ;g crkus
ds fy, ^chi* djsxk fd vksou lgh rkieku ij igq¡p x;k gSA
rc vki vksou esa viuk [kkuk j[ksa vkSj idkus ds fy, LVkVZ
nck,aA
180°C
In the following example I will show you how to preheat the oven at a temperature of 190°C.
fuEu mnkgj.k esa n'kkZ;k x;k gS fd vksou dks 190 ds rkieku ij dSls izhghV djsaA°C
Press STOP/CLEAR. / STOP/CLEAR nck,aA
Press CONV. / CONV nck,aA
Turn DIAL until display shows “190°C”.
DIAL “190°C”rc rd ?kqek,a tc rd fMlIys u n'kkZ,A
Press START for temperature confirmation.
rkieku dh fuf'prrk ds fy, START nck,aA
Press START. / START nck,aA
Preheating will be started with displaying “ Pr-H”.
“ Pr-H” n'kkZus ij izhghfVax vkjEHk gks tk;sxhA
16
Page 17
In the following example I will show you how to preheat the oven first, then cook some food at a temperature of
190°C for 50 minutes.
fuEu mnkgj.k esa n'kkZ;k x;k gS fd vksou dks igys dSls izhghV djsa] rc 50 feuV ds fy, 19 rkieku ij0°C dqN
[kkuk idk,aA
Press STOP/CLEAR. / STOP/CLEAR nck,aA
Press CONV. / CONV nck,aA
The convection oven has a temperature
range of 40°C and 100°C ~ 230°C
(180°C is automatically available when
convection mode is selected).
40°C 100°C ~ 230°C
vksou esa vkSj rd rkieku
lhek gksrh gSA dUoSD'ku eksM pquus ij
180°C
rkieku Lor% gh miyC/k gks tkrk gSA
If you do not set a temperature your
oven will automatically select 180°C, the
cooking temperature can be changed by
turning DIAL.
;fn vki rkieku lSV ugha djrs gSa rks vkidk
vksou Lor% gh pqu ysxk] dqfdax rkieku
DIAL
The rack must be used during
convection cooking.
180°C
?kqekdj cnyk tk ldrk gSA
Turn DIAL until display shows “190°C”.
DIAL “190°C”rc rd ?kqek,a tc rd fMlIys u n'kkZ,A
Press START for temperature confirmation.
rkieku dh fuf'prrk ds fy, START nck,aA
Turn DIAL until display shows “50:00”.
DIAL “50:00”rc rd ?kqek,a tc rd fMlIys u n'kkZ,A
Press START. / START nck,aA
When cooking you can increase or decrease cooking time by turning DIAL.
[kkuk idkrs le; ?kqekdj vki [kkuk idkus dk le; c<+k ;k ?kVk ldrs gSaDIAL
fxzy dqfdax ds nkSjku jSd dk iz;ksx
vo'; djuk pkfg,A
Convection Cooking
dUoSD'ku dqfdax
17
Page 18

Various Cook Functions
fofHkUu dqd dk;Ziz.kkfy;ka
Please follow the given steps to operate cook functions (Nutri Care, Indian Rasoi, 24 Hours, Utility Corner) in your Microwave.
COOK MODE
STEP-1
STEP-2
STEP-3
STEP-4
Nutri Care, Indian Rasoi, 24 Hours, Utility Corner
Press Stop/Clear
Press any of above cook mode button to select any of these food categories
HP (Health Plus)Co (Continental Menu),So(Soups), ,IC (Indian Cuisine),SC (Sweet Corner),
tS (Tandoor Se), bF (Breakfast) , CF (Child's Favourite) , bA (Bakery)
Turn DIAL to select weight (If Required)
Press Start
Utility Corner, (UC)
Press Stop/Clear
Press Utility Corner and select any of food category
UC (Utility Corner), FE (fermentation),CA (Cake)
Turn DIAL to set weight (if required)
Press Start
Rotisserie
jksVsljh
Never operate the oven at microwave and combination mode with rotisserie bar in the cavity when oven is empty.
[kkyh vksou esa jksVsljh ckj yxkdj ekbØksoso o dkWEchus'ku eksM esa dHkh u pyk;saA
1. Position the food on the spit, ensuring that the rotisserie bar runs centrally through the food. And tie the food with thread to the
bar if necessary.
Hkkstu dks jksVsljh ckj dh lyk[kksa esa yxk,a vkSj ;fn vko';d gks rks /kkxs ls cka/ksaA è;ku jgs fd jksVsljh ckj Hkkstu ds dsUæ ls xqt+jsA
2. Insert the end of the rotisserie bar (D) into the rotisserie jaw (A) on the left side of the oven wall. Push it to the left, rotating the
rotisserie bar slightly until the rotisserie-bar fits into the rotisserie jaw (A).
jksVsljh ckj dk fdukjk (D) vksou dh cka;h nhokj ij jksVsljh [kk¡ps (A) esa yxk;saA cka;h rjQ gYdk nck;sa tc rd jksVsljh ckj jksVsljh [kk¡ps
(A) esa u Q¡l tk,A
3. Support the other end of the rotisserie bar (E) on the hollow of the rotisserie holder (B).
jksVsljh ckj dk nwljk fdukjk (E) jksVsljh gksYMj (B) ds [kkyh Hkkx esa j[ksaA
4. Carefully place the heat proof glass ware in the microwave oven, on top of the glass turntable.
VuZ Vscy ds Åij ekbØksoso vksou esa Å"ekjks/kd dk¡p ds crZu /;ku ls j[ksaA
Note : This Rotisserie will support small pieces of Veg & Non-Veg food. Big pieces may get struck to the Glass Tray.
fVIi.kh % jksVsljh 'kkdkgkjh ,oa ek¡lkgkjh Hkkstu ds NksVs VqdM+ksa dks idkus esa lgk;d gSA cM+s VqdM+s Xykl Vªs ls Vdjk ldrs gSaA
18
A
Rotisserie-Jaw
Rotisserie-Holder
C
D
E
F
B
Page 19

NUTRI CARE
1. Health Plus (HP)
2. Continental (Co)
3. Soup (So)
Page 20

Health Plus
gSYFk Iyl
Menu Weight Limit Utensil Instructions
HP1
HP2
Kala
Chana
Karela
Subzi
0.1 ~ 0.3 kg Microwave
0.3 kg
safe bowl
Microwave
safe bowl
Kala Chana (soaked overnight)
Water
Oil
Onion Chopped
Salt, Chat Masala, Red Chilli Powder, Hara Dhania
Method : 1. Soak chana overnight, in a MWS bowl put soaked chanas
with water & cover. Select menu and weight and press start.
2. When beeps, remove & drain the water.
3. In a *MWS bowl add oil, chopped onion,salt, chaat masala,
red chilli powder and hara dhania and press start. Mix well.
Press start.
4. When beeps, add chanas to the bowl along with little hot
water and press start. Mix well. Give standing time of 3
minutes. Serve hot.
For
Chopped karela
Oil
Water
Chopped onion
Rai, jeera, hing & haldi
Salt, sugar, garam masala, dhania powder, jeera powder
Grated coconut
Method :
1. In a MWS bowl add oil, rai, jeera, hing, haldi, chopped
onion. Select menu and press start.
2. When beeps, add the chopped karela & cover. Press start.
3. When beeps, add some water, salt, sugar, garam masala,
dhania powder, jeera powder and cover. Press start.
Allow it to stand for 5 mins. Garnish with grated coconut
and serve.
0.1 kg
200 ml
1 tbsp
1/2 cup
NUTRI CARE
0.2 kg
400 ml
2 tbsp
1 cup
As per your taste
fof/k % 1.
pus dks jkrHkj fHkxks,a] ekbØksoso lsQ ckmy esa Hkhxs gq, pus ikuh ds
lkFk ysa vkSj <d nsaA ehuw vkSj otu pqudj LVkVZ nck,aA
2.
chi lqukbZ nsus ij] ckmy ckgj fudkysa vkSj ikuh cgk nsaA
3.
,d ekbØksoso lsQ ckmy esa rsy] dVh gqbZ I;kt] ued] pkV elkyk]
yky fepZ ikmMj vkSj gjk /kfu;k Mkysa vkSj LVkVZ nck,aA vPNh rjg
feykdj fQj LVkVZ nck,aA
4.
chi lqukbZ nsus ij] puk ckmy esa FkksM+s xeZ ikuh ds lkFk Mkysa vkSj
LVkVZ nck,aA vPNh rjg feyk,aA 3 feuV rd j[kk jgus nsaA
xje&xje ijkslsaA
0.3 kg
300 g
2 tbsp
As required
½ cup
For tempering
As per taste
For garnishing
fof/k % 1.
,d ekbØksoso lsQ ckmy esa rsy] jkbZ] thjk] ghax] gYnh] dVh gqbZ
I;kt ysaA ehuw pqudj LVkVZ nck,aA
2.
chi lqukbZ nsus ij] dVk gqvk djsyk Mkydj <d nsaA LVkVZ nck,aA
3.
chi lqukbZ nsus ij] FkksM+k ikuh] ued] phuh] xje elkyk] /kfu;k ikmMj]
thjk ikmMj Mkydj <d nsaA LVkVZ nck,aA 5 feuV rd j[kk jgus nsaA
dls gq, ukfj;y ls ltk,a vkSj ijkslsaA
0.3 kg
600 ml
3 tbsp
1½ cup
* MWS - Microwave Safe
20
Page 21

Health Plus
NUTRI CARE
Menu Weight Limit Utensil Instructions
HP3
HP4
Moong Dal
Lemon
Chicken
0.2 kg
0.1 ~ 0.3 kg Microwave
Microwave
safe bowl
safe bowl
For
Moong Dal soaked in water (for 1 hour)
Water
Oil
Jeera
Hari Mirch
Curry Leaves
Salt, Dhania-Jeera Powder, Haldi, Hing, Kasuri Methi, Lemon Juice,
Hara Dhania
Method : 1. Take 200 gms dal in Microwave Safe bowl, add Water,
Method : 1. Mix boneless chicken, soysauce, salt & pepper, garlic paste
Haldi & Hing.
2.
Select menu press start to cook.
3.
When beep take another bowl add oil, jeera, hari mirch,
curry leaves & press start.
4. When beep add dal, salt, dhania jeera powder, hara
dhania, kasuri methi (optional), water (if required) &
lemon juice and press start to cook.
For
Boneless Chicken
Soya sauce
Corn flour
Water
Salt, pepper & sugar
Garlic paste
Lemon juice
Oil
& lemon juice in a bowl. Refrigerate for ½ hour.
2. In a MWS bowl add oil, marinated chicken pieces, sugar,
corn flour mixed with water. Cover. Select menu & weight &
press start.
3. When beeps, mix well. Cover & press start.
Allow to stand for 3 minutes.
0.1 kg
100 g
½ tbsp
½ tbsp
½ cup
1 tbsp
2 tsp
½ tbsp
0.2 kg
200 g
400 ml
2 tbsp
1 tsp
2-3 nos.
5-6 nos.
As per your taste
fof/k %
1.
ekbØksoso lsQ ckmy esa 200 xzke nky ysa vkSj ikuh] gYnh rFkk ghax MkysaA
2.
ehuw pqudj idkus ds fy, LVkVZ nck,aA
3.
^chi* lqukbZ nsus ij nwljk ckmy ysa vkSj rsy] thjk] gjh fepZ]
djh iÙkk Mkysa rFkk LVkVZ nck,aA
4.
^chi* lqukbZ nsus ij nky] ued] /kfu;k thjk ikmMj] gjk /kfu;k]
dlwjh eSFkh ¼oSdfYid½] ikuh ¼;fn vko';d gks½ rFkk uhacw jl Mkysa
vkSj idkus ds fy, LVkVZ nck,aA
0.2 kg
200 g
1 tbsp
1 tbsp
½ cup
As per taste
As per taste
3 tsp
1 tbsp
fof/k % 1.
cksuySl fpdu] lks;k lkWl] ued] fepZ] yglu isLV rFkk uhacw jl ,d
ckmy esa ysdj vPNh rjg feyk ysaA
2.
ekbØksoso lsQ ckmy esa rsy] elkyk yxs gq, fpdu ds VqdM+s] phuh]
ikuh ds lkFk Hkhxk gqvk eDdk dk vkVk MkysaA
3.
^chi* lqukbZ nsus ij vPNh rjg feyk,a vkSj <ddj LVkVZ nck,aA
3 feuV rd j[kk jgus nsaA
0.3 kg
300 g
1½ tbsp
1½ tbsp
½ cup
2 tbsp
4 tsp
1½ tbsp
gSYFk Iyl
21
Page 22

Health Plus
gSYFk Iyl
Menu Weight Limit Utensil Instructions
Machi
HP5
kali mirch
Soya Idli
HP6
* Provided in Starter Kit
0.1 ~ 0.3 kg
0.1 ~ 0.3 kg
Microwave
safe bowl
Microwave safe
Idli Steamer*
For
Pomfret (fish category)
Salt, Lemon juice, Kli mich powder
Oil, chopped onion, chopped tomato, chopped garlic
Method : 1. Take Pomfret slices as per weight either
(0.1kg/0.2kg/0.3kg) and marinate with salt, lemon juice,
kali mirch as per taste for 1 hour.
2. In a MWS bowl add oil, chopped onion, chopped tomato,
chopped garlic and press start. Mix well.
Select menu & weight & press start.
3. When beeps, mix well, add marinated fish and salt to taste
and some water. Press start. Allow to stand for 5 mins.
For
Rice
Urad dal
Soya beans
Water
Salt
Mix vegetables - Green peas, sweet corns, carrots
Method :
Method : 1.
Wash & Soak rice, Urad dal & Soya beans for 4 hours.
2.
Grind, mix and ferment for 8 to 10 hours.
3. Grease Idli Stand with Oil. Put Idli batter in it. Select menu &
weight and press start to cook.
Chop mix vegetables as per your taste (for example
Note :
green peas, Sweet Corns, Carrots, Cauliflower etc.)
0.1 kg
100 g
0.1 kg
100 g
2 tbsp
2 tbsp
1 tsp
NUTRI CARE
0.2 kg
200 g
To marinate as per taste
As required
fof/k % 1.
ikseÝsV eNyh ds VqdM+s otukuqlkj (0.1 Kg/ 0.2 Kg/ 0.3Kg)
ysdj ued] uhacw jl vkSj dkyh fepZ ikmMj ds lkFk Loknkuqlkj
eSjhusV dj ysa vkSj ,d ?k.Vs ds fy, j[k nsaA
2.
ekbØksoso lsQ ckmy esa rsy] dVs gq, I;kt] VekVj] yglqu Mkysa
vkSj LVkVZ nck,aA vPNh rjg feyk,aA ehuw ,oa otu pqudj
LVkVZ nck,aA
3.
^chi* lqukbZ nsus ij vPNh rjg feyk,a] elkyk yxh gqbZ eNyh ,oa
Loknkuqlkj ued vkSj FkksM+k ikuh MkysaA LVkVZ nck,aA 5 feuV
rd j[kk jgus nsaA
0.2 kg
200 g
3 tbsp
3 tbsp
As required
2 tsp
As required
1.
pkoy] mM+n nky vkSj lks;kchu dks /kksdj 4 ?k.Vs ds fy,
fof/k %
fHkxksdj j[k nsaA
2.
ihlsa] feyk,a vkSj 8 ls 10 ?k.Vs rd [kehj cuk,aA
3.
bMyh LVSaM ij rsy yxk,aA bMyh ds xksys mlds vUnj j[ksaA
ehuw ,oa otu fu/kkZfjr djsa vkSj idkus ds fy, LVkVZ nck,aA
uksV % Loknkuqlkj fefJr lfCt;ksa dks dkVsa ¼mnkgj.k ds fy,
gjh eVj] LohV dkWuZ] xktj] xksHkh bR;kfn½
0.3 kg
300 g
0.3 kg
300 g
4 tbsp
4 tbsp
2 tsp
22
Page 23

Health Plus
NUTRI CARE
Menu Weight Limit Utensil Instructions
HP7
HP8
Nutrinuggets
Curd
Brinjal
0.1 ~ 0.3 kg
0.1 ~ 0.3 kg
Microwave
safe bowl
Microwave
safe bowl
For
Soaked and boiled nutrinuggets
Potato
Oil
Jeera
Chopped onion
Tomato puree
Salt, garam masala, red chilli powder, haldi, dhania powder
Water
Chopped coriander leaves
Method : 1. In a MWS bowl add oil, jeera, onion. Select menu and
weight and press start. Mix well.
2. When beeps, add tomato puree,nutrinuggets, potato,
salt, red chilli powder, haldi, dhania powder and add
½ the amount of water mentioned per weigh(For eg.
For 100g, add 1 cup of water) and press start. Mix well.
3. When beeps, add the remaining amount of water and
press start. Mix well. Allow to stand for 3 minutes.
Garnish with coriander leaves & serve hot with roti.
For
Brinjal
Curd
Oil
Curry leaves
Mustard & cumin seeds
Salt
Chopped giner
Method : 1. In a MWS bowl add oil & brinjal. Cover. Select menu &
weight & press start.
2. When beeps, remove & in another MWS bowl add oil,
mustard & cumin seeds, curry leaves & chopped ginger.
Press start.
3. When beeps, add brinjal, curd & salt. Mix well &
press start.
0.1 kg
50 g
50 g
1 tbsp
1/2 cup
½ cup
1 cup
0.1 kg
100 g
100 g
1 tbsp
1 tsp
1 tsp
gSYFk Iyl
0.2 kg
100 g
100 g
1½ tbsp
As per taste
1 cup
½ cup
As per taste
1½ cup
For garnishing
fof/k % 1. ekbØksoso lsQ ckmy esa rsy] thjk] I;kt ysaA ehuw ,oa otu pqudj
LVkVZ nck,aA vPNh rjg feyk,aA
2. chi lqukbZ nsus ij] VkWesVks I;wjh] U;wVªhuxsV~l] vkyw] ued] yky
fepZ ikmMj] gYnh] /kfu;k ikmMj Mkysa vkSj otukuqlkj crk;s x;s
ikuh dh ek=kk dk vk/kk ikuh Mkysa ¼mnkgj.kkFkZ 100 xzke ds fy,
1 di ikuh½A LVkVZ nck,aA vPNh rjg feyk,aA
3. chi lqukbZ nsus ij] cpk gqvk ikuh Mkysa vkSj LVkVZ nck,aA vPNh
rjg feyk,aA feuV rd j[kk jgus nsaA /kfu;k dh ifÙk;ksa ls
ltk,a vkSj jksVh ds lkFk xje&xje ijkslsaA
1. ekbØksoso lsQ ckmy esa rsy vkSj cSaxu ysdj <d nsaA ehuw vkSj
fof/k %
otu pqudj LVkVZ nck,aA
2. chi lqukbZ nsus ij] ckmy ckgj fudky ysa vkSj nwljs ekbØksoso lsQ
ckmy esa rsy] ljlksa vkSj vtokbu ds nkus] djh iÙkk vkSj dVh gqbZ
vnjd MkysaA LVkVZ nck,aA
3. chi lqukbZ nsus ij] cSaxu] ngh vkSj ued MkysaA vPNh rjg feykdj
LVkVZ nck,aA
3
0.2 kg
200 g
200 g
2 tbsp
A few sprigs
2 tsp
As per taste
2 tsp
0.3 kg
150 g
150 g
2 tbsp
1½ cup
1 cup
2 cup
0.3 kg
300 g
300 g
3 tbsp
3 tsp
3 tsp
23
Page 24

Continental
dkWUVhusUVy
Menu Weight Limit Utensil Instructions
Co1 0.1 ~ 0.3 kg
Pasta
Co2
Veg Au Gratin
0.1 ~ 0.3 kg
Microwave
safe bowl
&
Microwave
safe glass flat dish
&
High Rack
Microwave
safe flat glass dish
&
High rack
Penne Pasta
Butter
Onion Chopped
Garlic Chopped
Chopped Palak leaves
Hot Water
Cream
Grated Cheese
Nutmeg Powder
Oregano
Salt & Pepper
Method : 1. In MWS bowl take pasta with hot water. Select menu
Method : 1. In MWS flat glass dish take butter, vegetable & maida,
& weight press start.
2. Drain water from pasta. In MWS flat glass dishl add
butter, onion, garlic & palak, mix well press start.
3. Add cream, cheese, nutmeg powder, oregano, salt &
pepper and boiled pasta add some hot water, mix well
& sprinkle grated cheese keep the vessel on high rack
press start.
Mix Vegetables - Gajar, Cauliflower, French Beans (cut into
small pieces), Sweet Corns, Green peas etc.
Maida
Butter
Milk
Hot Water
Grated Cheese
Salt, Sugar & Pepper
mix well, select menu & weight press start.
2. When beeps, add milk, hot water, salt, sugar & pepper,
mix well & press start.
3. When beeps, mix well and spread grated cheese on it
and keep on high rack. Press start.
0.1 kg
1 tbsp
1 tbsp
1 tsp
50 gm
400 ml
0.1kg
1 tbsp
1 tsp
1 Cup
¼ Cup
2 tbsp
NUTRI CARE
0.2 kg
2 tbsp
2 tbsp
2 tsp
75 gm
800 ml
1 pinch
As per your taste
fof/k %
1.
ekbØksoso lsQ ckmy esa iLrk xeZ ikuh ds lkFk ysaA ehuw vkSj
otu pqudj LVkVZ nck,aA
2.
iLrk dk ikuh fudky nsaA ekbØksoso lsQ ¶ySV Xykl fM'k esa eD[ku]
I;kt] yglqu vkSj ikyd Mkydj vPNh rjg feyk,a vkSj LVkVZ nck,aA
3.
Øhe] pht+] eawxQyh ikmMj] vkWfjxuks] ued] fepZ vkSj mcyk gqvk
iLrk Mkysa] FkksM+k xeZ ikuh Mkydj vPNh rjg feyk,a vkSj dlk
gqvk pht+ fNM+dsaA fM'k dks gkbZ jSd ij j[kdj LVkVZ nck,aA
0.2 kg
2 tbsp
2 tsp
2 cup
½ cup
4 tbsp
As per your taste
fof/k %
1. ekbØksoso lsQ ¶ySV Xykl fM'k esa eD[ku] lfCt;ka vkSj eSnk Mkysa]
vPNh rjg feyk,aA ehuw vkSj otu pqudj LVkVZ nck,aA
2. chi lqukbZ nsus ij nw/k] xeZ ikuh] ued] phuh vkSj fepZ Mkydj
vPNh rjg feyk,a vkSj LVkVZ nck,aA
3. chi lqukbZ nsus ij vPNh rjg feyk,a vkSj mlds Åij dlk gqvk
pht+ QSyk,a vkSj gkbZ jSd ds Åij j[kdj LVkVZ nck,aA
0.3 kg
3 tbsp
3 tbsp
3 tsp
100 gm
1200 ml
1½ cup1 cup½ cup
4 tbsp3 tbsp2 tbsp
¾ tsp½ tsp¼ tsp
0.3 kg
3 tbsp
3 tsp
2 cup
¾ cup
6 tbsp
24
Page 25

Continental
NUTRI CARE
Menu Weight Limit Utensil Instructions
Co3 0.1 ~ 0.3 kg
Macaroni
Co4 0.1 ~ 0.3 kg
Baked
Mushrooms
Microwave
safe bowl
Microwave
safe flat glass dish
&
High Rack
Macaroni
Hot Water
Butter
Spring Onion Chopped
Garlic Chopped
Mushrooms Chopped
Tomato Sauce
Chilli Sauce
Salt, Sugar, Pepper & Oregano
Method : 1. In MWS bowl take Macaroni with hot water. Select menu &
Method : 1. In MWS glass flat dish put all the ingredients except
weight press start.
2. Drain water from it. In MWS bowl add all the ingredients with
boiled Macaroni, mix well & press start.
For
Mushrooms
White Sauce
Salt, Kali Mirch, Grated cheese
Butter
cheese, mix well. Select menu & weight, press start.
2. When beep keep high rack in the oven. Spread grated
cheese on the top of the mixture. Place the dish on
the rack. Press Start.
0.1 kg
400 ml
1 tbsp
1 tbsp
1 tsp
3 Nos.
0.1 kg
50 gm
1 tbsp
dkWUVhusUVy
0.2 kg
800 ml
2 tbsp
2 tbsp
2 tsp
4 Nos.
As per your taste
fof/k %
1. ekbØksoso lsQ Xykl ckmy esa eSdjkWuh xeZ ikuh ds lkFk ysaA ehuw
vkSj otu pqudj LVkVZ nck,aA
2. bldk ikuh fudky nsaA ekbØksoso ckmy esa lHkh lkefxz;ka mcys
gqbZ eSdjkWuh ds lkFk Mkysa] vPNh rjg feyk,a vkSj LVkVZ nck,aA
0.2 kg
100 gm
As per taste
1½ tbsp
fof/k %
1. ekbØksoso lsQ Xykl ¶ySV fM'k esa pht+ ds vfrfjDr lHkh
lkefxz;ka Mkysa vkSj vPNh rjg feyk,aA ehuw vkSj otu pqudj
LVkVZ nck,aA
2. chi lqukbZ nsus ij vksou ds vUnj gkbZ jSd dks j[ksaA feJ.k ds
Åij dlk gqvk pht+ QSyk,a vkSj fM'k dks gkbZ jSd ij j[kdj
LVkVZ nck,aA
0.3 kg
1200 ml
3 tbsp
3 tbsp
3 tsp
5 Nos.
3 tbsp2 tbsp1 tbsp
3 tsp2 tsp1 tsp
0.3 kg
150 gm100 gm50 gm
150 gm
2 tbsp
25
Page 26

Continental
dkWUVhusUVy
Menu Weight Limit Utensil Instructions
Co5 0.3 kg
Lasaneya
Microwave
safe flat glass dish
&
High Rack
Lasaneya Sheets (cooked)
White Sauce
Pizza Sauce
Mix Vegetables (boiled) - Egg plant, Zukini,
Brocolli, Mushrooms, Sweet Corns etc.
Oil
Oregano, Salt & Black Pepper
Grated Cheese
Method : 1. Except Lasagne sheets and cheese mix all the ingredients in
MWS glass bowl. Select menu & press start.
2. When beep, in MWS flat glass dish arrange lasagna sheet in
the bottom. Then spread vegetable mixture on it again keep
another lasagna sheet on it and make layers of sheets and
vegetable mixture. Spread grated cheese on the top and
press start.
3. When beep, keep high rack in the oven and place the dish on
the rack and press start.
NUTRI CARE
150 gm
1 cup
½ cup
2 cups
2 tbsp
As per your taste
4 tbsp
fof/k %
1. yklkus 'khV~l vkSj pht+ dks NksM+dj lHkh lkefxz;ka ekbØksoso lsQ
Xykl ckmy esa vPNh rjg feyk ysaA ehuw pqudj LVkVZ nck,aA
2. chi lqukbZ nsus ij ekbØksoso lsQ ¶ySV Xykl fM'k esa yklkus 'khV
QSyk,aA fQj mlds Åij lfCt;ksa dk feJ.k QSyk,aA nqckjk mlds
Åij nwljh yklkus 'khV QSyk,aA blh izdkj yklkus 'khV~l vkSj
lfCt;ksa dh vkSj ijrsa yxk,aA lcls Åij dlk gqvk pht+ QSyk,a
vkSj LVkVZ nck,aA
3. chi lqukbZ nsus ij gkbZ jSd dks vksou esa j[kdj mlds Åij fM'k
dks j[ksa vkSj LVkVZ nck,aA
26
Page 27

Soup
NUTRI CARE
Menu Weight Limit Utensil Instructions
So1
So2
Sweet
Corn Soup
Mushroom
Soup
0.3 kg
0.3 kg
Microwave
safe glass bowl
Microwave
safe glass bowl
For
Sweet Corn
Water
Oil
Cornflour
Salt, sugar,kali mirch, chopped onion and green chilli
Method : 1. Grind sweet corn with some water. Put in MWS glass
bowl along with 2 cups water. Select menu & press start.
Strain the stock.
2. When beeps, remove in another MWS glass bowl add oil,
green chilli and onion. Add the stock in it. Mix cornflour
with ½ cup water and add to the stock.
Add 2 cups water as your requirement, salt, sugar, kali
mirch and press start. Serve hot.
For
Mushrooms
Potato
Cabbage (chopped)
Onion (chopped)
Tomato sauce
Corn flour
Salt, sugar, pepper (black)
Oil
Water
Method : 1. In MWS glass bowl put potato in small pieces, chopped
cabbage and onion with 2 cups of water. Select menu
and press start.
2. When beeps, take the bowl out & grind the stock. After
grinding the stock, strain it and add water (if required).
3. In another bowl add oil, chopped mushroom and press start.
4. When beeps, add strained stock. Mix corn flour with ½ cup
water & add to the stock. Add salt, black pepper, sugar and
tomato sauce and press start. Serve hot garnish with grated
cheese.
lwi
0.3 kg
200 g
2 cups
1 tbsp
2 tbsp
As per taste
fof/k % 1.2.LohV dkWuZ dks dqN ikuh ds lkFk ihlsa vkSj ekbØksoso lsQ Xykl
ckmy esa nks di ikuh ds lkFk j[ksaA ehuw vkSj otu pqudj LVkVZ
nck,aA LVkWd dks fupksM+ ysaA
chi lqukbZ nsus ij] ,d nwljs ekbØksoso lsQ ckmy esa rsy] gjh
fepZ vkSj I;kt MkysaA
fQj LVkWd dks blesa MkysaA vk/kk di ikuh esa eDdk dk vkVk
feykdj LVkWd esa MkysaA fQj vko';drkuqlkj nks di ikuh] ued]
phuh] dkyh fepZ Mkydj LVkVZ nck,aA xje ijkslsaA
0.3 kg
100 g
1 No.
50 g
1 small
2 tbsp
2 tbsp
As per taste
2 tbsp
fof/k %
1.
ekbØksoso lsQ Xykl ckmy esa vkyw ds NksVs&NksVs VqdM+s] dVh gqbZ
cUnxksHkh vkSj I;kt Mkydj nks di ikuh ds lkFk j[k nsaA ehuw
pqudj LVkVZ nck,aA
2.
chi vkus ij] ckmy dks ckgj fudkysa vkSj LVkWd dks ihl ysaA fQj
iwjs LVkWd dks fupksM+sa vkSj viuh vko';drkuqlkj ikuh MkysaA
3.
vc ,d nwljs ckmy esa rsy] dVs gq, e'k:e Mkysa vkSj LVkVZ nck,aA
4.
chi vkus ij] fupksM+s gq, LVkWd dks bl ckmy esa Mkysa vkSj vk/kk di
ikuh esa eDdk dk vkVk feykdj bl LVkWd esa MkysaA fQj ued]
dkyh fepZ] phuh vkSj VksesVks lkWl Mkydj LVkVZ nck,aA
dls gq, pht+ ls ltkdj xeZ&xeZ ijkslsaA
2 cups
27
Page 28

Soup
lwi
Menu Weight Limit Utensil Instructions
0.3 kg Microwave
0.3 kg
safe glass bowl
Microwave
safe glass bowl
For
Chopped Tomato
Chopped Carrot
Chopped Onion
Chopped Ginger
Chopped Garlic
Salt, Sugar, Pepper
Cornflour
Water
Oil / Butter
From Stock (Boiled Vegetables)
Method :
1. In MWS glass bowl add chopped tomato, chopped onion,
ginger, garlic and carrot with 2 cup of water. After that put
the MWS bowl in Microwave. Select the menu and then
press start.
2.
When beeps, grind and strain the whole stock and add water
as per your requirement.
3.
In another bowl add oil/butter and stock and then put the
bowl in Microwave and press start. When beeps, add sugar,
salt, black pepper as per your taste and cornflour paste
which is made up by mixing the half cup of cold water and
add the grinded stock & press start.
4.
Serve hot and garnish with bread croutons, coriander (green
dhania) and fresh cream.
For
Boneless chicken
Ginger & Garlic paste
Salt & pepper powder
Cornflour paste
Oil / Water
Method :
In Microwave safe glass bowl put water & add chicken pieces.
1.
Select menu & press start.
When beeps, remove.
2.
In another microwave safe glass bowl add oil, ginger-garlic paste,
3.
chicken stock, salt, pepper, green chillies & 1 cup water. Press
start.
28
So-3
So4
Tomato
Soup
Chicken
Soup
NUTRI CARE
0.2 kg
100 g
25 g
1 small
1 tsp
1 tsp
As per your taste
2 tbsp
2 cups
2 tbsp
fof/k %
LVkWd ¼mcyh gqbZ lfCt;ksa½ ls
1.
ekbØksoso lsQ Xykl ckmy esa dVs gq, VekVj] I;kt] vnjd] yglqu
vkSj xktj nks di ikuh ds lkFk MkysaA fQj ml ckmy dks vksou esa
j[kdj ehuw vkSj otu fu/kkZfjr djsa vkSj LVkVZ nck,aA
2.
chi lqukbZ nsus ij iwjs dks ihldj fupksM+ ysa vkSj viuh vko';drk
ds vuqlkj ikuh feyk ysaA
3.
nwljs ckmy esa rsy@eD[ku vkSj LVkWd Mkysa vkSj ckmy dks vksou esa
j[kdj LVkVZ nck,aA chi lqukbZ nsus ij phuh] ued] Loknkuqlkj dkyh
fepZ vkSj dkWuZ¶yksj isLV tks vk/kk di BaMk ikuh Mkydj cukbZ tkrh gS
vkSj fils gq, LVkWd ¼mcyh gqbZ lkexzh½ dks Mkysa vkSj LVkVZ nck,aA
4.
xeZ&xeZ ijkslsa vkSj czSM ds VqdM+ksa] gjs /kfu;k rFkk rkt+k Øhe ls ltk,aA
0.3 kg
300 g
1 tsp each
As per your taste
2 tbsp + ½ cup of water
2 tbsp / 2 cups
fof/k % 1.
ekbØksoso lsQ Xykl ckmy esa ikuh ysdj fpdu ds VqdM+s MkysaA
ehuw pqudj LVkVZ nck,aA
2.
chi lqukbZ nsus ij ckgj fudky ysaA
3.
,d nwljs ekbØksoso lsQ Xykl ckmy esa rsy] vnjd&yglqu isLV]
fpdu LVkWd] ued] yky fepZ] gjh fepZ vkSj ,d di ikuh
Mkydj LVkVZ nck,aA
Page 29

Soup
NUTRI CARE
Menu Weight Limit Utensil Instructions
So5
Wonton
Soup
0.3 kg
Microwave
safe glass bowl
For
Chopped cabbage, carrot, capsicum, french beans
Ginger paste
Garlic paste
Spinach in pieces
Oil
Salt, sugar, pepper powder
Water
Ready wonton
Method : 1. In MWS glass bowl add oil and vegetables, ginger-garlic
paste. Select menu & press start.
2. When beeps, add salt, pepper, sugar & water as per your
requirement and put in Microwave and press start.
3. When beeps, mix well & press start.
Add wonton & serve.
How to make Wonton :
Maida -1 cup, Salt - 1 pinch, Oil - 1 tsp
Method : Mix all the ingredients in the bowl and make dough
with too warm water. After that cover the bowl and
leave the mixture for 10-15 minutes.
For Stuffing :
Cabbage, carrot, capsicum which is cut in long pieces
Method : Mix all the ingredients for stuffing. Make a small
puree of wonton and put the small quantity of stuffing
in between them and then cover the puree and press it.
0.3 kg
100 g each
1 tsp
1 tsp
10 leaves
2 tbsp
As per taste
2 cups
6-7 pieces
fof/k %
1.
ekbØksoso lsQ Xykl ckmy esa rsy] lfCt;ka ,oa vnjd&yglqu
isLV MkysaA ehuw pqudj LVkVZ nck,aA
2.
chi vkus ij] ued] fepZ] phuh vkSj vko';drkuqlkj ikuh Mkysa
vkSj vksou esa j[kdj LVkVZ nck,aA
3. chi vkus ij] vPNh rjg feyk,a vkSj LVkVZ nck,aA
fQj mlesa okWUVu Mkydj ijkslsaA
okWUVu dSls cuk,a %
eSnk - 1 di] ued - 1 pqVdh] rsy - 1 pEep
fof/k % lHkh lkexzh ,d ckmy esa feyk ysa vkSj rst xeZ ikuh ls MQ
cuk ysaA fQj ckmy dks <d nsa vkSj feJ.k dks 10-15 feuV ds fy,
j[k nsaA
Hkjkou ds fy, %
cUnxksHkh] xktj] f'keyk fepZ tks yEcs Vqd<+ksa esa dVh gksA
fof/k % Hkjus ds fy, lHkh lkefxz;ksa dks feyk ysaA okWUVu ls NksVhNksVh iwfj;ka cuk ysa vkSj Hkjkou dh FkksM+h-FkksM+h ek=kk muds chp esa
j[ksa vkSj nwljh iwjh Åij ls j[kdj nck,aA
lwi
29
Page 30

INDIAN RASOI
1. Indian Cuisine (IC)
2. Tandoor Se (tS)
3. Sweets Corner(SC)
4. Chatpat Corner(CC)
Page 31

Indian Cuisine
INDIAN RASOI
Menu Weight Limit Utensil Instructions
Gajar ka
IC1
Halwa
IC2
Mix Veg
* Provided in Starter Kit
0.3 kg Microwave
0.1 ~ 0.3 kg Microwave
safe glass bowl
+
MWS Idli
Steamer*
safe bowl
For
Grated gajar
Ghee
Milk powder
Khoya
Sugar
Elaichi powder & dry fruits
Method :
1. In MWS glass bowl take all the ingredients and mix well.
2. Place the bowl in Idli Steamer. Select menu & press start.
Oil
Onion, Garlic, Carrot, Capsicum, Cabbage
Salt, Red Chilli Powder
Corn Flour
Water
Soya Sauce
Tomato Sauce
Vinegar
Brown Sugar
Ajinomoto
Method : 1. In a MWS bowl mix all the vegetables and keep aside.
2. In another bowl add oil, all other ingredients. Mix it well
and press Start by selecting the desired weight. When
beep sounds, stir the bowl.
3. Now add vegetables to the gravy and continue cooking it
again.
1 tbsp
100 gm
1 tbsp
3/4 cup
1 tsp
1 tsp
1/2 tsp
1/2 tsp
Hkkjrh; O;atu
0.3 kg
300 g
2 tbsp
4 tbsp
5 tbsp
4 tbsp
As per taste
fof/k % 1.
ekbØksoso lsQ Xykl ckmy esa lHkh lkefxz;ksa dks ysdj vPNh rjg
feyk ysaA
2.
ckmy dks bMyh LVhej esa j[k nsaA ehuw pqudj LVkVZ nck,aA
1½ tbsp
200 gm
To taste
2 tbsp
1 cup
2 tsp
2 tsp
1/2 tsp
1/2 tsp
1 pinch
fof/k % 1.
ekbØksoso lsQ ckmy esa lHkh lfCt;ksa dks feyk ysa vkSj mudks
vyx j[k nsaA
2.
,d nwljs ckmy esa rsy Mkysa vkSj mlesa lHkh phtksa dks Mkydj
vPNh rjg ls feyk ysa rFkk ,fPNd otu pqudj LVkVZ nck,aA
chi lqukbZ nsus ij ckmy dks fgyk,aA
3.
vc lfCt;ksa dks xzsoh ds lkFk feyk,a vkSj dqfdax pkyw j[ksaA
2 tbsp
300 gm
2 tbsp
1½ cup
3 tsp
3 tsp
3/4 tsp
1/2 tsp
31
Page 32

Indian Cuisine
Hkkjrh; O;atu
Menu Weight Limit Utensil Instructions
IC3
IC4
Veg
Biryani
Kadhai
Paneer
0.1 ~ 0.3 kg Microwave
0.1 ~ 0.3 kg Microwave
safe bowl
safe bowl
For
Basmati Rice (soaked for 1 hour)
Water
Ghee
Laung, Elaichi, Dalchini, Pepper, Tej Patta, Salt
Mix Vegetables - (Gobhi, Mutter, Gajar, French Beans.)
Method : 1. In a MWS bowl add oil, laung, dalchini, elaichi, tej patta,
pepper corns, mix vegetables. Select menu & weight &
press start.
2. When beeps, add water, soaked rice & salt. Mix well &
cover. Press start.
3. Allow to stand for 5 minutes when cooking ends. Serve
hot with raita or salad.
For
Paneer
Onion Paste
Tomato Puree
Ginger-Garlic Paste, Salt & Sugar
Red Chilli Powder, Halid, Kasuri Methi, Garam Masala
Butter
Fresh Cream
Method :
Method : 1. In Microwave Safe Bowl take oil, onion paste, ginger garlic
paste, mix well and press start.
2. When beep, add tomato puree, butter, fresh cream, haldi,
red chilli powder, garam masala, kasuri methi, salt, sugar
and paneer cubes, mix well and press start, garnish with
hara dhania and serve hot.
0.1 kg
100 g
200 ml
1 tbsp
½ Cup
0.1 kg
100 g
3 tbsp
1½ tbsp
1½ tbsp
1 tbsp
INDIAN RASOI
0.2 kg
200 g
400 ml
2 tbsp
As per taste
1 Cup
fof/k %
1.
ekbØksoso lsQ ckmy esa rsy] ykSax] nkyphuh] byk;ph] rstiÙkk] fepZ]
eDdk ds nkus] fefJr lfCt;ka MkysaA ehuw ,oa otu pqudj LVkVZ nck,aA
2.
chi lqukbZ nsus ij ikuh] Hkhxs gq, pkoy vkSj ued MkysaA vPNh rjg
feykdj <d nsa vkSj LVkVZ nck,aA
3.
idus ds ckn 5 feuV rd j[kk jgus nsaA jk;rk ;k lykn ds lkFk
xeZ&xeZ ijkslsaA
0.2 kg
200 g
4 tbsp
2 tbsp
As per taste
As per taste
2 tbsp
1½ tbsp
fof/k %
1.
ekbØksoso lsQ ckmy esa rsy] I;kt] vnjd vkSj yglqu isLV
Mkydj vPNh rjg feyk;sa vkSj LVkVZ nck,aA
2.
^chi* lqukbZ nsus ij VksesVks I;wjh] eD[ku] rktk Øhe] gYnh] yky
fepZ ikmMj] xeZ elkyk] dlwjh eSFkh] ued] 'kdj vkSj iuhj ds
VqdM+s Mkysa] vPNh rjg feyk;sa vkSj LVkVZ nck,aA gjk /kfu;k ds
lkFk ltk,a vkSj xeZ&xeZ ijkslsaA
0.3 kg
300 g
600 ml
3 tbsp
1½ Cup
0.3 kg
300 g
5 tbsp
3 tbsp
3 tbsp
2 tbsp
32
Page 33

Indian Cuisine
INDIAN RASOI
Menu Weight Limit Utensil Instructions
Kadhai
Chicken
0.1 ~ 0.3 kgIC-5
Microwave
safe bowl
For
Boneless chicken
Oil
Methidana
Onion slices
chopped garlic
Dhania powder, red chilli powder, salt
Tomato puree
Hara Dhania
Capsicum
Ginger (finely sliced)
Cream
Method :
Method : 1. In Microwave Safe Bowl add oil, methidana, onion slices,
garlic, dhania powder, red chilli powder, chicken & salt.
Cover. Select menu & weight and press start.
2.
When beeps, mix well & add tomato puree, hara dhana,
capsicum & ginger. Mix well & cover and press start. Stand
for 3 minutes.
3.
Add cream. Mix well. Serve hot.
0.1 kg
100 g
½ tbsp
¼ tsp
1 no.
1 tsp
¼ cup
1 no.
1 tbsp
1 tbsp
Hkkjrh; O;atu
0.2 kg
200 g
1 tbsp
¼ tsp
2 nos.
2 tsp
As per taste
½ cup
A few sprigs
2 nos.
2 tbsp
For garnishing
fof/k %
1.
ekbØksoso lsQ ckmy esa rsy] eSFkhnkuk] I;kt dh Lykbl] yglqu]
/kfu;k ikmMj] yky fepZ ikmMj] fpdu vkSj ued Mkydj <d nsaA
ehuw ,oa otu pqudj LVkVZ nck,aA
2.
^chi* lqukbZ nsus ij vPNh rjg feyk,a vkSj VkWesVks I;wjh] gjk /kfu;k]
f'keyk fepZ vkSj vnjd MkysaA vPNh rjg feykdj <d nsa vkSj
LVkVZ nck,aA 3 feuV rd j[kk jgus nsaA
3.
Øhe Mkydj vPNh rjg feyk,a vkSj xje&xje ijkslsaA
0.3 kg
300 g
2 tbsp
1 tsp
3 nos.
3 tsp
1 cup
2 nos.
3 tbsp
3 tbsp
33
Page 34

Indian Cuisine
Hkkjrh; O;atu
Menu Weight Limit Utensil Instructions
Dal Tadka
Sambhar
0.1 ~ 0.3 kgIC6
0.2 kgIC7
Microwave
safe bowl
Microwave
safe bowl
For
Dal (soaked for 1 hour)
Water
Oil
Rai, jeera, kasuri methi, hara dhania, hing, haldi, green chilli
Salt
Method :
1. Take 200 gms dal in Microwave Safe bowl, add Water,
Haldi & Hing.
2. Select menu & weight and press start to cook.
3. When beeps, take another bowl add oil, jeera, hari mirch,
curry leaves, select menu & start
4. When beeps, add dal, salt, dhania jeera powder, hara
dhania, kasuri methi (optional), water (if required) and
lemon juice. Select menu & press start to cook.
For
Arhar Dal (soaked for 2 hours)
Oil
Onion chopped
Tomato chopped
Mixed vegetables - Drumsticks, ghiya, brinjals, red pumpkin
Boiled water
Imli pulp, green chilli, sambhar masala, salt, gud
Method : 1. Soak dal for 2 hours, In Microwave Safe Bowl take dal,
haldi, onion, green chilli, tomato, mix vegetables and
boiled water. Select menu and press start.
2.
When beeps, in another Microwave Safe Bowl take oil,
add rai, hing, curry leaves, dhania, red chilli. Press start.
3.
When beeps, mash dal very well and add to tadka.
Add imli pulp sambhar masala, gud and some water
(if required). Press start. Stand for 5 mins. Garnish with
coconut and hara dhania and serve with Idli.
INDIAN RASOI
0.1 kg 0.3 kg
fof/k %
fof/k %
0.2 kg
200 g 300 g100 g
400 ml 600 ml200 ml
2 tbsp 2½ tbsp1 tbsp
As per taste
As per taste
1.
ekbØksoso lsQ ckmy esa nky ysa vkSj ikuh] gYnh rFkk ghax MkysaA
2.
ehuw pqudj idkus ds fy, LVkVZ nck,aA
3.
^chi* lqukbZ nsus ij nwljk ckmy ysa] mlesa rst] thjk] gjh fepZ]
djh iÙkk yssa] ehuw pqudj LVkVZ nck,aA
4.
^chi* lqukbZ nsus ij nky] ued] /kfu;k&thjk ikmMj] gjk /kfu;k]
dlwjh eSFkh ¼oSdfYid½] ikuh ¼;fn vko';d gks½ ,oa uhacw jl MkysaA
ehuw pqudj LVkVZ nck,aA
0.2 kg
200 g
100 ml
1 medium
1 medium
1 cup
4 cup
As per taste
1.
nky dks 2 ?k.Vs fHkxks,aA ekbØoso lsQ ckmy esa nky] gYnh] I;kt]
gjh fepZ] VekVj ysaA fefJr lfCt;ksa vkSj mcys gq, ikuh dks vPNh
rjg feyk,aA ehuw pqusa vkSj LVkVZ nck,aA
2.
chi lqukbZ nsus ij ,d nwljs ekbØksoso lsQ ckmy esa rsy ysaA mlesa
jkbZ] ghax] djh iÙkk] /kfu;k] yky fepZ MkysaA LVkVZ nck,aA
3.
chi lqukbZ nsus ij nky dks vPNh rjg dqpysa vkSj mlesa rM+dk yxk
ysaA fQj beyh] lk¡Hkj elkyk] xqM+ vkSj vko';drkuqlkj ikuh feyk,aA
LVkVZ nck,aA 5 feuV rd idus nsaA ukfj;y vkSj gjk /kfu;k ls ltk,a
vkSj bMyh ds lkFk ijkslsaA
34
Page 35

Indian Cuisine
INDIAN RASOI
Menu Weight Limit Utensil Instructions
IC8
IC9
Kadhi
Baati
0.3 ~ 0.5 kg
0.2 ~ 0.4 kg
Microwave
safe bowl
Multicook tawa
&
High rack
For
Besan
Curd / matha
Oil
Rai, cumin seeds
Chopped onions
Salt, red chilli powder, haldi, coriander powder, amchur
Water
Method : 1. In a MWS bowl add oil, rai, jeera, chopped onion. Select
menu & weight & press start.
2. When beeps, mix & add besan, curd/matha, salt, red
chilli powder, haldi, coriander powder, amchur powder,
water (1/2 the amount mentioned per weight). Mix &
press start.
3. When beeps, mix & add remaining water & press start.
Pour tempering & serve.
For
Atta
Besan
Ginger garlic paste
Haldi & salt
Oil
Water
Method : 1. Mix atta, besan, ginger garlic paste, salt & turmeric
powder, little oil. Add water for kneading the dough.
Make big balls out of the dough.
2. Grease the multicook tawa & place the baati over it. Place the
tray on high rack. Select menu & weight & press start.
3. When beeps, turn the side & press start.
Hkkjrh; O;atu
0.3 kg
25 g
1/2 cup
1 tbsp
1 cup
2 cups
fof/k %
0.2 kg 0.3 kg 0.3 kg
150 g 200 g 250 g
50 g 100 g 150 g
1 tbsp 2 tbsp 2½ tbsp
½ tbsp 1 tbsp
fof/k %
0.4 kg
50 g
1 cup
1½ tbsp
As per taste
1½ cup
As per taste
3 cups
1.
ekbØksoso lsQ ckmy esa rsy] jkbZ] thjk] dVh gqbZ I;kt MkysaA
ehuw vkSj otu pqudj LVkVZ nck,aA
2.
chi lqukbZ nsus ij] feyk,a vkSj cslu] ngh@eëk] ued] yky fepZ
ikmMj] gYnh] /kfu;k ikmMj] vepwj ikmMj] ikuh ¼dqy otu dk
vk/kk½ MkysaA feykdj LVkVZ nck,aA
3.
chi lqukbZ nsus ij] feyk,a vkSj cps gq, ikuh dks Mkydj LVkVZ
nck,aA fQj rM+dk Mkydj ijkslsaA
As per taste
For kneading
1.
vkVk] cslu] vnjd&yglqu isLV] ued] gYnh ikmMj vkSj FkksM+k
rsy vPNh rjg feyk ysaA ikuh Mkydj MQ cuk ysaA fQj bl MQ
ls cM+s&cM+s xksys rS;kj dj ysaA
2.
eYVhdqd ros ij fpdukbZ yxkdj mlds Åij ckVh dks j[ksaA fQj
Vªs dks gkbZ jSd ij j[ksaA ehuw vkSj otu pqudj LVkVZ nck,aA
3.
chi lqukbZ nsus ij] ckVh dks iyV dj LVkVZ nck,aA
0.5 kg
75 g
1½ cup
2 tbsp
1½ cup
4 cups
1½ tbsp
35
Page 36

Indian Cuisine
Hkkjrh; O;atu
Menu Weight Limit Utensil Instructions
IC10
Kashmiri
Kaju Paneer
0.1 ~ 0.3 kg
Microwave
safe bowl
For
Paneer pieces
Kaju
Sliced onions
Chopped ginger
Chopped garlic
Chilli powder
Khus Khus paste
Tomato puree
Milk
Garam masala & salt
Method : 1. In a MWS bowl add oil, mustard seeds & chopped onion.
Select menu & press start.
2. When beeps, add grated coconut, coconut milk, tomato
puree, kaju powder, salt, red chilli powder & press start.
3. When beeps, mix well & add boiled potato & mix
vegetables & fresh cream. Press start. Give standing time
of 3 minutes.
4. Garnish with chopped coriander leaves & serve.
½ no.
1 tsp
1 tsp
½ tbsp
½ cup
½ cup
INDIAN RASOI
0.2 kg 0.3 kg0.1 kg
200 g 300 g100 g
½ cup ½ cup¼ cup
1 nos.
2 tsp
2 tsp
As per taste
1 tbsp
1 cup
1 cup
As per taste
fof/k %
1.
ekbØksoso lsQ ckmy esa rsy] ljlksa ds cht vkSj dVh gqbZ I;kt ysaA
ehuw pqudj LVkVZ nck,aA
2.
^chi* lqukbZ nsus ij] dlk gqvk ukfj;y] ukfj;y dk nw/k] VkWesVks
I;wjh] dktw ikmMj] ued] yky fepZ ikmMj Mkydj LVkVZ nck,aA
3.
^chi* lqukbZ nsus ij] vPNh rjg feyk,a] mcys gq, vkyw] lfCt;ka
vkSj rktk Øhe Mkydj feyk,a vkSj LVkVZ nck,aA 3 feuV rd
j[kk jgus nsaA
4. dVs gq, /kfu;k dh ifÙk;ksa ls ltkdj ijkslsaA
1½ nos.
3 tsp
3 tsp
1½ tbsp
1½ cup
1½ cup
36
Page 37

Tandoor Se...
INDIAN RASOI
Menu Weight Limit Utensil Instructions
tS1
tS2
Shaami
Kabab
Mutton
Tikka
0.3 kg
0.1 ~ 0.3 kg
Microwave
safe bowl
&
Multicook tawa
&
High rack
Microwave
safe bowl
&
Rotisserie
For
Minced mutton
Soaked Bengal Gram
Roasted Cumin seeds
Salt, red chilli powder, chaat masala, coriander powder
Chopped onions
Chopped coriander leaves
Oil
Method : 1. In a MWS bowl add minced mutton. Select menu
and press start.
2. Grind the cooked mutton, bengal gram, cumin seeds,
coriander powder, salt and chilli powder, chaat masala,
chopped coriander and onion. Make long flat kababs
of the paste.
3. Place the kababs on greased multicook tawa & on high
rack. Press start.
4. Turn over the kababs and again press start.
Note: For binding roll the kababs in maida
For
Boneless mutton pieces
For marinade
Hung curd
Ginger garlic paste
Salt, red chilli powder, haldi powder, garam masala, chaat masala
Oil
Lemon juice
Red color
Method : 1. Wash the mutton pieces & mix with ginger garlic paste,
curd, salt, lemon juice, garam masala, chaat masala,
red chilli powder. Refrigerate for 1 hour.
2. In a MWS bowl take this mixture. Select menu & weight
& press start.
3. When beeps, arrange the cooked mutton pieces on the
rotisserie bars & press start.
4. Serve with nan or roti.
rUnwj ls---
0.3 kg
300 g
50 g
As per taste
As per taste
2 nos.
A few sprigs
½ tbsp
fof/k %
1.
ekbØksoso lsQ ckmy esa dVs gq, eVu dks ysdj ehuw pqusa vkSj
LVkVZ nck,aA
2.
ids gq, eVu] caxkyh puk] vtokbu] /kfu;k ikmMj] ued vkSj
fepZ ikmMj] pkV elkyk] dVk gqvk /kfu;k vkSj I;kt dks ,d
lkFk ihl ysaA bl isLV ls yEc vkSj piVs dckc rS;kj dj ysaA
3.
fQj bu dckcksa dks fpduh eYVhdqd ros ij j[kdj gkbZ jSd ds
Åij j[ksaA LVkVZ nck,aA
4.
dckcksa dks iyVdj fQj ls LVkVZ nck,aA
uksV % ckbfUMax ds fy, dckcksa dks eSnk esa yisV ysaA
0.1 kg 0.2 kg 0.3 kg
100 g 200 g 300 g
2 tbsp
2 tbsp
½ tbsp
½ tsp
fof/k %
3 tbsp
3 tbsp
As per taste
1 tbsp
1 tsp
A pinch
1.
eVu ds VqdM+ksa dks /kksdj vnjd yglqu isLV] ngh] ued] uhacw jl]
xje elkyk] pkV elkyk] yky fepZ ikmMj ds lkFk feyk ysaA 1
?kaVs ds fy, jsfÝtjsVj esa j[k nsaA
2.
bl feJ.k dks ekbØksoso lsQ ckmy esa ysaA ehuw vkSj otu pqudj
LVkVZ nck,aA
3.
chi lqukbZ nsus ij] ids gq, eVu ds VqdM+ksa dks jksVsljh ckj ij
O;ofLFkr djsa vkSj LVkVZ nck,aA
4 tbsp
4 tbsp
2 tbsp
2 tsp
4. uku ;k jksVh ds lkFk ijkslsaA
37
Page 38

Tandoor Se...
rUnwj ls---
Menu Weight Limit Utensil Instructions
tS3
tS4
Murg
Tandoori
Tandoori
Subzi
0.1 ~ 0.3 kg
0.2 kg
High rack
&
Multicook tawa
Microwave
safe bowl
&
High rack
&
Multicook tawa
For
Chicken pieces (boneless)
For marinade
Hung curd
Ginger garlic paste
Salt, red chilli powder, garam masala & chaat masala
Oil
Lemon juice
Eatable red color
Method : 1. Wash chicken pieces & mix with all the ingredients of
Method : 1. In Microwave Safe Glass Bowl take oil, onion paste &
marinate. Keep for one hour in refrigerator.
2. Arrange chicken pieces on greased multicook tawa
apply little oil on each piece. Keep the multicook tawa
on high rack. Select menu & weight and press start.
3. When beeps, turn the piece, press start.
For
Mix vegetables - bhindi, cauliflower, Brinjal, mushrooms, potato, paneer cubes
Onion paste
Ginger garlic paste
Tomato puree
Red chilli powder, haldi, garam masala, salt
Oil
Hra Dhania
ginger garlic paste select menu and press start.
2. When beep add vegetables, red chili powder, haldi,
garam masala, chat masala salt, and Tamoto puree,
mix well & press start.
3. When beep, transfer this mixture to multicook tawa,
spread evenly on tawa. keep tawa on high rack &
press start serve hot with tandoori nan.
0.1 kg
100 g
2 tbsp
1 tsp
1 tbsp
1 tbsp
INDIAN RASOI
0.2 kg
200 g
3 tbsp
1½ tsp
As per taste
1 tbsp
1½ tbsp
A pinch
fof/k % 1.2.fpdu ds VqdM+ksa dks /kks,a vkSj eSjhusV lHkh rRoksa ds lkFk feyk,aA
,d ?k.Vs ds fy, jsfÝtjsVj ds vUnj j[ksaA
fpdu ds VqdM+ksa dks rsy yxs eYVhdqd ros ij O;ofLFkr djsaA gj
,d VqdM+s ij FkksM+k rsy yxk ysaA vc eYVhdqd ros dks gkbZ jSd
ij j[ksaA ehuw ,oa otu pqusa vkSj LVkVZ nck,aA
3.
^chi* lqukbZ nsus ij VqdM+ksa dks iyVsa] LVkVZ nck,aA
0.2 kg
200 g (cut into medium size pieces
1 cup
1 tsp
½ cup
As per taste
3-4 tbsp
For garnishing
1.
ekbØksoso lsQ Xykl ckmy esa rsy] I;kt vkSj vnjd&yglqu dh
fof/k %
isLV ysa] ehuw pqudj LVkVZ nck,aA
2.
^chi* lqukbZ nsus ij lfCt;ka] yky fepZ ikmMj] gYnh] xeZ elkyk]
pkV elkyk] ued vkSj VksesVks I;wjh Mkysa] vPNh rjg feyk,a vkSj
LVkVZ nck,aA
3.
^chi* lqukbZ nsus ij bl feJ.k dks eYVhdqd ros ij foLFkkfir dj
nsa] ros ij leku :i ls QSyk nsaA ros dks gkbZ jSd ij j[ksa vkSj
LVkVZ nck,aA rUnwjh uku ds lkFk xeZ&xeZ ijkslsaA
0.3 kg
300 g
4 tbsp
2 tsp
1 tbsp
2 tbsp
38
Page 39

Tandoor Se...
INDIAN RASOI
Menu Weight Limit Utensil Instructions
tS5
tC6
Hara Bhara
Kabab
Chicken
Lollipops
0.3 kg
0.1 ~ 0.3 kg
High rack
&
Multicook tawa
Microwave
safe bowl
&
Multicook tawa
&
High rack
For
Potatoes (boiled & grated)
Peas (boiled & mashed)
Palak leaves (boiled)
Coriander leaves
Sasuri methi
Salt, red chilli powder, chaat masala, garam masala
Oil
Method :
1. Mix all the ingredients together & make a dough. Make flat
kababs out of it.
2. Grease the metal tray & place on high rack. Now arrange
the kababs on the greased multicook tawa. Select menu &
press start.
3. When beeps, turn over the kababs & again press start.
Serve with coriander chutney or tomato sauce
For
Chicken keema
Boiled potato
Ginger garlic paste
Red chilli powder, garam masala, amchur powder, salt
Bread crumbs
Oil
Method : 1. In a MWS bowl take the chicken keema & cover.
Select menu & weight & press start.
2. When beeps, mix the cooked chicken keema with
boiled potatoes, ginger garlic paste, red chilli powder,
garam masala, amchur powder, salt.
3. Coat the lollipops with breadcrumbs.
4. Arrange the lollipops on greased multicook tawa.
Place the tray on high rack. Press start.
5. When beeps, turn the lollipops & press start.
Serve with chutney or sauce.
rUnwj ls---
0.3 kg
300 g
1 cup
1½ cup
1 few sprigs
2 tbsp
As per taste
¼ tbsp
1.
lHkh lkefxz;ksa dks ,d lkFk feykdj MQ cuk ysaA fQj blds piVs
fof/k %
dckc cuk ysaA
2.
eSVy Vªks dks fpduk djds gkbZ jSd ij j[k nsaA vc dckcksa dks
fpduk fd;s gq, eYVhdqd ros ds Åij O;ofLFkr djds ehuw pqusa
vkSj LVkVZ nck,aA
3.
chi lqukbZ nsus ij dckcksa dks iyVsa vkSj nqckjk ls LVkVZ nck,aA
/kfu;k dh pVuh ;k VksesVks lkWl ds lkFk ijkslsaA
0.2 kg 0.3 kg0.1 kg
200 g 300 g100 g
2 nos. 3 nos.1 no.
1½ tbsp 2 tbsp1 tbsp
As per taste
For coating the lollipops
2 tbsp 2 tbsp1 tbsp
1.
ekbØksoso lsQ ckmy esa fpdu dhek ysdj <d nsaA ehuw vkSj otu
fof/k %
pqudj LVkVZ nck,aA
2.
^chi* lqukbZ nsus ij] ids gq, fpdu dhek dks mcys gq, vkyw] vnjd
yglqu isLV] yky fepZ ikmMj] xje elkyk] vepwj ikmMj] vkSj
ued ds lkFk Mky nsaA
3.
czSM ds VqdM+ksa ij ykWyhikWi dh irZ p<+k nsaA
4.
ykWyhikWIl dks fpdus eYVhdqd ros ij O;ofLFkr dj nsaA Vªs dks
gkbZ jSd ds Åij j[kdj LVkVZ nck,aA
5.
chi lqukbZ nsus ij] ykWyhikWIl dks iyVsa vkSj LVkVZ nck,aA
pVuh ;k lkWl ds lkFk ijksalsaA
39
Page 40

Tandoor Se...
rUnwj ls---
Menu Weight Limit Utensil Instructions
tS7
Paneer
Tikka
0.3 kg
Rotisserie
For
Paneer cubes
Capsicum (big pieces), Tomato (big pieces)
For marinade
Hung curd
Ginger garlic paste
Salt, red chilli powder, garam masala
Lemon juice
Red color (edible)
Oil
Method : 1. Mix all the ingredients of marinade thoroughly.
2. Add paneer , capsicum, tomato pieces to it and refrigerate
it for 1 hour.
3. Arrange paneer, capsicum, tomato pieces on the rotisserie
bars. Select menu & press start.
When ready pour lemon juice& serve.
Note:- While putting the paneer pieces on rotisserie bars,
place them between the tomato & capsicum pieces.
4. Serve with chutney & salad.
INDIAN RASOI
0.3 kg
300 g
2 cups
4 tbsp
1½ tbsp
As per taste
2 tbsp
A pinch
1 tbsp
fof/k % 1.
eSjhusM dh lHkh lkefxz;ksa dks iwjh rjg ls feyk ysaA
2.
iuhj] f'keyk fepZ] VekVj ds VqdM+s blesa Mky nsa vkSj 1 ?k.Vs ds fy,
jsfÝtjsVj esa j[k nsaA
3.
fQj iuhj] f'keyk fepZ] VekVj ds VqdM+s jksVsljh ckj ds Åij O;ofLFkr
djsaA ehuw pqudj LVkVZ nck,aA rS;kj gksus ij uhacw jl Mkydj ijkslsaA
uksV % tc jksVsljh ckj ij iuhj ds VqdM+ksa dks j[ksa rks mUgsa VekVj vkSj
f'keyk fepZ ds chp esa j[ksaA
4. pVuh vkSj lykn ds lkFk ijkslsaA
40
Page 41

Tandoor Se...
INDIAN RASOI
Menu Weight Limit Utensil Instructions
tS8
Veg
Kabab
0.3 kg
High rack
&
Multicook tawa
For
Boiled vegetables - potato, cauliflower, carrots, green peas
Water
Oil
Cornflour
Bread crumbs
Ginger garlic paste
Chilli paste
Garam masala
Lemon juice, salt, sugar
Method : 1. Mix Boiled vegetables & strained chana dal, ginger garlic
paste, garam masala, dhania jeera powder, salt red chilli
powder, bread crumbs & hara dhania together, apply little
oil to your palms and shape as desired like tikki balls and
roll over with cornflour. Cutlet rolls, brush with little oil.
2. Keep multicook tawa on high rack place kababs on it.
Select menu & press start.
3. When beeps, turn over & press start.
Serve with chutney & salad.
0.3 kg
300 g
5 tbsp
3 tbsp
3 to 4 tbsp
½ tbsp
1½ tsp
1½ tsp
½ tsp
fof/k % 1.
mcyh gqbZ lfCt;ka vkSj fupksM+h gqbZ puk nky] vnjd yglqu isLV]
xeZ elkyk] /kfu;k thjk ikmMj] ued] yky fepZ ikmMj] czSM ds
VqdM+s] vkSj gjk /kfu;k ,d lkFk feyk ysaA viuh gFksfy;ksa ij FkksM+k
lk rsy yxk ysa vkSj fVDdh ds xksys dh ,fPNd vkÑfr nsa vkSj eDdk
dk vkVk yisV nsaA NksVs NksVs VqdM+s dj ysa rFkk FkksM+k rsy yxk nsaA
2.
eYVhdqd rok gkbZ jSd ij j[ksa] ml ij d+ckc j[ksaA ehuw ,oa otu pqusa
vkSj LVkVZ nck,aA
3.
chu lqukbZ nsus ij] dckcksa dks iyV dj LVkVZ nck,aA
pVuh vkSj lykn ds lkFk ijkslsaA
rUnwj ls---
41
Page 42

Sweets Corner
LohV dkWuZj
Menu Weight Limit Utensil Instructions
SC1
Kalakand
SC3 Shahi
42
Besan
Ladoo
Tukda
0.1 ~ 0.3 kg
0.1 ~ 0.3 kgSC2
0.1 ~ 0.3 kg
Microwave
safe glass bowl
Microwave
safe flat glass dish
Microwave
safe glass bowl
&
High Rack
Besan
Ghee
Powder Sugar
Elaichi Powder
Method : 1. In Microwave Safe Bowl take besan and ghee. Select
Grated Paneer
Milkmaid
Milk Powder
Cornflour
Elaichi Powder
Method : 1. In Microwave Safe Bowl take grated paneer, milkmaid,
Method : 1. Arrange bread slices on high rack. Select menu & press
menu & weight and press start.
2.
When beeps, stir it and press start.
3.
When beeps, stir and press start again.
4. Allow to cool. Add powdered sugar and elaichi powder.
Mix it well and make a ladoo.
milk powder, cornflour, elaichi powder, kesar. Mix well
select menu & weight and press start.
2. When beep. Mix it again and press start.
3. Garnish with dry fruits when set cut into pieces.
Bread Slices
Milkmaid
Milk
Sugar
Badam, Pista Pieces
Kesar-Elaichi Powder
start.
2. When beep turn slices press start.
3.
Mix Milkmaid, milk, sugar, dry fruits and kesar elaic hi
powder in Microwave Safe Flat Dish. Pour the mixture on
slices and press start. Serve hot.
0.1 kg
3 tbsp
50 gm
1/2 tsp
0.1 kg
50 gms
1 tbsp
1/2 tsp
1/2 tsp
1 slice
50 ml
25 ml
1 tbsp
2 tbsp
INDIAN RASOI
0.2 kg
5 tbsp
100 gm
1 tsp
fof/k %
1.
ekbØkoso lsQ ckmy esa cslu vkSj ?kh ysaA ehuw pqusa vkSj LVkVZ nck,aA
2.
chi lqukbZ nsus ij bls fgyk,a vkSj LVkVZ nck,aA
3.
chi lqukbZ nsus ij fgyk,a vkSj nqckjk LVkVZ nck,aA
4.
BaMk gksus nsaA cwjk vkSj byk;ph ikmMj MkysaA vPNh rjg feyk,a
vkSj yM~Mw cuk,aA
0.2 kg
100 gms
2 tbsp
1 tsp
fof/k %
fof/k %
1 tsp
1.
ekbØkoso lsQ ckmy esa dlk gqvk iuhj] feYdesM] feYd ikmMj]
eDdk dk vkVk vkSj byk;ph ikmMj vkSj dslj ysaA vPNh rjg
feyk,a] ehuw ,oa otu pqusa vkSj LVkVZ nck,aA
2.
chi lqukbZ nsus ij bls nqckjk feyk,a vkSj LVkVZ nck,aA
3.
lw[ks esoksa ds lkFk ltk,a vkSj te tkus ds ckn bls VqdM+ksa esa dkVsaA
2 slices
100 ml
50 ml
2 tbsp
3 tbsp
As per your taste
1.
gkbZ jSd ij czSM Lykbflt dks O;ofLFkr djsaA ehuw pqusa vkSj LVkVZ
nck,aA
2.
^chi* lqukbZ nsus ij Lykbflt dks iyV nsa vkSj LVkVZ nck,aA
3.
feYdesM] nw/k] phuh] lw[ks esos vkSj dslj byk;ph ikmMj dks
ekbØksoso lsQ ¶ySV fM'k esa vPNh rjg feyk,aA bl feJ.k dks
Lykbflt ds Åij Mkysa vkSj LVkVZ nck,aA xeZ&xeZ ijkslsaA
0.3 kg
7 tbsp
150 gm
1 tsp
0.3 kg
200 gms
3 tbsp
1 tsp
1 tsp
3 slices
150 ml
100 ml
3 tbsp
4 tbsp
Page 43

Sweets Corner
INDIAN RASOI
Menu Weight Limit Utensil Instructions
SC4
SC5
Kheer
Suji Halwa
0.1 ~ 0.3 kg
0.1 ~ 0.3 kg
Microwave
safe bowl
Microwave
safe glass bowl
For
Milk
Seviyan (roasted)
Sugar
Badam paste
Kesar & elaichi powder
Method : 1. In a MWS glass bowl take milk & select menu & weight
& press start.
2. When beeps, add seviyan to the bowl & press start.
3. When beeps, add almond paste, sugar, kesar & elaichi
powder & press start. Garnish with dry fruits & serve hot
or chilled.
For
Suji
Ghee (melted)
Water
Sugar
Cashewnuts, kishmish, kesar, elaichi powder
Method : 1. In a MWS glass bowl add ghee & suji, mix well. Select
menu & weight & press start.
2. When beeps, stir well & press start.
3. Add water, sugar, cashewnuts, kishmish, kesar, elaichi
powder & press start. Mix well & serve.
0.1 kg
100 ml
10 g
50 g
1 tbsp
01 kg
100 g
2 tbsp
300 ml
100 gms
LohV dkWuZj
0.2 kg
200 ml
20 g
100 g
1½ tbsp
As per taste
fof/k %
1.
ekbØkoso lsQ ckmy esa nw/k Mkydj ehuw ,oa otu pqusa vkSj
LVkVZ nck,aA
2.
chi lqukbZ nsus ij] ckmy esa lsfo;k¡ Mkysa vkSj LVkVZ nck,aA
3.
chi lqukbZ nsus ij] lw[ks esoksa ls ltk,a vkSj xje ;k BaMh djds
ijkslsaA
0.2 kg
200 g
3 tbsp
600 ml
200 gms
As per taste
fof/k %
1.
ekbØkoso lsQ Xykl ckmy esa ?kh vkSj lwth vPNh rjg feyk,aA
ehuw vkSj otu pqudj LVkVZ nck,aA
2.
^chi* lqukbZ nsus ij] vPNh rjg fgyk,a vkSj LVkVZ nck,aA
3.
fQj ikuh] phuh] dktw] fd'kfe'k] dslj] byk;ph ikmMj Mkydj
LVkVZ nck,aA vPNh rjg feykdj ijkslsaA
0.3 kg
300 ml
30 g
150 g
2 tbsp
0.3 kg
300 g
4 tbsp
900 ml
300 gms
43
Page 44

Sweets Corner
LohV dkWuZj
Menu Weight Limit Utensil Instructions
SC6
SC7
Sandesh
Seviyan
Zarda
0.1 ~ 0.3 kg
0.2 kg
Microwave
safe bowl
Microwave
safe bowl
For
Paneer
Milkmaid
Rose water
Elaichi seeds
Chopped pista
Method : 1. In a MWS bowl add grated paneer & milkmaid. Mix well.
2. Select menu & weight & press start.
3. When beeps, stir well & press start.
4. Allow to cool. Make balls out of the mixture & roll them
in elaichi powder & chopped pista.
For
Roasted Seviyan
Sugar
Water
Rose essence
Almonds
Chopped pista
Elaichi powder
Ghee
Method : 1. In a MWS glass bowl add sugar & water. Select menu &
press start.
2. When beeps, add rose essence , cardamom powder,
seviyan to the bowl. Press start. Give standing time of
3 mins. Garnish with almonds & pista & serve.
0.1 kg
100 g
50 g
½ tbsp
½ tsp
INDIAN RASOI
0.2 kg
200 g
100 g
1 tbsp
½ tsp
A few
fof/k %
1.
ekbØkoso lsQ ckmy esa dlk gqvk iuhj vkSj feYdesM ysdj vPNh
rjg feyk ysaA
2.
ehuw vkSj otu pqudj LVkVZ nck,aA
3.
chi lqukbZ nsus ij] vPNh rjg pyk,a vkSj LVkVZ nck,aA
4.
BaMk gksus nsaA fQj bl feJ.k ls xksys cuk,a vkSj mudks byk;ph
ikmMJ vkSj dVs gq, fiLrs esa yisV nsaA
0.2 kg
200 g
3 tbsp
1 cup
A few drops
A few
A few
½ tsp
1½ tbsp
fof/k %
1. ekbØksoso lsQ Xykl ckmy esa phuh vkSj ikuh ysaA ehuw pqudj
LVkVZ nck,aA
2. chi lqukbZ nsus ij xqykc dk b=k] byk;ph ikmMj vkSj lsfo;ka
ckmy esa Mkysa vkSj LVkVZ nck,aA 3 feuV rd j[kk jgus nsaA
cknke vkSj fiLrk ls ltk,a vkSj ijkslsaA
0.3 kg
300 g
150 g
1½ tbsp
1 tsp
44
Page 45

INDIAN RASOI
Menu Weight Limit Utensil Instructions
CC1
Lemon
Pickle
0.2 kg
Microwave Safe
Glass Bowl
Lemon pieces
Sugar
Chilli powder, Salt
For Tempering : Rai, Jeera, Hing etc.
Method : 1. Cut lemon and remove seeds. In MWS bowl add lemon
pieces, sugar, salt and chilli powder. Select menu and
press start. Store it in a bottle after it cools.
Chatpat Corner
pViV dkWuZj
150 gms
50 gms
As per your taste
fof/k %
1. uhacqvksa dks dkVdj muds chtksa dks fudky nsaA ekbØksoso lsQ ckmy
esa uhacw ds VqdM+s] phuh] ued vkSj fepZ ikmMj Mkysa vkSj vksou esa
j[kdj ehuw pqusa vkSj LVkVZ nck,aA BaMk gks tkus ij mls cksry esa
Hkjdj j[k nsaA
CC3
Mix Veg.
Pickle
Pizza
Sauce
0.3 kgCC2
0.2 kg
Microwave Safe
Glass Bowl
Microwave Safe
Glass Bowl
Mix Vegetable (Cauliflower, Carrot, Radish, Shalgam, Green peas)
Lemon juice
Salt, Chilli powder, Salt, Sugar, Pickle Masala
Oil
For tempering : Rai, Jeera, Hing etc.
Method : 1. In a MWS bowl put vegetables cut in long strips.
Method : 1. In a MWS bowl put oil, tomato, onion, garlic pods
Cover and keep it in Microwave. Select menu and
press start to cook. When it gives a beep, remove.
In another bowl add oil and tempering and press
start. When it gives a beep add masala, sugar, salt.
Add vegetables to this when it cools. Mix well and
store it in a fridge.
Tomato
Onions
Salt, Sugar, Ajwain, Oregano, Basil leaves
Garlic pods
Oil
and keep it in Microwave. Select menu & press start
to cook. When it gives a beep, remove and grind it in
a mixer. Now add salt, sugar, ajwain, basil leaves.
Keep it in Microwave and press start. When it gives a
beep, the sauce is ready.
250 gms
2 tbsp
As per your taste
2 tbsp
fof/k %
1.
ekbØkoso lsQ ckmy esa yEch ifê;ksa esa dVh gqbZ lfCt;ksa dks Mkysa
vkSj <ddj vksou esa j[k nsaA ehuw pqudj idus ds fy, LVkVZ nck,aA
chi lqukbZ nsus ij] ckgj fudky ysaA ,d vU; ckmy esa rsy vkSj
rM+dk lkexzh Mkydj LVkVZ nck,aA chi lqukbZ nsus ij elkyk] phuh]
ued MkysaA fQj BaMk gksus ij blesa idh gqbZ lfCt;ksa dks Mky nsaA
vPNh rjg feyk,a vkSj fÝt esa j[k nsaA
200 gms
1 No.
As per your taste
7-8
2 tbsp
fof/k %
1. ekbØksoso Xykl ckmy esa rsy] VekVj] I;kt] yglqu dh Qfy;ka
Mkydj vksou ds vUnj j[k nsaA ehuw pqudj idus ds fy, LVkVZ
nck,aA chi lqukbZ nsus ij] ckgj fudkysa vkSj feD'kj esa ihl ysaA
vc mlesa ued] phuh] vtokbu] rqylh ds iÙks Mkysa vkSj vksou
esa j[kdj LVkVZ nck,aA chi lqukbZ nsus ij lkWl rS;kj gks tk;sxhA
45
Page 46

Chatpat Corner
pViV dkWuZj
Menu Weight Limit Utensil Instructions
CC4
Tomato
Sauce
0.5 kg
Microwave Safe
Glass Bowl
Tomato
Onion
Chilli powder, salt, sugar
Chopped ginger and garlic
Garam masala
Method :
1. In a MWS bowl put tomato pieces, cover and keep it
in a Microwave. Select menu & press start to cook.
When it gives a beep, remove and grind it in a mixer.
Strain it. Again keep this in a Microwave and press start.
When it gives a beep, add salt, sugar, garam masala
and mix well. Again keep it in Microwave and press start.
INDIAN RASOI
500 g
1 No.
As per taste
2 tbsp
1 tsp
fof/k %
1.
ekbØksoso lsQ ckmy esa dVs gq, VekVj Mkysa] <ddj vksou es j[k
nsaA ehuw pqudj idus ds fy, LVkVZ nck,aA chi lqukbZ nsus ij] ckgj
fudkydj feD'kj esa ihl ysaA fupksM+dj nqckjk vksou esa j[ksa vkSj
LVkVZ nck,aA chi lqukbZ nsus ij ued] phuh vkSj xeZ elkyk Mkydj
vPNh rjg feyk,aA nqckjk vksou esa j[ksa vkSj LVkVZ nck,aA
46
Gongura
Chutney
0.3 kgCC5
Microwave Safe
Glass Bowl
Gongura
Chopped onion
Chopped green chillies
Mustard seeds
Oil
Salt & red chilli powder
Method :
1. Grind all the ingredients together except mustard seeds
& oil.
2. In a MWS bowl add oil & mustard seeds. Select menu &
press start.
3. Mix the grind ingredients with the mustard seeds & serve.
fof/k %
1.
ljlksa ds nkuksa vkSj rsy dks NksM+dj lHkh lkefxz;ksa dks ,d lkFk
ihl ysaA
2.
ekbØksoso lsQ ckmy rsy vkSj ljlksa ds nkus ysaA ehuw pqudj LVkVZ
nck,aA
3.
filh gqbZ lkefxz;ksa dks ljlksa ds nkuksa ds lkFk feyk ysa vkSj ijkslsaA
300 g
1 no.
5 nos.
1 tbsp
1 tbsp
As per taste
Page 47

24 HOURS
1. Breakfast (bF)
2. Child's Favourite (CF)
3. Bakery (bA)
Page 48

Breakfast
czsdQkLV
Menu Weight Limit Utensil Instructions
bF1
bF2
Veg
Sandwich
Poha
0.1 ~ 0.3 kg
0.1 ~ 0.3 kg
High rack
Microwave
safe bowl
For
Bread slices
Butter
Sauce / spread
Chopped vegetables (onion, tomato, capsicum)
Grated cheese
Salt & pepper
Method : 1. On a bread slice apply butter, layer with sauce, spread
chopped vegetables, sprinkle grated cheese.
Cover it with the other bread slice.
2. Keep the sandwich on high rack. Select menu & weight
& press start.
3. When beeps, change the side of the sandwich & again
press start.
For
Poha (washed)
Oil
Rai, jeera, hing, haldi, curry leaves
Chopped onion
Green chillies
Salt,red chilli powder, garam masala, sugar
Grated coconut & hara dhania
Method : 1. In a MWS bowl add oil, rai, jeera, curry leaves. Select
menu & weight & press start.
2. When beeps, add onion, green chillies, hing, haldi. Mix
& press start.
3. When beeps, add washed poha, salt, red chilli powder,
garam masala & sugar. Mix & press start. Squeeze
lemon juice.
Garnish with grated coconut & hara dhania & serve.
0.1 kg
100 g (2 slices)
1 tbsp
1½ tbsp
2 tbsp
2 tbsp
fof/k % 1.
01 kg
100 g
1 tbsp
1/2 cup
1 No.
fof/k %
24 HOURS
0.2 kg
200 g (4 slices)
2 tbsp
3 tbsp
4 tbsp
4 tbsp
As per taste
,d czSM Lykbl ij eD[ku yxk,a] lkWl dh ,d irZ yxkdj mlds
Åij dVh gqbZ lfCt;ka QSyk,a] dlk gqvk iuhj fNM+dsaA fQj ,d
nwljh czSM Lykbl ls <d nsaA
2.
lsaMfop dks gkbZ jSd ds Åij j[k nsaA ehuw vkSj otu pqudj LVkVZ
nck,aA
3.
chi lqukbZ nsus ij] lsaMfop dks iyV nsa vkSj nqckjk ls LVkVZ nck,aA
0.2 kg
200 g
1½ tbsp
As per taste
1 cup
2 Nos.
As per taste
For garnishing
1.
ekbØksoso lsQ ckmy esa rsy] jkbZ] thjk] djh iÙkk MkysaA ehuw vkSj
otu pqudj LVkVZ nck,aA
2.
chi lqukbZ nsus ij] I;kt] gjh fepZ] ghax] gYnh Mkydj feyk,a vkSj
LVkVZ nck,aA
3.
chi lqukbZ nsus ij] /kqyk gqvk iksgk] ued] yky fepZ ikmMj] xje
elkyk vkSj phuh MkysaA vPNh rjg feykdj LVkVZ nck,aA vc uhacw
dk jl fupksM+ nsaA
dls gq, ukfj;y vkSj gjs /kfu;s ls ltkdj ijkslsaA
0.3 kg
300 g (6 slices)
4 tbsp
4 tbsp
6 tbsp
6 tbsp
0.3 kg
300 g
½ tbsp
1 cup
3 Nos.
48
Page 49

Breakfast
24 HOURS
Menu Weight Limit Utensil Instructions
bF3
bF4
Upma
Daliya
0.1 ~ 0.3 kg
0.1 ~ 0.3 kg
Microwave
safe bowl
Microwave
safe bowl
For
Suji
Oil
Water
Sat & sugar
Onion
Green chilli
Rai, jeera, hing, curry leacves, urad dal
Lemon juice
Method : 1. In a MWS bowl add oil, rai, jeera, urad dal, green chilli,
suji. Mix well
2. Select menu & weight & press start.
3. When beeps, add onions, stir well & press start.
4. When beeps, add water, sugar, salt, lemon juice. Mix well
& press start. Stand for 5 minutes.
For
Daliya
Sugar or gud
Ghee (melted)
Water
Elaichi powder, nutmeg powder, chashewnuts
Milk
Method : 1. In a MWS safe bowl, add dalia & ghee. Mix well.
2. Select menu & weight & press start.
3. When beeps, mix, add water, sugar or gud, elaichi,
powder/nutmeg powder, cashewnuts. Mix well &
press start.
Stand for 5 minutes. Serve with hot milk.
Note: If you are using gud for sweetness then add
nutmeg powder & add elaichi powder if using sugar
for sweetness.
01 kg
100 g
1 tbsp
200 ml
1 No.
2 No.
0.1 kg
100 g
75 g
1 tbsp
300 ml
czsdQkLV
0.2 kg
200 g
2 tbsp
400 ml
As per taste
2 Nos.
3 Nos.
As per taste
As per taste
fof/k % 1.
ekbØksoso lsQ ckmy esa rsy] jkbZ] thjk] mM+n nky] gjh fepZ vkSj
lwth Mkydj vPNh rjg feyk,aA
2.
ehuw vkSj otu pqudj LVkVZ nck,aA
3.
chi lqukbZ nsus ij] I;kt Mkysa] vPNh rjg fgyk,a vkSj LVkVZ nck,aA
4.
chi lqukbZ nsus ij] ikuh] phuh] ued vkSj uhacw jl MkysaA vPNh
rjg feykdj LVkVZ nck,aA 5 feuV rd j[kk jgus nsaA
0.2 kg
200 g
150 g
2 tbsp
600 ml
As per taste
As required
fof/k %
1.
ekbØksoso lsQ ckmy esa nfy;k vkSj ?kh Mkydj vPNh rjg feyk,aA
2.
ehuw vkSj otu pqudj LVkVZ nck,aA
3.
chi lqukbZ nsus ij] feyk,a] ikuh] phuh ;k xqM+] byk;ph ikmMj@tk;Qy
ikmMj] dktw Mkysa vkSj vkSj vPNh rjg feykdj LVkVZ nck,aA
feuV rd j[kk jgus nsaA xje nw/k ds lkFk ijkslsaA5
uksV % ;fn vki feBkl ds fy, xqM+ bLrseky dj jgs gSa rks tk;Qy ikmMj
Mkysa vkSj tc feBkl ds fy, phuh bLrseky dj jgs gksa rks byk;ph
ikmMj MkysaA
0.3 kg
300 g
3 tbsp
600 ml
2 Nos.
3 Nos.
0.3 kg
300 g
200 g
3 tbsp
900 ml
49
Page 50

Breakfast
czsdQkLV
Menu Weight Limit Utensil Instructions
bF5
Paratha 0.2 kg High Rack
Pongal
bF6
0.1 ~ 0.3 kg
+
Multicook tawa
Microwave
safe glass bowl
Parantha Dough
Stuffing : Alu, Muli, Methi, Paneer, whichever you like.
Oil/Ghee
Method : 1. Select menu, keep multicook tawa on high rack &
Method : 1. In MWS glass bowl put ghee , soaked Rice & Moong dal.
press start.
2.
When beeps, keep paratha on tawa and brush with
oil & press start.
3.
When beeps, turn paratha and press start serve hot
with chutney or raita.
For
Rice (soaked)
Moong dal (soaked)
Water (hot)
Jaggery (grated)
Ghee
Elaichi powder
Dry fruits
Select menu & weight and press start.
2. When Beeps, add hot water, cover it and press start.
3. When beeps, remove cover add all the ingredients and mix
well press start.
0.1 kg
50 g
25 g
300 ml
100 g
25 g
1 tsp
24 HOURS
0.2 kg
As per your taste
2 tbsp
fof/k % 1.
ehuw pqudj eYVhdqd rok gkbZ jSd ij j[ksa vkSj LVkVZ nck,aA
2.
chi lqukbZ nsus ij ijkaBk ros ij Mkysa vkSj ?kh yxkdj LVkVZ nck,aA
3.
chi lqukbZ nsus ij ijkaBk dks iyVsa vkSj LVkVZ nck,aA pVuh ;k
jk;rk ds lkFk xeZ&xeZ ijkslsaA
0.2 kg
100 g
50 g
500 ml
200 g
50 g
2 tsp
As per taste
1.
ekbØksoso lsQ Xykl ckmy esa ?kh] Hkhxs gq, pkoy vkSj ew¡x nky
fof/k %
ysaA ehuw ,oa otu pqudj LVkVZ nck,aA
2.
chi lqukbZ nsus ij xeZ ikuh Mkydj <d nsa vkSj LVkVZ nck,aA
chi lqukbZ nsus ij <Ddu gVkdj lHkh lkefxz;k¡ Mky nsa vkSj
3.
vPNh rjg feykdj LVkVZ nck,aA
0.3 kg
150 g
75 g
700 ml
300 g
75 g
2 tsp
50
Page 51

Breakfast
24 HOURS
Menu Weight Limit Utensil Instructions
bF7
bF8
Oats
Porridge
with milk
Veg
Cutlets
0.2 ~ 0.4 kg
0.1 ~ 0.3 kg High rack
Microwave
safe bowl
+
Multicook tawa
For
Milk
Oats
Sugar
Method : 1. In a MWS bowl add all the ingredients.
Select menu & weight & press start.
Serve hot.
For
Boiled Vegetables-(Potato, Cauliflower, Carrots, green peas)
Cornflour
Bread crumbs
Ginger garlic paste
Chilli paste
Salt, garam masala
Lemon juice
Method :
1. Mix all the ingredients except bread crumbs together.
Shape them into flat cutlets. Brush the cutlets with oil.
2. Coat with bread crumbs. Arrange the cutlets on
multicook tawa. Keep on the high rack.
3. Select menu & weight & press start.
4. When beeps, turn over & press start.
0.2 kg
200 ml
25 g
1 tbsp
½ tsp
0.3 kg
300 ml
50 g
As per taste
fof/k % 1.
ekbØksoso lsQ ckmy esa lHkh lkefxz;ksa dks Mky ysaA ehuw vkSj
otu pqudj LVkVZ nck,aA
xje&xje ijkslsaA
0.2 kg0.1 kg 0.3 kg
200 g100 g 300 g
2 tbsp - 3 tbsp
1½ tbsp
½ tsp
1 tsp½ tsp 1½ tsp
As per taste
As per taste
1.
czSM ds VqdM+ksa ds vykok lHkh lkefxz;ksa dks ,d lkFk feyk ysaA
fof/k %
fQj mlls piVs dVySV~l cuk ysaA dVySV~l ij cz'k ls rsy
yxk ysaA
2.
Åij ls czSM ds VqdM+ksa dks yxk nsaA dVySV~l dks eYVhdqd ros
ij O;ofLFkr djsa vkSj gkbZ jSd ds Åij j[k nsaA
ehuw vkSj otu pqudj LVkVZ nck,aA3.
chi lqukbZ nsus ij] iyV nsa vkSj LVkVZ nck,aA4.
czsdQkLV
0.4 kg
400 ml
50 g
2 tbsp
1½ tsp
51
Page 52

Child's Favourite
cPpksa dh euilUn
Menu Weight Limit Utensil Instructions
Microwave
safe flat glass dish
Microwave
safe bowl
Microwave
safe bowl
For
Eggs
Oil
Chopped onion, tomato, coriander leaves
Salt, pepper
Method : 1. Beat the eggs well & add salt, pepper & coriander
leaves. Select menu & weight & press start.
2. Add oil, tomato & onion to MWS flat glass dish.
Select menu & weight & press start.
3. When beeps, add the egg mixture. Press start.
Allow to stand for 3 minutes.
For
Noodles
Water
Oil
Vinegar
Soya sauce
Chilli sauce
Mix Vegetables - Cabbage, capsicum, carrot, freanch beans etc.
Salt, sugar, kali mirch powder
Method : 1. In Microwave Safe Bowl take noodles, water, oil. Select
Method : 1. In a MWS bowl add sweet corn with water. Cover
menu & weight and press start.
2. When beeps, strain noodles & pour cold water over it. In
Microwave Safe Bowl put some oil and finely chopped
vegetables, add vinegar, soyasauce, chilli sauce, MSG
salt & paper to taste press start.
3. When beep, add noodles and mix well press start serve hot.
For
Sweet corn
Water
Salt, red chilli powder, chaat masala, lemon juice
Select menu & weight & press start.
2. When beeps, transfer the corns, add sal, red
chilli powder, chaat masala & lemon juice & serve.
52
CF1
CF2
CF3
Omelette
Noodles
Sweet corn
0.2 ~ 0.4 kg
0.1 ~ 0.3 kg
0.1 ~ 0.3 kg
01 kg
100 g
400 ml
1 tsp
½ tsp
½ tsp
½ tsp
½ cup
01 kg
100 g
50 ml
24 HOURS
0.3 kg 0.4 kg0.2 kg
3 Nos. 4 Nos.2 Nos.
1 tbsp 1 tbsp½ tbsp
1 cup 1 cup½ cup
As per taste
fof/k % 1.
v.Mksa dks vPNh rjg QSaVdj mlesa ued] fepZ vkSj /kfu;k dh ifÙk;ka MkysaA ehuw
vkSj otu pqudj LVkVZ nck,aA
2.
ekbØksoso lsQ ¶ySV fM'k esa rsy] VekVj vkSj I;kt MkysaA ehuw vkSj otu pqudj
LVkVZ nck,aA
3.
chi lqukbZ nsus ij] v.Ms dk feJ.k Mkysa vkSj LVkVZ nck,aA 3 feuV rd j[kk jgus nsaA
0.2 kg
200 g
800 ml
2 tsp
1 tsp
1 tsp
1 tsp
½ cup
As per taste
fof/k % 1.
ekbØksoso lsQ ckmy esa uwMYl] ikuh] rsy MkysaA ehuw ,oa otu pqudj LVkVZ nck,aA
2.
tc ^chi* lqukbZ ns rks uwMYl dks fupksM+sa vkSj Åij ls BaMk ikuh MkysaA ekbØksoso lsQ
ckmy esa FkksM+k lk rsy vkSj ckjhd dVh gqbZ lfCt;ka Mkysa] fQj Loknkuqlkj fljdk]
lks;k lkWl] fpyh lkWl] ,e,lth lkYV vkSj fepZ Mky nsaA LVkVZ nck,aA
3.
^chi* lqukbZ nsus ij uwMYl Mkysa vkSj vPNh rjg feykdj LVkVZ nck,aA xeZ&xeZ ijkslsaA
0.2 kg
200 g
100 ml
fof/k % 1.2.LVhe 'ksQ ds LVhe okVj ckmy esa ikuh MkysaA LVhe IysV ij LohV dkWUlZ j[ksa vkSj <d
As per taste
nsaA ehuw vkSj otu pqudj LVkVZ nck,aA
chi lqukbZ nsus ij] dkWUlZ dks vU; ckmy esa cny ysa vkSj ued] yky fepZ ikmMj] pkV
elkyk] uhacw jl Mkydj ijkslsaA
0.3 kg
300 g
1200 ml
3 tsp
1 tsp
1 tsp
1 tsp
1 cup
0.3 kg
300 g
150 ml
Page 53

Child's Favourite
24 HOURS
Menu Weight Limit Utensil Instructions
CF4
Pizza*
Vermicelli
CF5
Khichdi
* Do not put anything in the oven during preheat mode (Pre-h). / izh&ghV eksM (Pre-h) ds nkSjku dksbZ Hkh oLrq vksou ds vUnj u j[ksaA
0.3 kg
0.1 ~ 0.3 kg
Low rack
Microwave
safe bowl
Pizza base
Topping
Mix Vegetables : Tomato, capsicum, onion
Grated cheese
Oregano & Chilli flakes (optional)
Method :
1. Keep low rack inside and press start to preheat.
2. Pizza topping on Pizza base, spread chopped vegetables
on it. Sprinkle some grated Cheese over it place Pizza
on rack, press start
For
Roasted vermicelli
Oil
Rai, urad dal, curry leaves
Chopped onion
Chopped tomato
Salt, red chilli powder, haldi, garam masala
Water
Lemon juice
Method : 1. In a MWS bowl add oil, rai, chana dal, curry leaves,
chopped onion. Mix & select menu & weight &
press start.
2. When beeps, mix & add tomato. Press start.
3. When beeps, mix & add vermicelli, water, salt, red
chili powder, haldi, garam masala. Press start.
Stand for 3 minutes.
4. Squeeze lemon, mix & serve.
0.1 kg
100 g
1 tbps
½ cup
1 No.
400 ml
cPpksa dh euilUn
1 Big Pizza base
3 tbsp
1 cup
½ cup
As per taste
fof/k % 1.2.yks jSd vkWou ds vUnj j[ksa vkSj xeZ djus ds fy, LVkVZ nck,aA
iht+k csl ds Åij VkWfiaXl j[ksaA mlds Åij dVh gqbZ lfCt;ksa
dks QSyk,aA fQj dqN dlk gqvk pht+ fNM+dsaA vc iht+k dks jSd
ds Åij j[ksa vkSj LVkVZ nck,aA
0.3 kg0.2 kg
300 g200 g
As per taste
As per taste
As per taste
fof/k % 1.
ekbØksoso lsQ ckmy esa rsy] jkbZ] puk nky] djh iÙkk] dVh gqbZ
I;kt ysdj vPNh rjg feyk,aA ehuw vkSj otu pqudj LVkVZ nck,aA
2.
chi lqukbZ nsus ij] feyk,a vkSj VekVj Mkydj LVkVZ nck,aA
3.
chi lqukbZ nsus ij] feyk,a vkSj lsafo;k¡] ikuh] ued] yky fepZ
ikmMj] gYnh] xje elkyk Mkydj LVkVZ nck,aA 3 feuV rd
j[kk jgus nsaA
4.
uhacw fupksM+dj feyk,a vkSj ijkslsaA
2 tbps1½ tbps
1 cup1 cup
3 Nos.2 Nos.
1200 ml800 ml
53
Page 54

Child's Favourite
cPpksa dh euilUn
Menu Weight Limit Utensil Instructions
0.1 ~ 0.3 kgCF7
0.3 kg
Low rack
Microwave
safe flat glass dish
Bread slices
Butter
Garlic paste
Grated cheese
Salt, kali mirchi powder, oregano, chilli flakes
Method : 1. Mix butter, garlic paste, salt, kali mirchi powder and oregano
Method : 1. Make small pieces of Bread slices. Beat the egg very
together. Apply this mixture to both sides of bread slices.
2. Keep low rack in the oven & arrange the bread slices. Select
menu and press start.
Note : Use French bread to make garlic bread.
For
Bread slices
Milk (for dipping the bread)
Egg
Vanilla Essence
Sugar
Dry fruits
well . Mix all the ingredient very well.
2. Pour this mixture into microwave safe flat glass dish.
Select menu and weight. Press start.
CF6
Garlic
Bread*
Bread
Pudding
* Do not put anything in the oven during preheat mode (Pre-h). / izh&ghV eksM (Pre-h) ds nkSjku dksbZ Hkh oLrq vksou ds vUnj u j[ksaA
0.1 kg
2 Nos.
½ cup
1 Nos.
½ tsp
3 tbsp
24 HOURS
4 pices
5 tbsp
2 tbsp
4 tbsp
As per taste
fof/k %
1.
eD[ku] yglqu dh isLV] ued] dkyh fepZ dk ikmMj rFkk
vkWjsxkuks dks ,d lkFk feyk ysaA bl feJ.k dks czSM Lykbflt
ds nksuksa rjQ yxk nsaA
2.
yks jSd dks vksou ds vUnj j[kdj ml ij czSM Lykbflt dks
O;ofLFkr dj nsaA ehuw pqudj LVkVZ nck,aA
uksV % xkfyZd czSM cukus ds fy, ÝSap czSM dk bLrseky djsaA
0.2 kg
3 Nos.
1 cup
2 Nos.
¾ tsp
4 tbsp
As per your taste
czSM Lykbflt ds NksVs&NksVs VqdM+s dj ysaA v.Ms dks vPNh
fof/k % 1.
rjg QSaV ysaA lHkh lkefxz;ksa dks vPNh rjg feyk ysaA
bl feJ.k dks ekbØksoso lsQ ¶ySV Xykl fM'k esa MkysaA ehuw
2.
vkSj otu pqudj LVkVZ nck,aA
0.3 kg
4 Nos.
1½ cup
2 Nos.
1 tsp
5 tbsp
54
Page 55

Bakery
24 HOURS
Menu Weight Limit Utensil Instructions
bA1
bA2
Brownie
Cheese
Straw
0.3 kg
0.3 kg
Low rack
&
Metal cake tin
Low rack
&
Metal cake tin
For
Maida
Condensed milk
Butter
Almonds, Wallnuts
Soda by carb
Baking powder
Chocolate Essence
Coco powder
Method : 1. Sieve maida, baking powder and soda. In a bowl add
milkmaid and butter and beat well.
Add maida, coco powder, essence and mix. For spoon
dropping consistency add milk or water.
2. Select menu & press start. When beeps, put the tin with
batter on low rack. Press start to bake. Remove when it
gives a beep.
For
Maida
Grated cheese
Butter
Cold water
Pepper powder
Baking powder
Chilli powder
Salt
Method : 1. Sieve maida, baking powder, chilli powder and pepper
powder. In a bowl add maida and butter and cheese
and rub it with fingertips till it resembles breadcrumbs.
Add little cold water to make a soft dough. Roll it in to
½ c.m. roti and cut thin strips. Twist them and put in the
metal cake tin.
2. Select menu & press start. When beeps, put the tin on low
rack. Press start to bake. Remove when it gives a beep.
0.3 kg
125 g
150 g
100 g
As per taste
1/2 tsp
1 tsp
1 tsp
2 tbsp
eSnk] csfdax ikmMj vkSj lksMk dks NkusaA feYdesM vkSj eD[ku dks
fof/k % 1.
ckmy esa Mkydj QSaV ysaA eSnk] dksdks ikmMj vkSj b=k Mkydj
feyk,aA pEep ls cjkcj pykrs gq, nw/k ;k ikuh MkysaA
ehuw pqudj LVkVZ nck,aA chi lqukbZ nsus ij feJ.k ds fVu dks
2.
vksou esa yks jSd ij j[k nsa vkSj csd djus ds fy, LVkVZ nck,aA
chi lqukbZ nsus ij ckgj fudky ysaA
0.3 kg
200 g
50 g
50 g
As required
1/4 tsp
1/8 tsp
1/2 tsp
1/4 tsp
eSnk] csfdax ikmMj] fpyh ikmMj vkSj fepZ ikmMj dks NkusaA eSnk]
fof/k % 1.
eD[ku vkSj pht+ ckmy esa Mkydj maxfy;ksa ds iksjoksa ls rc rd
jxM+sa tc rd og czSM ds le:i u gks tk,A eqyk;e ykSank cukus
ds fy, FkksM+k lk BaMk ikuh feyk,aA blls ½ lseh- dh jksVh csysa
vkSj iryh ifê;ka dkVsaA fQj mudks ,saBdj eSVy dsd fVu esa j[ksaA
ehuw pqudj LVkVZ nck,aA chi lqukbZ nsus ij fVu dks vksou esa yks
2.
jSd ij j[k nsaA vc csd djus ds fy, LVkVZ nck,aA chi lqukbZ nsus
ij ckgj fudky ysaA BaMk djds ijkslsaA
csdjh
55
Page 56

Bakery
csdjh
Menu Weight Limit Utensil Instructions
bA3
bA4
Muffins
Jeera
Biscuits
0.3 kg
0.3 kg
Low rack
&
metal muffin tray
Low rack
&
Multicook tawa
For
Maida
Powdered sugar
Butter
Almonds, Wallnuts
Egg
Baking powder
Almond essence
Method : 1. Sieve maida, baking powder . In a bowl add powdered
sugar and butter and beat well. Add maida, essence
and mix.
For spoon dropping consistency add milk or water.
Pour in to the greased muffin tray and sprinkle chopped
almonds / walnuts.
2. Select menu & press start. When beeps, put the tray on
low rack. Press start to bake. Remove when it gives a beep.
For
Maida
Powdered suger
Butter
Jeera / Ajwain
Soda bi carb
Baking powder
Water
Method : 1. Sieve maida, baking powder and soda. In a bowl add
powdered sugar and butter and beat well. Add maida,
jeera powder, ajwain and make a soft dough with little
water. Roll a thick roti and cut cookies with the cutter.
Prick with a fork. Arrange on multicook tawa & place
the tawa on low rack.
2. Select menu & press start. When beeps, keep the rack
& press start to bake. Remove when it gives a beep.
Allow them to cool.
24 HOURS
0.2 kg
100 g
80 g
75 g
As per taste
1 No.
1/2 tsp
1/2 tsp
eSnk vkSj csfdax ikmMj dks NkusaA cwjk vkSj eD[ku dks ckmy esa
fof/k % 1.
Mkydj vPNh rjg QSaV ysaA eSnk vkSj ,lsal Mkydj feyk ysaA
pEep ls cjkcj pykrs gq, nw/k ;k ikuh MkysaA fpduh dh gqbZ
efQu Vªs ij Mkysa vkSj dVs gq, cknke@v[kjksV fNM+d nsaA
ehuw pqudj LVkVZ nck,aA chi lqukbZ nsus ij Vªs dks vksou esa yks
2.
jSd ij j[k nsaA vc csd djus ds fy, LVkVZ nck,aA chi lqukbZ
nsus ij ckgj fudkysaA
0.3 kg
200 g
75 g
75 g
As per taste
1 pinch
¼ tsp
As required
eSnk] csfdax ikmMj vkSj lksMk Nku ysaA cwjk vkSj eD[ku ckmy esa
fof/k % 1.
Mkydj vPNh rjg QSaV ysaA eSnk] thjk ikmMj] vtokbu Mkydj
FkksM+s ikuh ds lkFk eqyk;e ykSank cuk ysaA mlls ,d eksVh jksVh csy
ysa vkSj pkdw ls NksVh&NksVh dqdht+ dkV ysa vkSj dk¡Vs ls Nsn nsaA
eYVhdqd ros ds Åij O;ofLFkr djsa vkSj ros dks yks jSd ij j[ksaA
ehuw pqudj LVkVZ nck,aA chi lqukbZ nsus ij jSd dks ekbØksoso esa
2.
yksvj jSd ij j[k nsaA csd djus ds fy, LVkVZ nck,aA chi lqukbZ
nsus ij ckgj fudky ysaA BaMk gksus ds fy, j[k nsaA
56
Page 57

Bakery
24 HOURS
Menu Weight Limit Utensil Instructions
bA5
bA6
Chena Poda
Naan Khatai
0.2 kg
0.2 kg
Low rack
&
Microwave safe
flat glass dish
Low rack
&
Multicook tawa
For
Chena
Sugar
Suji
Method : 1. Mix chena, sugar & suji together adding little water.
2. Transfer this mixture to MWS flat glass dish.
3. Select menu & press start.
4. When beeps, place the MWS flat glass dish on low rack.
Press start.
For
Maida
Suji
Powdered sugar
Vanilla essence
Butter
Almonds & cashewnuts
Method : 1. Beat the butter & sugar together till it turns fluffy.
2. Add vanilla essence followed by maida & suji.
3. Make a dough out of this mixture.
4. Roll out a medium sized ball & put cashewnut on the top
of each piece. Arrange them on multicook tawa & place
the tawa on low rack.
5. Select menu & press start. When beeps, place the tray &
press start.
0.2 kg
200 g
100 g
20 g
Nsuk] phuh vkSj lwth dks FkksM+k ikuh Mkydj ,d lkFk feyk ysaA
fof/k % 1.
bl feJ.k dks ekbØksoso lsQ ¶ySV Xykl fM'k esa Mky nsaA
2.
ehuw pqudj LVkVZ nck,aA
3.
chi lqukbZ nsus ij] ekbØksoso lsQ ¶ySV Xykl fM'k dks yks jSd
4.
ij j[k nsaA LVkVZ nck,aA
0.2 kg
150 g
50 g
85 g
1 tsp
100 g
A few
eD[ku vkSj phuh dks rc QSaVsa tc rd og >kxnkj u gks tk,A
fof/k % 1.
ouhyk b=k Mkyus ds ckn eSnk vkSj lwth MkysaA
2.
bl feJ.k ls ,d ykSank cuk ysaA
3.
fQj blls e/;e vkdkj ds xksys cuk ysa vkSj izR;sd ds Åij ,d
4.
dktw j[ksaA fQj mudks eYVhdqd ros ds Åij j[k nsa vkSj ros dks
yks jSd ij j[ksaA
ehuw pqudj LVkVZ nck,aA chi lqukbZ nsus ij] Vªs j[k nsa vkSj
5.
LVkVZ nck,aA
csdjh
57
Page 58

Bakery
csdjh
Menu Weight Limit Utensil Instructions
bA7
Whole Wheat
Cookies
0.3 kg
Low rack
&
Multicook tawa
For
Whole wheat flour
Brown suger
Granulated sugar
Butter
Egg
Vanilla essence
Baking powder
Method : 1. In a bowl cream brown sugar, butter, granulated sugar
together and beat till fluffy. Add egg, vanilla essence,
baking powder.
Finally add flour and make a soft dough.
2. Roll out the dough and cut with a cookie cutter.
3. Select menu, press start. When beeps, put the cookies
on multicook tawa & place the tawa on low rack. Press
start to bake. Remove when it gives a beep.
24 HOURS
0.3 kg
200 g
100 g
50 g
100 g
1 No.
1/2 tsp
1/2 tsp
,d ckmy esa Øhe] 'kDdj] eD[ku] nkusnkj phuh dks ,d lkFk rc
fof/k % 1.
rd QSaVsa tc rd og >kxnkj u gks tk,A v.Mk] ouhyk b=k]
csfdax ikmMj MkysaA vUr esa vkVk Mkydj ykSank cuk ysaA
ykSans dks csydj dqdh dVj ls dkV ysaA
2.
ehuw pqudj LVkVZ nck,aA chi lqukbZ nsus ij] dqdht+ dks eYVhdqe
3.
ros ds Åij j[ksa vkSj ros dks yks jSd ij j[ksaA csd djus ds fy,
LVkVZ nck,aA chi vkus ij ckgj fudky ysaA
58
Page 59

UTILITY CORNER
1. Utility Corner (UC)
Page 60

Utility Corner
lqfo/kk dkWuZj
Menu Weight Limit Utensil Instructions
UC1
UC2
UC3
UC4
UC5
UC6
Keep warm
Steam clean
Defrost veg
Defrost non-veg
De-humidification
Light disinfect
0.3 kg
0.3 kg
0.2 ~ 0.5 kg
0.5 ~ 1.0 kg
0.3 kg
0.1 kg
Mircowave
safe bowl
Mircowave
safe bowl
Mircowave
safe bowl
Mircowave
safe bowl
Empty cavity
Microwave safe
glass utensil
&
Empty cavity
UTILITY CORNER
Method : 1. Any cooked food with cover (rice, dal, subzi, halwa, upma etc.). Select menu & press start.
Method : 1. Take water in a bowl, add vinegar & lemon juice in it. Select menu & press start.
Method : Veg (Paneer, green peas, sweet corn etc.)
Method : Non-veg- (Chicken, mutton)
Method : Namkeen, biscuits, papad, bhujia, wafers etc.
Method : 1. Sterilize Microwave safe glass utensil - Keep the empty utensil & select menu & press start.
dksbZ Hkh Hkkstu ¼pkoy] nky] lCth] gyok] miek bR;kfn½ ysdj <d nsaA ehuw pqudj LVkVZ nck,aA
fof/k %
1.
,d ckmy esa ikuh ysdj mlesa fljdk vkSj uhacw jl MkysaA ehuw pqudj LVkVZ nck,aA
fof/k %
1.
1. Take vegetables in a MWS bowl. Select menu & weight & press start.
fof/k %
'kkdkgkj ¼iuhj] gjh eVj] LohV dkWuZ bR;kfn½
ekbØksoso lsQ ckmy esa lfCt;ka¡ ysdj ehuw ,oa otu pqusa vkSj LVkVZ nck,aA
1.
1. Take in a MWS bowl, select menu & press start.
fof/k %
ek¡lkgkj ¼fpdu] eVu bR;kfn½
ekbØksoso lsQ ckmy esa fpdu] eVu bR;kfn ysdj ehuw pqusa vkSj LVkVZ nck,aA
1.
1. In a MWS bowl add the food to be dehumidified. Select menu & press start.
fof/k %
uedhu] fcLdqV] ikiM+] Hkqft;k] osQlZ bR;kfnA
ekbØksoso lsQ ckmy esa ueh jfgr djus ds fy, MkysaA ehuw pqudj LVkVZ nck,aA
1.
2. Clean the cavity - Keep the cavity empty. Select menu & press start.
When time ends (beeps), clean the cavity with a damp cloth.
Note : The oven has a special function Light Disinfect which allows to sterilize the MWS glass utensil thereby
giving a hygiene & clean utensils/cavity.
fof/k %
ekbØksoso lsQ Xykl crZuksa dks dhVk.kqeqDr djuk [kkyh crZu dks vksou esa j[kdj ehuw pqusa vkSj LVkVZ nck,aA-
1.
[kksg dh lQkbZ djuk [kksg dks [kkyh j[ksaA ehuw pqudj LVkVZ nck,aA
2.
le; dh lekfIr ij ¼chi lqukbZ nsus ij½ [kksg dks xhys diM+s ls lkQ dj nsaA
uksV % vksou esa ,d fof'k"V izfØ;k ykbV fMlbUQSDV gksrh gS tks ekbØksoso lsQ Xykl ;qVsaflYl dks dhVk.kqeqDr dj nsrk gS vkSj
QyLo:i LokLF; iznku djrk gS vkSj crZuksa@[kksg dh lQkbZ djrk gSA
-
60
Page 61

egRoiw.kZ lqj{kk funsZ'k & /;ku ls i<+sa vkSj Hkfo"; ds lanHkZ ds fy, j[ksaegRoiw.kZ lqj{kk funsZ'k & /;ku ls i<+sa vkSj Hkfo"; ds lanHkZ ds fy, j[ksa
61
Page 62
62
Page 63

Technical Specifications / Two Recipes for starter
rduhdh tkudkjh / uofl[kq, ds fy, nks O;atu
Power Input/ikoj buiqV
Output/vkmViqV
Microwave Frequency/ekbØksoso fÝDosalh
Outside Dimension/ckgjh eki
Power Consumption/ikoj datEi'ku
Microwave/ekbØksoso
Grill/fxzy
Combination/dkWEchus'ku
Convection/dUoSD'ku
MC-7880PSR
230 V AC 50Hz
900 W (IEC60705 rating standard)
2450 MHz
510 mm(W) X 310 mm(H) X 510 mm(D)
1350 Watts
1250 Watts
2650 Watts
1350 Watts
1. ROASTED PAPAD
Procedure :
Papad:
1. Place the raw papad at the
centre of Glass Tray, as
shown in the picture above.
2. Select Micro-100% Power
Level and Cook time.
3. After Papad cooking give
sta nd ing tim e of 30- 45
seconds.
To Cook Multiple Papads :
*Place Multiple papads over one
another, as shown in the picture
above.
Crispy Papad :
1. Press Quick Start without
papad.
Sprinkle little water or oil over
2.
the papad.
After beep, place the papad
3.
at the centre and press Start.
*Note : The cooking time may
vary –
a. As per the composition of the
papad material.
b. As per the Quantity of papad
used.
1. Hkqus gq, ikiM+
fof/k
ikiM+ %
1. Xykl Vªs ds chp esa dPpk ikiM+ j[ksa]
tSlk fd mijksDr fp=k esa n'kkZ;k x;k
gSA
2. ekbØks-100% ikoj Lrj vkSj idkus
dk le; fu/kkZfjr djsaA
3. ikiM+ id tkus ds ckn 30-45 lSdsaM
rd j[kk jgus nsaA
vf/kd ikiM+ idkus ds fy, %
*cgqr lkjs ikiM+ ,d nwljs ds Åij j[ksa]
tSlk fd mijksDr fp=k esa n'kkZ;k x;k gSA
fØLih ikiM+ %
1. ikiM+ j[kus ls igys fDod LVkVZ
nck,aA
ikiM+ ds Åij FkksM+k ikuh ;k rsy
2.
fNM+dsaA
chi ds ckn] Xykl Vªs ds chp esa ikiM+
3.
j[ksa] tSlk fd mijksDr fp=k esa
n'kkZ;k x;k gSA
*uksV % idkus ds le; esa vUrj gks
ldrk gS –
a. ikiM+ dh lkexzh dh cukoV ds
vuqlkjA
b. lbLrseky fd;s x, ikiM+dh dh
ek=kk ds vuqlkjA
2. POP CORN : Place the pop
corn bag to the glass tray
prop erly a s ins truc ted on
packing. Use Quick Start to set
3~4 minutes. Remove the bag
af ter p opi ng so und ha s
stopped. Take care that bag
corners do not touch sides
while rotating.
Note : Attend poping process
carefully. Do not overheat as
cause flash fire.
2. ikWi dkWuZ % iSfdax ij fn;s x,
funsZ'kkuqlkj ikWi dkWuZ dk cSx
dk¡p dh Vªs ij Bhd ls j[ksaA 3~4
feuV lSV djus ds fy, fDod
LVkVZ dk iz;ksx djsaA Hkquus dh
vkokt lekIr gksus ds ckn cSx dks
gVk ysaA /;ku j[ksa fd cSx ds dksus
?kqekrs le; lkbM ls u Nq,aA
uksV % Hkquus dh izfØ;k dks
/;kuiwoZd ns[ksaA vko;drk ls
vf/kd xeZ u djsa D;ksafd blls
vkx yx ldrh gSA
63
Page 64

P/No: MFL06477235
 Loading...