

LG LSSB2791 series Installation Manual

Built in Side by Side
Refrigerator
Installation Guide
Model:
LSSB2791
**

2
Contents
1. Precaution before installation ................................................................. 3
2. Product and cabinet dimension .............................................................. 4
3. Precaution when moving the product .................................................... 5
4. Cabinet diagram and maximum door opening ....................................... 5
5. Refrigerator/Freezer door opening and how to fix at 90 degrees ............. 6
6. Installation of part to prevent the product from falling over ..................... 6
7. Connecting power and securing space for water supply pipe .................. 8
8. How to install the water supply pipe ...................................................... 9
9. Product detail dimension ...................................................................... 10
10. Cabinet detail dimension .................................................................... 11
11. How to adjust the height of the refrigerator and freezer door .............. 12
12. How to adjust the height of the product .............................................. 13
13. How to disassemble/reassemble the top grill ...................................... 14
14. Left/Right door adjuster for refrigerator and freezer ............................ 15
3
Precaution
■ Install the product away from the heat of the heater, boiler or direct sunlight.
Install the product where air flows well and is well ventilated.
■ Refer to the dimension of the cabinet and prepare the cabinet with good air circulation.
Install the product so that air flows smoothly through the front air inlet. If the air circulation
structure is not ensured, it may interfere with the normal operation of the product.
■ Because the damage to the power cord from external animals (Rodents) can cause a
fire, install the product where there is no access from external animals.
■ If the cabinet is made of soft material (Ex: Plaster etc.), it can have week assembly force
or even can be damaged. Therefore use the cabinet made of firm strong material.
■ Use cabinet without any twisting from the heat emitted from the product or humidity from
the opening and closing of the refrigerator.
■ Install the product where it is leveled horizontally and vertically. (Within 1mm horizontally
and vertically) If the product is not leveled horizontally and vertically, it can be difficult to
install the product. (The cabinet must be made of material or must be in the structure not
to cause continuous deformation when 220.5 lb(100kg) of load is applied.)
■ Install the built-in refrigerator with a team of 2 people.
■ When installing the product, protect the children from the use of parts and installation
location.
■ During the installation, take out the screw from the plastic bag one by one to avoid any
injury from exposed parts.
■ Avoid the use of multi-tab as it can cause a fire.
■ Before installing the product, connect the product to make sure to check it is operating
normally.
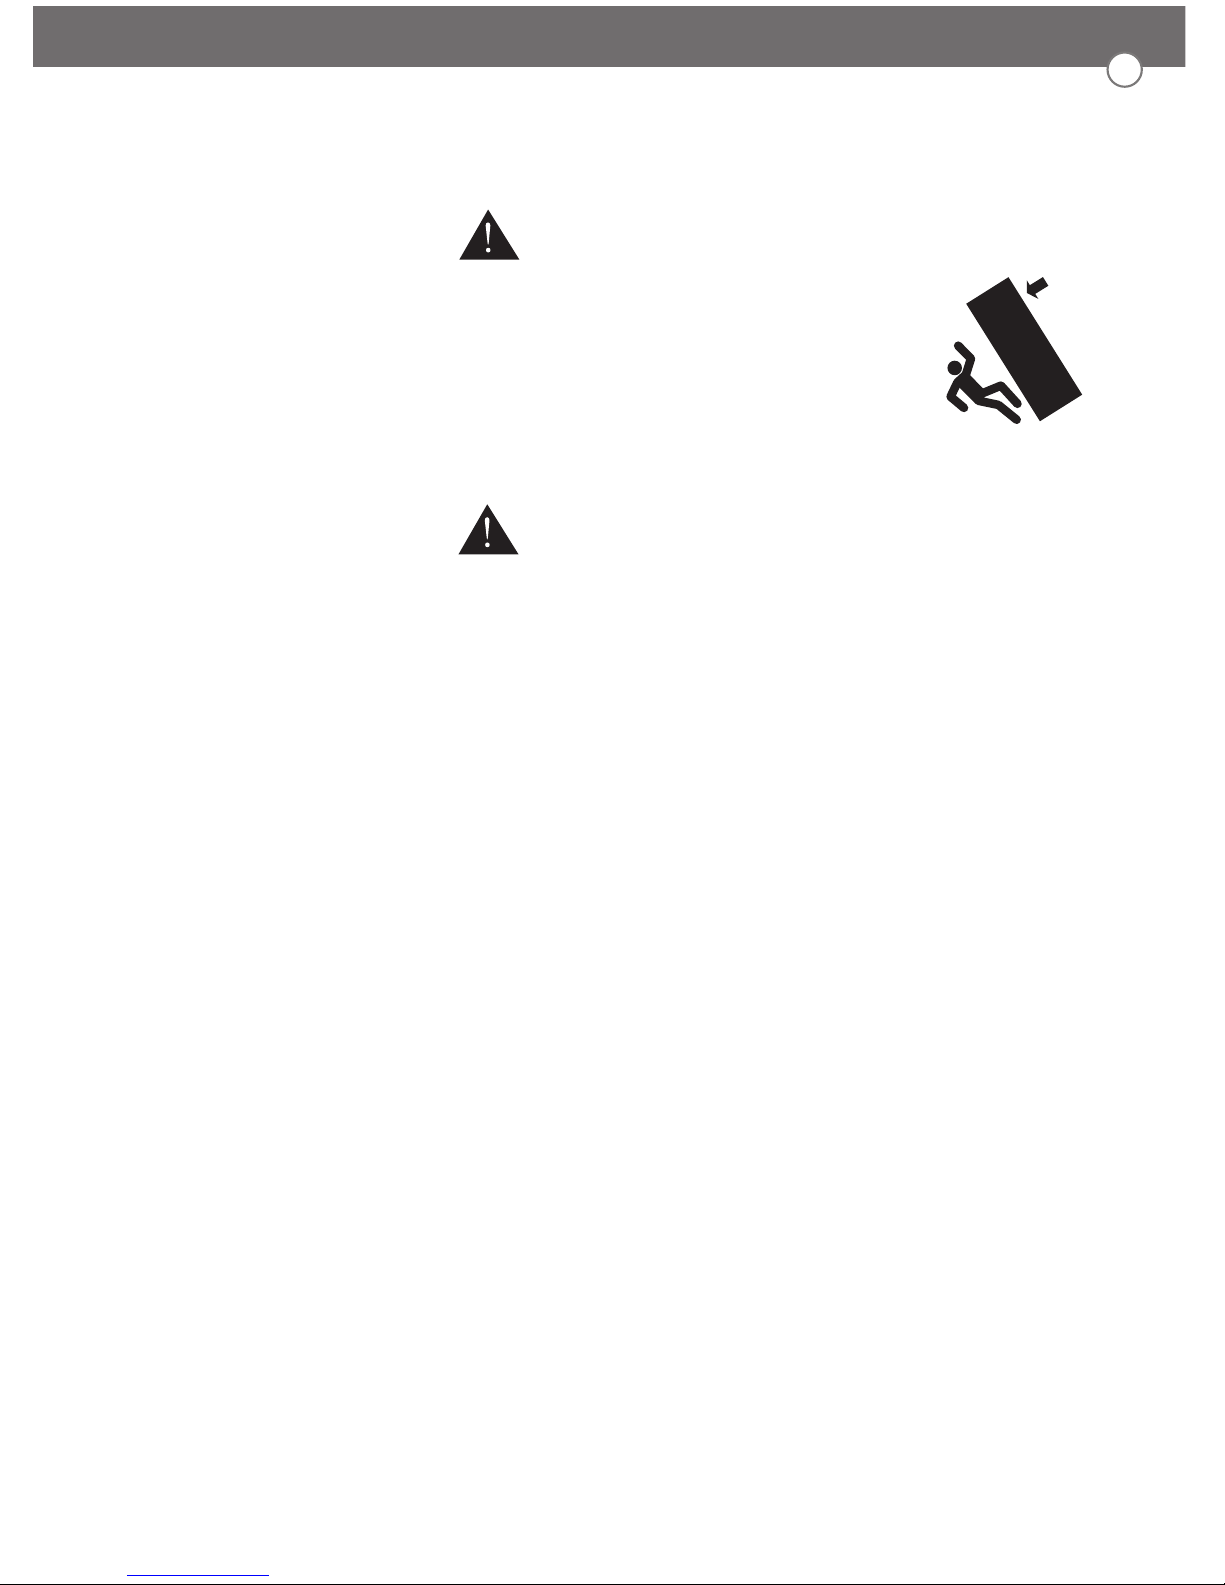
WARNING
TIP-OVER HAZARD
Use two or more people to move and install the refrigerator.
To prevent the refrigerator from tipping over, install anti-tip brackets
(provided). Failure to follow the refrigerator installation instructions
can result in serious injury or death.
1. Precaution before installation
4
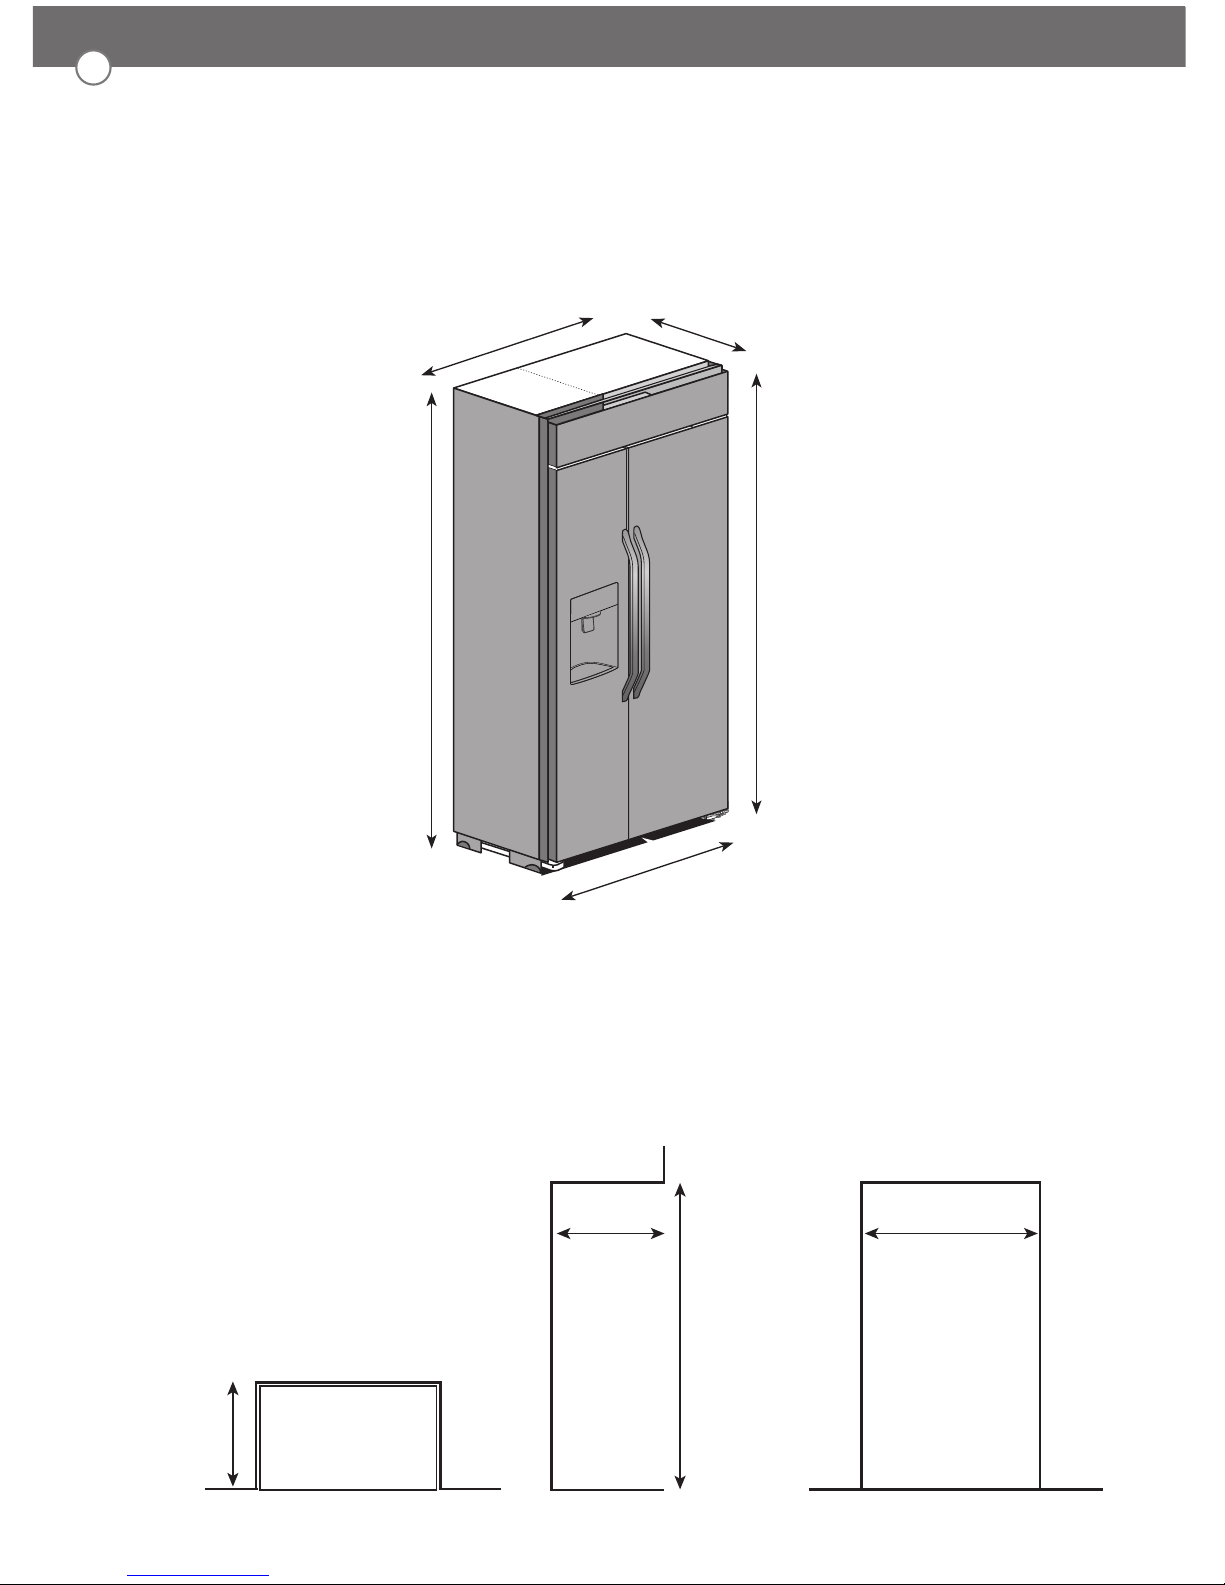
2. Product and cabinet dimension
- Product dimension (In) : 42”(1,067mm) x 83-1/2”(2,121mm) x 25-3/8”(645mm) (W x H x D)
- Cabinet dimension for product installation (In)
41-1/2”(1,054mm) X 83-3/4”(2,127mm) X 24”(610mm) (W x H x D)
Width of cabinet
41-1/2”(1,054mm)
View from front
Depth of cabinet
View from top
24”(610mm)
Depth of
cabinet
24”(610mm)
Height of cabinet
83-3/4”(2,127mm)
View from side
Check the dimension of the cabinet to install the product against the dimension stated in the
installation manual. The dimensions are the recommended dimensions to install the product. (If
the cabinet dimension is smaller than the recommended dimension, the product cannot be
installed.)
Depth from back of product to door
25-3/8”(645mm)
Width of back of product
41”(1,041mm)
Height of back of product
83-3/8”(2,116mm)
Height from floor to very top of the
front of the product
83-1/2”(2,121mm)
Width of front of product (Including left and right wing)
42”(1,067mm)
5
■. Before moving the refrigerator, check the line of movement to the location to install.
(Refer to the product dimension and rotating radius.)
3. Precaution when moving the product
1) Request the installation to the specialized technician.
It can cause electric shock, fire, malfunction and explosion.
2) Due to the characteristics of the built-in product, the top is heavy and can easily fall over when not
installed. Therefore be careful when moving the product. Also because the product can be
dangerous if left on inclined surface, always keep the product fixed or held.
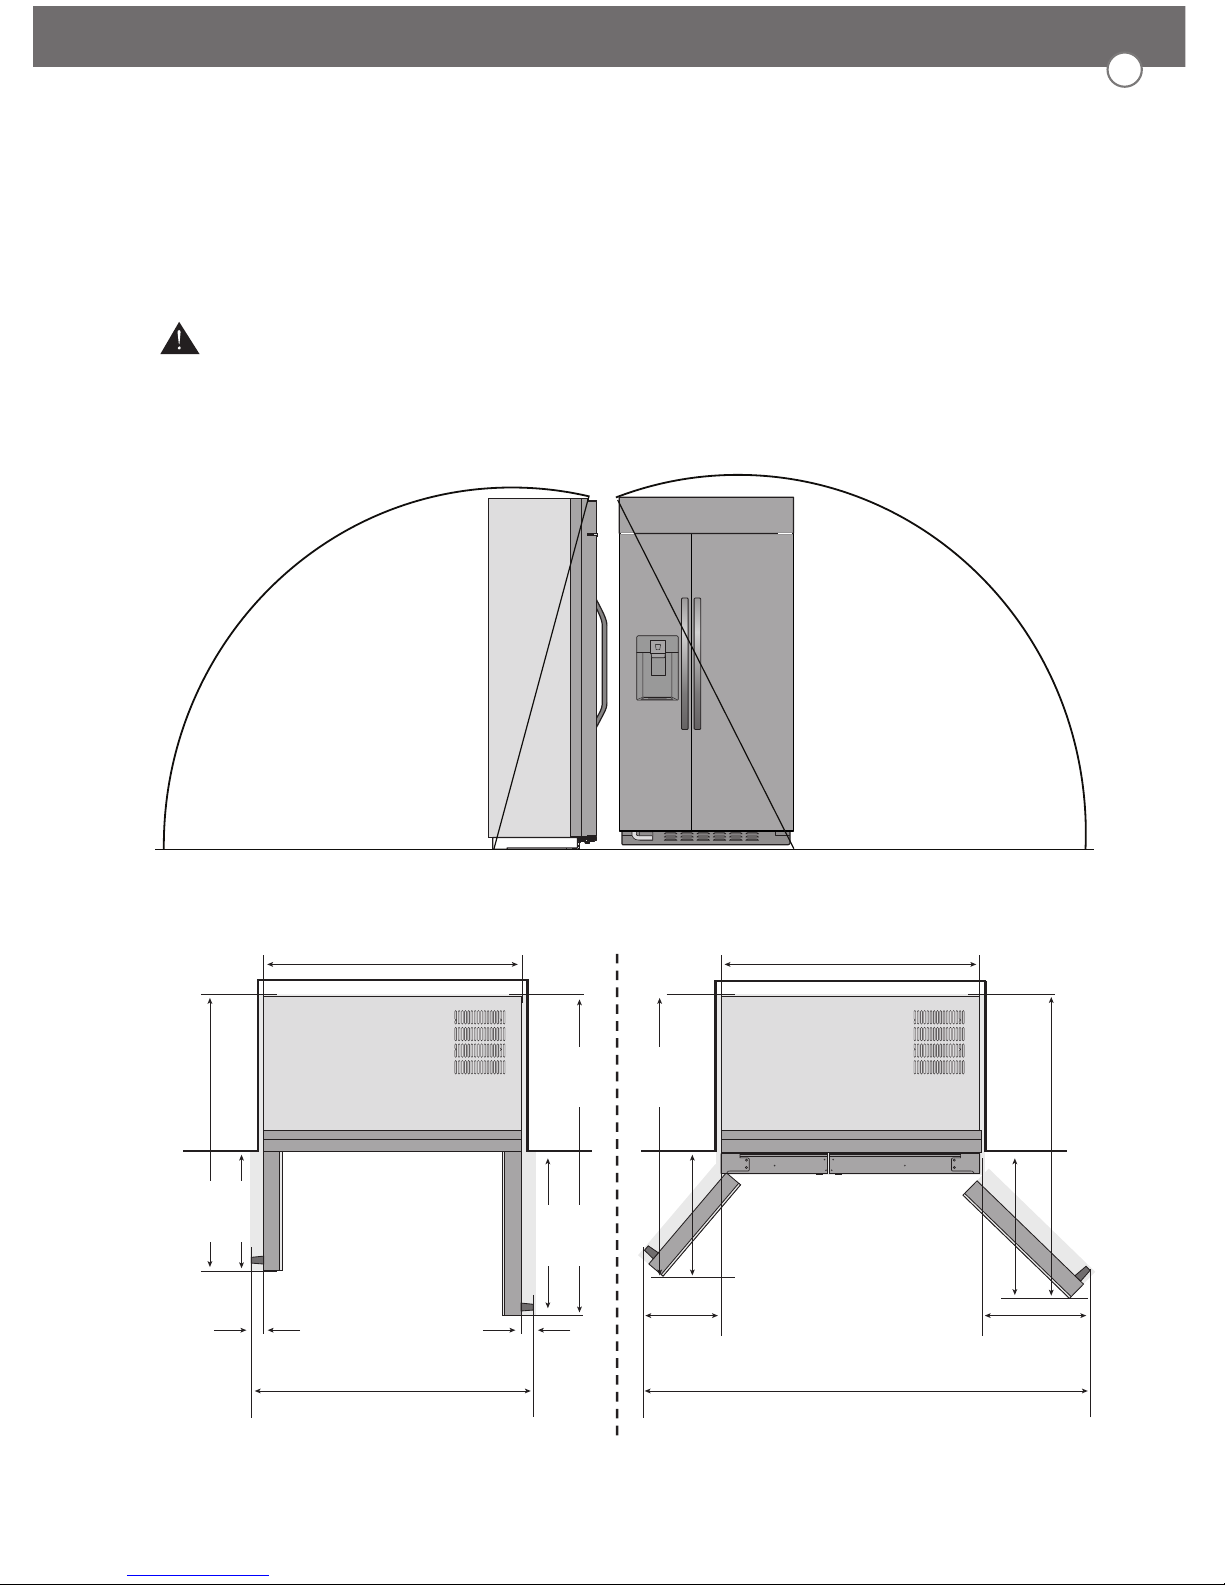
4. Cabinet diagram and maximum door opening
< Dimension when opening 90 degrees >
When installing the product on the wall near the corner, check the marked dimension to
keep minimum distance to avoid the handle hitting the wall.
< Dimension when opening 90 degrees >
41”(1,041mm) 41”(1,041mm)
45”(1,143mm) 68-1/8”(1,731mm)
2-5/16”
(59.5mm)
2-5/16”
(59.5mm)
41-9/16”
(1,056mm)
44-1/2”
(1,130mm)
19”
(485mm)
16”
(408.5mm)
11-3/4”
(298.5mm)
(Unit : In)
16-3/16”
(411mm)
48-5/16”
(1,227mm)
23”
(582mm)
39-3/8”
(1,000mm)
14”
(355mm)
86”
86”
(2,187mm)
(2,187mm)
86”
(2,187mm)
92-13/16”
92-13/16”
(2,357mm)
(2,357mm)
92-13/16”
(2,357mm)
6
5. Refrigerator/Freezer door opening and how to
fix at 90 degrees
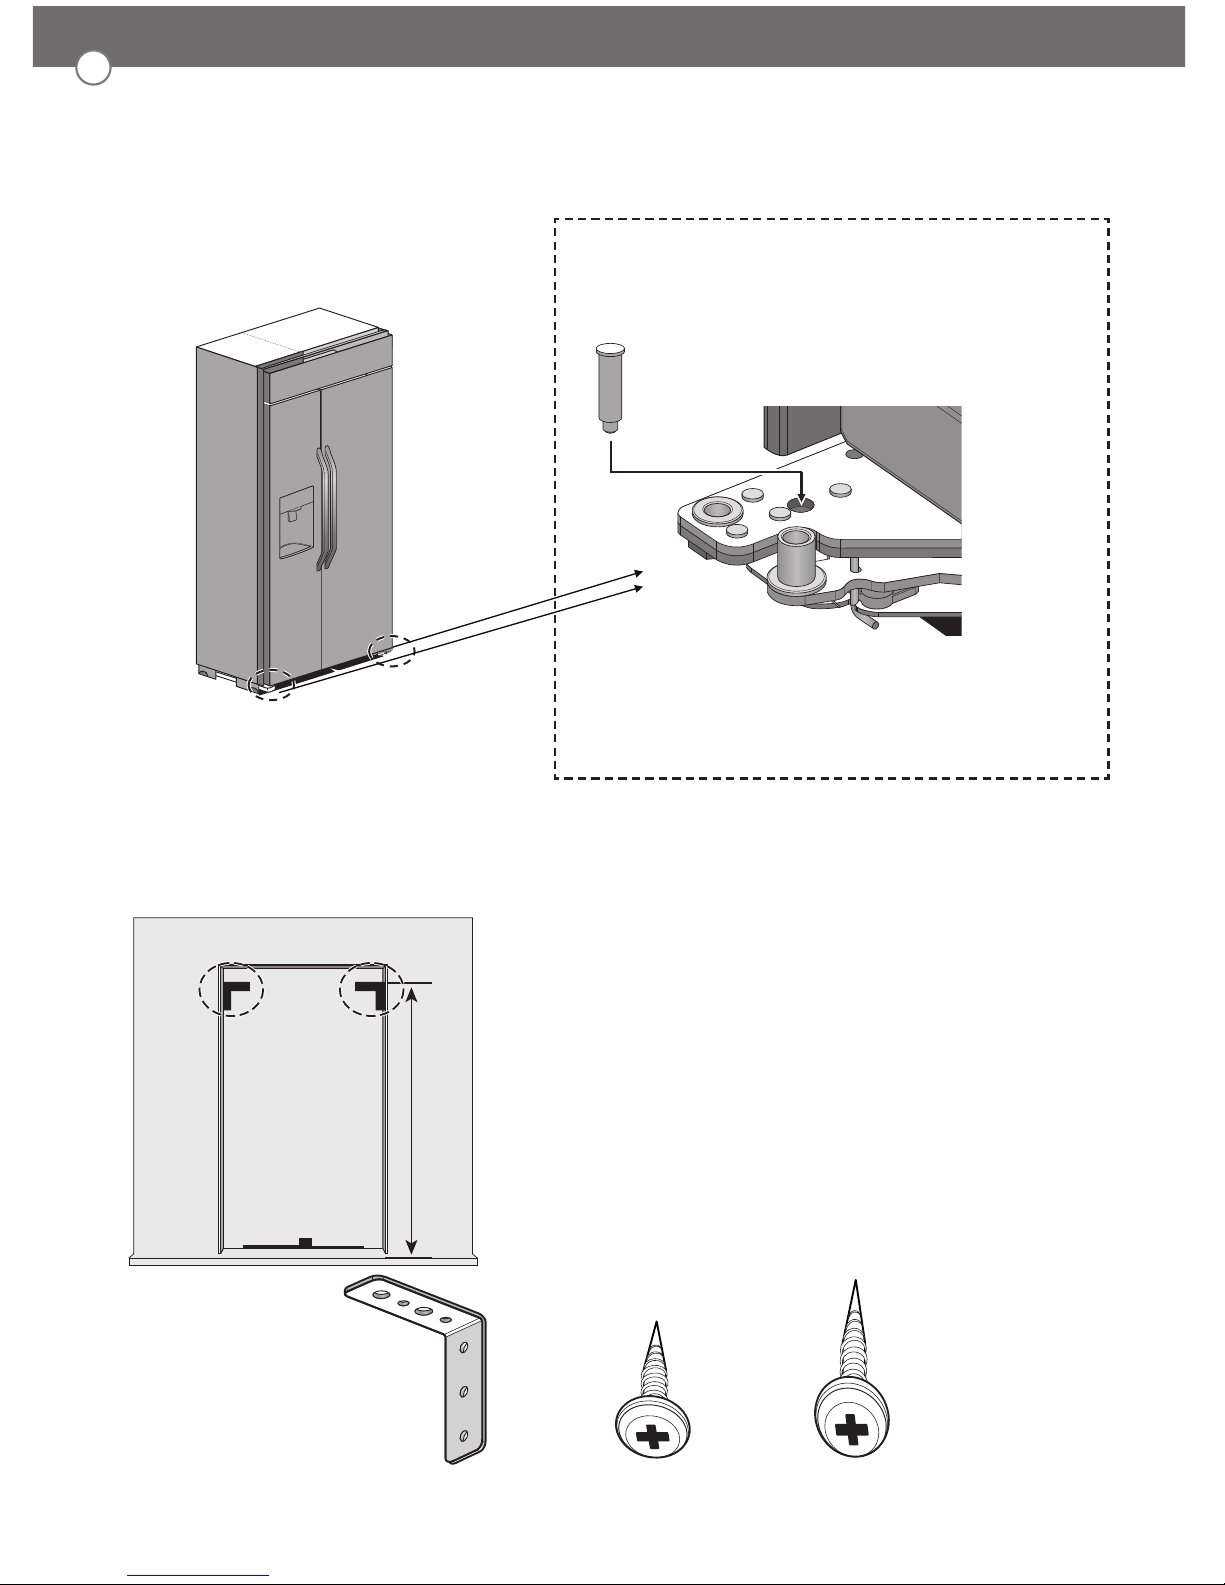
6. Installation of part to prevent the product from
falling over
※ Because the built-in product is heavy on the top, the
cabinet must be fixed firmly so that the product does not
move when using it.
• Fix the side of the cabinet to the building wall or side
of the furniture firmly.
• Use the part included in the accessory box as shown
in the picture to fix the cabinet to both sides of the
walls.
• If the part prevent the product from falling over is not
installed in the correct location, the product can fall
over to cause severe injury or death.
※ If the device to keep the refrigerator door
open and fixed cannot be inserted, move
the refrigerator door slowly in left and
right direction to push it in.
Part to prevent product
from falling over x 2
M4*L12 screw x 6 M4*L22 screw x 8
Push and install the device to keep the
refrigerator door open and fixed, included
in the accessory box, to the hole marked
on the picture completely.
The left and right side are installed in the
same method.
83-3/4”
83-3/4”
(2,126mm)
(2,126mm)
83-3/4”
(2,126mm)
 Loading...