

Page 1
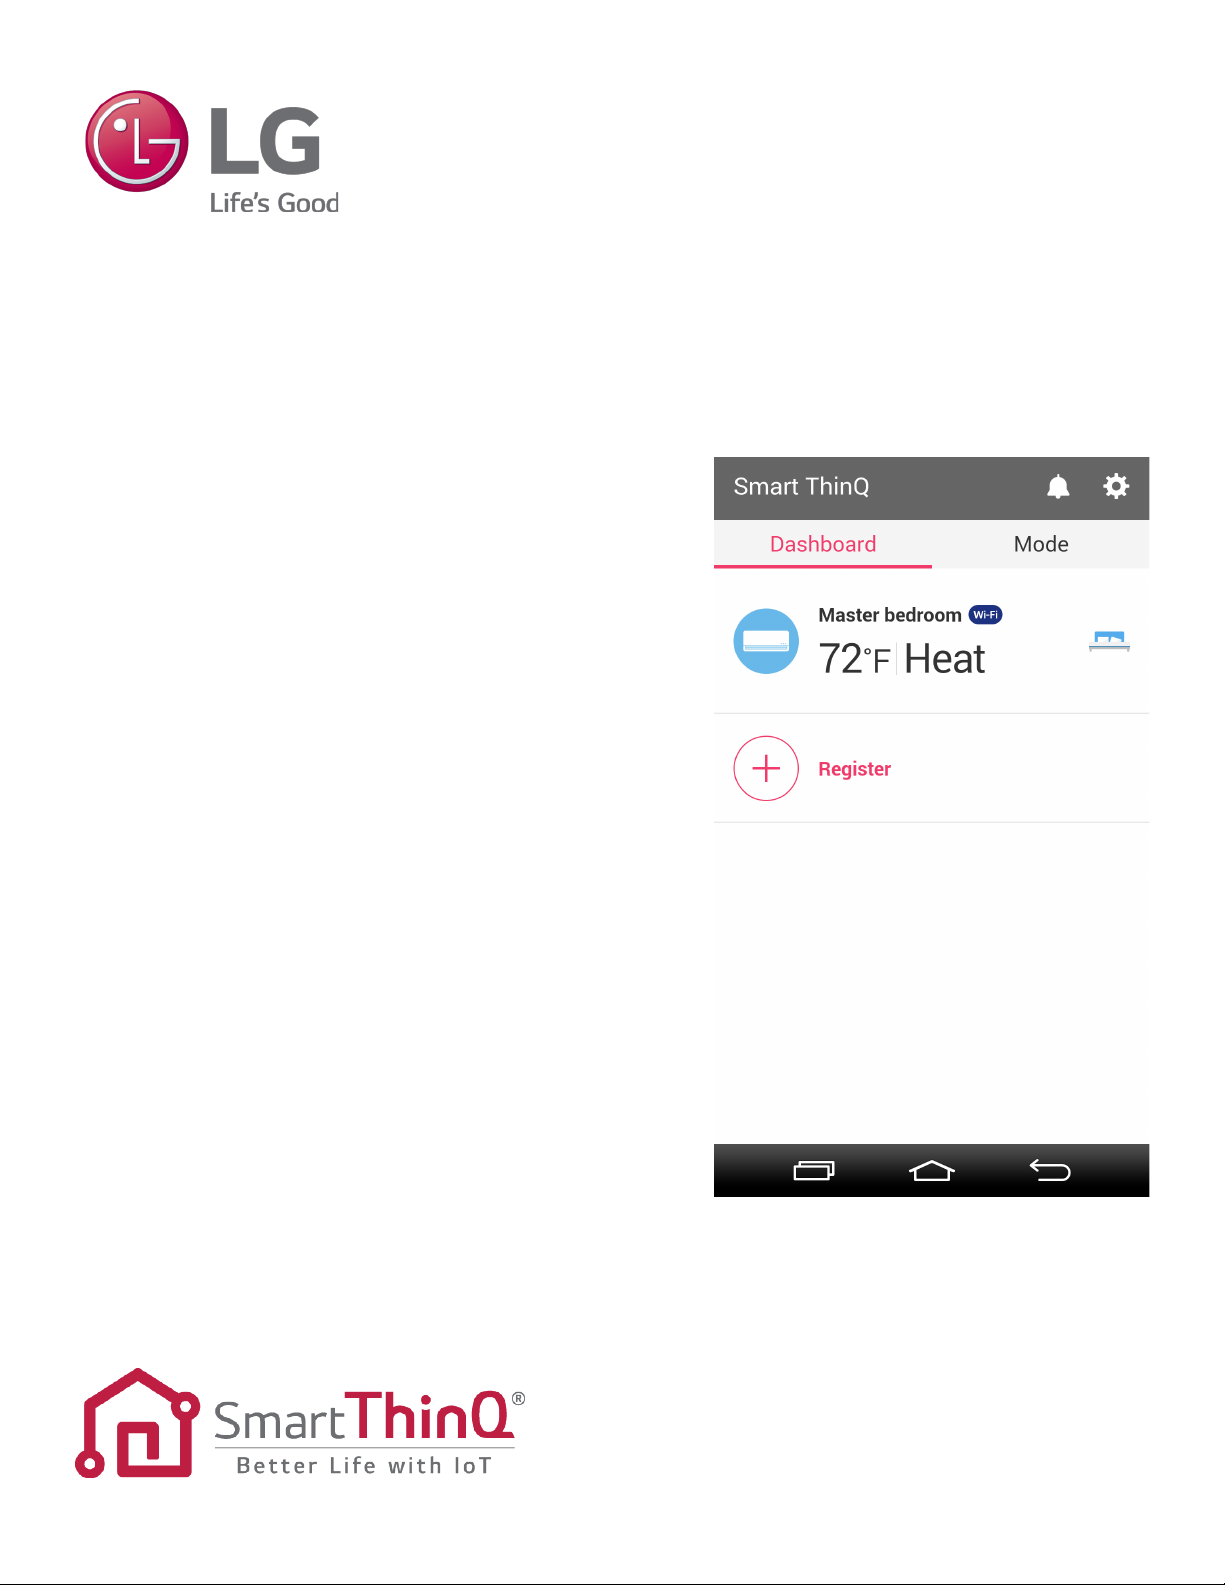
LG Smart ThinQ
USER MANUAL
Built-in Wi-Fi Module for LG Air Conditioners
Page 2

PROPRIETARY DATA NOTICE
This document, as well as all reports, illustrations, data, information, and other
materials are the property of LG Electronics U.S.A., Inc., and are
disclosed by LG Electronics U.S.A., Inc., only in confidence.
Do not throw away, destroy, or lose this manual.
Please read carefully and store in a safe place for future reference.
Content familiarity required for proper installation and operation.
The instructions included in this manual must be followed to prevent prod-
uct malfunction, property damage, injury, or death to the user or other
people. Incorrect operation due to ignoring any instructions will cause
harm or damage. A summary of safety precautions begins on page 4.
For more technical materials such as submittals, engineering
databooks, and catalogs, visit www.lghvac.com.
UM_Smart_ThinQ_12_16
For continual product development, LG Electronics U.S.A., Inc., reserves the right to change specifications without notice.
©LG Electronics U.S.A., Inc.
This document, as well as all reports, illustrations, data, information, and other materials are the property of LG Electronics U.S.A., Inc.
Page 3

TABLE OF CONTENTS
Safety Instructions ....................................................................................................................................................................................... 4
Terms and Conditions ..................................................................................................................................................................................6
LG Smart ThinQ ..........................................................................................................................................................................................9
LG Smart ThinQ Features ........................................................................................................................................................................................... 9
User Smartphone Environment .................................................................................................................................................................................... 9
Wireless Network Requirements ................................................................................................................................................................................ 10
Install the App ............................................................................................................................................................................................ 11
Install the iPhone App ..................................................................................................................................................................................................11
Install the Android App ................................................................................................................................................................................................. 11
Create Account .......................................................................................................................................................................................... 12
Smart ThinQ Login screen .......................................................................................................................................................................................... 12
LG Account Login ....................................................................................................................................................................................................... 12
Simple Login with Google or Facebook ...................................................................................................................................................................... 15
Product Registration .................................................................................................................................................................................. 17
iPhone Product Registration ....................................................................................................................................................................................... 20
Android Phone Product Registration .......................................................................................................................................................................... 24
Registration Errors ...................................................................................................................................................................................................... 25
User Manual
Smart ThinQ Dashboard ............................................................................................................................................................................26
Dashboard Settings .................................................................................................................................................................................................... 27
Cool Mode .................................................................................................................................................................................................29
Dry Mode ................................................................................................................................................................................................... 30
Heat Mode ................................................................................................................................................................................................. 31
Auto Changeover (ACO) Mode .................................................................................................................................................................32
Fan Mode ..................................................................................................................................................................................................33
Air Flow Mode ............................................................................................................................................................................................34
Air Flow (Swing Direction) .......................................................................................................................................................................................... 34
Jet and Saving ........................................................................................................................................................................................................... 35
Detail Screen ............................................................................................................................................................................................. 36
Sleep Timer and Weekly Reservation .......................................................................................................................................................37
Set up Sleep Timer ..................................................................................................................................................................................................... 37
Set up Off and On Timers ........................................................................................................................................................................................... 38
Filter Manager ...........................................................................................................................................................................................40
Modes ........................................................................................................................................................................................................ 41
Home Mode ................................................................................................................................................................................................................ 42
Vacation and Away Modes .......................................................................................................................................................................................... 43
Sleep Mode ................................................................................................................................................................................................................ 44
Smart Diagnosis ........................................................................................................................................................................................45
Settings ......................................................................................................................................................................................................48
Edit Product Nickname ............................................................................................................................................................................................... 49
Change Temperature Display ..................................................................................................................................................................................... 49
Choose Product Network ............................................................................................................................................................................................ 50
Troubleshooting .........................................................................................................................................................................................51
Due to our policy of continuous product innovation, some specifications may change without notification.
©LG Electronics U.S.A., Inc., Englewood Cliffs, NJ. All rights reserved. “LG” is a registered trademark of LG Corp.
3
Page 4
SAFETY INSTRUCTIONS
DANGER
WARNING
CAUTION
DANGER
WARNING
The instructions below must be followed to prevent product malfunction, property damage, injury or death to the user or other people. Incorrect operation due to ignoring any instructions will cause harm or damage. The level of seriousness is classified by the symbols below.
TABLE OF SYMBOLS
This symbol indicates an imminently hazardous situation which, if not avoided, will result in death or
serious injury.
This symbol indicates a potentially hazardous situation which, if not avoided, could result in death or
serious injury.
This symbol indicates a potentially hazardous situation which, if not avoided, may result in minor or
moderate injury.
Note:
This manual describes how to download and install the LG Smart ThinQ app. LG Smart ThinQ is a built-in Wi-Fi module, along
with a free smart phone application that provides monitoring and remote control capabilities for select LG Duct Free Split air
conditioners. Do not attempt to use this app with any other type of system.
There is risk of equipment damage or degraded performance.
Refer to the appropriate Installation Manuals for installation instructions of the indoor and outdoor units.
Smart ThinQ
Input power to the indoor unit remains connected and on during procedures in this manual. Do not touch any exposed
outdoor unit wiring, terminals, or other electrical components with tools or exposed skin. Only qualied technicians should
install, use or remove this unit.
Improper installation or use may result in re, explosion, electric shock, physical injury and/or death.
Don’t use or store ammable gas or combustibles near an outdoor or indoor unit.
There is risk of re, explosion, and physical injury or death.
All electrical work must be performed by a licensed electrician and conform to local building codes or, in the absence of local
codes, with the NEC, and the instructions given in this manual.
If the power source capacity is inadequate or the electric work is not performed properly, it may result in re, electric shock, physical injury or death.
This symbol indicates situations that may result in equipment or property damage accidents only.
This symbol indicates an action that should not be performed.
Do not install the LG Smart ThinQ unit if it will be exposed to rain or other precipitation. Do not install the unit in a loca-
tion exposed to open ame or extreme heat. Do not touch the unit with wet hands or if it has been submerged in any liquid.
There is risk of re, electric shock, explosion, and physical injury or death.
Do not spill water or other liquid on the inside of the indoor unit, especially on electrical components. Do not drop the
LG Smart ThinQ air conditioner unit into water. If the unit is immersed in water or other liquid, contact your local authorized
LG distributor for support.
There is risk of re, electric shock, explosion, and physical injury or death.
For replacement of an installed outdoor or indoor unit, always contact an LG trained service provider.
There is risk of re, electric shock, explosion, and physical injury or death.
4
Due to our policy of continuous product innovation, some specifications may change without notification.
©LG Electronics U.S.A., Inc., Englewood Cliffs, NJ. All rights reserved. “LG” is a registered trademark of LG Corp.
Page 5
WARNING
SAFETY INSTRUCTIONS
Dispose of any packing materials safely.
• Packing materials, such as nails and other metal or wooden parts may cause puncture wounds or other injuries.
• Tear apart and throw away plastic packaging bags so that children may not play with them and risk suffocation and death.
Do not allow water, dirt, or animals to enter the unit.
There is risk of re, electric shock, explosion, and physical injury or death.
Note:
The unit must be installed indoors. Do not install the LG Smart ThinQ unit if it will be exposed to rain or other precipitation.
There is risk of unit failure or degraded performance.
Do not spill water or other liquid on the inside of the indoor unit, especially on electrical components. Do not drop the
LG Smart ThinQ air conditioner unit into water. If the unit is immersed in water or other liquid, contact your local authorized
LG distributor for support.
There is risk of unit failure or degraded performance.
Do not allow water, dirt, or animals to enter the unit.
There is risk of unit failure or degraded performance.
User Manual
Do not impart force to the product.
There is risk of equipment damage or degraded performance.
Clean up the site after all procedures are nished, and check that no metal scraps, screws, or bits of wiring have been left
inside or surrounding the outdoor or indoor units.
Do not operate the unit with the panel(s) or protective cover (s) removed; keep ngers and clothing away from moving
parts.
Non-secured covers can result in malfunction due to dust or water in the service panel.
Due to our policy of continuous product innovation, some specifications may change without notification.
©LG Electronics U.S.A., Inc., Englewood Cliffs, NJ. All rights reserved. “LG” is a registered trademark of LG Corp.
5
Page 6

TERMS AND CONDITIONS
LG Smart ThinQ Terms and Conditions
In using LG Smart ThinQ smartphone application, you agree to the LG Smart ThinQ terms and conditions.
• LG Smart ThinQ smartphone application is to be used only with LG Electronics, Inc. inverter air conditioner products.
• LG Smart ThinQ smartphone application cannot be sold/transferred/rented to any other parties.
• All data generated by LG Smart ThinQ smartphone application cannot be sold/transferred/rented to any other parties.
• A complete list of LG Smart ThinQ terms and conditions is at www.lghvac.com.
Data Guide
Open Source
To obtain the source code under GPL, LGPL, MPL, and other open source licenses, that is contained in this product, please visit http://opensource.lge.com.
In addition to the source code, all referred license terms, warranty disclaimers and copyright notices are available for download. LG Electronics will also provide open source code to you on CD-ROM for a charge covering the cost of performing such distribution (such as the cost of
media, shipping, and handling) upon email request to opensource@lge.com. This offer is valid for three (3) years from the date on which you
purchased the product.
Smart ThinQ
6
Due to our policy of continuous product innovation, some specifications may change without notification.
©LG Electronics U.S.A., Inc., Englewood Cliffs, NJ. All rights reserved. “LG” is a registered trademark of LG Corp.
Page 7

FCC WARNING STATEMENTS
FCC Part 15.19 Statements
This device complies with Part 15 of the FCC Rules. Operation is subject to the following two conditions: (1) this device may not cause harmful interference, and (2) this device must accept any interference received, including interference that may cause undesired operation.
FCC Part 15.105 statement
This equipment has been tested and found to comply with the limits for a Class B digital device, pursuant to part 15 of the FCC Rules. These
limits are designed to provide reasonable protection against harmful interference in a residential installation. This equipment generates,
uses, and can radiate radio frequency energy and, if not installed and used in accordance with the instructions, may cause harmful interference to radio communications. However, there is no guarantee that interference will not occur in a particular installation. If this equipment
does cause harmful interference to radio or television reception, which can be determined by turning the equipment off and on, the user is
encouraged to try to correct the interference by one or more of the following measures:
• Reorient or relocate the receiving antenna.
• Increase the separation between the equipment and receiver.
• Connect the equipment into an outlet on a circuit different from that to which the receiver is connected.
Consult the dealer or an experienced radio/TV technician for help.
FCC Part 15.21 statement
Any changes or modifications not expressly approved by the party responsible for compliance could void the user’s authority to operate this
equipment.
RF Exposure Statement
The antenna(s) must be installed such that a minimum separation distance of at least 20 cm is maintained between the radiator (antenna)
and any individual at all times. This device must not be co-located or operating in conjunction with any other antenna or transmitter.
Note:
Any changes or modifications to this device not explicitly approved by manufacturer could void your authority to operate this equipment.
End Product Labeling
The module is labeled with its own FCC ID and IC Certification Number. If the FCC ID and IC Certification Number are not visible when the
module is installed inside another device, then the outside of the device into which the module is installed must also display a label referring
to the enclosed module. In that case, the final end product must be labeled in a visible area with the following:
“Contains FCC ID: BEJ-LCW003”
“Contains IC: 2703N-LCW003”
<IC Warning Statements>
RSS-GEN, Sec. 7.1.3 – (licence-exempt radio apparatus)
This device complies with Industry Canada license-exempt RSS standard(s). Operation is subject to the following two conditions: (1) this
device may not cause interference, and (2) this device must accept any interference, including interference that may cause undesired operation of the device.
User Manual
Due to our policy of continuous product innovation, some specifications may change without notification.
©LG Electronics U.S.A., Inc., Englewood Cliffs, NJ. All rights reserved. “LG” is a registered trademark of LG Corp.
7
Page 8

FCC WARNING STATEMENTS
OEM Responsibilities to comply with FCC and Industry Canada Regulations
The module has been certified for integration into products only by OEM integrators under the following condition:
- The transmitter module must not be co-located or operating in conjunction with any other antenna or transmitter except in accordance with
FCC multi-transmitter product procedures.
As long as the condition above is met, further transmitter testing will not be required.
However, the OEM integrator is still responsible for testing their end-product for any additional compliance requirements required with this
module installed (for example, digital device emissions, PC peripheral requirements, etc.).
The OEM integrator has to be aware not to provide information to the end user regarding how to install or remove this RF module or change
RF related parameters in the user manual of the end product.
Note:
In the event that these conditions can’t be met (for certain configurations or co-location with another transmitter), then the FCC and Industry
Canada authorizations are no longer considered valid and the FCC ID and IC Certification Number can’t be used on the final product. In
these circumstances, the OEM integrator will be responsible for re-evaluating the end product (including the transmitter) and obtaining a
separate FCC and Industry Canada authorization.
Smart ThinQ
8
Due to our policy of continuous product innovation, some specifications may change without notification.
©LG Electronics U.S.A., Inc., Englewood Cliffs, NJ. All rights reserved. “LG” is a registered trademark of LG Corp.
Page 9

LG SMART THINQ
LG Smart ThinQ Features
This manual describes how to download and use the LG Smart ThinQ app. LG Smart ThinQ is a built-in WiFi module, along with a free smart
phone app that provides monitoring and remote control capabilities for certain LG Duct Free Split air conditioners. The app has the following
features and benefits:
• You can sign in to the app using LG credentials, or using your Google or Facebook login credentials. You only have to log in to the app
once. The app remembers your login details for subsequent logins.
• View current temperature settings of the air conditioning unit and change temperature, fan speed, and air ow direction from anywhere in
the house or at a remote location (through the use of wireless connection). Multiple users can control the household air conditioning unit
remotely.
• Monitor lter usage of the unit.
• Set up weekly reservations to start and stop air conditioner activity.
• Set up the unit to run in different Modes, depending on your schedule. You can set up specic temperatures for when you are home, away
on vacation, or sleeping.
• Troubleshoot problems on your own using the Smart Diagnosis function.
Note:
Smart ThinQ app only functions with certain LG Single Zone Wall Mounted Extended Piping units.
User Smartphone Environment
Before using LG Smart ThinQ, you must download and install the latest version of the free app from either the App store (iOS) or the Play
store (Android).
User Manual
You must supply the smartphone; either an Apple iPhone® or an Android phone.
The following minimum specifications are needed to successfully run the LG Smart ThinQ app on a smartphone:
• Android 4.12 or higher.
• iOS 8.0 or higher.
Normal operation may be hindered if the environment does not satisfy minimum specifications as outlined above. Some functions may not
operate, may be slow in performance, or part of the screen may be unclear. Smart ThinQ app is not optimized for tablets.
Note:
Due to LG’s policy of continuous product innovation, the design and content of screens in the Smart ThinQ app may change without notification.
• Screens shown in this manual may be different from the latest version of the app.
• Screens shown in this manual may look different on other smart phones.
• Some functionality of the app may be limited by the type of smart phone.
LG Smart ThinQ will be referred to as Smart ThinQ in this manual.
* iPhone® is a trademark of Apple, Inc.
Due to our policy of continuous product innovation, some specifications may change without notification.
©LG Electronics U.S.A., Inc., Englewood Cliffs, NJ. All rights reserved. “LG” is a registered trademark of LG Corp.
9
Page 10
LG SMART THINQ
Wireless Network Requirements
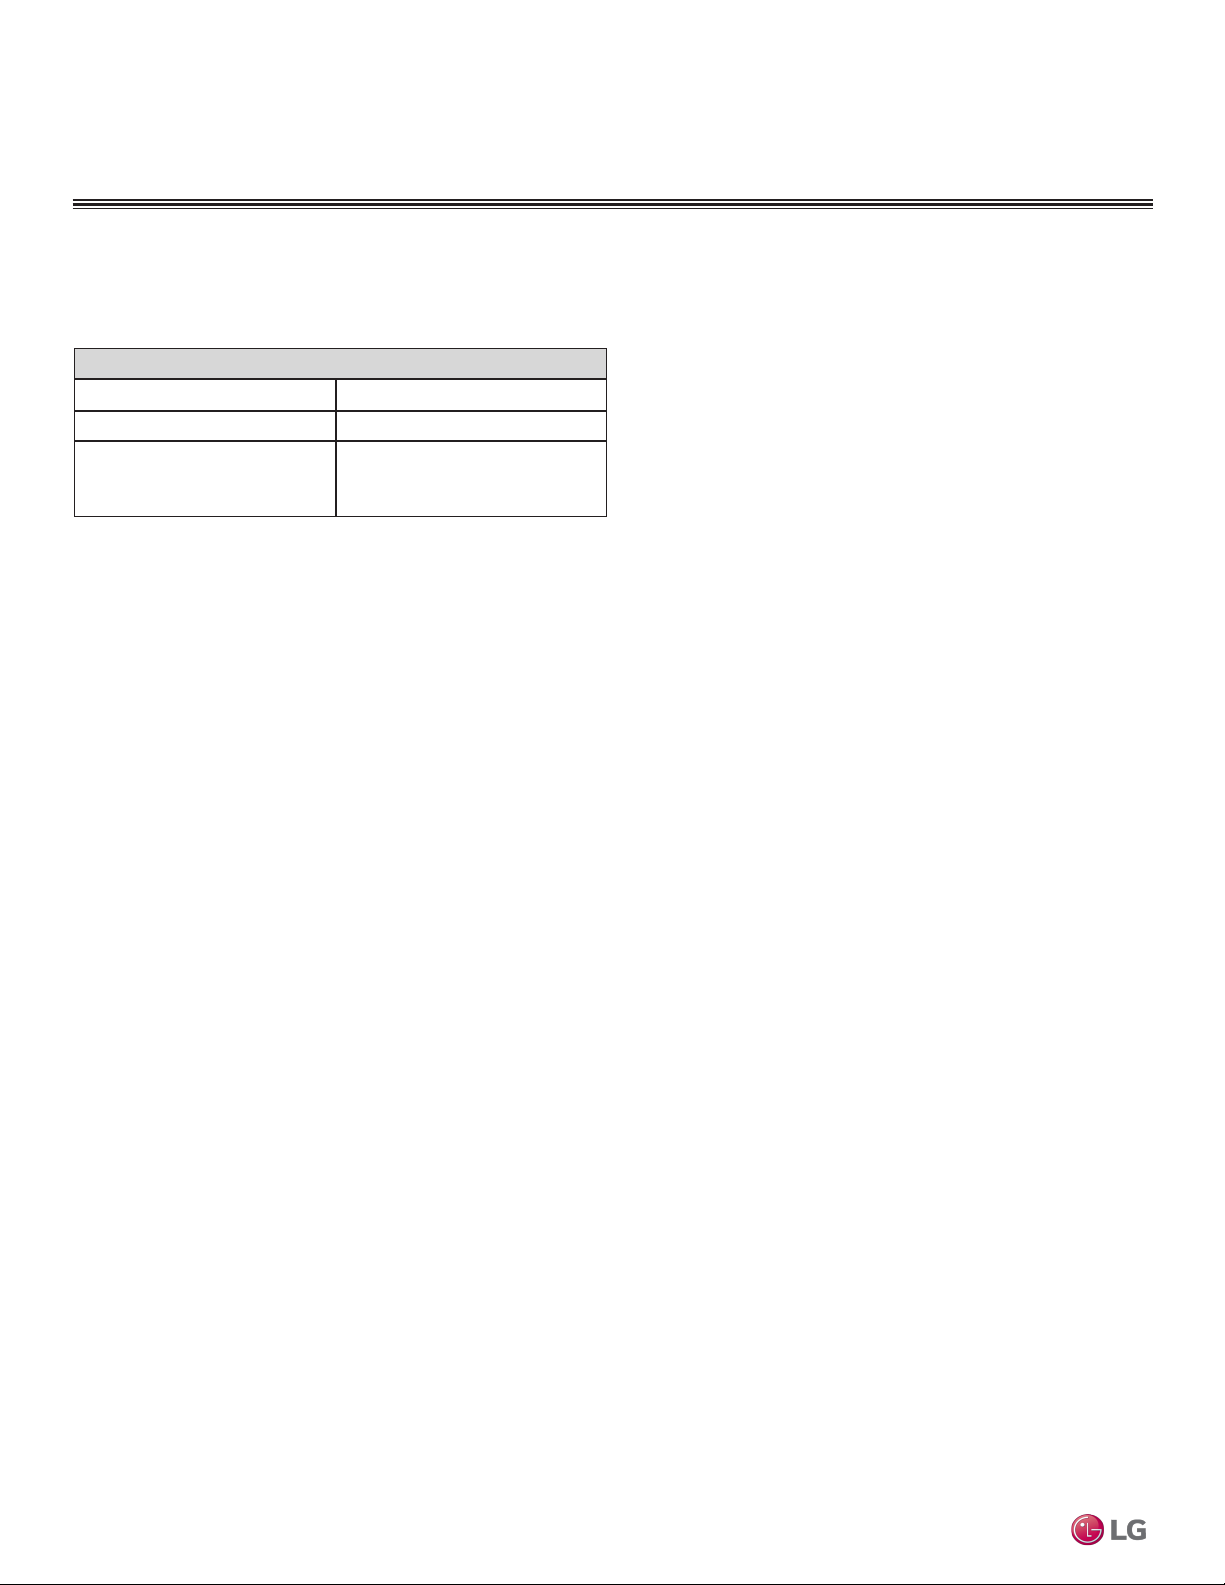
The table below lists the wireless network requirements for running the Smart ThinQ app on a smart phone.
Wireless module (LCW-003) Specications
Standard IEEE 802.11 b/g/n
Frequency range 2400 ~ 2483 MHz
802.11b : 21 dBm
Output power (Max)
Note:
• If the wireless network router is physically too far from the unit, connection to the server may fail.
• WPA2 is the recommended security method for wireless network router. If the wireless network router is setup as WEP security, connection
may fail.
• For the Router SSID, use only letters and numbers. Other characters may not be supported.
802.11g : 18 dBm
802.11n : 17 dBm
Smart ThinQ
10
Due to our policy of continuous product innovation, some specifications may change without notification.
©LG Electronics U.S.A., Inc., Englewood Cliffs, NJ. All rights reserved. “LG” is a registered trademark of LG Corp.
Page 11
INSTALL THE APP
Install the iPhone App
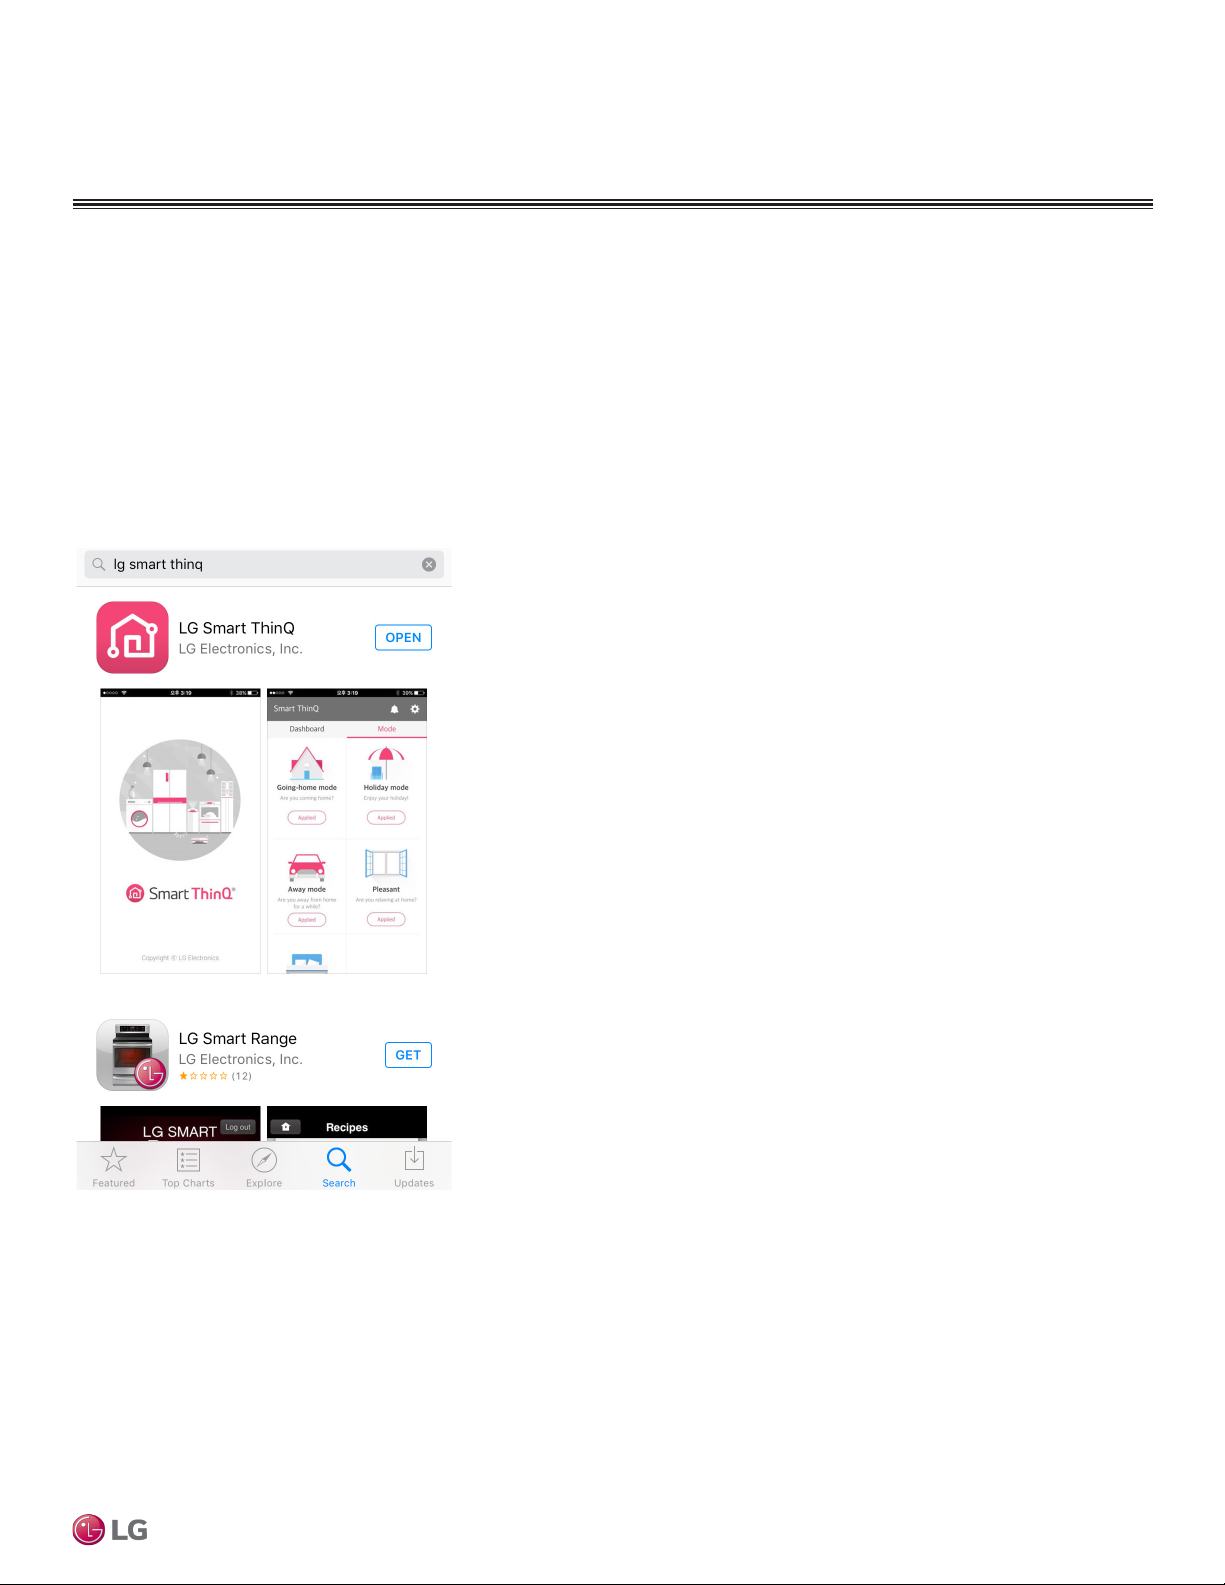
1. Tap the App Store icon on the iPhone screen.
2. Type LG Smart ThinQ in the search window and search for the app.
3. Find the app from the search results list and then tap the INSTALL button. If asked, enter your Apple iTunes® password, and then tap OK
to proceed.
4. When the app is finished installing, an OPEN button is displayed on the screen. If you are ready to begin registration, tap OPEN to launch
the app. See Figure 1.
* iTunes® is a trademark of Apple, Inc.
Figure 1:
Install the Android App
Follow these steps to install the app on an Android smartphone.
User Manual
1. Tap the Play Store icon on the phone.
2. Type LG Smart ThinQ in the search window and search for the app.
3. Tap the INSTALL button on the LG Smart ThinQ screen.
4. Tap the ACCEPT button on the App permissions screen.
5. When the app is finished installing, an OPEN button is displayed on the screen.
6. If you are ready to begin registration, tap OPEN and the app will start.
Due to our policy of continuous product innovation, some specifications may change without notification.
©LG Electronics U.S.A., Inc., Englewood Cliffs, NJ. All rights reserved. “LG” is a registered trademark of LG Corp.
11
Page 12
CREATE ACCOUNT
Smart ThinQ Login screen
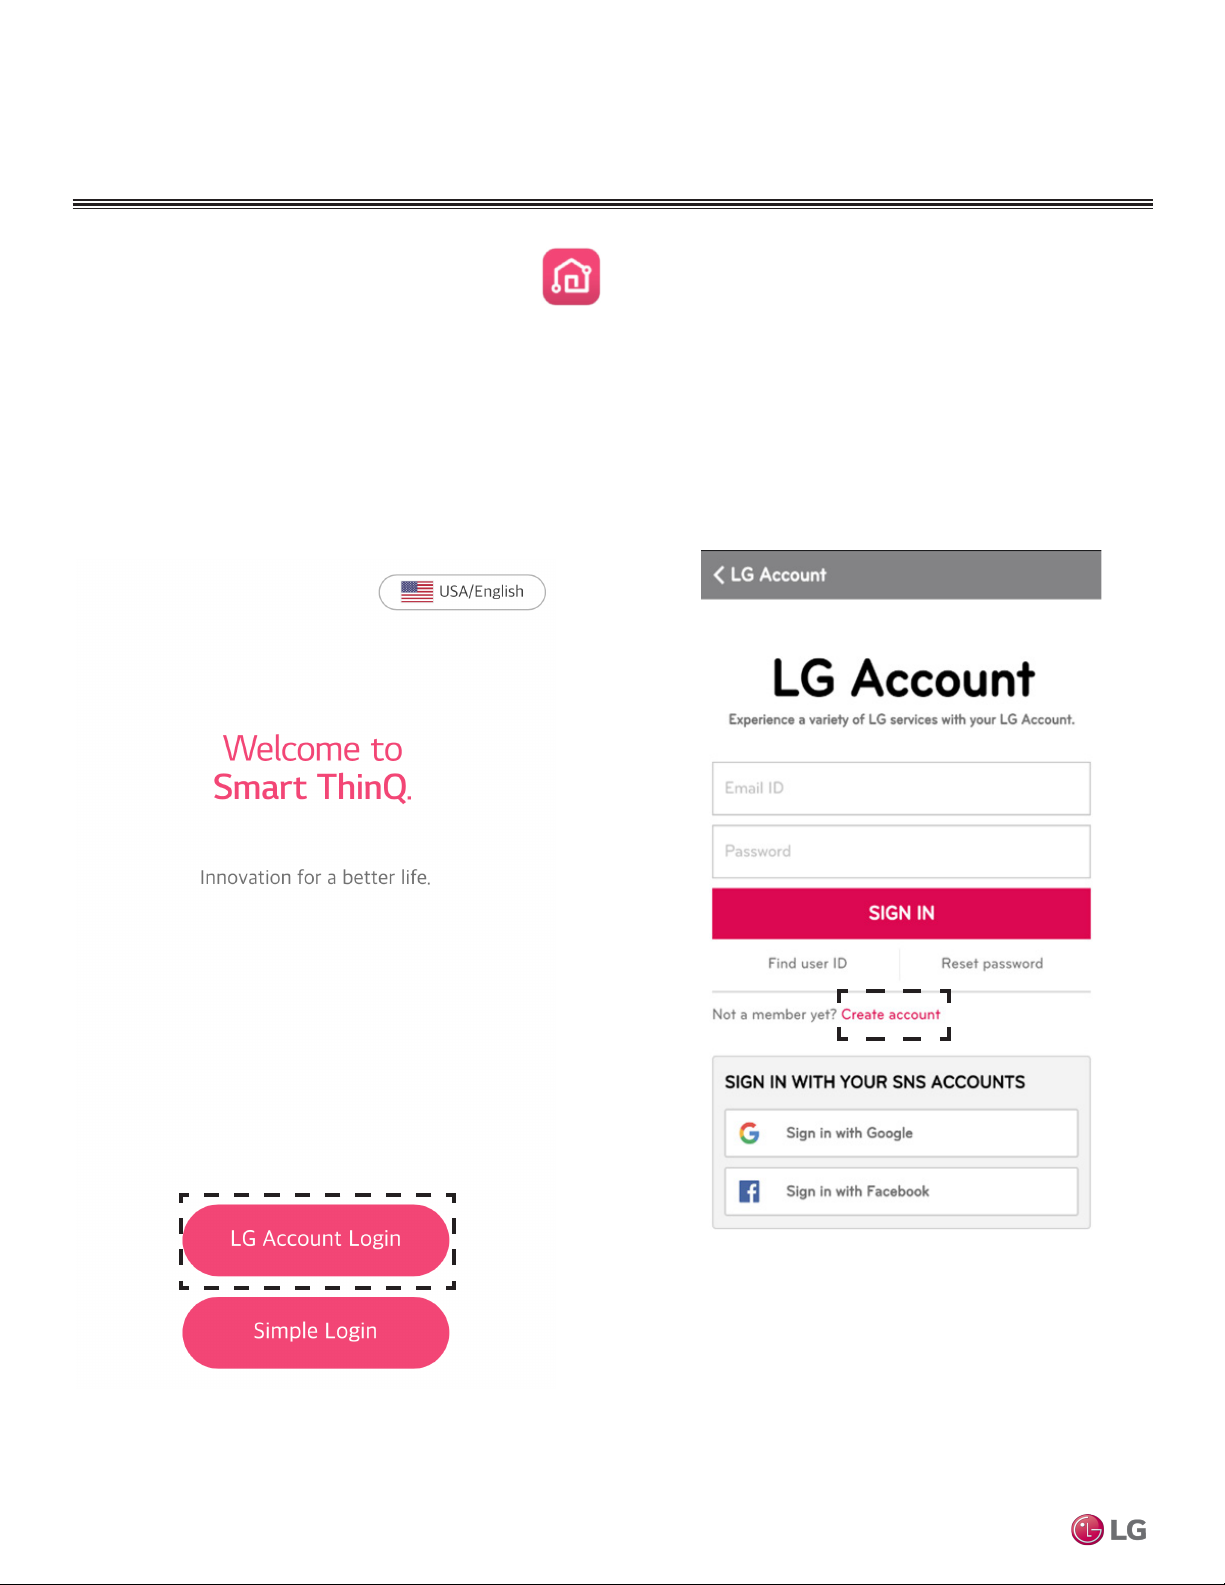
1. From your smartphone, launch the app by tapping on the icon. The LG Smart ThinQ Login screen displays. You can log in to the
app in two ways:
• LG Account Login: You have to create an account and sign in with your LG credentials.
• Simple Login: You can sign in using your Google or Facebook login credentials.
LG Account Login
1. Tap LG Account Login.
2. Tap Create Account. See Figure 3.
Smart ThinQ
Figure 2:
Figure 3:
12
Due to our policy of continuous product innovation, some specifications may change without notification.
©LG Electronics U.S.A., Inc., Englewood Cliffs, NJ. All rights reserved. “LG” is a registered trademark of LG Corp.
Page 13
CREATE ACCOUNT
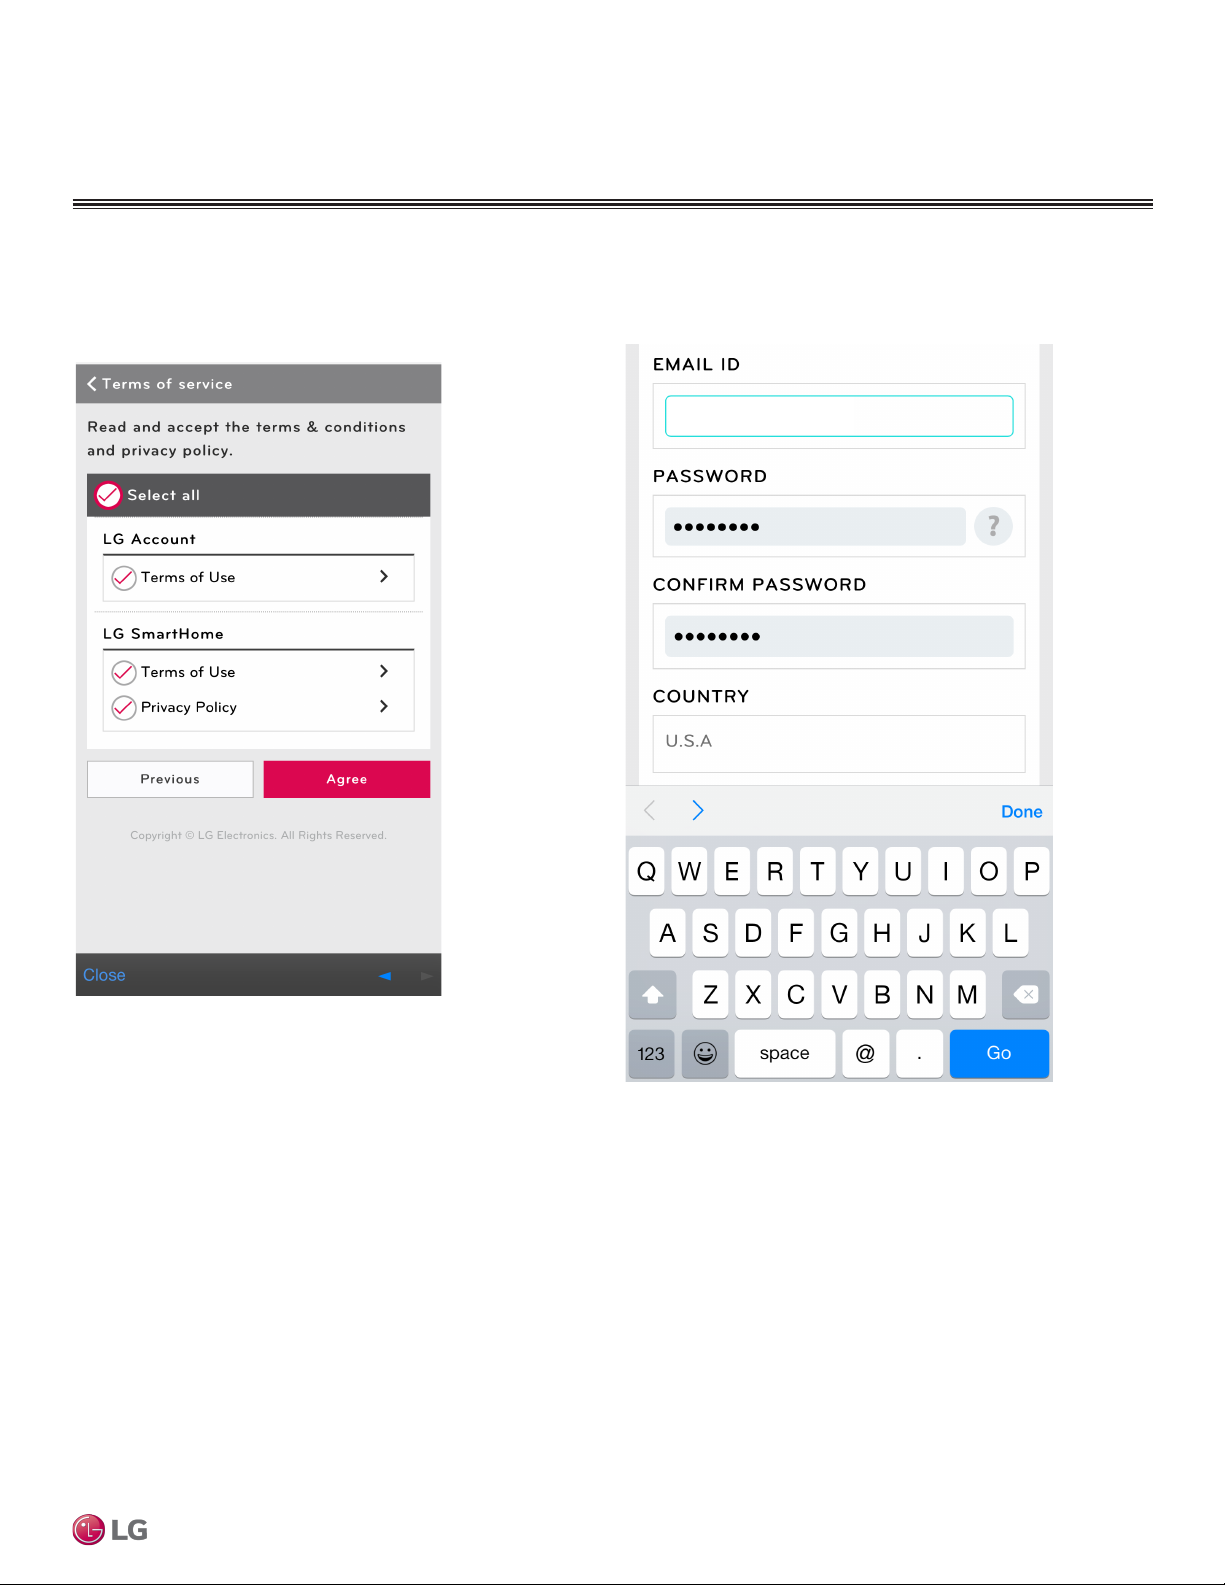
3. Tap Agree to agree to the Terms of Service. 4. Enter the user registration information to sign up for the service.
Tap Done when finished.
Figure 4:
Figure 5:
User@lge.com
User Manual
Due to our policy of continuous product innovation, some specifications may change without notification.
©LG Electronics U.S.A., Inc., Englewood Cliffs, NJ. All rights reserved. “LG” is a registered trademark of LG Corp.
13
Page 14
CREATE ACCOUNT
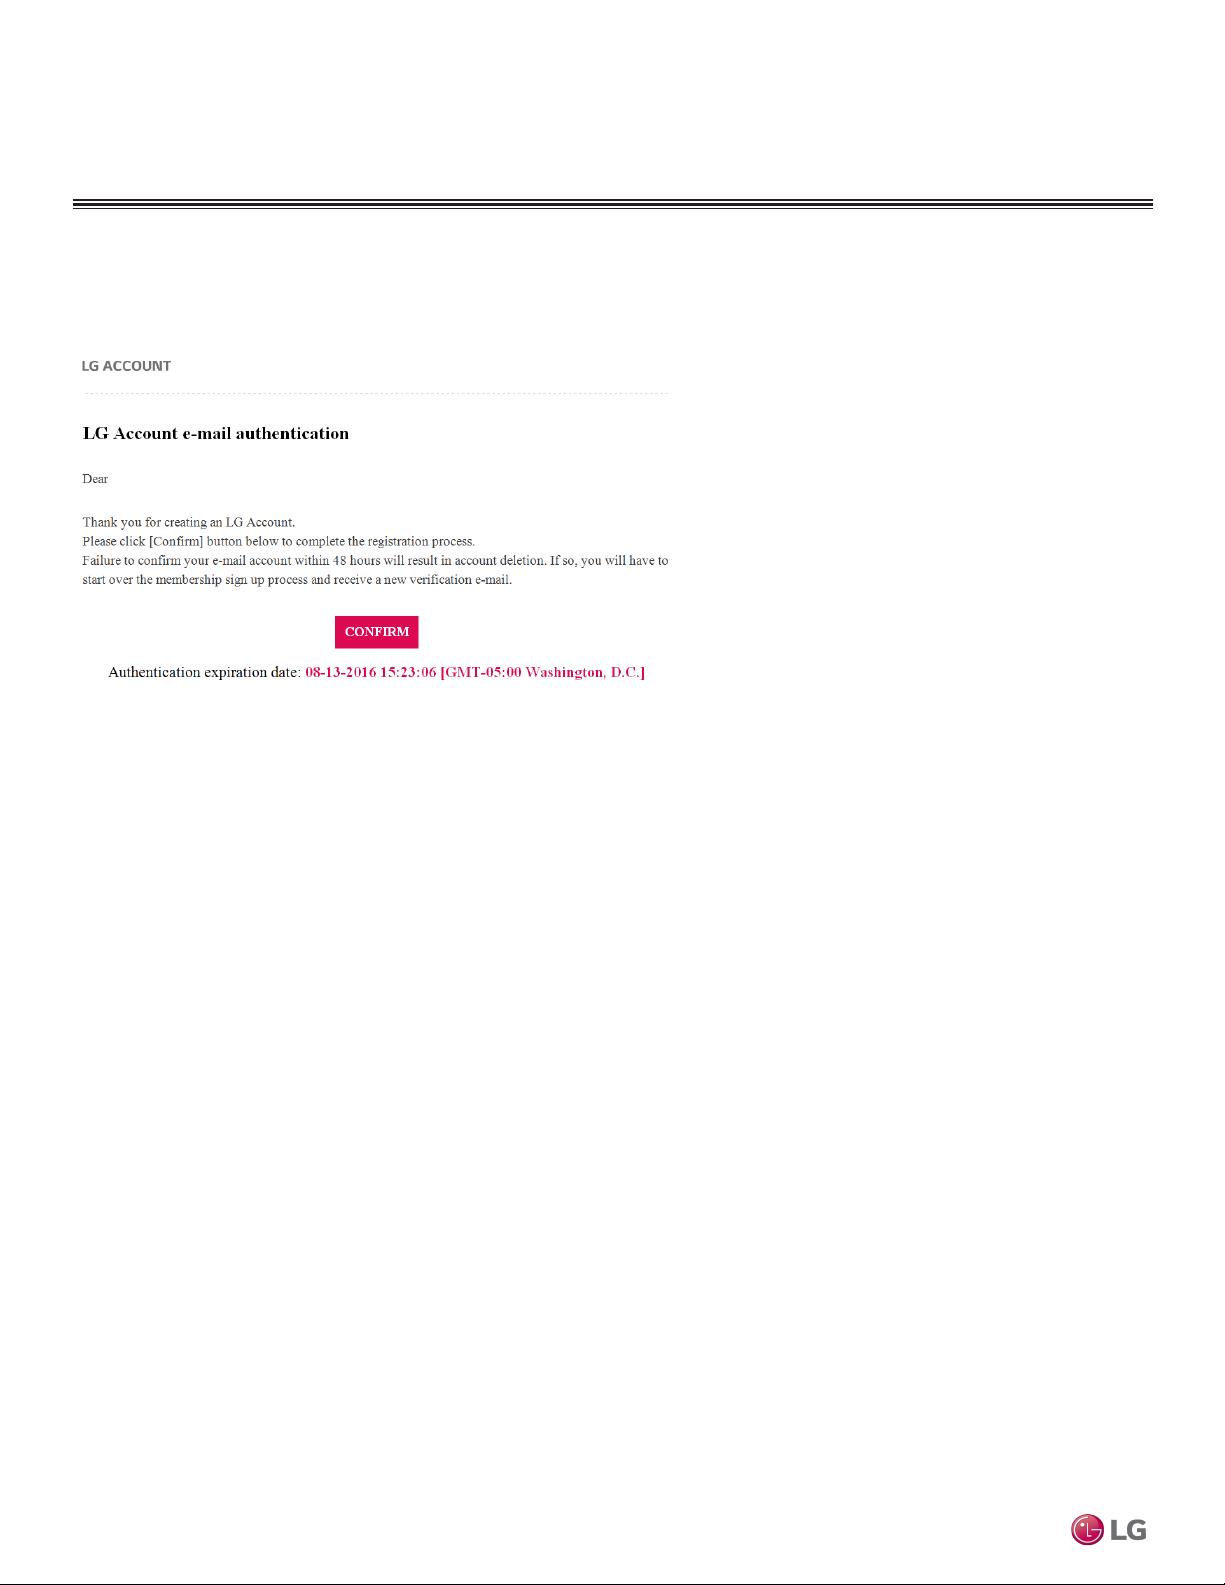
5. A confirmation email is sent to your email address that you provided.
6. Find the confirmation email in your Inbox and tap CONFIRM.
Figure 6:
7. Go back to the app on your phone and tap SIGN IN.
• You cannot use LG Smart ThinQ app if the email conrmation is incomplete. If you login to the LG Smart ThinQ app before conrming via
email, an error screen displays. Tap Re-send Conrmation email to receive the conrmation email in your Inbox again. Then follow the
above steps.
Note:
Smart ThinQ
You only have to log in once. The app remembers your login details.
14
Due to our policy of continuous product innovation, some specifications may change without notification.
©LG Electronics U.S.A., Inc., Englewood Cliffs, NJ. All rights reserved. “LG” is a registered trademark of LG Corp.
Page 15

Simple Login with Google or Facebook
CREATE ACCOUNT
1. On the Account Login screen, choose Google or Facebook.
Figure 7:
2. Sign in with your login credentials for Google or Facebook.
Figure 8:
User Manual
User@gmail.com
Due to our policy of continuous product innovation, some specifications may change without notification.
©LG Electronics U.S.A., Inc., Englewood Cliffs, NJ. All rights reserved. “LG” is a registered trademark of LG Corp.
15
Page 16

CREATE ACCOUNT
3. Enter registration information.
4. Tap Agree to agree to the terms of service.
Figure 9:
Smart ThinQ
5. A confirmation email is sent to your email address that you provided.
6. Find the confirmation email in your Inbox and tap CONFIRM.
7. Go back to the app on your phone and tap SIGN IN.
Note:
You only have to log in once. The app remembers your login details for subsequent logins.
16
Due to our policy of continuous product innovation, some specifications may change without notification.
©LG Electronics U.S.A., Inc., Englewood Cliffs, NJ. All rights reserved. “LG” is a registered trademark of LG Corp.
Page 17

PRODUCT REGISTRATION
Follow the steps in the Create Account section to create an account and sign in with your LG credentials or with your Google or Facebook
login credentials.
1. On the Smart ThinQ Dashboard, tap Register to begin the registration process.
Figure 10:
2. In Select a Product screen, tap Air conditioner.
Figure 11:
User Manual
Due to our policy of continuous product innovation, some specifications may change without notification.
©LG Electronics U.S.A., Inc., Englewood Cliffs, NJ. All rights reserved. “LG” is a registered trademark of LG Corp.
17
Page 18

PRODUCT REGISTRATION
3. In Choose Product screen, choose Wall mounted.
Figure 12:
4. Tap on remote control
Figure 13:
Smart ThinQ
18
Due to our policy of continuous product innovation, some specifications may change without notification.
©LG Electronics U.S.A., Inc., Englewood Cliffs, NJ. All rights reserved. “LG” is a registered trademark of LG Corp.
Page 19

5. Verify that the air conditioner unit has a Smart ThinQ logo. Touch Yes.
Figure 14:
PRODUCT REGISTRATION
User Manual
Due to our policy of continuous product innovation, some specifications may change without notification.
©LG Electronics U.S.A., Inc., Englewood Cliffs, NJ. All rights reserved. “LG” is a registered trademark of LG Corp.
19
Page 20

PRODUCT REGISTRATION
iPhone Product Registration
If you are registering through iPhone, the Product Registration Guide on the screen will display 4 steps. Go through the 4 steps of the Product Registration Guide as shown on your smartphone.
Product Registration step 1: Point the remote control at the air conditioner unit and press the two buttons (as shown in Figure 15) simultaneously for 3 seconds.
Figure 15:
Smart ThinQ
20
Due to our policy of continuous product innovation, some specifications may change without notification.
©LG Electronics U.S.A., Inc., Englewood Cliffs, NJ. All rights reserved. “LG” is a registered trademark of LG Corp.
Page 21

iPhone Product Registration, continued
PRODUCT REGISTRATION
Product Registration step 2: Wait for the Wi-fi light to blink on the air
conditioner unit. You will hear a beeping sound from the unit. The
Wi-Fi indicator will blink for approximately 5-10 minutes to deliver
network information.
Figure 16:
Product Registration step 3.
Note:
This step only displays if you are registering through iPhone. If you
are not registering through iPhone, see Android Phone Product
Registration.
Figure 17:
User Manual
Due to our policy of continuous product innovation, some specifications may change without notification.
©LG Electronics U.S.A., Inc., Englewood Cliffs, NJ. All rights reserved. “LG” is a registered trademark of LG Corp.
21
Page 22

PRODUCT REGISTRATION
iPhone Product Registration, continued
i) Press the home button of the iPhone quickly, to minimize the app.
ii) Tap Settings, and then tap Wi-Fi.
iii) Select the wireless named LG_AC-xx-xx-xx, where “x” represents numbers which will be exclusive to your module.
iv) For your home, select the wireless network that you want to connect to. If asked, type in your wireless password and tap Connect to
proceed.
Smart ThinQ
Figure 18:
Figure 19:
v) Press the home button of the iPhone and then return to the app.
Note:
• For specic conguration information regarding your wireless network, consult the user manual of your wireless router.
• The smartphone screen of the wireless network may vary, depending on your wireless network setup and the type of smartphone.
22
Due to our policy of continuous product innovation, some specifications may change without notification.
©LG Electronics U.S.A., Inc., Englewood Cliffs, NJ. All rights reserved. “LG” is a registered trademark of LG Corp.
Page 23

iPhone Product Registration, continued
PRODUCT REGISTRATION
Product Registration step 4: Touch Verify connection.
Figure 20:
The registration progress screen displays.
Figure 21:
User Manual
Note:
Depending on your home network, connection to the unit could take up to 30 minutes. Refer to the Wireless Network Requirements section
of this manual for wireless requirements.
Due to our policy of continuous product innovation, some specifications may change without notification.
©LG Electronics U.S.A., Inc., Englewood Cliffs, NJ. All rights reserved. “LG” is a registered trademark of LG Corp.
23
Page 24

PRODUCT REGISTRATION
Android Phone Product Registration
If you are registering through an Android phone, the Product Registration Guide on the screen will display 3 steps. Go through the 3 steps of
the Product Registration Guide as shown on your smart phone.
Android Product Registration steps:
1. Point the remote control at the air conditioner unit and press the two buttons (as shown in Figure 15) simultaneously for 3 seconds.
2. Wait for the Wi-fi light to blink on the air conditioner unit. You will hear a beeping sound from the unit. The Wi-Fi indicator will blink for approximately 5-10 minutes to deliver network information. See Figure 16.
3. Select your wireless network and enter password if necessary. See Figures 18 and 19.
4. The Registration Complete screen displays. See Figure 22.
Figure 22:
Smart ThinQ
Note:
Depending on your home network, connection to the unit could take up to 30 minutes. Refer to the Wireless Network Requirements section
of this manual for wireless requirements.
24
Due to our policy of continuous product innovation, some specifications may change without notification.
©LG Electronics U.S.A., Inc., Englewood Cliffs, NJ. All rights reserved. “LG” is a registered trademark of LG Corp.
Page 25

PRODUCT REGISTRATION
Registration Errors
• If you make changes to your wireless network or if your router information changes, you have to go through the registration steps once
more.
• If the wireless network router is physically too far from the unit, connection to the server may fail.
• You cannot run the Smart ThinQ app from two smart phones at the same time while using the same user account. Log out from one
device before logging in with another.
Wi-Fi Connection error
An error screen is displayed if there is an error in the connection.
Touch Try Again to try the connection again or Cancel to go back to
the beginning of the product registration process.
Figure 23:
Duplicate user error
An error screen is displayed if another user is using the app to control the same air conditioning unit.
Figure 24:
User Manual
Due to our policy of continuous product innovation, some specifications may change without notification.
©LG Electronics U.S.A., Inc., Englewood Cliffs, NJ. All rights reserved. “LG” is a registered trademark of LG Corp.
25
Page 26

SMART THINQ DASHBOARD
Dashboard
Once connection is established between the app and the new unit through the registration process, the Smart ThinQ Dashboard displays.
• Tap Register to register more air conditioner units.
Smart ThinQ
Figure 25:
Figure 26:
26
Due to our policy of continuous product innovation, some specifications may change without notification.
©LG Electronics U.S.A., Inc., Englewood Cliffs, NJ. All rights reserved. “LG” is a registered trademark of LG Corp.
Page 27

SMART THINQ DASHBOARD
Dashboard Settings
Tap the Settings icon on the top right corner of the Smart ThinQ Dashboard to display the Settings menu. Here you can edit settings, such as
the product nickname, time zone, country and language, and so on. You can also log out of the app, view the terms and conditions, or delete
account. See Figures 28 and 29.
Alerts
Tap the Alert icon on the top right corner of the Smart ThinQ Dashboard to see any system alerts.
Figure 27:
Figure 28:
User@lge.com
User Manual
Due to our policy of continuous product innovation, some specifications may change without notification.
©LG Electronics U.S.A., Inc., Englewood Cliffs, NJ. All rights reserved. “LG” is a registered trademark of LG Corp.
27
Page 28

SMART THINQ DASHBOARD
Dashboard Settings, continued
Figure 29:
Smart ThinQ
28
Due to our policy of continuous product innovation, some specifications may change without notification.
©LG Electronics U.S.A., Inc., Englewood Cliffs, NJ. All rights reserved. “LG” is a registered trademark of LG Corp.
Page 29

The current temperature setting of your unit will display on top of the Dashboard.
1. On the Dashboard, choose the air conditioner unit that you want to put in Cool Mode.
2. Tap the Cool button.
3. Select the new cool temperature setting.
Optionally, you can select a fan speed.
Figure 30:
COOL MODE
User Manual
Due to our policy of continuous product innovation, some specifications may change without notification.
©LG Electronics U.S.A., Inc., Englewood Cliffs, NJ. All rights reserved. “LG” is a registered trademark of LG Corp.
29
Page 30

DRY MODE
The Dehumidifying (Dry) mode removes excess moisture from an environment with high humidity or during local rainy seasons. This method
prevents mold from setting in. This mode adjusts the room temperature automatically to maintain the optimal level of humidity.
1. On the Dashboard, choose the air conditioner unit that you want to put in Dry Mode.
2. Tap the Dry button.
3. Optionally, from the Fan Speed settings, tap a fan speed.
Note:
When the unit is in Dry (dehumidifying) mode, you cannot adjust the room temperature. Temperature may fluctuate during the dehumidifying
process and will be adjusted automatically.
Figure 31:
Smart ThinQ
30
Due to our policy of continuous product innovation, some specifications may change without notification.
©LG Electronics U.S.A., Inc., Englewood Cliffs, NJ. All rights reserved. “LG” is a registered trademark of LG Corp.
Page 31

The current temperature setting of your unit will display on top of the Dashboard.
1. On the Dashboard, choose the air conditioner unit.
2. Tap the Heat Mode button.
3. Choose the new heat temperature setting.
4. Optionally, from the Fan Speed settings, tap a fan speed.
Figure 32:
HEAT MODE
User Manual
Due to our policy of continuous product innovation, some specifications may change without notification.
©LG Electronics U.S.A., Inc., Englewood Cliffs, NJ. All rights reserved. “LG” is a registered trademark of LG Corp.
31
Page 32

AUTO CHANGEOVER (ACO) MODE
The Auto Changeover (ACO) functionality changes the operation mode of the unit automatically to maintain a set temperature of ± 3.6 °F (±2
°C), from the temperature set on the Dashboard.
1. On the Dashboard, choose the air conditioner unit.
2. Tap the ACO Mode button.
3. Choose the new auto cooling temperature setting.
• The temperature range is 64 °F (18 °C) through 86 °F (30 °C).
4. Optionally, from the Fan Speed settings, tap a fan speed.
Figure 33:
Smart ThinQ
32
Due to our policy of continuous product innovation, some specifications may change without notification.
©LG Electronics U.S.A., Inc., Englewood Cliffs, NJ. All rights reserved. “LG” is a registered trademark of LG Corp.
Page 33

The Fan mode only circulates the indoor air without changing the room temperature.
1. On the Dashboard, choose the air conditioner unit.
2. Tap the Fan Mode button.
3. From the Wind Speed settings, tap a fan speed.
Note:
• You cannot change temperature settings while in this mode.
Figure 34:
FAN MODE
User Manual
Due to our policy of continuous product innovation, some specifications may change without notification.
©LG Electronics U.S.A., Inc., Englewood Cliffs, NJ. All rights reserved. “LG” is a registered trademark of LG Corp.
33
Page 34

AIR FLOW MODE
Air Flow (Swing Direction)
You can set the up/down and left/right swing directions of the louver using the Air Flow Mode.
1. On the Dashboard, choose the air conditioner unit.
2. Tap on Air Flow Mode (below Fan Speed) to see the Air Flow Mode options.
3. Tap the up/down or left/right arrows to adjust the Up/Down Swing or the Left/Right swing.
Auto Swing
If you want the louvers to swing back and forth automatically, tap Auto Swing for Up/Down or Left/Right swings. See Figure 36.
Figure 35: Figure 36:
Smart ThinQ
34
Due to our policy of continuous product innovation, some specifications may change without notification.
©LG Electronics U.S.A., Inc., Englewood Cliffs, NJ. All rights reserved. “LG” is a registered trademark of LG Corp.
Page 35

Jet and Saving
• Choose Jet in the Additional Setting section for higher fan speed.
• Choose Saving for energy saving mode.
Figure 37:
AIR FLOW MODE
User Manual
Due to our policy of continuous product innovation, some specifications may change without notification.
©LG Electronics U.S.A., Inc., Englewood Cliffs, NJ. All rights reserved. “LG” is a registered trademark of LG Corp.
35
Page 36

DETAIL SCREEN
The Detail screen lets you access Reservation, Filter Manager, Smart Diagnosis, and Settings.
1. Tap on the ellipses on the top right of the screen to access the Detail menu.
Figure 38:
Smart ThinQ
36
Due to our policy of continuous product innovation, some specifications may change without notification.
©LG Electronics U.S.A., Inc., Englewood Cliffs, NJ. All rights reserved. “LG” is a registered trademark of LG Corp.
Page 37

SLEEP TIMER AND WEEKLY RESERVATION
Using the Reservation function, you can do the following:
• Use the Sleep Timer function to place the unit into a countdown mode which will then activate the Sleep Mode.
• Set up weekly reservations to start and stop air conditioner activity.
Set up Sleep Timer
1. From the Detail screen, tap Reservation.
2. From the Reservation screen, tap Sleep Timer.
3. Slide the button to the right of the Reservation Setting area of the screen to ON.
4. Scroll the amount of time to countdown to Sleep Mode. You can set it up to 7 hours in advance. See Figure 40.
5. Tap Save.
Figure 39:
Figure 40:
User Manual
Due to our policy of continuous product innovation, some specifications may change without notification.
©LG Electronics U.S.A., Inc., Englewood Cliffs, NJ. All rights reserved. “LG” is a registered trademark of LG Corp.
37
Page 38

SLEEP TIMER AND WEEKLY RESERVATION
Set up Off and On Timers
You can set up timers to start and stop air conditioner activity.
1. From the Reservation screen, tap Off Timer or On Timer.
2. Slide the button to the right of the Off and/or On area of the screen to ON.
3. Use the scrolls to set the hour and minutes to be counted down (rounded to 10 minute intervals).
4. Tap Save.
Note:
• You cannot place the Sleep countdown timer and the Off and/or On timers in the ON position at the same time. An error message will
display.
• Timer only sets the amount of time (as a count down, not as a time of day that is being set) before Sleep Mode activation.
Figure 41 shows the Sleep Timer setting. Figure 42 shows the setting for the On Timer of the unit.
Figure 41: Figure 42:
Smart ThinQ
38
Due to our policy of continuous product innovation, some specifications may change without notification.
©LG Electronics U.S.A., Inc., Englewood Cliffs, NJ. All rights reserved. “LG” is a registered trademark of LG Corp.
Page 39

SLEEP TIMER AND WEEKLY RESERVATION
Set up weekly reservations
You can set up weekly reservations to start and stop air conditioner activity. You can set the operation to repeat daily or on specific days.
1. From the Reservation screen, tap Weekly Reservation.
2. Tap Add Reservation to add a new reservation.
3. Set the operation start and stop times.
4. Tap Save.
Figure 43:
Figure 44:
User Manual
Due to our policy of continuous product innovation, some specifications may change without notification.
©LG Electronics U.S.A., Inc., Englewood Cliffs, NJ. All rights reserved. “LG” is a registered trademark of LG Corp.
39
Page 40

FILTER MANAGER
Using the Filter Manager function, you can monitor filter usage for the air conditioner. The app gives a visual percentage detail as to the
remainder of usage left on the existing filter, along with
1. In the Detail screen, tap Filter Manager. You can see how much of the filter has been used, as well as the hours of available usage remaining before you need to clean the filter.
Smart ThinQ
Figure 45:
Figure 46:
40
Due to our policy of continuous product innovation, some specifications may change without notification.
©LG Electronics U.S.A., Inc., Englewood Cliffs, NJ. All rights reserved. “LG” is a registered trademark of LG Corp.
Page 41

MODES
Mode Main Screen
You can set up the air conditioning unit to run in different modes, depending on your schedule. On the Dashboard screen, tap Mode on top.
The following Modes are available:
• Home
• Away
• Vacation
• Pleasant
• Sleep
Figure 47:
User Manual
Due to our policy of continuous product innovation, some specifications may change without notification.
©LG Electronics U.S.A., Inc., Englewood Cliffs, NJ. All rights reserved. “LG” is a registered trademark of LG Corp.
41
Page 42

MODES
Home Mode
1. Tap Start under the Home icon in the Modes main screen.
2. Adjust the settings of the unit, as needed. For example, you can set the unit at a certain temperature in Cool Mode. These settings will be
saved as Home Mode.
• You can change the settings later, as needed.
• Note that every time you change a Mode, you will hear a beeping noise from the unit.
Smart ThinQ
Figure 48:
Figure 49:
42
Due to our policy of continuous product innovation, some specifications may change without notification.
©LG Electronics U.S.A., Inc., Englewood Cliffs, NJ. All rights reserved. “LG” is a registered trademark of LG Corp.
Page 43

MODES
Vacation and Away Modes
If you are going on vacation or will be away for a day, you can set up the unit to run in a certain mode. For example, you can turn the unit off
for selected days.
1. Tap Start under the Vacation or Away icons in the Mode screen.
2. Adjust the settings of the unit, as needed. The settings are saved as Vacation (Figure 50) or Away (Figure 51) Mode.
You can change the settings later, as needed.
Figure 50: Figure 51:
User Manual
Due to our policy of continuous product innovation, some specifications may change without notification.
©LG Electronics U.S.A., Inc., Englewood Cliffs, NJ. All rights reserved. “LG” is a registered trademark of LG Corp.
43
Page 44

MODES
Sleep Mode
1. Tap Start under the Sleep icon in the Mode screen.
2. Adjust the settings of the unit, as needed. For example, you can set the unit to run at a certain temperature when you are sleeping. These
settings will be saved as Sleep Mode.
You can change the settings later, as needed.
Note:
You cannot apply the Sleep Mode if the unit is turned off.
Figure 52: Figure 53:
Smart ThinQ
44
Due to our policy of continuous product innovation, some specifications may change without notification.
©LG Electronics U.S.A., Inc., Englewood Cliffs, NJ. All rights reserved. “LG” is a registered trademark of LG Corp.
Page 45

SMART DIAGNOSIS
Using the Smart Diagnosis function, you can troubleshoot problems that you are having with the air conditioning unit on your own. You can
also view tips on general maintenance of the unit.
1. Tap Smart Diagnosis in the Detail screen.
Figure 54:
2. Tap Start Smart Diagnosis.
Figure 55:
User Manual
Due to our policy of continuous product innovation, some specifications may change without notification.
©LG Electronics U.S.A., Inc., Englewood Cliffs, NJ. All rights reserved. “LG” is a registered trademark of LG Corp.
45
Page 46

SMART DIAGNOSIS
3. Smart Diagnosis process starts. 4. The Smart Diagnosis Results screen displays the problem with
the air conditioning unit and lists possible solutions.
Smart ThinQ
Figure 56:
Figure 57:
46
Due to our policy of continuous product innovation, some specifications may change without notification.
©LG Electronics U.S.A., Inc., Englewood Cliffs, NJ. All rights reserved. “LG” is a registered trademark of LG Corp.
Page 47

SMART DIAGNOSIS
5. Tap Diagnosis Complete when the diagnosis is complete. Select Yes or No to provide feedback on the diagnosis and go back to the Smart
Diagnosis main screen.
Note:
If you need further assistance after the smart diagnosis is complete, please contact your installing contractor or service company.
Figure 58:
User Manual
Due to our policy of continuous product innovation, some specifications may change without notification.
©LG Electronics U.S.A., Inc., Englewood Cliffs, NJ. All rights reserved. “LG” is a registered trademark of LG Corp.
47
Page 48

SETTINGS
Tap Settings in the Detail screen to access the Settings Menu. You can perform the following actions:
• Change the name of the air conditioner unit
• Change temperature display
• Update or change your wireless network information
• View the latest version of the software
Smart ThinQ
Figure 59:
Figure 60:
48
Due to our policy of continuous product innovation, some specifications may change without notification.
©LG Electronics U.S.A., Inc., Englewood Cliffs, NJ. All rights reserved. “LG” is a registered trademark of LG Corp.
Page 49

SETTINGS
Edit Product Nickname
1. Tap on Product Nickname to change the name of the air conditioner unit.
2. You can enter names for the units registered through the app.
This is helpful if you have more than one unit registered through
the app. For example, one could be named Living room AC and
the other could be named Master Bedroom AC.
3. Tap Save when finished. Note that in the Product Nickname field,
you can enter up to 16 characters.
Figure 61:
Change Temperature Display
1. Tap on Temperature Unit to change the Temperature Display of
the air conditioner unit.
2. You can choose Fahrenheit or Celsius.
Figure 62:
User Manual
Due to our policy of continuous product innovation, some specifications may change without notification.
©LG Electronics U.S.A., Inc., Englewood Cliffs, NJ. All rights reserved. “LG” is a registered trademark of LG Corp.
49
Page 50

SETTINGS
Choose Product Network
Tap on Product Network to change your wireless network settings. You can search for available Wi-Fi networks.
Note:
If your router information changes, or if there is a change in your wireless network, you have to go through the product registration process again. Refer to the Product Registration section of this manual.
Smart ThinQ
Figure 63:
Figure 64:
50
Due to our policy of continuous product innovation, some specifications may change without notification.
©LG Electronics U.S.A., Inc., Englewood Cliffs, NJ. All rights reserved. “LG” is a registered trademark of LG Corp.
Page 51

TROUBLESHOOTING
Problem Possible Cause Solution
The app is not connecting to the indoor unit.
The indoor unit is not connecting to the Wi-Fi.
Check to see if the indoor unit is turned off.
Check to see if the wireless router is turned off.
Check to see if the wireless router is placed too far
away.
Turn the indoor unit on.
Turn the router on.
Install the wireless router near the air
conditioning unit.
User Manual
Due to our policy of continuous product innovation, some specifications may change without notification.
©LG Electronics U.S.A., Inc., Englewood Cliffs, NJ. All rights reserved. “LG” is a registered trademark of LG Corp.
51
Page 52

LG Electronics, U.S.A., Inc.
Commercial Air Conditioning Division
4300 North Point Parkway
LG Customer Information Center, Commercial Products
1-888-865-3026 USA
Follow the prompts for commercial A/C products and parts.
Alpharetta, Georgia 30022
www.lghvac.com
UM_Smart_ThinQ_12_16
New Issue
 Loading...