How it Works
Log In / Sign Up
Buy Points
How it Works
FAQ
Contact Us
Questions and Suggestions
Users
LG
Loading...
L
LS120HEV2
2
LS120HP
LS120HSV4
6
LS120HSV5
2
LS120HXV
4
LS120HXV2
LS120HYV
2
Ls121hsv
LS121HSV2
3
LS121HSV3
6
LS122CE
4
LS122HE
Ls122he-ce
LS150X03-A3
LS161HSV
LS180CE
7
LS180CE.AWHAEUS
LS180CP
2
LS180CPI
LS180CPO
LS180HE
5
LS180HEV
5
LS180HEV1
5
LS180HEV2
LS180HP
LS180HSV4
6
LS180HSV5
2
LS181HSV2
3
LS181HSV3
6
LS182HE
LS186CE
Ls186he-ce
2
LS1920WG
LS202BBWL
2
LS202BLSL
2
LS222BBSL1
2
LS232JBWPL
2
LS240CE
7
LS240CE.AWHAEUS
LS240CP
LS240CPO
LS240HE
6
LS240HEV
6
LS240HEV1
2
LS240HEV2
2
LS240HLV
3
LS240HP
LS240HPI
LS240HSV2
3
LS240HSV3
7
LS242BBWLN
LS242CE
LS242HE
LS243HLV
5
LS24GBBDLN
LS252JDWL
2
LS253JBVL
2
LS292BBSL
2
LS300CE
2
LS300HLV
3
LS300HV3
LS300N-B1
LS300N-D1
LS300P-B1
2
LS300P-C1
LS300P-D1
LS300P-D2
LS301CE
2
LS301HE
2
LS302CP
LS302HP
LS303HLV
5
LS305HV
LS307HV
LS307HV2
5
LS307HV3
3
LS31
LS312BBSLN
LS314JBGLB
2
LS33
LS34
2
LS340 Series
2
LS344DBGL
2
LS344JBGL
2
LS344JBVL
2
LS345 Series
2
LS34 Series
4
LS35
3
LS35 series
2
LS360HLV
4
LS360HV
LS360HV2
5
LS360HV3
4
LS363HLV
5
LS40
5
LS4000
LS42F
LS42X
LS43ST
LS450
4
Loading...
Loading...
Nothing found
LS242BBWLN
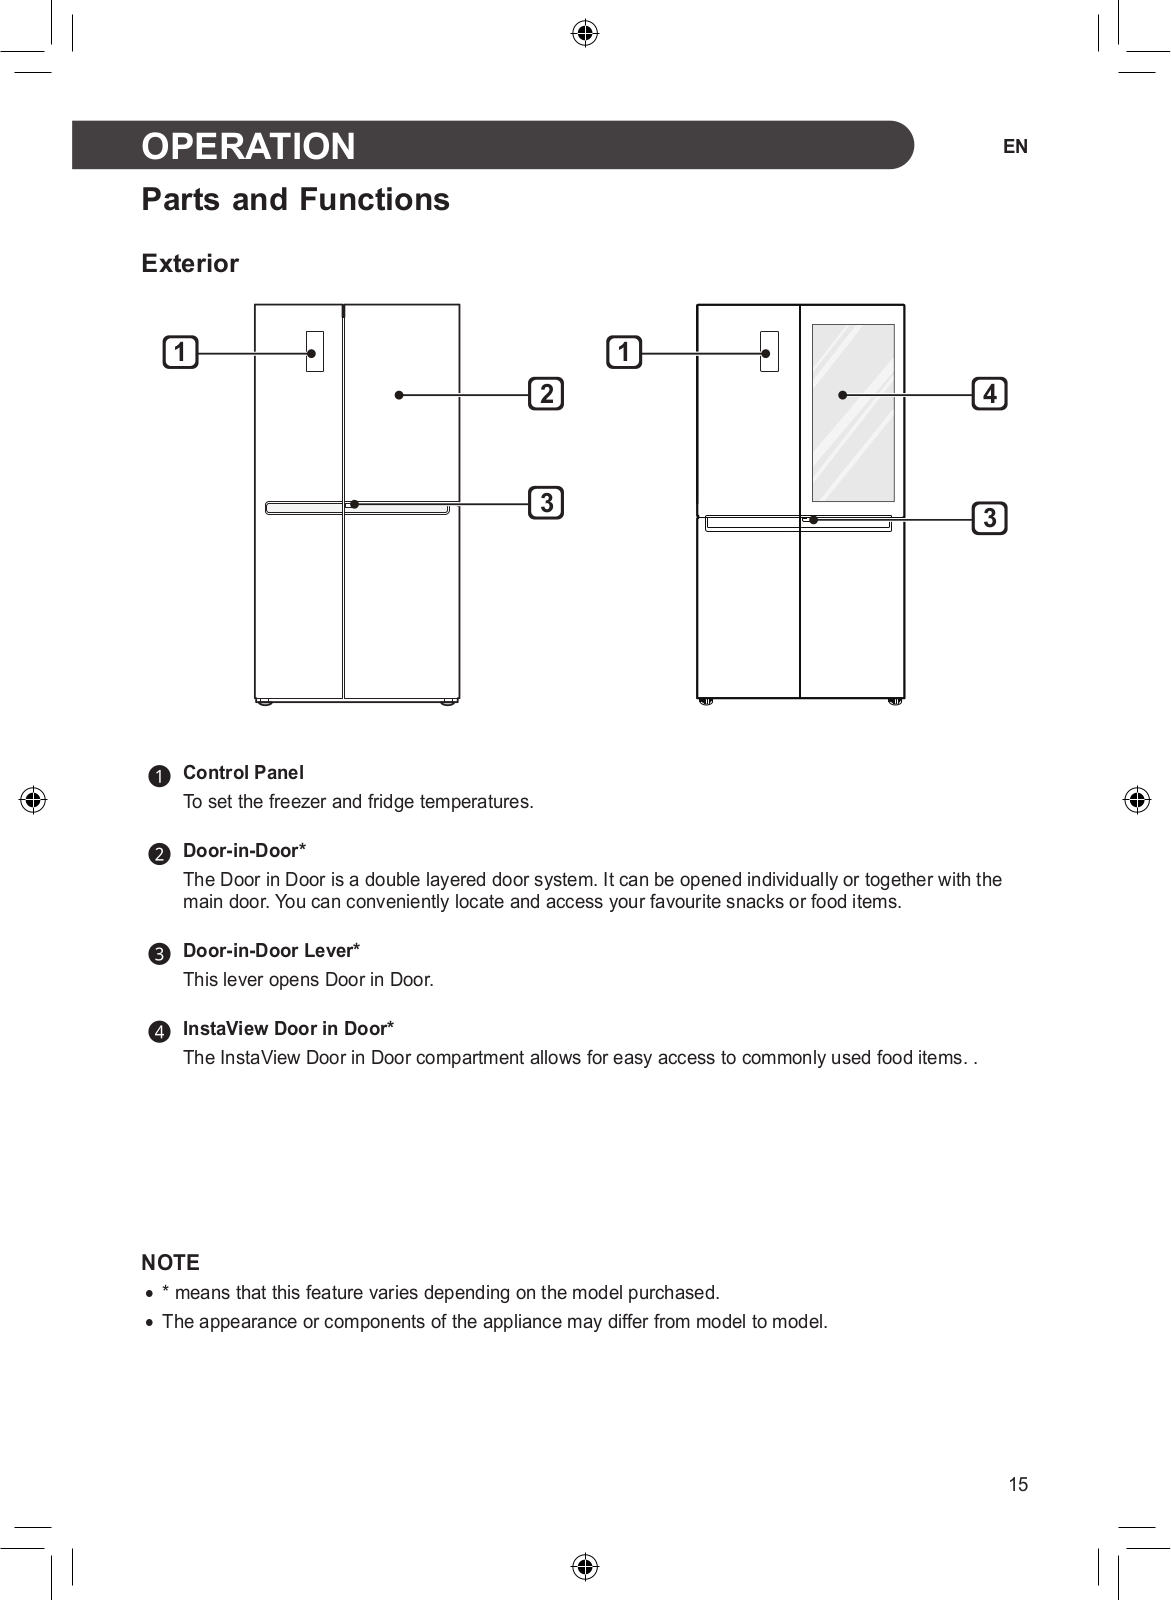
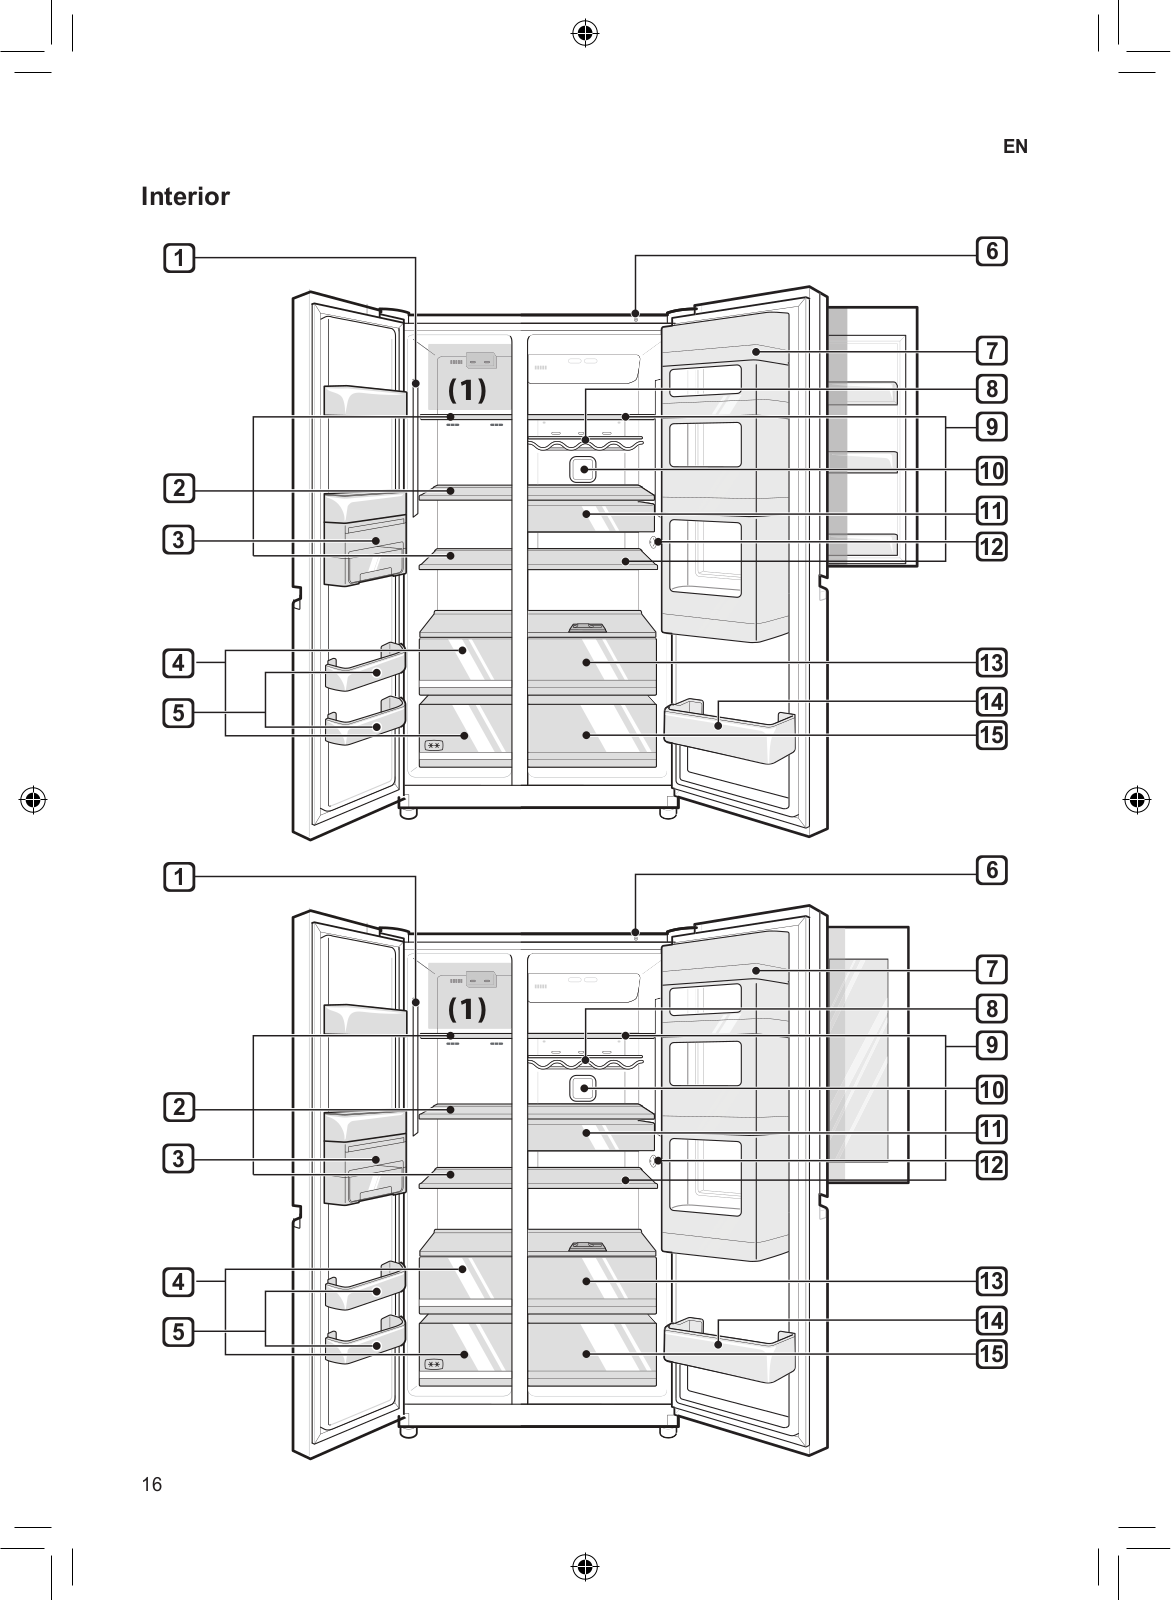
Owner’s Manual
84 pgs
5.89 Mb
0
Table of contents
Loading...
LG LS242BBWLN Owner’s Manual
...
LG Owner’s Manual
Download
Specifications and Main Features
Frequently Asked Questions
User Manual
Download
Loading...
+
58
hidden pages
Unhide
You need points to download manuals.
1 point = 1 manual.
You can buy points or you can get point for every manual you upload.
Buy points
Upload your manuals
 Loading...