

Page 1
PLEASE
READ THIS OWNER'S MANUAL THOROUGHLY
BEFORE OPERATING AND KEEP IT HANDY
FOR REFERENCE AT ALL TIMES.
OWNER'S MANUAL
REFRIGERATOR-
FREEZER
LISEZ ATTENTIVEMENT CE MANUEL AVANT FAIRE
FONCTIONNER LÕAPPAREIL ET CONSERVEZ-LE
POUR TOUTE RFRENCE Ë TOUT MOMENT.
MANUEL DE L ÕUTILISATEUR
RFRIGRATEUR-
CONGLATEUR
LEA ESTE MANUAL DE INSTRUCCIONES
DETENIDAMENTE Y GUçRDELO COMO
REFERENCIA PARA EL FUTURO.
MANUAL DE INSTRUCCIONES
REFRIGERADOR-
CONGELADOR
P/No. 3828JD8328S
website: http://www.lgservice.com
e-mail: http://www.lgeservice.com/techsup.html
LRTP0831W, LRTP0931W
Page 2

REFRIGERATOR SAFETY............................ 3
INSTALLING YOUR REFRIGERATOR ....... 4
Unpacking Your Refrigerator .................................... 4
Installation .................................................................. 4
Electrical Requirements ........................................... 5
FEATURES CHART ...................................... 6
OPERATION ................................................... 7
Starting ...................................................................... 7
Temperature Control ................................................ 7
Ice Making ................................................................. 8
Chilled Compartment ................................................ 9
Defrosting .................................................................. 9
Deodorizer...................................................................9
SUGGESTIONS ON FOOD STORAGE
........... 10
CLEANING YOUR REFRIGERATOR ........ 11
LAMP REPLACEMENT .............................. 12
GENERAL INFORMATION ......................... 12
REVERSIBLE DOOR ................................... 13
BEFORE CALLING FOR SERVICE .......... 15
2
TABLE OF
CONTENTS
Page 3

3
REFRIGERATOR SAFETY
ENGLISH
Your safety and the safety of others is very important.
We have provided many important safety messages in this manual and on your appliance.
Always read and obey all safety messages.
This is the safety alert symbol.
This symbol alerts you to hazards that can kill or hurt you and others.
All safety messages will be preceded by the safety alert symbol and the word
DANGER or WARNING. These words mean:
You will be killed or seriously injured if
you don’t follow instructions.
You can be killed or seriously injured if
you don’t follow instructions.
All safety messages will identify the hazard, tell you how to reduce the chance of injury, and tell
you what can happen if the instructions are not followed.
IMPORTANT SAFETY INSTRUCTIONS
WARNING:
To reduce the risk of fire, electric shock, or injury when using your refrigerator,
follow these basic precautions:
SAVE THESE INSTRUCTIONS
DANGER
WARNING
DANGER
Suffocation Hazard
Remove doors from your old refrigerator.
Failure to do so can result in death or
brain damage.
■ Plug into a grounded 3-prong outlet.
■ Do not remove ground prong.
■ Do not use an adapter.
■ Do not use an extension cord.
■ Disconnect power before servicing.
■ Replace all panels before operating.
■ Remove doors from your old refrigerator.
■ Use nonflammable cleaner.
■ Keep flammable materials and vapors,
such as gasoline, away from refrigerator.
■ Use two or more people to move
refrigerator using handles and install
refrigerator.
Proper Disposal of
Your Old Refrigerator
IMPORTANT - Child entrapment and suftocation
are not problems of the past. Junked or abandoned
refrigerators are still dangerous - even if they will sit
for just a few days. If you are getting rid of your old
refrigerator, please follow these instructions to help
prevent accidents.
Before you throw away your old refrigerator
or freezer:
■ Take off the doors.
■ Leave the shelves
in place so that
children may not
easily climb
inside.
Page 4
4
Remove tape and any temporary labels from your
refrigerator before using. Do not remove any
warning type labels, the model and serial number
label, or the Tech Sheet that is attached to back
wall of the refrigerator.
To remove any remaining tape or glue, rub the
area briskly with your thumb. Tape or glue residue
can also be easily removed by rubbing a small
amount of liquid dish soap over the adhesive with
your fingers. Wipe with warm water and dry.
Do not use sharp instruments, rubbing alcohol,
flammable fluids, or abrasive cleaners to remove
tape or glue. These products can damage the
surface of your refrigerator. For more information,
see Important Safety Instructions in the
Refrigerator Safety section.
Refrigerator shelves are installed in the shipping
position.
Please reinstall shelves according to your
individual storage needs.
1. Avoid placing the unit near heat sources, direct
sunlight, or moisture.
2. To avoid vibration, the unit must be level. If
required, adjust the leveling screws to
compensate for unevenness of the floor.
The front should be slightly higher than the rear
to aid in door closing.
Leveling screws can be turned easily by tipping
the cabinet slightly.
Turn the leveling screws clockwise ( ) to
raise the unit, counterclockwise ( ) to
lower it.
3. Install this appliance between 55 °F (13 °C)
and 110 °F (43 °C.) If the temperature around
the appliance is too low or high, cooling ability
may lessen.
NEXT
1. Clean your refrigerator thoroughly and wipe off
all dust accumulated during shipping.
2. Install accessories such as ice cube bin,
drawers, shelves, etc., in their proper places.
They are packed together to prevent possible
damage during shipment.
3. Let your refrigerator run for 2 or 3 hours before
putting food in it.
Check the flow of cold air in the freezer
compartment to ensure proper cooling.
Your refrigerator is now ready for use.
INSTALLING YOUR
REFRIGERATOR
WARNING
Excessive Weight Hazard
Use two or more people to move and
install refrigerator.
Failure to do so can result in back or
other injury.
When Moving Your Refrigerator:
Your refrigerator is heavy. When moving the
refrigerator for cleaning or service, be sure to
protect the floor.
Always pull the refrigerator straight out when
moving it.
Do not wiggle or walk the refrigerator when
trying to move it, as floor damage could occur.
WARNING
Explosion Hazard
Keep flammable materials and vapors,
such as gasoline, away from refrigerator.
Failure to do so can result in death,
explosion, or fire.
Installation
Unpacking Your
Refrigerator
Page 5
Before you move your refrigerator into its final
location, it is important to make sure you have the
proper electrical connection:
Recommended Grounding Method
A 115 Volt, 60 Hz., AC only 15 or 20 ampere
fused, grounded electrical supply is required.
It is recommended that a separate circuit serving
only your refrigerator be provided. Use an outlet
that cannot be turned off by a switch. Do not use
an extension cord.
NOTE: Before performing any type of installation,
cleaning, or removing a light bulb, turn the control,
(Thermostat, Refrigerator, or Freezer Control
depending on the model) to OFF and then
disconnect the refrigerator from the electrical
source. When you are finished, reconnect the
refrigerator to the electrical source and reset the
control (Thermostat, Refrigerator, or Freezer
Control, depending on the model) to the desired
setting.
5
Electrical Requirements
ENGLISH
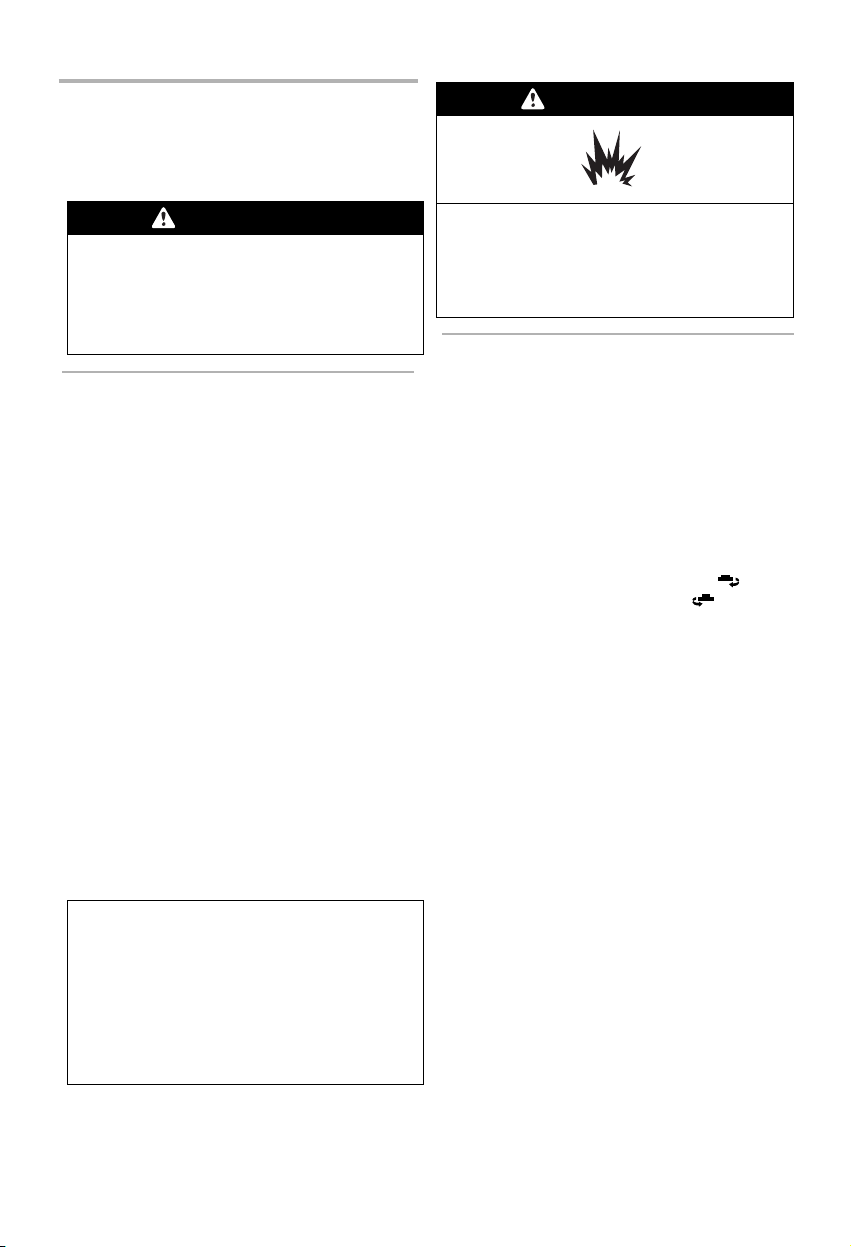
WARNING
Electrical Shock Hazard
Plug into a grounded 3-prong outlet.
Do not remove ground prong.
Do not use an adapter.
Do not use an extension cord.
Failure to follow these instructions can
result in death, fire, or electrical shock.
Page 6

6
FEATURES CHART
FREEZER
COMPARTMENT
REFRIGERATOR
COMPARTMENT
Twisting Ice Serve
Freezer Temperature
Control Knob
Chilled Compartment
Refrigerator Temperature
Electronic Control
Lamp
Deodorizer
Vegetable Drawer
Used to keep fruits
and vegetables, etc.
fresh and crisp.
Base Grille
Freezer Door Rack
Egg Storage Rack
(GR-292 only)
Refrigerator
Door Rack
Leveling Screws
Page 7

7
When your refrigerator is first installed, allow it 2-3
hours to stabilize at normal operating
temperatures prior to filling it with fresh or frozen
foods.
If operation is interrupted, wait 5 minutes before
restarting.
REFRIGERATOR
The default setting of the temperature control
button for the refrigerator compartment is
NORMAL.
You can set the refrigerator temperature using
the Refrigerator Temperature Control.
The temperature of the compartment is raised as
the LED luminesce from MIN to MAX.
You can select the desired set point in five (5)
steps between minimum and maximum.
For the economic electricity, set the LED to the
MIN position.
FREEZER
The default setting of the temperature control
knob for the freezer compartment is the MID
point.
For colder temperatures, adjust the control knob
to MAX, and for warmer temperatures, adjust the
control knob to MIN position.
OPERATION
ENGLISH
Starting
Temperature Control
TEMPERATURE CONTROL 5 STEPS
TEMP.CONTROL
Ref. Temp Control
Page 8

■
Defrosting takes place automatically.
■
The defrosted water flows down to the
evaporating tray which is located in the lower
back side of the refrigerator and is evaporated
automatically.
8
Determine which ice-making system you have
General
■
To make ice cubes, fill the ice tray with water
and place it on the ice cube box. Then insert the
ice cube box in the freezer compartment.
■
To remove ice cubes, hold the tray at its ends
and twist gently.
Twisting Ice Serve
■
To make ice cubes, fill the ice tray with water
and insert in its position.
■
Twist the knob gently. The ice cubes will fall into
the ice cube box.
■
You can remove the Twisting Ice Serve to make
the freezer compartment larger.
■
You should remove the ice trays and ice cube
box toward.
OPERATION
Ice Making
Defrosting
Ice Trays
Ice Cube Box
Ice Trays
Ice Cube Box
Frame
When the door is opened, the warmer air doesn't
affect the fresh meat. You can keep food fresher
in it.
Chilled Compartment
Page 9

9
OPERATION
ENGLISH
Catalyst
Catalyst
■
Deodorizing is assured because a catalyst is
used.
■
Unpleasant odor of food in the fresh food
compartment is deodorized with no harm to you
and the food.
Deodorizer
■
The catalyst is located in the cool air outlet,
Where it works all the time and is protected.
■
Do not puncture the cooling air outlet with a
sharp tip because the deodorizing catalyst may
be damaged.
■
When storing food with a strong odor, wrap it or
store it in a container with a lid because the
odor may be absorbed by other foods.
How To Use
Page 10

10
SUGGESTIONS ON
FOOD STORAGE
■
Store fresh food in the refrigerator
compartment. How food is frozen and thawed
is an important factor in maintaining its
freshness and flavor.
■
Do not store food which goes bad easily at low
temperatures, such as bananas, pineapples,
and melons.
■
Allow hot food to cool prior to storing. Placing
hot food in the refrigerator could spoil other
food and lead to higher electric bills!
■
When storing, cover food with vinyl wrap or
store in a container with a lid. This prevents
moisture from evaporating and helps food to
keep its taste and nutrients.
■
Do not block air vents with food. Even
circulation of chilled air keeps refrigerator
temperatures even.
■
Do not open the door frequently. Opening the
door lets warm air enter the refrigerator,
causing temperatures to rise.
■
Do not store bottles in the freezer
compartment - they may break when frozen.
■
Do not refreeze food that has been thawed.
This deteriorates taste and nutrition.
■
When storing frozen food like ice cream for a
long period, place it on the freezer shelf,
not in the door rack.
■
Avoid storing any food close to the bottom
area of the freezer shelf to keep efficient air
circulation.
■
Avoid placing moist food deep inside
refrigerator shelves, it could freeze upon direct
contact
with chilled air.
■
Always clean food prior to refrigeration.
Vegetables and fruits should be washed and
wiped,
and packed food should be wiped clean to
prevent adjacent food from spoiling.
■
When storing eggs in their storage rack,
ensure that they are fresh. Always store them
in a upright position, which keeps them fresh
longer.
Storing Food
Refrigerator Compartment
Freezer Compartment
Page 11

11
CLEANING YOUR
REFRIGERATOR
ENGLISH
Both the refrigerator and freezer sections defrost
automatically. However, clean both sections
about once a month to prevent odors from
building up. Wipe up spills immediately.
To clean your refrigerator.
■
Unplug refrigerator or disconnect power.
■
Remove all removable parts from inside, such
as shelves, crispers, etc.
■
Use a clean sponge or soft cloth and a mild
detergent in warm water. Do not use abrasive
or harsh cleaners.
■
Hand wash, rinse, and dry all surfaces
thoroughly.
■
Plug in refrigerator or reconnect power.
■
Additional cleaning tips are listed below:
ENGLISH
WARNING
Explosion Hazard
Use nonflammable cleaner.
Failure to do so can result in death,
explosion, or fire.
COMMENTS
■
Waxing external painted metal
surfaces helps provide rust
protection. Do not wax plastic
parts. Wax painted metal
surfaces at least twice a year
using appliance wax (or auto
paste wax). Apply wax with a
clean, soft cloth.
■
For products with a stainless
steel exterior, use a clean sponge
or soft cloth and a mild detergent
in warm water. Do not use
abrasive or harsh cleaners. Dry
thoroughly with a soft cloth.
■
To help remove odors, you can
wash the inside of the refrigerator
with a mixture of baking soda and
warm water. Mix 2 tablespoons
soda to 1 quart of water (26 g
soda to 1 liter water.) Be sure the
soda is completely dissolved so it
is not abrasive and doesn't
scratch the surfaces of the
refrigerator.
■
Do not use cleaning waxes,
concentrated detergents,
bleaches, or cleaners containing
petroleum on plastic parts.
■
Do not use paper towels, window
sprays, abrasive cleaners, or
flammable fluids. These can
scratch or damage material.
■
Remove base grille. (See the
Base grille section on page 6.)
■
Use a vacuum with an extended
attachment to clean condenser
coils.
■
Vacuum coils when dusty or dirty.
Coils may need to be cleaned as
often as every other month.
■
Replace base grille.
PART
Outside
Inside walls
(allow
freezer to
warm up so
cloth won’t
stick)
Door liners
and gaskets
Plastic parts
(covers and
panels)
Condenser
coils
Page 12

12
1. Unplug the power cord from the outlet.
2. Remove refrigerator shelves.
3. To remove the lamp cover, insert a slotted
driver at the one of
under hole of the lamp cover and pull it out
forwards.
4. Turn the lamp counterclockwise.
5. Assemble in reverse order of disassembly.
Replacement bulb must be the same
specification as original.
Most power failures are corrected in an hour or
two and will not affect your refrigerator
temperatures. However, you should minimize the
number of door openings while the power is off.
During power failures of longer duration, place a
block of dry ice on top of your frozen packages.
During average length vacations, you will
probably find it best to leave the refrigerator in
operation.
Place freezable items in freezer for longer life.
When you plan to be away for an extended
period, remove all food, disconnect the power
cord, clean the interior thoroughly, and leave
each door OPEN to prevent odor formation.
If you move, empty the refrigerator (freezer)
completely and wash a mild solution of baking
soda and water. (2 tablespoons soda to 1 quart
water) Be sure the soda is completely dissolved
to avoid scratching the inside of the refrigerator
(freezer.). Secure any loose items, such as racks,
bins, ice trays, etc. Do not try to move a loaded
refrigerator.
The outside wall of the refrigerator cabinet may
sometimes be warm, especially just after
installation.
Don't be alarmed. This is due to the
anti-condensation pipe, which pumps hot
refrigerant to prevent sweating on the outer
cabinet wall.
LAMP
REPLACEMENT
GENERAL
INFORMATION
WARNING
DRY ICE
When using dry ice, provide adequate
ventilation.
Dry ice is frozen carbon dioxide (CO
2
).
When it vaporizes, it can displace oxygen,
causing dizziness, light-headedness,
unconsciousness, and death by suffocation.
Open a window and do not breathe the vapors.
Vacation Time
Power Failure
If You Move
Anti-Condensation Pipe
Anti-Condensation
Pipe
Page 13

13
(When converting from left-opening type to
right-opening type)
REVERSIBLE DOOR
ENGLISH
PRECAUTION
1. The door can be reversed if required by location
or user preference.
2. Before reversing the door, remove all foods and
accessories (shelves, trays, bins, etc..) which
are not attached to the refrigerator.
3. Use a phillips driver, bolt driver, torque wrench,
or spanner to remove or attach the bolt.
4. Be careful not to drop the refrigerator or doors
when assembling or disassembleling the lower
hinge and the adjustable screw assembly.
5. Don’t lay the refrigerator down while working on
it, as this will cause a malfunction and damage.
6. Be careful not to drop the doors when removing
or replacing them.
How To Reverse The Door
2. Remove the freezer door p
3. Remove the center hinge q and the
refrigerator door r
4. Remove the lower hinge s
6
4
5
3
1. Remove the cap n and upper hinge o
1
2
7
5 Reverse the position of the adjustable
screw assembly t
Page 14

2
1
13
12
3
5
11
3
10
4
8
9
6
14
6. Assemble the lower hinge s
7. Move the cap and bracket to the opposite
side of the refrigerator door
8. Move the cap to the opposite side and
assemble the center hinge.
9. Assemble the door stopper for the
correct side
10. Move the cap to the opposite side of the
freezer door
11. Reverse the pin position of the upper hinge
12. Assemble the upper hinge and replace the
cap
Page 15

15
BEFORE CALLING FOR SERVICE
ENGLISH
SERVICE CALLS CAN OFTEN BE AVOIDED!
IF YOU FEEL YOUR REFRIGERATOR IS NOT OPERATING PROPERLY, CHECK THESE POSSIBLE
CAUSES FIRST :
PROBLEM POSSIBLE CAUSES
REFRIGERATOR DOES
NOT OPERATE
REFRIGERATOR OR FREEZER
COMPARTMENT TEMPERATURE
TOO WARM
ABNORMAL NOISE(S)
REFRIGERATOR
HAS ODOR
DEW FORMS ON THE
CABINET SURFACE
■
Has a house fuse blown or circuit breaker tripped?
■
Has the power cord plug been removed or loosened
from the electrical wall outlet?
■
Temperature control not set on proper position.
■
Appliance is placed close to wall or heat source.
■
Warm weather-frequent door openings.
■
Door is not closed entiredly.
■
Door left open for a long time.
■
Large amount of foods are kept in the refrigerator.
■
Refrigerator is installed in a weak or uneven place,
or leveling screw needs adjusting.
■
Unnecessary objects placed behind the refrigerator.
■
Foods with strong odors should be tightly covered
or wrapped.
■
Interior needs cleaning.
■
Not unusual during periods of high humidity.
■
Door may have been left ajar.
■
To Prove Warranty Coverage
Retain your Sales Receipt to prove date of qurchase.
A copy of your Sales Receipt must be submitted at the time warranty service is provided.
■
To Obtain Product, Customer or Service Assistance
Call Toll-free for Customer Service
Tel : 1-800-243-0000
■
To Obtain Nearest Authorized Service Center
Call 1-800-243-0000, push option #1,24 hours a day, 7days per week.
Please have your product type (Monitor, TV, VCR, MWO, Refrigerator) and ZIP code ready.
Customer Assistance Numbers
Page 16

 Loading...