

LG LPT-A100L Owner's Manual

Before connecting, operating or adjusting this
product, please read this instruction booklet
carefully and completely.
LG PAN TILTER
OWNER’S MANUAL
MODEL : LPT-A100L
PART DESCRIPTION
2
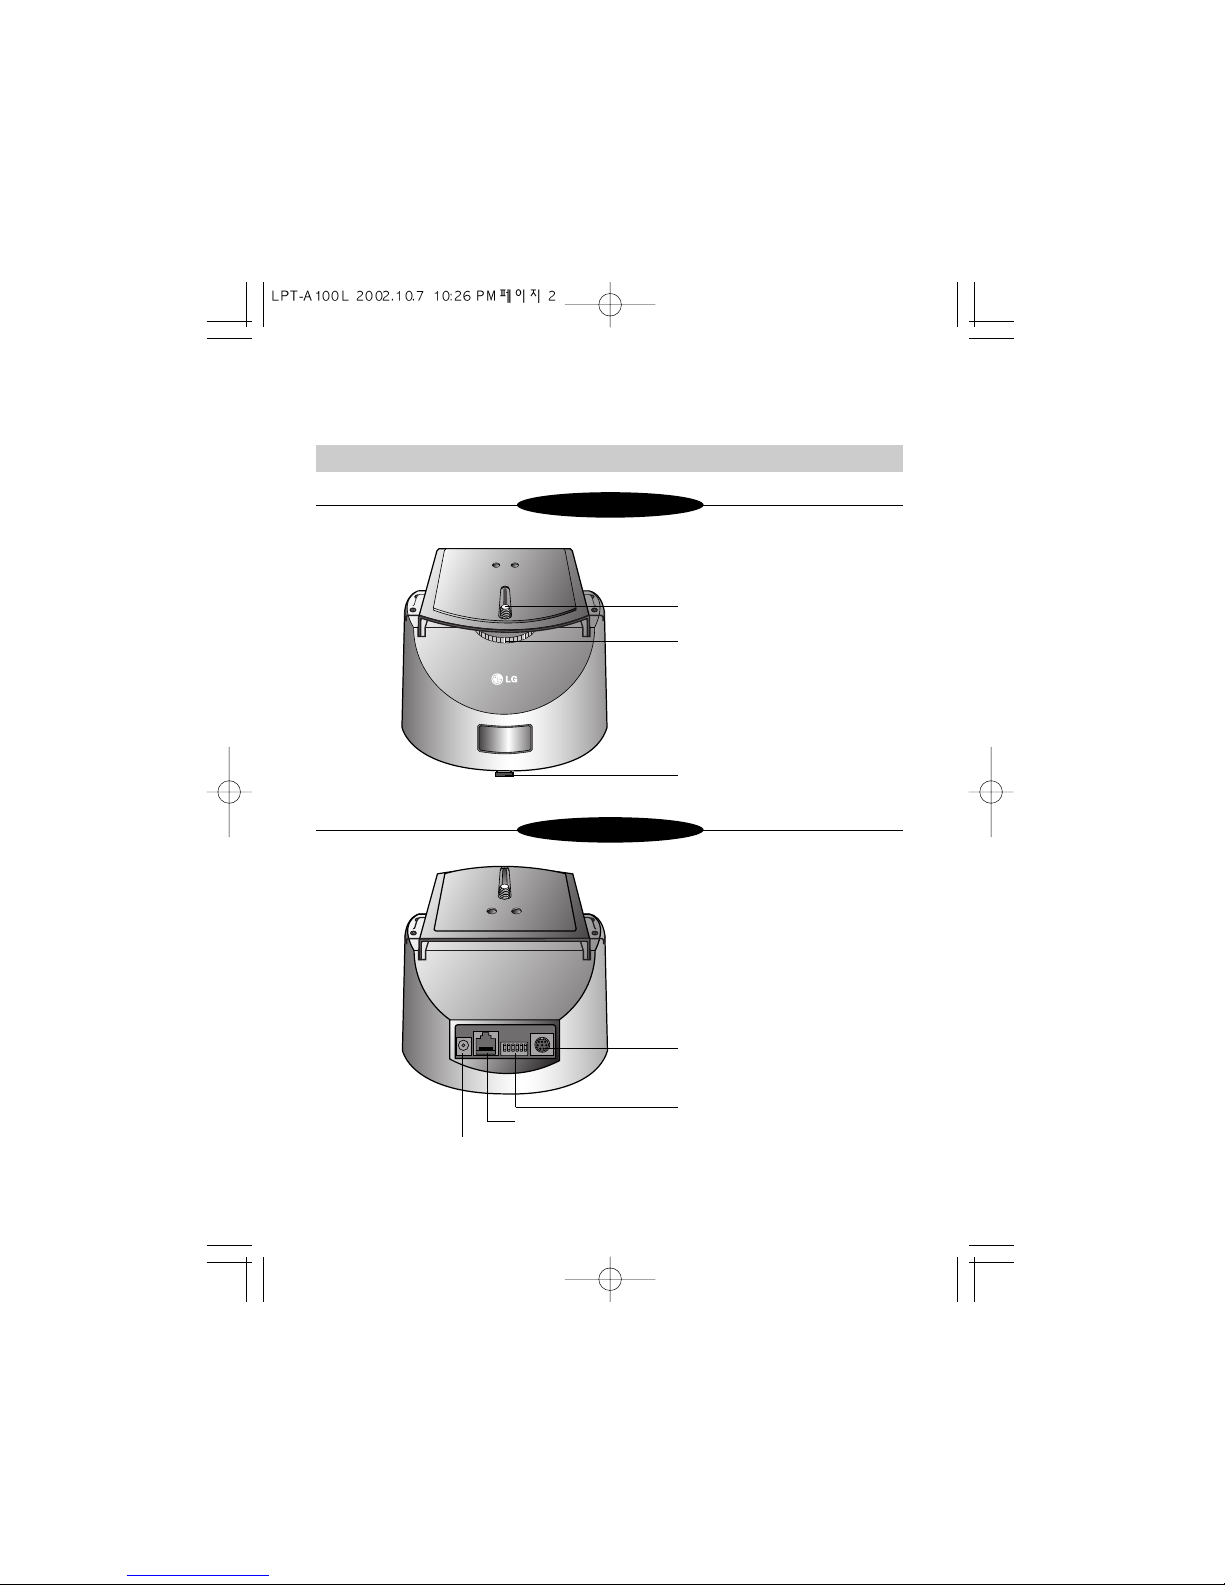
Front
Rear
Fixing screw
Handle for fixing camera.
Axis of rotating
connector for camera
ID choice switch
control
Power input terminal
Installation
3
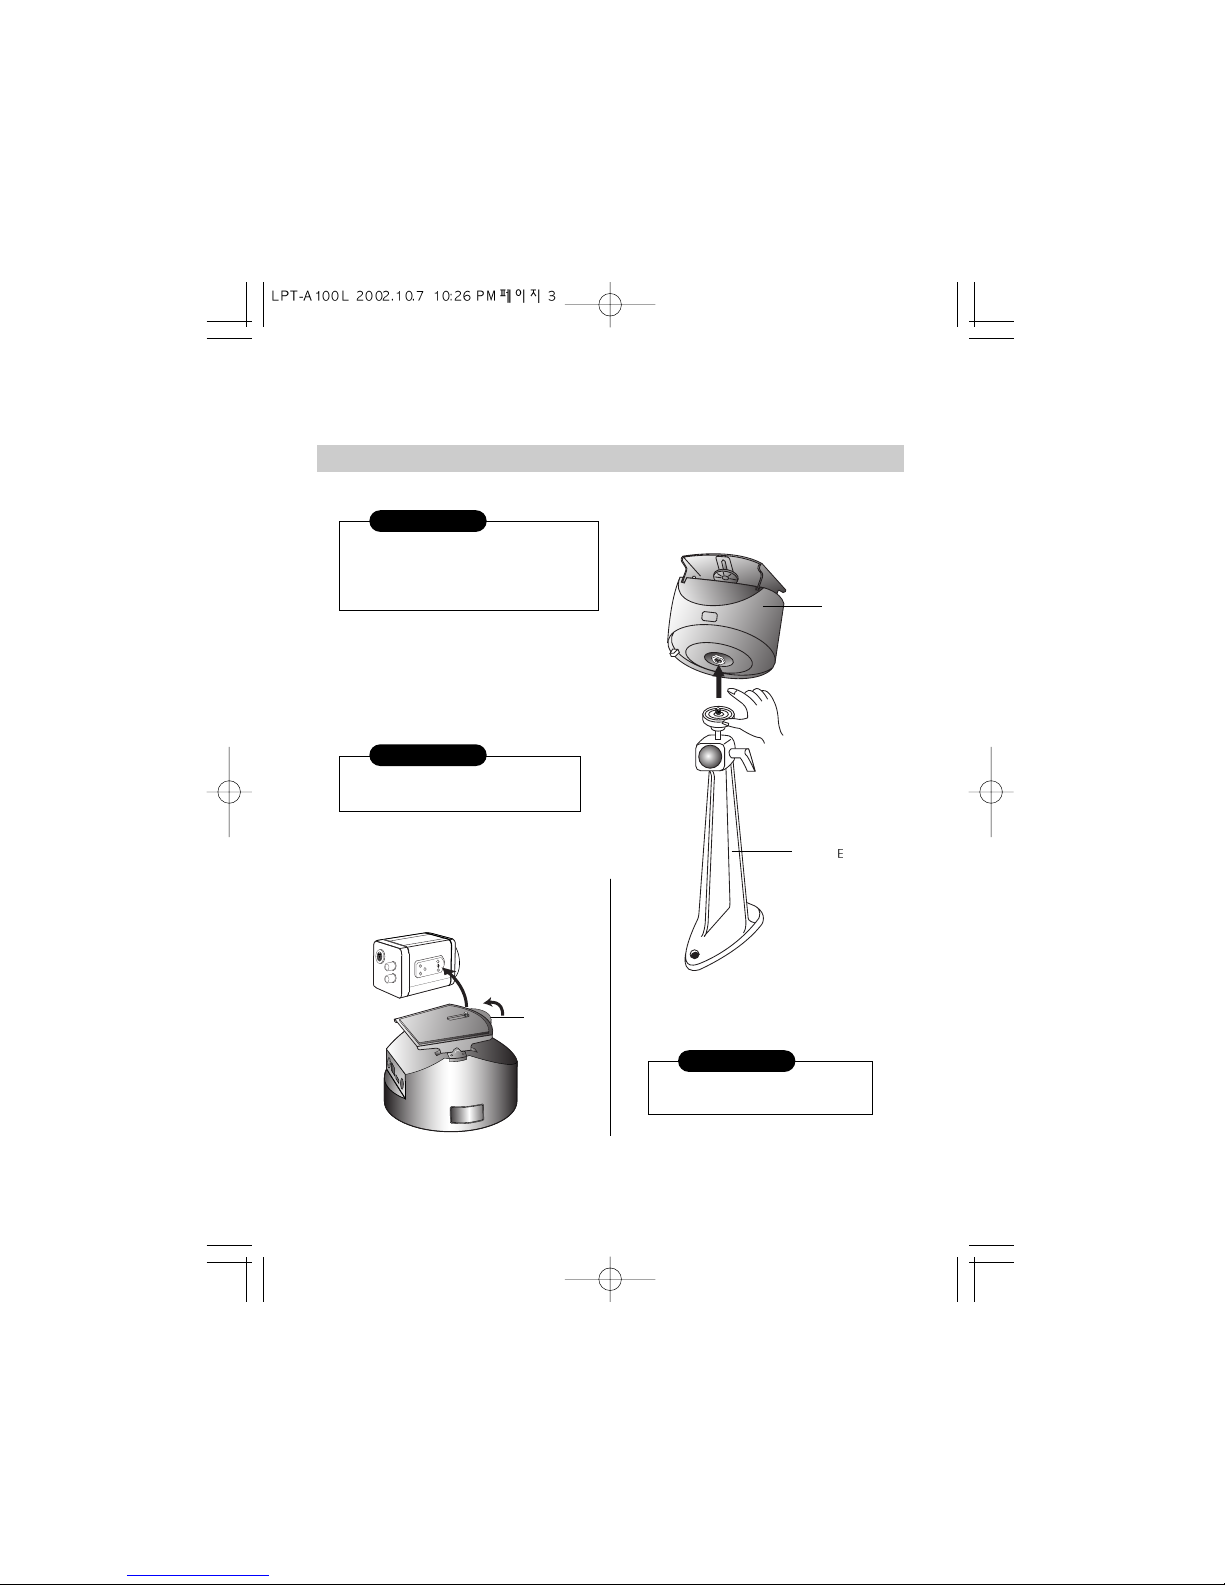
Select proper place for installing Pantilter.
The place must support the weight of
Pantilter, camera and stand.
(The camera and Pantilter weight 2kg.)
Keep all obstacles away so that
Pantilter rotates without clash.
To prevent injury by falling camera
or Pantilter, fix all products tightly.
1 At first, fix stand at proper place
tightly.
2. Fix camera on Pantilter
Use handle to fix camera on Pantilter.
3. Fix Pantilter on stand.
You can use various kinds of stand
depending on the place of installation.
Warning
Warning
Preparation
Pantilter
stand ( xtra purchase
is requard)
handle to fix
camera
Connection camera with Pantilter
4
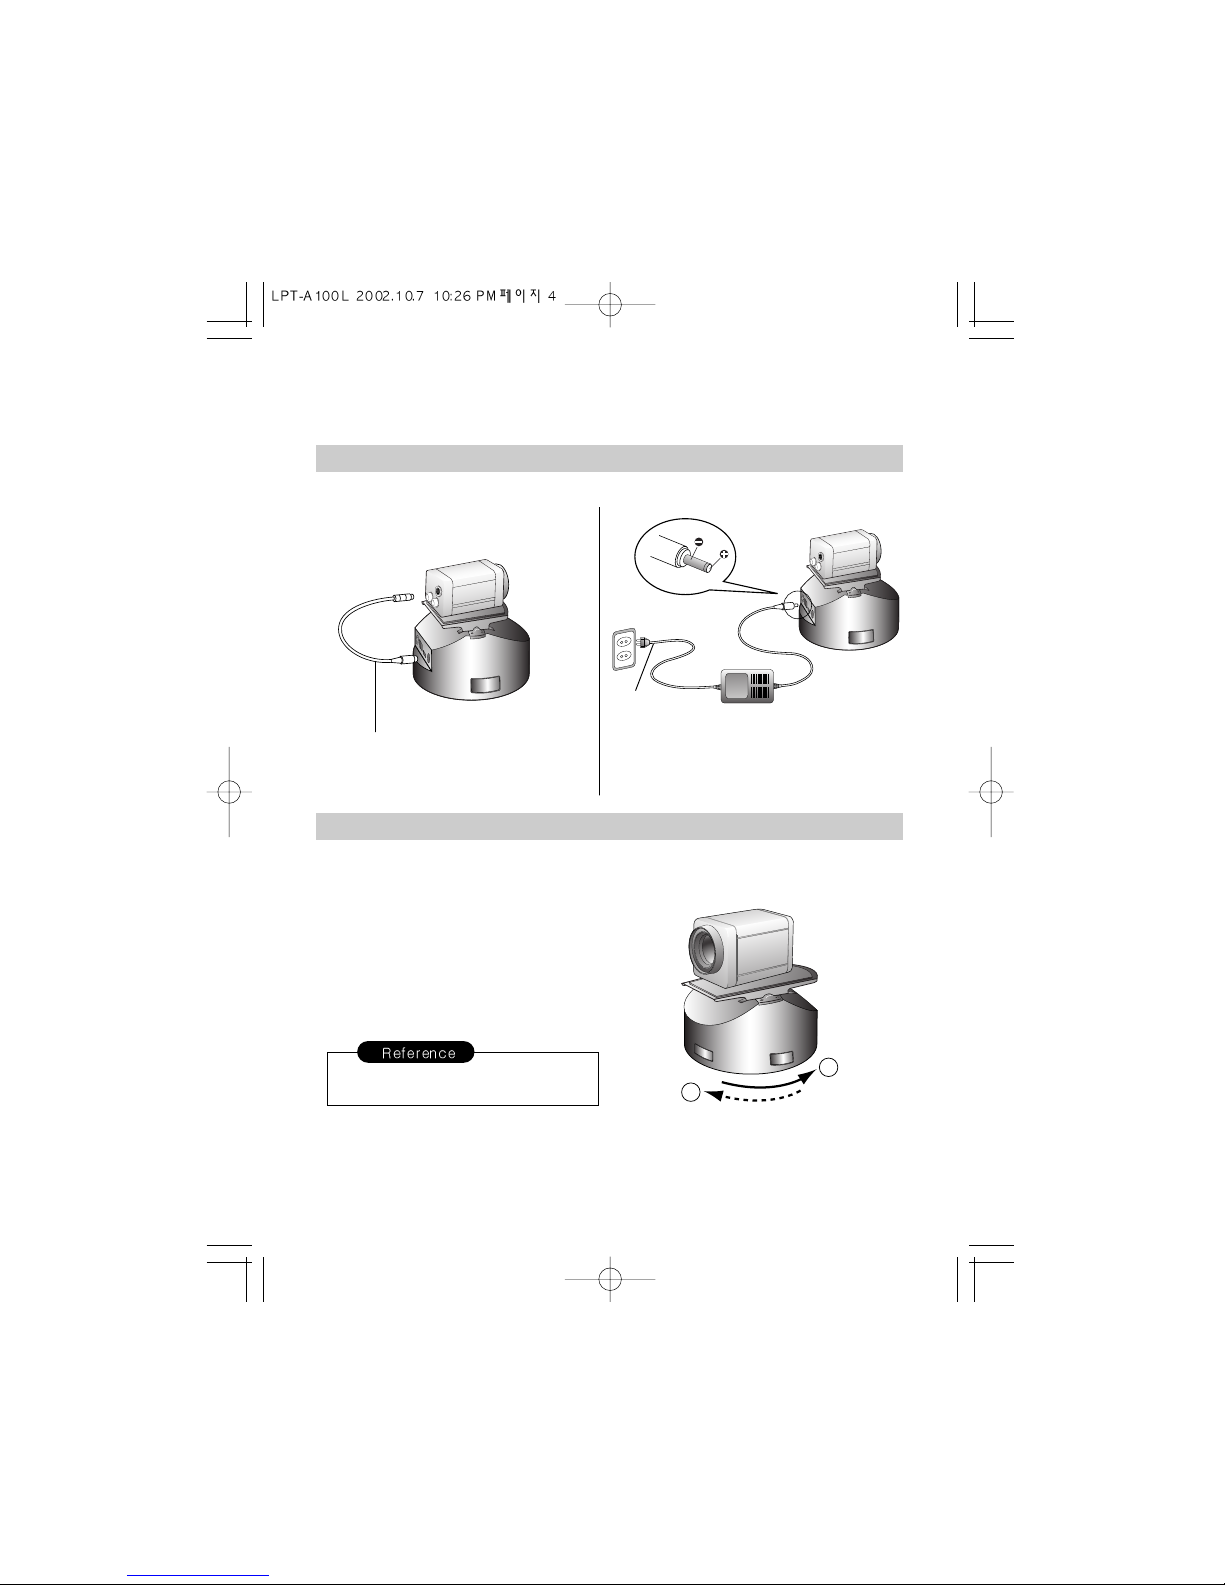
1. System connection 2, Power connection
Camera movement (self-motion)
Initial Movement
Suppling power on system, pantilter moves
toward the end of left side and then returns
to the place where it used to be.
There is no initial movement if it is located
at the L-limit point when power is supplied.
DV12V
system cable
220V
Connect the AC220V~DC12V power supply with
Pantilter.
(Connect this product only to an 220V, 60Hz outlet.
In the case of using 110V, please use an optional
booster.)
1
2
lnitial movement
 Loading...