

LG LMVM1945 INSTALLATION INSTRUCTIONS
- 10 -
LEARN ABOUT YOUR MICROWAVE OVEN
This section discusses the concepts behind microwave cooking and introduces you to the basics you need to
know to operate your microwave oven. Please read this information before use.
OPERATION
CLOCK
This oven includes a 12-hour clock.
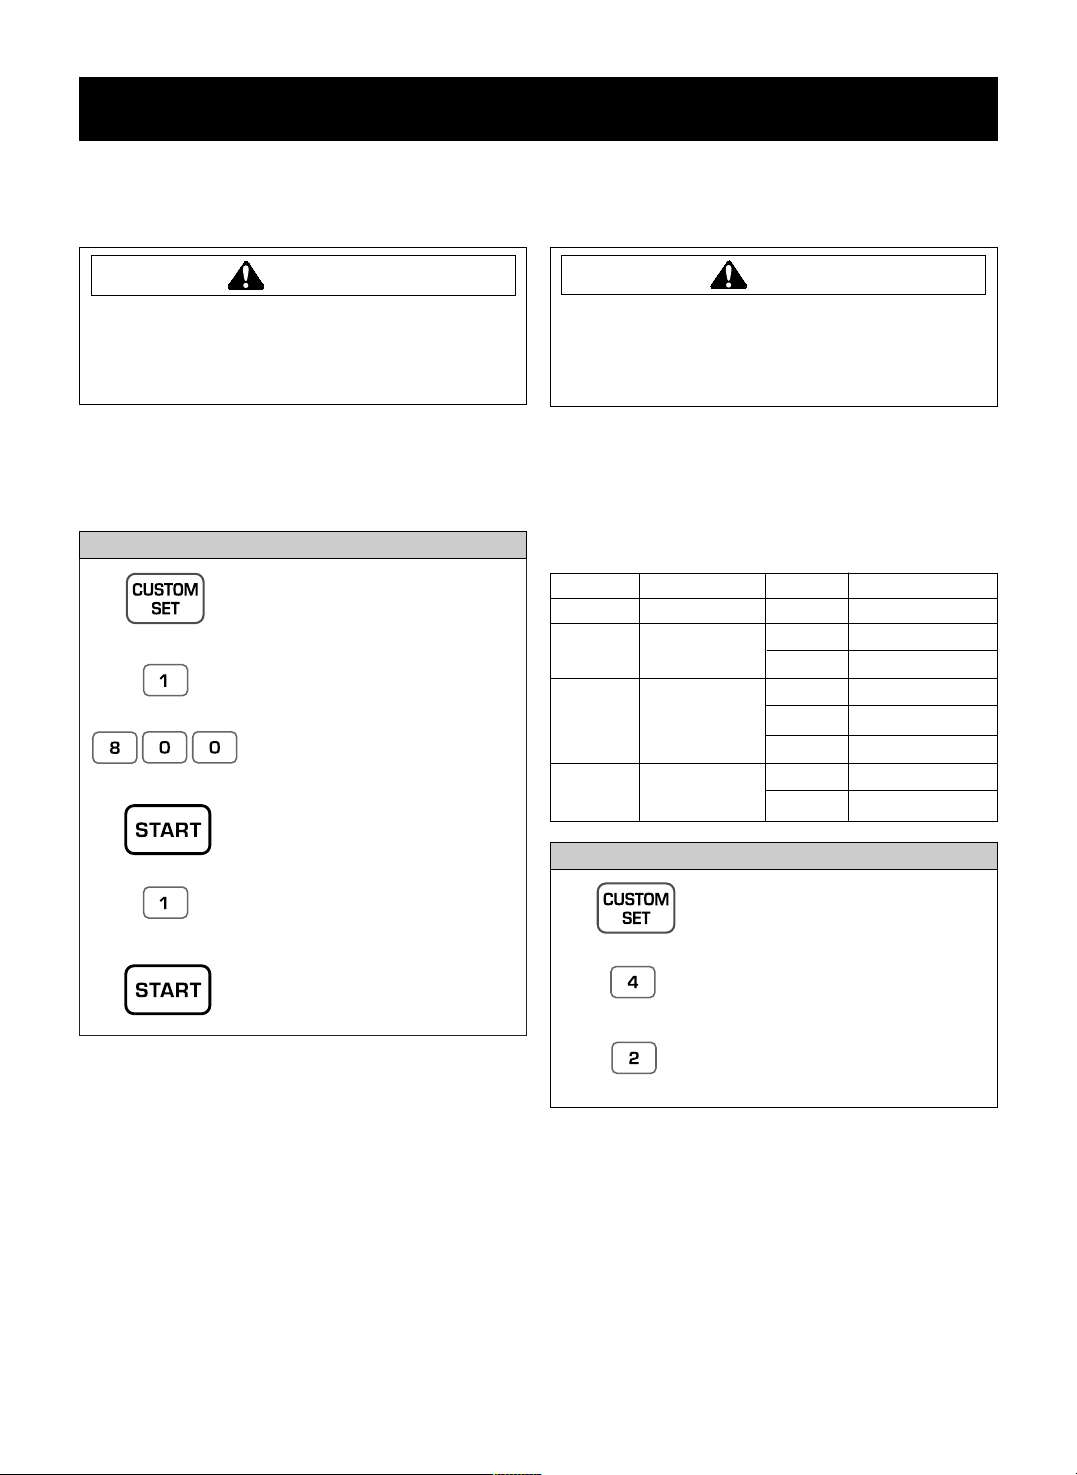
1. Touch CUSTOM SET pad.
2. Touch 1 pad.
3. Enter the time by using the
number key pad.
4. Touch START pad.
5. Touch 1 pad.
(Press 1 for AM,
Press 2 for PM)
6.Touch START pad.
Example: To set 8:00 AM.
CUSTOM SET
You can change the default values for clock set, beep
sound, display speed and defrost weight.
See following chart for more information.
NUMBER FUNCTION NUMBER RESULT
1
2
1
2
3
1
2
Clock set
Beef ON/OFF
control
Display
Defrost weight
mode select
Sound ON
Sound OFF
Slow speed
Normal speed
Fast speed
Lbs.
Kg.
1
2
3
4
1. Touch CUSTOM SET pad.
2. Touch number 4 pad.
3. Touch number 2 pad.
Example: To change defrost weight mode.(from Lbs. to Kg.)
To avoid risk of personal injury
or property damage, do not use
stoneware, aluminum foil, metal utensils,
or metal trimmed utensils in the oven.
To avoid risk of personal injury
or property damage, do not run oven empty.
CAUTION
CAUTION
- 11 -
OPERATION
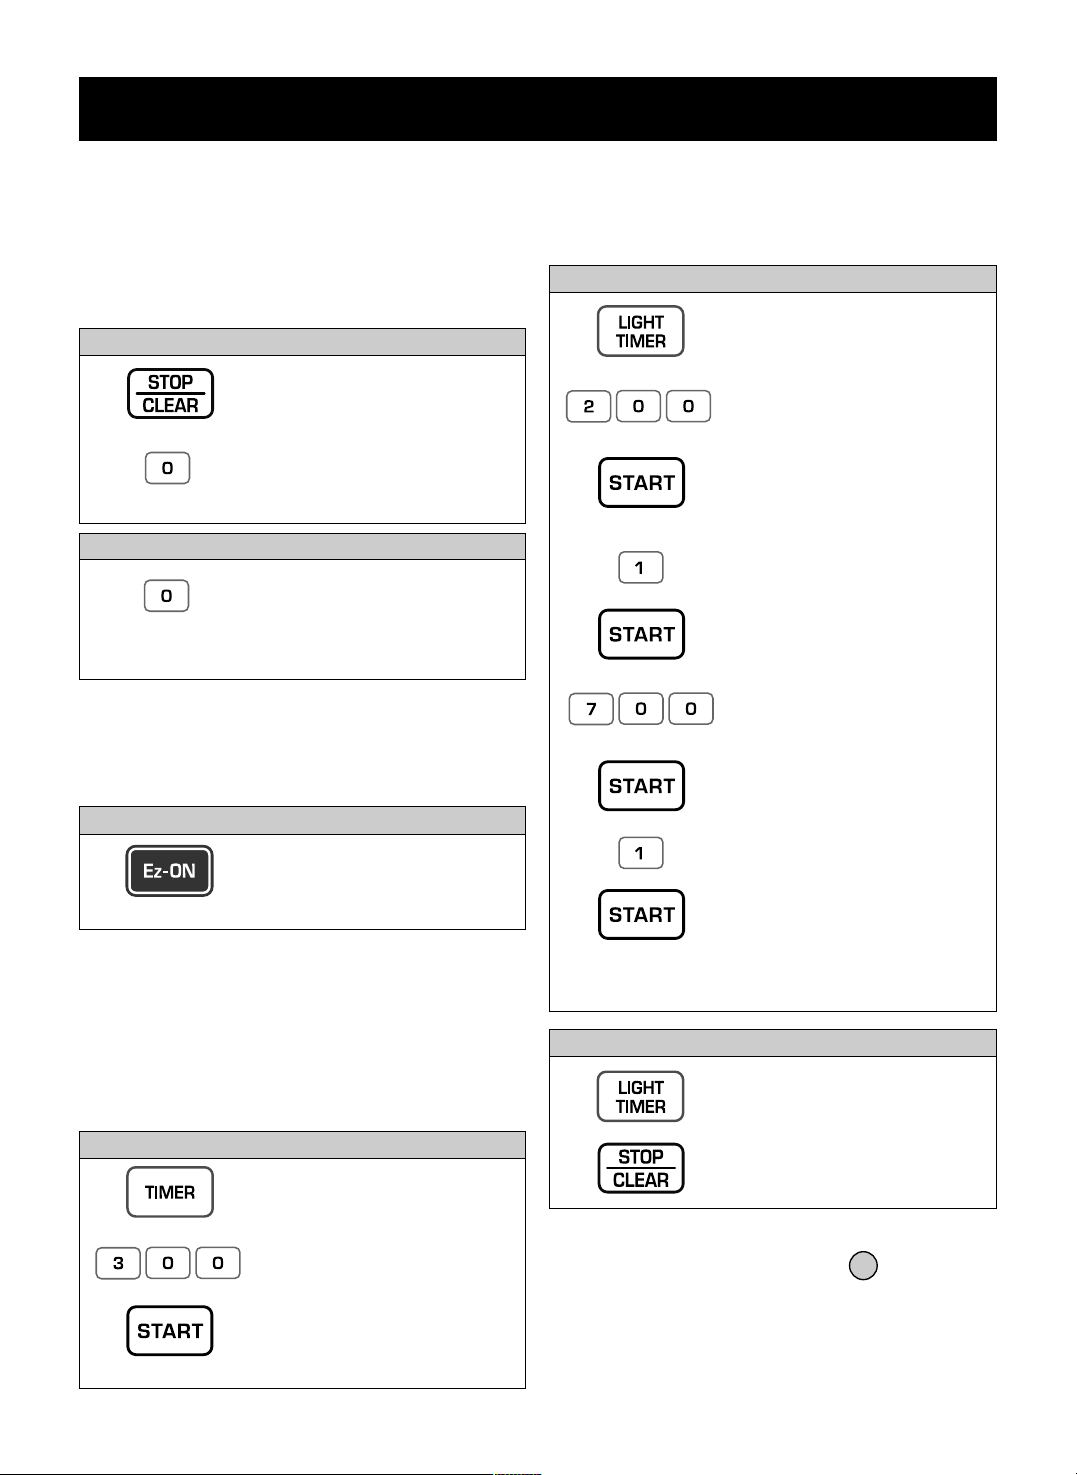
1. Touch TIMER pad.
2. Enter the time by using the
number key pad.
3. Touch START pad.
When the time is over, you will
hear seven beeps and END
will display.
Example: To time 3 minutes.
TIMER
You can use your microwave oven as a timer. Use the
Timer for timing up to 99 minutes, 99 seconds.
LIGHT TIMER
You can set the
LIGHT
to turn on and off automatically
at any time you want. The light comes on at the same
time every day until reset.
1. Touch LIGHT TIMER pad.
2. Enter the time you want the
LIGHT to turn on.
3. Touch START pad.
4. Touch 1 pad.
(Press 1 for AM.,
press 2 for PM.)
5. Touch START pad.
6. Enter the time you want the
LIGHT to turn off.
7. Touch START pad.
8. Touch 1 pad.
(Press 1 for AM.,
press 2 for PM.)
9. Touch START pad.
Example: Turn on 2:00 AM, turn off 7:00 AM.
1. Touch LIGHT TIMER pad.
2. Touch STOP/CLEAR pad.
NOTE: To reset that time to turn on and off the
LIGHT, repeat steps 1 to 9.
Example: To cancel the LIGHT TIMER.
NOTE: If you want to cancel the LIGHT TIMER in
operation, you should touch key.
LIGHT
HI-LOW-OFF
CHILD LOCK
You may lock the control panel to prevent the
microwave from being accidentally started or used by
children.
The Child Lock feature is also useful when cleaning the
control panel. Child Lock prevents accidental
programming when wiping the control panel.
1. Touch STOP/CLEAR pad.
2. Touch and hold 0 pad more
than 4 seconds. LOCKED will
appear in the display window
with two beeps.
Example: To set the child lock.
1. Touch and hold 0 pad more
than 4 seconds. LOCKED will
disappear and you hear two
beeps. At this time the oven
is ready.
Example: To cancel the child lock.
Ez-ON
A time-saving pad, this simplified control lets you
quickly set and start microwave cooking without the
need to touch START pad.
NOTE:
If you touch Ez-ON, it will add 30 seconds up to 3
minutes; after 3 minutes, every touch will add 1 minute
up to 99 min 59 seconds.
1. Touch Ez-ON pad 4 times.
The oven begins cooking and
display shows time counting
down.
Example: To set Ez-On for 2 minutes.
- 12 -
OPERATION
VENT 5 LEVELS
NOTE: If the temperature from the range or cooktop below
the oven gets too hot, the exhaust fan in the vent hood will
automatically turn on at the LEVEL 4 setting to protect the
oven.
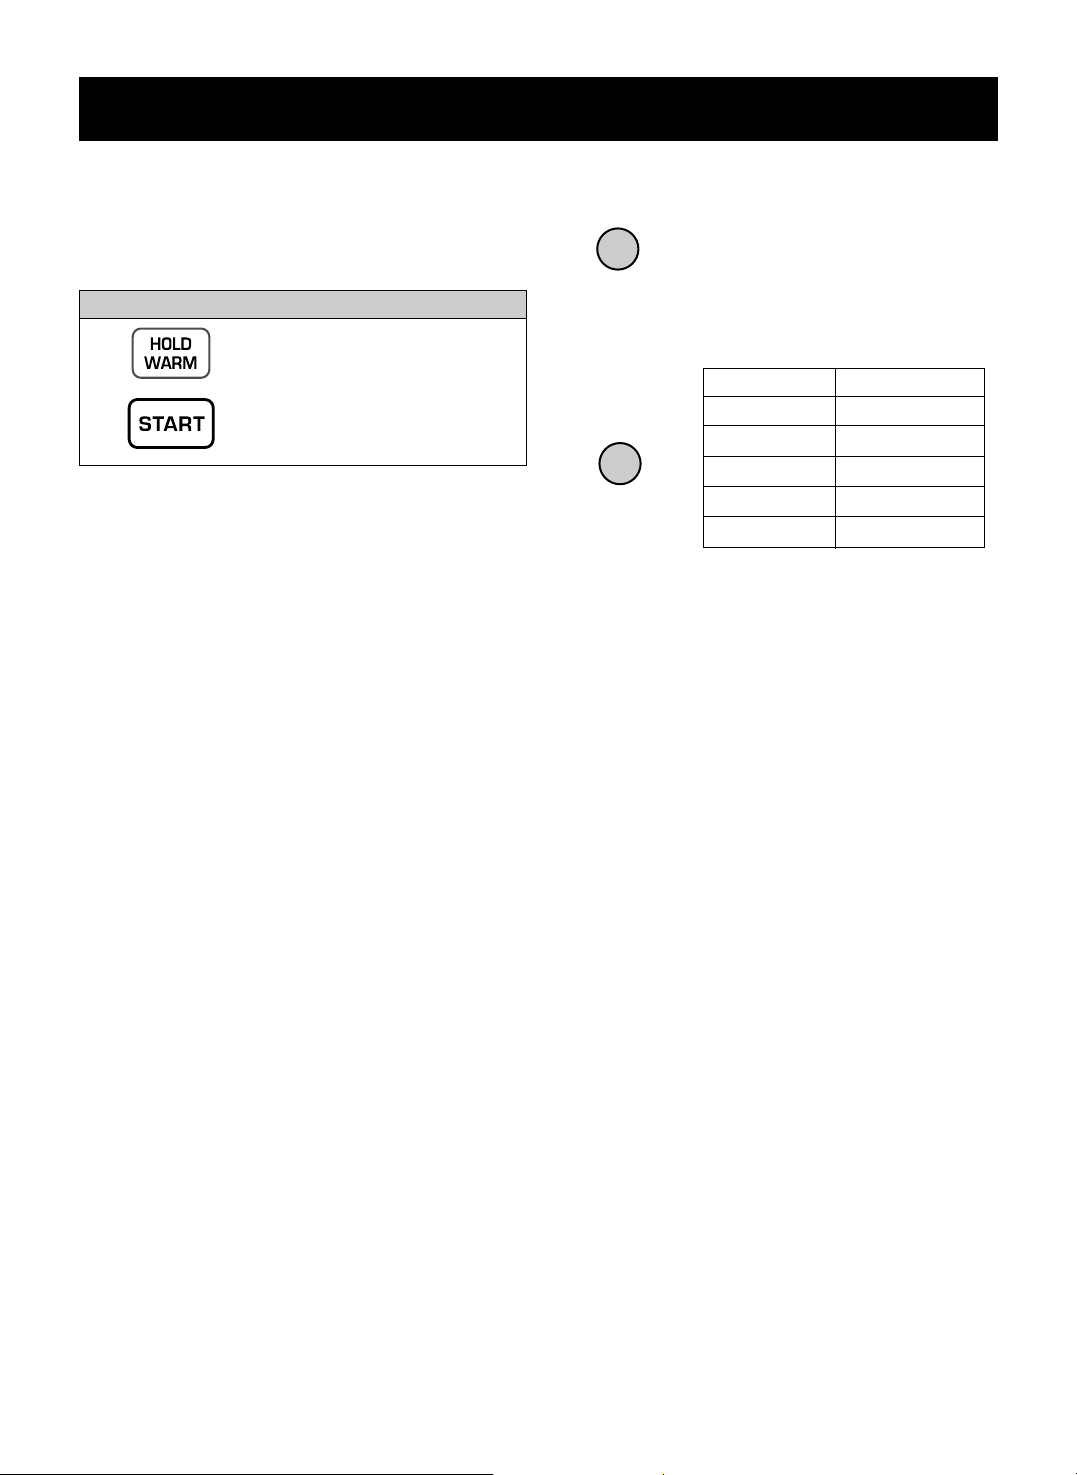
LIGHT HI-LOW-OFF
Touch LIGHT button once for bright
light, twice for night light, or three
times to turn the light off.
LIGHT
HI-LOW-OFF
VENT
5 LEVELS
HOLD WARM
You can keep cooked food warm in your microwave
oven for up to 99 minutes 99 seconds. You can use
HOLD WARM by itself or to follow a cooking cycle
automatically.
1. Touch HOLD WARM pad.
2. Touch START pad.
Example: To use the hold warm.
NOTES:
• HOLD WARM operates for up to 99 minutes 99
seconds.
• Food cooked covered should be covered during
HOLD WARM.
• Pastry items (pies, turnovers, etc.) should be
uncovered during HOLD WARM.
• Complete meals kept warm on a dinner plate could
be covered during HOLD WARM.
To make HOLD WARM automatically follow another
cycle:
• While you are programming the cooking instructions,
touch HOLD WARM before touching START.
• When the last cooking cycle is over, you will hear two
tones and “HOLD WARM” will appear in the oven
display.
• You can set HOLD WARM to follow AUTO
DEFROST, or multi-cycle cooking.
MODE Touch button
HIGH 1 time
MED-HIGH 2 times
MED-LOW 3 times
LOW 4 times
Off 5 times
MORE/LESS
By using the MORE or LESS keys, all of the
preprogrammed cook and time cook features can be
adjusted to cook food for a longer or shorter time.
Pressing MORE will add 10 seconds of cooking time
each time you press it. Pressing LESS will subtract 10
seconds of cooking time each time you press it.
- 13 -
OPERATION
AUTO COOK
Auto Cook lets you heat common microwave-prepared
foods without selecting cooking times and power levels.
Auto Cook has preset cook powers for 3 food functions:
Chicken choices, Homemade bakery, Large dish menus.
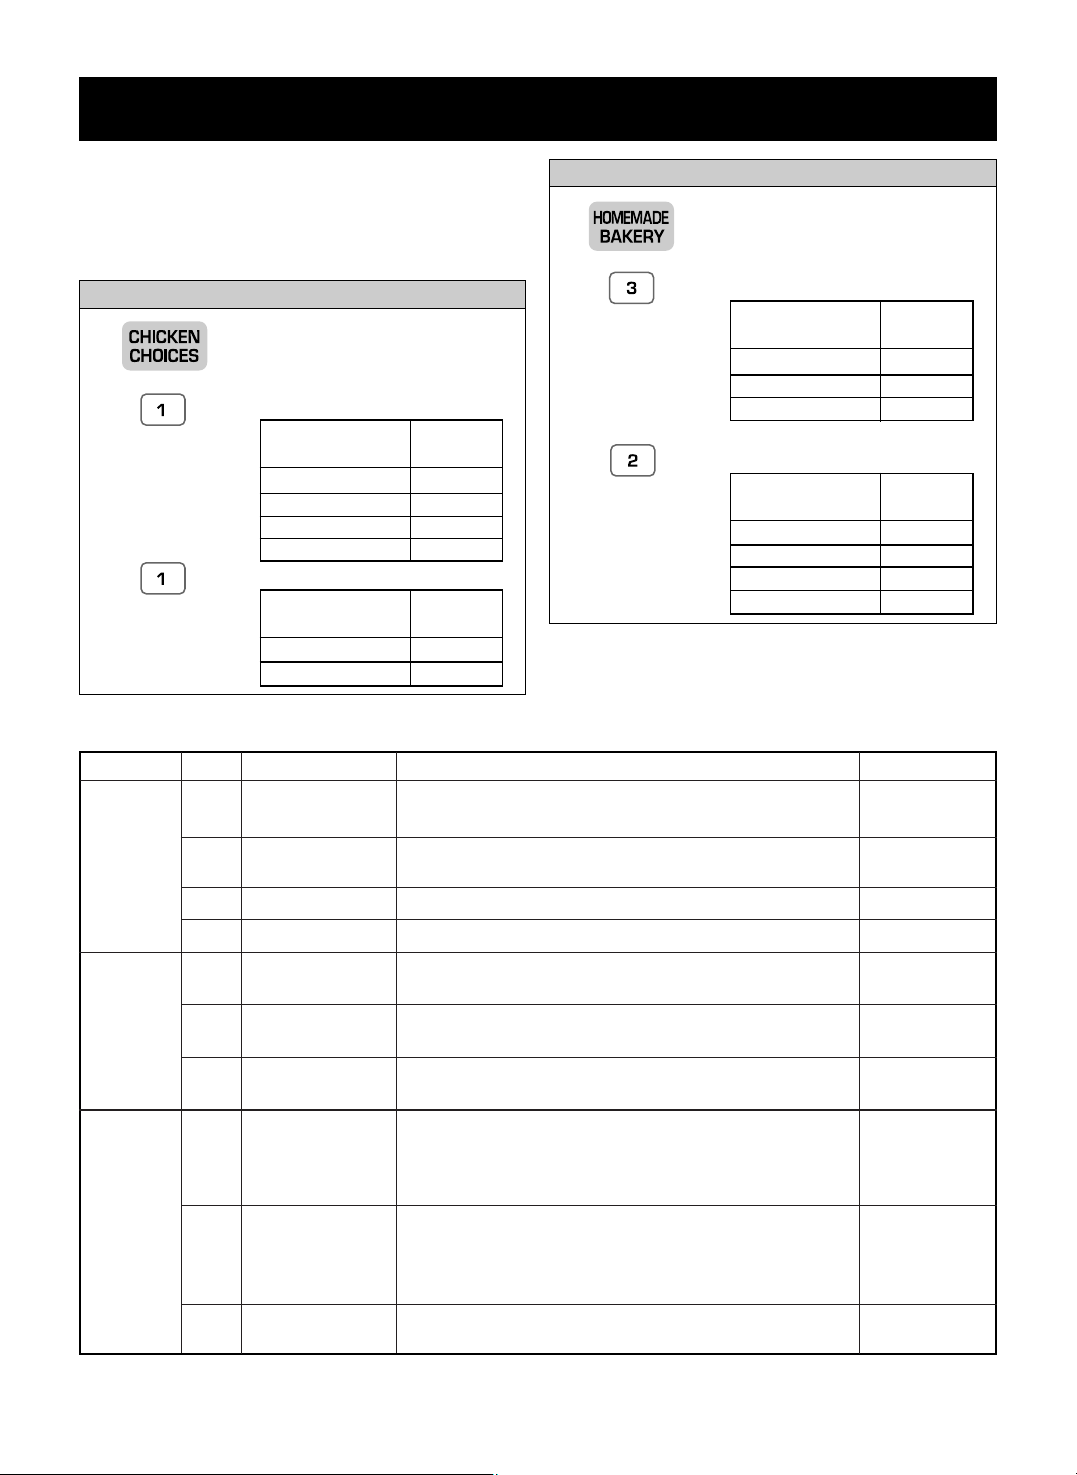
1. Touch CHICKEN CHOICES
pad.
2. Choose food category.
3. Touch 1 pad.
Example: To cook 6 oz. Chicken wing.
Category
Chicken wings
Chicken nuggets
Spicy chicken
Mexican chicken
Touch pad
number
1
2
3
4
Amount
6 oz.
12 oz.
Touch pad
number
1
2
1. Touch HOMEMADE
BAKERY pad.
2. Choose food category.
3. Touch 2 pad.
Example: To cook 2 slices of French toast.
Category
Roll/Muffin
Pancake
French toast
Touch pad
number
1
2
3
Amount
1 slice
2 slices
3 slices
4 slices
Touch pad
number
1
2
3
4
AUTO COOK TABLE
FUNCTION CODE CATEGORY INSTRUCTIONS AMOUNT
Chicken
choices
Homemade
bakery
Large
dish
menus
Place in a single layer around the edge of a dinner plate or
serving platter.
Place in a single layer around the edge of a dinner plate.
See recipe guide. (page 24)
See recipe guide. (page 24)
Place on oven tray or a plate.
Place in stacks of three pancakes on an appropriate sized plate.
Note: Heat toppings for 20~30 seconds before adding to toast.
Before serving, add butter, syrup, fruit jam,or whatever suits
your taste.
Prepare as directed and cover with plastic wrap. Before serving
test noodles in center of dish to determine if cooked properly.
Place under broiler for a few minutes if additional browning is
desired.See recipe guide. (page 24)
Prepare as directed and always cover with the dish cover or
plastic wrap. Check center pieces for internal temperature of
170
°F, 76°C. Place under broiler if additional browning or
crisping is desired.See recipe guide. (page 25)
See recipe guide. (page 25)
6 or 12 oz.
4 or 8 oz.
2 or 4 servings
2 or 4 servings
1, 2, 3 or 4 pieces
(Fresh)
3 or 6 cakes
(Frozen)
1, 2, 3 or 4 slices
4 ~ 6 servings
3 or 4 lbs.
6 ~ 8 servings
1
2
3
4
1
2
3
1
2
3
Chicken wings
Frozen, Precooked
Chicken nuggets
Frozen, Precooked
Spicy chicken
Mexican chicken
Roll / Muffin
Pancake
French toast
Lasagna
Whole chicken
Casserole
- 14 -
OPERATION
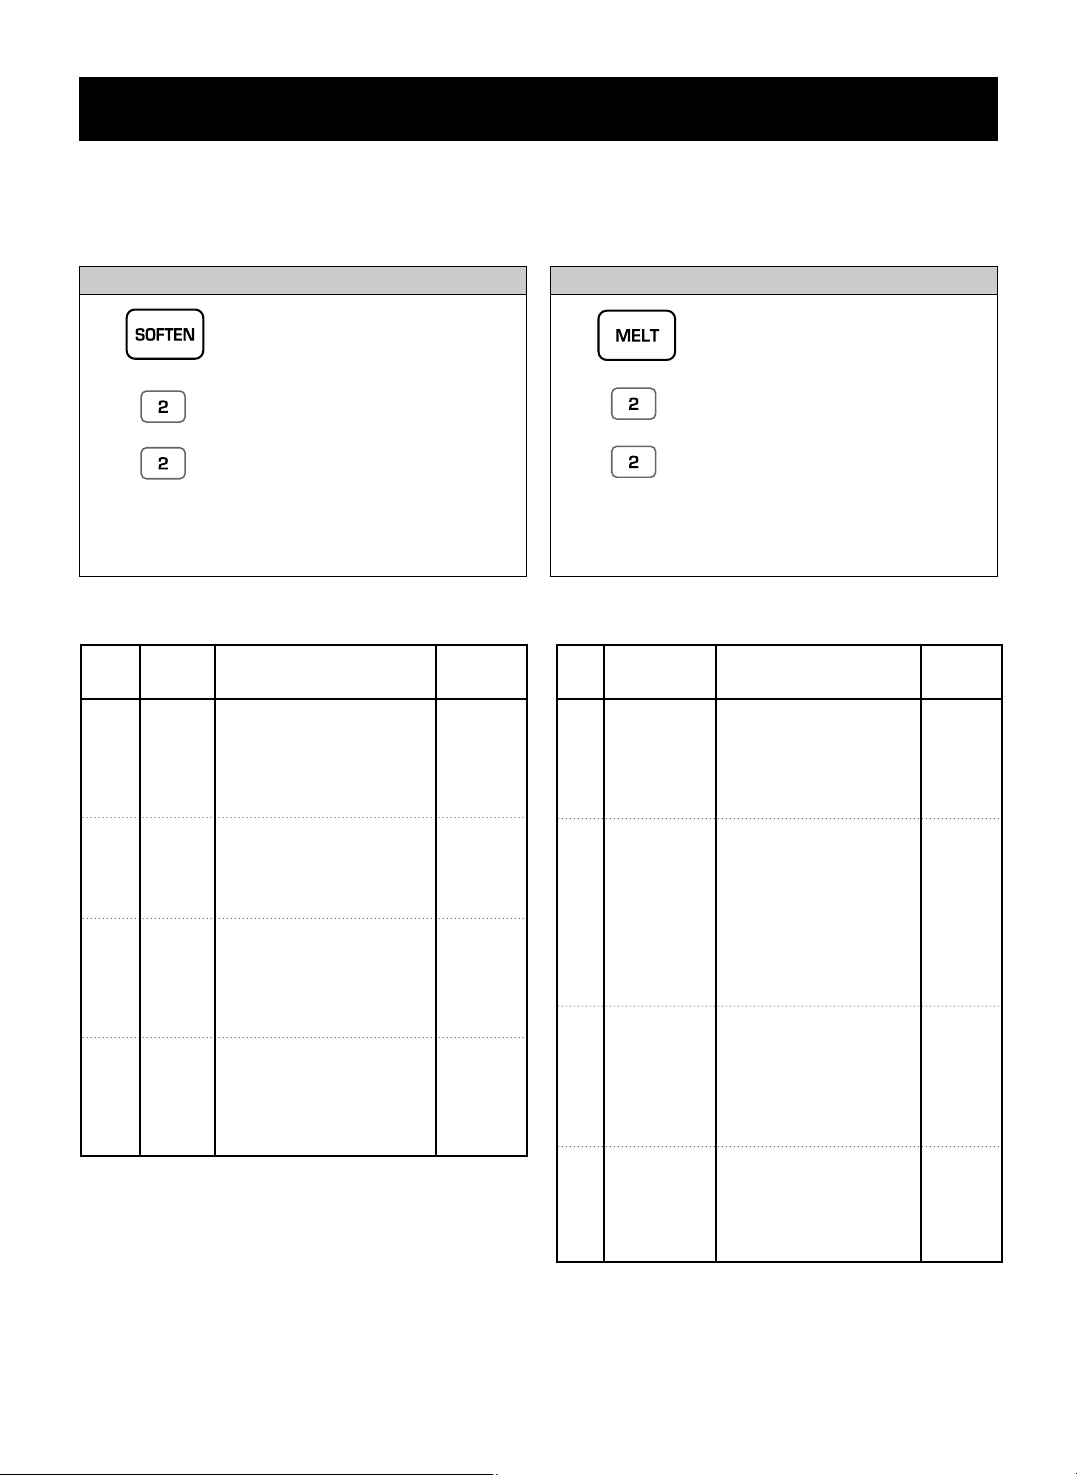
SOFTEN
The oven uses low power to soften foods (butter, ice
cream, cream cheese, and frozen juice)
See the following table.
1. Touch SOFTEN pad.
2. Choose the category.
Touch 2 pad for ice cream.
3. Touch 2 pad.
When the cook time is over,
you will hear four beeps and
COOK END will be displayed.
Example for quart of ice cream.
MELT
The oven uses low power to melt foods (butter or
margarine, chocolate, processed cheese food, or
marshmallows). See the following table.
1. Touch MELT pad.
2. Choose the category.
Touch 2 pad for chocolate.
3. Touch 2 pad.
When the cook time is over,
you will hear four beeps and
COOK END will be displayed.
Example for 8 oz. Chocolate.
SOFTEN TABLE
AMOUNT
1, 2 or 3
sticks
Pint,
Quart,
Half
gallon
DIRECTION
Unwrap and place in
microwabable container.
Butter will be at room
temperature and ready
for use in recipe.
Place container in oven.
Ice cream will be soft
enough to make
scooping easier.
Unwrap and place in
microwavable Container.
Cream cheese will be at
room temperature and
ready for use in recipe.
Remove top.
Place in oven.
Frozen juice will be soft
enough to easily mix with
water.
CATEGORY
Butter
Ice
cream
Cream
cheese
Frozen
juice
CODE
1
2
3
4
3 or 8 oz.
6, 12 or
16 oz.
MELT TABLE
AMOUNT
1, 2 or 3
sticks
4 or 8 oz.
8 or 16
oz.
5 or 10
oz.
DIRECTION
Unwrap and place in
microwavable container.
No need to cover butter.
Stir at the end of cooking
to complete melting.
Chocolate chips or
squares of baking
chocolate may be used.
Unwrap squares and
place in microwavable
container. Stir at the end
of cycle to complete
melting.
Use processed cheese
food only. Cut into cubes.
Place in a single layer in
microwavable container.
Stir at the end of cooking
to complete melting.
Large or miniature
marshmallows may be used.
Place in microwavable
container. Stir at the end of
cycle to complete melting.
CATEGORY
Butter or
Margarine
CODE
1
2
Chocolate
Cheese
Marshmallows
3
4
- 15 -
OPERATION
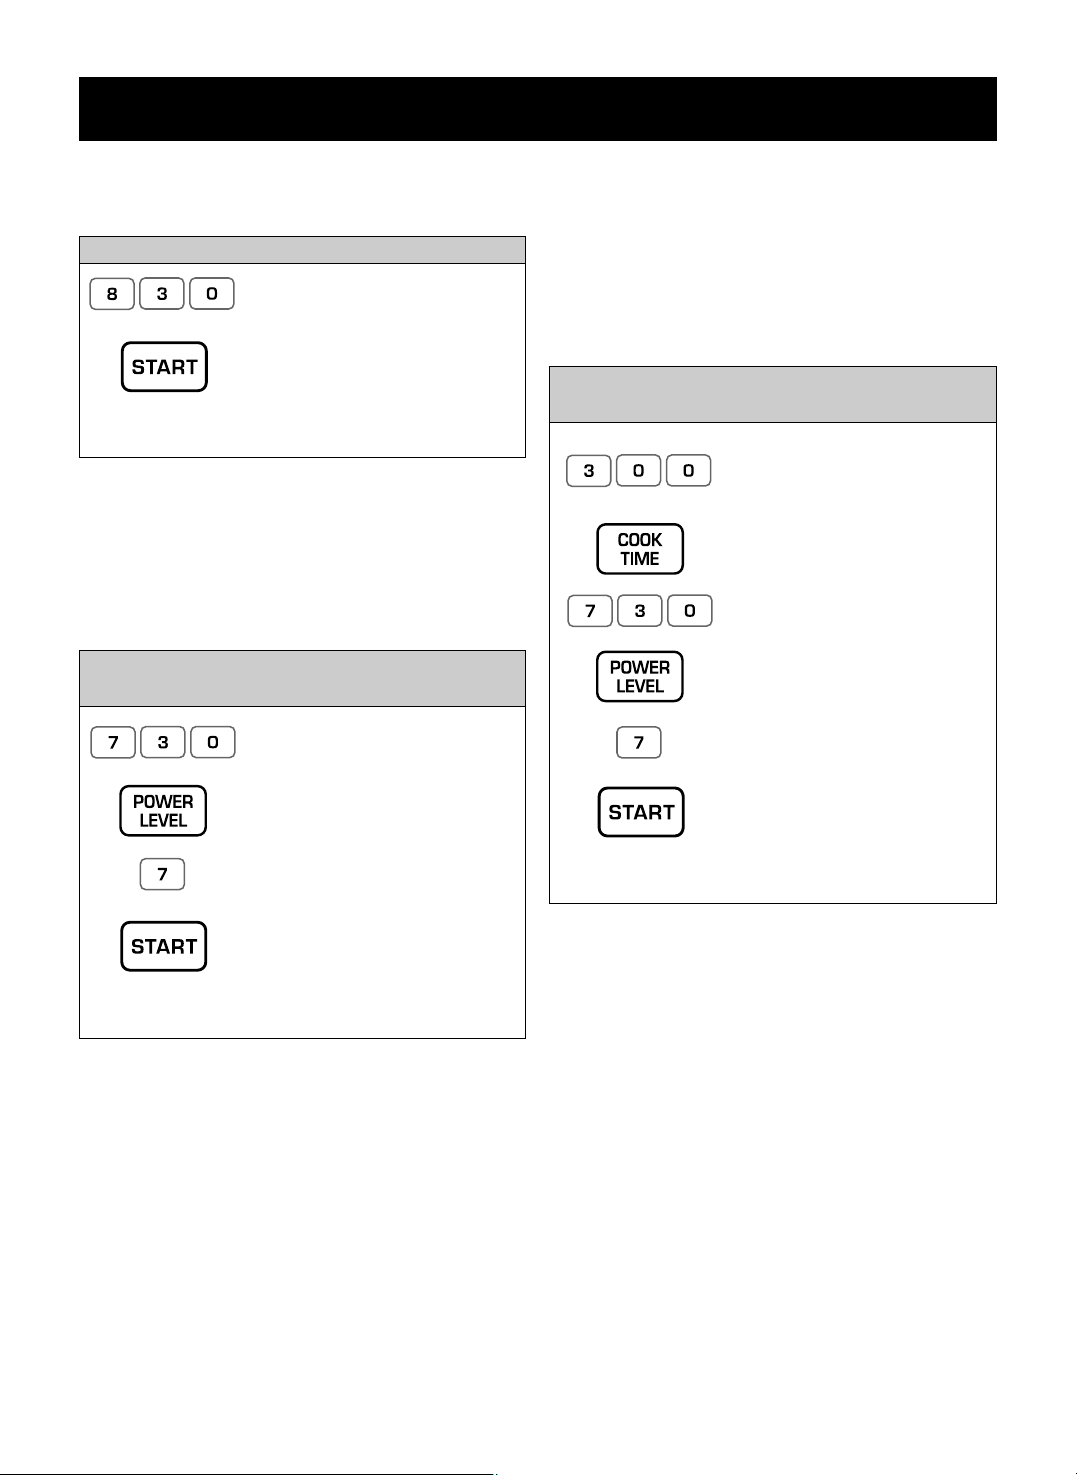
COOKING AT HIGH COOK
POWER
1. Enter the cook time.
2. Touch START pad.
When the cook time is over,
you will hear four beeps and
COOK END will display.
Example: To cook food for 8 minutes 30 seconds.
COOKING WITH MORE THAN
ONE COOK CYCLE
For best results, some recipes call for one Power Level
for a certain length of time, and another Power Level
for another length of time. Your oven can be set to
change from one to another automatically, for up to
three cycles if the first heating cycle is defrost or the
last at 0% power.
1. Enter the cook time.
2. Touch POWER LEVEL pad.
3. Enter the power level.
4. Touch START pad.
When the cook time is over,
you will hear four beeps and
COOK END will display.
Example: To cook food for 7 minutes 30 seconds
at 70% power.
COOKING AT LOWER POWER
LEVELS
HIGH power cooking does not always give you the best
results with foods that need slower cooking, such as
roasts, baked goods, or custards. Your oven has10
power settings in addition to HIGH.
1. Enter the first cook time.
2. Touch COOK TIME pad.
3. Enter the second cook time.
4. Touch POWER LEVEL pad.
5. Enter the power level.
6. Touch START pad.
When the cook time is over,
you will hear four beeps
and COOK END will display.
Example:
To cook food for 3 minutes at 100% power and
then 70% power for 7 minutes 30 seconds.
 Loading...