

LG LGVX6000, VX6000 Quick Reference Manual

BIENVENIDO A VERIZON WIRELESS
guía de
referencia
rápida
WELCOME TO VERIZON WIRELESS
quick
reference
guide
Vea el reverso para la versión en español.
VX6000
P/N : MMBB0097501(1.3)(G)


WELCOME AND THANK YOU FOR CHOOSING VERIZON WIRELESS
You’re now connected to the nation’s largest, most reliable wireless network, covering
more cities, towns and places than anyone else. This guide will help you understand your
phone and all the things you can do with it.
For more details, please refer to the User Guide. If you ever have any questions and
would like to access an online Q&A, please visit us online at verizonwireless.com and
check out How to Use Your Phone.
Don’t forget to give the enclosed CD a whirl to see all the great things your new device
and service can do. You’ll also get a glimpse of all that Verizon Wireless has to offer.
WITH VERIZON WIRELESS, YOU’LL ENJOY THE BENEFITS
OF OUR WORRY-FREE GUARANTEE
SM
1.) You’ll enjoy the largest, most reliable nationwide network.
2.) You have the option to change to any qualifying price plan or airtime promotion at
any time. Note: You won’t pay any additional fees to change plans. Some price plans
require specific equipment. You become eligible to take advantage of equipment upgrades
WELCOME
1
1
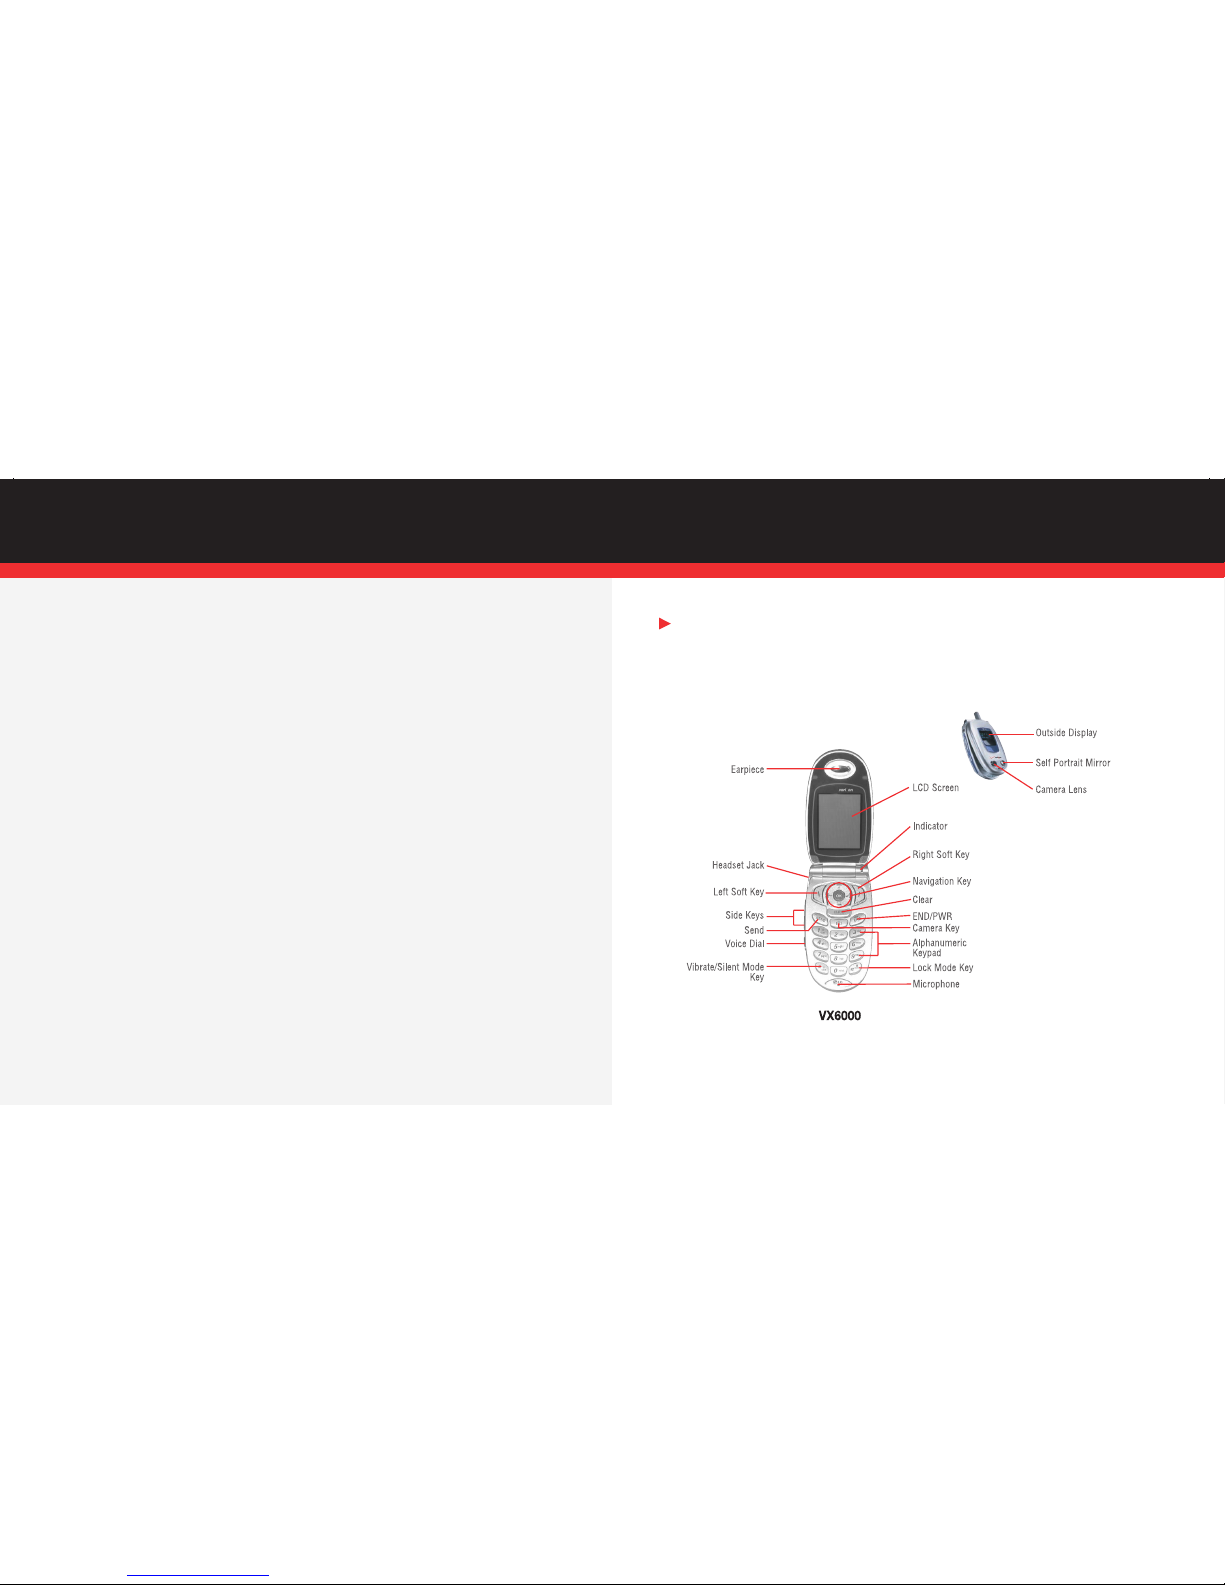
GETTING STARTED
The following shows key components of your wireless phone.
at promotional pricing during the last two months of your contract period. If you’re not
upgrading equipment within the final two months of your contract, you may have to pay
full retail price. Promotional offers will require an extension of your customer agreement.
3.) If you ever have a problem, it becomes our problem the first time you call. No
runarounds, no hassles. If your issue can’t be resolved during the course of your first call,
we’ll take the responsibility of getting back to you with an answer.
4.) You can get a free phone every two years with New Every Two®. Sign up for and
maintain two years of service on a digital plan of $34.99 or higher to qualify for a free
phone (up to a $100 value), or receive $100 toward the purchase of a more expensive
phone with a two-year renewal.
5.) Your satisfaction is guaranteed on any equipment you purchase from us. We provide
a 15-day satisfaction guarantee on any product you buy from Verizon Wireless. You pay
only for the service you use.
Note: Certain conditions and restrictions apply. See store for details. Annual Customer Agreement
required. Network claim based on industry reports of carrier-operated covered population, and over 36
million customers. See the Worry-Free Guarantee brochure and our Return/Exchange Policy for details.
WIRELESS BASICS
2 3
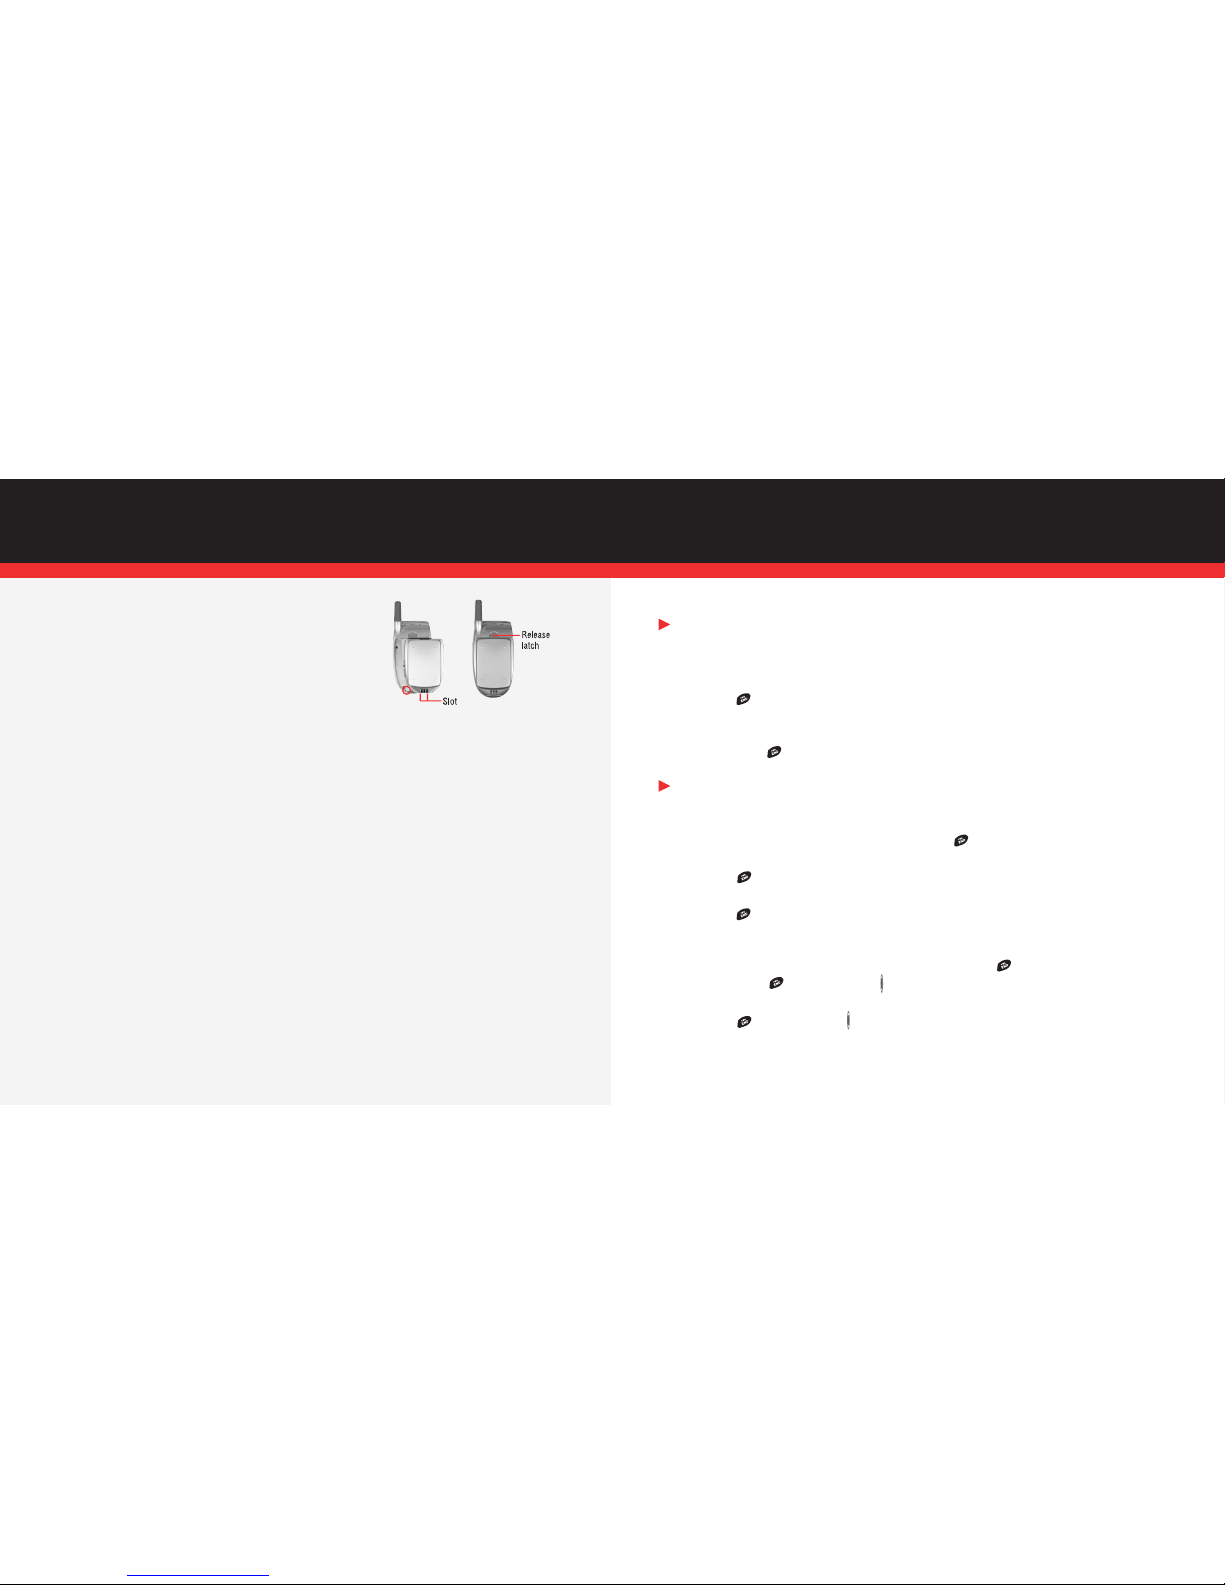
■ Installing the Battery
To install the battery, insert the bottom of
the battery into the opening on the back of the phone.
Then push the battery down until the latch clicks.
■ Removing the Battery
Turn the power off; push up the release latch to detach the battery.
■ Charging the Battery
The desktop charger has a slot for recharging batteries that accommodates the phone
and battery for charging.
1.) Plug the charger into a wall outlet. The phone must be charged from a 120 V
power source.
2.) Insert the phone with an installed battery or the battery by itself into the slot of the
charger. The red light indicates the battery is charging and the green light indicates
the battery is fully charged.
The charge time varies depending upon the battery level, and the maximum charge
time for a fully discharged battery is 3 hours.
POWERING THE PHONE ON AND OFF
■ Powering the Phone On
1.) Install a charged battery or connect the phone to an external power source such as
a cigarette lighter adapter or car kit.
2.) Press for a few seconds until the red light flashes.
■ Powering the Phone Off
Press and hold until the display turns off.
PLACING AND RECEIVING CALLS
■ Placing a Call
When you make a call, follow these simple steps:
1.) Make sure the phone is turned on. If not, press .
2.) Enter the phone number, with area code (if needed).
3.) Press . If the phone is locked, enter the lock code (the default code is
the last 4 digits of your mobile telephone number).
4.) Press to end the call.
■ Receiving Calls
1.) When the phone rings or vibrates, press any key except to answer.
If you press or the Side Keys while the phone is ringing, the ringing
or vibration is muted for that call and the call will go to voicemail.
2.) Press or the Side Keys twice to end the call.
4 5
■ Setting Up Your Language Preferences
You can have on-screen option menus in either Spanish or English. Just follow
these simple instructions to make your choice.
1.) Press Left Soft Key Menu.
2.) Press Settings.
3.) Press and then press .
4.) Set English/Spanish with then press .
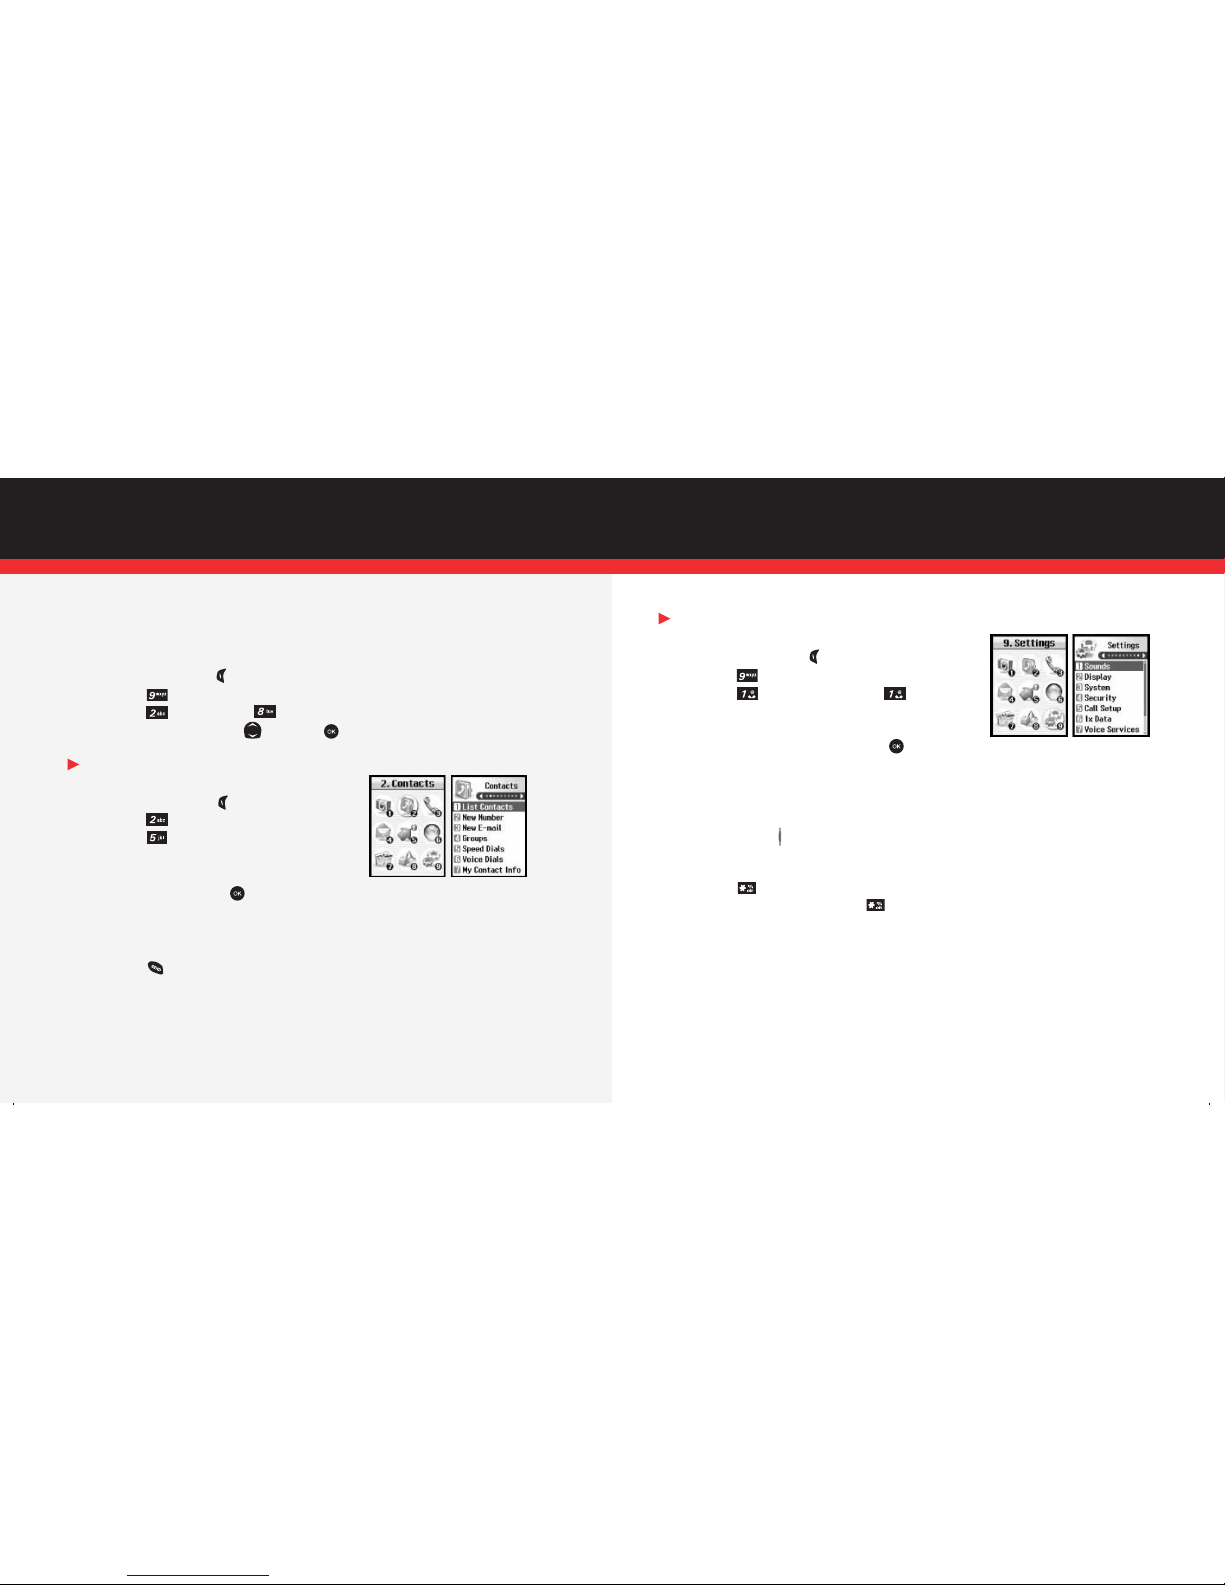
PROGRAMMING SPEED DIAL NUMBERS
■ To Set Up Speed Dialing Numbers
1.) Press Left Soft Key Menu.
2.) Press Contacts.
3.) Press Speed Dials.
4.) Select the speed dial number from 2 to 99.
Select the phone number from your
contact list and press .
■ To Use Speed Dialing
1.) Enter a speed dial number from 2 to 99.
2.) Press .
CHANGING YOUR RINGERS AND TONES
■ Selecting a Ringer
1.) Press Left Soft Key Menu.
2.) Press Settings.
3.) Press Sounds and then press Ringers.
4.) Select either Caller ID/No Caller ID/Restrict to
change the ringer.
5.) Select the desired ringer and press .
■ Your phone comes with a selection of ring tones.
■ You can also purchase many more ring tones through our Get It Now
®
service.
■ Adjusting Ringer Volume
Press Side Keys up and down.
■ Setting Ringer To Vibrate
1.) Press for 3 seconds.
2.) To reset, press and hold down twice.
6 7
SETTING UP AND USING VOICEMAIL
■ New Customer
1.) Press and hold or dial
and press .
The phone calls voicemail.
2.) At the recording, press the .
3.) Follow the voice prompts to set up your account.
■ Existing Customer
Press and press .
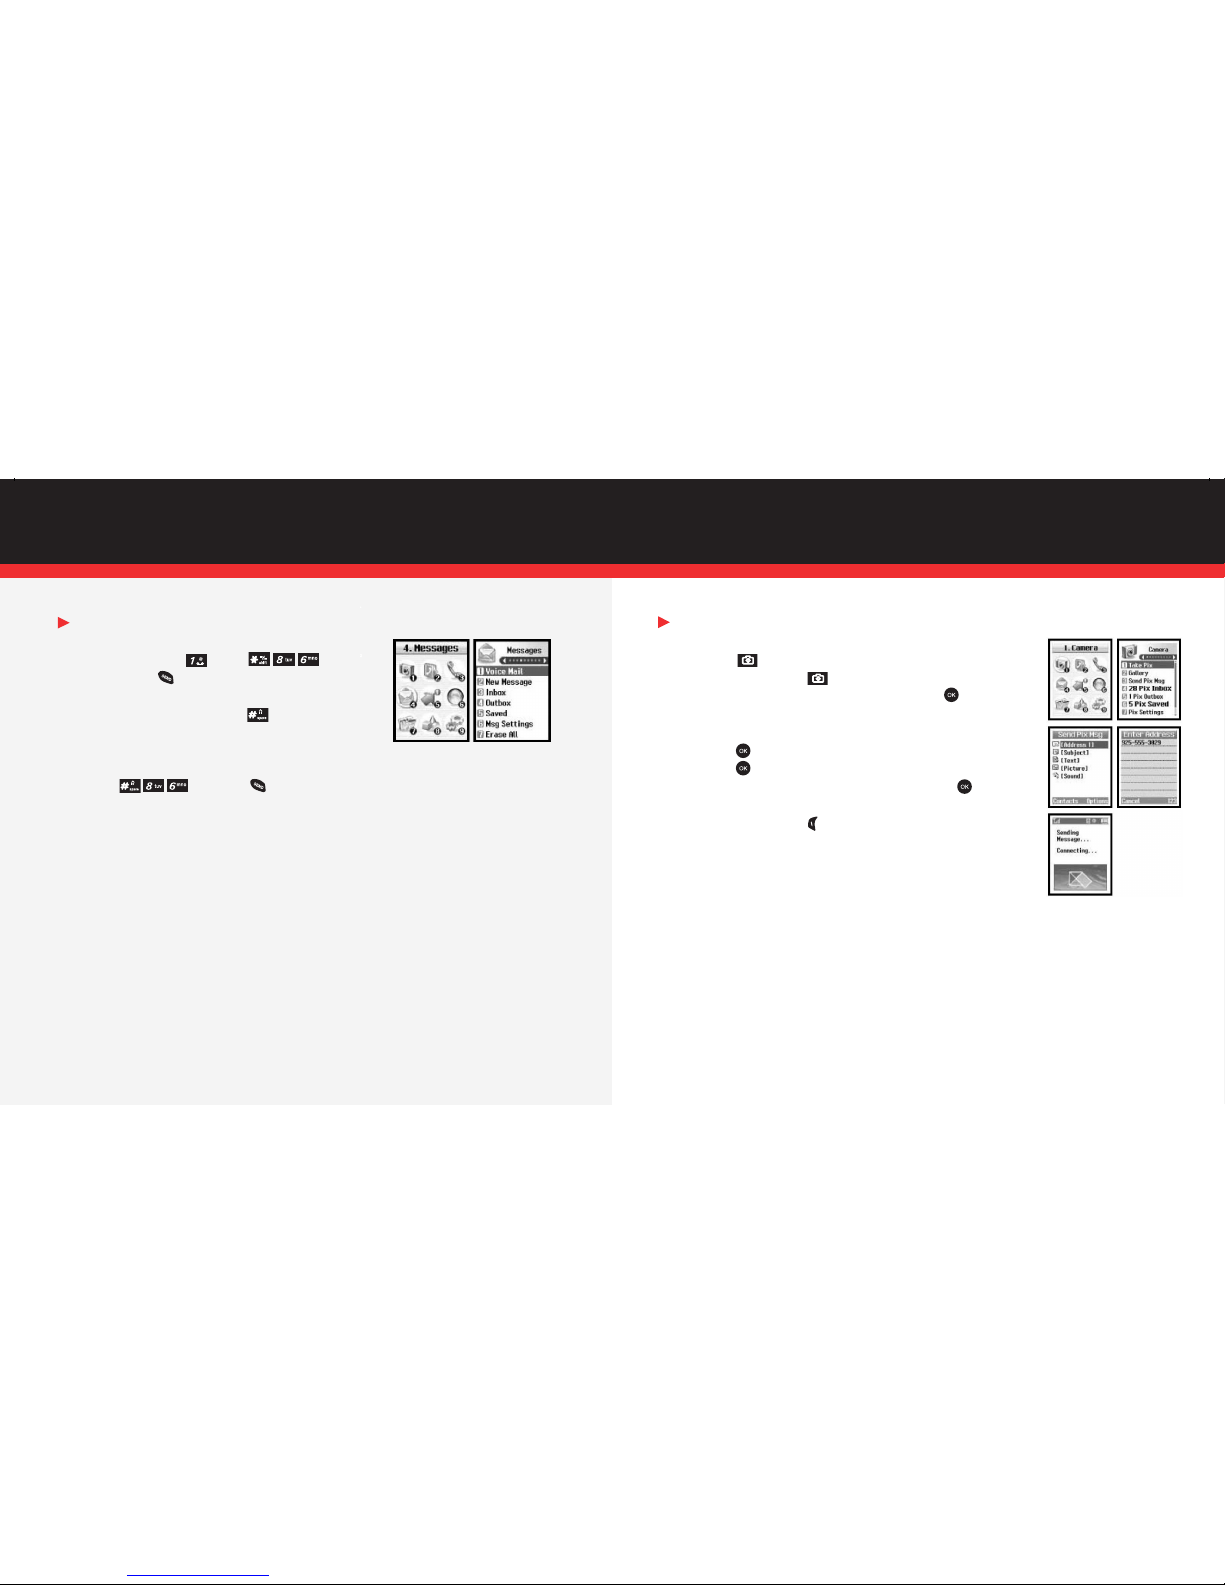
SNAP IT. SHARE IT
■ Snapping and Sending a Picture*
1.) Press Key and press Take Pix.
You can also press Key for 2 seconds.
2.) Using phone screen as your viewfinder, press to snap
picture. (You’ll hear a “shutter” sound and photo will display
on screen).
3.) Press again to prepare to send. Picture is saved to Gallery.
4.) Press to select address and enter a Verizon Wireless
phone number or any e-mail address, and press . Up
to 10 recipients can be added to each picture message.
5.) Press Left Soft Key Send.
*Picture messages can only be sent and received when you are in the Verizon Wireless
National Enhanced Services Area. Your phone’s screen will show a 1x when you are in
this area.
PICTURE MESSAGING
8 9
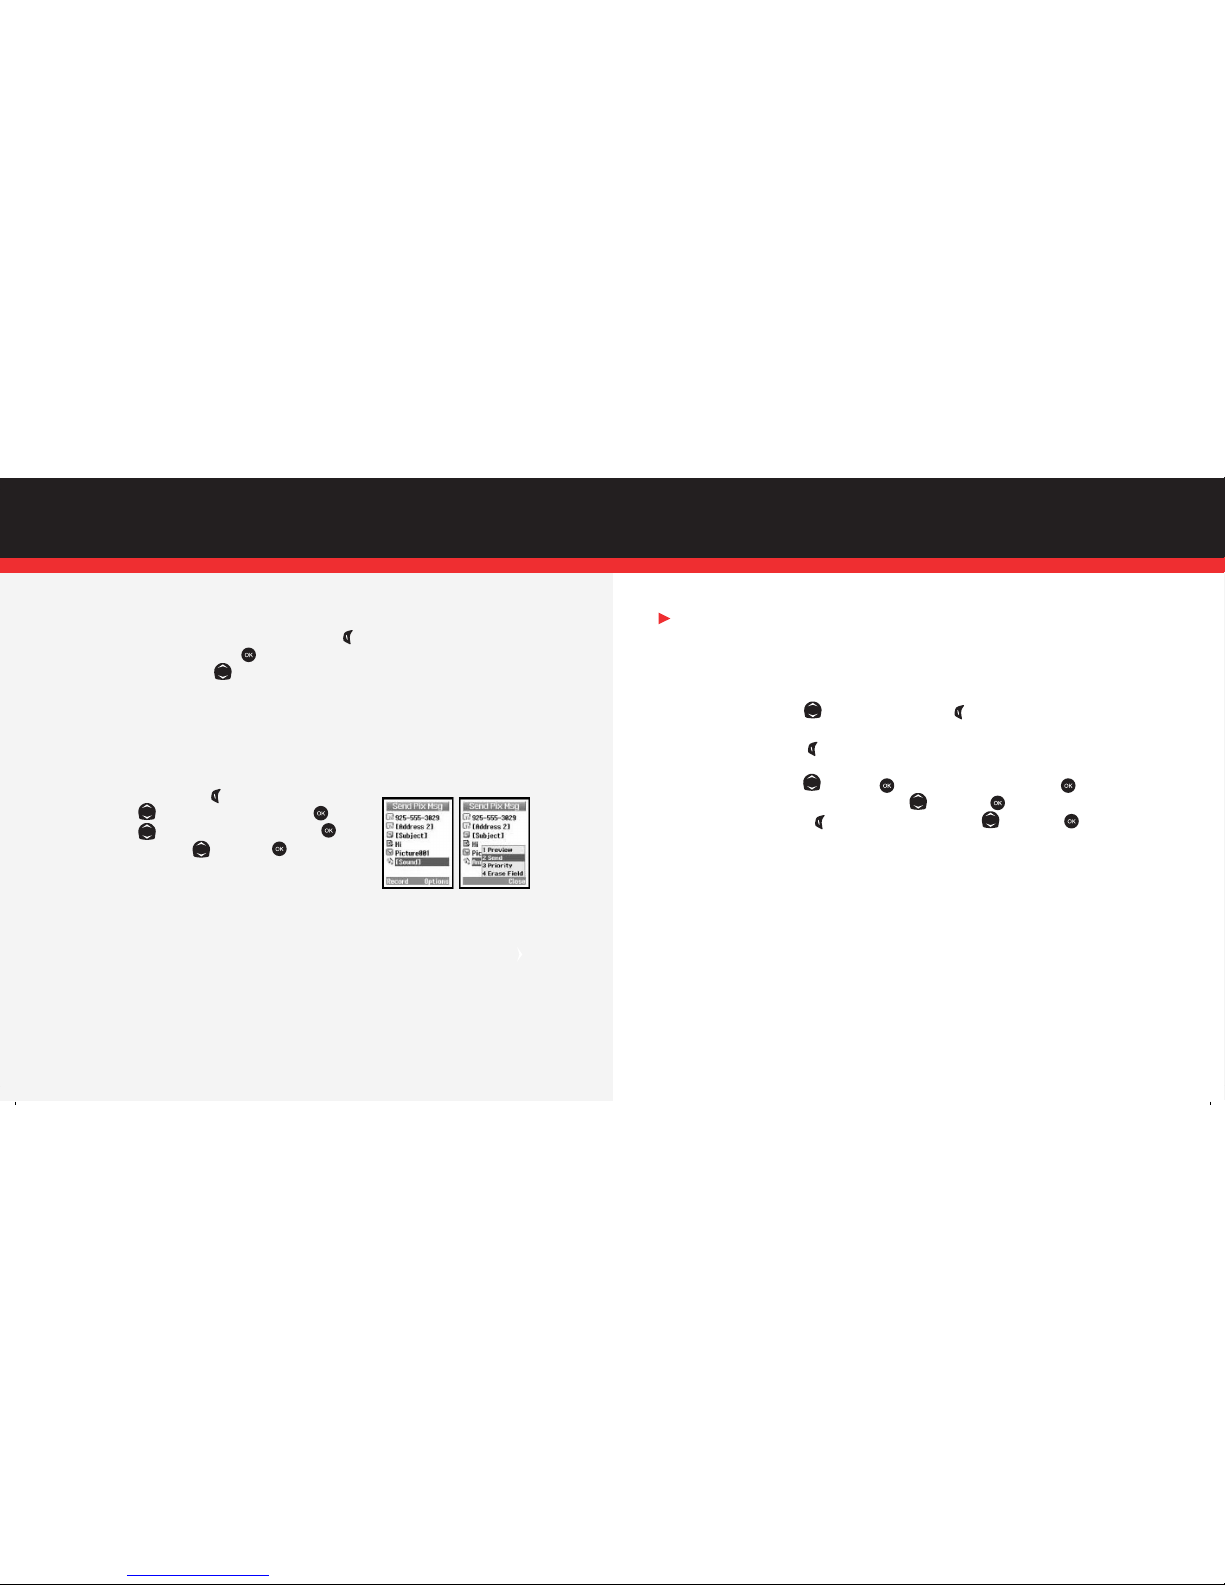
STYLE IT
■ Adding Sound To a Message
1.) Complete Snapping and Sending a Picture steps 1–4.
2.) Add a Voice Memo or pre-recorded Sound.
To add a Voice Memo:
Select Sound with then press Left Soft Key
Record to record your own message. When finished,
press Left Soft Key Done. Voice Memo is now saved.
To add a Pre-recorded Sound:
Select Sound with and press . Select Sound again and press .
Select the Sound you wish to add with then press .
3.) Press Right Soft Key Options and select Send with then press .
■ Replying To a Picture Message
1.) After viewing the picture, press Left Soft Key Reply.
2.) Select Pix Msg and press .
3.) Select Picture using , then press Left Soft Key Take Pix to activate the camera.
4.) Follow Snapping and Sending a Picture steps 2–5.
■ Receiving a New Picture Message
All new picture messages will automatically be delivered to your Pix Inbox and
displayed on your phone’s screen. If you would like to be prompted to accept or reject
new picture messages, follow the steps below.
1.) Press Left Soft Key Menu and Select Camera.
2.) Using select Pix Settings and press .
3.) Using select Auto Receive and press .
4.) Select Off using then press .
10 11
 Loading...