

LG LGRD3610 Owner’s Manual [in]
CONTENTS 1
PHONE COMPONENTS 2
ONSCREEN ICONS 4
INSTALLING THE SIM CARD AND
BATTERY 5
Installing the SIM card 5
Installing and Removing the Battery 5
Charging the Battery 6
Battery Charge Level 6
BASIC FUNCTIONS 7
Turning the Phone On and Off 7
Changing the display language 7
Airplane Mode 7
Making a Call 8
Receiving Calls 8
PLAY FM RADIO 9
MENU TREE 10
ENTERING AND EDITING
INFORMATION 11
Entering Information Using T9 Text Input 11
To Edit in Hindi Mode 12
MESSAGES 13
Write Text 13
SMS Chat 15
Inbox 15
Outbox 16
Voice Mail 17
Archive in SIM 17
Drafts 18
Templates 18
SMS Groups 18
Erase Msgs 19
Msg Settings 19
PREMIUM SERVICES 20
SMS 51234 Services 20
Example 20
INTRODUCTION 21
MENU FEATURES 22
FUNCTIONS USED DURING A CALL 32
FCC SAR VALUE INFORMATION 33
LIMITED WARRANTY STATEMENT 56
SERVICE CENTER LIST 59
1
CONTENTS
RD3610_Slim_Eng081106 2008.11.7 5:21 PM Page 1
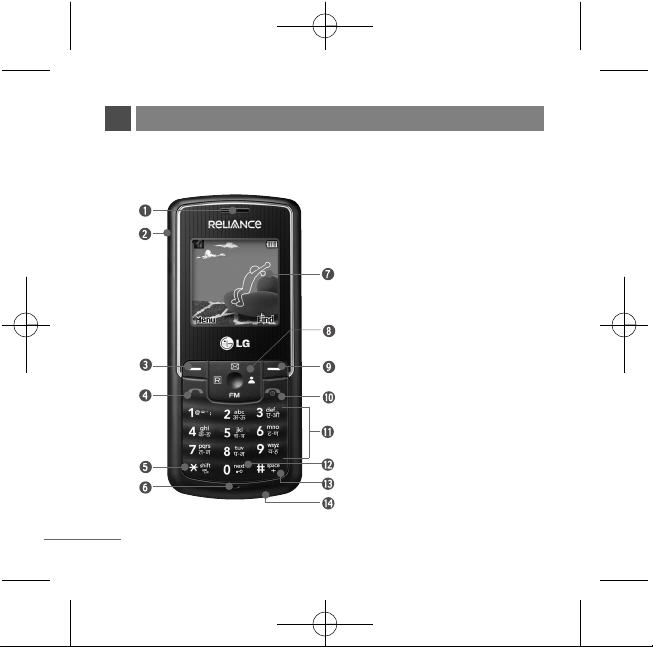
The following shows key components of your mobile phone.
PHONE COMPONENTS
2
1. Earpiece
2. Headset Jack
3. Soft Key 1
4. CALL Key
5. Vibrate Mode Key
6. Microphone
7. LCD Screen
8. 4 Way Navigation Key
9. Soft Key 2/Clear
10. END/PWR Key
11. Alphanumeric Keypad
12. Key Guard
13. International Call Prefix Key
14. Charger Port
RD3610_Slim_Eng081106 2008.11.7 5:21 PM Page 2
LCD Screen Displays messages & indicator
icons.
Soft Keys The names of the functions, of these
keys appear on the bottom of the screen.
G
Soft Key 1
Used to display the function setting menu.
Accepts the highlighted choice when
navigating through a menu.
G
Soft Key 2/Clear
Used to search phonebook and clear a single
space or character. Go to previous menu.
During a call, activate speaker On/Off.
Send SMS on call reject during an incoming
call.
CALL Key Allows user to place or answer calls.
See and redial from call history.
END/PWR Key Used to turn power On/Off and
to end a call. Using this key, you can return to the
main menu display screen. When you press once,
when a call is received, the phone stops ringing or
vibrating depending on the mode it is in. Press
twice to reject the call.
Alphanumeric Keypad These keys enable
you to enter numbers and characters and choose
menu items.
Navigation Key This Navigation key allows
quick access Messages,
FM Radio, Reliance Mobile World,
Profiles.
Vibrate Mode Key In standby mode, set the
vibrate mode by pressing and holding the key
about 2 seconds.
3
RD3610_Slim_Eng081106 2008.11.7 5:21 PM Page 3

The phone screen displays several onscreen icons which appear when the
phone is powered on.
ONSCREEN ICONS
4
Displays the strength of the signal
received by the phone and current
signal strength is indicated by the
number of bars displayed on the
screen.
No service.
The phone is not receiving a system
signal.
In use. A call is in progress.
* No icon indicates the phone is in
standby mode.
Charge level. Indicates battery charge
level.
Roaming mode.
General mode.
Silent mode.
Alarm mode.
Vibrate Only mode.
Outdoor mode.
Indicates that a Text Message or Voice
Mail Messages has been received.
Headset mode.
RD3610_Slim_Eng081106 2008.11.7 5:21 PM Page 4
Installing the SIM card
Your SIM card contains your phone number,
service details and contacts and must be
inserted into your handset. If your SIM card is
removed then your handset becomes unusable
until a valid is inserted. Always disconnect the
charger and other accessories from your
handset before inserting and removing your SIM card. Slide the SIM card into the SIM card
holder. Make sure that the SIM card is properly inserted and the gold contact area on the
card is facing downwards. To remove the SIM card, press down lightly and pull it in the
reverse direction.
NNoottee
The metal contact of the SIM card can easily be damaged by scratches. Pay special attention to
the SIM card while handling.
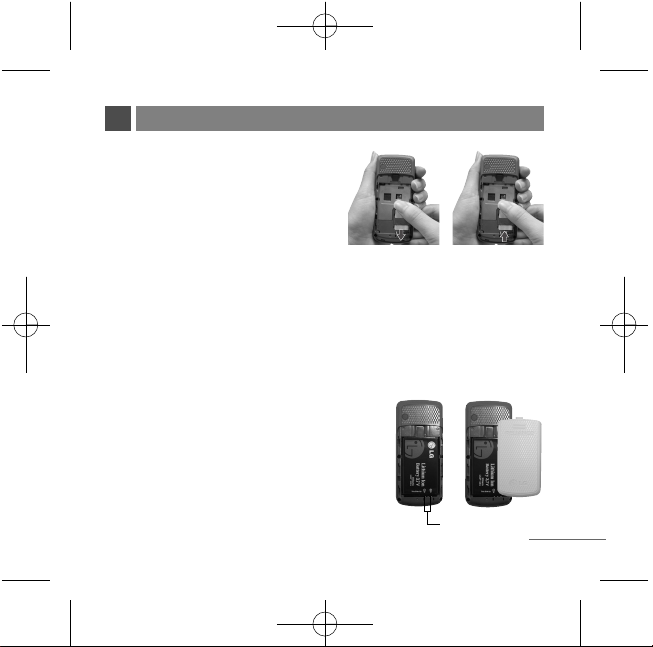
Installing and Removing the Battery
G
To install, insert the battery into the opening on the
back of the phone, and insert the bottom of battery
into groove at the bottom of the handset. Gently
press down the cover until the latch snaps into
place.
G
To remove, push the back cover down. Push the tab
with one hand and lift the top of the battery to
separate.
5
INSTALLING THE SIM CARD AND BATTERY
Slot
RD3610_Slim_Eng081106 2008.11.7 5:21 PM Page 5
6
Charging the Battery
To use the AC adapter charger provided with your phone:
1. Plug the AC adapter into the electrical outlet.
2. Insert the micro USB charger of the adapter into the AC adapter jack on the
bottom of the phone. (Make sure the battery is installed.)
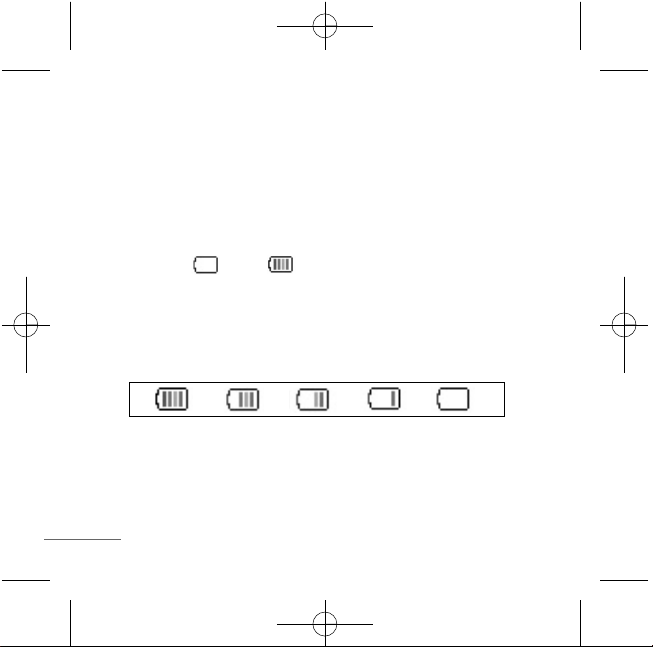
G
As the phone charges, the battery icon continually displays a progression
from empty ( ) to full ( ).
You can also charge the battery through the USB cable for laptops and PCs.
It takes about five hours to fully recharge a completely rundown battery.
Battery Charge Level
The battery charge level is shown at the top right of the LCD screen.
When the battery charge level becomes low, the low battery sensor will alert
you in three ways: sounding an audible tone, blinking the battery icon outline,
and POP UP displaying Recharge the battery If the battery charge level
becomes exceedingly low, the phone will automatically switch off and any
function in progress will not be saved.
RD3610_Slim_Eng081106 2008.11.7 5:21 PM Page 6
Turning the Phone On and Off
1. Install a charged battery pack or connect the phone to an external power
source such as the AC adaptor.
2. Hold down the Key for 2 seconds until the LCD screen flashes.
NNoottee
As any other communication device, avoid any unnecessary contact with the antenna
while your phone is turned on.
Changing the display language
1. In standby mode, press Soft Key 1 Menu.
2. Press , , .
3. Set English/
ffggUUnnhh
with and then press Soft Key 1.
Airplane Mode
When your phone is in Airplane Mode, it cannot send or receive any calls or
access online information. You may use the phone’s other features, such as
Game, Scheduler, Memo, etc. When Airplane Mode is enabled, The message is
displayed on the screen “Airplane Mode”.
1. In standby mode, press Soft Key 1 Menu, , , .
2. Select On or Off and press Soft Key 1.
7
BASIC FUNCTIONS
RD3610_Slim_Eng081106 2008.11.7 5:21 PM Page 7

Making a Call
Every time you make a call, follow these steps:
1. Make sure that the phone is turned on.
2. Type the phone number and then press Call.
G
If the phone is locked, press Soft Key 2 Unlock and type the 4 digits lock
code.
3. To end the call press End.
Receiving Calls
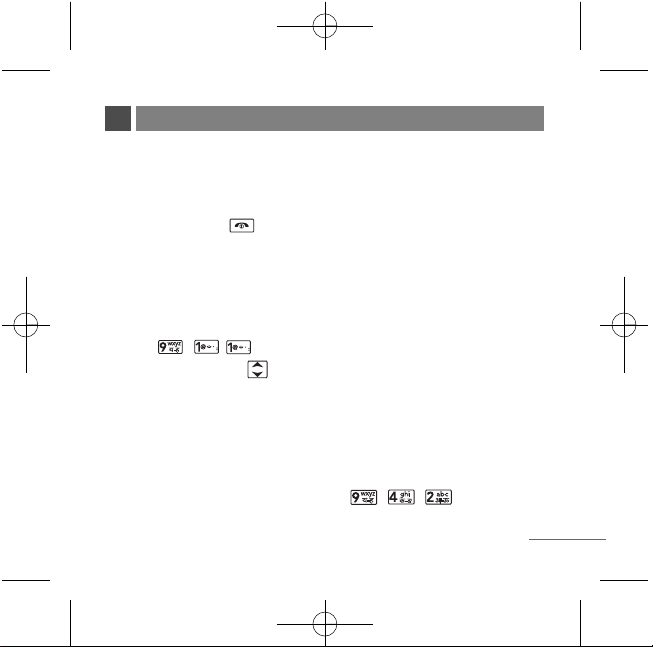
1. When the phone rings or vibrate (as per mode set), press any key (except
) or depending on the Call setting.
G
When you press once, when a call is received, the phone stops ringing
or vibrating depending on the mode it is in. Press twice to reject the
call.
2. To end an answered call, press .
3. If you are not in the condition to receive call, press Soft key 2 to send
predefined SMS on Call Reject to the caller during incoming call.
NNoottee
You can edit the predefined SMS on call reject.
8
RD3610_Slim_Eng081106 2008.11.7 5:21 PM Page 8
1. Attach headset to the headset jack.
2. Press Menu + 8 FM Radio + 1 Listen To Radio or Press for long time in
idle mode.
3. Press Soft Key 1 for below Options:
G Main Screen Go to main screen.
G Switch Off Switch off the FM Radio.
G Edit Channel Adjust and save channels manually.
G Auto Scanning Auto scan and save channels.
G Reset All Reset all channels to default mode.
G Listen Via Listen FM Radio via Speaker or Headset.
NNoottee
Upto 12 channels can be configured. 92.7 BIG FM is Set as the default FM Channel.
9
PLAY FM RADIO
RD3610_Slim_Eng081106 2008.11.7 5:21 PM Page 9

10
1. Names
1. Add Name
2. Find
3. Groups
4. Speed Dial
5. Copy & Move
6. Erase Names
7. My Profile
8. Memory Info
2. Messages
1. Write
2. Inbox
3. Outbox
4. Voice Mail
5. Archive in SIM
6. Drafts
7. Templates
8. SMS Groups
9. Erase Msgs
0
. Msg Settings
3. Premium Services
1. SMS 51234 Services
2. Dial 51234 Services
3. Reliance Caller Tunes
4. Call History
1. Missed
2. Received
3. Dialled
4. In Call Memo
5. Call Duration
6. Erase History
5. Mobile World
1. R-Menu
2. Reset R-Menu
3. Games
6. Profiles
1. Vibrate Only
2. Silent
3. General
4. Outdoor
5. Headset
7. Organ.&Tools
1. Scheduler
2. Memo
3. Alarm
4. Stopwatch
5. Calculator
6. World Clock
8. FM Radio
1. Listen To Radio
9. Settings
1. Display
2. My Menu
3. Call
4. Phone
5. Security
MENU TREE
RD3610_Slim_Eng081106 2008.11.7 5:21 PM Page 10
11
Entering Information Using
T9 Text Input
In the text input field, press Soft Key
1, and select entry mode by
pressing Up/Down navigation key.
There are 6 entry mode - T9En, Abc,
123, Symbols, Smileys and Hindi.
- Shift Key : Press Shift key to
change the Letter Case.
- Next Key : In T9En mode,
press to display other matching
words.
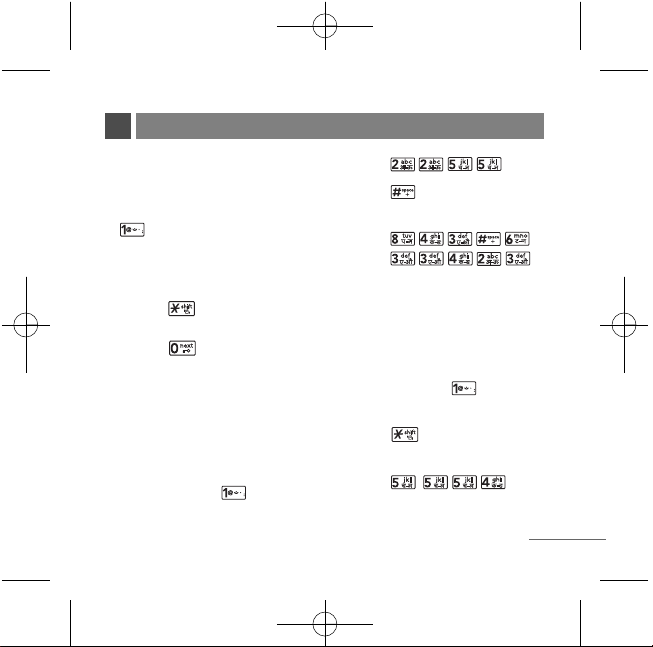
Typing In T9 Mode
For example, to write “Call the
office”, follow these steps:
1. Press: Soft Key 1, to change
letter case to T9En mode.
2. Press: .
3. Press: to complete the word
and add a space.
4. Press:
.
5. Display: Call the office.
Typing In ABC (Multi-tap) Mode
For example, to type “LG”, follow
these steps:
1. Press: Soft Key 1, to change
letter case to Abc mode.
2. Press: to change to ABC
Caps Lock mode.
3. Press: .
4. Display: LG.
ENTERING AND EDITING INFORMATION
RD3610_Slim_Eng081106 2008.11.7 5:21 PM Page 11
12
123 (Numbers) Mode
Type numbers using one keystroke
per number.
To change to 123 mode in a text entry
field, press Soft Key 1, and
select 123 mode.
Symbols/Smileys Mode
To change to Symbols/Smileys mode
in a text entry field, press Soft Key 1,
and select Symbol or Smileys
mode.
Press to cycle through the
desired items. To select item, Press
the assigned number key.
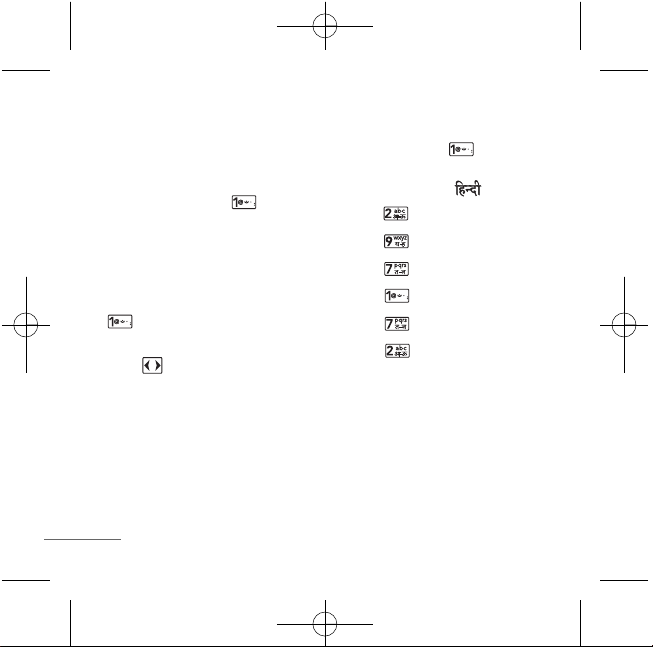
To Edit in Hindi Mode
Press Soft Key 1, and select
Hindi mode.
For example, to type " "
1. Press 2 times.
2. Press 8 times.
3. Press 5 times.
4. Press 4 times.
5. Press 3 times.
6. Press 3 times.
RD3610_Slim_Eng081106 2008.11.7 5:21 PM Page 12
13
Write Text
LMS(Long Message Service) allows you to send a message up to 462
characters at a time. Before sending LMS message, total number of SMS
packets formed are intimated to the user and confirmation is taken to send.
Maximum 3 packets for English and 4 for Hindi messages can be sent. Each
LMS packet is received as individual message. Every LMS message shows the
packet sequence number in the message for ex: In case of 3 packets, <1/3>,
<2/3>, <3/3>.
1. Press Soft Key 1 Menu, or .
2. Select Write.
3. Select Write Text.
4. Type your desired message and press Soft Key 1 Options.
G
Send Use to send the message.
G
Text Mode Use to select text type (entry mode).
G
Templates Select a sample message.
G
Save Save message to draft.
G
Insert Number Insert the desired number saved in phone.
G
Add Signature Insert signature (pre edited in Msg Setting).
5. After selecting Send, enter the contact number where the message is to be
sent, enter the next recipients address by pressing . You can add up to
10 recipients. Press Soft Key 1 Options.
MESSAGES
RD3610_Slim_Eng081106 2008.11.7 5:21 PM Page 13

G
Send Use to send the message.
G
The Last Select a recent sent number.
G
SMS Groups Select SMS Group.
G
Find Names Select a phonebook entry.
6. After entering the phone number, press Soft key 1 Options and select utility
for your message. Select send to send your message.
G
Send Use to send the message.
G
Priority Allows you to give the priority to message. Normal
or Urgent.
G
Delivery Ack This function allows you to know whether the
message is successfully transmitted to other party
or not when the transmitted message is received in
other party’s phone. If you want to activate this
function, set to On.
G
Deferred Allows you to delay sending the message until the
programmed time frame. Immediate/After 30
Minutes/After 1 Hour/After 2 Hours/After 12
Hours/After 1 Day/After 2 Days.
G
Validity Indicates the validity of message delivery to the
Short Message Service Center (SMSC) without
being transmitted to the destination address for
certain periods of time. Those messages will be
deleted within the programmed time frame. Validity
time frames are as follows: Default/30 Minutes/
1 Hour/2 Hours/12 Hours/1 Day/2 Days.
G
Save Sent Msg You can save this message in Outbox.
14
RD3610_Slim_Eng081106 2008.11.7 5:21 PM Page 14
15
SMS Chat
SMS Chat enhances your text message experience.
1. Press Soft Key 1 Menu, or .
2. Select Write.
3. Select SMS Chat.
4. Insert mobile number of other party and your chat name and press Soft Key 1
Options + 0(Send).
5. Type your message.
6. Press Soft Key 1 Options:
G Send Send the chat message.
G Text Mode Allows you to select text type.
G Templates Select message from preloaded template.
G Change Chat Name Change your chat name.
G Change Receiver Change contact number of receiver.
G Single Line Editor Select editing mode from Single Line Editor.
G Scroll Mode Select scroll mode.
G Exit Exit from SMS chat.
Inbox
Received Text messages, Page, Delivery ack, lists may be searched, and the
RD3610_Slim_Eng081106 2008.11.7 5:21 PM Page 15
contents may be viewed. Received messages are sorted in an order of unread
messages and read messages. Up to 30 message can be stored.
To view the list of the received messages.
1. Press Soft Key 1 Menu, or .
2. Select Inbox.
G Messages are saved in order of Unread/Read.
3. After selecting the desired message with key, press Soft Key 1 Options.
G View You can read the selected message.
G Reply This allows you to reply to the selected message.
G Erase Delete the selected message from the inbox.
Outbox
Up to 10 sent messages and 10 unsent messages can be stored in the Outbox.
Users may view lists and contents of sent messages or unsent messages in this
menu. To save a message in Outbox “Save Sent Messages” should be selected
in “Msg Settings”.
1. Press Soft Key 1 Menu, or .
2. Select Outbox.
3. Select Sent or Unsent.
4. After selecting the desired message with key, press Soft Key 1 Options.
G View You can read the selected message.
16
RD3610_Slim_Eng081106 2008.11.7 5:21 PM Page 16
G Forward You can modify and forward the message you've got.
G Erase Delete the selected message from the Outbox.
NNoottee
Options for Unsent are as follows; View/Resend/Erase/Forward
Voice Mail
Allows you to view the new voice messages recorded in the voice mail box.
Once you exceed the storage limit, the old messages will be overwritten. When
you have a new voice message your phone will alert you.
1. Press Soft Key 1 Menu, or .
2. Select Voice Mail.
3. Press Soft Key 1 Options. Listen/Erase While you are answering a call, if you
have a new message, the sender’s number will be displayed on the screen.
Archive in SIM
Archive allows you to store your messages in a different folder in the SIM card.
Storage capacity depends on your SIM card.
1. Press Soft Key 1 Menu, or .
2. Select Archive in SIM.
3. After selecting the desired message with key, press Soft Key 1 Options.
View/Forward/Erase.
17
RD3610_Slim_Eng081106 2008.11.7 5:21 PM Page 17
Drafts
The text message is saved in Drafts. A total of up to 10 messages can be saved
in Drafts.
1. Press Soft Key 1 Menu, or .
2. Select Drafts.
3. After selecting the desired message with key, press Soft Key 1 Options.
View/Erase
Templates
There are 10 predefined phrases included in the Templates. You can add up 20
templates more. A total of 30 templates can be saved.
1. Press Soft Key 1 Menu, or .
2. Select Templates.
3. After selecting the desired message with key, press Soft Key 1 Options.
View/Add/Erase
NNoottee
Only added templates can be deleted.
SMS Groups
SMS Groups consist of 5 SMS Groups with each group consisting of maximum
10 members. After selecting group and moving input display, send a message to
the phone number of the selected group member.
18
RD3610_Slim_Eng081106 2008.11.7 5:21 PM Page 18
1. Press Soft Key 1 Menu, or .
2. Select SMS Groups.
3. After selecting the desired message group with key, press Soft Key 1
Options. View/Send/Rename/Clear Group/Clear All
Erase Msgs
Allows you to erase messages in each message box.
1. Press Soft Key 1 Menu, or .
2. Select Erase Msgs.
3. Select the item of choice with key then press Soft Key 1 Options.
Msg Settings
Allows you to configure settings for messages.
1. Press Soft Key 1 Menu, or
2. Select Msg Settings.
3. Select the item of choice with key then press Soft Key 1 Select.
Customize Msg settings for your preference.
19
RD3610_Slim_Eng081106 2008.11.7 5:21 PM Page 19
SMS 51234 Services
Exciting SMS-based Infotainment services such as News, Joke, Horoscope etc
are available to Reliance subscribers. Using the Premium Services, the user will
be able to access interesting information on common subjects through SMS.
User needs to select the Menu corresponding to the Service Keyword.
1. Press Soft Key 1 Menu, .
2. Select SMS 51234 Services.
3. Place the cursor on the item that you want to select, and then press Soft key 1,
You may select from 14 items. (1.Reliance Caller Tunes 2.News 3.Cricket Score
4.Missed Calls 5.Horoscope 6.Jokes 7.Contest 8.Thought of The Day 9.Beauty
Tips 10.Health 11.Prepaid Balance 12.Bill Info 13.Unbilled Info 14.Help)
You may select the keyword that you want to send in subsequent-Menu.
Example
For example, to receive the "sports news" you can operate the phone as follow:
1. Press Menu + 3(Premium Serv) + 1(SMS 51234 Services) + 2(News) +
Soft Key 1 & 5(Sports)
2. Press Soft Key 1 Send.
3. Display: Sending.. To:51234
20
PREMIUM SERVICES
RD3610_Slim_Eng081106 2008.11.7 5:21 PM Page 20

21
Congratulations on your purchase of the RD3610 Cellular phone that has been designed to operate with the
latest digital mobile communication technology, Code Division Multiple Access (CDMA). The CDMA
system has greatly enhanced voice clarity and can provide various types of advanced features.
This is an advanced and compact phone which has diverse features as follows:
G
One touch key for FM Radio.
G
Large, easy-to-read, 5 lines display + 1 Icon Line + 1 Menu Line.
G
Paging, Messaging, Voice Mail and Caller ID.
G
17-key keypad (10 number keys / 2 function keys / 2 Soft keys / 1 four way navigation /
1 Call key / 1 End key).
G
Long battery stand-by and talk time.
G
Choice of 17 Ring sounds + 30 Reliance Mobile World downloadable Ring tones.
G
Choice of 4 Wallpapers.
G
Menu-driven interface with prompt for easy operation and configuration.
G
Voice Privacy inherent with CDMA encoding.
G
Any Key Answer, Auto Redial, Speed Dial up to 99 memory locations.
G
Optional accessories with greater convenience and enhanced functionality.
G
PREMIUM SERVICES, Mobile World, Games, In Call Memo.
G
Airplane Mode, Rhythmic Lighting.
G
SMS, LMS, SMS Groups.
G
SMS on call reject.
INTRODUCTION
RD3610_Slim_Eng081106 2008.11.7 5:21 PM Page 21

22
Names
AAdddd NNaammee
MMeennuu 11..11
Store up to 500 contacts, adding 3
phone numbers + Memo with each
entry and assign Group + Ring Tone +
Message Alert Tone to each entry.
FFiinndd
MMeennuu 11..22
To find phone numbers you have
stored in the Phone Book.
Options available here.
View All Names Allows you to
view contacts phone as well as
Sim.
Copy to SIM
Move to SIM
Find Group
SIM Card Only Allows you to View
only contacts from Sim Card.
Phone Only Allows you to view
only contacts from Phone.
Text Mode
GGrroouuppss
MMeennuu 11..33
This is a function for managing
groups, group name and setting Ring
tones for each group members.
SSppeeeedd DDiiaall
MMeennuu 11..44
Speed Dial allows you to make a call
faster by just pressing a
corresponding number. Speed dial
location available 1 to 99.
NNoottee
Speed dial can be assigned only for
contacts in the phone memory.
CCooppyy && MMoovvee
MMeennuu 11..55
Select Storage Type between Phone
to SIM and SIM to Phone.
MENU FEATURES
RD3610_Slim_Eng081106 2008.11.7 5:21 PM Page 22
 Loading...