

Page 1
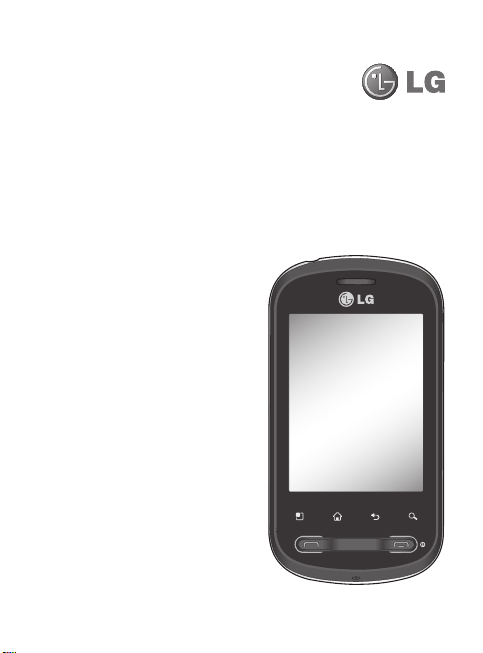
Simple Manual
LG-P350
ENGLISH
P/N : MFL00000000 (1.0) G
www.lg.com
Page 2

Making an Emergency call when there is no USIM card present
in the handset:
1.
Enter emergency number 111 or 112
2.
Press
Voice call
to activate Emergency call.
Bluetooth QD ID B017379
Page 3
LG-P350LG-P350 User Guide
• Some of the contents of this
manual may not apply to your
phone depending on your phone’s
software or your service provider.
• This handset is not recommended
for the visually impaired because
of its touch-screen keypad.
• Copyright ©2011 LG Electronics,
Inc. All rights reserved. LG
and the LG logo are registered
trademarks of LG Group and
its related entities. All other
trademarks are the property of
their respective owners.
• Google search,Maps, Google Mail,
YouTube, Talk and Android Market
are trademarks of Google, Inc.
This handset is not recommended for
blind disability person due to touch
screen keypad.
Page 4

Congratulations on your purchase of the
advanced and compact LG-P350 phone by
LG, designed to operate with the latest digital
mobile communication technology.
Page 5

Guidelines for safe and effi cient use
Please read these simple
guidelines. Not following these
guidelines may be dangerous
or illegal.
Exposure to radio
frequency energy
THIS DEVICE MEETS
INTERNATIONAL GUIDELINES
FOR EXPOSURE TO RADIO
WAVES
Your mobile device is a radio
transmitter and receiver. It is
designed and manufactured
not to exceed the limits for
exposure to radio frequency (RF)
recommended by international
guidelines (ICNIRP). These limits
are part of comprehensive
guidelines and establish
permitted levels of RF energy
for the general population. The
guidelines were developed
by independent scientific
organisations through periodic
and thorough evaluation of
scientific studies. The guidelines
include a substantial safety
margin designed to assure the
safety of all persons, regardless
of age and health.
The exposure standard for
mobile devices employs a unit
of measurement known as
the Specific Absorption Rate,
or SAR. The SAR limit stated
in the international guidelines
is 2.0 W/kg*. Tests for SAR
are conducted using standard
operating positions with the
device transmitting at its highest
certified power level in all tested
frequency bands. Although
the SAR is determined at the
highest certified power level, the
actual SAR of the device while
operating can be well below the
maximum value. This is because
the device is designed to operate
at multiple power levels so as to
use only the power required to
reach the network. In general,
the closer you are to a base
station, the lower the power
output of the device. Before a
phone model is available for sale
3
Page 6

Guidelines for safe and effi cient use
to the public, compliance with
the European R&TTE directive
must be shown. This directive
includes as one essential
requirement the protection of
the health and the safety for the
user and any other person.
The highest SAR value for this
device when tested for use at
the ear is 1.30 W/kg.
This device meets RF exposure
guidelines when used either in
the normal use position against
the ear or when positioned
at least 1.5 cm away from
the body. When a carry case,
belt clip or holder is used for
body-worn operation, it should
not contain metal and should
position the product at least
1.5 cm away from your body.
In order to transmit data files
or messages, this device
requires a quality connection
to the network. In some cases,
transmission of data files or
messages may be delayed until
4
such a connection is available.
Ensure the above separation
distance instructions are
followed until the transmission
is completed. The highest SAR
value for this device when tested
for use at the body is 1.46 W/kg.
* The SAR limit for mobile
devices used by the public is 2.0
watts/kilogram (W/kg) averaged
over ten grams of body tissue.
The guidelines incorporate a
substantial margin of safety to
give additional protection for the
public and to account for any
variations in measurements. SAR
values may vary depending on
national reporting requirements
and the network band.
Page 7

FCC SAR information
Your mobile device is also
designed to meet the
requirements for exposure to
radio waves established by
the Federal Communications
Commission (USA) and Industry
Canada.
These requirements set a SAR
limit of 1.6 W/kg averaged over
1 gram of tissue. The highest
SAR value reported under
this standard during product
certification for use at the ear is
0.00 W/kg and when properly
worn on the body is 0.00 W/kg.
Additionally, this device was
tested for typical body-worn
operations with the back of the
phone kept 2cm between the
users body and the back of the
phone.
To comply with FCC RF exposure
requirements, a minimum
separation distance of 2cm
must be maintained between
the user’s body and the back of
the phone.
* FCC Notice & Caution
Notice!
This device complies with part
15 of the FCC Rules. Operation
is subject to the following two
conditions:
(1) This device may not cause
harmful interference, and
(2) this device must accept
any interference received,
including interference
that may cause undesired
operation.
Caution!
Change or Modifications that
are not specifically approved by
the manufacturer could void the
user’s authority to operate the
equipment
5
Page 8
Guidelines for safe and effi cient use
Product care and
maintenance
WARNING
Only use batteries, chargers
and accessories approved
for use with this particular
phone model. The use of any
other types may invalidate any
approval or warranty applying
to the phone, and may be
dangerous.
Do not disassemble this unit.
•
Take it to a qualified service
technician when repair work
is required.
Repairs under warranty, at
•
LG’s option, may include
replacement parts or boards
that are either new or
reconditioned, provided that
they have functionality equal
to that of the parts being
replaced.
Keep away from electrical
•
appliances such as TVs,
6
radios, and personal
computers.
The unit should be kept away
•
from heat sources such as
radiators or cookers.
Do not drop.
•
Do not subject this unit to
•
mechanical vibration or shock.
Switch off the phone in any
•
area where you are required
by special regulations. For
example, do not use your
phone in hospitals as it may
affect sensitive medical
equipment.
Do not handle the phone
•
with wet hands while it is
being charged. It may cause
an electric shock which
may cause serious injury or
damage your phone.
Do not charge a handset near
•
flammable material as the
handset can become hot and
create a fire hazard.
Use a dry cloth to clean the
•
exterior of the unit (do not use
Page 9

solvents such as benzene,
thinner or alcohol).
Do not charge the phone
•
when it is on soft furnishings.
The phone should be charged
•
in a well ventilated area.
Do not subject this unit to
•
excessive smoke or dust.
Do not keep the phone next
•
to credit cards or transport
tickets; it can affect the
information on the magnetic
strips.
Do not tap the screen with
•
a sharp object as it may
damage the phone.
Do not expose the phone to
•
liquid, moisture or humidity.
Do not use the phone or
•
accessories in places with
high humidity such as pools,
greenhouses, solariums or
tropical environments, it may
cause damage to the phone
and invalidation of warranty.
Efficient phone operation
Electronic and medical devices
All mobile phones may get
interference, which could affect
performance.
Do not use your mobile phone
near medical equipment without
requesting permission. Please
consult your doctor to determine
if operation of your phone may
interfere with the operation of
your medical device.
Some hearing aids might be
disturbed by mobile phones.
Minor interference may affect
TVs, radios, PCs, etc.
Pacemakers
Pacemaker manufacturers
recommend that a minimum
separation of 15cm be
maintained between a mobile
phone and a pacemaker to avoid
potential interference with the
pacemaker. To achieve this use
the phone on the opposite ear
to your pacemaker and do not
7
Page 10

Guidelines for safe and effi cient use
carry it in a breast pocket.
Hospitals
Switch off your wireless device
when requested to do so in
hospitals, clinics or health care
facilities. These requests are
designed to prevent possible
interference with sensitive
medical equipment.
Road safety
Check the laws and regulations
on the use of mobile phones in
the area when you drive.
Do not use a hand-held
•
phone while driving.
Give full attention to driving.
•
Use a hands-free kit, if
•
available.
Pull off the road and park
•
before making or answering
a call if driving conditions so
require.
RF energy may affect some
•
electronic systems in your
vehicle such as car stereos
8
and safety equipment.
If your vehicle is equipped
•
with an airbag, ensure it is
not obstructed by your mobile
device or accessories. It may
fail or cause a serious injury if
obstructed when deployed.
If you are listening to music
•
while out and about, please
ensure that the volume
is at a reasonable level
so that you are aware of
your surroundings. This is
particularly Important when
near roads.
Avoid damage to your
hearing
Damage to your hearing can
occur if you are exposed to loud
sound for long periods of time.
We therefore recommend that
you do not turn on or off the
handset close to your ear. We
also recommend that music
and call volumes are set to a
reasonable level.
Page 11

NOTE:
Excessive sound
pressure from earphones can
cause hearing loss.
Glass Parts
Some parts of your mobile
device are made of glass. This
glass could break if your mobile
device is dropped on a hard
surface or receives a substantial
impact. If the glass breaks, do
not touch or attempt to remove.
Stop using your mobile device
until the glass is replaced by an
authorized service provider.
Blasting area
Do not use the phone where
•
blasting is in progress.
Observe restrictions, and
follow any regulations or
rules.
Potentially explosive
atmospheres
Do not use the phone at a
•
Petrol station.
Do not use near fuel or
•
chemicals.
Do not transport or store
•
flammable gas, liquid, or
explosives in the same
compartment of your vehicle
as your mobile phone and
accessories.
In aircraft
Wireless devices can cause
interference in aircraft.
•
Turn your mobile phone off
before boarding any aircraft.
•
Do not use it within the
vicinity of any aircraft without
permission from the crew.
Children
Keep the phone in a safe
place out of the reach of small
children. It includes small parts
which may cause a choking
9
Page 12

Guidelines for safe and effi cient use
hazard if detached.
Emergency calls
Emergency calls may not be
available under all mobile
networks. Therefore, you should
never depend solely on the
phone for emergency calls.
Check with your local service
provider.
Battery information and
care
You do not need to completely
•
discharge the battery before
recharging. Unlike older
batteries there is no memory
effect that could compromise
the battery’s performance.
Use only LG batteries and
•
chargers. LG chargers are
designed to maximize the
battery life.
Do not disassemble or short-
•
circuit the battery.
Keep the metal contacts of
•
the battery clean.
10
Replace the battery when it
•
no longer provides acceptable
performance.
Recharge the battery if it has
•
not been used for a long time
to maximize usability.
Do not expose the battery
•
charger to direct sunlight or
use it in high humidity, such
as in the bathroom.
Do not leave the battery
•
in hot or cold places, this
may deteriorate the battery
performance.
Using an incorrect battery
•
increases the risk of
explosion.
Dispose of used batteries
•
according to the
manufacturer’s instructions.
Please recycle when possible.
Do not dispose as household
waste.
If you need to replace the
•
battery, take it to the nearest
authorised LG Electronics
service point or dealer for
Page 13

assistance.
Always unplug the charger
•
from the wall socket after
the phone is fully charged
to save unnecessary power
consumption of the charger.
Actual battery life will depend
•
on network configuration,
product settings, usage
patterns, battery and
environmental conditions.
Driver Safety Tips
When driving a car, driving is
your first responsibility. When
using your wireless phone
behind the wheel of a car,
practice good common sense
and remember the following tips:
• Use a hands free device. If
possible, add an additional
layer of convenience and
safety to your wireless phone
with one of the many hands
free accessories available
today.
•
Let the person you are
speaking with know you are
driving; if necessary, suspend
the call in heavy traffic or
hazardous weather conditions.
• Use your wireless phone to
call emergency services for
yourself or others.
In the case of fire, traffic
accident or medical
emergencies;
- Australia Dial (0-0-0)
- New Zealand Dial (1-1-1)
- International Dial (1-1-2)
- other local emergency number.
• Do not take notes or look
up phone numbers while
driving. Jotting down a “to do”
list or flipping through your
address book takes attention
away from your primary
responsibility, driving safely.
• If possible, place calls when
you are not moving or before
pulling into traffic. Try to plan
calls when you will not be
driving.
11
Page 14

Guidelines for safe and effi cient use
• Do not engage in stressful
or emotional conversations
that may be distracting. Make
people you are talking with
aware you are driving and
suspend conversations that
have the potential to divert
your attention from the road.
12
Page 15

Important notice
Please check to see if any
problems you have encountered
with your phone are described
in this section, before taking the
phone in for service or calling a
service representative.
1. Phone memory
When available space on your
phone memory is less than 10%,
your phone cannot receive a new
message. You need to check your
phone memory and delete some
data such as applications or
messages to make more memory
available.
To manage the application
On the home screen, touch
1
Applications
Settings> Applications
Manage applications
When all applications
2
appear, scroll and select
the application you want to
uninstall.
Tap
3
uninstall the application you
desired.
Uninstall
tab and select
and touch OK to
>
.
2. Optimising Battery Life
You can extend your battery's
life by turning off features that
you don't need to run constantly
in the background. You can also
monitor how applications and
system resources consume
battery power.
To extend the life of your
battery
- Turn off radio communications
that you aren't using. If you
aren't using Wi-Fi, Bluetooth, or
GPS, turn them off.
- Turn down screen brightness
and set a shorter screen
timeout.
- Turn off automatic syncing
for Google Mail, Calendar,
Contacts, and other
applications.
- Some applications you’ve
downloaded may cause your
battery’s life to be reduced.
13
Page 16

Important notice
To check the battery charge
level
On the home screen, touch
1
Applications
Settings> About phone >
Status
The battery status (charging,
2
discharging) and level (as a
percentage of fully charged)
are displayed at the top of the
screen.
To monitor and control what
uses the battery
1
On the home screen, touch
Applications
Settings> About phone>
Battery use.
2
The top of the screen
displays battery usage time.
Either how long since last
connected to a power source
or, if connected to a power
source, how long you were
last running on battery power.
The body of the screen lists
applications or services using
battery power from greatest
amount to least.
14
tab and select
.
tab and select
3. Installing an Open
Source OS
If you install an open source
OS on your phone, and do not
use the OS provided by the
manufacturer, this may cause
your phone to malfunction.
If you install and
WARNING:
use an OS other than the one
provided by the manufacturer,
your phone is no longer covered
by the warranty.
To protect your
WARNING:
phone and personal data,
download applications only
from trusted sources, such
as Android Market™. If some
applications are not properly
installed on your phone, your
phone may not work correctly
or a serious error could occur.
You will need to uninstall those
applications and all of its data
and settings from the phone.
Page 17

4. Using Unlock pattern
Set unlock pattern to secure
your phone. This opens a set of
screens that guide you through
drawing a screen unlock pattern.
On the home screen, touch
Applications tab and select
Settings
>
>
Follow the screens to be guided
through drawing a screen unlock
pattern. Select Next to continue
to next screen.
Location & security
Set up screen lock
WARNING:
to take when using the
Pattern Lock. It is very
important that you remember
the unlock pattern you set.
You have 5 opportunities to
enter your unlock Pattern,
PIN or Password. If you have
used all 5 opportunities, you
may attempt again after 30
seconds.
>
Pattern
Precautions
When you can’t recall your
unlock Pattern, PIN, or
Password:
If you’ve created a Google
account on the phone, tap the
Forgot pattern button. Then, you
are required to sign in with your
Google account to unlock your
phone If you haven’t created a
.
Google account on the phone or
you forgot it, you need to perform
a hard reset.
Caution:
If you perform a hard
reset, all user applications
and user data will be deleted.
Please remember to backup any
important data before performing
a hard reset.
15
Page 18

Important notice
5. Using Safe Mode and
Hard Reset
Using Safe mode
* To recover the phone from any
malfunction
Turn off your phone and reboot.
While your phone is powering
back on, press and hold the
Send key while the Android
Logo is displayed. Your phone
will boot all the way to the
main screen and display "safe
mode" in the lower left-hand
corner.
* Using Hard Reset (Factory
Reset)
If it does not restore to its
original state, use
initialise your phone.
Remove and reinsert the
1
battery.
Press and hold for over 10
2
seconds:
Send
key +
key.
16
Hard Reset
Power/Lock
Down Volume
key +
When the power turns on,
3
release these keys.
WARNING
If you perform a Hard Reset,
all user applications and
user data will be deleted.
Please remember to back up
any important data before
performing a
Hard Reset
6. Connecting to Wi-Fi
networks
To use Wi-Fi on your phone,
you access a wireless access
point, or “hotspot.” Some access
points are open and you can
simply connect to them. Others
are hidden or implement other
to
security features, so you must
configure your phone so it can
connect to them.
Turn off Wi-Fi when you're not
using it, to extend the life of your
battery.
.
Page 19

To turn Wi-Fi on and connect to
a Wi-Fi network
On the home screen, touch
1
Applications
tab and select
Settings > Wireless &
networks > Wi-Fi settings
Touch
Wi-Fi
2
to turn it on and
.
begin scan for available Wi-Fi
networks.
- List of available Wi-Fi networks
is displayed. Secured networks
are indicated by a lock icon.
Touch a network to connect
3
to it.
- If the network is open, you
are prompted to confirm that
you want to connect to that
network by touching
Connect
- If the network is secured,
you're prompted to enter
a password or other
credentials. (Ask your network
administrator for details.)
The Status bar displays icons
4
that indicate Wi-Fi status.
7. Using a micro SD card
Pictures, along with Music and
Video files, can only be saved to
external memory.
Before using the built-in camera,
you need to insert a micro SD
memory card to your phone first.
Without inserting a memory
card, you will not be able to save
pictures and video you have
taken.
WARNING:
Do not insert or remove
the memory card when the
phone is on. Otherwise, it may
damage the memory card as
well as your phone, and the
.
data stored on the memory
card may be corrupted. To
remove the memory card safely,
please select
> Applications > Settings >
SD card & phone storage >
Unmount SD card
Home Screen
.
17
Page 20

Important notice
8. Opening and Switching
Applications
Multi-tasking is easy with
Android because open
applications keep running
even when you open another
application. There’s no need
to quit an application before
opening another. Use and
switch among several open
applications. Android manages
each application, stopping and
starting them as needed, to
ensure that idle applications
don’t consume resources
unnecessarily.
To stop the application you use
On the home screen, touch
1
Applications
Settings> Applications
Manage applications >
Running.
Scroll to the desired
2
application and touch
stop
18
tab and select
Force
to stop using it.
TIP Getting back to recent
Apps
- Press and hold Home key,
then a screen will display a
list of the applications you
used recently
9.
Copy LG PC Suite from
SD Card
The LG PC Suite IV is a program
that helps you connect your
mobile phone to a PC using
a USB data communication
cable, so that you can use the
functions of the mobile phone on
your PC.
Major Functions of the LG PC
Suite IV
• Create, edit and delete phone
>
data conveniently.
• Synchronise data between a
PC and a phone (Contacts,
Calendar, Message(SMS),
Bookmark, Call log).
Page 21

• Transfer multimedia files
(photos, videos, music)
conveniently with a simple
drag & drop between a PC and
a phone.
• Transfer the messages from a
phone to a PC.
• Use your phone as a Modem.
• S/W update without losing
your data.
Installing LG PC Suite from your
micro SD memory card
Insert your micro SD memory
1
card on your phone. (It may
already be inserted on your
phone.)
Before connecting the USB
2
data cable, make sure that
the
Mass storage only
mode
is enabled on your phone.
(On the applications menu,
choose
Settings > SD card
& phone storage
Mass storage only
, then select
check
box.)
Connect your phone through
3
USB data cable to your PC.
• In the status bar, drag the
4
USB icon.
• Choose USB Connected and
Turn On USB storage.
• You can view the mass
storage content on your PC
and transfer the files.
• Copy the
5
‘LGPCSuiteIV’
folder on your mass storage
to your PC.
• Run ‘LGInstaller.exe’ file
on your PC and follow the
instructions.
* When LG PC Suite IV installation
is completed, disable
storage only
Suite IV.
NOTE:
Please do not remove
or delete other program fi les
installed on your memory card.
This may cause damage to your
preinstalled applications on the
phone.
Mass
mode to run LG PC
19
Page 22

Important notice
10.
Connecting your
phone to a computer
via USB
NOTE:
To synchronise your phone
via USB cable with your PC, you
need to install the LG PC Suite
program on your PC. You can
download this program from
the LG website (www.lg.com).
Go to http://www.lg.com and
select your region, country &
language. Visit LG website for
more information. As PC Suite is
embedded at inboxed SD card,
you can simply copy it to your PC.
LG-P350 does not support:
- PC Connection via Bluetooth
- LG Air Sync (Web Sync, R-
Click)
- OSP (On Screen Phone)
- To-do in Calendar
- Memo
- Java Application
User’s guide for PC Suite IV is in
Help menu after the installation
PC Suite IV.
20
Use the USB cable with
1
your phone to connect the
phone to a USB port on your
computer. You will receive a
notification that the USB is
connected.
2
Open the Notification drawer
and touch USB connected.
"Turn On USB storage"
3
Touch
to confirm that you want to
transfer files between your
phone’s micro SD card and
the computer.
When the phone is connected as
USB storage, you will receive a
notification. Your phone’s micro
SD card is mounted as a drive
on your computer. You can now
copy files to and from the micro
SD card.
11. Unlock screen when
using data connection
Your display will go dark if
untouched for a period of time
when using data connection. To
turn on your LCD screen, just
Page 23

touch it.
Note:
When uninstalling PC
Suite IV, USB and Bluetooth
Drivers are not automatically
removed. Therefore, they must
be uninstalled manually.
Tip!
To use a micro SD card on
your phone again, you need to
open the Notifi cation drawer and
touch "
Turn off USB storage
During this time, you can’t
access the micro SD card from
your phone, so you can’t use
applications that rely on the
micro SD card, such as Camera,
Gallery and Music.
To disconnect your phone from
the computer, carefully follow
your computer’s instructions
to disconnect USB devices
correctly, to avoid losing
information on the card.
Safely disconnect the USB
1
device on your computer.
Open the Notification drawer
2
and touch
storage
Turn off USB
.
".
Touch
Turn off USB storage
3
in the dialog that opens.
12.
Hold phone up right
Please hold the mobile phone up
right as a regular phone.
While making/receiving calls or
sending/receiving data, try to
avoid holding the lower part of
the phone where the antenna is
located. It may affect call quality.
13. When Screen freezes
If the phone does not respond to
user input or the screen freezes:
Remove the battery, insert it
again and turn the phone on.
If it still does not work, please
contact the service centre.
14. Do not connect your
phone when turning
your PC on/off
Make sure to disconnect your
phone and PC via data cable as
your PC might have errors.
21
Page 24

Before using the mobile phone, please read fi rst!
How to save music/video
files to the phone
Connect your phone to the PC
using the USB cable.
Touch and drag down the status
bar on the home screen. Select
USB connected
storage
files
.
If you didn't install LG Android
Platform Driver on your PC, you
need to set it manually. On the
home screen, touch
tab and select
card & phone storage
Mass storage only
For more information, refer to
'Transferring files using USB
mass storage devices'.
Save music or video files from
the PC to the phone's removable
storage.
- You may copy or move files
from the PC to the phone's
removable storage using a card
reader.
22
>
>
Turn on USB
Open folder to view
Applications
Settings > SD
> activate
.
- If there is a video file with a
subtitle file (.smi or .srt file with
the same name as the video
file), place them in the same
folder to display the subtitle
automatically when playing the
video file.
- When downloading music or
video files, copyright must
be secured. Please note that
a corrupted file or file with a
wrong extension may cause
damage to the phone.
How to play music/video
files to the phone
Playing music files
From home screen touch
Application
the file you want to play from
Artist, Albums, Songs, Playlists
tabs.
Playing video files
From home screen touch
Application
locate the file you want in the list
and select it to play.
tab >
tab >
Music
Video player,
. Locate
Page 25

How to move the
contacts from the old
phone to the current
phone
Export your contacts as a CSV
file from your old phone to the
PC using a PC sync program.
Download LG PC Suite IV at
1
www.lg.com and install it in
the PC. Run the program and
connect your phone to the PC
using the USB cable.
Select the
2
to
select the CSV file saved in
the PC.
If the fields in the imported
3
CSV file are different from the
ones in LG PC Suite IV, you
need to map the fields. After
mapping the fields, click OK.
Then, the contacts are added
to the PC.
Menu
Contacts
>
File
>
icon. Go
Import
and
If the connection of LG-P350
4
phone (using the USB cable)
is detected by LG PC Suite
IV, click "Sync" or "Sync
Contacts" to synchronise the
contacts saved in the PC to
your phone and save them.
How to send data from
your phone via Bluetooth
Sending data via Bluetooth:
You can send data via Bluetooth
by running a corresponding
application, not from Bluetooth
menu, unlike regular mobile
phones.
*
Sending pictures:
Gallery application and select
Picture
>
Menu
and select
If Bluetooth is turned on and
select
Choose the device you want to
send data from the list.
. Click
Bluetooth
Scan for devices
Run the
Share
> Check
>
23
Page 26

Before using the mobile phone, please read fi rst!
*
Exporting contacts:
Contacts application. Touch
the address you want to export
to. Press
Share
>
Bluetooth
if Bluetooth is turned on and
select
Scan for devices
Choose the device you want to
send data from the list.
*
Sending multi-selected
contacts:
Run the "Contacts"
application. To Select more
than one contact press
key and touch
Select the contacts you want
to send or press
and touch
Share
>
Bluetooth
if Bluetooth is turned on and
select
Scan for devices
Choose the device you want to
send data from the list.
24
Menu
and Select
Multiselect
Select all
Run the
> Check
Menu
. Select
> Check
>
Menu
key
>
*
Connecting to FTP (Only
the FTP server is supported
on this handset):
"
Settings
" > "
networks
" > "
settings
". Then, select the
"
Discoverable
and search for other devices.
Find the service you want and
connect to the FTP server.
TIP:
The version is Bluetooth 2.1
EDR and certified by Bluetooth
SIG. It is compatible with other
Bluetooth SIG certified devices.
.
- If you want to search for this
phone from other devices,
go to "
Settings
& networks
settings
".
Then, select the "
checkbox.
The checkbox is cleared after
120 seconds.
- Supported profiles are HFP,
HSP, OPP, PBAP (server), FTP
(server), A2DP, AVRCP, and
DUN.
Select
Wireless &
Bluetooth
" checkbox
" > "
" > "
Bluetooth
Discoverable
Wireless
"
Page 27

Getting to know your phone
To turn the phone on, press and hold the Power key for 3 seconds.
To turn the phone off, press the Power key for 3 seconds and touch Power Off.
TIP! When screen is locked
1. Drag your finger from left to right to unlock the screen.
2. To turn the phone off, press the Power key for 3 seconds and touch
Power Off.
Earpiece
Home key
- Returns to the
home screen from
any screen.
Menu key
- Check what
options are
available.
Send key
WARNING:
can damage its LCD and touch-screen functionalities.
Placing a heavy object on the phone or sitting on it
Tip! Press Menu key whenever you tap an application to check what options
are available.
Tip! LG-P350 does not support video call.
Tip! If LG-P350 has errors when you use it or you cannot turn it on, remove
battery, install it again and turn it on after 5 seconds.
Back key
- Returns to the previous
screen.
Search key
- Search the web and
contents in your
phone.
Power/Lock key
- Powers your phone
on/off by pressing and
holding the key.
- Turns the screen off
and locks the phone.
25
Page 28

Stereo earphone
connector
Charger, micro USB cable
connector
Volume keys
- On the home screen:
controls ringer
volume.
- During a call: controls
your earpiece volume.
- When playing a track:
controls volume
continuously.
Microphone
Camera lens
SIM card slot
micro SD memory
card slot
26
Back cover
Battery
Page 29

Installing the SIM card
and battery
Before you can start exploring
your new phone, you’ll need to
set it up. To insert the SIM card
and battery:
To remove the back cover,
1
hold the phone firmly in your
hand. With your other hand,
firmly press your thumb
on the back cover. Lift off
the battery cover with your
forefinger.
Slide the SIM card into the
2
SIM card holder. Make sure
the gold contact area on the
card is facing downwards.
27
Page 30

Insert the battery into place
3
by aligning the gold contacts
on the phone and the battery.
Replace the back cover of the
4
phone.
28
Charging your phone
Slide back the cover of the
charger connector on the side
of your LG-P350. Insert the
charger, and plug it into an
electrical outlet. Your LG-P350
must be charged until you can
see
.
NOTE:
The battery must be initially
fully charged to improve battery
lifetime.
NOTE:
The LG-P350 has an
internal antenna. Be careful not
to scratch or damage this rear
area, as this will cause loss of
performance.
Page 31

Installing the memory
card
To store multimedia files such
as captured images by using a
built-in camera, you must insert
a memory card to your phone.
NOTE:
The LG-P350 supports up
to a 32GB memory card.
To insert a memory card:
1
Turn the phone off before
inserting or removing the
memory card. Remove the
back cover.
Insert the memory card
2
into the slot. Make sure the
gold contact area is facing
downwards.
29
Page 32

Your Home screen
WARNING!
Do not insert or remove the
memory card when the phone
is on. Otherwise, it may
damage the memory card as
well as your phone, and the
data stored on the memory
card may be corrupted.
Formatting the memory
card
Your memory card may already
be formatted. If it isn’t, you must
format it before you can use it.
NOTE:
All fi les on the card are
deleted when you format the
card.
30
On the home screen, touch
1
Applications
the
tab to open
the applications menu.
Scroll and touch
2
3
Scroll and touch
phone storage
4
Unmount SD card.
Touch
5
Format SD card
Settings
SD card &
.
.
, then
confirm your choice.
6
If you set the pattern lock,
input the pattern lock and
select
Erase everything.
The
card will then be formatted
and ready to use.
NOTE:
If there is content on your
memory card, the folder structure
may be different after formatting
since all the fi les will have been
deleted.
Tip!
If your memory card is already
Unmounted, you can use the
following step to format it.
Touch
Applications > Settings
> SD card & phone storage >
Format SD card.
Page 33

Lock your phone
When you are not using LGP350, press the Power/Lock key
to lock your phone. This helps
prevent accidental presses and
saves battery power.
Also, if you do not use the phone
for a while, the home screen or
other screen you are viewing is
replaced with the lock screen to
conserve the battery.
Note:
If there are any programs
running when you set the
pattern, they may be still running
in lock mode. It is recommended
to exit all programs before
entering the lock mode to avoid
unnecessary charges. (e.g.
phone call, web access and data
communications).
Tip! Setting unlock pattern:
You can draw your own
unlock pattern by connecting
four or more dots.
If you set a pattern, the
phone's screen is locked.
To unlock the phone, draw
the pattern you set on the
screen.
Tip!
When you set an unlock
pattern, you need to create
your Gmail account first.
Caution:
The phone will be
locked for 30 seconds after 5
incorrect attempts at drawing
the unlock pattern.
31
Page 34

Unlock screen
Whenever your LG-P350 is not
in use, it will return to the lock
screen. Drag your finger from left
to right to unlock the screen.
Silent Mode
From Notification drawer, touch
to be or if you don't use
an unlock pattern, simply drag
to the right.
To wake up your phone, press
Send or Power/Lock
lock screen will appear. Touch
the lock icon and drag your
finger to the right to unlock your
home screen. The last screen
32
key. The
you were working on opens.
Home
Simply swipe your finger to the
left or right to view them.
You can also customise each
panel with widgets, shortcuts,
which are shortcuts to your
favourite applications, folders
and wallpapers.
NOTE:
Some screen images may
be different depending on your
phone provider.
Tip!
To add an application icon to
the home screen, touch and hold
the application you want to add
to the home screen.
Tip!
• Touch and hold that icon.
The
Applicatons
change as the
• Drag and drop an application
icon to the
Tip!
You cannot delete the
preloaded applications. (Only
their icons can be deleted from
the screen.)
Tra sh
icon will be
Trash
icon .
icon .
Page 35

Getting back to
a recently used
applications
Touch and hold the Home key.
The screen will show you a pop
up with icons of applications that
you've used recently.
Notification drawer
The notification drawer runs
across the top of your screen.
Bluetooth
Wi-Fi
GPS
Touch and slide the notification
drawer down with your finger.
Or, on the home screen,
touch
Menu
Notifications
key and select
. Here, you can
3G
connection
Ring
check and manage Wi-Fi,
Bluetooth, GPS status as well as
other notifications.
Onscreen Keyboard
You can also enter text using
the onscreen keyboard. The
onscreen keyboard automatically
displays on the screen when you
need to enter text. To manually
display the keyboard, simply
touch a text field where you want
to enter text.
Qwerty Keypad (Phone Keypad)
Shift Key -
capitalise the next letter you
type. Double tap for all caps.
XT9 Key -
on or off.
Setting key-
the settings menu. Choose from
Editor settings, Keyboard layout,
Writing language, User dictionary
and Other input method.
Touch once to
Turn XT9 Mode
Tap to view
33
Page 36

Number and Symbols Key -
Touch to change input to number
and symbol entry.
Enter Key -
new line in the message field.
Language Key -
change the On-screen Keyboard
language.
Delete Key
Go forward or backward
between letters.
Tip!
To switch between Qwerty
Keypad and Phone Keypad,
touch
and choose Keyboard Layout.
Tap to create a
Tap to
from Phone Keypad
Google Account
Set-up
The first time you open the
Google application on your
phone, you will be required to
sign in with your existing Google
account. If you do not have a
Google account, you’re prompted
to create one.
34
IMPORTANT
• Some applications work only
with the first Google Account
you add. If you plan to use
more than one Google Account
with your phone, be sure to
sign into the one you want
to use with such applications
first. When you sign in,
your contacts, Google mail
messages, Calendar events,
and other information from
these applications and services
on the web are synchronised
with your phone.
Calls
Answering and rejecting
a call
When screen is locked/ When
screen is unlocked
When your phone rings, drag the
Answer
icon
Decline
Drag
to reject an incoming call. Drag
Excuse msg bar from the bottom
to the right.
icon to the left
Page 37

if you want to send one.
When your phone rings press
the Answer button. Press Decline
button to reject the incoming
call.Touch the Excuse msg bar
from the bottom.
Messaging
Your LG-P350 combines SMS
and MMS into one intuitive,
easy-to-use menu.
WARNING:
character limit may vary from
country to country depending
on how the SMS is coded
and in what language.
WARNING:
video, or audio fi le is added
to an SMS message, it will be
automatically converted into
an MMS message, and you
will be charged accordingly.
The 160-
If an image,
Opening Email and the
Accounts Screen
You can use the
application to read email from
services other than Google Mail.
The Email application supports
the following account types:
POP3, IMAP and Exchange.
Email
Social Networking
With your phone, you can take
advantage of social networking
and manage your micro-blog
in on-line communities. You
can update your current status,
upload photos, and view your
friends’ status updates in realtime.
You can add your Facebook and
Twitter accounts to your phone.
If you don’t have an account, you
can visit their sites to set it up.
NOTE:
Additional costs may be
incurred when connecting and
using online services. Check your
data charges with your network
provider.
35
Page 38

Camera
Getting to know the viewfinder
Brightness
– This defines and controls the amount of sunlight
entering the image. Slide the brightness indicator along the bar,
towards “-” for a lower brightness image, or towards “+” for a higher
brightness image.
Zoom
– Zoom in or zoom out. Alternatively, you can use the side
volume keys.
Video mode
this icon to switch to video
mode.
Taking a photo
Gallery
to access your saved photos
from within the camera
mode. Simply touch, and
your gallery will appear on
Settings
– Touch this icon to open
the settings menu. See
advanced settings
Colour effect
NOTE:
You can change a colour picture to black and white or sepia,
but you cannot change a black-and-white or sepia picture to colour.
NOTE:
You need to insert a memory card fi rst to take a picture. Without
inserting a memory card, you will not be able to take a picture or save
the picture you have taken.
Using the
.
– Choose a colour tone for your new photo.
the screen.
36
– Slide down
– This enables you
Page 39

Once you’ve taken the
photo
Your captured photo will appear
on the screen.
Touch to share your
Share
photo as
Bluetooth
Twitter
.
,
.
or
Email, Facebook,
Gmail
,
Messaging,
Picasa
or
NOTE:
Additional charges may
apply when MMS messages are
downloaded while roaming.
NOTE:
Share option may vary
by area, phone, carrier, plan
and version of Android Phone
Software.
Touch to use the image
Set as
as
Contact icon
Wallpaper
Touch to edit the name
Rename
of the selected picture.
37
Page 40

Google applications
Maps
Check your current location and
traffic and receive directions to
your destination. The LG-P350
must be connected to Wi-Fi or
3G/GPRS.
NOTE:
Maps does not cover all
cities and countries.
Press Menu key to use options:
Search
you are looking for.
Directions
find out the route of the place
you entered. Touch
the data. Choose from Contacts
or Point on Map or My current
location.
Layers
view from Traffic to Satellite or
Terrain. Tap Latitude, then you
will see the location of your
contacts from Google Account.
My Location
current location on the map.
Join Latitude
location with friends you choose
38
– Enter the place
– This will let you
to input
– You can switch
– Point your
– Share your
and Google.
More
Starred items and more.
– Clear map or find
Market™
Android Market™ lets you
download useful applications
and games.
Google Mail™
Google Mail™ is configured
when you first set up your
phone. Depending on your
synchronisation settings,
Google Mail™ on your phone is
automatically synchronised with
your Google Mail™ account on
the web.
Ta lk
Talk is Google’s instant
messaging program. It lets you
communicate with other people
who also use Talk.
Page 41

ThinkFree Office
ThinkFree Office allows you to
read documents, and provides
limited editing functions for
Microsoft Word, Excel and
PowerPoint. However, you cannot
edit a PDF file.
Touch and hold a file, then
1
Open, Upload, Rename,
Move, Copy, Delete, Send
and Properties options are
available. This is depending
on the file type.
The Web
Browser
NOTE:
Additional charges apply
when connecting to these
services and downloading
content. Check data charges with
your network provider.
Using options
Press the
Menu
options.
New window
window.
key to view
– Open a new
Bookmark
Bookmark, show Most
Visited Site and History.
Windows
open windows.
Refresh
the web page.
Forward
page you connected to after the
current page. This is different
from the Back key, which goes
to the previous page.
– Add/Show
– Show all your
– Touch to refresh
– Goes to the
Wi-Fi
Turn on Wi-Fi
From Home Screen , open
Notification drawer and touch
on.
From Menu, choose Settings >
Wireless & network settings >
Wi-Fi
.
To connect to Wi-Fi
Choose the Wi-Fi network you
want to connect with. If you
see
, you need to enter a
password to connect.
39
Page 42

TIP!
If you are out of the Wi-Fi area
and choose 3G connection,
additional charges may be
applied.
USB tethering
You can share your phone's
internet connection with your
computer.
You can tether your phone to
your computer with a USB cable.
Settings
>
settings
hotspot
Wireless & network
>
Tethering & portable
>
USB tethering
For more information regarding
USB tethering, click Help.
TIP!
To use USB Tethering, you need
to install PC Suite onto your
PC first.
Wi-Fi Tethering
Use your LG-P350 as a portable
Wi-Fi hotspot.
Settings
>
settings
40
Wireless & network
>
Tethering & portable
hotspot
>
Portable Wi-Fi
.
hotspot
TIP!
If your phone turns into sleep
mode even when it is connected
to Wi-Fi, the Wi-Fi connection will
be disabled automatically. In this
case, if your phone has access
to 3G data, it may be connected
to the 3G network automatically,
and additional charges may be
applied.)
NOTE:
The LG-P350 supports
.
WEP, WPA/WPA2-PSK and
802.1x EAP security. If your
Wi-Fi service provider or network
administrator sets encryption for
network security, fi ll in the key in
the pop-up window. If encryption
is not set, this pop-up window
will not be shown. You can obtain
the key from your Wi-Fi service
provider or network administrator.
Page 43

Phone Software update
LG Mobile Phone Software
update from internet
For more information on using
this function, please visit http://
update.lgmobile.com or http://
www.lg.com/common/ index.jsp
→ select country and language.
This feature allows you to
conveniently update the firmware
of your phone to the latest
version from the internet without
the need to visit a service centre.
As the mobile phone firmware
update requires the user’s full
attention for the duration of the
updating process, please make
sure to check all instructions
and notes that appear at each
step before proceeding. Please
note that removing the USB
data cable or battery during the
upgrade may seriously damage
your mobile phone.
Notice
To obtain the corresponding
source code under GPL,
LGPL, MPL and other open
source licences, please visit
http://opensource.lge.com/
All referred licence terms,
disclaimers and notices are
available for download with
the source code.
41
Page 44

Accessories
These Accessories are available for use with the LG-P350.
(
Items described below may be optional.
Charger Data cable
Battery User Guide
Stereo
headset
NOTE:
• Always use genuine LG accessories.
• Failure to do this may void your warranty.
• Accessories may vary in different regions.
42
)
Connect your
LG-P350 and
PC.
Learn more
about your LGP350.
Page 45

Technical data
Ambient Temperatures
Max: +55°C (discharging), +45°C (charging)
Min: -10°C
Declaration of Conformity
Declaration of Conformity
Suppliers Details
Name
LG Electronics Inc
Address
LG Twin Tower 20,Yeouido-dong, Yeongdeungpo-gu Seoul, Korea 150-721
Product Details
Product Name
GSM 850 / E-GSM 900 / DCS 1800 / PCS 1900 Quad Band and WCDMA Terminal Equipment
Model Name
LG-P350
Trade Name
LG
Applicable Standards Details
R&TTE Directive 1999/5/EC
EN 301 489-01 v1.8.1 / EN 301 489-07 v1.3.1 / EN 301 489-17 v2.1.1
/ EN 301 489-19 v1.2.1 / EN 301 489-24 v1.4.1
EN 300 328 v1.7.1
EN 60950-1:2006+A11:2009
EN 50360:2001 / EN62209-1:2006 / IEC62209-2:2010
EN 301 511 v9.0.2
EN 301 908-1 v3.2.1 / EN 301 908-2 v3.2.1
Supplementary Information
The conformity to above standards is veri ed by the following Noti ed Body(BABT)
BABT, Forsyth House, Church eld Road, Walton-on-Thames, Surrey, KT12 2TD, United Kingdom
Noti ed Body Identi cation Number : 0168
Declaration
I hereby declare under our sole responsibility
that the product mentioned above to which this
declaration relates complies with the above mentioned
standards, regulation and directives
LG Electronics Inc. – EU Representative
Veluwezoom 15, 1327 AE Almere, The Netherlands
Name Issue Date
Doo Haeng Lee/Director 13, Jan , 2011
Signature of representative
43
Page 46

MANUFACTURER’S WARRANTY
W
Australia & New Zealand
1. WHAT THIS WARRANTY COVERS:
LG offers you a warranty that the enclosed Product and its enclosed accessories
will be free from defects in material and workmanship according to the following
terms and conditions:
(1) The warranty for the Product is for ONE (1) year beginning on the date of
purchase of the Product.
(2) The warranty extends only to the original consumer purchaser of the
Product (“Customer”) and is not assignable or transferable to any
subsequent customer.
LG offers a warranty for genuine LG battery packs, extending SIX (6)
months from the date of purchase.
(3) This warranty is only valid to the original purchasing Customer for the
duration of the warranty period as long as it is purchased and used in
AUSTRALIA or NEW ZEALAND.
(4) During the warranty period, any defective LG Product or part will be
repaired or replaced by LG or its authorised service centre, at LG’s option,
with new or factory rebuilt replacement items. LG or the authorised service
centre will return the Product to the Customer in working condition. No
charge for either parts or labour in repair or replacement of the Product
will be incurred by the Customer. If parts, boards or equipment are
replaced, they shall become the property of LG.
(5) Upon request from LG, the Customer must provide LG with proof of the
date of purchase.
(6) The Customer will bear the cost of transporting, delivering and handling
the Product to and from LG or its authorised service centre.
(7) The benefits available from this warranty are in addition to all applicable
statutory rights.
Page 47

MANUFACTURER’S WARRANTY
Australia & New Zealand
2. WHAT THIS WARRANTY DOES NOT COVER:
(1) Defects or damage resulting from use of the Product in other than its
normal and customary manner.
(2) Defects or damage from abnormal use, abnormal conditions, improper
storage, exposure to moisture or dampness, unauthorised modifications,
unauthorised connections, unauthorised repair, misuse, neglect, abuse,
accident, alteration, improper installation, or other acts which are not the
fault of LG, including damage caused by shipping, blown fuses, spills of
food or liquid.
(3) Breakage or damage to antennas, unless caused directly by defects in
material or workmanship.
(4) If the Customer does not notify LG of the alleged defect or malfunction of
the Product during the applicable warranty period, the Customer shall have
no coverage or benefits under this warranty.
(5) Products which have had the serial number removed or made illegible.
(6) If the battery short circuits or the seals of the battery are broken or show
evidence of tampering, or the battery was used in equipment in a manner
other than that which has been specified, the Customer shall have no
coverage or benefits under this warranty.
(7) Damage resulting from use of non-LG approved accessories.
(8) All plastic surfaces and all other externally exposed parts that are
scratched or damaged due to normal use.
(9) Products operated outside published maximum ratings.
(10) Products used or obtained in a rental program.
(11) Consumables (such as fuses).
Page 48

MANUFACTURER’S WARRANTY
Australia & New Zealand
(12) Defects or damage resulting from breakage of or tampering with the LCD
screen.
(13) Where applicable, Products that have been subject to an unauthorised
removal or deactivation of the network operator lock function.
3. STATEMENT:
Except for those terms that cannot by law be excluded, all terms other than
those expressly contained in this warranty statement are excluded. To the
extent permitted by law, LG excludes all liability (whether in contract, tort or
otherwise) for any consequential, special, incidental or indirect loss or damage
including loss of profit, loss or impairment of privacy of conversations, work
stoppage or loss or impairment of data arising out of the use or inability to use
the Product.
4. HOW TO GET WARRANTY SERVICE:
To obtain information regarding warranty service, please call the following toll
free telephone numbers;
AUSTRALIA:
LG Electronics Australia Pty Ltd
2 Wonderland Drive
Eastern Creek NSW 2766
PO Box 212
HORSLEY PARK NSW 2175
Tel: 1300 LG CARE
(1300 54 2273) Australia
Fax: 02-8805-4201
NEW ZEALAND:
LG Electronics Australia Pty Ltd
Unit A, 38 Highbrook Drive
East Tamaki 2013
PO Box 58195 Greenmount
Auckland 2141
Tel: 0800 LG CARE
(0800 54 2273) New Zealand
Fax: 09-914-2441
Page 49

Page 50

 Loading...