

LG LG-GX500 Owner's Manual

OWNER’S MANUAL
LG-GX500
P/NO : MMBB0371107 (1.0)
W
www.lg.com
ENGLISH
OWNER’S MANUAL LG-GX500

Bluetooth QD ID B016312
GX500 User Guide
Some of the contents in this
manual may differ from your phone
depending on the software of the
phone or your service provider.
And this handset is not
recommended for blind disability
person due to touch screen keypad.

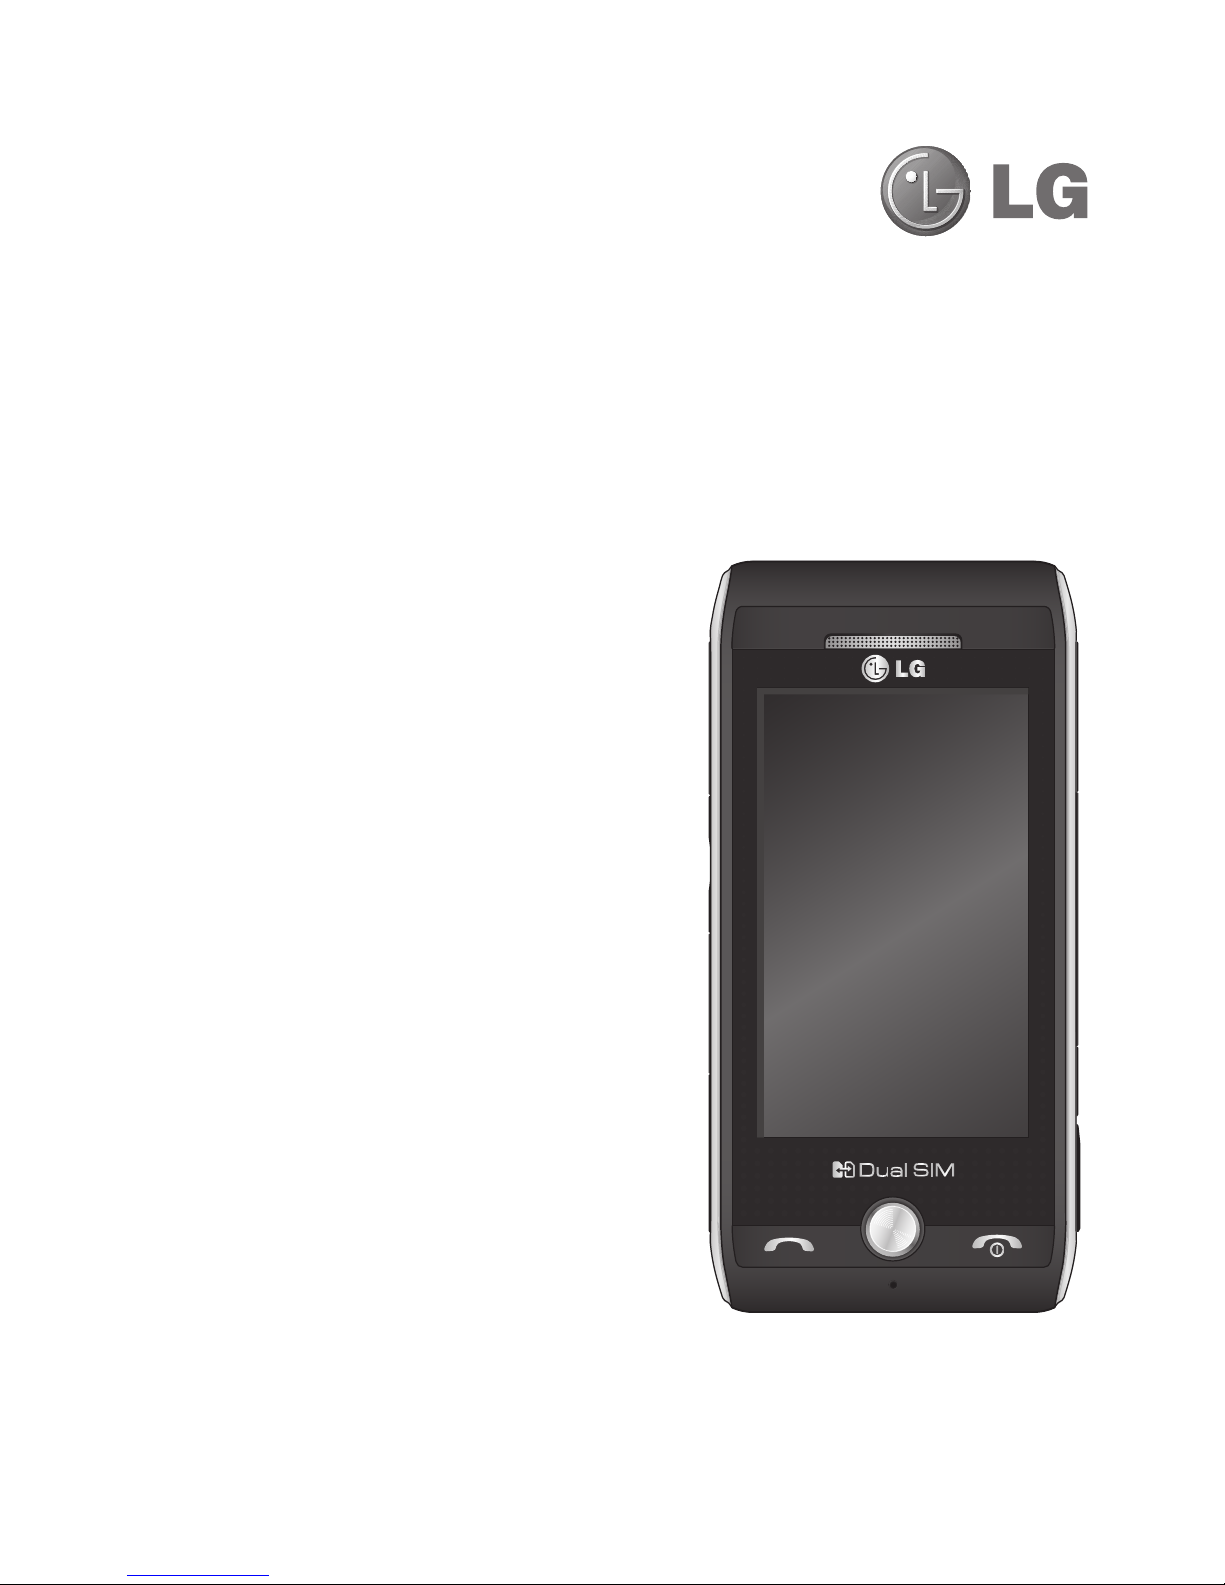
Congratulations on your purchase of the
advanced and compact GX500 phone by LG,
designed to operate with the latest digital
mobile communication technology.

3
Contents
Getting to know your phone ........6
Open view ....................................8
Installing the SIM and battery......9
Memory card .............................11
Menu map ..................................12
Your standby screen ..................13
Touch screen tips .....................13
The quick keys .........................14
Changing your Status from
the status bar ...........................16
Using the Multitasking function ..16
Calls ...........................................17
Making a call ............................17
Making a call from your
contacts ...................................17
Answering and rejecting a call ...17
Speed dialling ..........................17
Making a second call ................18
Viewing your call logs................18
Using call divert ........................19
Using call barring ......................19
Changing the common call
setting .....................................20
Contacts .....................................21
Searching for a contact .............21
Adding a new contact ...............21
Creating a group .......................22
Changing your contact settings ..22
Viewing information ..................23
Messaging .................................24
Messaging ...............................24
Sending a message ..................24
Entering text .............................25
T9 predictive ............................25
Abc manual ..............................25
Keyboard..................................26
Handwriting recognition.............26
Setting up your email ................26
Retrieving your email ................27
Changing your email settings.....27
Message folders .......................28
Changing your text message
settings ....................................28
Changing your multimedia
message settings .....................29
Changing your other settings .....30

4
LG GX500 | User Guide
Camera ......................................31
Taking a quick photo ................31
After you’ve taken your photo ....31
Using the advanced settings ......31
Viewing your saved photos ........32
Video camera .............................33
Shooting a quick video ..............33
After you’ve shot your video ......33
Adjusting the Exposure ..............34
Using the advanced settings ......34
Watching your saved videos ......35
Your photos and videos .............36
Viewing your photos and
videos ......................................36
Using zoom when viewing
a photo ....................................36
Adjusting the volume when
viewing a video .........................36
Setting a photo as wallpaper .....36
Editing your photos ...................37
Multimedia .................................38
Pictures ..................................38
Sending a photo .......................38
Printing an image .....................38
Moving or copying an image ......39
Sounds ....................................39
Videos .....................................39
Watching a video ......................39
Sending a video clip ..................39
Games and Applications ...........39
Installing a game/application
via local install ..........................40
Playing a game .........................40
Documents ...............................40
Transferring a fi le to your
phone ......................................41
Viewing a fi le ............................41
Others......................................41
Music ......................................42
Transferring music onto your
phone ......................................42
Playing a song ..........................43
Creating a playlist .....................43
Using the radio .........................43
Searching for stations ...............44
Resetting channels ...................44
Utilities .......................................45
Recording a sound or voice .......45
Using your calculator.................45
Converting a unit ......................45
Adding a city to your world
time .........................................45
Using the stopwatch .................46
Adding an item to your
calendar ...................................46
Adding an item to your task
lisk ..........................................47
Date fi nder ...............................47
Contents

5
Settings ...................................47
PC Suite .....................................48
Installing the LG PC Suite on
your computer ..........................48
Connecting your phone and
PC ...........................................48
Backing up and restoring your
phone’s information ..................49
Viewing phone fi les on your PC ..49
Synchronising your contacts ......50
Synchronising the messages .....50
Music Sync ..............................50
Transferring music using
Windows Media Player ..............51
DivX Converter ..........................51
The web .....................................53
Browser ...................................53
Opera Mini ...............................53
Accessing the web ....................53
Adding and accessing your
bookmarks ...............................54
Using RSS reader......................54
Saving a page ..........................55
Accessing a saved page ............55
Viewing your browser history .....55
Changing the web browser
settings ....................................55
Using your phone as a modem ..56
Settings .....................................57
Using Dual SIM-card menu ........57
Personalising your profi les .........57
Changing your screen settings ...57
Changing your phone settings ...58
Changing your connectivity
settings ....................................59
Network settings ......................59
Connectivity Settings .................60
Java settings ............................60
Using memory manager ............60
Sending and receiving your
fi les using Bluetooth..................61
Pairing with another Bluetooth
device ......................................63
Using a Bluetooth headset .........63
Accessories ...............................64
Network service.........................65
Technical data............................65
Guidelines for safe and
effi cient use ...............................67
Trouble Shooting ........................71
6
LG GX500 | User Guide
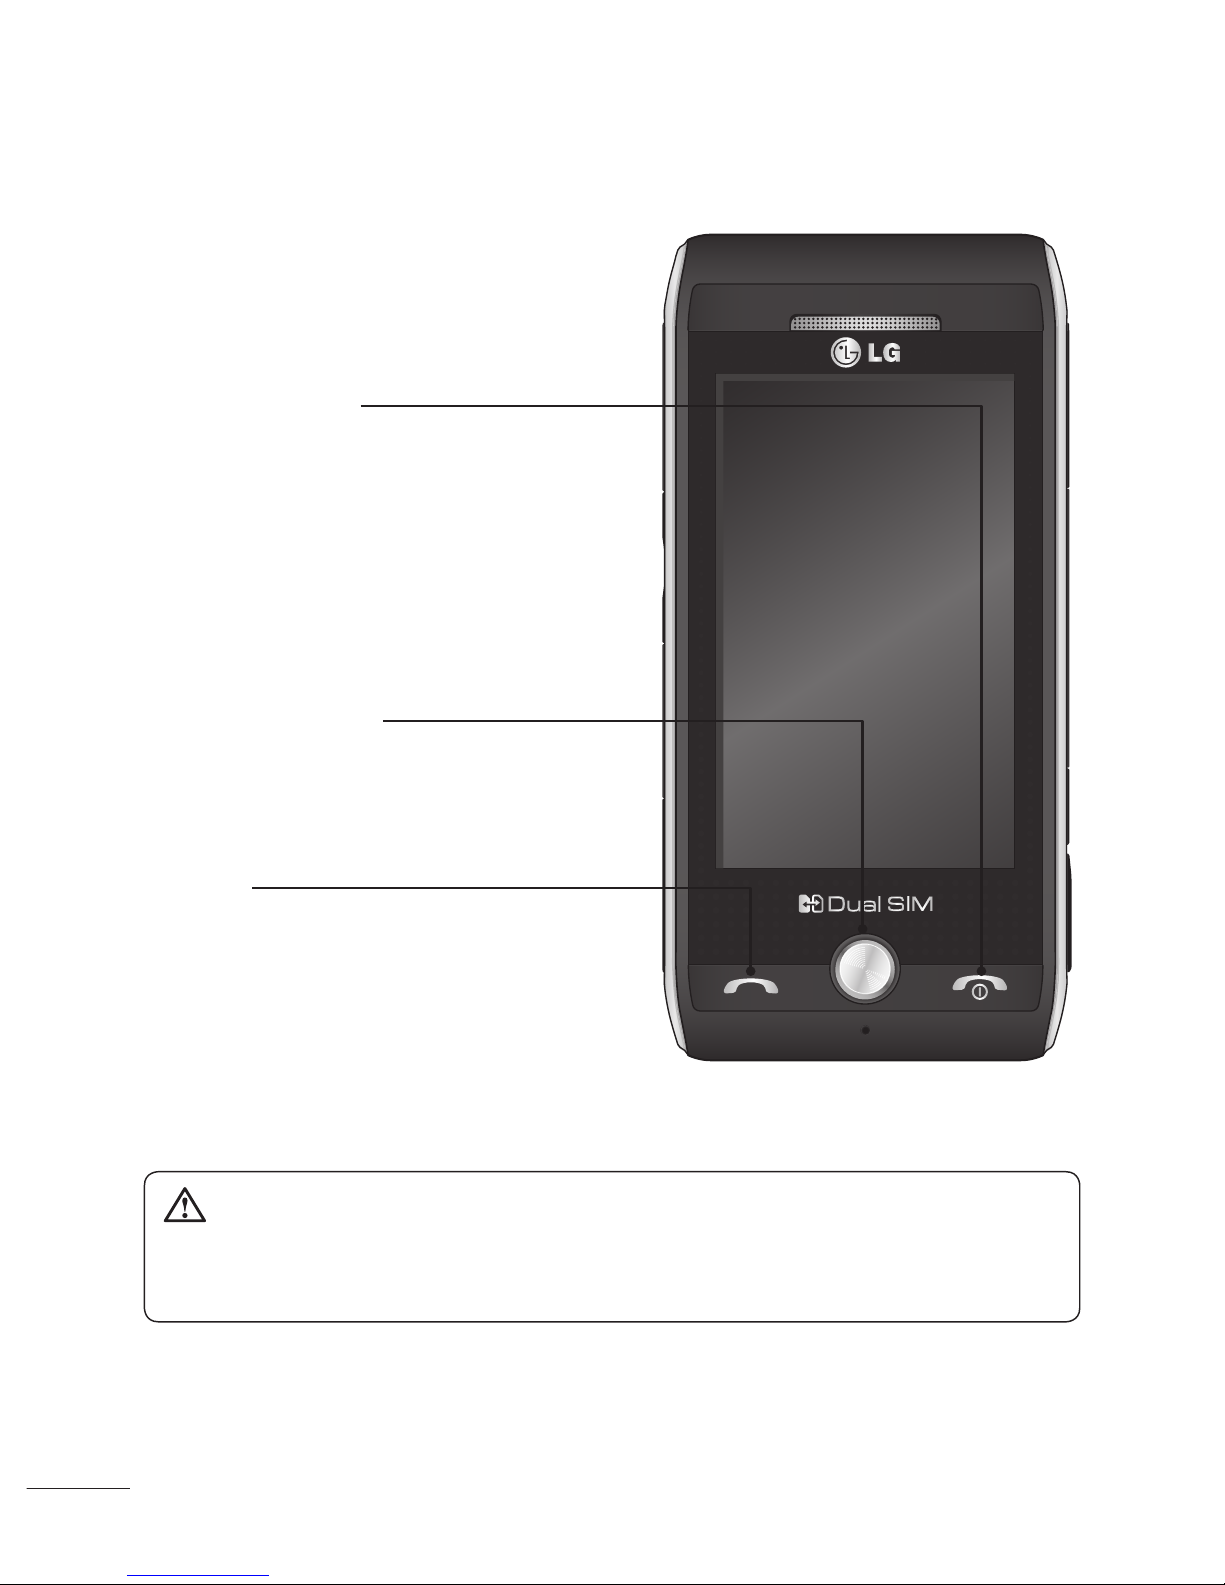
Getting to know your phone
End/Power key
Ends or rejects a call.
Turns the phone on/off.
Press once to return to the
standby screen.
Multitasking key
Call key
Dials a phone number and
answers incoming calls.
WARNING: Placing a heavy object on the phone or sitting on it
while it is in your pocket can damage the phone’s LCD and touch
screen functionality.
7
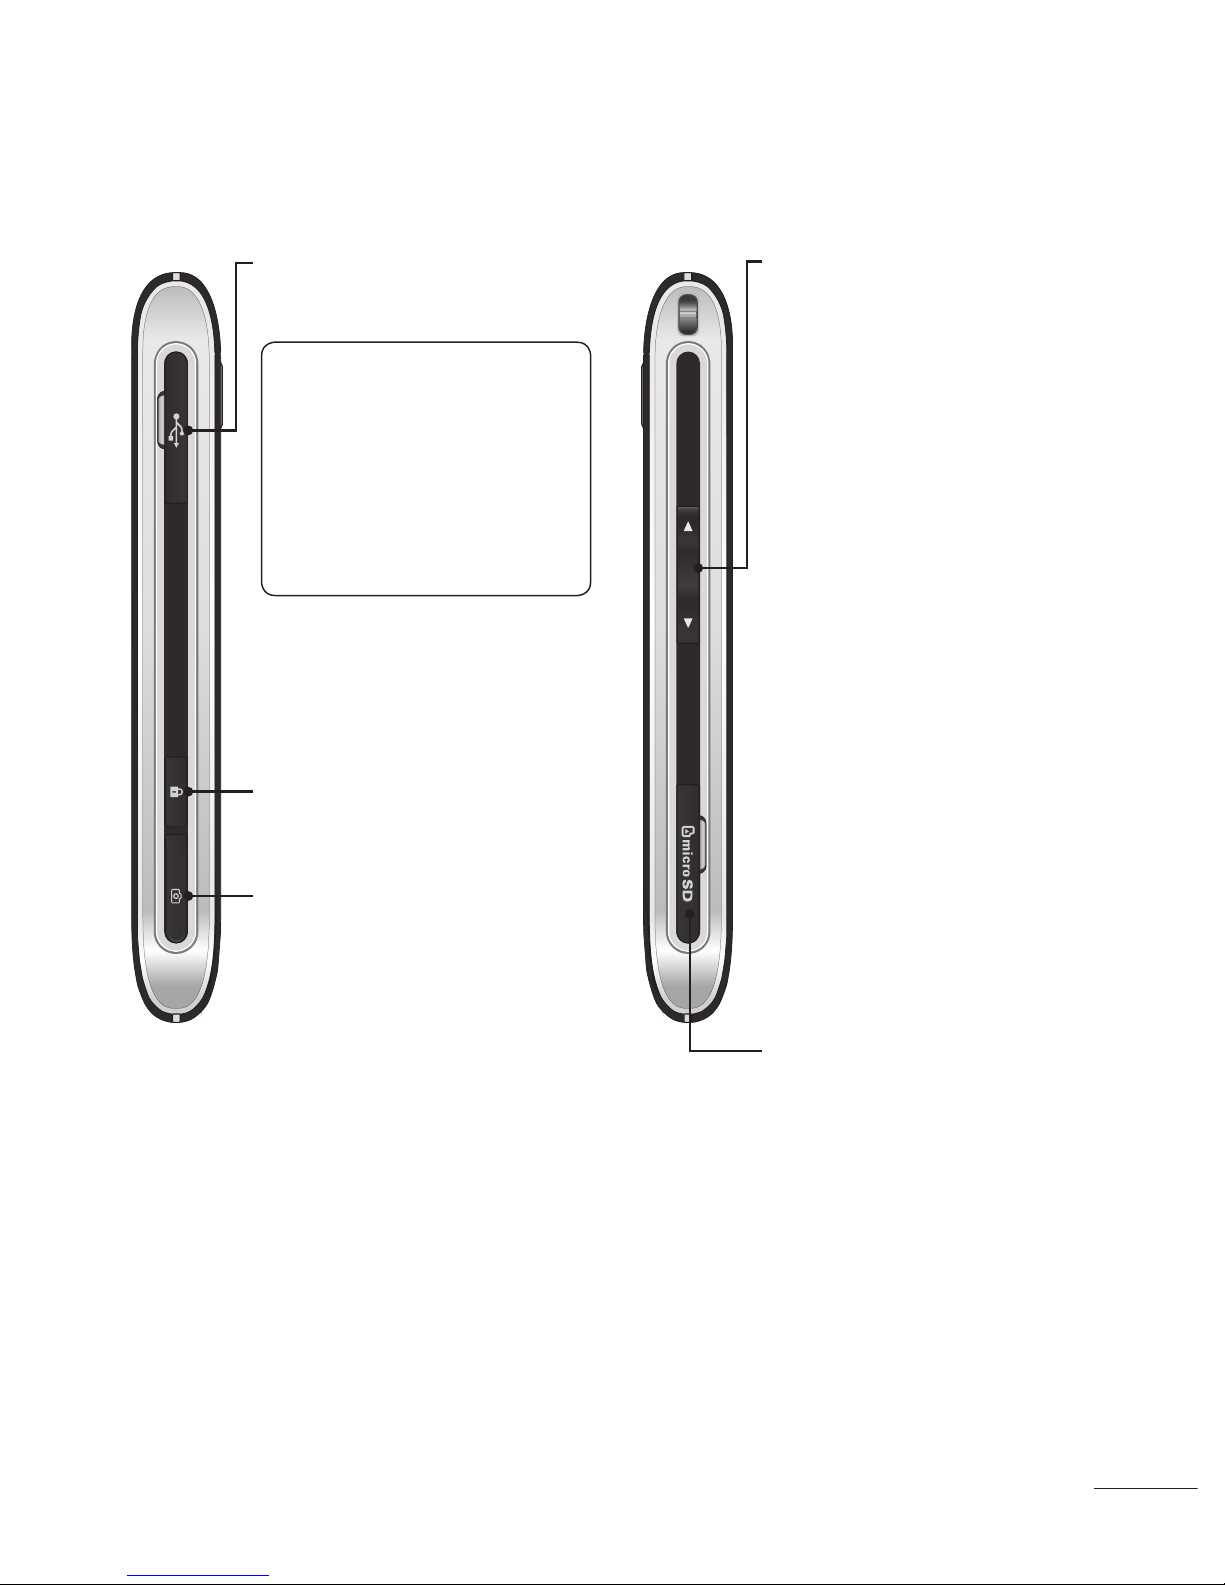
Charger, Cable,
Handsfree connector
TIP: To connect the
USB cable, wait
until the phone has
powered up and has
registered to the
network.
Side keys
When the screen is •
idle: volume of key
tone.
During a call:•
volume of the
earpiece.
When playing a •
BGM track
- Short press:
controls the
volume.
Lock/Unlock key
Capture button
Micro SD memory
card socket
8
LG GX500 | User Guide
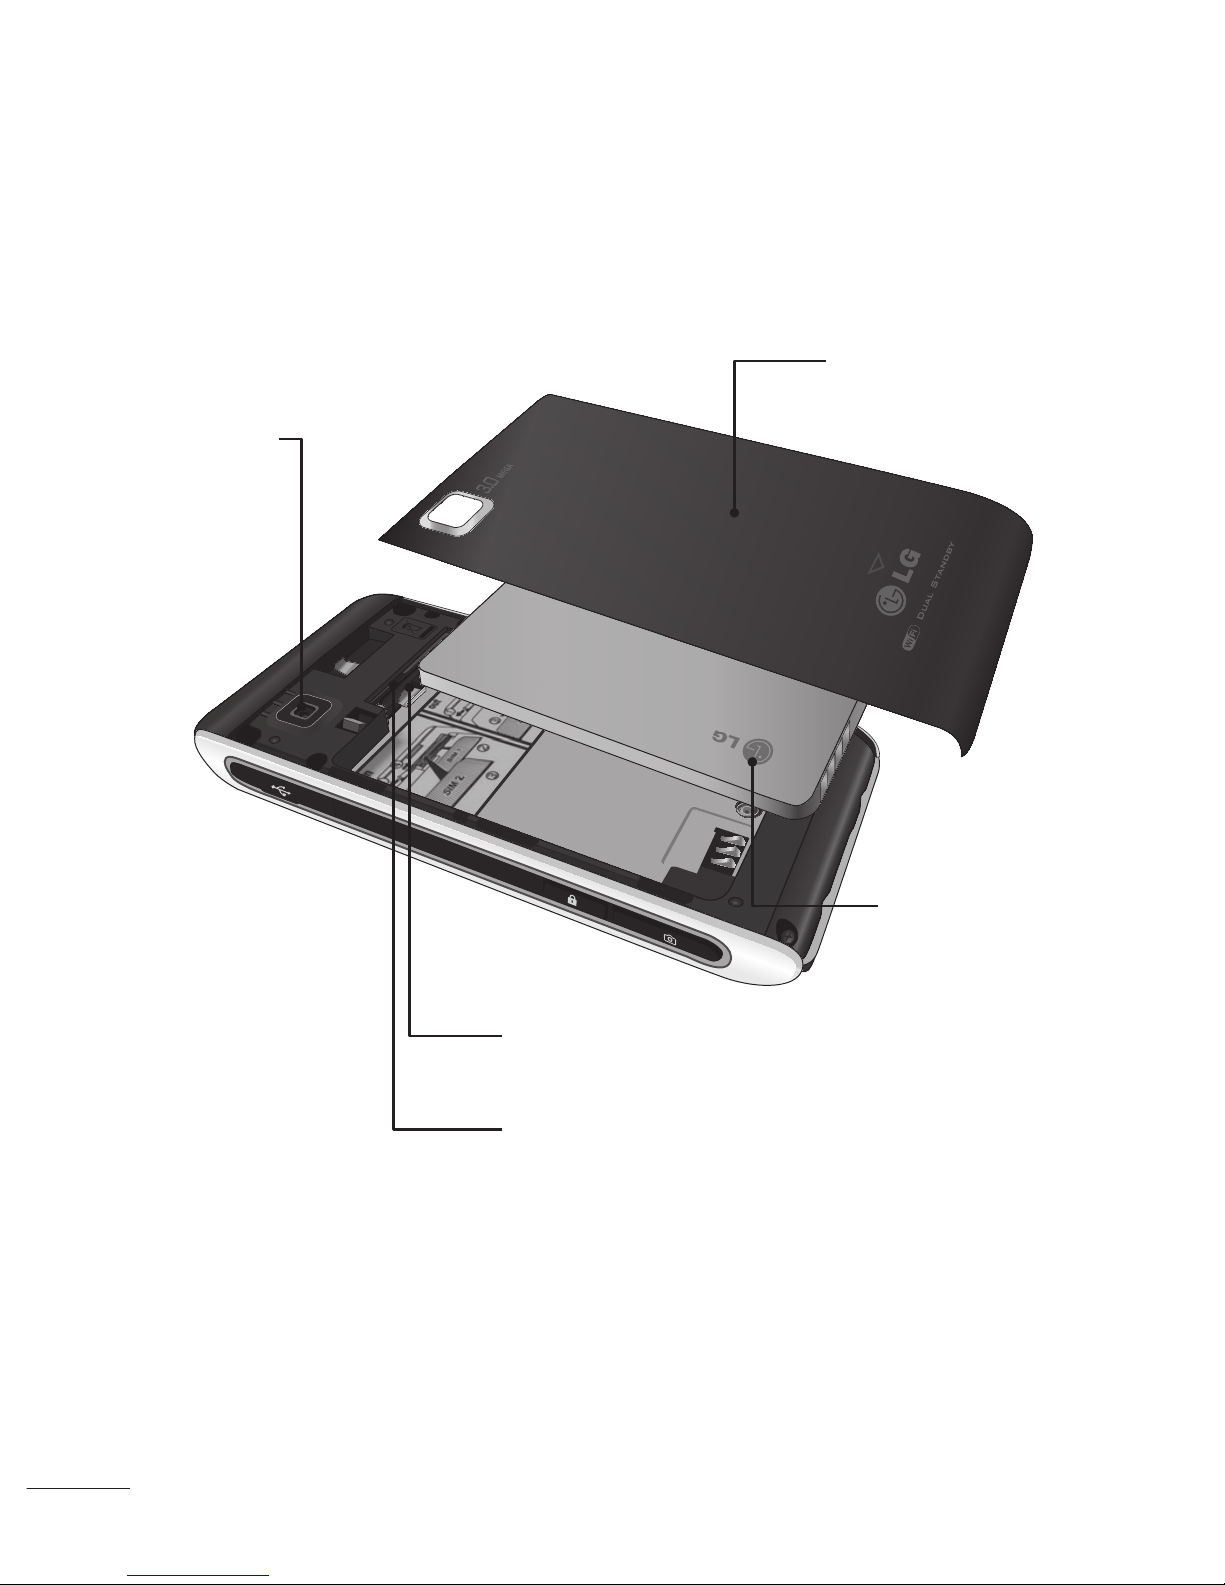
Open view
Battery cover
Battery
SIM1 Card Socket
SIM2 Card Socket
Camera
lens
9
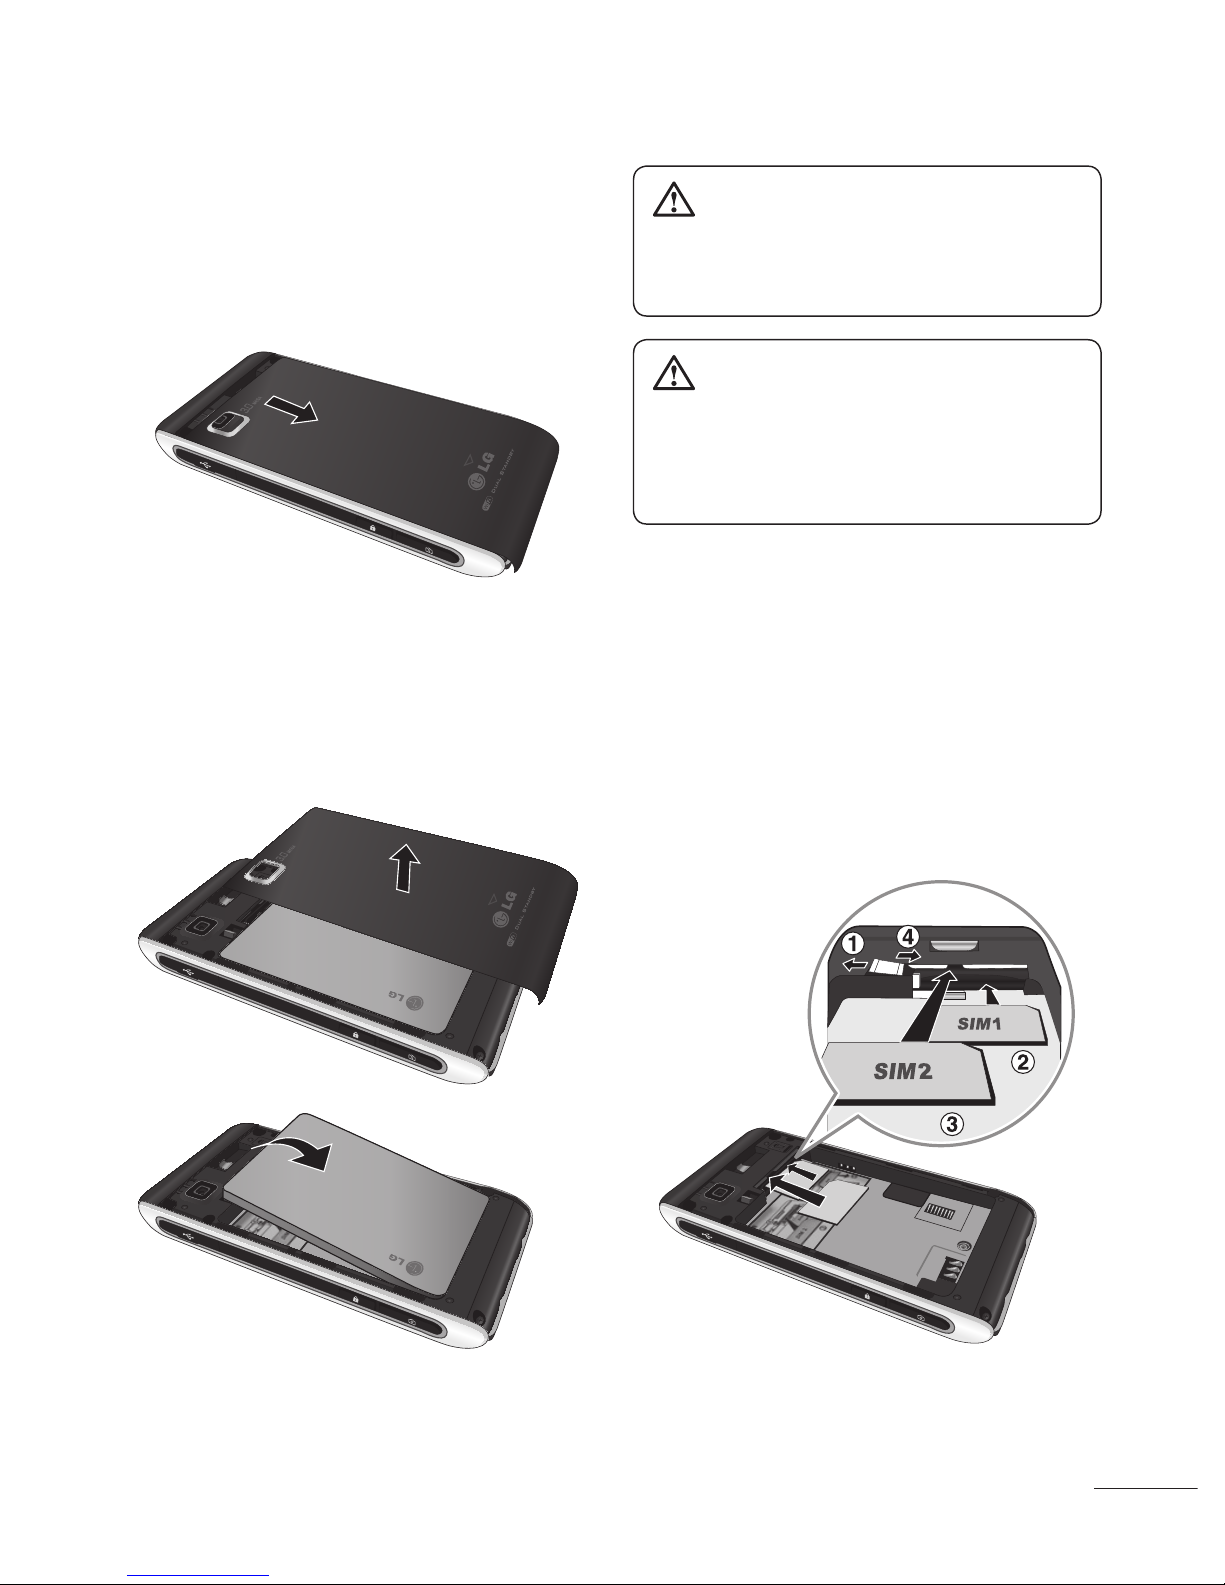
Installing the SIM and battery
1 Remove the battery cover
Slide the battery cover towards
the bottom of the phone and
away from it.
2 Remove the battery
Using the cut-out at the top
and lift it from the battery
compartment.
WARNING: Do not use your
fingernail when removing the
battery.
WARNING: Do not remove
the battery when the phone
is switched on, as this may
damage the phone.
3 Install the SIM card
Slide the SIM card into the SIM
card holder making sure that
the gold contact area on the
card is facing downwards. To
remove the SIM card, pull it
gently in the opposite direction.
10
LG GX500 | User Guide
Installing the SIM and battery
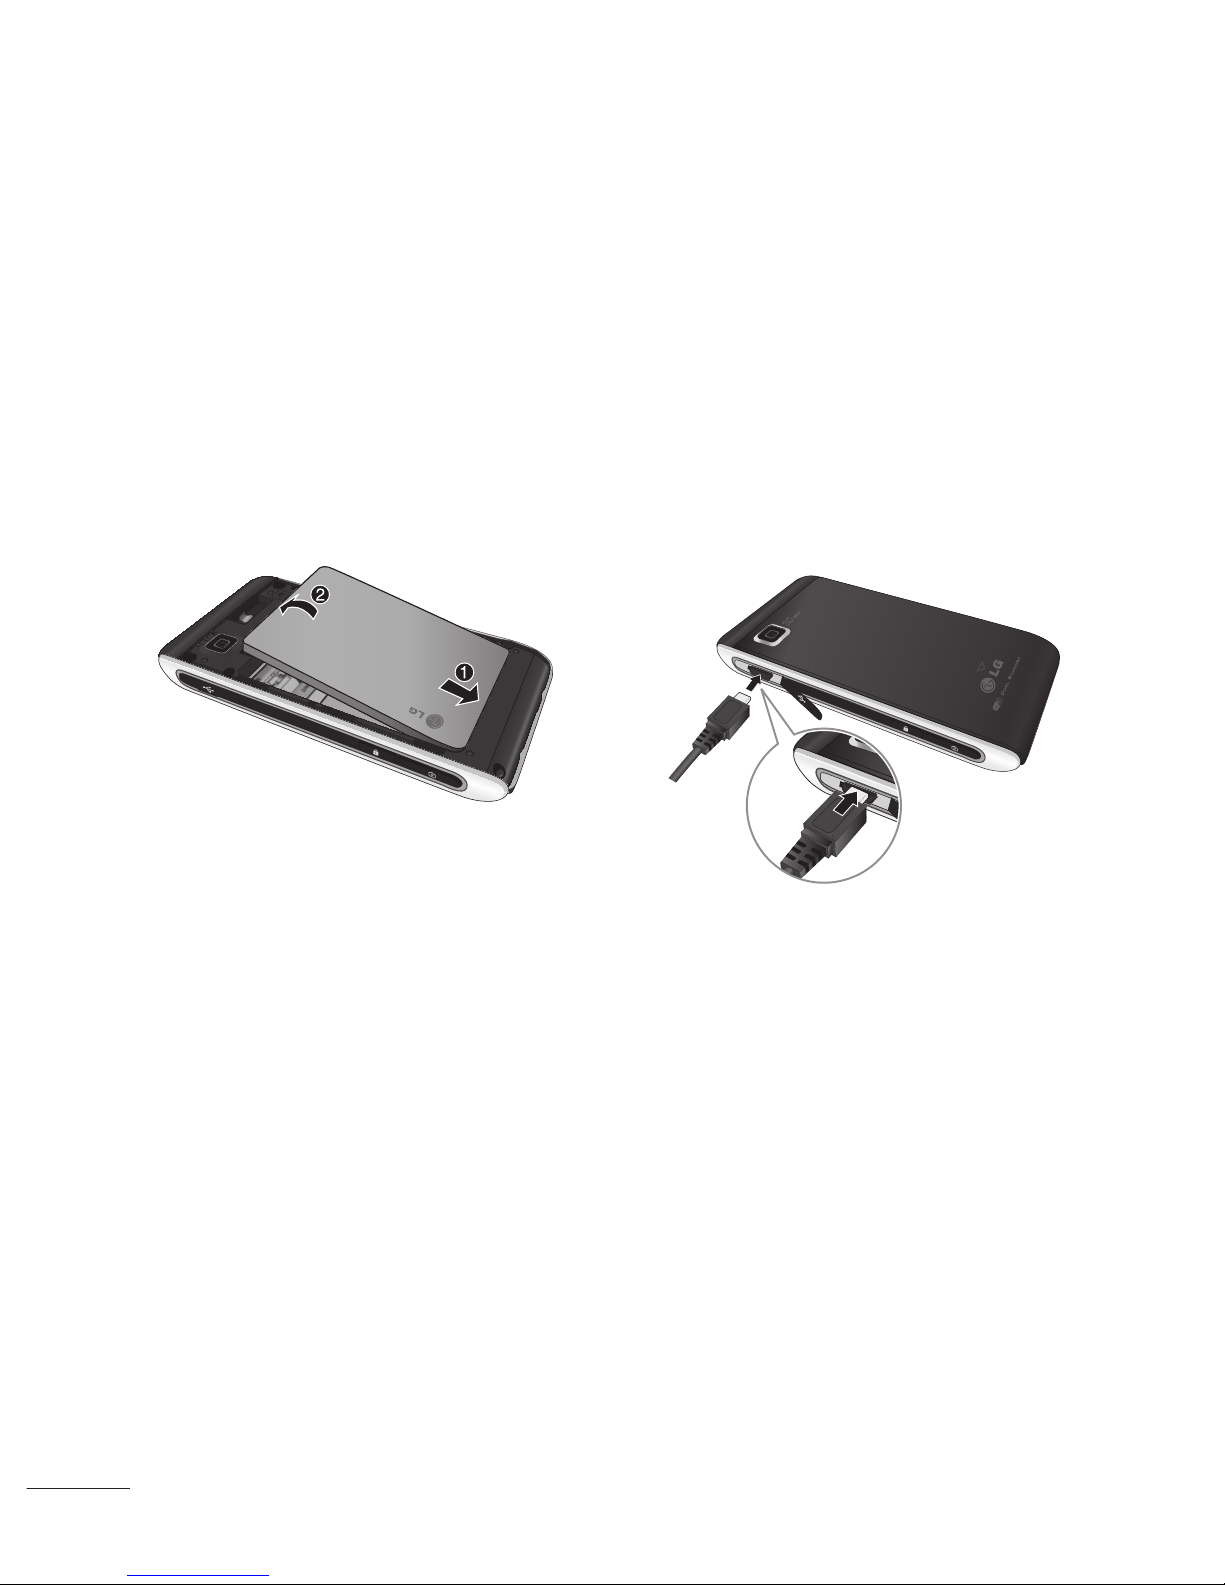
4 Install the battery
Insert the bottom of the battery
first into the bottom edge
of the battery compartment.
Ensure that the battery
contacts align with the
terminals on the phone. Press
down the top of the battery
until it clicks into place.
5 Charging your phone
Lift and twist the charger
socket cover of the on the
side of your GX500. Insert
the charger and plug it into a
mains electricity socket. Your
GX500 needs to be charged
until “Battery full” appears on
screen.
11
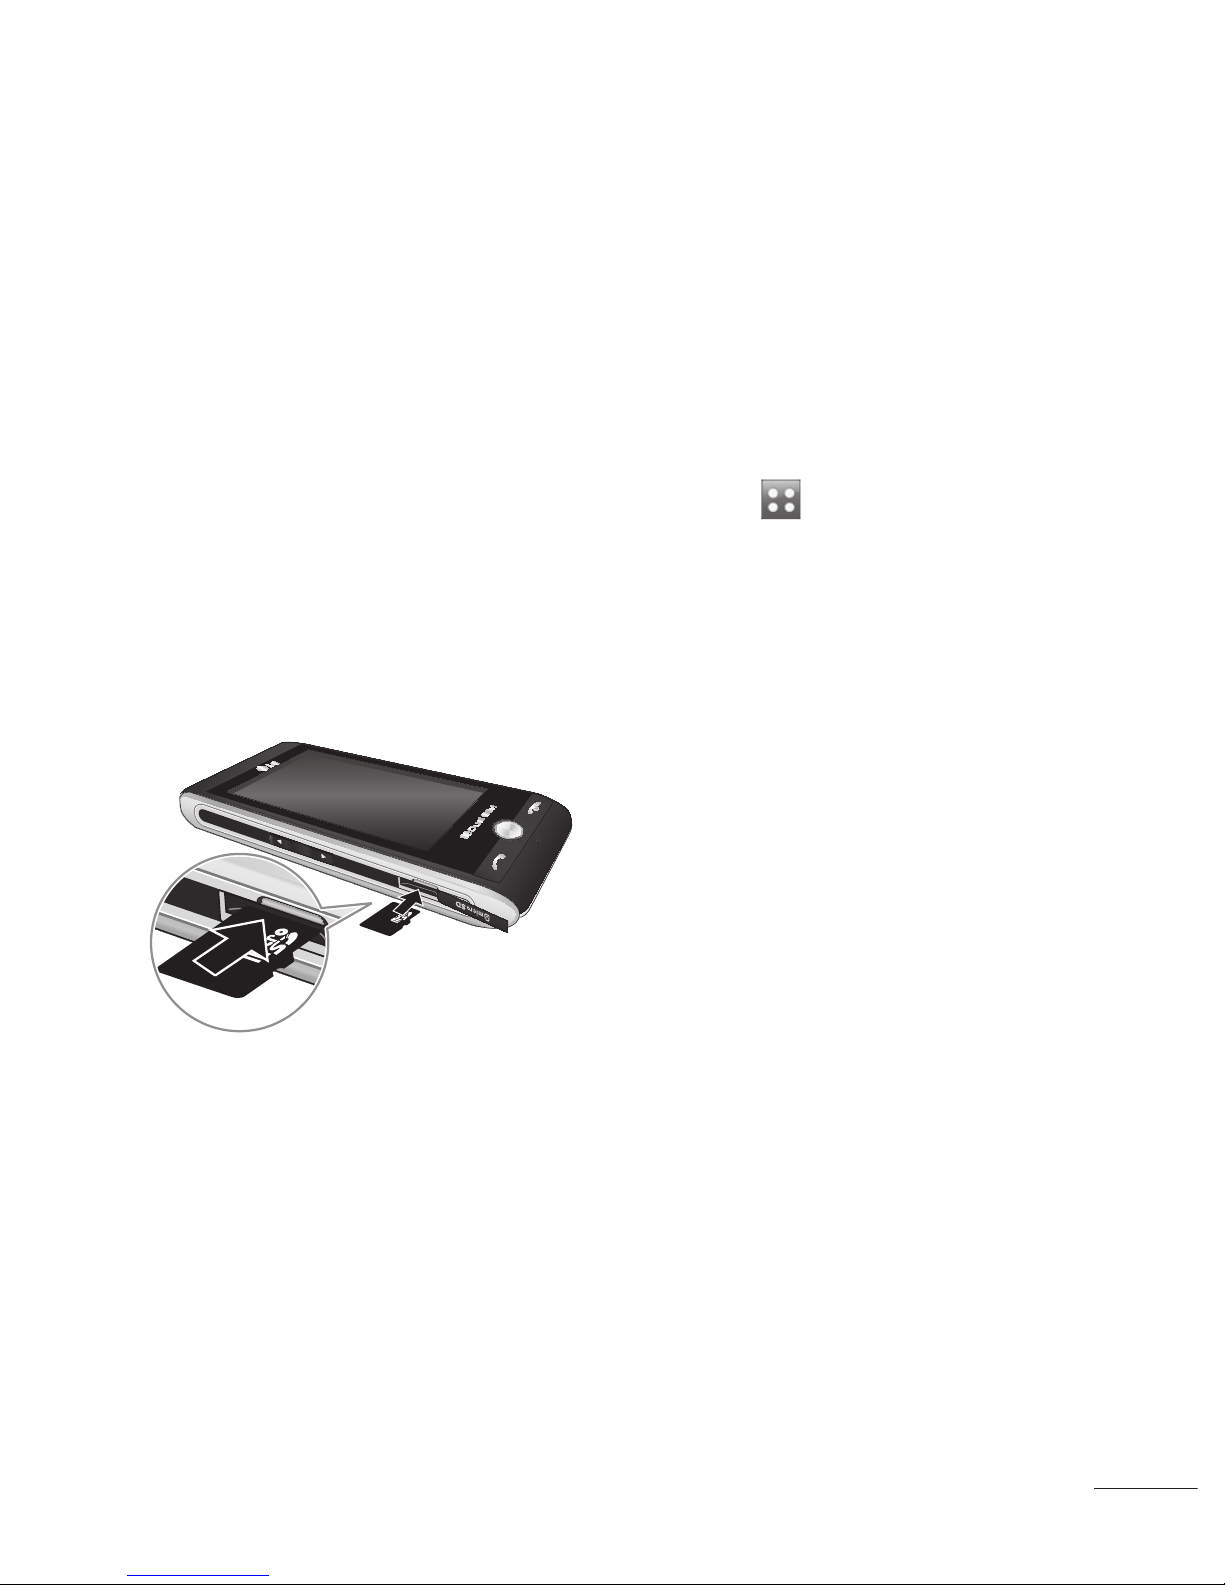
Installing a memory card
You can expand the memory
space on your phone by using a
MicroSD memory card.
NOTE: A memory card is an
optional accessory.
1 Open the memory card slot
cover on the right hand edge
of the phone.
2 Slide the memory card into the
slot until it clicks into place.
3 Replace the cover.
Formatting the memory
card
Your memory card may already
be formatted. If your card isn’t
formatted, you will need to format
it before you can begin using it.
1 From the standby screen
select
, then scroll through
SETTINGS Tab and choose
Phone settings.
2 Touch Memory info then
choose External memory.
3 Touch Format and then
confirm your choice.
4 Enter the password, if one is
set, and your card will then be
formatted and ready to use.
NOTE: If your memory card
already has content, it will
automatically be filled in the
correct folder; for example,
videos will be stored in the My
Videos folder.
Memory card
12
LG GX500 | User Guide
Touch in the standby screen to open a Top menu. From here you
can access further menus: COMMUNICATION, ENTERTAINMENT,
UTILITIES and SETTINGS.
Menu map
COMMUNICATION
Contacts
Recent history
Messaging
E-mail
Dialling
Social networking
Speed dials
New message
UTILITIES
Browser
Google
Alarms
Organiser
Memo
Voice recorder
Tools
Drawing Panel
ENTERTAINMENT
Camera
Gallery
Music
My stuff
Games & Apps
Pocket Apps
FM radio
Video camera
SETTINGS
Dual SIM settings
Profiles
Screen settings
Phone settings
Call settings
Bluetooth
Connectivity
Wi-Fi

13
From your standby screen you
can access all the menu options,
make a quick call and view the
status of your phone as well as
many other things.
Touch screen tips
The home screen is also a great
place to get accustomed to the
touch screen.
To select an item, touch the
icon accurately. Your GX500 will
vibrate slightly when it recognises
you’ve touched an option.
To scroll through lists, touch the
last item visible and slide your
finger up the screen. The list
will move up so more items are
visible.
There’s no need to press •
too hard, the touchscreen is
sensitive enough to pick up on
a light, yet firm, touch.
Use the tip of your finger to •
touch the option you want. Be
careful not to touch any other
options around it.
When the screen back light is •
off, press the Unlock/Lock key
on the right hand side to bring
back the home screen.
Don’t cover the phone with a •
case or cover. The touchscreen
won’t work with any material
covering it.
There are two types of idle •
screen. Flick left or right to
change your idle screen types
on the standby screen.
1 Widget idle - When you touch
, the mobile widget panel
appears.
2 Speed dial idle - When you
touch , the speed dial list
appears. You can drag and
click what you need right away
in both idle types.
Your standby screen
14
LG GX500 | User Guide
Your standby screen
The quick keys
The quick keys provide easy, one-touch access to your most used
functions.
Touch to bring up the
touch dialling pad to
make a call. Input the
number as you would
using a normal key pad
and touch Call or press
the
hard key.
Touch to open your
address book. To search
for the number you want
to call, enter the name
of the contact at the top
of the screen using the
touchpad. You can also
create new contacts and
edit existing ones.
Touch to access the
Messaging options menu.
From here you can create
a new SMS or MMS, or
view your message folder.
Touch to open the full
Top menu which is
divided into four vertical
sub-menus. Touch each
sub-menu’s tab to view
further options.
15
The status bar
The status bar uses various icons
to indicate things like signal
strength, new messages and
battery life, as well as telling you
whether your Bluetooth or GPRS
is active.
Below is a table which explains
the meaning of the icons you’re
most likely to see in the status
bar.
Icon Description
Multitasking
Network signal strength
(number of bars will vary)
No network signal
Remaining battery life
Battery empty
New text message
New voice message
Message inbox is full
Message sending failed
Multimedia message
sending failed
Icon Description
An alarm is set
Customised Profile in use
Normal profile in use
Outdoor profile in use
Silent profile in use
Headset profile in use
Calls are diverted
EDGE in use
Roaming
Flight mode is on
Bluetooth is active
BGM play
BGM pause
Memory card is enable
to use
Wi-Fi

16
LG GX500 | User Guide
Your standby screen
Changing your Status from
the status bar
Touch the status bar to open
the Status Summary. It shows
the current Time, Network, SVC
ID, Battery, Handset memory,
External Memory, Profile, MP3
and Bluetooth status. Here you
can set Profile type, play/pause
MP3 and activate/deactivate
Bluetooth.
Using the Multitasking
function
Press the multitasking hard key
to open the Multitasking
menu. From here you can view all
the applications you have running
and access them with one touch.
When you have an application
running in the background (e.g.
a game or the FM radio), will
appear in the status bar.
17
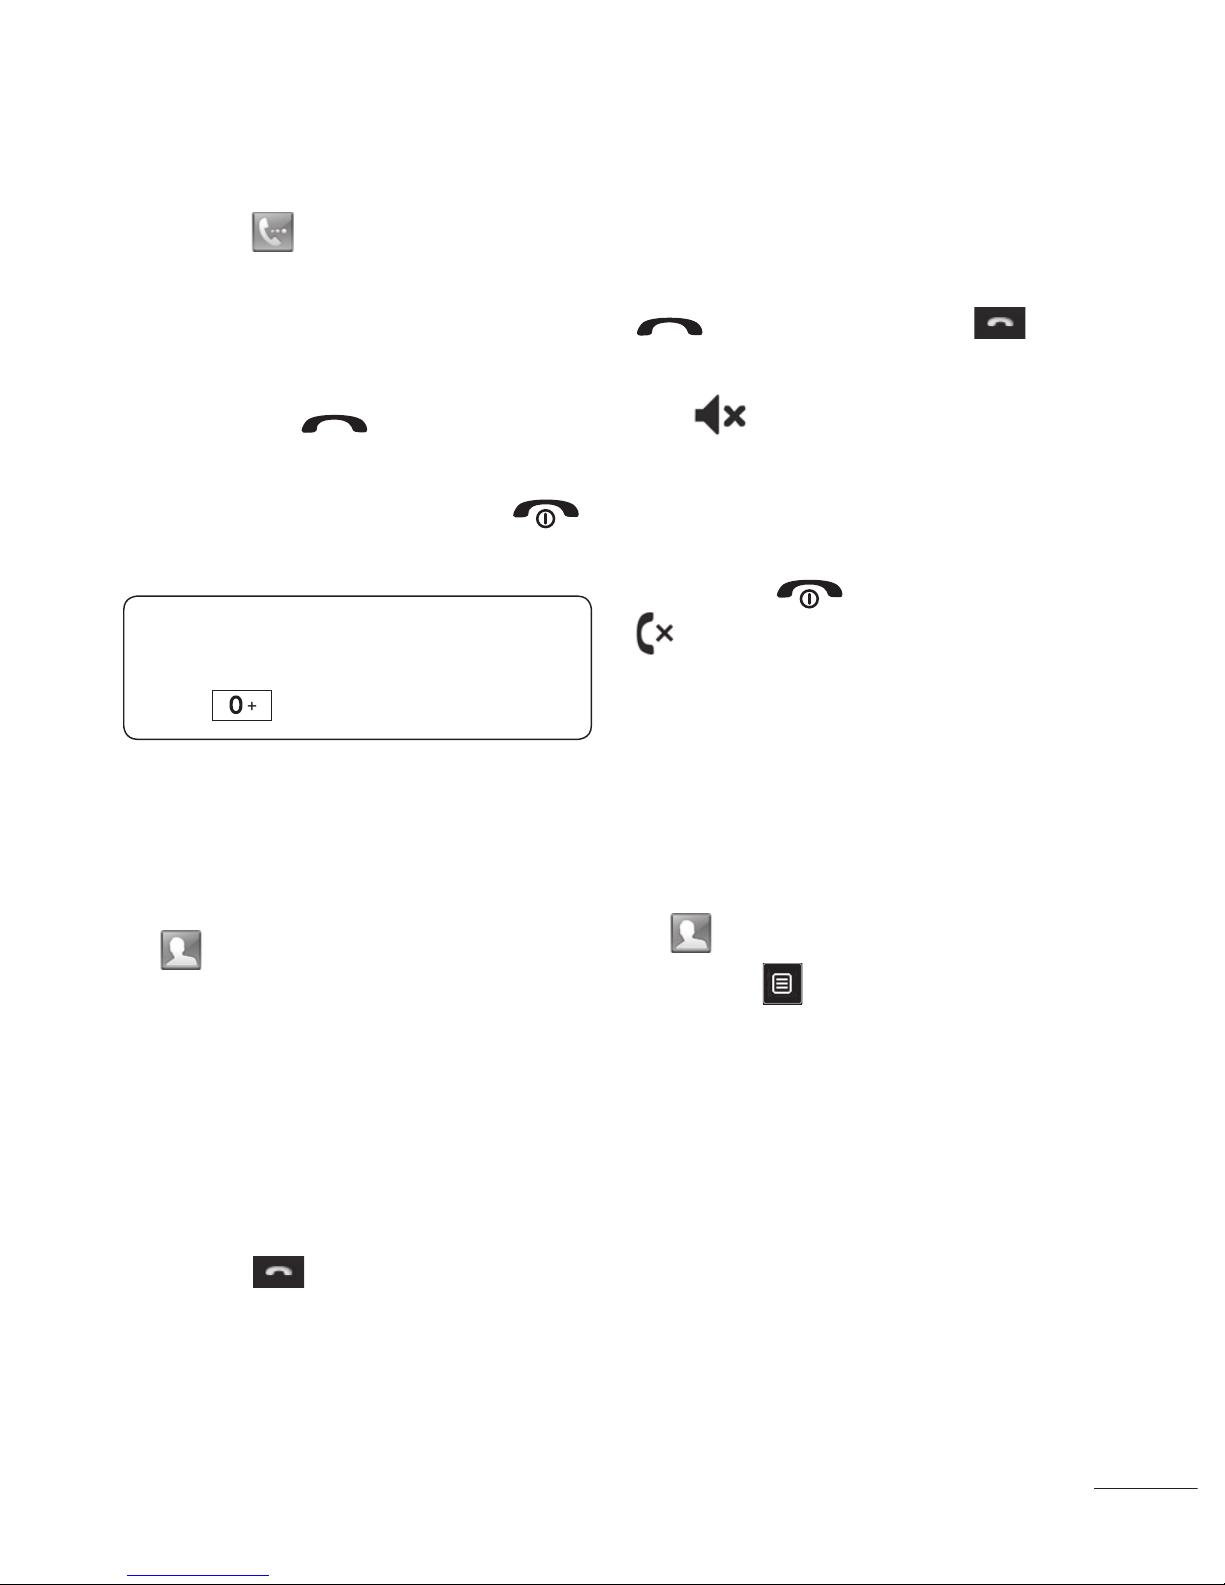
Calls
Making a call
1 Touch to open the keypad.
2 Key in the number using the
keypad. To delete a digit touch
the clear key.
3 Press the Hard key or
touch call to initiate the call.
4 To end the call press the
hard key.
TIP! To enter + for making an
international call, press and
hold
.
Making a call from your
contacts
1 From the standby screen touch
to open the address book.
2 Enter the first few letters of the
contact you would like to call.
3 From the filtered list, touch the
contact you’d like to call and
select the number to use if you
have more than one saved.
4 Touch
.
Answering and rejecting
a call
When your phone rings press the
hard key or touch to
answer the call.
Tap to mute the ringing. This
is great if you’ve forgotten to
change your profile to Silent for
a meeting.
Press the
hard key or touch
to reject an incoming call.
Speed dialling
You can assign a frequentlycalled contact to a speed dial
number.
1 From the home screen touch
to open Contacts.
2 Touch
and choose Speed
dials.
3 Your Voicemail is already set
to speed dial 1. You cannot
change this. Touch any other
number to assign it a speed
dial contact.
18
LG GX500 | User Guide
Calls
4 Your address book will open.
Select the contact you’d like
to assign to that number by
touching their phone number
once. To find a contact tap the
search field box and enter the
first letter of the name of the
contact required.
Making a second call
1 During your initial call, touch
and select the number you
want to call.
2 Dial the number or search your
contacts.
3 Press
to connect the call.
4 Both calls will be displayed on
the call screen. Your initial call
will be locked and the caller
put on hold.
5 To change between the calls,
touch
and choose Swap
call or press the number of
the held call.
6 To end one or both calls press
and select End followed by
All, Held or Active.
TIP! You can combine your
calls by selecting Accept then
Join. Check that your network
provider supports conference
calling.
NOTE: You will be charged for
each call you make.
Viewing your call logs
Touch and select
Communication and tap Recent
history. Choose to view:
All calls - View a complete list of
all dialled, received and missed
calls.
Dialled calls - View a list of all
the numbers you have called.
Received calls - View a list of
all the numbers that have called
you.
Missed calls - View a list of all
the calls you have missed.
TIP! From any call log touch
and Delete all to delete all the
recorded items.
19
Using call divert
1 Touch , select Settings and
choose Call settings.
2 Touch Call divert.
3 Choose whether to divert all
calls, when the line is busy,
when there is no answer or
when you are not reachable.
4 Input the number you’d like to
divert to.
5 Touch Request to activate.
NOTE: Charges are incurred for
diverting calls. Please contact
your network provider for details.
TIP! To turn off all call diverts,
choose Deactivate all from the
Call divert menu.
Using call barring
1 Touch , select Settings and
choose Call settings.
2 Touch Call barring.
3 Choose any or all of the six
options:
All outgoing
Outgoing international
Outgoing international calls
except home country
All incoming
Incoming when abroad
Deactivate all
4 Enter the call barring
password. Please check with
your network operator for this
service.
TIP! Select Fixed dial number
to turn on and compile a list of
numbers which can be called
from your phone. You’ll need
your PIN2 code from your
operator. Only numbers included
in the fixed dial list can be
called from your phone.

20
LG GX500 | User Guide
Calls
Changing the common call
setting
1 Touch , select Settings and
choose Call settings.
2 Touch Common setting.
From here you can amend the
settings for:
Call reject - Slide the switch
to On to highlight the Reject
list. You can touch the text
box to choose from all calls,
specific contacts or groups,
or those from unregistered
numbers (those not in your
contacts). Touch Save to
change the setting.
Send my number - Choose
whether your number will
be displayed when you call
someone.
Auto redial - Slide the switch
left for On or right for Off.
Answer mode - Choose
whether to answer the phone
using the send key or any key.
Minute minder - Slide the
switch left to On to hear a tone
every minute during a call.
BT answer mode - Select
Hands-free to be able to
answer a call using a Bluetooth
headset, or select Handset to
press a key on the handset to
answer a call.
Save new number - Select
Yes to save a new number.
21
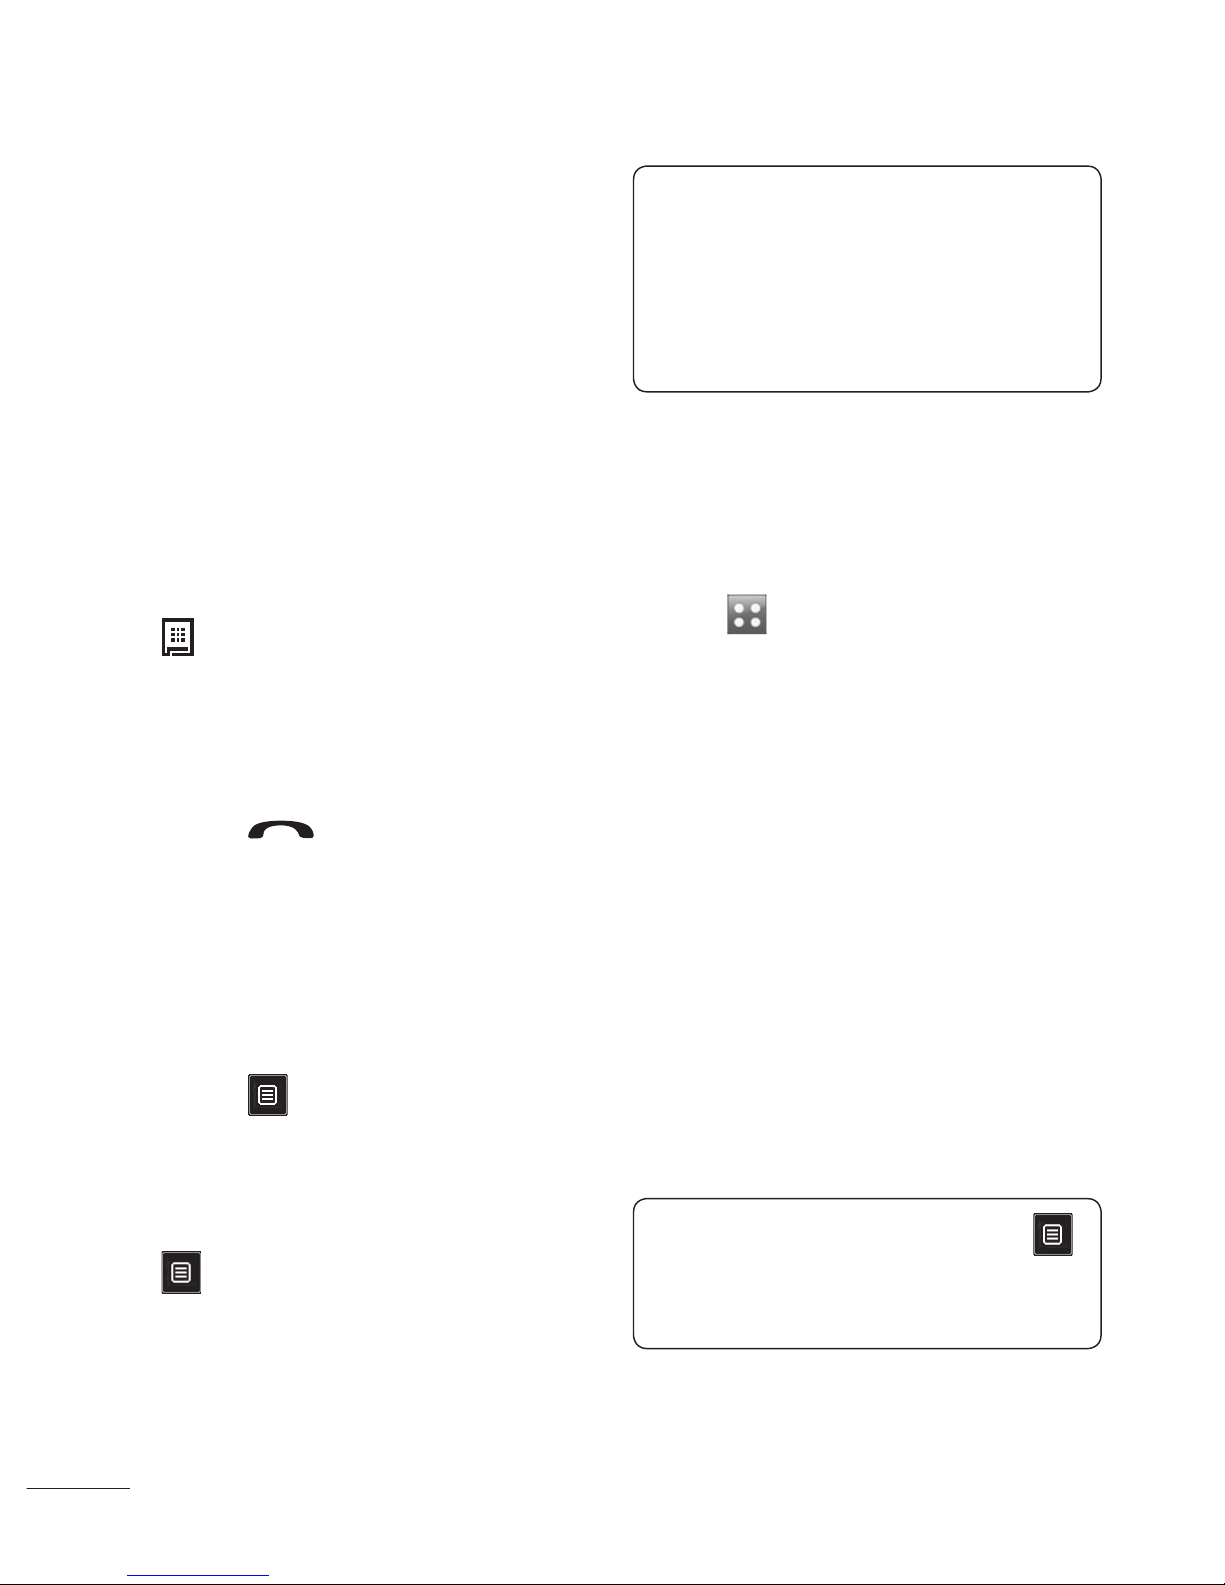
Searching for a contact
There are two ways to search for
a contact:
From the standby screen
1 From the standby screen touch
to open the address book.
Select the contact from the list
that you want to make a call.
2 Touch
or press the
hard key to initiate the call.
From the main menu
1 Touch
, select .
2 Touch Contacts, then Search.
3 You see a list of contacts,
typing in the first letter of a
contact’s name will jump the
menu to that alphabetical area
of the list.
TIP! The alphabetical keypad
is displayed once you tap the
blank square.
Adding a new contact
1 From the standby screen touch
and touch Add contact.
2 Choose whether to save the
contact to your Handset or SIM
(SIM 1/SIM 2).
3 Enter the first and last name
of your new contact. You do
not have to enter both, but you
must enter one or the other.
4 You can enter up to five
different numbers per contact.
Each entry has a preset type
Mobile, Home, Office, Pager,
Fax and General. When you
have finished, touch Close.
5 Add an email address.
6 Assign the contact to one or
more groups. Choose from
No group, Family, Friends,
Colleagues, School or VIP.
Contacts

22
LG GX500 | User Guide
Contacts
7 You can also add a Ringtone,
Birthday, Anniversary,
Homepage, Home address,
Company name, Job title,
Company address and a
Memo.
8 Touch Save to save the
contact.
Creating a group
1 Touch .
2 Touch Contacts then Groups.
3 Touch
.
4 Select Add group.
5 Enter a name for your new
group. You can also assign a
ringtone to the group.
6 Touch Save.
NOTE: If you delete a group, the
contacts which were assigned to
that group will not be lost. They
will remain in your address book.
Changing your contact
settings
You can adapt your contact
settings so that your address
book suits your own preferences.
TIP! To scroll through a list of
options, touch the last item
visible and slide your finger up
the screen. The list will move up
so more items are visible.
1 From the standby screen touch
.
2 Touch Contacts, then
Settings.
3 From here you can adjust the
following settings:
Contact list settings - You
can also choose to show the
first name or last name of a
contact first.

23
Copy - Copy your contacts
between your SIM cards(SIM1
or SIM2) and your handset.
Choose to do this one at a
time, or all at once. If you
select one at a time, you’ll
need to select each contact to
copy one by one.
Move - This works in the same
way as Copy, but the contact
will only be saved to the
location you’ve moved it to. So
if you move a contact from the
SIM to the handset it will be
deleted from the SIM memory.
Send all contacts via
Bluetooth - Send all of your
contacts to another device
using Bluetooth. You will be
prompted to turn on Bluetooth
if you select this option.
Backup contacts - See
Backing up and restoring your
phone’s information in PC Sync
part.
Restore contacts - See
Backing up and restoring your
phone’s information in PC Sync
part.
Clear contacts - Delete all
your contacts. Touch Yes if you
are sure you want to wipe your
address book.
Viewing information
1 From the standby screen touch
.
2 Touch Contacts, then
information.
3 From here you can view your
Service dial numbers, your
Own number, your Memory
info. (how much memory
space you’ve got left) and My
business card.
TIP! If you’ve yet to add a
business card for yourself,
select My business card and
enter all your details as you
would for any contact. Touch
Save to finish.
24
LG GX500 | User Guide
Messaging
Your GX500 combines SMS,
MMS and email into one intuitive
and easy to use menu.
There are two ways to enter the
messaging centre:
1 Touch from the standby
screen.
2 Touch
from the standby
screen, then select
Communication tab and
choose .
TIP! You can send Schedule
SMS through Calendar Module.
Sending a message
1 Touch New message, then
select Message to open a
blank message.
2 From here you can send an
SMS or MMS. To send an
email, touch from the
standby screen. Then select
Communication tab and
E-mail.
3 Touch Insert, to add an image,
video, sound or template.
4 Touch To at the top of the
screen to enter the recipient’s
number, or touch the search
icon to open your address
book. You can add multiple
contacts. Touch Send when
ready.
NOTE: You can send SMS to
many users at a time. Click on
contact search icon and Select
multiple from Options where in
user can mark/unmark contacts
for sending message. To send
the SMS to a particular group of
contacts click on contacts search
icon and select search by Group
after composing the SMS.
WARNING: You will be
charged per 1 page text
message for each person that
you send the message to.
WARNING: If an image,
video or sound is added to an
SMS it will be automatically
convert to an MMS and you will
be charged accordingly.
Messaging
25
Entering text
There are five ways to enter text:
Keypad, Keyboard, Handwriting-
Screen, Handwriting-Box,
Handwriting-Double Box.
You can choose your input
method by tapping and Input
method.
Tap the screen once, the
keyboard appears.
Touch to turn on T9
predictive text.
You can choose writing
languages.
Tap to change numbers,
symbols and text keypad.
Use
to scroll through the
different keyboard types in each
text entry mode (for example,
capitals or lowercase).
T9 predictive
T9 mode uses a built-in
dictionary to recognise words
you’re writing based on the key
sequences you touch. Simply
touch the number key associated
with the letter you want to enter,
and the dictionary will predict the
word you want to use.
For example, press 8, 3, 5, 3, 7,
4, 6, 6, 3 to write ‘telephone’.
Abc manual
In Abc mode you must touch the
key repeatedly to enter a letter.
For example, to write ‘hello’,
touch 4 twice, 3 twice, 5 three
times, 5 three times again, then
6 three times.
26
LG GX500 | User Guide
Messaging
Keyboard
In Keyboard mode the screen
flips to landscape and a full
keyboard appears on screen.
Simply touch each letter to write
your message and press:
to switch to upper case.
Handwriting recognition
In Handwriting mode you
simply write on the screen and
your GX500 will convert your
handwriting into your message.
Select Handwriting-Screen
or Handwriting-Double Box
depending on your preferred
view.
TIP! You may find it easier to
use the stylus in this mode,
please remember to press lightly
to protect your screen from
damage.
Handwriting recognition translates
stylus gestures into letters,
numbers or other character, and
displays these characters as text.
Handwriting recognition is only
active where text can be entered.
Setting up your email
You can stay in touch on the
move using email on your GX500.
It’s quick and simple to set up a
POP3 or IMAP4 email account.
1 Touch then select
Communication tab.
2 Select
then scroll menu to
Settings.
3 Touch Email then Email
accounts.
4 Touch Add account.
5 Setup Wizard will help you set
up your email settings.
6 You can check and edit
settings by selecting the
account in the list. You can
also check the additional
settings that were filled in
automatically when you
created the account.
7 You can change your default
email account by touching
Activate.

27
Retrieving your email
You can automatically or
manually check your account for
new emails.
To check manually:
1 Touch then select .
2 Touch Mailbox.
3 Touch the account you want to
use then
.
4 Choose Retrieve and your
GX500 will connect to your
email account and retrieve
your new messages.
Changing your email
settings
You can change your email
settings according to your own
preferences.
1 Touch then select .
2 Touch Settings and Email
and then you can adapt the
following settings:
Allow reply Email - Choose
to allow the sending of ‘read,
confirmation’ messages.
Request reply Email - Choose
whether to request read
confirmation messages.
Retrieve interval - Choose
how often your GX500 checks
for new email messages.
Retrieve amount - Choose
the number of emails to be
retrieved at any one time.
Include message in Fwd &
Reply - Choose to include the
original message in your reply.
Include attachment - Choose
to include the original
attachment in any reply.
Auto Retrieval in Roaming -
Choose whether to retrieve
your messages automatically
or not.
New email notification -
Choose whether to be alerted
to new emails.
Signature - Create an email
signature and switch this
feature on.
Priority - Choose the priority
level of your email messages.

28
LG GX500 | User Guide
Messaging
Message folders
You’ll recognise the folder
structure used on your GX500,
which is fairly self-explanatory.
New message - Open a new
blank message.
Inbox - All the messages you
receive are placed into your inbox
From here you can view, delete
and more, see Managing your
messages below for details.
Drafts - If you don’t have time
to finish writing a message, you
can save what you’ve done so
far here.
Outbox - This is a temporary
storage folder while messages
are being sent.
Sent items - Messages you send
are placed in this folder.
My Folders - Create folders to
store your messages.
Templates - Use a list of
commonly used text and
multimedia message templates.
Emoticons - Add and insert
emoticons for your messages.
Settings - Change the settings
for your text and multimedia
messages.
Changing your text
message settings
Your GX500 message settings
are pre-defined so that you can
send messages immediately.
These settings can be changed
according to your preferences.
TIP! To scroll through a list of
options, touch the last item
visible and slide your finger up
the screen. The list will move up
so more items are visible.
 Loading...