

LG LGE960W User Manual
For AndroidTM
mobile technology
platform 4.2

Copyright © 2012 Google Inc. All rights reserved.
Edition 1.2.
Googl e, And roid, Gmail, Google Maps, Chrome ,
Nexus 4 , Google Play, YouTube, Google+, and other
trademarks are propert y of Google Inc. A list of
Googl e trade marks is availab le at http://www.
google.com/permissions/guidelines.html. LG and
the LG logo are tra demar ks of LG electro nics Inc.
All other marks and trademar ks are proper ties of
their respective owners.
The content of this guideboo k may dif fer in some
details from th e product or its soft ware. Fo r best
results, make sure you’re runn ing the latest Android
system u pdate. To check, go to Settings > System >
About phone > S ystem updates.
All information in this guidebook is subject to
change without notice.
For online hel p and suppor t, visi t support.google.
com/nexus.
NEXU S 4 GUIDEBOOK ii


Table of contents
Part One: Using Nexus 4
1. Get started 2
Inser t a SIM card 2
Charge the battery 4
Get around 7
Browse & organize your
Home screens 10
Touch & type 14
Type text by speaking 16
Why use a Google Account? 18
What’s New in Android 20
2. Explore your phone 24
Swipe up for Google Now 24
Swipe down for notications
& settings 27
Relax with Google Play 31
NEXU S 4 GUIDEBOOK iv

Use & customize the lock screen 35
Try Face Unlock 38
Share content with Android Beam 39
Change the wallpaper 41
Take a screenshot 42
Connect to keyboards, mice,
& other devices 43
3. Use the Phone app 47
Make a phone call 47
Answer or diver t calls 49
Work with the Call log 51
Place an Internet (SIP) call 52
Listen to your voicemail 54
4. Use the keyboard 59
Enter & edit text 59
Try Gesture Typing 63
Use keyboard dictionaries 65
NEXU S 4 GUIDEBOOK v

5. Try some apps 66
Use All Apps 66
Start Gmail 68
Find People 69
Manage your Calendar 71
Open & use Clock 73
Manage downloads 75
6. Use Google Now & Search 77
About Google Now 77
Use Google Now 83
Turn off Google Now 86
Control location access,
repor ting, & history 87
Search & Voice Actions basics 92
Search tips & tricks 95
Use Voice Actions 97
Voice Actions commands 99
Google Now Card list 102
About Gmail Cards 114
NEXU S 4 GUIDEBOOK vi

About the Location History card 115
About the Stocks card 116
Search settings 117
Privacy & accounts 120
7. Accessibility 122
Accessibility over view 122
Accessibility gestures for
Android 4.2 (Jelly Bean) 124
Set up your phone 127
Use magnication gestures 130
Use TalkBack 131
Change TalkBack settings 132
Use Explore by Touch with TalkBack 134
Navigate the Home screen 136
Try Google Play 140
Use Gmail 144
Browse Chrome 148
Use the lock screen 151
Accessibility settings 152
NEXU S 4 GUIDEBOOK vii

Part Two: Adjusting settings
8. Wireless & network settings 156
Connect to Wi-Fi networks 156
Connect to Bluetooth devices 163
Optimize data usage 168
Control airplane mode &
other network settings 174
Connect to vir tual private networks 176
9. Device settings 179
Change sound settings 179
Set up Daydream 180
Use Wireless Display 182
Transfer les through USB 183
Extend battery life 185
Manage memor y usage 187
NEXU S 4 GUIDEBOOK viii

10. Security settings 192
Security on Android 192
Manage security settings 193
Protect against harmful apps 195
Set screen lock 197
Encr ypt your data 200
Work with certicates 203
11. Personal, account, &
system settings 208
Manage location access 208
Change backup & reset options 211
Add or remove accounts 214
Congure sync options 216
Appendix: Hardware reference 220
What’s in the box 220
Nexus 4 222
Specs 224
NEXU S 4 GUIDEBOOK ix

Part One
Using
Nexus 4

1
Get started
Insert a SIM card
Before you star t using your phone, you may
need to insert your Micro SIM card. If no card
is installed, the message “No SIM card” appears on the phone’s lock screen.
GE T STARTED 2
The SIM card tray is located on the lef t side
of the phone below the volume button. The
eject button is a small hole just above the
tray door. To install a new Micro SIM card:
1. Insert the SIM ejection tool that comes
with the phone (or a thin pin) into the eject
bu tton ho le, and pu sh r mly but ge ntly un til the tray pops out.
2. Remove the tray and place the micro SIM
card inside it, with the contacts out and
the angled corner to the right. There is
only on e possible way to t the card snug ly into the tray.
3. Carefully reposition the tray in the slot
and push it gently back into the phone.
TIP: Your phone’s IMEI identication
number is on the SIM card tray. You
may need this number later to identify
your phone for service purposes. Write
down the IMEI number or take a photo
of the label on the product box.
GE T STARTED 3

Charge the battery
Your battery will not be fully charged when
you rst unpack your Nexus 4. It’s a good
idea to fully charge the battery as soon as
you get a chance.
If you’re using the travel adapter that comes
with the phone, connect one end of the data
cable to the charger port at the bottom of
the phone, and the other end to the travel
adapter. Then connect the travel adapter to
a power outlet.
GE T STARTED 4

• T he travel adapte r varies by country
or region.
• Use only the travel adapter and Mi-
cro USB cable that come with your
Nexus 4. Using a different travel
adapter or cable may damage your
phone.
• The input voltage range between
the wall outlet and this travel adapter is AC 100V–240V, and the travel
adapter’s output voltage is DC 5V,
2A.
• Charging your phone through a USB
cable attached to another device,
such as a laptop computer, takes
longer than charging with a travel
adapter.
• Nexus 4’s battery can’t be removed.
Don’t attempt to open the phone.
GE T STARTED 5
IMPORTANT: If you use a wire less charger, you must use an approved model
and only as directed. The Nexus 4 travel adapter may not generate enough
current to power a wireless charger.
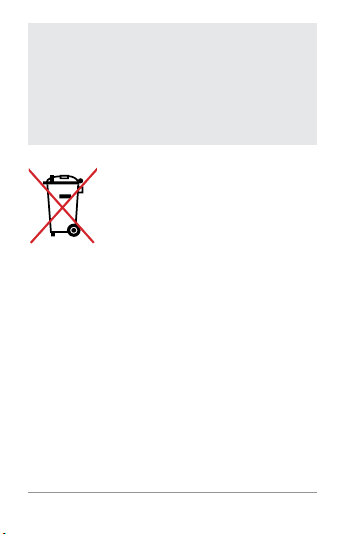
DO NOT throw the battery in
municipal waste. The symbol
of the crossed out wheeled
bin indicates that the battery
should not be placed in municipal waste.
Set up your phone
The rst time you turn on the phone, you’ll
see a Welcome screen.
• To choose a different language, touch the
menu.
• To continue, touch Start and follow the
instructions.
When prompted, sign in using the email ad-
GE T STARTED 6

dress and password for your Google Account. If you don’t have one yet, create one.
An email address that you use for any of the
following counts as a Google Account:
• Gmail
• YouTube
• Google Apps
• AdWords
• Any other Google product
When you sign in with a Google Account, all
the email, contacts, Calendar events, and
other data associated with that account are
automatically synced with your phone.
If you have multiple Google Accounts, you
can add the others later.
Get around
Every Home screen shows the Favorites tray:
another quick way to get to your apps:
GE T STARTED 7
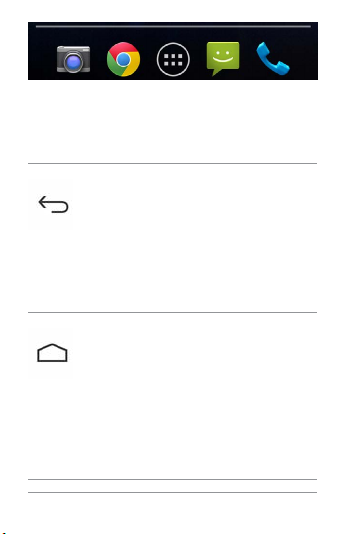
At the bottom of ever y Nexus 4 screen, no
matter what you’re doing, you’ll always nd
these three navigation buttons:
Back
Opens the previous screen you
were working in, even if it was in
a different app. Once you back
up to the Home screen, you
can’t go back any further in your
his tor y.
Home
Opens Home. If you’re viewing a lef t or right Home screen,
opens the central Home screen.
To open Google Now, swipe up.
Google Now gives just what you
need to know, right when you
need it.
GE T STARTED 8
Recent apps
Opens a list of thumbnail images
of apps you’ve worked with recently. To open an app, touch it.
To remove a thumbnail from the
list, swipe it left or right.
If you don’t use these buttons often, they
may shrink to dots or fade away, depending
on the cu rrent app. To brin g them back, to uch
their location.
On the All Apps screen available from the Favorites tray,
notice the Settings icon. This
Settings
brings you to the Settings
screens for your phone, where
you can adjust things like network, sound, and account settings, among many others.
GE T STARTED 9
TIP: You can use Quick Settings to toggle Wi-Fi, change display brightness,
and more. To open Quick Settings,
swipe down with two ngers from the
top of any screen. Or, swipe down with
one nger to pull down the notication
shade, and touch the Quick Settings
icon at the top right.
At the top of the screen you’ll nd Google
Search, which lets you search your phone
or the Internet. Touch Google to type your
search terms, or the
speak them; you can also say “Google” and
your query to activate a voice search.
Microphone icon to
Browse & organize your Home
screens
Browse Home screens
To move between Home screens, swipe left
or right.
GE T STARTED 10
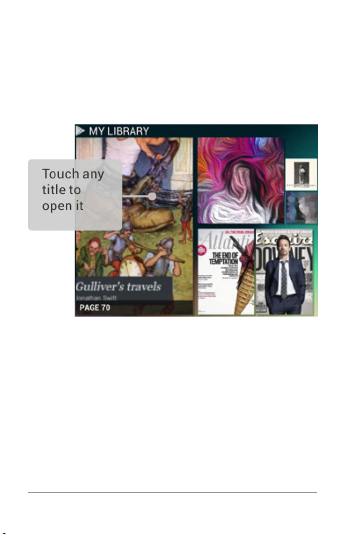
The My Librar y widget displays apps, music,
movies, magazines, books, and games you
already have – including free content that
comes with your Nexus 4:
GE T STARTED 11

When you’re ready to shop for more, try the
suggestion s in one of the Play Re commenda tions widgets:
To resize a widget, touch & hold, then let go
and drag the blue dots. To remove it, touch &
hold, then drag it to the Remove icon at the
top of the screen.
GE T STARTED 12

Organize Home screens
To add an app or widget to a Home screen:
1. Go to the Home screen where you want to
place the app or widget.
2. Touch the All Apps icon.
3. Swipe right, if necessary, to nd the app
or widget you want.
4. Touch & hold the app or widget until the
Home screen appears, slide it into place,
and lift your nger.
To move an app or widget icon to a different
location on a Home screen:
1. Touch & hold the icon.
2. Slide your nger to the new position.
To move between Home screens, slide toward the edge of the screen.
To bump another icon out of the way, slide
slowly into it.
3. Lift your nger.
The icon drops into its new position.
GE T STARTED 13
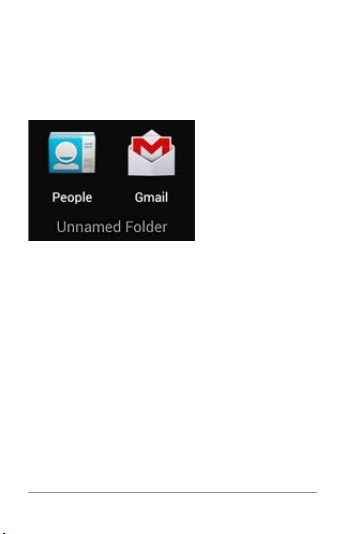
To combine two icons in a folder, slide one
quickly over the other.
To open a folder, touch it. To rename a folder,
touch its name.
Touch & type
To select or activate something, touch it.
To type something , such as a name, password, or search terms, just touch where you
want to type. A keyboard pops up that lets
you type into the eld.
Other common gestures include:
• Touch & hold. Touch & hold an item on the
GE T STARTED 14

screen by touching it and not lifting your
nger until an action occurs.
• Drag. Touch & hold an item for a moment
and then, without lifting your nger, move
your nger on the screen until you reach
the target position. For example, you can
move apps around on the Home screen.
• Swipe or slide. Quickly move your nger
across the surface of the screen, with -
out pausing when you rst touch (so you
don’t drag something instead). For example, you can slide a Home screen left or
right to view the other Home screens.
• Double-tap. Tap quickly twice on a webpage, map, or other screen to zoom. For
example, double-tap a picture in Chrome
to zoom in, and double-tap again to zoom
out.
• Pinch. In some apps (such as Maps,
Chrome, and Gallery), you can zoom in
and out by placing two ngers on the
screen at once and pinching them together (to zoom out) or spreading them apart
(to zoom in).
GE T STARTED 15

• Rotate the screen. The orientation of
most screens rotates with your phone as
you turn it. To lock or unlock the screen’s
vertical orientation, swipe down with two
ngers from the top of any screen and
touch the Rotation icon in Quick Settings.
To change your phone’s noti-
Settings
cation sounds, volumes, and
more, go to
vice > Sound.
To change your phone’s brightness, font size, and more, go
to
Display.
Settings > De-
Settings > Device >
Type text by speaking
You can speak to enter text in most places
that you can enter text with the onscreen
keyboard.
1. Touch a text eld, or a location in text
you’ve already entered in a text eld.
GE T STARTED 16
2. Touch the Microphone key on the on screen keyboard.
3. When you see the microphone image,
speak what you want to type.
Say “comma,” “period,” “question mark,” “exclamation mark,” or “exclamation point” to
enter punctuation.
When you pause, what you spoke is transcribed by the speech-recognition service
and entered in the text eld, underlined. You
can touch the Delete key to erase the underlined text. If you star t typing or entering more
text by speaking, the underline disappears.
To improve processing of your voice input,
Google may record a few seconds of ambient
background noise in temporar y memory at
any time. This recording remains on the device only fleetingly and is not sent to Google.
GE T STARTED 17
To change you r phone’s spe ech
settings, go to Settings > Per-
sonal > Language & input.
Settings
Why use a Google Account?
A Google Account lets you organize and access your personal information from any
computer or mobile device:
• Use Google Play. Google Play brings together all your favorite content in one
place: movies, TV shows, books, music,
magazines, apps, and more. When you
sign in with your Google Account, you can
reach any of this content from any of your
devices – as long as you have a network
connection. You can also shop for more in
the Google Play store.
• Synchronize and back up everything.
Whether you draft an email, add an event
to your calendar, or add a friend’s address, your work gets backed up continu -
GE T STARTED 18

ously by Google and synchronized with
any computer where you use the same
Google Account.
• Access from anywhere. Check your latest
calendar, email, text messages, or social
stream, no matter what computer or mobile device you’re using.
• Keep your stuff secure and available.
Google works round the clock to protect
your personal data from unauthorized access and to ensure that you get it when
you need it, wherever you need it.
• Simplify shopping. You can connect your
Google account with Google Wallet, which
makes it easy to purchase music, books,
apps, and more on Google Play and other
online stores.
• Use other Google services. Your Google
Account also lets you take full advantage of other Google apps and ser vices
that you may want to use, such as Gmail,
Google Maps, Navigation, Google Play,
YouTube, Google Talk, Messaging, and
more.
GE T STARTED 19

What’s New in Android
Whether you’re new to Android or an avid
user, check out some of the new features in
Android 4.1 and 4.2 (Jelly Bean). For a comprehensive list of all changes since Android
4.0, see Android 4.1, Jelly Bean and Android
4.2: A new flavor of Jelly Bean.
• Gesture Typing (Android 4.2)
Instead of typing each letter, use Gesture Typing to input a word without lifting
your nger. You don’t need to worry about
spaces because they’re added automatically for you.
Glide your nger over the letters you want
to type, and lift it after each word.
• Google Play widgets
New widgets on your Home screens display recently used apps, music, movies,
books, or games you already have – including preloaded content that comes
with your device. Other widgets offer suggestions for browsing Google Play.
GE T STARTED 20

Touch a widget to access its content on
Google Play. Touch & hold a widget to re size it or remove it.
• Quick Settings (Android 4.2)
Use Quick Settings to easily access WiFi settings, manage display brightness,
open the main Settings menu, and more.
Swipe down with two ngers from the top
right corner of any screen to open Quick
Settings, then touch one of the boxes to
open a specic setting.
• Expandable notications
Expandable notications were introduced
in Android 4.1, including the option to per-
form actions from the notication itself.
In Android 4.2, you can expand notica-
tions more easily with a swipe of your
nger.
Swipe down the notication shade from
the top of the screen, then glide your
nger down the notications to expand
them. Touch an icon inside a notication
to handle a task directly.
GE T STARTED 21
 Loading...