

LG LGE900H Owner’s Manual [fr]
User Guide
LG-E900h
ENGLISH
FRANÇAIS
Printed in Korea
P/N : MFL66983323 (1.0) H
www.lg.com

Bluetooth QD ID B016767
LG-E900h User Guide - English
This guide helps you to start using your phone.
•
If you need more information, please visit
www.lg.com.
Some of the contents of this manual may not
•
apply to your phone, depending on your phone’s
software or your service provider.
This handset is not recommended for the visually
•
impaired because of its touch-screen keypad.
Copyright ©2010 LG Electronics, Inc. All rights
•
reserved. LG and the LG logo are registered
trademarks of LG Group and its related entities.
All other trademarks are the property of their
respective owners.

Congratulations on your purchase of the
advanced and compact LG-E900h phone
by LG, designed to operate with the latest
digital mobile communications technology.
Copyrights and trademarks
Rights to all technologies and products
that comprise this device are the property
of their respective owners:
This product includes
•
software licensed from
MS, an a liate of the
Microsoft Corporation.
Microsoft and software bearing
the Microsoft name are registered
trademarks of the Microsoft Corporation.
Before using this product, refer to the
Microsoft software license terms for
Windows Phone 7 software agreement.
at the back of this guide for information
about rights and restrictions.
®
Bluetooth
•
•
is a registered trademark of
the Bluetooth SIG, Inc.
© 2010 Microsoft Corporation. All rights
reserved. Microsoft, Internet Explorer®
Mobile, Windows® Phone, Windows®
Phone Marketplace, Xbox LIVE®, Zune®,
<list Windows and all other trademarked
names and logos that are referenced in
the materials, in alphabetical order> are
trademarks of the Microsoft group of
companies.

Contents
Assembling .............................................. 5
Getting to know your phone ..................... 5
Open view .............................................. 6
Installing the USIM and battery ................ 7
Navigating your Windows Phone ............. 9
Using the touch screen ........................... 9
Getting to know your Start screen .......... 11
Knowing and navigating the screen ........ 11
Customising the Start screen ................. 14
Accessing applications .......................... 15
Getting to know the application bar ........ 15
Customising your Windows Phone ......... 18
Entering text ......................................... 20
Downloading applications from
Marketplace ......................................... 21
Getting Started ...................................... 22
Signing in with a Windows Live ID .......... 22
Importing your contacts......................... 23
Staying in Sync ..................................... 23
Communicating ..................................... 24
Phone .................................................. 24
Messaging ........................................... 26
Email ................................................... 27
Facebook ............................................. 30
Entertainment ........................................ 31
Camera ................................................ 31
Pictures ............................................... 35
Music & Videos ..................................... 38
Games ................................................. 41
FM Radio ............................................. 42
4
LG-E900h | User Guide
Utilities ................................................... 44
Setting an alarm ................................... 44
Using your calculator ............................ 44
Adding an event to your calendar ........... 44
Offi ce ................................................... 45
Windows applications ............................ 46
Maps ................................................... 46
Marketplace ......................................... 46
Hotmail ................................................ 47
The Web ................................................. 48
Browser ............................................... 48
Connectivity ........................................... 49
Bluetooth ............................................ 49
Wi-Fi ................................................... 50
Play To ................................................. 51
Settings ................................................. 52
system ................................................. 52
applications .......................................... 53
Software update .................................... 56
Phone software update ......................... 56
Accessories ........................................... 57
For Your Safety ...................................... 58
Safety Guidelines ................................... 62
Troubleshooting ..................................... 76
FAQ ........................................................ 78
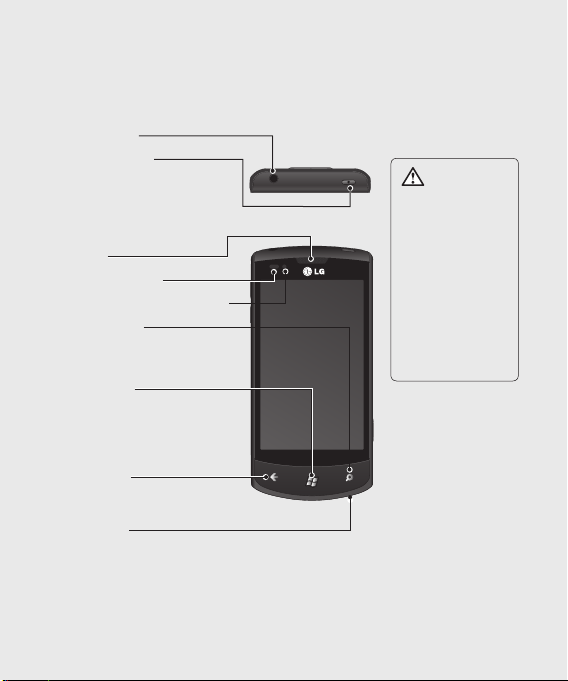
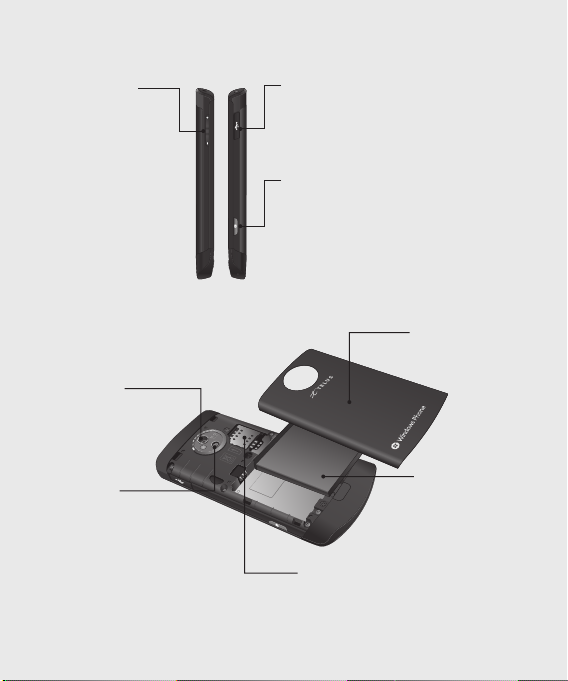
Assembling
Getting to know your phone
Headset jack
Power/Lock key
• Long press (three seconds) to the
power on/o .
• Short press to turn the
screen on/o .
Earpiece
Proximity sensor
ALS(Ambient Light Sensor)
Search button
Open Quick Search
Start button
Return to the Start screen; Start the
Voice Recognition function (press
and hold).
Back button
Return to the previous screen.
Mouthpiece
WARNING:
Placing a heavy
object on the
phone or sitting
on it can damage
its LCD and touch
screen functionality.
Do not cover the
protective lm on the
proximity sensor of
the LCD, as this can
cause the sensor to
malfunction.
5
Assembling
Volume keys
• When the screen
is idle: volume
of system tone &
ring tone.
• During a call:
earpiece volume.
• When playing
a track: controls
track volume.
Open view
External
camera lens
Camera
ash
6
LG-E900h | User Guide
Charger, data cable (USB cable
port)
TIP! Before connecting a USB cable, wait
until the phone has powered up and
been registered on the network.
Camera key
• Go directly to camera preview by
pressing the camera key.
Battery cover
Battery
USIM card tray
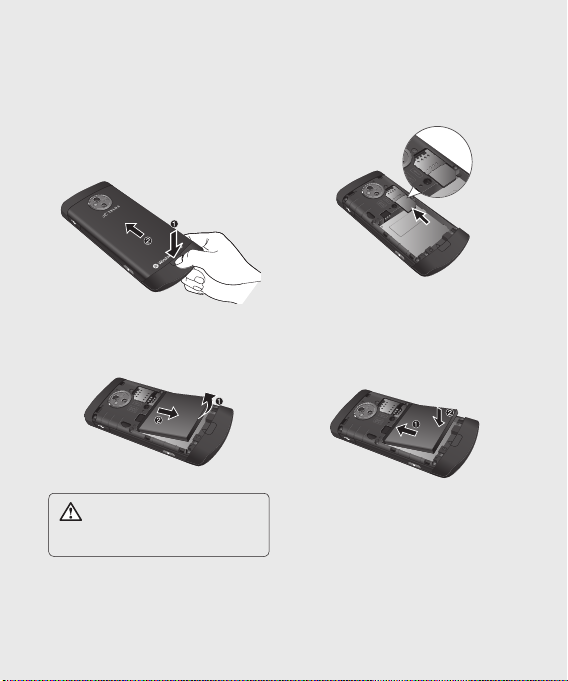
Installing the USIM and battery
1 Remove the battery cover
Press the battery cover release button
as shown in the image below (1). Lift the
cover away from the phone (2).
2 Remove the battery
Using the cut-out at the bottom, lift the
battery out of its compartment.
contact area on the card is facing into the
phone. Push the USIM card holder back.
4 Install the battery
First, insert the top of the battery into the
top edge of the battery compartment.
Ensure that the battery contacts align with
the phone’s terminals. Press the bottom of
the battery down until it clips into place.
WARNING: Do not remove the
battery when the phone is switched on,
as this may damage the phone.
3 Install the USIM card
Put the USIM card into the USIM card
holder. Make sure the gold-coloured
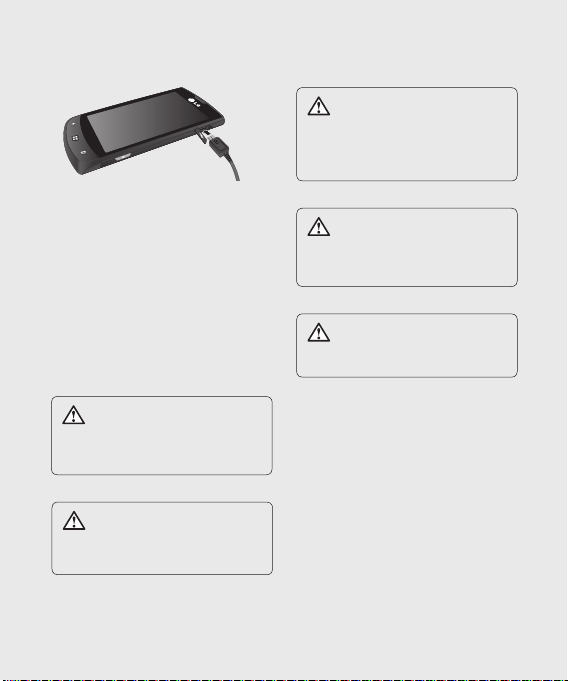
5 Charging your phone
Open the charger port cover on the side
of your LG-E900h. Insert the charger
connector into the port and plug the
charger into a mains electricity outlet.
7
Assembling
You cannot switch on the phone if
the battery is fully discharged It takes
approximately four to ve minutes to reach
a charge state su cient for booting by TA
charger.
It takes approximately 14-15 minutes
longer to charge using a USB connection.
If the battery is critically low, the image
for the critically low battery will appear to
notify you to charge for longer.
NOTE: The battery must be fully charged
initially to improve battery life.
WARNING: Do not connect the
charger to the phone without the
battery being installed. You must check
the battery is inserted before charging.
WARNING: Do not remove the
battery or USIM card while charging
the phone.
WARNING: There is a risk of
explosion if the battery is replaced by an
incorrect type. Dispose of used batteries
in accordance with the manufacturer's
instructions.
WARNING: Unplug the charger
from the mains and phone during
lightning storms to avoid electric shock
or re.
WARNING: Make sure that no
sharp items come into contact with the
battery. This could pose a re risk.
8
LG-E900h | User Guide
Navigating your Windows Phone
Using the touch screen
Touch screen tips
Your phone's touch screen lets you easily
select items or perform functions. Learn
basic actions to use the touch screen.
NOTE:
•
To avoid scratching the touch screen, do not
use sharp objects.
Do not allow the touch screen to come
•
into contact with other electrical devices.
Electrostatic discharges can cause the touch
screen to malfunction.
Do not allow the touch screen to come
•
into contact with water. The touch screen
may malfunction in humid conditions or if
exposed to water.
For optimal use of the touch screen, remove
•
the screen protection lm before using
your phone.
Your touch screen has a layer that detects
•
small electrical charges emitted by the
human body.
For best performance, tap the touch screen
•
with your ngertip. The touch screen will
not react to touches by sharp objects, such
as a stylus or pen.
NOTE:
Your phone turns o the touch screen when
•
you do not use it for a speci ed period. To
turn on the screen, press the [Power] button.
You can also adjust the backlight time or
•
change the wallpaper. On the Start screen,
go to the application list and select Settings
> lock & wallpaper.
Universal gestures on your touch
screen
For most applications, natural gestures
can be used to move about and give
commands. To type text, use the onscreen
or the hardware keyboard.
The following gestures are used to move
around for your Windows Phone 7:
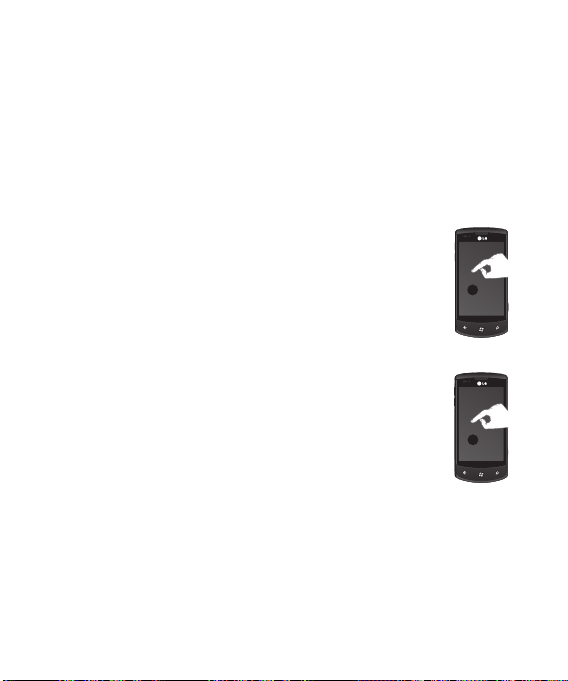
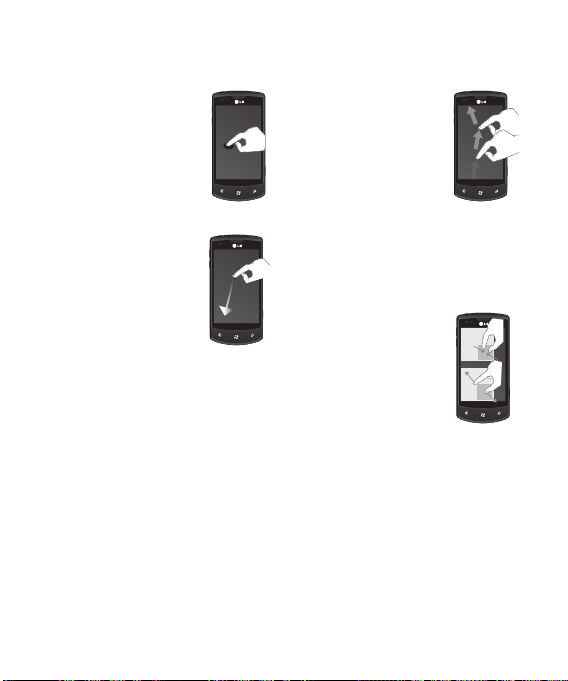
Tap
A tap is a single, quick
downward touch on the
screen. Tap is used to
execute commands (like
pressing Enter on a PC).
Tapping also stops any
movement on the screen.
Double tap
A double tap is two quick
downward touches on
the screen in the same
place. The double tap
commands the phone
to zoom in or out, as
appropriate.
9
Navigating your Windows Phone
Touch and hold
To touch and hold, the
nger is pressed down
and held there for a few
seconds.
Scroll
Scrolling is for moving
objects upwards and
downwards.
The nger is pressed
down and moved in the
desired direction. To end
the scrolling, the nger
is lifted up. Either the
content will follow (as
with moving a map into
the centre of the screen)
or it can be used for
reordering items.
10
LG-E900h | User Guide
Flick
Flicking is for moving
objects sideways.
The nger is pressed down
and moved in the desired
direction. To end the
gesture, the nger is lifted
up. Either the content will
follow (as with moving a
map into the centre of the
screen) or it can be used
for reordering items.
Pinch and stretch
Pinch and stretch are
opposites of each other.
These gestures are often
used with maps to zoom
in and out.
Pinching is achieved
by pressing two ngers
down on the screen and
bringing them together.
This zooms in on content,
while centering the image
between the nger tips.
For stretching, the ngers
are moved apart from
each other to zoom out
on an image.
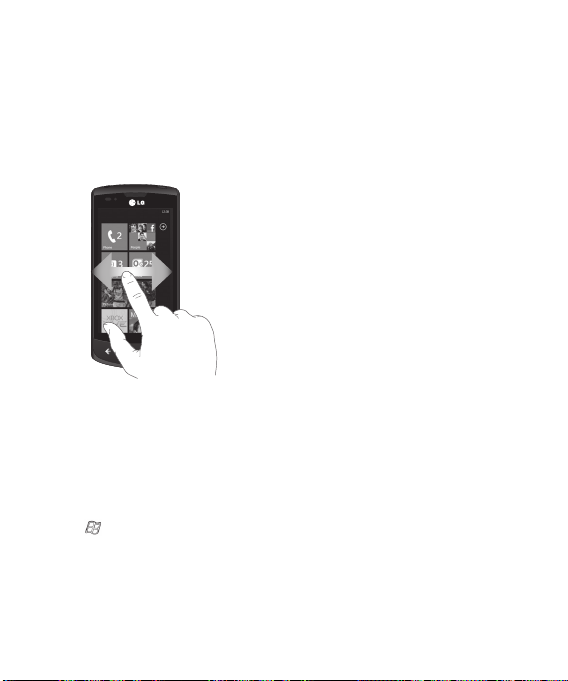
Getting to know your Start
screen
From this screen you can access menu
options, make a call, view the status of your
phone and much more.
Knowing and navigating the
screen
Start screen is the beginning of the
Windows Phone 7 experience for you after
you power on your phone. The Start screen
displays application tiles that you have
pinned and placed in a position of your
choice for quick launch. Pressing the [Start]
Button
on the phone always returns
you to the Start screen, no matter what
application is running.
Simply swipe your nger to the left,
1
right, up or down to view them.
You can also customise tiles on the Start
screen, which are shortcuts to your
favourite menus and applications.
NOTES: When you are in a standby display
after unlocking the phone, swipe your nger
upwards to see the Start screen displaying
application tiles.
11
Navigating your Windows Phone
Tiles on the Start screen
A tile is an easily recognisable visual shortcut for an application or its content. You can
place tiles anywhere on the phone Start experience.
Tiles that use the tile noti cation feature can update the tile graphic or title text, or
increment a counter, enabling you to create a personalised, “at a glance” Start experience.
Examples include displaying if it is your turn in a game, the weather, or how many email
messages you have received.
The Start screen is always presented in portrait view.
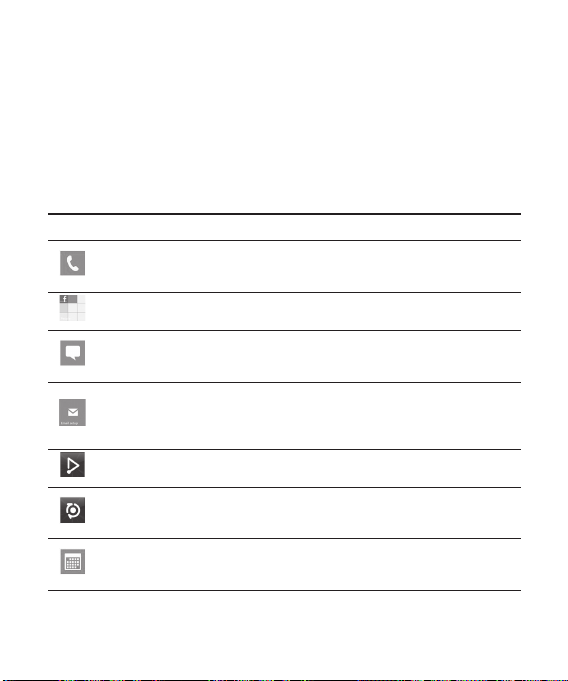
Icon Description
Make calls, with quick access to recent callers, favourites, and all your contacts.
Dial manually using the numeric keypad. Just tap the voicemail icon to listen to
voice message you want, in any order you like.
Touch to access People hub, the integrated communication application for
emails, messages, contacts and other information.
Send and receive SMS text messages. Conversations are saved in an instant chat
style, so you can see a history of messages you’ve sent and received. Send MMS
messages with a picture you've taken.
Your Windows Phone works with Microsoft Exchange, Microsoft Outlook Web
App and many of the most popular email systems, including Hotmail, Yahoo!
Mail, Google and others. Save attached photos and graphics to your Saved
Pictures.
Touch Play To to stream videos, music, and pictures from your phone to Digital
Living Network Alliance (DLNA) compatible playback devices.
With ScanSearch, you can search product and local information for streets,
cities, or countries. ScanSearch allows you to view local business information,
including locations and contact information.
Enter events on your new Windows Phone. Subscribe to calendars. Set alerts to
remind you of events, appointments and deadlines. Plus, they get synced back
to the calendar on your Windows Live and vice versa.
12
LG-E900h | User Guide
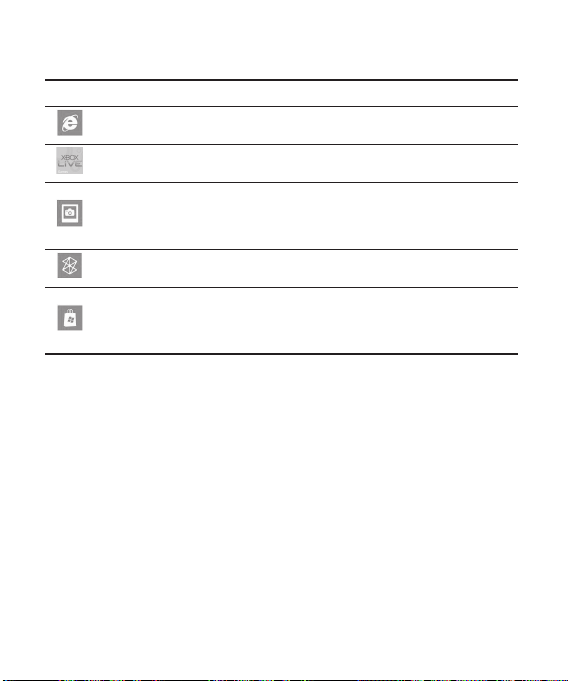
Icon Description
Touch to access the Internet Explorer.
Access to Xbox LIVE to play a game and invite a friend to play it with you.
Download new games onto your phone.
View photos and videos you’ve taken with your new Windows Phone, received
in Email or MMS messages, or synced from your computer’s Zune Software.
(Windows OS only) View them in portrait or landscape format. Zoom in on
photos for a closer look. Send an email or MMS messages with attached photos.
Play musics, videos and podcasts stored in the device by connecting to your PC
to synchronise your stu . Listen to FM radio. Go to marketplace.
Search the Application Store for your Windows Phone applications and musics
you can purchase or download, using your Wi-Fi or cellular data network
connection. Read reviews or write your own reviews for your favourite apps.
Download and install the applications on your Start screen.
NOTES: The arranged location, name, or design of tiles may vary by your setting status, area,
service provider, plan, and version of Windows Phone software.
Application functionality and availability may vary depending on the country or region where
you purchase and use your Windows Phone. Contact your service provider for more information.
13

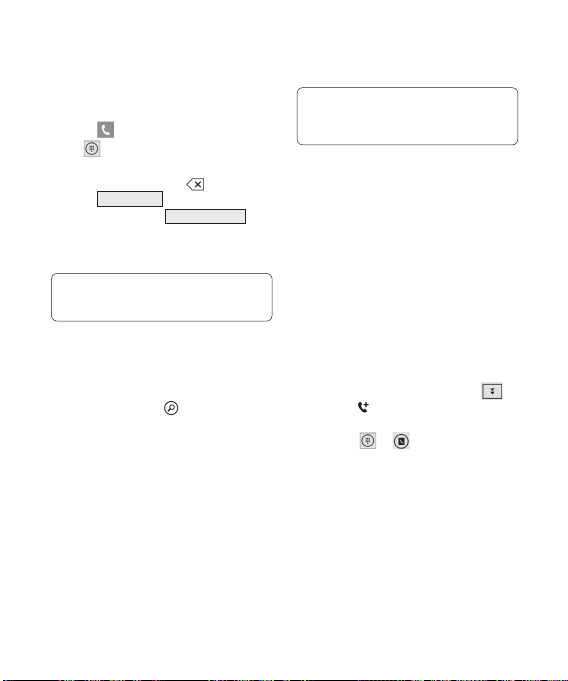
Navigating your Windows Phone
Viewing the status bar
The status bar uses di erent icons to
display phone information, such as signal
strength, new messages, battery life, and
active Bluetooth and data connections.
Below is a table explaining the meaning of
icons you’re likely to see in the status bar.
Icon Description
H
3G
G
E
14
LG-E900h | User Guide
[Status bar]
Signal strength
HSDPA
3G
2G-GPRS
2G-EDGE
Call forwarding
Roaming
Wireless network signal strength
Bluetooth status
Ringer mode
Input status
Battery power level
Data connection
Icon Description
System clock
Customising the Start screen
You can customise the
layout of Tiles on the
Start screen.
You can pin all sorts
of things to the
screen, including
apps, websites, map
locations, and even
contacts. If you pin a
contact to the Start
screen, you’ll get all
of that person’s feed
updates-right from
the tile.
To pin most things to the screen, touch and
hold the item until the menu appears, or
open the app list, then tap pin.
If you’d like to move a tile somewhere
•
else on the Start screen, tap and hold the
tile, and then move it wherever you want.
To remove a tile, touch and hold it, and
•
tap unpin
.

Navigating and setting
applications
Accessing applications
To access your Windows Phone’s
applications:
On the Start screen, tap the arrow
1
access the application list.
Scroll down to the tile if it isn’t already
2
visible.
Select an application.
3
Press the Back button
4
the previous screen; Press the Start
button to return to the Start screen.
NOTES:
You can add a shortcut to an application by
•
tapping and holding the application icon
from the application list. You can move the
application to the location you want on the
Start screen.
•
Your Windows Phone has a built-in motion
sensor that detects its orientation. If you
rotate the phone while using some features,
the interface will automatically switch to
landscape view.
to return to
to
Getting to know the application
bar
To set an application, you can use the
below application bar and application bar
menu at the bottom of the screen.
For example, to read a message
1
On the Start screen, tap the arrow to
access the application list.
Tap Messaging .
2
Tap to expand the application menu
3
and see the text labels for the icons in
the application bar.
Select the icon button or menu that you
4
want to set.
Application bar
The Application bar provides a view that
displays icon buttons with text hints and an
optional context menu if you tap the visual
row of dots or icks up the Application bar.
This view can be hidden again by tapping
outside of the menu area or on the dots,
using the back button, or selecting a menu
item or Application bar icon.
15

Navigating your Windows Phone
Application bar menu
The Application bar menu is an optional
way to access speci c tasks from the
Application bar. The Application bar menu
can be accessed by tapping the visual
row of dots in the Application bar or by
icking the Application bar up. This view
can be hidden again by tapping outside
of the menu area or on the dots, using the
back button, or selecting a menu item or
Application bar Icon.
NOTES:
A maximum of ve menu items can be
•
displayed.
If no menu items are displayed, only the icon
•
text hints are displayed.
The Application bar menu will remain on the
•
screen until you perform an action.
16
LG-E900h | User Guide
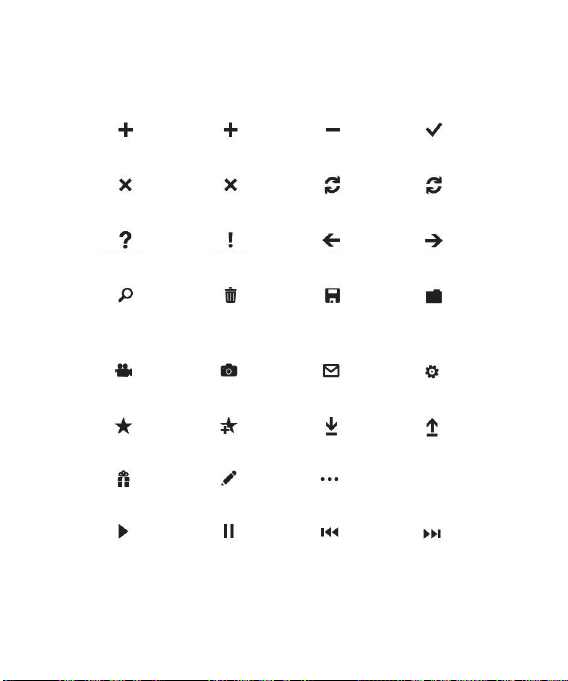
Application bar icons
The following are some of the application setting icons that are frequently used.
new add minus check
close cancel sync refresh
question mark exclamation back next
search delete save folder
video
favourites
share
play
camera
add to favourites
edit
pause
e-mail
download
over ow dots
previous/rewind
settings
upload
next/fast forward
17

Navigating your Windows Phone
Customising your Windows
Phone
Get more from your phone by customizing
it to match your preferences.
Setting the current time and date
On the Start screen, tap the arrow to
1
go to your App list.
Tap Settings > System > date & time.
2
Flick the Set automatically bar and
3
change the date and time and other
options.
Turning on or o the ringtone and
sounds
You can adjust the Ringtone and sound
like Ringtone, New text message, New
voicemail, New email, and so on.
On the Start screen, tap the arrow to
1
go to your App list.
Tap Settings > System > ringtones &
2
sounds.
18
LG-E900h | User Guide
Switching to silent mode
You can switch the silent mode on or o by
icking the Ringer status bar left or right.
Adjusting the volume of ringtones
Press the Volume key up or down to adjust
the ringtone volume.
Selecting a wallpaper for the Start
screen
On the Start screen, tap the arrow to
1
go to your App list.
Tap Settings > System > lock &
2
wallpaper > change wallpaper.
Select an image and save.
3
You can also change the Screen time-out
and password.
NOTE:
LG is not responsible for any use of default
•
images or wallpapers provided on your
phone.

Adjusting the brightness of the
display
To adjust the brightness in the setting
menu,
On the Start screen, tap the arrow to
1
go to your App list.
Tap Settings > System > brightness.
2
Drag the slider for Automatically adjust
3
to O and tap the desired brightness
level.
NOTE: The brightness level of the display
will a ect how quickly the phone consumes
battery power.
Locking your SIM card
You can lock your phone by activating the
PIN supplied with your SIM card.
On the Start screen, tap the arrow to
1
go to your App list.
Tap Settings and drag to select
2
application > phone.
Drag the SIM security Slider to On.
3
Enter your PIN and select enter.
4
NOTE:
Once the PIN lock is enabled, you must enter
•
the PIN each time you turn on the phone.
If you enter an incorrect PIN too many times,
•
your SIM card will be blocked. You must then
enter a PIN unlock key (PUK) to unblock the
SIM card.
19
Navigating your Windows Phone
Entering text
You can enter text by selecting characters
on the virtual keypad.
You cannot enter text in some languages.
To enter text, please check out and select
from the supported languages for writing.
(Settings > System > keyboard)
Entering text using the onscreen
keyboard
Tap the input panel icon.
1
Tap characters to enter your text.
2
20
LG-E900h | User Guide
NOTES:
The phone features several typing aids,
•
such as text suggestions that appear above
the keyboard, auto-correction. (Settings >
System > keyboard)
Windows Phone 7 supports only full
•
alphabet layouts, such as QWERTY, AZERTY,
and QWERTZ. 12/-20 key layouts are not
supported.
The shift key allows you to type capital
•
letters. There are three shift modes: On, O
and Caps Lock (tap and hold).
The emoticon key brings up the emoticons
•
picker.
Tapping and holding a, i, e, u, o on the
•
screen displays an accent picker.
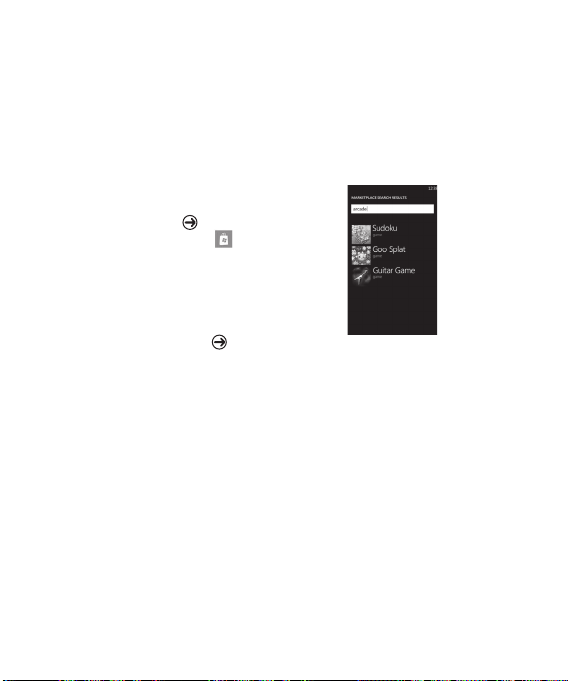
Downloading applications from
Marketplace
Marketplace lets you easily nd and acquire
music and applications (including games)
to enhance your Windows phone.
Individual category pages have been
added to the site for apps, games and
music.
On the Start screen, tap to go to your
•
App list and tap Marketplace
Or, tap the Marketplace tile from the
Start screen.
Press the Search button to search for
•
apps and tap the search string again to
edit and search.
Type in the desired string tap the
•
results are displayed below on the same
page.
Tap a list item to go to the
•
corresponding Marketplace page.
.
While browsing or searching for an app,
•
you can tap on an application or game
and the Details page for the app will
appear.
Select the item you want to buy and tap
•
download.
NOTE:
Pictures, podcasts, and videos are not
•
available on Marketplace.
This feature may not be available depending
•
on your region.
21
Getting Started
When you turn on your phone for the rst time, you will be guided through essential settings.
Please follow the instructions on the screen to activate your phone.
The following are the recommended steps.
SELECT LANGUAGE > WINDOWS PNONE SETTINGS > TIME ZONE and sign in with your
Windows Live ID
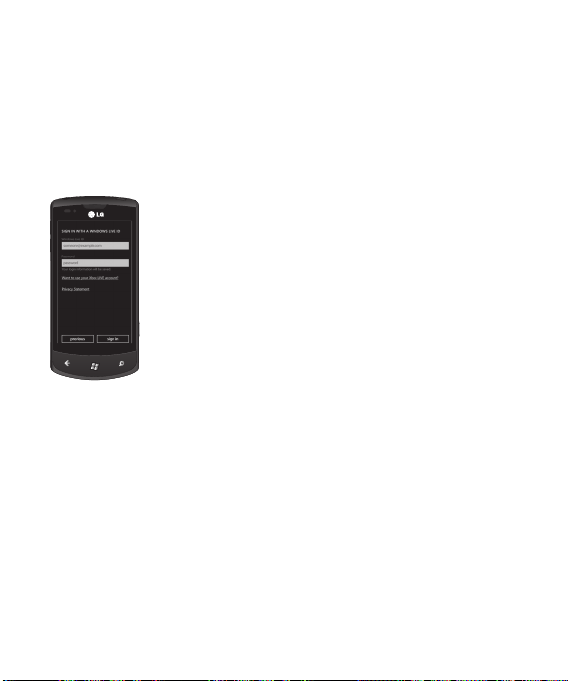
Signing in with a Windows Live ID
com/ResetPassword.aspx.
If you haven't yet signed in with a Windows Live ID, there are a few things you won't be
able to do on your phone at rst (such as, get applications or play Xbox LIVE games).
To get applications, play Xbox LIVE games, user a Zune Pass,
automatically synchronise Windows Live information to the web and
more, you need to sign in with a Windows LIVE ID.
Your Windows Live ID is the email address you use to sign in to
services like Xbox LIVE®, Zune®, Hotmail®, and so on. If you can’t
remember the email address you use:
For Xbox LIVE: On your Xbox 360® console, sign in with your gamer
tag, then press the Guide button on your controller (the one in the
middle that looks like the Xbox logo). In Settings, click Account
Management > Windows Live ID.
For Zune: Sign in to the Zune software on your PC. Right-click your
pro le picture and click Switch user to see your Windows Live ID.
To reset your password or get a reminder, go to http://account.live.
22
LG-E900h | User Guide

Importing your contacts
When you set up your email or Facebook account, your contacts
are imported automatically into your People hub. And when you
add Facebook, your friends’ feeds appear in your People hub, their
photos show up in your Pictures hub, and your own feeds pop up
in your Me tile.
To set up a Facebook (or any kind of email) account:
Tap the arrow on the Start screen to go to your App list.
1
Tap Settings > email & accounts.
2
Getting your contacts from your old phone is also easy. Put your
old SIM card into your new phone, and then go to Settings. Flick to
applications, tap people, and then tap import SIM contacts.
Staying in Sync
To sync your music, videos, pictures, and updates from your
computer to your phone (or vice versa), you’ll need the Zune
software.
Go to windowsphone.com to install the Zune software.
1
Connect your phone to your computer using the USB cable.
2
Open the Zune software, and then follow the instructions to get
3
your music, videos, pictures, and so on into your collection.
Click collection, and then drag everything you want to sync to
4
the phone icon in the lower left.
23
Communicating
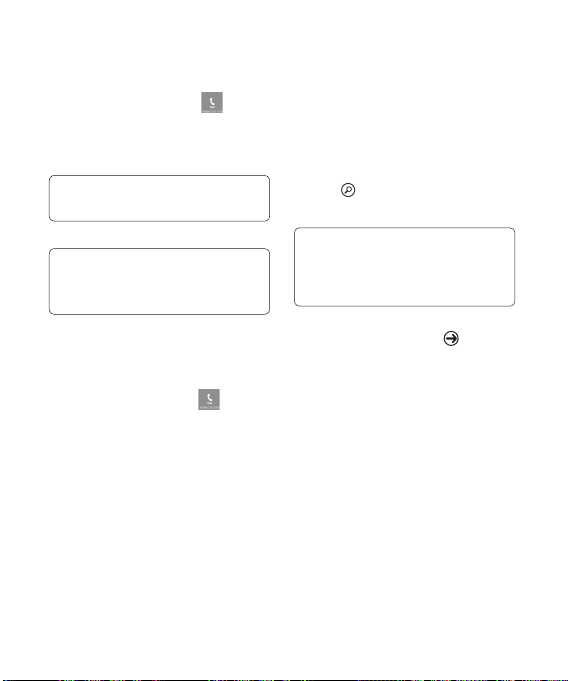
Phone
Making phone calls
Touch .
1
Tap
2
.
3
Enter the number on the keypad.
To delete a digit, touch
4
Touch
call
To end a call, touch
5
You can also place calls using the Phone tile
on the Start screen. You can dial calls.
TIP! To enter “+” to make international
calls, touch and hold down [0+] .
Calling your contacts
Touch People to open your contacts.
1
Scroll through the contact list or enter
2
the rst letter(s) of the contact you want
to call by touching
In the list, touch the contact you want to
3
call, and then select the number to use
if there is more than one for that contact.
Answering and rejecting a call
When your phone rings, tap the answer tab
to answer.
Tap the ignore tab to reject an incoming
call.
24
LG-E900h | User Guide
.
to make a call.
end call
.
TIP! When the phone rings, Turn down
the volume button on the left if you
want to switch to silent ringer mode.
Flight mode (disable wireless
communications)
Some locations may require you to turn
o your phone’s wireless connections by
.
placing your phone in Flight mode.
Tap SETTINGS > ight mode. This features
toggles OFF your phone’s mobile, Wi-Fi, and
Bluetooth communications simultaneously.
Adjusting call volume
To adjust the volume during a call, use the
volume up & down button on the left side
of the phone.
Making a second call
During your initial call, touch the
1
then tap
2
Call the number, or search your contacts
using the
3
Touch the call icon to connect the call.
4
Both calls will be displayed on the call
screen. Your initial call will be locked and
put on hold.
Touch PRESS TO SWAP on the top of the
5
screen to switch between calls.
To end active calls, touch end call.
6
If there is no active call, it will end the
Hold call.
NOTE: You will be charged for each call you
make.
.
or .
Viewing your call history
On the Start screen, press the to view
the Call log.
View a complete list of all dialled, received,
and missed voice calls.
TIP! Touch any single call log entry to
view the date, and time of the call.
TIP! Tap the Application bar tab, then
touch delete all to delete all the
recorded items.
Call settings
You can con gure phone call settings,
such as call forwarding, and other special
features o ered by your service provider.
On the Start screen, touch .
1
Tap the Applications bar at the bottom
2
of the call history screen and open the
Call Settings menu.
Scroll and tap call settings and choose
3
options that you want to adjust.
Voicemail number - Edits the voicemail
number
Show my caller ID to - Choose whether to
display your number on an outgoing call.
international assist- Helps to
automatically correct some common
mistakes while dialling internationally or
dialling while abroad.
Searching for a contact
There are two ways to search for a contact:
On the Start screen
On the Start screen, touch the People
1
hub tile to open your contacts (People
hub).
Touch
2
and enter the contact name
using the keypad.
TIP! To search for the initial of a name,
touch the Contacts tab at the top of
the screen and select Groups. This will
display a list of all your groups.
From the application menu
On the Start screen, touch to go to
1
the applications menu.
Touch the People application and select
2
the desired pro le.
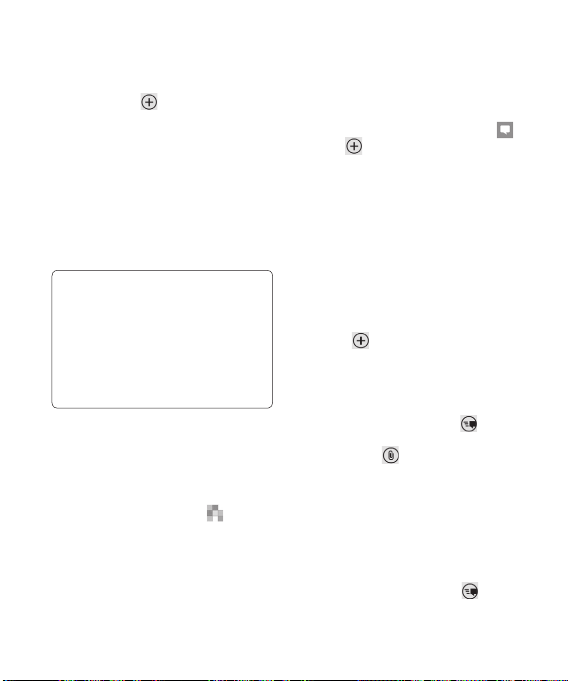
Adding a new contact
On the Start screen, touch the People
1
application.
25
Communicating
2
If you want to add a picture to the new
contact, touch
You can use a saved picture or take a
new one.
Touch the desired item and tap a text
3
eld to open the touch keyboard.
Touch the Done icon to save the current
4
added information.
5
Touch a category of contact information
and enter the details about your contact.
6
Touch the save icon to save the Contact
TIP!
Tap the Application bar tab, and then
•
touch “delete” to delete the contact
you just saved.
When you long tab a contact in a
•
people list, a short menu that you can
choose to pin to start, edit and delete
appears.
Favourite Contacts
You can classify frequently called contacts
as favourites.
Adding a contact to your Favourites (Pin
to the Start screen)
1
On the Starts screen, touch
your pro le contacts.
2
Touch a contact to view the details.
3
Touch Pin to start on the application
menu, and then your favourite contact
pins to Start screen.
.
to open
Messaging
Sending a text message
On the Start screen, tap Messaging
1
> New .
2
Do one of the following:
•
Begin typing a person's name in the To:
box, and then tap a matching contact
name in the list. Repeat to add more
recipients, and their names will be added
automatically in the To: box.
•
Enter the person's mobile phone number
or their email address in the To: box. To
enter additional recipients, tap Enter
after each one.
•
Tap Add
tap it. Repeat to add more recipients, and
their names will be added automatically
in the To: box.
1
Tap the message box, type your
message, and then tap Send
NOTES: If you want to attach data on your
messaging, touch
screen and choose the desired le. Remember
that you are able to attach pictures only.
Replying to a text message
On the Start screen, tap Messaging , and
1
then tap the conversation that has the
text message you received.
Tap the message box, type your
2
response, and then tap Send
, ick to a contact, and then
.
at the bottom of the
.
26
LG-E900h | User Guide

Forwarding a text message
On the Start screen, tap Messaging
1
, and then tap the conversation that has
the text message you want to forward.
Tap and hold a message, and then tap
2
Forward.
Type the person's name, mobile phone
3
number, or email address in the To: box.
Tap the message box, type a message if
4
you'd like, and then tap Send
NOTES:
Your mobile operator might charge you
•
extra for text messaging, and this service
must be available with your current phone
plan.
Text messages are also called SMS (Short
•
Message Service) messages and can be up
to 160 characters long.
If your text message is longer than 160
•
characters, it will be sent in one or more
additional messages.
Sometimes mobile operators will send a text
•
message that you can't reply to or forward,
and the message box says Read-only
message.
.
Saving a picture from a text message
On the Start screen, tap Messaging .
1
Tap a conversation that has a picture,
2
and then tap the picture.
Tap and hold the opened picture, and
3
then tap Save to phone.
The picture is saved in the Saved Pictures
album on your phone.
NOTES:
Your mobile operator might charge you extra
•
for text messaging, and this service must be
available with your current phone plan.
Text messages that have a picture attached
•
are also called MMS (Multimedia Message
Service) messages.
Some pictures you receive might be
•
protected using digital rights management
and can't be saved to your phone. However,
the picture can still be set as the wallpaper
on your phone.
Email
Setting up an email account
Whether it's personal or work-related email,
you can use it on your Windows Phone
by setting up di erent types of email
accounts. Depending on the email account
you set up on your phone, other items from
your account (such as contacts, calendar,
and more) can be retrieved as well.
NOTE: To set up an email account on your
phone, you must have a working cellular data
or Wi-Fi connection. For more information
about connecting to a Wi-Fi network, see
Connect to a Wi-Fi network.
Setting up a Windows Live account
When you're rst setting up your phone,
you're asked to sign in with your Windows
Live ID. If you didn't sign in with it at that
time or if you have more than one Windows
Live ID, you can use the steps below to
set up your primary Windows Live ID or
27

Communicating
additional Windows Live IDs.
On the Start screen, ick left to the Apps
list, tap
Settings, and then tap Email
& accounts.
Tap Add an account > Windows Live
1
and follow the instruction on the screen.
NOTES:
•
The rst Windows Live account that you set
up can't be deleted from your phone.
•
If you set up additional Windows Live IDs
on your phone, photos in those additional
accounts won't be synced to your phone.
You can create a Hotmail account here and
•
retrieve new email messages from Hotmail
to your Inbox. When you access this Hotmail
application, the number of new emails is
displayed on the email tile.
Setting up a Microsoft Exchange
email account
You can use the following steps to set up
an email account that is on a Microsoft
Exchange Server. (For example, your
email account at work might be on a
Microsoft Exchange Server.) You can also
use the steps in the following procedure
to set up other email accounts that
use Exchange ActiveSync—including a
hosted Microsoft Exchange email account
or an Outlook Web App account.
On the Start screen, ick left to the Apps
1
list, tap
Settings, and then tap Email
& accounts.
2
Tap Add an account > Outlook.
28
LG-E900h | User Guide
Setting up an email account from an
Internet Service Provider (ISP)
When you set up an email account, your
phone will try to automatically nd correct
settings for your email account. The email
account might be one that's through your
Internet Service Provider (ISP), or it might
be another IMAP or POP email account
from another provider.
On the Start screen, ick left to the Apps
1
list, tap
Settings, and then tap Email
& accounts.
2
Tap Add an account > Other account.
The following is a list of settings that you'll
need to know beforehand when the correct
email account settings can't be found
automatically. Generally, you can nd this
information on the provider's website.
•
The email account type (POP or IMAP)
•
The incoming email server address
•
The outgoing (SMTP) email server
address
•
Server authentication settings
•
SSL requirements for incoming email
•
SSL requirements for outgoing email
Sending an email message
After you set up an email account on your
phone, you can send or receive emails on
that account.
1
On the Start screen, tap the email
account that you want to access (for
example, Outlook, Google, or Windows
Live).
 Loading...