How it Works
Log In / Sign Up
Buy Points
How it Works
FAQ
Contact Us
Questions and Suggestions
Users
LG
Loading...
L
LF1020SRX
2
LF1020WRX
2
LF1021SFX
LF131BBSLN
2
LF246HV
LF25RLTS
LF25RTS
LF300CP
6
LF300CP(LP-C303R20)
LF43 Series
LF480CE
6
LF480CEI
LF480CE(LP-C483TA0)
LF500B
LF51 series
2
LF53073032D
LF53074032D
LF53075032B
LF53075032D
LF5500
LF55 series
LF5600
LF56 series
LF6000
LF6300
LF63 Series
LF66105SS
LF67105SS
LF68V00S
2
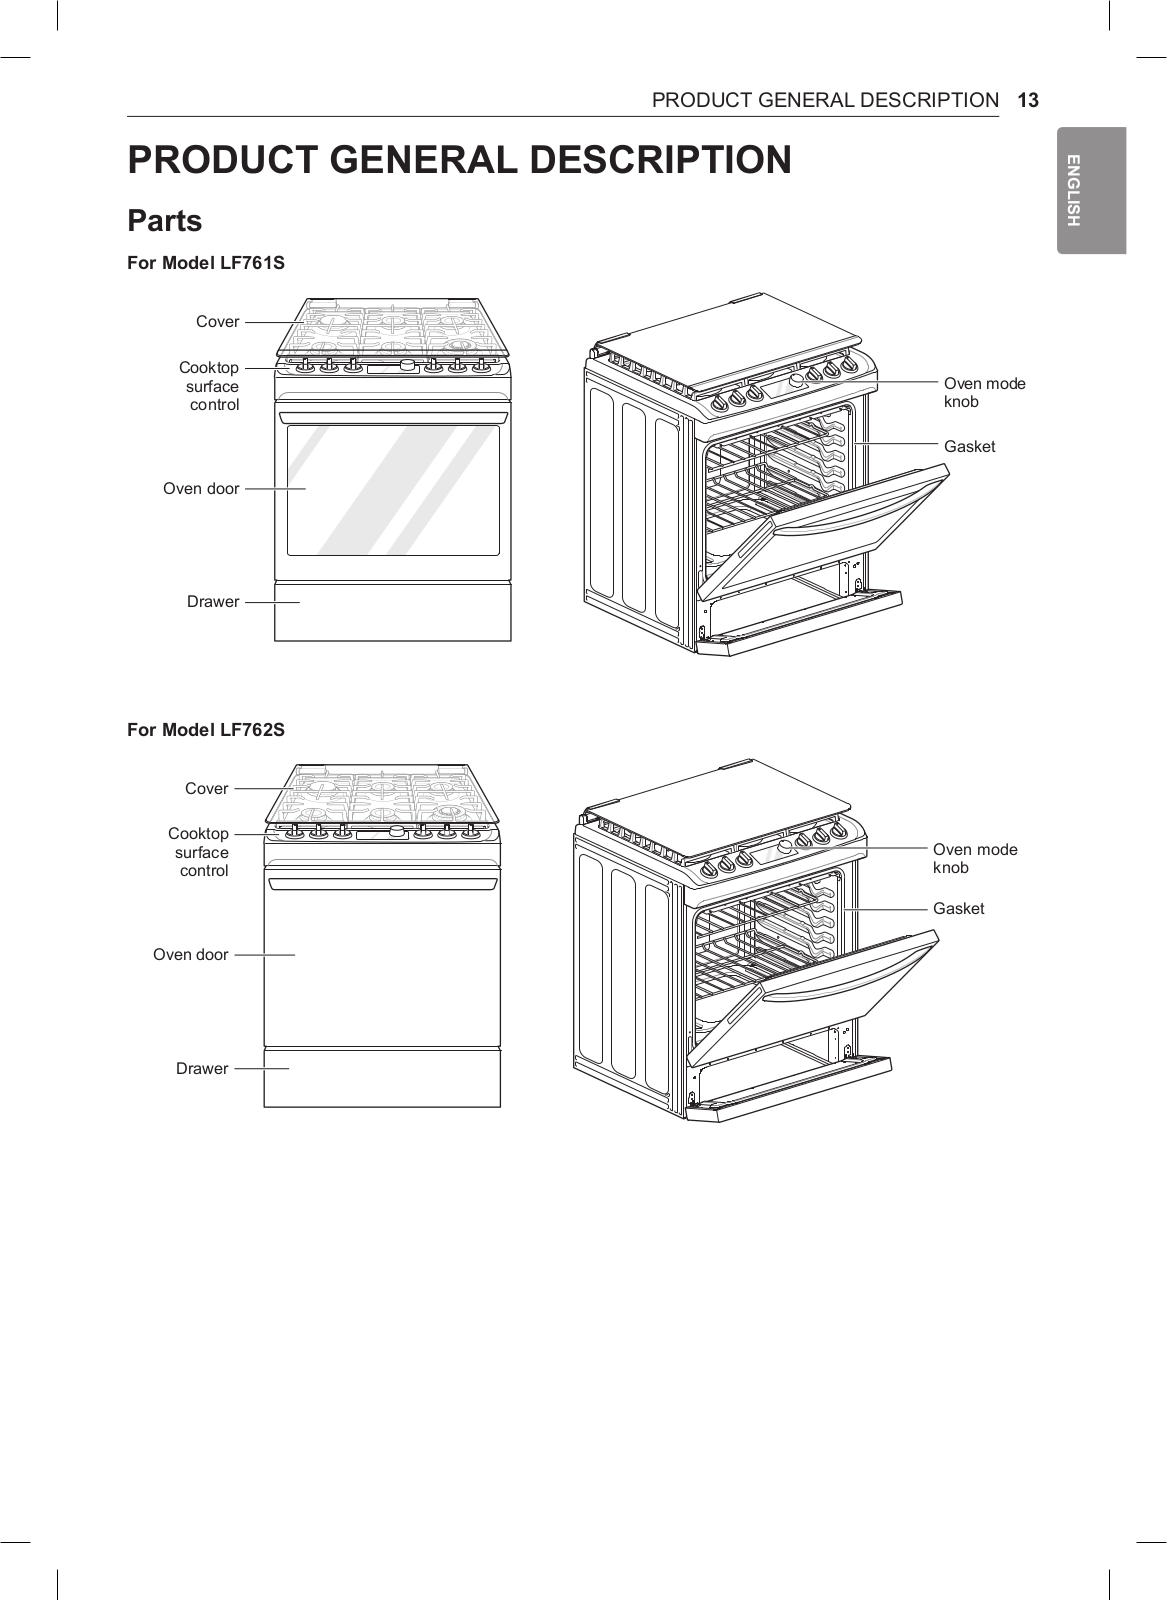
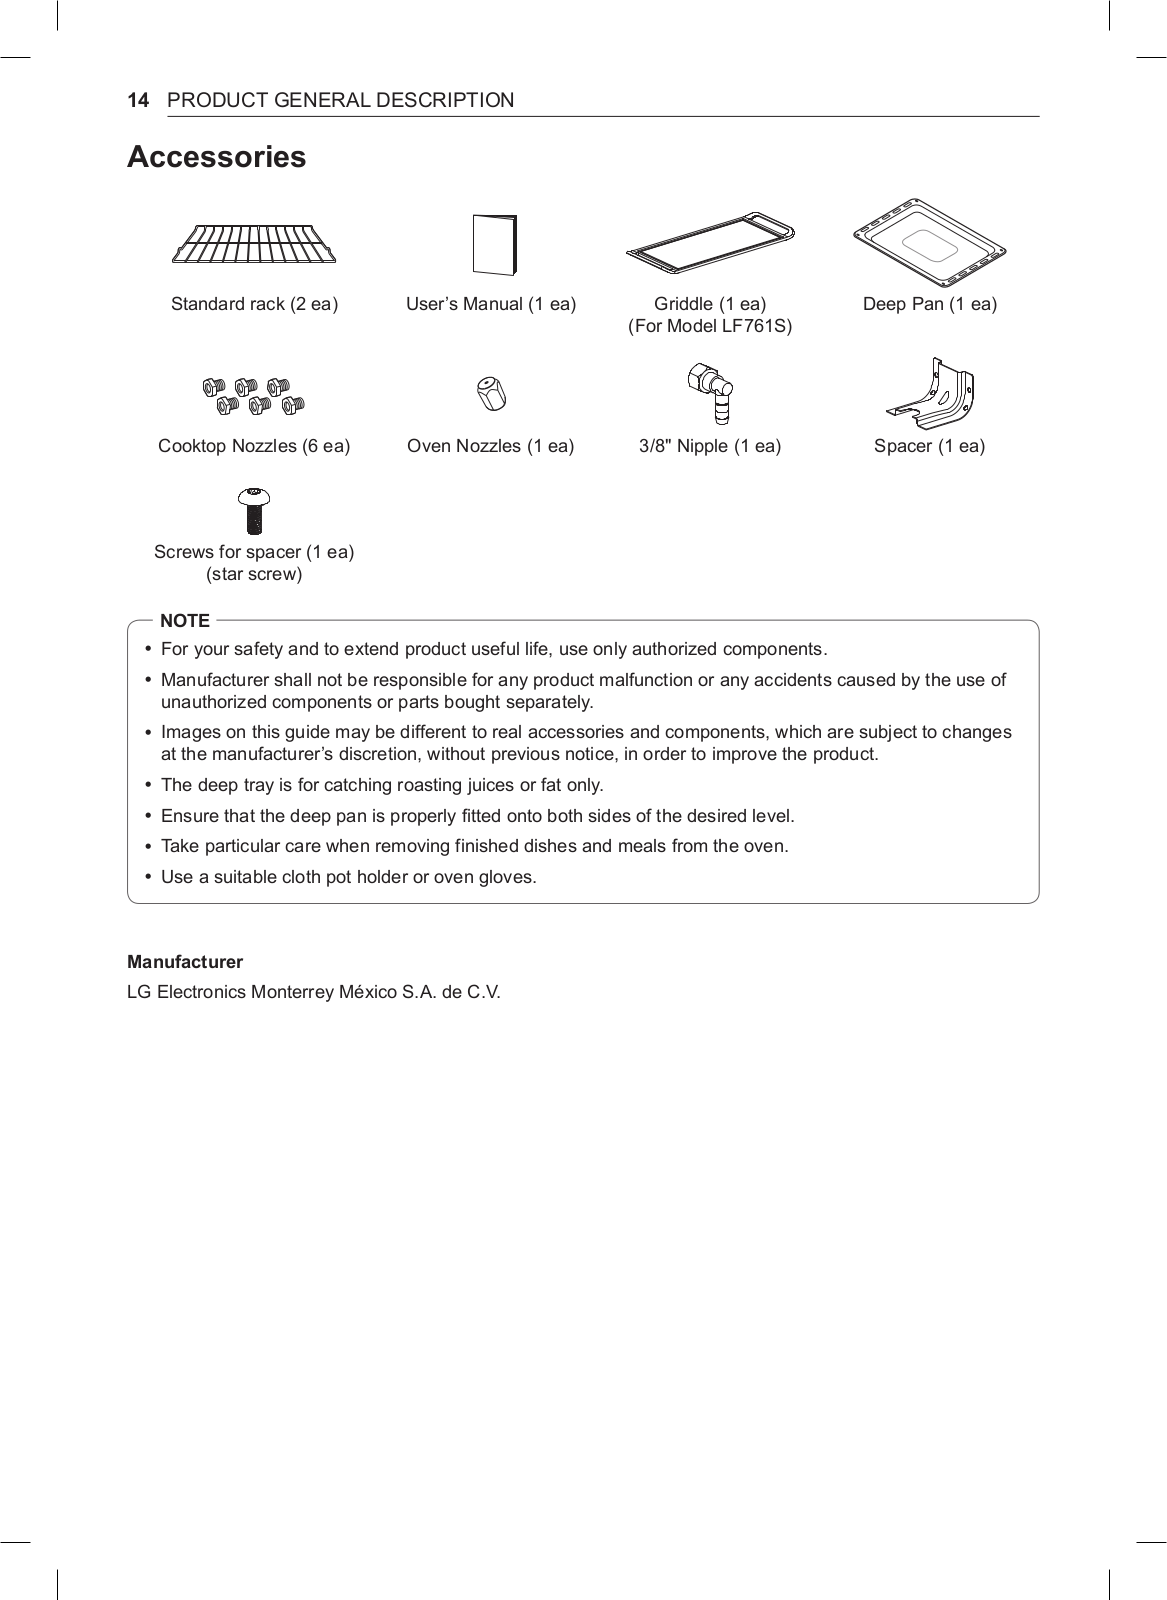
LF761S
2
LF98100GF
3
LF98100SS
LF98105GF
LF98105SB
3
LF98105SS
3
LF98110AS
3
LF98110GF
3
LF98110SB
3
LF98110SS
LF98V10S
LFA840
5
LFC20740
3
LFC20740 Series
3
LFC20740ST
3
LFC20740ST/00
LFC20740SW
LFC20740SW/00
LFC20745
3
LFC20745SB
3
LFC20745 Series
5
LFC20745SW
LFC20749
LFC20749 Series
LFC20760
6
LFC20760SB
9
LFC20760SB/00
LFC20760SB/03
LFC20760SB/04
2
LFC20760SB/06
LFC20760 Series
7
LFC20760ST
6
LFC20760ST/00
LFC20760ST/03
LFC20760ST/04
2
LFC20760ST/06
LFC20760ST - 19.7 cu. ft. Refrigerator
2
LFC20760SW
6
LFC20760SW/00
LFC20760SW/03
LFC20760SW/04
LFC20760SW/06
LFC20770
2
LFC20770SB
10
LFC20770SB/00
LFC20770 Series
4
LFC20770ST
11
LFC20770ST/00
LFC20770ST/01
LFC20770SW
10
LF-K9350A
2
LF-K9350Q
LF-K9350X
3
LF-KP5932
LF-KW6940
LF-KW6940X
LF-KW6945
LF-KW6945Q
LF-KW6945X
LF-M330
2
LF-M330D
4
LF-M335
2
LF-M335D
5
LF-M335X
LF-M340
4
LF-M340A
2
LF-M340D
10
LF-M340X
2
LF-U850
6
LF-U850D
17
LF-U850X
Loading...
Loading...
Nothing found
LF761S
Owner’s Manual
88 pgs
15.57 Mb
0
Owner’s Manual [fr]
88 pgs
14.81 Mb
0
Table of contents
Loading...
LG LF761S Owner’s Manual
...
LG Owner’s Manual
Download
Specifications and Main Features
Frequently Asked Questions
User Manual
Download
Loading...
+
61
hidden pages
Unhide
You need points to download manuals.
1 point = 1 manual.
You can buy points or you can get point for every manual you upload.
Buy points
Upload your manuals
 Loading...