

Page 1

ENGLISH
OWNER’S MANUAL
ELECTRIC
RANGE
Read this owner’s manual thoroughly before operating the appliance
and keep it handy for reference at all times.
LDE4415**
LDE4413**
LDE4411**
MFL68881501_07
www.lg.com
Page 2

2
TABLE OF CONTENTS
TABLE OF CONTENTS
IMPORTANT SAFETY
3
INSTRUCTIONS
PRODUCT OVERVIEW
9
9 Parts
9 Accessories
INSTALLATION
10
10 Installation Overview
10 Product Specifications
11 Before Installing the Range
12 Installing the Range
14 Connecting Electricity
18 Engaging the Anti-tip Device
18 Test Run
OPERATION
19
19 Control Panel Overview
20 Knob Position
21 Changing Oven Settings
21 Clock
21 Oven Light
21 Minimum & Maximum Default Settings
22 Timer On/Off
22 Settings
-Setting the Hour Mode
-Setting Convection Auto Conversion
-Adjusting the Oven Temperature
-Turning the Preheat Alarm Light On/Off
-Adjusting the Beeper Volume
-Adjusting Cooktop On alert Volume
-Selecting Fahrenheit or Celsius
23 Lockout
24 Start Time (Delayed Timed Cook)
24 Cook Time (Timed Cook)
25 Using the Cooktop
25 Cooking Areas
25 Hot Surface Indicator
25 Using the Cooktop Elements
26 The Recommended Surface Cooking
Setting
27 Using the Proper Cookware
27 Choosing Cookware
27 Home Canning Tips
28 Using the Oven
28 Before Using the Oven
28 Oven Vent
28 Using Oven Racks
28 Bake
29 Convection Mode
30 Recommended Baking and Roasting Guide
31 Broil
32 Recommended Broiling Guide
33 Warm
33 Proof
34 Pizza
34 Speed Roast
SMART FEATURES
35
35 Before Using Tag On
35 Using the Tag On Function
36 Using Tag On with Applications
MAINTENANCE
37
37 Cleaning the Glass-Ceramic Cooktop
38 EasyClean
41 Self Clean (For Model : LDE4415 / LDE4413)
43 Changing the Oven Light
44 Cleaning the Exterior
45 Removing and Replacing the Lift-Off Oven
Doors
47 Door Care Instructions
TROUBLESHOOTING
48
48 FAQs
50 Before Calling for Service
SMART DIAGNOSIS™
54
54 Using Smart Diagnosis™
WARRANTY
55
®
Page 3
IMPORTANT SAFETY INSTRUCTIONS
3
IMPORTANT SAFETY INSTRUCTIONS
Read and follow all instructions when using the range to prevent the risk of fire, electric
shock, personal injury, or damage. This guide does not cover all possible conditions that
may occur. Always contact your service agent or manufacturer about problems that you do
not understand.
Download this owner's manual at: http://www.lg.com
This is the safety alert symbol. This symbol alerts you to potential hazards that
can result in property damage and/or serious bodily harm or death.
All safety messages will follow the safety alert symbol and either the word
WARNING or CAUTION. These words mean:
WARNING
CAUTION
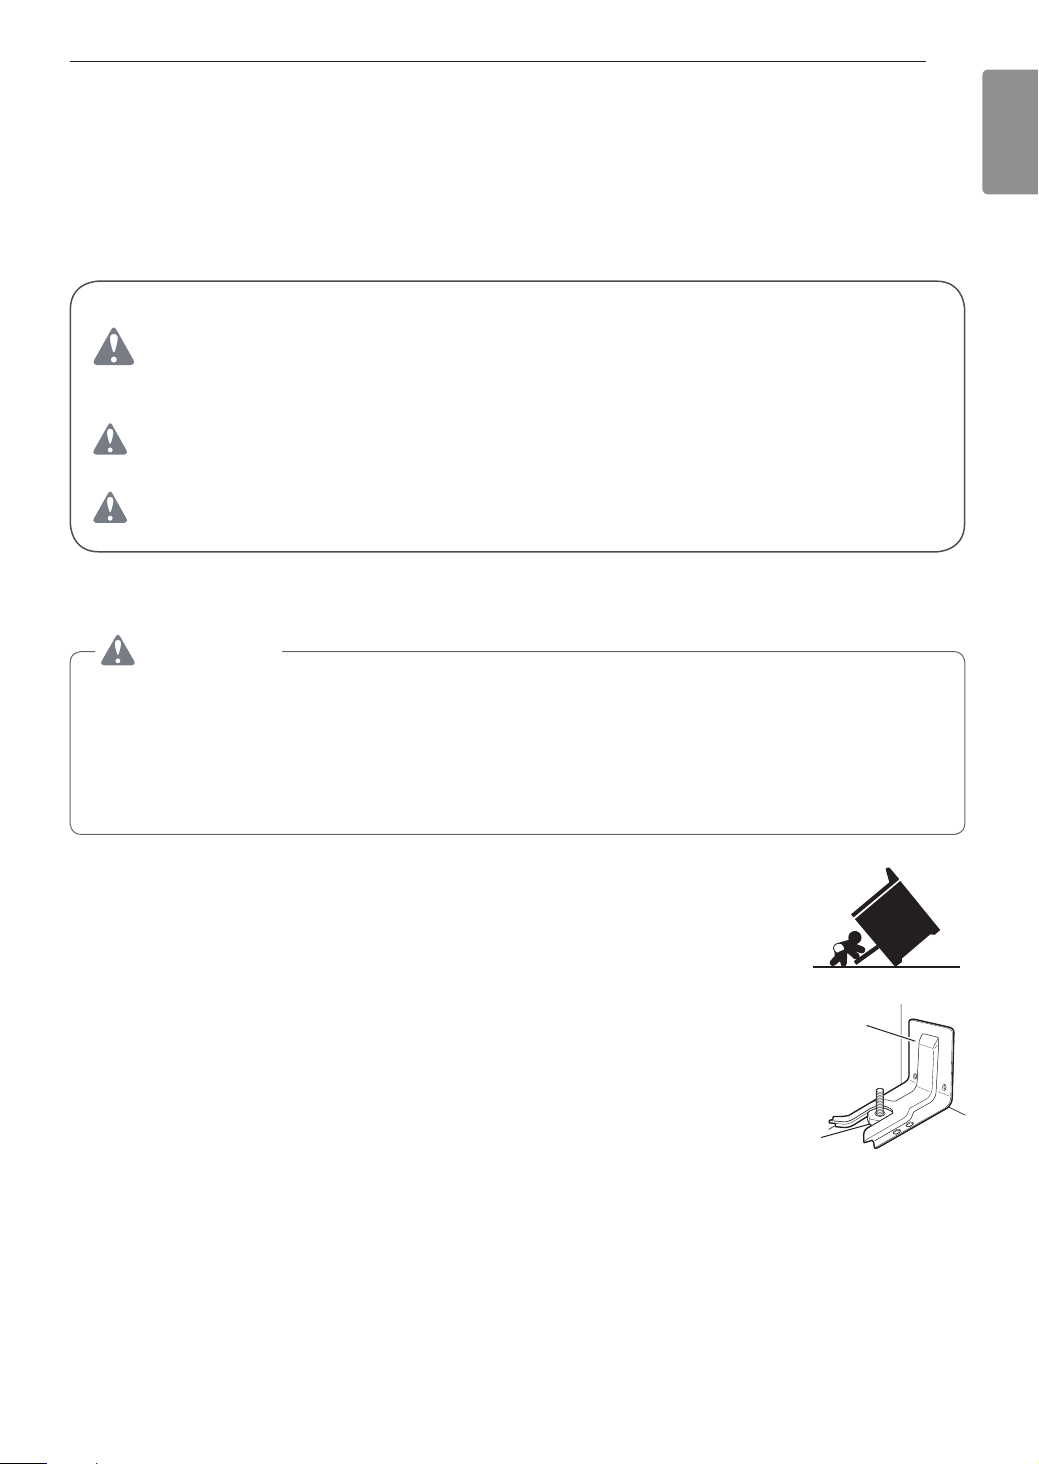
ANTI-TIP DEVICE
WARNING
TO REDUCE THE RISK OF TIPPING, THE APPLIANCE MUST BE SECURED BY A
PROPERLY INSTALLED ANTI-TIP DEVICE. TO CHECK IF THE DEVICE IS INSTALLED
PROPERLY, REMOVE THE DRAWER BODY AND VERIFY THAT THE ANTI-TIP
DEVICE IS ENGAGED, OR GRASP THE TOP REAR EDGE OF THE RANGE BACK
GUARD AND CAREFULLY ATTEMPT TO TILT IT FORWARD. Refer to the installation
section for instructions.
- Indicates a hazardous situation which, if not avoided, could result
in death or serious injury.
Indicates a hazardous situation which, if not avoided, could result
in minor or moderate injury.
ENGLISH
•It is possible for a child or adult to tip the range and be killed.
•Verify that the anti-tip device has been properly installed and
attached to the floor or wall and engaged to the leveling leg of the
range.
•Do not operate the range without the anti-tip device in place and
engaged.
•Never remove the oven legs. The range will not be secured to the
anti-tip bracket if the legs are removed.
•Do not step or sit on the oven door. The range could be tipped and
injury might result from spilled hot liquid, food, or the range itself.
•Do not rest large, heavy items such as whole turkeys on the open
oven door. The range could tip forward and cause injury.
•Reengage the anti-tip device after pulling the range out for
cleaning, service, or any other reason.
•Failure to follow these instructions can result in death or serious burns to children or
adults.
Anti-tip
bracket
Leveling
leg
Page 4
4
IMPORTANT SAFETY INSTRUCTIONS
SAFETY PRECAUTIONS
WARNING
This product contains chemicals known to the State of California to cause cancer and
birth defects or other reproductive harm. Wash hands after handling.
•DO NOT TOUCH HEATING ELEMENTS OR INTERIOR SURFACES OF OVEN. Heating
elements may be hot even though they are dark in color. Interior surfaces of an oven
become hot enough to cause burns. During and after use, do not touch or let clothing or
other flammable materials contact heating elements or interior surfaces of oven until they
have had sufficient time to cool. Other surfaces, such as oven vent openings and surfaces
near these openings, oven doors, and windows of oven doors, also get hot and may cause
burns if not cooled.
•Use care when opening door. The hot air and steam that escape can cause burns to
hands, face and eyes. Let hot air or steam escape from the oven before removing or
replacing food in the oven.
•Do not repair or replace any part of the appliance unless specifically recommended in the
manual. All other servicing should be performed by a qualified technician.
•Do not use harsh etching, abrasive cleaners or sharp metal scrapers to clean the oven
door glass since they can scratch the surface. Scratches may cause the glass to shatter.
WARNING
If the door glass, cooktop glass, surface, or oven heating unit of the range are damaged,
discontinue use of the range and call for service.
•Do not operate the oven without the charcoal heater mesh.
•Do not use plastic to cover food. Use foil or oven-safe lids only.
•Do not allow anyone to climb, stand or hang on the door, storage drawer or cooktop. They
could damage the range and even tip it over, causing severe personal injury.
•Do not line the oven walls, racks, bottom, or any other part of the oven with aluminum foil
or any other material. Doing so will disrupt heat distribution, produce poor baking results
and cause permanent damage to the oven interior (aluminum foil will melt to the interior
surface of the oven)
•Never attempt to dry a pet in the oven.
•Never use your appliance for warming or heating the room.
•Always use pot holders or oven mitts when removing food from the oven or the surface
element. Cookware will be hot. Use only dry pot holders. Moist or damp pot holders on
hot surfaces may result in burns from steam. Do not let the pot holder touch hot heating
elements. Do not use a towel or other bulky cloth to remove food.
•Do not heat unopened food containers. Pressure in the containers may cause them to
burst which may result in injury.
•To eliminate the risk of burns or fire by reaching over heated surface units, cabinet storage
space located above the surface units should be avoided. If cabinet storage is to be
provided, the risk can be reduced by installing a range hood that projects horizontally a
minimum of 5 inches beyond the bottom of the cabinets.
Page 5
IMPORTANT SAFETY INSTRUCTIONS
5
FLAMMABLE MATERIALS
WARNING
Be certain that all packing materials are removed from the appliance before operating.
Keep plastic, clothes, paper, and other flammable materials away from parts of the
appliance that may become hot.
•Do not store or use flammable material in the oven or near or on the cooktop. Flammable
materials include paper, plastic, pot holders, linens, wall coverings, curtains, and gasoline
or other flammable vapors and liquids such as grease or cooking oil. These materials can
be ignited when the oven and cooktop are in use.
•Wear proper apparel. Do not wear loose-fitting or hanging garments, which may ignite if
they contact hot surfaces, and cause severe burns.
•Do not use the oven for drying clothes. Only use the oven for its intended purpose.
•If a cabinet storage is provided directly above cooking surface, place items that are not
frequently used and can be safely stored in an area subjected to heat. Temperatures may
be unsafe for volatile items such as flammable liquids, cleaners or aerosol sprays.
ELECTRICAL SAFETY
CAUTION
Be certain that all packing materials are removed from the appliance before operating.
Keep plastic, clothes, paper, and other flammable materials away from parts of the
appliance that may become hot.
ENGLISH
•Always disconnect power from the appliance before servicing.
•Do not use aluminum foil or any other material to line the oven bottom.
Improper installation of these liners may result in a risk of electric shock or fire.
•Do not allow aluminum foil or the temperature probe to contact heating elements.
WARNING
Before replacing the oven light bulb, switch off the electrical power to the oven at the
main fuse or circuit breaker panel. Failure to do so can result in severe personal injury,
death, or electrical shock.
DEEP FAT FRYER
•Use extreme caution when moving or disposing of hot grease.
•Always heat fat slowly, and watch as it heats.
•If frying combinations of oils and fats, stir them together before heating.
•Use a deep fat thermometer, if possible, to prevent overheating fat beyond the smoking
point.
•Use the least possible amount of fat for effective shallow or deep-fat frying. Filling the pan
with too much fat can cause spillovers when food is added.
Page 6

6
IMPORTANT SAFETY INSTRUCTIONS
CHILD SAFETY
•Do not touch the hot surface between the bottom of the oven door and the top of the
drawer on the front of the oven while the oven is in operation. The surface becomes hot
and can cause burns and other injury.
•Do not leave small children unattended near the oven.
WARNING
Do not leave children alone or unsupervised near the appliance when it is in use or is
still hot. Children should never be allowed to sit or stand on any part of the appliance as
they could be injured or burned.
CAUTION
Do not store items of interest to children in cabinets above a range or on the back guard
of a range – children climbing on the range to reach items could be seriously injured.
•Never let a child hang on the oven door.
•Do not allow children to crawl into the oven.
•Let hot utensils cool in a safe place, out of reach of small children.
•Children should not be allowed to play with controls or other parts of the appliance.
GLASS-CERAMIC COOKING SURFACE
•Surface units may be hot even though they are dark in color. Areas near surface units may
become hot enough to cause burns. During and after use, DO NOT TOUCH SURFACE
UNITS OR AREAS NEAR UNITS or let clothing or other flammable materials contact
surface units or areas near units until they have had sufficient time to cool. This includes
the cooktop and the area above the oven door.
•Do not cook on a broken cooktop. If the cooktop is broken, cleaning solutions and
spillovers may penetrate the broken cooktop and create a risk of electric shock. Contact a
qualified technician immediately.
•Do not use the glass cooktop surface as a cutting board.
•Do not place or store items that can melt or catch fire on the glass cooktop, even when it
is not being used.
•Choose proper burner size. For smaller pots and pans, use the smaller heating
elements. For larger pots and pans, use the larger heating elements. Select pans that
have flat bottoms large enough to cover the heating elements. Using undersized pans
exposes a portion of the heating element to direct contact and may result in clothing
burning.
•Glazed cookware. Only certain types of glass, glass-ceramic, ceramic, earthenware,
or other glazed cookware are suitable for range-top service without breaking due to the
sudden change in temperature.
•Never cook directly on the glass. Always use cookware.
•Always turn the surface units off before removing cookware.
•Turn cookware handles inward so they don't extend over adjacent surface units.
This reduces the risk of burns, ignition of flammable materials, and spillage due to
unintentional contact with the cookware.
•Immediately clean spills on the cooking area to prevent a tough cleaning chore later.
•Some cleaners can produce dangerous fumes if applied to a hot surface.
Page 7

IMPORTANT SAFETY INSTRUCTIONS
7
•Always place the pan in the center of the surface unit you are cooking on. Never leave
surface units unattended at high heat settings. Proper contact of cookware to burner
also will improve efficiency. Boilovers cause smoking and greasy spills that may catch on
fire.
•Clean cooktop with caution. Do not use sponges or cloth to wipe spills on a hot cooking
area. Use a proper metal scraper. If a wet sponge or cloth is used to wipe spills on a hot
cooking area, it can cause steam burns. Some cleaners can produce noxious fumes if
applied to a hot surface.
•Do not turn surface units on before placing cookware.
•Do not store heavy items above the cooktop surface that could fall and damage it.
•Do not place aluminum foil or plastic items such as salt and pepper shakers, spoon
holders, or plastic wrappings or any other material on the range when it is in use.
•Do not use a steel-wool pad or scrub pad or abrasive cleaning pads. They can scratch the
surface.
ENERGY SAVING TIPS
•Multiple-rack cooking saves time and energy. Whenever possible, cook foods requiring the
same cooking temperature together in one oven.
•For optimal performance and energy savings, follow the guides on page 30 for proper rack
and pan placements.
•Match the size of the cookware to the amount of food being cooked to save energy when
heating. Heating ½ quart of water requires more energy in a 3-quart pot than in a 1-quart
pot.
•Use cookware with flat bottoms to provide the best contact with the cooktop surface when
cooking on the glass-ceramic cooktop.
•Match the size of the cooktop burner or element to the size of the cookware in use. Using
a large element for a small pan wastes heating energy, and the exposed surface of the
element is a burn or fire hazard.
•Reduce energy use by cleaning light oven soils with the EasyClean
self-clean. (For Model : LDE4415 / LDE4413)
•Avoid opening the oven door more than necessary during use. This helps the oven
maintain temperature, prevents unnecessary heat loss, and saves on energy use.
®
feature instead of
ENGLISH
SAFETY DURING USE
•Do not touch the oven racks while they are hot.
•If a rack must be moved while the oven is hot, do not let the pot holder contact the hot
heating element in the oven.
•Use caution with the Timed Cook or Delayed Timed Cook features. Use the automatic
timer when cooking cured or frozen meats and most fruits and vegetables. Foods that can
easily spoil, such as milk, eggs, fish, meat or poultry, should be chilled in the refrigerator
first. Even when chilled, they should not stand in the oven for more than 1 hour before
cooking begins, and should be removed promptly when cooking is complete. Eating
spoiled food can result in sickness from food poisoning.
•Accessible parts may become hot when the grill is in use.
•Do not place food or cookware on the bottom of the oven cavity. Doing so will cause
permanent damage to the oven bottom finish.
•Do not use water on grease fires. Should an oven fire occur, leave the oven door closed
and turn the oven off. If the fire continues, throw baking soda on the fire or use a fire
extinguisher. Do not put water or flour on the fire. Flour may be explosive and water can
spread a grease fire and cause personal injury.
Page 8

8
IMPORTANT SAFETY INSTRUCTIONS
•Pull the oven rack to the stop-lock position when loading and unloading food from the
oven. This helps prevent burns caused by touching hot surfaces of the door and oven
walls.
•Do not use the oven if a heating element develops a glowing spot during use or shows
other signs of damage. A glowing spot indicates the heating element may fail and present
a potential burn, fire, or shock hazard. Turn the oven off immediately and have the heating
element replaced by a qualified service technician.
•When using cooking or roasting bags in the oven, follow the manufacturer’s directions.
SAFETY WHEN CLEANING (Self Clean Model : LDE4415 / LDE4413)
•Open a window or turn on a ventilation fan or hood before self-cleaning.
•If the oven is heavily soiled with oil, self-clean the oven before using the oven again. The
oil could cause a fire.
•Wipe up heavy soil on the bottom of the oven before using the Self Clean function.
•Do not use oven cleaners. Commercial oven cleaner or oven liner protective coating of
any kind should not be used in or around any part of the oven.
•Never keep pet birds in the kitchen. The health of birds is extremely sensitive to the fumes
released during an oven self-clean cycle. Fumes may be harmful or fatal to birds. Move
birds to a well-ventilated room.
•Clean in the self-clean cycle only parts listed in this manual. Before self-cleaning the oven,
remove the broiler pan, all oven racks, the meat probe and any utensils or food from the
oven.
•Important Instruction. The oven displays an F error code and sounds three long beeps
during the self-cleaning process if it malfunctions in the self-clean mode. Switch off the
electrical power to the main fuse or breaker and have the oven serviced by a qualified
technician.
•It is normal for the cooktop of the range to become hot during a self-clean cycle.
Therefore, touching the cooktop during a self-clean cycle should be avoided.
•Never pour cold water over a hot oven for cleaning. Doing so may cause the oven to
malfunction.
•Make sure oven lights are cool before cleaning.
•Do not clean door gasket. The door gasket is essential for a good seal. Care should be
taken not to rub, damage, or move the gasket.
•If there is a fire in the oven during self-clean, turn the oven off and wait for the fire to go
out. Do not force the door open. Introduction of fresh air at self-clean temperatures may
lead to a burst of flame from the oven. Failure to follow this instruction may result in severe
burns.
COOK MEAT AND POULTRY THOROUGHLY
•To protect against food-borne illnesses, cook meat and poultry thoroughly. The USDA has
indicated the following as safe minimum internal temperatures for consumption:
•Ground beef: 160 °F
•Poultry: 165 °F
•Beef, veal, pork, or lamb: 145 °F
•Fish/seafood: 145 °F
Page 9
PRODUCT OVERVIEW
9
PRODUCT OVERVIEW
Parts
Oven
controller
Cooktop
Cooktop
controller
Upper
oven door
Lower
oven door
Accessories
ENGLISH
Glass-ceramic
Oven mode knob
Gasket
Rack
Included Accessories
Cleaning
pad
Cooktop
cleaning pad
(1ea)
Spray bottle
(1ea)
Standard rack
- LDE4415 (2ea)
- LDE4413 / LDE4411 (3ea)
Non-scratch scouring pad
(1ea)
Gliding rack (1ea)
(LDE4415 Model only)
Scraper (1ea)
(LDE4411 Model only)
Cleaner
Cooktop
cleaner
(1ea)
Optional Accessories
Grid Broiler pan
NOTE
•Contact LG Customer Service at 1-800-243-0000 (1-888-542-2623 in Canada) if any accessories are
missing.
•For your safety and for extended product life, only use authorized components.
•The manufacturer is not responsible for product malfunction or accidents caused by the use of separately
purchased, unauthorized components or parts.
•The images in this guide may be different from the actual components and accessories, which are subject
to change by the manufacturer without prior notice for product improvement purposes.
Page 10

10
INSTALLATION
INSTALLATION
Installation Overview
Please read the following installation instructions first after purchasing this product or transporting it to another
location.
Check and choose the
proper location
240 V or 208 V
Black White Red
Terminal
block
Conduit
connection
plate
Install anti-tip device Level the range Connect electric range
Plug in the power cord Engage the anti-tip device Test run
Product Specifications
The appearance and specifications listed in this manual may vary due to constant product improvements.
Oven Range Models LDE4415, LDE4413, LDE4411
Description Electric Double Oven Range
Electrical requirements 15.5kW 120/240 VAC or 11.6kW 120/208 VAC
7
29
Exterior Dimensions
Height to cooking surface 36" (91.4 cm)
Net weight 181 lb (82.0 kg)
Total capacity
/8" (W) x 48 7/8" (H) x 26 1/2" (D) (D with door closed)
75.7 cm (W) x 124.0 cm (H) x 67.3 cm (D) (D with door closed)
Upper Oven: 3.0 cu. ft.
Lower Oven: 4.3 cu. ft.
Total cap.: 7.3 cu. ft.
Page 11
INSTALLATION
11
Before Installing the Range
WARNING
Tip - Over Hazard
A child or adult can tip the range and
be killed. Verify the anti-tip bracket
has been installed. Ensure the
anti-tip bracket is engaged when the
range is moved.
Do not operate the range without the
anti-tip bracket in place. Failure to
follow these instructions can result
in death or serious burns to children
and adults.
To check that leveling leg is
inserted into anti-tip bracket,
grasp the top rear edge
of the range and carefully
attempt to tilt it forward.
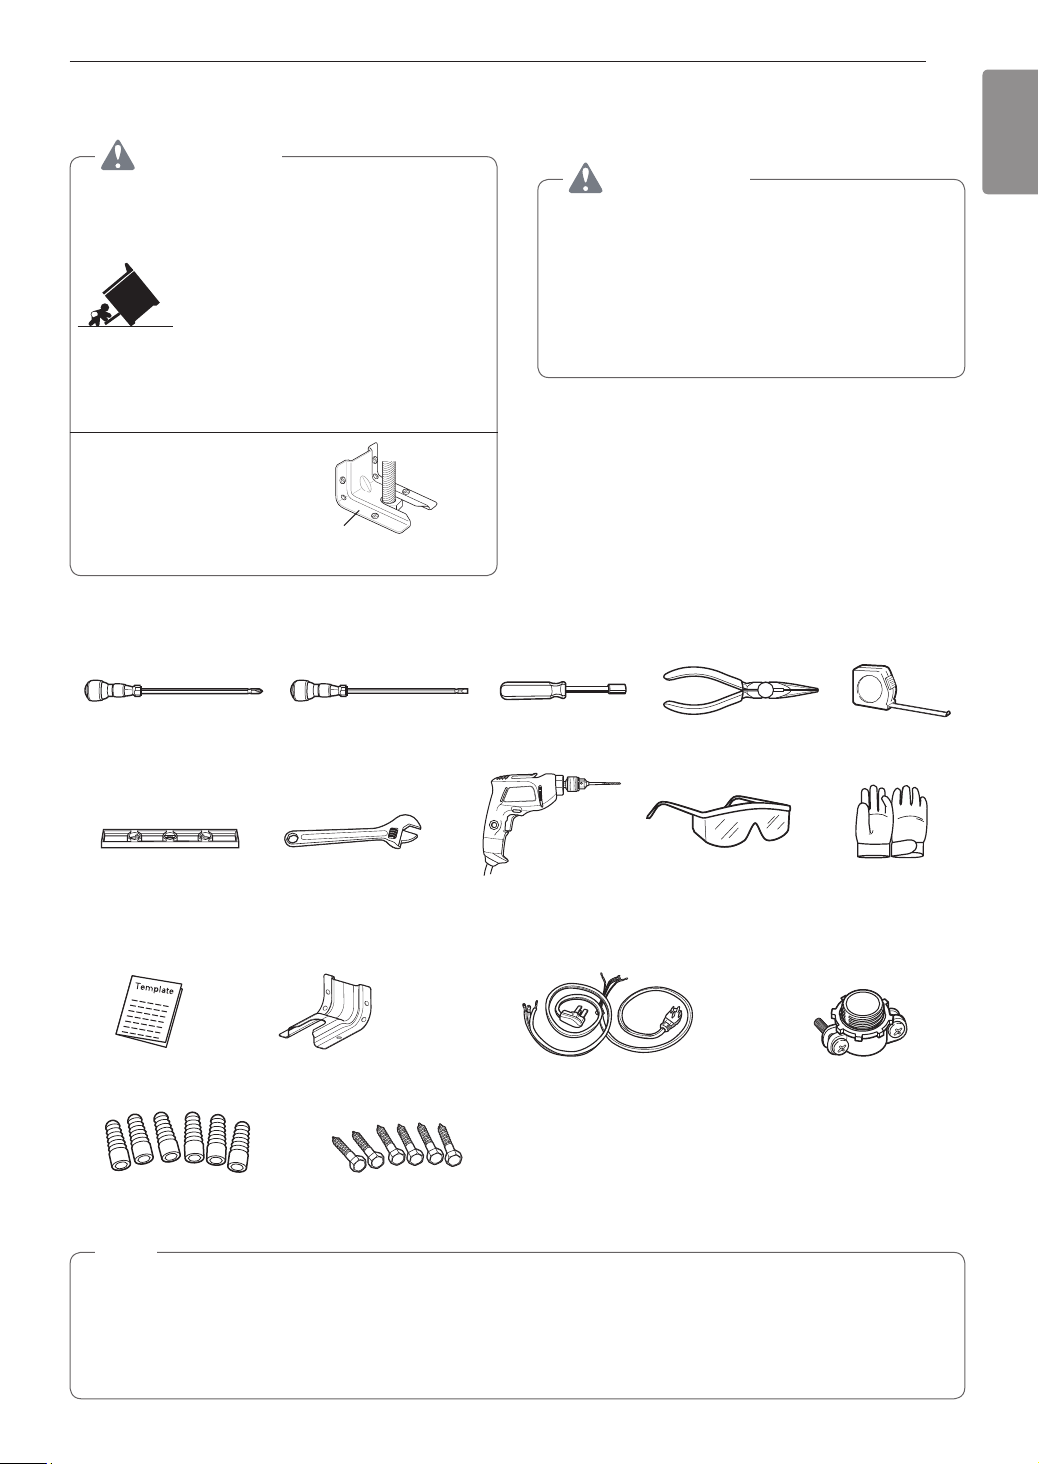
Tools Needed
Anti-tip
bracket
Leveling
leg
If you did not receive an anti-tip bracket with your
purchase, call 1-800-243-0000 (1-888-542-2623 in
CANADA) to receive one at no cost.
WARNING
•The information in this manual should be
followed exactly. Failure to do so may result
in fire, electrical shock, property damage,
personal injury, or death.
•Wear gloves during the installation
procedure. Failure to do so can result in bodily
injury.
ENGLISH
Phillips screwdriver
Level
Flat-blade screwdriver
Adjustable wrench
Parts Provided
Template (1)
Anchor sleeves (6) Lag bolts (6)
Anti-tip bracket kit (1)
1
/4" Nut driver
Drill
Parts not Provided
4-Wire cord or
3-Wire cord
(UL approved 40 or 50
AMP)
Pliers
Safety glasses
Tape measure
Strain relief
(For conduit
Installations only)
NOTE
•Observe all governing codes and ordinances.
•Have the installer show you the location of the circuit breaker or fuse. Mark it for easy reference.
•As when using any appliance generating heat, there are certain safety precautions you should follow.
•Be sure your range is installed and grounded properly by a qualified installer or service technician.
Gloves
Page 12

12
INSTALLATION
Installing the Range
Unpacking and Moving the Range
CAUTION
•You should use two or more people to move
and install the range. (Excessive Weight
Hazard) Failure to do so can result in back or
other injury.
•Do not use the door handles to push or
pull the range during installation or when
moving the range out for cleaning or
service. Doing so can result in serious damage
to the door of the range.
Remove packing material, tape and any temporary
labels from your range before using. Do not remove
any warning-type labels, the model and serial number
label, or the Tech Sheet that is located on the back of
the range.
To remove any remaining tape or glue, rub the area
briskly with your thumb. Tape or glue residue can also
be easily removed by rubbing a small amount of liquid
dish soap over the adhesive with your fingers. Wipe
with warm water and dry.
Do not use sharp instruments, rubbing alcohol,
flammable fluids, or abrasive cleaners to remove tape
or glue. These products can damage the surface of
your range.
Your range is heavy and can be installed on soft
floor coverings such as cushioned vinyl or carpeting.
Use care when moving the range on this type of
flooring. Use a belt when moving the range to prevent
damaging the floor. Or slide the range onto cardboard
or plywood to avoid damaging the floor covering.
Choosing the Proper Location
CAUTION
•Avoid placing cabinets above the range. To
minimize the hazard caused by reaching over
the open flames of operating burners, install a
ventilation hood over the range that projects
forward at least five inches beyond the front of
the cabinets.
•Make sure wall covering, countertop and
cabinets around the range can withstand
the heat (up to 194 °F) generated by the
range. Discoloration, delamination or melting
may occur. This range has been designed to
comply with the maximum allowable wood
cabinet temperature of 194 °F.
•Before installing the range in an area
covered with linoleum or other synthetic
floor covering, make sure the floor covering
can withstand temperatures of at least
200 °F (93 °C).
•Use an insulated pad or
plywood under the range if installing the
range over carpeting.
The range should always be plugged into its own
individual properly grounded electrical outlet. This
prevents overloading house wiring circuits which
could cause a fire hazard from overheated wires. It is
recommended that a separate circuit serving only this
appliance be provided.
Mobile Home - Additional Installation
Requirements
The installation of this range must conform to the
Manufactured Home Construction and Safety
Standard, Title 24 CFR, Part 3280 (formerly the
Federal Standard for Mobile Home Construction
and Safety, Title 24, HUD Part 280), or when
such standard is not applicable, the Standard for
Manufactured Home Installations, ANSI A225.1/NFPA
501A or with local codes.
•When this range is installed in a mobile home, it
must be secured to the floor during transit. Any
method of securing the range is adequate as long
as it conforms to the standards listed above.
•A four-wire power supply cord or cable must be
used in a mobile home installation.
1
/4 in. (0.64 cm)
Page 13
INSTALLATION
13
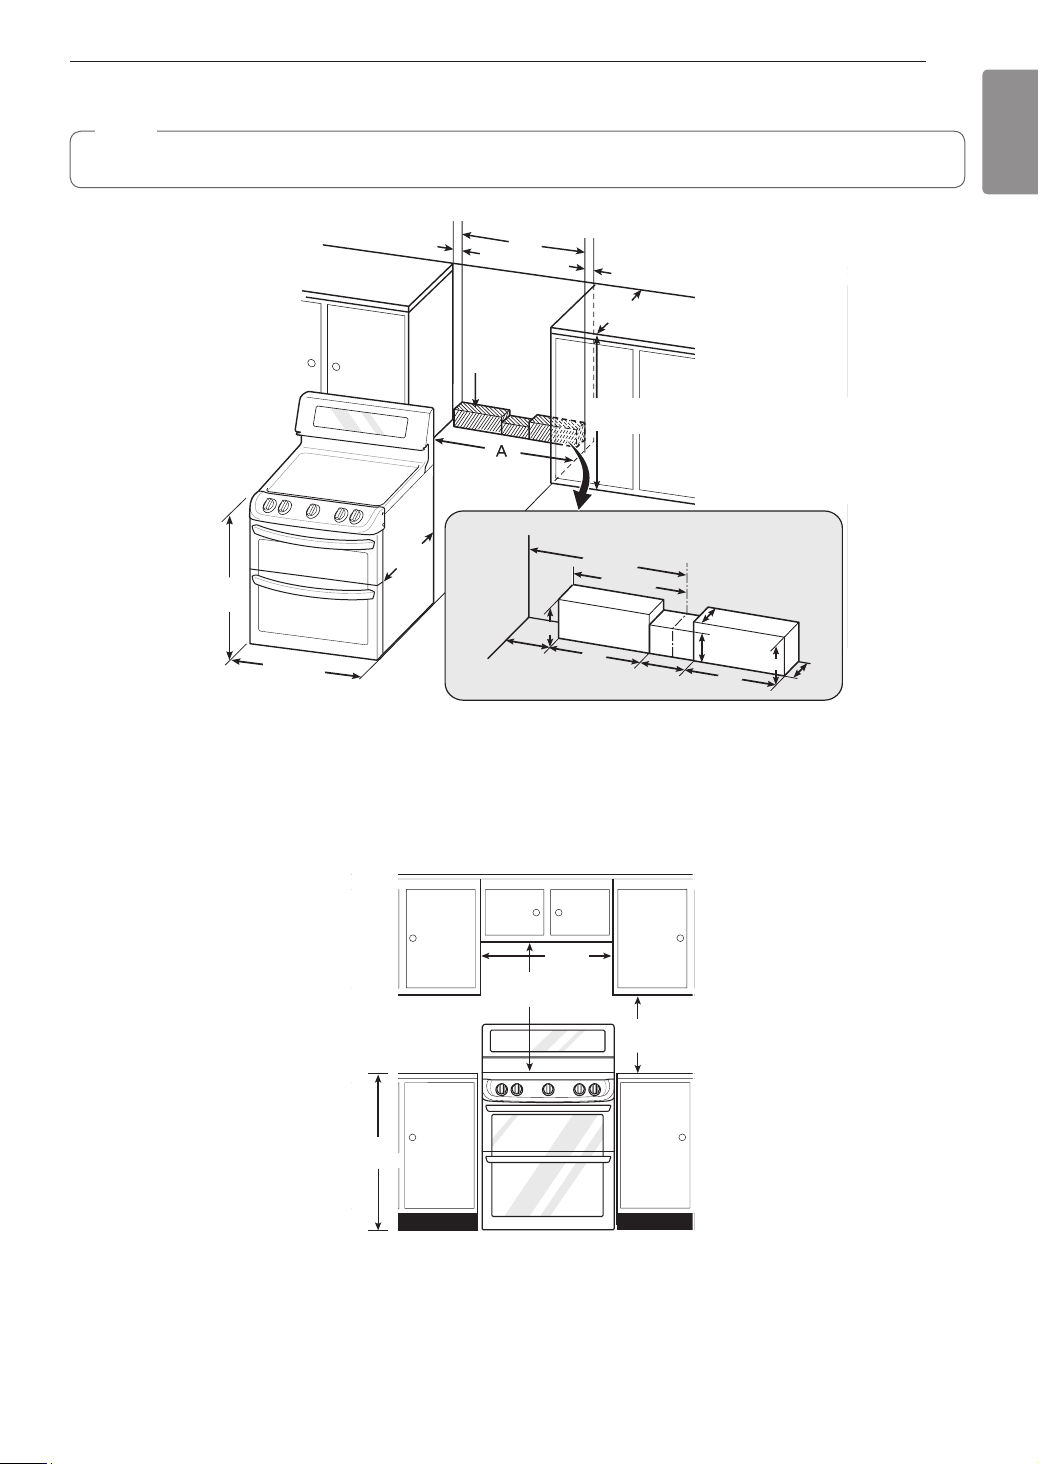
Dimensions and Clearances
NOTE
Save for the use of the local electrical inspector.
3" (7.6 cm)
24"
(60.9 cm)
36"
(91.4 cm)
29.8"
(75.7 cm)
24"
(60.9 cm)
Acceptable
electrical
outlet area
Cabinet
opening
Cabinet
4"
(10 cm)
(63.5 cm)
36"
(91.4 cm)
15" (38 cm)
6"
(15.2 cm)
9"
(23 cm)
3" (7.6 cm)
25"
Wall
11" (28 cm)
(10 cm)
Normal counter
top depth
Counter
top height
Center
2.5" (6.3 cm)
5"
(13 cm)
4"
9"
(23 cm)
(15.2 cm)
ENGLISH
6"
2.5"
(6.3 cm)
A = 30" (76.2 cm) For U.S.A
= 30" (76.2 cm) ~ 31" (78.7 cm) For CANADA
15
For installation in Canada, a free-standing range is not to be installed closer than
/32" (12 mm) from any
adjacent surface.
30"
(76.2 cm)
*30" (76.2 cm)
Minimum
**15"
(38.1 cm)
36"
(91.4 cm)
Minimum Dimensions
* 30" (76.2 cm) minimum clearance between the top of the cooking surface and the bottom of an unprotected
wood or metal cabinet; or 24" (60.9 cm) minimum when bottom of wood or metal cabinet is protected by not less
1
/4" (6.4 cm) flame retardant millboard covered with not less than no. 28 MSG sheet steel, 0.015"
than
(0.381 mm)
stainless steel, 0.024" (0.610 mm) aluminum or 0.020" (0.508 mm) copper.
** 15" (38.1 cm) minimum between countertop and adjacent cabinet bottom.
Page 14
14
INSTALLATION
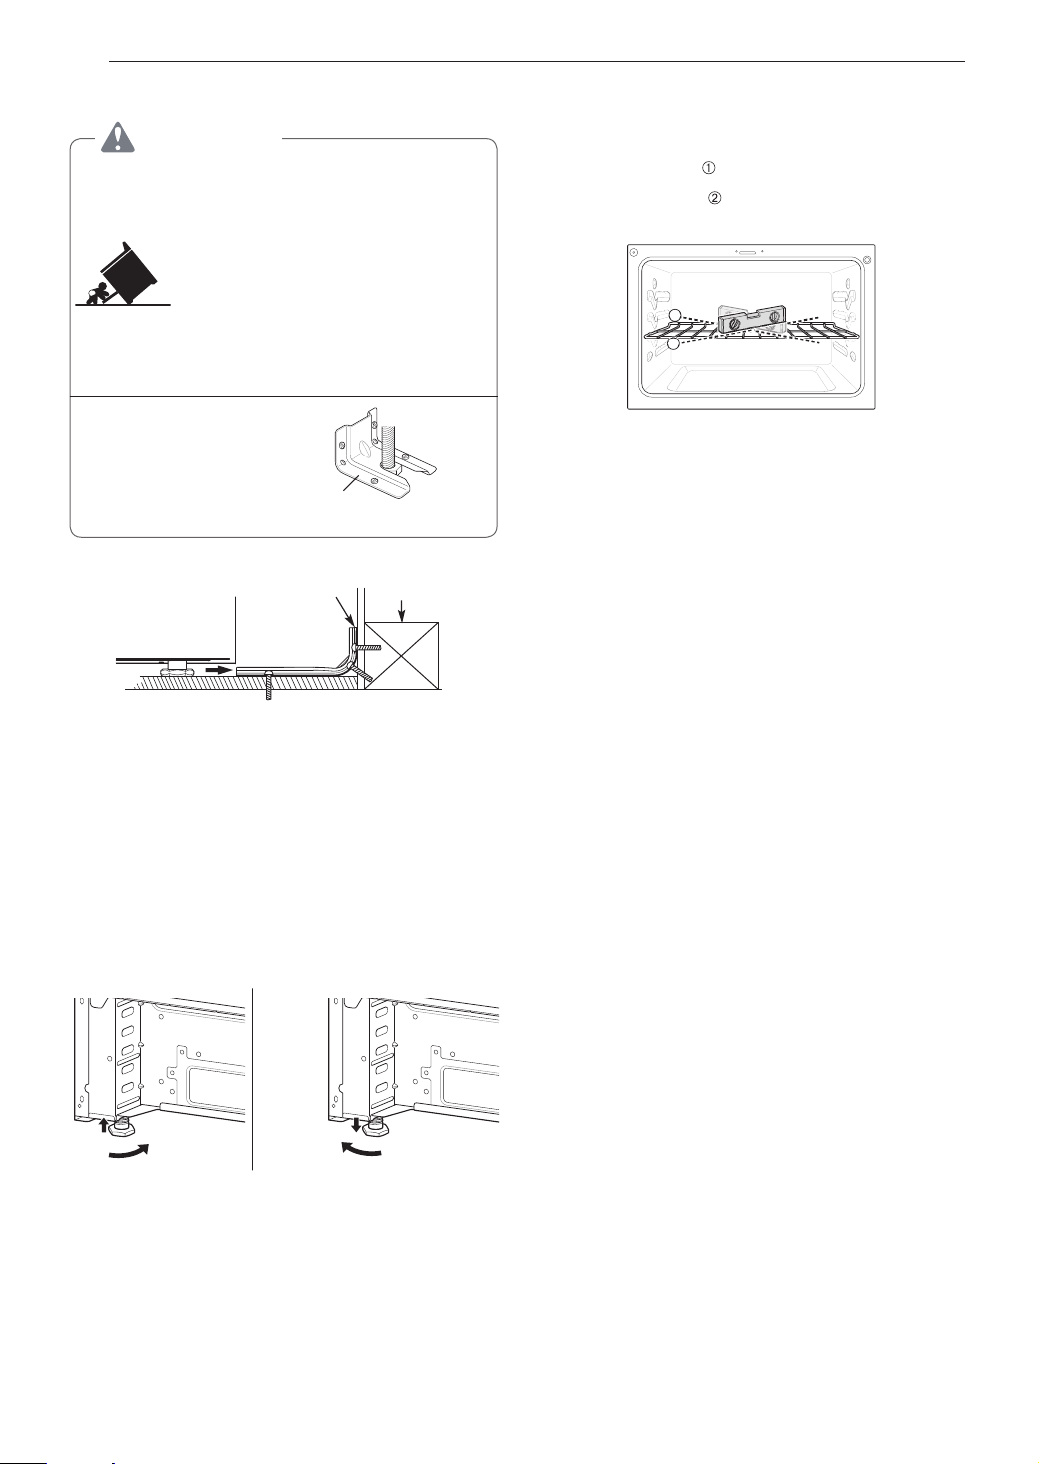
Installing the Anti-tip Device
WARNING
Tip - Over Hazard
A child or adult can tip the range and
be killed. Verify the anti-tip bracket
has been installed. Ensure the anti-tip
bracket is engaged when the range
is moved. Do not operate the range
without the anti-tip bracket in place.
Failure to follow these instructions
can result in death or serious burns to
children and adults.
To check that leveling leg is
inserted into anti-tip bracket,
grasp the top rear edge
of the range and carefully
attempt to tilt it forward.
Screw must
enter wood or
concrete
Locate the anti-tip bracket using the template
An anti-tip bracket is packaged with the template.
The instructions include necessary information to
complete the installation. Read and follow the range
installation instruction sheet (template).
Anti-tip
bracket
Anti-tip
bracket
Leveling the Range
Level the range by adjusting the leveling legs with a
wrench. Extending the legs slightly may also make it
easier to insert the rear leg into the anti-tip bracket.
Leveling
leg
Wall plate
Use a level to check your adjustments. Place the level
diagonally on the oven rack, and check each direction
for level.
First check direction
Then check direction
on the rack, adjust the leveling legs with a wrench.
.
. If the level doesn’t show level
2
1
Connecting Electricity
Electrical Requirements
This appliance must be installed and grounded on a
branch circuit by a qualified technician in accordance
with the National Electrical code ANSI/NFPA NO. 70 latest edition.
All wiring should conform to Local and NEC codes.
This range requires a single-phase, 3 wire, A.C
120/208 V or 120/240 V 60 Hz electrical system. Use
only a 3-conductor or a 4-conductor UL- listed range
cord with closed-loop terminals, open-end spade
lugs with upturned ends or similar termination. Do not
install the power cord without a strain relief.
A range cord rated at 40 amps with 120/208 or
120/240 minimum volt range is required. If a 50 amp
range cord is used, it should be marked for use with
3
1
/8" diameter connection openings. This appliance
may be connected by means of a conduit or power
cord. If a conduit is being used, go to page 17 for
3 wire conduit connections or 4 wire conduit
connections.
Page 15
INSTALLATION
15
WARNING
•Allow 2 to 3 ft (61.0 cm to 91.4 cm) of slack
in the line so that the range can be moved if
servicing is ever necessary.
•The power supply cord and plug should
not be modified. If it will not fit the outlet,
have a proper outlet Installed by a qualified
electrician.
•Using an extension cord to connect the
power is prohibited. Connect the power
cord and plug directly.
•Electrical ground is required on this
appliance.
•Make sure that the power cord is not
pinched by the range or heavy objects.
Failure to do so can result in serious burns or
electrical shock.
Specified power-supply-cord kit rating
Diameter (inches)
Range rating, watts
Specified
rating of
power
120/240
volts
3-wire
8,750 16,500
16,501 22,500
120/208
volts
3-wire
7,801 12,500
12,501 18,500
supply-
cord kit,
amperes
40 or 50A
50
3, 4 - Wire electrical wall Receptacle
of Range
connection
Opening
Power
cord
3
/8"
1
1 3/4"
Conduit
1
/8"
1
1 3/8"
Use the cord/conduit connection plate to install the
power cord or conduit. Leave the connection plate
as installed for power cord installations. Remove the
connection plate for conduit installations and use the
smaller 11/8 in. (2.8 cm) conduit hole instead of the
13/8 in. (3.5 cm) power cord hole.
1
/8"
(2.8 cm) Conduit
1
13/8"
(3.5 cm) Cord
Remove the Conduit connection plate
For power cord installations, hook the strain relief
over the 1
3
/8 in. (3.5 cm) power cord hole located
below the rear of the oven. Insert the power cord
through the strain relief and tighten it.
Conduit
connection
plate
Power cord
3
Assembling power cord strain relief at the 1
/8" opening
For conduit installations, insert the conduit strain
relief in the 11/8 in. (2.8 cm) conduit hole. Then install
the conduit through the body of the strain relief and
fasten the strain relief with its ring.
ENGLISH
4 Wire receptacle (14-50R)
3 Wire receptacle (10-50R)
Connecting the Power Cord
The rear access cover must be removed. Loosen the
two screws with a screwdriver. The terminal block will
then be accessible.
Access cover
Ring
Body
Assembling conduit cord strain relief at the 1
Cord/
Conduit
connection
plate
Conduit
1
/8" opening
Page 16
16
INSTALLATION
3-Wire Connection : Power Cord
WARNING
•The middle (neutral or ground) wire, which
is white, of a 3-wire power cord or a 3-wire
conduit has to be connected to the middle
post of the main terminal block. The
remaining two wires of the power cord or
conduit have to be connected to the outside
posts of the main terminal connection block.
Failure to do so can result in electrical shock,
severe personal injury or death.
Install the power cord as follows:
For power cord installations, hook the strain relief
over the power cord hole (1
rear of the oven. Insert the power cord through the
strain relief and tighten it.
Do not install the power cord without a strain
relief.
Remove the lower 3 screws from the terminal
1
block and retain them.
Insert the 3 screws through each power cord
2
terminal ring and into the lower terminals of
the terminal block. Make sure that the center
(neutral) wire, which is white, is connected to the
center lower position of the terminal block.
Tighten the 3 screws securely into the terminal
3
block. Do not remove the ground strap
connections.
3-wire connection
Black White Red
3
/8") located below the
4-Wire Connection : Power Cord
WARNING
•Only a 4-conductor power-supply cord kit
rated 120/208 or 120/240 volts, 50 amperes
and marked for use with ranges with closedloop connectors or opened spade lugs with
upturned ends shall be used.
The white middle (neutral) wire of the power
cord or 4-wire conduit has to be connected
to the middle post of the main terminal
block. The other two wires of the power
cord or conduit have to be connected to
the outside posts of the main terminal
connection block. The 4th ground wire
(green) must be connected to the frame of
the range with the ground screw. Failure
to do so can result in electrical shock, severe
personal injury or death.
Install the power cord as follows:
Do not install the power cord without a strain
relief.
Remove the lower 3 screws from the terminal
1
block and retain them.
Remove the ground screw and bend the end of
2
the ground strap up so the slot is over the hole
of the center screw removed in step 1.
Insert the ground screw into the power cord
3
ground wire (green) terminal ring and secure it to
the range frame.
Insert the 3 screws through each power cord
4
terminal ring and into the lower terminals of the
terminal block. Make sure that the white center
(neutral) wire is connected to the center lower
position of the terminal block.
Terminal
block
Conduit
connection plate
If screws are not tightened securely, it can result in
electrical spark and severe personal injury or death.
Tighten the 3 screws securely into the terminal
5
block. The center screw now attaches the bent
up ground strap to the block.
4-wire connection
Black White Red
Terminal
block
Ground
screw
If screws are not tightened securely, it can result in
electrical spark and severe personal injury or death.
Conduit
connection plate
Ground
strap
Bend strap up
and attach
Page 17
INSTALLATION
17
3-Wire Connection: Conduit
Install the conduit as follows:
Remove the conduit connection plate from the rear of
the oven and rotate it. The conduit hole (1
be used.
First, prepare the conduit wires as shown below.
3-Wire
Conduit
connection
plate
Second, install the conduit strain relief.
For conduit installations, purchase a strain relief and
insert it in the 1
install the conduit through the body of the strain relief
and fasten the strain relief with its ring. Reinstall the
bracket.
For conduit connections:
If the wire in the conduit is copper it must be 8 or 10
AWG wiring.
If the wire in the conduit is aluminum it must be 6 or 8
AWG wiring.
Loosen the lower 3 screws from the terminal
1
block.
Insert the bare wire (white/neutral) end through
2
the center terminal block opening. Do not
remove the ground strap connections.
1
/8 in. (2.8 cm) conduit hole. Then
or
4-Wire
1
/8") must
Ground
wire
4-Wire Connection: Conduit
WARNING
•The white middle (neutral) wire of the power
cord or 4-wire conduit has to be connected
to the middle post of the main terminal
block. The other two wires of the power
cord or conduit have to be connected to
the outside posts of the main terminal
connection block. The 4th ground wire
(green) must be connected to the frame of
the range with the ground screw. Failure
to do so can result in electrical shock, severe
personal injury or death.
Follow the instructions for installing the conduit
1
under 3-Wire Connection: Conduit until the strain
relief and bracket are installed. Do not install the
conduit without a strain relief.
Loosen the 2 lower left and right screws from
2
the terminal block. Remove the lower 2 center
screws. Do not discard any screws.
Remove the ground screw and bend the end of
3
the ground strap up so the slot is over the hole
of the center screw removed in step 1.
Attach the ground (green) bare wire end to
4
the range frame and secure it in place with the
ground screw.
Insert the bare wire (white/neutral) end through the
5
center terminal block opening. The center screw
now attaches the bent up ground strap to the block.
Insert the two side bare wire ends into the left
6
and the right terminal block openings. Tighten
the 3 screws securely into the terminal block.
(approximately 35 - 50 IN-LB)
ENGLISH
Insert the two side bare wire ends into the lower
3
left and the lower right terminal block openings.
Tighten the 3 screws securely into the terminal
block. (approximately 35 - 50 IN-LB)
3-wire connection
Black White Red
Terminal
block
Wire
ends
Conduit
connection plate
If screws are not tightened securely, it can result in
electrical spark and severe personal injury or death.
4-wire connection
Black White Red
Terminal
block
Ground
Wire
ends
Conduit
connection
plate
Ground
screw
If screws are not tightened securely, it can result in
electrical spark and severe personal injury or death.
Ground
wire
strap
Bend strap
up and
attach
Page 18
18
INSTALLATION
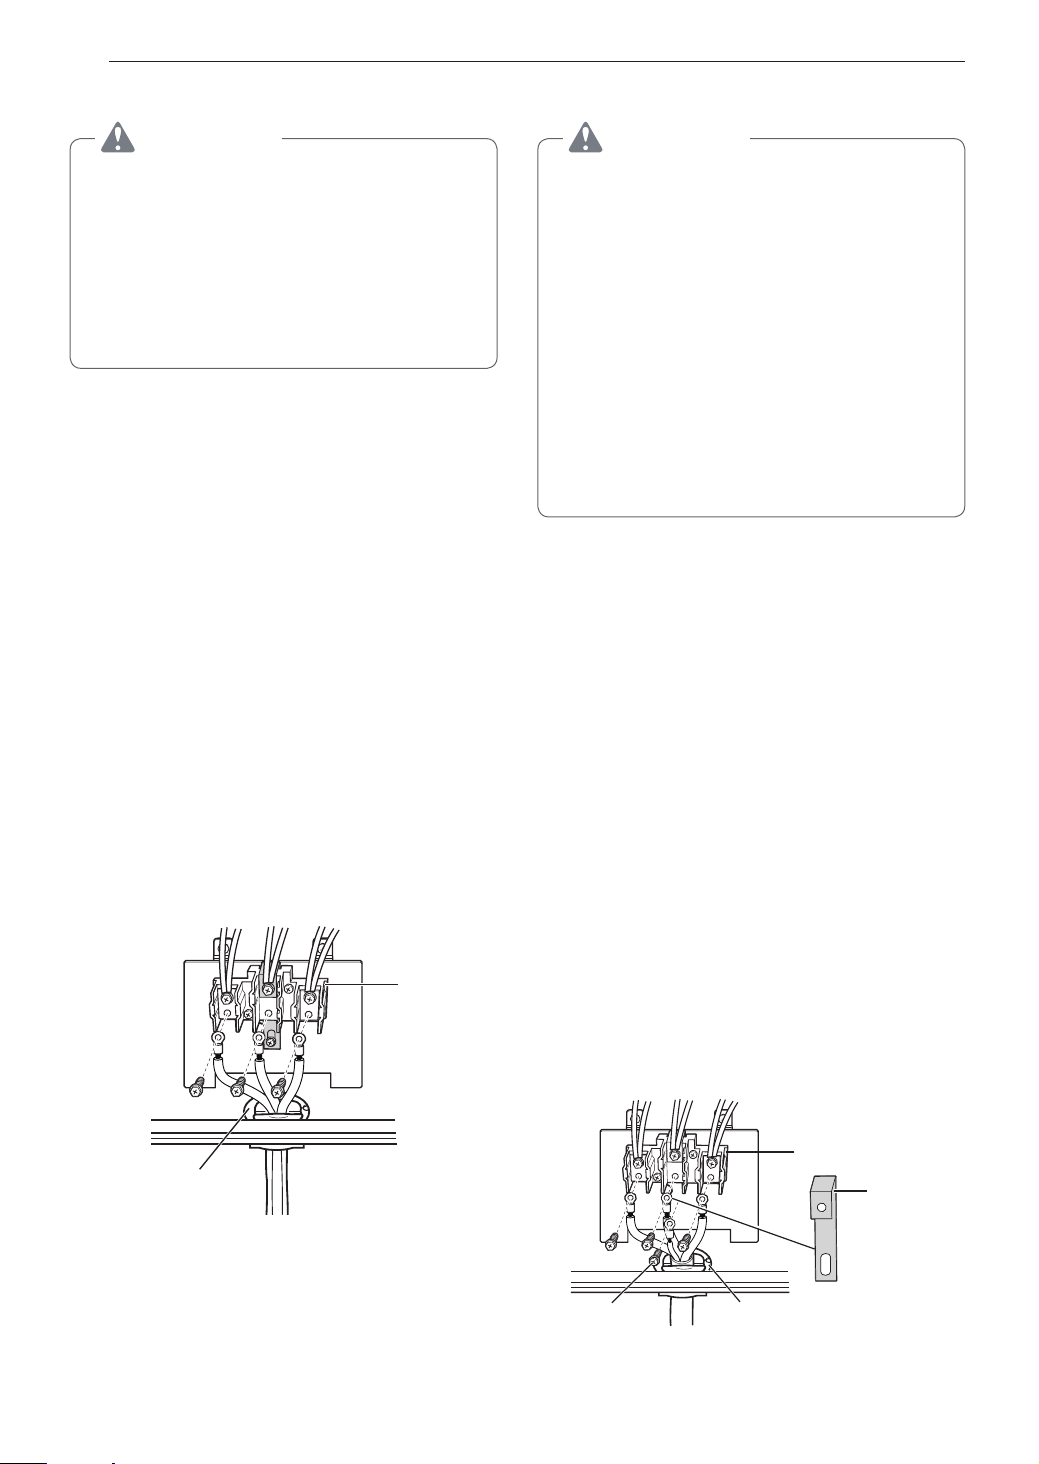
Engaging the Anti-tip Device
•Move the range close enough to the opening to
plug into the receptacle.
•Slide the range into position ensuring that the back
leg slides under the anti-tip bracket. The range
should sit flush against the back wall when properly
installed.
•Carefully attempt to tip the range forward to ensure
that the anti-tip bracket is engaged properly. If
properly installed, the anti-tip bracket will prevent
the range from being tipped. If the range can be
tipped, reinstall the range until the anti-tip bracket is
properly installed and the range will not tip forward.
•Turn on electrical power. Check the range for
proper operation.
Test Run
Check if the range is properly installed and run a test
cycle.
Touch Clear/Off to start test.
1
Turn each knob to the Hi position to check
2
that the surface heating elements are working
properly. The elements should glow red and
radiate heat, and they should cycle on and off
periodically even when the knob is in the Hi
position. This cycling prevents the glass-ceramic
from being cracked by thermal shock.
IMPORTANT : The warming zone does not
consume enough power to glow red.
*For Model : LDE4415 / LDE4413
3
After checking all the surface heating elements,
check the locking system by touching Lower
Clear/Off for three seconds. The oven door
should lock and the cooktop should not operate
while the Lockout function is turned on. Touch
Lower Clear/Off for three seconds to disable
Lockout.
Now check the oven's operation. Touch Bake
4
and touch the number keys to set the oven
temperature to 350 °F.
The oven should finish preheating in 15 minutes,
5
and the convection fan should operate while the
oven is preheating.
After checking the oven's operation, turn the
6
temperature up to 450 °F and leave the oven on
for at least an hour to help remove any oil which
might cause smoke and odors when first using
the oven.
NOTE
Smoke may come out of the range when it is first
used.
Page 19

OPERATION
19
OPERATION
Control Panel Overview
For Model : LDE4415 / LDE4413
1 3 2
For Model : LDE4411
1 3 2
ENGLISH
2
2
4 5
7 68
4 5
7 6
9
1
Oven Control
2
Features
3
Number Keys
4
Start Key
5
NFC Tag On
Hot Surface Indicator
The hot surface indicator light glows as long as any surface cooking area is too hot to touch.
It remains on after the element is turned off and until the surface has cooled to approximately 150 ˚F.
Flashing Time
If your oven displays a flashing clock, touch Clock and reset the time, or touch any key to stop the flashing.
6
Smart Diagnosis
7
Clear Off / Lockout Key
8
Speed Broil / Broil Key
- LDE4415 : Speed Broil
- LDE4413 : Broil
9
Cooktop Elements
TM
Page 20

20
OPERATION
Knob Position
After cleaning the oven knobs, make sure to replace each knob in the correct position. Failure to do so can result
in improper operation of the burners.
LDE4415
LDE4413
LDE4411
Dual Single Single Single Triple
Dual Single Single Single Dual
Dual Single On/off Single Single
Page 21

OPERATION
21
Changing Oven Settings
Clock
The clock must be set to the correct time of day in
order for the automatic oven timing functions to work
properly.
Touch Clock.
1
Touch the numbers to enter the time. For
2
example, to set the clock for 10:30, touch the
numbers: 1, 0, 3 and 0.
Touch Start.
3
NOTE
•The time of day cannot be changed during a
timed baking or self-clean cycle.
•To check the time of day when the display is
showing other information, touch Clock.
•If no other keys are touched within 25 seconds
of touching Clock, the display reverts to the
original setting.
•If the display time is blinking, you may have
experienced a power failure. Reset the time.
Minimum & Maximum Default
Settings
All of the features listed have a minimum and a
maximum time or temperature setting that may be
entered into the control. An entry acceptance beep
sounds each time a control key is touched.
An entry error tone (two short tones) sounds if the
entry of the temperature or time is below the minimum
or above the maximum setting for the feature.
Feature
Clock
Timer
Cook Time
min.
Temp. /
Time
12 Hr.
24 Hr.
12 Hr. 0:01 min.
24 Hr. 0:01 min.
12 Hr. 0:01 min.
24 Hr. 0:01 min.
1:00
Hr. / min.
0:00
Hr. / min.
max.
Temp. /
Time
12:59
Hr. / min.
23:59
Hr. / min.
11:59
Hr. / min.
11:59
Hr. / min.
11:59
Hr. / min.
11:59
Hr. / min.
Default
ENGLISH
Oven Light
The interior oven light automatically turns on when
the door is opened. Touch Light to manually turn the
oven light on.
NOTE
The oven light cannot be turned on if the Self
Clean function is active. (For Model : LDE4415 /
LDE4413)
Conv. Bake
Conv.
Roast
Speed Broil
& Broil
Bake
Proof 12 Hr.
Pizza 12 Hr.
Speed
Roast
Warm 3 Hr.
Self Clean
(LDE4415 /
LDE4413)
EasyClean
®
300 °F /
150 °C
300 °F /
150 °C
Lo
400 °F
170 °F /
80 °C
3 Hr. 5 Hr. 4 Hr.
550 °F /
285 °C
550 °F /
285 °C
Hi
500 °F
550 °F /
285 °C
350 °F
(*325 °F)/
12 Hr.
350 °F
(*325 °F)/
12 Hr.
Hi /
3 Hr.
350 °F /
12 Hr.
12 Hr.
10 min.
* Using Auto Conversion
•Default cook mode times are without setting cook
time.
Page 22

22
OPERATION
Timer On/Off
The Upper or Lower Timer On/Off serves as an extra
timer in the kitchen that beeps when the set time has
run out. It does not start or stop cooking.
The Upper or Lower Timer On/Off feature can be
used during any of the other oven control functions.
The Upper and Lower Timer can be operated
independently of each other.
Setting the Timer (for example to set 5 minutes)
Touch Upper Timer On/Off or Lower Timer On/
1
Off once.
0:00 appears and Timer flashes in the display.
Touch 5.
2
0:05 appears in the display.
Touch Timer On/Off to start the Timer. The
3
remaining time countdown appears in the
display.
NOTE
If Upper Timer On/Off or Lower Timer On/Off is
not touched, the timer returns to the time of day.
Settings
Touch the Settings key repeatedly to toggle through
and change oven settings.
The Settings key allows you to:
•set the hour mode on the clock (12 or 24 hours)
•enable/disable convection auto conversion
•adjust the oven temperature
•activate/deactivate the preheating alarm light
•set the beeper volume
•switch the temperature scale between Fahrenheit
and Celsius
Setting the Hour Mode
The control is set to use a 12-hour clock. To reset the
clock to 24-hour mode, follow the steps below.
Touch Settings once.
1
Touch 1 to toggle between a 12-hour and
2
24-hour clock.
Touch Start to accept the change.
3
When the set time runs out, End shows in the
4
display. The indicator tones sound every 15
seconds until Upper Timer On/Off or
Lower Timer On/Off is touched.
NOTE
•If the remaining time is not in the display, recall
the remaining time by touching Upper Timer
On/Off or Lower Timer On/Off.
•Touch Upper Timer On/Off or Lower Timer
On/Off twice to set the time in minutes and
seconds.
•Touch Upper Timer On/Off or Lower Timer
On/Off once to set the time in hours and
minutes.
Canceling the Timer
Touch Upper Timer On/Off or Lower Timer
1
On/Off once.
The display returns to the time of day.
Setting Convection Auto Conversion
When Conv. Bake and Conv. Roast are selected,
Convection Auto Conversion automatically converts the
standard recipe temperature entered to a convection
temperature by subtracting 25 °F / 14 °C. This
auto-converted temperature shows on the display. For
example, select Conv. Bake, enter 350 °F, and 325 °F
shows on the display after preheat.
Convection Auto Conversion is enabled by default. To
change the setting, follow these instructions.
Touch Settings repeatedly until Auto appears in
1
the display.
Touch 1 to disable or enable auto conversion.
2
Touch Start to accept the change.
3
Page 23

OPERATION
23
Adjusting the Oven Temperature
Your new oven may cook differently from the one
it replaced. Use your new oven for a few weeks to
become more familiar with it before changing the
temperature settings. If after familiarizing yourself with
the new oven, you still think that it is too hot or too
cold, you can adjust the oven temperature yourself.
NOTE
To begin, either raise or lower the thermostat
15 °F (8 °C). Try the oven with the new setting. If
the oven still needs adjustment, raise or lower the
thermostat again, using the first adjustment as a
gauge. For example, if the adjustment was too
much, raise or lower the thermostat 10 °F (5 °C).
If the adjustment was not enough, raise or lower
the thermostat 20 °F (12 °C). Proceed in this way
until the oven is adjusted to your satisfaction.
Touch Settings repeatedly until L_AJ or U_AJ
1
appears in the display.
Use the number keys to enter the number
2
of degrees you want to adjust the oven
temperature.
Adjust the temperature either up or down by
3
touching Settings repeatedly to toggle between
plus (+) or minus (-).
Adjusting the Beeper Volume
Touch Settings repeatedly until Beep appears in
1
the display.
Touch 1 to select Hi, Lo or Off.
2
Touch Start to accept the change.
3
Adjusting Cooktop On alert Volume
Touch Settings repeatedly until CtOP appears
1
in the display.
Touch 1 to select Hi, Lo, Off.
2
Touch Start to accept the change.
3
Selecting Fahrenheit or Celsius
Set the oven temperature display to show either
Fahrenheit (°F) or Celsius (°C) units. The oven
defaults to Fahrenheit unless changed by the user.
Touch Settings repeatedly until Unit appears in
1
the display.
Touch 1 to select F (Fahrenheit) or C (Celsius).
2
Touch Start to accept the change.
3
ENGLISH
Touch Start to accept the change.
4
NOTE
•This adjustment does not affect the broiling
or Self Clean temperatures. The adjustment
is retained in memory after a power failure.
The oven temperature can be increased (+) or
decreased (-) as much as 35 °F or 19 °C.
•Once the temperature is increased or
decreased, the display shows the adjusted
temperature until it readjusts.
Turning the Preheat Alarm Light On/Off
When the oven reaches its set-temperature, the
preheating alarm light flashes 5 times or until the
oven door is opened.
You can activate or deactivate the preheating alarm
light.
Touch Settings repeatedly until PrE appears in
1
the display.
Touch 1 to turn the light on/off.
2
Touch Start to accept the change.
3
Lockout
The Lockout feature automatically locks the oven
door and prevents most oven and cooktop controls
from being turned on. It does not disable the clock,
timer or the interior oven light.
Touch and hold Lower Clear/Off for three
1
seconds.
The lock melody sounds, Loc appears in the
2
display and the lock
Once the oven door is locked, the lock
3
indicator stops blinking and remains on.
To deactivate the Lockout feature, touch and
4
hold Lower Clear/Off for three seconds. The
unlock melody sounds and the door and the
controls unlock.
NOTE
The Burner On indicator light turns on when the
knob is turned even if the cooktop element does
not operate.
NOTE (For model : LDE4411)
In models without a self-clean option, the Lockout
feature locks the controls but does not lock the
oven door.
blinks in the display.
Page 24

24
OPERATION
Start Time (Delayed Timed Cook)
The automatic timer of the Delayed Timed Cook
function turns the oven on and off at the time you
select. This feature can be used with the Bake, Conv.
Bake and Conv. Roast modes.
Setting a Delayed Timed Cook
For example, to bake at 300 °F and delay the start
of baking until 4:30, first set the clock for the correct
time of day.
Touch Bake. 350 °F appears in the display.
1
Set the temperature: touch 3, 0 and 0.
2
Touch Cook Time and set the baking time.
3
Touch Start Time.
4
Set the start time: touch 4, 3 and 0 for 4:30.
5
Touch Start. A short beep sounds and Timed
6
Delay and the start time appear in the display.
The oven begins baking at the set start time.
NOTE
•To cancel the Delayed Timed Cook function,
touch Clear/Off at any time.
•To change the cooking time, repeat step 3 and
touch Start.
•If the oven clock is set as a 12-hour clock, you
can delay the cook time for 12 hours. If the
oven clock is set as a 24-hour clock, you can
delay the cook time for 24 hours.
The oven will continue to cook for the set amount
of time and then turn off automatically. When the
cooking time has elapsed:
•End and the time of day show in the display.
•The cook end indicator tone sounds every 60
seconds until Clear/Off is touched.
•When Warm is set, the warming function is
activated after the cooking time ends.
Cook Time (Timed Cook)
Set the oven to cook for a specific length of time
using the Timed Cook feature. This feature can only
be used with the Bake, Conv. Bake and Conv. Roast
modes.
Setting the Cook Time Function
For example, to bake at 300 °F for 30 minutes, first
set the clock to the correct time of day.
Touch Bake. 350 °F appears in the display.
1
Set the temperature.
2
Touch 3, 0 and 0.
Touch Cook Time. Timed flashes in the display.
3
Bake, 0:00 and 300 °F appear in the display.
Set the baking time: touch 3 and 0 (for 30
4
minutes). The baking time can be set for any
amount of time between 1 minute and 11 hours
and 59 minutes.
Touch Start.
5
NOTE
To activate the Warm function at the end of the
timed cook cycle, repeat steps 1-4 and then touch
Warm. Warm appears in the display.
(Refer to the Warm section on page 33)
The oven will continue to cook for the set amount
of time and then turn off automatically. When the
cooking time has elapsed:
•End and the time of day show in the display.
•The cook end indicator tone sounds every 60
seconds until Clear/Off is touched.
•When Warm is set, the warming function is
activated after the cooking time ends.
Changing the Cook Time during Cooking
For example, to change the cook time from 30
minutes to 1 hour and 30 minutes, do the following.
CAUTION
•Use the automatic timer when cooking cured or
frozen meats and most fruits and vegetables.
Foods that can easily spoil, such as milk, eggs,
fish, meat or poultry, should be chilled in the
refrigerator. Even when chilled, they should
not stand in the oven for more than 1 hour
before cooking begins, and should be removed
promptly when cooking is completed.
•Eating spoiled food can result in sickness from
food poisoning.
Touch Cook Time.
1
Change the baking time: touch 1, 3, 0.
2
Touch Start to accept the change.
3
Page 25

OPERATION
25
Using the Cooktop
Cooking Areas
The cooking areas on your range are identified by
permanent circles on the glass cooktop surface.
For the most efficient cooking, fit the pan size to the
element size.
Pans should not extend more than
beyond the cooking area.
When a control is turned on, a glow can be seen
through the glass cooktop surface. The element
cycles on and off to maintain the preset heat
setting, even on Hi.
For Model : LDE4415
DUAL
DUAL
WARM
ZONE
WARM
ZONE
SINGLE SINGLE
TRIPLE
SINGLE
SINGLE
SINGLE
For Model : LDE4411
SINGLE
1
/2 to 1-inch
For Model : LDE4413
WARM
DUAL
ZONE
SINGLE
DUAL
Using the Cooktop Elements
CAUTION
•Only use cookware and dishes that are safe for
oven and cooktop use.
•Always use oven mitts when removing food
from the cooktop and oven.
•Do not place sealed containers on the cooktop.
•Do not use plastic wrap to cover food while on
the cooktop. Plastic may melt onto the surface
and be very difficult to remove.
•Never leave food on the cooktop
unattended. Spillovers can cause smoke.
Greasy spillovers may catch on fire.
•The surface element may appear to have
cooled after it has been turned off. The element
may still be hot and touching the element before
it has cooled sufficiently can cause burns.
Turning on a Single element
Push the Single element knob in.
1
Turn the knob in either direction to the desired
2
setting.
The control knob clicks when it is positioned at
both Off and Hi.
ENGLISH
NOTE
It is normal to see a very faint red ring around the
outer edge of a dual or triple element when using
it as a single element at a high heat setting. This
is only a reflection from the bright glow of the
center element and is not a malfunction.
Hot Surface Indicator
The hot surface indicator light glows as long as any
surface cooking area is too hot to touch.
It remains on after the element is turned off and until
the surface has cooled to approximately 150 °F.
CAUTION
It is normal for the surface elements to cycle on
and off during cooking, even on higher settings.
This will happen more frequently if cooking on a
lower temperature setting.
Off On
Single
NOTE
•Hi is the highest temperature available.
•Lo is the lowest temperature available.
Page 26

26
A B
OPERATION
Turning on the Dual element
There is one dual element located in the left front
position. Use the dual element as a dual or single
element.
1
2-A
2-B
Push in the appropriate knob.
Turn the knob counterclockwise to use it as
a Single element.
Turn the knob clockwise to use it as a Dual
unit.
Heating with inner
(smaller) element only
Heating with both
elements together
Turning on the Warming Zone
CAUTION
FOOD POISON HAZARD: Bacteria may grow in
food at temperatures below 140 °F.
•Always start with hot food. Do not use the warm
setting to heat cold food.
•Do not use the warm setting for more than 2 hours.
•Always use pot holders or oven mitts when
removing food from the center warming element.
The Warming Zone, located in the back center of the
glass surface, will keep hot, cooked food at serving
temperature. Use the Warming Zone to keep food
warm after it has already been cooked. Attempting
to cook uncooked or cold food on the Warming Zone
could result in a food-borne illness.
Turn the control knob to the On position.
1
Turning on a Triple element (on some models)
There is one triple element that can be used as either
a single, dual or triple element.
1
2-A
2-B
2-C
Push in the appropriate knob.
Turn the knob counterclockwise to use the
Single element.
Turn the knob clockwise to the Dual position
to use as a Dual element.
Turn the knob clockwise to the Triple
position to use as a Triple element.
Single Dual Triple
NOTE
•For best results, food on the warmer should
be kept in its container or covered with a lid or
aluminum foil to maintain food quality.
•The warmer will not glow red like the other
cooking elements.
•The Warming Zone can be operated as a single
element on some models.
The Recommended Surface Cooking
Setting
Setting Recommended Use
8.5-Hi
5.5-8.0
3.5-5.0
2.2-3.0
Lo-2.0
•Bring liquid to a boil
•Start cooking
•Hold a rapid boil, frying, deep fat fry
•Quickly brown or sear food
•Maintain a slow boil
•Fry or saute foods
•Cook soups, sauces and gravies
•Stew or steam food
•Simmer
•Keep food warm
•Melt chocolate or butter
•Simmer
Page 27

OPERATION
27
Using the Proper Cookware
The size and type of cookware will influence the
settings needed for the best cooking results. Be
sure to follow the recommendations for using proper
cookware.
Cookware should have flat
bottoms that make good
contact with the entire surface
heating element. Check for
flatness by placing a ruler
across the bottom of the
cookware. The ruler should
touch the cookware across
the entire bottom, with no
gaps.
Cookware recommendations
•Flat bottom and straight sides
•Heavy-gauge pans
•Pan sizes that match the amount of food to be
prepared and the size of the surface element
•Weight of handle does not tilt pan. Pan is well
balanced
•Tight-fitting lids
•Flat bottom woks
Cookware should not
Choosing Cookware
The cookware material determines how evenly and
quickly heat is transferred from the surface element to
the pan bottom. The most popular materials available
are:
•Aluminum - Excellent heat conductor. Some types
of food will cause it to darken (anodized aluminum
cookware resists staining and pitting). If aluminum
pans slide across the ceramic cooktop, they may
leave metal marks which will resemble scratches.
Remove these marks immediately.
•Copper - Excellent heat conductor but discolors
easily. May leave metal marks on glass-ceramic
(see Aluminum above).
•Stainless steel - Slow heat conductor with uneven
cooking results. Is durable, easy to clean and
resists staining.
•Cast iron - A poor heat conductor but retains heat
very well. Cooks evenly once cooking temperature
is reached. Not recommended for use on ceramic
cooktops.
•Porcelain-enamel on metal - Heating
characteristics will vary depending on base
material. Porcelain-enamel coating must be smooth
to avoid scratching ceramic cooktops.
•Glass - Slow heat conductor. Not recommended for
ceramic cooktop surfaces because it may scratch
the glass.
ENGLISH
•have a curved or warped
bottom.
•be smaller or larger than the
surface burner.
•have a heavy handle that tilts
the pan.
•be a wok with a ring stand.
•have loose or broken handles.
•have loose-fitting lids.
NOTE
•Do not use pans less than 7 inches in
diameter on the front elements.
•Do not use foil or foil-type containers. Foil may
melt onto the glass. Do not use the cooktop if
metal has melted on it. Call an authorized LG
Service Center.
Home Canning Tips
Be sure that the canner is centered over the
surface element and is flat on the bottom.
•The base must not be more than 1 inch larger than
the element. Use of water bath canners with rippled
bottoms may extend the time required to bring the
water to a boil and may damage the cooktop.
•Some canners are designed with smaller bases for
use on smooth surfaces.
•Use the high heat setting only until the water comes
to a boil or pressure is reached in the canner.
•Reduce to the lowest heat setting that maintains
the boil, or pressure. If the heat is not turned down,
the cooktop may be damaged.
Page 28

28
OPERATION
Using the Oven
Before Using the Oven
NOTE
•Because the oven temperature cycles, an oven
thermometer placed in the oven cavity may not
show the same temperature that is set on the
oven.
•It is normal for the convection fan to run while
preheating during a regular bake cycle.
•The convection fan motor may run periodically
during a regular bake cycle.
•The heat turns off if the door is left open during
baking. If the door is left open for longer than
30 seconds during baking, the heat turns off.
The heat turns back on automatically once the
door is closed.
Oven Vent
Areas near the vent may become hot during operation
and may cause burns. Do not block the vent opening.
Avoid placing plastics near the vent as heat may
distort or melt the plastic.
It is normal for steam to be visible when cooking
foods with high moisture content.
Replacing Racks
Place the end of the rack on the support.
1
Tilt the front end up and push the rack in.
2
CAUTION
•Replace oven racks before turning the oven on
to prevent burns.
•Do not cover the racks with aluminum foil, or
any other material, or place anything on the
bottom of the oven. Doing so will result in poor
baking and may damage the oven bottom.
•Only arrange oven racks when the oven is cool.
Bake
Bake is used to prepare foods such as pastries,
breads and casseroles. The oven can be programmed
to bake at any temperature from 170 °F (80 °C) to
550 °F (285 °C). The default temperature is 350 °F
(175 °C).
Setting the Bake Function (example, 375 °F)
Touch Bake.
1
Set the oven temperature: touch 3, 7 and 5.
2
Oven Vent
Using Oven Racks
The racks have a turned-up back edge that prevents
them from being pulled out of the oven cavity.
Removing Racks
Pull the rack straight out until it stops.
1
Lift up the front of the rack and pull it out.
2
Touch Start. The oven starts to preheat.
3
As the oven preheats, the temperature is displayed
and rises in 5-degree increments. Once the oven
reaches the set temperature, a tone sounds and the
oven light blinks on and off.
When cooking is complete, touch Clear/Off.
4
Remove food from the oven.
5
NOTE
It is normal for the convection fan to operate
periodically throughout a normal bake cycle in the
lower oven. This is to ensure even baking results.
Page 29

OPERATION
29
Baking Tips
•Baking time and temperature will vary depending
on the characteristics, size, and shape of the
baking pan used.
•Check for food doneness at the minimum recipe
time.
•Use metal bakeware (with or without a nonstick
finish), heatproof glass-ceramic, ceramic or other
bakeware recommended for oven use.
•Dark metal pans or nonstick coatings will cook food
faster with more browning. Insulated bakeware will
slightly lengthen the cooking time for most foods.
NOTE
The oven bottom has a porcelain-enamel finish.
To make cleaning easier, protect the oven bottom
from excessive spillovers by placing a cookie
sheet on the rack below the rack you are cooking
on. This is particularly important when baking a
fruit pie or other foods with a high acid content.
Hot fruit fillings or other foods that are highly
acidic may cause pitting and damage to the
porcelain-enamel surface and should be wiped up
immediately.
Tips for Convection Baking
•Use Convection Bake for faster and more even
multiple-rack cooking of pastries, cookies, muffins,
biscuits, and breads of all kinds.
•Bake cookies and biscuits on pans with no sides
or very low sides to allow heated air to circulate
around the food. Food baked on pans with a dark
finish will cook faster.
•When using Convection Bake with a single rack,
place the oven rack in position 3. If cooking on
multiple racks, place the oven racks in positions 1
and 3 (for two racks).
•Multiple oven rack cooking may slightly increase
cook times for some foods.
•Cakes, cookies and muffins have better results
when using multiple racks.
The Convection Roast feature is designed to give
optimum roasting performance. Convection Roast
combines cooking with the convection fan to roast
meats and poultry. The heated air circulates around
the food from all sides, sealing in juices and flavors.
Foods are crispy brown on the outside while staying
moist on the inside. Convection roasting is especially
good for large tender cuts of meat, uncovered.
ENGLISH
Convection Mode
The convection system uses a fan to circulate
the heat evenly within the oven. Improved heat
distribution allows for even cooking and excellent
results while cooking with single or multiple racks.
Setting the Convection Function (example, 375 °F)
Touch Conv. Bake or Conv. Roast. The display
1
flashes 350 °F.
Set the oven temperature: touch 3, 7 and 5.
2
Touch Start. The display shows Conv. Bake or
3
Conv. Roast and the oven temperature starting
at 100 °F.
As the oven preheats, the display shows increasing
temperatures in 5-degree increments. Once the oven
reaches the set adjusted temperature, a tone sounds
and the oven light flashes on and off. The display
shows the auto converted oven temperature, 350 °F
and the fan icon.
When cooking has finished or to cancel, touch
4
Clear/Off.
NOTE
The oven fan runs while convection baking. The
fan stops when the door is open. In some cases,
the fan may shut off during a convection bake
cycle.
Tips for Convection Roasting
Use a broiler pan and grid when preparing meats for
convection roasting. The broiler pan catches grease
spills and the grid helps prevent grease splatters.
Place the oven rack on the bottom.
1
Place the grid in the broiler pan.
2
Place the broiler pan on the oven rack.
3
Grid (sold separately)
Broiler pan (sold separately)
CAUTION
•Do not use a broiler pan without a grid.
•Do not cover the grid with aluminum foil.
•Position food (fat side up) on the grid.
Page 30

30
OPERATION
Recommended Baking and Roasting
Guide
Baking results will be better if baking pans are
centered in the oven as much as possible. If cooking
on multiple racks, place the oven racks in the
positions shown.
Rack and Pan Placement
Baking rack guide
Food
Cakes
Cookies
Pizza
Pastry
Crust
Breads
Desserts
•Layer cakes
•Bundt cakes
•Sugar cookies
•Chocolate chips
•Brownies
•Fresh
•Frozen
•From scratch
•Refrigerator
•Biscuit, canned
•Biscuit, from scratch
•Muffins
•Fruit crisps and
cobblers, from
scratch
•Pies, from scratch,
2-crust fruit
Rack position
Upper
Oven
Lower
Oven
1
1
1
1
1
2
2
1
1
1
1
1
1
1
3
3
3
3
3
2
2
2
2
3
2
2
3
2
Multiple rack baking
Standard rack
(Position 1)
Single rack baking
Standard rack
Standard rack
(Position 3)
Roasting rack guide
Rack
Food
Rare
Beef
Pork
Poultry
Rib
Boneless
rib, top
sirloin
Beef
tenderloin
Rib 1
Bone-in, sirloin 1
Ham, cooked 1
Whole chicken 1
Chicken pieces 1
Turkey 1
Medium
Well done
Rare
Medium
Well done
Rare
Medium
position
Lower Oven
1
1
1
1
1
1
1
1
Page 31

OPERATION
31
Broil
The Broil function uses intense heat from the upper
heating element to cook food. Broiling works best for
tender cuts of meat, fish, and thinly cut vegetables.
Some models may feature a hybrid broiler consisting
of an inner broiler that utilizes a carbon heating
element which provides instantaneous heat, and
a traditional outer broiling element. During normal
broiler operation, it is normal for either element to
cycle off intermittently.
CAUTION
•Do not use a broiler pan without a grid. Oil can
cause a grease fire.
•Do not cover the grid and broiler pan with
aluminum foil. Doing so will cause a fire.
•Always use a broiler pan and grid for excess fat
and grease drainage. This will help to reduce
splatter, smoke, and flare-ups.
NOTE
•This range is designed for closed-door broiling.
Close the door to set the Broil function. If the
door is open, the Broil function cannot be set
and door appears on the display. Close the
door and reset the Broil function. Opening the
door turns off the broil burner during broiling.
If the door is opened during broiling, the broil
burner turns off after five seconds. The broiler
turns back on automatically once the door is
closed.
Speed Broil (on some models)
The Speed Broil setting is designed to reduce the
amount of time it takes to broil foods. By utilizing
the infrared broil element, which provides heat
instantaneously, there is no need for preheating.
Setting the oven to Broil / Speed Broil
Smoking
Due to the intense heat associated with broiling, it
is normal to experience smoke during the cooking
process. This smoke is a natural byproduct of
searing and should not cause you to worry. If you are
experiencing more smoke than you are comfortable
with, use the following tips to reduce the amount of
smoke in your oven.
Always use a broiler pan. Do not use saute pans
1
or regular baking sheets for safety reasons.
The broiler pan should always be thoroughly
2
cleaned and at room temperature at the
beginning of cooking.
Always run your cooktop ventilation system or
3
vent hood during broiling.
Keep the interior of your oven as clean as
4
possible. Leftover debris from prior meals can
burn or catch fire.
Avoid fatty marinades and sugary glazes. Both
5
of these will increase the amount of smoke you
experience. If you would like to use a glaze,
apply it at the very end of cooking.
If you are experiencing significant smoke with
6
any food item, consider:
•Lowering the broiler to the Lo setting.
•Lowering the rack position to cook the food
further away from the broiler.
•Using the Hi broil setting to achieve the level of
searing you desire, and then either switching
to the Lo broil setting, or switching to the Bake
function.
As a rule, fattier cuts of meat and fish will
7
produce more smoke than leaner items.
Adhere to the recommended broil settings and
8
cooking guidelines in the chart on the following
page whenever possible.
ENGLISH
Touch Broil or Speed Broil once for Hi or twice
1
for Lo.
Touch Start. The oven begins to heat.
2
Let the oven preheat for approximately five
3
minutes before cooking the food if using broil.
Touch Clear/Off to cancel at any time or when
4
cooking is complete.
Page 32

32
OPERATION
Recommended Broiling Guide
The size, weight, thickness, starting temperature, and your preference of doneness will affect broiling times.
This guide is based on meats at refrigerator temperature. For best results when broiling, use a pan designed for
broiling.
Upper oven Lower oven
Food
Ground Beef
Well done
Beef Steaks
Rare
Medium
Well done
Rare
Medium
Well done
Chicken 1 whole cut up
Lobster
Tails
Fish Fillets
Ham Slices
(precooked)
Pork Chops
Well done
Lamb Chops
Medium
Well done
Medium
Well done
Salmon
Steaks
Quantity and/or
Thickness
1 lb. (4 patties)
1
/2 to 3/4" thick
1" thick
1
/2 lbs.
1 to 1
1
/2" thick
1
1
/2 lbs.
2 to 2
1
/2 lbs., split
2 to 2
lengthwise
2 Breasts
2–4
10 to 12 oz. each
1
/4 to 1/2" thick 2 5 2-3 4 6 3-4 Handle and turn very
1
/2" thick 2 4-5 2-3 4 6-8 2-4 Increase time 5 to 10
1
/2" thick)
1 (
2 (1" thick)
about 1 lb.
2 (1" thick) about
10 to 12 oz.
1
/2" thick)
2 (1
about 1 lb.
2 (1" thick)
4 (1" thick)
about 1 lb.
Rack
Position
First Side
(minutes)
2 4-7 3-5 4 4-7 3-5
2
2
2
1
1
1
1
1
- - - 2 14 Do not
2
1
2
2
1
1
2
1
3-4
4-5
5-6
10
10
8-10
4-5
5-6
10
8
9
7
7
9
6
7
Second
Side
(minutes)
2-3
2-3
3-4
3-4
4-5
5-6
4-6
3-5
3-5
2-4
2-3
3-4
4-5
5-6
3-5
3-5
Rack
Position
4
4
4
3
3
3
3
3
4
3
4
4
3
3
4
3
First Side
(minutes)
4-5
4-7
6
10
10-12
12
14-16
8-9
5-6
9-10
6
8
10
12
8
9
Second
Side
(minutes)
2-3
3-4
4-5
4
5-6
6-8
4-6
3-5
turn over
2-4
4-6
3-4
4-5
5-6
6-8
4-6
4-6
Comments
Space evenly. Up to 8
patties may be broiled at
once.
Steaks less than 1" thick
cook through before
browning. Pan frying is
recommended. Slash fat.
Broil skin-side-down first.
Cut through back of shell.
Spread open. Brush with
melted butter before
broiling and after half of
broiling time.
carefully. Brush with
lemon butter before and
during cooking, if desired.
minutes per side for 1
thick or home-cured ham.
Grease pan. Brush steaks
with melted butter.
1
/2"
•This guide is only for reference. Adjust cook time according to your preference.
NOTE
The USDA advises that consuming raw or undercooked fish, meat, or poultry can increase your risk of foodborne illness.
The USDA has indicated the following as safe minimum internal temperatures for consumption:
•Ground beef: 160 °F (71.1 °C)
•Poultry: 165 °F (73.9 °C)
•Beef, veal, pork, or lamb: 145 °F (62.8 °C)
•Fish / Seafood: 145 °F (62.8 °C)
Page 33

OPERATION
33
Tips for Broiling
Beef
•Steaks and chops should always be allowed to rest
for five minutes before being cut into and eaten.
This allows the heat to distribute evenly through the
food and creates a more tender and juicy result.
•Pieces of meat that are thicker than two inches
should be removed from the refrigerator 30 minutes
prior to cooking. This will help them cook more
quickly and evenly, and will produce less smoke
when broiling. Cooking times will likely be shorter
than the times indicated in the Broiling Chart.
•For bone-in steaks or chops that have been
frenched (all meat removed from around the bone),
wrap the exposed sections of bone in foil to reduce
burning.
Seafood
•When broiling skin-on fish, always use the Lo broil
setting and always broil the skin side last.
•Seafood is best consumed immediately after
cooking. Allowing seafood to rest after cooking can
cause the food to dry out.
•It is a good idea to rub a thin coating of oil on the
surface of the broiling pan before cooking to reduce
sticking, especially with fish and seafood. You can
also use a light coating of non-stick pan spray.
Vegetables
•Toss your vegetables lightly in oil before cooking to
improve browning.
Warm
This function will maintain an oven temperature of
170 °F. The Warm function will keep cooked food
warm for serving up to three hours after cooking has
finished. The Warm function may be used without any
other cooking operations or can be used after cooking
has finished using a Timed Cook or a Delayed Timed
Cook.
Setting the Warm Function
Touch Warm or Warm/Proof. On the lower oven,
1
touch Warm/Proof to toggle between warm and
proof.
Touch Start.
2
Touch Clear/Off at any time to cancel.
3
Setting the Warm Function after a Timed Cook
Select the cooking function.
1
Enter the oven temperature using the number
2
keys.
Touch Cook Time and enter the cook time using
3
the number keys.
Touch Warm.
4
Touch Start.
5
When cooking is finished, touch Clear/Off to
6
cancel the Warm function.
NOTE
•The Warm function is intended to keep food
warm. Do not use it to cool food down.
•It is normal for the fan to operate during the
Warm function.
Proof
This feature maintains a warm oven for rising yeast
leavened products before baking.
Setting the Proof Function
Use rack position 2 or 3 for proofing.
1
Touch Warm/Proof until Proof appears in the
2
display.
ENGLISH
Touch Start.
3
Touch Clear/Off when proofing is finished.
4
Page 34

34
OPERATION
NOTE
•To avoid lowering the oven temperature and
lengthening proofing time, do not open the oven
door unnecessarily. Check bread products early
to avoid over proofing.
•Do not use the proofing mode for warming
food or keeping food hot. The proofing oven
temperature is not hot enough to keep foods
at safe temperatures. Use the Warm feature
to keep food warm. Proofing does not operate
when the oven is above 125 °F. Hot shows in
the display.
•It is normal for the fan to operate during the
Proof function.
Pizza
The Pizza function is specially designed for cooking
pizza. It heats from both the top and bottom to brown
food more evenly.
This system is designed to give the optimum cooking
performance for pizza by automatically selecting a
combination of the broil and bake heating systems.
When using this function, there is no need to preheat
the oven prior to cooking.
Setting the Pizza Function
Touch Pizza once. P1 appears in the display.
1
Touch Pizza repeatedly to toggle between P1,
P2, and P3. Select the desired option. (See
Pizza Chart below.)
Touch Start. The Pizza function starts operation.
2
Touch Clear/Off to cancel Pizza at any time.
3
Upper Pizza
Display
Mode
P1
P2
P3 Fresh Pizza 400 °F 2 13-18
Item
Frozen pizza,
Regular crust
Frozen pizza,
Rising crust
Average
temper-
ature
415 °F 2 13-18
425 °F 2 18-23
Rack
position
Recom-
mended
time
(minutes)
Lower Pizza
Display
Mode
P1
P2
P3 Fresh Pizza 400 °F 2 15-20
Item
Frozen
pizza,
Regular
crust
Frozen
pizza,
Rising
crust
Average
temper-
ature
415 °F 2 15-20
425 °F 2 22-26
Rack
position
Recom-
mended time
(minutes)
•This chart is based on one 12" pizza, and is only
for reference. Adjust cook time according to size of
pizza and preference.
Speed Roast
The Speed Roast feature is designed to quickly roast
poultry. The combination of intense heat from the
upper heating element and heated air from the back
heating element result in crispier food and help to
save cooking time. Speed roasting is especially good
for medium sized poultry.
NOTE
•The recommended cook time is 60-65 minutes
for a whole chicken weighing 3.3 lb.
•Adjust the cook time according to the weight of
the poultry.
•Place the oven rack in position 2.
•Speed Roast is designed to reduce the cooking
time. There is no need for preheating.
•This function is optimized for poultry, so
the temperature of Speed Roast cannot be
changed.
•It is normal for the fan to operate during the
Speed Roast function.
Setting the Speed Roast Function
Put food in the oven.
1
Touch Speed Roast. The display shows Roast.
2
Touch Start.
3
Page 35

SMART FEATURES
35
SMART FEATURES
Before Using Tag On
The Tag On function allows you to conveniently
use LG Smart Diagnosis™, set the cook mode and
EasyClean® features, and communicate with your
appliance using a smart phone. To use the Tag On
function:
Download the LG Smart Oven application to a
1
smart phone.
Turn on the NFC (Near Field Communication)
2
function in the smart phone. The Tag On function
is only compatible with smart phones that are
equipped with the NFC function and based on
the Android 4.0 (Ice Cream Sandwich) or later
OS (operating system).
Turning On the Smart Phone's NFC
Function
Enter the Settings menu of the smart phone
1
and select Share & connect under WIRELESS
NETWORKS.
Check Use Read and Write/P2P receive.
3
NOTE
•Depending on the smart phone manufacturer
and Android OS version, the NFC activation
process may differ. Refer to the manual of the
smart phone for details.
•You can activate Tag On function by using the
Android 4.0 smart phone with NFC function or
higher. NFC function may not work depending
on smart phones.
ENGLISH
Set NFC and Direct/Android Beam to ON and
2
select NFC.
Using the Tag On Function
The Tag On Icon
Look for the Tag On icon next to the Start key on
the control panel. Position the smart phone next
to the icon when using the Tag On function with
the LG Smart Diagnosis™, cook mode setting
and EasyClean® features of the LG Smart Oven
application.
Page 36

36
SMART FEATURES
The NFC Antenna Position
When using the Tag On function, position the smart
phone so that the NFC antenna inside the back of
the smart phone matches the position of the Tag On
icon on the appliance. (The position of the antenna
cannot be seen, so the LG Smart Oven application
will attempt to find it and display a target range for the
antenna on the smart phone's screen.)
If the application is not able to show a target range,
position the center back of the smart phone over
the Tag On icon on the appliance. If the connection
is not made immediately, move the smart phone
very slightly in a widening circular motion until the
application verifies the connection.
Because of the characteristics of NFC, if the
transmission distance is too far, or if there is a metal
sticker or a thick case on the phone, transmission will
not be good.
Touch [
a more detailed guide on how to use the Tag On
function.
] in the LG Smart Oven application for
Using Tag On with
Applications
Touch an LG appliance's Tag On logo with an
NFC-equipped smart phone to use the LG Smart
Oven application's LG Smart Diagnosis™, Oven
Settings, and EasyClean® features.
Smart Diagnosis™
Allows you to diagnose and troubleshoot problems
with your range.
EasyClean
Allows you to set EasyClean® alerts, read the
instruction guide, and simulate and compare energy
consumption when using EasyClean® versus
self-clean cycles. (For Model : LDE4415 / LDE4413)
Oven Settings
Allows the user to change oven settings, including
the hour mode, preheat alarm light, beeper volume,
temperature units, convection auto conversion, and
thermostat adjustment.
IMPORTANT : Features could be added or deleted
when the LG Smart Oven application is updated.
Data saved on the LG Smart Oven application could
be deleted when the application is updated or your
smart phone is changed.
®
Page 37

MAINTENANCE
37
MAINTENANCE
Cleaning the Glass-Ceramic
Cooktop
CAUTION
•Do not use scrub pads or abrasive cleaning
pads. They may damage your cooktop surface.
•For your safety, wear an oven mitt or pot
holder while using a scraper on the hot cooking
surface.
Use ceramic cooktop cleaner on the glass cooktop.
Other creams may not be as effective or may scratch,
damage or stain the cooktop surface.
To maintain and protect the surface of the glass
cooktop, follow these steps:
Before using the cooktop for the first time, clean
1
it with a ceramic cooktop cleaner. This helps
protect the top and makes cleanup easier.
Use ceramic cooktop cleaner daily to help keep
2
the cooktop looking new.
Shake the cleaning cream well. Apply a few
3
drops of cleaner directly to the cooktop.
Burned-On Residue
While the cooktop is still hot, remove any burnt
1
on deposits or spilled food from the
glass-ceramic cooking surface with a suitable
metal razor scraper. (Similar to scraping paint
off of a windowpane, it will not damage the
decorated cooking surface.) Hold the scraper at
an approximate 30° angle to the cooktop.
NOTE
•Do not use a dull or nicked blade.
•To prevent burns, wear an oven mitt or pot
holder while using the metal scraper.
When the cooking surface has cooled down,
2
apply a few dabs (about the size of a dime) of an
approved cleaner in each burner area and work
the cleaning cream over the cooktop surface
with a damp paper towel.
ENGLISH
Use a paper towel to clean the entire cooktop
4
surface.
Rinse with clear water and use a dry cloth or
5
paper towel to remove all cleaning residue.
NOTE
Do not heat the cooktop until it has been cleaned
thoroughly.
IMPORTANT
If any sugar or food containing sugar (preserves,
ketchup, tomato sauce, jellies, fudge, candy, syrups,
chocolate) spills, or plastic or foil melts on the
cooktop, remove the molten material IMMEDIATELY
with a metal razor scraper (it will not damage the
decorated cooking surface) while the cooking surface
is still hot to avoid the risk of damage to the
glass-ceramic surface. For your safety, please use an
oven mitt or pot holder while scraping the hot cooking
surface.
NOTE
Approved cleaners
•Weiman Cooktop Cleaning Cream
(www.weiman.com)
•Cerama Bryte (www.ceramabryte.com)
•Golden Ventures Cerama Bryte
•Easy-Off 3 in 1 Glass Top Cleaner Spray
(www.easyoff.us)
Rinse with clean water and wipe the cooktop
3
surface with a clean, dry paper towel.
Page 38

38
MAINTENANCE
Metal Marks and Scratches
Be careful not to slide pots and pans across
1
the cooktop. Doing so will leave metal markings
on the cooktop surface. To help remove these
marks, use a ceramic cooktop cleaner with a
cleaning pad for ceramic cooktops.
If pots with a thin overlay of aluminum or copper
2
are allowed to boil dry, the overlay may leave
black discoloration on the cooktop. This should
be removed immediately before heating again or
the discoloration may be permanent.
CAUTION
Cookware with rough or uneven bottoms can
mark or scratch the cooktop surface.
•Do not slide metal or glass across the cooktop
surface.
•Do not use cookware with any dirt build-up on
the bottom.
EasyClean
LG’s EasyClean® enamel technology provides two
cleaning options for the inside of the range. The
EasyClean® feature takes advantage of LG’s new
enamel to help lift soils without harsh chemicals, and
it runs using ONLY WATER for just 10 minutes in low
temperatures to help loosen LIGHT soils before handcleaning.
•For Model : LDE4415 / LDE4413
While EasyClean
and LIGHT soils, the Self Clean feature can be
used to remove HEAVY, built up soils. The intensity
and high heat of the Self Clean cycle may result in
smoke which will require the opening up of windows
to provide ventilation. Compared to the more intense
Self Clean process, your LG oven gives you the
option of cleaning with LESS HEAT, LESS TIME, and
virtually NO SMOKE OR FUMES.
When needed, the range still provides the Self Clean
option for longer, more thorough oven cleaning for
heavier, built up soils.
Benefits of EasyClean
•Helps loosen light soils before hand-cleaning
•EasyClean
•Makes for a better self-clean experience
(For Model : LDE4415 / LDE4413)
- Delays the need for a self-clean cycle
- Minimizes smoke and odors
- Can allow shorter self-clean time
®
®
is quick and effective for small
®
®
only uses water; no chemical cleaners
NOTE (For model : LDE4411)
This model does not include a self-clean option.
The EasyClean® feature may not be effective in
removing heavy, built-up soils. Because the range
does not include a self-clean option, clean the
oven regularly using the EasyClean® feature to
prevent heavy, burnt-on soil from building up in
the oven.
Page 39

MAINTENANCE
39
When to Use EasyClean
Suggested
Cleaning Method
EasyClean
Self Clean*
(For Model
: LDE4415 /
LDE4413)
* The Self Clean cycle can be used for soil that has been built up over time.
®
Example of Oven Soiling Soil Pattern
Cleaning Tips
•Allow the oven to cool to room temperature before
using the EasyClean® cycle. If your oven cavity is
above 150 °F (65 °C), Hot will appear in the display,
and the EasyClean
the oven cavity cools down.
•A plastic spatula can be used as a scraper to
scrape off any chunks or debris before and during
oven cleaning.
•Using the rough side of a non-scratch scouring pad
may help to take off burnt-on stains better than a
soft sponge or towel.
•Certain non-scratch scrubbing sponges, such as
those made of melamine foam, available at your
local stores, can also help improve cleaning.
•The range should be level to ensure that the bottom
surface of the oven cavity is entirely covered by
water at the beginning of the EasyClean
•For best results, use distilled or filtered water. Tap
water may leave mineral deposits on the oven
bottom.
•Soil baked on through several cooking cycles will
be more difficult to remove with the EasyClean
cycle.
•Do not open the oven door during the EasyClean
cycle. Water will not get hot enough if the door is
opened during the cycle.
•For hard to reach areas such as the back surface
of the lower oven, it is better to use the Self Clean
cycle. (For Model : LDE4415 / LDE4413)
®
cycle will not be activated until
®
Types of
Small drops or
spots
Light splatter Fat/grease
Medium to
heavy splatter
Drops or spots
ingredients
Fat/grease
Filling or
sugar based
Cream or
EasyClean® Instruction Guide
Remove oven racks and accessories from the
1
oven.
Scrape off and remove any burnt-on debris with
2
a plastic scraper.
Fill a spray bottle with 1¼ cups (10 oz or 300 ml)
3
of water and use the spray bottle to thoroughly
spray the inside surfaces of the oven.
Use at least ¼ cup (2 oz or 60 ml) of the water
4
®
cycle.
®
®
to completely saturate the soil on both the walls
and in the corners of the oven.
Soils
Cheese
or other
soils
tomato
sauce
ENGLISH
Common Food Items
That Can Soil Your Oven
Pizza
Steaks, broiled
Fish, broiled
Meat roasted at low
temperatures
Meat roasted at high
temperatures
Pies
Casseroles
Suggested plastic scrapers:
•Hard plastic spatula
•Plastic pan scraper
•Plastic paint scraper
•Old credit card
Page 40

40
MAINTENANCE
Spray or pour the remaining 1 cup (8 oz or 250
5
ml) of water onto the bottom center of the oven
cavity. The indentation on the oven bottom
should be fully covered to submerge all soils.
Add water if necessary.
NOTE
Use the "mist" setting on the spray bottle for
better coverage. The entire 1¼ cup (10 oz or 300
ml) of water should be used for each oven cavity
cleaned. Do not spray water directly on the door.
Doing so will result in water dripping to the floor.
Close the oven door.
6
Touch EasyClean
Touch Start.
®
.
CAUTION
•Some surfaces may be hot after the
EasyClean® cycle. Wear rubber gloves while
cleaning to prevent burns.
•During the EasyClean® cycle, the oven
becomes hot enough to cause burns. Wait
until the cycle is over before wiping the inside
surface of the oven. Failure to do so may result
in burns.
•Avoid leaning or resting on the oven door glass
while cleaning the oven cavity.
Clean the oven cavity immediately after the
9
EasyClean® cycle by scrubbing with a wet,
non-scratch scouring sponge or pad. (The
scouring side will not scratch the finish.) Some
water may spill into the bottom vents while
cleaning, but it will be captured
in a pan under the oven cavity
and will not hurt the burner.
NOTE
Do not use any steel scouring pads, abrasive
pads or cleaners as these materials can
permanently damage the oven surface.
Once the oven cavity is cleaned, wipe any
10
excess water with a clean dry towel. Replace
racks and any other accessories.
If some light soils remain, repeat the above
11
steps, making sure to thoroughly soak the
soiled areas.
•For Model : LDE4415 / LDE4413
If stubborn soils remain after multiple
EasyClean
Be sure that the oven cavity is empty of oven
racks and other accessories, and that the oven
cavity surface is dry before running the Self
Clean cycle. Consult the Self Clean section of
your owner’s manual for further details.
®
cycles, run the Self Clean cycle.
A tone will sound at the end of the 10 minute
7
cycle. Touch Clear/Off to clear the display and
end the tone.
After the cleaning cycle and during hand-
8
cleaning, enough water should remain on the
oven bottom to completely submerge all soils.
Add water if necessary. Place a towel on the
floor in front of the oven to capture any water
that may spill out during hand-cleaning. If you
are cleaning the upper oven on a double oven
range, it is also best to cover the holes in the top
of the lower oven door with a towel to capture
any water that may drip into the door during
hand cleaning.
NOTE
•If you forget to saturate the inside of the oven
with water before starting EasyClean
Clear/Off to end the cycle. Wait for the range
to cool to room temperature and then spray
or pour water into the oven and start another
EasyClean® cycle.
•The cavity gasket may be wet when the
EasyClean
not clean the gasket.
•If mineral deposits remain on the oven bottom
after cleaning, use a cloth or sponge soaked in
vinegar to remove them.
•It is normal for the fan to operate during the
EasyClean
®
cycle finishes. This is normal. Do
®
cycle.
®
, touch
Page 41

MAINTENANCE
41
Using the Scraper
(For Model : LDE4411)
The retractable razor scraper included with the range
can be used to help remove stubborn soil from inside
the oven.
To use the scraper, depress the button and slide
1
it forward to extend the blade.
Scrape the surface of the oven, sliding the blade
2
parallel to the surface. Do not gouge at the oven
surface with the tips of the blade.
When finished, carefully clean the blade with
3
a cloth, keeping fingers away from the sharp
edges of the blade. Depress the button and slide
it backward to store the blade.
Replacing the Scraper Blade
(For Model : LDE4411)
If the scraper blade becomes dull or damaged,
remove and replace it.
CAUTION
Keep fingers away from sharp edges of blade.
To remove the blade, depress the scraper's
1
button and slide it forward to extend the blade.
Hold the scraper as shown, with one end of the
2
blade resting on the edge of a table or other flat
surface.
Carefully push down on the scraper handle to
3
slide the blade free from the handle.
Self Clean (For Model :
LDE4415 / LDE4413)
The Self Clean cycle uses extremely hot temperatures
to clean the oven cavity. While running the Self Clean
cycle, you may notice smoking or an odor. This is
normal; especially if the oven is heavily soiled.
During Self Clean, the kitchen should be well
ventilated to minimize the odors from cleaning.
Before Starting Self Clean
•Remove the oven racks, broiler pan, broiler grid, all
cookware, aluminum foil or any other material from
the oven.
•The kitchen should be well ventilated to minimize
the odors from cleaning.
•Wipe any heavy spillovers on the bottom of the
oven.
•Make sure that the oven light bulb cover is in place
and the oven light is off.
•The oven light cannot be turned on during a Self
Clean cycle. The oven light cannot be turned on
until the oven temperature has cooled below
500 ˚F (260 ˚C) after a Self Clean cycle is complete.
CAUTION
•Do not leave small children unattended near
the appliance. During the Self Clean cycle, the
outside of the range can become very hot to
the touch.
•If you have pet birds, move them to another
well-ventilated room. The health of some birds
is extremely sensitive to the fumes given off
during the Self Clean cycle of any range.
•Do not line the oven walls, racks, bottom or any
other part of the range with aluminum foil or
any other material. Doing so will destroy heat
distribution, produce poor baking results and
cause permanent damage to the oven interior
(aluminum foil will melt to the interior surface of
the oven).
•Do not force the door open. This can damage
the automatic door locking system. Use care
when opening the oven door after the Self
Clean cycle. Stand to the side of the oven when
opening the door to allow hot air or steam to
escape. The oven may still be VERY HOT.
ENGLISH
To insert a new blade, align the back of the blade
4
with the groove in the scraper handle. With the
end of the blade against a flat surface, carefully
push the handle down to slide the blade into
position.
Page 42

42
MAINTENANCE
During the Self Clean cycle, the cooktop elements
and warming drawer cannot be used.
NOTE
•Remove oven racks and accessories before
starting the Self Clean cycle.
•If oven racks are left in the oven cavity during
the Self Clean cycle, they will discolor and
become difficult to slide in and out.
•Clean the frame of the oven and door with hot
soapy water. Rinse well.
•Do not clean the gasket. The fiberglass material
of the oven door gasket cannot withstand
abrasion. It is essential for the gasket to remain
intact. If you notice it becoming worn or frayed,
replace it.
•Wipe up any heavy spillovers on the oven
bottom.
•Make sure that the oven light bulb cover is in
place and the oven light is off.
•It is normal for the fan to operate during the Self
Clean cycle.
•The Burner On indicator light turns on when
the knob is turned even if the cooktop element
does not operate.
Setting Self Clean
The Self Clean function has cycle times of 3, 4, or 5
hours.
CAUTION
Do not force the oven door open when the lock
icon is displayed. The oven door remains locked
until the oven temperature has cooled. Forcing
the door open will damage the door.
Setting Self Clean with a Delayed
Start
Remove all racks and accessories from the
1
oven.
Touch Self Clean. The oven defaults to the
2
recommended four-hour self clean for a
moderately soiled oven. Touch twice for a
five-hour self clean or three times for a
three-hour self clean.
Touch Start Time.
3
Use the number keys to enter the time of day
4
you would like the Self Clean to start.
Touch Start.
5
NOTE
It may become necessary to cancel or interrupt a
Self Clean cycle due to excessive smoke or fire in
the oven. To cancel the Self Clean function, touch
Clear/Off.
Self Clean Soil Guide
Soil Level Cycle Setting
Lightly Soiled Oven Cavity 3-Hour Self Clean
Moderately Soiled Oven Cavity 4-Hour Self Clean
Heavily Soiled Oven Cavity 5-Hour Self Clean
Remove all racks and accessories from the
1
oven.
Touch Self Clean. The oven defaults to the
2
recommended four-hour self clean for a
moderately soiled oven. Touch twice for a fivehour self clean or three times for a three-hour
self clean.
Touch Start.
3
Once the self-clean cycle is set, the oven door
4
locks automatically and the lock icon displays.
You will not be able to open the oven door
until the oven has cooled. The lock releases
automatically when the oven has cooled.
During Self Clean
•The Self Clean cycle uses extremely hot
temperatures to clean the oven cavity. While
running the Self Clean cycle, you may notice
smoking or an odor. This is normal, especially if the
oven is heavily soiled.
•As the oven heats, you may hear sounds of metal
parts expanding and contracting. This is normal
and will not damage the oven.
•Do not force the oven door open when the lock
is displayed. The oven door remains locked until
the oven temperature has cooled. Forcing the door
open will damage the door.
Page 43

MAINTENANCE
43
After the Self Clean Cycle
•The oven door remains locked until the oven
temperature has cooled.
•You may notice some white ash in the oven. Wipe it
off with a damp cloth or a soap-filled steel wool pad
after the oven cools. If the oven is not clean after
one self-clean cycle, repeat the cycle.
•If oven racks were left in the oven and do not slide
smoothly after a self-clean cycle, wipe racks and
rack supports with a small amount of vegetable oil
to make them glide more easily.
•Fine lines may appear in the porcelain because it
went through heating and cooling. This is normal
and will not affect performance.
NOTE
•The Self Clean cycle cannot be started if the
Lockout feature is active.
•Once the Self Clean cycle is set, the oven door
locks automatically. You will not be able to open
the oven door until the oven is cooled. The lock
releases automatically.
•Once the door has been locked, the lock
indicator light stops flashing and remains on.
Allow about 15 seconds for the oven door lock
to activate.
•If the clock is set for a 12-hour display (default)
the Delayed Self Clean can never be set to
start more than 12 hours in advance.
•After the oven is turned off, the convection
fan keeps operating until the oven has cooled
down.
Changing the Oven Light
The oven light is a standard 40-watt appliance bulb. It
turns on when the oven door is open. When the oven
door is closed, touch Light to turn it on or off.
Unplug the range or disconnect power.
1
Turn the glass bulb cover in the back of the oven
2
counterclockwise to remove.
Turn the bulb counterclockwise to remove it from
3
the socket.
Insert the new bulb and turn it clockwise.
4
Insert the glass bulb cover and turn it clockwise.
5
Plug in the range or reconnect the power.
6
WARNING
•Make sure that the oven and bulb are cool.
•Disconnect the electrical power to the range at
the main fuse or circuit breaker panel. Failure
to do so can result in severe personal injury,
death, or electrical shock.
ENGLISH
Page 44

44
MAINTENANCE
Cleaning the Exterior
Front Manifold Panel and Knobs
It is best to clean the manifold panel after each use
of the range. For cleaning, use a damp cloth and mild
soapy water or a 50/50 solution of vinegar and water.
For rinsing, use clean water and polish dry with a soft
cloth.
CAUTION
•Do not use abrasive cleansers, strong liquid
cleaners, plastic scouring pads or oven
cleaners on the manifold panel. Doing so will
damage the finish.
•Do not try to bend the knobs by pulling them
up or down, and do not hang a towel or other
objects on them. This can damage the shaft.
•The control knobs may be removed for easy
cleaning.
•To clean the knobs, make sure that they are in
the Off position and pull them straight off the
stems.
•To replace the knobs, make sure the knob has
the Off position centered at the top, and slide
the knob directly onto the stem.
NOTE
To prevent scratching, do not use abrasive
cleaners on any of these materials.
NOTE
•Do not use a steel wool pad. it will scratch the
surface.
•To clean the stainless steel surface, use warm
sudsy water or a stainless steel cleaner or
polish.
•Always wipe in the direction of the metal
surface finish.
•To purchase stainless steel appliance cleaner
or polish, or to locate a dealer near you, call our
toll-free customer service number:
1-800-243-0000 (USA),
1-888-542-2623(CANADA)
or visit our website at: www.lg.com
Oven Door
•Use soapy water to thoroughly clean the oven door.
Rinse well. Do not immerse the door in water.
•You may use a glass cleaner on the outside glass
of the oven door. Do not spray water or glass
cleaner on the door vents.
•Do not use oven cleaners, cleaning powders, or
harsh abrasive cleaning materials on the outside of
the oven door.
•Do not clean the oven door gasket. The oven door
gasket is made of a woven material that is essential
for a good seal. Care should be taken not to rub,
damage, or remove this gasket.
Painted and Decorative Trim
For general cleaning, use a cloth with hot soapy
water. For more difficult soils and built-up grease,
apply a liquid detergent directly onto the soil. Leave it
on for 30 to 60 minutes. Rinse with a damp cloth and
dry. Do not use abrasive cleaners.
Stainless Steel Surfaces
To avoid scratches, do not use steel wool pads.
Place a small amount of stainless steel
1
appliance cleaner or polish on a damp cloth or
paper towel.
Clean a small area, rubbing with the grain of the
2
stainless steel if applicable.
Dry and buff with a clean, dry paper towel or soft
3
cloth.
Repeat as necessary.
4
CAUTION
Do not use harsh cleaners or harsh abrasive
cleaning materials on the outside of the oven
door. Doing so can cause damage.
Don’t hand
clean oven
door gasket
Do hand
clean door
Page 45

MAINTENANCE
45
Broiler Pan and Grid
•Do not store a soiled broiler pan or grid anywhere
in the range.
•Do not clean the broiler pan or grid in a selfcleaning mode. (For Model : LDE4415 / LDE4413)
•Remove the grid from the pan. Carefully pour out
the grease from the pan into a proper container.
•Wash and rinse the broiler pan and grid in hot water
with a soap-filled or plastic scouring pad.
•If food has burned on, sprinkle the grid with cleaner
while hot and cover with wet paper towels or a
dishcloth. Soaking the pan will remove burned-on
foods.
•Both the broiler pan and grid may be cleaned with a
commercial oven cleaner or in the dishwasher.
Oven Racks
Remove the oven racks before operating the self
clean cycle. (For Model : LDE4415 / LDE4413)
Removing and Replacing the
Lift-Off Oven Doors
CAUTION
•Be careful when removing and lifting the
door.
•Do not lift the door by the handle. The door
is very heavy.
Upper Oven
Removing the Door
Fully open the door.
1
Lift up and rotate the hinge locks toward the
2
hinge until they stop.
ENGLISH
Food spilled into the tracks could cause the
1
racks to become stuck. Clean racks with a mild,
abrasive cleaner.
Rinse with clean water and dry.
2
NOTE
For Model : LDE4415 / LDE4413
If the racks are cleaned using the self clean cycle
(not recommended), the color will turn slightly
blue and the finish will become dull. After the self
clean cycle is complete, and the oven has cooled,
rub the sides of the racks with wax paper or a
cloth containing a small amount of vegetable oil.
This will make the racks glide more easily into the
rack tracks.
Close the door to 30 degrees (you will feel the
3
door stop). The hinge locks will contact the oven
frame.
about 30°
On both sides of the door, touch down on the
4
release buttons on each hinge.
Push
Page 46

46
MAINTENANCE
Lift the door up until it is clear of the hinges.
5
about 30°
Replacing the Door
Be sure both hinges are in a 30 degree position.
1
Slide the door back onto the hinges until you
2
hear a solid click and the release buttons have
engaged.
Lower Oven
Removing the Door
Fully open the door.
1
Unlock the hinge locks, rotating them as far
2
toward the open door frame as they will go.
Lock
Slot
Hinge
lock
Firmly grasp both sides of the door at the top.
3
Close the door to the removal position
4
(approximately five degrees) which is halfway
between the broil stop position and fully closed.
If the position is correct, the hinge arms will
move freely.
Unlock
about 5°
Fully open the door.
3
Push the hinge locks down onto the door frame.
4
Close the oven door.
5
Lift door up and out until the hinge arms are
5
clear of the slots.
Page 47

MAINTENANCE
47
Replacing the Door
Firmly grasp both sides of the door at the top.
1
With the door at the same angle as the removal
2
position, seat the indentation of the hinge arms
into the bottom edge of the hinge slots. The
notch in the hinge arms must be fully seated into
the bottom edge of the slots.
Hinge arm
Bottom
edge of slot
Indentation
Open the door fully. If the door will not open fully,
3
the indentation is not seated correctly in the
bottom edge of the slots.
Door Care Instructions
Most oven doors contain glass that can break.
CAUTION
•Do not close the oven door until all the oven
racks are fully in place.
•Do not hit the glass with pots, pans, or any
other object.
•Scratching, hitting, jarring, or stressing the
glass may weaken its structure causing an
increased risk of breakage at a later time.
ENGLISH
Lock the hinge locks, rotating them back toward
4
the slots in the oven frame until they lock.
Hinge arm
Hinge lock
Close the oven door.
5
Page 48

48
TROUBLESHOOTING
TROUBLESHOOTING
FAQs
What types of cookware are recommended for
use with the cooktop?
•The pans must have a flat bottom and straight
sides.
•Only use heavy-gauge pans.
•The pan size must match the amount of food to be
prepared and the size of the surface element.
•Use tight fitting lids.
•Only use flat-bottom woks.
Why do the heating elements appear to be turning
ON and OFF during use of the cooktop or oven?
Depending on your cooktop element setting or the
temperature selected in your oven, it is NORMAL for
the cooking elements to cycle on and off.
My new oven doesn’t cook like my old one. Is
there something wrong with the temperature
settings?
No, your oven has been factory tested and calibrated.
For the first few uses, follow your recipe times and
temperatures carefully. If you still think your new
oven is too hot or too cold, you can adjust the oven
temperature yourself to meet your specific cooking
needs. Refer to the Oven Temperature Adjustment
section in this manual for easy instructions on how to
adjust your thermostat.
Is it normal to hear a clicking noise coming from
the back of my oven when I am using it?
Your new range is designed to maintain a tighter
control over your oven’s temperature. You may hear
your oven’s heating elements click on and off more
frequently on your new oven. This is NORMAL.
Why is the time flashing?
This means that the product has just been plugged
in, or that it has experienced a power interruption. To
clear the flashing time, touch any button and reset the
clock if needed.
Can I use aluminum foil to catch drippings in my
oven cavity?
Never use aluminum foil to line the bottom or sides fo
the oven or the warming drawer. The foil will melt and
stick to the bottom surface of the oven and will not be
removable. Use a sheet pan placed on a lower oven
rack to catch drippings instead. (If foil has already
melted onto the bottom of the oven, it will not interfere
with the oven's performance.)
Can I use aluminum foil on the racks?
Do not cover racks with aluminum foil. Covering
entire racks with foil restricts air flow, leading to poor
cooking results. Use a sheet pan lined with foil under
fruit pies or other acidic or sugary foods to prevent
spillovers from damaging the oven finish.
CAUTION
Foil may be used to wrap food in the oven or
warming drawer, but do not allow the foil to come
into contact with the exposed heating/broiling
elements in the oven. The foil could melt or ignite,
causing smoke, fire, or injury.
Can I leave my racks in the oven when running a
Self Clean cycle? (For Model : LDE4415 / LDE4413)
No. Although it will not damage the racks, it will
discolor them and may make them hard to slide in
and out during use. Remove all items from the oven
before starting a Self Clean cycle.
What should I do if my racks are sticky and have
become hard to slide in and out?
Over time, the racks may become hard to slide in and
out. Apply a small amount of olive oil to the ends of the
racks. This will work as a lubricant for easier gliding.
What should I do for hard to remove stains on my
cooktop?
The cooktop should be cleaned after every use to
prevent permanent staining. When cooking foods with
high sugar content, such as tomato sauce, clean the
stain off with a scraper while the cooktop is still warm.
Use an oven mitt when scraping to prevent burns.
Refer to the MAINTENANCE section of this owner's
manual for further instruction.
During convection cooking the fan stops when I
open the door. Is that normal?
Yes, this is normal. When the door is opened, the
convection fan will stop until the door is closed.
Why aren't the function buttons working?
Make sure that the range is not in Lockout mode. The
will show in the display if Lockout is activated.
lock
To deactivate Lockout, touch and hold Lower Clear/
Off for three seconds. The unlock melody sounds
and Loc appears in the display until the controls are
unlocked.
Page 49

TROUBLESHOOTING
49
My range is still dirty after running the
EasyClean® cycle. What else should I do?
®
The EasyClean
cycle only helps to loosen light soils
in your oven range to assist in hand-cleaning of your
oven. It does not automatically remove all soils after
the cycle. Some scrubbing of your oven range is
®
required after running the EasyClean
cycle.
I tried scrubbing my oven after running EasyClean®,
but some soils still remain. What can I do?
The EasyClean® feature works best when the soils
are fully soaked and submerged in water before
running the cycle and during hand-cleaning. If soils
are not sufficiently soaked in water, it can negatively
affect the cleaning performance. Repeat the
EasyClean® process using sufficient water.
•For Model : LDE4415 / LDE4413
Sugar-based and certain greasy soils are especially
hard to clean. If some stubborn soils remain, use the
Self Clean feature to thoroughly clean your oven.
Soils on my oven walls are not coming off. How
can I get my walls clean?
Soils on the side and rear walls of your oven range
may be more difficult to fully soak with water. Try
®
repeating the EasyClean
process with more than
the ¼ cup (2 oz or 60 ml) spray recommended.
®
Will EasyClean
get all of the soils and stains out
completely?
It depends on the soil type. Sugar-based and certain
grease stains are especially hard to clean. Also, if
stains are not sufficiently soaked in water, this can
negatively affect cleaning performance.
•For Model : LDE4415 / LDE4413
If stubborn or built-up stains remain, use the Self Clean
feature. Refer to the Self Clean section of your owner's
manual.
Are there any tricks to getting some of the
stubborn soils out?
Scraping the soils with a plastic scraper before
and during hand-cleaning is recommended. Fully
saturating soils with water is also recommended.
•For Model : LDE4415 / LDE4413
However, certain types of soils are harder to clean
than others. For these stubborn soils, the Self Clean
cycle is recommended. Consult the Self Clean section
of your owner's manual for details.
Is it safe for my convection fan, broil burner or
®
heater element to get wet during EasyClean
?
Yes. The convection fan, broiler burner or heater
element may get a little wet during cleaning. However,
direct spray onto the broil burner and heater elements
is not necessary because these are self-cleaning
during regular use.
Do I need to use all 1¼ cups (10 oz or 300 ml) of
®
water for EasyClean
?
Yes. It is highly recommended that 1 cup (8 oz or
250 ml) of water be sprayed or poured on the bottom
and an additional ¼ cup (2 oz or 60 ml) of water
be sprayed on walls and other soiled areas to fully
saturate the soils for better cleaning performance.
I see smoke coming out of my oven range’s
®
cooktop vents during EasyClean
. Is this normal?
This is normal. This is not smoke. It is actually water
vapor (steam) from the water in the oven cavity. As
®
the oven heats briefly during EasyClean
, the water
in the cavity evaporates and escapes through the
oven vents.
®
How often should I use EasyClean
®
EasyClean
can be performed as often as you wish.
?
EasyClean® works best when your oven is LIGHTLY
soiled from such things as LIGHT grease splatter
and small drops of cheese. Please refer to the
EasyClean® section in your owner's manual for more
information.
®
What is required for EasyClean
?
A spray bottle filled with 1¼ cups (10 oz or 300 ml) of
water, a plastic scraper, a non-scratch scrubbing pad
and a towel. You should not use abrasive scrubbers
such as heavy-duty scouring pads or steel wool.
Except for a towel, all of the materials you need are
included in a special cleaning kit with your new range.
®
Can I run the EasyClean
cycle on both of my
ovens at once?
®
Yes. You can run the EasyClean
cycle on both
ovens at the same time. Some oven surfaces will be
hot after the cycle completes running. Avoid leaning
or resting on the oven door glass while cleaning the
oven cavities.
•For Model : LDE4415 / LDE4413
You can not run the Self Clean cycle on both ovens at
the same time.
ENGLISH
Page 50

50
TROUBLESHOOTING
Before Calling for Service
Before you call for service, review this list. It may save you time and expense. The list includes common
occurrences that are not the result of defective workmanship or materials in this appliance.
Symptoms Possible Causes / Solutions
•Poor installation. Place oven rack in center of oven. Place a level on the oven
rack. Adjust leveling legs at base of range until the oven rack is level.
Range is not level.
Cannot move
appliance easily.
Appliance must be
accessible for service.
•Be sure floor is level and strong and stable enough to adequately support range.
•If floor is sagging or sloping, contact a carpenter to correct the situation.
•Kitchen cabinet alignment may make range appear unlevel. Be sure cabinets are
square and have sufficient room for range clearance.
•Cabinets not square or are built in too tightly. Contact builder or installer to make
appliance accessible.
•Carpet interferes with range. Provide sufficient space so range can be lifted over
carpet.
•Anti-tip device engaged.
Oven control beeps
and displays any F
code error.
Surface units will not
maintain a rolling boil
or cooking is not fast
enough
Surface units do not
work properly
Surface unit stops
glowing when
changed to a lower
setting
Areas of discoloration
on the cooktop
Frequent cycling on
and off of surface
units
•Electronic control has detected a
fault condition. Touch Clear/Off to
clear the display and stop beeping.
Reprogram oven. If fault recurs,
record fault number. Touch Clear/Off
and contact a Service agent.
•Improper cookware being used.
- Use pans which are flat and match the diameter of the surface unit selected.
•In some areas, the power (voltage)may be low.
- Cover pan with a lid until desired heat is obtained.
•A fuse in your home may be blown or the circuit breaker tripped.
- Replace the fuse or reset the circuit breaker.
•Cooktop controls improperly set.
- Check to see the correct control is set for the surface unit you are using.
•This is normal. The unit is still on and hot.
•Food spillovers not cleaned before next use.
- See Cleaning the Glass-Ceramic Cooktop section.
•Hot surface on a model with a light-colored cooktop.
- This is normal. The surface may appear discolored when it is hot. This is
temporary and will disappear as the glass cools.
•This is normal.
- The element will cycle on and off to maintain the heat setting.
CODE CAUSE
F-3 Touch key error
F-9
F-19
Oven not heating
(Upper oven)
Oven not heating
(Lower oven)
Page 51

TROUBLESHOOTING
51
Symptoms Possible Causes / Solutions
•Plug on range is not completely inserted in the electrical outlet.
- Make sure electrical plug is plugged into a live, properly grounded outlet.
•A fuse in your home may be blown or the circuit breaker tripped.
Oven will not work
Steam is exhausted
through the oven
vent.
Appliance does not
operate.
Oven light does not
work.
Oven smokes
excessively during
broiling.
Food does not bake
or roast properly
Food does not broil
properly
- Replace the fuse or reset the circuit breaker.
•Oven controls improperly set.
- See the Using the Oven section.
•Oven too hot.
- Allow the oven to cool to below locking temperature.
•Cooking foods with high moisture produces steam. This is normal.
•Make sure cord is plugged correctly into outlet. Check circuit breakers.
•Service wiring is not complete. Contact your electrician for assistance.
•Power outage. Check house lights to be sure. Call your local electric company
for service.
•Replace or tighten bulb. See Changing the Oven Light section in this Owner’s
Manual.
•Control not set properly. Follow instructions under Setting Oven Controls.
•Meat too close to the element. Reposition the rack to provide proper clearance
between the meat and the element. Preheat broil element for searing.
•Meat not properly prepared. Remove excess fat from meat. Cut remaining fatty
edges to prevent curling.
•Insert on broiler pan wrong side up and grease not draining. Always place grid
on the broiler pan with ribs up and slots down to allow grease to drip into pan.
•Grease has built up on oven surfaces. Regular cleaning is necessary when
broiling frequently.
- Old grease or food spatters cause excessive smoking.
•Oven controls improperly set.
- See the Using the Oven section.
•Rack position is incorrect or the rack is not level.
- See the Using the Oven section.
•Incorrect cookware or cookware of improper size being used.
- See the Using the Oven section.
•Oven sensor needs to be adjusted.
- See Oven Temperature Adjustment in the Features section.
•Oven controls improperly set.
- Make sure you touch Broil.
•Improper rack position being used.
- See the Broiling Guide.
•Cookware not suited for broiling.
- Use broiling pan and grid.
ENGLISH
Page 52

52
TROUBLESHOOTING
Symptoms Possible Causes / Solutions
Food does not broil
properly
Oven temperature too
hot or too cold
Scratches or
abrasions on cooktop
surface
Metal marks
Brown streaks or
specks
Areas of discoloration
on cooktop
Oven will not Self
Clean *
“Crackling” or
“popping” sound
Fan noise
•Aluminum foil used on the broiling pan and grid has not been fitted properly and
slit as recommended.
- See the Using the Oven section.
•In some areas the power voltage may be low.
- Preheat the broil element for 5-7 minutes.
- See the Broiling Guide.
•Oven sensor needs to be adjusted.
- See Oven Temperature Adjustment in the Features section.
•Coarse particles such as salt or sand between cooktop and utensils can cause
scratches. Be sure the cooktop surface and bottoms of utensils are clean before
using. Small scratches do not affect cooking and will become less visible with
time.
•Cleaning materials not recommended for glass-ceramic cooktop have been
used. See Cleaning the Glass-Ceramic Cooktop in the MAINTENANCE section.
•Cookware with rough bottom has been used. Use smooth, flat-bottomed
cookware.
•Scraping of metal utensils on cooktop surface. Do not slide metal utensils
on cooktop surface. Use a glass-ceramic cooktop cleaning creme to remove
the marks. See Cleaning the Glass-Ceramic Cooktop in the MAINTENANCE
section.
•Boilovers are cooked onto surface. Use a blade scraper to remove soil. See
Cleaning the Glass-Ceramic Cooktop in the MAINTENANCE section.
•Mineral deposits from water and food. Remove using a glass-ceramic cooktop
cleaning creme. Use cookware with clean, dry bottoms.
•The oven temperature is too high to set a Self Clean operation.
- Allow the range to cool and reset the controls.
•Oven controls improperly set.
- See the Self Clean section.
•A Self Clean cycle cannot be started if the oven lockout feature is active.
•This is the sound of the metal heating and cooling during both the cooking and
Self Clean functions.
- This is normal.
•A convection fan may automatically turn on and off.
- This is normal.
Convection Fan stops
Displayed Time is
flashing
•Convection fan stops during a convection bake cycle.
- This is normal and is done to allow for more even heating during the cycle.
This is not a failure of the range and should be considered normal operation.
•This is normal. This means that the product has just been plugged in, or that it
has experienced a power interruption. Touch the Clock key and reset the time,
or touch any key to stop the flashing.
* For Model : LDE4415 / LDE4413
Page 53

TROUBLESHOOTING
53
Symptoms Possible Causes / Solutions
Excessive smoking
during a Self Clean
cycle *
Oven door does not
open after a Self
Clean cycle *
The oven does not
clean after a Self
Clean cycle *
CLEAN and door flash
in the display *
LOCKED is on in the
display when you
want to cook *
Burning or oily odor
emitting from the vent
Oven racks are
difficult to slide *
Moisture collects on
oven window or steam
comes from oven vent
A chime sounds
intermittently when
surface elements are
turned on.
•Excessive soil.
- Touch the Clear/Off button. Open the windows to rid the room of smoke. Wait
until the Self Clean mode is cancelled. Wipe up the excess soil and reset the
clean.
•Oven is too hot.
- Allow the oven to cool below locking temperature.
•Allow about one hour for the oven to cool after the completion of a Self Clean
cycle. The door can be opened when the lock
•The control and door may be locked.
•Oven controls not properly set.
- See the Self Clean section.
•Oven was heavily soiled.
- Clean up heavy spillovers before starting the clean cycle. Heavily soiled ovens
may need to Self Clean again or for a longer period of time.
•The Self Clean cycle has been selected, but the door is not closed.
- Close the oven door.
•The oven door is locked because the temperature inside the oven has not
dropped below the locking temperature.
- Touch the Clear/Off button. Allow the oven to cool.
•This is normal in a new oven and will disappear in time.
- To speed the process, set a Self Clean cycle for a minimum of 3 hours. See
the Self Clean section. (For Model : LDE4415 / LDE4413)
•The shiny, silver-colored racks were cleaned in a Self Clean cycle.
- Apply a small amount of vegetable oil to a paper towel and wipe the edges of
the oven racks with the paper towel.
•This is normal when cooking foods high in moisture.
•Excessive moisture was used when cleaning the window.
•When any one element is turned on, a chime sounds to indicate the cooktop is in
use.
•If multiple elements are being used, only the first element chimes.
ENGLISH
is no longer displayed.
* For Model : LDE4415 / LDE4413
Page 54

54
SMART DIAGNOSIS™
SMART DIAGNOSIS™
Should you experience any problems with your range,
it has the capability of transmitting data to your smart
phone using the LG Smart Oven application or via
your telephone to the LG call center.
Smart Diagnosis™ cannot be activated unless your
range is turned on by touching the Start button. If
your range is unable to turn on, then troubleshooting
must be done without using Smart Diagnosis™.
Smart Diagnosis™ Through the Call
Center
Call the LG call center at: (LG U.S.) 1-800-243-
1
0000 (LG Canada) 1-888-542-2623.
When instructed to do so by the call center
2
agent, hold the mouthpiece of your phone over
the Smart Diagnosis™ logo on the machine.
Hold the phone no more than one inch from (but
not touching) the machine.
NOTE
Do not touch any other buttons or icons on the
display screen.
Touch and hold the Start button for three
3
seconds.
Keep the phone in place until the tone
4
transmission has finished. This takes about 6
seconds and the display will count down the
time.
Once the countdown is over and the tones have
5
stopped, resume your conversation with the call
center agent, who will then be able to assist you
in using the information transmitted for analysis.
Using Smart Diagnosis™
Smart Diagnosis™ Using Your Smart
Phone
Download the LG Smart Oven application on
1
your smart phone.
Open the LG Smart Oven application on your
2
smart phone. Touch Smart Diagnosis™ button to
advance to the next screen.
Follow directions of the application. Using ‘Tag
3
On’ is recommended but, if it does not work well,
the application will show how to use Audible
Diagnosis.
Touch [ ] in the LG Smart Oven application
4
for a more detailed guide on how to use the Tag
On function.
NOTE
•Call quality differences by region may affect the
function.
•Use the home telephone for better
communication performance, resulting in better
service.
•Bad call quality may result in poor data
transmission from your phone to the machine,
which could cause Smart Diagnosis™ to
malfunction.
NOTE
•For best results, do not move the phone while
the tones are being transmitted.
•If the call center agent is not able to get an
accurate recording of the data, you may be
asked to try again.
Page 55

WARRANTY
55
WARRANTY (USA)
Should your LG Electric Range fail due to a defect in materials or workmanship under normal home use, during
the warranty period set forth below, LG will at its option repair or replace the product. This limited warranty is
valid only to the original retail purchaser of the product and applies only when purchased and used within the
United States including U.S. Territories. Proof of original retail purchase is required to obtain warranty service
under this limited warranty.
Warranty Period Scope of Warranty HOW SERVICE IS HANDLED
One (1) year from date of
original retail purchase
•Replacement products and parts are warranted for the remaining portion of the original warranty period or
ninety (90) days, whichever is greater.
•Replacement products and parts may be new or remanufactured.
THIS WARRANTY IS IN LIEU OF ANY OTHER WARRANTY, EXPRESS OR IMPLIED, INCLUDING WITHOUT
LIMITATION, ANY WARRANTY OF MERCHANTABILITY OR FITNESS FOR A PARTICULAR PURPOSE. TO
THE EXTENT ANY IMPLIED WARRANTY IS REQUIRED BY LAW, IT IS LIMITED IN DURATION TO THE
EXPRESS WARRANTY PERIOD ABOVE. NEITHER THE MANUFACTURER NOR ITS U.S. DISTRIBUTOR
SHALL BE LIABLE FOR ANY INCIDENTAL, CONSEQUENTIAL, INDIRECT, SPECIAL, OR PUNITIVE
DAMAGES OF ANY NATURE, INCLUDING WITHOUT LIMITATION, LOST REVENUES OR PROFITS, OR
ANY OTHER DAMAGE WHETHER BASED IN CONTRACT, TORT, OR OTHERWISE.
Some states do not allow the exclusion or limitation of incidental or consequential damages or limitations on how
long an implied warranty lasts, so the above exclusion or limitation may not apply to you. This warranty gives you
specific legal rights and you may also have other rights that vary from state to state.
Parts and Labor
LG will provide parts and labor to repair or replace
defective parts.
ENGLISH
THIS LIMITED WARRANTY DOES NOT COVER:
•Service trips to deliver, pick up, or install or repair the product; instruction to the customer on operation of
the product; repair or replacement of fuses or correction of wiring or plumbing, or correction of unauthorized
repairs/installation.
•Failure of the product to perform during power failures and interruptions or inadequate electrical service.
•Damage caused by leaky or broken water pipes, frozen water pipes, restricted drain lines, inadequate or
interrupted water supply or inadequate supply of air.
•Damage resulting from operating the Product in a corrosive atmosphere or contrary to the instructions outlined
in the Product’s owner’s manual.
•Damage to the Product caused by accidents, pests and vermin, lightning, wind, fire, floods, or acts of God.
•Damage or failure caused by unauthorized modification or alteration, or if it is used for other than the intended
purpose, or any water leakage where the unit was not properly installed.
•Damage or failure caused by incorrect electrical current, voltage, or plumbing codes, commercial or industrial
use, or use of accessories, components, or consumable cleaning products that are not approved by LG.
•Damage caused by transportation and handling, including scratches, dents, chips, and/or other damage to the
finish of your product, unless such damage results from defects in materials or workmanship and is reported
within one (1) week of delivery.
•Damage or missing items to any display, open box, discounted, or refurbished Product.
•Products with original serial numbers that have been removed, altered, or cannot be readily determined. Model
and Serial numbers, along with original retail sales receipt, are required for warranty validation.
•Increases in utility costs and additional utility expenses.
•Repairs when your Product is used in other than normal and usual household use (e.g. commercial use, in
offices and recreational facilities) or contrary to the instructions outlined in the Product’s owner’s manual.
•Costs associated with removal of your Product from your home for repairs.
Page 56

56
WARRANTY
•The removal and reinstallation of the Product if it is installed in an inaccessible location or is not installed in
accordance with published installation instructions, including LG’s owner’s and installation manuals.
•Damage resulting from misuse, abuse, improper installation, repair, or maintenance. Improper repair includes
use of parts not approved or specified by LG.
Problem Cause Prevention
•Cooktop crack Cooktop crack caused by impact of object •DO NOT store heavy items
above the cooktop surface as
primary crack
they could fall and damage
it.
•DO NOT scratch the
cooktop or the cooktop could
crack.
•Clean the cooktop before
Mechanical breakage
out of warranty
secondary crack
in warranty
and after using.
•Cooktop enamel
Improper usage •Do not hit the enamel
chipping off
•Oven or racks are
Aluminum foil has melted in the oven •Never cover the oven bottom
stained after using
aluminum foil
•Unit has no power 1. House power turned off (power supply)
2. Tripped breaker
3. The power cord is not installed properly.
3-WIRE HOOK UP
White White
Black Black
Red Red
4-WIRE HOOK UP
cooktop.
or cover an entire rack with
materials such as aluminum
foil.
•If the foil has already melted
onto the oven, it will not
affect the performance of the
oven.
•Check power at main board
before calling for service.
•Match power cord type and
outlet type
•Properly install the power
cord
OUTER WIRE
CENTER WIRE
GROUND
STRAP
(NEUTRAL)
OUTER WIRE
<NEMA 10-50> <NEMA 14-50>
BLACK WIRE
REMOVE
GROUND
STRAP
(NEUTRAL)
WHITE WIRE
RED WIRE
GREEN GROUND WIRE
Page 57

WARRANTY
57
Problem Cause Prevention
•Surface is not level
•Oven is tipping
1. Range not leveled
2. Anti-tip device not installed correctly
Anti-tip bracket
Level both sides of range
Approximately
0.65"
(16.5 mm)
2
1
Screw must
enter wood or
concrete
Use carpenter’s level to
check level.
•Check with installer first
Wall plate
The cost of repair or replacement under these excluded circumstances shall be borne by the consumer.
OBTAIN WARRANTY SERVICE AND ADDITIONAL INFORMATION
If you do not have access to the internet and you need assistance using your product or you would like to
schedule service, you may contact LG Electronics at the number below.
For assistance or service, call 1-800-243-0000.
If you need further assistance, you can write to LG with any questions or concerns at the address below:
LG Electronics, 201 James Record Road, Huntsville, Alabama 35813
For additional product information, visit our website at http://www.lg.com
ENGLISH
Page 58

58
MEMO
MEMO
Page 59

LG Customer Information Center
1-800-243-0000
1-888-542-2623
Register your product Online!
www.lg.com
USA
CANADA
Printed in Korea
 Loading...