

Page 1

KB775 User Guide
- English
Page 2

Part 15.21 statement
" Change or Modifications that are not expressly approved by the manufacturer could void
the user's authority to operate the equipment. “
Part 15.105 statement
This equipment has been tested and found to comply with the limits for a class B digital
device, pursuant to Part 15 of the FCC Rules.
These limits are designed to provide reasonable protection against harmful interference in
a residential installation. This equipment generates uses and can radiate radio frequency
energy and, if not installed and used in accordance with the instructions, may cause harmful
interference to radio communications. However, there is no guarantee that interference will
not occur in a particular installation. if this equipment does cause harmful interference or
television reception, which can be determined by turning the equipment off and on, the user
is encouraged to try to correct the interference by one or more of the following measures:
- Reorient or relocate the receiving antenna.
- Increase the separation between the equipment and receiver.
- Connect the equipment into an outlet on a circuit different from that to
which the receiver is connected.
- Consult the dealer or an experienced radio/TV technician for help.
Page 3

Part 15 Class B Compliance
This device and its accessories comply with part15 of FCC rules.
Operation is subject to the following two conditions:
(1) This device & its accessories may not cause harmful interference.
(2) This device & its accessories must accept any interference received,
including interference that may cause undesired operation.
Body-worn Operation
This device has been tested for typical body-worn operations
with the distance of 0.79inches (2.0cm) from the user’s body.
To comply with FCC RF exposure requirements, a minimum separation distance
of 0.79inches(2.0cm) must be maintained from the user's body.
Additionally, Belt clips, holsters & other body-worn accessories may not contain
metallic components.
Page 4

Congratulations on your purchase of the
advanced and compact KB775 phone by LG,
designed to operate with the latest digital
mobile communication technology.
Disposal of your old appliance
1
When this crossed-out wheeled bin symbol is attached to
a product it means the product is covered by the European
Directive 2002/96/EC.
2 All electrical and electronic products should be disposed of
separately from the municipal waste stream via designated
collection facilities appointed by the government or the
local authorities.
3 The correct disposal of your old appliance will help prevent
potential negative consequences for the environment and
human health.
4 For more detailed information about disposal of your old
appliance, please contact your city offi ce, waste disposal
service or the shop where you purchased the product.
Page 5
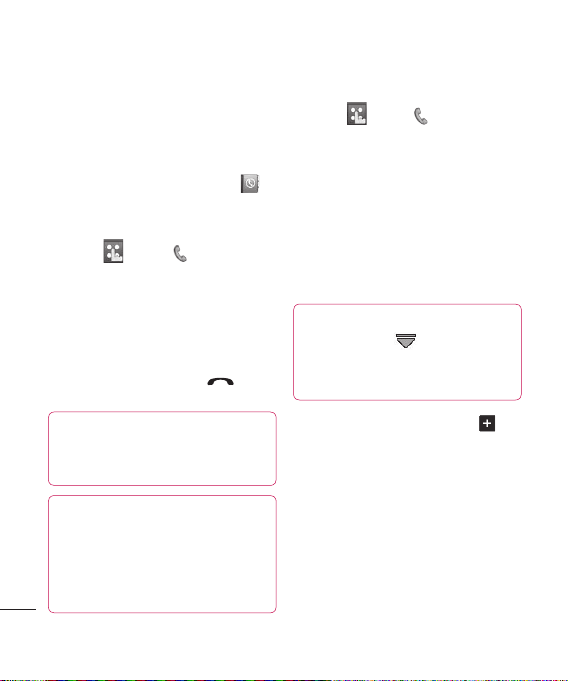
Calls
Making a call or video call
1 Touch
2 Key in the number using the
keypad.
clear key.
3 Press the
the call.
4 To end the call press the hard
key.
TIP! To enter + for making an
international call, touch
twice.
TIP! Press the lock/unlock key to
lock the touchscreen to prevent
calls being made by mistake.
TIP! To bring up the keypad during
a call, touch the
TIP! You can Make video call,
The basics
Save number, Send message
or Search contacts by tapping
LG KB775 | User Guide
to open the keypad.
To delete a digit touch the
hard key to initiate
key.
.
Making a call from your contacts
1 From the standby screen touch
to open the address book.
2 Touch Name and enter the fi
few letters of the contact you would
like to call.
3 From the fi ltered list, touch the
contact you’d like to call and select
the number to use if you have more
than one saved.
4 Touch Call or press the
key to initiate the call.
TIP! You can search your contacts
from the call screen. Touch
and choose Search contacts.
Scroll through your contacts or
enter the fi rst few digits of a
number to fi lter the list.
rst
hard
Answering and rejecting a call
When your phone rings press the
hard key to answer the call.
Press the
ringing. This is great if you’ve forgotten
to change your profi le to Silent for a
meeting. Press the
reject an incoming call.
hard key to mute the
hard key to
Page 6
Calls
Speed dialling
You can assign a frequently-called
contact to a speed dial number.
1 Touch
2 Choose Contacts and touch
Speed dials.
3 Your Voicemail is already set to
speed dial 1.
this. Touch any other number to
assign it a speed dial contact.
4 Your address book will open. Select
the contact you’d like to assign
to that number by touching their
phone number once.
o call a speed dial number, touch
T
press and hold the assigned number
until the contact appears on screen.
The call will initiate automatically,
there’s no need to press .
The basics
LG KB775 | User Guide
, select .
You cannot change
from the standby screen then
Viewing your call logs
TIP! To scroll through a list of
options, touch the last item visible
and slide your fi nger up the screen.
The list will move up so more items
are visible.
If you press it brings up the calls lists.
There are two arrows at the top of the
screen which allow you to scroll between:
All calls - View the complete list of all
your dialled, received and missed calls.
Dialled calls - View the list of all the
numbers you have called.
Received calls numbers you have received calls from.
Missed calls - View the list of all the
calls you have missed.
Touch
history. You can also choose to view:
View the list of all the
and select and tap Call
Page 7
Call charges - View the charges
applied to your dialled numbers (this
service is network dependant, some
operators are unable to support this)
and the call duration of all your calls;
received and dialled.
Data volume - View the amount in
kilobytes of all your received and sent
data.
TIP! From any call log touch
and Delete all to delete all the
recorded items.
TIP!
Touch any single call log
entry then View to view the date,
time and duration of the call.
Using call divert
1 Touch , select and choose
Call settings.
2 Touch Call divert and choose
V
oice calls or Video calls
Deactivate all.
3 Choose whether to divert all calls,
when the line is busy
, when there
is no answer or when you are not
reachable then touch Activate.
4
Input the number you’d like to divert to.
5 Touch Divert to activate.
Note: Charges are incurred for
diverting calls. Please contact your
network provider for details.
TIP! To turn off all call diverts,
choose Deactivate all from the
Call divert menu.
01
02
03
04
05
06
07
08
The basics
Page 8
Calls
Using call barring
1 Touch , select and choose
Call settings.
2 Touch Call barring and choose
V
oice calls or Video calls
Deactivate all.
3 Choose any or all of the fi ve options:
All outgoing
Outgoing
Outgoing international calls
except home country
All incoming
Incoming when abroad
4 Enter the call barring password.
Please check with your network
operator f
The basics
LG KB775 | User Guide
international
or this service.
TIP! Select Fixed dial numbers
from Call settings to turn on and
compile a list of numbers which
be called from your phone.
need your PIN2 code from your
operator. If you create a fi xed dial
list, only the numbers in the list
can be called from your phone.
You’ll
Changing the common call
settings
1 Touch , select and choose
Call settings.
2 Touch Common setting.
you can amend the settings for:
Call reject - Select On or Off and
choose to reject all calls, those
from specifi c groups or contacts,
calls from unregistered numbers
(those not in your contacts) or
callers who don’t have caller ID on.
Touch Save to change the setting.
From here
Page 9

Send my number - Choose
whether your number will be
displayed when you call someone.
Auto redial - Choose On or Off.
Answer mode - Choose how to
answer the phone: Press send
key or Press any key.
Minute minder - Select On to hear
a tone every minute during a call.
BT answer mode - Select
Hands-free to be able to answer
a call using a Bluetooth headset or
select Handset to press a key on
the handset to answer a call when
using a Bluetooth headset.
Save new number - Choose Yes
or No.
TIP! To scroll through a list of
options, touch the last item visible
and slide your fi nger up the screen.
The list will move up so more items
are visible.
Changing your video call
settings
1 Touch , select and choose
Call settings.
2 Touch V
ideo call setting.
3 Choose the settings of your video
Determine whether to
calling.
Use private image and Select
private image, and switch on the
Mirror (so you can see yourself on
screen).
01
02
03
04
05
06
07
08
The basics
Page 10
Contacts
Searching for a contact
There are two ways to search for a
contact:
From the standby screen
From the standby screen touch
open the address book.
From the main menu
1 Touch
Contacts. Then touch Search.
2 From the list, touch the contact
you’d like to call and select the
number to use if you have more
than one saved.
3 Touch Call or press the
key to initiate the call.
TIP! The alphabetical keypad is
displayed once you tap the blank
square.
TIP! To scroll through your list
of contacts, touch the last item
The basics
visible and slide your fi nger up
the screen. The list will move up
so more items are visible.
LG KB775 | User Guide
, select and choose
Adding a new contact
1 Touch , select and choose
Contacts.
2 Touch Add new.
3 Choose whether to save the
to
contact to your Handset or USIM.
4 Enter the fi rst and last name of
your new contact.
to enter both, but you must enter
one or the other.
TIP! Once you have typed in
a name, press
hard
rest of the information for your
contact.
5 Input the number and touch and
you can input more numbers. For
example, you can input a different
number for their Mobile, Home,
Offi ce, Pager, Fax, VT and General.
6 You can then add up to two email
addresses.
7 Assign the contact to a group.
Choose from No group
Friends, Colleagues, School or
VIP.
You do not have
to edit the
, Family,
Page 11
8 You can also add an Image,
Ringtone, Homepage, Home
address, Company name, Job title,
Company address and a Memo.
9 Touch Save to save the contact.
Contact options
There are many things you can do
when viewing a contact. Here’s how
to access and use the options menu:
1 Open the contact you’d like to use.
See Searching for a contact on
page 24.
2 Press
to open the list of
options. From here you can:
Send message - Send a message
to the contact. If the contact has an
email address, select whether you’d
like to send an email or SMS/MMS.
Send business card - Send the
contact’s details to another person
as a business card. Choose to send
it as a Text message,
Multimedia message, using
Email or via Bluetooth.
Make voice call - You can make a
voice call to the contact.
Make video call - You can make a
video call to the contact.
Add new contact - You can add a
new contact.
Edit - Change any of the contact's
details.
Mark/Unmark - Mark your
contacts for multiple selection.
Search by - You can search the
entry by number or group.
Save to USIM/Handset - Choose
to save the contact to the USIM
card or handset.
Delete - Delete the contact. Touch
Yes if you are sure.
Text entry settings
01
02
03
04
05
06
07
08
The basics
Page 12

Contacts
Creating a group
1 From the standby screen touch
tap and select Contacts.
2 Select Groups and touch
3 Select Add new group.
4 Enter a name for your new group.
5 Touch Save.
Note: If you delete a group,
contacts which were assigned to
that group will not be lost. They will
remain in your address book.
TIP!
You can edit an existing
group by highlighting it and
touching
member to the group from your
contacts, assign a group ringtone,
rename the group or delete a
group.
The basics
LG KB775 | User Guide
. Choose to Add a
the
Changing your contact settings
You can adapt your contact settings
so that your address book works book
suits your own preferences.
.
TIP! To scroll through a list of
options, touch the last item
visible and slide your fi nger up
the screen. The list will move up
so more items are visible.
1 From the standby screen touch
then tap . Select Contacts and
choose Settings.
2 From here you can adjust the
following settings:
Contact list settings - Choose
whether to view contacts saved
to both your Handset & USIM,
Handset only or USIM only. You
can also select to show the fi rst
name or last name of a contact fi rst.
Copy - Copy your contacts from
your USIM to your handset or from
your handset to your USIM. Choose
to do this one at a time, or all at
Page 13

once. If you select one at a time,
you’ll need to select each contact
to copy one by one.
Move - This works in the same
way as Copy, but the contact
will only be saved to the location
you’ve moved it to, e.g. if you move
a contact from your USIM to the
handset it will be deleted from the
USIM memory.
Send all contacts via Bluetooth
- Beam all of your contacts to
another device or computer using
Bluetooth.
Synchronise contacts - You can
send the contents of phonebook to
the server directly.
Backup contacts - See Backing
up and restoring your phone’s
information on page 84.
Restore contacts - See Backing
up and restoring your phone’s
information on page 84.
Clear contacts - Delete all your
contacts. Touch Ye s if you are
sure you want to wipe your address
book.
Viewing information
1 From the standby screen touch
tap and select Contacts.
2 Select Infomation.
3 From here you can view your
Ser
vice dial numbers, your Own
number, your Memory info. (how
much memory space you’ve got
left) and My business card.
TIP! If you’ve yet to add a
business card for yourself, select
Add and enter all your details as
you would for any contact. Touch
Save to fi nish.
01
02
03
04
05
06
07
08
The basics
Page 14
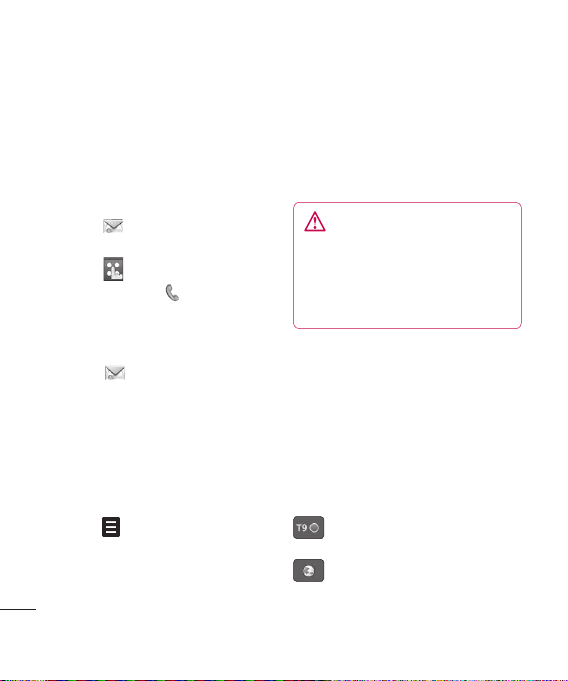
Messaging
Messaging
Your KB775 combines SMS, MMS
and email into one intuitive and easy
to use menu.
There are two ways to enter the
messaging centre:
• Touch
from the standby
screen.
• Touch
screen, then tap
from the standby
and select
Messaging.
Sending a message
1 Touch then choose Create
new message.
2 Choose Message to send an SMS
or MMS.
Or to send an email, choose
Email. See page 33 for details.
3 A new SMS or email will open.
Write your message as normal.
4 Touch
The basics
then Insert, to add
an image, video, sound or other
information, including contact
details.
LG KB775 | User Guide
5 Touch Send.
Choose a contact
from your list and touch Select
or touch Number then enter the
phone number. You can add multiple
contacts. Touch Send to send your
message.
WARNING: If an image, video
or sound is added to an SMS it
will be automatically converted to
an MMS and you will be charged
accordingly
.
Entering text
There are fi ve ways to enter text:
Keypad, Keyboard, Handwriting-
Screen, Handwriting-Box, HandwritingDouble Box.
Tap the screen once, then keyboard
shows up.
Touch to turn on T9 predictive
text.
You can choose writing
languages.
Page 15
Tap to change numbers, symbols
and texts keypad.
Use
to scroll through the different
keyboard types in each text entry mode
(for example, capitals or lowercase).
To enter a space touch
.
TIP! Simply touch each letter to
write your message and press:
to switch to upper case
to add a space
T9 predictive
T9 mode uses a built-in dictionary
to recognise words you’re writing
based on the key sequences you
touch. Simply touch the number key
associated with the letter you want to
enter, and the dictionary will predict
the word you want to use.
For example, press 8, 3, 5, 3, 7, 4, 6,
6, 3 to write ‘telephone’.
If the word you want doesn’t appear,
touch Spell. If you touch Spell you
can then enter the word using Abc
manual mode and your word or name
will be added to the dictionary.
Abc manual
In Abc mode you must touch the
key repeatedly to enter a letter. For
example, to write ‘hello’, touch 4
twice, 3 twice, 5 three times, 5 three
times again, then 6 three times.
Keyboard
In Keyboard mode the screen fl ips to
landscape and a full keyboard appears
on screen.
Simply touch each letter to write your
message and press:
to switch to upper case
to add a space
01
02
03
04
05
06
07
08
The basics
Page 16
Messaging
TIP! Keyboard mode predicts and
shows what you will type in next.
These words are predicted based
on the sentences you have typed
in so far. If you do not wish to use
the suggested words, keep typing
in new words. If you wish to use
the suggested words, press the
space bar to confi rm them.
Handwriting recognition
In Handwriting mode you simply
write on the screen and your KB775
will convert your handwriting into
your message. Select Screen or Box
depending on your preferred view.
WARNING: You may fi nd
it easier to use a stylus in this
mode,
please remember to press
lightly to protect your screen from
The basics
damage.
LG KB775 | User Guide
Handwriting recognition translates
stylus gestures into letters, numbers
or other character, and displays
these characters as text. Handwriting
recognition is only active where text
can be entered.
Note: Most letters can be written
using different stroke styles. See
the tables below. The position on the
screen decides case, not the style.
Alphabet
If you select capital letter mode (ABC),
letters you type will be inserted as
capital letters even if you write in small
letters, and vice versa.
Page 17
Letter Strokes
A
B
C
D
E
F
G
H
I
J
K
L
M
N
O
P
Q
R
S
T
U
V
W
Letter Strokes
X
Y
Z
ß
Accented characters
Accent Strokes
Space
Backspace
Enter
Switching the
text mode
Punctuation marks
Mark Strokes
Full stop
.
At
@
Note: Start each stroke at the dot.
01
02
03
04
05
06
07
08
The basics
Page 18
Messaging
Numbers
Numbers are written above the arrow.
Number Strokes
0
1
2
3
4
5
6
7
8
9
The basics
LG KB775 | User Guide
Accented letters
Write the character as described
above, then write the accent above
the arrow.
Other such characters, for example
follow the same principle.
grave
acute
circumflex
tilde
ring
dieresis
cedilla
Page 19
Setting up your email
You can stay in touch on the move
using email on your KB775. It’s quick
and simple to set up a POP3 or IMAP4
email account.
TIP! To scroll through a list of
options, touch the last item visible
and slide your fi nger up the
screen. The list will move up so
more items are visible.
1 Touch then select Settings.
2 Touch Email then Email accounts.
3 Open and touch Add new.
4 You can enter an email set up
wizard.
Follow the instructions
and touch Continue to move on.
Now your account is set up, it
will appear in the list of accounts
in your Email folder. Open
and touch Edit. You will need the
following details:
Account name - Enter a name for
this account.
My name - Enter your name.
Username - Enter the account’s
username.
Password - Enter the account’s
password.
Email address - Enter the
account’s email address.
Reply email address - Enter the
‘reply to’ email address.
Outgoing mail server
Incoming mail server
Maximum receive size - Choose
the size limit of your emails, the
maximum is 1MB.
Mailbox type - Enter the mailbox
type, POP3 or IMAP4.
Save to server - Choose whether
to save your emails to the server.
For IMAP4 accounts copies are
always saved.
Save sent mail into - Choose
where to save your IMAP4 emails.
For POP3 accounts copies are
always saved on the phone.
Retrieve only new
01
02
03
04
05
06
07
08
The basics
Page 20

Messaging
Access point - Choose your
Internet access point. Touch
access point to use a preset
access point.
Email to retrieve - Choose the
way to download emails. Choose
from Header only or All including
body for POP3, header only, header
+ body, or all for IMAP4.
Auto retrieve - Choose whether to
fetch your new emails automatically.
Advanced settings - Choose
whether to use the advanced
settings.
SMTP port number - Normally,
this will be 25.
SMTP TLS/SSL - Choose whether
to use TLS/SSL for outgoing server.
Incoming server port - Normally,
this is 110 for POP3 accounts and
143 for IMAP4 accounts.
The basics
Incoming TLS/SSL - Choose
whether to use TLS/SSL for
incoming server.
LG KB775 | User Guide
SMTP authentication - Choose
the security settings for the
outgoing mail server.
SMTP Username - Enter the
SMTP username.
SMTP Password - Enter the
SMTP password.
APOP secure login - Choose to
activate APOP secure login for a
POP3 account. IMAP4 accounts are
always set to off.
Retrieving your email
You can automatically or manually
check your account for new email.
See ‘Change your email settings’.
To check automatically:
1 Touch
by Email.
2 Touch Retrieve inter
choose an interval time to switch
auto retrieve on.
then Settings, followed
val and
Page 21

Sending an email using your
new account
1 Touch then chose Create new
message.
2 Choose Email and a new email will
open.
3 Enter the recipient’s address and
write your message.
Touch the
paperclip symbol to attach images,
videos, sounds or other fi le types.
4 Touch Send and your email will be
sent.
TIP! You can email Word, Excel,
PowerPoint and PDF documents
to your KB775 so you can review
them on the move.
Changing your email settings
You can adapt your email settings so
that it works in the way you prefer.
You may have already entered some
of this information during the set up
wizard.
TIP! To scroll through a list of
options, touch the last item
visible and slide your fi nger up
the screen. The list will move up
so more items are visible.
1 Touch then open Settings.
2 Touch Email and then you can
adapt the following settings :
Allow reply email - Choose
to allow the sending of ‘read
confi rmation’ messages.
Request reply email - Choose
whether to request ‘read
confi rmation’ messages.
Retrieve interval - Choose how
often your KB775 checks for new
email messages.
Retrieve amount - Choose the
number of email to be retrieved at
one time.
Include message in Fwd &
Reply - Choose to include the
original message or not.
01
02
03
04
05
06
07
08
The basics
Page 22

Messaging
Include attachment - Choose to
include the original attachment.
Auto Retrieval in Roaming
- Choose to auto retrieve your
messages when abroad, or stop
auto retrieval.
New Email notifi cation - Choose
whether to be alerted to new
emails.
Signature - Create an email
signature and switch this feature on.
Priority - Choose the priority level
of your email messages.
Message folders
You’ll recognise the folder structure
used on your KB775, it’s fairly selfexplanatory.
Inbox - All the SMS and MMS
messsages you receive are placed
into your inbox. From here you can
reply, forward and more, see below
The basics
for details.
Mailbox - All the email messages
you receive are placed in your
LG KB775 | User Guide
mailbox. If you have more than one
email account set up messages are
fi led into the correct account.
Drafts - If you don’t have time to
fi nish writing a message, you can
save what you’ve done so far here.
Outbox - This is a temporary storage
folder while messages are being sent.
Sent items - All the messages you
send are placed into your Sent items
folder.
My folders - Create new, personal
folders to manage your messages.
Templates
Emoticons
Settings
Managing your messages
You can use your Inbox to manage
your messages.
TIP! To scroll through a list of
options, touch the last item
visible and slide your fi nger up
the screen. The list will move up
so more items are visible.
Page 23

1 Touch then Inbox.
2 Touch
and then choose to:
Reply - Send a reply to the
selected message.
Forward - Send the selected
message on to another person.
Call - Make a Voice or Video call
to the person who sent you the
message.
Delete - Delete the message.
Delete all - Delete all of the
messages.
Create new message - Open a
new, blank message or email.
Mark/Unmark - Mark your
messages for multiple deletion or
to move them into a different folder.
Copy & Move - Choose to make a
copy of your message or move it to
a different folder.
Filter - View your message
by type. This will group SMS
separately from MMS.
Message info. - See additional
information for the message, for
example, the time it was sent.
If you see the message No space
for USIM message you should
delete some messages from your
inbox.
If you see the message No space
for messages you can delete
either messages or saved fi les to
create space.
Using templates
Create templates for the SMS and
MMS messages you send most
frequently. You’ll fi nd some templates
already on your phone, you can edit
these if you wish.
1 Touch
2 Choose T
then choose Templates.
ext templates or
Multimedia templates. You
can then touch
to Add new,
Edit, Delete or Delete all for Text
templates, and Add new, Write
multimedia message or Edit for
Multimedia templates.
01
02
03
04
05
06
07
08
The basics
Page 24

Messaging
Using emoticons
Liven up your messages using
emoticons. You’ll fi nd some commonly
used emoticons already on your phone.
1 Touch
2 Touch
Delete or Delete all emoticons.
then choose Emoticons.
to Add new, Edit,
Changing your text message
settings
Your KB775 message settings are
pre-defi ned so that you can send
messages immediately. If you’d like
to change the settings, see below for
more information.
TIP! To scroll through a list of
options, touch the last item
visible and slide your fi nger up
the screen. The list will move up
so more items are visible.
The basics
Touch then choose Settings
then Text message. You can make
changes to:
LG KB775 | User Guide
Text message centre - Enter the
details for your message centre.
Delivery report - Choose to receive
confi rmation that your message was
delivered.
Validity period - Choose how
long your message is stored at the
message centre.
Message types - Convert your text
into Text, Voice, Fax, X.400 or Email.
Character encoding - Choose how
your characters are encoded, this
impacts the size of your message and
therefore data charges.
Send long text as - Choose to send
as Multiple SMS or as an MMS.
Page 25

Changing your multimedia
message settings
Touch then choose Settings
then Multimedia message. You can
make changes to:
Retrieval mode - Choose Home
or Roaming network. If you then
choose Manual you will receive only
notifi cations of MMS and you can
then decide whether to download
them in full.
Delivery report - Choose to allow
and/or request a delivery report.
Read reply - Choose to allow and/or
send a read reply.
Priority - Choose the priority level of
your MMS.
Validity period - Choose how
long your message is stored at the
message centre.
Slide duration - Choose how long
your slides appear on screen.
Delivery time - Deliver your
message at a specifi c time.
Multi msg. centre - Enter the
details for your message centre.
Changing your other settings
Touch then choose Settings
then:
Videomail - If your operator supports
this service you can create a new
account.
Voicemail - Your voicemail service
has already been set up although you
can add new voicemail services here.
Service message - Choose to
receive or block service messages.
You can also set your message security
by creating trusted and untrusted lists
of senders.
Info. service - Choose your reception
status, language and other settings.
01
02
03
04
05
06
07
08
The basics
Page 26

Camera
Taking a quick photo
1 Press the camera key on the
right hand side of the handset.
2 Holding the phone horizontally,
point the lens towards the subject
of the photo.
3 Slightly press the camera key.
The white viewfi
centre of the screen will change to
red as the camera attempts to focus.
4 When the focus box turns green,
the camera has focused on your
subject.
5 Press the camera key fully
Get creative
LG KB775 | User Guide
nder box in the
After you’ve taken your photo
Your captured photo will appear on
screen. The name of the image runs
along the bottom of the screen and
fi ve icons will appear.
Touch to take another photo
straightaway. Your current photo will
be saved.
Touch to look at the other photos
in your album. Your current photo will
be saved.
Touch to send the photo as an
MMS, Email or via Bluetooth. You can
.
also print the photo using Bluetooth.
Touch to set the photo you have
just taken as your wallpaper.
Touch to delete the photo you have
just taken and confi rm by touching
Yes. The viewfi nder will reappear.
Page 27

Camera
Changing the image size
The more pixels, the larger the fi le
size, which in turn means they take
up more of your memory. If you want
to fi t more pictures on to your phone
you can alter the pixel number to make
the fi le size smaller.
1 From the viewfi nder touch
the bottom left corner.
2 Select
3 Select a pixel value from the fi ve
numerical options (3M: 2048x1536,
2M: 1600x1200, 1M: 1280x960,
640x480, 320x240) or choose the
preset:
Contacts - This sets up the camera
to take a photo the perfect size to
be added to a phone contact.
from the settings menu.
Choosing a colour tone
1 From the viewfi nder touch
Get creative
the bottom left corner.
2 Select
LG KB775 | User Guide
from the settings menu.
3 There are four colour tone options,
Normal(colour),
Negetive, Sepia.
4 Touch the colour tone you’d like to
use and select Close.
TIP! You can change a photo taken
in colour to black and white or
sepia after it’s taken but you cannot
in
change a picture taken in black
and white or sepia back to colour.
Black & White,
Using the inner camera
Your LG KB775 has a 640x480 inner
camera, not just for video calling but for
taking pictures too.
1 To switch to the inner camera
touch
choose Inner camera.
2 After a few seconds you’ll see
yourself in the viewfi
in
capture the image press the
camera key as normal.
then select
. Then
nder. To
Page 28

3 After you’ve taken the photo you’ll
be offered all the same options as
are available for an image taken
with the main camera.
4 To return to the main camera touch
and then . Then choose
Outer camera.
Viewing your saved photos
1 You can access your saved photos
from within the camera mode and
from the standby screen.
viewfi nder, simply touch
From the
. From
the standby screen you should
touch
, then select . Choose
My stuff followed by My Images.
2 Your gallery will appear on screen.
Viewing the details of a photo
1 Touch the photo once then touch
that appears.
the
i
2 The photo will reveal the name,
the date it was taken,
the size (in
kilobytes and pixels) and the image
type (e.g. jpeg) on the top.
3 Touch
to close the details and
view the photo.
01
02
03
04
05
06
07
08
Get creative
Page 29

Video camera
Shooting a quick video
1 Press the camera key on the
right side of the phone.
2 Touch the video camera icon
in the viewfi nder to switch to
video mode. The video camera’s
viewfi nder will appear on screen.
Note: You can also access the video
camera menu by pressing and
holding the camera key from the
standby screen.
3 Holding the phone horizontally,
point the lens towards the subject
of the video.
4 Press the camera key once to
start recording.
5 REC and a timer will appear at the
bottom of the viewfi nder.
6 To pause the video touch
resume by selecting
Get creative
7 Touch
capture button a second time to
stop recording.
LG KB775 | User Guide
.
on screen or press the
After you’ve shot your video
A still image representing your
captured video will appear on screen.
The name of the image runs along
the bottom of the screen together
with three icons down the right side.
Touch to shoot another video
straight away. Your current video will
be saved.
Touch to look at the other video
clips in your album. Your current
video clip will be saved.
Touch to delete the video you
have just made and confi rm by
touching Yes. The viewfi nder will
reappear.
Touch to send the video as an
MMS, Email or via Bluetooth.
and
Page 30

Video camera
Choosing a colour tone
1 From the viewfi nder touch in
the bottom left corner.
2 Select
3 There are four colour tone options,
Normal (colour),
Negative, Sepia.
4 When you’ve made your selection
touch Close and the changes will
appear in your viewfi
TIP! You can change a video
shot in colour to black and white
or sepia after it’
cannot change a video shot in
black and white or sepia back to
colour.
from the settings menu.
Black & White,
nder.
s taken, but you
Using the inner video camera
Your LG KB775 has a 320x240 inner
camera, not just for video calling but
Get creative
for recording videos too.
LG KB775 | User Guide
1 To switch to the inner camera
touch
then select . Then
choose Inner camera.
2 After a few seconds you’ll see
yourself in the viewfi
recording the image press the
capture button as normal, press it a
second time to stop recording.
3 After you’ve shot the video you’ll be
offered all the same options as are
available for a video shot using the
main camera.
4 To return to the main camera touch
and then . Then choose
Outer camera.
TIP! You can still alter the video
size, video quality, duration, mute,
white balance, colour tone and
more by touching
way as when using the main
camera.
nder. To start
in the same
Page 31

Watching your saved videos
1 From the viewfi nder, simply touch
. From the standby screen you
should touch
, then select
and select My stuff and choose
My Videos.
2 Your gallery will appear on screen.
3 Touch the video you want to view
once to bring it to the front of the
galler
y.
4 Touch the video a second time to
open it fully
.
01
02
03
04
05
06
07
08
Get creative
Page 32

Your photos and videos
Viewing your photos and videos
1 From the viewfi nder, simply touch
.
2 Your gallery will appear on screen.
3 Touch the video or photo you want
to view once to bring it to the front
of the galler
4 Touch it a second time to open it
fully
5 Videos will begin to play
automatically
To pause playback touch the
screen to bring up the options and
select
TIP! Change the way your photos
and videos are displayed in the
galler
or Random at the bottom of the
screen.
Get creative
TIP! To delete a photo or video,
open it and select
to confi rm.
LG KB775 | User Guide
y.
.
.
.
y by touching Standard
. Touch Ye s
Adjusting the volume when
viewing a video
To adjust the volume of the audio on
a video whilst it is playing, touch the
volume bars on the bottom of the
screen. Alternatively you can use the
volume key.
Capturing an image from a video
1 Select the video you would like to
capture an image from.
2 Touch
to pause the video on the
frame you’d like to convert to an image.
3 Touch .
4 The image will appear on screen,
with its assigned image name.
5 Select Save.
6 Touch the image then
to the gallery.
7 The image will be saved in the My
stuff > My images folder and
appear in the galler
exit gallery and then re-open for
this to appear.
y. You need to
to return
Page 33

WARNING: Some functions
will not work properly if the
multimedia fi
le has not been
recorded on the phone.
Viewing the details of a video
or photo
Videos and photos are grouped
together in the gallery. If you have
trouble telling which are photos and
which are videos, check the details.
For example, videos may be 3GP fi le
types and photos may be JPEG or GIF
fi le types.
1 Touch the video still or photo to
bring it to the front of the galler
screen. Then touch
i
y
to see more
information.
2 The video still or photo will reveal
its name,
the date it was taken, its
size (in kilobytes and pixels) and
whether it’s an image or a video
(e.g. MP4/3GP or JPEG) on the top.
3 Touch
to close the details and
view the video still or photo.
Sending a photo or video from
the gallery
1 Touch a photo or video twice to
open it.
If you select a video, press
when
it starts to play.
2 Select
and choose how you
would like to send the video or
photo: Message, Email, Bluetooth.
3 The chosen messaging application
will open so you can send the video
or photo.
Note:
The photo or video may need
to be resized before it can be sent by
MMS. Some videos may be too large
to send by MMS at all, in which case
choose one of the other sending
options.
01
02
03
04
05
06
07
08
Get creative
Page 34

Your photos and videos
Adding text to a photo
1 From the editing screen, touch .
2 Input the letter you want.
3 Enter your text using the keypad
and touch Done.
4 Move the text by touching it and
sliding it to the place you’d like it to
be.
Adding an effect to a photo
1 From the editing screen, touch .
2 Choose to apply any of the six
options to the photo:
Soften - Move the marker along
the bar to soften the focus of the
photo.
Select Done to save the
changes or choose Cancel.
Sharpen - Move the marker along
the bar to sharpen the focus of the
photo. Select Done to save the
changes or choose Cancel.
Get creative
Mosaic blur - Touch to apply a
blurred mosaic effect to the photo.
LG KB775 | User Guide
Touch
photo.
Colour Effect - Change the
colour of a photo to Black and
white, Sepia, Colour negative,
Enhanced RGB or Contrast. If
you select Contrast move the
marker along the bar to increase or
decrease the contrast.
Frame - Add a frame to your photo.
You may be prompted to allow the
image size to be changed. To see
the frame types select Yes. The
chosen frame will be superimposed
over your photo.
Resize - Touch here for size
options. Touch your desired size to
change the size of the photo.
3 To undo an effect simply touch
TIP! You can add more than one
effect to a photo, except for a
colour effect of which you can
only select one at a time.
to return to the normal
.
Page 35

Adding a colour accent to a
photo
1 From the editing screen, touch
.
2 Choose Colour Accent.
3 Select part of the photo. A traced
line will appear around ever
ything
in that area that is of the same or
similar colour.
For example, someone’s hair or the
colour of their jumper.
4 Touch Save.
5 All colour will be removed from
the photo,
apart from the section
marked for colour accenting.
6 Alter the intensity of the accenting
by sliding the marker up or down
the intensity bar
.
7 Select Save to save the changes.
Swapping the colours in a
photo
1 From the editing screen, touch
.
2 Choose Colour Swapping.
3 Select part of the photo. A traced
line will appear around ever
ything
in that area which is of the same or
similar colour.
For example, someone’s hair or the
colour of their jumper.
4 Touch
and select a colour.
5 Press Swap.
6 The part of the photo selected for
colour accenting will change to the
selected colour
.
7 Select Save to save the changes.
01
02
03
04
05
06
07
08
Get creative
Page 36

TV
TV & Radio
Your KB775 is available to access the
Mobile TV & Radio services. When you
select
you can see the TV & Radio
broadcasting.
Note:
- You need to pull out antenna in your
- According to radio wave
- Depending on service coverage or
- Watching TV has signifi cant impact
Get creative
LG KB775 | User Guide
from the standby screen,
phone.
environment, each channel reception
performance can be different.
indoor conditions you may have no or
only poor TV signal strength.
on stand-by time and talk-time. Be
aware of your KB775 needs to be recharged much earlier and it is
recommended to do so after every TV
watching.
- If you have moved from one
broadcasting station coverage into
another, you may need to run a new
channel search if you can not get TV
signal reception.
Watching your TV
1 From the standby screen, touch
and tap then choose .
Select TV.
2 The broadcasted program
is displayed,
programs. You can change channel.
3 Touch
Change language - If the
language icon appears beside CH,
it means that the program supports
multi-language. You can select
this option to change the displayed
language in your screen.
Capture - You can capture the
screen image. The captured image
shall be saved in ‘Images’ of the
My Stuff.
you can see TV
and choose from:
Page 37

Note: You cannot copy or move the
pictures taken to external memory
or other folders, and attach them to
MMS/E-mail or send to others via
Bluetooth.
Listen to radio - You can switch
to radio mode.
TV guide - You can see the TV
guide.
TV channels - You can see the
available channel lists.
Program detail - You can see the
TV program detail.
Favorite - You can view the
favorite list and add the channel to
the favorite list.
Channel Scan - You can scan
the available channels within your
current area.
Delete Channel - You can delete
the channel in your channel list.
Settings - You can change
the brightness, resolution, and
message popup on or off.
TIP! When you watch the TV
broadcasting, the icon
is
appeared beside the current
channel in the upper left corner
of the screen. If you touch this
icon, the search channel popup
will be shown and you can select
the channel by touching the
number.
Listening your radio
1 From the standby screen, touch
and tap then choose .
Select Radio.
2 The broadcasted program is
displayed,
you can see radio
programs.
You can change channel.
01
02
03
04
05
06
07
08
Get creative
Page 38

TV
Note:
- This phone supports DIGITAL DVB-T
Radio, not FM Radio.
- In different parts of the country,
radio channels may not be available
to access.
Change other settings
Message popup on/off - When new
message arrived while watching TV,
message alert popup will be shown if
you set the option as on.
Reset channel - You can reset
TV/Radio channel and favorite list.
Note: If it has a problem with channel
reception performance, you need to
reset channels.
Get creative
LG KB775 | User Guide
Page 39

Multimedia
You can store any multimedia fi les
into your phone’s memory so that
you have easy access to all of your
pictures, sounds, videos and games.
You can also save your fi les to a
memory card. The advantage of using
a memory card is that you can free up
space on your phone’s memory.
To access the Multimedia menu,
touch
then . Touch My stuff
to open a list of folders storing all of
your multimedia fi les.
My images
My images contains a list of pictures
including default images pre-loaded
onto your phone, images downloaded
by you and images taken on your
phone’s camera.
Touch
to change the view from
thumbnail image to list.
My images options menu
Touch for options.
The options which are available to
you in My images depend on what
type of image you have selected.
All of the options will be available
for pictures you have taken on the
phone’s camera, but only the Use as,
Print via Bluetooth, Sort by, File
info. and Memory info. options are
available for default images.
TIP! To scroll through a list of
options, touch the last item
visible and slide your fi nger up
the screen. The list will move up
so more items are visible.
Send - Send the image to a friend.
Use as - Set the image to appear at
certain times.
Move - Move an image from the
phone memory to a memory card or
vice versa.
01
02
03
04
05
06
07
08
Get creative
Page 40

Multimedia
Copy - Copy an image from the
phone memory to a memory card or
vice versa.
Delete - Delete an image.
Rename - Rename an image.
Mark/Unmark - Select multiple fi les.
Print via Bluetooth - Print an image
fi le via Bluetooth
®
.
Create new folder - Create a new
folder within the My images folder.
Slide show - Start a slide show.
Sort by - Sort images into a specifi c
order.
File info. - View the information of
the selected fi le.
Memory info. - View the memory
status.
Sending a photo
1 Touch then .
2 Touch My stuff then choose My
Get creative
images.
3 Select a photo and touch
LG KB775 | User Guide
4 Touch Send and choose from
Message, Email or Bluetooth.
5 If you choose Message or Email,
your photo will be attached to the
message and you can write and
send the message as normal.
you choose Bluetooth, you will be
prompted to turn Bluetooth on and
your phone will search for a device
to send the picture to.
Using an image
You can choose images to use as
wallpapers or even to identify a caller.
1 Touch
then .
2 Touch My stuff then My images.
3 Select an image and touch
4 Touch Use as and choose from:
Wallpaper - Set a wallpaper for
the standby screen.
Contacts image - Allocate an
image to a particular person in your
.
contacts list so that the picture
shows when they call you.
If
.
Page 41

Outgoing call - Set an image to
appear during outgoing calls.
Start-up - Set an image to appear
when you switch the phone on.
Shut down - Set an image to
appear when you switch the phone
off.
Organising your images
1 Touch then .
2 Touch My stuff then My images.
3 Touch
then Sort by.
4 Choose from Date, Type or Name.
Note: As well as sorting your images
by category, you can also manually
sort them.
Deleting an image
1 Touch then .
2 Touch My stuff then My images.
3 Select an image and touch .
4 Touch Delete then Ye
s to confi rm.
Moving or copying an image
You can move or copy an image
between the phone memory and the
memory card. You might want to do
this to either free up some space
in one of the memory banks or to
safeguard your images from being lost.
1 Touch
then .
2 Touch My stuff then My images.
3 Select an image and touch .
4 Select Mo
ve or Copy.
01
02
03
04
05
06
07
08
Get creative
Page 42

Multimedia
Marking and unmarking images
If you want to move, copy, send or
delete several images at once, you
fi rst need to identify them by marking
them with a tick.
1 Touch
2 Touch My stuff then My images.
3 Touch then Mark/Unmark.
4 A box will appear to the left of
each image.
and a tick will appear in the box
marking it.
5 To unmark an image, touch the
image again so that the tick
disappears from the box.
6 Once you have marked all of the
appropriate boxes,
choose one of the options.
Get creative
LG KB775 | User Guide
then .
Touch the image twice
press
Creating a slide show
If you want to look at all of the images
on your phone or scan through what
you’ve got, you can create a slide
show to save you from having to open
and close each individual image.
1 Touch
2 Touch My stuff then My images.
3 Touch then Slide show.
4 Use the
the images or touch
your images in a random order.
and
then .
and to skip through
to show
Page 43

Checking your memory status
You can check to see how much of
your memory space you have used
and how much you have left to use.
1 Touch
then .
2 Touch My stuff then My images.
3 Touch
4 Choose Handset memor
then Memory info.
y or
External memory.
Note: If you do not have a memory
card inserted, you will not be able to
select My memory card.
My sounds
The My sounds folder contains
the Default sounds and Voice
recordings. From here you can
manage, send or set sounds as
ringtones.
Using a sound
1 Touch then .
2 Touch My stuff then My sounds.
3 Select Def
ault sounds or Voice
recordings.
4 Select a sound and touch Play to
listen to it.
5 Touch
and select Use as.
6 Choose from Voice ringtone,
Video ringtone, Message tone,
Start-up, Shut down.
My videos
The My videos folder shows the list
of downloaded videos and videos you
have recorded on your phone.
01
02
03
04
05
06
07
08
Get creative
Page 44

Multimedia
Watching a video
1 Touch then .
2 Touch My stuff then My videos.
3 Select a video and touch Play.
Using options while video is
paused
Touch while in pause mode and
choose from:
Capture - Capture the frozen frame
as a picture.
File info. - View the Name,Size,
Time, Type, Duration, Dimension,
and Copyright details.
Send - Send the video in a Message,
Email, or via Bluetooth.
Delete - Delete the video.
Use as - Use the video as a ringtone.
Get creative
LG KB775 | User Guide
Date,
Protect
Sending a video clip
1 Select a video and touch .
2 Touch Send and choose from
Message, Email or Bluetooth.
3 If you choose Message or Email,
your video clip will be attached to
the message and you can write
and send the message as normal.
If you choose Bluetooth, you will
be prompted to turn Bluetooth on
and your phone will search for a
device to send the video to.
Using a video clip as a ringtone
1 Select a video and touch .
2 Touch Use as and choose
from Voice ringtone or Video
ringtone.
Page 45

Using the video options menu
From the My videos folder, you can
choose from the following options:
Use as - Set a video as your ringtone.
Send - Send a video to a friend.
Move - Move a video clip from the
phone memory to a memory card or
vice versa.
Copy - Copy a video clip from the
phone memory to a memory card or
vice versa.
Delete - Delete a video.
Rename - Rename a video.
Mark/Unmark - Select multiple fi les.
Create new folder - Create a new
folder within the My videos folder.
Sort by - Sort videos into a specifi c
order.
File info. - View the information of
the selected fi le.
Memory info. - View the memory
status.
My games and apps
You can download new games and
applications to your phone to help
keep you amused when you have
time to spare.
Downloading a game
1 Touch then .
2 Touch My stuff then My games
& apps.
3 Select Download games and
touch Connect.
4 You will connect to the web portal
from where you can fi
nd a game to
download.
01
02
03
04
05
06
07
08
Get creative
Page 46

Multimedia
Playing a game
1 Touch then .
2 Touch My stuff then My games &
apps.
3 Select a game and touch Launch.
Using the games options menu
From the My games & apps. folder,
the following options are available:
Create new folder – Create a folder
within My games & apps.
Sort by - Sort the games and
applications by Date, Size or Name.
URL info. - View the information of
URL.
Memory manager - View the
memory status.
Flash contents
The Flash contents folder contains
all of your default and downloaded
Get creative
SWF fi les.
LG KB775 | User Guide
Viewing an SWF fi le
1 Touch then .
2 Touch My stuff then Flash
contents.
3 Select the fi le and touch V
Using options viewing the SWF fi le
Full screen view - View your
SWF in full screen mode (this only
appears if you touch
pausing).
Mute - Switch the sound off.
/ - Pause or resume
playback.
Use as wallpaper - You can set
the wallpaper with Default fi le.
File info. - View the name, Size,
Date, Time, Type and Protection of
the fi le.
iew.
without
Page 47

Documents
1 Touch then .
2 Touch My stuff then Documents.
From the Documents menu,
you can
view all of your document fi les. From
here you can view Excel, Powerpoint,
Word, Text and pdf fi les in My stuff.
Transferring a fi le to your
phone
Bluetooth is probably the easiest way
to transfer a fi le from your computer
to your phone. You can also use LG
PC Suite via your sync cable, see
page 82 for details.
To transfer using Bluetooth:
1 Make sure your phone and
computer have Bluetooth switched
on and are visible to one another
.
2 Use your computer to send the fi le
via Bluetooth.
3 When the fi le is sent you will have
to accept it on your phone by
touching Ye
s.
4 The fi le should appear in your
Documents or Others folder
.
Viewing a fi le
1 Touch then .
2 Touch My stuff then Documents.
3 Select a document and touch Open.
Others
The Others folder is used to store fi les
which are not pictures, sounds, videos,
games or applications. It is used in the
same way as the Documents folder.
You may fi nd that when you transfer
fi les from your computer to your phone
that they appears in the others folder
rather than the Documents folder. If
this happens you can move them.
To Move a fi le from Others to
Documents:
1 Touch
then .
2 Touch My stuff then Others.
3 Select a fi le and touch .
4 Touch Mo
ve, check the destination,
then touch Move again.
01
02
03
04
05
06
07
08
Get creative
Page 48

Multimedia
Music
Your LG KB775 has a built-in music
player so you can play all your
favourite tracks. To access the music
player, touch
then then
Music.
From here you can access a number
of folders:
Recently played - View all of the
songs you have played recently.
All tracks - Contains all of the songs
you have on your phone.
Playlists - Contains any playlists you
have created.
Artists - Browse through your music
collection by artist.
Albums - Browse through your
music collection by album.
Genres - Browse through your music
collection by genre.
Get creative
Shuffl e tracks - Listen to your
music in a random order.
LG KB775 | User Guide
Transferring music onto your
phone
The easiest way to transfer music
onto your phone is via Bluetooth or
your sync cable.
You can also use LG PC Suite, see
page 83 for details. To transfer using
Bluetooth:
1 Make sure both devices have
Bluetooth switched on and are
visible to one another
2 Select the music fi le on the other
device and choose to send it via
Bluetooth.
3 When the fi le is sent you will have
to accept it on your phone by
touching Ye
4 The fi le should appear in Music >
All tracks.
.
s.
Page 49

Playing a song
1 Touch then .
2 Touch Music,
then All tracks.
3 Select the song you want to play
and touch Play.
4 Touch
5 Touch
to pause the song.
to skip to the next song.
6 Touch to skip to the previous
song.
7 Touch
to return to the Music
menu.
TIP! To change the volume while
listening to music, touch
or
press the volume key.
Creating a playlist
You can create your own playlists by
choosing a selection of songs from
the All tracks folder.
1 Touch
2 Touch Music,
then .
then Playlists.
3 Touch Add, enter the playlist name
and touch Save.
4 The All tracks folder will show.
T
ouch all of the songs that you
would like to include in your
playlist; a tick will show next to
their name.
5 Touch Done.
To play a playlist,
select it and touch Play.
Note: To add a second playlist, touch
then Add new playlist.
01
02
03
04
05
06
07
08
Get creative
Page 50

Multimedia
Editing a playlist
From time to time, you may want to
add new songs or delete songs from
a playlist. When you want to do this,
you can edit the playlist.
1 Touch
2 Touch Music, then Playlists.
3 Open the playlist.
4 Touch
Now playing – Play the playlist.
Add new songs – To add more
songs to the playlist. Mark the ones
you want and touch Done.
Move up/down – Move the song
up or down the list to change the
playing order.
Send – Send a song as a message
or via Bluetooth.
Remove from list – Remove a
song from the playlist. Touch Yes to
Get creative
confi rm.
Mark/Unmark – Select multiple
fi les.
LG KB775 | User Guide
then .
and select:
Use as – You can set the song as
an effect sound.
File info. – View the information of
the selected fi le.
Memory info. – View the memory
status.
Deleting a playlist
1 Touch then .
2 Touch Music,
3 Touch then Delete or Delete
all to delete all of the playlists.
then Playlists.
Page 51

The web
With the browser at your fi ngertips,
you can get up-to-date news and
weather forecasts as well as
information on sports or traffi c
whenever you need it. In addition, the
browser allows you to download the
latest music, ringtones, wallpapers
and games.
Accessing the web
1 From the standby screen select
, then touch and choose
Browser.
2 To access the browser homepage
directly
, select Home. Alternately
select Enter address and type
in your desired URL, followed by
Connect.
Note: An additional cost is incurred
when connecting to this service and
downloading content. Check your data
charges with your network provider.
Adding and accessing your
bookmarks
For easy and fast access to your
favourite websites, you can add
bookmarks and save web pages.
1 From the standby screen select
, then touch and choose
Browser.
2 Select Bookmarks.
A list of your
Bookmarks will appear on the
screen.
3 To add a new bookmark, select
and touch Add new. Enter a name
for your bookmark followed by the
URL.
4 Touch Save.
Your bookmark will
now appear in the list of bookmarks.
5 To access the bookmark simply
scroll to the required one and touch
Open.
You will be connected to
your bookmark.
01
02
03
04
05
06
07
08
The web
Page 52

The web
Using RSS reader
RSS (Really Simple Syndication) is a
family of web feed formats used to
publish frequently updated content
such as blog entries, news headlines
or podcasts. An RSS document, which
is called a feed, web feed, or channel,
contains either a summary of content
from an associated web site or the full
text. RSS makes it possible for people
to keep up with their favourite web
sites in an automated manner that is
easier than checking them manually.
The user subscribes to a feed by
entering the feed’s link into the
reader or by clicking an RSS icon in a
browser that initiates the subscription
process. The reader checks the user’s
subscribed feeds regularly for new
content,downloading any updates that
it fi nds.
The web
LG KB775 | User Guide
Saving a page
1 Access your required web page as
described above.
2 Touch
3 Enter a name for the web page so
4 Touch Save.
and select Saved pages.
you can easily recognise it.
Accessing a saved page
1 From the standby screen select
, then touch and choose
Browser.
2 Select Saved pages.
3 Select the required page and touch
, followed by Open.
Page 53

Viewing your browser history
1 From the standby screen select
, then touch and choose
Browser. Select History.
2 A list of web page titles you have
accessed recently will be displayed.
To access one of these pages,
simply select the required page
and touch Connect.
Changing the web browser
settings
1 From the standby screen select
, then touch and choose
Browser.
2 select Settings.
3 You can choose to edit Profi les,
Appearance settings, Cache,
Cookies, Security,
or to reset all
settings, select Reset Settings.
4 Once you have changed your
settings, select OK.
Using your phone as a modem
Your KB775 can double as a modem
for your PC, giving you email and
internet access even when you can’t
connect using wires. You can use
either the USB cable or Bluetooth.
Using the USB cable:
1 Ensure you have the LG PC Suite
installed on your PC.
2 Connect your KB775 and your PC
using the USB cable and launch the
LG PC Suite software.
3 Click Communication on your
Then click Settings and select
PC.
Modem.
4 Choose LG Mobile USB Modem
and select OK.
It will now appear
on screen.
5 Click Connect and your PC will
connect through your KB775.
Note: For more information on
synchronising using the LG PC Suite
see page 83.
01
02
03
04
05
06
07
08
The web
Page 54

The web
Using Bluetooth:
1 Ensure Bluetooth is switched On
and Visible for both your PC and
KB775.
2 Pair your PC and KB775 so
that a passcode is required for
connection.
3 Use the Connection wizard on
your LG PC Suite to create an
active Bluetooth connection.
4 Click Communication on your PC.
Then click Setting.
5 Click Modem.
6 Choose Standard Modem over
Bluetooth link and click OK. It will
now appear on screen.
7 Click Connect and your PC will
connect through your KB775.
Note: For more information on
Bluetooth see pages 90-92.
The web
LG KB775 | User Guide
Page 55

Organiser
Adding an event to your
calendar
1 From the standby screen select
, then touch and choose
Organiser. Select Calendar.
2 Select the date you would like to
add an event to.
3 Select Add new event option to
add new event.
4 Select whether you would like to
add an Appointment, Anniversar
or Birthday and touch OK.
5 Check the date and enter the time
you would like your event to begin.
6 For appointments and anniversaries
enter the time and date your event
fi
nishes in the lower two time and
date boxes.
7 If you would like to add a subject
or a note to your event,
touch
Subject or Location and type in
your note, followed by OK.
8 Select Save and your event will
be saved in the calendar
. A square
cursor will mark the day that any
events have been saved to and
a bell will ring at the start time of
your event, so that you can stay
organised.
TIP!
You can set a holiday period in
your calendar. Touch each day you
are on holiday one at a time, then
touch
and select Set holiday.
Each day will be shaded red. When
you come to set an alarm, you
y
can choose to exclude days set as
holiday.
Changing your default calendar
view
1 From the standby screen select
, then touch and choose
Organiser. Select Settings.
2 Touch Calendar settings and
choose either Def
ault view or
Week starts on.
3 Touch OK to confi
rm your choice.
01
02
03
04
05
06
07
08
Get organised
Page 56

Organiser
Adding an item to your to do list
1 From the standby screen select
, then touch and choose
Organiser.
2 Select T
3 Set the date for the to do item, add
4 Save your to do list item by
Get organised
LG KB775 | User Guide
o do and touch in the
top right hand corner.
notes and select a priority level:
High, Medium or Low.
selecting Save.
TIP! You can edit an item by
selecting it, and touching
Now select Edit. Confi rm your
amends by selecting Save.
Sharing a to do item
1 From the standby screen select ,
then
and choose Organiser.
Select To do.
2 Select the to do item you would like
to share,
then touch
3 Select Send. You can choose to
share your to do item by Text
message, Multimedia msg.,
Email or Bluetooth.
TIP! You can back up and
synchronise your calendar with
.
your computer
page 83.
Using date fi nder
Date fi nder is a handy tool to help you
calculate what the date will be after a
certain amount of days has passed.
For example, 60 days from
10.10.2008 will be 09.12.2008. This
is great for keeping tabs on deadlines.
.
. See PC Sync on
Page 57

1 From the standby screen select
, then touch and choose
Organiser.
2 Select Date fi nder.
3 In the From tab set your required
date.
4 In the After tab set the number of
days.
5 The T
arget date will be shown
below.
Setting your alarm
1 From the standby screen select ,
then
and choose Alarms.
2 Touch to set your alarm.
3 Set the time you would like the
alarm to sound and touch Set.
4 Choose whether you would like
your alarm to sound Not repeated,
Daily, Mon - Fri, Mon - Sat, Sat
- Sun or Except holiday.
Touch
OK.
5 Select
to select a sound for your
alarm. To listen to sounds touch the
sound, followed by Play. After you
have made your selection, touch
Select.
6 Add a memo for the alarm. Touch
OK when you have fi
nished typing
the memo. When the alarm sounds
the memo will be displayed.
7 Finally you can set the snooze
inter
val at 5, 10, 20, 30 minutes,
1 hour or off. Press OK to confi rm
your choice.
8 Once you have set your alarm,
touch Save.
Note: Y
ou can set up to 5 alarms.
TIP!
Even when your phone is off,
the alarm will still sound at the set
time. If you touch snooze the
alarm will sound again in 5
minutes. If you touch Stop the
message ‘Turn on your phone?’
will pop up.
01
02
03
04
05
06
07
08
Get organised
Page 58

Organiser
Adding a memo
1 From the standby screen select
, then touch and choose
Memo.
2 Touch
3 Type your memo, followed by Save.
4 Your memo will appear on screen
to add a new memo.
the next time you open the Memo
application.
TIP! You can edit an existing
memo. Select the one you want
to edit and touch Edit.
Voice recorder
Use your voice recorder to record
voice memos or other sounds.
1 Touch
2 Touch Voice recorder and press
Get organised
Duration – Set the recording
LG KB775 | User Guide
then .
to start recording or press
and choose from:
duration. Choose from MMS msg.
size, 1 min or No limit.
Quality – Select the sound quality.
Choose from Super Fine, Fine or
Normal.
Go to my sounds – Open the
Voice recordings folder in My
sounds.
Recording a sound or voice
1 Touch then .
2 Touch Voice recorder.
3 Touch
4 Touch to end recording.
5 Touch to listen to your
recording.
to begin recording.
Sending the voice recording
1 Once you have fi nished recording,
touch
.
2 Touch Send and choose from
Message, Email or Bluetooth.
If you choose Message or Email,
the recording will be added to the
message and you can write and
send it as normal.
Bluetooth, you will be prompted to
turn Bluetooth on.
If you choose
Page 59

Note: After you have fi nished
recording, touch
and choose
Send, Files(Rename, File info.),
Delete, Use as (to use the recording
as your ringtone) or Go to my
sounds.
Using your calculator
1 From the standby screen select ,
then touch
and choose Tools.
2 Select Calculator.
3 Use the keypad to input numbers.
4 For simple calculations, touch the
function you require (+,
-, ÷, x),
followed by =.
5 For more complex calculations,
touch
and choose from sin,
sin, cos, tan, deg, sec, csc, cot,
rad, log, ln, exp, π, x^2, √, 1/x,
x^y.
Adding a city to your world
clock
1 From the standby screen select ,
then touch
2 Select W
3 Touch the
and choose Tools.
orld clock.
icon, followed by
Add city. Start typing the name
of the city you require and it will
show at the top of the screen.
Alternatively touch Map, and select
your chosen city from the map.
4 Touch Select to confi
rm your
choice.
Converting a unit
1 From the standby screen select ,
then touch
and choose Tools.
2 Select Unit converter.
3 Choose whether you would like
to convert Currenc
y, Surface,
Length, Weight, Temperature,
Volume or Velocity.
01
02
03
04
05
06
07
08
Get organised
Page 60

Organiser
4 You can now select the unit, and
enter the value you would like to
convert from, followed by the unit
you would like to convert to.
5 The corresponding value will
appear on the screen.
Using the stopwatch
1 From the standby screen select ,
then touch
2 Select Stopwatch.
3 Touch Start to begin the timer
4 Touch Lap if you want to record a
lap time.
5 Touch Stop to end the timer
6 Touch Resume to restart the
stopwatch at the time you stopped
it at or touch Reset to begin the
time again.
Get organised
and choose Tools.
.
.
LG KB775 | User Guide
Page 61

PC Sync
You can synchronise your PC with
your phone to make sure all your
important details and dates match,
but also as a backup to put your mind
at ease.
Installing LG PC Suite on your
computer
1 From the standby screen select
, then touch
and choose
Phone settings.
2 Select Connectivity,
then USB
connection mode.
3 Select PC suite and touch Select.
4 Insert the supplied CD into your PC.
LG PC Suite Installer will appear
on your screen.
Click on LG PC
Suite Installer.
5 Select the language you would like
the installer to run in and click OK.
6 Follow the instructions on screen
to complete the LG PC Suite
Installer wizard.
7 Once installation is complete, the
LG PC Suite Icon will appear on
your desktop.
Connecting your phone and PC
1 Connect the USB cable to your
phone and your PC.
2 Double click on the LG PC Suite
Icon on your desktop.
3 Click on Connection Wizard,
then
USB.
4 Click on Ne
xt, then Next again,
then Finish. Your phone and PC
are now connected.
01
02
03
04
05
06
07
08
Get organised
Page 62

PC Sync
Backing up and restoring your
phone’s information
1 Connect your phone to your PC as
outlined above.
2 Click on the Backup icon, and
select Backup or Restore.
3 Mark the contents you would
like to back up or restore. Select
the location you would like to
backup information to, or restore
information from. Click OK.
4 Your information will be backed up.
Viewing your phone fi les on
your PC
1 Connect your phone to your PC as
outlined above.
2 Click on the Contacts icon. Your
PC will now import and display all
contacts saved to your USIM card
and handset.
Get organised
3 All of the documents, Flash
contents, images, sounds and
videos you have saved onto your
phone will be displayed on the
LG KB775 | User Guide
screen in the LG Phone folder.
TIP! Viewing the contents of your
phone on your PC helps you to
arrange fi
les, organise documents
and remove contents you no
longer need.
Synchronising your contacts
1 Connect your phone to your PC.
2 Click on the Contacts icon.
3 Select To Phone. Your PC will
export your chages to your handset.
4 Click on File and select Save. Y
can now select where you would
like to save your contacts to.
Note: To backup contacts saved to
your USIM card, click on the SIM
card folder on the left side of your PC
screen. Right-click your contact then
Select All. Right-click your contact
again and select Copy to Phone
Memory. Now click on the Handset
folder on the left of your screen and
all your numbers will be displayed.
ou
Page 63

Synchronising your messages
1 Connect your phone to your PC.
2 Click on the Messages icon.
3 All of your phone messages will be
displayed in folders on your screen.
4 Use the tool bar at the top of
your screen to edit and rearrange
messages.
Using your phone as a mass
storage device
Your phone can only be used as a
mass storage device if you have a
memory card inserted.
1 Disconnect your phone from your
PC.
2 From the standby screen select
, then touch
and choose
Phone settings.
3 Select Connectivity,
then USB
connection mode.
4 Select Mass storage and touch
select.
5 Connect your phone to your PC.
Y
our phone will read: Connecting
as Mass Storage… followed by
Connected as Mass Storage
Mode. Do not disconnect during
transfer.
6 All of your phone fi les will
automatically be stored on to your
PC hard drive.
Note: Mass Storage backs up
content saved on your memor
only, not your handset memory. To
transfer the content of your handset
memory (e.g. contacts) you’ll need to
synchronise using PC Sync.
y card
01
02
03
04
05
06
07
08
Get organised
Page 64

Music Sync
Adding Music to Your Handset
Before You Get Started
To transfer music from your PC
to your device, you will need the
following:
• Microsoft Windows XP or Vista.
• Windows Media Player 10 or above
• USB cable
• MicroSD card (If you wish to use
external memory as the music
storage.)
Transferring music using
Windows Media Player
1 From the idle screen select
then touch
settings.
2 Select Connectivity,
USB connection mode and
choose Music sync.
3 Connect your handset and your PC
Get organised
using a compatible USB cable.
LG KB775 | User Guide
and choose Phone
then select
4 When you try to connect handset
on your PC,
read: Music Sync... followed by
“Disconnect cable to stop Music
Sync.”
5 On the PC, you will be prompted
to launch your preferred music
management software.
6 Select the Window Media Player.
7 Go to the Sync Tab, then drag and
drop the music you wish to transfer
to your handset into the
pane.
8 Click on ‘Start Sync’ button. This
,
step begins the transfer process.
Warning: Do not disconnect phone
while the transfer is in progress.
Note: Music Sync is available for only
music contents.
your handset will
‘Sync List’
Page 65

Settings
Within this folder you can adapt your
settings to make your KB775
personal to you.
Note: For information on call settings
see page 22.
Changing your screen settings
1 Touch then choose .
2 Touch Screen and then choose
from:
Screen theme - Choose the
theme for your Home screen,
Outgoing call, Start-up and Shut
down.
Clock & calendar - Choose how
these are displayed on the screen.
Backlight - Choose how long the
backlight and keypad remains on
for.
Brightness - Adjust the screen’s
brightness.
Handset theme - Quickly change
the whole look of your screen.
Font - Adjust the font colour.
3 Touch Save to save your settings.
Personalising your profi les
You can quickly change your profi le
on the standby screen. Simply touch
the currently active profi le icon at the
top of your screen.
Using the settings menu you can
personalise each profi le setting.
1 Press
and then choose .
2 Touch Profi les and then choose
the profi le you want to edit.
3 Touch
and choose Edit.
4 You can then change all of the
sounds and alert options available
in the list,
including your Ringtone
and Volume, Message alerts
settings and more.
01
02
03
04
05
06
07
08
Settings
Page 66

Settings
Changing your phone settings
Enjoy the freedom of adapting your
KB775 so that it works in a way
which suits you best.
TIP! To scroll through a list of
options, touch the last item
visible and slide your fi nger up
the screen. The list will move up
so more items are visible.
1 Touch then choose .
2 Touch Phone settings then
choose from the list below.
Date & time - Adjust your date
and time settings or choose to auto
update the time when you travel or
for daylight saving.
Power save - Choose to switch the
factory set power saving settings On
or Off.
Languages - Change the
language of your KB775’s display.
Settings
LG KB775 | User Guide
Auto key lock - Choose when and
how your keypad is locked.
Security - Adjust your security
settings, including PIN codes and
handset lock.
Connectivity - See Changing
your connectivity settings below
for more information.
Touchscreen effect - Change the
touchscreen settings.
Memory manager - See Using
memory manager below for more
information.
Touchpad calibration - Reset
your screen for ease of use.
Reset settings - Reset all the
settings to their factory defi nitions.
Handset information - View
the technical information for your
KB775.
Page 67

Changing your connectivity
settings
Your connectivity settings have
already been set up by your network
operator, so you can enjoy your new
phone from the off. If you want to
change any settings, use this menu.
Touch
then . Touch Phone
settings and select Connectivity.
Network settings - Your KB775
connects automatically to your
preferred network. To change these
settings use this menu.
Internet profi les - You can set and
view Internet profi les.
Access points - Your network
operator has already saved this
information. You can add new access
points using this menu.
USB connection mode - Choose
Mass storage, PC suite and Music
sync. You can activate USB connecton
mode of your phone for serveral
usages.
Server sync - If Sync service is
supported by your network operator,
this service function synchronises
the data in a phone and the data on
a server such as Contacts, Calendar,
Tasks, and Memo via a wireless
network.
Streaming settings - Your network
operator has already saved this
information. You may edit it if you’d
like to make changes.
Using memory manager
Your KB775 has three memories
available: the phone, the USIM Card
and an external memory card (you
may need to purchase the memory
card separately).
You can use memory manager to
determine how each memory is used
and see how much space is available.
Touch
followed by . Select
Phone settings then Memory
manager.
01
02
03
04
05
06
07
08
Settings
Page 68

Settings
Handset common memory - View
the memory available on your
KB775 for Pictures, Sounds, Video,
Flash, MMS, Email, Java applications,
Documents and others.
Handset reserved memory the memory available on your
handset for Text msg on the phone,
Contacts, Calendar, To do list, Memo,
Alarm, Call history, Bookmarks and
Miscellaneous items.
USIM memory - View the memory
available on your USIM Card.
External memory - View the memory
available on your external memory
card (you may need to
memory card separately).
Primary storage settings - Choose
the location you prefer items to be
saved to.
TIP! See page 12 for information
on inserting a memory card.
Settings
LG KB775 | User Guide
purchase the
View
Sending and receiving your
fi les using Bluetooth
Bluetooth is a great way to send and
receive fi les as no wires are needed
and connection is quick and easy.
You can also connect to a Bluetooth
headset to make and receive calls.
To send a fi le:
1 Open the fi le you want to send,
typically this will be a photo, video
or music fi le.
2 Touch
3 Touch Ye
4 Your KB775 will automatically
5 Choose the device you want to
6 Your fi le will be sent.
TIP! Keep an eye on the progress
bar to make sure your fi le is sent.
and choose Send.
Choose Bluetooth.
s to turn Bluetooth on.
search for other Bluetooth enabled
devices within range.
send the fi
le to and touch Send.
Page 69

To receive a fi le:
1 To receive fi les your Bluetooth
must be both On and V
isible.
See Changing your Bluetooth
settings below for more
information.
2 A message will prompt you to
accept the fi
le from the sender.
Touch Yes to receive the fi le.
3 You will see where the fi le has
been saved.
Files will usually be
saved to the relevant folder in My
stuff.
Changing your Bluetooth
settings:
1 Touch
then touch .
2 Choose Bluetooth then Settings.
Make your changes to:
My device visibility - Choose to
be Visible, Visible for 1 min or
Hidden.
My device name - Enter a name
for your LG KB775.
Supported services - You can
view the list of devices such as
headsets and handsfree kits
supported by this Bluetooth
enabled phone.
Remote SIM mode - Choose On
or Off.
My address - Check your
Bluetooth address.
01
02
03
04
05
06
07
08
Settings
Page 70

Settings
Pairing with another Bluetooth
device
By pairing your KB775 and another
device, you can set up a passcode
protected connection. This means
your pairing is more secure.
1 Check your Bluetooth is On and
Visible. You can change your
visibility in the Settings menu.
2 Touch Search new device.
3 Your KB775 will search for devices.
When the search is completed
Refresh and Add will appear on
screen.
4 Choose the device you want to
pair with, touch Add and enter the
passcode then touch OK.
5 Your phone will then connect to the
other device, on which you should
enter the same passcode.
6 You passcode protected Bluetooth
connection is now ready.
Settings
LG KB775 | User Guide
Using a Bluetooth headset
1 Check your Bluetooth is On.
2 Follow the instructions that came
with your headset to place your
headset in pairing mode and pair
your devices.
3 Touch Ye s to Connect now.
TIP! See page 23 for details on
BT answer mode so that you
can control how you answer calls
when your Bluetooth headset is
connected.
 Loading...