

USER GUIDE
ENGLISH
Copyright ©2020 LG Electronics Inc. All rights reserved.
MFL71762001 (1.1) www.lg.com

About this user guide
Thank you for choosing this LG product. Please carefully read this user
guide before using the device for the first time to ensure safe and proper
use.
• Always use genuine LG accessories. The supplied items are designed
only for this device and may not be compatible with other devices.
• Descriptions are based on the device default settings.
• Default apps on the device are subject to updates, and support for
these apps may be withdrawn without prior notice. If you have any
questions about an app provided with the device, please contact the LG
Authorized Service Center. For user-installed apps, please contact the
relevant service provider.
• Modifying the device’s operating system or installing software from
unofficial sources may damage the device and lead to data corruption
or data loss. Such actions will violate your LG license agreement and
void your warranty.
• Some content and illustrations may differ from your device, depending
on the area, service provider, software version, or OS version, and are
subject to change without prior notice.
• Software, audio, wallpaper, images, and other media supplied with
your device are licensed for limited use. If you extract and use these
materials for commercial or other purposes, you may be infringing
copyright laws. As a user, you are fully responsible for the illegal use of
media.
• Additional charges may incur for data services, such as messaging,
uploading, downloading, auto-syncing and location services. To avoid
additional charges, select a data plan suitable to your needs. Contact
your service provider to obtain additional details.
• Failure to follow the instructions in this guide and improper use may
damage the device.
1

Instructional notices
WARNING: Situations that could cause injury to the user and third
CAUTION: Situations that may cause minor injury or damage to the
NOTE: Notices or additional information.
parties.
device.
2

Table of contents
01
Custom-designed
Features
6 Camera features
12 Audio features
13 Google Assistant
15 Fingerprint Recognition
02
Basic Functions
20 Product components and
accessories
21 Parts overview
24 Turning the power on or off
25 Installing the SIM card and
memory card
27 Removing the memory card
27 Battery
29 Touch screen
32 Home screen
40 Screen lock
44 Multi-tasking feature
49 Memory card encryption
50 Taking screenshots
51 Content sharing
53 Do not disturb
03
Useful Apps
55 Installing and uninstalling apps
57 App Shortcuts
58 Phone
62 Messaging
63 Camera
81 Gallery
89 Chrome
89 Google apps
92 Contacts
94 Clock
96 Music
97 Calculator
97 QuickMemo+
101 HD Audio Recorder
3Table of contents

103 Smart cleaning
104 LG Mobile Switch
104 App trash
104 Game Launcher
105 LG Pay
109 SmartWorld
04
Settings
111 Settings
111 Network & internet
119 Connected devices
123 Sound
124 Notifications
124 Display
125 Wallpaper & theme
126 Lock screen & security
127 Privacy
128 Location
129 Extensions
132 Apps
132 Battery
133 Storage
133 Accounts
133 Digital Wellbeing & parental
controls
134 Google
134 System
137 Accessibility
05
Appendix
141 LG Language Settings
141 LG Bridge
142 Phone software update
144 Anti-Theft Guide
145 Open Source Software Notice
Information
145 Regulatory information
(FCC ID number, etc.)
146 Trademarks
147 Laser safety statement
148 More information
150 FAQ
06
For Your Safety
07
LIMITED WARRANTY USA
4Table of contents

01
Custom-designed
Features
Camera features
x1.0
Select flash optionSet camera options
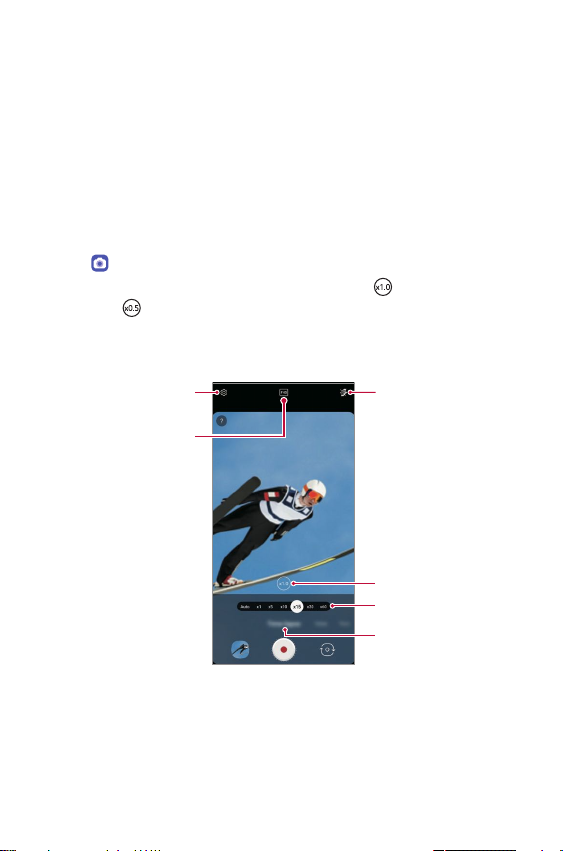
Time-lapse
You can record time-lapse videos optimized for the situation.
Videos can be recorded with optimal speed and steady motion by
analyzing various shooting environments. The time-lapse speed can be
automatically adjusted according to the shooting target and environment.
You can also select the time-lapse speed manually.
Tap and select Time-lapse by swiping camera modes.
1
• Select a zoom from standard angle x1 zoom
.
zoom
• Select a time-lapse speed from Auto / x1 / x5 / x10 / x15 / x30 /
x60.
Select screen ratio
/ wide angle x0.5
Select zoom
Select time-lapse speed
Select Time Lapse
from camera modes
Custom-designed Features 6

Tap to record a video.
2
• You can change a zoom and time-lapse speed while recording.
• To pause the recording, tap
Tap to stop recording.
3
• The recorded video will be saved in Gallery.
• Audio is not recorded during time-lapse recording.
• You can save storage space by setting the Save as HEVC option in
It compresses the video file in HEVC format.
• Other devices may not support video files in HEVC format.
. To resume the recording, tap .
3D AR Sticker
Depth camera on the back of the device allows you to create realistic 3D
AR stickers by recognizing facial contours in greater detail.
Tap and select Sticker by swiping camera modes.
1
Tap on the screen.
2
Swipe the sticker list left or right to select the AR sticker to use.
3
• The face detected by the camera is scanned in 3D.
.
Sticker list
Custom-designed Features 7
Tap to take a photo.
4
• The photo is taken with 3D AR Sticker applied.
• The 3D scanning feature of Depth camera is available only for close-up
portrait shooting.
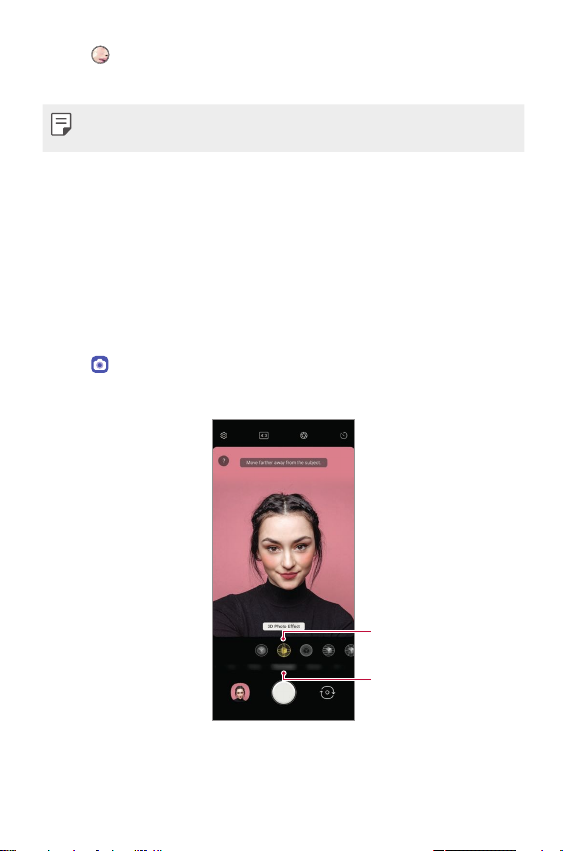
3D Photo Effect
3D Photo Effect allows you to take 3D photos that give a greater sense
of depth to portraits by using the Depth camera on the back of the device.
Photos taken with 3D Photo Effect can be viewed as moving pictures in
the Gallery app.
You can share 3D photos via Facebook, which supports the Google Depth
standard.
Tap and select Portrait by swiping camera modes.
1
Select 3D Photo Effect by swiping effect modes for Portrait.
2
Select 3D Photo Effect
from effect modes
Select Portrait
from camera modes
Custom-designed Features 8

When 3D Photo Effect is available. appears on the screen, tap to
3
take a photo.
• The photo will be saved in Gallery.
•
Select a 3D photo from Gallery or Preview and tap to apply a photo
4
effect.
• Select Save a copy or OK after applying the effect.
• This feature is available only on the rear camera.
appears on the image taken with 3D Photo Effect.
Select a photo effect
Custom-designed Features 9
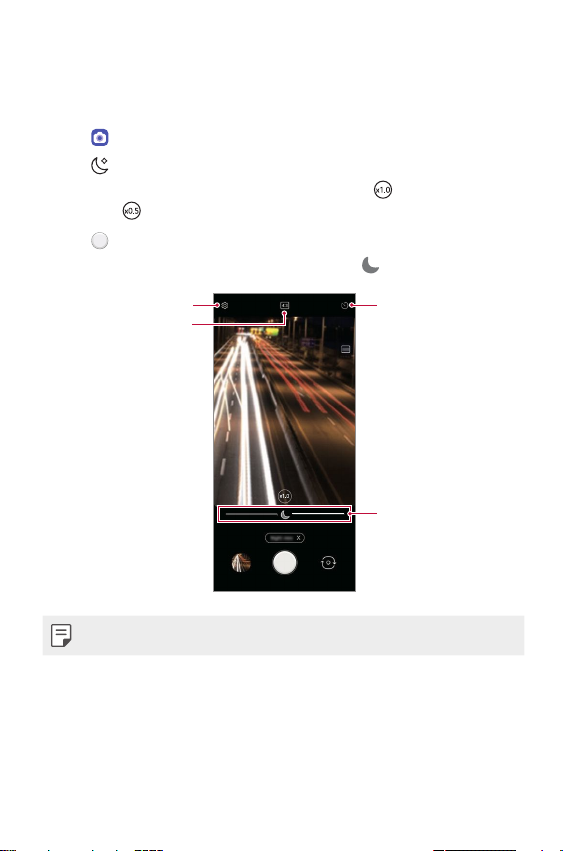
Night view
x1.0
You can take vivid and clear night photos even in low light conditions by
using the Night View feature.
Tap and select More by swiping camera modes.
1
Tap .
2
• Select a zoom from standard angle x1 zoom
.
zoom
Tap to take a photo.
3
• To adjust the brightness of the photo, slide
/ wide angle x0.5
left or right.
Set camera options
Select screen ratio
• Hold the camera steady and firm while taking a photo.
Custom-designed Features 10
Set timer
Adjust brightness
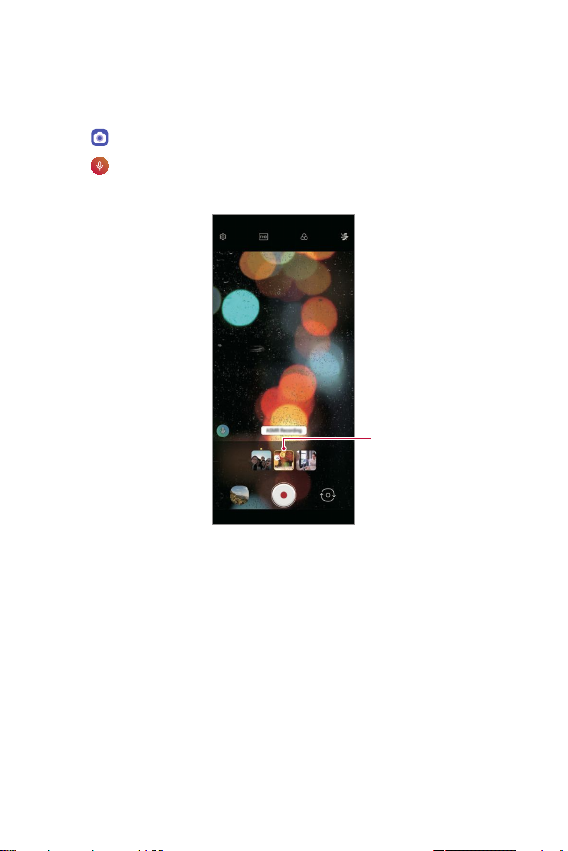
Video recording with specialized audio options
You can record a video using three different voice recording options to suit
your purpose.
Tap and select Video by swiping camera modes.
1
Tap and select Basic, ASMR Recording, or Voice Bokeh by swiping
2
audio options.
Audio options
Basic
You can record a video with standard stereo sound.
ASMR Recording
With four sensitive microphones in the device, you can record an ASMR
video.
Custom-designed Features 11
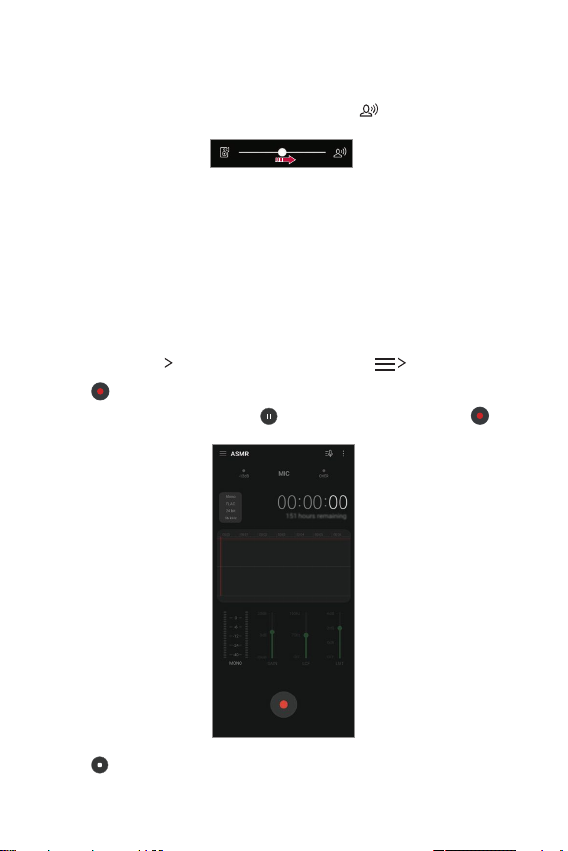
Voice Bokeh
You can emphasize the voice of a subject by reducing ambient noise.
• To reduce ambient noise, drag the slide bar to
.
Audio features
Recording ASMR sounds
This feature allows you to record the audio clearly and precisely by
amplifying the sound from the microphones.
Tap Essentials HD Audio Recorder, then tap ASMR.
1
Tap to start recording.
2
• To pause the recording, tap
. To resume the recording, tap .
Tap to stop recording.
3
Custom-designed Features 12
LG 3D Sound Engine
The 3D surround sound feature allows you to enjoy stereophonic and
immersive sound while playing music or video.
• Tap Essentials
3D Sound Engine and tap
Settings Sound Sound quality and effects LG
to activate it.
• You must connect an external audio device by wire to use this feature,
which does not support wireless devices or Bluetooth
®
devices.
Google Assistant
Google Assistant overview
Your device has the built-in Google Assistant feature. Find answers and
get things done while on-the-go.
• To use this feature, first connect to the network and sign in to your
Google Account.
Sign in
Press the Google Assistant key on the left side of the device.
1
OR
Swipe diagonally from a bottom edge of the screen.
Follow the on-screen instructions.
2
• The device saves your voice data for recognition.
Set whether to use the voice match unlock function.
3
• If you use the voice match unlock function, you can unlock the
device even when the device screen is turned off or the device is
charging by saying “OK Google” or “Hey Google”.
Custom-designed Features 13
• For stronger security, it is advisable to use Pattern, PIN, or Password.
• When a similar voice or your recorded voice is used, the screen may be
unlocked.
• To use this feature, tap Essentials
Secure lock settings Smart Lock, and then use the screen lock
method you set to unlock the device. Tap Voice Match, then tap Unlock
with Voice Match
again. Note that Swipe is excluded.
• You need to unlock the device by using the specified method if you fail
to unlock the device with voice recognition. See
for details.
Tap Save.
4
, then enter the currently used unlock method
Settings Lock screen & security
Setting a screen lock
Accessing by Voice
When the home screen is turned off or locked, say “OK Google” or
1
“Hey Google”.
When the Google Assistant screen appears, say a command or ask a
2
question.
Accessing from Home Screen or Any Other
Screen
Press the Google Assistant key on the left side of the device.
1
OR
Swipe diagonally from a bottom edge of the screen.
Say a command or question when you see on the bottom of the
2
screen.
• Voice recognition accuracy may decrease if you speak with an unclear
voice or in a noisy place. When you use the voice recognition feature,
increase its accuracy by speaking with a clear voice in a quiet place.
Custom-designed Features 14

Fingerprint Recognition
Fingerprint recognition overview
You must register your fingerprint on your device first before using the
fingerprint recognition function.
You can use the fingerprint recognition function in the following cases:
• To unlock the screen.
• To view locked contents in Gallery or QuickMemo+.
• Confirm a purchase by signing in to an app or identifying yourself with
your fingerprint.
• Your fingerprint can be used by the device for user identification. Very
similar fingerprints from different users may be recognized by the
fingerprint sensor as the same fingerprint. For added security, set the
screen lock using a pattern, PIN or Password.
• If the device cannot detect your fingerprint, or you forget the value
specified for registration, contact the LG Authorized Service Center.
Precautions for fingerprint recognition
Fingerprint recognition accuracy may decrease due to a number of
reasons. To maximize the recognition accuracy, check the following before
using the device.
• At the bottom center of the product’s screen, there is a built-in sensor
that recognizes fingerprints. Be careful not to scratch or damage the
fingerprint sensor with metal objects such as coins or keys.
• If you replace the protective film on the product with a polarized film
that diffuses the light or a film that is too thick, it may decrease the
fingerprint recognition rate.
Custom-designed Features 15

• If there are foreign substances (sweat, lotion, water, dirt, grease, etc.)
on the fingerprint sensor or on the finger to be put on the sensor,
fingerprint recognition may not work properly. Wipe the sensor and the
finger clean and remove all moisture before putting the finger on the
sensor.
• If the finger’s surface is rough due to it being scarred or pruney from
water, the sensor may not be able to recognize the fingerprint. In such
a case, register another finger’s fingerprint.
• If you bend your finger or use the fingertip only, your fingerprint may
not be recognized. Make sure that your finger covers the entire surface
of the fingerprint sensor.
• Scan only one finger for each registration. Scanning more than one
finger may affect fingerprint registration and recognition.
• The device may generate static electricity if the surrounding air is dry.
If the surrounding air is dry, avoid scanning fingerprints, or touch a
metallic object such as a coin or a key before scanning fingerprints to
remove static electricity.
Registering fingerprints
You can register and save your fingerprint on the device to use fingerprint
identification.
On the home screen, tap Essentials Settings Lock screen &
1
security
Fingerprints.
• This feature is available only when the screen lock is set.
- Lock the device with a pattern, PIN or password.
• If the screen lock is not set, enable it by following the on-screen
instructions. See
Setting a screen lock
for details.
Custom-designed Features 16
Check the location of the fingerprint sensor on the right side of the
2
device, and lightly place your finger on the sensor.
• Make sure that the finger fully covers the fingerprint sensor.
Follow the on-screen instructions.
3
• Place your finger on the sensor and hold it until you feel a vibration.
• Move the same finger around on the sensor a little by little until the
fingerprint registration is complete.
When the fingerprint registration is done, tap OK.
4
• Tap Add more to register another fingerprint. If you register only
one fingerprint and the corresponding finger is not in a good
condition, the fingerprint recognition may not work well. As a
preventative measure, register multiple fingerprints.
Managing fingerprints
You can edit or delete registered fingerprints.
On the home screen, tap Essentials Settings Lock screen &
1
security
Unlock according to the specified lock method.
2
From the fingerprint list, tap a fingerprint to rename it. To delete it, tap
3
Fingerprints.
.
Custom-designed Features 17

Unlocking the screen with a fingerprint
You can unlock the screen or view locked content by using your
fingerprint.
On the home screen, tap Essentials Settings Lock screen &
1
security
Unlock according to the specified lock method.
2
On the fingerprint settings screen, activate the desired function:
3
• Screen lock: Unlock the screen with a fingerprint.
• Content lock: Access contents you have locked in Gallery and
• Screen unlock when screen is off: Unlock the screen with a
Fingerprints.
QuickMemo+ with a fingerprint.
fingerprint even when the screen is off.
Custom-designed Features 18

02
Basic Functions

Product components and
accessories
The following items are included with your device.
• Device
• USB cable
• Charger
• The items supplied with the device and any available accessories may
vary depending on the area and service provider.
• Do not use unapproved USB cables or chargers with your device. The
LG limited warranty does not cover damage caused by the use of third
party accessories.
• Some of the device parts are made of tempered glass. If you drop your
device on a hard surface or subject it to severe impact, the tempered
glass may be damaged. If this happens, stop using your device
immediately and contact the LG Authorized Service Center.
• If any of these basic items are missing, contact the dealer from which
you purchased your device.
• To purchase additional basic items, contact the LG Authorized Service
Center.
• To purchase optional items, contact the LG Authorized Service Center
for available dealers.
• Some items in the product box are subject to change without notice.
• The appearance and specifications of your device are subject to change
without notice.
• Device specifications may vary depending on the area or service provider.
• Be sure to use authentic accessories provided by LG Electronics. Using
third-party accessories may damage the device or cause malfunctions.
• Remove the protective film from the Fingerprint sensor before using the
fingerprint recognition feature.
• Quick Start Guide
• Ejection pin
Basic Functions 20
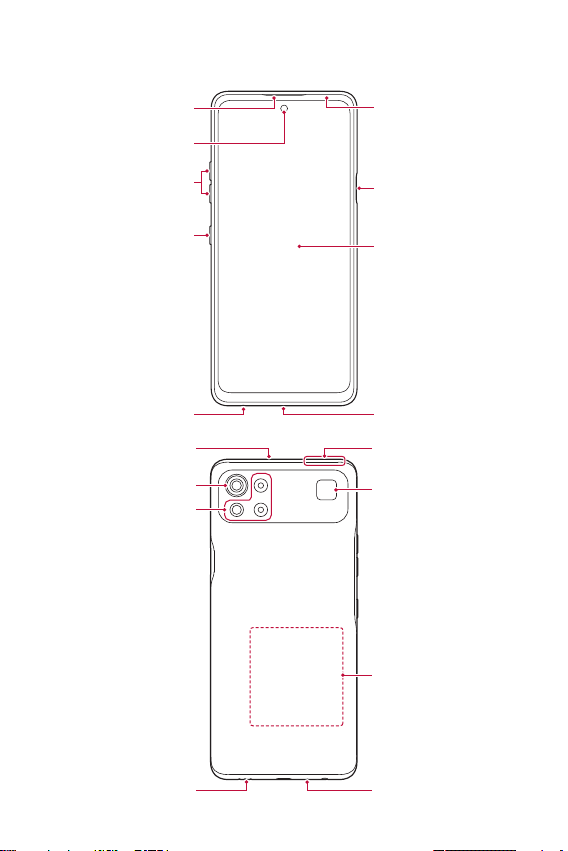
Parts overview
SIM/Memory card trayMicrophone
Earpiece
Front camera lens
Volume keys (+/-)
Google Assistant key
Stereo headset jack Charger/USB cable port
Rear camera lens
Sub camera lenses
Proximity/Ambient light
sensor
Power/Lock key/
Fingerprint sensor
Touch screen
Flash
NFC/LG Pay touchpoint
Speaker
Microphone
Basic Functions 21

• Press and hold the volume down key and Power/Lock key at the same
time for a second to take a screenshot.
Do NOT attempt to remove the back cover.
This device has a non-removable battery. Do not attempt to remove the
back cover. Doing so may severely damage the battery and device, which
could cause overheating, fire, and injury.
• Proximity/Ambient light sensor
- Proximity sensor: During a call, the proximity sensor turns off the
screen and disables touch functionality when the device is in close
proximity to the human body. It turns the screen back on and enables
touch functionality when the device is outside a specific range.
- Ambient light sensor: The ambient light sensor analyzes the ambient
light intensity when the auto-brightness control mode is turned on.
• Volume keys
- Adjust the volume for ringtones, calls or notifications.
- While using Camera, gently press a Volume key to take a photo. To
take continuous photos, press and hold the Volume key.
- Press the Volume Down key twice to launch the Camera app when
the screen is locked or turned off. Press the Volume Up key twice to
launch Screen-off memo.
• Power/Lock key/ Fingerprint sensor
- Briefly press the key when you want to turn off the screen.
- Press and hold the key when you want to select a power control
option.
- Use the fingerpirnt sensor to unlock the screen or access locked
contents. See
Fingerprint recognition overview
for details.
• Google Assistant key
- Activate Google assistant. See
Google Assistant
for details.
Basic Functions 22
• Some functions may be restricted for access, depending on the device
Microphone Do not cover the microphone.
Microphone Do not cover the microphone.
specifications.
• The rear of the device includes a built-in NFC antenna. Be cautious when
handling the device to avoid damaging or covering the NFC antenna.
• Do not put heavy objects on the device or sit on it. Failure to do so may
damage the touch screen.
• Screen-protective film or accessories may interfere with the proximity
sensor.
• If your device is wet or is being used in a humid place, the touch screen
or buttons may not function properly.
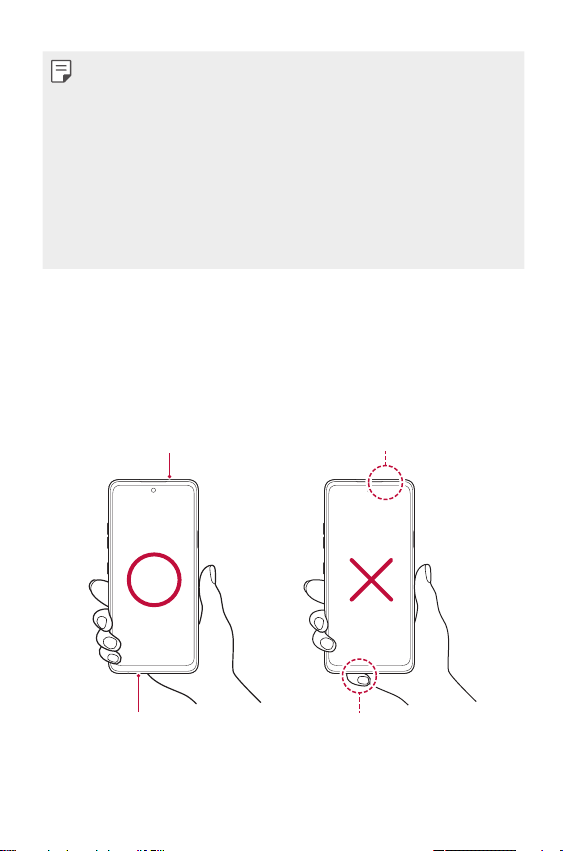
There are two microphones built into this product. Be careful not to cover
the microphones. While you are talking on the phone, do not cover the
microphone with your hand or fingers.
Do not use a phone case that is not a genuine product or cover the
microphone with accessories, tape, etc.
Hold the product correctly as shown in the image when you are using it.
Basic Functions 23

Turning the power on or off
Turning the power on
When the power is turned off, press and hold the Power/Lock key.
• When the device is turned on for the first time, initial configuration
takes place. The first booting time for the smart phone may be longer
than usual.
Turning the power off
Press and hold the Power/Lock key, then select Power off.
Restarting the device
When the device is not working properly or does not respond, restart it by
following the instructions below.
Press and hold the Power/Lock key and the Volume Down key at the
1
same time until the power is turned off.
When the device restarts, release the key.
2
Power control options
Press and hold the Power/Lock key, then select an option.
• Power off: Turn the device off.
• Restart: Restart the device.
Basic Functions 24
Installing the SIM card and
memory card
Insert the SIM card from your mobile service provider and the separately
purchased memory card into the device.
• Be careful with the ejection pin since it has a sharp edge.
• In order for the water-resistant and dust-resistant features to work
effectively, the card tray must be inserted correctly.
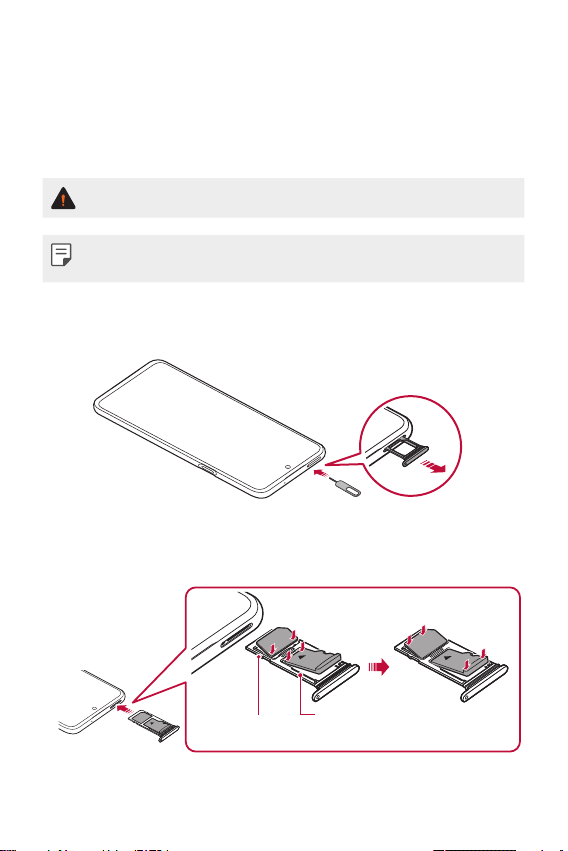
Insert the ejection pin into the hole in the card tray and then pull out
1
the card tray from the device.
Place the SIM card and/or memory card on the card tray and then
2
insert the card tray into the device in the direction of the arrow.
for SIM card
Basic Functions 25
for memory card
(optional-sold separately)
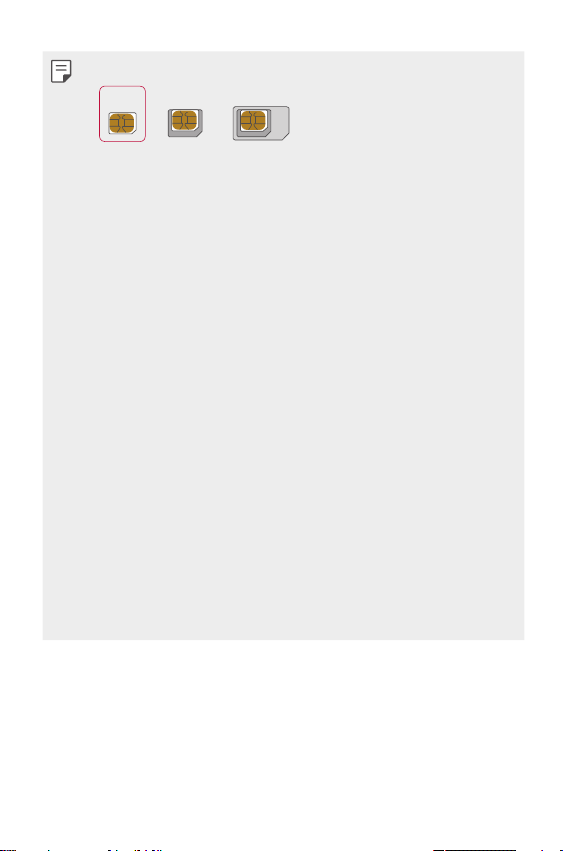
• This device supports only Nano SIM cards.
Nano Micro Standard
• For problem-free performance, it is recommended to use the phone
with the correct type of SIM card. Always use a factory-made SIM card
supplied by the service provider.
• Do not lose your SIM card. LG is not responsible for damage and other
issues caused by loss or transfer of a SIM card.
• Be careful not to damage the SIM card when you insert or remove it.
• When you insert the SIM card or memory card, place it on the card tray
correctly.
• When you insert the card tray back into the device, insert it horizontally
in the direction of arrow as shown in the figure. Make sure that the card
placed on the card tray does not move out of its position.
• Insert the SIM card with the gold-colored contacts facing downwards.
• Be sure to insert the SIM card into the device by following the
instructions in the user manual.
• If you insert to or remove the card tray from the device, be careful not
to let water or other liquids enter into the card tray. If a wet card tray or
card is inserted into the device, your device may get damaged.
• Memory card is an optional item.
• Frequent writing and erasing of data may shorten the memory card
lifespan.
• Some memory cards may not be fully compatible with the device. If you
use an incompatible card, it may damage the device or the memory card,
or corrupt the data stored in it.
Basic Functions 26
Removing the memory card
Unmount the memory card before removing it for safety.
On the home screen, tap Essentials Settings Storage .
1
Insert the ejection pin into the hole in the card tray and then pull out
2
the card tray from the device.
Remove the memory card from the card tray.
3
Insert the card tray back into the slot.
4
• Do not remove the memory card while the device is transferring or
accessing information. This may cause data to be lost or corrupted, or
may damage the memory card or the device. LG is not responsible for
losses that result from the abuse or improper use of memory cards,
including the loss of data.
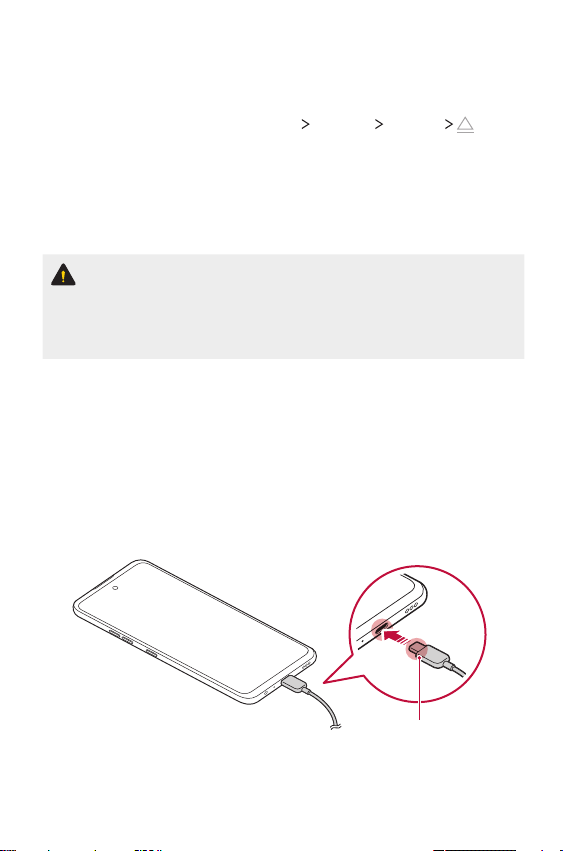
Battery
Charging the battery
Before using the device, fully charge the battery.
Charge the device with the USB Type-C cable.
Charging cable terminal
Basic Functions 27

• Do not charge while the device or charging cable is wet or contains
moisture. This can cause fire, electric shock, injury or damage to device.
If there is moisture, stop using the device immediately and remove the
moisture completely.
• Do not use unapproved USB cables or chargers with your device. The
LG limited warranty does not cover damage caused by the use of third
party accessories.
• Using the device when it is charging may cause electric shock. To use the
device, stop charging it.
• Remove the charger from the power socket after the device is fully
charged. This prevents unnecessary power consumption.
• A charging adapter that supports fast charging is included with the
product. The fast charging feature may not work if a fast charging
adapter other than the genuine adapter provided with the product is
used.
• Another way to charge the battery is by connecting a USB cable
between the device and a desktop or laptop computer. This may take a
longer time than plugging the adapter to a wall outlet.
• Do not charge the battery by using a USB hub that is unable to maintain
the rated voltage. Charging may fail or unintentionally stop.
• Since the battery is a consumable, the battery life may be shortened as
time goes.
Basic Functions 28
Using the battery efficiently
Battery lifespan may decrease if you keep many apps and functions
running simultaneously and continuously.
Cancel background operations to increase battery life.
To minimize battery consumption, follow these tips:
• Turn off the Bluetooth
them.
• Set the screen timeout to as short a time as possible.
• Minimize the screen brightness.
• Set a screen lock when the device is not in use.
• Check the battery level while using any downloaded apps.
®
or Wi-Fi network function when not using
Touch screen
You can familiarize yourself with how to control your device by using
touch screen gestures.
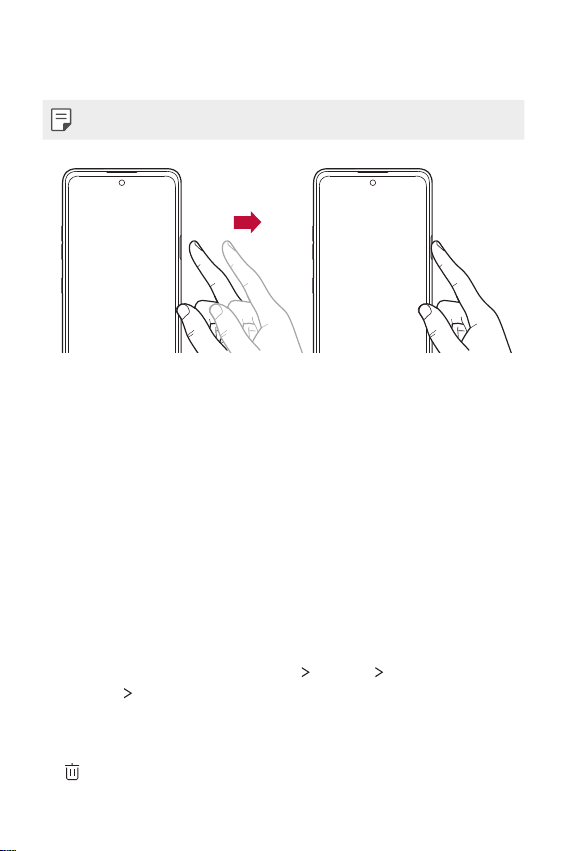
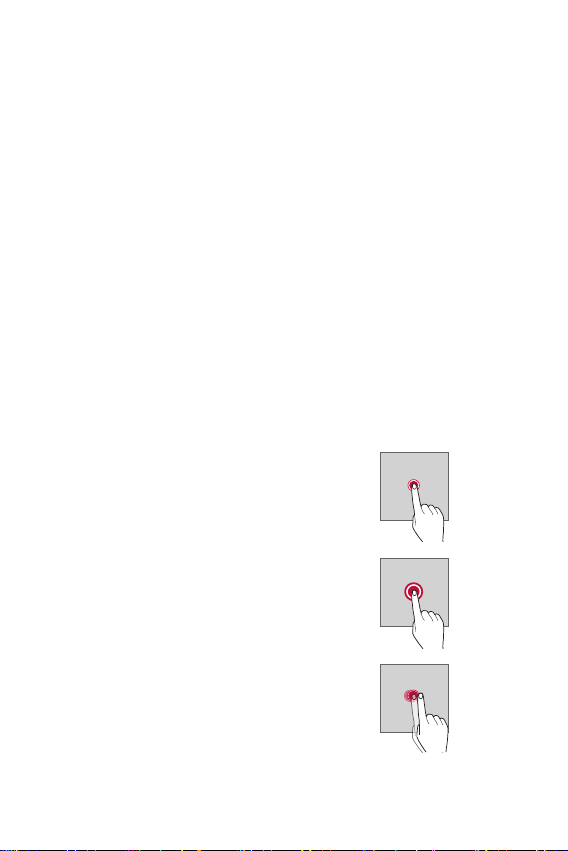
Tapping
Lightly tap with your fingertip to
select or run an app or option.
Touching and holding
Touch and hold for several seconds to
display a menu with available options.
Double-tapping
Tap twice quickly to zoom in or out on
a web page or map.
Basic Functions 29
 Loading...