

LG IPS237W Owner's Manual

www.lg.com
OWNER’S MANUAL
IPS LED MONITOR
IPS237W
Please read this manual carefully before operating
your set and retain it for future reference.
IPS LED MONITOR MODEL
ENGLISH

2
ENG
ENGLISH
TABLE OF CONTENTS
CONTENTS
3 LICENSES
4 KEY FEATURES
4 ADVANCED FEATURES OF LG IP-
S237W WITH LG SmartShare
5 ASSEMBLING AND PREPAR-
ING
5 Unpacking
6 Parts and buttons
7 Setting up the Monitor set
7 - Attaching the Stand Base
8 - Detaching the Stand Base
8 - Mounting on a table
9 - Using the cable holder
11 USING THE MONITOR SET
11 - LG SmartShare
13 - Supported Files for LG SmartShare
14 - Connecting or Disconnecting Wireless
Router
20 - Keyboard and Mouse Connection
21 WIRED CONNECTION
21 - D-SUB connection
21 - HDMI connection
22 - Smartphone (MHL) Connection
24 WIRELESS CONNECTION
24 - Wi-Di Connection
28 - Miracast Connection
32 - Using DLNA
33 SOFTWARE UPDATE
34 CUSTOMIZING SETTINGS
35 Customizing Settings
35 - Menu Settings
36 - PICTURE
37 - COLOR
38 - DISPLAY
39 - OTHERS
40 Wi-Fi Setting
41 FUNC. Setting
41 - VOLUME
41 - TRUE COLOR FINDER
42 - SUPER ENERGY SAVING
43 TROUBLESHOOTING
46 SPECIFICATIONS
47 Preset Modes (Resolution)
47 Indicator
48 PROPER POSTURE
48 Proper posture for using the Monitor set.

3
ENG
ENGLISH
LICENSES
LICENSES
Supported licenses may differ by model. For more information of the licenses, visit www.lg.com.
HDMI, the HDMI logo and High-Definition Multimedia Interface are trademarks
or registered trademarks of HDMI Licensing LLC.
4
ENG
ENGLISH
KEY FEATURES
KEY FEATURES
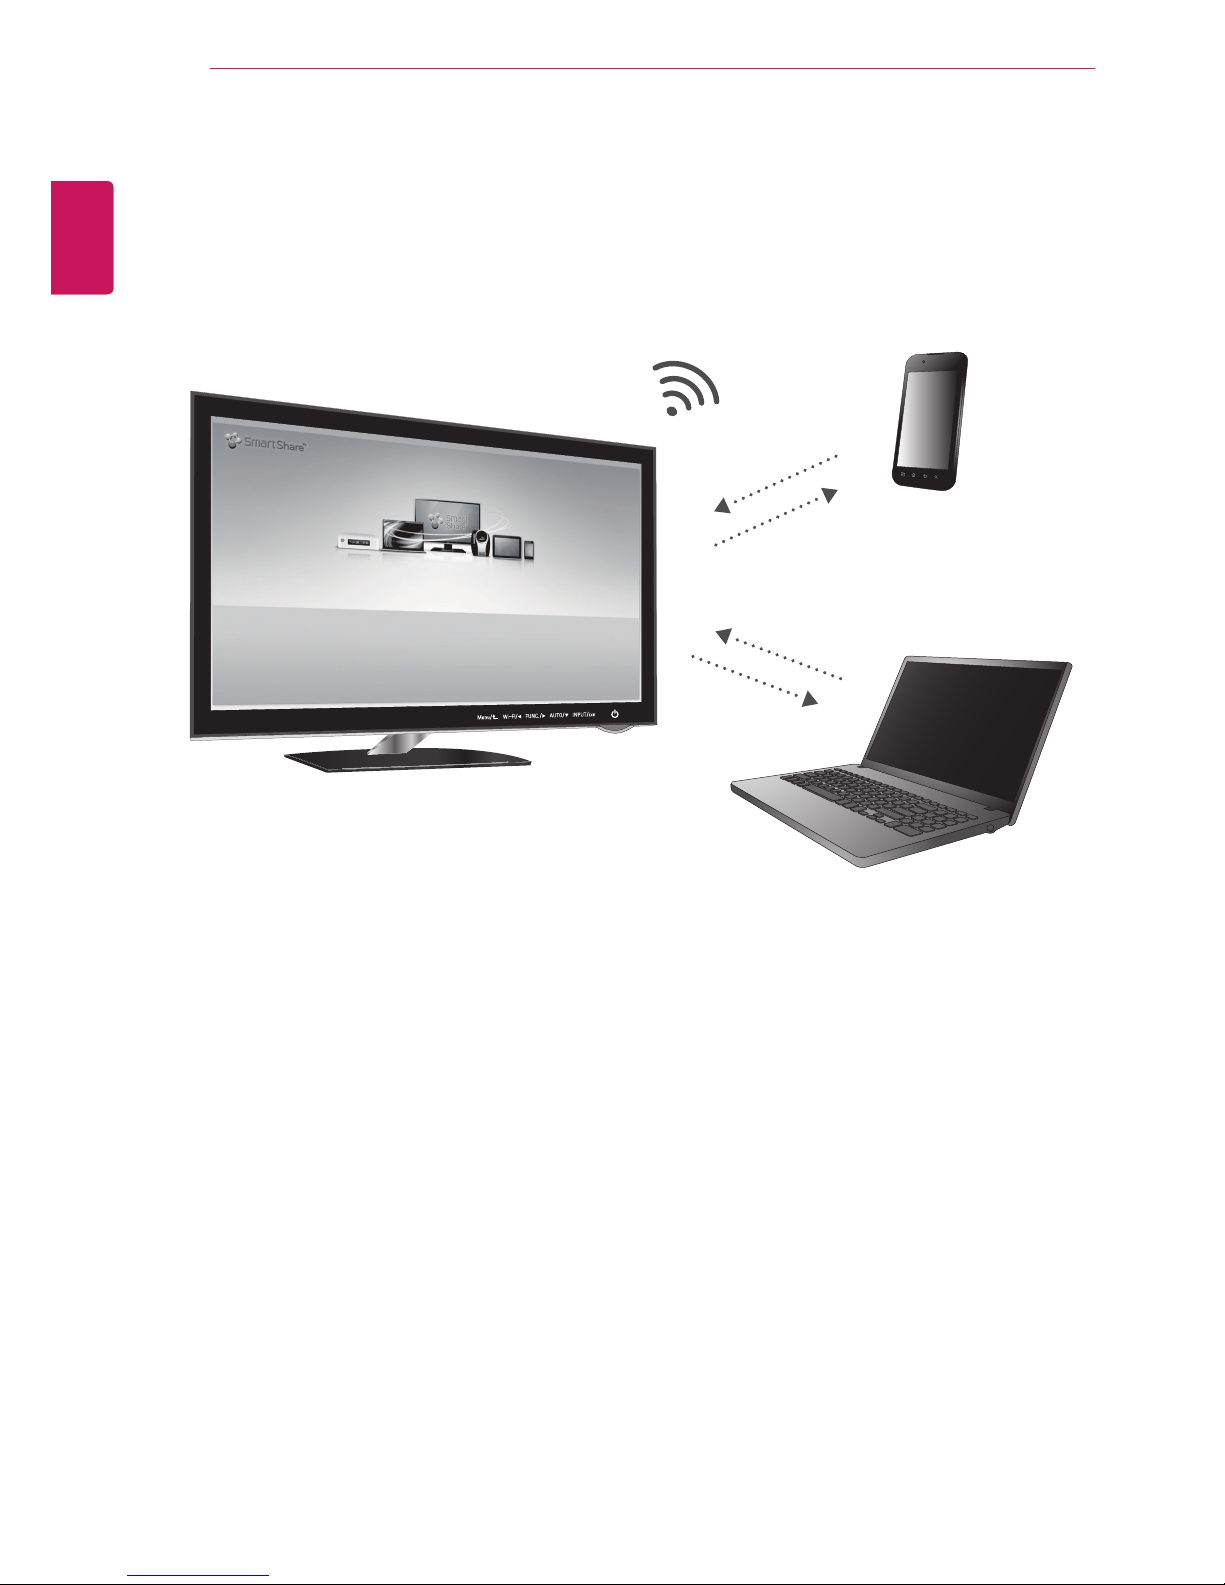
ADVANCED FEATURES OF LG IPS237W WITH LG SmartShare
With the LG SmartShare for LG IPS237W, the user environment of the monitor becomes smart.
y
Miracast function to wirelessly shares the screen of a smartphone or other devices.
y
Wireless Display (Wi-Di) function to display high-definition screen (720p, 1080p) by connecting a
computer to the monitor wirelessly.
y
Digital Living Network Alliance (DLNA) function to play media contents (picture, video, music)
stored in a computer, mobile phone, camera, etc.
y
Mobile High-definition Link (MHL) function to play video and sound from a smartphone on the monitor
by connecting the smartphone to the monitor.
y
Automatic software update simply by connecting to Internet without user interaction.
y
Connect a keyboard and a mouse to the monitor and use with the computer or other wireless devices.
y
Support various DRM technologies, such as HDCP 2.0 and DTCP, for content security.
y
Crystal clear screen at any angle with the IPS panel that gives you 178 degree wide viewing on up/
down/left/right.
y
Full HD widescreen with 1920 x 1080 resolution and 16:9 viewing ratio optimized for video, game,
Internet and paper work.
y
Two HDMI ports to provide easy connection to various devices such as VCR, DVD and PC.
y
Surround speaker to provide live sound.
y
Stylish ultra-slim bezel and touch buttons.
LG_Monitor_C54A 2233
/PU$P OOFDUFE
You c an e njoy co nten ts f rom smar t de vice s di rect ly o n yo ur m onit or s cree n th roug h Sm artS hare fea ture .
Plea se ex ecute Mirac ast, W iDi, D LNA fu nction of y our de vices
that you would like to con nect t o you r moni tor.
Pres s 'Wi -Fi' b utton for s etting s

5
ENG
ENGLISH
ASSEMBLING AND PREPARING
ASSEMBLING AND PREPARING
Unpacking
Check your product box for the following items. If there are any missing accessories, contact the local
dealer where you purchased your product. The illustrations in this manual may differ from the actual product
and accessories.
y
Do not use any unapproved accessories to ensure the safety and product life span.
y
Any damages or injuries by using unapproved accessories are not covered by the warranty.
y
The accessories supplied with your product may vary depending on the model.
y
Product specifications or contents in this manual may be changed without prior notice due to upgrade
of product functions.
CAUTION
NOTE
Stand Body Stand Base
CD(Owner's Manual) /
Card
D-SUB Cable
(This cable is not included in all
countries.)
( Depending on the country ) ( Depending on the country )
Power Cord AC-DC Adapter AC-DC Adapter
or
Two Screws
MHL Cable
(This cable is not included in all
countries.)
or
6
ENG
ENGLISH
ASSEMBLING AND PREPARING
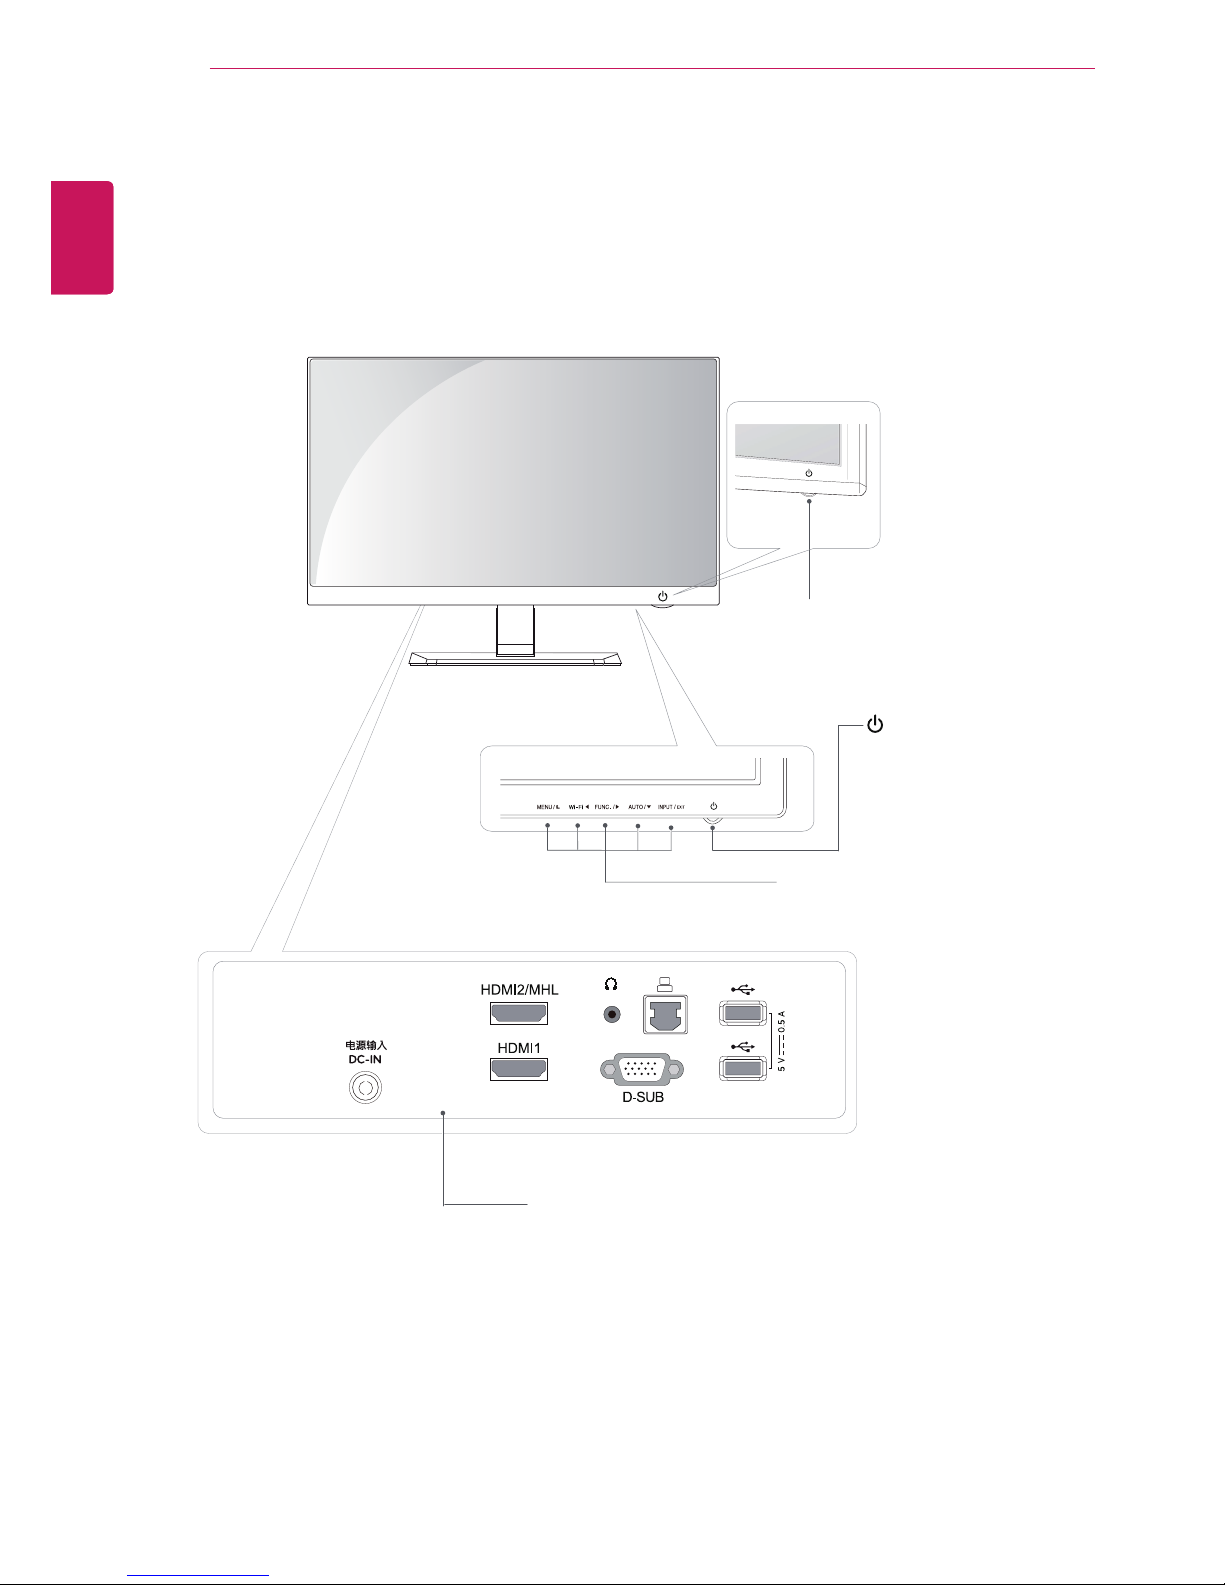
Parts and buttons
Power Indicator
y
Lighting On: Turned on
y
Lighting Off: Turned off
Connection panel (See p.11)
Button (See p.34)
(Power Button)
7
ENG
ENGLISH
ASSEMBLING AND PREPARING
Setting up the Monitor set
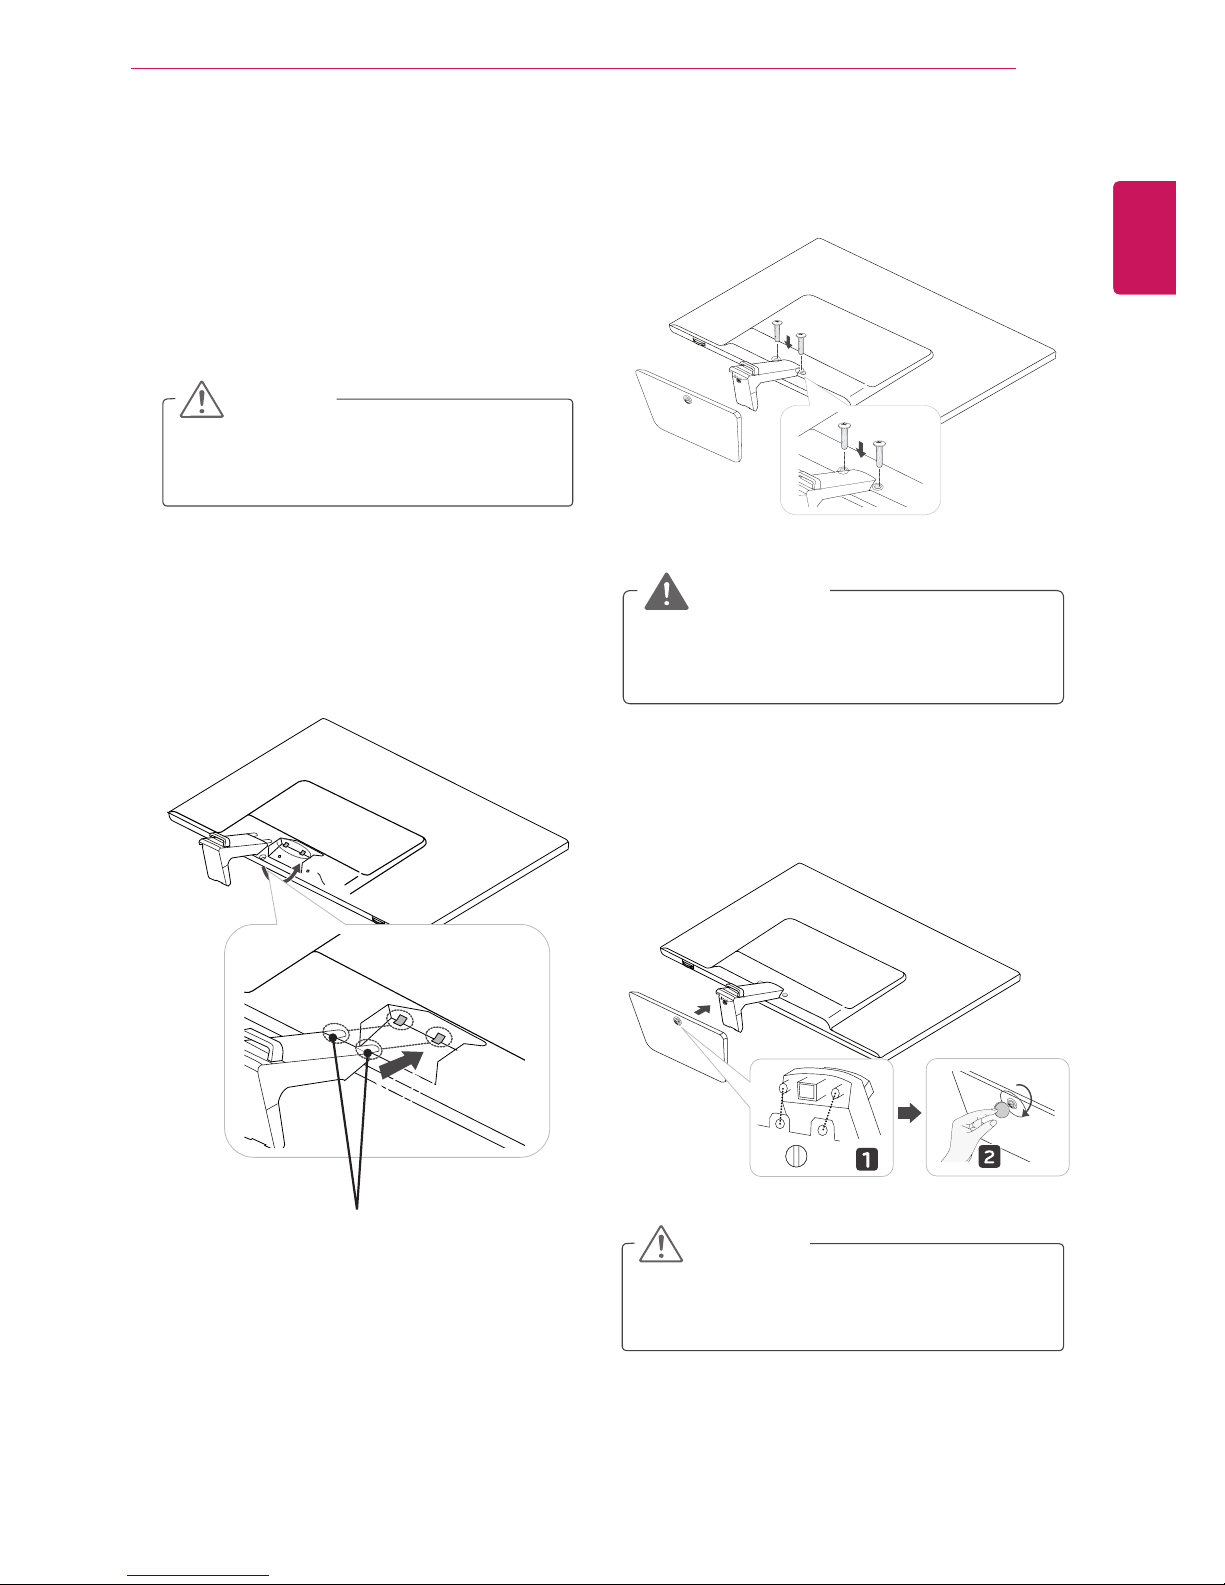
Attaching the Stand Base
1
Place the Monitor set with the screen side
down on a flat and cushioned surface.
Lay a foam mat or soft protective cloth
on the surface to protect the screen from
damage.
CAUTION
2
Attach the
Stand Body
to the monitor.
Insert the two Lockers of the Stand Body right
into the groove of the monitor head and secure
them by pressing the left and right bottom
sides.
Locker
3
Secure the monitor and the
Stand Body
with
the 2 screws.
4
Attach the
Stand Base
from the
Stand Body
by
turning the screw to the right with a
Coin
.
Tighten the screws firmly to prevent the monitor
from tilting forward. Do not over tighten.
CAUTION
If you don`t fasten the screw tightly, monitor
will fall down and get damaged.
WARNING

8
ENG
ENGLISH
ASSEMBLING AND PREPARING
Mounting on a table
1
Lift and tilt the Monitor set into its upright
position on a table.
Leave a 10 cm (minimum) space from the wall
for proper ventilation.
2
Connect the AC-DC Adapter and Power Cord
to a wall outlet.
10 cm
10 cm
10 cm
10 cm
or
2
Turn the screw to the left, and then pull out the
Stand Base
from the
Stand Body
.
Detaching the Stand Base
1
Place the monitor with the screen side down on
a flat and cushioned surface.
3
Remove 2 screws and pull out the
Stand Body
from the monitor.
Connect the power cable at the back of the
monitor to prevent it from being caught in the
stand body.
CAUTION
9
ENG
ENGLISH
ASSEMBLING AND PREPARING
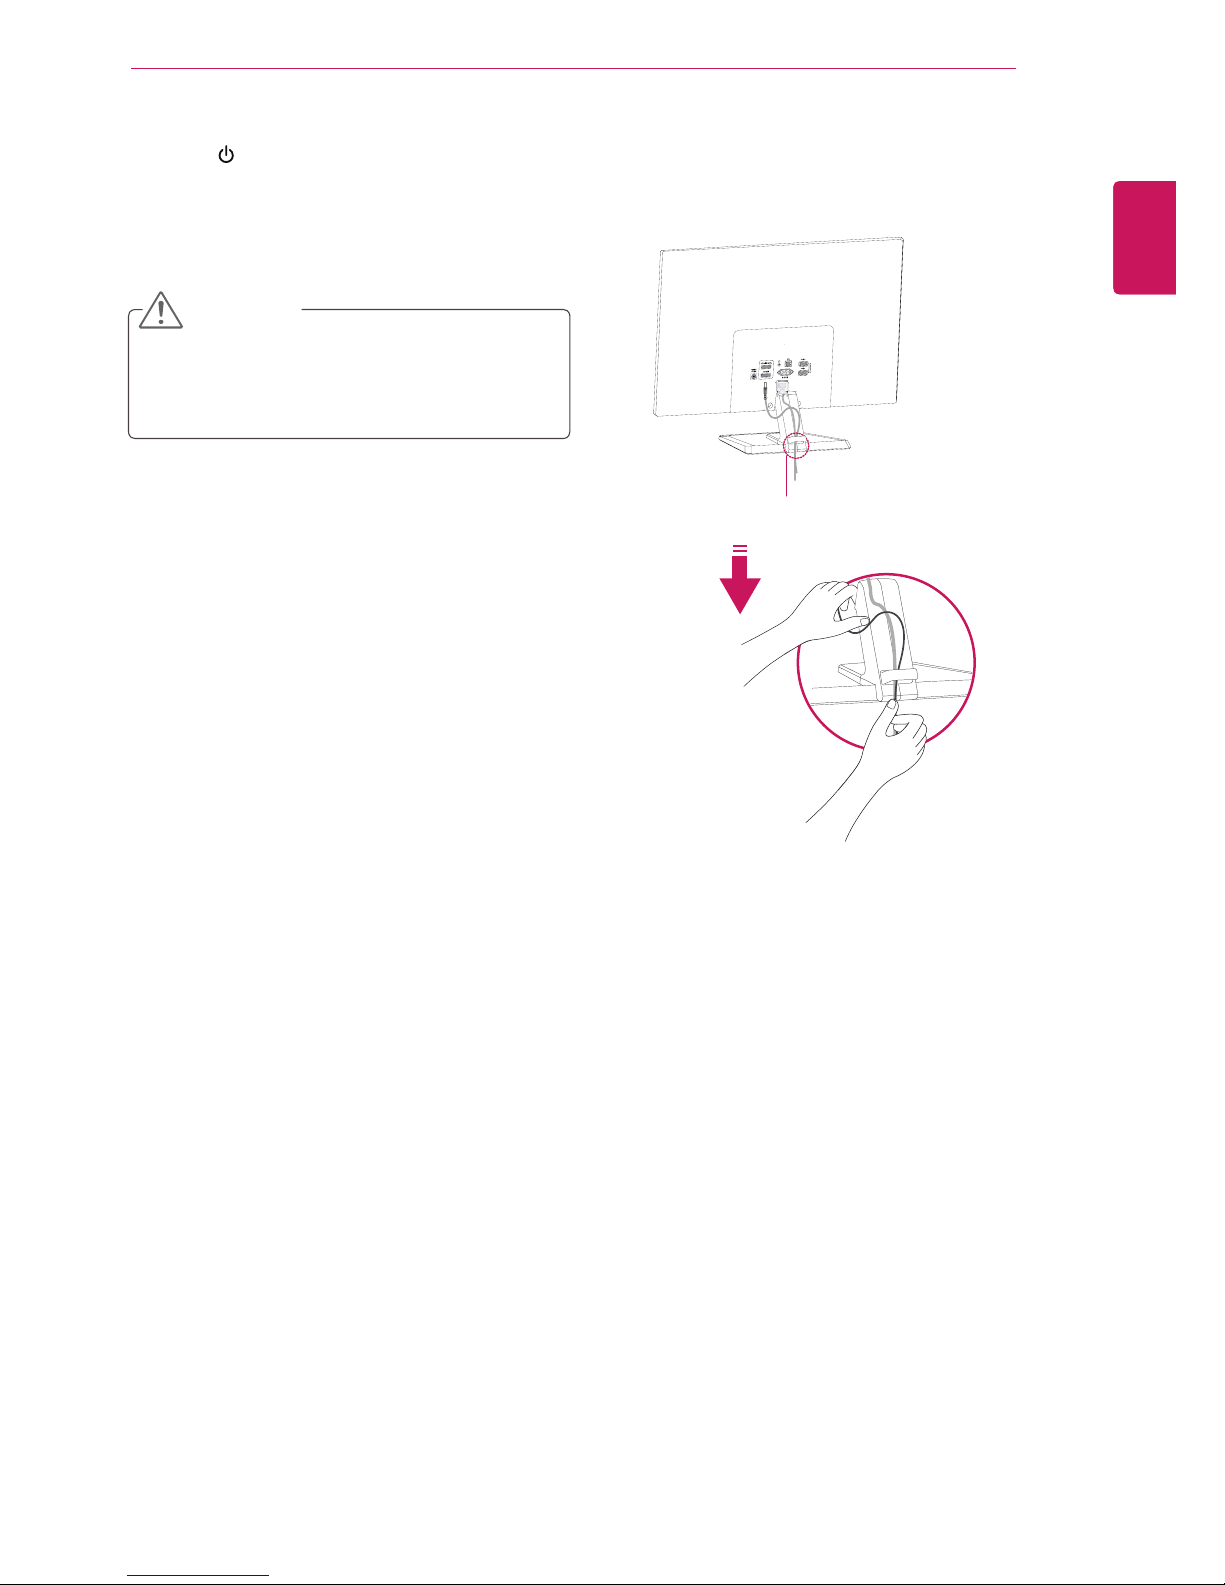
Using the cable holder
3
Press (Power) button on the bottom switch
panel to turn the power on.
Unplug the power cord before moving the
Monitor to another location. Otherwise electric
shock may occur.
CAUTION
Cable holder

10
ENG
ENGLISH
ASSEMBLING AND PREPARING
Using the Kensington security system
The Kensington security system connector is
located at the back of the Monitor set. For more
information of installation and using, refer to the
manual supplied with the Kensington security
system or visit
http://www.kensington.com
.
Connect the Kensington security system cable
between the Monitor set and a table.
The Kensington security system is optional.
You can obtain it from most electronics stores.
NOTE
When you adjust the angle, do not hold the
bottom of the Monitor set frame as shown on
the following illustration, as may injure your
fingers.
Do not touch or press the screen when
adjusting the angle of the monitor.
Do not hold this set like below picture.Monitor
screen can detach from stand base and injure
your body.
WARNING
Tilt from +20 to -5 degrees up or down to adjust
the angle of the Monitor set to suit your view.
NOTE
Front Rear
11
ENG
ENGLISH
USING THE MONITOR SET
USING THE MONITOR SET
LG SmartShare
LG SmartShare is a LG Electronics' unique software that allows users to share media files (video, picture,
music, etc.) of a device connected to a network and use various functions.
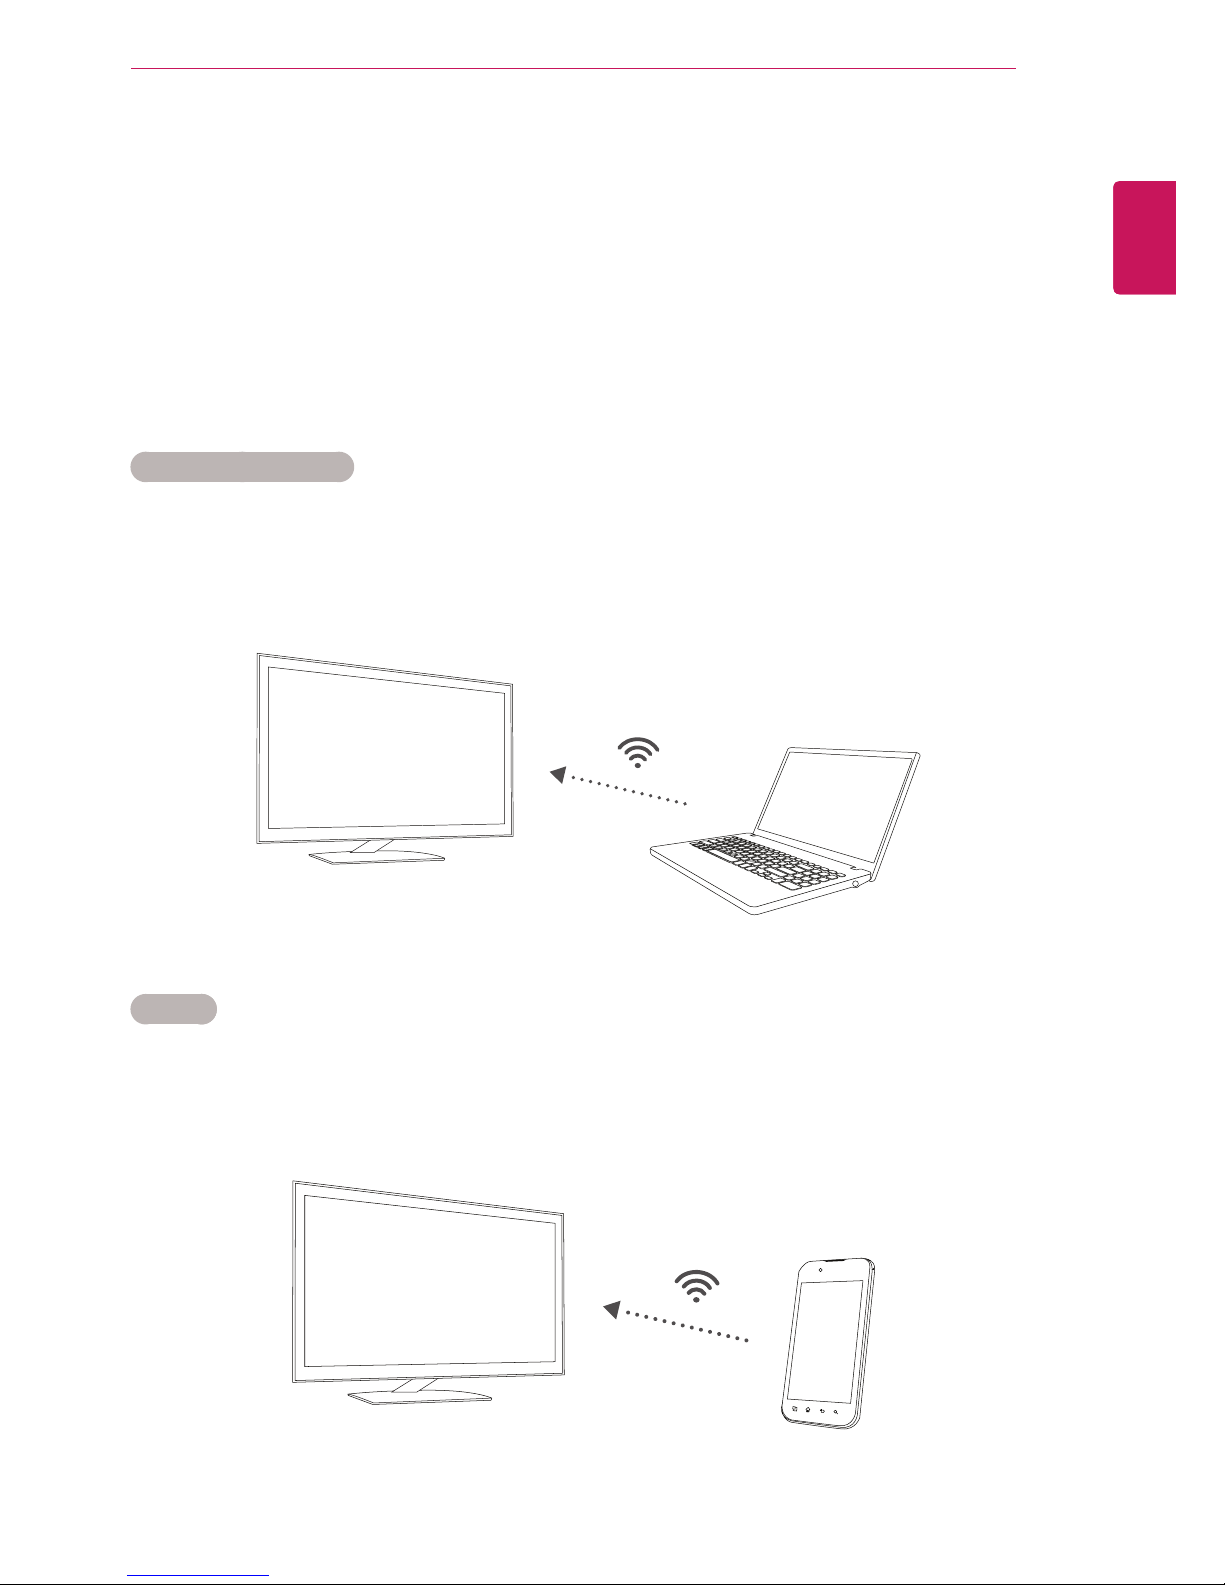
LG SmartShare for LG IPS237W supports the following three wireless connection methods:
LG SmartShare allows a user to wirelessly connect a computer with the Wi-Di technology to the monitor
and transmit a high quality image.
LG SmartShare allows a user to connect a smartphone or other devices with the Miracast technology to the
monitor and display its screen on the monitor.
Wireless Display (Wi-Di)
Miracast

12
ENG
ENGLISH
USING THE MONITOR SET
LG SmartShare allows a user to connect a device with the DLNA technology and the monitor to the same
network and display its media contents (picture, video, music, etc.) on the monitor.
Digital Living Network Alliance (DLNA)

13
ENG
ENGLISH
USING THE MONITOR SET
Supported Files for LG SmartShare
Maximum data transmission rate: 20 Mbps (Mbps stands for Megabit per second)
Maximum supported resolution: 1920 x 1080 at 30p
Video Codec
Supported Music Files
Supported Photo Files
Extension Codec
AVI Video H264, MPEG2, MPEG4, DivX3, DivX4, DivX5, XviD
Audio AC3, PCM, MP2, MP3
MKV Video H264, DivX4, DivX5, Xvid, MPEG2, MPEG4, VC-1 (WMV9)
Audio AAC, AC3, MP2, PCM, MP3
MP4 Video H264, MPEG4, XviD
Audio AC3, MP3, HE-AAC
MOV Video H264, MPEG4
Audio MP3
MPEG Video MPEG1, MPEG2
Audio MP3, MP2, PCM
FLV Video H264, Sorenson
Audio AAC, MP3
File Format Details
AAC all bit rate
AC3 640 kbps
MP2
MP3 320 kbps
DTS
PCM 1536 kbps
File Format Details
JPG N/A
BMP 1920x1080
PNG 1920x1080
14
ENG
ENGLISH
USING THE MONITOR SET
LG_Monitor_C54A 2233
/PU$ POOFD UFE
You c an e njoy con tent s fr om s mart dev ices dir ect ly o n yo ur m onit or s cree n th roug h Sm artS hare fea ture .
Pleas e exe cute M iraca st, Wi Di, D LNA fun ction of yo ur dev ices
that you w ould l ike t o conn ect t o your monit or.
Press 'Wi-F i' bu tton f or set tings
Connecting or Disconnecting Wireless Router
The monitor must be connected to a wireless router to use DLNA.
y
Automatic firmware update is possible only when the monitor is connected to a wireless router that is
connected to the Internet.
y
The network connection may not be working properly depending on Internet Service Provider (ISP).
y
The wireless network may be affected by the interference from a device that uses 2.4 GHz frequency,
such as a wireless telephone, Bluetooth device or microwave. It is also interfered by a device that
uses 5 GHz frequency such as Wi-Fi devices.
y
The wireless network service may run slowly depending on surrounding wireless environment.
y
Some devices may have network traffic jam if any of local home networks is turned on.
y
To connect to a wireless router, a router that supports wireless connection is necessary; the wireless
connection function of the corresponding router must also be activated. Ask the router manufacturer
whether the router supports wireless connection.
y
To connect to a wireless router, verify the SSID and security settings of the wireless router. Please
refer to the user guide of the corresponding router regarding SSID and security settings of the
wireless router.
y
The connection method may vary according to the manufacturer of the wireless router.
y
Adhoc or WPS connection is not supported.
NOTE
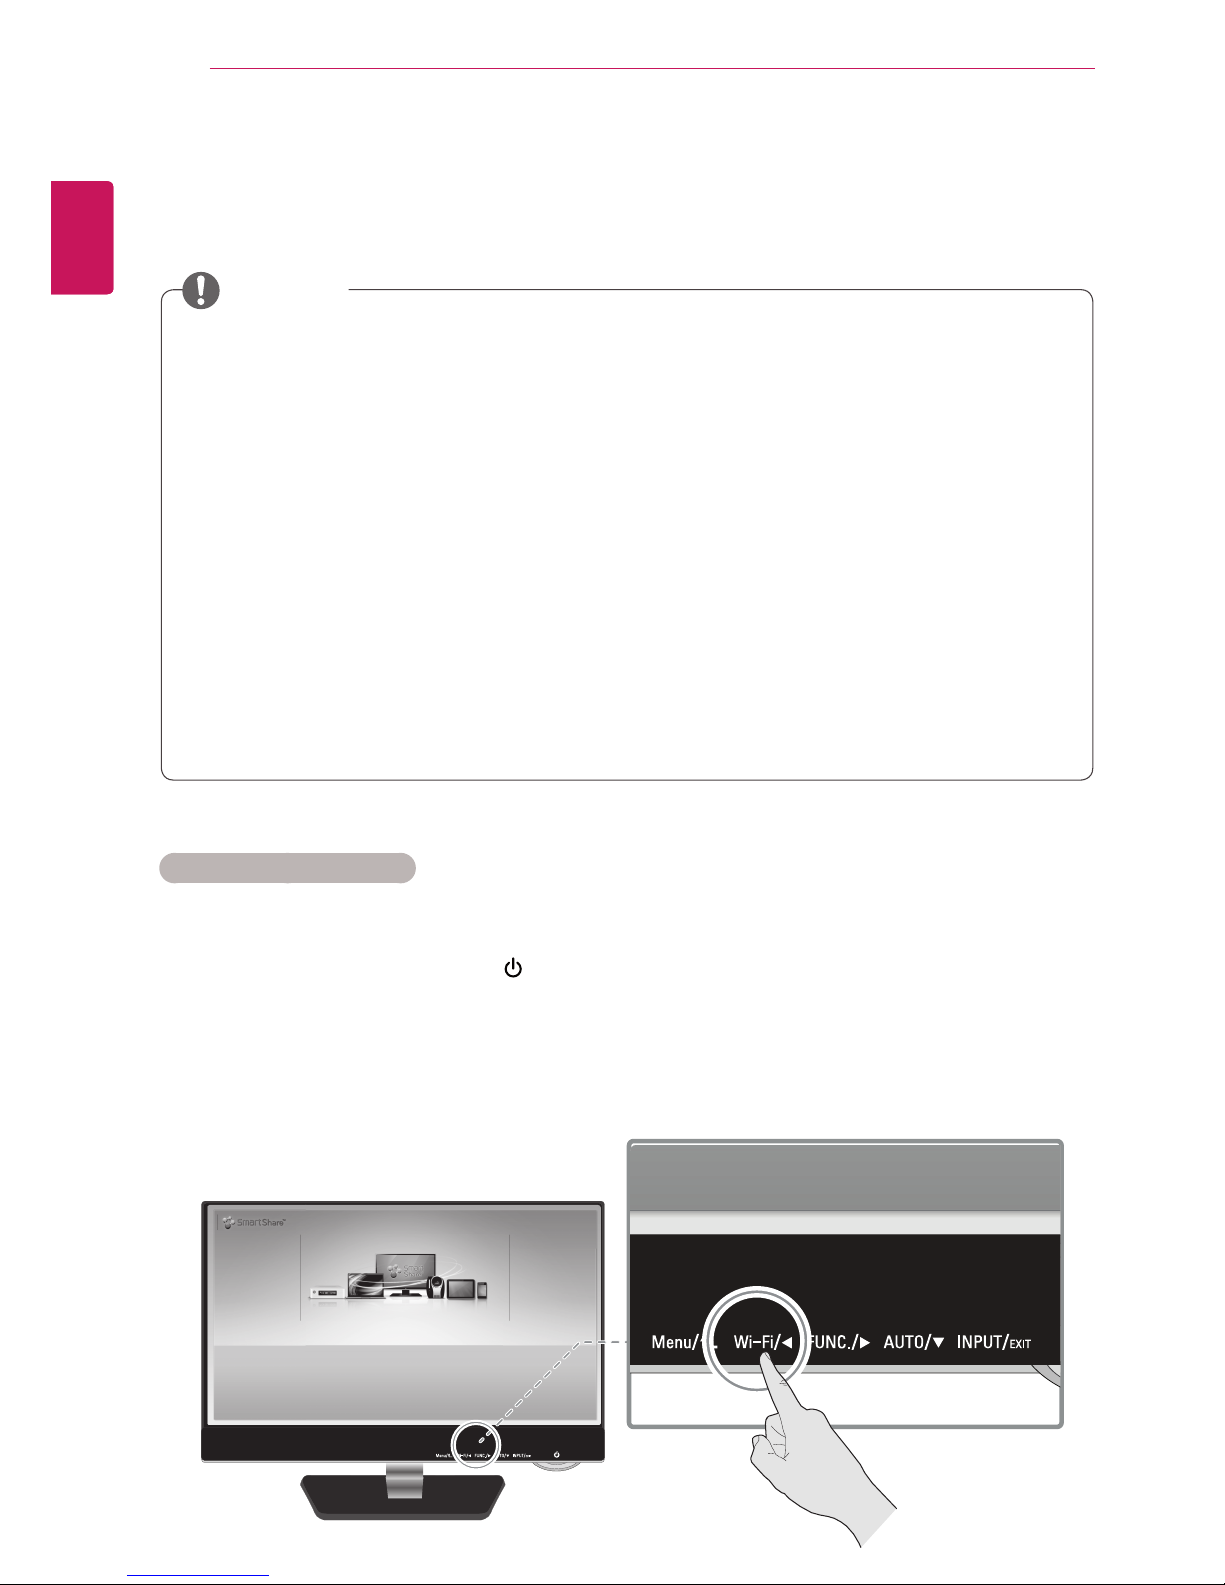
Follow the steps below to connect the monitor to a wireless router.
1
Turn on the monitor by pressing the (power button) of the monitor and press the [Wi-Fi] button to go
to the SmartShare home screen.
2
When the monitor name and ID are all displayed on the SmartShare home screen, press the [Wi-Fi]
button.
Connecting Wireless Router

15
ENG
ENGLISH
USING THE MONITOR SET
Conne ct to you r wir eless net work.
You can enj oy th e con tent from othe r de vices eas ily t hroug h DL NA.
Mirac ast D evic e Sea rch
AP (A ccess Poi nt) S earch
Setti ngs
SELECT EX IT
SEL ECT EXI T
$IPPT FGSPN "1TU PDPO OFDU UPUI FOFU XPSL
4FUUJ OHT "1 "DDF TT1P JOU 4FBSDI 1BHF
$0//&$5 &9*5
"1/BN F "1/BNF "1/BN F"1/BN F" 1/BN F"1/BN F
"1/BN F
"1/BN F
"1/BN F
"1/BN F
"1/BN F
"1/BN F
$0//&$5
&9* 5
3
When the Settings screen appears, select the [AP (Access Point) Search] and press the [Select]
button.
4
When wireless routers are searched and displayed, select a wireless router to use and press the
[Connect] button.
 Loading...