How it Works
Log In / Sign Up
Buy Points
How it Works
FAQ
Contact Us
Questions and Suggestions
Users
LG
Loading...
I
iPECS-50
iPECS-600
iPECS-Micro
ipLDK 100
IPLDK 20
3
ipLDK 300
ipLDK 300e
ipLDK 50
IPLDK CRS
ipLDK NEXER
IPQ10R1N
IPQ13R1N
IPQ18R1N
IPS206T
2
IPS206T-PN
IPS206TX
IPS224T
2
IPS224TA
IPS224T-PN
2
IPS224V
3
IPS224VA
IPS224V-PN
14
IPS225
IPS225P
7
IPS225P-BN
IPS225PX
IPS225T
2
IPS225T-BN
5
IPS225TX
IPS225V
14
IPS225V-BN
10
IPS225V-PN
IPS225VX
IPS226
IPS226T
IPS226TX
IPS226V
14
IPS226V-PN
12
IPS226VX
IPS231B
2
IPS231B-BN
4
IPS231P
18
IPS231P-BN
17
IPS231PX
IPS234T
3
IPS234TA
IPS234T-PN
2
IPS234V
13
IPS234VA
IPS234V-PN
7
IPS235
IPS235G-BN
2
IPS235P
9
IPS235P-BN
8
IPS235PX
IPS235T
4
IPS235T-BN
5
IPS235TX
IPS235V
12
IPS235V-BN
13
IPS235VX
IPS236
2
IPS236G-PN
2
IPS236V
17
IPS236V-PN
14
IPS236VX
IPS237L
3
IPS237L-BN
3
IPS237L-PN
IPS237LY
IPS237W
IPS237WY
IPS277L
4
IPS277L-BN
4
IPS277L-PN
2
IPS277LY
IPS LED MONITOR
10
IPSOLUTE LNP2810 series
IPSOLUTE LNP2810T series
IPSOLUTE LW9422 series
IQ
2
IQA32M46W
IQA36M46W
IQA56M98D
IQA60M98D
IQB27B42W
IQB27FW
IQB32B42W
IQB32B84R
IQB32B86R
IQB36B42W
IQB36B86R
IQB36C95W
IQB42P97G
IQB50M90W
IQB55M90W
IQB56W10G
IQB60M92W
IQB64W
IQB64W10W
Loading...
Loading...
Nothing found
IPS234VA
User Manual
28 pgs
5.17 Mb
0
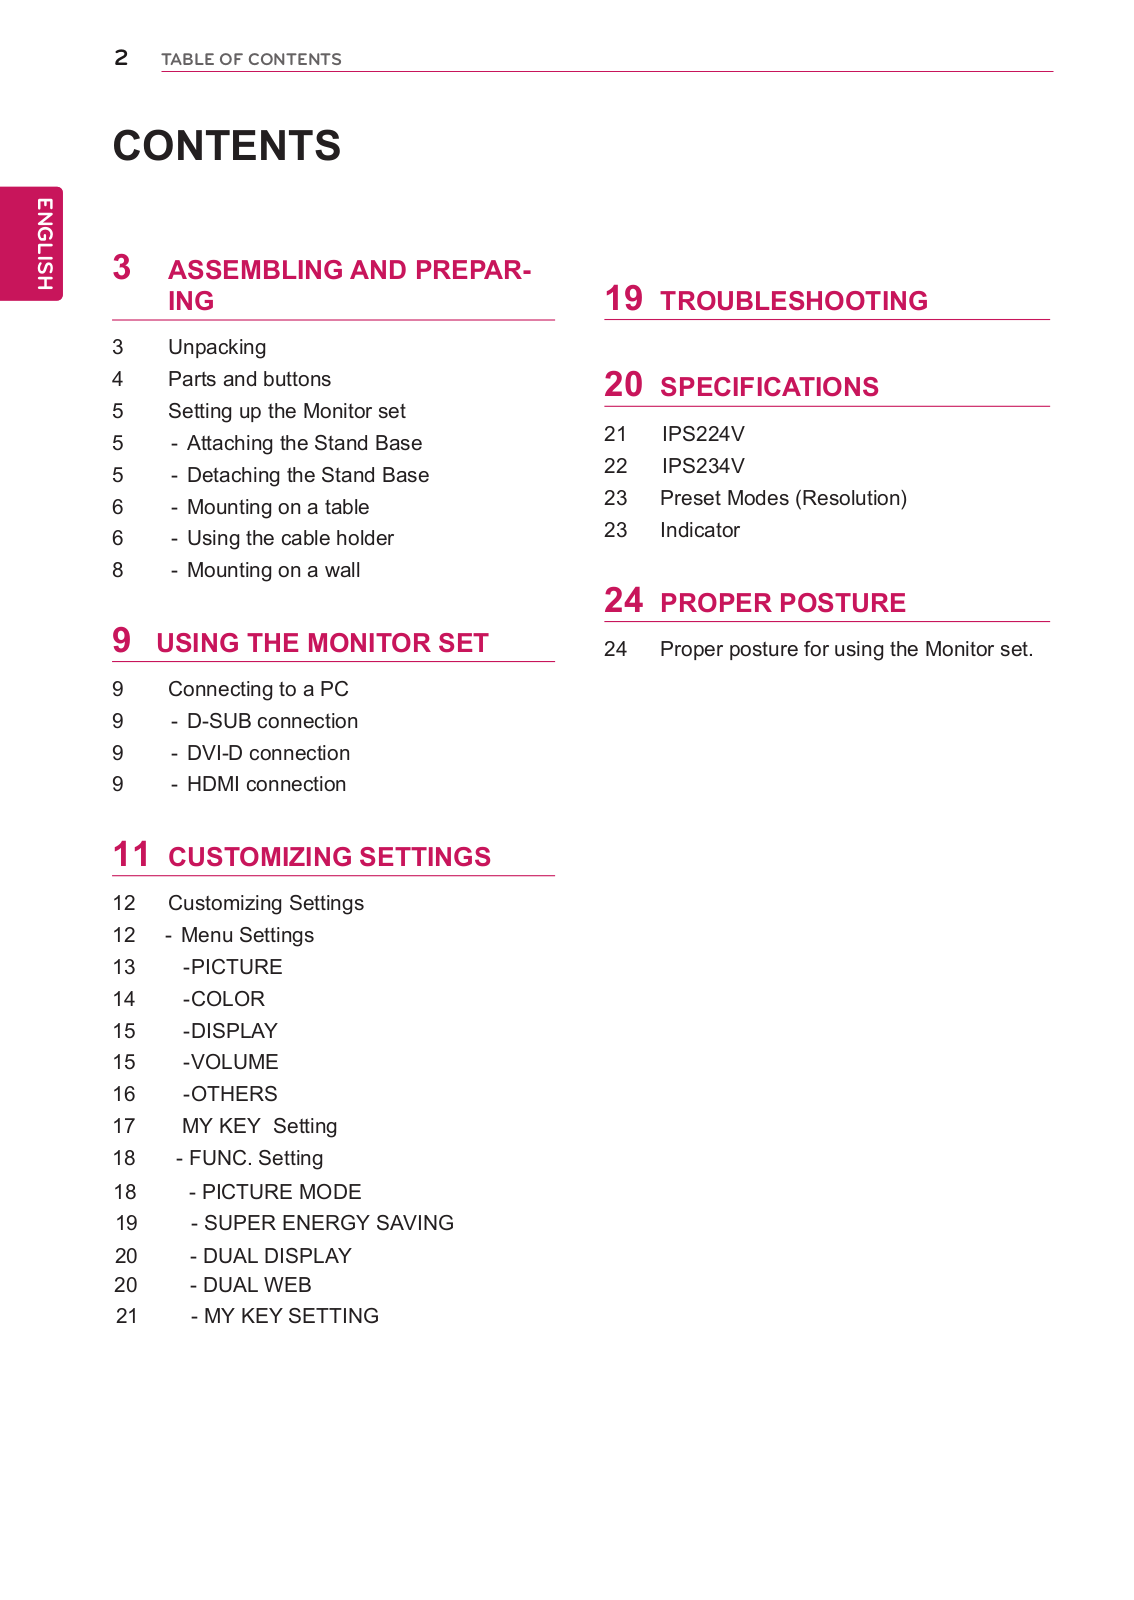
Table of contents
Loading...
LG IPS234VA User Manual
...
LG User Manual
Download
Specifications and Main Features
Frequently Asked Questions
User Manual
Download
Loading...
+
19
hidden pages
Unhide
You need points to download manuals.
1 point = 1 manual.
You can buy points or you can get point for every manual you upload.
Buy points
Upload your manuals
 Loading...