

LG GW600 Users manual

GW 600 User Guide
- English
This document is the user guide for the GW600
Windows Mobile Pocket PC. All rights for this document are reserved by
LG Electronics. Copying, modifying and distributing this document without
the consent of LG Electronics are prohibited.

Part 15.21 statement
" Change or Modifications that are not expressly approved by the manufacturer could void
the user's authority to operate the equipment. “
Part 15.105 statement
This equipment has been tested and found to comply with the limits for a class B digital
device, pursuant to Part 15 of the FCC Rules.
These limits are designed to provide reasonable protection against harmful interference in
a residential installation. This equipment generates uses and can radiate radio frequency
energy and, if not installed and used in accordance with the instructions, may cause harmful
interference to radio communications. However, there is no guarantee that interference will
not occur in a particular installation. if this equipment does cause harmful interference or
television reception, which can be determined by turning the equipment off and on, the user
is encouraged to try to correct the interference by one or more of the following measures:
- Reorient or relocate the receiving antenna.
- Increase the separation between the equipment and receiver.
- Connect the equipment into an outlet on a circuit different from that to
which the receiver is connected.
- Consult the dealer or an experienced radio/TV technician for help.

Part 15 Class B Compliance
This device and its accessories comply with part15 of FCC rules.
Operation is subject to the following two conditions:
(1) This device & its accessories may not cause harmful interference.
(2) This device & its accessories must accept any interference received,
including interference that may cause undesired operation.
Body-worn Operation
This device has been tested for typical body-worn operations
with the distance of 0.79inches (2.0cm) from the user’s body.
To comply with FCC RF exposure requirements, a minimum separation distance
of 0.79inches(2.0cm) must be maintained from the user's body.
Additionally, Belt clips, holsters & other body-worn accessories may not contain
metallic components.

GW600 Features
v
This product’s keys on the LCD screen are touch keys.
v
Be sure to read “Cautions for Touch Keys” before using this product.
Cautions for Touch Keys
1.
Make sure your hands are clean and dry.
v
Remove all moisture from the surface of your hands or the touch keys in a humid environment.
2.
You do not need to press hard on the touch keys to make them work. Do not subject the product to
severe impact, as this may damage the touch key sensors.
3.
Use the tip of your finger to press exactly on the touch key you want, being careful not to touch the keys
for other functions.
4.
When both the home screen and touch key lights are off, pressing a touch key will not turn on the home
screen light. Press and the home screen light will turn back on(touch keys do not work when
the touch key lights are off).
5.
Touch keys may not work normally if a mobile phone case or plastic cover is covering them.
6.
Keep metal and other conductive materials away from the surface of the touch keys, as contact with
them may result in an error.
7.
This phone allows to use a pen or a stylus to select Menu. Also you can use your finger to select Menu.
Use the tip of your finger may not press the key correctly.
8.
Touch key cannot be activated properly in hot and humid environment.
GW600 Features
8

Getting Started
Installing the SIM Card and Battery
1. Installing the SIM card.
Your SIM card contains your phone number, service details and contacts and must be inserted into your
handset. If your SIM card is removed then your handset becomes unusable (except for emergency calls
depending on which Country you are in at the time) until a valid one is inserted. Always disconnect the
charger and other accessories from your handset before inserting and removing your SIM card. Slide the
SIM card into the SIM card holder. Make sure that the SIM card is properly inserted and the gold contact
area on the card is facing downwards. To remove the SIM card, press down lightly and pull it in the
reverse direction.
Note
v
The metal contact of the SIM card can easily be damaged by scratches. Pay special attention to the SIM
card while handling. Follow the instructions supplied with the SIM card.
2. Installing the battery.
Insert the Battery into the battery compartment as the metal contacts meet in the middle of the phone.
Push down the top of the battery until it snaps into place. Place the battery cover to the phone as shown.
Charging the Battery
Before connecting the charger to the phone you must first check the battery is installed.
Getting Started
9

Getting Started
<Charging mode>
1.
When you recharge your phone after device switch off, the phone's LED lights up red and displays a
charging animation.
2.
When the phone is fully charged, the LED lights up green and the animation stops.
3.
When the battery is fully discharged, the LED light is blinked and animation is not displayed.
4.
During LED blinking, you cannot power on the phone to get sufficient power for booting.
5.
As soon as charged power reach 1% (need 1 or 2 minutes), the LED blinking is stoped and charging
animation is displayed. And you can power on the phone.
6.
If you press and hold the power button for approx. 2 seconds in charging mode, the phone is turned on.
CAUTION!
• When you charge a fully discharged battery, it may take over a minute for the display to respond.
This is not a malfunction but completely normal.
(If using a USB cable, it may take over 10 minutes.)
• Do not force the connector as this may damage the phone and/or the charger.
Getting Started
10
• If you use the charger out of your own country, use an attachment plug adaptor for the proper
configuration.
• Do not remove your battery or the SIM card while charging.
• There is risk of explosion if battery is replaced by an incorrect type. Dispose of used batteries
according to the maker's instructions.
WARNNING
• Unplug the charger from the mains and phone during lightning storms to avoid electric shock or fire.
• Make sure that no sharp-edged items such as animal teeth or nails come into contact with the
battery. There is a risk of this causing a fire.
Disconnecting the Charger
Disconnect the travel adapter from the phone as shown in the diagram. Make sure you pull by the plug,
not the cord.
How to Use a MicroSD Memory Card (Optional)
<MicroSD memory card>
<How to insert a microSD memory card>
1.
Lift the plastic cover which protects the microSD slot.
2.
Insert the memory card into the slot with the metal contacts facing down. Do not force the memory
card into the slot, if the card does not slide in easily, please check that the card is being inserted the
correct way or if there is a foreign object in the slot.
3.
Once inserted, push the memory card until you hear a
correctly engaged.
4.
Close the plastic slot protection.
5.
Do not remove the memory card when reading/writing the memory card.
Click
, meaning that the microSD has been
Getting Started
11

Getting Started
Attention:
v
Avoid using the microSD memory card when the battery is low.
v
When writing to the card, wait for the operation to complete before
removing the card.
v
The card is designed to fit easily into the system one way only.
v
Do not bend the card or force it into the slot.
v
Do not insert any memory cards other than microSD.
Supports up to 32GB microSD. For more information on the microSD, please
refer to the memory card instruction manual.
Memory Card Formatting
Before you start to use the memory card you have to format it. A message will pop up after you insert the
memory card notifying you to format the memory card.
Getting Started
12
Note
v
Usually the microSD has already been formatted.
Turn the Device On and Off
To turn on the device, press the button. When you turn on the device for the first time, you are
asked to complete a calibration process. For more information, see “Calibrate the device” on next page.
To turn off the device, press again.

Reset the Device
Occasionally you may need to reset your device. A normal (or soft) reset of your device clears all active
program memory and shuts down all active programs. This can be useful when the device is running
slower than normal, or a program is not performing properly. A soft reset is also necessary after the
installation of some programs. If a soft reset is performed when programs are running, unsaved work will
be lost.
You can also perform a hard reset (also known as a full reset). A hard reset should be performed only if
a normal reset does not solve a system problem. After a hard reset, the device is restored to its default
settings—the way it was when you first purchased it and turned it on. Any programs you installed, data
you entered, and settings you customized on the device will be lost.
To perform a soft reset
• Find out Soft reset key which is small hole at the left side of your device shown enclosed by circles in
the picture below.
Use the stylus to press the reset key and hold it for a while. Your device may shut down. Press the
POWER button, the device restarts and displays the Today screen.
A soft reset of your device clears all active program memory and shuts down all active programs. This
can be useful when your device is running slower than normal, or a program is not performing properly.
A soft reset is also necessary after the installation of some programs. If a soft reset is performed when
programs are running, unsaved work will be lost.
Getting Started
13

Getting Started
To perform a hard reset
• A Hard Reset should only be performed after all other trouble shooting options have been exhausted.
After a hard reset, the device is restored to its default settings - the way it was when you first
purchased it and turned it on. Any programs you installed, data you entered, and settings you
customized on your device will be lost.
1.
Power the device ON
2.
Tap
Start
>
Settings
3.
Enter 1234 for the password twice.
4.
Press Enter.
5.
Select what to reset.
You have to enter your password and confirm again for hard reset. However when you forget your
password, the only way to hard reset the device is via the hard key sequence.
1.
Power the device OFF.
2.
Press and hold the following hard keys in sequence.
+ +
>
System
tab >
Clear Storage
.
Getting Started
14
Keep pressing keys until your LCD screen turns on.
Align screen will appear if you success hard key reset.
Calibrate the Device
Calibrating the device screen involves tapping with the stylus the center of a cross as it moves around the
screen. This process ensures that when you tap the screen with your stylus, the tapped item is activated.
If your device does not accurately respond to screen taps, follow these steps to re-calibrate it:
1.
Tap
Start
>
Settings
2.
On the
Genera
completed, Align screen reappears. Click OK on upper right corner to return to setting mode.
>
l tab, tap
System
tab >
Align Screen
Screen
.
, and follow the instructions on the screen. After calibration is

Manage Screen Settings
The device touch screen has three orientation modes: Portrait, Landscape (right-handed), and Landscape
(left-handed). Portrait mode allows you to get a better view or a better operation of certain programs on
your device, while Landscape mode may be optimal for viewing longer text files.
v
To change the orientation, tap
orientation you want.
If Accelerometer Sensor is turned on (check (
Sensor
of screen display when the orientation for device is changed.
v
To smooth the edges of screen fonts for many programs, on the
System
v
To increase the readability or to see more content on the screen, on the
(tap
), rotation sensor automatically perceive the orientation of your device and decide to direction
tab >
Start
Screen
>
Settings
), select the
>
System
Start
>
Settings
Enable ClearType
tab >
Screen
>
System
LG Menu
), adjust the text size by moving the slider.
tab >
Screen
) >
Settings > Sensor
check box.
>
General
ClearType
Text Size
tab, and select the
>
Accelerometer
tab(tap
Start
tab
>
Settings
>
Getting Started
15

Screen information
The Today Screen
Customising the Today screen
The Today screen displays important information, such as upcoming appointments and status indicators.
You can tap a section on the screen to open the associated program.
v
To access the Today screen, tap
You can select the item you want to appear on the Today screen. To change its position, tap
Move Down
. If you want to customise the further task and appointment information by tapping
(
LG Menu) > Settings > Today > Items
tab.
Move up
Options
or
.
Check the
after the specified length of time has elapsed, the screen switches to the Today screen.
v
To synchronise the Today screen display, including the background image, tap
You can select the desired theme for the background. If you use your own background image, tap the
this picture as the background
Screen information
Today timeout
Settings > Today > Appearance
select the number of hours from the drop down list. If you don't use your phone
and tap
tab.
Browse
to locate the file you want.
(
LG Menu)
>
Use
16

Default MS Today Screen
On the Today screen, you can see important and recent information for the day.
1. Start button:
2. LGdatetime:
3. Phone information:
4. Service provider name:
5. Unread message:
6. Get Xpress Mail:
7. Upcoming Appointments:
8. No new missed calls:
9. IM:
Go to Instant Message program menu.
10. Indicators:
11. Weather:
12. Calendar:
13. Contacts:
Shows the Start menu that you can use directly.
Shows today's date and current time. Tap to select the clock type.
Wireless Manager / Bluetooth phone on or off.
Shows your service provider name.
You can see the unread message from Inbox account.
You can install Xpress Mail application.
You can see the upcoming schedule.
You can see the missed call history.
Connectivity, SIM card, Volume and Battery indicator.
You can check today's weather. Tap to see more detail weather forecast.
Link to Calendar
Link for Contacts list
Screen information
17
Screen information
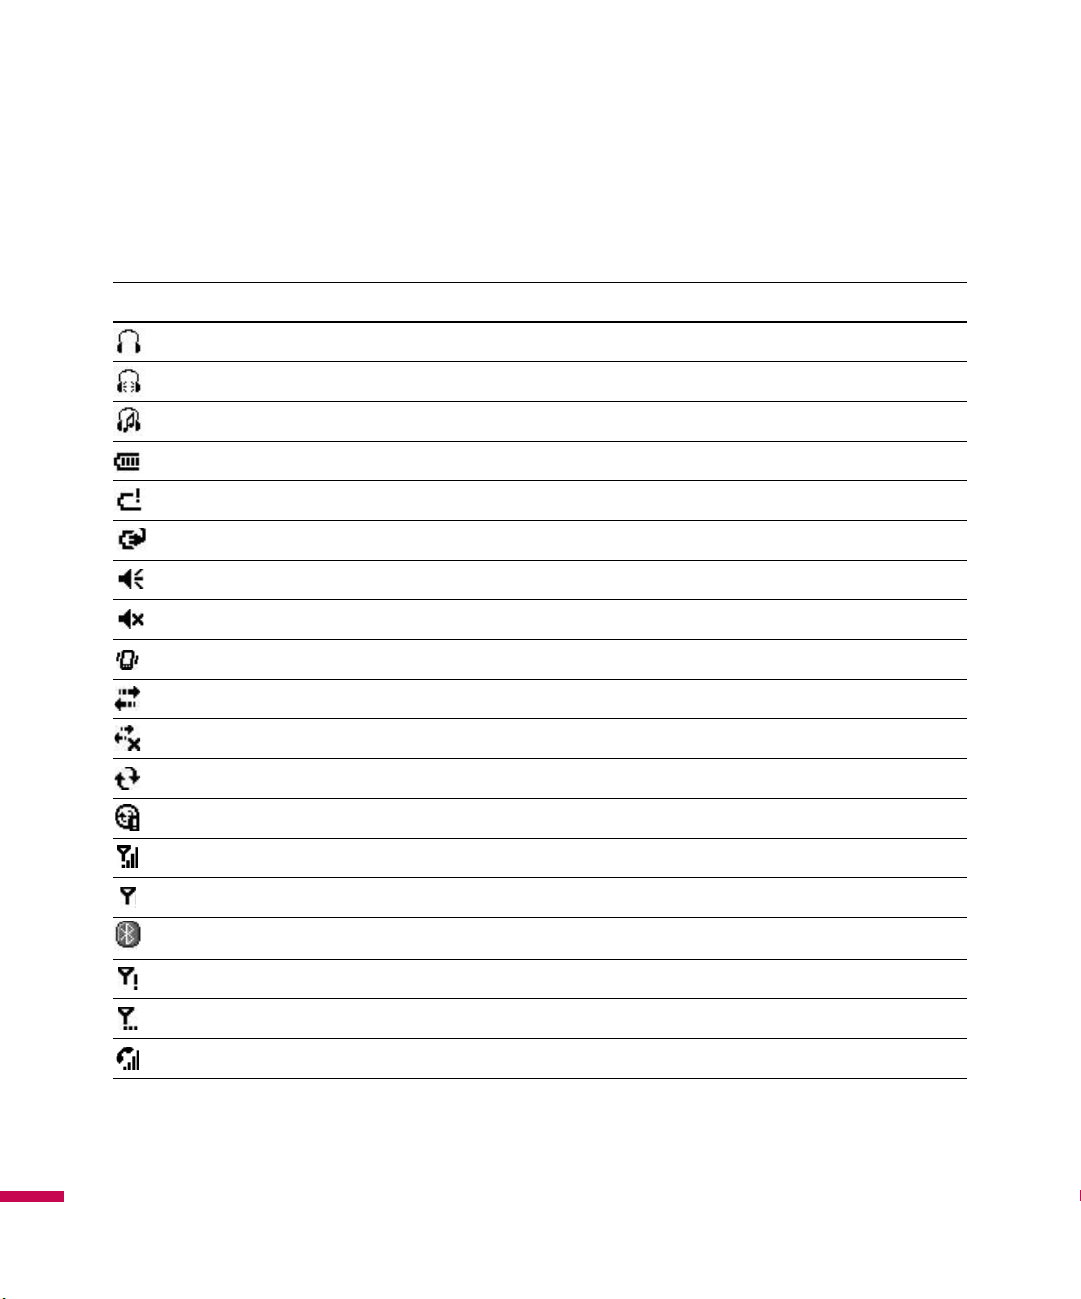
Indicators
Following are some of the status icons that you may see on your device.
Icon Description
Bluetooth Hands-Free connection established
Bluetooth Hands-Free channel opened
Bluetooth High Quality Audio channel opened
Indicates the remained battery power .
Indicates the battery is very low.
Battery charging.
Sound on.
Sound off.
Ringer in vibration mode.
Connection is active.
Connection is not active.
Synchronization in progress.
Synchronization error.
Indicates maximum signal strength.
No signal.
Indecates Bluetooth service.
Screen information
No phone service.
Searching for phone service.
Voice call in progress.
18
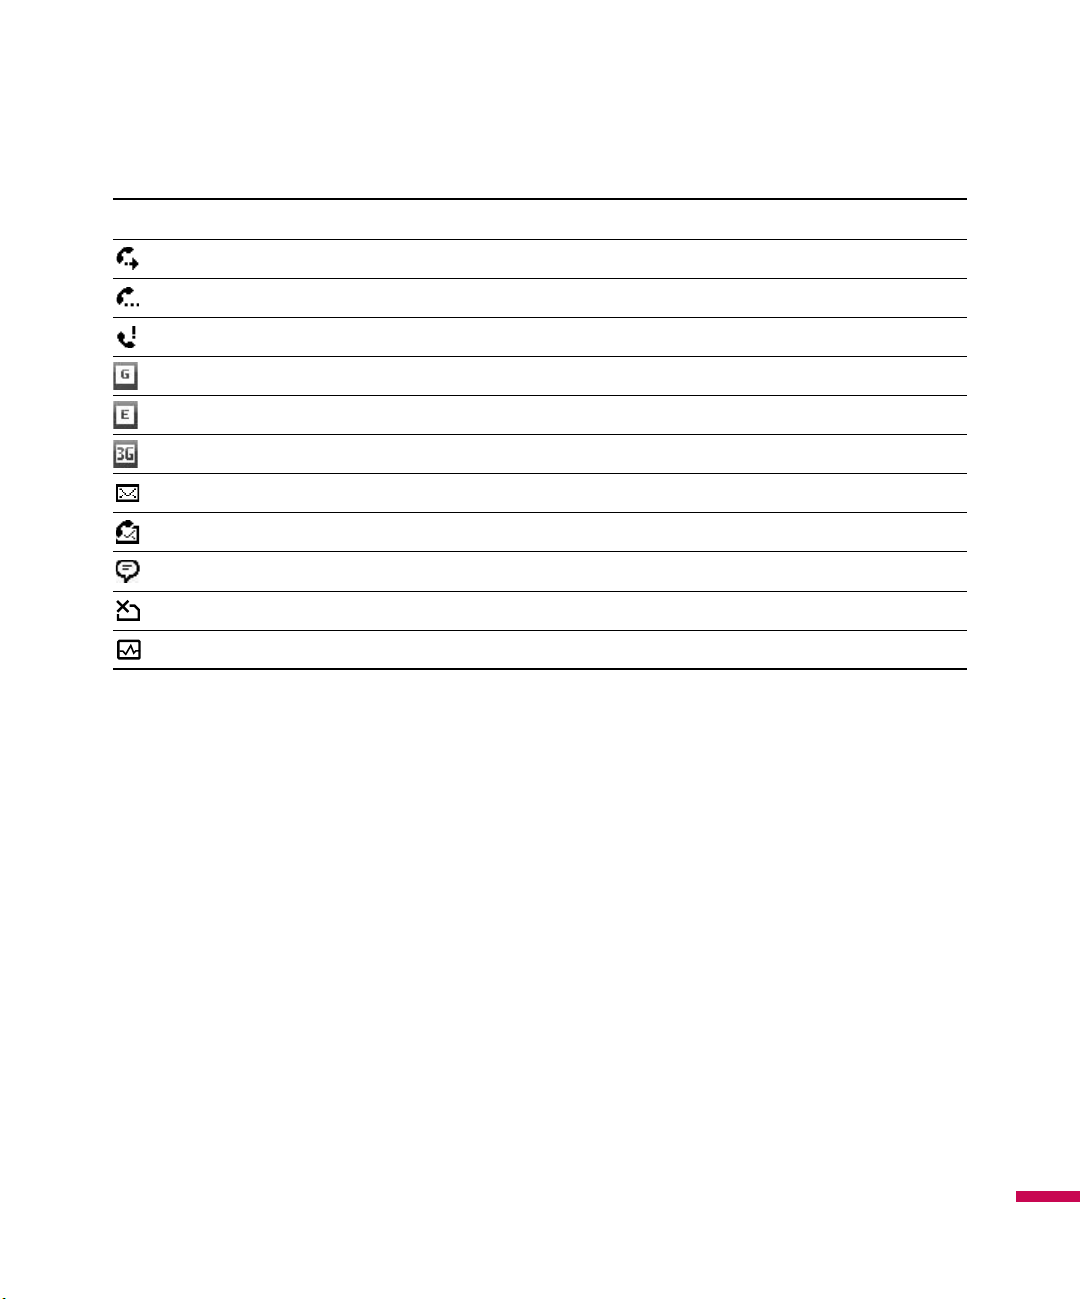
Icon Description
Calls are forwarded.
Call on hold.
Missed call or rejected call.
GPRS (General Packet Radio Services) available
EDGE (Enhanced Data Rates For Global Evolution) available
WCDMA or HSDPA available
New e-mail or text messages.
New voice mail
There are more notifications. Tap the icon to view all.
SIM is not inserted. You can not use Network service without SIM.
Shows the list of running Applications by tapping this indicator.
Using the Start Menu
The Start menu, located at the top left corner of the Today screen, displays a list of programs. It lets you
open a screen and switch from one program to another. You can start a program by scrolling through the
programs list and tap a program.
Editing the Today Screen
1.
Tap to open the Today screen.
2.
Tap to start a program. The items displayed in Start menu can be synchronised by tapping
Settings
3.
Tap to start a recently-used program.
4.
Tap to view and select more programs that are installed in your device.
5.
Tap to change device settings.
6.
Tap to see a Help topic for the current screen.
>
Personal
tab >
Menus
Start
>
.
Screen information
19
Screen information
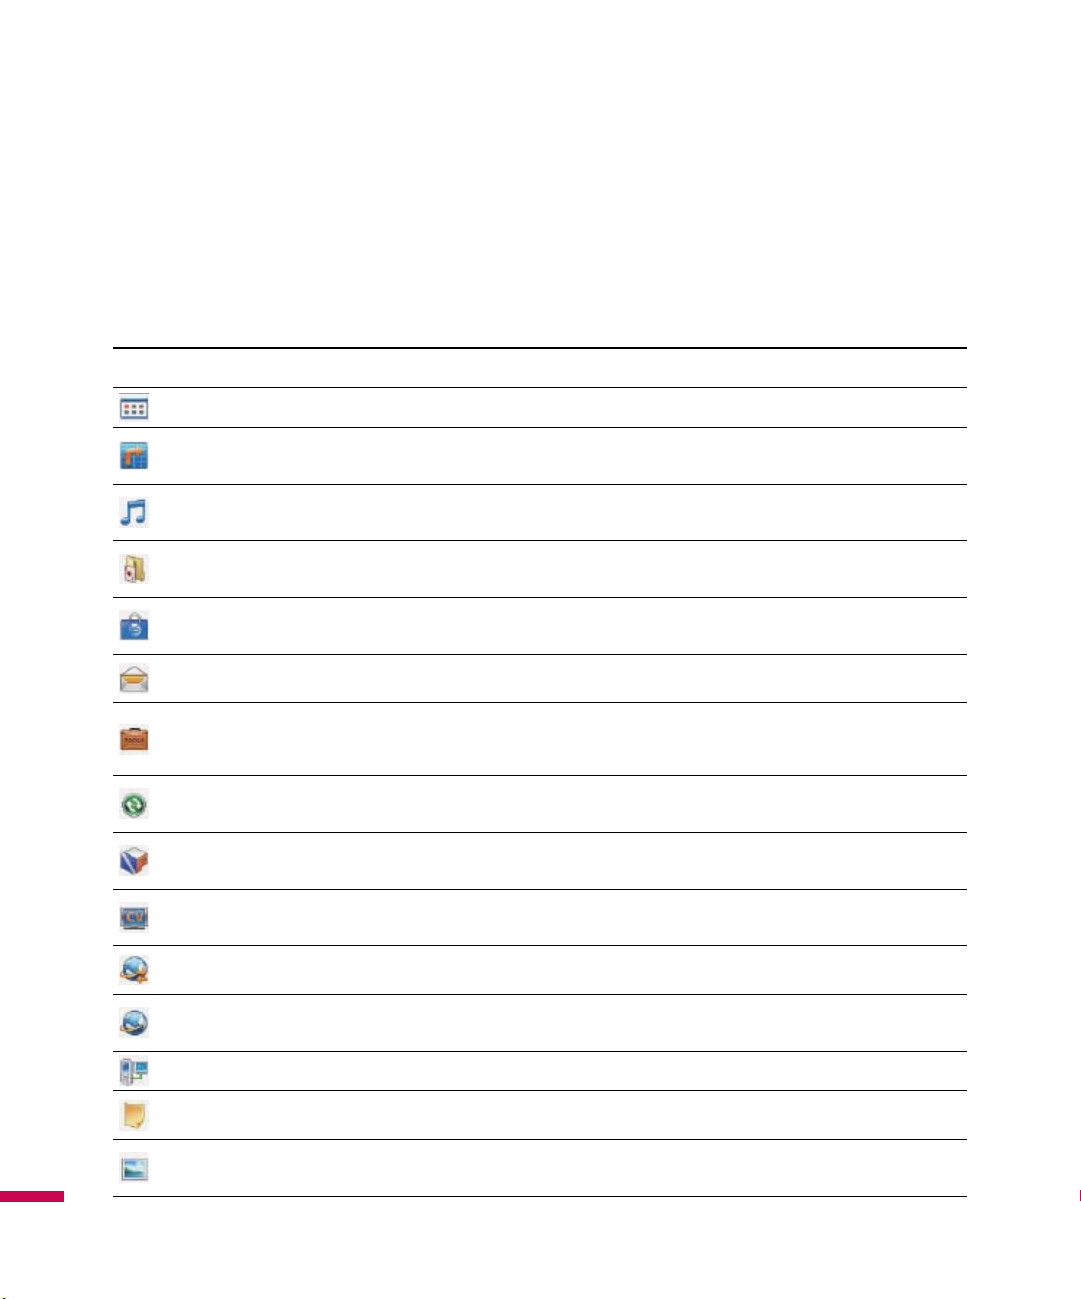
Program Indicators
Following are some of the icons for the programs that are already
installed on your device.
Icon Name (Path) Description
Apps
(Tap
LG Menu
>
Multimedia
>
Apps
) Use pre-installed applications.
AT&T GPS
voice guided turn-by-turn GPS driving directions with real time traffic based navigation.
AT&T Music
streaming media, and access AT&T's 1 music player.
Games (Tap LG Menu > Multimedia > Games)
Bubble Breaker, MsPac-Man, Solitaire and Sudoku.
MEdia Mall
multimedia, tones, videos and other applications.
Messaging
messages.
Tools
mobile device.
File Explorer, GPS Utility, Java, etc..
Active Sync
between your device and a PC.
Browser
downloads new programs and files from the Internet.
Cellular Video
and entertainment clips via AT&T’s high-speed data network while on the go.
Internet Sharing
Screen information
internet sharing device.
MEdia Net
(weather, news, etc.) and download ringtones or other personalization items.
(Tap
LG Menu > Applications > AT&T GPS)
(Tap
LG Menu > Multimedia > AT&T Music
(Tap
LG Menu > Multimedia > MEdia Mall)
(Tap
LG Menu > Communication > Messaging)
(Tap
LG Menu > Applications > Tools
(Tap
LG Menu > Communication > ActiveSync)
(Tap
LG Menu > Applications > Browser)
(Tap
LG Menu > Multimedia > Cellular Video)
(Tap
LG Menu > Applications > Internet Sharing)
(Tap
LG Menu > Multimedia > MEdia Net)
Helps you get around town by providing
) Shop for music, songs, music videos,
Play pre-installed games: Block Breaker Deluxe,
Shop for games, musics, graphics,
Sends and receives e-mail and text
) Access some array of tools and utilities on your
Synchronizes information
Browses Web and WAP sites, and
Watch news, sports, weather,
Use your device as a
Browses to access your favorite content
20
Modem Link (Tab Start > Programs)
Notes
(Tap
LG Menu > Applications > Notes)
and recordings
Pictures & Videos
sorts picture and video files in the My Pictures folder of your device or on a storage card.
(Tap
LG Menu > Multimedia > Pictures & Videos)
Use your mobile device as a modem.
Creates handwritten or typed notes, drawings,
Collects, organizes, and
Icon Name (Path) Description
Stopwatch
time of an event. The duration of an individual lap time (up to 99 times) and the total time can be
displayed.
Task Manager
Tasks
Windows Media
on your device.
(Tap
LG Menu > Applications > Stopwatch)
(Tap
LG Menu > Settings > Task Manager)
(Tap
LG Menu > Communication > Tasks)
(Tap LG Menu
Settings
Allows you to record the elapsed
Check activating task information.
Keeps track of your tasks.
>
Multimedia > Windows Media)
Enables the multimedia function
You can adjust the device settings to suit the way you work. To see all available settings, tap
Settings
, then tap the
Personal, System
, and
Connections
tabs located at the bottom of the screen.
Personal tab
Icon Description
Buttons
Clock Style & Weather
Gesture
exclusive programs.
Input
Lock
Lock Key
Menus
Owner Information
Phone
Sounds & Notifications
notification for different events.
Assign a program or function to a hardware button.
Select clock style. Weather also be set specified information.
Enable to recognize your flicking gesture. Adjusting click sensitivity and select
Set options for each of the input methods.
Set a password for your device.
Enables or disables the handset's Keypad Lock key.
Set what programs will appear in the Start menu.
Enter your personal information on your device.
Customize phone settings such as ring tone, set a PIN number for your SIM card, and more.
Enable sounds for events, notifications, and more, and set the type of
Start
>
Screen information
Today
Customize the appearance and the information to be displayed on the Today screen.
TTY
Enable TTY (Teletypewriter) support for your device.
21
Screen information
Icon Description
Voice Command
command is enabled.
System tab
Icon Description
About
This is where you can see basic information such as the Windows Mobile® version and
type of processor used on your device. You can also specify a name for your device.
Backlight
Certificates
Clear Storage
memory and reset your device to factory default settings.
Clock & Alarms
zone when you’re traveling. Alarms can also be set at specified days and times of a week.
Customer Feedback
sending your feedback to Microsoft.
Encryption
only on your device.
Error Reporting
External GPS
when there are programs on your device that access GPS data or you have connected a GPS receiver to
your device. See Help for details.
LG X Button
the button.
Set the backlight timeout and adjust brightness.
Enable to use Voice Command function. Select the items where are voice
See information about certificates that are installed on your device.
Tap this icon only when you need to remove all your data and files from the
Set the device clock to the date and time of your locale or to a visiting time
You can participate the Customer Experience Improvement Program by
Allow files on your storage card to be encrypted. Encrypted files will be readable
Enable or disable error reporting when errors are occured on your device.
Set the appropriate GPS communication ports, if required. You may need to do this
Stop running programs and set the "X" button to end programs immediately when you tap
Screen information
22
Managed Programs
Memory
stop currently running programs.
Power
display (switching device to Sleep mode) to conserve battery power.
Regional Settings
numbers, currency, date, and time on your device.
Remove Programs
Check the device memory allocation status and memory card information. You can also
Check the remaining battery power. You can also set the timeout for turning off the
This is where you can see installation history of your device.
Set the regional configuration to use, including the format for displaying
Remove programs that you installed on your device.
Icon Description
Screen
Sensor
System information
Task Manager
Time Auto update
Video Share
Windows Update
with the latest security patches or fixes.
Change the screen orientation, re-calibrate the screen, and change the screen text size.
Set your Auto Luminous Control and Proximity sensor to use or not.
Connections tab
Icon Description
Bluetooth
and type of processor used on your device. You can also specify a name for your device.
Connections
dial-up, GPRS, and more, so that your device can connect to the Internet or a private local network.
Domain
GPRS Setting
USB to PC
ActiveSync on the computer is unable to detect the device.
Wi-Fi
Enroll Connect your device with company resources.
Allows you to customize Wi-Fi settings.
Check your system information and storage information.
Shows the executing application list.
If Auto update sets On, current city time will follow the network time.
You can change the Video share default settings.
Link to Microsoft's Web site and update Windows Mobile® on your device
This is where you can see basic information such as the Windows Mobile® version
Set up one or more types of modem connections for your device, such as phone
Set the GPRS authentication method.
Enhances the connection between the device and the computer, in situations when
Wireless LAN
Wireless Manager
Phone.
Shows information about the active wireless network.
Allows you to manage all of wireless settings such as Wi-Fi, Bluetooth and
Screen information
23
Entering and Searching Information
You are available to the various input methods on the screen, including
Trnscriber
method is currently selected. The Input Selector arrow (shown at the right side of the Input Panel icon)
opens a list of available input methods.
, and
XT9 Keypad
. The Input Panel icon appears on the menu bar to indicate which input
Keyboard, LGJavaKey
,
Overview of Input Panel
To change the input method, tap the Input Selector arrow.
Icon Indicates the selected input method is
The on-screen keyboard.
Transcriber.
LGJavaKey
XT9 Keypad
Using the Keyboard
To enter text, symbols, and numbers, you can either type using the QWERTY Keyboard to type ABC
charanters or the standard on-screen
Keyboard
.
Entering and Searching Information
24
Using the standard on-screen Keyboard
The on-screen Keyboard is available when text entry is possible. You can enter text by tapping keys on
the keyboard that are displayed on the screen.
Enter text using the on-screen keyboard
v
The on-screen keyboard is available when text entry is possible.
v
To make the keys larger, tap the Input Selector arrow, and then
select
Keyboard
v
General rule for entering text is same as MS based PC.
, and then tap
Large Keys
.
Options
. In the
Input method
list,

Using the LGJavaKey
v
You can use as navigation keys (left/right/up/down/center) when your Java applications are
launched.
v
You can move the cursor and select menu on out of Java application.
XT9 Keypad
With XT9 keypad, you can enter text by tapping keys displayed on the screen. This is the most common
way to enter text with word prediction function in 20 Qwerty of portrait screen.
v
XT9 Keypad is available when text entry is possible.
v
Enter letters by tapping the keys labelled with the required letters.
v
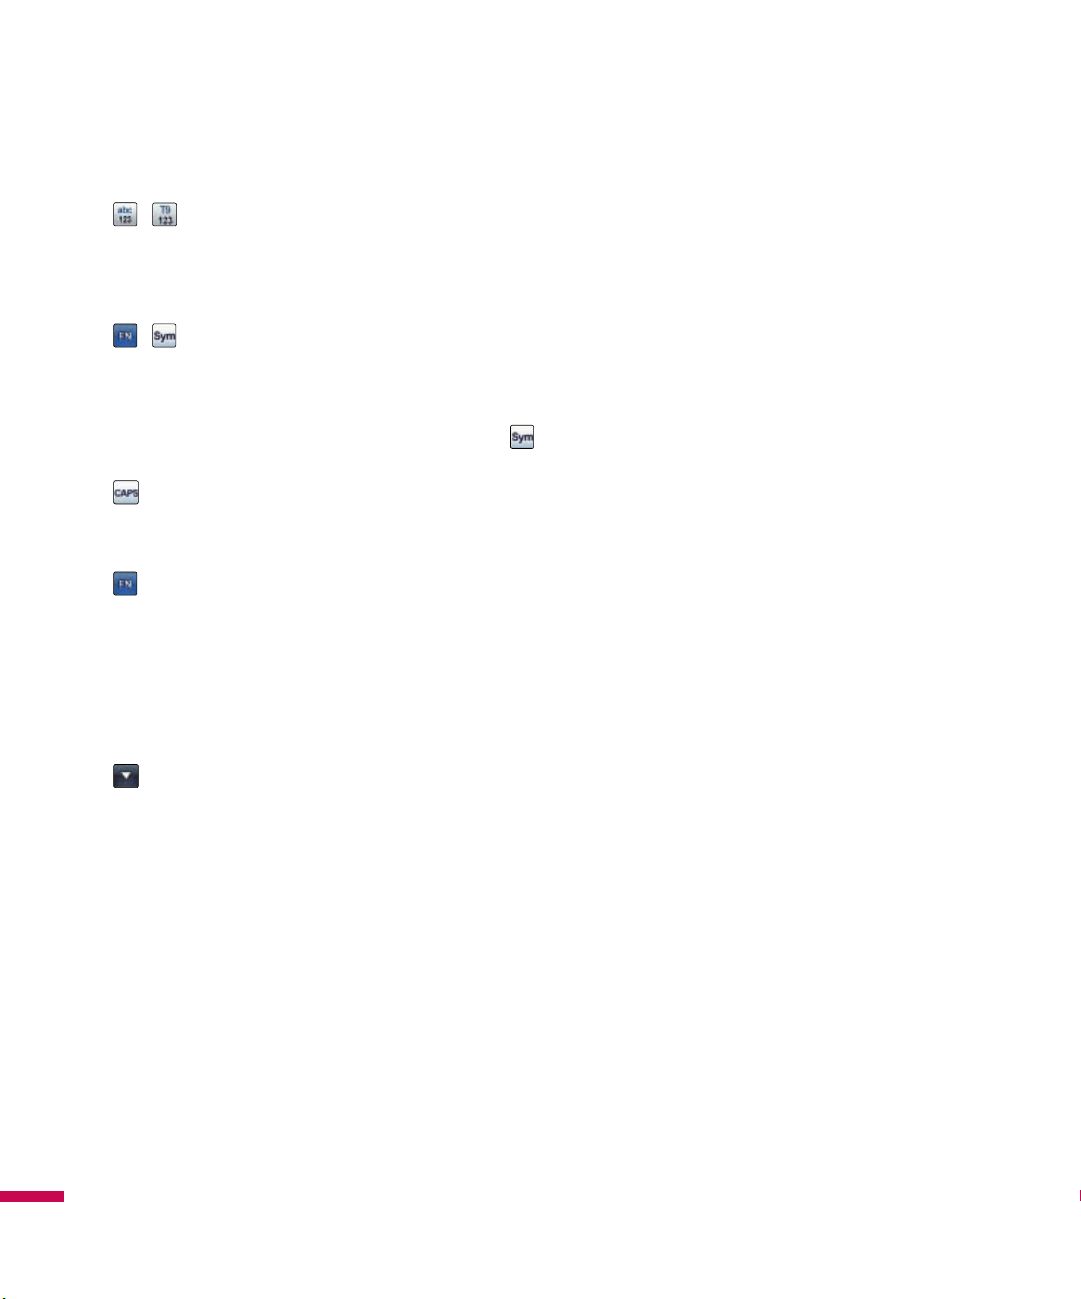
There are four input modes and you can change by tapping Fn, T9/123 and abc/123. You can turn
on and off XT9 prediction function by tapping Fn and T9/123 or abc/123 successively. If you tap just
T9/123 or abc/123, you can enter 123 mode. If you tap just Fn, you can enter symbol mode.
+
XT9 mode
If you turn on XT9 mode by tapping Fn and T9/123 successively, you can enter words with only one
keystroke per letter. The XT9 mode automatically compares your keystrokes with an internal dictionary to
determine the correct word, thus requiring far fewer keystrokes than the traditional multitap mode.
This is sometimes known as predictive text. This feature is supported only in portrait screen.
Entering and Searching Information
+
ABC mode
If you turn off XT9 mode by tapping Fn and abc/123 successively, you can enter letters by tapping the key
labeled with the required letter once or twice until the correct letter is displayed. Tap once for the first
letters and twice for the second letters. This mode is known as multitap mode.
25
Entering and Searching Information
/
123 mode
If you tap T9/123(abc/123), you can enter 123 mode. Type numbers using one keystroke per number.
You can also enter additional symbols in 123 mode.
/
Symbol mode
Short press of FN key gives symbol for one key press, and long press of FN locks symbol mode.
The symbol mode enables you to enter various symbols or special characters.
You can enter extra symbols by tapping Sym key in full qwerty.
CAPS
Short press switches to uppercase for one keypress, long press switches to caps lock mode.
FN
v
Portrait mode:
v
Landscape mode:
Touch for switching to symbol keypad. Switch to letter keypad again after one key input. If you want to
lock symbol keypad, press and hold the icon.
Tap this key for entering Symbols or turning XT9 on and off.
Tap this key for entering Symbols and numbers.
Entering and Searching Information
26
Arrow key in full qwerty
Pressing the arrow key will hide the menu bar and show the bigger text area.
Using Transcriber
Transcriber
combination of both. Transcriber works transparently in the background of programs, recognizing words
with its integrated dictionary. When Transcriber is turned on, it interprets stylus movement anywhere on
the screen as handwriting input. For more information about using Transcriber, see Help on your device.
is a handwriting recognition program that allows you to write in cursive, print, or a

To start Transcriber
1.
Start a program that accepts user input, such as Word Mobile.
2.
Tap the Input Selector arrow, and tap Transcriber. The Transcriber introductory screen appears.
To write using Transcriber
1.
In a program, position the cursor where you want text to appear.
2.
Use the stylus to write anywhere on the screen. The handwriting will be converted to text shortly after
you lift the stylus from the screen.
To enter punctuation and symbols
Transcriber comes with an on-screen keyboard that provides an easy way to add punctuation or a special
symbol to existing text.
v
From a program, tap
on the Transcriber toolbar. The keyboard remains visible until you tap the
button again.
Note
v
To reposition the keyboard, tap and hold the title bar, then drag to the desired location.
When no text is selected, you can also open the keyboard by doing the gesture.
To edit text
1.
In a program, draw a line across the text you want to edit.
2.
After you lift the stylus from the screen, the line will disappear and the selected text will be
highlighted.
3.
Do either of the following:
v
Rewrite the text.
v
Use gestures to capitalize letters, insert a space, and so on.
Entering and Searching Information
27
Entering and Searching Information
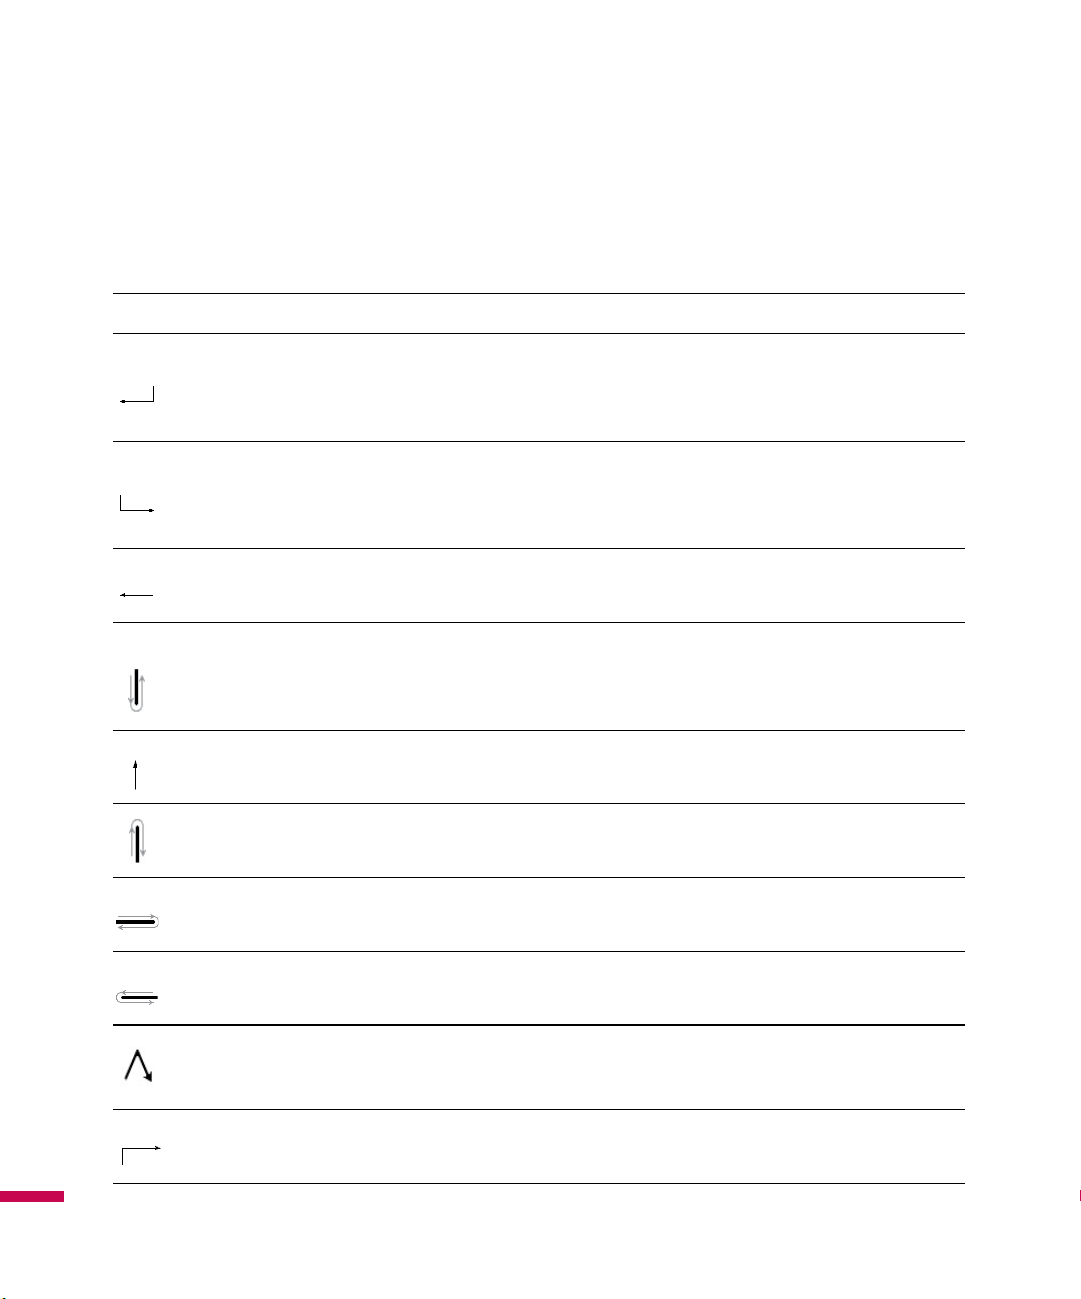
Transcriber Gestures
Use quick strokes of the stylus to edit your text or to insert returns, spaces, or tabs.
Do To
Insert a paragraph return at the cursor.
The horizontal portion of the gesture must be at least two times longer than the vertical
portion.
Insert a space at the cursor.
The horizontal portion of the gesture must be at least two times longer than the vertical
portion.
Move the cursor one space back and erase any text.
Do the gesture by drawing a line from right to left.
Open the menu of alternate words if a word is selected or the onscreen Transcriber keyboard
if no text is selected.
Do the gesture by drawing a line straight down and back up.
Entering and Searching Information
28
Change the capitalization of a selected letter, word, or block of text.
Do the gesture by drawing a line straight up.
Undo the last action.
Do the gesture by drawing a line straight up and back down.
Copy the selected text.
Do the gesture by drawing a line from left to right and back.
Cut the selected text.
Do the gesture by drawing a line from right to left and back.
Paste copied or cut text.
Do the gesture by drawing a line from the lower left of the screen diagonally up toward the right
and back down to the right.
Insert a tab.
The horizontal portion of the gesture must be at least two times longer than the vertical portion.
Note
v
You can also use the Enter, Space, and Backspace buttons on the Transcriber toolbar.
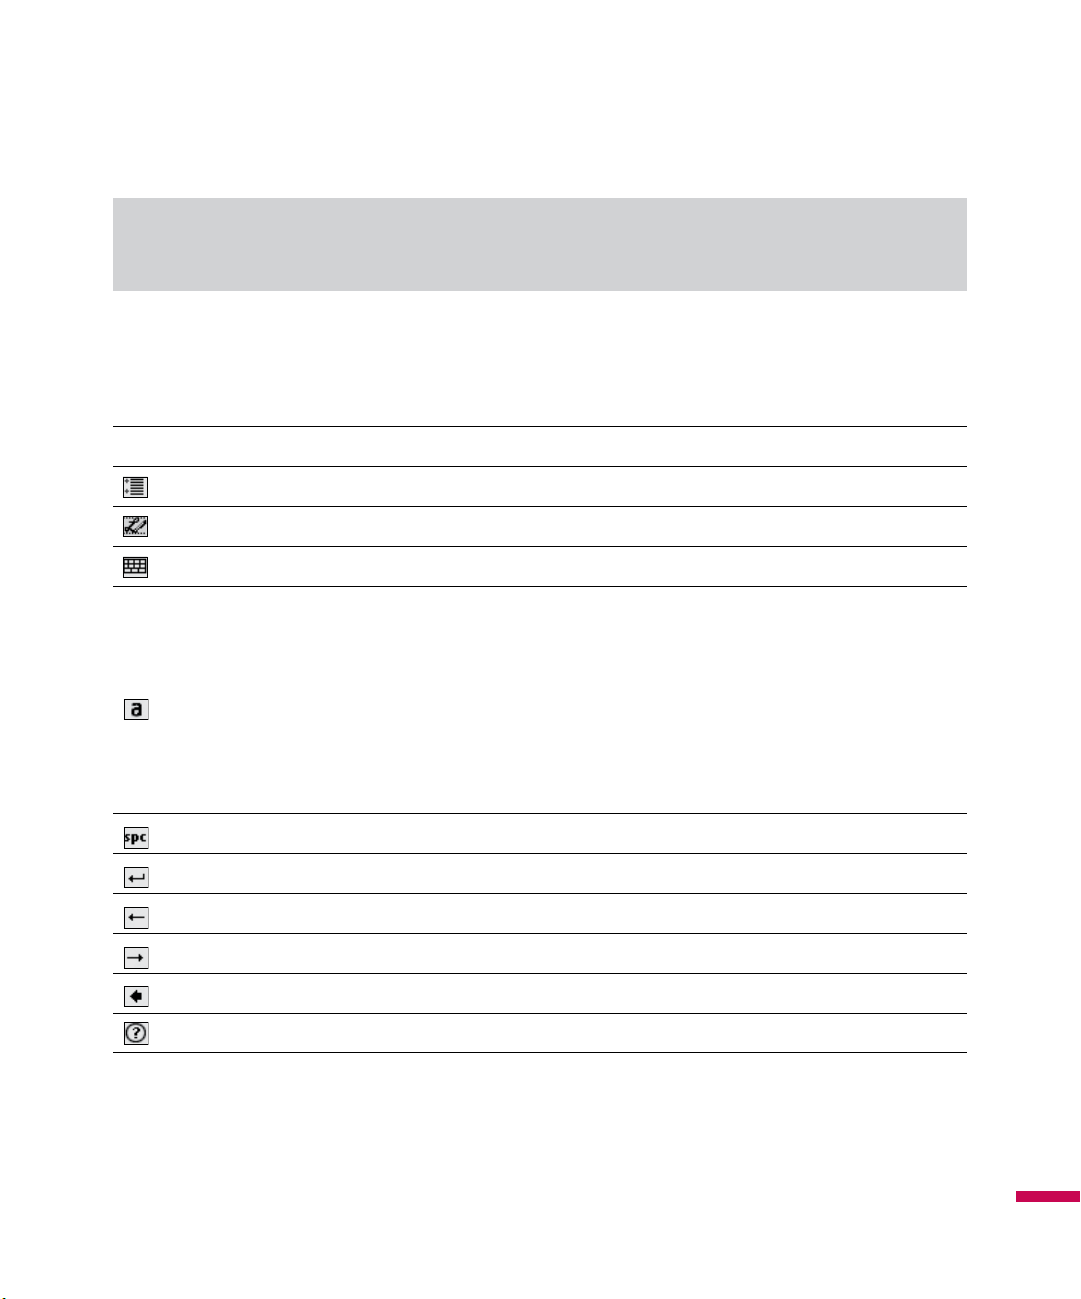
The Transcriber toolbar
Tap To
You can set the transcriber options such as writing direction, text and shorthand.
You can set the shape of letters as your handwriting.
You can enter numbers, punctuation and symbols.
You can change text input methods.
• a mode. This is the default for optimum handwriting recognition.
• 123 mode. Numbers and some letters are allowed and the calculator is activated.
• A mode. All letters are automatically capitalized.
If you are in A or 123 mode, recognition returns automatically to the default mode once
you lift the stylus.
You can insert a space at the cursor.
You can insert a paragraph return at the cursor.
You can insert the cursor one space to the left.
You can move the cursor one space to the right.
Back and erase any text.
Help
Entering and Searching Information
29

Entering and Searching Information
Drawing and Writing on the Screen
You can draw directly on the screen, or write on the screen and save notes in your own handwriting. To do
this, you must set the input mode in Notes to
If you prefer to use handwriting or frequently add drawings to your notes, you may find it helpful to set
Writing as the default input mode. If you prefer typed text, set
To set the input mode for Notes
1.
Tap (
2.
In the note list, tap
3.
In the
v
v
4.
Tap OK.
To write a note
LG Menu)
Default mode
Writing
Typing
if you want to draw or enter handwritten text in a note.
if you want to create a typed note.
>
Applications
Menu
>
box, tap one of the following:
>
Options
Notes
.
Writing
.
.
Typing
as the default input mode.
Entering and Searching Information
30
1.
Tap (
2.
In the note list, tap
3.
Write your text on the screen.
4.
When finished, tap OK to return to the note list.
Note
v
LG Menu)
To select handwritten text, tap and hold next to the writing. As soon as dots appear, and before they
form a complete circle, quickly drag across the writing.
If a letter crosses three ruled lines, it is treated as a drawing rather than text.
>
Applications
New
.
>
Notes
.

To draw in a note
1.
Tap (
2.
In the note list, tap
3.
To draw on the screen, use the stylus like a pen.
4.
A selection box appears around your drawing.
5.
When finished, tap OK to return to the note list.
Note
v
LG Menu)
To select a drawing (for example, to copy or delete it), tap and hold the drawing briefly. When you lift the
stylus, the drawing is selected.
>
Applications
New
.
>
Notes
.
Picsel Viewer Pan and Zoom Mode
The document you wish to see is often larger than the space available on the screen. There are two ways
to see more of it. To pan (or ‘scroll’) to a different part of the document, simply stroke your pen across the
screen in the direction you would like the page to move.
To pan the page up, touch and hold your pen somewhere near the middle of the screen and draw a line
towards the top, then take your pen off the screen. You can do this repeatedly so that you can view any
size of document. Further, you can ‘throw’ the document across the screen, and it will continue moving
after you have released the pen. This gives you time to start another stroke. This inertia can be used to
save time while you pan around the document.
Entering and Searching Information
You can also zoom the size of the document, so that more or less of it is visible at a different size. The
tap-and-stroke gesture for this is to tap your pen briefly near the middle of the screen then touch and
hold it again in the same place (a “double-tap”). Now, stroke your pen up to zoom in, or down to zoom
out. Release your pen when you reach the scale you like. Using this, you can view small print details on
diagrams, or can get an overview of a whole page.
31

Entering and Searching Information
Thumbnail
While viewing a page, a thumbnail can be displayed to:
- Give an overview of the current page
- Show the position of the current visible screen on the page
Currently, there are two modes that can be used. For document map mode, the visible area of the
document is the same, and the thumbnail is superimposed at the bottom of the screen, on a transparent
panel. A red transparent box on top of this thumbnail shows the current screen position and size.
For magnify mode, the screen is split in two. A magnifying glass icon can be used to navigate the
thumbnail at the top, and the bottom portion shows the zoomed document.
Find text in a PDF
You can search a word or words in a PDF file. The Find menu searches the currently open PDF
1. Select Search > Find menu. Then search dialog is shown.
Entering and Searching Information
32
2. Type the text you want to search.
3. Press OK.
* This viewer doesn’t use exact case match.

Quick reference
Search > Find
Search > Find prev
Search > Find next
Search > Snap to result
Search > Cancel
Thumbnail > Off
Thumbnail > Document map
Thumbnail > Magnify
Goto > Page
Goto > First
Goto > Prev
Goto > Next
Goto > Last
Find the word in this document
Find the word before current focused word
Find the word after current focused word
Move to current focused word
Cancel finding the word
Off the thumbnail
View the document map
View the document through magnifying glass
Go to page where you want
Jump to the first page
Go to the previous page
Go to the next page
Jump to the last page
Entering and Searching Information
33

Entering and Searching Information
Recording a Note
You can create a stand-alone recording (voice note) or you can add a recording to a note.
To create a voice note
1.
Tap (
2.
Do one of the following:
v
To create a stand-alone recording, record from the note list.
v
To add a recording to a note, create or open a note.
3.
If you do not see the Recording toolbar, tap
4.
Hold your device’s microphone near your mouth or other source of sound. Press the recording button
from the Recording Toolbar.
5.
If you adding a recording to a note, tap OK to return to the note list when finished.
6.
If you are recording in an open note, an icon will appear in the note.
7.
If you are creating a stand-alone recording, the recording will appear in the note list.
LG Menu) > Applications > Notes
.
Menu
>
View Recording Toolbar
.
Entering and Searching Information
34
To change recording formats
1.
Tap
Start
>
Settings
2.
Tap the
3.
Tap OK.
Note
v
Options
You can also change recording formats from within Notes. In the note list, tap Menu > Options > Global
Input Options link (at the bottom of the page).
>
Personal
tab, and in the
tab >
Input
.
Voice recording format
list, tap the format you want.
 Loading...