


GW550 User Guide
- English
This document is the user guide for the LG GW550 Windows Mobile
Smartphone. All rights for this document are reserved by LG Electronics.
Copying, modifying and distributing this document without the consent of
LG Electronics are prohibited.

Part 15.21 statement
This device is not intended for sale in the USA.
" Change or Modifications that are not expressly approved by the manufacturer could void
the user's authority to operate the equipment. “
Part 15.105 statement
This equipment has been tested and found to comply with the limits for a class B digital
device, pursuant to Part 15 of the FCC Rules.
These limits are designed to provide reasonable protection against harmful interference in
a residential installation. This equipment generates uses and can radiate radio frequency
energy and, if not installed and used in accordance with the instructions, may cause harmful
interference to radio communications. However, there is no guarantee that interference will
not occur in a particular installation. If this equipment does cause harmful interference or
television reception, which can be determined by turning the equipment off and on, the user
is encouraged to try to correct the interference by one or more of the following measures:
- Reorient or relocate the receiving antenna.
- Increase the separation between the equipment and receiver.
- Connect the equipment into an outlet on a circuit different from that to
which the receiver is connected.
- Consult the dealer or an experienced radio/TV technician for help.

Part 15 Class B Compliance
This device and its accessories comply with part15 of FCC rules.
Operation is subject to the following two conditions:
(1) This device & its accessories may not cause harmful interference.
(2) This device & its accessories must accept any interference received,
including interference that may cause undesired operation.
Body-worn Operation
This device has been tested for typical body-worn operations
with the distance of 0.79inches (2.0cm) from the user’s body.
To comply with FCC RF exposure requirements, a minimum separation distance
of 0.79inches(2.0cm) must be maintained from the user's body.
Additionally, Belt clips, holsters & other body-worn accessories may not contain
metallic components.

Introduction
Congratulations on your purchase of this LG GW550 Windows Mobile Smartphone.
This user guide contains information on the use and operation of this phone. Please read
all the information carefully for optimal performance and to prevent damage or misuse of
the phone. Any changes or modifi cations not expressly approved in this user guide could
void your warranty for this equipment.
Introduction
10

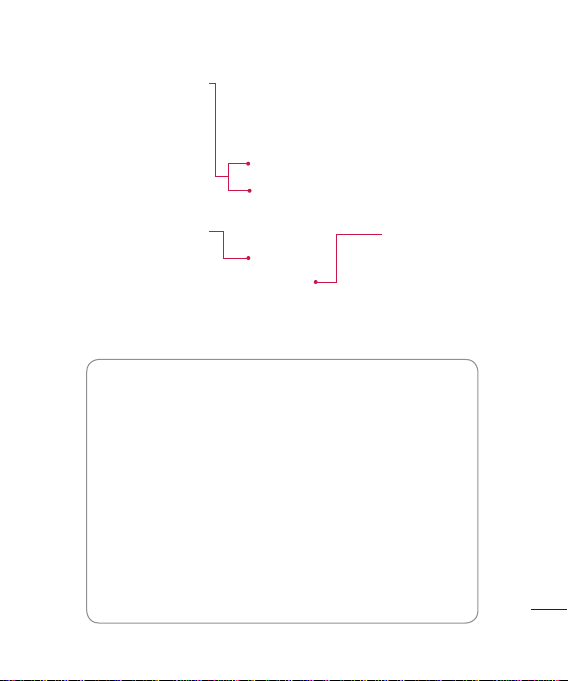
Phone Components
1. Phone button
2. Proximity Sensor
3. Display screen
GW550 Features
12. Earpiece
13. Camera
4. Home key
5. Left soft key
6. Call key
7. Enter key
8. Messaging key
9. Microphone
10. Speakers
11. microSD Card Holder
14. Navigation key
15. Right soft key
16. End key
17. Back key
18. Keyboard
19. Smart E-mail key
20. Smart Contacts key
21. Smart Applications
key
22. Camera
23. Battery
Compartment
24. SIM Card Holder
GW550 Features
11

GW550 Features
Keys and Parts Functions
1. Phone button
b Long press to turn the phone on or off.
b Short press to display Quick List. Quick
List allows you to turn off or lock the
keyboard of your device, provides shortcut
access to Task Manager or Wireless
Manager, or allows you to change profi les.
2. Proximity Sensor
3. Display screen
4. Home key: Press to return to the Today
screen.
5. Left soft key: Press to perform the
function indicated by the text on the
display above it.
6. Send key: Press to place or answer
incoming calls. In standby mode, press
to access the dialer and view the most
recent incoming, outgoing and missed
calls.
7. Enter key: Press to confi rm a selection.
8. Messaging key: Press to access
Messaging.
GW550 Features
9. Microphone
10. Speakers
11. microSD Card Holder
12. Earpiece
13. Camera: Use for video calls.
12
14. Navigation key: Use as directional keys
to move up, down, left, or right.
15. Right soft key: Press to perform the
function indicated by the text on the
display above it.
16. End key: Press to end or reject a call.
17. Back key: Press to go back to the
previous screen or back out of menus
one level at a time. When entering text,
press to delete single characters; press
and hold to delete entire words.
18. Keyboard
19. Smart E-mail key: Press to access
Smart E-mail. Smart E-mail is a
shortcut application to send and receive
e-mails.
20. Smart Contacts key: Press to access
Smart Contacts. Smart Contacts allows
you to add your favorite contacts or
phone numbers to the Smart Contacts
list.
21. Smart Applications key: Press to
access Smart Applications. Smart
Application allows you to add your
favorite applications to the Smart
Applications list for easy access.
22. Camera: Use to take photos or videos.
23. Battery Compartment
24. SIM Card Holder
Volume Keys
bWhen the screen
is idle
, press to adjust
system volume.
bDuring a call, press to
adjust the in-call volume.
GW550 Features
USB Connector
Use to connect the
charger
, earphone, or USB
cable to synchronize with
a computer.
How to hold your phone
In order to allow better RF antenna sensitivity, LG suggests that you hold
the handset as depicted in the fi
Please do not cover the RF antenna area with your hand during a call and
using a bluetooth connection. It may degrade speech quality.
gure below.
Camera Key
Press to activate the
camera and take photos
or videos.
GW550 Features
13

Getting Started
Installing the SIM card and
Battery
Always turn off your phone and disconnect
it from the charger and other accessories
before installing or replacing the SIM card,
microSD card, and battery.
To remove the back cover
1. Use both thumbs to push and slide the
back cover down until it disengage.
Lift to remove the back cover.
2.
Battery
Your phone comes with a rechargeable Li-ion
battery.
To remove the battery
Getting Started
1. Turn the phone off.
2. Remove the back cover.
3. Insert your fi nger in the battery’s fi nger
grip, then gently push down the battery
14
towards the direction of the arrow to
release and remove the battery.
SIM Card
Your SIM card contains your phone number,
subscription details, and contacts and must
be inserted into your handset.
To install the SIM card
Insert the SIM card with the metal contacts
facing down and the cut-off corner on the
top-right side.

Getting Started
To remove the SIM card
1. Remove the battery if it is installed.
Slide the SIM card out the slot.
2.
Note
The SIM card and its contacts can be
easily damaged by scratching and bending
the card. Be careful when installing and
removing the card. Refer to the instructions
supplied with the SIM card.
To install the battery
1. Remove the back cover.
Insert the battery. Align the contacts of the
2.
battery with the corresponding connectors
on the battery compartment and insert in
the direction of the arrow (A) then push
the battery into place (B).
3. Replace the back cover.
To replace the back cover
1. Align the back cover (A).
2.
Push the back cover to lock into place (B).
Getting Started
15
Getting Started
Charging the Battery
1. Make sure the battery is installed inside
the battery compartment.
2. Plug the power adaptor into a wall outlet.
3. Flip open the USB connector’s cover of
the phone.
4. Connect the power adaptor into the USB
connector of your phone.
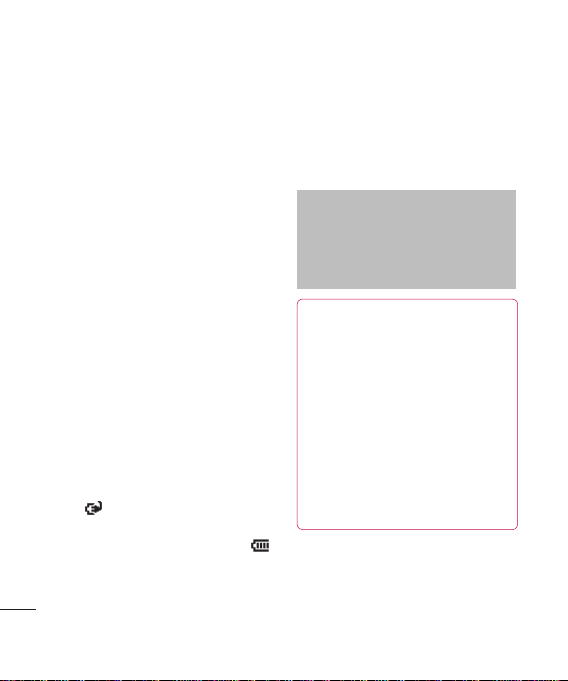
Battery Indicators
When the phone is turned on...
b The
Getting Started
16
icon indicates that the battery
is charging.
b When the battery is fully charged, the
icon is displayed.
When the phone is turned off...
b A charging animation is displayed on the
screen.
b When the battery is fully charged, the
animation stops and the screen turns
blank.
Note
When you charge a fully discharged battery,
it may take over a minute for the display
to respond. It is not a malfunction but
completely normal.
CAUTION!
b Do not remove the battery or the SIM
card while charging.
b There is a risk of explosion if battery
is replaced by an incorrect type.
Replace only with batteries approved
by the manufacturer.
b Dispose of used batteries according
to the local regulations in your area.
b Do not force the mini USB connector
as this may damage the phone or
the cable.

WARNING!
• Unplug the charger from the mains and
phone during lightning storms to avoid
electric shock or fi re.
• Make sure that no sharp-edged items,
such as nails,
battery. There is a risk of causing fi re.
come into contact with the
microSD Card
For additional storage space for your photos,
videos, music and fi les, install a microSD
card into your phone.
To install the microSD card
1. Push the microSD card slot towards the
direction of the arrow (A) to release lock,
then fl ip up the slot (B).
2. Slide the microSD card into the slot with
the gold contact area facing up (C).
3. Flip down (D) then push the slot towards
the direction of the arrow (E) to lock.
Getting Started
Getting Started
17
Getting Started
To remove the microSD card
1. Turn the phone off.
2. Push the microSD card slot to release
lock.
3. Flip up the slot.
4. Slide out the microSD card from the slot.
5. Flip down then push the slot to lock.
Info!
The microSD card is an optional
accessory and is not included in your
package. Contact your retailer to
purchase one.
b Avoid using the microSD card when the
battery is low.
b The card is designed to fi t easily into
the slot.
b Do not bend the card or force it into
the slot.
b Do not insert any memory cards other
than microSD.
Getting Started
18
Turn the Device On and Off
To turn on the device, press and hold the
Power button located on top of the device.
To turn off the device:
Press the Power button and select
•
Power off.
Press and hold the Power button.
•
Lock the Keyboard
To lock the keyboard, press and hold the
End key.
To unlock keyboard, select Unlock, then
press *.
Getting Started
Getting Started gives you step-by-step
instructions on how to set up the basic
functions of your device. From the Today
screen, do either of the following to access
Getting Started:
b Scroll down to select the Getting Started
shortcut menu, then scroll left or right and
select a specifi c topic.
b Select Start > Getting Started, then
select the topic to view.

Adjust Volume
Your device has two types of volume:
b System Volume: Adjust the system
volume to change the volume level of
system sounds and notifi cations like
alarm, ringer, keypad, audio and video
playback.
To adjust the system volume:
•
When the device is in idle mode, press
the volume keys up or down to increase
or decrease volume.
b In-Call Volume: Adjusts the volume level
of the phone conversation.
To adjust the in-call volume:
During a call, press the volume keys
•
up or down to increase or decrease
volume.
Getting Started
Getting Started
19

Screen Information
The Today Screen
From the home screen, you can quickly check your schedule, and see at a glance any missed
calls or new messages.
Default Today Screen
Service Provider’s Name
Wi-Fi Status
Shortcut menu
Scroll down to view more
shortcut menu.
a menu to expand to more
Highlight
shortcuts.
Start menu
(Left soft key function)
b Press the left soft key
to access.
Contacts
(Right soft key function)
b Press the right soft key
To Customize the Today Screen
You can change the layout, background image, color scheme and the time out of the Today
screen.
Screen Information
To customize settings of the Today screen, go to Start > Settings > Home Scr
4
20
Status Indicators
Alarm Indicator
Date and Time
to access Contacts.
een.
Screen Information
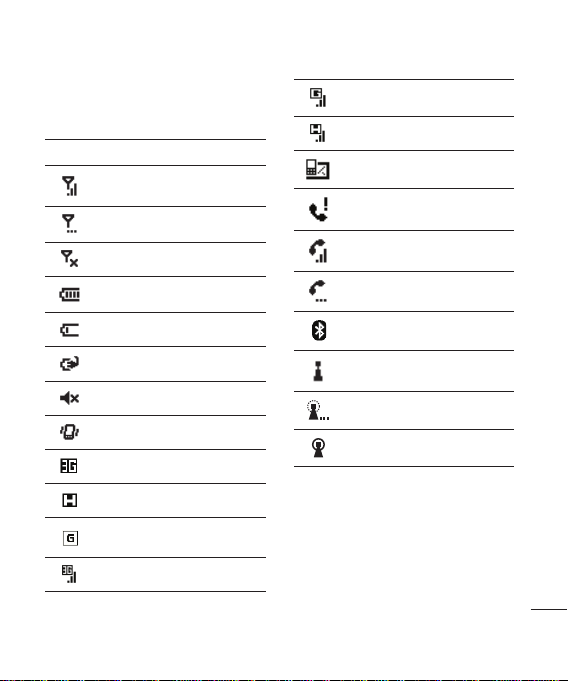
Status Indicators
The following are some of the status icons
that you may see on your device.
Icon Description
Indicates maximum signal
strength
Searching for signal
No phone service
Indicates battery level
Battery low
Battery charging
Silent mode enabled
Vibrate mode enabled
WCDMA (3G) available
HSDPA available
GPRS (General Packet Radio
Services) available
3G network in use
GPRS network in use
HSDPA network in use
New message received
Missed call or rejected call
Call in progress
Call on hold
Bluetooth active
Wireless network available
Wireless network connecting
Wireless network connected
Screen Information
21

Screen Information
Shortcut Menu
The shortcut menu displays notifi cations or other information of each menu item.
By default the following applications are displayed:
Menu Description
Clock and Alarm
Calls and Messages
Notifi cation
Appointments Displays upcoming schedules and allows you to set appointments.
Getting Started Select an item to view its help information.
Favorites
Screen Information
Settings Displays and allows you to easily adjust basic device settings.
b To access a shortcut menu, use the navigation keys, then press the Enter key.
b To add shortcuts of media applications, go to Start > Settings > Home Scr
Screen Layout > Sliding Panel Media.
22
Displays the date and time. To adjust date and time press the
Enter key.
Displays notifi cations about recent voice and video calls,
voicemail, and other messages. To access a submenu, use the
navigation keys to scroll, then press the Enter key.
Displays and allows you to add your favorite web pages for easy
access.
een> Home
Screen Information
Start Menu
The Start menu contains all the programs
installed on your device.
Accessing the Start menu
b From the Home screen, press the left soft
key Start to access the Start menu.
b By default, the Recent Programs screen is
b To go to the next screen display, press the
b To go back to the previous screen, press
Programs
The following programs are installed on your device.
To view other programs, press
displayed.
the left soft key All Programs.
left soft key Mor
the Back key
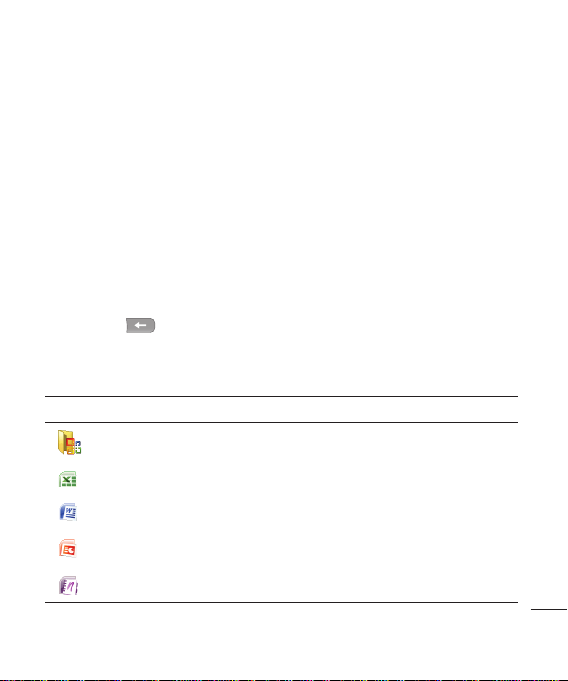
Icon Program Description
e.
.
Offi ce Mobile
Excel Mobile Create new and edit Excel workbooks.
Word Mobile Create new and edit Word documents.
PowerPoint
Mobile
OneNote Mobile Create notes with pictures and recordings.
View and setup slide shows.
b To access a menu, use the
navigation keys to highlight the
then press the Enter key.
item,
Screen Information
23
Screen Information
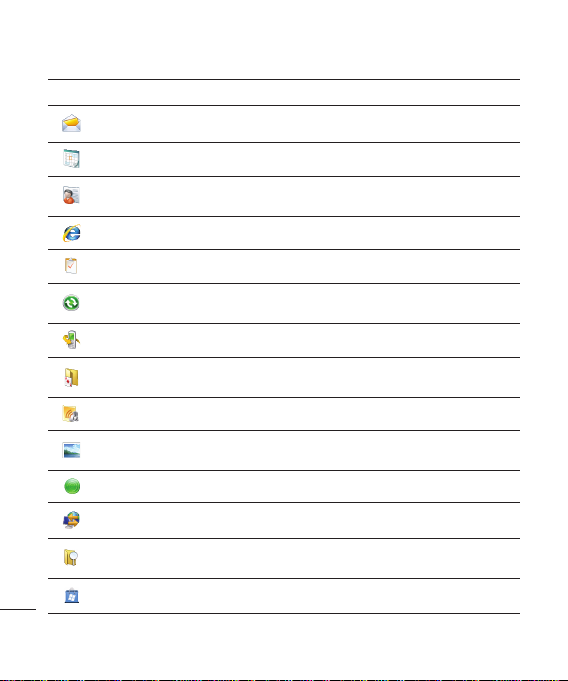
Icon Program Description
Messaging Send and receive e-mail and text messages.
Calendar Schedule appointments and set alarm notifi cations.
Contacts
Internet Explorer Browse the web and download fi les from the Internet.
Tasks Keeps track of your tasks.
Active Sync
Call History Displays the list of missed, received or placed calls.
Games
Voice Notes Record voice notes.
Pictures & Videos
Screen Information
24
Getting Started Learn the basics on how to operate your device.
Internet Sharing Use your device as an Internet sharing device.
File Explorer
Marketplace Purchase and download applications on the web.
Lets you store names, phone numbers, e-mail and other
information.
Synchronizes information between your device and a
computer.
Play pre-installed games on your device: Bubble Breaker and
Solitaire.
Collects, organizes, and sorts photo and video fi les in the My
Picture folder of your device or the storage card.
Browse fi les and folders saved on your device or the storage
card.
Screen Information
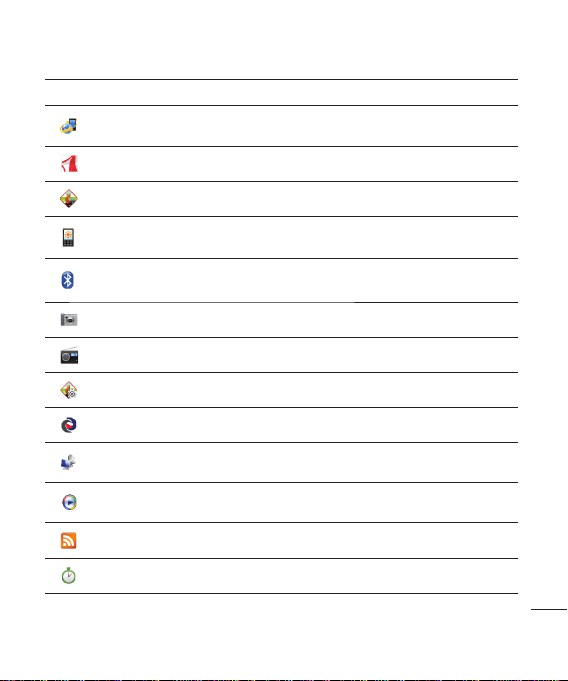
Icon Program Description
Microsoft My
Phone
Adobe Reader LE View *.pdf fi les on your device.
AGPS Settings Enable Assisted Global Positioning System.
Backlight
Bluetooth
Manager
Camera Capture photos and record videos.
FM Radio Connect the earphones and tune in to the FM radio.
GPSExtra Download GPS data.
Java Download and install Java applications on your device.
Remote Desktop
Windows Media
RSS Viewer View RSS or RDF-compatible newsfeeds.
Stopwatch Functions as a timer.
Synchronizes information on your device with your My Phone
account at http://myphone.microsoft.com.
Control the level of brightness when using the battery or
external power.
Connect with other Bluetooth devices and create a network.
Set up and connect to your computer to access fi les and
programs from your device.
Mobile version of Windows Media Player. Tune in and watch
your favorite music videos.
Screen Information
25
Screen Information
Icon Program Description
Windows Live Mobile version of Windows Live™.
Clock & Alarm Allows you to set the date and time and set alarms.
MSN Money Access MSN Money to view stocks.
MSN Weather View the weather forecast via MSN Weather.
Search Widget Provides access to Live Search.
Speed Dial Allows you to add phone numbers for speed dial.
XT9 Settings
Screen Information
26
Allows you to set the language of the dictionary and enable
functions such as word completion, next word prediction and
others.
Entering Information
Using the Keyboard
QWERTY Keyboard
Numeric Keypad
Your device comes with a full keyboard
for text entry and other shortcut button
functions.
QWERTY Keyboard
QWERTY keyboard is activated whenever
an alphanumeric text entry is required. This
functions just like a standard computer
keyboard.
b To switch between the different letter
cases,
To type all in upper case letters, press
and hold
keys. To switch back to lower case entry,
press
CAPS
.
press
CAPS
then press the corresponding
CAPS
again.
b To enter a single symbol or number
printed at the top of keys,
press
Fn
press the corresponding key.
To enter various symbols or numbers,
press and hold
corresponding keys.
To switch back to text mode, press
again. To enter the symbols that are not
shown on the keypad, press
Fn
then press the
Sym
then
select the desired symbol.
b Press to go to the next line.
b Press
to erase a character.
DEL
The following icons are displayed on the
status indicator area:
Icon Description
Enter text in lower case letter
Enter one character in upper
case and the rest in lower case
Enter all text in upper case letter
Enter a number or symbol
Enter all numbers or symbols
then
Fn
Entering Information
27
Entering Information
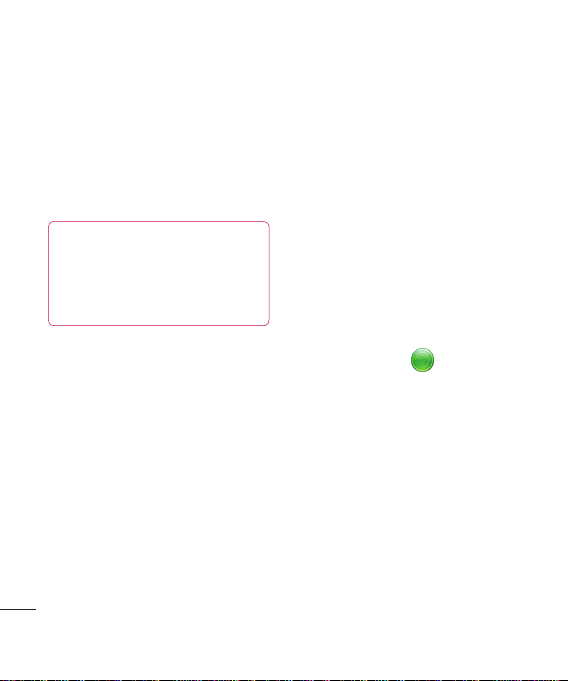
XT9 Mode
By default, the QWERTY keyboard is set to
XT9 mode. XT9 predicts words and suggests
spellings as you type the fi rst few characters,
so you can just select the word you want.
To activate XT9 mode, press
and select XT9 English.
To enter text using XT9
1. Type the fi rst few characters of the word.
2. As you type, the dictionary displays
predicted words below the word you are
typing.
3. Scroll left or right to highlight the word
then press the Enter key to select.
The following icons are displayed on the
status indicator area:
Icon Description
Enter the fi rst character in
upper case and the rest in
Entering Information
28
lower case
Enter text in lower case letter
Fn
+ spacebar
Numeric Keypad
The numeric keypad functions just like a
standard phone keypad. It is automatically
activated whenever numeric entries are
required, such as in setting the time.
Recording a Note
You can create a stand-alone recording
(voice note) or you can add a recording to
a note.
To create a voice note
1. Select Start > Voice Notes.
2. Hold your device’s microphone near your
mouth or other sound sources.
3. Select Record to start recording.
4. Select Stop to stop recording.
To add a recording to a note
1. Select Start > Offi ce Mobile > OneNote
Mobile.
2. Create or open a note.
3. Select Menu > Insert Recording.
3. Hold your device’s microphone near your
mouth or other sound sources.
3. Select Record to start recording.
4. Select Stop to stop recording.
Contacts
Contacts
Contacts is your address book and
information storage for the people you
communicate with. You can store phone
numbers, e-mail addresses, home
addresses, and other information that relates
to a contact. You can also add a picture or
assign a ringtone to a contact.
Your device supports two types of contacts:
Outlook and SIM Contacts.
Outlook Contact
Contacts are stored in the device memory.
If you use Outlook on your PC, you can
synchronize contacts between your device
and the PC.
SIM Contact
Contacts are stored in the SIM card memory.
You can only store a name and a phone
number per entry.
To Create a Contact
1. From the Today screen, select Contacts.
2. Select New.
3. Select Outlook Contact or SIM Contact,
then enter the contact details.
4. When fi nished, select Done.
TIP!
b You can create a contact from Call
History list, select Menu > Save to
Contacts.
b To add the sender of a message
to Contacts, select the received
message and the number, then press
the Enter key.
To Find a Contact
There are several ways to fi nd a contact
when your contact list is long.
1. From the Today screen, select Contacts.
2. If you are not in Name view, tap Menu >
View By > Name.
3. Do one of the following:
b Enter the fi rst character of a name. Scroll
down to select the desired name from
the the list. The next character you enter
continues to narrow the search.
b Filter the list by category. In the contact
list, select Menu > Filter. Then, select
a category you’ve assigned to a contact.
To show all contacts again, select No
Categories.
Contacts
29

Contacts
To Work with the Contact List
There are several ways to use and
synchronise the contact list. Here are a
few tips:
1. From the Today screen, select Contacts.
2. In the contact list, do any of the following:
b In Name view, you can search for a
contact by entering a name or by using
the alphabetical index. To switch to Name
view, select Menu > View By > Name.
b To see a summary of information about
a contact, select the contact. From there
you can also make a call or send a
message.
b To see a list of contacts employed by
a specifi c company, select Menu >
View By > Company. Then, select the
company name.
To Change Contact Information
1. From the Today screen, select Contacts.
2. Select the contact.
3. Select Menu > Edit and enter the
changes.
4. When fi nished, select Done.
Contacts
30
To Delete a Contact
1. From the Today screen, select Contacts.
2. Select the contact.
3. Select Menu > Delete.
4. Select Yes to confi rm delete.
To Copy Contacts
To copy saved Contacts from SIM card to
your device or from your device to SIM card:
1. From the Today screen, select Contacts.
2. Select Menu > Select Contacts >
Several or All.
3. Select Menu > Copy Contacts > To
Contacts or To SIM.