

LG GU230GO Owner's Manual

General Inquiries
<LG Customer Information Centre>
0844-847-5847 or +44-844-847-5847
* Make sure the number is correct before making
a call.
www.lg.com P/N : MFL66986101(1.0)
ENGLISH
GU230

Bluetooth QD ID B015954
—
GU230 User Guide
English
This guide will help you understand your new mobile phone.
It will provide you with useful explanations of features on your
phone.
Some of the content of this manual may differ from your phone
depending on the software of the phone or your service provider.
Disposal of your old appliance
1 When this crossed-out wheeled bin
symbol is attached to a product it means
the product is covered by the European
Directive 2002/96/EC.
2 All electrical and electronic products
should be disposed of separately
from the municipal waste stream
via designated collection facilities
appointed by the government or the
local authorities.
3 The correct disposal of your old
appliance will help prevent potential
negative consequences for the
environment and human health.
4
For more detailed information about
disposal of your old appliance,
please contact your city o ce, waste
disposal service or the shop where you
purchased the product.

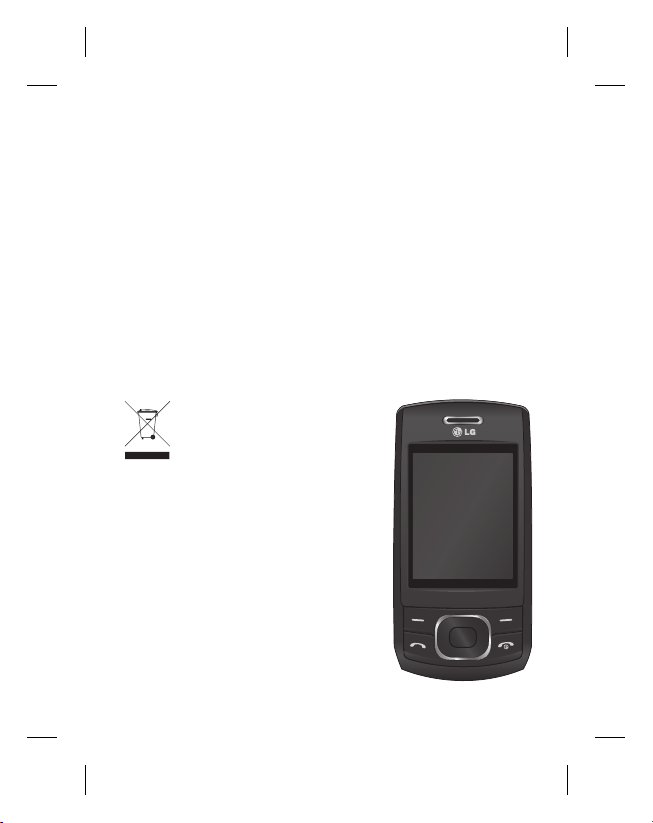
Getting to Know Your Phone
Main screen
Charger,
Cable slot,
Hands-free
connector
Call key
Dials a phone
number and
answers
incoming calls.
2
End/Power key
Ends or rejects a call.
Turns the phone
on/off. Returns to the
standby screen when
you use the menu.
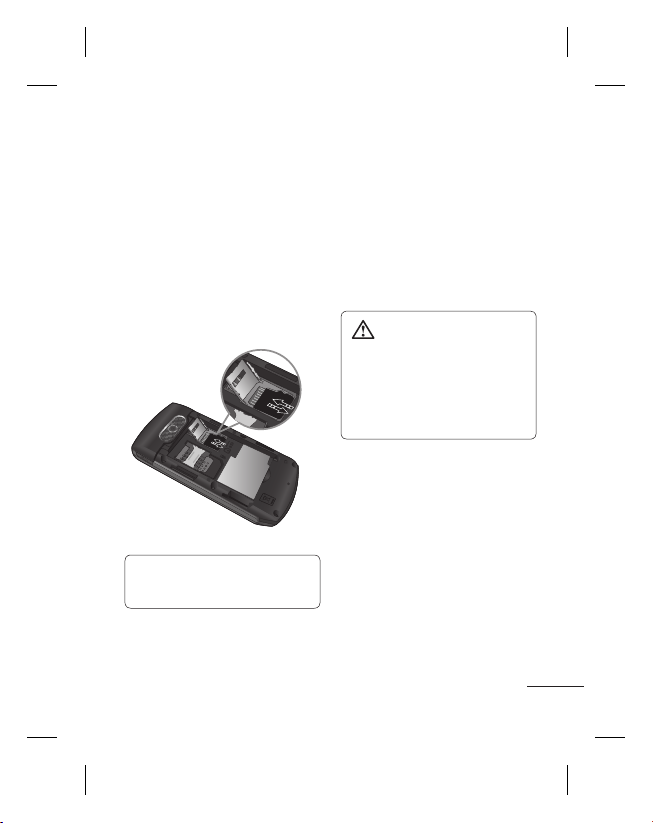
Installing a Memory Card
Lift the memory card cover
and insert a microSD card
with the gold contact area
facing downward. Close the
memory card cover so that it
clicks shut.
To remove the memory card,
gently push it as shown in the
diagram.
Note: A memory card is an
optional accessory.
Formatting the Memory
Card
Press Menu and select
Settings.
Choose Memory manager,
select External memory,
press Format, and then insert
the security code.
WARNING: When you
format your memory card,
all the content will be wiped.
If you do not want to lose
the data on your memory
card, back it up rst.
3
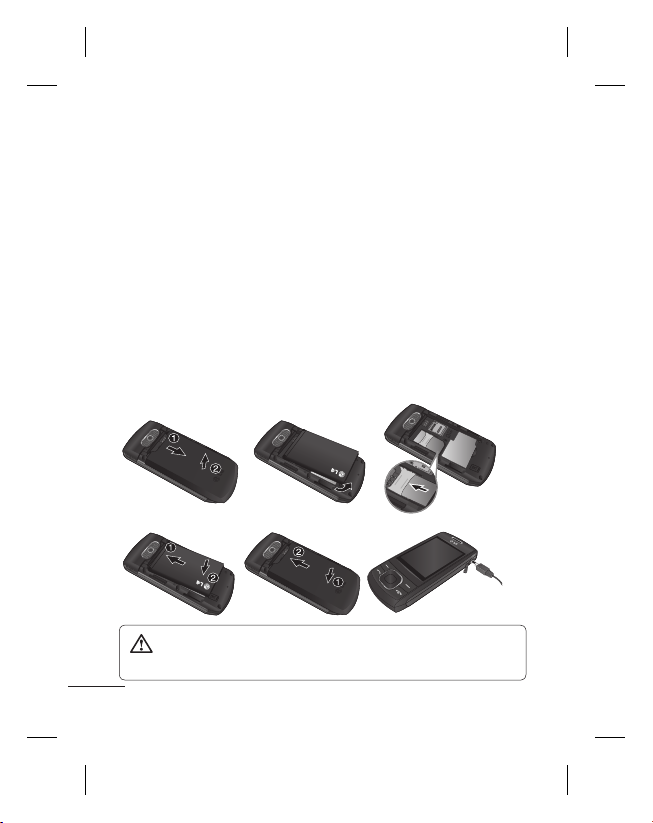
Installing the SIM Card and Charging the Battery
Installing the SIM Card
When you subscribe to a
cellular network, you are
provided with a plug-in
SIM card loaded with your
subscription details, such
as your PIN and network
services.
Important!
›
The plug-in SIM card can be
easily damaged by scratches
or bending, so be careful when
handling, inserting or removing
the card. Keep all SIM cards out
of the reach of small children.
Illustrations
1 Open the battery cover
2 Remove the battery
3 Insert your SIM
4 Insert your battery
5 Close the battery cover
6 Charge your battery
12
4
WARNING: Do not remove the battery when the phone is
switched on, as this may damage the phone.
4
56
3
Calls
Making a Call
1 Key in the number using
the keypad. To delete a
digit, press CLR.
2
Press to initiate the
call.
To end the call, press .
3
TIP! To enter + when
making an international call,
press and hold 0.
Making a Call from Your
Contacts
1 Select Names from the
Standby screen.
2
Using the keypad, enter the
first letter of the contact
you want to call. For
example, for Office, press
“6” three times to select the
first character, “O”
3
Select Call or press to
initiate the call.
Answering and Rejecting
a Call
When your phone rings, press
to answer the call.
You can control the volume
by pressing the Up and Down
Navigation keys.
Press
or select Reject to
reject the incoming call.
TIP! You can change the
settings on your phone to
answer your calls in different
ways. Press Menu, select
Settings and choose Call.
Select Answer mode and
choose from Press send key,
Slide up and Press any key.
Speed Dialling
You can assign a speed dial
number to a contact you call
frequently.
5

Viewing your Call History
You can only check the log of
missed, received and dialled
calls if the network supports
Calling Line Identification
(CLI) within the service area.
Changing the call settings
You can set call-specific
functions. Press Menu, select
Settings and choose Call.
• Call divert - Choose whether
to divert your calls.
• Call barring - Select when
you would like calls to be
barred.
• Fixed dial numbers - Choose
a list of numbers that can be
called from your phone. You
will need your PIN2 code
from your operator. Only
numbers included in the
fixed dial list can be called
from your phone.
6
• Call waiting - Be alerted
when you have a call
waiting. This depends on
your network provider.
• Call reject - Set the rejected
call list.
• Send my number - Choose
whether your number will
be displayed when you call
someone. This depends on
your network provider.
• Auto redial - Choose On
or Off.
• Answer mode - Choose
whether to answer the
phone using Any key, Send
key only or Slide up.
• Free call timer - Choose
whether or not to display
the call time.
• Minute minder - Select On
to hear a tone every minute
during a call.
• BT answer mode - Set to
Hands-free or Handset.

• Save new number - Choose
Yes or No.
• Slide close setting - Choose
End call or Continue call.
Contacts
Searching for a Contact
1 Select Names from the
standby screen.
2 Using the keypad, enter the
first letter of the contact
you want to call.
3 To scroll through the
contacts, use the up and
down arrows.
Adding a New Contact
1 Press Menu, then select
Contacts and choose
Names. Then press Options
- Add new contact.
2 Enter all the information
you have in the fields
provided and select
Options-Done.
Adding a Contact to a
Group
You can save your contacts in
groups; for example, to keep
your work colleagues and
family separate. There are a
number of groups including
Family, Friends, Colleagues,
School and VIP already set up
on the phone.
Messaging
Your GU230 includes text
messaging, multimedia
messaging and E-mail
functions, and can also
receive network service
messages.
7

Sending a Message
1 Press Menu, select
Messaging and choose
Create message.
2 A new message editor will
open. The message editor
combines Text message
and Multimedia messages
into one intuitive and easyto-switch-between editor.
The default setting for
the message editor is text
messages.
3 Enter your message.
4 Choose Options - Insert
to add an Image, Video
clip, Sound clip, Schedule,
Business card, Note,
Text field, To-do or Text
template.
5 Press Options - Send.
8
Setting up Your E-mail
You can stay in touch on the
move using email on your
GU230. It’s quick and simple
to set up a POP3 or IMAP4
email account.
1 Press Menu, select
Messaging, and choose
Message settings.
2 Select E-mail then E-mail
accounts.
3 Press Add then set the
E-mail account.

Sending an E-mail Using
your New Account
To send/receive an email,
you should set up an email
account.
1 Select Menu, select
Messaging and choose
Create message.
2 Choose E-mail and a new
email will open.
3 Enter a subject.
4 Enter your message.
5 Press Options and select
Insert to add an Image,
Video Clip, Sound Clip,
Business card, Schedule or
Note.
6 Press Send to and enter the
recipient’s address, or press
Options and select Insert
- Contact Details to open
your contacts list.
7 Press Send and your email
will be sent.
Entering Text
You can enter alphanumeric
characters using the phone’s
keypad. The following text
input methods are available
on the phone: T9 predictive
mode, ABC manual mode and
123 mode.
Note: Some fields may allow
only one text input mode
(e.g. telephone numbers in
the address book fields).
T9 Predictive Mode
T9 predictive mode uses
a built-in dictionary to
recognise the words you
are writing based on the
key sequences you press.
Simply press the number key
associated with the letter
you want to enter, and the
dictionary will recognise the
word once all the letters are
entered.
9
 Loading...