

Page 1

ENGLISH
Owner’s Manual
REFRIGERATOR
-
FREEZER
Please read carefully the manual instruction and safety caution
before operating your refrigerator and retain it for future reference
www.lg.com
P/No. : MFL69844942
Copyright © 2018 LG Electronics Inc. All Rights Reserved
Page 2

CONTENTS
IMPORTANT SAFETY INFORMATION ................
INSTALLATION ........................................................
3
12
INNER PARTS
...........................................................
OPERATIONS ..........................................................
Starting
Before Setting The Temperature
Door Alarm
Self Test
Controls For Refrigerator Compartment
Express Freeze
Lock
(Optional)
Wi-Fi (Optional)
Controls For Freezer Compartment
Ice Making
Vegetable Drawer
Defrosting
Door Cooling
Deodorizer (Optional)
Water Dispenser
Home Bar
(Optional)
(Optional)
SUGGESTIONS ON FOOD STORAGE ...............
13
23
29
CLEANING .................................................................
GENERAL INFORMATION ...................................
LAMP REPLACEMENT ..........................................
IMPORTANT WARNINGS .....................................
BEFORE CALLING FOR SERVICE
......................
EARTH (GROUNDING) CONSTRUCTION
(OPTIONAL)
SMART FUNCTION
SMART DIAGNOSIS
...............................................................
.................................................
.................................................
2
30
32
32
33
34
35
36
38
Page 3
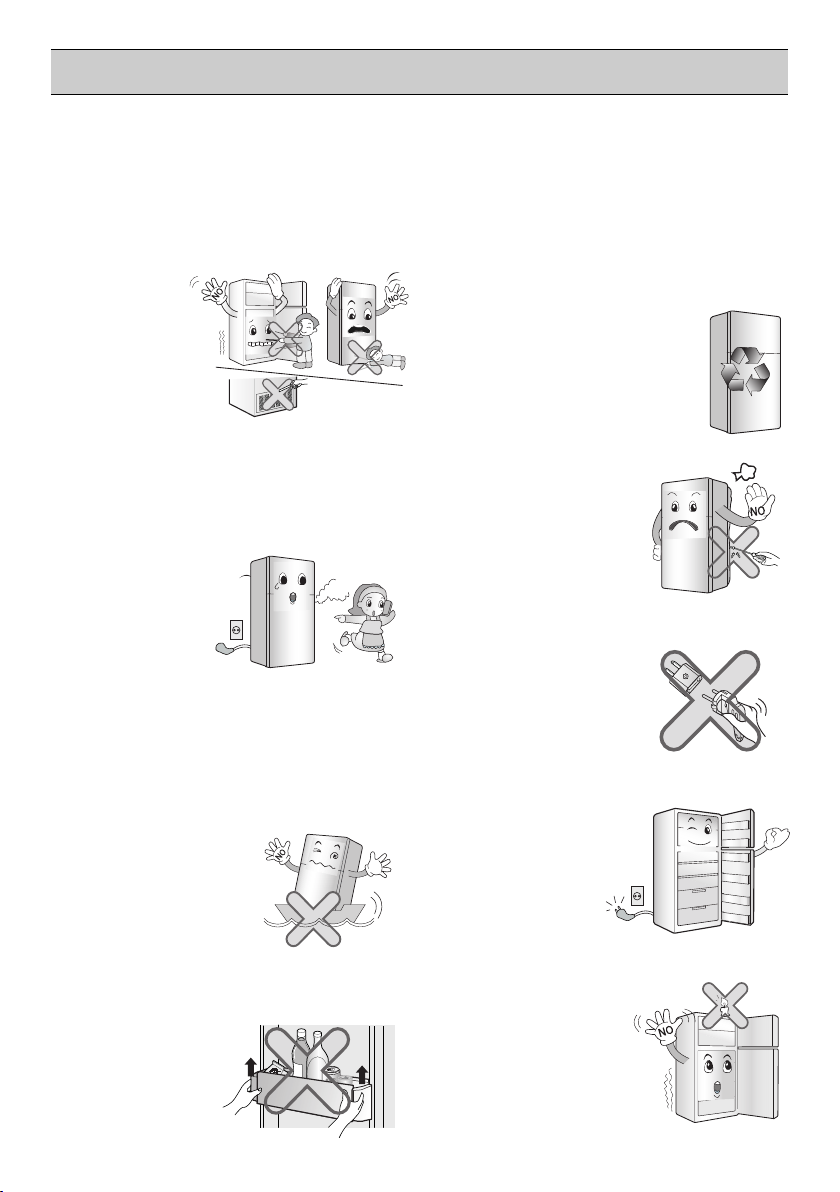
IMPORTANT SAFETY INFORMATION
WARNING
Keep ventilation openings, in the appliance enclosure or in the
built-in structure,
Do no
the defrosting
manuf
Do not damage the refrigerant circuit.
Do not use electrical appliances inside the food storage
compartment of the appliance, unless they are of the type
recommended by the manufacturer.
The refrigerant and insulation blowing gas used in the
appliance require special disposal procedures. When disposal,
please consult with services agent or a similarly qualified person.
This appliance contains a small amount of isobutane refrigerant
(R600a),natural gas with high environmental compatibility, but it is
t use mechanical device
actur
er
clear of obstruction.
s or o
process, other than those recommended by the
.
ther means t
o accelerate
also combustible.When transporting and installing the appliance,
care should be taken to ensurethat no parts of the refrigerating
circuit are damaged. Refrigerant squirting outof the pipes could
ignite or cause an eye injury. if a leak is detected, avoid anynaked
flames or potential sources of ignition and air the room in which
theappliance is standing for several minutes.
In order to avoid the creation of a flammable gas air mixture if a
leak in the refrigerating circuit occurs, the size of the room in which
the appliance may be sited depends on the amount of refrigerant
used. The room must be 21 m in size for every 8g of R600a
refrigerant inside the appliance. The amount of refrigerant in your
particular appliance is shown on the identification plate inside the
appliance. Never start up an appliance showing any signs of damage.
if in doubt, consult your dealer.
3
Page 4
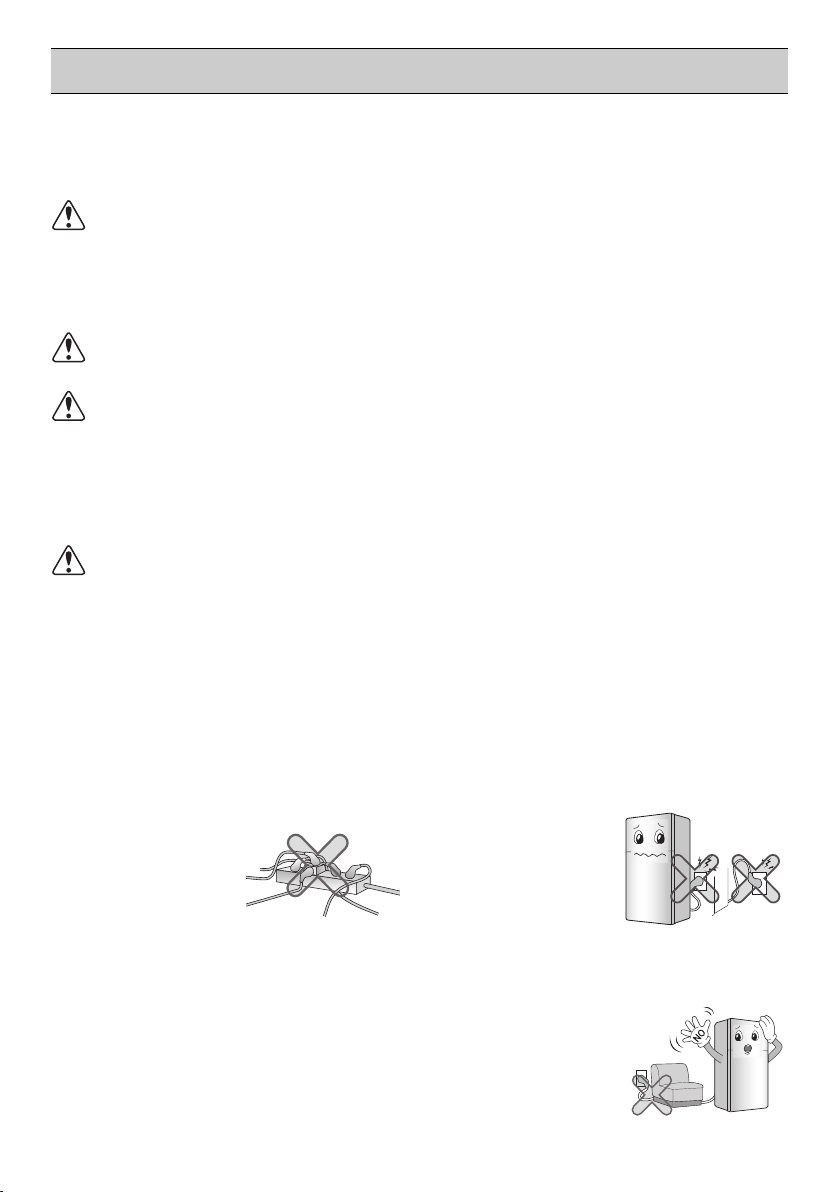
• Using several devices at one outlet
may cause fire.
• The electric leakage breaker may
damage food and
the dispenser may
be leaked.
Prevent the power cord from being
squeezed or imprinted if the
refrigerator is pushed in after the
power plug is extracted during the
installation.
It becomes the cause of fire or electric
shock.
Do not allow the power plug to face
upward or to be squeezed at the
back of the refrigerator.
Water may be flown
into or the plug may
be damaged, which
causes fire or
electric shock.
Do not allow the power cord bent or
pressed by the heavy object to be
damaged.
It may damage the
power cord to cause
fire or electric shock.
IMPORTANT SAFETY INFORMATION
BASIC SAFETY PRECAUTIONS
This guide contains many important safety messages. Always read
and obey all safety messages.
This is the safety alert symbol. It alerts you to safety messages that inform you
of hazards that can kill or hurt you or others or cause damage to the product. All
safety messages will be preceded by the safety alert symbol and the hazard signal
word WARNING, or CAUTION. These words mean:
WARNING
CAUTION
All safety messages will identify the hazard, tell you how to reduce the chance of
injury, and tell you what can happen if the instructions are not followed.
You can be killed or seriously injured if you don’t follow
instructions.
Indicates an imminently hazardous situation which, if not
avoided, may result in minor or moderate injury, or product
damage only.
WARNING
To reduce the risk of fire, electric shock, or injury to persons when using your
product, basic safety precautions should be followed, including the following.
Read all instructions before using this appliance.
1. When connecting the power
Do not use many power outlets.
4
Page 5

IMPORTANT SAFETY INFORMATION
1. When connecting the power
Do not extend or modify the length
of the power plug.
It causes electric
shock or fire by the
electric damage of the
power cord or others.
Pull out the power plug not by
grasping the cord but the plug of its
end.
It may cause electric
shock or short circuit
to fire.
Do not pull out the cord or touch the
power plug with wet hands.
It may cause electric
shock or injury.
Make sure of gr
ounding.
The incorrect
grounding may
cause breakdown
and electric
shock.
Be sur
e to use grounded exclusive
oper voltage consent for the
pr
Ground
Copper
Flat
Wire
More than
30 inches
power plug.
Be sure to use grounded extension
consents when extension consents
ar
e used.
It becomes the cause of fire.
Unplug the power plug when
cleaning, handling or replacing the
interior lamp of the refrigerator.
•
It may cause electric shock or injury.
Remove water or dust fr
power plug and insert it with the
ends of the pins securely connected.
Dust, water or unstable
connection may fire or
electric shock.
Wait for 5 minutes or longer when
reconnecting the
plug.
It may cause the
operation of the
freezer to fail.
When the power cord or the power
plug is damaged or the holes of the
outlet are loosed, do not use them.
It may cause electric
shock or short circuit to
make fire.
5
om the
After
5minutes
Page 6
IMPORTANT SAFETY INFORMATION
2. When using the refrigerator
(For CENELEC countries) This
appliance can be used by children
aged from 8 years and above and
persons with reduced physical,
sensory or mental capabilities or
lack of experience and knowledge if
they have been given supervision or
instruction concerning use of the
appliance in a safe way and
understand the hazards involved.
Children shall not play with the
appliance. Cleaning and user
maintenance shall not be made by
children without supervision.
* CENELEC countries: AT, BE, BG,
HR, CY, CZ, DK, EE, FI, MK, FR, DE,
GR, HU, IS, IE, IT, LV, LT, LU, MT, NL,
NO, PL, PT, RO, SK, SI, ES, SE, CH,
TR, GB
(For IEC countries) This appliance is
not intended for use by persons
(including children) with reduced
physical, sensory or mental
capabilities, or lack of experience
and knowledge, unless they have
been given supervision or instruction
concerning use of the appliance by a
person responsible for their safety.
Children shall not play with the
appliance.
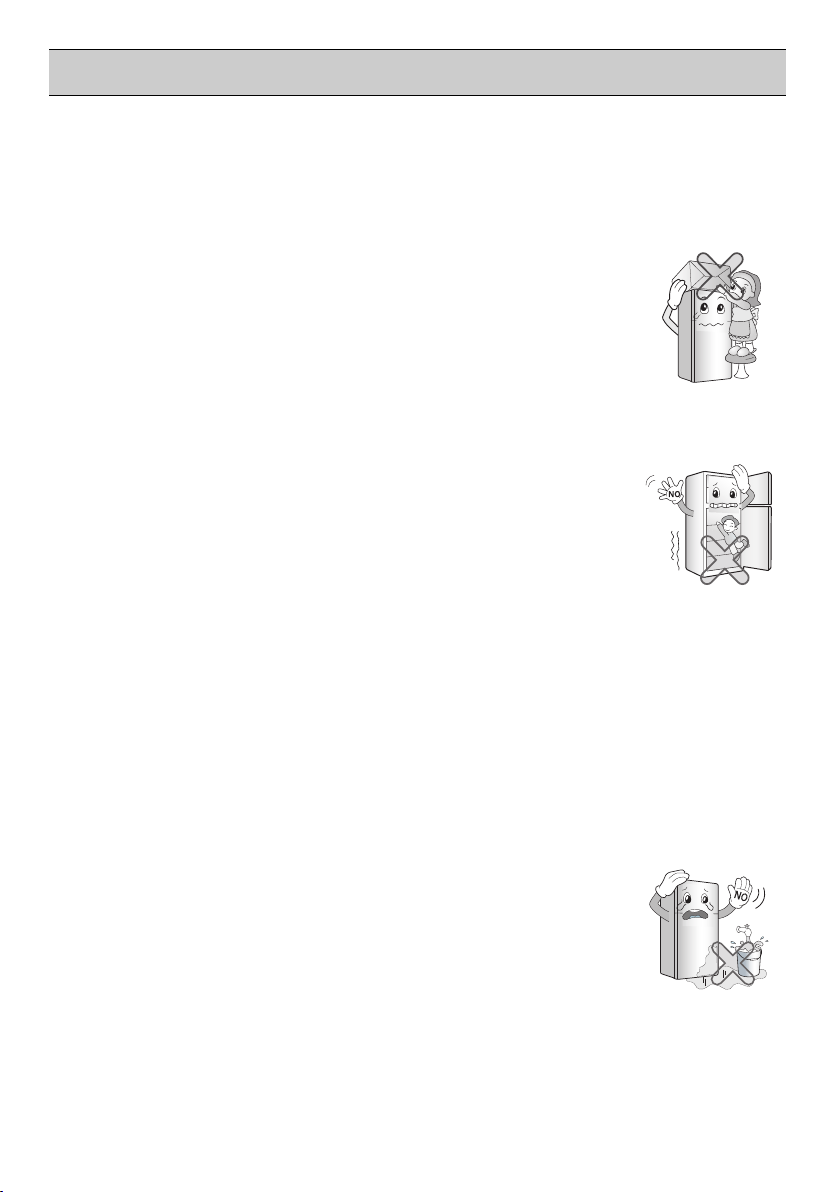
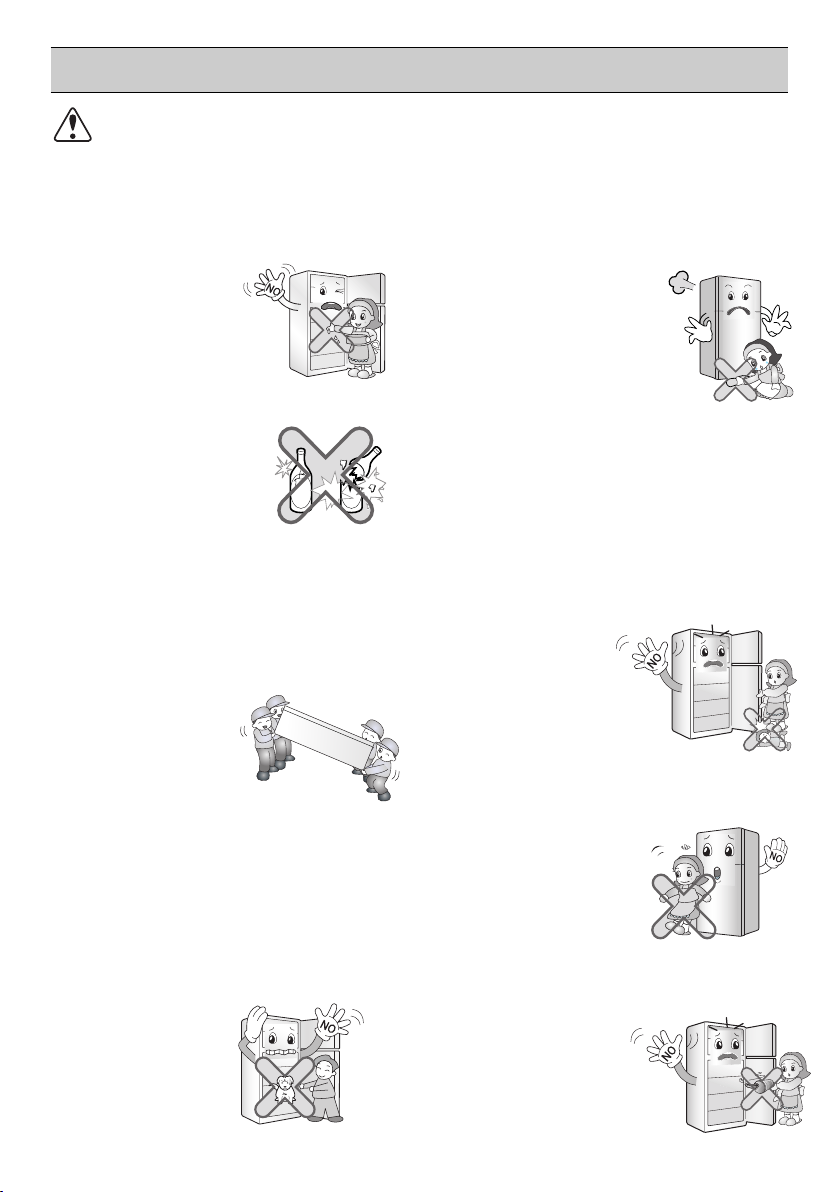
Do not place the heavy object or the
dangerous object (container with
liquid) on the refrigerator.
It may be dropped to
cause injury, fire or
electric shock when
opening or closing the
door.
Prevent children from entering the
product.
It may endanger the
life of a child if the child
enters the refrigerator.
Opening and closing the door of the
refrigerator vigorously may cause
the stored food in the refrigerator
basket to fall by shock and hurt the
foot, so take precautions.
Do not install the refrigerator in the
wet place or the place which water
or rain splashes.
Deterioration of
insulation of electric
parts may cause
electric leakage.
6
Page 7
IMPORTANT SAFETY INFORMATION
Benzene
Ether
Thinner
2. When using the refrigerator
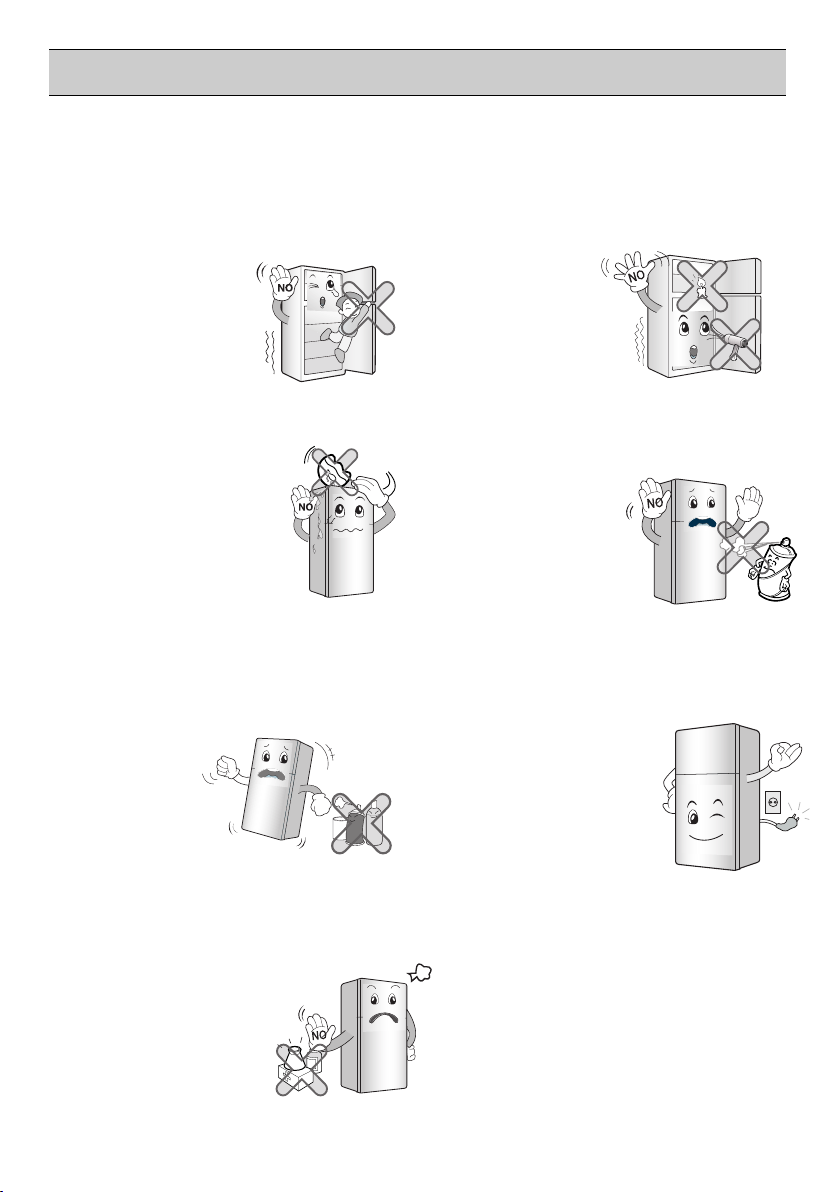
Do not cling to the door or the shelves
of the door or the cool chamber.
It may make the refrigerator fallen down
or damage the hands.
Especially, do not
allow the children to
do the above.
Do not place flower vase, cup,
cosmetics, medicine or
any container with water
on the refrigerator.
It may cause fire, electric
shock or injury by
dropping down.
Do not use or store inflammable
materials ether, benzene, alcohol,
medicine, LP gas, spray or
cosmetics near
or in the
refrigerator.
It may cause
explosion or fire.
Do not use drier to dry the inside,
nor light a candle to remove odor.
It may cause explosion or
fire.
Do not use the combustible spray
near the refrigerator.
It may cause fire.
In case of thunder and lightning,
or not in use for a long period
of time, detach the
power
There is a danger of
electric shock or fire.
plug.
Do not store the medicine or the
academic
materials at the refrigerator.
When the material with
the strict temperature
control is stored, it may be
deteriorated or it may
The Academic
make an unexpected
reaction to cause any
Medicine
The Medicine
risk.
Tempered glass is applied at the
front door (optional). It can be
damaged by general impact.
Do not touch the broken part.
It may cause injury.
7
Page 8

IMPORTANT SAFETY INFORMATION
2. When using the refrigerator
When gas is leaked, do not touch
the refrigerator or the air outlet
and ventilate the room
immediately.
- The explosion by spark may
cause fire or burn.
- Because this refrigerator uses
natural gas as the environtment-
friendly refrigerant, even as small
amount is combustible. When
the gas is leaked by the severe
damage during delivering,
installing or using the refrigerator,
any spark may cause fire or burn.
Install in places away from the fire
such as the place where flammable
gas is leaked.
It may cause
fire.
Use the submerged refrigerator after
checking it.
It may cause
electric shock or
fire.
Do not spray water at the outside or
the inside of the refrigerator or do
not clean it with benzene or thinner.
Deterioration of
insulation of electric
parts may cause
ThinnerThinner
electric shock or fire.
Do not allow any person except the
qualified engineer to disassemble,
repair or alter the refrigerator.
It may cause
injury, electric
shock or fire.
When disposing the refrigerator,
remove the packing materials from
the door.
It may cause to lock
out the child.
Install the refrigerator on the solid
and level floor.
Installing it on the unstable place may
cause death by falling down the
refrigerator when
opening or closing
the door.
8
Page 9
IMPORTANT SAFETY INFORMATION
ENGLISH
OK
2. When using the refrigerator
Do not insert the hands or the metal
stick into the exit of cool air, the
cover, the bottom of the refrigerator,
the heatproof grill (exhaust hole) at
the backside.
It may cause
electric shock
or injury.
When any strange smell or smoke is
detected from the refrigerator,
disconnect the power plug
immediately and contact to the
Down-block
service center.
office
Service
center
It may cause
fire.
Do not use the refrigerator for nondomestic purpose (storing medicine
or testing material, using at the ship,
etc.).
It may cause an unexpected risk such
as fire, electric
shock, deterioration
of stored material or
chemical reaction.
What to do with your old refrigerator.
Your refrigerator contains liquids
(refrigerant, lubricant) made of
recyclable materials. Allthese materials
must be sent to a recyclingwaste
disposal site as they can be
reused aftera specific
recycling process. Contact
localauthorities.
Do not remove the cover
on the back.
Do not use an Adapter
on the back.
Place all the components in the right
places before
connecting the
power.
Completely empty inside before
out the container from the
door
taking
.
Never leave lit candles or incense on
the fridge, at risk
of causing fire or
product damage.
9
Page 10
IMPORTANT SAFETY INFORMATION
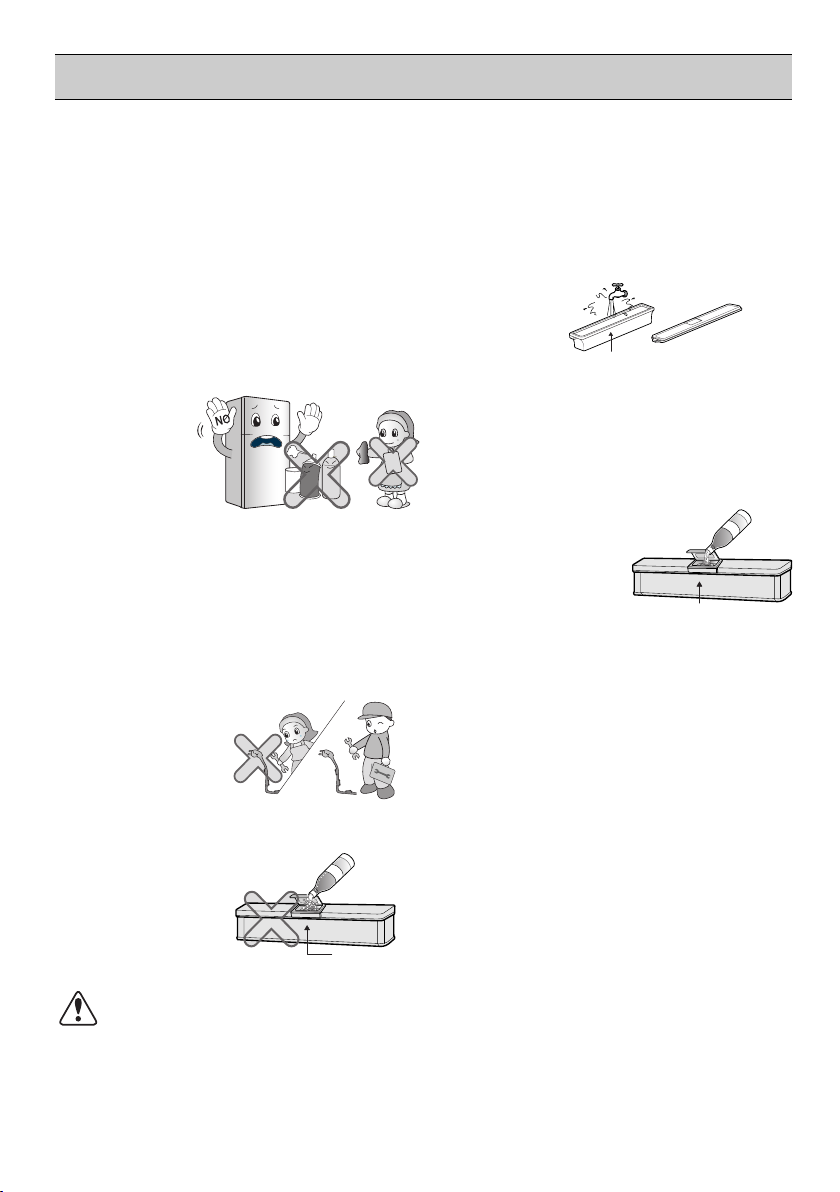
Carry the refrigerator with the handle
bar at the bottom of the front and
the top of the rear.
Otherwise, your hands may be slipped
to cause injury. Because the product is
heavy, carrying it
alone may hurt
people or accidents
may occur.
Do not put bottle in the freezer.
It may freeze the
contents to break the
bottle to cause injury.
Do not place the food in disorder
inside the refrigerator.
The food may fall during opening and
closing the door of the refrigerator and
hurt people.
Do not insert the hands into the
bottom of the refrigerator.
The iron plate of the
bottom may cause
injury.
Do not put any living animal in the
refrigerator.
Do not apply oil in the door
connection part in any
circumstances.
It may cause
damage to the
plastic parts.
oiloil
Do not lean on the doors. Hinges
may deregulate themselves, harming
seal cooler and
compromising
performance.
CAUTION
Violating this direction may cause injury or damage house or
furniture. Always be careful, please.
Do not touch food or containers at the
freezer with wet hands.
It may cause
frostbite.
Because opening or closing the door
or the home bar of the refrigerator
may cause injury to the person
around it, be careful, please.
Opening or closing the door may
cause feet or hands to be caught in
the chink in door or the child to be
get hurt by the
corner.
10
Page 11
Technician
Products
for steel
Strong
Chemicals
Water Tank
Water
Clean the water tank according to
the instruction before using the Ice
Maker.
IMPORTANT SAFETY INFORMATION
Do not use products such as grinding
sponge, brush, iron, or even special
products to clean stainless steel, soap
products such as alcohol, kerosene,
gasoline, wax, or solvent, or strong
chemicals such as chlorine, detergent,
or vinegar, for the purpose of gloss.
These products may damage the
protective lacquer, and they may
cause risk or
stain on the
surface of the
refrigerator.
Avoid the contact of oil or fat on the
plastic parts. They may cause
damage.
When the power cord is damaged,
let a technician to replace it to remove
the danger of an
accident.
Do not use the carbonated water.
The gas pressure
may cause
leakage.
WARNING : fill with potable water
only.
Water Tank
Use only water. If any other liquid is
used, the operation of the system
may be deteriorated. If a problem
occurs by using any liquid other than
water, the manufacturer
will not be
responsible.
Water Tank
Only water
Do not store excessive water
bottle or side dish container,
etc. in the door basket. It will
make you put excessive force
to take out the water bottle or
side dish container from the
basket, and it may damage
the basket or it may cause
injury of your hand hitting the
surrounding structure.
WARNING
Please do not use a dishwasher to clean the lower drawers; the high
temperature may cause damage to the baskets which make them
unusable.
11
Page 12
THIS REFRIGERATOR IS MANUFACTURED WITH GREAT CARE,
AND UTILIZES THE LATEST IN TECHNOLOGY.
WE ARE CONFIDENT THAT YOU WILL BE FULLY SATISFIED WITH
IT'S PERFORMANCE AND RELIABILITY.
BEFORE YOU START YOUR REFRIGERATOR, PLEASE READ THIS
BOOKLET CAREFULLY.
IT PROVIDES EXACT INSTRUCTIONS FOR INSTALLATION,
OPERATION AND MAINTENANCE, AND ALSO SUPPLIES SOME
USEFUL HINTS.
INSTALLATION
1. Select a good location. Place your refrigerator where it is easy to use.
2.Avoid placing the unit near heat sources, direct sunlight or moisture.
3. Air must circulate properly around your refrigerator to ensure
efficient operation. If your refrigerator is placed in a recessed area
in the wall, allow at least 10 inches (25 cm) or greater clearance
above the refrigerator and 2 inches (5 cm) or more from the wall.
The refrigerator should be elevated 1 inch (2.5 cm) from the floor,
especially if the floor is carpeted.
4.
To avoid vibrations, the unit must be level. If required, adjust the
leveling screws to compensate for unevenness of the floor. The
front should be slightly higher than the rear to aid in door closing.
Leveling screws can be turned easily by tipping the cabinet slightly.
Turn the leveling screws clockwise ( ) to raise the unit,
counterclockwise( ) to lower it.
5.
Don't install this appliance below 5°C. It may cause the debasement
of the refrigerator.
NEXT
1.
Clean your refrigerator thoroughly and wipe off all dust accumulated
during shipping.
2.
Install accessories such as ice cube box, etc., in their proper places.
They are packed together to prevent possible damage during
shipment.
3.
Connect the power supply cord (or plug) to the outlet. Don't double
up with other appliances on the same outlet.
4.
Prior to storing food, leave your refrigerator on for 2 or 3 hours.
Check the flow of cold air in the freezer compartment to ensure
proper cooling.
Your refrigerator is now ready for use.
12
Page 13

INNER PARTS
INTERNAL CONTROLLER MODEL TYPE A
FREEZER
COMPARTMENT
Lamp
Twisting Ice Serve
Type Ice Making
Shelf
REFRIGERATOR
COMPARTMENT
Lamp
Deodorizer
(Optional)
Door Cooling
Temperature
Refrigerator
Control
Shelves
(Optional)
Vegetable Drawer
NOTE
Smart Diagnosis
Freezer Temperature
Control Dial
Freezer Door Rack
( )
Freezer Door Rack
Refrigerator Door
Rack
Egg Tray
Refrigerator Door
Rack
(Optional)
Levelling Screw
- This guide covers several different models. The refrigerator you have
purchased may have some or all of the features shown above.
- To keep a position of inner parts like as baskets, drawers and shelves
supplied by manufactureris the most efficient usage for energy saving.
Optional)
(
SUGGESTION FOR ENERGY SAVING
- Please do not keep the door open for a long time, close door in the shortest time.
- Too much food are not advised to be put in. Enough space should be kept for cool air circulating freely.
- Do not set the temperature of refrigerator lower than needed. Do not put the food near the temperature
sensor.
- Allow hot food to cool prior to storing. Placing hot food in the fridge-freezer could spoil other food, and
lead to higher electric bills.
- Do not block air vents with food. Smooth circulation of cold air keeps fridge-freezer temperature even.
-
Do not open the door frequently. Opening the door lets warm air enter the fridge-freezer, and cause
temperature to rise.
13
Page 14

INNER PARTS
INTERNAL CONTROLLER MODEL TYPE B
FREEZER
COMPARTMENT
Lamp
Twisting Ice Serve
Type Ice Making
REFRIGERATOR
COMPARTMENT
Temperature
Hygiene Fresh
Vegetable Drawer
Shelf
Lamp
Deodorizer
(Optional)
Fresh Zone
Door Cooling
Refrigerator
Control
Shelves
(Optional)
(Optional)
Smart Diagnosis
Freezer Temperature
Control Dial
Freezer Door Rack
(Optional)
( )
Freezer Door Rack
Refrigerator Door
Rack
Door Cooling
Egg Tray
Refrigerator Door
Rack
Levelling Screw
- This guide covers several different models. The refrigerator you have
NOTE
purchased may have some or all of the features shown above.
- To keep a position of inner parts like as baskets, drawers and shelves
supplied by manufactureris the most efficient usage for energy saving.
SUGGESTION FOR ENERGY SAVING
- Please do not keep the door open for a long time, close door in the shortest time.
- Too much food are not advised to be put in. Enough space should be kept for cool air circulating freely.
- Do not set the temperature of refrigerator lower than needed. Do not put the food near the temperature
sensor.
- Allow hot food to cool prior to storing. Placing hot food in the fridge-freezer could spoil other food, and
lead to higher electric bills.
- Do not block air vents with food. Smooth circulation of cold air keeps fridge-freezer temperature even.
-
Do not open the door frequently. Opening the door lets warm air enter the fridge-freezer, and cause
temperature to rise.
14
Page 15

INNER PARTS
INTERNAL CONTROLLER MODEL TYPE
FREEZER
COMPARTMENT
Lamp
Twisting Ice Serve
Type Ice Making
Shelf
REFRIGERATOR
COMPARTMENT
Lamp
Deodorizer
(Optional)
Pull Out Tray
Door Cooling
Temperature
Refrigerator
Control
Shelves
(Optional)
Vegetable Drawer
C
Smart Diagnosis
Freezer Temperature
Control Dial
Freezer Door Rack
Optional)
(
( )
Freezer Door Rack
Optional)
(
( )
Refrigerator Door
Rack
Refrigerator Door
Rack
(Optional)
Egg Tray
Levelling Screw
- This guide covers several different models. The refrigerator you have
NOTE
purchased may have some or all of the features shown above.
- To keep a position of inner parts like as baskets, drawers and shelves
supplied by manufactureris the most efficient usage for energy saving.
SUGGESTION FOR ENERGY SAVING
- Please do not keep the door open for a long time, close door in the shortest time.
- Too much food are not advised to be put in. Enough space should be kept for cool air circulating freely.
- Do not set the temperature of refrigerator lower than needed. Do not put the food near the temperature
sensor.
- Allow hot food to cool prior to storing. Placing hot food in the fridge-freezer could spoil other food, and
lead to higher electric bills.
- Do not block air vents with food. Smooth circulation of cold air keeps fridge-freezer temperature even.
-
Do not open the door frequently. Opening the door lets warm air enter the fridge-freezer, and cause
temperature to rise.
15
Page 16

INNER PARTS
INTERNAL CONTROLLER MODEL TYPE
FREEZER
COMPARTMENT
Twisting Ice Serve
Type Ice Making
Shelf
REFRIGERATOR
COMPARTMENT
Lamp
Deodorizer
(Optional)
Pull Out Tray
Door Cooling
Temperature
Refrigerator
Control
Shelves
(Optional)
Hygiene Fresh
(Optional)
Vegetable Drawer
D
Smart Diagnosis
Freezer Temperature
Control Dial
Freezer Door Rack
Optional)
(
( )
Freezer Door Rack
Optional)
(
( )
Refrigerator Door
Rack
Refrigerator Door
Rack
(Optional)
Egg Tray
Levelling Screw
- This guide covers several different models. The refrigerator you have
NOTE
purchased may have some or all of the features shown above.
- To keep a position of inner parts like as baskets, drawers and shelves
supplied by manufactureris the most efficient usage for energy saving.
SUGGESTION FOR ENERGY SAVING
- Please do not keep the door open for a long time, close door in the shortest time.
- Too much food are not advised to be put in. Enough space should be kept for cool air circulating freely.
- Do not set the temperature of refrigerator lower than needed. Do not put the food near the temperature
sensor.
- Allow hot food to cool prior to storing. Placing hot food in the fridge-freezer could spoil other food, and
lead to higher electric bills.
- Do not block air vents with food. Smooth circulation of cold air keeps fridge-freezer temperature even.
-
Do not open the door frequently. Opening the door lets warm air enter the fridge-freezer, and cause
temperature to rise.
16
Page 17

INNER PARTS
EXTERNAL CONTROLLER MODEL TYPE A
FREEZER
COMPARTMENT
Lamp
Twisting Ice Serve
Type Ice Making
REFRIGERATOR
COMPARTMENT
Shelf
Lamp
Deodorizer
(Optional)
Fresh Zone
Door Cooling
Smart Diagnosis
Freezer Temperature
Control Dial
Freezer Door Rack
(Optional)
( )
Freezer Door Rack
Refrigerator Door
Rack
Door Cooling
Egg Tray
Shelves
(Optional)
Hygiene Fresh
(Optional)
Vegetable Drawer
NOTE
- This guide covers several different models. The refrigerator you have
purchased may have some or all of the features shown above.
- To keep a position of inner parts like as baskets, drawers and shelves
supplied by manufactureris the most efficient usage for energy saving.
Refrigerator Door
Rack
Levelling Screw
SUGGESTION FOR ENERGY SAVING
- Please do not keep the door open for a long time, close door in the shortest time.
- Too much food are not advised to be put in. Enough space should be kept for cool air circulating freely.
- Do not set the temperature of refrigerator lower than needed. Do not put the food near the temperature
sensor.
- Allow hot food to cool prior to storing. Placing hot food in the fridge-freezer could spoil other food, and
lead to higher electric bills.
- Do not block air vents with food. Smooth circulation of cold air keeps fridge-freezer temperature even.
-
Do not open the door frequently. Opening the door lets warm air enter the fridge-freezer, and cause
temperature to rise.
17
Page 18

INNER PARTS
EXTERNAL CONTROLLER MODEL
FREEZER
COMPARTMENT
Lamp
Twisting Ice Serve
Type Ice Making
Shelf
REFRIGERATOR
COMPARTMENT
Lamp
Deodorizer
(Optional)
Fresh Zone
Door Cooling
Shelves
(Optional)
Hygiene Fresh
(Optional)
Vegetable Drawer
TYPE
C
Smart Diagnosis
Freezer Temperature
Control Dial
Freezer Door Rack
(Optional)
( )
Freezer Door Rack
Optional)
(
( )
Refrigerator Door
Rack
Refrigerator Door
Rack
Egg Tray
Levelling Screw
- This guide covers several different models. The refrigerator you have
NOTE
purchased may have some or all of the features shown above.
- To keep a position of inner parts like as baskets, drawers and shelves
supplied by manufactureris the most efficient usage for energy saving.
SUGGESTION FOR ENERGY SAVING
- Please do not keep the door open for a long time, close door in the shortest time.
- Too much food are not advised to be put in. Enough space should be kept for cool air circulating freely.
- Do not set the temperature of refrigerator lower than needed. Do not put the food near the temperature
sensor.
- Allow hot food to cool prior to storing. Placing hot food in the fridge-freezer could spoil other food, and
lead to higher electric bills.
- Do not block air vents with food. Smooth circulation of cold air keeps fridge-freezer temperature even.
-
Do not open the door frequently. Opening the door lets warm air enter the fridge-freezer, and cause
temperature to rise.
18
Page 19

INNER PARTS
DISPENSER MODEL
FREEZER
COMPAR
TMENT
Lamp
Shelf
Twisting Ice Serve
Type Ice Making
REFRIGERATOR
COMPARTMENT
Lamp
Deodorizer
(Optional)
Fresh Zone
Door Cooling
Shelves
(Optional)
Hygiene Fresh
(Optional)
Vegetable Drawer
TYPE A
Smart Diagnosis
Temperature
Freezer
Control Dia
Freezer Door Rack
( )
Freezer Door Rack
Wat
Egg Tray
Refrigerator Door
Rack
Levelling Screw
l
(Optional)
er Tank
- This guide covers several different models. The refrigerator you have
NOTE
purchased may have some or all of the features shown above.
- To keep a position of inner parts like as baskets, drawers and shelves
supplied by manufactureris the most efficient usage for energy saving.
SUGGESTION FOR ENERGY SAVING
- Please do not keep the door open for a long time, close door in the shortest time.
- Too much food are not advised to be put in. Enough space should be kept for cool air circulating freely.
- Do not set the temperature of refrigerator lower than needed. Do not put the food near the temperature
sensor.
- Allow hot food to cool prior to storing. Placing hot food in the fridge-freezer could spoil other food, and
lead to higher electric bills.
- Do not block air vents with food. Smooth circulation of cold air keeps fridge-freezer temperature even.
-
Do not open the door frequently. Opening the door lets warm air enter the fridge-freezer, and cause
temperature to rise.
19
Page 20

INNER PARTS
DISPENSER MODEL TYPE
FREEZER
COMPARTMENT
Twisting Ice Serve
Type Ice Making
Shelf
REFRIGERATOR
COMPARTMENT
Lamp
Deodorizer
(Optional)
Pull Out Tray
Door Cooling
Temperature
Refrigerator
Control
Shelves
(Optional)
Hygiene Fresh
(Optional)
Vegetable Drawer
D
Smart Diagnosis
Freezer Temperature
Control Dial
Freezer Door Rack
Optional)
(
( )
Freezer Door Rack
Optional)
(
( )
er Tank
Wat
Refrigerator Door
Rack
(Optional)
Egg Tray
Levelling Screw
- This guide covers several different models. The refrigerator you have
NOTE
purchased may have some or all of the features shown above.
- To keep a position of inner parts like as baskets, drawers and shelves
supplied by manufactureris the most efficient usage for energy saving.
SUGGESTION FOR ENERGY SAVING
- Please do not keep the door open for a long time, close door in the shortest time.
- Too much food are not advised to be put in. Enough space should be kept for cool air circulating freely.
- Do not set the temperature of refrigerator lower than needed. Do not put the food near the temperature
sensor.
- Allow hot food to cool prior to storing. Placing hot food in the fridge-freezer could spoil other food, and
lead to higher electric bills.
- Do not block air vents with food. Smooth circulation of cold air keeps fridge-freezer temperature even.
-
Do not open the door frequently. Opening the door lets warm air enter the fridge-freezer, and cause
temperature to rise.
20
Page 21

INNER PARTS
DOOR IN DOOR MODEL
Deodorizer
(Optional)
Door Cooling
(Optional)
(Optional)
TYPE A
Smart Diagnosis
( )
Home Bar
- This guide covers several different models. The refrigerator you have
NOTE
purchased may have some or all of the features shown above.
- To keep a position of inner parts like as baskets, drawers and shelves
supplied by manufactureris the most efficient usage for energy saving.
SUGGESTION FOR ENERGY SAVING
- Please do not keep the door open for a long time, close door in the shortest time.
- Too much food are not advised to be put in. Enough space should be kept for cool air circulating freely.
- Do not set the temperature of refrigerator lower than needed. Do not put the food near the temperature
sensor.
- Allow hot food to cool prior to storing. Placing hot food in the fridge-freezer could spoil other food, and
lead to higher electric bills.
- Do not block air vents with food. Smooth circulation of cold air keeps fridge-freezer temperature even.
-
Do not open the door frequently. Opening the door lets warm air enter the fridge-freezer, and cause
temperature to rise.
21
Page 22

INNER PARTS
DOOR IN DOOR MODEL
Deodorizer
(Optional)
Door Cooling
(Optional)
TYPE
C
Smart Diagnosis
( )
(Optional)
( )
Home Bar
- This guide covers several different models. The refrigerator you have
NOTE
purchased may have some or all of the features shown above.
- To keep a position of inner parts like as baskets, drawers and shelves
supplied by manufactureris the most efficient usage for energy saving.
SUGGESTION FOR ENERGY SAVING
- Please do not keep the door open for a long time, close door in the shortest time.
- Too much food are not advised to be put in. Enough space should be kept for cool air circulating freely.
- Do not set the temperature of refrigerator lower than needed. Do not put the food near the temperature
sensor.
- Allow hot food to cool prior to storing. Placing hot food in the fridge-freezer could spoil other food, and
lead to higher electric bills.
- Do not block air vents with food. Smooth circulation of cold air keeps fridge-freezer temperature even.
-
Do not open the door frequently. Opening the door lets warm air enter the fridge-freezer, and cause
temperature to rise.
22
Page 23

OPERATIONS
STARTING
When your refrigerator is first installed, allow it 2-3 hours to stabilize at normal operating temperatures
prior to filling it with fresh or frozen foods.
If operation is interrupted, wait 5 minutes before restarting.
BEFORE SETTING THE TEMPERATURE
●
The temperature of the refrigerator is kept constant regardless of changes in room temperature.
It is recommended that, once set, the temperature settings(the controls for the refrigerator and
freezer compartments) not be changed unless necessary.
●
This refrigerator has one temperature control button for the refrigerator compartment and one
temperature control dial for the freezer compartment.
●
The default setting of the temperature control button for the refrigerator compartment is ‘3°C’.
(for external controller model),
●
The default setting of the temperature control dial for the freezer compartment is ‘3’ for model
type A & B or ‘5’ for model type C & D.
●
This refrigerator has a temperature sensor in the refrigerator compartment. It will start and stop
the compressor automatically as needed.
DOOR ALARM
When the door of the refrigerator or the freezer is open for 1 minute, an alarm will sound three times.
It the door remains open, the alarm will repeat every 30 seconds.
SELF TEST
●
Your refrigerator contains a built in diagnostic capability. If it develops a malfunction in certain areas,
it will display an error code to assist the repair technician. While an error code is displayed, other
control and display functions will not operate.
●
If an error code is displayed, contact a service center. Do not disconnect the power cord from
the outlet.
CONTROLS FOR REFRIGERATOR COMPARTMENT
FOR INTERNAL CONTROLLER MODEL
The default setting of the temperature control button for
the refrigerator compartment is NORMAL.
To control the refrigerator temperature, press the REF.
TEMP CONTROL button.
Whenever pressing the button, LED emitting the light.
The temperature is set in 7 steps, from Cold to Coldest
cooling.
23
Page 24

OPERATIONS
FOR EXTERNAL CONTROLLER MODEL
Display graphic can be different, depend on the type of your refrigerator.
a
●
Touch
'Fridge' button to control refrigerator temperature.
●
Whenever the button, the LED emits light.
●
Touch
● The number showing up on the LED luminesce indicate the temperature of refrigerator compartment.
●
You can select the desired setting point seven steps, from '0 C' to '6oC'.
-
-
EXPRESS FREEZE
●
The Express Freeze
touching
‘Hygiene Fresh’ button to operate hygiene motor (optional).
Touch
Touch
button, Fridge temperature will be down each 1 C.
ⓐ
button, Hygiene Fresh motor will be on, power mode, off .
ⓑ
(OPTIONAL)
fe
ature operates
o
o
(optional)
b
when the refrigerator first turn on.
The compressor and circulating fan
operate at maximum cooling capacity to
quickly lower the refrigerator temperature.
It shuts off automatically.
●
If warm food is placed into the refrigerator, Express Freeze can be started with the button
on the control panel. Express Freeze will shut off when the temperature reaches
the proper level or it can be shut off manually by the Express Freeze button.
touching
LOCK (OPTIONAL)
●
LOCK
Touch
and hold the Lock button
for 3 seconds to lock the Lock.
When it is locked, the Lock LED will be on
and the other button will not operate. To
touch
unlock, and hold the Lock button
for 3 seconds again.
Wi-Fi
(OPTIONAL)
This sets the refrigerator to connect to your home's Wi-Fi network.
24
Page 25

OPERATIONS
CONTROLS FOR FREEZER COMPART
MENT
Depend on your product
5 3
3
<Type A & B> <Type C & D>
To lower the temperature in the freezer, t nob
To raise the temperature in the freezer, tu nob
●
When the freezer compartment is not co gh in
7
( 6 ~ ).
●
7
Knob is for quick freezing in the free partment.
continuously or the
refrigerator compartm be warmer. When the quick
urn the k
rn the k
ld enou
zer com
ent can
right and set to a higher number.
left and set to a smaller number.
winter, adjust the control for the freezer to High
The refrigerator can be operated
6 5
5
5
4
freezing is finished,
please return to set the Knob at Normal.
●
Setting the Freezer Knob at will sati
sufficient freezing effect, so it is recomm o set the Knob at NORMAL.
●
Refrigerator temperature would be wa en the Freezer temperature set to be colder
7
sfy
. Setting the Freezer Knob at NORMAL will have
ended t
rmer wh
ICE MAKING
Twisting Ice Serve Type
●
To make ice cubes, fill the ice tray with nd
insert in its position.
●
To remove ice cubes, hold the lever of and
pull turn gently. Then, ice cubes drop ice
cube box.
water a
the tray
in to the
.
You can disassemble the I to
NOTE
• Twisting Ice Serve Type:
secure space in the freeze
Remove
1. Ice Tray
2. Ice Cube Box.
WARNING
• Do not use anything other than wa
• Fill the water up to the marked line
ce Maker
r.
1 and 2
.
ter.
..
Ice Trays
Ice Cube Box
1
2
<Twisting Ice Serve Type>
25
Page 26

OPERATIONS
VEGETABLE DRAWER
How to use
●
Vegetable drawer can be used through the control of knob.
●
Check the position of knob prior to store the food.
●
Do not locate the knob on the middle point.
DEFROSTING
●
Defrosting takes place automatically.
●
The defrosted water flows down to the evaporating tray which located in
the lower back side of the refrigerator and is evaporated automatically.
DOOR COOLING
(OPTIONAL)
The anion coating in the duct cover purifies the air
and helps stored foods remain fresh longer.
If water of foreign substances enter the cool air vent
while cleaning, efficiency will be lowered. In addition,
if gasket is damaged, efficiency may be lowered owing to
the escape of cool air.
DEODORIZER (OPTIONAL)
●
Unpleasant odor of food in fresh food
compartment is deodorized with no harm to
you and the food.
How to use
• As Deodorizer is located in cooling air inlet for circulating air in fresh food compartment, there is
no need for any handling.
• Do not prick the cooling air inlet with a sharp tip because Deodorizer may be damaged.
• When storing food with a strong odor, wrap it or store it in a container with a lid because odor may be
passed on to other foods.
Re-Using of Deodorizer
• Used some length and the odor is strong,
Deodorizer can be revived and re-used.
• Separate Deodorizer in ceiling of refrigerator
compartment, using hair drier to remove
moisture or malodor and oxidize under sunlight
to decomposing malodor by ultraviolet.
REF. TEMP. CONTROL
MIN MAX
26
Page 27

OPERATIONS
WATER DISPENSER (OPTIONAL)
●
Put water after the water tank being in position. Necessarilly separate the water tank to
NOTE
clean it or not use it.
●
When the water tank is not position after filling it with water, water can leak out by the
valve pushed.
●
Putting water in the water tank
1. Open the cover cap and pour water into the
water tank.
2. Close the cover cap.
3. The water tank is optional removable part
which can be applied to enlarge the storage
capacity.
You can store food, drinks after removing
the water tank cover.
Caution
Do not use anything other than water including.
Hot water needs to be cooled before being put
in the water tank.
Cover Cap
WATER
PUSH
●
Drinking
1. Press the dispenser pad with cup.
2. The water is released when the dispenser pad is
pressed. The pad returns to its original position when
the cup is removed and the water stops its flow.
27
Page 28

HOME BAR
How to use Home Bar
(OPTIONAL)
Press the button at the top left side of Home Bar
until “click” sounds.
You can use various storage spaces inside Home
Bar to systematically store food.
Do not use the button to close Home Bar.
Store food that is frequently taken out and used.
You don’t have to open the door and it saves
electricity.
LED lamp is turned on for easy taking out of the
contents when Home Bar is open.
Do not hang on Home Bar for safety reasons.
How to disassemble Home Bar basket
Press until
“click” sounds
1. If you lightly lift and take out the basket,
the basket is hooked into the grooves at
the left and right side of the drawer.
How to assemble Home Bar basket
1. Place the basket on the guide and push
in to be hooked into the wide groove.
2. At this time, hold the both ends of the
basket, lift with force to separate one side,
and separate the other side.
2. At this time, hold both ends of the basket,
insert one side with force, and assemble
the other side.
Caution
How to disassemble Home Bar cover
Please follow the guidelines. Otherwise, it may be damaged.
Lift Home Bar cover upward and pull to separate and take out.
1
2
2
1
Caution
Before the disassembly, take out all food to
empty inside the refrigerator.
28
Page 29

SUGGESTIONS ON FOOD STORAGE
STORING FOOD
●
Store fresh food in the refrigerator compartment. How food is frozen and thawed is an
important factor in maintaining its freshness and flavor.
●
Do not store food which goes bad easily at low temperatures, such as bananas, pineapples,
and melons.
●
Allow hot food to cool prior to storing. Placing hot food in the refrigerator could spoil other
food, and lead to higher electric bills!
●
When storing the food, cover it with vinyl wrap or store in a container with a lid. This prevents
moisture from evaporating, and helps food to keep its taste and nutrients.
●
Do not block air vents with food. Smooth circulation of chilled air keeps refrigerator temperatures
even.
●
Do not open the door frequently. Opening the door lets warm air enter the refrigerator, and
cause temperatures to rise.
FREEZER COMPARTMENT
●
Do not store bottles in the freezer compartment - they may break when frozen.
●
Do not refreeze food that has been thawed. This causes loss of taste and nutrition.
●
When storing frozen food like ice cream for a long period, place it on the freezer shelf, not in
the door rack.
●
Loading for Freezing - It is recommended to load newly introduced foods on the following
position for freezing:
Newly Introduced Food
●
Freezer Door Basket, marked (
storage of frozen food (optional).
) is -12°C compartment, that is suitable for short term
REFRIGERATOR COMPARTMENT
●
Avoid placing moist food on deep interior refrigerator
shelves, it could freeze upon direct contact with chilled
air. To avoid this it is better to store food in the covered
container.
●
It is desirable to store moist food (especially vegetable
and fruit) in the vegetable storage compartment. If it is
necessary to store on a shelf of the refrigerator, put it
close to the door away from the back wall of the
refrigerator to avoid being frozen by the cool circulating in the refrigerator.
●
Always clean food prior to refrigeration. Vegetables and fruits should be washed and wiped,
and packed food should be wiped clean, to prevent adjacent food from spoiling.
●
When storing eggs in their storage rack, ensure that they are fresh, and always store them
in a up-right position, which keeps them fresh longer.
29
Page 30

CLEANING
It is important that your refrigerator be kept clean
to prevent undesirable odors. Spilled food should
be wipe up immediately, since it may acidify and
stain plastic surfaces if allowed to settle.
Never use metallic scouring pads, brushes,
coarse abrasive cleaners or strong alkaline
solutions on any surface.
Before you clean, however, remember that damp
objects will stick or adhere to extremely cold
surfaces. Do not touch frozen surfaces with wet
or damp hands.
EXTERIOR - Use a lukewarm solution of mild
soap or dish washable solution to clean the
durable finish of your refrigerator. Wipe with a
clean, damp cloth and then dry.
For products with a stainless steel exterior, use a clean
sponge or soft cloth and a mild Detergent in warm water.
Do not use abrasive or harsh cleaners. Dry thoroughly
with a Soft cloth. Do not use appliance wax, bleach, or
other products containing chlorine on stainless steel.
INTERIOR - Regular cleaning of the interior and
interior parts is recommended. Use a lukewarm
solution of mild soap or dish washable solution to
clean the durable finish of your refrigerator. Wipe
with a clean, damp cloth and then dry.
INTERIOR PARTS - Wash compartment shelves,
door racks, storage trays and magnetic door
seals etc. Use a lukewarm solution of mild
soap or dish washable solution to clean
the inner lining of your refrigerator. Wipe with
a clean damp cloth and then dry.
WARNING
Always remove power cord from the wall
outlet prior to cleaning in the vicinity of
electrical parts(lamps, switches, controls, etc.).
Wipe up excess moisture with a sponge or
cloth to prevent water or liquid from getting
into any electrical part and causing electric
shock. Do not use flammable or toxic cleaning
liquids.
• Do not use : Surface
active agents, Car wax, Anticorrosive, or any kind
of oil, Gasoline, Acids, Wax.
• Only use dish washable
solution, and soapy water when cleaning.
• Using harsh cleaning chemicals will cause the
external finishes to change colour.
30
Page 31

CLEANING
WATER DISPENSER
(OPTIONAL)
Grille -
Wipe with a wet cloth, and dry with a dry cloth.
Water Tank -
1. Putting the Water
Is not necessary to remove the water tank in order to supply
it (it could be filled like shows fig. 1 pulling the tank gate).
NOTE
- Before closing door, close the cap and clamp tightly.
- Do not use liquids containing sugar or carbonated drinks like soda
2. Disassembly
Lift the water tank, gripping a side and bottom of water tank.
NOTE
When disassemble Water Tank, use all water
3. Assembly
If by some cause removes the water tank, place again the water
tank on its original position. Verify that the valve assembly
correctly in the hole of the door (fig. 3,4). Once assembled push
down and check the tank position with line.
Water Tank -
1. Remove the tank cover.
inside dispenser first.
3. Clean the inside and outside of the cap
with diswashing detergent and rinse
throughly under running water. Dry the water
with a cloth.
WATER
PUSH
2. Clean the inside and outside of the water tank
with diswashing detergent and rinse
throughly under running water. Dry the water
with a cloth.
Caution
1. Use lukewarm water when cleaning.
2. Do not use anything other than water. If it is
used with soft drinks,put water in the water
tank and discharge three or four cups of
water shortly.
31
Page 32

GENERAL INFORMATION
VACATION TIME
During average length vacations, you will probably
find it best to leave the refrigerator in operation.
Place freezable items in freezer for longer life.
When you plan to be away for an extended period,
remove all food, disconnect the power cord, clean
the interior thoroughly, and leave each door OPEN
to prevent odor formation.
POWER FAILURE
Most power failures are corrected in an hour or two
and will not affect your refrigerator temperatures.
However, you should minimize the number of door
openings while the power is off. During power
failures of longer duration, place a block of dry ice on
top of your frozen packages.
IF YOU MOVE
Remove or securely fasten down all loose items
inside the refrigerator.
To avoid damaging the leveling screw(s), turn them
all the way into the base.
This appliance is intended to be used in
household and similar applications such as:
- Staff kitchen areas in shops, offices and
other working environments.
- Farm houses and by clients in hotels, motels
and other residential type environments.
- Bed and breakfast type environments.
- Catering and similar non-retail applications.
ANTI-CONDENSATION PIPE
The outside wall of the refrigerator cabinet may
sometimes get warm,
especially just after
installation.
Don't be alarmed.
This is due to the anticondensation pipe, which
pumps hot refrigerant to
prevent "sweating" on the
outer cabinet wall.
LAMP REPLACEMENT
NOTE
● This product applies LED Lamp which can not be replaced by the user.
Please contact authorized service centre for the lamp replacement.
32
Page 33

IMPORTANT WARNINGS
DO NOT USE AN EXTENSION CORD
If possible, connect the refrigerator to its own
individual electrical outlet to prevent it and other
appliances or household lights from causing an
overload that could cause a power outage.
ACCESSIBILITY OF SUPPLY PLUG
The refrigerator-freezer should be so positioned that
the supply plug is accessible for quick disconnection
when accident happens.
SUPPLY CORD REPLACEMENT
If the supply cord is damaged, it must be replaced
by the manufacturer or its service agent or a
similarly qualified person in order to avoid a hazard.
VERY DANGEROUS ATTRACTION
An empty refrigerator can be a dangerous
attraction to ch
latches, lids or the entire door from your
unused appliance, or take some other action
to make it harmless.
ildren. Remove either gaskets,
ABOUT GROUNDING (EARTHING)
In the event of an electric short circuit, grounding
(earthing) reduces the risk of electric shock by
providing an escape wire for the electric current.
In order to prevent possible electric shock, this
appliance must be grounded.
Improper use of the grounding plug can result in
an electric shock. Consult a qualified electrician
or service person if the grounding instructions
are not completely understood, or if you have
doubts on whether the appliance is properly
grounded.
DO NOT MODIFY OR EXTEND THE
POWER CORD LENGTH.
It will cause electric shock
or fire.
This appliance must be grounded (earthed).
DON'T WAIT! DO IT NOW!
Do not store inflammable materials, explosives
or chemicals in the refrigerator.
Do not store explosive substances such as aerosol cans with a flammable propellant in this
appliance.
DISPOSAL OF THE OLD APPLIANCE
This appliance contains fluid (refrigerant, lubricant) and is made of parts and materials which are
reusable and/or recyclable.
All the important materials should be sent to the collection center of waste material and can be
reused
r rework (recycling). For take back, please contact with the local agency.
aft
e
33
Page 34

BEFORE CALLING FOR SERVICE
SERVICE CALLS CAN OFTEN BE AVOIDED!
IF YOU FEEL YOUR REFRIGERATOR IS NOT OPERATING PROPERLY, CHECK THESE
POSSIBLE CAUSES FIRST :
PROBLEM POSSIBLE CAUSES
REFRIGERATOR DOES
NOT OPERATE
REFRIGERATOR OR FREEZER
COMPARTMENT TEMPERATURE
TOO WARM
●
Has a house fuse blown or circuit breaker tripped?
●
Has the power cord plug been removed or loosened
from the electrical wall outlet?
●
Temperature control not set on proper position.
●
Appliance is placed close to wall or heat source.
●
Warm weather-frequent door openings.
●
Door left open for a long time.
●
Large amount of foods are kept in the refrigerator.
ABNORMAL NOISE(S)
REFRIGERATOR
HAS ODOR
DEW FORMS ON THE
CABINET SURFACE
●
Refrigerator is installed in a weak or uneven place, or
leveling screw needs adjusting.
●
Unnecessary objects placed in the back side of the
refrigerator.
●
Foods with strong odors should be tightly covered or
wrapped.
●
Interior needs cleaning.
●
Not unusual during periods of high humidity.
●
Door may have been left ajar.
DISPOSAL OF YOUR OLD APPLIANCE
1. This crossed-out wheeled bin symbol indicates that waste
electrical and electronic products (WEEE) should be disposed
of separately from the municipal waste stream.
2. Old electrical products can contain hazardous substances so
correct disposal of your old appliance will help prevent
potential negative consequences for the environment and
human health. Your old appliance may contain reusable parts
that could be used to repair other products, and other valuable
materials that can be recycled to conserve limited resources.
3. You can take your appliance either to the shop where you
purchased the product, or contact your local government waste
office for details of your nearest authorised WEEE collection
point. For the most up to date information for your country
please see www.lg.com/global/recycling
34
Page 35

EARTH (GROUNDING) CONSTRUCTION (OPTIONAL)
It is recommended to install the earth wire to prevent electric shock
in case of electricity leakage.
How to connect the earth wire:
• Connect the earth wire's metal ring end to the earth screw
on the back of the refrigerator.
• Peel off the cable sheath/insulation at the other end of the earth wire. Attach the peeled wire
to a metal screw/nail and then drive it through the wall or ground.
Do not connect the earth wire to the following locations.
• Gas pipe
It could produce sparks which lead to fire and explosion.
• Telephone earth wire and lightning rod
It is dangerous during lightning.
• Water pipe and water tap
The earth wire connection will not work when the middle of the water pipe is made of plastic.
If it is connected to a metal water pipe, it could cause someone to be electrocuted.
When installing the product in a humid or wet location, you must install the earth wire.
Ex) • Unfloored or dirt floored room (Room with dirt and no floor), concrete floor
• Location where it can get wet such as near the sink
• Location where water can leak or is humid such as basement
• Other wet or humid location
Especially, for locations where it always get wet such as near the restaurant sink, you are obligated by
the law to install a circuit breaker in addition to the earth wire.
After consulting with your retailer or electric construction company, you must do the earth wire
construction (Type 3 earth construction). Please note that earth construction could incur extra fees.
35
Page 36

SMART FUNCTION
(Only for applied models)
Using LG SmartThinQ
Application
Things to check before using LG
SmartThinQ
• For appliances with the or logo
Check the distance between the appliance
1
and the wireless router (Wi-Fi network).
• If the distance between the appliance and
the wireless router is too far, the signal
strength becomes weak. It may take a
long time to register or installation may
Turn off the Mobile data or Cellular Data
2
on your smartphone.
• For iPhones, turn data off by going to
Settings → Cellular → Cellular Data.
Connect your smartphone to the wireless
3
router.
NOTE
• To verify the Wi-Fi connection, check that
Wi-Fi icon on the control panel is lit.
• The appliance supports 2.4 GHz Wi-Fi
networks only. To check your network
frequency, contact your Internet service
provider or refer to your wireless router
manual.
• LG SmartThinQ is not responsible for any
network connection problems or any faults,
malfunctions, or errors caused by network
connection.
• If the appliance is having trouble connecting to
the Wi-Fi network, it may be too far from the
router. Purchase a Wi-Fi repeater (range
extender) to improve the Wi-Fi signal strength.
• The Wi-Fi connection may not connect or may
be interrupted because of the home network
environment.
• The network connection may not work
properly depending on the Internet service
provider.
• The surrounding wireless environment can
make the wireless network service run slowly.
fail.
• The appliance cannot be registered due to
problems with the wireless signal
transmission. Unplug the appliance and wait
about a minute before trying again.
• If the firewall on your wireless router is
enabled, disable the firewall or add an
exception to it.
• The wireless network name (SSID) should be
a combination of English letters and numbers.
(Do not use special characters.)
• Smartphone user interface (UI) may vary
depending on the mobile operating system
(OS) and the manufacturer.
• If the security protocol of the router is set to
WEP, you may fail to set up the network.
Please change it to other security protocols
(WPA2 is recommended) and register the
product again.
Installing LG SmartThinQ
Search for the LG SmartThinQ application from
the Google Play Store or Apple App Store on a
smart phone. Follow instructions to download
and install the application.
NOTE
• If you choose the simple login to access the
LG SmartThinQ application, you must go
through the appliance registration process
each time you change your smartphone or
reinstall the application.
Wi-Fi Function
• For appliances with the or logo
Communicate with the appliance from a smart
phone using the convenient smart features.
Firmware Update
Keep the appliance performance updated.
Smart Diagnosis™
If you use the Smart Diagnosis function, you will
be provided with the useful information such as
a correct way of using the appliance based on
the pattern of use.
Settings
Allows you to set various options on the
refrigerator and in the application.
NOTE
• If you change your wireless router, your
Internet service provider or your password
after registering the appliance, please delete it
from the LG SmartThinQ Settings → Edit
Product and register again.
36
Page 37

SMART FUNCTION
(Only for applied models)
• The application is subject to change for
appliance improvement purposes without
notice to users.
• Functions may vary by model.
Connecting to Wi-Fi
The Wi-Fi button, when used with the LG
SmartThinQ application, allows the refrigerator
to connect to a home Wi-Fi network. The Wi-Fi
icon shows the status of the refrigerator’s
network connection. The icon illuminates when
the refrigerator is connected to the Wi-Fi
network.
Initial Appliance Registration
Run the LG SmartThinQ application and follow
the instructions in the application to register the
appliance.
Re-registering the Appliance or
Registering Another User
Press and hold the Wi-Fi button for 3 seconds
to temporarily turn it off. Run the LG
SmartThinQ application and follow the
instructions in the application to register the
appliance.
NOTE
• To disable the Wi-Fi function, press and hold
the Wi-Fi button for 3 seconds. Wi-Fi icon will
be turned off.
Open Source Software Notice
To obtain the source code under GPL, LGPL,
MPL, and other open source licenses, that is
contained in this product, please visit http://
opensource.lge.com.
In addition to the source code, all referred
license terms, warranty disclaimers and
copyright notices are available for download.
LG Electronics will also provide open source
code to you on CD-ROM for a charge covering
the cost of performing such distribution (such as
the cost of media, shipping, and handling) upon
email request to opensource@lge.com. This
offer is valid for a period of three years after our
last shipment of this product. This offer is valid
to anyone in receipt of this information.
Smart Diagnosis™ Using a Smart
Phone
• For appliances with the or logo
Use this function if you need an accurate
diagnosis by an LG Electronics customer
information centre when the appliance
malfunctions or fails.
Smart Diagnosis™ can not be activated unless
the appliance is connected to power. If the
appliance is unable to turn on, then
troubleshooting must be done without using
Smart Diagnosis™.
Information
Symptoms Reason Solution
• Find the Wi-Fi network connected to
your smartphone and remove it, then
register your appliance on LG
SmartThinQ
• Turn off the Mobile data of your
smartphone and register the
appliance using the Wi-Fi network.
• The wireless network name (SSID)
should be a combination of English
letters and numbers. (Do not use
special characters.)
• Only a 2.4 GHz router frequency is
supported. Set the wireless router to
2.4 GHz and connect the appliance
to the wireless router. To check the
router frequency, check with your
Internet service provider or the
router manufacturer.
• If the distance between the
appliance and the router is too far,
the signal may be weak and the
connection may not be configured
correctly. Move the location of the
router so that it is closer to the
appliance.
Your home appliance
and smartphone is
not connected to the
Wi-Fi network.
The password for the Wi-Fi
that you are trying to connect
to is incorrect.
Mobile data for your
smartphone is turned on.
The wireless network name
(SSID) is set incorrectly.
The router frequency is not 2.4
GHz.
The distance between the
appliance and the router is too
far.
37
Page 38

SMART DIAGNOSIS
(Only for applied models)
FOR INTERNAL CONTROLLER MODEL
Smart diagnosis function is...
Use the function to contact the service center and receive precise diagnosis when the refrigerator
malfunctions or fails. Use it only to connect to the consultant and do not use it in normal times.
How to use the function
First, call to the LG service center. Only use the Smart Diagnosis feature when instructed to do so by
the LG call center agent.
1.
Open the refrigerato
2.
s the ref
Pres
button or
or 3sec
If the buzzer sounds 4
3.
(upper) door and place the phone near the
speaker hole.
Check if the speaking side(microphone) of the
telephone is toward the speaker hole.
4. Do not take away the telephone while data is
being transmitted.
During the data transmission for smart diagnosis,
wait with the telephone placed near the speaker
hole at the top right side.
r (
lower) door.
igerator temperature control
r
re.f
mo
times, open the Freezer
w CAUTION
The transmission sound may be irritating.
Do not take away the telephone until the sound
stops for good diagnosis.
5. After the completion of the data transmission,
listen to the explanation of the consultant
about the result of the smart diagnosis.
When the data transmission is completed, along
with the display of the data transmission
completion, the refrigerator will be automatically
turned off and on a few seconds later.
Listen to the explanation of the consultant about
the result of the analyzed diagnosis and follow the
instructions.
NOTE
• Position the phone so that its microphone is
aligned with the speaker hole.
• The Smart Diagnosis™ sound is generated
after around three seconds.
• Do not take the phone off the speaker hole
while the data is transmitted.
• Hold the phone to the upper right speaker hole
and wait while the data is transmitted.
• The data transfer sound may be harsh to the
ear while the Smart Diagnosis™ data is being
transmitted, but do not take the phone off the
speaker hole for accurate diagnosis until the
data transfer sound has stopped.
• When the data transfer is complete, the
transfer completion message is displayed and
the control panel is automatically turned off
and then on again after a few seconds. After
the customer information centre explains the
diagnosis result.
• The Smart Diagnosis™ function depends on
the local call quality.
• The communication performance will improve
and you can transmit a better signal if you use
a land line home phone.
• If the Smart Diagnosis™ data transfer is poor
due to poor call quality, you may not receive
the best Smart Diagnosis™ service.
38
Page 39

SMART DIAGNOSIS (Only for applied models)
FOR EXTERNAL CONTROLLER MODEL
Smart diagnosis function is...
Use the function to contact the service center and receive precise diagnosis when the refrigerator
malfunctions or fails. Use it only to connect to the consultant and do not use it in normal times.
How to use the function
First, call to the LG service center. Only use the Smart Diagnosis feature when instructed to do so by
the LG call center agent.
1. Close all refrigerator doors, and touch
and hold display lock button to make it
locked state.
If the display is already in locked state,
touch
and hold lock button to reset the lock and
touch
and hold the lock button again to make it
locked state.
Caution
■
If it passes 5 minutes in locked state, smart
diagnosis function will not be activated, so
be careful.
Touch
2. and hold fridge temperature button
for 3 seconds or longer.
(All display screens will be turned off,
and in a while, 3 will be displayed on the
fridge temperature display part.)
3. Open all refrigerator compartment and
freezer compartment doors, and place
the telephone near the speaker hole at
the top right side.
Check if the speaking side(microphone) of
the telephone is toward the speaker hole.
4. Do not take away the telephone while
data is being transmitted.
During the data transmission for smart
diagnosis, wait with the telephone placed
near the speaker hole at the top right side.
The remaining time for data transmission is
displayed on the display screen.
Caution
■
The transmission sound may be irritating.
Do not take away the telephone until the
sound stops for good diagnosis.
5. After the completion of the data
transmission, listen to the explanation
of the consultant about the result of the
smart diagnosis.
When the data transmission is completed,
along with the display of the data transmission completion, the refrigerator will be automatically turned off and on a few seconds
later.
Listen to the explanation of the consultant
about the result of the analyzed diagnosis
and follow the instructions.
NOTE
• Position the phone so that its microphone is
aligned with the speaker hole.
• The Smart Diagnosis™ sound is generated
after around three seconds.
• Do not take the phone off the speaker hole
while the data is transmitted.
• Hold the phone to the upper right speaker hole
and wait while the data is transmitted.
• The data transfer sound may be harsh to the
ear while the Smart Diagnosis™ data is being
transmitted, but do not take the phone off the
speaker hole for accurate diagnosis until the
data transfer sound has stopped.
• When the data transfer is complete, the
transfer completion message is displayed and
the control panel is automatically turned off
and then on again after a few seconds. After
the customer information centre explains the
diagnosis result.
• The Smart Diagnosis™ function depends on
the local call quality.
• The communication performance will improve
and you can transmit a better signal if you use
a land line home phone.
• If the Smart Diagnosis™ data transfer is poor
due to poor call quality, you may not receive
the best Smart Diagnosis™ service.
39
Page 40

 Loading...