How it Works
Log In / Sign Up
Buy Points
How it Works
FAQ
Contact Us
Questions and Suggestions
Users
LG
Loading...
G
GSL560V
GSL561PZUZ
GSL561Z
GSL6611
GSL6611BK
2
GSL6611PS
GSL6611WH
3
GSL6621
GSL6621PS
GSL6626
2
GSL6631
GSL6631PS
GSL6646
2
GSL6646PS
2
GSL6661
GSL6661PS
GSL6671
GSL6676
2
GSL6681
GSL6691
GSL6691PS
GSL7601
GSL760MCXV
GSL760PZUV
GSL760PZUZ
3
GSL760PZXV
3
GSL760SWXV
GSL760V
GSL760Z
GSL761MCZZ
4
GSL761PZUZ
2
GSL761PZXV
2
GSL761V
GSL9366APPP
2
GSL960PZBZ
3
GSL960PZUZ
GSL960PZVZ
6
GSL960V
GSL960Z
GSL961PZBZ
2
GSL961SWUZ
3
GSL961V
GSL961Z
GSM760Z
GSM860BMAV
6
GSM860LBAZ
5
GSM960NSBZ
GSN121HSV
2
GSN181HSV
2
GSNC126E0A2
GSNC126E0A3
GSNC126E0A4
2
GSNC126E0M0
GSNC126E0U1
GSNC126E1A0
GSNC126E1A1
GSNC126E5U2
GSNC126E5U3
GSNC126E5U4
2
GSNC18654A4
2
GSNC18658U4
2
GSNC1865DA1
GSNC1865NU2
GSNC1865NU3
GSNC1865NU4
2
GSNC1865SA2
GSNC1865SA4
2
GSNC1865SM0
GSNC1865SU1
GSNC24654A4
2
GSNC24658U4
2
GSNC2465DA1
GSNC2465NU2
GSNC2465NU4
2
GSNC2465SA3
GSNC2465SA4
2
GSNH126E0A2
GSNH126E0A4
2
GSNH126E0M0
2
GSNH126E1A0
2
GSNH126E5U2
GSNH126E5U4
2
GSNH18654A4
2
GSNH18658U4
2
GSNH186TMA0
2
GSNH186TMM0
2
GSNH24654A4
GSNH24658U4
2
GSP325NSCV
4
GSP325NSYV
4
GSP325PVCV
5
GSP325PZCV
2
GSP545NSQZ
2
GSP545NSYZ
GSP545PVQV
GSP545PVYV
GSP545PVYZ
GSS6611
GSS6611PS
GSS6626
2
Loading...
Loading...
Nothing found
GSNC126E0A3
Owner’s Manual
48 pgs
6.88 Mb
0
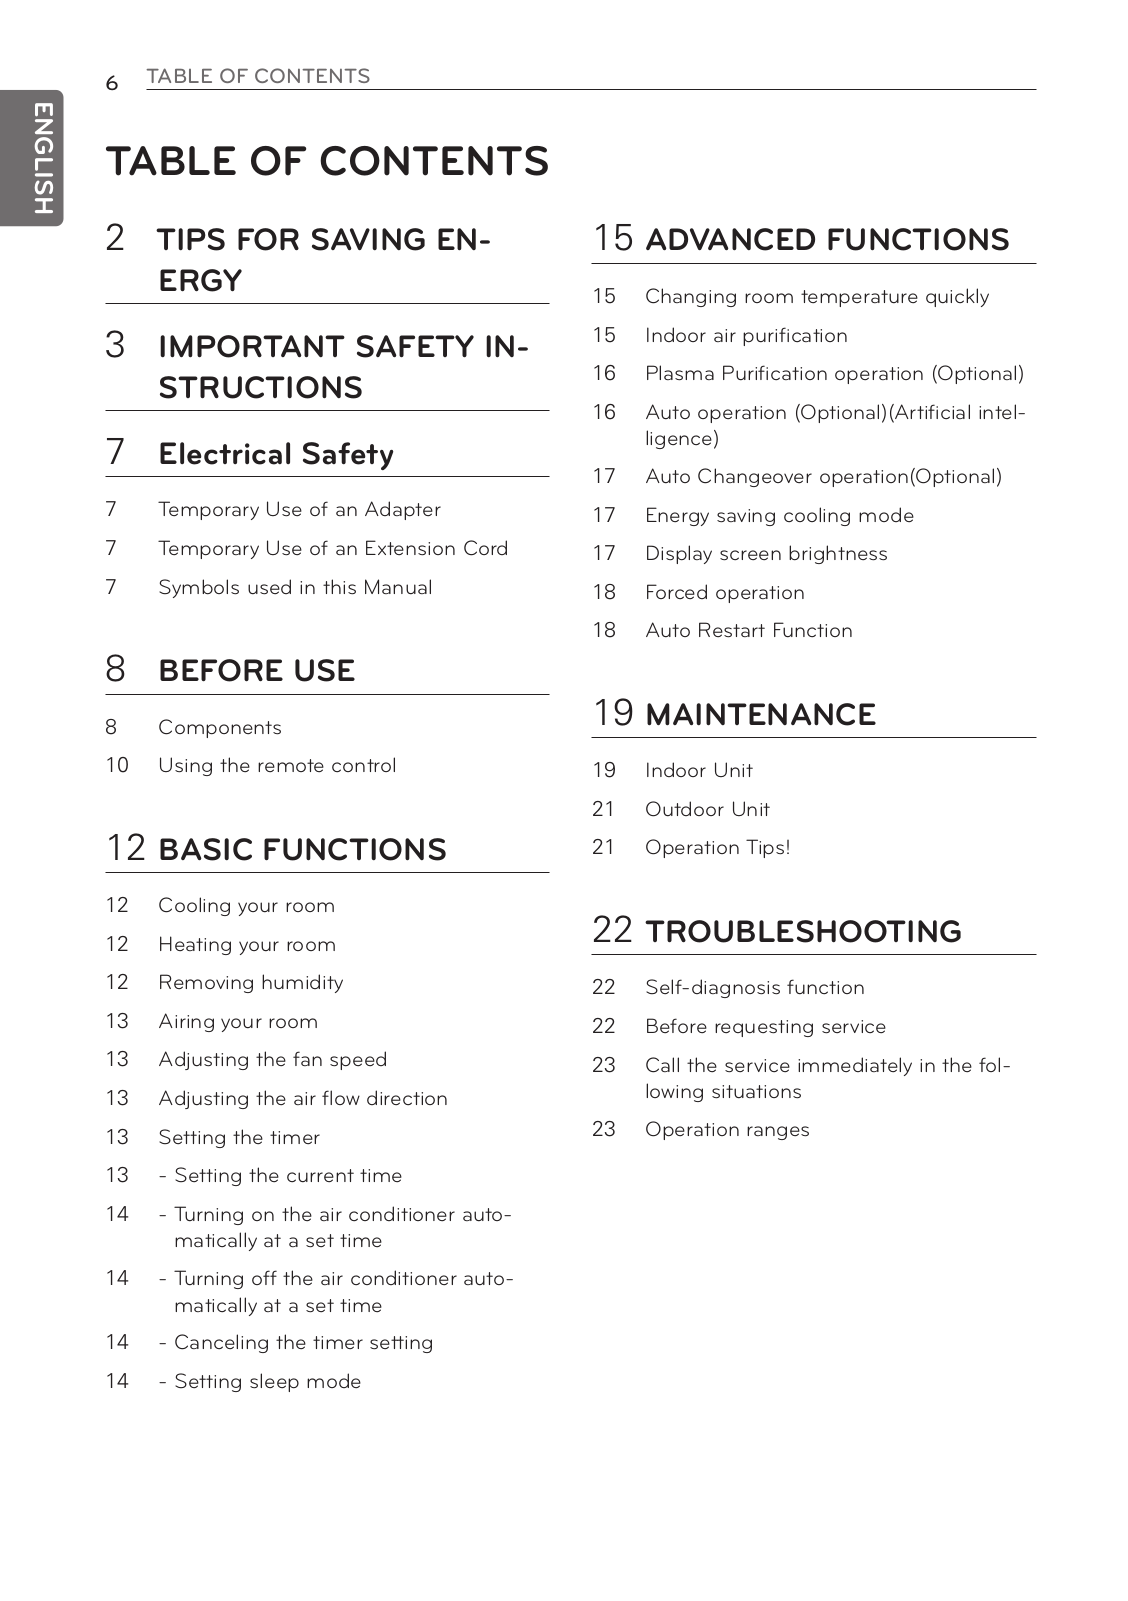
Table of contents
Loading...
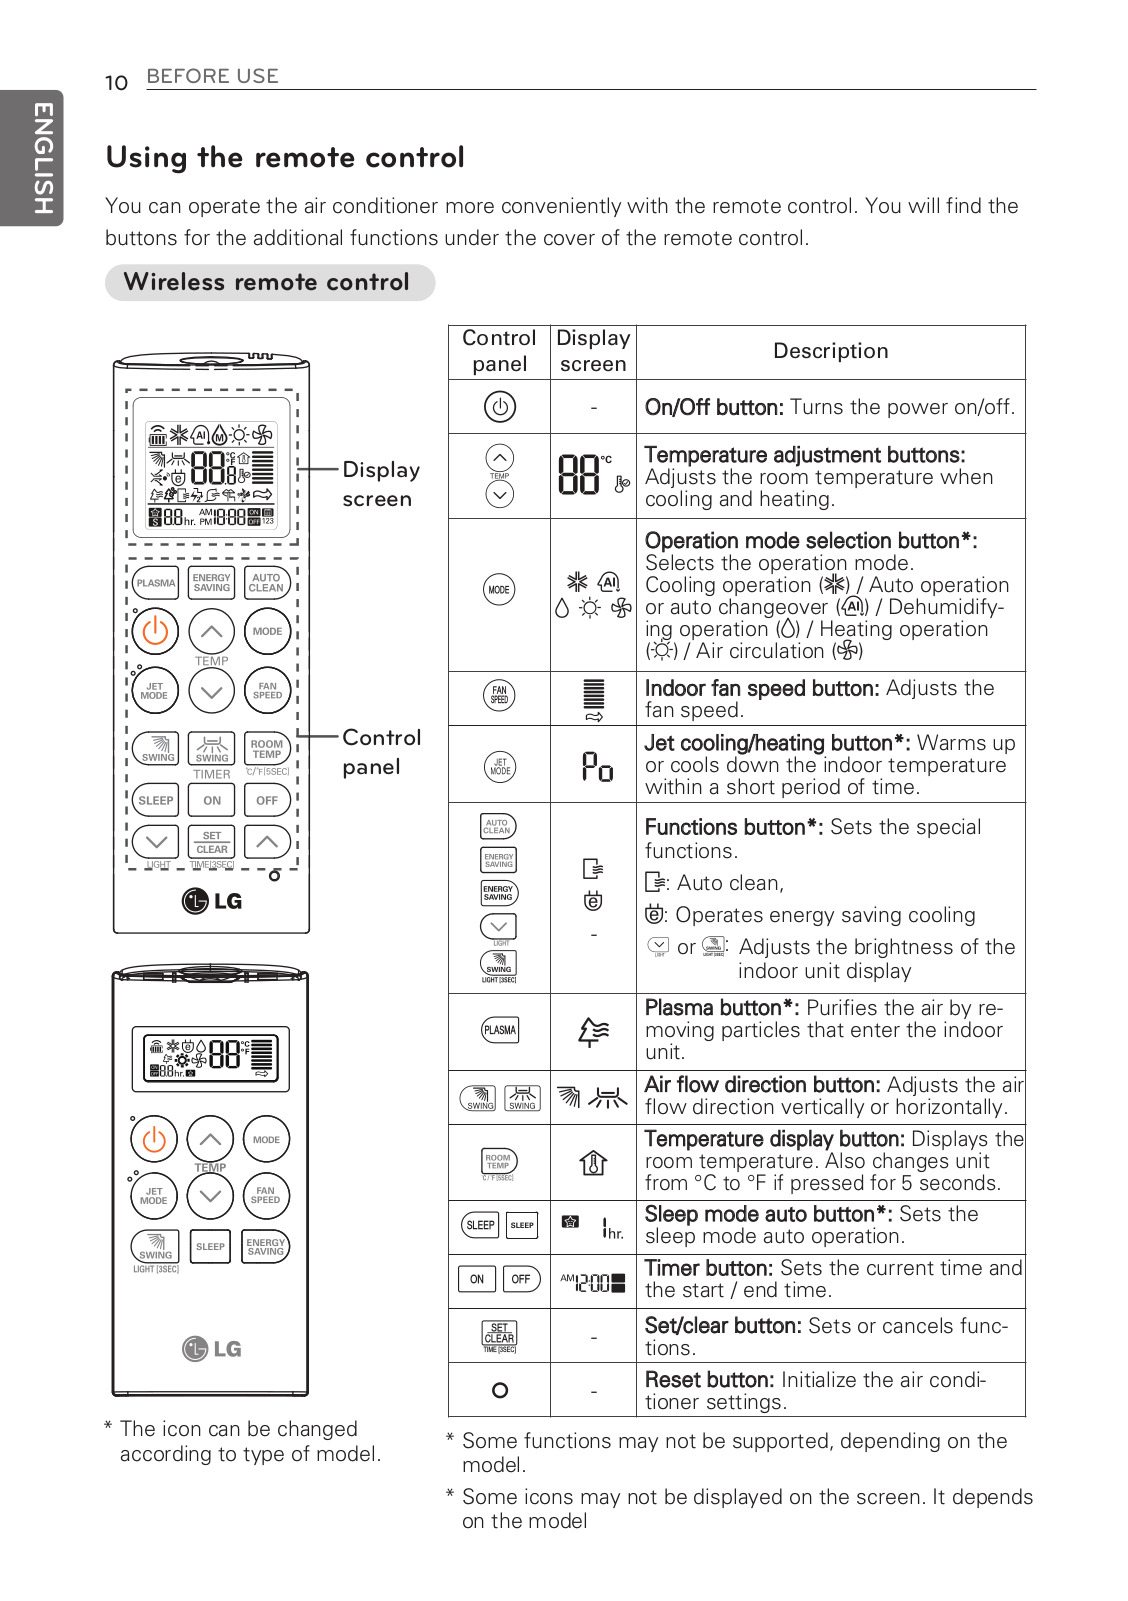
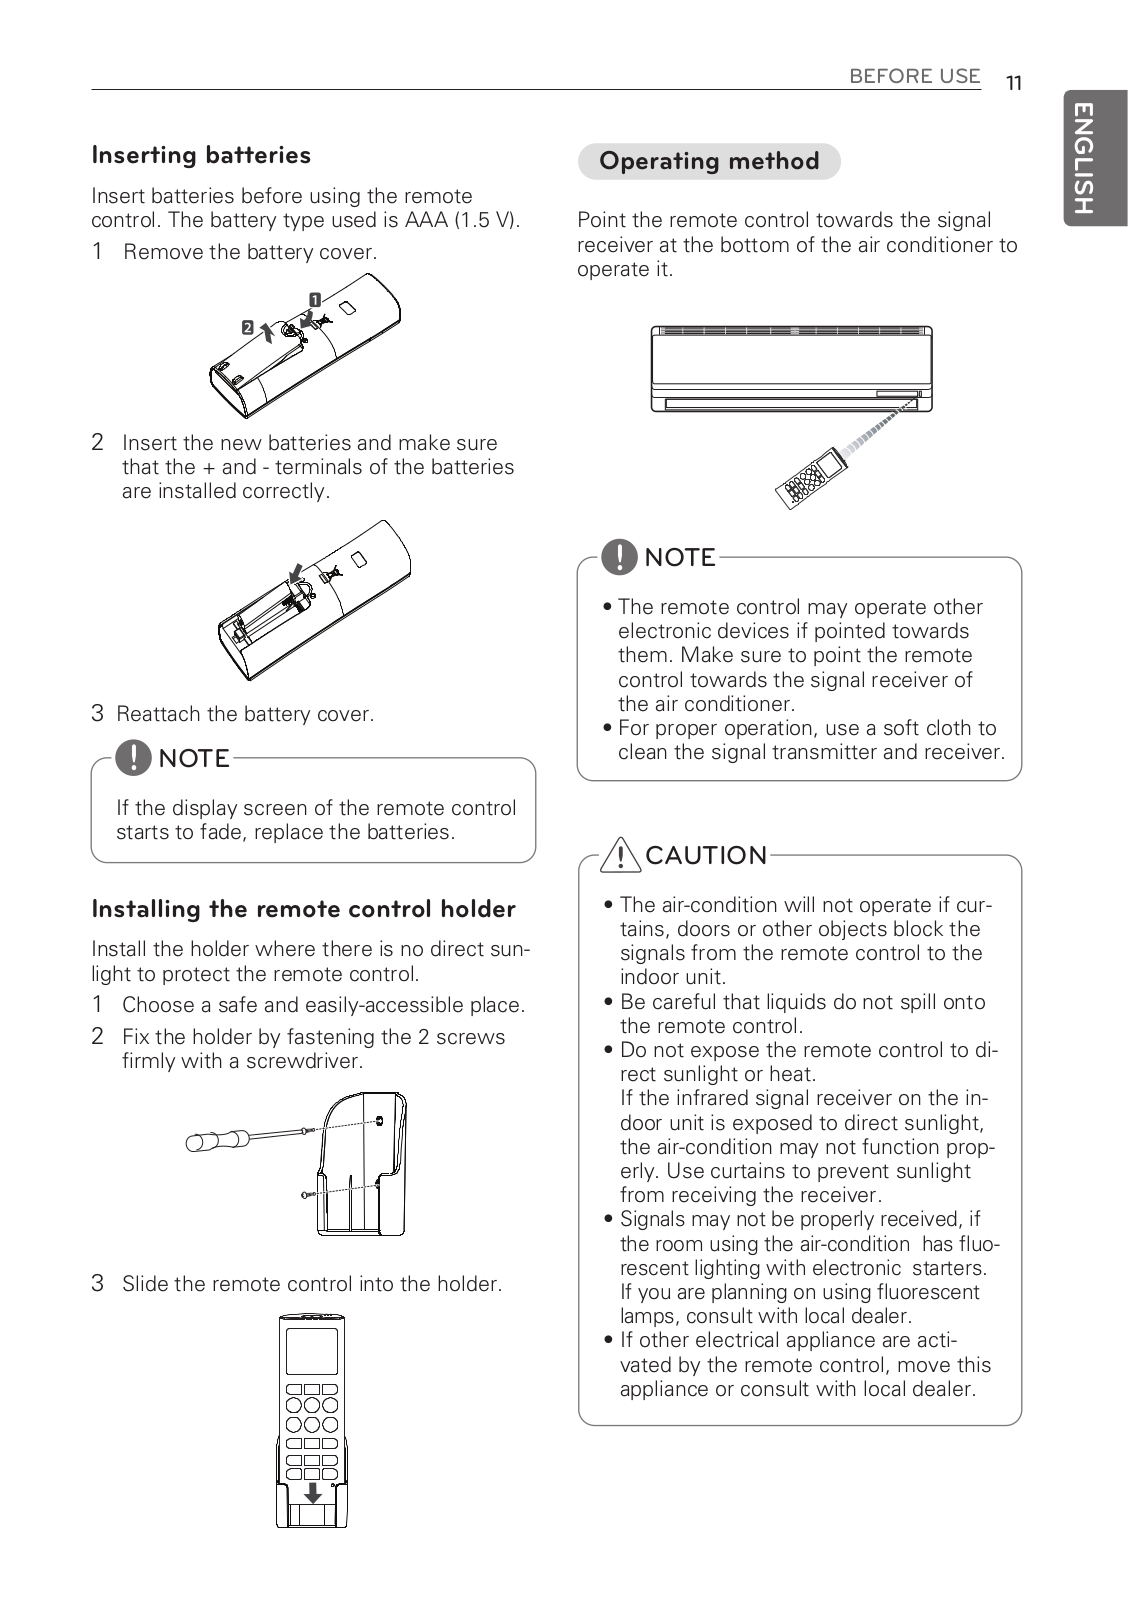
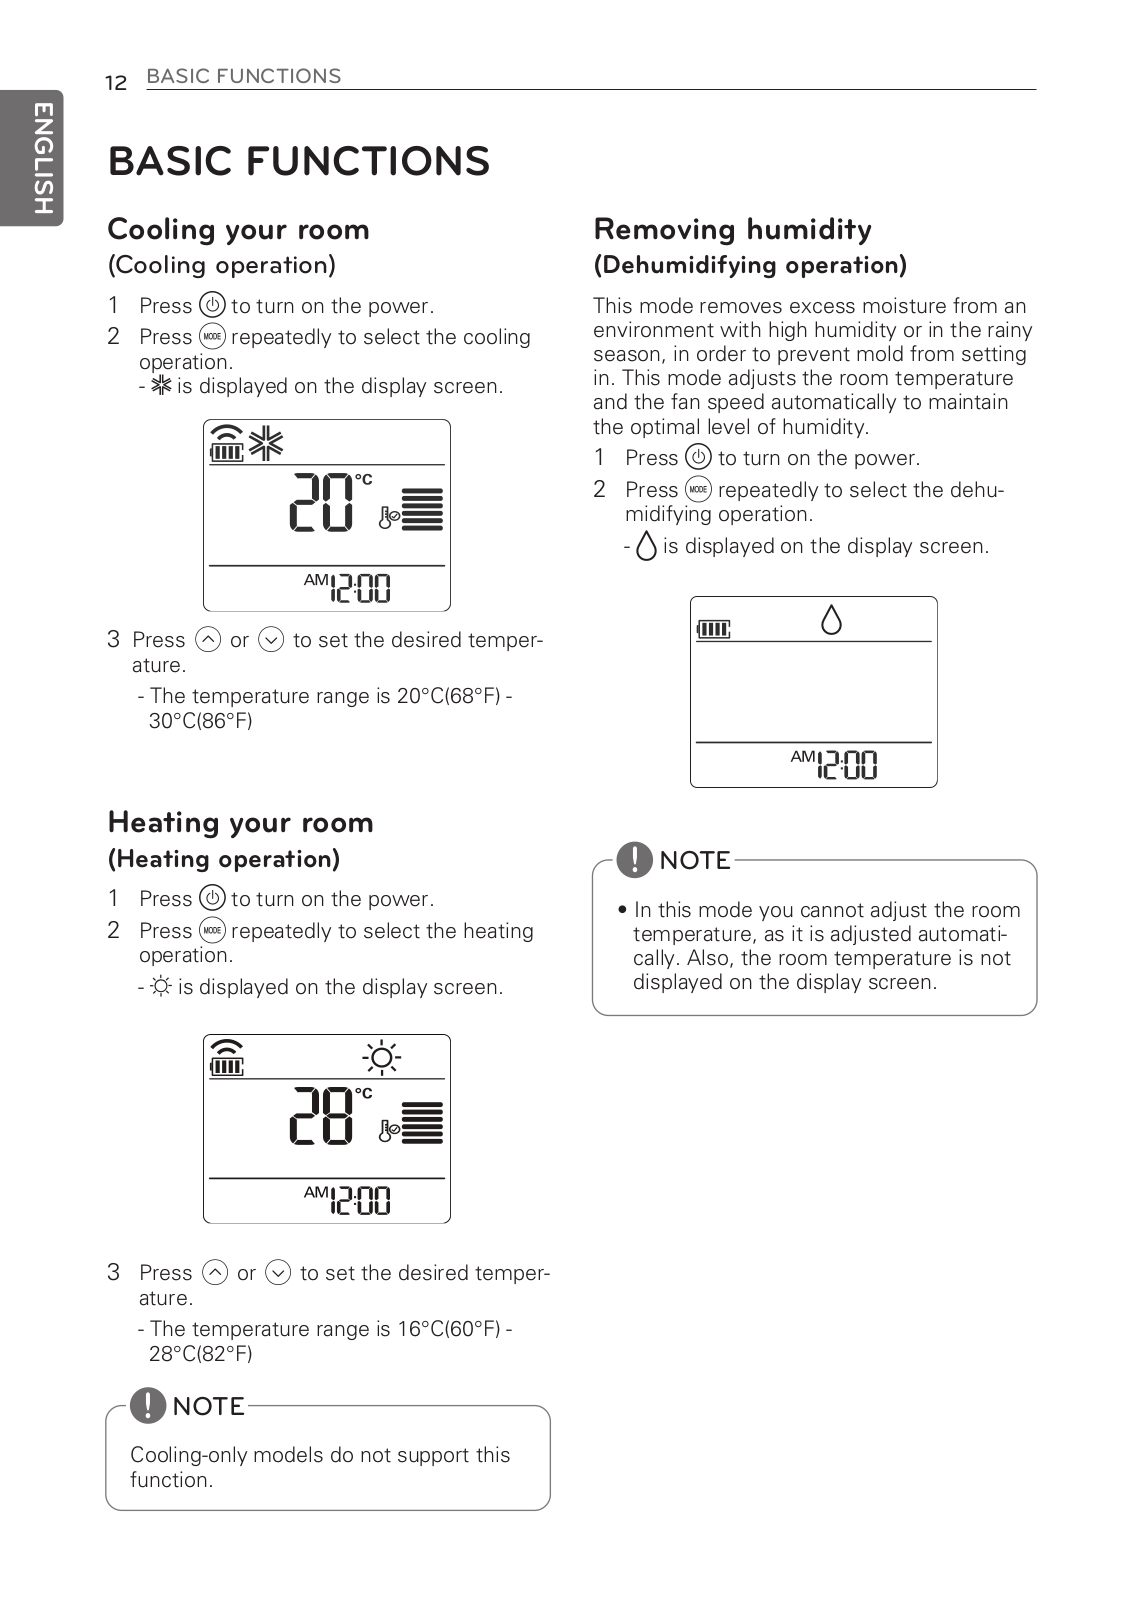
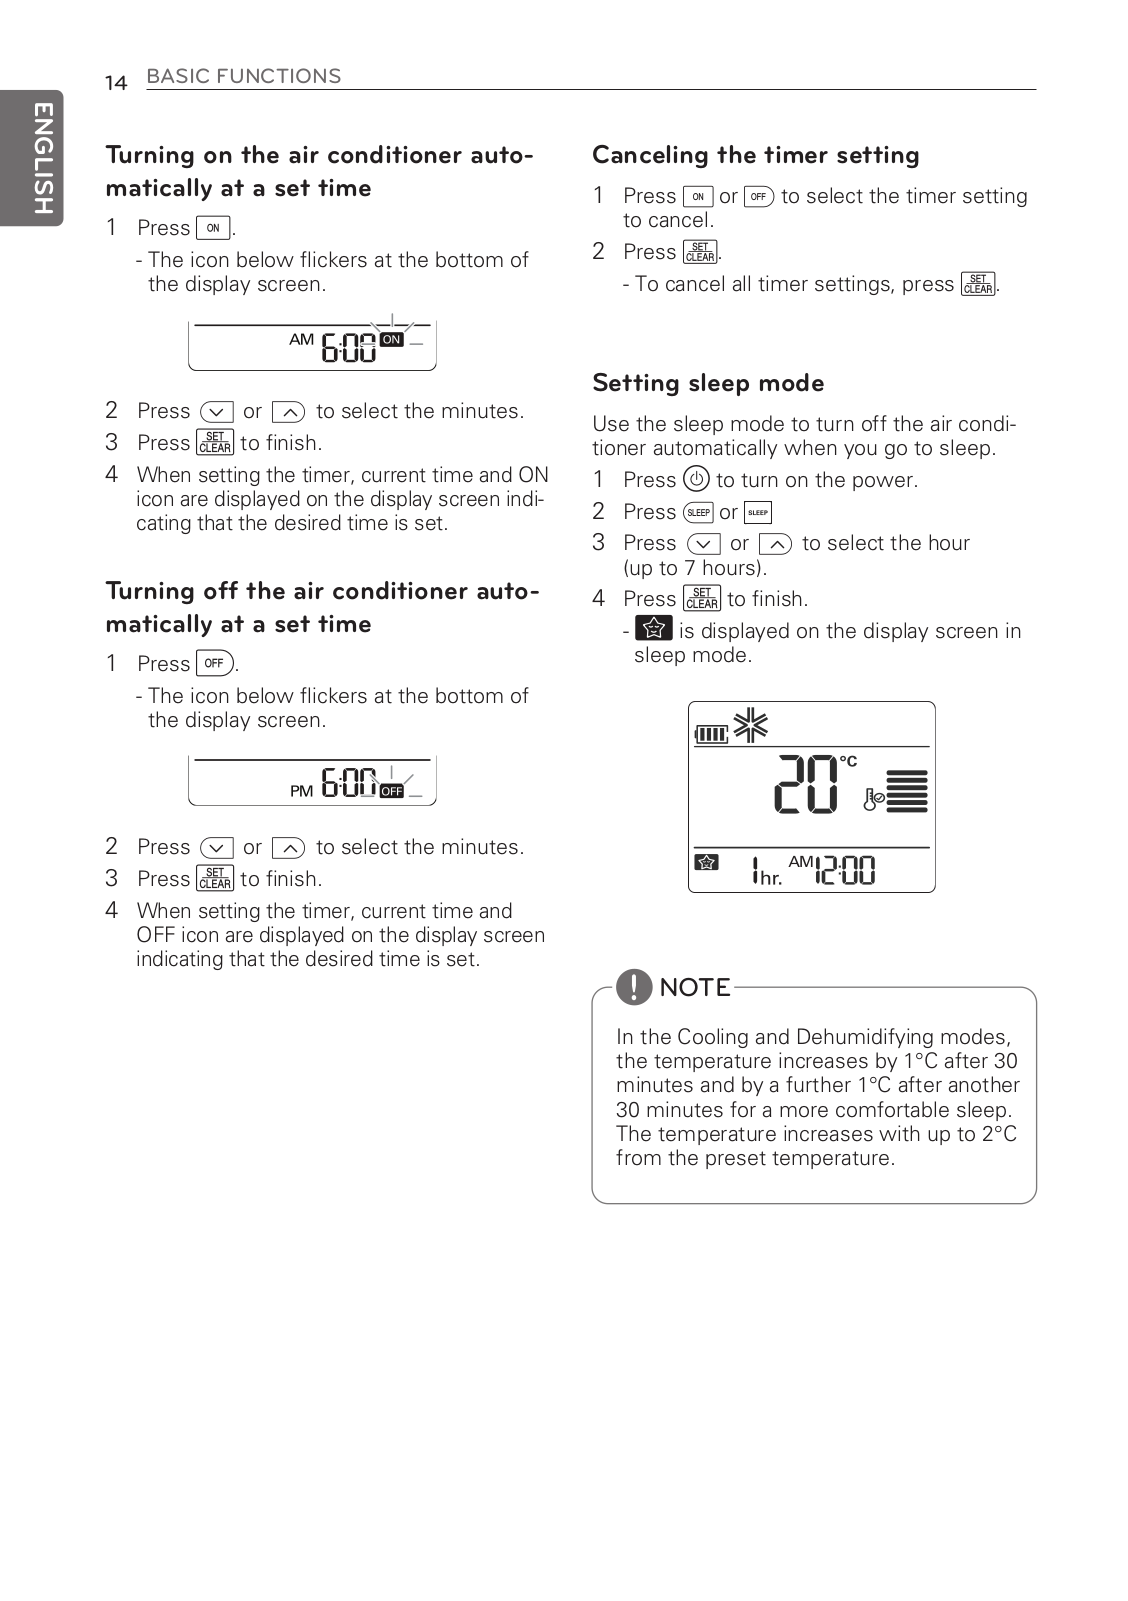
LG GSNC126E5U3, GSNC126E0A3, GSNC2465SA3, GSNC1865NU3 Owner’s Manual
...
LG Owner’s Manual
Download
Specifications and Main Features
Frequently Asked Questions
User Manual
Download
Loading...
+
33
hidden pages
Unhide
You need points to download manuals.
1 point = 1 manual.
You can buy points or you can get point for every manual you upload.
Buy points
Upload your manuals
 Loading...