How it Works
Log In / Sign Up
Buy Points
How it Works
FAQ
Contact Us
Questions and Suggestions
Users
LG
Loading...
G
GR-T5820
GR-T582G
6
GR-T582GA
GR-T582GBX
GR-T582GL
2
GR-T582GT
2
GR-T582GV
14
GR-T582GVA
2
GR-T582GVX
GR-T5830
GR-T592GL
GR-T622
5
GR-T622AT
4
GR-T622BV
2
GR-T622DE
16
GR-T622DEC
GR-T622QVQ
2
GR-T632BEQ
GR-T632BVQ
3
GR-T632DEQ
GR-T632DVQ
4
GR-T642QLC
2
GR-T642QVC
2
GR-T692BEQ
4
GR-T692BLQ
2
GR-T692BVQ
2
GR-T692DVQ
5
GR-T712DVQ
GR-T722
5
GR-T722AT
3
GR-T722ATC
GR-T722ATCA
2
GR-T722BV
GR-T722DE
12
GR-T722QVQ
2
GR-T727RB
GR-U171CK
GR-U171CLK
GR-U192S
2
GR-U192SVK
GR-U212RCI
GR-U212RVK
2
GR-U212SL
GR-U232RVK
GR-U232SL
GR-U252S
GR-U262RC
GR-U262-SC
4
GR-U262-SLC
2
GR-U292-RLC
2
GR-U292-RVC
2
GR-U292-SC
8
GR-U292SLC
5
GR-U292SQ
2
GR-V191R
3
GR-V191RL
3
GR-V192R
GR-V192RL
2
GR-V192S
2
GR-V192SL
3
GR-V201SL
GR-V202RLV
GR-V202S
2
GR-V204SLBT
GR-V2074TNA
GR-V2077TNA
GR-V212R
2
GR-V212RK
GR-V212RL
GR-V212RL2
GR-V212RLK
GR-V212RSK
GR-V212RV
GR-V212SL
GR-V212SL2
GR-V212SLB
GR-V215RL
2
GR-V222RL
GR-V222RLV
GR-V222SL
3
GR-V231RL
2
GR-V232R
5
GR-V232RL
2
GR-V232S
3
GR-V232SPV
GR-V242RK
GR-V242RL
GR-V242SL
GR-V2522SL
GR-V2523SL
GR-V252SL
GR-V2621-SCA
2
GR-V262RC
5
GR-V262RL
GR-V262RLC
2
GR-V262RSC
GR-V262-SC
6
GR-V262-SCA
4
GR-V262-SLC
3
GR-V262-SLCA
2
Loading...
Loading...
Nothing found
GR-U292-RVC
User Manual
15 pgs
673.12 Kb
0
User Manual [pl]
15 pgs
751.36 Kb
0
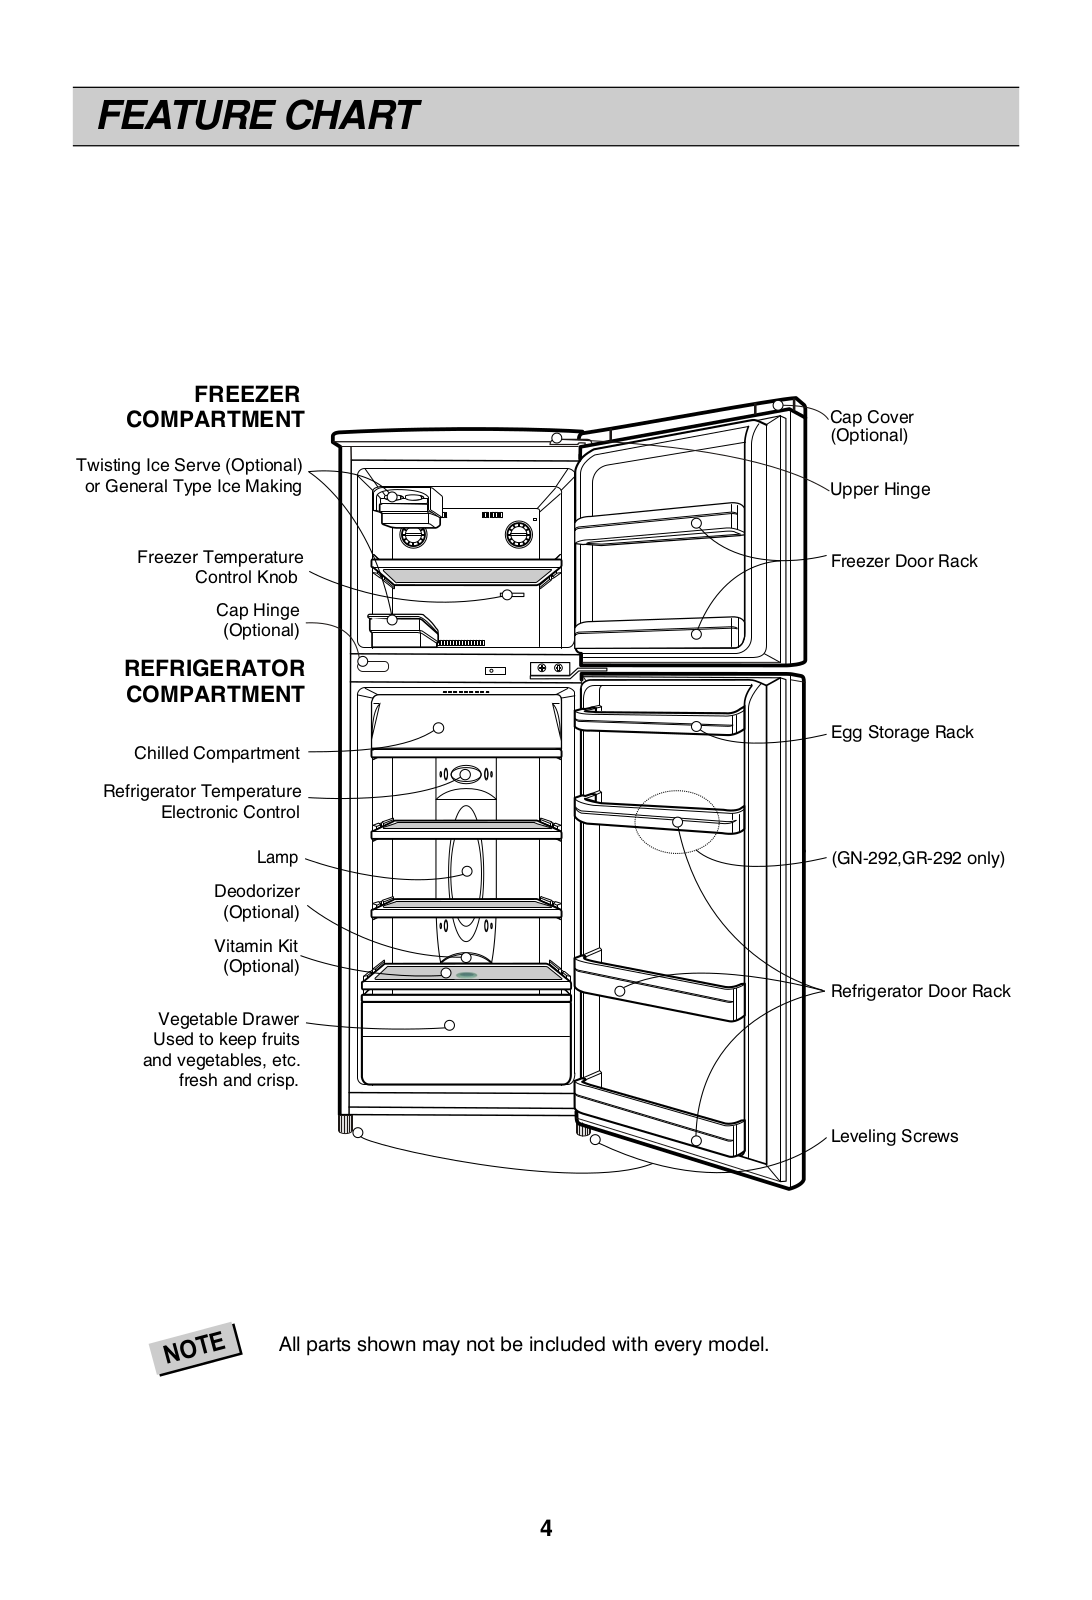
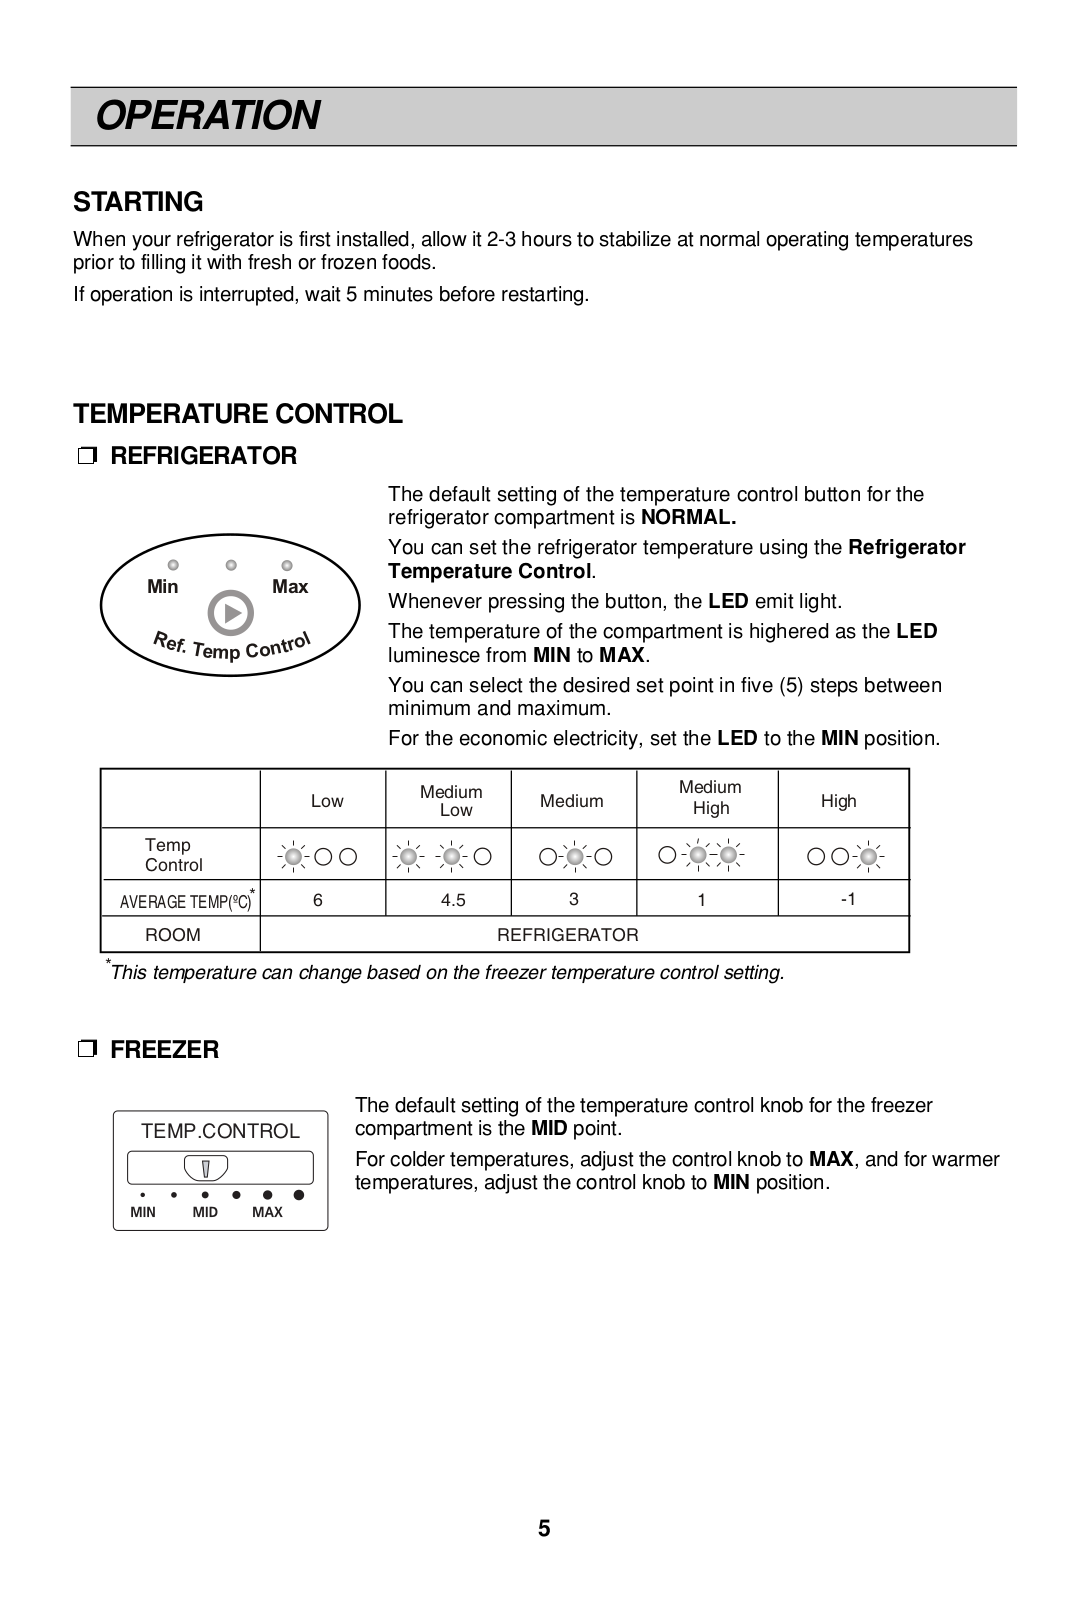
Table of contents
Loading...
LG GR-U292-RVC, GR-U292-RLC User Manual
...
LG User Manual
Download
Specifications and Main Features
Frequently Asked Questions
User Manual
Download
Page 1
Page 2
Page 3
Page 4
Page 5
Page 6
Page 7
Page 8
Page 9
Page 10
Page 11
Page 12
Page 13
Page 14
Page 15
Loading...
+
hidden pages
Unhide
You need points to download manuals.
1 point = 1 manual.
You can buy points or you can get point for every manual you upload.
Buy points
Upload your manuals
 Loading...