

LG GR-L227SSPA Owner’s Manual
website:http://www.lg.ca
LSC21943ST
2
Entry
Important safety instructions
Identification of parts
Where to install
Door removal
Mount the freezer and refrigerator compartment doors
Water supply installation
Water connection instruction guide
Height adjustment
Starting
Adjusting the temperatures and functions
Shelf
Bottle holder (Applicable to some models only)
Egg box
Humidity control in the vegetable compartment
Deodorizer (Applicable to some models only)
Optichill
TM
Temperature Transition Corner
Temperature Change at Optichill
TM
Optichill
TM
Location of foods
Storing foods
How to remove and replace parts
General information
Cleaning
Troubleshooting
Table of Contents
Introduction
Installation
Operation
Suggestion on
food storage
Care and
maintenance
3
3
4
5
6
7
7
8
11
12
12
18
18
19
19
20
20
20
19
21
22
23
25
25
26
Entry
The model and serial numbers are found on the inner case or back of refrigerator
compartment of this unit. These numbers are unique to this unit and not
available to others. You should record requested information here and retain
this guide as a permanent record of your purchase. Staple your receipt here.
Date of purchase
Dealer
Dealer address
Dealer phone no.
Model no.
Serial no.
Before use, this refrigerator must be properly installed and located in accordance with
the installation instructions in this manual.
Never unplug your refrigerator by pulling on the power cord. Always grip the plug firmly
and pull it straight out from the outlet.
When moving your appliance away from the wall, be careful not to roll over the power
cord or to damage it in any way. Do not crush or damage the water line.
After your refrigerator is in operation, do not touch the cold surfaces in the freezer
compartment, particularly when your hands are damp or wet. Skin could adhere to
these extremely cold surfaces.
Unplug the power cord from the power outlet for cleaning or other requirements. Never
touch it with wet hands because you can get an electric shock or be injured.
Never damage, bend, kink, pull out, or twist the power cord because damage to the
power cord can cause product failure, fire, or electric shock. If you have doubts the
appliance is properly grounded, consult a qualified electrician.
Never place glass products in the freezer because they may be broken from expansion
when their contents are frozen.
Never put your hands within the ice storage bin of the automatic icemaker. You can be
injured by the operation of the automatic icemaker.
The appliance is not intended for use by young children without supervision.
Young children should be supervised to ensure that they do not play with the appliance.
Never allow anyone to climb, sit, stand, or hang on the door. These actions may
damage the refrigerator and even tip it over, causing severe personal injury.
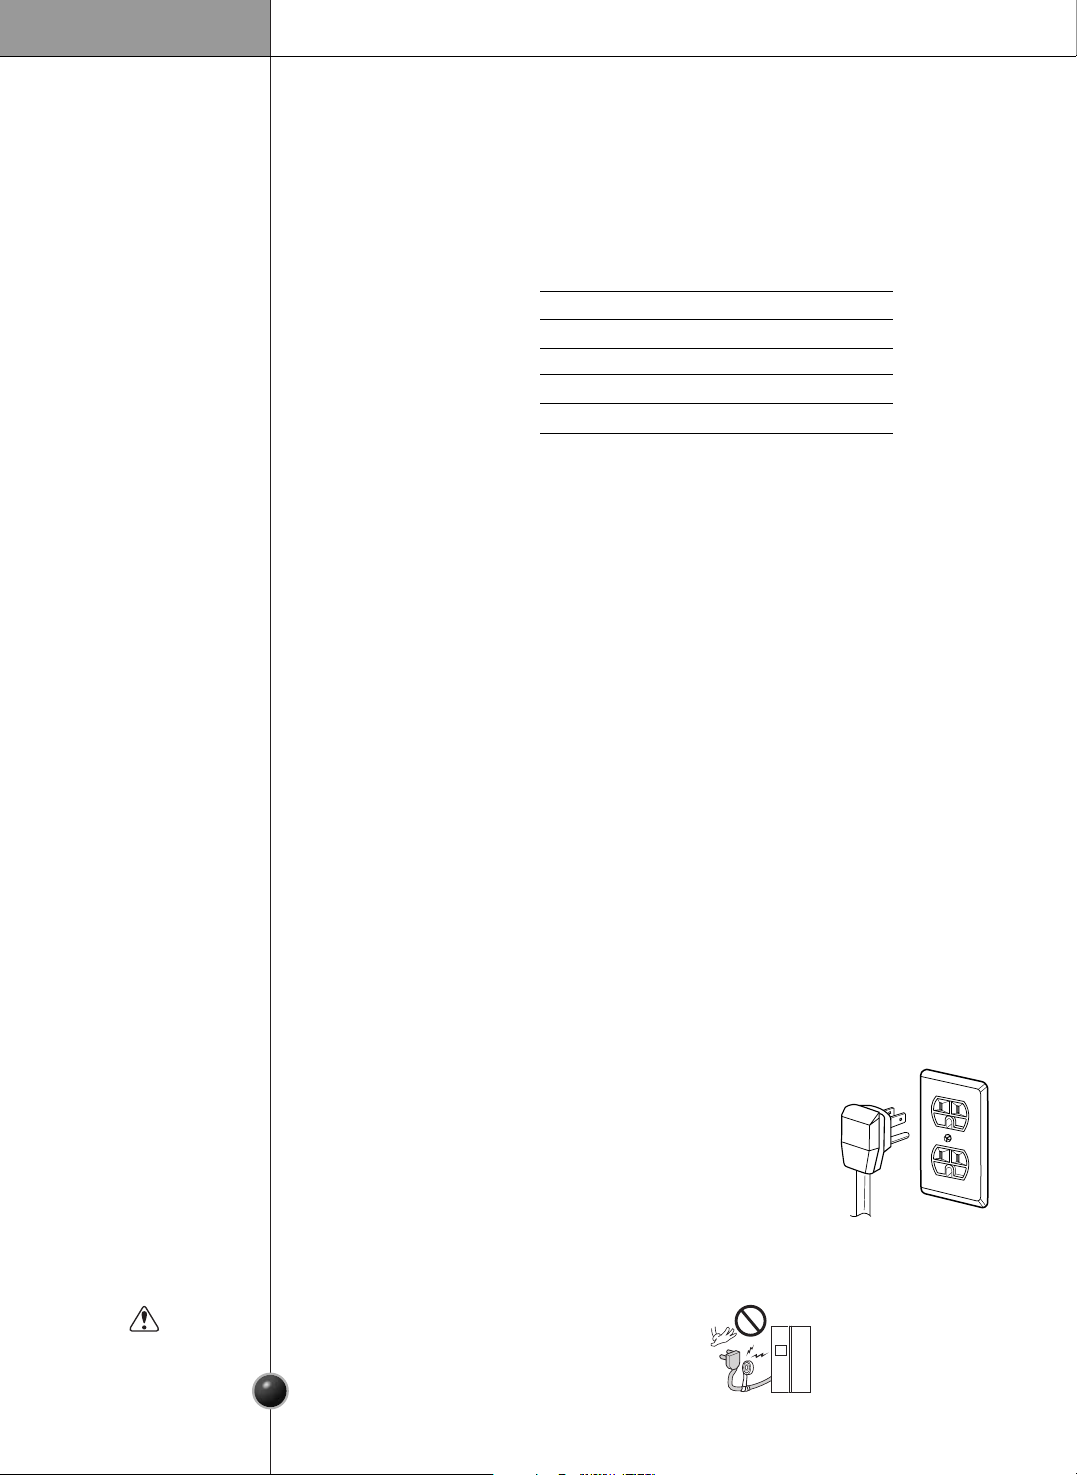
Before you move your refrigerator into its final location, it is
important to make sure you have the proper electrical connection.
A 115 Volt, 60 Hz., AC only, 15 or 20 amp, fused and grounded
single-outlet circuit is required. Use an outlet that cannot be turned
off by a switch. Do not use an extension cord.
The refrigerator-freezer should be so positioned that the supply
plug is accessible for quick disconnection in the event of an
emergency.
If the supply cord is damaged, it must be replaced by the manufacturer or its service
agent or a similarly qualified person in order to avoid any hazard.
Do not modify or extend the Power Cord length.
It may cause electric shock or fire.
Introduction
3
Important safety instructions
Recommended
grounding
method
Accessibility of
supply plug
Supply cord
replacement
Warning
4
Identification of parts
DANGER: Risk of child entrapment.
Before you throw away your old refrigerator or freezer:
Take off the doors but leave the shelves in place so that children may not easily climb
inside.
The appliance is not intended for use by young children without supervision.
Young children should be supervised to ensure that they do not play with the appliance.
Don’t store or use gasoline or other flammable vapor and liquids in the vicinity of this or
any other appliance.
In the event of an electric short circuit, grounding (earthing) reduces the risk of electric
shock by providing an escape wire for the electric current.
In order to prevent possible electric shock, this appliance must be grounded.
Improper use of the grounding plug can result in an electric shock. Consult a qualified
electrician or service person if the grounding instructions are not completely understood
or if you have doubts on whether the appliance is properly grounded.
Child entrapment
warning
Don’t store
Grounding
(Earthing)
Introduction
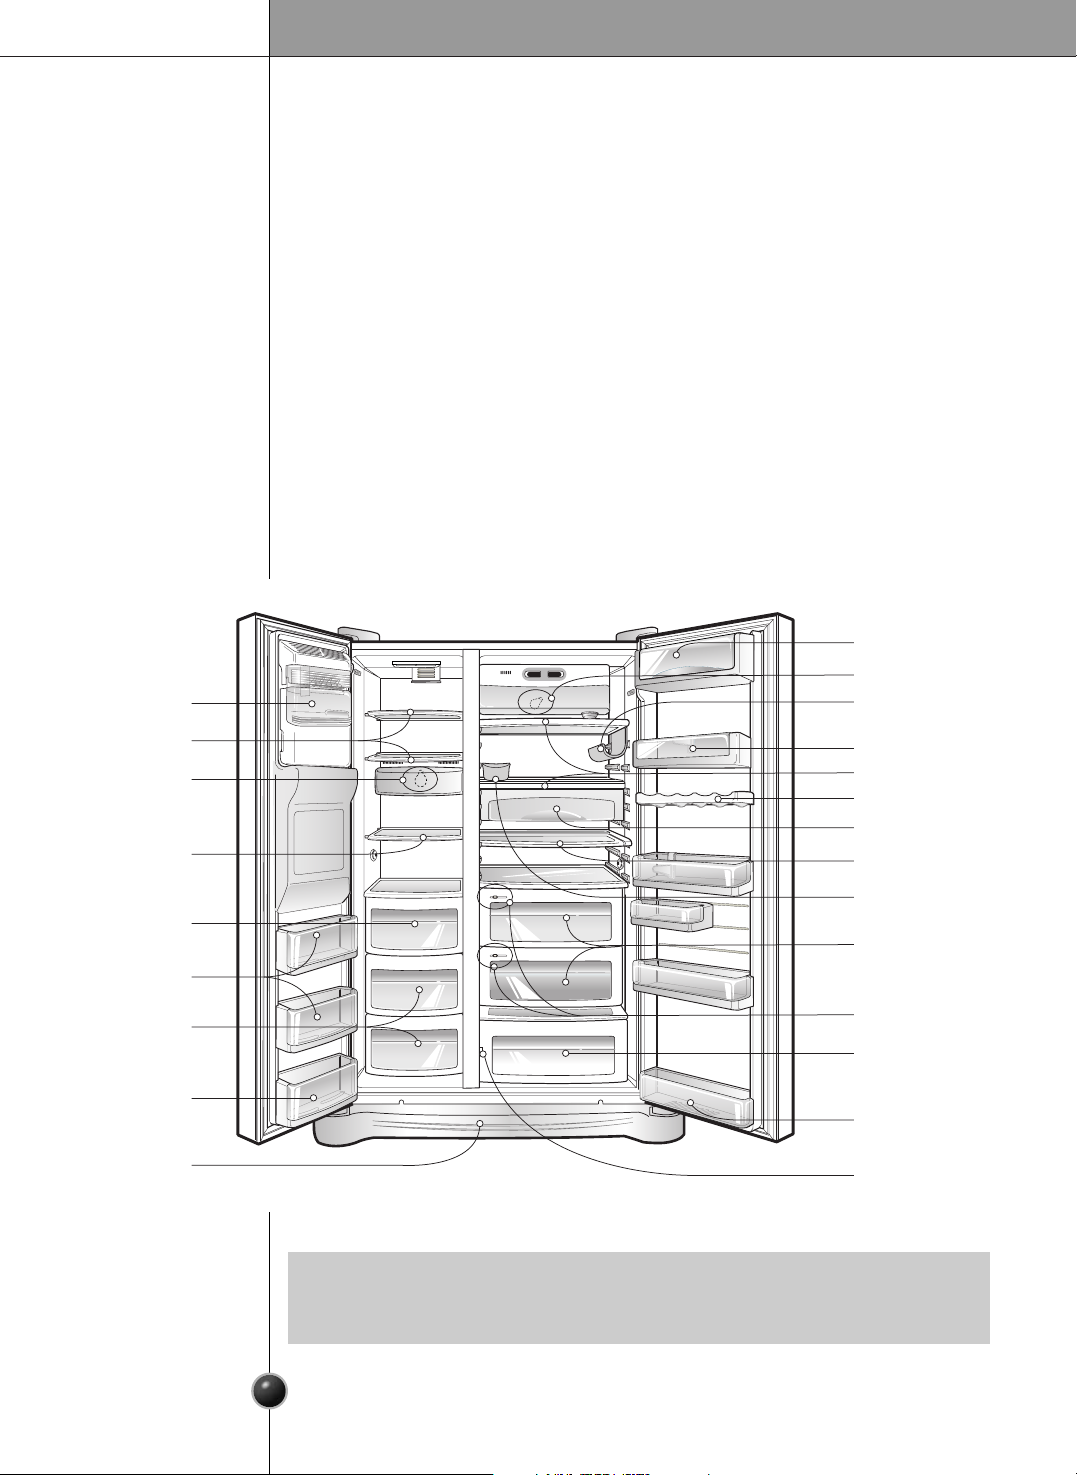
•
Parts, features, and options vary by model. Your model may not include every option.
NOTE
Freezer
Compartment
Refrigerator
Compartment
Milk Product Corner
Lamp
Wine Holder
(Plastic or wire)
Drawer
Lamp
Automatic
Icemaker
Shelf
Shelf
Door Rack
Drawer
Door Rack
Lower Cover
Shelf
Snack Drawer
Folding Shelf
Can Server
Egg Box
Vegetable Drawer
Door Rack
Door Rack
Conversion switch
(Meats/Vegetables)
(Optional)
Hunidity Switch
Optichill (Optional)
Fresh compartment
(Optional)
Installation
5
Strong
and even floor
Select a good
location
Where water
supply can be
easily connected
in a dry place
Where it is free
from heat
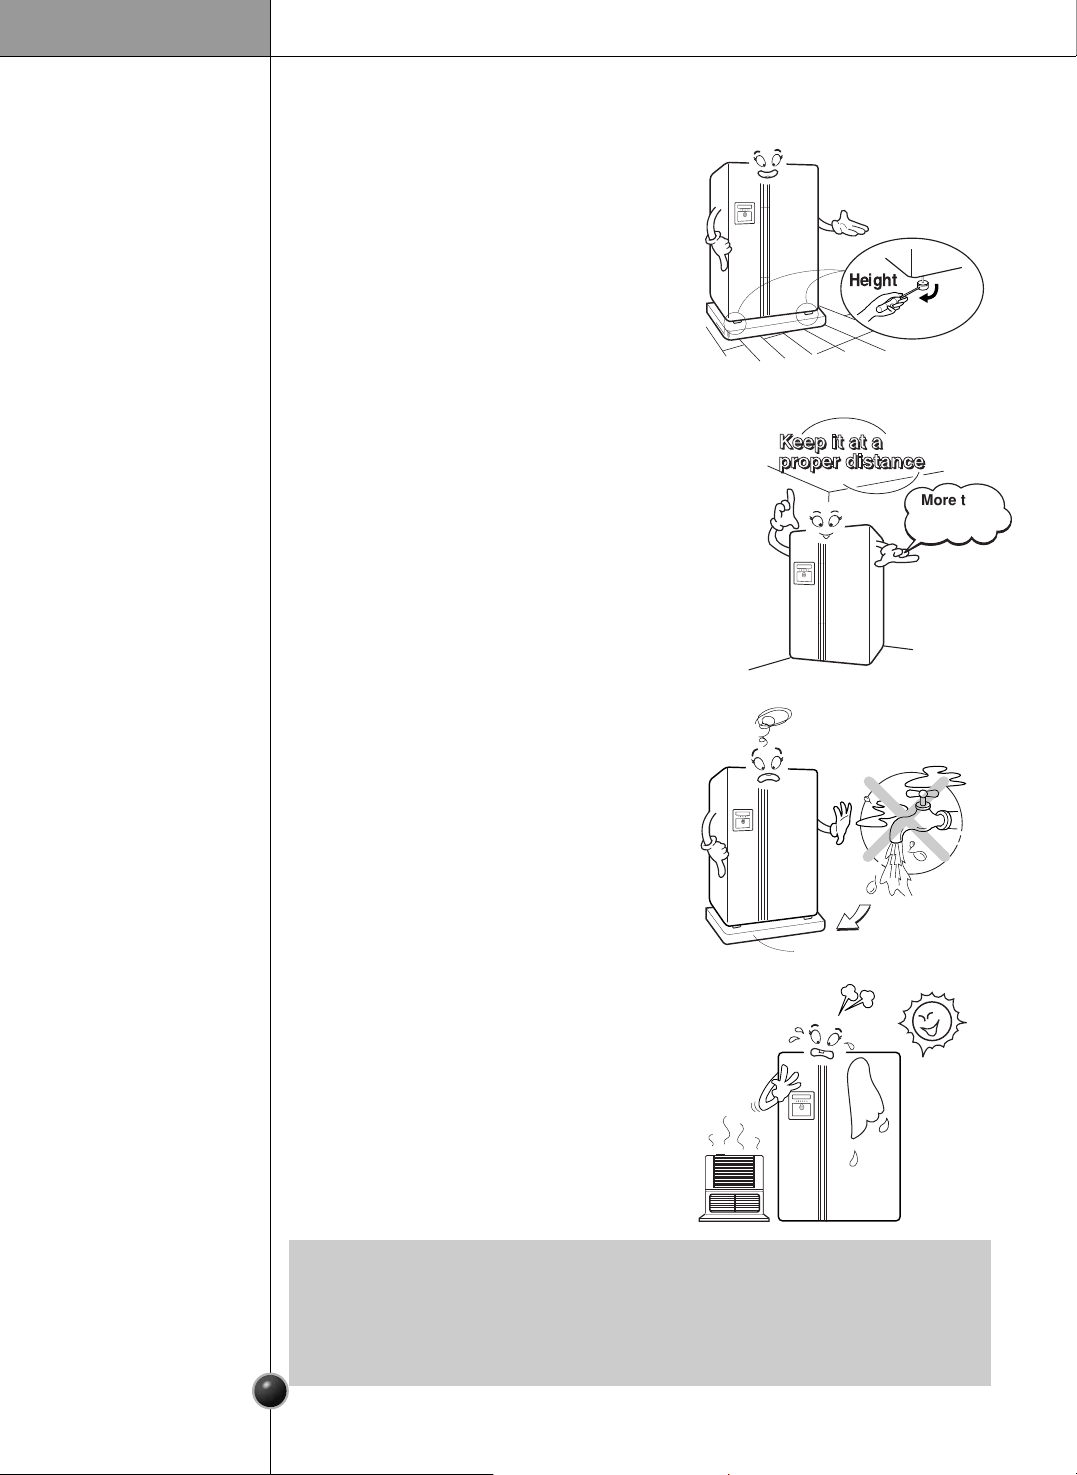
1. Place your appliance where it is easy to use.
2. Avoid placing the unit near heat sources, direct
sunlight, or moisture.
3. To ensure proper air circulation around the
refrigerator, please maintain sufficient space on
both the sides as well as top and maintain at least
2 inches (5 cm) from the rear wall.
4. To avoid vibrations, the appliance must be leveled.
5. Don't install the appliance below 5°C (41°F).
It may cause affect the performance.
Select a place where a water supply can be
easily connected between the automatic ice
maker and dispenser.
Installing the refrigerator in a wet or damp
area may cause rust and may be an electrical
hazard.
If this refrigerator is installed where the
ambient temperature is high, the freezing
capacity is deteriorated and the cost of
electricity used increases.
Where to install
Unstable installation may cause vibration and
noise. If the floor to install the refrigerator on
is not even, make the refrigerator level by
rotating the height adjusting screw. Carpet
or floor covering on which a refrigerator is
installed may be discolored by heat from the
bottom of the refrigerator.
Do not allow carpet or flooring to block
airflow under the refrigerator.
•
Install the refrigerator at a place where the ambient temperature is 5˚C ~ 43˚C
(41˚F~110˚F).
Ambient temperature outside this range may cause product malfunction. Also, the
tube between the dispenser and automatic ice maker may freeze.
NOTE
Bottom Pad
0AECDJ
More than
2"(5 cm)
to back
Door removal
Electric Shock Hazard
Disconnect electrical supply to refrigerator before installing.
Failure to do so could result in death or serious injury.
If your entrance door is too narrow for the
refrigerator to pass through, remove the
refrigerator door and pass the refrigerator laterally.
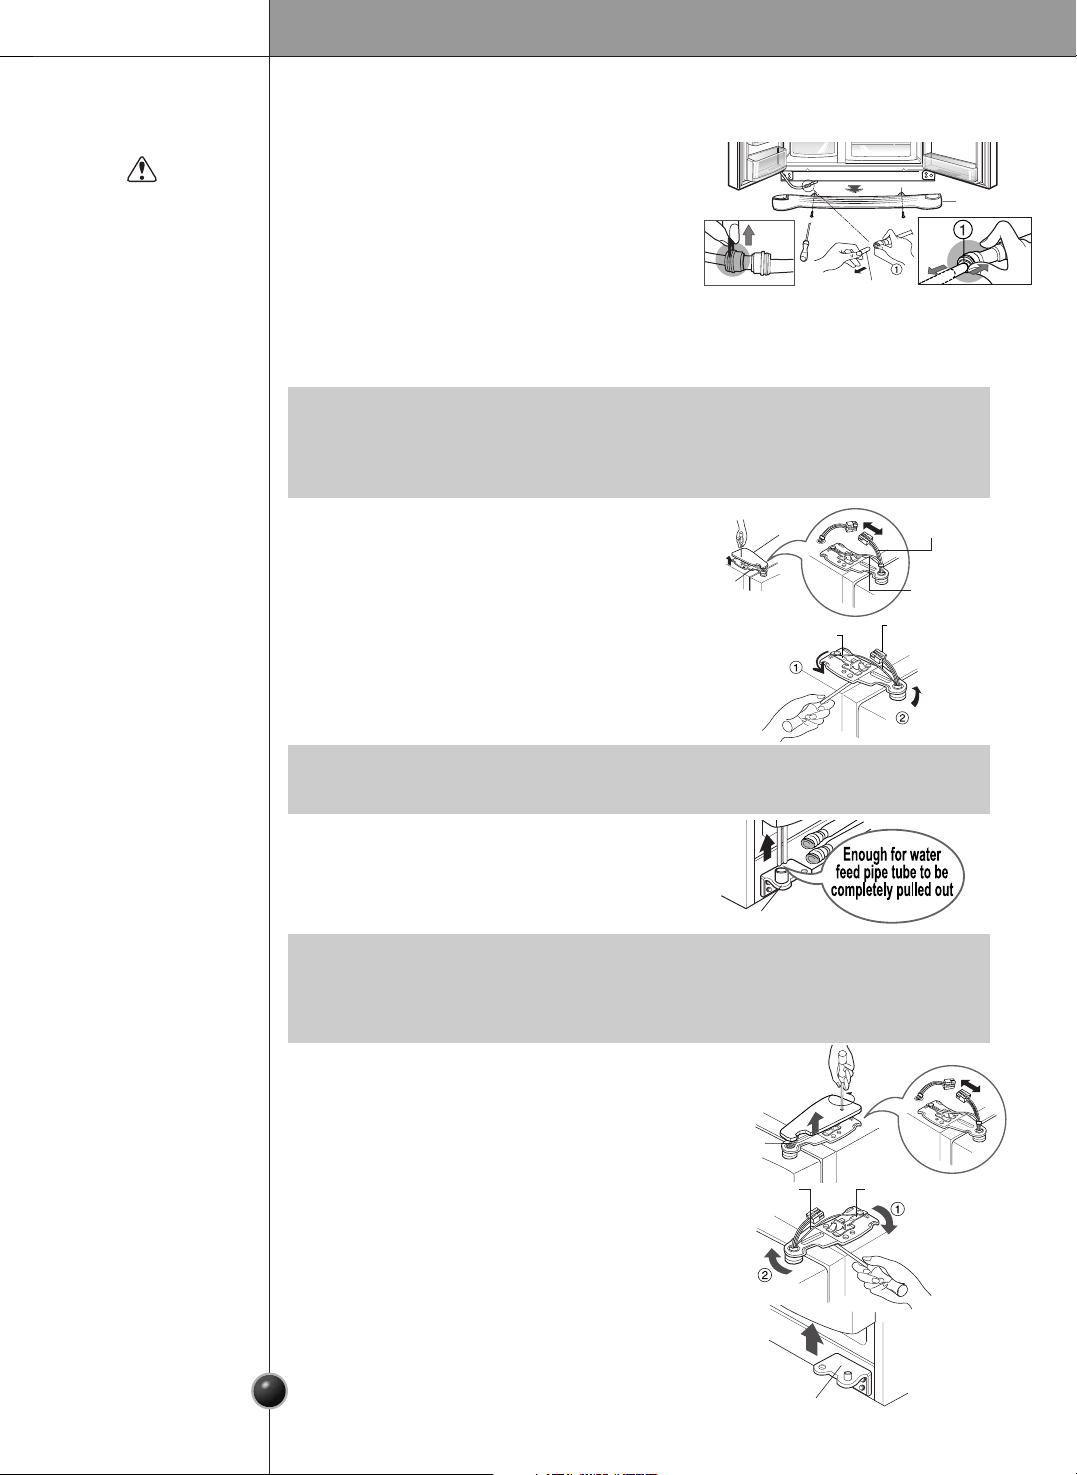
Remove the lower cover by lifting upward, and then pull up the water feed tube while
pressing the release ring shown in the figure to the right.
Remove lower
cover and
water feed tube
Warning
Remove the
freezer
compartment
door
Remove the
refrigerator
door
Installation
6
1) Remove the hinge cover by loosening the
screws. Disconnect all connections except
the ground line.
2) Remove the keeper by rotating it counter
clockwise and then lifting the upper
hinge up.
3) Remove the freezer compartment door by
lifting it upward. This time, the door
should be lifted enough for the water feed
tube to be completely pulled out.
1) Loosen the hinge cover screws and remove
the cover. Remove connection wire, if any,
except for the ground line.
2) Remove keeper by rotating it clockwise
and then remove the upper hinge by lifting
it up .
3) Remove the refrigerator compartment door
by lifting it up.
•
If a tube end is deformed or abraded, trim the part away.
Disconnecting the tube under the door causes about
1
/
2
gallon (2 liters) water to flow
out. Please put up a big container to prevent it.
NOTE
•
When removing the upper hinge, be careful that the door does not fall forward .
NOTE
•
After removing the door, take it into the kitchen where you are installing the
refrigerator. Lay it down on a blanket and be careful to avoid damaging the water
feed tube.
NOTE
Lower cover
Lower hinge
Lower hinge
Keeper
Feed water tube
Connection
wires
Hinge
cover
Upper hinge
Keeper
Upper hinge
Earth line
Upper hinge
Connection
wires
7
Installation
Mount the freezer and refrigerator
compartment doors
Water supply installation
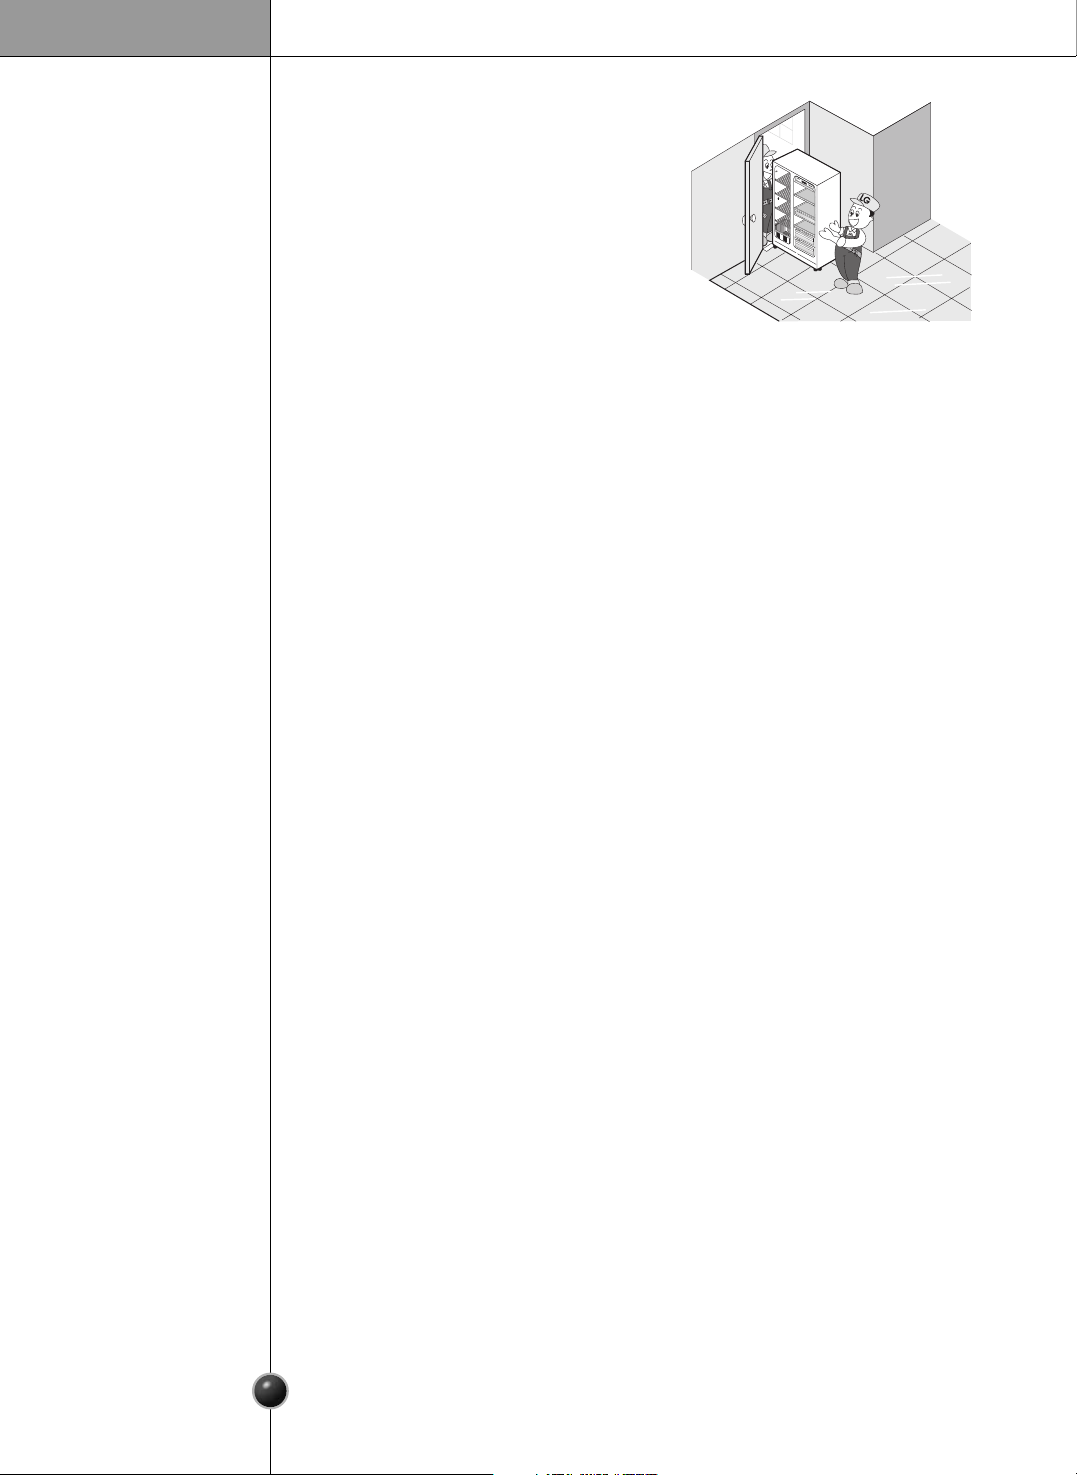
Pass the refrigerator laterally through the access
door as shown in the right figure.
Automatic icemaker operation needs water pressure of 21~121 psi (1.5~8.5
kgf/cm2) (That is, a paper cup (6 oz. or 180 cc) will be fully filled within
3 seconds.)
If water pressure does not reach the rating 21 psi (1.5 kgf/cm2) or below, it is
necessary to purchase a separate pressure pump for normal automatic icemaking
and cool water feed.
Keep the total length of the feed water pipe tube within 26’ (8 m). Be careful for the
tube to avoid being kinked. If the tube is 26’ (8 m) or longer it may cause trouble in
water feed.
Install the water supply line where it will not be affected by heat.
Connect to a potable water supply only.
Mount them in the reverse sequence of removal after they pass through the access
door.
Pass the
refrigerator
Before
installation
Warning
This appliance contains fluids (refrigerant and lubricant) and is made of parts and
materials which are reusable and/or recyclable.
All the important materials should be sent to the collection center of waste material
and can be reused after rework (recycling). For recycling, please contact the local
recycling authority.
Disposal of the
old appliance
1
2
3
4
5
Ma
x
FR
Z
T
E
M
P
REF
TE
MP
M
i
n
5
4
32
1
M
a
x
8
Water connection instruction guide
Read all directions carefully before you begin.
Connecting
the refrigerator
to a water source
Connect to a potable water supply only.
Warning
•
If operating the refrigerator before installing the water connection, turn icemaker
to the OFF position to prevent operation without water.
•
All installations must be in accordance with local plumbing code requirements.
•
Use copper tubing and check for leaks.
•
Install copper tubing only in areas where temperatures will remain above freezing.
•
It may take up to 24 hours for your icemaker to begin producing ice.
IMPORTANT
The icemaker water valve contains a flow washer which is used as a water
pressure regulator.
The icemaker needs to be connected to a cold water line with water pressure
20 ~ 120 psi (lb/inch2)
Cold water supply
Standard screwdriver
7
/
16
-inch and
1
/
2
-inch open-end wrenches or two adjustable wrenches
1
/
4
-inch nut driver
1
/
4
-inch drill bit
Hand drill or electric drill (properly grounded)
Tools required
•
Your refrigerator dealer has a kit available with a 1/4-inch saddle-type shut-off valve,
a union, and copper tubing. Before purchasing, make sure a saddle-type valve
complies with your local plumbing codes. Do not use a piercing-type or 3/16-inch
saddle valve which reduces water flow and clogs more easily.
NOTE
Installation
9
1. Unplug refrigerator or disconnect power.
2. Turn OFF main water supply. Turn on the nearest faucet to relieve the pressure
on the line. It may help to open an outside faucet to allow the water to drain from
the line in the house.
3. Find a
1
/
2
-inch vertical COLD water pipe near the refrigerator.
Connect
the tubing to
water line
•
Horizontal pipe will work, but the following precaution must be taken: Drill on the top of
the pipe, not the bottom. This will help keep water away from the drill. This also keeps
normal sediment from collecting in the valve.
NOTE
4. To determine the length of copper tubing you will need, measure from the
connection on the lower left rear of the refrigerator to the water pipe.
Add 7 feet (2.1m) to allow for moving refrigerator for cleaning.
Use
1
/
4
-inch O.D. (outside diameter) copper tubing. Be sure both ends of
copper tubing are cut square.
5. Using a drill, drill a
1
/
4
-inch hole in the cold water pipe you have selected.
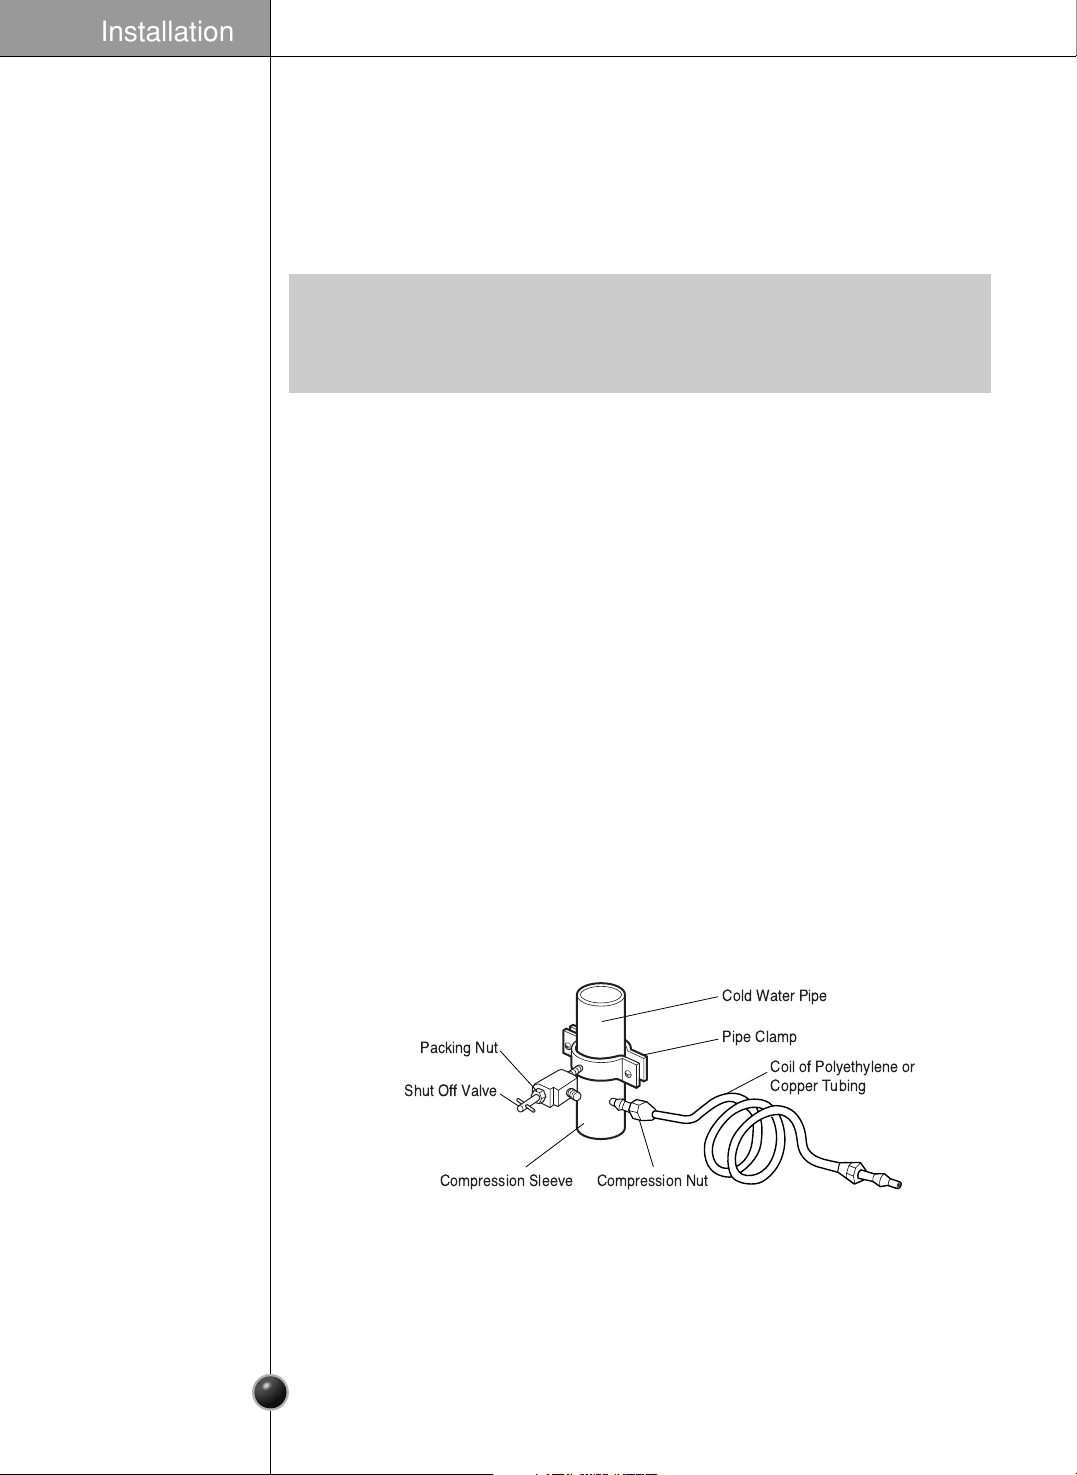
6. Fasten shut-off valve to cold water pipe with pipe clamp.
Be sure the outlet end is solidly in the
1
/
4
" drilled hole in the water pipe and the
washer is under the pipe clamp. Tighten the packing nut. Tighten the pipe
clamp screws carefully and evenly so the washer makes a watertight seal.
Do not overtighten or you may crush the copper tubing, especially if soft
(coiled) copper tubing is used. Now you are ready to connect the copper
tubing.
7. Slip the compression sleeve and the compression nut onto the copper tubing
as shown. Insert the end of the tubing into the outlet end squarely as far as it
will go. Screw compression nut onto the outlet end with a wrench. A flare nut
wrench works best, but an open end wrench will suffice. Do not overtighten.
8. Place the free end of the tubing into a container or sink, and turn on the main
water supply. Flush out the tubing until the water is clear. Turn off the shutoff
valve on the water pipe. Coil the copper tubing as shown below.
Cold Water Pipe
Pipe Clamp
Coil of Polyethylene or
Copper Tubing
Compression NutCompression Sleeve
Shut Off Valve
Packing Nut
Installation
10
Before making the connection to the refrigerator, be sure the refrigerator
power cord is not plugged into the wall outlet.
• If your refrigerator does not have a water filter, we recommend installing
one. If your water supply has sand or particles, that could clog the screen of
the refrigerator’s water valve. Install the filter in the water line near the
refrigerator.
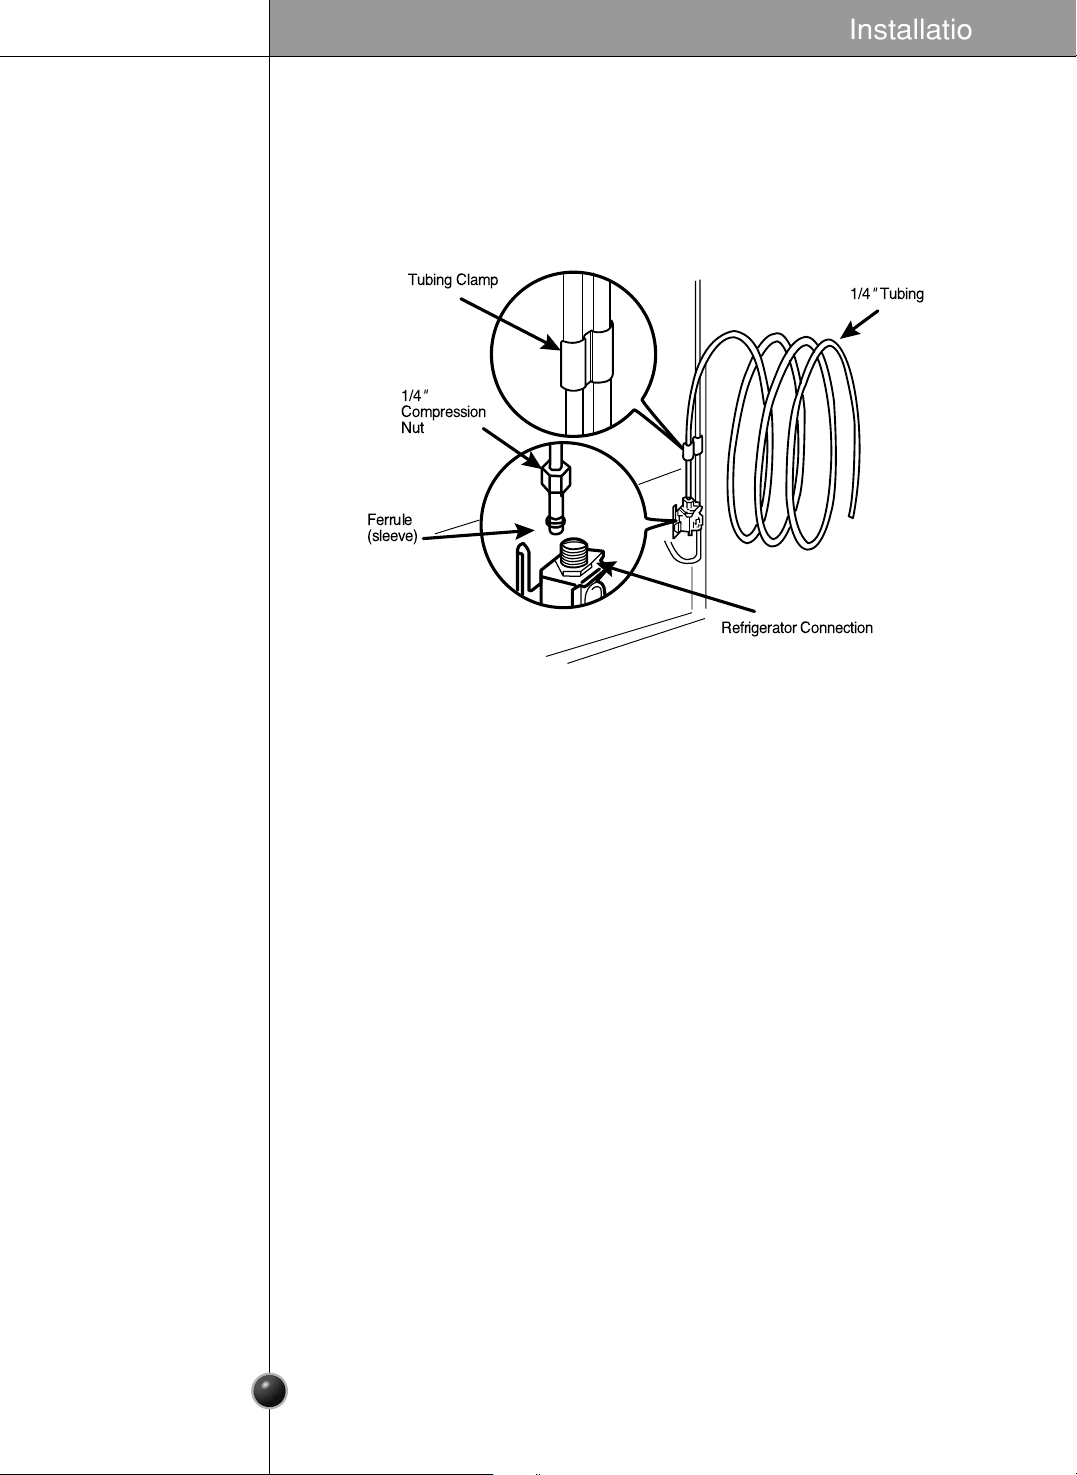
1. Remove the plastic flexible cap from the water valve.
2. Place the compression nut and ferrule (sleeve) onto the end of the tubing as
shown.
3. Insert the end of the copper tubing into the connection as far as possible. While
holding the tubing, tighten the fitting.
Connect the tubing to
the refrigerator
Tighten any connections that leak.
Plug In the Refrigerator
Arrange the coil of copper tubing behind the refrigerator so it does not vibrate
against the back of the refrigerator or against the wall. Push the refrigerator
back to the wall.
Start the lcemaker
Set the icemaker switch to the ON position The icemaker will not begin to
operate until it reaches its operating temperature of 15 °F (-9 °C). It will then
begin operation automatically.
Turn the water on at
the shutoff valve
"
"
Installation
 Loading...