


REFRIGERATORFREEZER
OWNER'S MANUAL
PLEASE
READ THIS OWNER'S MANUAL THOROUGHLY
BEFORE OPERATING AND KEEP IT HANDY FOR
REFERENCE AT ALL TIMES.
пйгйСагъзад л
ейкйбагъзхе йнСЦгЦзаЦе
азлнкмдсаь ий
щдлигмДнДсаа
иЦкЦС ЗдгыуЦзаЦе пйгйСагъзадД
ЗзаеДнЦгъзй икйуанДвнЦ СДззмы
азлнкмдсаы а ЗлЦЙСД СЦкЬанЦ ЦЦ ийС кмдйв.
СЗйдДеЦкзав пйгйСагъзад
дЦкЯЗзаснЗй дйкалнмЗДуД
иЦкЦС дйкалнмЗДззье, ЕмСъ гДлдД,
кЦнЦгъзй йбзДвйенЦлъ бЯ беЯлнйе СДзйЙй
дЦкЯЗзаснЗД дйкалнмЗДуД, нД нкаеДвнЦ
зДСДгЯ вйЙй иЯС кмдйы Сгь бЗЦкзЦззь Сй
зъйЙй м ЕмСъ-ьдав уДл.
Internet Address: http://www.lg.ru
Warranty card Text & Tel no. (095)742-77-77
Table of Contents
Introduction
Installation
Operation
Registration
Important Safety I
Identification of P
Installation
Starting
Temperature Cont
Refrigerator
Freezer
Function
Super Freezer
Vacation
Lock
Self Test
Ice Making
Defrosting
Water Dispenser
nstruction
arts
rol
4
4
15
16
16
17
17
17
19
19
19
20
20
20
20
21
Suggestion On
Food storage
Care and
Maintenance
Trouble Shooting
To Reverse
the Doors
Storing Food
General Informati
Lamp Replacemen
Cleaning
Trouble Shooting
Precaution
How to Reverse the Door
The working life of this set is 7 years since the date of
delivery to consumer
3
on
t
.
23
24
24
25
27
29
29
Introduction
Registration
Introduction
The model and serial number are found on the rear of
this unit. This number is unique to this unit and not
available to others. You should record requested
information here and retain this guide as a permanent
record of your purchase. Staple your receipt here.
Date of Purchase :
Dealer Purchased From :
Dealer Address :
Dealer Phone No. :
Model No. :
Serial No. :
Important Safety Instruction
BASIC SAFETY PRECAUTIONS
This guide contains many important safety messages.
Always read and obey all safety messages.
This is the safety alert symbol. It alerts you to safety
messages that inform you of hazards that can kill or hurt
you or others or cause damage to the product. All safety
messages will be preceded by the safety alert symbol and
the hazard signal word DANGER, WARNING, or
CAUTION. These words mean:
DANGER
WARNING
CAUTION
All safety messages will identify the hazard, tell you how
to reduce the chance of injury, and tell you what can
happen if the instructions are not followed.
You will be killed or seriously injured if
you don’t follow instructions.
You can be killed or seriously injured if
you don’t follow instructions.
Indicates an imminently hazardous
situation which, if not avoided, may
result in minor or moderate injury, or
product damage only.
4
Introduction
Important Safety Instruction
To reduce the risk of fire, electric shock, or injury to
persons when using your product, basic safety
precautions should be followed, including the
following. Read all instructions before using this
appliance.
1. When connecting the power
The dedicated outlet should be used.
• Using several devices at one outlet
may cause fire.
• The electric leakage breaker may
damage food and the dispenser may
be leaked.
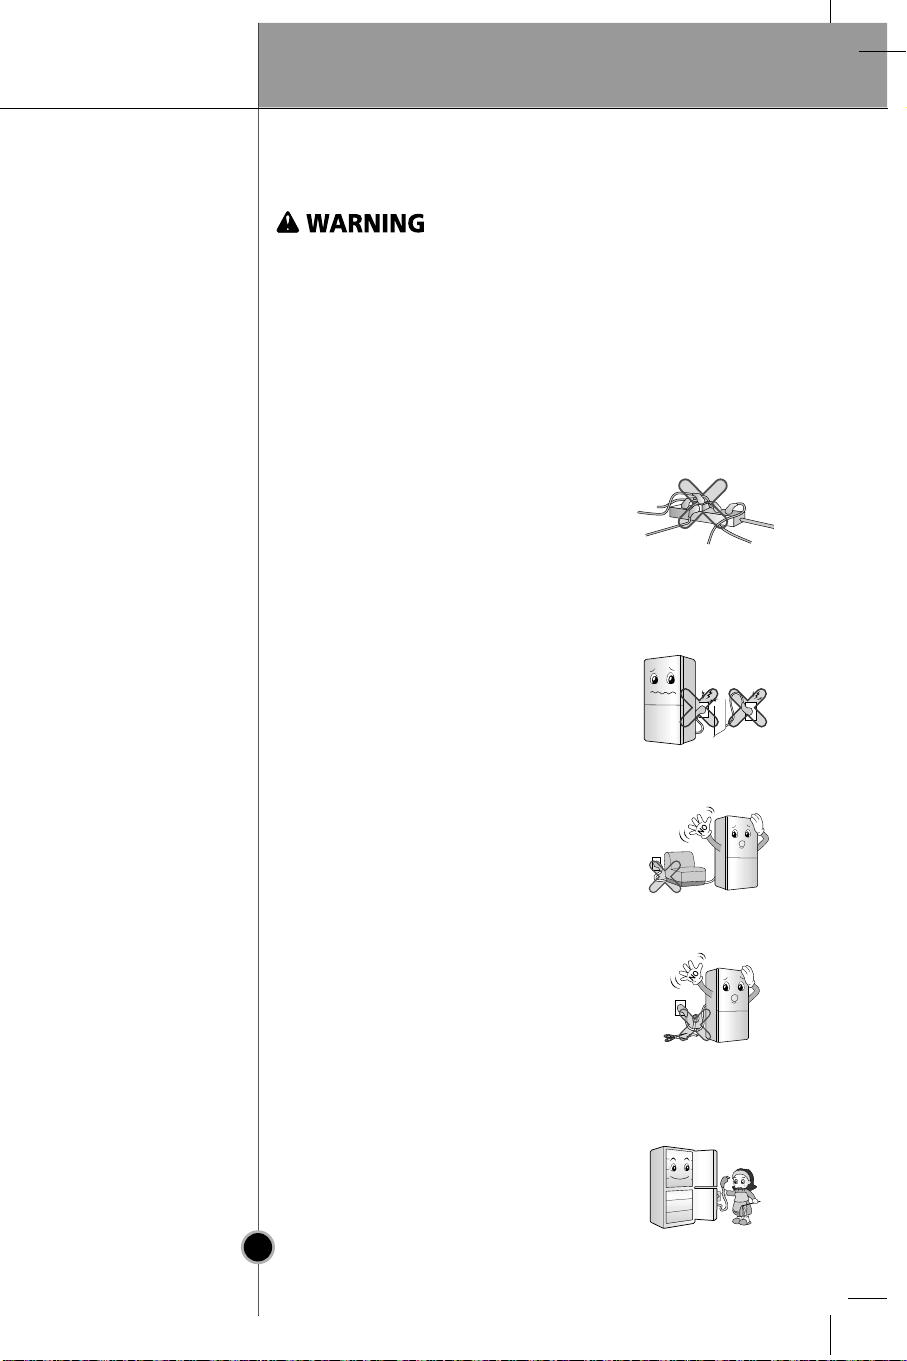
Do not allow the power plug to face upward or to
be squeezed at the back of the fridge-freezer.
Water may be flown into or the plug
may be damaged, which causes fire or
electric shock.
Do not allow the power cord bent or pressed by the
heavy object to be damaged.
It may damage the power cord to cause
fire or electric shock.
Do not extend or modify the length of the power
plug.
It causes electric shock or fire by the
electric damage of the power cord or
others.
Unplug the power plug when cleaning, handling or
replacing the interior lamp of the fridge-freezer.
• It may cause electric shock or injury.
• When replacing the interior lamp of
the fridge-freezer, make sure that the
rubber ring for preventing the electric
spark within the socket is not taken off.
5
Introduction
6
Important Safety Instruction
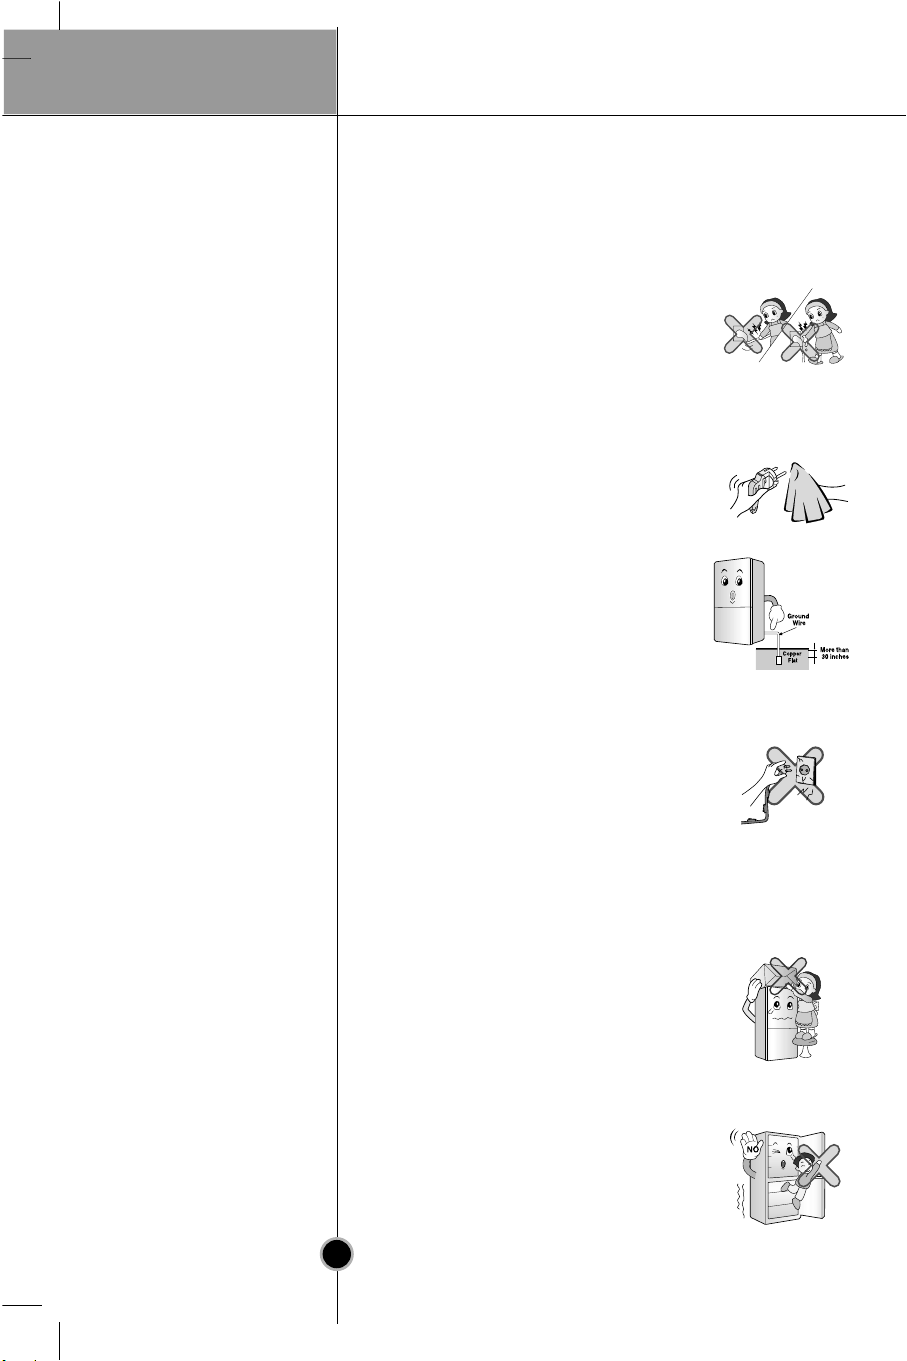
Do not pull out the cord or touch the power plug
with wet hands.
• It may cause electric shock or injury.
Remove water or dust from the power plug and
insert it with the ends of the pins securely
connected.
Dust, water or unstable connection may
fire or electric shock.
Make sure of grounding.
The incorrect grounding may cause
breakdown and electric shock.
When the power cord or the power plug is
damaged or the holes of the outlet are loosed, do
not use them.
It may cause electric shock or short circuit
to make fire.
2. When using the fridge-freezer
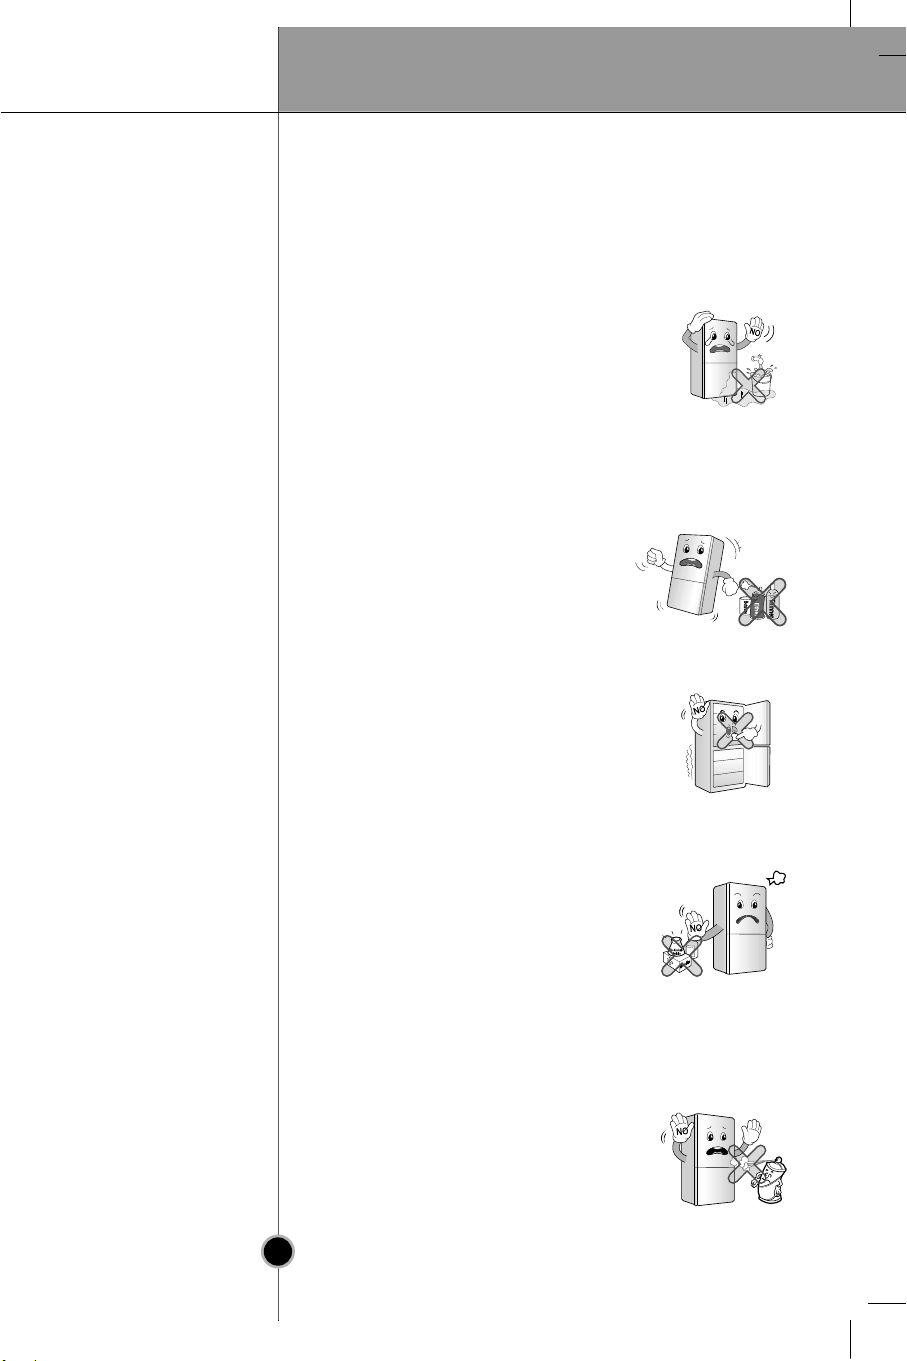
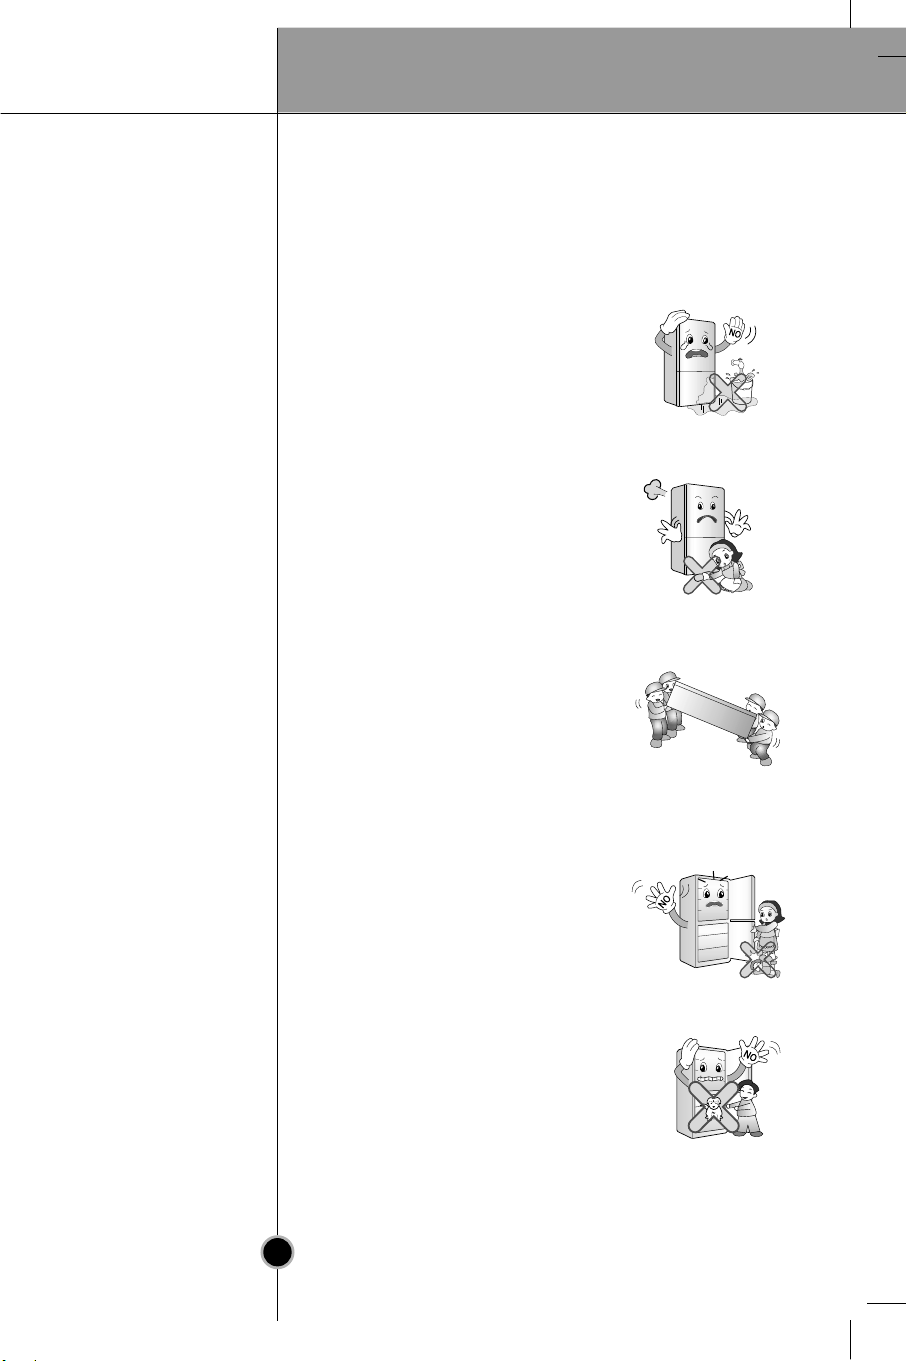
Do not place the heavy object or the dangerous
object (container with liquid) on the fridge-freezer.
It may be dropped to cause injury, fire or
electric shock when opening or closing
the door.
Do not cling to the door or the shelves of the door
or the home bar of the freezer or the cool chamber.
It may make the fridge-freezer fallen
down or damage the hands. Especially,
do not allow the children to do the
above.
Introduction
7
Do not install the fridge-freezer in the wet place or
the place which water or rain splashes.
Deterioration of insulation of electric
parts may cause electric leakage.
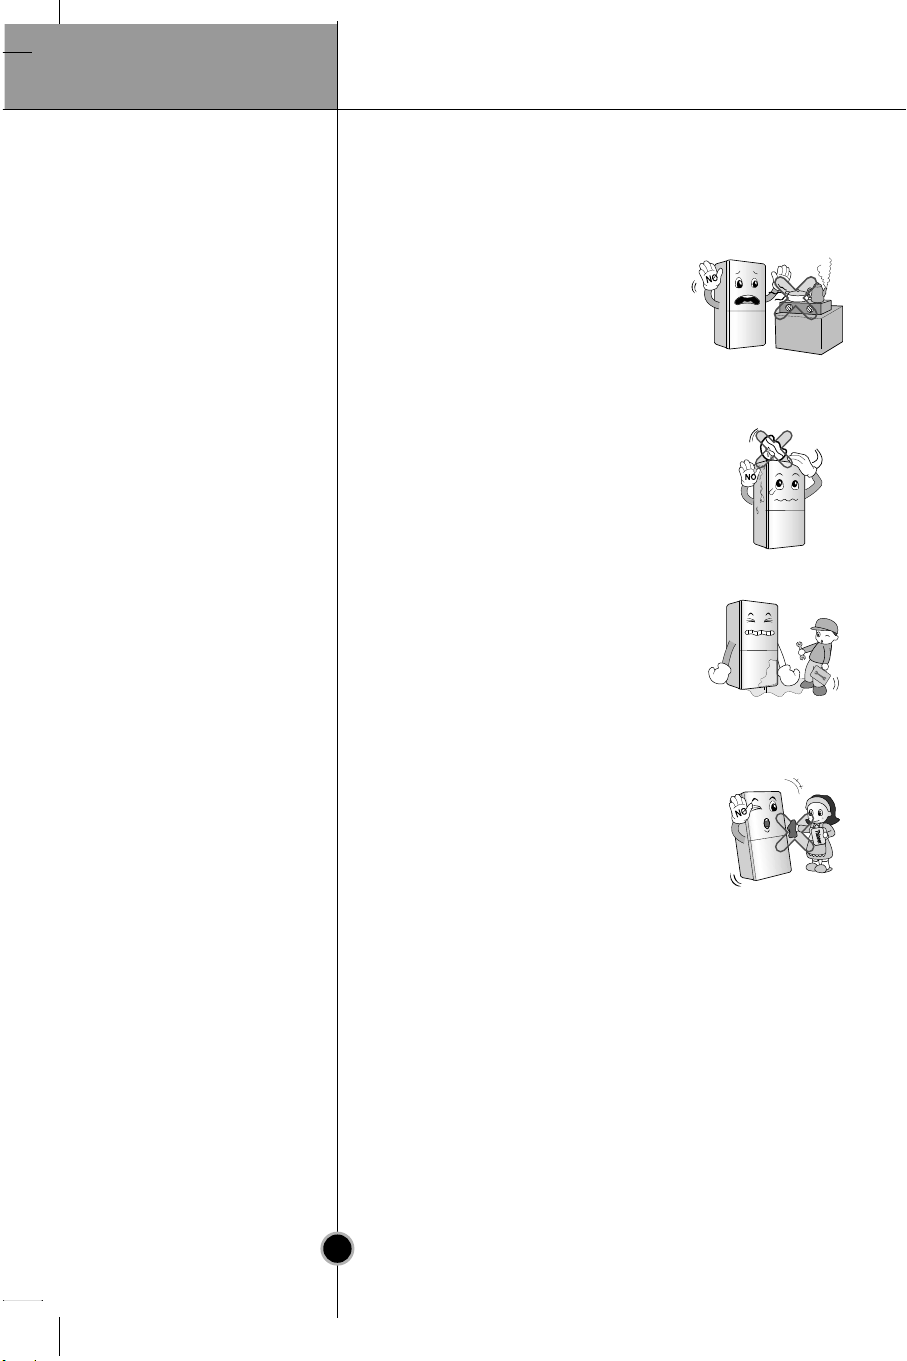
Do not use or store inflammable materials ether,
benzene, alcohol, medicine, LP gas, spray or
cosmetics near or in the fridge-freezer.
It may cause explosion or fire.
Do not place the lit candle within the fridge-freezer
to deodorize.
It may cause explosion or fire.
Do not store the medicine or the academic materials
at the fridge-freezer.
When the material with the strict
temperature control is stored, it may be
deteriorated or it may make an
unexpected reaction to cause any risk.
Do not use the combustible spray near the fridgefreezer.
It may cause fire.
Important Safety Instruction
Introduction
8
Avoid the heating devices.
It may cause fire.
Do not place flower vase, cup, cosmetics, medicine
or any container with water on the fridge-freezer.
It may cause fire, electric shock or
injury by dropping down.
Use the submerged fridge-freezer after checking it.
It may cause electric shock or fire.
Do not spray water at the outside or the inside of
the fridge-freezer or do not clean it with benzene or
thinner.
Deterioration of insulation of electric
parts may cause electric shock or fire.
Important Safety Instruction
Introduction
Important Safety Instruction
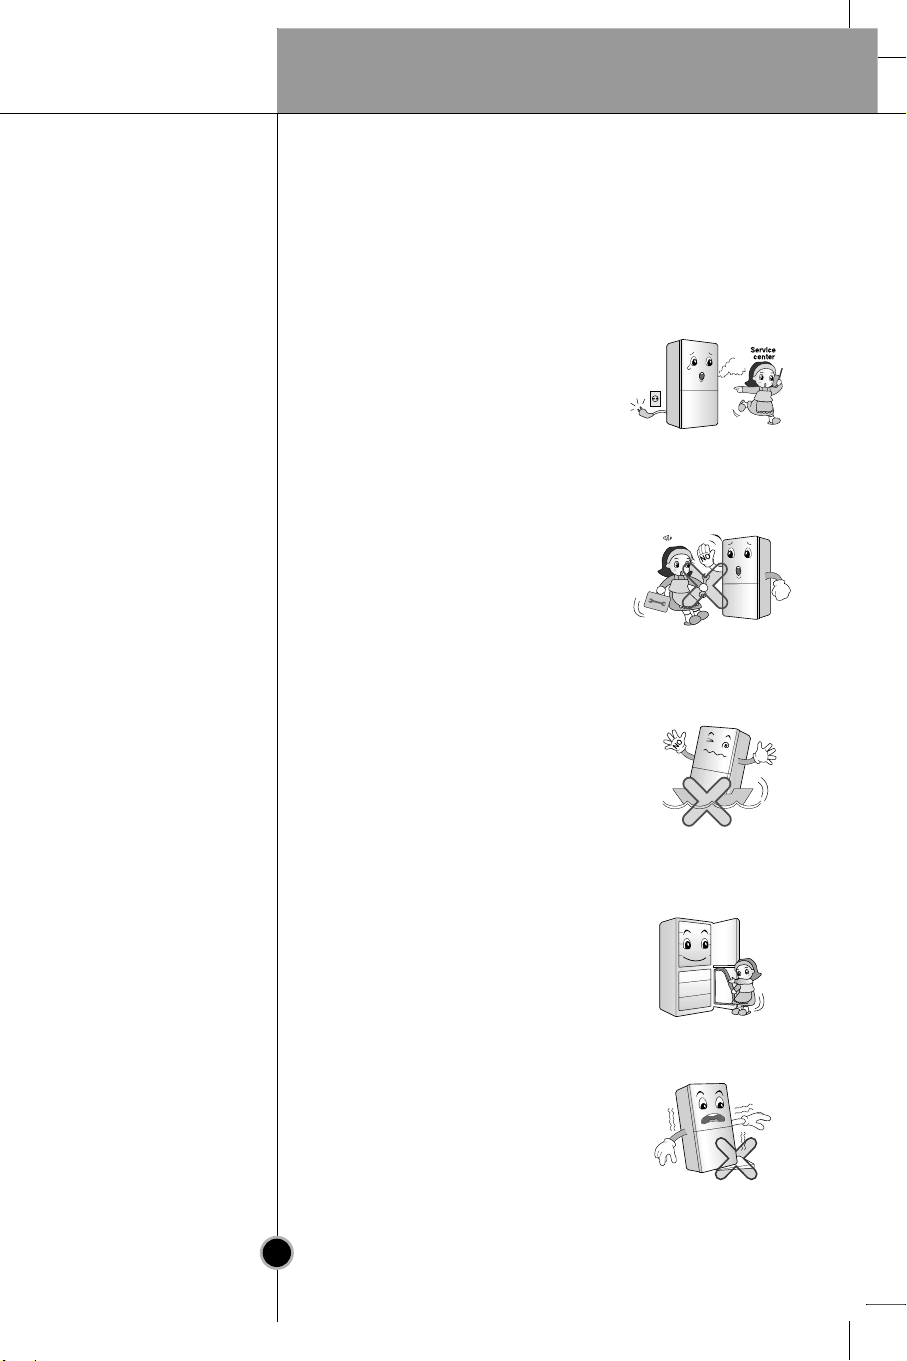
When any strange smell or smoke is detected from
the fridge-freezer, disconnect the power plug
immediately and contact to the service center.
It may cause fire.
Do not allow any person except the qualified
engineer to disassemble, repair or alter the fridgefreezer.
It may cause injury, electric shock or
fire.
Do not use the fridge-freezer for non-domestic
purpose (storing medicine or testing material, using
at the ship, etc.).
It may cause an unexpected risk such
as fire, electric shock, deterioration of
stored material or chemical reaction.
When disposing the fridge-freezer, remove the
packing materials from the door.
It may cause to lock out the child.
Install the fridge-freezer on the solid and level floor.
Installing it on the unstable place may
cause death by falling down the
fridge-freezer when opening or
closing the door.
9
Introduction
10
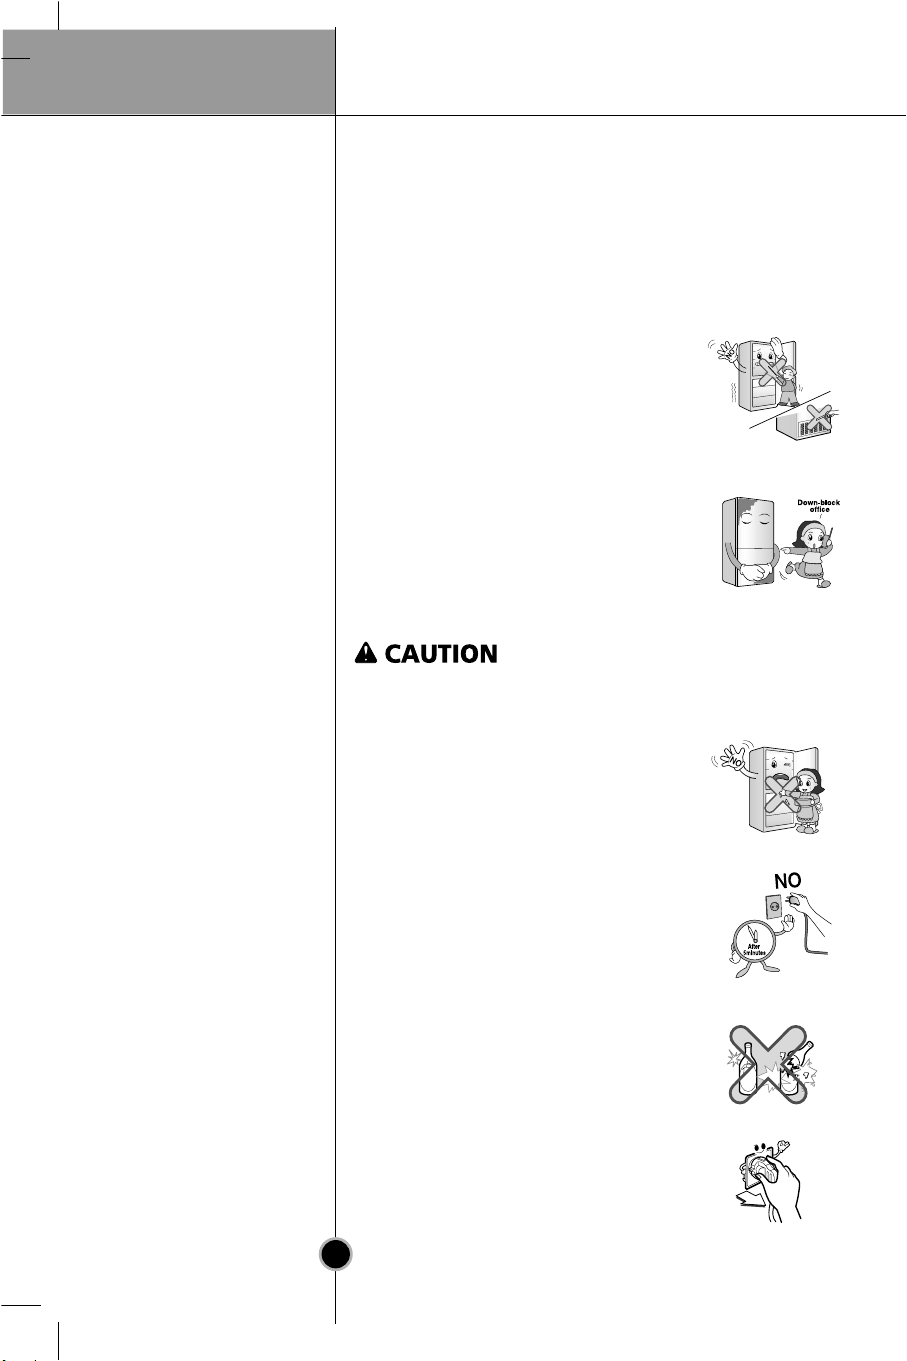
Do not insert the hands or the metal stick into the
exit of cool air, the cover, the bottom of the fridgefreezer, the heatproof grill (exhaust hole) at the
backside.
It may cause electric shock or injury.
When you want to dispose the fridge-freezer,
contact to the down-block office.
When you want to dispose the large
living waste such as
electric home appliance and furniture,
you’d better contact the local downblock office.
Violating this direction may cause injury or damage
house or furniture. Always be careful, please.
Do not touch food or containers at
the freezer with wet hands.
It may cause frostbite.
Wait for 5 minutes or longer when
reconnecting the plug.
It may cause the operation of the
freezer to fail.
Do not put bottle in the freezer.
It may freeze the contents to break the
bottle to cause injury.
Pull out the power plug not by
grasping the cord but the plug of its
end.
It may cause electric shock or short
circuit to fire.
Important Safety Instruction
Introduction
11
Do not install the fridge-freezer in the wet place or
the place which water or rain splashes.
Deterioration of insulation of electric
parts may cause electric leakage.
Do not insert the hands into the bottom of the
fridge-freezer.
The iron plate of the bottom may
cause injury.
Carry the fridge-freezer with the handle bar at the
bottom of the front and the top of the rear.
Otherwise, your hands may be slipped
to cause injury.
Because opening or closing the door of the fridgefreezer may cause injury to the person around it, be
careful, please.
Opening or closing the door may
cause feet or hands to be caught in
the chink in door or the child to be get
hurt by the corner.
Do not put any living animal in the
fridge-freezer.
Important Safety Instruction
Introduction
12
• This fridge-freezer must be properly installed and
located in accordance with the Installation
Instruction before it is used.
• Never unplug your fridge-freezer by pulling on the
power cord. Always grip plug firmly and pull straight
out from the outlet.
• When moving your appliance away from the wall, be
careful not to roll over or damage the power cord.
• After your fridge-freezer is in operation, do not
touch the cold surfaces in the freezer compartment,
particularly when hands are damp or wet. Skin may
adhere to these extremely cold surfaces.
• Pull out the power plug prior to cleaning the fridgefreezer.
Never damage, serverely bend, pull out, or twist the
power cord because power cord damage may cause a
fire or electronic shock.
Never place glass products in the freezer because they
may be broken when their inner contents are frozen.
• Do not directly spray water inside or outside the
fridge/freezer.
There is a risk of explosion or fire.
• Do not insert the power plug with wet hands.
You may receive an electric shock.
• Do not put a container filled with water on top of
the appliance.
If the water spills on to any electrical parts, it may lead
to fire or electric shock.
• Do not install the fridge/freezer in a damp place,
where it could be splashed with water.
Incorrect insulation of the electrical parts may cause an
electric shock or file.
Important Safety Instruction
Precaution
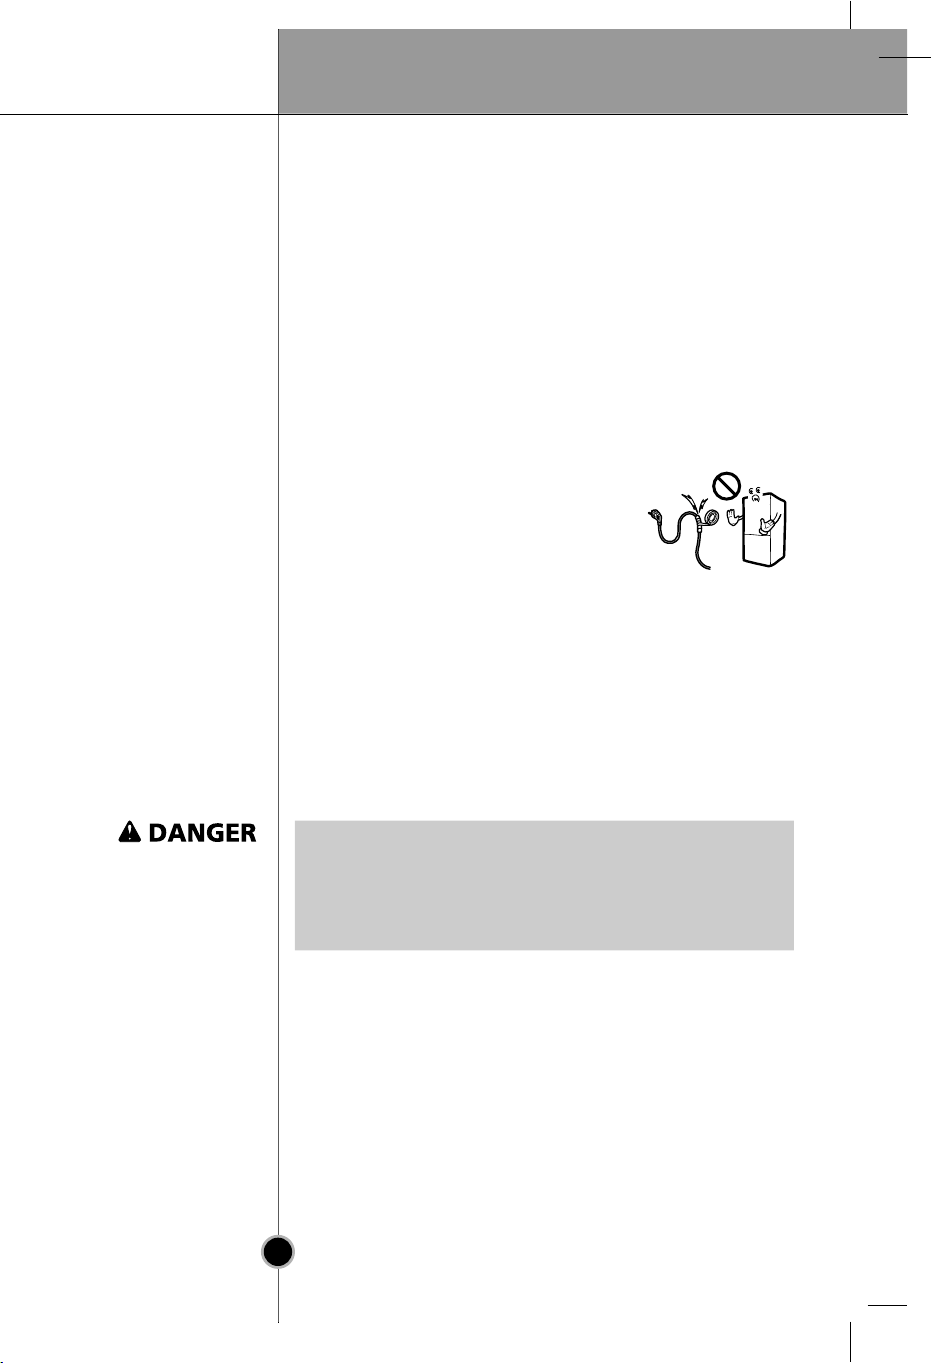
Do not modify or
extend the Power
Cord length
Introduction
Important Safety Instruction
• Do not disassemble, repair or alter the appliance.
It may cause fire or abnormal operations, which may
lead to injury.
• Pull the power plug out of the socket before
replacing the interior light in the refrigerator.
Otherwise, there is a risk of electric shock.
• If possible, connect the fridge-freezer to its own
individual electrical outlet to prevent it and other
appliances or household lights from causing an
overload.
It will cause electric shock or fire.
Don’t Use on
Extension Cord
Accessibility of
Supply Plug
Supply Cord
Replacement
Don't store
Grounding
(Earthing)
If possible, connect the fridge-freezer to its own indivi
electrical outlet to prevent it and other appliances or
household lights from causing an overload.
The supply plug of the refrigerator-freezer should be
placed in easy accessible position for quick disconnection
in emergency.
If the supply cord is damaged, it must be replaced by the
manufacturer or its service agent or a similarly qualified
person in order to avoid a hazard.
Risk of child entrapment.
Before you throw away your old refrigerator or freezer:
Take off the doors.
Leave the shelves in place so that children may not easily
climb inside.
Don't store or use gasoline or other flammable vapors
and liquids in the vicinity of this or any other appliance.
In the event of an electric short circuit, grounding
(earthing) reduces the risk of electric shock by providing
an escape wire for the electric current. In order to prevent
possible electric shock, this appliance must be grounded.
Improper use of the grounding plug can result in an
electric shock. Consult a qualified electrician or service
person if the grounding instructions are not completely
understood, or if you have doubts on whether the
appliance is properly grounded.
13
dual
Introduction
Introduction
Important Safety Instruction
• If the wall socket is loose, do not insert the power
plug.
It may cause electric shock or fire.
• Never unplug your refrigerator by pulling on the
power cord. Always grip plug firmly and pull it
straight out from the outlet.
You may disconnect a wire and cause a short circuit.
• Do not use a wet or damp cloth when cleaning the
plug. Remove any foreign matter from the power
plug pins.
Otherwise, there is a risk of fire.
• Do not put your hands into the bottom area of the
appliance.
Any Sharp edges may cause personal injury..
• After unplugging the appliance, wait for at least
five minutes before plugging it again to the wall
socket.
Abnormal operation of the freezer may cause material
damage.
• If the appliance is not to be used for a long time,
pull out the power plug.
Any deterioration in the insulation may cause fire.
• Do not let children touch or play with the control
panel on the front of the appliance.
• The refrigerant used in fridge/freezer and the
gases in the insulation material require special
disposal procedures. Ensure that none of the pipes
on the back of the appliances are damaged prior
to disposal.
14
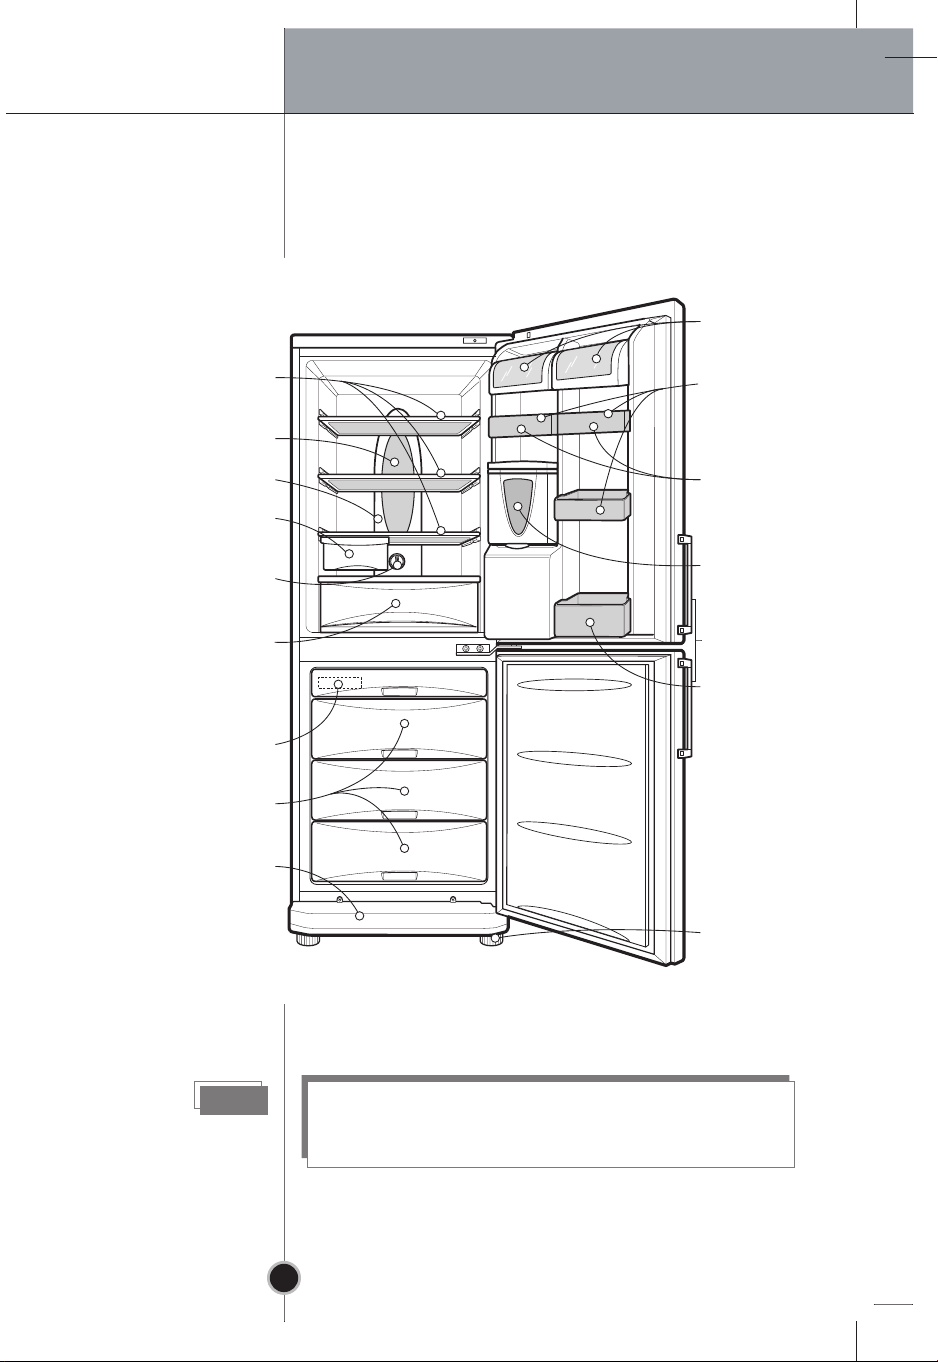
Identification of Parts
Introduction
Utility Corner
(movable)
Removable Glass
Shelf
Lamp
Multi-air Flow Duct
Fresh Zone (Optional)
Refrigerator
Temperature Control
Vegetable Drawer
Used to keep fruits and
vegetables, etc. fresh
and crisp.
(1 or 2)
Ice Cube Tray
Freezer Compartment
Removable Plinth
Door Basket
Egg Tray(1 or 2)
Water Tank
Handle (Optional)
2
Bottle Door
Basket
Leveling Screw
Note
If you find some parts missing from your unit, they
may be parts only used in other models.
15
Installation
Installation
Installation
1.
Select a good location.
Place your fridge-freezer where it is easy to use.
2.
Avoid placing the unit near heat sources,
direct sunlight or moisture.
3.
There must be proper air circulation around your
fridge-freezer to keep it operating efficiently.
4.
To avoid vibration, the unit must be leveled.
If required, adjust the leveling screws to compensate
for the uneven floor.
The front should be slightly higher than the rear to aid
in door closing.
Leveling screws can be turned easily by tipping the
cabinet slightly.
Turn the leveling screws counterclockwise( ) to
raise the unit, clockwise( ) to lower it.
5.
Clean your fridge-freezer thoroughly and wipe off all
dust accumulated during shipping.
6.
Install accessories such as ice cube box, etc., in their
proper places.They are packed together to prevent
possible damage during shipment.
Starting
7.
Connect the power supply cord (or plug) to the outlet.
Don't double up with other appliances on the same
outlet.
8.
To ensure proper air circulation around the fridge freezer, please maintain sufficient space on both the
sides as well as top and maintain at least 2 inches (5
cm) from the rear wall.
When your fridge-freezer is installed, allow it 2-3 hours to
stabilize at normal operating temperature prior to filling
it with fresh or frozen foods.
If power plug is disconnected, allow 5 minutes delay
before restarting.
Your fridge-freezer is now ready for use.
16
Operation
Temperature Control
Your fridge-freezer has two controls that let you regulate
the temperature in the fridge and freezer compartments.
Refrigerator
Freezer
• Initially set the TEMP. CONTROL at
"4". Then adjust the compartment
temperature according to your
desire.
• If you want an inside temperature
slightly less cold or colder, turn the
MAX MIN
7
6
5
3
4
TEMP. CONTROL
knob towards MIN or MAX,
respectively. When the surrounding
temperature is low, adjust the TEMP. CONTROL 'MIN'.
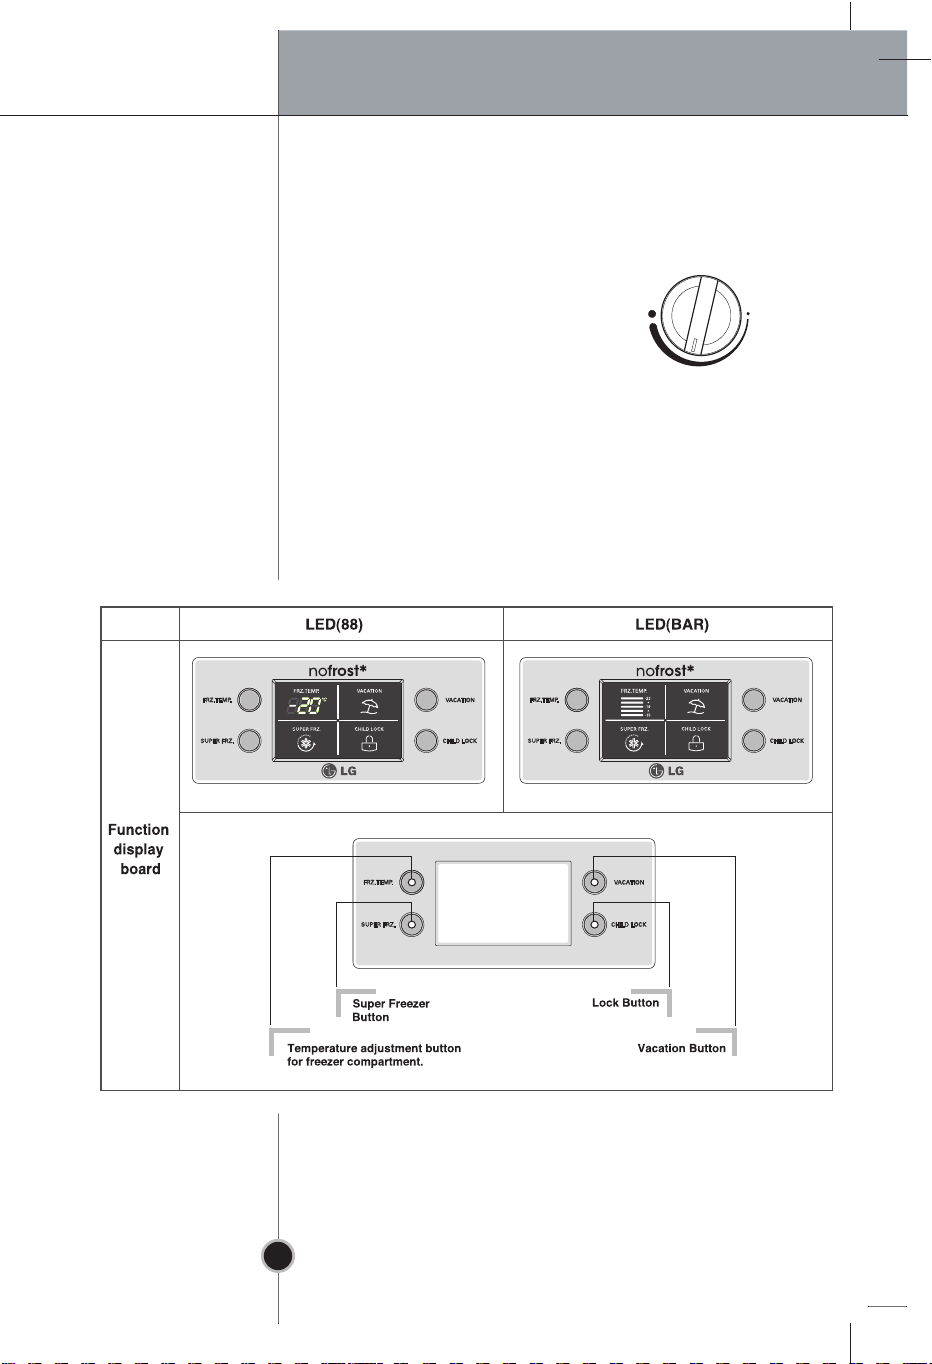
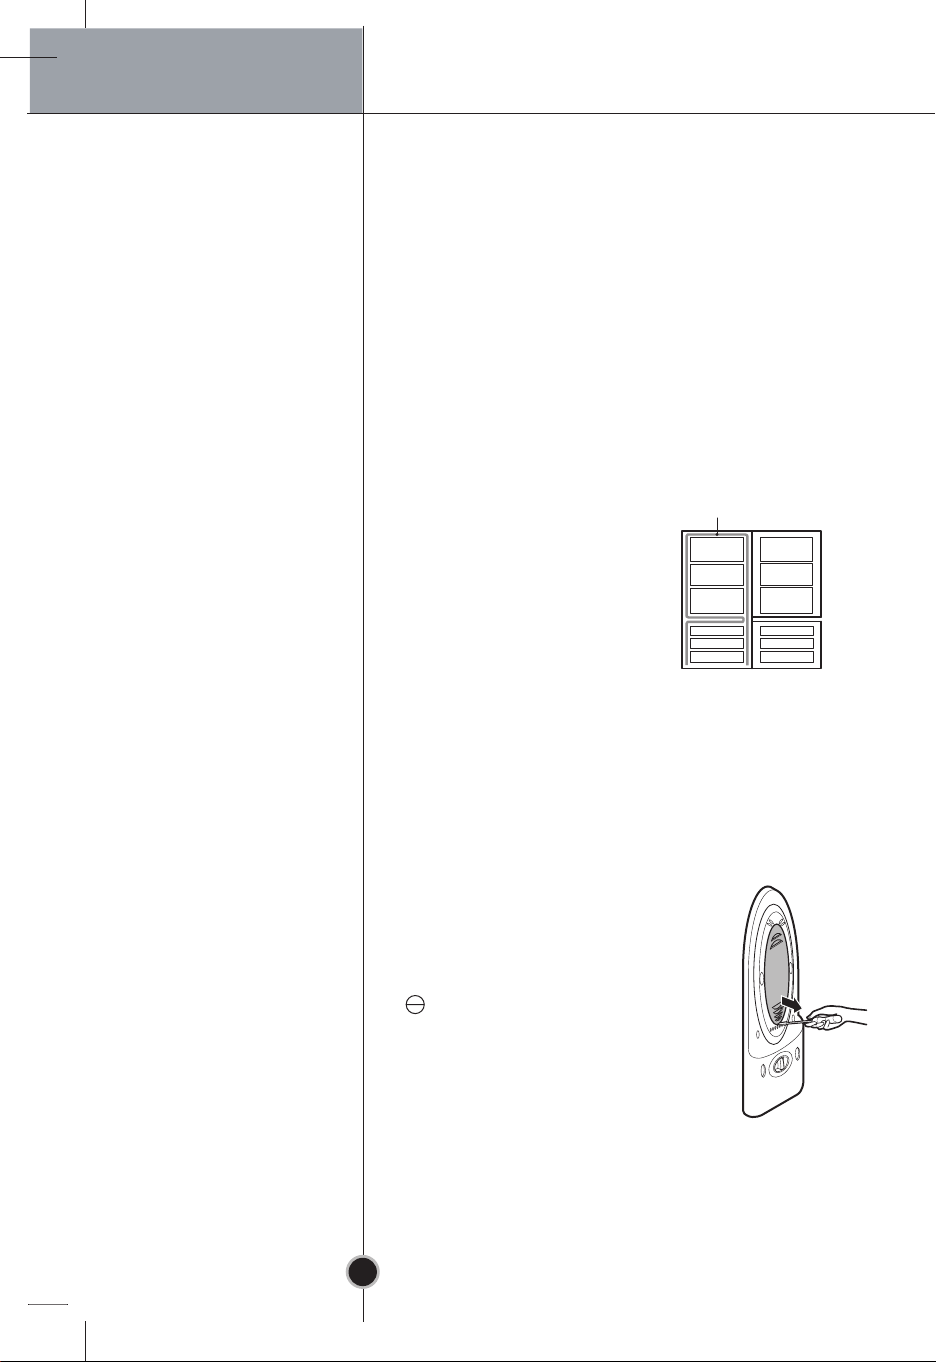
Display Panel For Temperature Control
1
2
17
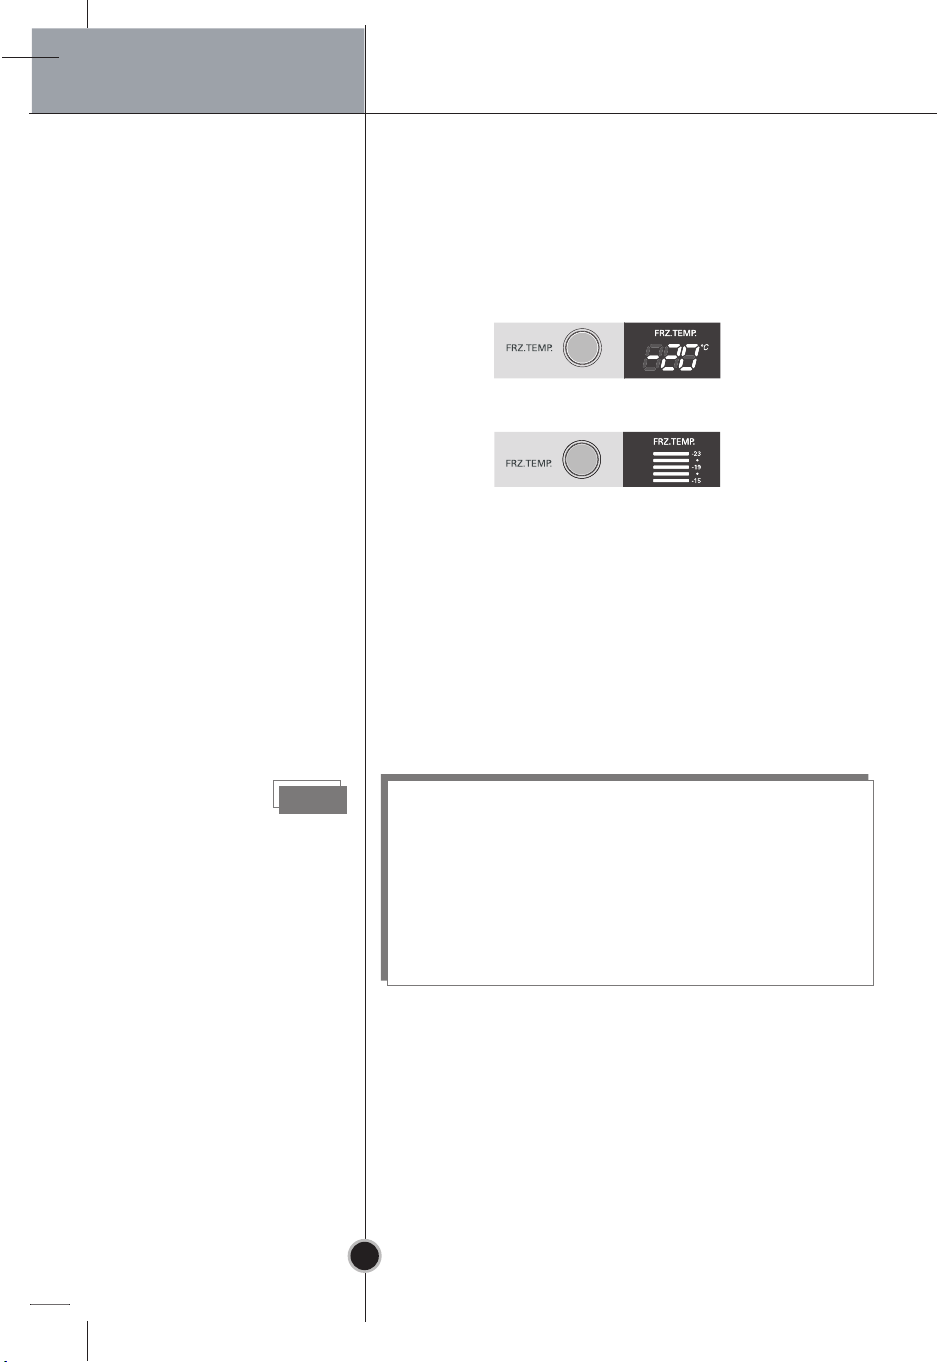
Operation
• The initial Temperature of the Freezer Compartment is
-18°C . You can now adjust the temperature of the
compartment as you want.
< LED 88 Type >
< LED BAR Type >
• When you press the temperature control buttons, the
temperature of Freezer compartment is repeated in the
following order.
LED 88 Type Freezer Compartment :
-18°C → -19°C → -20°C → -21°C → -22°C → -23°C
→ -15°C → -16°C → -17°C
Note
LED BAR Type Freezer Compartment :
-19°C → -21°C→ -23°C → -15°C → -17°C
The actual inner temperature varies depending on the
food status, as the indicated setting temperature is a
target temperature, not actual temperature within
refrigerator.
Refrigeration function is weak in the initial time.
Please adjust temperature as above after using
refrigerator for minimum 2~3 days.
18
Function
Operation
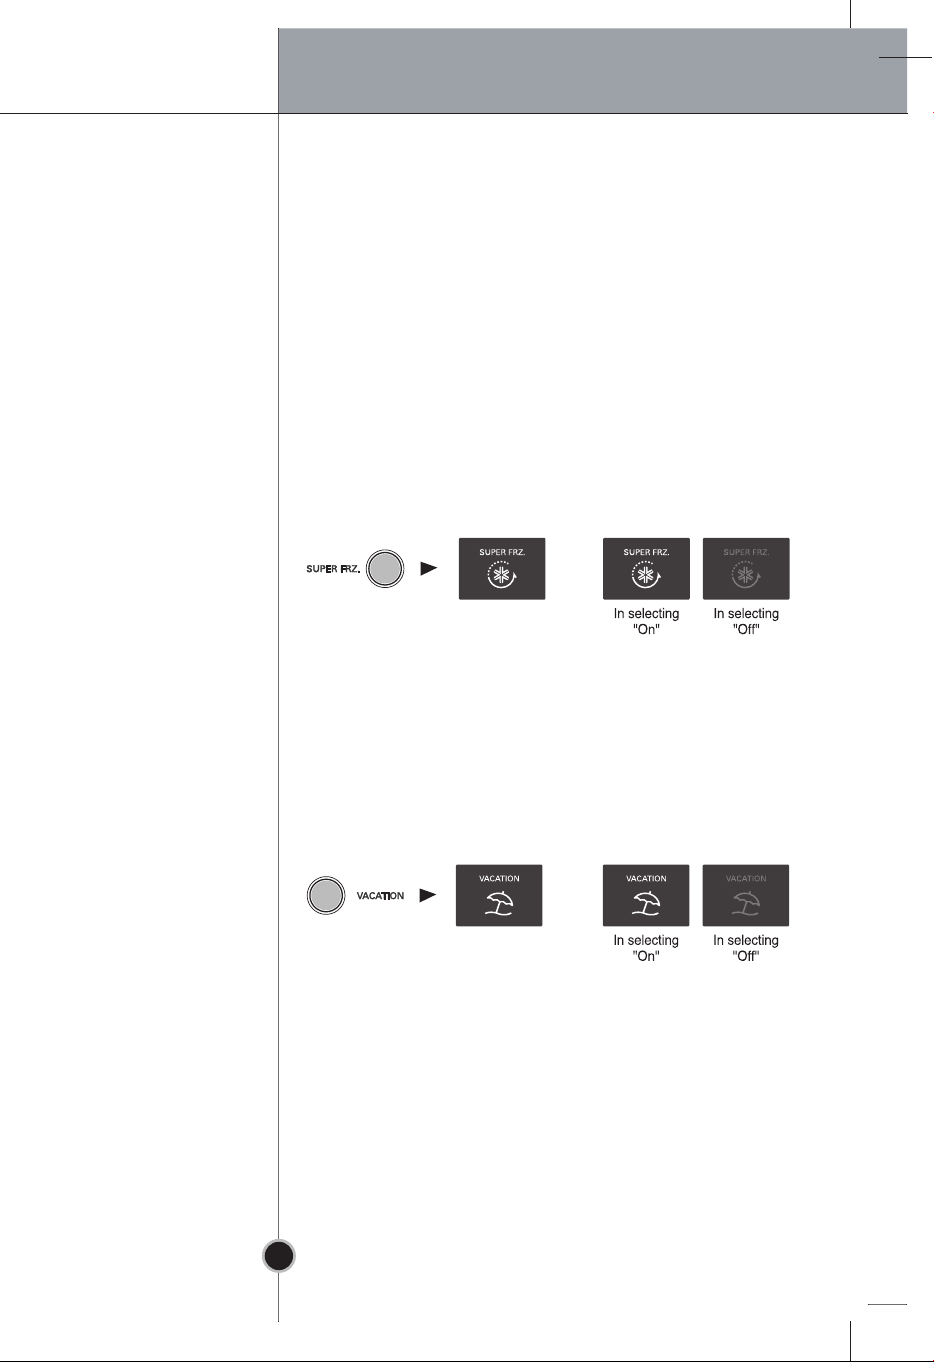
Super Freezer
Vacation
• Please select this function for prompt freezer.
• This function is used when you want to freeze the
foods quickly. Press the ‘SUPER FRZ.’ (Super Freezer)
button once, and then the quick freeze operation starts
with the lamp on.
• The Super Freeze operation takes about 3 hours. When
its operation ends, it automatically returns to the
previous temperature setting. If you want to stop the
quick freeze operation, press the ‘SUPER FRZ.’ button
once more, the lamp goes out, and the Super Freeze
operation stops and the refrigerator returns to the
previous temperature setting.
• This function makes the fridge-freezer work in a power
saving mode which is useful for when you are away on
holiday, by reducing energy consumption as much as
possible.
Pressing ‘VACATION’ starts operation with lamp on
and pressing it again stops the operation.
19
Operation
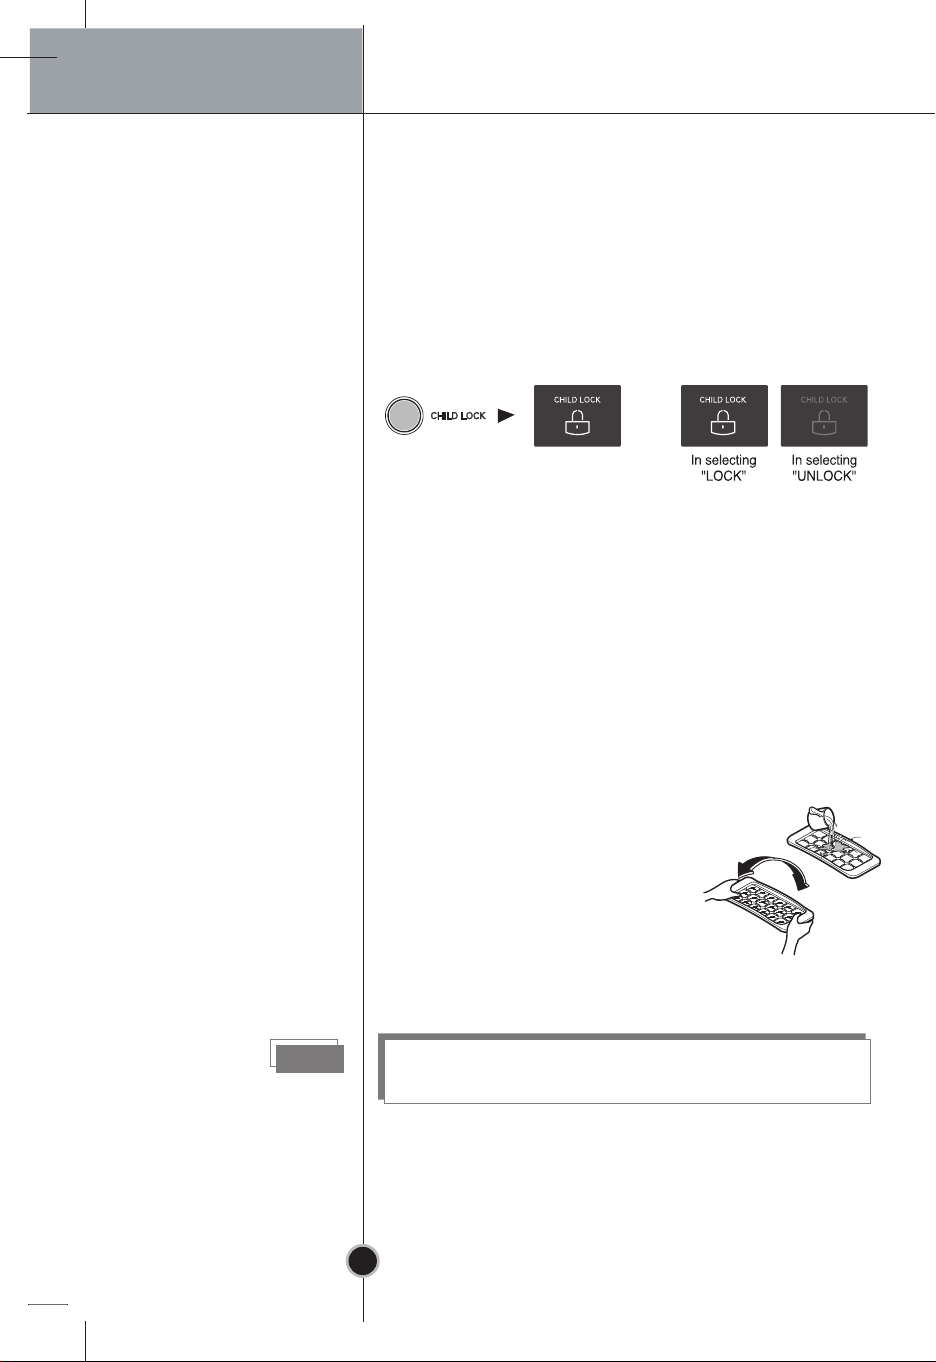
Lock
Self Test
Ice Making
• Pressing this button stops operation of other buttons.
• ”Locking” or “Un-Locking” is repeated whenever
pressing the ‘CHILD LOCK’ button. (For “Locking” or
“Un-Locking” press the ‘CHILD LOCK’ button for 2 secs.)
• When ‘CHILD LOCK’ is activated, pressing the other
buttons would not work.
This function allows you to check for operational
problems. If you think you have a problem with your
fridge-freezer, then press the temperature control
button:
- If the indicate lights move up or down, then there is no
problem with your fridge-freezer.
- If the indicate lights do not move up or down, then
please leave the power connected and call your nearest
service agent.
• To make ice cubes, fill the ice
tray to the water level and place
it in the freezer.
• If ice cubes are required fast,
press the ‘SUPER FRZ.’ button.
• To remove ice cubes, hold the
tray at its ends and twist gently.
Tip
Defrosting
To remove ice cubes easily, run water on the tray
before twisting.
Defrosting takes place automatically.
The defrosting water flows down to the evaporating tray
and is evaporated automatically.
20
Features
Operation
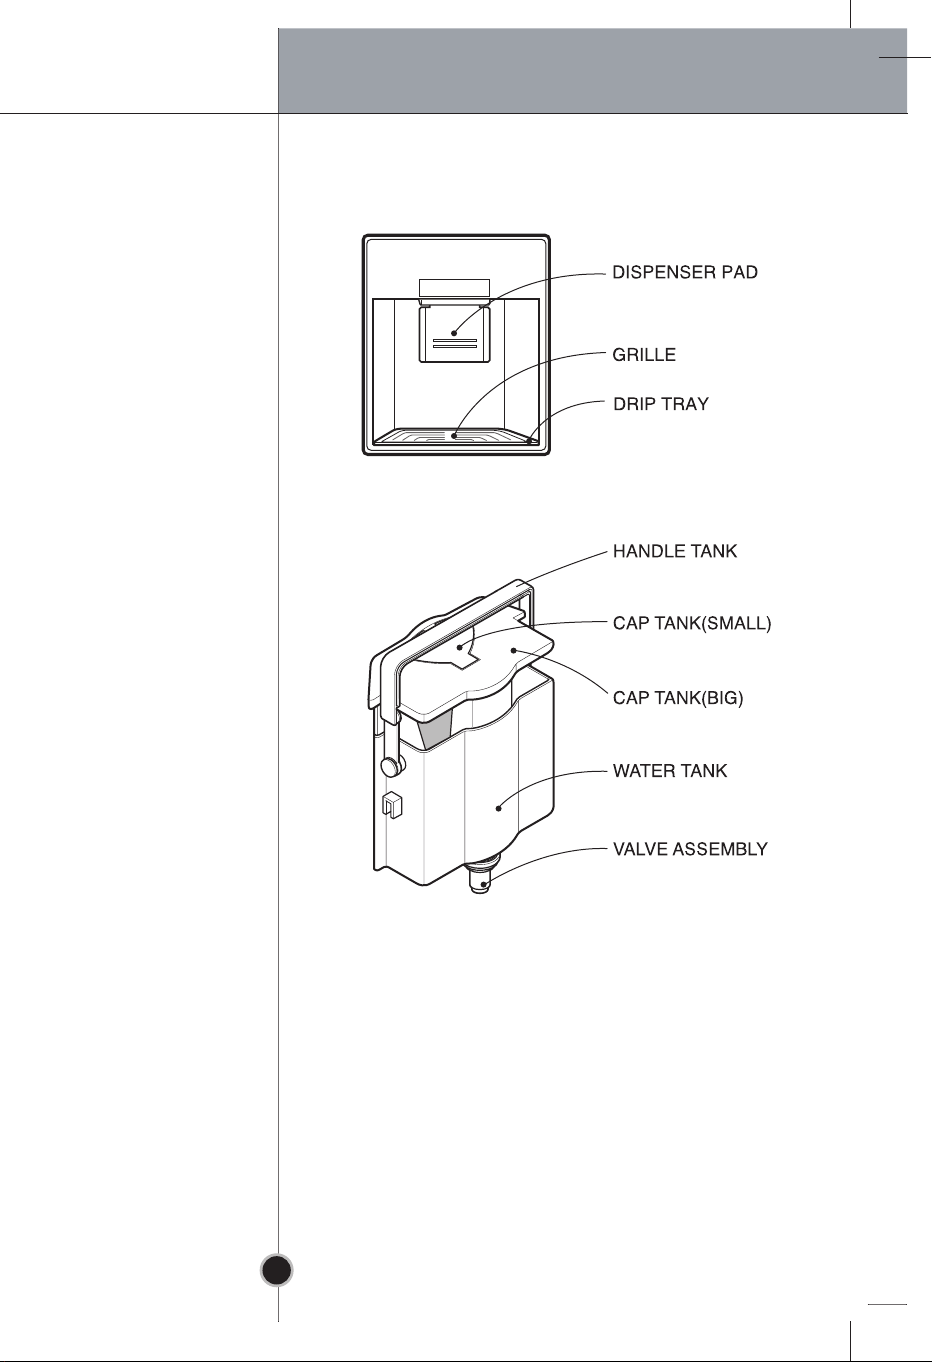
Water Dispenser
Install
• Please assemble the VALVE ASSEMBLY after correctly
adjusting it with a DOOR HOLE.
21
Operation
Filling of
WATER TANK
Drinking
CAUTION
1. After turning the HANDLE Tank backward with the
WATER TANK installed at the DOOR, Open the CAP
TANK (SMALL) and then fill water using a kettle etc.
* Fill water while watching a sight glass on the front
of the WATER TANK.
* Water up to 4.5
can be filled.
2. Press and fix the CAP TANK(SMALL).
3. After filling spring water, fix the HANDLE TANK at a
proper position.
1. Press the Dispenser Pad with a cup.
2. If pressing the Pad, water inside of the Dispenser is
supplied.
3. If slowly removing a cup from the Pad, water will not
fall down.
Do not use other beverage (milk, juice, carbonated
beverage etc) than spring water. Especially beverage
including grain must not be used (may result in failure).
22
Storing Food
Suggestions on food storage
Storing Food
• Do not store food which goes bad easily at low
temperature, such as banana, and melon.
• Allow hot food to cool prior to storing. Placing hot
food in the fridge-freezer could spoil other food, and
lead to higher electric bills.
• When storing the food, use a container with a lid. This
prevents moisture from evaporating, and helps food to
keep its taste and nutrients.
• Do not block air vents with food. Smooth circulation of
cold air keeps fridge-freezer temperature even.
• Do not open the door frequently. Opening the door
lets warm air enter the fridge-freezer, and cause
temperature to rise.
• To adjust the temperature control easily, do not store
food near the temperature control dial.
• Never keep too many foods in door rack, as this may
stop the door from fully closing.
• Do not store bottles in the freezer compartment - they
may break when frozen.
Note
• Do not refreeze food that has been thawed. This
causes loss of taste and nutrition.
If you keep the fridge-freezer in a hot, and humid
place, frequently open its door or put a lot of
vegetables in it, dew may form in it, which has no
effect on its performance.
Remove the dew with dust cloth free from care.
23
Care and Maintenance
General Information
Power Failure
If You Move
Anti
Condensation
Pipe
• 1~2 hour power failure does no harm to the foods
stores. Try to avoid opening and closing the door too
frequently.
• Take out foods from the fridge-freezer and firmly fix
the loose items with tape.
• Turn the leveling screws until they stop before moving
the fridge-freezer. Otherwise the screw may scratch
the floor or the fridge-freezer cannot move.
• The Anti-Condensation
pipe is installed around the
front side of fridge-freezer
as well as on the partition
between fridge
compartment and freezer
compartment to prevent
dewing.
• Especially after installation
or when ambient
temperature is high, the fridge-freezer may feel hot,
which is quite normal.
Anti-Condensation
Pipe
Lamp Replacement
1. Unplug the power cord from the
outlet.
2. Remove fridge shelves.
3. To remove the lamp cover, insert
type driver in the underside of
the lamp cover and pull it out
forwards.
4. Turn the lamp counterclockwise.
5. Assemble in reverse order of
disassembly.
Replacement lamp must be the same specification as
original.
24
Cleaning
Care and Maintenance
Before Cleaning
Exterior
Interior
After Cleaning
Be sure to unplug the power.
Clean the outside of the fridge-freezer with a soft cloth
soaked with hot water or liquid detergent. If you use a
detergent, be sure to wipe it with a clean wet cloth.
As above.
Check that the power cord is not damaged, power plug
has not overheated, and that the power plug is tightly
inserted into the outlet.
Be sure to dry the appliance with a cloth after washing
it with water.
Do not use abrasive, petroleum, benzene, thinner,
hydrochloride acid, boiling water, rough brush, etc, as
they may damage parts of the fridge-freezer.
25
Care and Maintenance
GRILLE and DRIP
TRAY
Exterior Dispenser
WATER TA
NK
CAP TANK
(Big & Small)
VALVE ASSEMBLY
Remove the GRILLE , wipe moisture out around the DOOR
part and the DRIP TRAY using a clean cloth.
Wipe moisture etc out outside of Dispenser and on the
DISPENSER PAD using a cloth.
1. Lift the WATER TANK up by pressing the fixing LEVER
on the bottom of WATER TANK and then remove it.
2. After removing the CAP TANK (BIG), clean and fully
rinse the inside/outside part of the WATER TANK by
using neutral cleansing agent.
Clean and fully rinse the CAP TANK (Big & Small) by using
neutral cleansing agent.
Especially for the groove part of the CAP TANK, it is
convenient to cleanse it by using a small brush.
Clean and fully rinse the VALVE ASSEMBLY by using a
small brush. Rinse it while operating the bottom part of
the valve assembly. Always fix the Sealing Rubber
separated for cleansing at the existing position
(may result in water leakage).
26
Trouble Shooting
Trouble Shooting
Before calling for service, check this list.
It may save you both time and expense.
This list includes common occur
the result of defective workmanship or materials in
this appliance.
rences that are not
Problem
Fridge-Freezer
does not operate
Fridge or Freezer
Compartment
Temperature too
warm
Vibration or
Rattling or
Abnormal Noise
Possible Causes
• Power plug may be unplugged from the electric
outlet.
Plug it in securely.
• House fuse has blown or circuit breaker has
tripped.
Check and/or replace fuse and reset circuit breaker.
• Power cut.
Check house lights.
• Temperature control not set on proper position.
Refer to Temperature Control section.
• Appliance is placed close to heat source.
• Warm weather-frequent door openings.
• Door left open for a long time.
• Package holding door open or blocking air duct in
freezer compartment.
• The floor on which the fridge-freezer is installed
may be uneven or the fridge-freezer may be
unstable.
Make it even by rotating the leveling screw.
• Unnecessary objects placed in the back side of the
fridge-freezer.
Frost or Ice
Crystals on frozen
Food
Moisture forms on
Cabinet Surface
• Door may have been left ajar or package holding
door open.
• Too frequent or too long door openings.
• Frost within package is normal.
• This phenomenon is likely to occur in a wet space.
Wipe it with a dry towel.
27

Trouble Shooting
Problem Possible Causes
Moisture collects
inside
Fridge has odor
Door not closing
properly
Interior light does
not work
• Too frequent or too long door openings.
• In humid weather, air carries moisture into fridge when
doors are opened.
• Foods with strong odors should be tightly covered or
wrapped.
• Check for spoiled food.
• Interior needs cleaning.
Refer to CLEANING section
• Food package is keeping door open.
Move packages that keep door from closing.
• Fridge-freezer is not level.
Adjust the leveling screws.
• The floor on which the fridge-freezer is installed
may be uneven or the fridge-freezer may be
unstable.
Slightly raise the front side with the leveling screw.
• No power at outlet.
• Light lamp needs replacing.
Refer to the Lamp Replacement section
Disposal of your old appliance
1. When this crossed-out wheeled bin symbol is attached to a
duct it means the product is covered by the European
pro
it
ies.
2/
96/EC.
of
ted
cal
Directive 200
2. All electrical and electronic products should be disposed
separately from the municipal waste stream via designa
collection facilities appointed by the government or the lo
author
3. The correct disposal of your old appliance will help prevent
potential negative consequences for the environment and
human health.
4. For more detailed information about disposal of your old
appliance, please contact your city office, waste disposal
service or the shop where you purchased the product.
28

To Reverse the Doors
Your fridge-freezer is designed with reversible doors,so that they may open from either
the left or right hand side to suit your kitchen design.
Precaution
Before reversing the door, first of all,you should take out food and accessories like
1.
shelves or trays which are not fixed in the fridge-freezer.
Use Torque Wrench or Spanner to fix or remove the bolt.
2.
Do not lay the fridge-freezer down.This will cause problems.
3.
Be careful not to drop the doors in disassembling or assenbling
4.
How to Reverse the Door
To separate the door handle of the left side, separate the
1.
door cap and unscrew the screw in counterclockwise
2
direction.Separate the door handle of the freezer in the
same order. (You do not need to follow the above procedure
for the hidden h
andle.)
2.After unscrewing the screw of the right hinge cover on
the top, separate the right hinge cover to separate the
connecting cable .Separate the bolt fixating the upper
right hinge ,and carefully separate the refrigerator door .
9
8
3.After separating the upper left cap of the separated
refrigerator door , carefully take off the top cap and
pull the cable to connect to the hole on the left side.Set
the separated top cap at the regular position and set the
11
cap on the cable hole on the right side.Loosen the screw
32
under the cold room door , move it to the left of the
stopper , and then connect
31
10
13
4.Press and separate the cap connected to the cover front
14
using the (+) driver, and unscrew the screws to
move the cable to the left to set it. After setti
separated cover front on the regular position, screw the
screws and cover them with the cap in
with the owner’s m
18
1716
anual.
1
3
4
6
5
7
11
12
10
5
10
12
it.
15
1716
ng the
14
15
cluded
.
3
2
2
2
1
3
4
6
5
7
8
9
10
12
11
10
13
31
32
17
18
29
19
14
15
16

5. Loosen the bolt of the Hinge Middle , remove the Hinge
21
Middle , and lift up the freezer door to separate it.
20
(When separating the refrigerator door, separate the bu
together.)Separate the hinge cover and set it on the separated
part of middle hinge . After unscrewing the screw connected
to the bottom cover connect the cover cap on the right side.
Loosen the pin in counterclockwise direction and move t
21
25
29
21
30
sh 35
24
26
o the
hole on the left side to tighten in clockwise direction. Loosen
the bolt connected to the lower hinge . Unscrew the screw
32
fixating the door stopper at the bottom of the freezer
30
, and fixate it on the hole on the left side with the
stopper .And then, move the upper cap to the righ
cove
27
31
31
r it.
28
door
door
33
t and
35
22
23
21
20
24
33
26
25
30
28
29
9
27
31
32
6. Set the separate lower hinge on the bottom hole of the left
side of the freezer, and tighten the bolt . After fixating
bottom cover at the regular position, align the freezer d
on the pin of lower hinge to attach it properly. Turn
the separated middle hinge and sheet hinge to assemble
them. And set the bush and washer together to tighten
the bolt . (When tightening the bolt, be careful not to cause
an scratch on the cap decor on top of the freezer door
25
20
28
27
29
21 22
2335
the
oor30
over
).
7.After assembling the door by aligning the hinge hole on the
bottom of the refrigerator door and the pin of the middle
21
hinge , connect properly to the hold of the upper left
37
included in the owner’s manual. After connecting the cable
9
, tighten the bolt to screw the screws to the left
36
cover included in the owner’s manual. Move the hinge cover
19
attached on the left side to the right and attach
7
8. Move the separated door handle to the right and fixate the
3
screw on the right position to attach the door cap .Move
the door cap on the right side to the left and attach it. Attach
the freezer door handle in the same method as the refrigerator
door handle
38
1
.
10
hinge
6
hinge
it.
1
2
2
21
20
30
28
27
25
6
36
7
37
3
2
3
2
19
9
10
38
38
Note
Reversing the doors is not covered by the warranty.
30

32
32
43
44
44
45
Холодильное отделение
Морозильное отделение
Функция
Глубокая
заморозка
Отпуск
Замок
45
45
47
47
47
48
48
48
48
49
51
52
52
53
Процедура
пере
вешивания двери
на пр
с
отивоположную
торону
Меры предосторожности
Проце
дура перевешивания двери
31
55
57
57

32

33
ЖОҚ
ЖОҚ

34
ЖОҚ

ЖОҚ
ЖОҚ
35
ЖОҚ
ЖОҚ

Қ
О
Ж
Қ
О
Ж
Қ
О
Ж
36

Қ
О
Ж
Қ
О
Ж
37

ЖОҚ
ЖОҚ
38
ЖОҚ

ЖОҚ
39
ЖОҚ
ЖОҚ

40

41

42

43

44

Функции
панели
дисплея
MAX MIN
7
6
5
3
4
TEMP. CONTROL
Индикаторная панель управления температурой
Светодиод (88) Светодиод (линейка)
1
2
Кнопка глубокой заморозки Кнопка блокировки
Кнопка регулировки температуры
морозильной камеры
45
Кнопка режима отпуска

• Исходная температура морозильной камеры
составляет -18°С. Вы можете отрегулировать
температуру камеры по своему желанию.
< Светодиод типа 88 >
Примечание
< Светодио
дная линейка >
• При нажатии кнопок управления температурой
значения температуры морозильной камеры
отображаются в следующем порядке:
Морозильная камера со светодиодными
индикаторами типа 88:
-18°C → -19°C → -20°C → -21°C → -22°C → -23°C
→ -15°C → -16°C → -17°C
Морозильная камера с индикаторной
светодиодной линейкой:
-19°C → -21°C→ -23°C → -15°C → -17°C
Фактическая температура внутри камеры
меняется в зависимости состояния продуктов,
поскольку отображаемая на панели температура
является целевой, а фактической температурой
холодильника.
На начальном этапе функция замораживания
работает слабо.
Пожалуйста, отрегулируйте температуру как
указано выше, после того, как холодильник
проработает 2-3 дня.
46

Функция
Глубокая
заморозка
Отпуск
• Выберите эту функцию для быстрой заморозки
продуктов.
• Эта функция используется когда вы хотите быстрой
заморозить продукты. Нажмите кнопку ‘SUPER FRZ.’
(Глубокая заморозка) один раз, после чего загорится
соответствующий индикатор и начнется процесс
быстрой заморозки.
• Действие глубокой заморозки продолжается примерно
3 часа. По завершении операции, холодильник
автоматически возвращается к ранее установленному
температурному режиму. Если вы хотите прекратить
операцию быстрой заморозки, нажмите кнопку
‘SUPER FRZ.’ (Глубокая заморозка) еще раз, индикатор
погаснет, операция глубокой заморозки прекращается
и холодильник возвращается к ранее заданному
температурному режиму.
• Эта функция переводит холодильник в режим
экономии энергии, который полезен, когда вы
уезжаете на выходные, что позволяет максимально
сократить потребление энергии.
При нажатии кнопки ‘VACATION’ холодильник
начинает работать в режиме экономии и загорается
соответствующий индикатор. При повторном нажатии
на кнопку холодильник выходит из этого режима.
47

Замок
• При нажатии этой кнопки все остальные кнопки
прекращают работать.
• При нажатии кнопки ‘CHILD LOCK’ происходит
блокировка или разблокировка замка. Для
блокировки или разблокировки нажмите кнопку
‘CHILD LOCK’ на 2 секунды.
• Когда функция замка от детей активирована,
другие кнопки при нажатии не работают.
48

49

50

51

52

53

Снимите решетка, вытрите влагу, скопившуюся
вокруг двери и поднoc чистой тканью
54

55

56

3
2
2
2
1
3
Чтобы снять расположенную слева ручку
дверцы , сначала нужно удалить колпачки ,
а
против часовой стрелки.Ручка дверцы
1
затем отвинтить винты в направлении
3
4
морозильной камеры снимается так же, как и
ка холодильной камеры.(При наличии
руч
скрытой ручки выполнение описанной выше
процедуры не требуется).
Отвинтив винт крышки правой верхней петли
2.
, сни
мите крышку правой петли и отключите
динительный кабель .Извлеките болт ,
сое
крепящий верхнюю правую петлю , и осторожно
снимите
Удалив левую верхнюю крышку со снятой
3.
дверцы холодильной камеры , осторожно
снимите верхнюю
13
и
подключите его к отверстию на левой стороне.
Установите сн
на
место и закройте отверстие заглушкой .
Ос
лабьте винт , расположенный под дверцей
морозильника , сместите ее влево относительно
31
упора и произведите соединение.
При помощи отвертки (+) нажмите и отделите
4.
колпачки с передней крышки и отвинтите
винты , чтобы пере
6
55
9
8
дверцу морозильного отделения .
11
10
крышку , вытяните кабель
12
ятый ранее верхний колпачок
32
10
15
1716
местить кабель в левое
14
18
7
10
11
положение.После установки на место снятой
передней крышки вверните винты
ранее
и
закройте их головки колпачком , входящим в
14
15
комплект поставки вместе с руководством по
применению.
2
12
1716
4
6
5
7
8
10
12
11
10
19
14
15
16
9
13
31
32
17
18
57

5.
Ослабьте болт средней петли , снимите среднюю
21
петлю и приподнимите дверцу морозильного
отделения , чтобы снять ее.(При снятии дверцы
20
30
холодильной камеры втулку нужно снимать вместе
с дверцей).Снимите крышку петли и установите ее
на снятую часть средней петли .Отвинтив винт от
нижней крышки , колпачок крышки нужно установить
25
на правую сторону.Отвинтите штырь в направлении
21
35
24
21
26
29
против часовой стрелки, переместите его в отверстие
на левой стороне и завинтите в направлении по
часовой стрелке. Отвинтите болт , крепящий
нижнюю петлю .Отвинтите винт , крепящий
доводчик дверцы , на нижней стороне дверцы
морозильной камеры , а затем с его помощью
закрепите доводчик к отверстию на левой стороне.
28
31
30
31
После этого верхний колпачок нужно переместить
27
32
33
на правую сторону и установить его там.
6.
Закрепите снятую нижнюю петлю к отверстиям,
28
расположенным на левой стороне морозильной
камеры и завинтите болт .После закрепления нижней
крышки по месту совместите дверцу морозильного
отделения со штифтом нижней петли и закрепите
25
30
ее.Переверните снятую среднюю петлю и пластину
22
петли и соберите их. Затем установите втулку и
23
шайбу и затяните болт .(Завинчивать болт следует
27
29
21
35
20
осторожно, чтобы не поцарапать декоративную крышку,
расположенную поверх холодильной камеры).
7.
После установки дверцы путем выравнивания
отверстия для петли внизу дверцы холодильной камеры
10
и штыря средней петли , следует надежно закрепить
дверцу к левой верхней петле , поставляемой в
21
37
комплекте с руководством пользователя.Подключив
кабель , завинтите болт и закрепите крышку левой
петли , поставляемой в комплекте с руководством
9
36
пользователя, при помощи винтов Переместите
крышку петли на правую сторону и установите ее.
8.
Переместите снятую ручку дверцы на правую сторону
19
и закрепите ее там при помощи винтов и установите
колпачки .Переместите колпачки с правой стороны
2
7
6
1
3
38
на левую и установите их там.Ручка морозильной
камеры устанавливается так же, как ручка
холодильной камеры .
2
1
35
22
23
21
20
24
33
26
25
21
28
27
36
7
37
3
2
3
2
30
20
25
6
19
10
28
29
9
27
31
32
30
9
38
38
58

Зміст
Введення
Встановлення
Експлуатація
Реєстрація
Важливі зауваження щодо безпечного користування
Основні частини холодильника
Встановлення
Підготовка до роботи
Регулювання температури
Холодильне відділення
Морозильне відділення
Функції
Швидке заморожування
Режим відпустки
Блокування
Самодіагностика
Приготування льоду
Розморожування
Дозатор води
60
60
71
72
72
73
73
73
75
75
75
76
76
76
76
77
Рекомендації зі
зберігання
продуктів
Догляд і
обслуговування
Можливі несправності
і способи їх усунення
Пере
вішування
двер
ей
Зберігання продуктів
Загальна інформація
Загальна інформація
Заміна лампи
Чищення і прибирання
Можливі несправності і способи їх усунення
Застережні заходи
Перевішування дверей
59
79
80
80
81
83
85
85

60

61

62

63

64

65

66

67

ПОПЕРЕДЖЕННЯ
68

НЕБЕЗПЕКА
69

ЗАСТЕРЕЖЕННЯ
70

Полиця з кришкою
(пересувна)
Знімна скляна
полиця
Лампа
Багатопотокова
система подачі
повітря
Зона для свіжих
продуктів
(не в усіх моделях)
Регулятор температури
холодильного
відділення
Висувний ящик
для овочів
Для збереження
овочів, фруктів і т.п.
свіжими і хрусткими.
(1 або 2)
Лоток для кубиків
льоду
Морозильне
відділення
Знімний цоколь
Дверні полиці
Лоток для яєць
(1 або 2)
Резервуар для води
Дверна ручка
(не в усіх моделях)
Дверна полиця для
2-літрових пляшок
Регулювальний гвинт
Якщо у Вашому холодильнику відсутні деякі
вказані на малюнку частини, можливо, вони не
входять в комплект постачання даної моделі і
використовуються тільки в інших моделях.
71

Встановлення
Встановлення
1. Правильно виберіть місце.
Встановіть прилад так, щоб ним було зручно
користуватися.
2. Не ставте його поряд з джерелами тепла, під
прямим сонячним промінням або у вологому
середовищі.
3. Для ефективної роботи холодильника забезпечте
вільну циркуляцію повітря навколо приладу.
4. Щоб уникнути вібрації, прилад необхідно вирівняти.
При необхідності компенсуйте нерівність підлоги за
допомогою регулювальних гвинтів.
Для того, щоб дверці закривалися легко, холодильник
повинен бути злегка нахилений назад.
Регулювальні гвинти легко обертаються при легкому
нахилі корпусу холодильника.
Для того, щоб опустити холодильник, обертайте
регулювальні гвинти проти годинникової стрілки ( ),
а для того, щоб підвести - за годинниковою
стрілкою ( ).
5. Ретельно вимийте холодильник і витріть весь пил,
що накопичився під час транспортування.
6. Встановіть усі знімні частини холодильника на місце
(контейнер для льоду тощо). Вони упаковані окремо
для запобігання пошкодженню при транспортуванні.
7. Вставте вилку шнура живлення в розетку. Не
включайте в цю ж розетку інші електроприлади.
Підготовка
до роботи
8. Для вільної циркуляції повітря навколо приладу,
забезпечте достатньо простору з обох боків і зверху
приладу, а також не менше 5 см ззаду.
При першій установці холодильника дайте йому
попрацювати 2-3 години, щоб у ньому встановилася
нормальна робоча температура, і тільки тоді заповнюйте
його свіжими або замороженими продуктами.
Якщо ви вимикали холодильник з розетки, зачекайте 5
хвилин, перш ніж знову вмикати його.
Холодильник готовий до роботи.
72

Експлуатація
Регулювання температури
У холодильнику є два регулятори, які дозволяють
регулювати температуру в морозильному і в
холодильному відділеннях.
Холодильне
відділення
Морозильне
відділення
• Спочатку встановіть регулятор
температури TEMP. CONTROL
в положення "4". Потім
встановіть необхідну температуру
в холодильному відділенні.
MAX MIN
7
6
5
4
TEMP. CONTROL
2
3
1
• Якщо ви хочете злегка підвищити або знизити
температуру усередині відділення, поверніть ручку
у напрямі позначок MIN або МАХ відповідно. Якщо
навколишня температура низька, встановіть регулятор
TEMP. CONTROL у положення 'MIN'.
Індикаторна панель регулятора температури
ЦИФРОВИЙ ІНДИКАТОР
ШКАЛЬНИЙ ІНДИКАТОР
Кнопка швидкого
заморожування
Кнопка регулювання температури
морозильного відділення.
73
Кнопка блокування
Кнопка режиму відпустки

Експлуатація
• Початкова температура у морозильному відділенні
-18°C. Ви можете відрегулювати температуру за
власним бажанням.
< Цифровий індикатор >
< Шкальний індикатор >
Примітка
• При натисненні
кнопок регулювання температури,
значення температури у морозильному відділенні
повторюються у наступному порядку:
Індикатор температури морозильного відділення
цифрового типу:
-18°C → -19°C → -20°C → -21°C → -22°C → -23°C
→ -15°C → -16°C → -17°C
Індикатор температури морозильного відділення
шкального типу:
-19°C
→ -21°C→ -23°C → -15°C → -17°C
Поточна температура усередині холодильника
залежить від стану продуктів, оскільки
температура, що показується на індикаторі, є
заданою, а не поточною температурою усередині
холодильника.
На початку використання ефективність
охолодження досить слабка, тому відрегулюйте
температуру через 2~3 дні користування
холодильником.
74

Функції
Експлуатація
Швидке
заморожування
Режим відпустки
• Скористайтеся цією функцією для швидкого
заморожування продуктів.
• Ця функція використовується коли потрібно швидко
заморозити продукти. Одноразово натисніть кнопку
‘SUPER FRZ.’ (Швидке заморожування). Загориться
індикатор і почнеться процес швидкого заморожування.
• Операція швидкого заморожування триває приблизно
3 години. По закінченні операції холодильник
автоматично переходить у попередній температурний
режим. Щоб припинити процес швидкого заморожування,
натисніть кнопку ‘SUPER FRZ.’ ще раз. Індикатор згасне,
процес швидкого заморожування припиниться, і
холодильник автоматично перейде у попередній
температурний режим.
При ввімкненні
функції
При вимкненні
функції
• Ця функція дозволяє використовувати холодильник
в режимі енергозбереження, що може бути корисним,
наприклад, коли ви виїжджаєте у відпустку, оскільки
при цьому максимально скорочується споживання
енергії.
При натисненні кнопки ‘VACATION’ вмикається цей
режим і починає горіти індикатор. При повторному
натисненні цієї кнопки режим енергозбереження
відміняється.
75
При ввімкненні
функції
При вимкненні
функції

Експлуатація
Блокування
Самодіагностика
Приготування льоду
• Ця кнопка блокує роботу інших клавіш панелі
керування.
• При натисканні на кнопку ‘CHILD LOCK’ більше ніж
на 2 секунди функція блокування включатиметься
або відключатиметься.
• У режимі блокування ‘CHILD LOCK’ натиснення на
інші клавіші не дасть результату.
Заблоковано Розблоковано
Функція дозволяє діагностувати проблеми в роботі
холодильника. Якщо ви вважаєте, що холодильник
працює неправильно, натисніть кнопку регулювання
температури:
- Якщо індикатори загораються і згасають, холодильник
справний.
- Якщо індикатори поводяться інакше, залиште
холодильник ввімкненим і викличте фахівця центру
обслуговування.
• Щоб приготувати кубики льоду,
заповніть лоток для льоду водою
і помістіть його в морозильне
відділення.
• Якщо лід потрібний терміново,
натисніть кнопку ‘SUPER FRZ.’.
• Щоб вийняти кубики льоду, візьміться за краї лотка і
злегка поверніть їх в протилежні сторони.
Примітка
Розморожування
Щоб кубики легко виймалися, спочатку полийте
лоток водою з-під крана.
Розморожування виконується автоматично.
При розморожуванні вода стікає в лоток випарника і
автоматично випаровується.
76

Компоненти
Експлуатація
Дозатор води
ВАЖІЛЬ ДОЗАТОРА
РЕШІТКА
ВОДОЗБІРНИК
РУЧКА РЕЗЕРВУАРА
КРИШКА РЕЗЕРВУАРА
(МАЛА)
Встановлення
КРИШКА РЕЗЕРВУАРА
(ВЕЛИКА)
РЕЗЕРВУАР ДЛЯ ВОДИ
КЛАПАННИЙ ПРИСТРІЙ
• Зберіть КЛАПАННИЙ ПРИСТРІЙ і встановіть його у
ОТВІР НА ДВЕРЦЯТАХ.
77

Експлуатація
Наповнювання
резервуара
для води
Як користуватися
дозатором
1. Встановивши резервуар для води в дверці,
поверніть його ручку назад, відкрийте малу кришку
і залийте воду, наприклад, з чайника.
* Наливаючи воду, стежте за індикатором
наповнення на резервуарі для води.
* Максимальний об'єм складає 4,5 літра.
2. Натиснувши, закрийте малу кришку.
3. Наливши воду, зафіксуйте ручку резервуара у
належній позиції.
1. Натисніть стаканом на важіль дозатора.
2. Вода наливається, поки стакан натискає на важіль
дозатора.
3. Акуратно приберіть стакан, щоб вода не пролилася.
Не наливайте в резервуар нічого, окрім води,
зокрема газовані напої, молоко і сік. Це особливо
відноситься до напоїв з м'якоттю (вони можуть
привести до несправності).
78

Рекомендації зі зберігання продуктів
Зберігання продуктів
Зберігання продуктів
• Не зберігайте при низькій температурі продукти, які від
цього втрачають якість, наприклад, банани або дині.
• Дайте остигнути гарячій їжі, перш ніж поміщати її в
холодильник. Присутність у холодильнику гарячої їжі
може привести до псування інших продуктів і
збільшення споживання енергії.
• Зберігайте продукти в контейнерах з кришками. Це
запобігає випаровуванню вологи і сприяє збереженню
смаку і живильних властивостей продуктів.
• Стежте за тим, щоб продукти не блокували вентиляційні
отвори. Безперешкодна циркуляція холодного повітря
забезпечить рівномірність температурного режиму
всередині холодильника.
• Не слід часто відкривати двері холодильника. Відкриття
дверей веде до потрапляння в холодильник теплого
повітря, що викликає підвищення температури.
• Для безперешкодного регулювання температури не
ставте продукти біля ручки регулятора температури.
• Не ставте на дверні полиці занадто багато продуктів,
оскільки вони можуть заважати щільному закриванню
дверей.
Примітка
• Не зберігайте в морозильному відділенні пляшки, тому
що при заморожуванні вони можуть лопнути.
• Не можна повторно заморожувати продукти, що
відтанули. Це приводить до втрати смакових і живильних
властивостей продуктів.
Якщо холодильник знаходиться в теплому і
сирому місці і його дверці часто відкриваються,
або в ньому зберігається багато овочів, усередині
може утворюватися волога, що не впливає на
роботу приладу.
Витріть вологу чистою ганчіркою.
79

ДОГЛЯД І ОБСЛУГОВУВАННЯ
Загальна інформація
Збій живлення
При переїзді
Протиконденсатна
трубка
• Збій живлення тривалістю 1~2 години не приведе до
псування продуктів. Проте, в цей час краще якомога
рідше відкривати дверці холодильника.
• Вийміть усі продукти і надійно закріпіть усі рухомі
частини холодильника за допомогою клейкої стрічки.
• Укрутіть гвинти регулювання висоти всередину до
упору щоб уникнути пошкодження підлоги і
перешкоджанню пересуванню холодильника.
• Протиконденсатна трубка встановлена по периметру
передньої частини холодильника, а також на
перегородці між холодильним і морозильним
відділеннями. Вона призначена для запобігання
утворенню вологи.
• Холодильник може
нагріватися, це нормально,
особливо відразу після
встановлення або у
приміщеннях з високою
температурою повітря.
Заміна лампи
1.
Вийміть вилку шнура живлення
з розетки.
2.
Вийміть полиці з холодильного
відділення.
3.
Для зняття кришки лампи,
просуньте під кришку плоску
викрутку і витягніть кришку
назовні.
4.
Виверніть лампу проти
годинникової стрілки.
5.
Встановіть нову лампу і виконайте вказані операції
у зворотному порядку.
Нова лампа повинна мати ті ж характеристики, що
і замінена.
80

ДОГЛЯД І ОБСЛУГОВУВАННЯ
Чищення і прибирання
Перед початком
прибирання
Зовнішні поверхні
холодильника
Внутрішні поверхні
холодильника
Після прибирання Переконайтеся, що шнур живлення не пошкоджений,
Не забудьте вимкнути холодильник з розетки.
Зовнішні поверхні холодильника промивають м’якою
тканиною з теплою водою або розчином миючого
засобу. При застосуванні миючого засобу витріть його
чистою вологою тканиною.
Як вказано вище.
розетка не перегрілася і вилка щільно вставлена в
розетку.
Після миття водою просушіть холодильник м’якою
тканиною.
Не використовуйте для миття холодильника
абразивні миючі засоби, бензин, розчинник, гас,
соляну кислоту, окріп, металеві щітки і т.п., так як
вони можуть пошкодити деталі холодильника.
81

ДОГЛЯД І ОБСЛУГОВУВАННЯ
Решітка і
водозбірник
Зовнішня частина
дозатора
Резервуар для води
Кришка резервуара
(велика і мала)
Клапанний пристрій
Зніміть решітку, чистою тканиною витріть вологу з
дверцят і з водозбірника.
Чистою тканиною витріть вологу з дозатора води і
важеля дозатора.
1. Підніміть резервуар для води, натиснувши на
фіксуючий важіль внизу, і потім вийміть його.
2. Зніміть велику кришку резервуара, нейтральним
миючим засобом повністю прочистіть і промийте
резервуар ззовні і зсередини.
Нейтральним миючим засобом повністю прочистіть
і промийте велику і малу кришки резервуара.
Приділіть о
контейнера. Його зручніше мити невеликою щіткою.
Промийте і добре прополощіть клапанний пристрій
за допомогою невеликої щітки. Промийте його,
одночасно рухаючи нижню частину клапанного
пристрою. Не забудьте встановити ущільнюючу
гумову прокладку, зняту на час миття, щоб уникнути
протікання води.
собливу увагу жолобку в кришці
82

Неполадка
Холодильник
не працює
Можливі несправності й способи їх усунення
Можливі несправності й способи
їх усунення
Прочитайте цей розділ до того, як звертатися в
сервісний центр. Це може заощадити ваші час і
гроші. У цьому списку приведені найбільш
поширені ситуації, які не є результатом поганої
якості збірки або матеріалів.
Можлива причина
• Вилка могла випасти з розетки.
Надійно вставте вилку в розетку.
• Можливо, перегорів запобіжник або відключився
автоматичний переривач у квартирі.
Ввімкніть автоматичний переривач і при необхідності
замініть запобіжник.
• Збій живлення.
Перевірте наявність світла в будинку.
Дуже висока
температура в
холодильному
або морозильному
відділенні
Вібрація,
деренчання
або незвичайний
шум
Іній або кристали
льоду на
заморожених
продуктах
Краплі вологи на
корпусі
холодильника
• Неправильно встановлений регулятор температури.
Див. розділ «Регулювання температури».
• Холодильник розташований дуже близько до
джерела тепла.
• Дуже часто відкривалися дверці холодильника при
високій температурі повітря в кімнаті.
• Дверці холодильника залишалися відкритими
протягом тривалого часу.
• Продукти перешкоджають щільному закриттю
дверцят або блокують вентиляційні отвори у
морозильному відділенні.
• Поверхня, на якій встановлений холодильник,
можливо, нерівна, або холодильник встановлений
ненадійно.
Вирівняйте холодильник за допомогою гвинта
регулювання висоти.
• Сторонні предмети на задній стінці холодильника.
• Можливо, дверці були закриті нещільно, або
продукти заважають їм закритися до кінця.
• Дверці відкриваються дуже часто або на довгий час.
• Іній усередині упаковки - нормальне явище.
• Подібне зазвичай виникає в місцях з підвищеною
вологістю.
Видаліть вологу сухою ганчіркою.
83

Можливі несправності й способи їх усунення
Неполадка
Усередині
збирається волога
Неприємний запах • Продукти, що мають сильний запах, слід покласти
Дверці закривається
нещільно
Не працює внутрішнє
освітлення
Можлива причина
• Дверці відкриваються дуже часто або на довгий
час.
• Коли вологість повітря висока, при відкритті дверцят
холодильника всередину потрапляє волога.
в щільно закриту тару або добре загорнути.
• Перевірте, чи немає продуктів, що зіпсувалися.
• Потрібно вимити внутрішні поверхні холодильника.
Див. розділ «Чищення і прибирання».
• Продукти заважають закриванню дверцят.
Пересуньте продукти, які заважають закриванню
дверцят.
• Холодильник не вирівняний.
Відрегулюйте гвинти регулювання висоти.
• Поверхня, на якій встановлений холодильник,
можливо, нерівна, або холодильник
встановлений ненадійно.
Трохи підніміть холодильник спереду за допомогою
регулювальних гвинтів.
• Відсутнє живлення.
• Потрібно замінити лампу.
Див. розділ «Заміна лампи».
84

Перевішування дверей
У вашому холодильнику передбачена можливість перевішування дверей для того,
щоб пристрій відповідав обстановці на вашій
Застережні заходи
кухні.
Перш, ніж роз
1.
деталі (полиці, лот
Для відгвинчування чи загвинчування болта скористайтеся гайковим ключем.
2.
Не кладіть холодильник/морозильник на підлогу. Це може призвести до
3.
почати перевішування дверей, заберіть всі продукти і незафіксовані
ки) з холодильника/морозильника.
несправності.
Не упустіть двері під час складання чи розбирання.
4.
3
2
Перевішування дверей
Щоб від'єднати дверну ручку з лівої сторони, зніміть
1.
2
адку і відкрутіть гвинти у напрямку проти
накл
динникової стрілки. Таким же чином зніміть дверну
го
4
руч
ку морозильного відділення.(Якщо ручка
1
3
2
3
2
прихована, вам не потрібно виконувати вищевказані дії).
2.Після видалення гвинта накладки правої верхньої
5
петлі зніміть накладку правої петлі і від'єднайте
з'єднувальний дріт . Відгвинтіть болт , яким
кріпиться верхня петля , і обережно зніміть дверцята
лодильного відділення .
хо
3.Після видалення верхнього ковпачка з лівої
сторони
обережно
13
і
зняту верхню заглушку на місце, потім ковпачком
закрийте отвір для кабелю з правої сторони.Відгвинтіть
гвинт
переставте його на упор дверцят з лівої сторони і
знятої двері холодильного відділення ,
зніміть верхню кришку , витягніть дріт
просуньте його в отвір з лівої сторони.Встановіть
32
під дверцятами холодильного відділення ,
6
5
9
8
10
12
7
11
10
12
31
11
10
5
7
8
10
12
11
10
зафіксуйте.
1
4
6
9
13
4.За допомогою хрестоподібної викрутки (+) натисніть
на
ковпачок на передній панелі і вийміть його,
потім відкрутіть гвинти і протягніть дріт з лівої
15
1716
сторони.Після встановленн
панелі закрутіть гвинти і закрийте їх ковпачками
, що
14
15
містяться у пакеті з інструкцією з експлуатації.
85
14
18
я на місце знятої передньої
1716
31
32
17
18
19
14
15
16

5. Відгвинтіть болти середньої петлі , зніміть середню
21
лю , після чого підніміть дверцята морозильного
пет
ілення і зніміть їх.(Знімаючи двері морозильного
відд
відд
ілення, зніміть також втулку ) .Зніміть заглушку петлі
24
і встановіть її на місце
гвинт на н
ижній панелі встановіть заглушку з правої
20
30
знятої середньої петлі .Відкрутіть
25 26
сторони. Обертаючи проти годинникової стрі
і вийміть штифт , потім встановіть його у отвір
сторони і
лабте болт нижньої петлі .Відкрутіть гвинт , що
Ос
заглушку внизу дверей морозильного відділення
фіксує
30
, і
зафіксуйте ним заглушку на отворі з лівої сторони .
ля цього переставте верхній ковпачок на праву сторону.
Піс
29
затягніть, обертаючи за годинниковою стрілкою.
27
31
21
35
21
лки, ослабте
з лівої
28
33
32
35
22
23
21
20
24
33
26
31
25
30
28
29
9
27
31
32
6. Встановіть зняту нижню петлю в нижній лівій частині
морозильного відд
закріплення нижньої панелі на місці сумістіть дверцята
морозильного відд
і встановіть їх.Переверніть
22
і встановіть їх на місце. Встановіть вту
23
затягніть болт .(Затягуючи болт, будьте обережні,
і
щоб не пошко
ілення і затягніть болт .Після
ілення зі штифтом нижньої петлі
20
дити декоративне покриття холодильника)
28
27
25
30
зняту середню і плоску петлю
21
35
лку з шайбою
29
7.Після того, як ви встановили двері, сумістивши отвір внизу
двері холодильного відділення і штифт середньої петлі
21 37
закріпіть тримач верхньої лівої петлі , що міститься
,
у пакеті з інструкцією
затягніть болт і закрутіть гвинти накладки лівої петлі
36
, що міститься у пакеті
Переставте
заглушку петлі з лівої сторони на праву і
з експлуатації. Підключивши дріт ,
7
закріпіть.
8. Переставте зняту дверну ручку на праву сторону,
зафіксуйте її на місці гвинтами і закрийте їх ковпачками
2
. Переставте
і
закріпіть. Ручку морозильного відділення встановіть у
тому ж поря
дверні заглушки з правої сторони на ліву
дку, як і ручку холодильного відділення .
10
9
6
з інструкцією з експлуатації.
19
1
3
38
2
1
21
20
30
28
27
25
6
36
7
37
2
2
19
9
10
38
3
38
3
Гарантія не поширюється на перевішування
дверей.
86

P/No. MFL37432227
 Loading...