

LG GR-B229RNA Owner's Manual

1
ENGLISH HEBREW
ENGLISH
OWNER’S MANUAL
BOTTOM FREEZER AND
FRENCH DOOR REFRIGERATOR
Please read this owner’s manual thoroughly before
operating and keep it handy for reference at all times.
Model Name*=color number
GM-769R*C
GM-849R*C
GM-651R*C
P/No.: MFL67851404-3
GR-B229RNA
GR-B239R*A
GR-B230RNA
GR-F229RNK GR-F230RNK
GM-650*
GR-B240R*A
www.lg.com

2TABLE OF CONTENTS
TABLE OF CONTENTS
3 PRODUCT FEATURES
4-9
10-11
10-11 Refrigerator Interior
12 INSTALLATION
12 Unpacking Your Refrigerator
12 - Flooring
12 - Measuring the Clearances
13 Removing/Assembling the Refrigerator
Door Handles
14 Removing/Assembling the Freezer
Drawer Handle
15 Removing/Assembling the Doors and
Drawers
15 - Removing the Left Refrigerator Door
15 - Removing the Right Refrigerator Door
16 - Assembling the Right Refrigerator Door
16 - Assembling the Left Refrigerator Door
17 - Removing the Freezer Drawers
18 - Assembling the Freezer Drawers
19 Leveling and Door Alignment
19 - Leveling
19 - Door Alignment
IMPORTANT SAFETY
INSTRUCTIONS
COMPONENTS
20 HOW TO USE
20 Air Flow
20 Adjusting Control Settings
20 - Shabbath Mode
22 Automatic Icemaker (Installed Ice Maker
Models Only)
22 - Turning the Automatic Icemaker On or Off
22 - When You Should Turn the Icemaker Off
22 - Normal Sounds You May Hear
22 - Preparing for Vacation
23 Food Storage Guide
23 - Storing Frozen Food
24 Water Dispenser
24 Refrigerator Shelves
25 Humidity Controlled Crispers
26 Pantry Drawer
26 Dairy, Doors and Ice Bins
27 Durabase
27 Durabase Divider
27 Pullout Drawer
28 Water Filter (Dispenser Models Only)
30 MAINTENANCE
30 General Cleaning Tips
32-34 CONNECTING THE
WATER LINE (Installed Ice
Maker Models Only)
ENGLISH
35-43 TROUBLESHOOTING
44 SMART DIAGNOSIS
TM
44 Using Smart Diagnosis
TM
3 PRODUCT FEATURES
PRODUCT FEATURES
ENGLISH
* Depending on the model, some of the following functions may not be available.
DOOR ALARM
The Door Alarm function is designed to prevent refrigerator malfunctioning
that could occur if a refrigerator door or freezer drawer remains open. If a
refrigerator door or freezer drawer is left open for more than 60 seconds,
a warning alarm sounds at 30 second intervals.
HUMIDITY CONTROLLED CRISPERS
The Humidity Controlled Crispers are designed to help keep your fruits
and vegetables fresh and crisp. You can control the amount of humidity
in the crispers by adjusting the settings between Low and High.
GLIDE‘N’SERVE
Glide‘N’Serve provides storage space with a variable temperature control
that keeps the compartment colder than the refrigerator. It is a convenient
place to store sandwiches or meat to be cooked.
AUTO CLOSING HINGE
The refrigerator doors and freezer drawers close automatically with a
slight push. (The door only closes automatically when it is open at an
angle less than 30°.)
ICE PLUS
Ice production can be increased by approximately 20 percent when the
freezer section is maintained at the coldest temperature for a 24-hour
period.
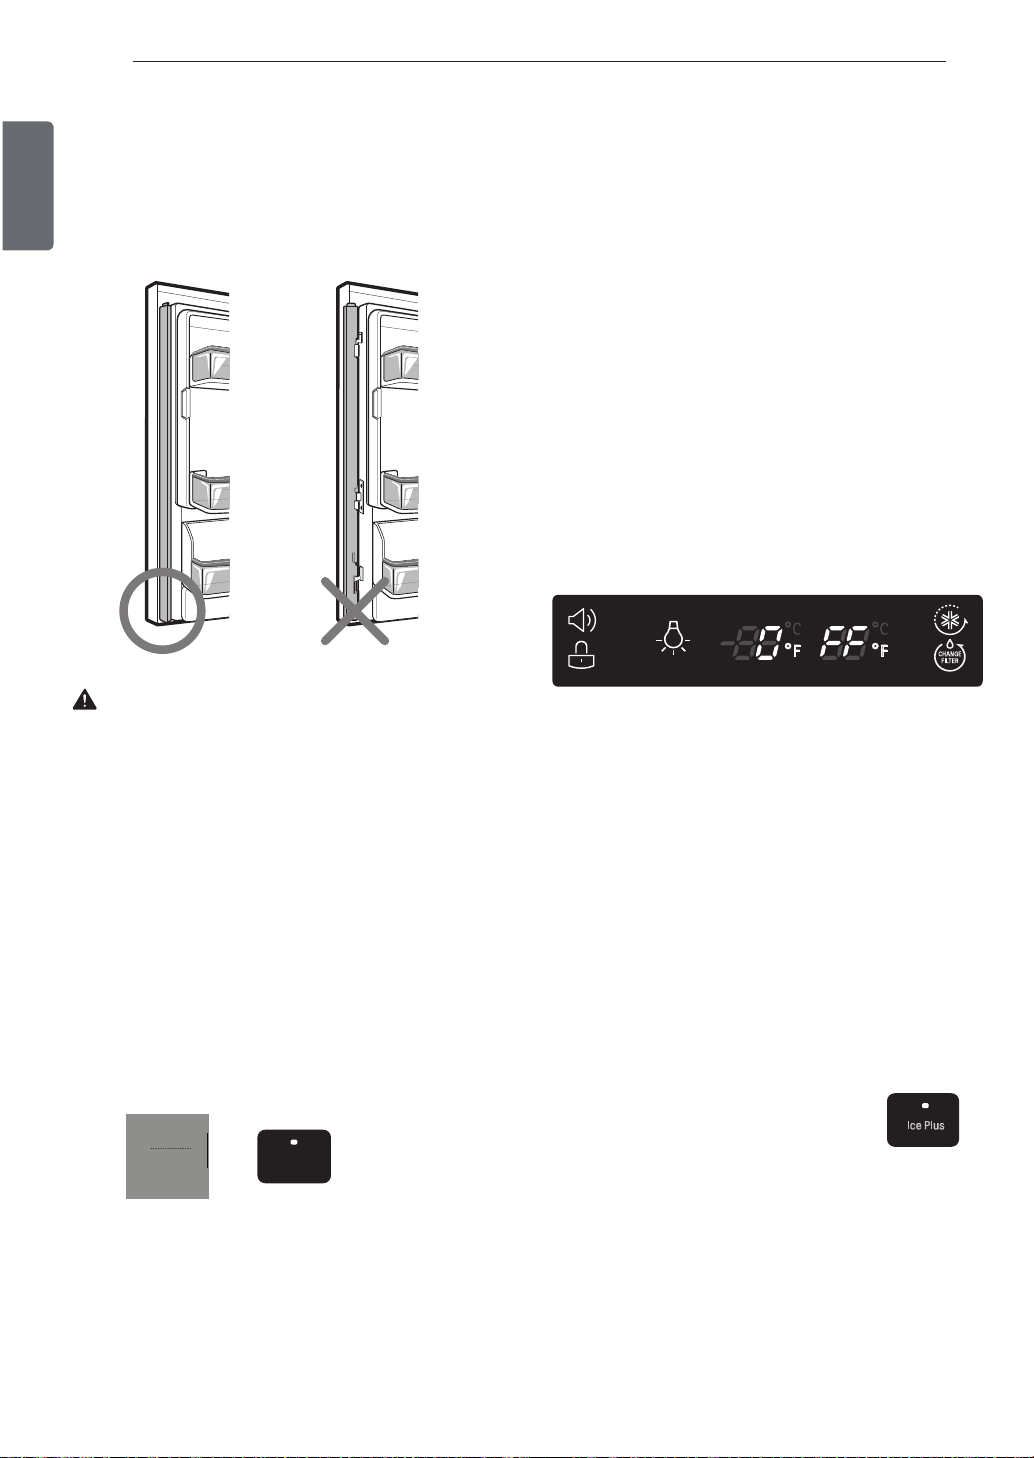
This manual contains several important safety notices. Always read and obey all of the following safety messages.
This is the safety alert symbol. This symbol is a warning to potential dangers that could cause death, injury
or damage to you, others or the product. All safety messages will follow after this warning symbol and the
word “DANGER”, “CAUTION” or “WARNING”. These words mean:
4IMPORTANT SAFETY INSTRUCTIONS
ENGLISH
DANGER
WARNING
CAUTION
All safety messages inform you of potential danger, advise you on how to reduce the risk of injury and tell you what
can occur if the instructions are not followed.
ţRepair or replace immediately all electric service
cords that have become frayed or otherwise
damaged. Do not use a cord that shows cracks or
abrasion damage along its length or at either the
plug or connector end.
ţ When moving your refrigerator away from the wall,
be careful not to roll over or damage the power
cord.
between the doors and cabinet are necessarily
small. Be careful closing doors when children are
in the area.
ţ This refrigerator must be properly installed in
accordance with the Attention Installer
Instructions that were taped to the front of the
refrigerator.
ţ If the use of this unit is no longer needed, please
contact local authorities to dispose of this product in a
safe way due contains Pentane-cycle or pentane like
gas for insulation. Insulation gases require a special
elimination process. This product contains flammable
insulation.
You may be killed or suffer fatal damage if you do not follow instructions.
You may be killed or seriously injured if you do not follow instructions.
Indicates a potentially hazardous situation which, if not avoided, may result in minor
injury or damage to the product.
WARNING
ţ%0/OT refreeze frozen foods which have thawed
completely.
ţ/FWFSTUPSFFYQMPTJWFTVCTUBODFTPSDIFNJDBMTJO
your refrigerator such as benzene, alcohol, aerosol
cans, etc. It is DANGEROUS!!
…You may safely refreeze frozen foods that have
thawed if they still contain ice crystals or if they
are still cold—below 4°C.
any off-odor or off-color should not be refrozen
and should not be eaten. Thawed ice cream
should be discarded. If the odor or color of any
food is poor or questionable, get rid of it.
The food may be dangerous to eat.
Even partial thawing and refreezing reduces the
eating quality of foods, particularly fruits,
vegetables and prepared foods. The eating quality
of red meats is affected less than that of many
other foods. Use refrozen foods as soon as
possible to save as much of their quality as you can
SAVE THESE INSTRUCTIONS
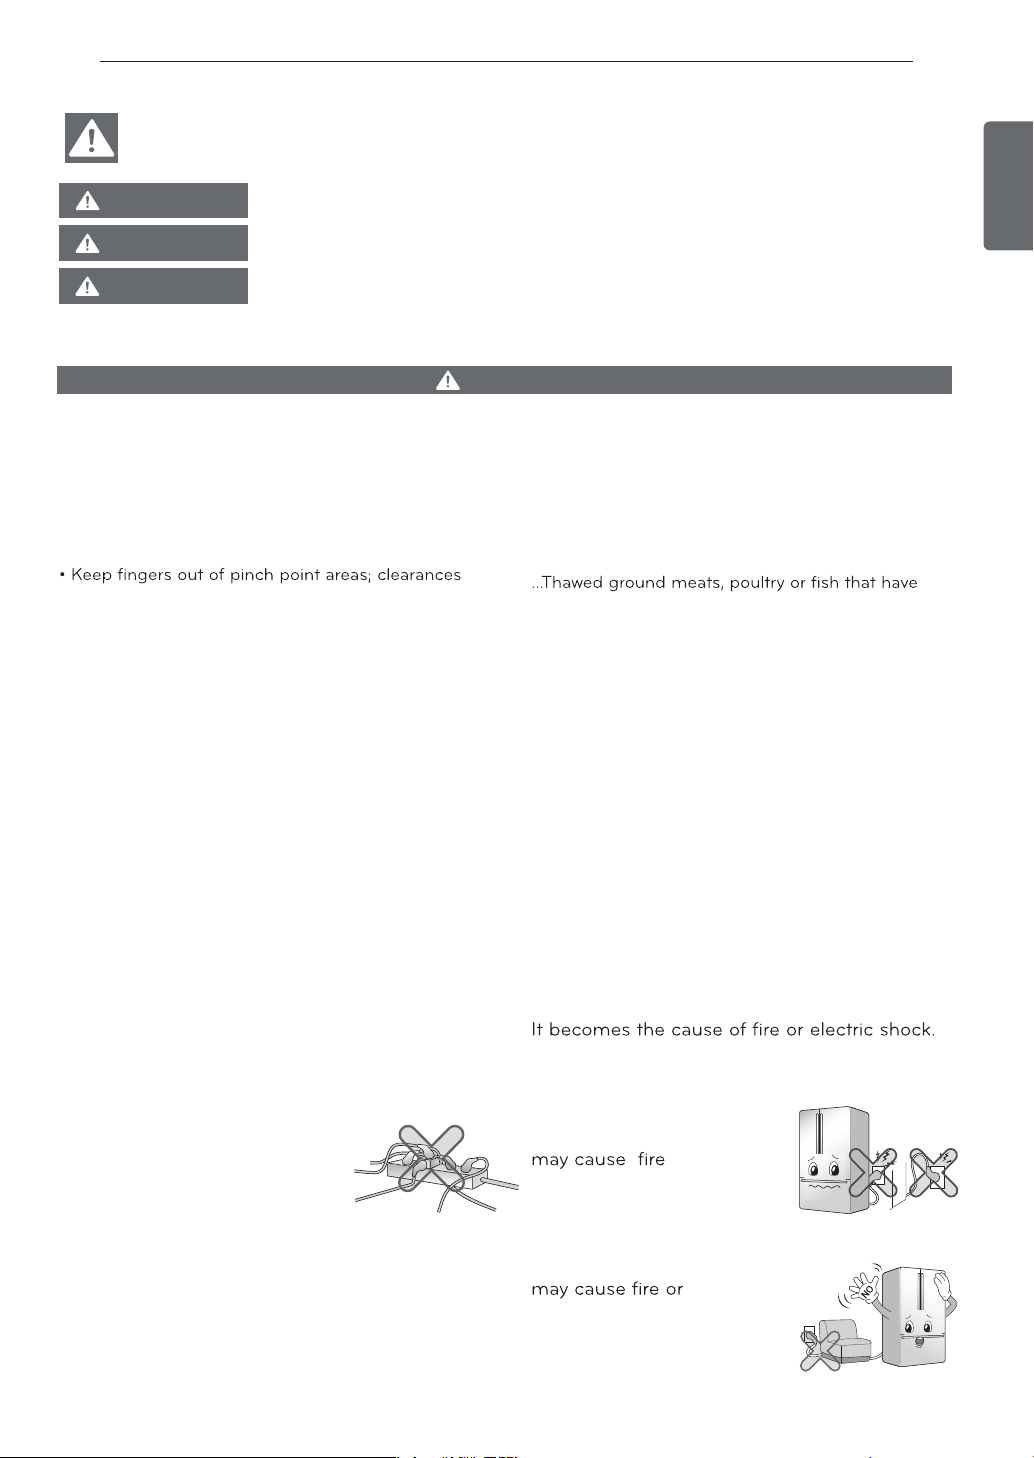
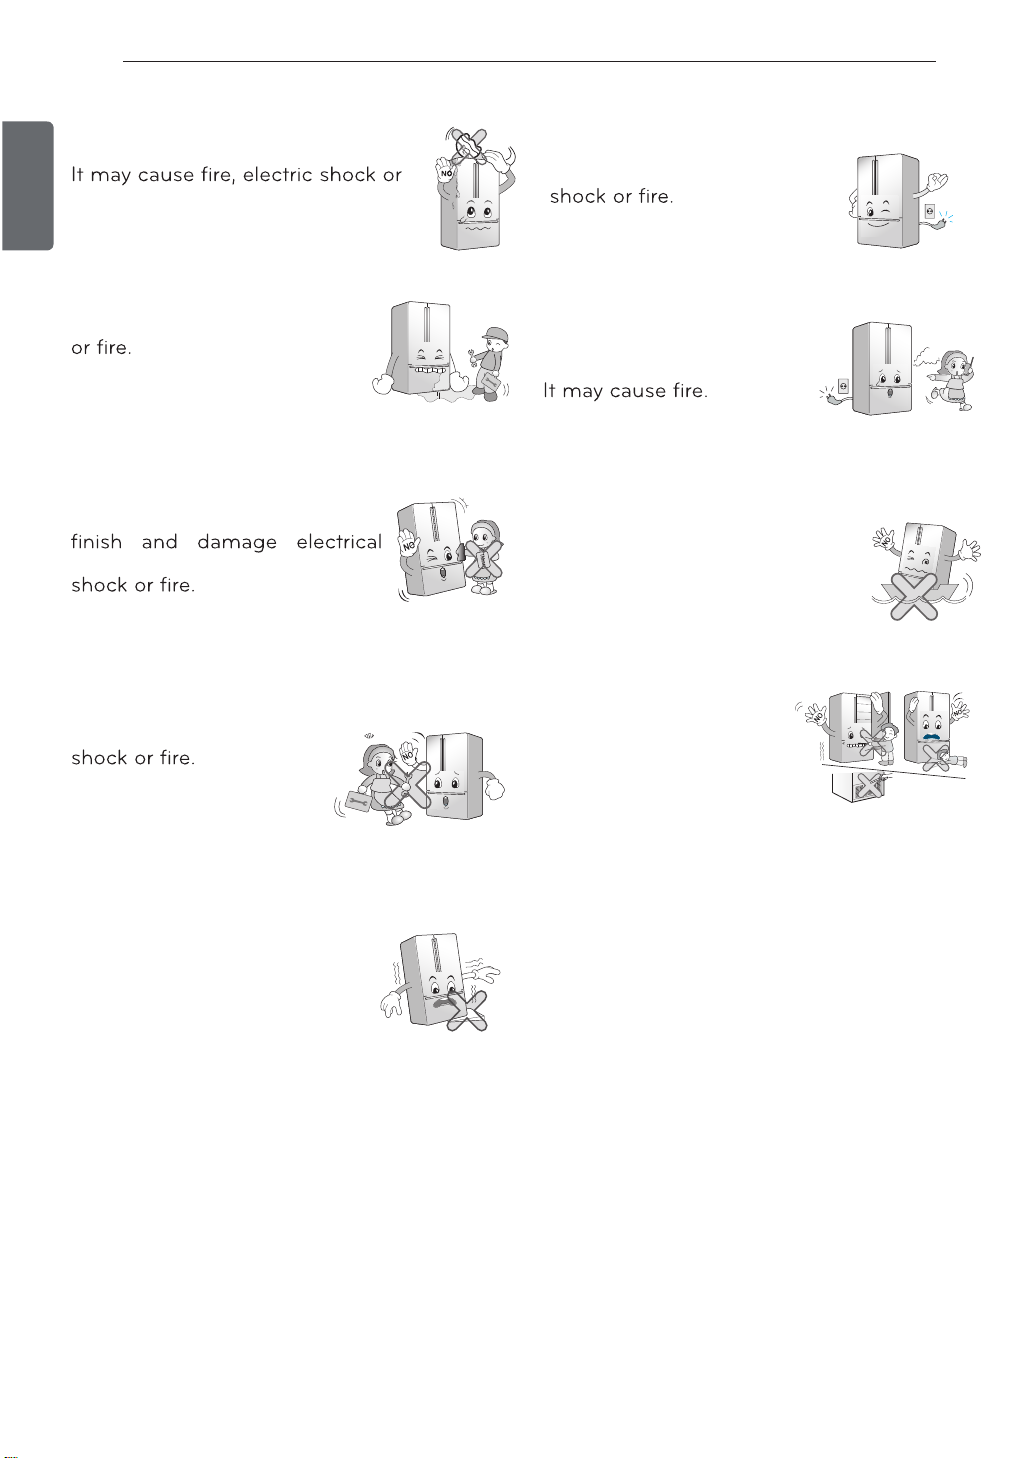
To reduce the risk of fire, electric shock, or injury to persons when using your product,
basic safety precautions should be followed, including the following.
Read all instructions before using this appliance.
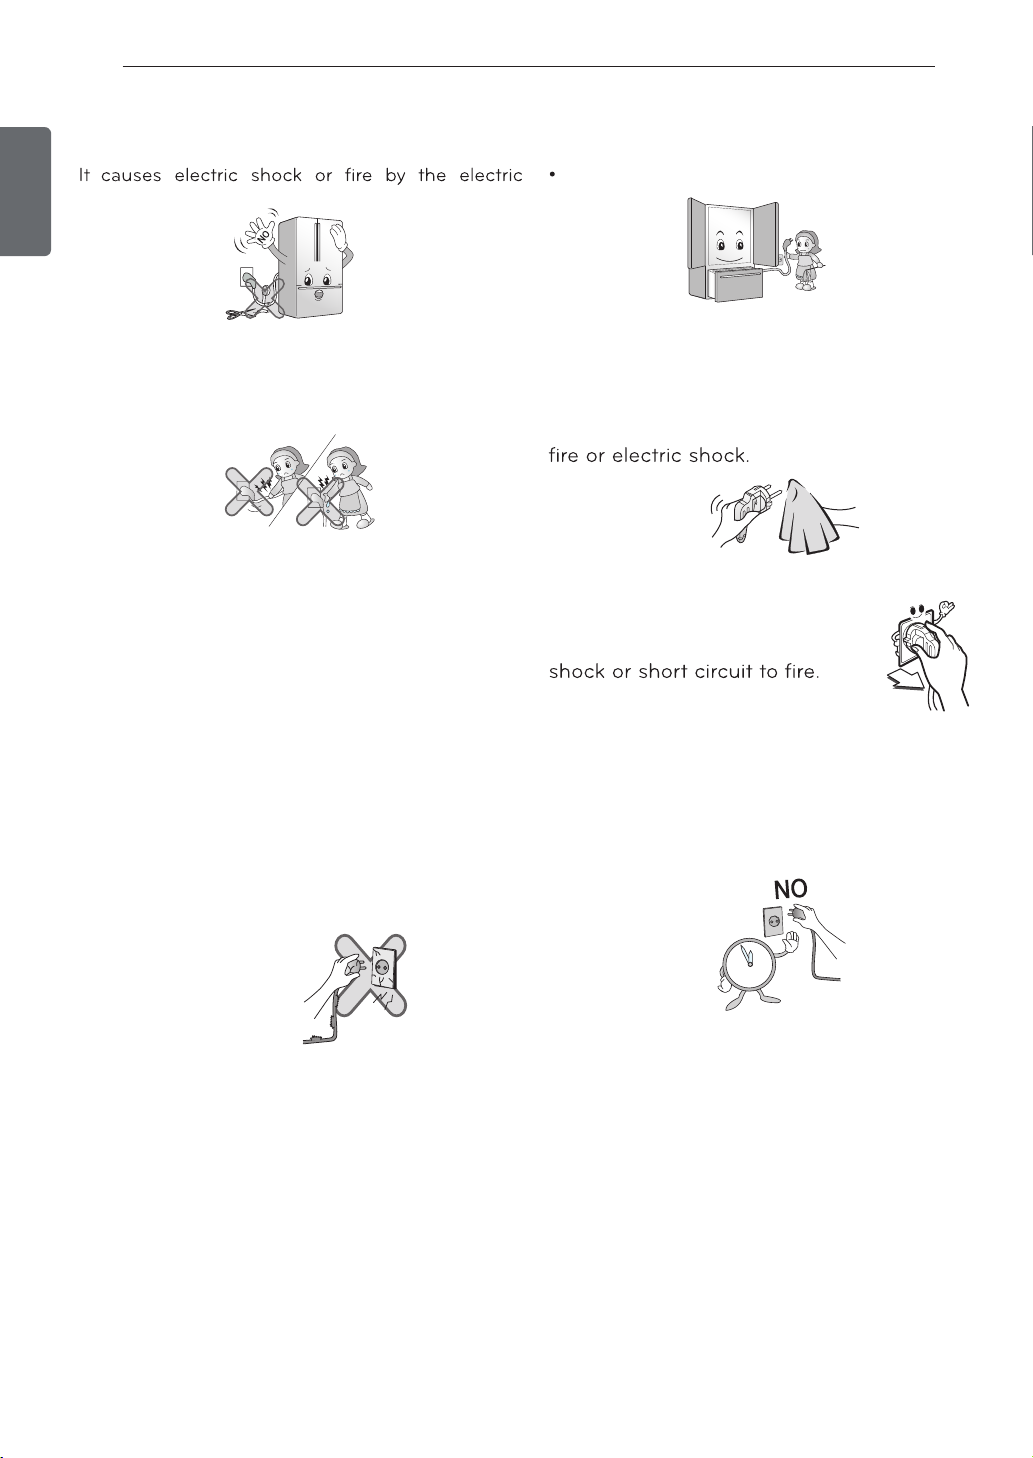
1. When connecting the power
The dedicated outlet should be used.
ţ Using several devices at one outlet may
cause fire.
ţ The electric leakage breaker may
damage food and the dispenser
may be leaked.
Prevent the power cord from being squeezed or
imprinted if the refrigerator is pushed in after the
power plug is extracted during the installation.
When moving your appliance away from the wall,
be careful not to roll over the power cord or to
damage it in any way.
Do not allow the power plug to face upward or to
be squeezed at the back of the refrigerator.
Water falling onto the plug,
or a damaged plug
or electric shock.
Do not allow the power cord
to be kinked or crushed as it
electric shock.
5 IMPORTANT SAFETY INSTRUCTIONS
Do not extend or modify the length of the
power cord.
ENGLISH
damage of the power cord or others.
Do not pull out the cord or touch the power
plug with wet hands.
It may cause electric shock or injury.
Make sure of proper grounding.
Consult a qualified electrician or service
person if the grounding instructions are not
completely understood, or if you have doubts
on whether the appliance is properly grounded.
Unplug the power plug when cleaning
or handling the refrigerator.
Not doing so may cause electric shock
or injury.
Remove water or dust from the power plug
and insert it with the ends of the pins
securely connected.
Dust, water or unstable connection may cause
Pull out the power plug by grasping the
plug from its body.
Not doing so may cause electric
The incorrect grounding may cause breakdown
and electric shock.
When the power cord or the power plug is
damaged or the holes of the outlet are loose,
do not use them.
It may cause electric shock or short circuit
resulting in fire.
Wait for 5 minutes or longer when
reconnecting the plug.
Not doing so may cause the operation of
the freezer to fail.
After
5minutes
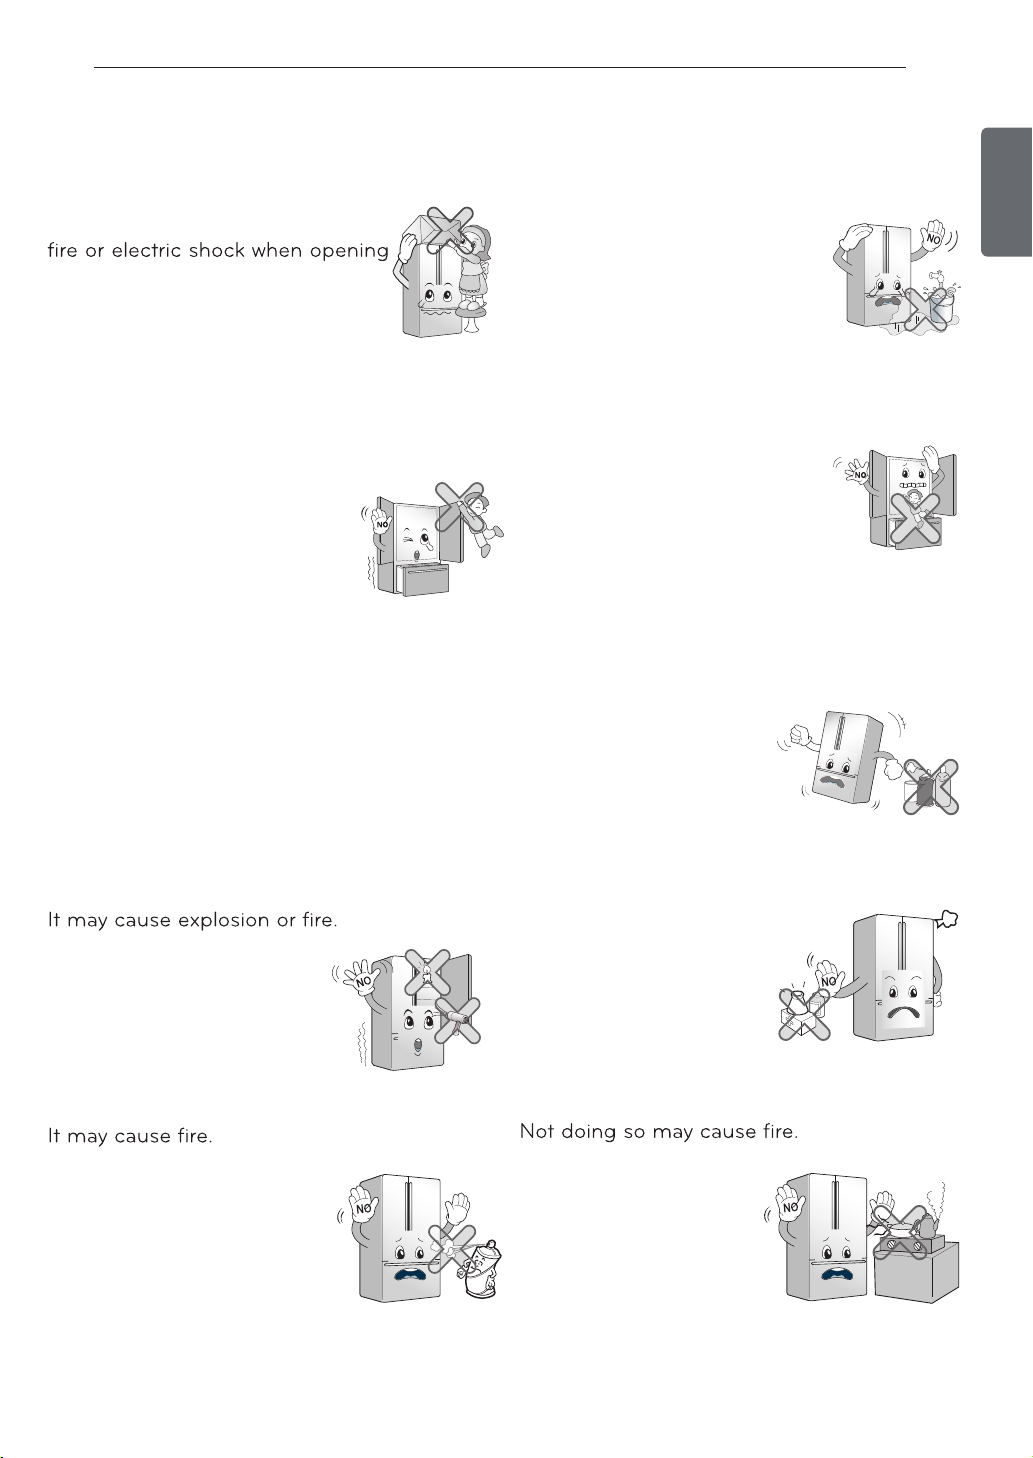
2. When using the refrigerator
Do not place the heavy object or the
dangerous object (container with liquid) on
the refrigerator.
It may be dropped causing injury,
or closing the door.
Do not cling to the door or the shelves of the
refrigerator unit.
It may make the refrigerator fallen down or
damage the hands. Especially, do not allow the
children to do the above.
Opening and closing the door of the
refrigerator vigorously may cause the stored
food in the refrigerator basket to fall when the
door is opened, so take precautions.
6IMPORTANT SAFETY INSTRUCTIONS
ENGLISH
Do not install the refrigerator in any outdoor
sheltered area or in a wet surrounding area.
Deterioration of insulation of
electric parts may cause
electric leakage.
Prevent children from entering the product.
It may endanger the life of a child if the child
enters the refrigerator.
Do not store explosive substances such as
aerosol cans with a flammable propellant
in this appliance.
Do not use drier to dry the inside, nor light a
candle to remove odor.
Do not use any combustible spray near the
refrigerator.
Thinner
Benzene
Ether
Do not store the medicines or chemicals in
the refrigerator.
When the material with
the strict temperature
control is stored, it may be
deteriorated or it may
make an unexpected
reaction to cause any risk.
The Academic
Medicine
The Medicine
Install in places away from heat sources and
flammable gas outlets.
7 IMPORTANT SAFETY INSTRUCTIONS
Do not place flower vase, cups, cosmetics,
medicine or any container with water
ENGLISH
on the refrigerator.
injury by dropping down.
Use the submerged
refrigerator after
checking it.
It may cause electric shock
Do not spray water on the outside or the
inside of the refrigerator or do not clean it
with benzene or solvents.
It can deteriorate the cabinet
parts causing electric
In case of thunder and lightning, or not in use
for a long period of time, detach the power
plug.
There is a danger of electric
When any strange smell or smoke is detected
from the refrigerator, disconnect the power
cord immediately and
contact an authorised
Service
center
service center.
Do not use the refrigerator for non-domestic
purposes (This unit should not be installed or
used in mobile applications).
T
h
i
n
n
e
r
Do not allow any person except the qualified
engineer to disassemble, repair or alter the
refrigerator.
It may cause injury, electric
Install the refrigerator on a solid and level
floor.
Installing it on the unstable
place may cause death by
falling down the refrigerator
when opening or closing the
door.
Do not insert hands or metal objects into the
exit of cool air, the cover, the bottom of the
cold air outlets, lower
front vent cover, or the
heat cover at the rear of
the unit.
It may cause electric
shock or injury.

8IMPORTANT SAFETY INSTRUCTIONS
Violating this direction may cause injury or damage to house or furniture. Always be careful,
please.
ENGLISH
Do not place the food in disorder inside the
refrigerator.
The food may fall during opening and
closing the door of the refrigerator and hurt
people.
Do not insert hands into the bottom of the
refrigerator.
The iron plate of the
bottom may cause injury.
Because opening or closing the door of the
refrigerator may cause injury to the person
around it, be careful, please.
Opening or closing the
door may cause feet or
hands to be caught in
the chink in door or the
child to be get hurt by
the corner.
Do not store bottles in the freezer.
It may freeze the contents to
break the bottle to cause injury.
Do not put any living
animal in the
refrigerator.
Do not touch food or containers in the freezer
with wet hands.
It may cause frostbite.
9 IMPORTANT SAFETY INSTRUCTIONS
This appliance is not intended for use by children, persons with physical or mental disabilities, persons with reduced
sensory or mental capacity, or persons with lack of experience or know-how, unless they have supervision or instruction
ENGLISH
in relation to the use of the appliance by the person responsible for their safety. Children should be supervised to
assure that they do not play with the appliance.
DANGER: CHILDREN MAY BECOME TRAPPED
Children becoming trapped or suffocated is not
a problem of the past. Discarded and abandoned
refrigerators are a hazard, even if they remain there
“for just a few days”. If you would like to dispose of
your old refrigerator, please follow the instructions
below to prevent any accidents.
BEFORE DISPOSING YOUR REFRIGER
OR FREEZER WHEN NO LONGER IN USE:
Remove the doors.
Leave the shelves in place so that children
cannot easily become stuck in them.
CFC DISPOSAL
Your old refrigerator may have a cooling system that uses
CFC’s (chlorofluorocarbons). CFC are believed to warm
stratospheric Ozone.
If you decide to throw out your old refrigerator, ensure
that CFC contaminants are properly disposed of by a
ATOR
This appliance contains fluid (refrigerant, lubricant), is
made of parts and materials which are reusable and / or
recyclable. All the important materials should be sent to
to the collection center of waste material and can be reused after rework (recycling). For take back, please
contact with the local agency.
REQUIREMENTS FOR GROUND CONNECTION
IMPORTANT: Please read carefully.
TO CONNECT ELECTRICITY
WARNING
ELECTRICAL SHOCK HAZARD
FOR YOUR PERSONAL SAFETY, this appliance must
be properly grounded. Have the wall outlet and be
the outlet is properly grounded.
RECOMMENDED GROUNDING METHOD
The refrigerator should always be plugged into its
own individual properly grounded electrical outlet
rated for 230 Volts, 50 Hz, AC only, and fused at
15 amperes.
This provides the best performance and also
prevents overloading house wiring circuits which
It is recommended that a separate circuit serving
only this appliance be provided.
in accordance with environmental legislation in effect.
obligation to have it replaced with a properly
grounded three-prong wall outlet.
Do not, under any circumstances, cut or
remove the third (ground) prong from the
power cord.
NOTE: Before performing any type of installation,
cleaning,or removing a light bulb, turn the control
(Thermostat, Refrigerator Control or Freezer
Control, depending on the model)to OFF and
then disconnect the refrigerator from the electrical
refrigerator to the electrical source and reset the
control (Thermostat, Refrigerator Control or
Freezer Control, depending on the model) to the
desired setting.
WARNING: Don’t use an extension cord.
If possible, connect the refrigerator to its own
individual electrical outlet to prevent it and other
appliances or household lights from causing an
overload that could cause a power outage.
Accessibility of Supply Plug
The refrigerator-freezer should be so positioned
that the supply plug is accessible for quick
disconnection when accident happens.
WARNING
POWER CORD REPLACEMENT
If the power cord is damaged, it must be replaced by
personal by LG Electronics , to avoid some risk.
Use a receptacle which cannot be turned off with
a switch or pull chain. Do not use an extension
cord.
Where a standard two-prong wall outlet is
encountered, it is your personal responsibility and
WARNING
DO NOT USE MECHANICAL DEVICES
Do not use mechanical devices or other means to
accelerate the defrosting process, only those
recommended by the manufacturer.
10COMPONENTS
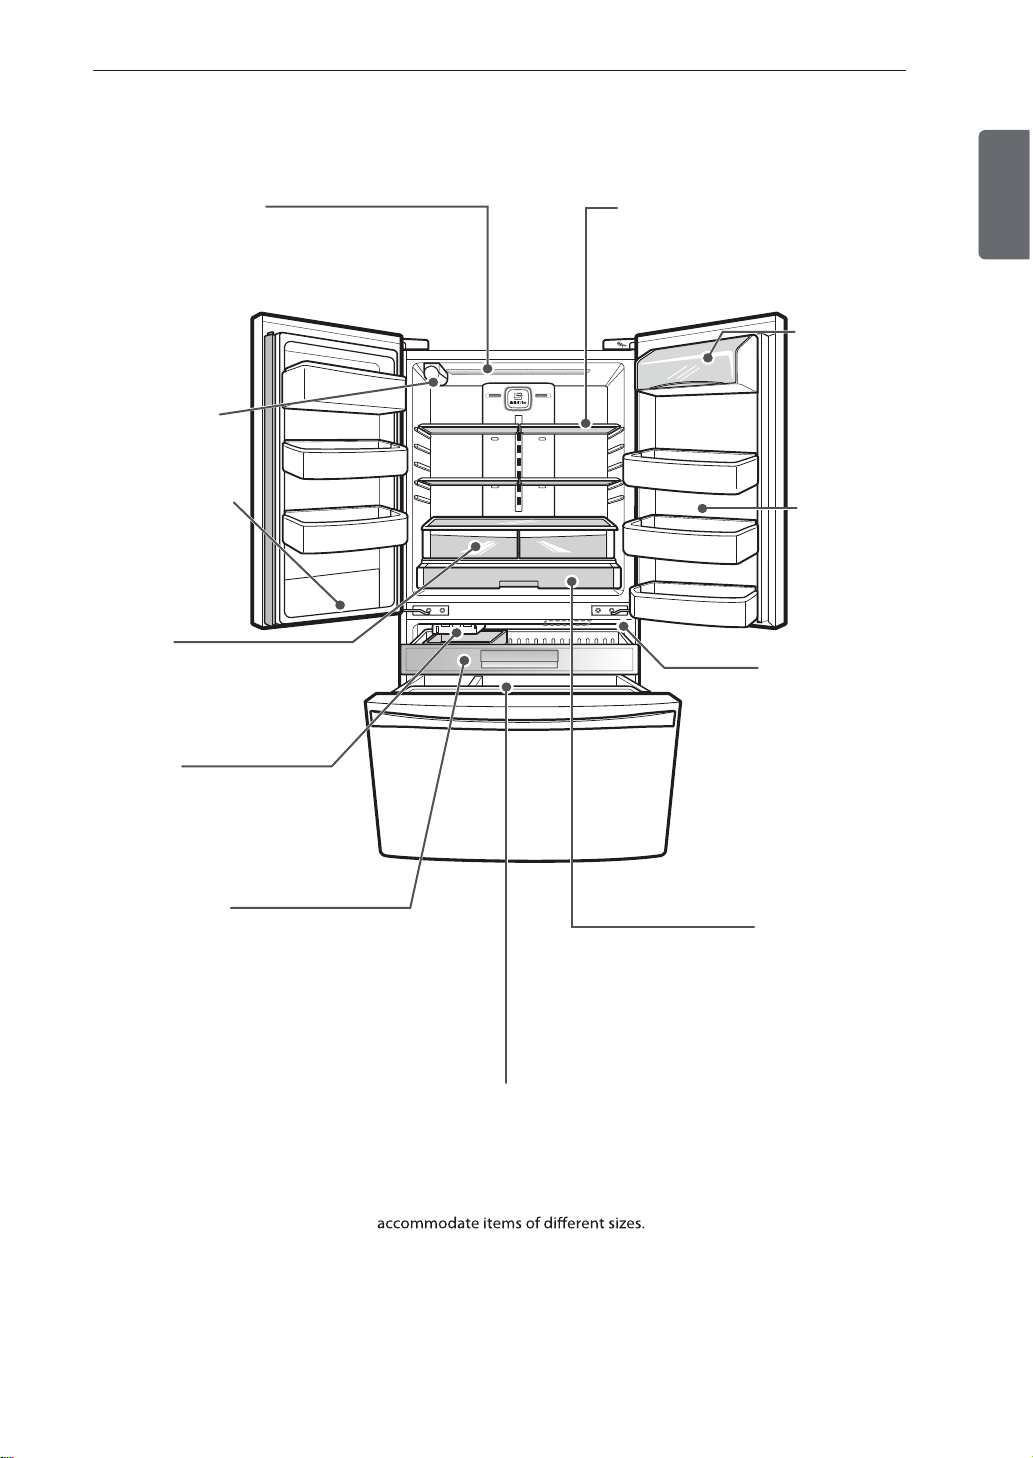
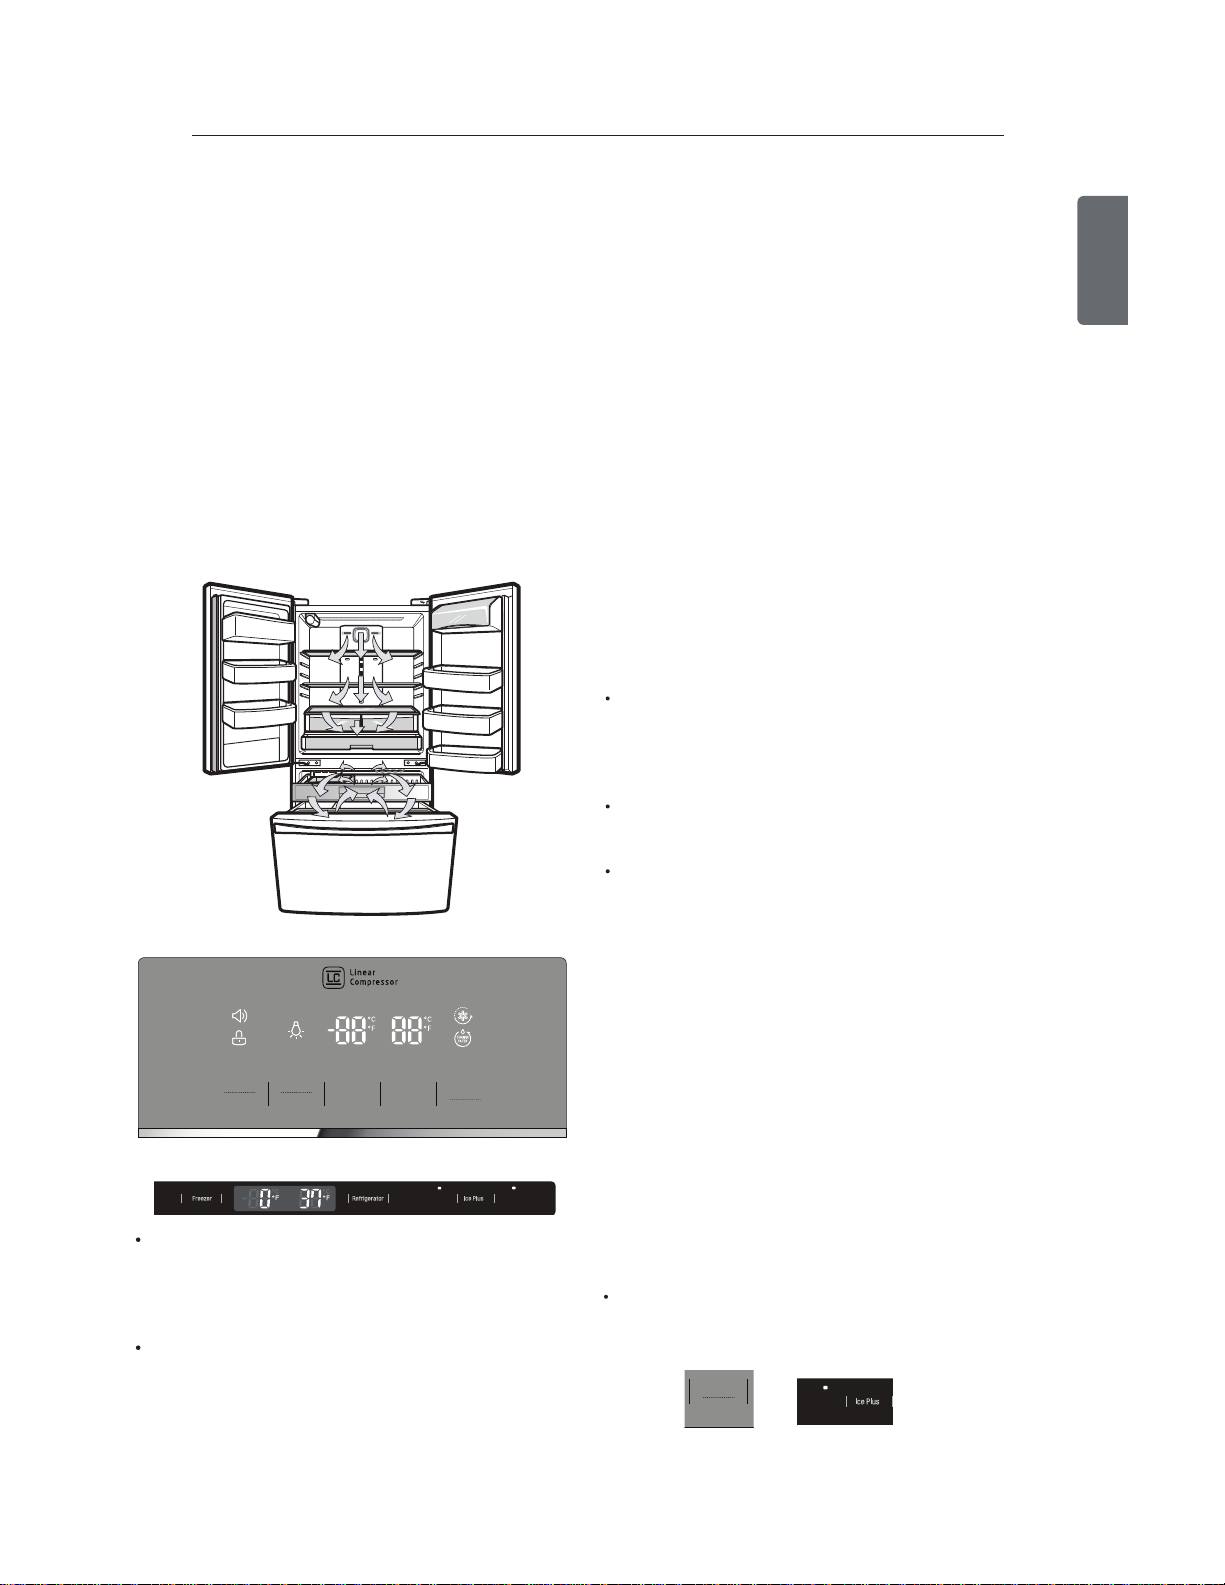
Refrigerator Interior
LED interior lamps
The interior lamps light up the inside
of the refrigerator.
Water Filter
(S om e models )
Water Tank
Cover
(Some models)
Crisper
Co ntr ols hu mi dit y and helps
vegetables and fruit to stay crisp.
Icemaker
(Installed Ice Maker Models Only)
Ice cubes are
automatically produced.
Adjustable Refrigerator Shelf
The shelves in your refri gerator are
ad jus table to mee t yo ur indiv id ual
storage needs.
Dairy Product Bin
Used t o p re se r ve
dairy products.
Modular Door Bins
Interchangeable bins
can be arranged to
s uit your storage
needs.
Auto Closing Hinge
Th e r e fri gera tor doo rs
and freezer drawers close
automatically when you
push them slightly.
(Th e doo r only clo se s
automatically when it is
open at an angle of less
than 30°.)
ENGLISH
ENGLISH
Pullout Drawer
Used for extra storage within the
freezer compartment.
Glide'N'Serve
Used for large party trays,
deli items and beverages.
Durabase® and Durabase® Divider
T h e D u r a b a s e i s a s t o r a g e s p a c e
recommended for the preservation of large
food items. The Durabase Divider is used to
organize the Durabase area into sections.
It ca n be ad just ed fro m side to si de to
11 COMPONENTS
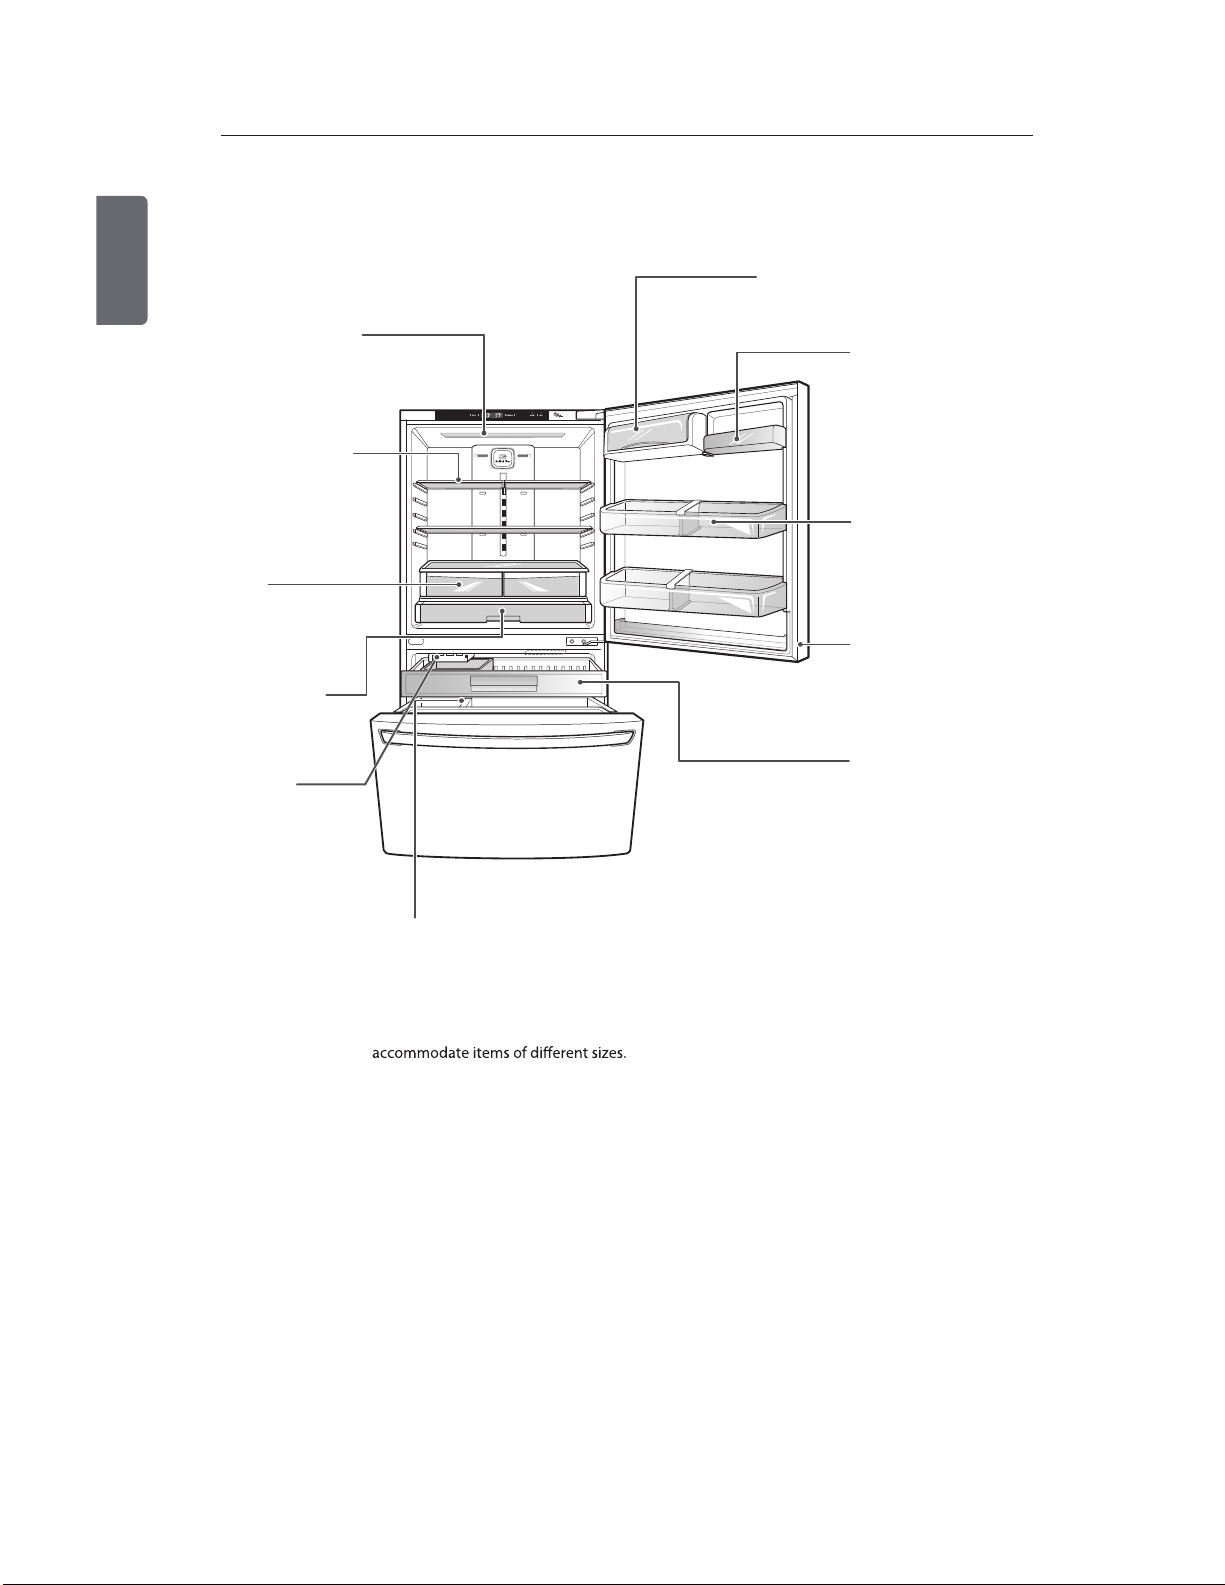
ENGLISH
Refrigerator Interior
LED interior lamps
The interior lamps light up
the inside of the refrigerator.
Adjustable
Refrigerator Shelf
The shelves in your
refrigerator are adjustable
to meet your individual
storage needs.
Crisper
Controls humidity and
helps vegetables and
fruit to stay crisp.
Glide‘N’Serve
Used for large party
trays, deli items and
beverages.
Icemaker
(Installed Ice Maker
Models Only)
Ice cubes are
automatically produced.
Dairy Product Bin
Used to preserve dairy products.
Fold-Up Bin
Can be folded up when
tall storage is needed in
the Door Bin.
Door Bin
Interchangeable bins can
be arranged to suit your
storage needs.
Auto Closing Door
The refrigerator door and
freezer drawers close
automatically when you
push them slightly.
Pullout Drawer
Used for extra storage
within the freezer
compartment.
Durabase® and Durabase® Divider
The Durabase is a storage space
recommended for the preservation of large
food items. The Durabase Divider is used
to organize the Durabase area into sections.
It can be adjusted from side to side to
12INSTALLATION
“This appliance is intended to be used in household and
similar applications such as:
-Staff kitchen areas in shops, offices and other working
environments; farms houses and by clients in hotel, motels and others residential type environments.
-Bed and breakfast type environments; catering and similar non-reatil applications.”
WARNING
EXCESSIVE WEIGHT HAZARD
Use the assistance of two or more persons to move or
install the refrigerator. Not following these instructions
may cause injury to the back and other parts of the
body.
UNPACKING
Before installing your refrigerator, remove any tape
or temporary stickers. Do not remove any stickers
that feature warnings, the model serial number or the
technical label of the product located on the back of the
refrigerator.
To remove adhesive tape residue, rub it well with your
fingers and a little liquid detergent. Clean with warm
water and let dry.
Do not use sharp instruments, rubbing alcohol, flammable
liquids or abrasive cleaning products to remove the
adhesive
surface of your refrigerator. For more information, see
the section on “Important Safety Instructions”.
The shelves come already installed in their factory
position.
according to your spacing needs.
Moving Your Refrigerator:
Your refrigerator is extremely heavy. Make sure you
protect the floor when moving your refrigerator for
cleaning or servicing. Always pull your refrigerator
straight out when moving it. Do not shift from side
to side or “walk” the refrigerator when attempting to
move it as this can cause damage to the floor.
tape or glue. These products can damage the
Remove the shelves and replace them
3. Install the refrigerator in an area between 55 °F
(13 °C) and 110 °F (43 °C). If the surrounding temperature
is lower or higher than previously mentioned, it can
adversely affect the unit.
CAUTION: Avoid placing the unit near heat
sources, direct sunlight or humidity.
ONCE INSTALLED
1. Carefully clean your refrigerator and remove and dust
accumulated during shipping.
2. Install accessories such as the ice bin, door racks,
shelves, etc., in their proper places. These are already
packed to prevent any possible damage during
shipping.
3. Leave your refrigerator on for 2 to 3 hours before
storing food inside. Verify that there is a flow of cold air
in the freezer compartment to ensure proper cooling.
Your refrigerator is now re
ady for use.
WARNING:
Take care when working with the hinges, base cover
and stops, etc. You may injure yourself.
DO not place your hands or any tools in the air vents,
the base cover or in the bottom of the refrigerator. This
may cause injury or electrical shock.
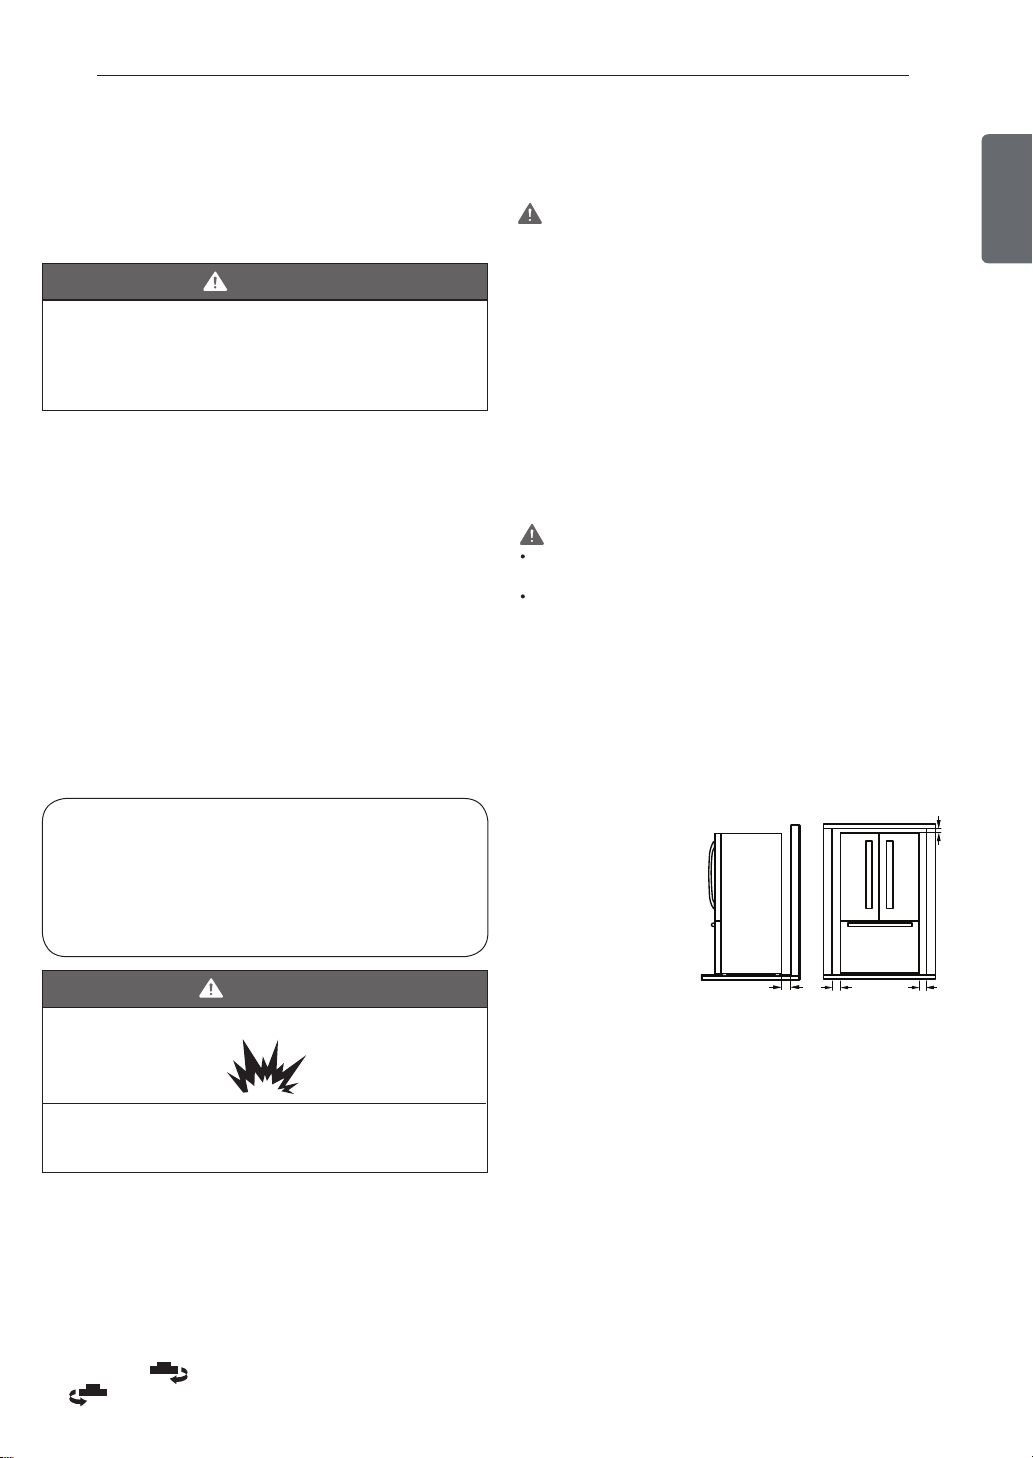
Keep a Proper Distance from Adjacent
Objects
Please keep the refrigerator at an adequate
distance from other objects. Insufficient
spacing can reduce the refrigerator’s
freezing efficiency and increase electricity
consumption.
2’’(5.08 cm)
ENGLISH
DANGER
EXPLOSION HAZARD
Keep all flammable materials and vapors (such as
gasoline) away from the refrigerator. Not following
these instructions may cause death, explosion or fire
INSTALLATION
1. Avoid placing the unit near heat sources, direct
sunlight, or humidity.
2. To avoid vibration, the unit should be leveled. If needed,
adjust the leveling screws to compensate for an
unleveled floor. The front should be slightly taller than
the rear to ensure that the doors close properly. The
leveling screws can easily be turned by slightly tilting
the front of the refrigerator, turning the leveling screws
clockwise (
(
) to lower it.
) to raise it and counter-clockwise
2’’(5.08 cm)
Flooring
To avoid noise and vibration, the unit must be leveled and
installed on a solidly constructed floor. If required, adjust
the leveling legs to compensate for unevenness of the
floor. The front should be slightly higher than the rear to
aid in door closing. Leveling legs can be turned easily by
tipping the cabinet slightly. Turn the leveling legs to the
left to raise the unit or to the right to lower it. (See Leveling
and Door AlJgnment.)
2’’(5.08 cm) 2’’(5.08 cm)
13 INSTALLATION
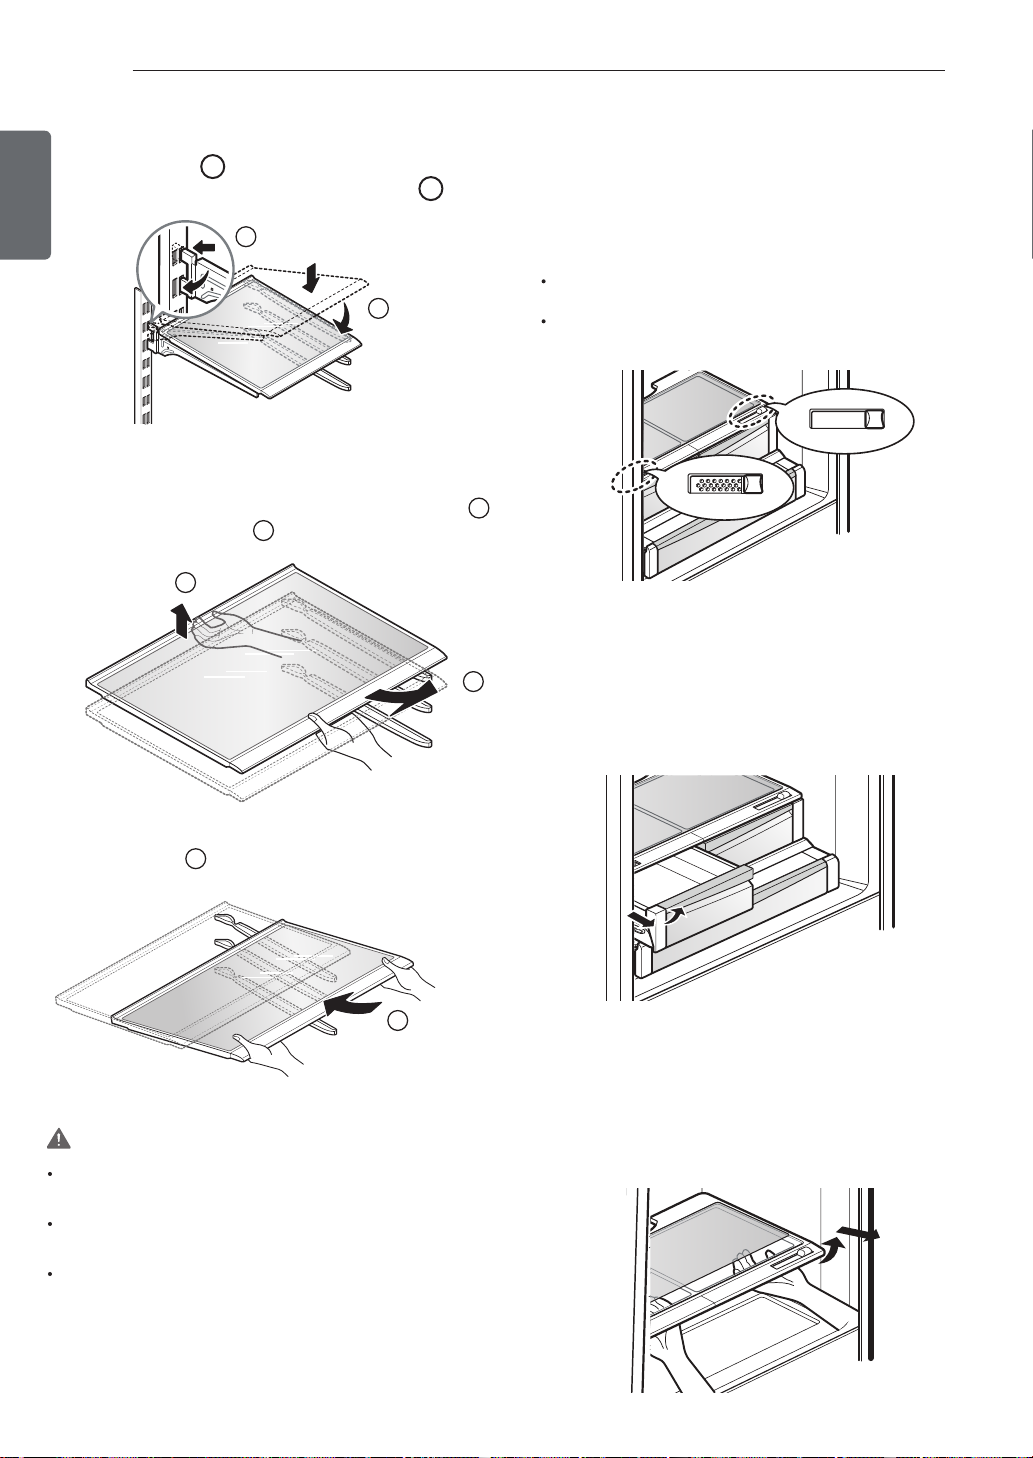
HOW TO REMOVE AND INSTALL THE REFRIGERATOR DOORS
ENGLISH
For moving the refrigerator through a house door, it might be necessary to remove refrigerator and freezer door
handles.
NOTE: Removing the doors is always recommended when it is necessary to move the refrigerator through a narrow
opening. If it is necessary to remove the handles, follow the directions below.
3/8 in (10 mm)
1/4 in (6 mm)
Hex Socket Wrench Phillips Screwdriver Flat Head Screwdriver Allen Wrench
HOW TO REMOVE REFRIGERATOR DOOR HANDLE
(on some models)
NOTE: Handle app
illustrations on this page.
Loosen the set screws with a 3/32 in (2,5 mm). Allen
wrench and remove the handle.
NOTE: If the handle mounting fasteners need to be
tightened or removed, use a 1/4 in (6,4 mm). Allen
wrench.
earance may vary from
TOOLS YOU MIGHT NEED OR USE
Set Screw
Allen
Wrench
1/4 in (6 mm)
3/32 in (2,5 mm)
Mounting
Fasteners
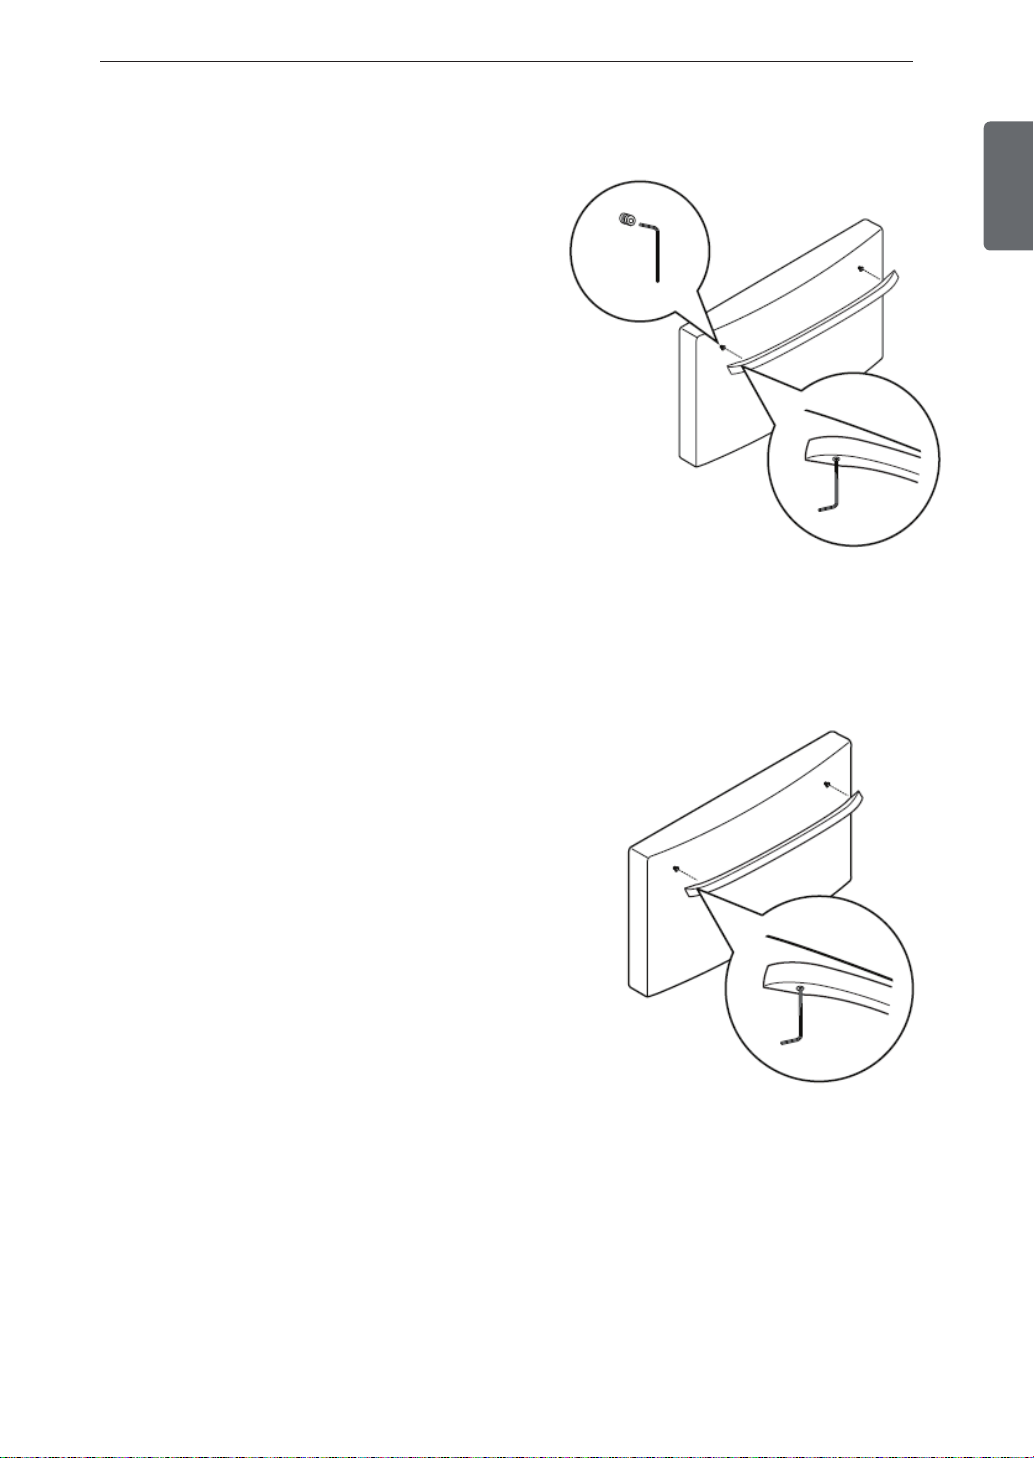
HOW TO REPLACE REFRIGERATOR DOOR HANDLE
(on some models)
NOTE: Handle appearance may vary from
illustrations on this page.
Place the handle on the door by fitting the handle
footprints over the mounting fasteners and tightening
the set screws with a 3/32 in (2,5 mm) Allen wrench.
NOTE: If the handle mounting fasteners need to be
tightened or removed, use a
¼ in. Allen wrench.
Mounting
Fasteners
INSTALLATION
14
NOTE: Removing the doors is always recommended when it is necessar y to move the refrige rator th rough
a
narrow
HOW TO REMOVE FREEZER DOOR HANDLE
NOTE: Handle appearance may vary from illustrations on
this page.
Loosen the set screws located on the lower side of the
handle with a 3/32 in (2,5 mm). Allen wrench and remove
the handle.
NOTE: If the handle mounting fasteners need to be
tightened or removed, use a 1/4 in (6,4 mm). Allen
wrench.
opening. If it is necessar y to rem ove the handles, foll ow the directions below.
ENGLISH
HOW TO REPLACE FREEZER DOOR HANDLE
NOTE: Handle appearance may vary from illustrations on
this page.
Place the handle on the door by fitting the handle
footprints over the mounting fasteners and tightening
the set screws with a 3/32 in (2,5 mm). Allen wrench.
NOTE: If the handle mounting fasteners need to be
tightened or
wrench
removed, use a 1/
4 in (6,4 mm). Allen
15 INSTALLATION
(1)
(2)
(4)
(3)
(6)
(7)
(5)
REMOVING AND REPLACING
REFRIGERATOR DOORS
ENGLISH
WARNING
Excessive Weight Hazard:
Use two or more people to remove and install the
refrigerator doors. Failure to do so can result in back
or other injury.
WARNING
Electrical Shock Hazard
Disconnect the electrical supply to the refrigerator
before installing. Failure to do so could result in
serious injury or death.
Do not put hands, feet or other objects into the air
vents or bottom of the refrigerator. You may be
injured or receive an electrical shock.
T
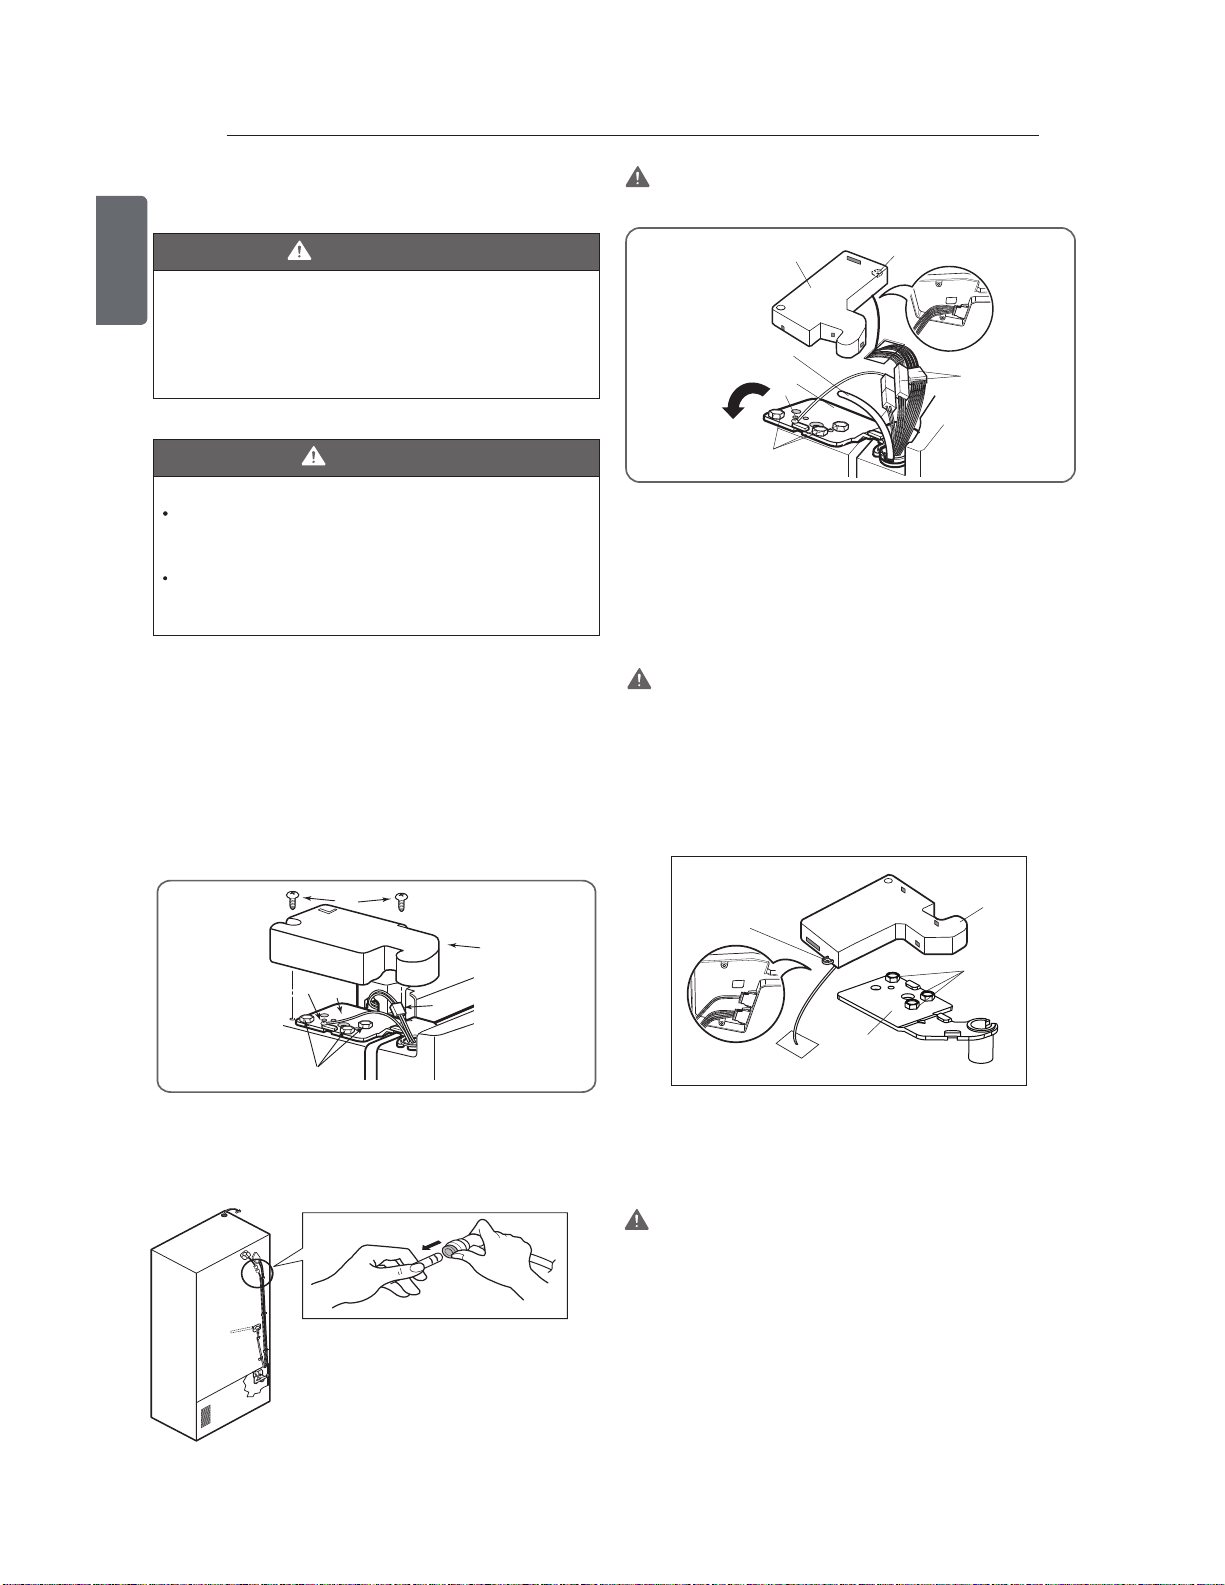
o remove the left refrigerator door (3 Door models)
Type 1
1. Open the door. Remove the top hinge cover screw (1).
Lift up the cover (2).
2. Remove the cover.
3. Disconnect all wire harnesses (3).
4. Remove the grounding screw (4).
5. Remove the three bolts (5) using a 10mm or 13/32 in
socket wrench. Lift off the top hinge (6).
CAUTION: Before you begin, remove food and bins
from the doors.
1. Open the door. Remove the top hinge cover screw (1).
Lift up the cover (2).
2. Remove the cover.
3. Pull out the tube (3).
4. Disconnect all wire harnesses (4).
5. Remove the grounding screw (5).
6. Remove the three bolts (6) using a 10mm socket
wrench. Lift off the top hinge (7).
CAUTION: When lifting the hinge, be careful that the
door does not fall forward.
7. Lift the door from the middle hinge pin and remove
the door.
e the door, inside facing up, on a non-scratching
8. Plac
surface.
To remove the right refrigerator door: (All models)
(1)
(2)
(4)
(6)
(5)
(3)
Type 2
On the back of the refrigerator, pull the water tube out of
the collet fitting on the connector by pressing the fitting
release ring (see picture below).
(1)
(4)
(2)
(3)
1. Open the door. Remove the top hinge cover screw (1).
Lift up the cover (2).
2. Remove the cover.
3. Remove the three bolts (3) using a 10mm
wrench. Lift off the top hinge (4)
socket
CAUTION: When lifting the hinge, be careful that the
door does not fall forward.
4. Lift the door from the middle hinge pin and remove
the door.
5. Place the door, inside facing up, on a non-scratching
surface.

16INSTALLATION
(1)
(2)
(4)
(3)
(6)
(7)
(5)
Reinstalling the Refrigerator Door
Left Door
1. Lower the door onto middle hinge pin (10).
2. Line up the holes in the top hinge with the holes in
the top of the refrigerator. Insert and tighten the
three Bolts (6) in the hinge.
3. Install the grounding screw (5) and connect the two
wire harnesses (4).
4. Push the water tube (3) located at the top of the left
door into the hole beside the left hinge on the top of
the cabinet until it exits through the back.
5. Insert the water supply tube (3) into the connector
until you see only one scale mark. Fully insert the tube
over 5/8 in. (15 mm).
6. Hook tabs on left side of hinge cover (1) under the
edge of the top hinge (7) and position the cover in
place. Insert and tighten the cover screw (1).
Right Door
1. Lower the door onto middle hinge pin (9).
2. Line up the holes in the top hinge with the holes in
the top of the refrigerator. Insert and tighten the three
Bolts (6) in the hi
3. Hook the tabs on right side of hinge cover (2) under
the edge of the top hinge (4) and position the cover in
place. Insert and tighten the cover screw (1).
nge.
ENGLISH
CAUTION
Collet
Tube
Scale Mark
Clip
(10)
(9)
After inserting, pull the tube to
make sure that it is secure and
reinsert the clip.
17 INSTALLATION
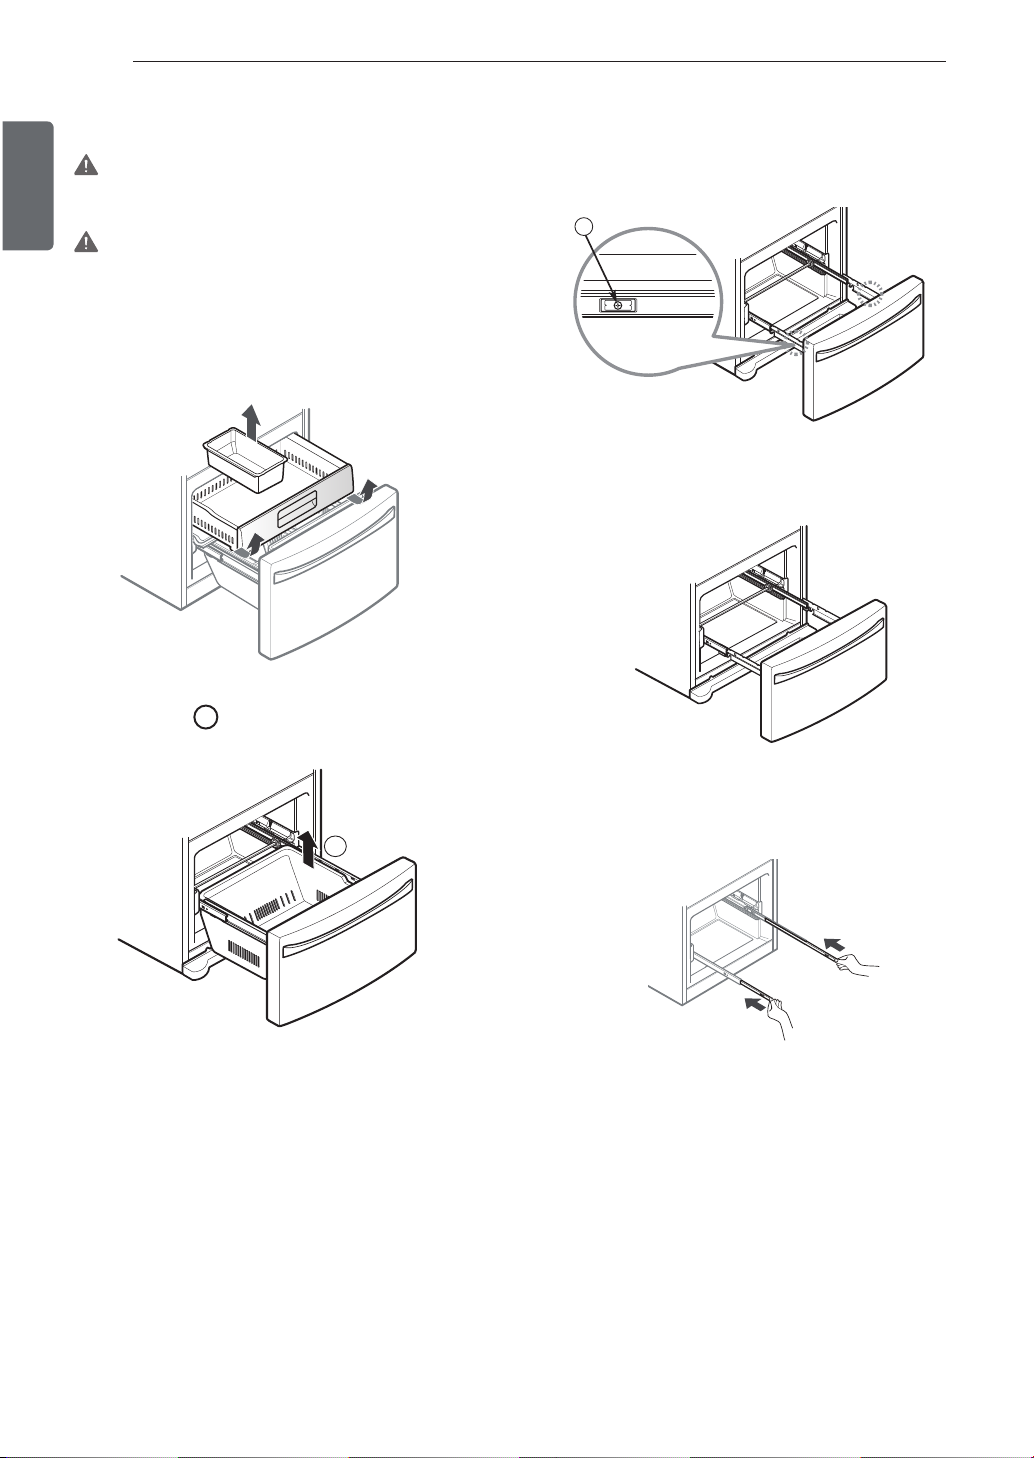
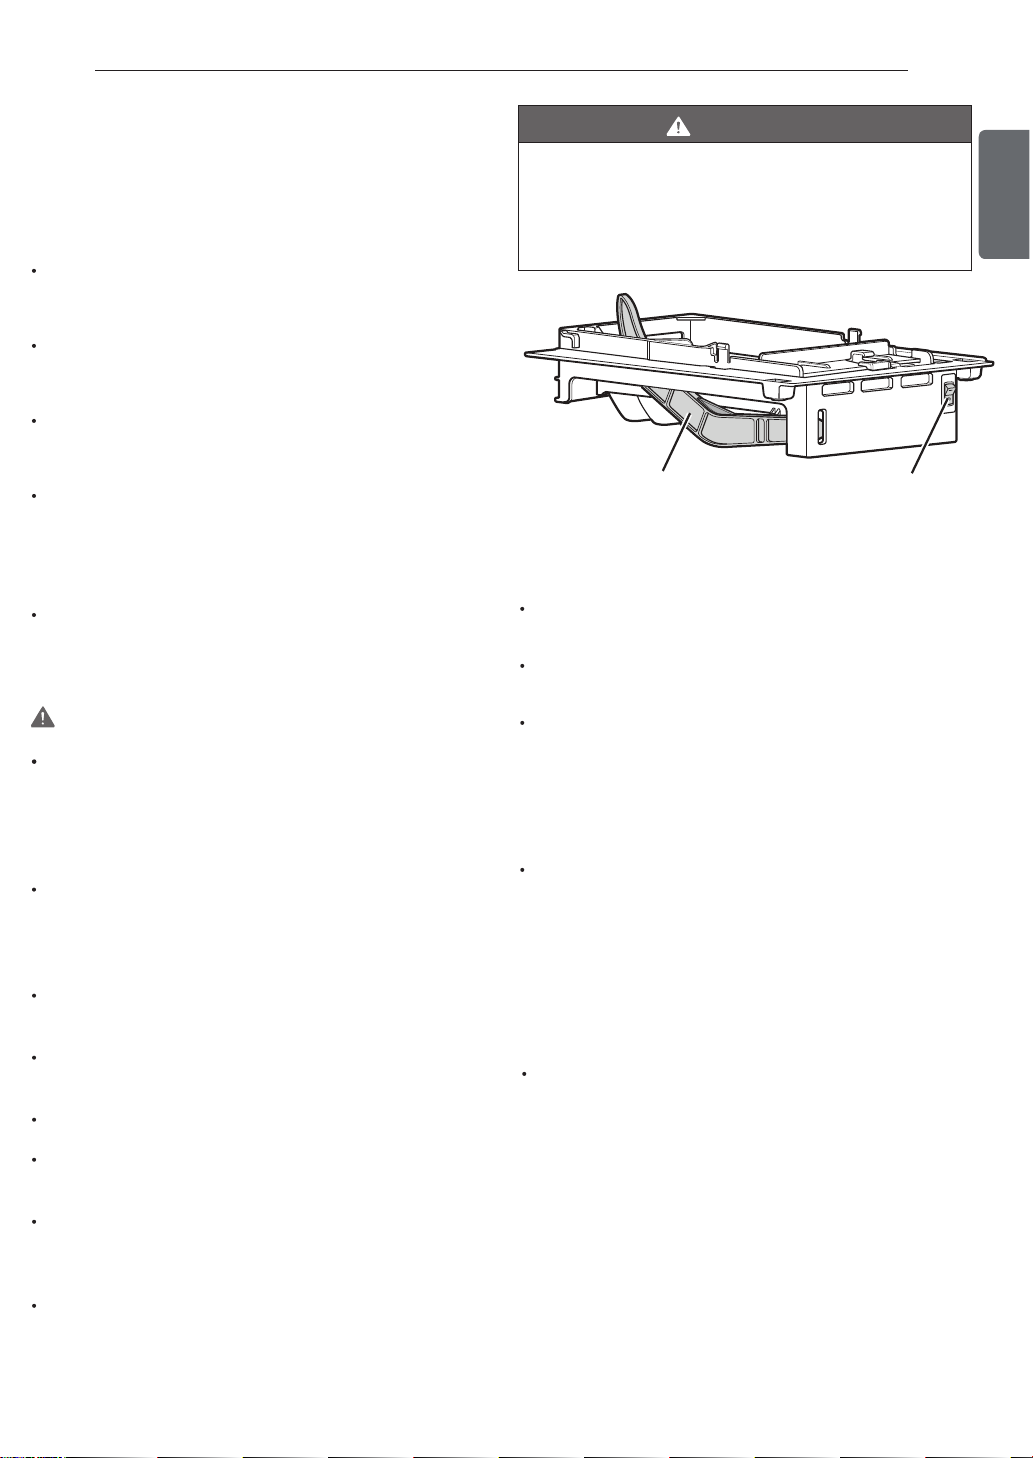
HOW TO REMOVE THE FREEZER DRAWER
ENGLISH
WARNING: Use two or more people to remove and
install the freezer drawer. Failure to do so can result in
back or other injury.
CAUTION: Do not hold the handle when removing or
replacing the drawer. The handle may come off, causing
personal injury.
To remove, pull the drawer out to full extension. Lift
the drawer up and out, making sure to clear the rail
system.
Remove the screws (2) of the rail on both sides.
2
Grasp the drawer on each side and pull it up to separate
it from the rails.
Pull the drawer open to full extension. Remove the
1
lower basket
system.
by lifting the basket from the rail
1
With both hands, hold the center bar and push it in to
allow both rails to slide in simultaneously.
HOW TO REPLACE THE FREEZER DRAWER
Pull out each rail to full extension.
18INSTALLATION
With the drawer pulled out to full extension, insert the
lower basket
in the rail assembly.
4
4
ENGLISH
Grasp the drawer on each side and hook door
supports
sides.
Lower the door into its final position and tighten the
screws
1
into the rail tabs 2 located on both
located on both sides.
3
3
1
2
To replace, with the drawer pulled out to full extension,
insert the drawer in the rail assembly.
19 INSTALLATION
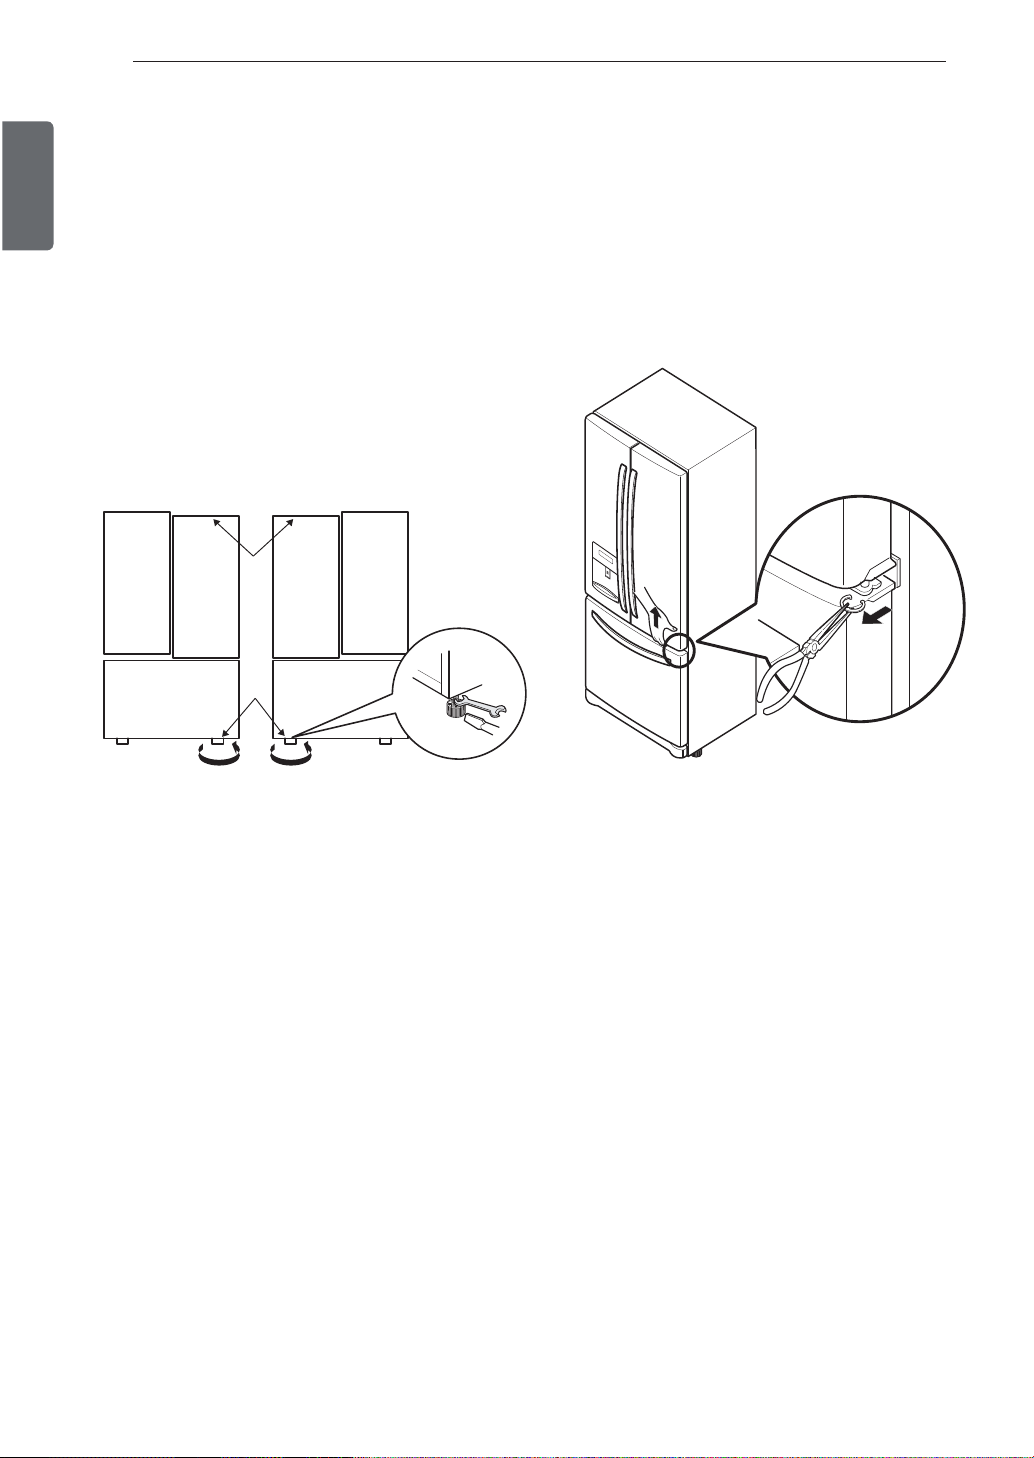
LEVELING AND DOOR ALIGNMENT
ENGLISH
Leveling
After installing, plug the refrigerator’s power cord into a 3-prong
grounded outlet and push the refrigerator into the final position.
Your refrigerator has two front leveling legs—one on the right
and one on the left. Adjust the legs to alter the tilt from frontto-back or side-to-side. If your refrigerator seems unsteady, or
you want the doors to close more easily, adjust the refrigerator’s
tilt using the instructions below:
NOTE: Tools Required: 11/16 in (18 mm) wrench or flat blade
screwdriver.
1. Turn the leveling leg to the left to raise that side of the
refrigerator or to the right to lower it. It may take several turns of
the leveling leg to adjust the tilt of the refrigerator.
Door Alignment
If the space between your doors is uneven, follow the
instructions below to align the doors:
1. With one hand, lift up the door that you would like to
raise at the middle hinge.
2. With your other hand, use pliers to insert snap ring as
shown.
3. Insert additional snap rings until the doors are aligned.
(Three snap rings are provided with the refrigerator in the
Use & Care Guide packet.)
NOTE: Having someone push backward against the top of the
refrigerator takes some weight off of the leveling legs. This
makes it easier to adjust the legs.
2. Open both doors again and check to make sure that they
close easily. If the doors do not close easily, tilt the refrigerator
slightly more to the rear by turning both leveling legs to the
left. It may take several more turns, and you should turn both
leveling legs the same amount.
NOTE: Your refrigerator is uniquely designed with two fresh food
doors. Either door can be opened or closed independently of
the other. You may have to exert slight pressure on the doors to
get them to close completely.
20HOW TO USE
SETTING THE CONTROLS
AIRFLOW
The refrigerator control functions as the thermostat for
the entire appliance (refrigerator and freezer sections).
The colder the setting, the longer the compressor will
run to keep the temperature colder. The freezer control
adjusts the cold air flow from the freezer to the refrigerator.
Setting the freezer control to a lower temperature keeps
more cold air in the freezer compartment to make it
colder.
Cold air circulates from the freezer to the fresh food
section and back again through air vents in the wall
dividing the two sections. Be sure not to block vents while
packing your refrigerator. Doing so will restrict airflow and
may cause the refrigerator temperature to become too
warm or cause interior moisture buildup. (See air flow
diagram below.)
NOTE: When changing control settings, wait 24 hours
before making additional adjustments. The controls are
set correctly when milk or juice is as cold as you would
like and when ice cream is firm. If the temperature in
either compartment is too cold or too warm, change the
setting one increment at a time. Wait 24 hours for the
change to stabilize before adjusting again.
Dispenser
Some dripping may occur after dispensing water. Hold
your cup beneath the dispenser for a few seconds after
dispensing to catch all of the drops.
NOTE: The dispenser will not work if any door is left open
or if the control lock is engaged.
* Depending on the model, some of the following
functions may not be available.
Express Freeze
When you press the Express Freeze button, the Express
Freeze graphic will illuminate in the display and will
continue for 24 hours. The function will automatically
shut off after 24 hours.
ENGLISH
Temperature
Door Alarm
Lock
Hold 3sec.
Light
Shabbath
Hold 3sec.
Freezer
Fridge
Express
Freeze
Water Filter
Filter Reset
Hold 3sec.
or
Shabbath
Hold 3 Sec
The Refrigerator Temp Control ranges from 33°F to
46°F (0°C to 8°C). Press the Refrigerator button to
cycle through the available temperature settings one
increment at a time.
The Freezer Temp Control range is from -6°F to 8°F
(-21°C to -13°C). Press the Freezer button to cycle through
the available temperature settings one increment at a
time.
Door
Alarm
You can stop this function manually by touching the
button one more time.
This function increases both ice making and freezing
capabilities.
Water Filter
When the water filter indicator turns on, you have to
change the water filter. After changing the water filter,
press and hold the Express Freeze (Filter Reset) button
for three seconds to turn the indicator light off. You need
to change the water filter approximately every six months.
Light
Press the Light button to turn the light on and off. When
dispensing water, a light underneath the water switch will
illuminate.
Shabbath mode is the function designated for use
of the refrigerator during Shabbath.
To set the Shabbath mode on, press the Shabbath
button for 3 seconds. Then, initially SB SB shows in
the display as well as lamp and alarm turn off.
Light
Shabbath
Hold 3sec.
Shabbath
Hold 3 Sec
21 HOW TO USE
Articulating Mullion
ENGLISH
This feature is a metal strip attached to the left door that
articulates (rotates) 90 degrees as the door is closed,
forming a mullion (base) for the left and right door
gaskets to seal against.
Caution When Closing the Door
CAUTION
To reduce the risk of scratching the door or breaking the
door mullion, please make sure that the refrigerator door
mullion is always folded in.
Door Alarm
ţ8IFO power is connected to the refrigerator, the door
alarm is initially set to ON. When you press the Door
Alarm button, the display will change to OFF and the
Door Alarm function will deactivate.
Lock
power is initially connected to the refrigerator, the
ţ8IFO
Lock function is off.
ţ*G you want to activate the Lock function to lock other
buttons, press and hold the Door Alarm button for three
seconds or more. The Lock icon will display and the Lock
function is now enabled.
ţ8IFO the Lock function is activated, no other buttons
will work. The dispenser pad is also deactivated.
ţTo disable the Lock function, press and hold the Door
Alarm button for approximately three seconds.
Display Mode (For Store Use Only)
The Display Mode disables all cooling in the refrigerator
and freezer sections to conserve energy while on display
in a retail store. When activated, OFF will display on the
control panel.
T
o deactivate:
With either refrigerator door opened, press and hold the
Refrigerator and Express Freeze buttons at the same
time for five se
conds. The control panel will beep and
the temperature settings will display to confirm that
Display Mode is deactivated. Use the same procedure to
activate the Display Mode.
Ice Plus
ţ8IFO either the refrigerator or the freezer door is left
open for more than 60 seconds, the alarm tone will
sound to let you know that the door is open.
ţ8IFO you close the door, the door alarm will
Door Alarm
Lock
Hold 3sec.
Door
Alarm
stop.
This function increases both ice making and
freezing capabilities.
ţ8IFOZPVQSFTTUIF*DF1MVTCVUUPOUIFMJHIU
will be on in the display and will continue for
24 hours. The function will automatically shut
off after 24 hours.
ţ:PVDBOTUPQUIJTGVODUJPONBOVBMMZCZ
pressing the button one more time.
22HOW TO USE
AUTOMATIC ICEMAKER (Installed Ice Maker Models Only)
The icemaker will produce approximately 70-210 cubes
in a 24-hour period, depending on freezer compartment
temperature, room temperature, number of door openings
and other operating conditions.
It takes about 12 to 24 hours for a newly installed
refrigerator to begin making ice. Wait 72 hours for full
ice production to occur.
Ice making stops when the in-door ice bin is full. When
full, the in-door ice bin holds approximately 6-8 (12-16
oz) glasses of ice.
To turn off the automatic icemaker, set the icemaker
switch to OFF (O). To turn on the automatic icemaker,
set the switch to ON (I).
The water pressure must be between 20 and 120 psi
(0,14 ~ 0,82 MPa) on models without a water filter and
between 40 and 120 psi (0,28 ~ 0,82 MPa) on models
with a water filter to produce the normal amount and
size of ice cubes.
Foreign substances or frost on the ice-detecting sensor
can interrupt ice production. Make sure the sensor area
is clean at all times for proper operation.
CAUTION
WARNING
Personal Injury Hazard
DO NOT place fingers or hands on the automatic ice
making mechanism while the refrigerator is plugged in.
Automatic
mrA ffO tuhS
WHEN YOU SHOULD SET THE ICEMAKER
POWER SWITCH TO OFF (O)
When the water supply will be shut off for several
hours.
When the ice bin is removed for more than one or two
minutes.
When the refrigerator will not be used for several days.
Power Switch
ENGLISH
The fi rst ice produced after installation may include
particles or odor from the water supply line or the
water tank. Throw away the fi
ice (about 24 cubes). This is also necessary if the
refrigerator has not been used for a long time.
If discolored ice is produced, check the water supply.
If the p
roblem continues, contact to qualified service
center. Do not use the ice or water until the problem
is corrected.
Be sure nothing interferes with the sweep of the
Automatic Shut Off Arm.
When the bin fi lls to the level of the Automatic Shut
Off Arm, the icemaker will stop producing ice.
It is normal for some cubes to be stuck together.
If ice is not used frequently, old ice cubes will become
cloudy, tase stale, and shrink.
Never store beverage cans or other items in the ice
bin for the purpose of rapid cooling. Doing so may
damage the icemaker or the containers may burst.
Never use thin crystal glass or crockery to collect ice.
Such containers may chip or break resulting in glass
fragments in the ice.
rst few batches of
NOTE: The ice bin should be emptied when the
icemaker ON/OFF switch is turned to the OFF position.
NORMAL SOUNDS YOU MAY HEAR
The icemaker water valve will buzz as the icemaker fills
with water. If the power switch is in the ON (I) position,
it will buzz even if it has not yet been hooked up to
water. To stop the buzzing, move the power switch to
OFF (O).
NOTE: Keeping the power switch in the ON (I) position
before the water line is connected can damage the
icemaker.
You will hear the sound of cubes dropping into the bin
and water running in the pipes as the icemaker refills
PREPARING FOR VACATION
Set the icemaker power switch to
the water supply to the refrigerator.
NOTE: The ice bin should be emptied anytime the
icemaker ON/OFF switch is turned to the OFF (O)
position.
If the ambient temperature will drop below freezing, have
a qualfied technician drain the water supply system to
prevent serious property damage due to fl ooding caused
by ruptured water lines or connections.
OFF (O) and shut off
23 HOW TO USE
FOOD STORAGE GUIDE
Wrap or store food in the refrigerator in airtight and
ENGLISH
moisture-proof material unless otherwise noted. This
prevents food odor and taste transfer throughout the
refrigerator. For dated products, check date code to
ensure freshness.
Items
Butter or
margarine
Cheese
Milk
Eggs
Fruit
How to
Keep opened butter in
a covered dish or closed
compartment. When
storing an extra supply,
wrap in freezer packaging
and freeze.
Store in the original
wrapping until you are
ready to use it. Once
opened, rewrap tightly in
plastic wrap or aluminum
foil.
Wipe milk cartons. For
best storage, place milk
on interior shelf.
Store in original carton on
interior shelf, not on door
shelf.
Do not wash or hull the
fruit until it is ready to be
used. Sort and keep fruit
in its original container,
in a crisper, or store in a
completely closed paper
bag on a refrigerator
shelf.
Leftovers Cover leftovers with
plastic wrap, aluminum
foil, or plastic containers
with tight lids.
STORING FROZEN FOOD
NOTE: Check a freezer guide or a reliable cookbook for
further information about preparing food for freezing or
food storage times.
Freezing
Your freezer will not quick-freeze a large quantity of food.
Do not put more unfrozen food into the freezer than will
freeze within 24 hours, no more than 2 to 3 lbs. of
food per cubic foot ( 1 to 1,5 kg of food per each 30
liters ) of freezer space. Leave enough space in the
freezer for air to circulate around packages. Be careful
to leave enough room at the front so the door can
close tightly.
Storage times will vary according to the quality and type
of food, the type of packaging or wrap used (how airtight
and moisture-proof) and the storage temperature. Ice
crystals inside a sealed package are normal. This simply
means that moisture in the food and air inside the
package have condensed, creating ice crystals.
NOTE: Allow hot foods to cool at room temperature for
30 minutes, then package and freeze. Cooling hot foods
before freezing saves energy.
Packaging
Successful freezing depends on correct packaging.
When you close and seal the package, it must not allow
air or moisture in or out. If it does, you could have food
odor and taste transfer throughout the refrigerator and
could also dry out frozen food.
Leafy
vegetables
Vegetables with skins
(carrots, peppers)
Fish
Remove store wrapping
and trim or tear off
bruised and discolored
areas. Wash in cold water
and drain. Place in plastic
bag or plastic container
and store in crisper.
Place in plastic bags or
plastic container and
store in crisper.
Store fresh fish and
shellfish in the freezer
section if they are not
being consumed the
same day of purchase.
It is recommended to
consume fresh fish and
shellfish the same day
purchased.
Packaging recommendations:
ţ3JHJE plastic containers with
ţStraight-sided canning/freezing jars
ţ)eavy-duty aluminum foil
ţ1MBstic-coated paper
ţ/POQFSNeable plastic wraps
freezer-grade self-sealing plastic bags
Follow package or container instructions for proper
freezing methods.
Do not use
ţ#read wrappers
ţ/POQPMyethylene plastic containers
ţContainers without tight lids
ţWax paper or wax-coated freezer wrap
ţ5IJO semi-permeable wrap
lids
CAUTION: Do not keep beverage cans or plastic food
containers in the freezer compartment. They may break
or burst if they freeze.
WARNING: DO NOT STORE ELECTR*CAL
APPLIANCES, do not use electrical appliances inside
the food storage compartment, unless they are
recommended by the manufacturer.
REFRIGERATOR SECTION
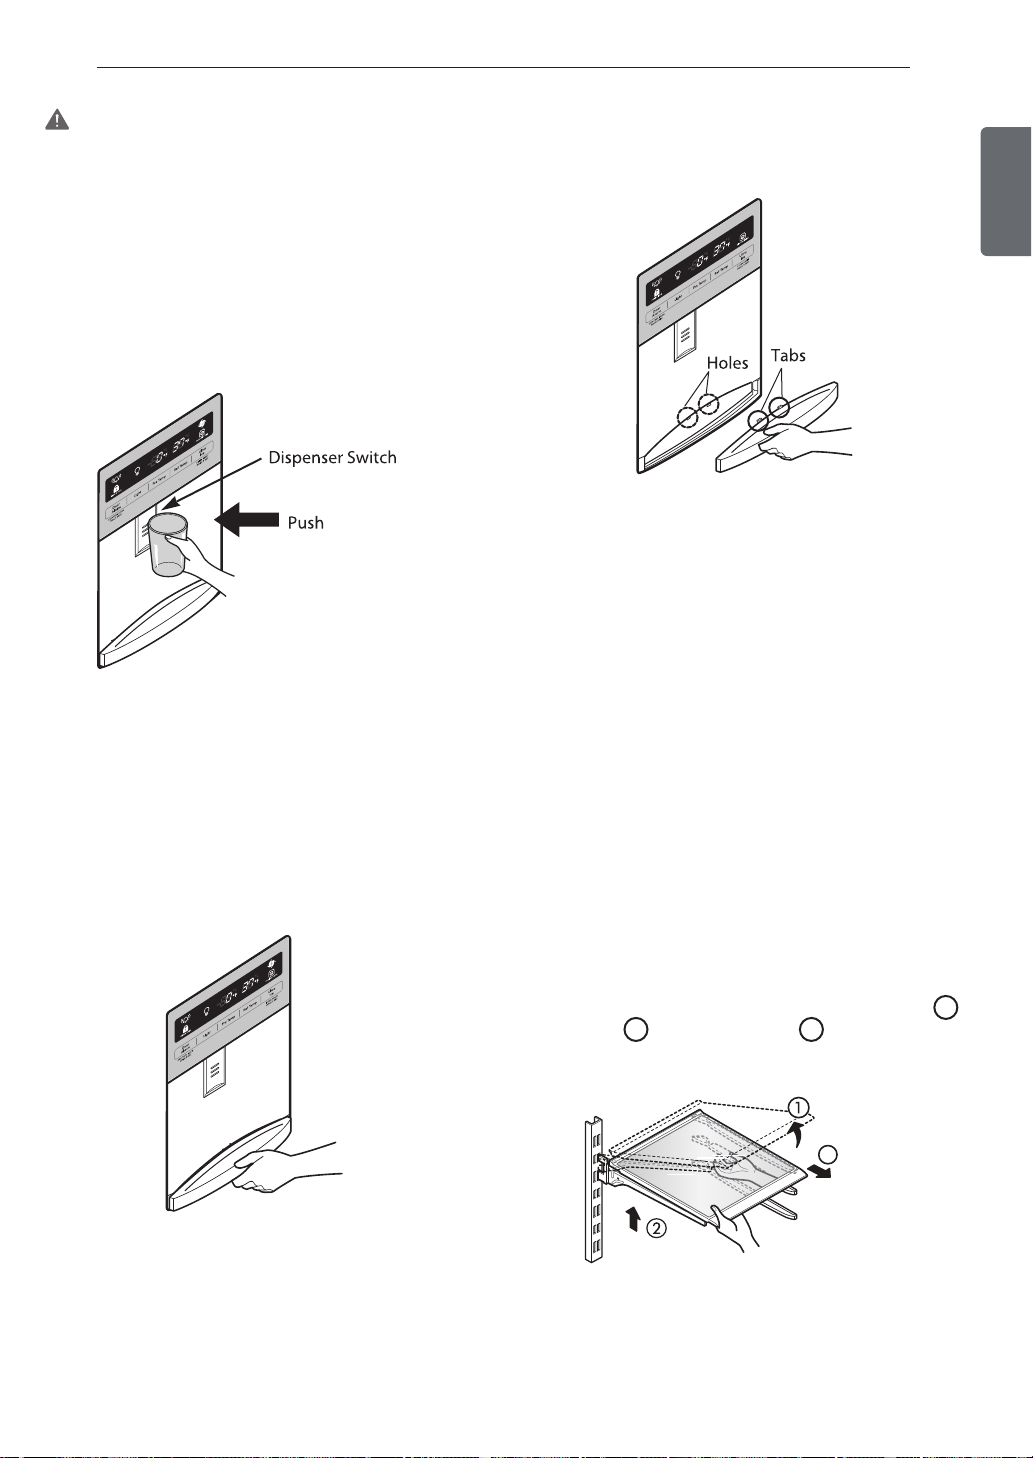
WATER DISPENSER
To dispense cold water, push on the dispenser switch
with a glass.
24HOW TO USE
To replace the tray, slightly tilt up the front of the tray
snap the tabs into the holes.
and
REFRIGERATOR SHELVES
The shelves in your refrigerator are adjustable to meet
your individual storage needs. Your model may have full
or split shelves.
ENGLISH
Some dripping may occur after dispensing. Hold your
cup beneath the dispenser for a few seconds after
dispensing to catch all of the drops.
WATER TRAY
To remove the tray, press down on either of the front
corners and pull out.
NOTE: There is no drain beneath the tray. You may need
to empty the tray of any liquid that collects in it.
Adjusting the shelves to fit different heights of items will
os gnioD .reisae tnaw uoy meti tcaxe eht gnidn fi ekam
will also reduce the amount of time the refrigerator
door is open which will save energy.
IMPORTANT: Do not clean glass shelves with warm water
while they are cold. Shelves may break if exposed to
sudden temperature changes or impact.
NOTE: Glass shelves are heavy. Use special care when
removing them.
Adjusting Shelves (Split Shelf)
Remove shelves from the shipping position and replace
shelves in the position you want.
To remove a shelf —Tilt up the front of the shelf
2
and lift it
. Pull the shelf out.
(on some models)
3
3
1
25 HOW TO USE
To reinstall a shelf —Tilt the front of the shelf
ENGLISH
up and guide the shelf hooks into the slots at a
1
desired height
. Then, lower the front of the
shelf so that the hooks drop into the slots
1
Adjusting Shelves (Full Shelf)
(on some models)
To remove a shelf —Tilt up the back of the shelf
and pull the shelf out.
1
2
HUMIDITY CONTROLLED CRISPER
The crispers provide fresher tasting fruit and vegetables
2
.
by letting you easily control humidity inside the drawer.
You can control the amount of humidity in the moisture
sealed crispers by adjusting the control to any setting
between VEGETABLE and FRUIT.
VEGETABLE keeps moist air in the crisper for best
2
storage of fresh, leafy vegetables.
FRUIT lets moist air out of the crisper for best storage
of fruit.
Fruit Vegetable
1
FruitVegetable
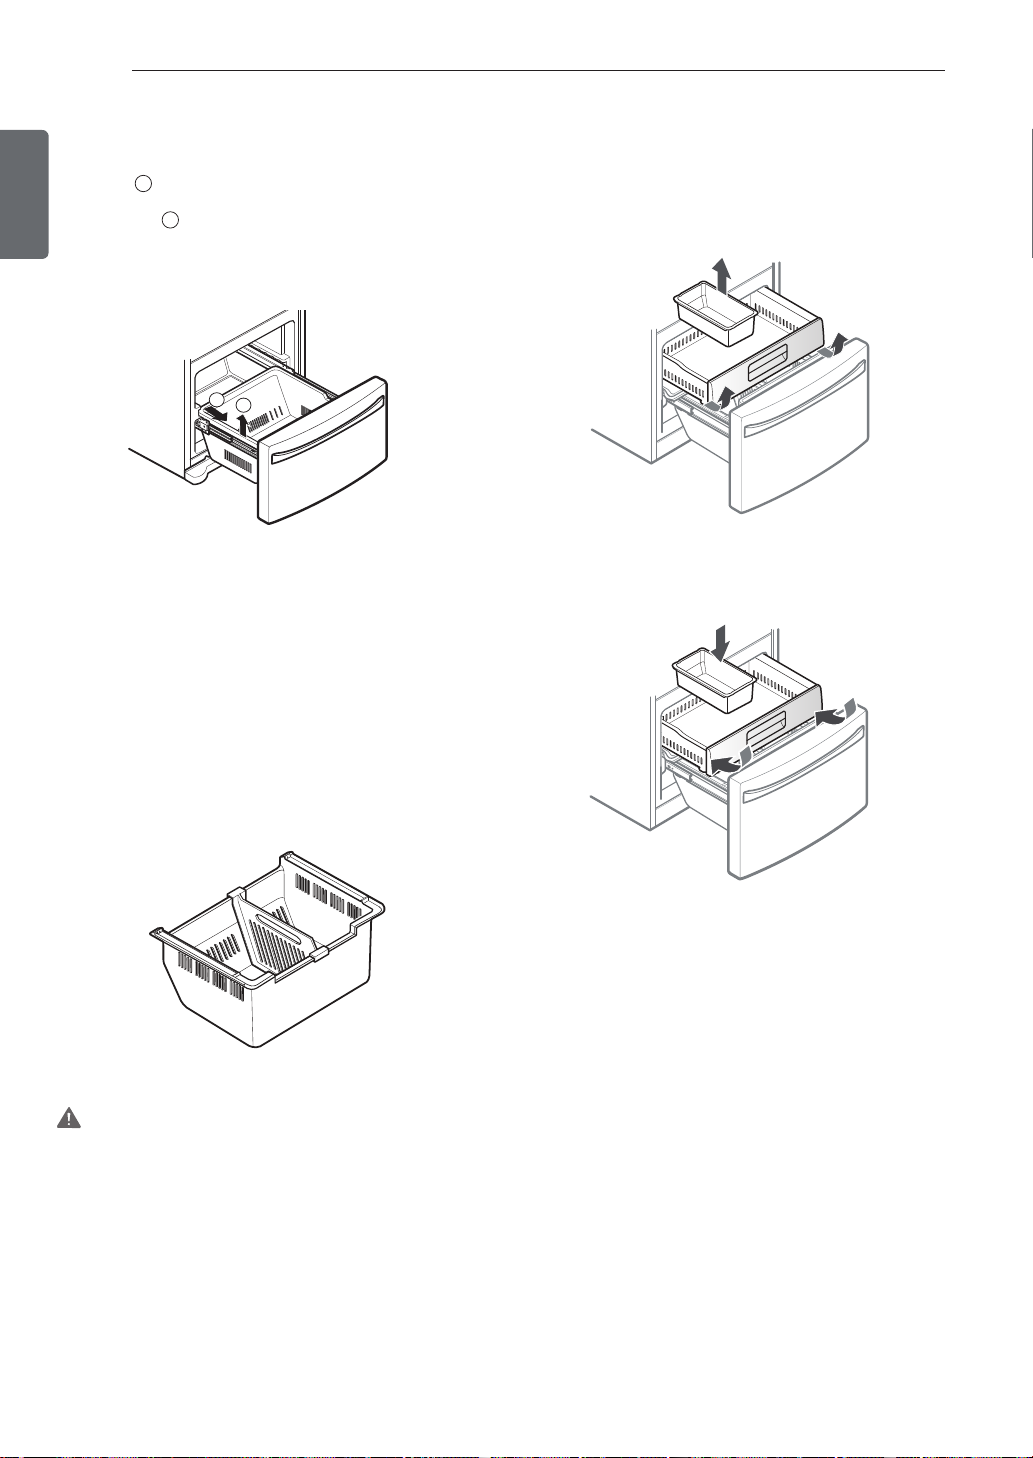
REMOVING THE HUMIDITY CONTROLLED CRISPER
1. To remove, pull the drawer out to full extension.
2
2. Lift the front of the crisper up, then pull it straight out.
3. To install, slightly tilt up the front, insert the drawer into
the frame and push it back into place.
To reinstall a shelf — Slide the shelf into the guides
until it stops.
1
1
CAUTION:
Make sure that shelves are level from one side to the
other.
Make sure that the shelf stopper is completely inserted
between the wall ribs.
Make sure that hooks are inserted in the correct
position. (Left shelf to left hole, right shelf to right hole
only.)
Failure to do so may result in the shelf falling or
spilling food.
To remove the glass
1. Lift up the glass under the crisper cover.
2. Pull the glass up and out.
NOTE: Pantry drawer not shown for clarity.
26HOW TO USE
PANTRY DRAWER
This drawer can be used for large party trays, deli items
and beverages. (Do not use this drawer for vegetables or
items that require high humidity.)
Pull forward to open. Lift slightly and pull out to remove.
DAIRY BIN
1. To remove the dairy bin, simply lift it and pull straight out.
2. To replace the dairy bin, slide it above the desired
location and push down until it stops.
FREEZER SECTION
ICE BIN
1. Pull the Freezer Drawer and the Pullout Drawer out as
far as possible to remove the Extra Ice Bin.
2. Gently lift and pull out the ice bin.
3. To replace, pull both drawers out as far as possible,
and set the bin in its correct position in the Pullout
Drawer. Close the Pullout Drawer and then the Freezer
Drawer.
Pullout Drawer
Extra Ice Bin
ENGLISH
DOOR BINS
The door bins are removable for easy cleaning and
adjustment.
1. To remove the bin, simply lift the bin up and pull
straight out.
2. To replace the bin, slide it in above the desired support
and push down until it snaps into place.
NOTE: Some bins may vary in appearance and will
only fi t in one location.
CAUTION: Pinch hazard! Keep hands and feet clear
of the bottom of the freezer drawer when opening
and closing.
27 HOW TO USE
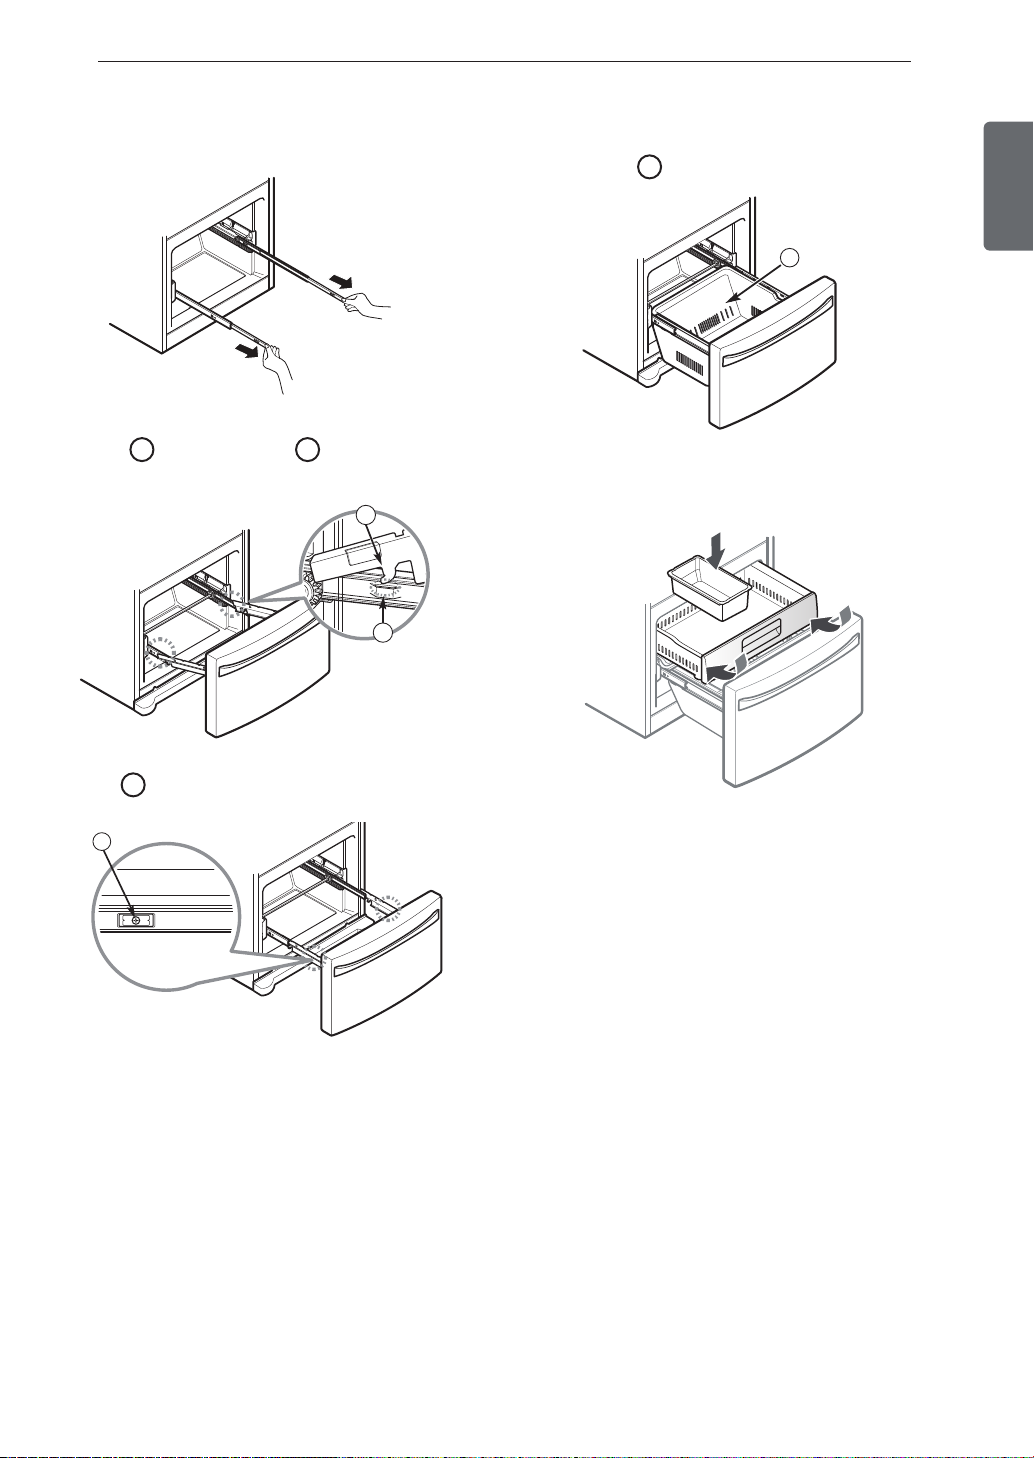
DURABASE REMOVAL AND REPLACEMENT
ENGLISH
1. To remove the Durabase, open the drawer to full
extension 1 . Push the Durabase to the back as much as
possible, tilt the front of the Durabase up, and then lift
it up and out 2 .
2. To replace, tilt the back of the Durabase into the
drawer, then lower it down and into the rail assembly.
1
2
NOTE: Assemble the Durabase before assembling
the pullout drawer. The pullout drawer needs
clearance in order to properly seat its rollers. If the
items are assembled improperly, the freezer door
may not close.
DURABASE DIVIDER
PULLOUT DRAWER
1. To remove, pull the drawer out to full extension. Lift
the drawer up and out, making sure to clear the rail
system.
2. To replace, with the drawer pulled out to full
extension, insert the drawer in the rail assembly.
The Durabase divider allows you to organize the
Durabase area into sections. It can be adjusted from side
to side to accommodate items of different sizes.
WARNING: If the Durabase divider is removed, there is
enough open space for children or pets to crawl inside.
To prevent accidental child and pet entrapment or
suff ocation risk, DO NOT allow children or pets to
touch or go near the drawer.
HOW TO USE
28
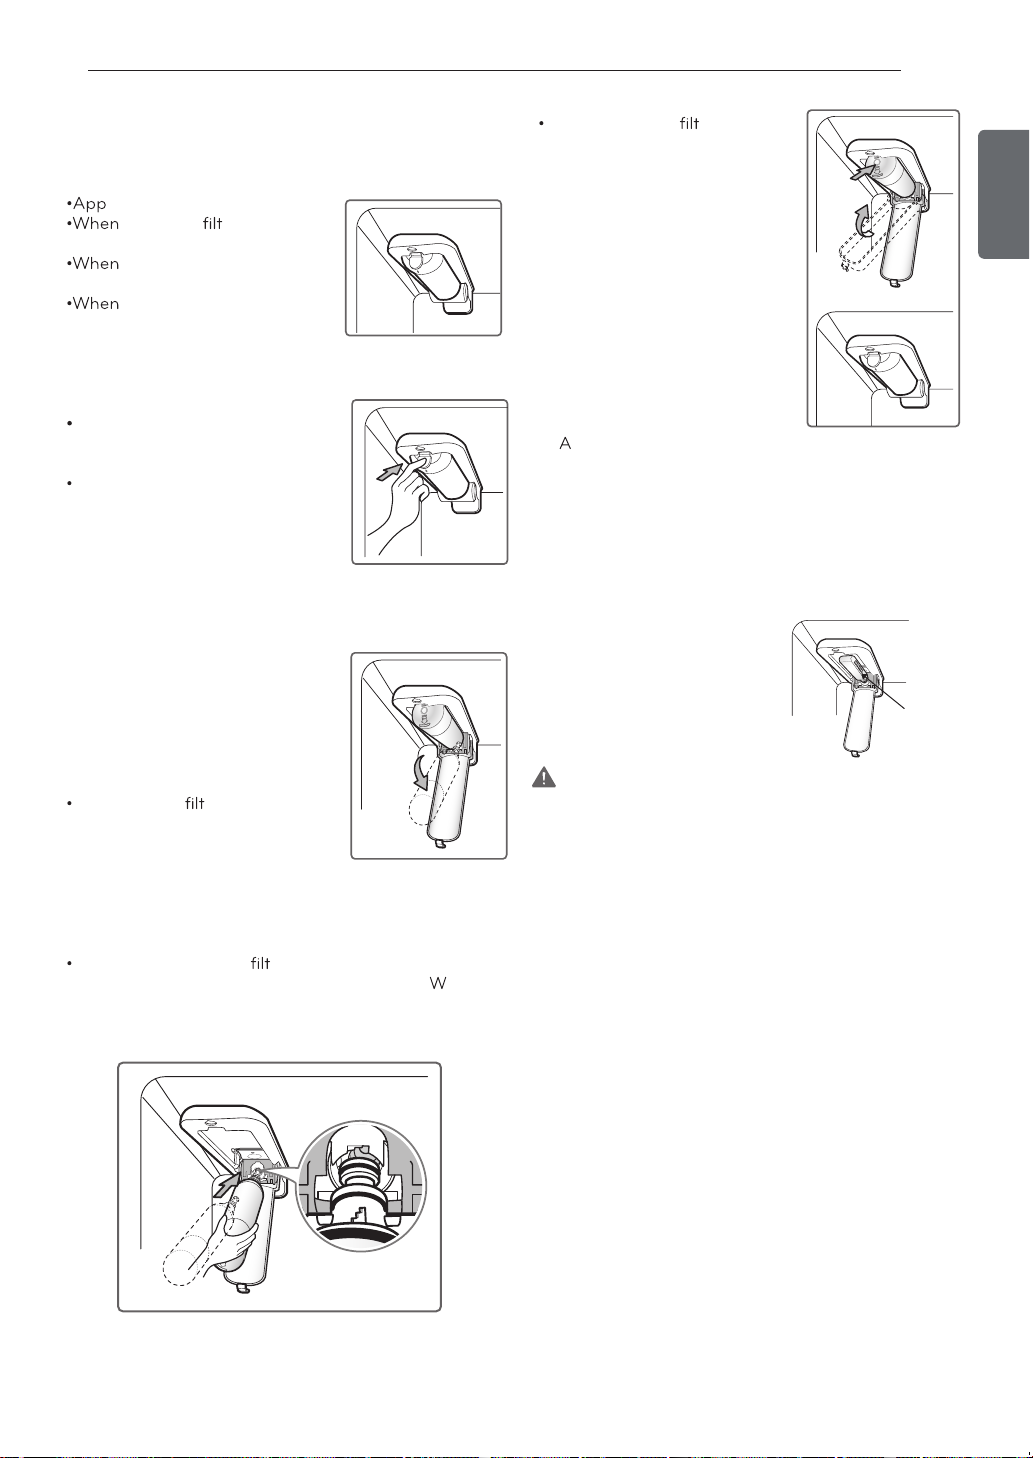
WATER FILTER (DISPENSER MODELS ONLY).
It is recommended that you replace the water filter:
roximately every 6 months.
the water
turns on.
the water dispenser
output decreases.
the ice cubes are smaller
than normal.
1. Remove the old water filter.
Lower or remove the top left
shelf to allow the water filter to
rotate all the way down.
Press the push button to open
the water filter cover.
NOTE: Replacing the water filter
causes a small amount of water
(around 1 oz. or 25 cc) to drain.
Before pushing the button to open
the water filter cover, place a cup
under the front end of the cover
to collect any leaking water.
Hold the water filter upright,
once itis removed, to prevent any
remaining water from spilling out
of the water filter.
Pull the water
pull out. Make sure to rotate the
filter down completely before
pulling it out of the manifold hole.
er indicator
er downward and
Rotate the water
position and close the cover.
The cover will click when closed
correctly.
3.
fter the water filter is replaced, dispense 2.5 gallons
(9 liters) of water (flush for approximately 5 minutes) to
remove trapped air and contaminates from the system.
Do not dispense the entire 2.5 gallon (9 liters)
amount continuously. Depress and release the
dispenser pad for cycles of 30 seconds ON and 60
seconds OFF.
4. Water Filter Bypass Plug
Keep the water filter
bypass plug. You MUST
use the water filter bypass
plug when a replacement
water filter cartridge is not
available.
er up into
Water Filter
Bypass Plug
CAUTION: DO NOT operate refrigerator without water
filter or water filter plug installed.
NOTE: To purchase replacement water filter cartridges,
visit your local appliance dealer or parts distributor.
ENGLISH
2. Replace with a new water filter.
Take the new water
remove the protective cover from the o-rings. ith water
filter tabs in the horizontal position, push the new water
filter into the manifold hole until it stops.
er out of its packaging and
The replacement water filter cartridge’s part
number is ADQ36006101.
29
HOW TO USE
Application Guidelines/Water Supply Parameters
ENGLISH
It is essential that the manufacturer’s recommended
installation, maintenance and water filter replacement
requirements be carried out for the product to perform
as advertised.
NOTE: While the testing was performed under standard
laboratory conditions, actual performance may vary.
Replacement Cartridge: ADQ36006101
Visit our website at www.lg.com
3M is a trademark of 3M Company.
© 2009 3M Company. All rights reserved.
Service Flow 0.5 gpm (1.9 lpm)
Water Supply Potable Water
Water Pressure 40-120 psi (0,28 - 0,83 MPa)
Water Temperature 33°F - 100°F (0.6°C - 38°C)
WARNING
Connect always to a potable water source to avoid
security and health issues.
WARNING
To reduce the risk associated with ingestion
of contaminants: Do not use with water that is
microbiologically unsafe or of unknown quality without
adequate disinfection before and after of the system.
Systems certified for cyst reduction may be used on
disinfected water that may contain filterable cysts. EPA
Establishment Number 10350-MN-005
CAUTION
To reduce the risk associated with property damage
due to water leakage:
Read and follow the Water Filter instructions before
installation and use of this system.
Installation and use MUST comply with all state and
local plumbing codes.
Do not install if water pressure exceeds 120 psi (0,83
MPa). Contact a plumbing professional if you are
uncertain of how to check your water pressure.
Do not install where water hammer conditions may
occur. If water hammer conditions exist, you must
install a water hammer arrester. Contact a plumbing
professional if you are uncertain of how to check for
this condition.
Do not install on hot water supply lines.
The maximum operating water temperature of this
water filter system is 100°F (38°C).
Protect water
refrigerator in ambient conditions below
55°F (12.7°C). Drain water filter when storing unit in
temperatures below 40°F (4.4°C).
The disposable water er must be replaced every
six months, at the rated capacity, or if a noticeable
reduction in flow rate occurs.
er from freezing. Do not operate
 Loading...