

Lg GR-409GTQ, GR-369GTQ Owners Manual [zh]
P/No. MFL31177114
3
Registration
Important Safety Instruction
Identification of Parts
Installation
Starting
Temperature Control
Quick Freeze
Vacation
Self Test
Door Alarm
Ice Making
Defrosting
Water Dispenser
Storing Food
General Information
Lamp Replacement
Cleaning
Trouble Shooting
Precaution
How to Reverse the Doors
Table of Contents
Introduction
Installation
Operation
Suggestion On
Food storage
Care and
Maintenance
Trouble Shooting
To Reverse the
Doors
4
4
6
7
7
8
8
9
9
9
9
9
10
12
13
14
16
13
18
18
Introduction
4
The model and serial number are found on the rear of
this unit. This number is unique to this unit and not
available to others. You should record requested
information here and retain this guide as a permanent
record of your purchase. Staple your receipt here.
Date of Purchase :
Dealer Purchased From :
Dealer Address :
Dealer Phone No. :
Model No. :
Serial No. :
Important Safety Instruction
This fridge-freezer must be properly installed and
located in accordance with the Installation
Instruction before it is used.
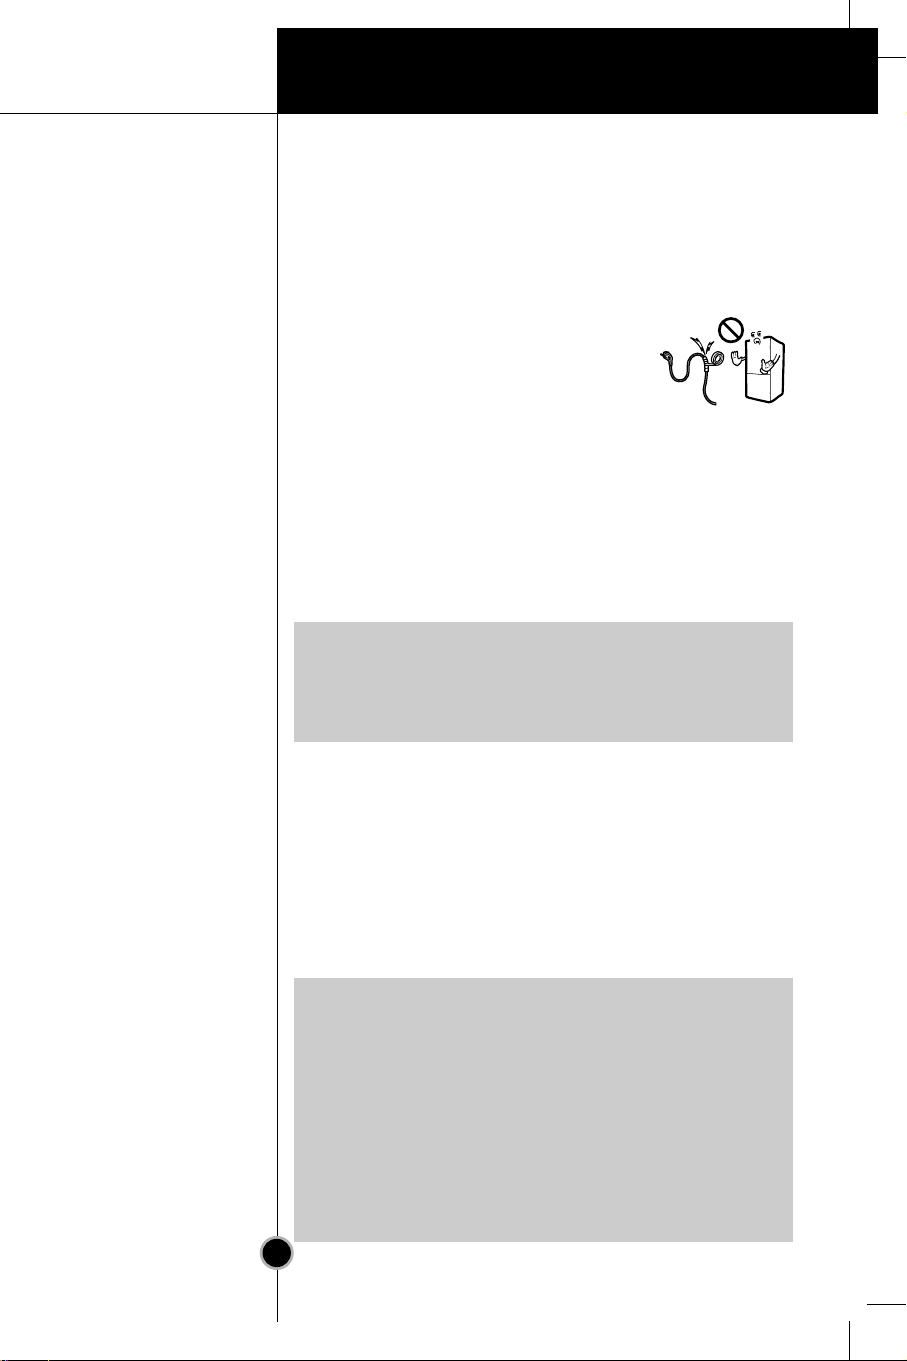
Never unplug your fridge-freezer by pulling on the
power cord. Always grip plug firmly and pull straight out
from the outlet.
When moving your appliance away from the wall,
be careful not to roll over or damage the power
cord.
After your fridge-freezer is in operation, do not
touch the cold surfaces in the freezer compartment,
particularly when hands are damp or wet. Skin may
adhere to these extremely cold surfaces.
Registration
Introduction
Precaution
Introduction
5
Pull out the power plug prior to cleaning the fridge-freezer.
Never damage, serverely bend, pull out, or twist the power cord because
power cord damage may cause a fire or electronic shock.
Never place glass products in the freezer because they may be
broken when their inner contents are frozen.
It will cause electric shock or fire.
If possible, connect the fridge-freezer to its own individual
electrical outlet to prevent it and other appliances or household
lights from causing an overload.
The supply plug of the refrigerator-freezer should be placed in
easy accessible position for quick disconnection in emergency.
If the supply cord is damaged, it must be replaced by the
manufacturer or its service agent or a similarly qualified person
in order to avoid a hazard.
Don't store or use gasoline or other flammable vapors and
liquids in the vicinity of this or any other appliance.
In the event of an electric short circuit, grounding (earthing) reduces
the risk of electric shock by providing an escape wire for the electric
current. In order to prevent possible electric shock, this appliance
must be grounded. Improper use of the grounding plug can result in
an electric shock. Consult a qualified electrician or service person if
the grounding instructions are not completely understood, or if you
have doubts on whether the appliance is properly grounded.
Important Safety Instruction
Precaution
Do not modify or
extend the Power
Cord length
Don't Use an
Extension Cord
Accessibility of
Supply Plug
Supply Cord
Replacement
Danger
Don't store
Grounding
(Earthing)
ww
Warning
Risk of child entrapment.
Before you throw away your old refrigerator or freezer:
Take off the doors.
Leave the shelves in place so that children may not easily
climb inside.
ww
Keep ventilation openings, in the appliance enclosure or in
the built-in structure, clear of obstruction.
ww
Do not use mechanical devices or other means to accelerate
the defrosting process, other than those recommended by
the manufacturer.
ww
Do not damage the refrigerant circuit.
ww
Do not use electrical appliances inside the food storage
compartments of the appliance, unless they are of the type
recommended by the manufacturer.
ww
The refrigerant and insulation blowing gas used in the
appliance require special disposal procedures. When disposal,
please consult with service agent or a similarly qualified person.
Introduction
6
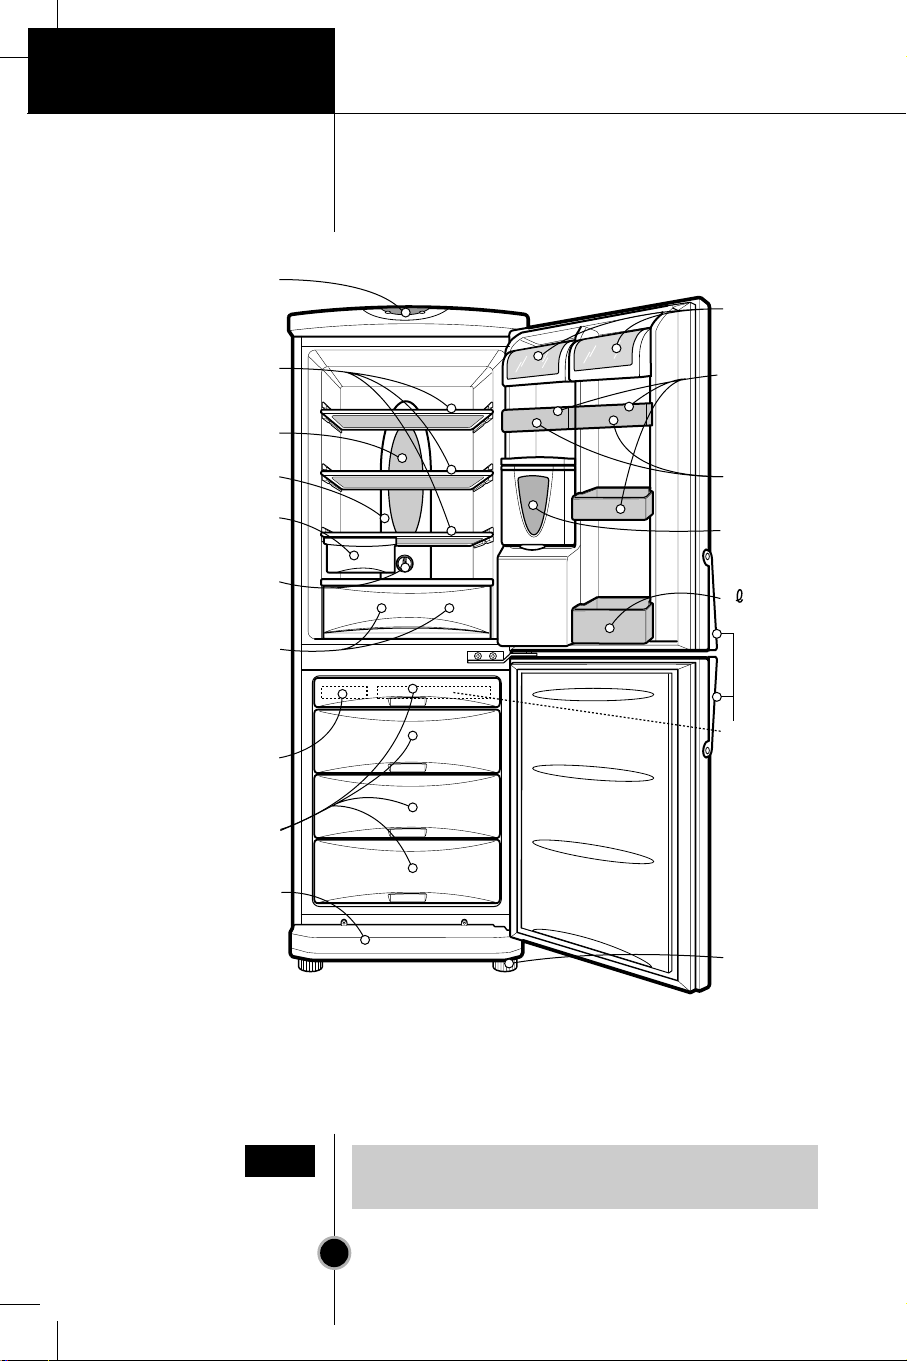
Identification of Parts
If you found some parts missing from your unit,
they may be parts only used in other models.
Door Basket
(2, 3, 4)
Utility Corner
(movable, 1 or 2)
Egg Tray(1 or 2)
Freezer Temperature
Control
Removable
Glass Shelf(2 or 3)
Lamp
Multi-air Flow Duct
Fresh Zone
(Optional)
Refrigerator
Temperature Control
Vegetable Drawer
Used to keep fruits
and vegetables, etc.
fresh and crisp.
Ice Cube Tray
Freezer
Compartment
Removable
Plinth
2 Bottle
Door Basket
Leveling Screw
Handle
(user install)
Water Tank
(optional)
Note
Installation
7
1.
Select a good location.
Place your fridge-freezer where it is easy to use.
2.
Avoid placing the unit near heat sources,
direct sunlight or moisture.
3.
There must be proper air circulation around your
fridge-freezer to keep it operating efficiently.
4.
To avoid vibration, the unit must be leveled.
If required, adjust the leveling screws to compensate
for the uneven floor.
The front should be slightly higher than the rear to aid
in door closing.
Leveling screws can be turned easily by tipping the
cabinet slightly.
Turn the leveling screws counterclockwise( ) to
raise the unit, clockwise( ) to lower it.
5.
Clean your fridge-freezer thoroughly and wipe off all
dust accumulated during shipping.
6.
Install accessories such as ice cube box, etc., in their
proper places.They are packed together to prevent
possible damage during shipment.
7.
Connect the power supply cord (or plug) to the outlet.
Don't double up with other appliances on the same
outlet.
8.
To ensure proper air circulation around the fridge freezer, please maintain sufficient space on both the
sides as well as top and maintain at least 2 inches (5
cm) from the rear wall.
When your fridge-freezer is installed, allow it 2-3 hours to
stabilize at normal operating temperature prior to filling
it with fresh or frozen foods.
If power plug is disconnected, allow 5 minutes delay
before restarting.
Your fridge-freezer is now ready for use.
Installation
Starting

Operation
8
Your fridge-freezer has two controls that let you regulate
the temperature in the fridge and freezer compartments.
• Initially set the TEMP. CONTROL
at "4". Then adjust the
compartment temperature
according to your desire.
• If you want an inside temperature
slightly less cold or colder, turn the
knob towards MIN or MAX, respectively.
When the surrounding temperature is low, adjust the
TEMP. CONTROL 'MIN'.
• Freezer temperature control is on the top of the fridgefreezer. Initially set the Freeze Temp at mid-point. By
pressing the Freezer Temp button, you can adjust the
temperature of the Freezer as indicated by the numbers
of lamps lit.(the setting is composed of five steps,
5 lamps lit indicates coldest.)
• When you starting the Fridge-Freezer or connecting the
power plug to the outlet, temperature setting is
automatically set to the mid-point.
• This function is used when
you want to freeze the foods
quickly. Press the 'QUICK
FREEZE' button once, and
then the quick freeze
operation starts with the
lamp lit.
The quick freeze operation
takes about 3 hours.
When its operation ends,
it automatically returns to the normal state.
If you want to stop the quick freeze operation, press
the 'QUICK FREEZE' button once more, the lamp goes
out, and the quick freeze operation stops and the
refrigerator returns to the normal state.
Temperature Control
Fridge
Freezer
Quick Freeze
TEMP. CONTROL
7
MAX
MIN
1
6
5
4
2
3
FREEZE TEMP
VACATION QUICK FREEZE
QUICK FREEZE
Operation
9
This function makes the fridge-freezer
work in a power saving mode which is
useful for when you are away on
holiday, by reducing energey
consumption as much as possible.
Pressing 'VACATION' starts operation
with lamp ON and pressing it again
stops the operation.
For better functioning, you should set
the TEMP. CONTROL to "MIN".
This function allows you to check for operational
problems. If you think you have a problem with your
fridge-freezer, then press the temperature control button:
- If the indicate lights move up or down, then there is no
problem with your fridge-freezer.
- If the indicate lights do not move up or down, then
please leave the power connected and call your nearest
service agent.
When the door of the fridge is left opened for a while,
the alarm sounds.
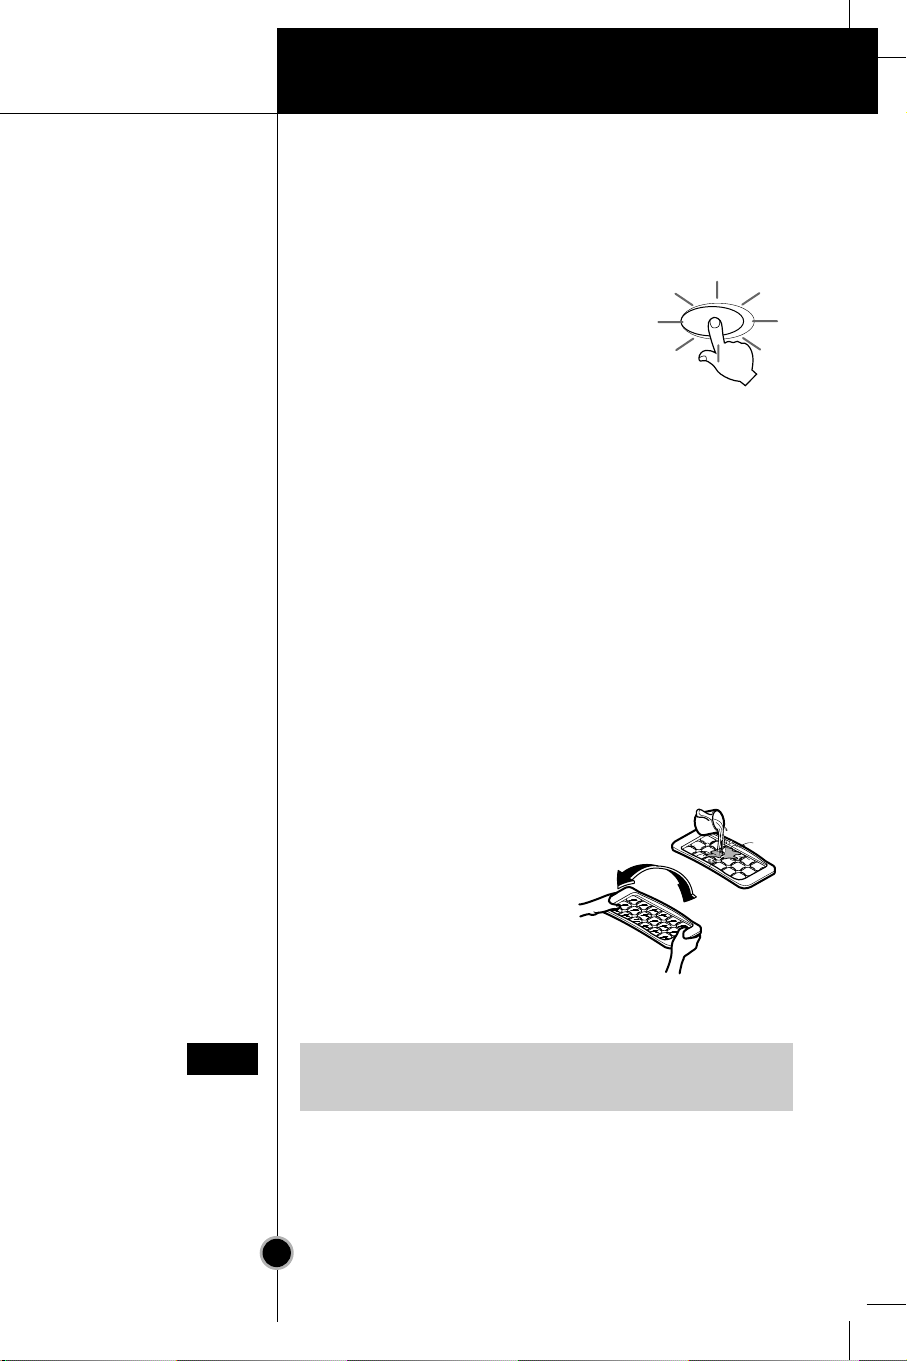
• To make ice cubes, fill the
ice tray to the water level
and place it in the freezer.
• If ice cubes are required
fast, press the 'QUICK
FREEZE' button.
• To remove ice cubes,
hold the tray at its ends and twist gently.
Defrosting takes place automatically.
The defrosting water flows down to the evaporating tray
and is evaporated automatically.
Vacation
Self Test
Door Alarm
Ice Making
Defrosting
VACATION
To remove ice cubes easily, run water on the tray
before twisting.
Tip
Please assemble the VALVE ASSEMBLY after correctly
adjusting it with a DOOR HOLE.
Operation
10
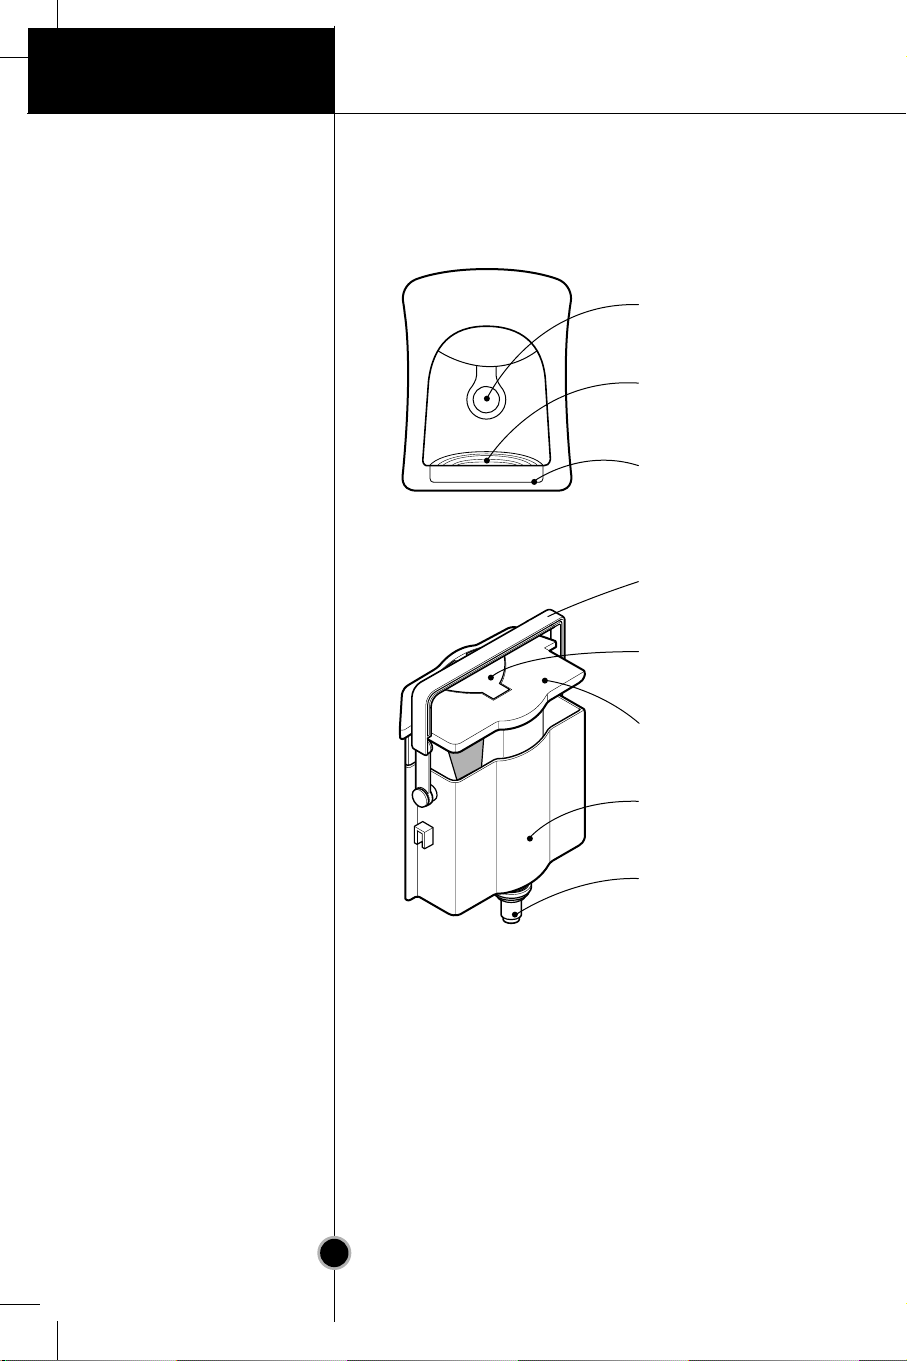
Water Dispenser (optional)
Features
Install
DISPENSER PAD
GRILLE
DRIP TRA Y
HANDLE TANK
CAP T ANK(SMALL)
CAP T ANK(BIG)
WATER TANK
VALVE ASSEMBLY
Operation
11
Filling of
WATER TANK
Drinking
Caution
Do not use other beverage (milk, juice, carbonated
beverage etc) than spring water. Especially beverage
including grain must not be used (may result in failure).
1.
After turning the HANDLE Tank backward with the
WATER TANK installed at the DOOR, Open the CAP
TANK (SMALL) and then fill water using a kettle etc.
* Fill water while watching a sight glass on the front of
the WATER TANK.
* Water up to 4.5lcan be filled.
2.
Press and fix the CAP TANK(SMALL).
3.
After filling spring water, fix the HANDLE TANK at a
proper position.
1.
Press the Dispenser Pad with a cup.
2.
. If pressing the Pad, water inside of the Dispenser is
supplied.
3.
If slowly removing a cup from the Pad, water will not
fall down.

Suggestions on food stor age
12
Storing Food
If you keep the fridge-freezer in a hot, and humid place,
frequently open its door or put a lot of vegetables in it,
dew may form in it, which has no effect on its
performance.
Remove the dew with dust cloth free from care.
Note
• Do not store food which goes bad easily at low
temperature, such as banana, and melon.
• Allow hot food to cool prior to storing. Placing hot food
in the fridge-freezer could spoil other food, and lead to
higher electric bills.
• When storing the food, use a container with a lid. This
prevents moisture from evaporating, and helps food to
keep its taste and nutrients.
• Do not block air vents with food. Smooth circulation of
cold air keeps fridge-freezer temperature even.
• Do not open the door frequently. Opening the door lets
warm air enter the fridge-freezer, and cause
temperature to rise.
• To adjust the temperature control easily, do not store
food near the temperature control dial.
• Never keep too many foods in door rack, as this may
stop the door from fully closing.
• Do not store bottles in the freezer compartment - they
may break when frozen.
• Do not refreeze food that has been thawed. This causes
loss of taste and nutrition.

13
Care and Maintenance
• 1~2 hour power failure does no harm to the foods
stores. Try to avoid opening and closing the door too
frequently.
• Take out foods from the fridge-freezer and firmly fix the
loose items with tape.
• Turn the leveling screws until they stop before moving
the fridge-freezer. Otherwise the screw may scratch the
floor or the fridge-freezer cannot move.
• The Anti-Condensation pipe
is installed around the front
side of fridge-freezer as well
as on the partition between
fridge compartment and
freezer compartment to
prevent dewing.
• Especially after installation or
when ambient temperature is high, the fridge-freezer
may feel hot, which is quite normal.
Lamp Replacement
1.
Unplug the power cord from the outlet.
2.
Remove fridge shelves.
3.
To remove the lamp cover, insert
type driver in the underside
of the lamp cover and pull it out
forwards.
4.
Turn the lamp counterclockwise.
5.
Assemble in reverse order of
disassembly.
Replacement lamp must be the
same specification as original.
• You must check the O-RING,
which is made by rubber and prevent electric spark.
General Information
Power Failure
If You Move
Anti Condensation
Pipe
Anti-Condensation
Pipe
 Loading...