

LG GP08NU11, GP08LU11 Owner's Manual

• Please pay attention to handling Electrostatic
Sensitive Devices, you may use anti-static
products such as wrist straps, heel straps, mats
to protect your body from electrostatic.
• Make sure you have a personal computer with
an open USB port before connecting the drive
to your computer.
• Power for all other devices should be turn off
before attaching the cables.
Connect the drive to the computer as shown in
figure.
A. Using an USB 2.0 cable only.
1. Connect the USB 2.0 cable to the
External Super Multi DVD Rewriter.
2. Connect the other end of the USB 2.0
cable to your computer.
B. Using USB 2.0 Cable and
USB Power cable. (DC-jack type)
1. Connect the USB 2.0 cable to the
External Super Multi DVD Rewriter.
2. Connect the other end of the USB 2.0
cable to your computer.
3. Connect the USB power cable (DC-jack
type) to the External Super Multi DVD
Rewriter.
4. Connect the other end of the USB power
cable to your computer.
• The Rewriter may get its power from the USB
power. All systems may not meet USB power
requirements and full performance may not be
achieved. In this case, connect to the included
USB power cable (DC-jack type.).
• Please do connect the USB cables by any
means other than specified above. Using the
wrong type of cable with this drive can cause
it to malfunction.
When the computer is ready, confirm that the
drive is detected. And then, insert the supplied
software CD into the External Super Multi DVD
Rewriter and install the software.
• The machine does not have an ON/OFF switch.
As soon as it is connected to the AC power, the
power up sequence begins.
The power supply cord is intended to serve as
the main disconnect device. The power outlet
shall be near the equipment and shall be easily
accessible.
• The appliance is not intended for use by young
children or infirm persons without supervision.
• Young Children should be supervised to ensure
that they do not play with appliance.
• If the appliance is supplied from a cord extension
set or an electrical portable outlet device, the cord
extension set on electrical portable outlet device
must be positioned so that it is not subject to
splashing or ingress of moisture.
Installation
USB Power cable
(DC-jack type)
NOTES
Connecting to computer
Hardware Installation
NOTES
NOTES
A. Using an USB 2.0 cable only.
B. Using USB 2.0 Cable and USB Power cable.
(DC-jack type)
USB 2.0 cable
USB 2.0 cable
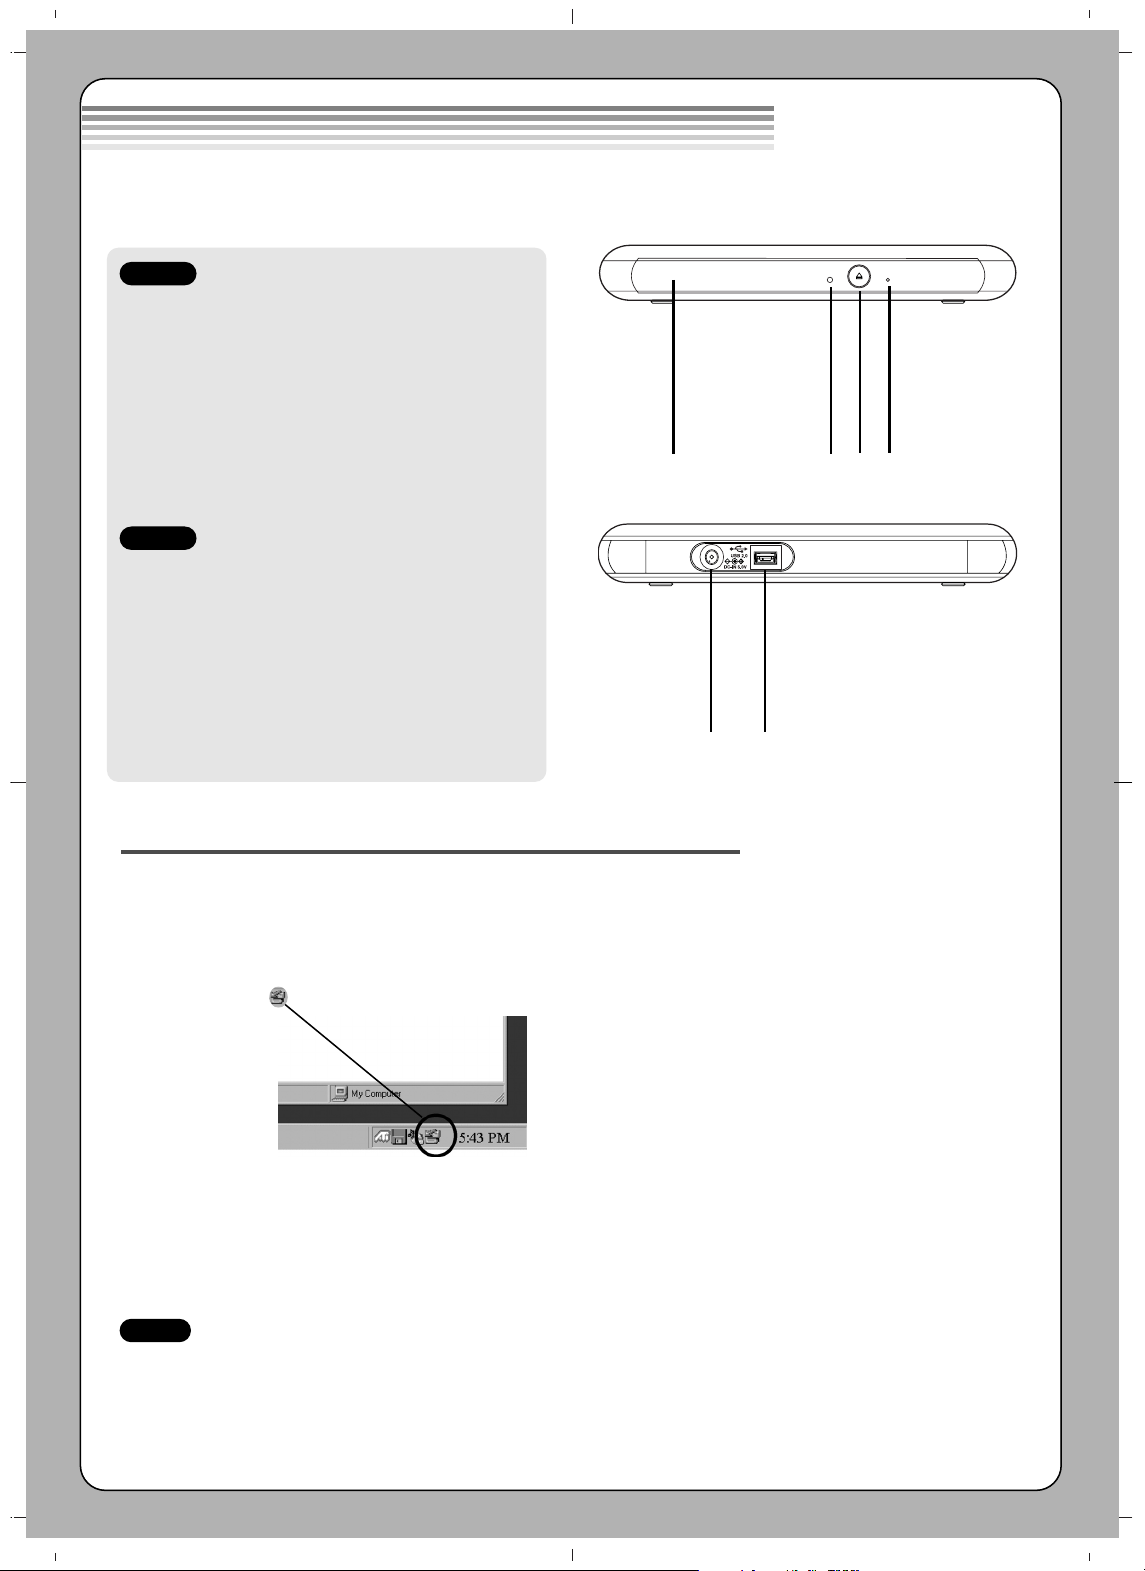
1. Disc Tray
2. Drive activity indicators
The LED used to indicate the operation of
External Super Multi DVD Rewriter.
3. Eject Button
4. Emergency Eject Hole
1. Power Connector
This connector is used to connect to the USB
power cable. (DC-jack type) Or, this connector
is used to connect to the AC Power adapter
cord (5V, 2A, outside diameter: 4mm,
inside diameter: 1.75mm) (Not supplied).
2. USB Connector
This connector is used to connect to the USB
2.0 cable.
Location and function of controls
Removing the USB converter cable (For Windows)
The drive supports the plug and play(not swap) function of Windows, and can be removed and inserted by
performing the following operation.
1. Stop the application software being currently used.
2. Click the icon “ ” of the taskbar located on your screen’s bottom right side.
3. Click “Safely Remove USB Mass Storage Device-Drive[x:]”.
4. Click “Ok” and then remove the USB converter cable.
1 2
3 4
This following is the general figure of the design of the drive.
The drive’s appearance and specifications may change without prior notice.
Front
Rear
1 2
NOTE
Don’t remove the USB 2.0 cable when the busy indicator on the drive blinks, or during computer startup.
The removing procedure varies depending on your OS.
 Loading...