

LG GC980W Manual book

Before connecting, operating or adjusting your new Video,
please read this user guide carefully. Thank you.
User guide
Video
Model: GC990W GC980W GC480W
GC260W
GC980W1F_BAUSLLS_ENG 1/19/09 10:18 AM Page 1
Contents, safety and cleaning
Please read the following information carefully.
2
Contents
Introducing your Video
and remote control 3
Connecting to a television 4
Tuning
TV stations 5
Adjusting TV stations manually 6
Operating your Video 7
Recording
Television programs 8
Timer recording 9
Advanced functions 10-13
Troubleshooting 14
Controlling your TV with the
supplied remote control and
technical specifications 15
Safety
• Position your Video so that no
bright light or sunlight falls directly
onto it.
• Care should be taken not to
expose your Video to any
unnecessary vibration, moisture,
dust or heat.
• During electrical storms it is
advisable to unplug both the aerial
cable and mains plug to prevent
accidental damage to your Video
and TV.
• Do not operate your Video if it is
damaged.
• If your Video still does not operate
properly, unplug it and call your
dealer. Your Video should not be
repaired by anyone except
qualified service personnel.
• Never remove the top cover of
your Video as this can expose you
to very high voltage and other
hazards.
• Ensure that your Video is placed in
a position to allow a free flow of
air.
• The apparatus shall not be
exposed to dripping or splashing
and that no objects filled with
liquids, such as vases, shall be
placed on the apparatus.
Cleaning
1 Unplug the Video from the mains
supply.
2 Clean the cabinet with a soft
damp cloth, do not apply liquid
cleaners or aerosol cleaners.
Never spray cleaning liquids on or
near the Video.
Video head cleaning
High quality video tapes will not
normally deposit dirt onto the video
heads, but old or damaged tapes
may. This dirt can accumulate on the
video heads after a long period of
time and cause the picture to
become blurred or broken up.
To clean the video heads use a video
heads cleaning tape available from
electrical stores.
GC980W1F_BAUSLLS_ENG 1/19/09 10:18 AM Page 2
The appliance is not intended for use by young children or frail persons
without supervision.
Young Children should be supervised to ensure that they do not play with
appliance.
If the appliance is supplied from a cord extension set or an electrical portable
outlet device, the cord extension set on electrical portable outlet device must be
positioned so that it is not subject to splashing or ingress of moisture.
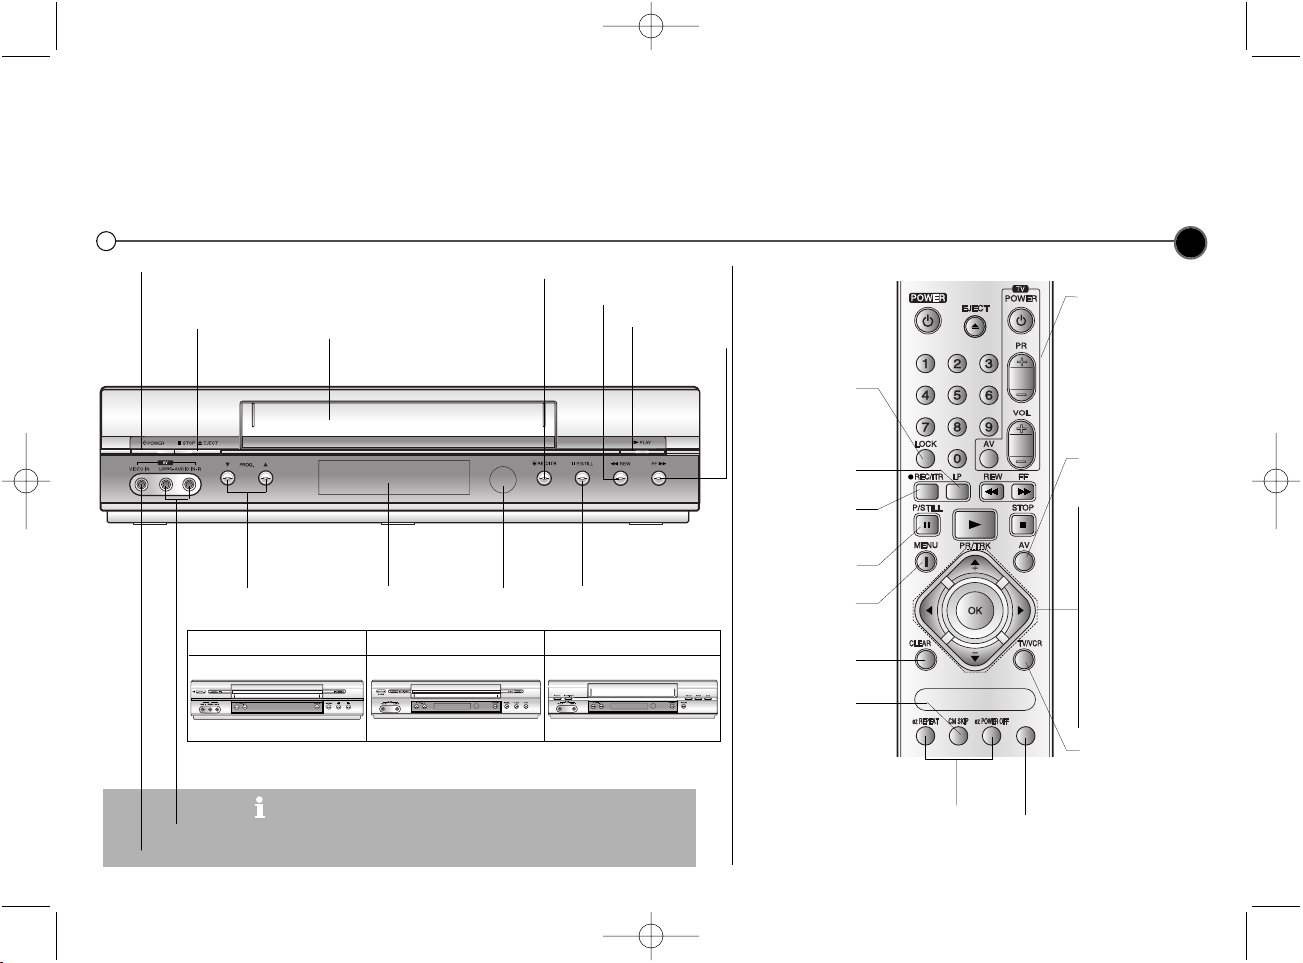
Introducing your Video and Remote Control
Most of your Video’s functions are accessed using the Remote Control. A summary of the functions of the main
buttons are shown below (right), other buttons are described elsewhere in this guide.
Basic functions of your Video can also be operated using the control panel on the front of your Video.
3
Video IN and Audio IN sockets are for connecting devices such as
Video Cameras, Games Consoles and other Video. You will need to
connect to them using an Audio Video cable.
Don’t forget to install AAA type batteries in the Remote Control.
Video IN
Audio IN
TV control buttons
(Controlling your TV
with the supplied
remote control
-See page 15)
To watch one TV
channel whilst
recording another.
To display the
on screen menu
To reset the tape
counter to zero
To select the
recording speed
of the tape
Use the 3/4/1/2
buttons to move
through the menus,
after accessing them
via the MENU button.
Select the channel
you want to watch
(PR+/-).
To adjust tracking
(TRK+/-).
To control vertical
tremble during picture still (TRK +/-).
Press OK to approve
a menu item or show
the clock or counter.
To select the input
source for recording
To fast forward
picture search by
30 secs.
To record
programme
being watched
To pause and view
frame by frame
See page 12
To switch the child
lock on and off
Feature is not available.
GC980W GC480W GC260W
To turn the Video on.
After turning on, the Video can be
operated by the Remote Control
To stop or
eject the tape
Tape Compartment
To rewind a tape
To play a tape
To fast forward
a tape
Select the channel
you want to watch.
Display
Panel
Remote
Control
Sensor
To record the programme you
are watching
To Pause a tape or
view it frame by frame
GC980W1F_BAUSLLS_ENG 1/19/09 10:18 AM Page 3
*

Connecting to a television
The information given here refers to the two most common forms of connection. Make sure that all the appliances
are unplugged from the mains power, before making any connections to avoid causing damage to your equipment.
Using a AV cable to connect your appliances will give you the best sound and picture quality.
4
Connection guide
Roof aerial
Your outside aerial should be
connected to the AERIAL socket
of your Video.
RF cable
If you are using the RF cable a
connection needs to be made from
the RF.OUT socket on your Video to
the aerial socket on your television.
AV socket
If you have a AV socket connection
on your television you can connect
the television’s AUDIO IN/VIDEO IN
sockets to the AUDIO OUT/VIDEO
OUT sockets on the back of the
Video.
Tune a video channel
If you are using a AV connection then
the video picture will be shown on the
AV channel of your television.
If you are using a RF cable you need
to select a Video channel on your
television and tune it to the Video
signal, a test picture.
Turn on the Video and TV.
Select the vacant position 68 on your
TV.
Press POWER on the Remote
Control to put the Video on standby
then press and hold PROG. 3 or 4
on the front of your Video for more
than 4 seconds. If the test picture
appear clearly on the television
screen, the position 68 is your video
channel.
If the test picture do not appear
clearly, go to next.
Select a vacant position between 22
and 68 on your television.
Press PROG. 3 or 4 on the Video
until the test picture appear clearly on
the television screen.
You can also set the output frequency
to OFF if there is any interference
when your TV is connected to the
Video with a AV cable.
Press POWER on the front of your
video when you have finished.
Roof aerial
(not supplied)
RF cable
AUDIO /
VIDEO OUT
Television (not supplied)
Video
You should use either a RF
connection or a AV
connection between your
Video and Television.
Aerial in
RF out
Note : GC480W/GC260W have no
AUDIO OUT (R) sockets.
Audio cable
Video cable
AUDIO/VIDEO IN
GC980W1F_BAUSLLS_ENG 1/19/09 10:18 AM Page 4
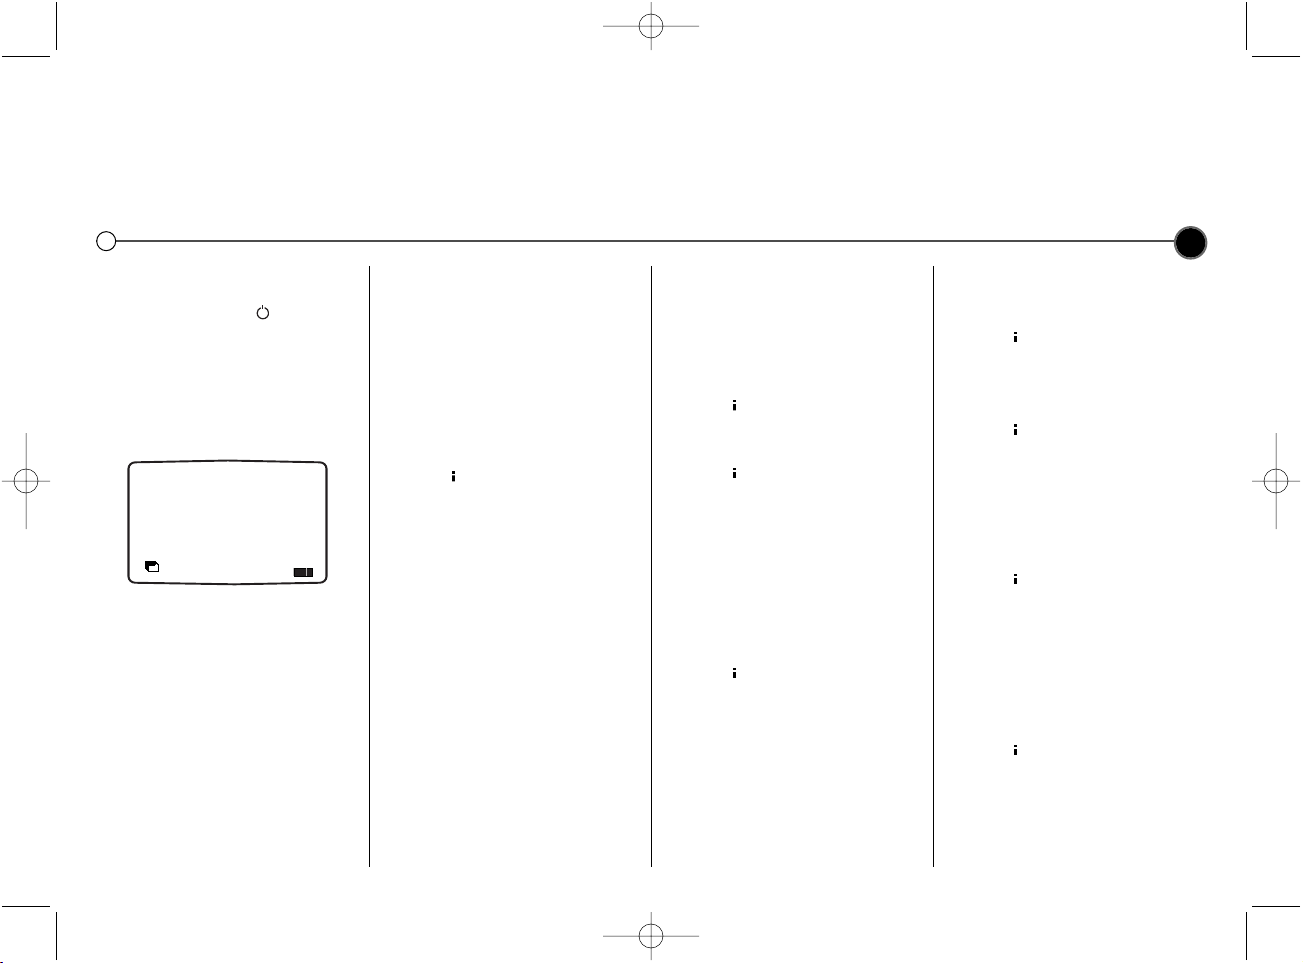
Tuning in TV stations
The first time you use your Video you will see ACMS (Automatic Channel Memory System) displayed on the screen.
This system automatically tunes and stores TV channels. If you want to return to ACMS after your initial set up, access
it via the menu.
5
Using ACMS
1 Press the POWER to turn on
your Video.
2 Select the video channel you have
tuned on your television, refer to
your TV user guide if necessary.
The ACMS menu screen will
appear.
3 Press OK to start the automatic
tuning process.
4 When the ACMS has finished a
screen showing all the channels
that have been found and the
positions they have been placed in
will be displayed.
5 Check that the channels
correspond to the positions in
which you want them. If they are
not in the order that you would like
they can be moved or deleted.
See Changing the order of the
television stations and Deleting
the television stations.
6 Press to store the settings.
Changing the order of
the television stations
You will find it useful to have a
current television programme guide
to hand during this operation.
1 Press to access the main
menu. Use 1 or 2 to select PR
SET then press OK.
2 Press again.
3 Use either the 3 or 4 buttons to
select the programme number that
you wish to move. Then press 2.
4 Press 3 or 4 until you reach the
position you wish to store the
channel in.
5 Press OK. The programme will
move to the new position.
6 Press to leave the menu.
To move other programs repeat the
above process.
Deleting the television
stations
1 Press to access the main
menu.
2 Use 1 or 2 to select PR SET
then press OK.
3 Press then use 3 or 4 to
select the programme number you
wish to delete.
4 Press 1, after a short while the
selected station will be deleted.
The remaining stations are
resorted automatically.
5 Press to remove the menu.
If you wish to delete further
stations repeat the above process.
Selecting ACMS
1 Turn on your television and your
Video and select the video
channel on your television.
2 Press to access the main
menu. Press 1 or 2 to select
ACMS, and then OK.
3 Follow the instructions in Using
ACMS, at the beginning of this
page.
GC980W1F_BAUSLLS_ENG 1/19/09 10:18 AM Page 5
ACMS
Pr-12
ACMS
OK
i
 Loading...