

LG GB220, GB220GO.AO2USV Owner's Manual
www.lgmobile.com P/N : MMBB0346813 (1.1)
GB220
Some of the contents in this
manual may di er from your
phone depending on the software
of the phone or your service
provider.

Bluetooth QD ID
B015474
-
GB220 User Guide
This guide will help you understand your new mobile phone. It will provide you with useful
explanations of features on your phone.
Some of the contents in this manual may di er from your phone depending on the software of
the phone or your service provider.
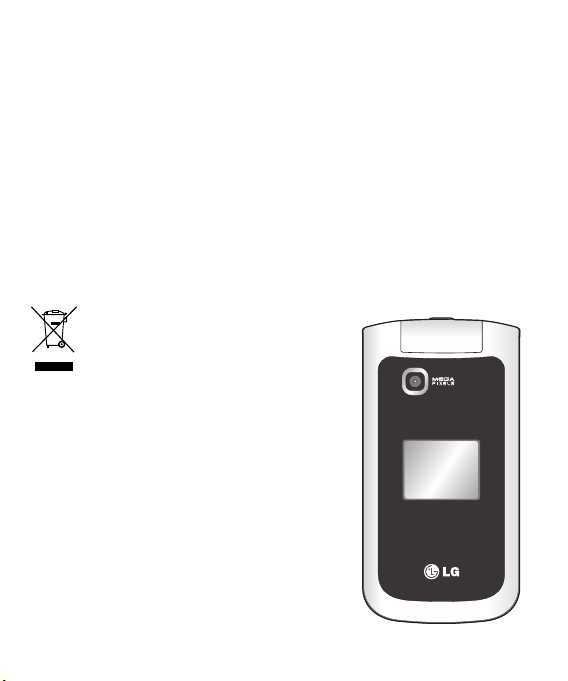
Disposal of your old appliance
1 When this crossed-out wheeled bin symbol is
attached to a product it means the product is
covered by the European Directive 2002/96/EC.
2 All electrical and electronic products should
be disposed of separately from the municipal
waste stream via designated collection facilities
appointed by the government or the local a
uthorities.
3 The correct disposal of your old appliance will
help prevent potential negative consequences for
the environment and human health.
4 For more detailed information about disposal of
your old appliance, please contact your city office,
waste disposal service or the shop where you
purchased the product.
English

Getting to know your phone
Main screen
Goes to Go to menu
Goes to Radio
Navigation keys
• In standby mode:
up- Go to,
Down - Names,
left-Pro les,
Right -Messaging.
• In menu: Navigates
between menus.
Goes to O2 Active
Goes to Camera mode
Call key
Dials a phone number and
answers incoming calls.
Goes to Music
Opens the music player
2
End/Power key
Ends or rejects a call. Turns the
phone on/o . Returns to the
standby screen when you use
the menu.

Volume key / Side keys
1) In standby mode ( Opened) :
Volume adjustment
2) In standby mode (closed): Short
press - The sub LCD backlight on.
Long press ( Down key only) -Go
to Self Camera mode and you can
take a photo.
3) During a call : Earpiece volume
adjustment
4) During playing MP3 music: Audio
volume
Charger, cable slot,
Handsfree connector
Memory card slot
Installing a memory card
Lift the memory card cover and insert a micro
SD card with the golden contact area facing
downwards. Close the memory card cover so
that it clicks shut.
To remove the memory card, gently push it as
shown in the diagram.
Note: A memory card is an optional accessory.
Formatting the memory card
Press Menu and Select Settings.
Choose Memory manager, select External
memory and press Format.
WARNING: When you format your memory
card, all the content will be wiped. If you do
not want to lose the data on your memory card,
back it up first.
3
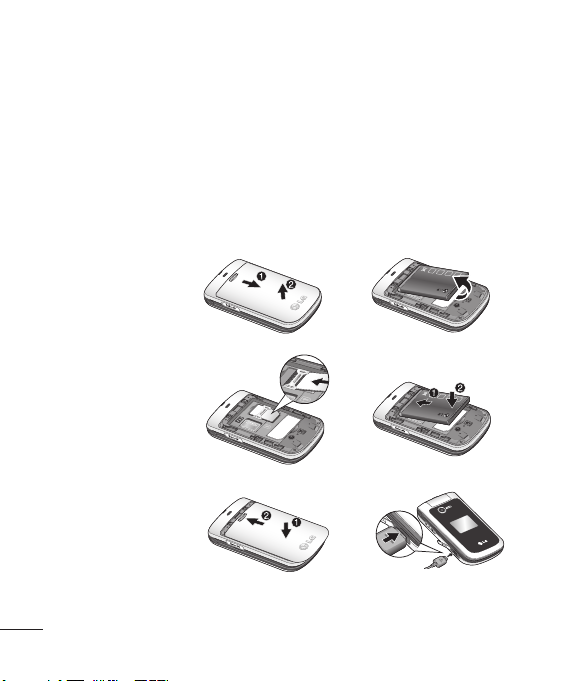
Installing the SIM Card and Charging the Battery
Installing the SIM Card
When you subscribe to a cellular network, you are provided with a plug-in SIM card loaded with
your subscription details, such as your PIN, any optional services available and many others.
Important! › The plug-in SIM card and its contacts can be easily damaged by scratches or bending,
Illustrations
1 Open battery cover
2 Remove the battery
3 Insert your SIM
4 Insert the battery
5 Close the battery cover
6 Charge your battery
so be careful when handling, inserting or removing the card. Keep all SIM cards out of
the reach of small children.
1
3
2
4
5
WARNING: Do not remove the battery when the phone is switched on, as this may damage the
phone.
4
6

Menu map
Messaging
1. Create message
2. Inbox
3. My mailbox
4. Drafts
5. Outbox
6. Sent items
7. Saved itmes
8. Emoticons
9. Message settings
Settings
1. Profiles
2. Display
3. Date & Time
4. Connectivity
5. Call
6. Phone
7. Network
8. Internet profiles
9. Access points
10. Packet data Conn.
11. Security
12. Memory manager
13. Restore factory settings
Organiser
1. Alarm clock
2. Calendar
3. To-do list
4. Notes
5. Secret notes
6. Calculator
7. Stopwatch
8. Date finder
9. Converter
10. World time
11. Go to
12. O2
13. Settings
Contacts
1. Names
2. Settings
3. Groups
4. Speed dials
5. Service dial numbers
6. Own number
7. My business card
Gallery
1. My memory card
2. My images
3. My sounds
4. My videos
5. My games & apps
6. Others
Games & Apps
1. My games & apps
2. Settings
Call log
1. Call log
2. Missed calls
3. Received calls
4. Dialled numbers
5. Call duration
6. Packet data counter
7. Call costs
Media
1. Camera
2. Video
3. Music
4. FM Radio
5. Voice recorder
O2 Active
1. Home
2. Bookmarks
3. Last web address
4. Settings
5. Go to address
6. Saved pages
5

Calls
Making a call
1 Key in the number using the keypad. To
delete a digit press CLR.
2 Press OK to initiate the call.
3 To end the call, press
TIP! To enter + when making an international
call, press and hold 0.
Making a call from your contacts
1 Select Names from Contacts.
2 Using the keypad, enter the rst letter of
the contact you want to call. For example,
for Office, Press 6 three times to select the
rst character, “O”
3 Select Call or press
Answering and rejecting a call
When your phone rings, press Accept or press
to answer the call.
You can control the volume by pressing the
side keys.
or select Reject to reject the
Press
incoming call.
6
.
to initiate the call.
TIP! You can change the settings on your phone
to answer your calls in different ways. Press
Menu, select Settings, and choose Call. Select
Answer mode and choose from Press send key,
Open flip and Press any key.
Speed dialling
You can assign a speed dial number to a
contact you call frequently.
Viewing your Call history
You can check the record of missed, received,
and dialled calls only if the network supports
the Calling Line Identi cation (CLI) within the
service area.
Changing the call settings
You can set the menu relevant to a call. Press
Menu, select Settings and choose Call.
• Call divert - Choose whether to divert your
calls.
• Call barring – Select when you would like
calls to be barred.
• Fixed dial number – Choose a list of
numbers that can be called from your
phone. You’ll need your PUK2 code from
your operator. Only numbers included in
the xed dial list can be called from your
phone.
 Loading...