

LG GB220 Users manual

GB220 User Manual
This device is not intended for sale in the USA.
ENGLISH

Part 15.21 statement
" Change or Modifications that are not expressly approved by the manufacturer could void
the user's authority to operate the equipment. “
Part 15.105 statement
This equipment has been tested and found to comply with the limits for a class B digital
device, pursuant to Part 15 of the FCC Rules.
These limits are designed to provide reasonable protection against harmful interference in
a residential installation. This equipment generates uses and can radiate radio frequency
energy and, if not installed and used in accordance with the instructions, may cause harmful
interference to radio communications. However, there is no guarantee that interference will
not occur in a particular installation. If this equipment does cause harmful interference or
television reception, which can be determined by turning the equipment off and on, the user
is encouraged to try to correct the interference by one or more of the following measures:
- Reorient or relocate the receiving antenna.
- Increase the separation between the equipment and receiver.
- Connect the equipment into an outlet on a circuit different from that to
which the receiver is connected.
- Consult the dealer or an experienced radio/TV technician for help.

Part 15 Class B Compliance
This device and its accessories comply with part15 of FCC rules.
Operation is subject to the following two conditions:
(1) This device & its accessories may not cause harmful interference.
(2) This device & its accessories must accept any interference received,
including interference that may cause undesired operation.
Body-worn Operation
This device has been tested for typical body-worn operations
with the distance of 0.79inches (2.0cm) from the user’s body.
To comply with FCC RF exposure requirements, a minimum separation distance
of 0.79inches(2.0cm) must be maintained from the user's body.
Additionally, Belt clips, holsters & other body-worn accessories may not contain
metallic components.

Getting to know your phone
Main screen
OK key
Left softy key
Goes to My stuff
directly.
Home screen Key
Goes to Home screen
or Menu.
Call key
Dials a phone number
and answers incoming
calls.
Navigation keys
•
In standby mode:
Up: Quick menu.
Down: Search
Right: Messaging
Left: Profiles
•
In menu: Navigates between menus.
Right soft key
Goes to Shortcuts help directly.
Use this key to go back to a
previous screen.
Clear Key
Deletes a character with each press.
End/Power key
Ends or rejects a call. Turns the
phone on/off.
Returns to the Home screen when
you use the menu.
01
02
03
04
05
06
07
08
SET UP
7
7
Installing the USIM and battery
1 Remove the battery cover
Press the battery cover release latch. The
battery cover should slide and lift off easily.
2 Remove the battery
Lever the bottom edge of the battery
and remove it carefully from the battery
compartment.
WARNING: Do not remove the battery
when the phone is switched on, as this may
damage the phone.
3 Install the USIM card
Slide the USIM card into the USIM card
holder. Make sure that the gold contact
area on the card is facing downwards. To
remove the USIM card, push it out of the
holder from the top.
WARNING: Do not insert the USIM card
when the slide is open, as this may damage
your phone and USIM card.
01
02
03
04
05
06
07
08
SET UP
9

Installing the USIM and battery
SET UP
10
LG GB220 | User Guide
4 Install the battery
Insert the top of the battery fi rst into the
top edge of the battery compartment.
Ensure the battery contacts align with the
terminals on the phone. Press the bottom
of the battery down until it clips into place.

5 Replace the battery cover
Insert the top of the battery cover and push
down and slide until it clicks into place.
6 Charging your phone
Pull open the cover of the charger socket
on the side of your GB220. Insert the
charger and plug into a mains electricity
socket. Your GB220 will need to be
charged until a message reading Fully
Charged appears on screen.
WARNING: Do not charge the phone when
it is on soft furnishings. The phone should be
charged in a well ventilated area.
01
02
03
04
05
06
07
08
SET UP
11
Memory card
Installing a memory card
You can expand the memory space available
on your phone using a memory card.
NOTE: A memory card is an optional accessory.
Open the memory card cover. Slide the
memory card into the slot until it clicks into
place. Make sure that the gold contact area is
facing downwards.
Removing a memory card
Open the cover and carefully remove the
memory card by gently pushing it in to the
phone and quickly releasing it, as shown in
the following diagram:
Formatting a memory card
Your memory card may already be formatted.
If not you will need to do so before you can
begin using it.
1 From the Home screen press
select Settings.
2 Choose Memory manager and select
External memory.
3 Press Format and enter the password,
which is set to 0000 as default. Your card
will be formatted and ready to use.
4 To view the new formatted folders on your
GB220 press
Choose My memory card.
and
and select My stuff.
SET UP
12
LG GB220 | User Guide
WARNING: When you format your memory
card, all the content will be wiped. If you do not
want to lose the data on your memory card,
back it up fi rst.
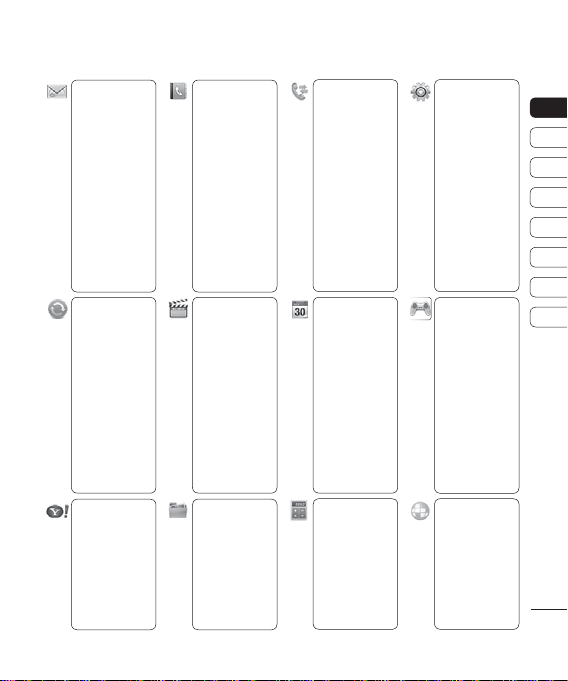
Menu map
Messaging
1 Create new
message
2 Inbox
3 My mailbox
4 Drafts
5 Outbox
6 Sent items
7 Chat in class
8 Templates
9 Emoticons
0
Message settings
Gallery
Web
1 Home
2 Bookmarks
3 Last web
address
4 Settings
5 Go to address
6 Saved pages
Contacts
1 Names
2 Settings
3 Groups
4 Speed dials
5 Service dial
numbers
6 Own number
7 My business
card
Multimedia
1 Camera
2 Video
3 Music
4 Voice recorder
5 Ringtone
creator
My stuff
1 My images
2 My sounds
3 My videos
4 My games &
apps
5 Others
6 My memory
card
Calling
1 Call logs
2 Missed calls
3 Received calls
4 Dialed numbers
5 Call duration
6 Packet data
counter
Call costs
7
Organiser
1 Alarm clock
2 Calendar
3 To-do list
4 Notes
5 Secret notes
6 Calculator
7 Stopwatch
8 Date fi nder
9 Converter
0 World time
* Go to
STK (SIM service)
#
13 Settings
Tools
1 Quick menu
2 Alarms
3 Calculator
4 Stopwatch
5 Converter
6 World time
Settings
1 Profi les
2 Display
3 Date and time
4 Connectivity
5 Call
6 Phone
Network
7
8 Internet profi le
9
Access points
Packet data conn.
0
*
Security
Memory manager
#
13 Restore factory
settings
Applications
1 My games &
apps
2 Settings
My view
1 My view
2 Enter address
3 Bookmarks
4 RSS reader
5 Saved pages
6 History
7 Settings
01
02
03
04
05
06
07
08
SET UP
13
Your Home screen
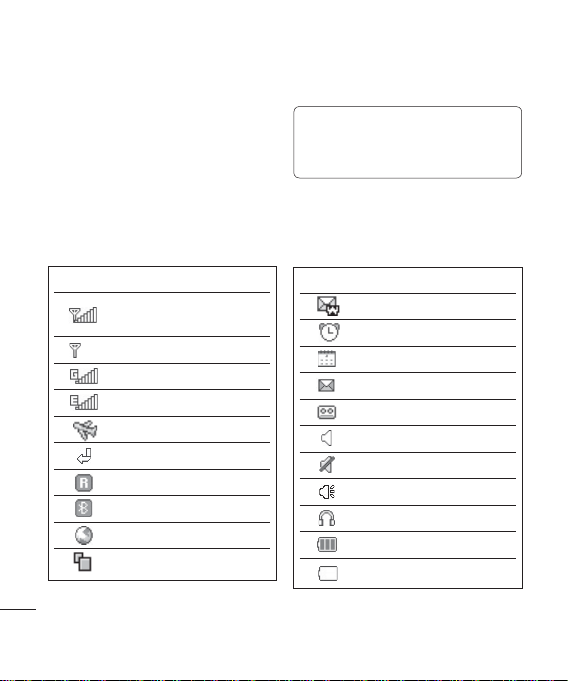
The status bar
The status bar uses various icons to indicate
things like signal strength, new messages
and battery life, as well as telling you whether
your Bluetooth connection is active.
The table below explains the meaning of
icons you’re likely to see in the status bar.
TIP! You can quickly access chosen menus
using your Favourites list. In standby mode
press the left soft key. Select <Empty>, and then
Add to add a menu as a favourite.
Icon Description
Network signal strength
GPRS available
EDGE available
Flight mode is activated
Calls are diverted
YOUR HOME SCREEN
14
Roaming service
Bluetooth® is activated
WAP service is connected
Multitasking available
LG GB220 | User Guide
(number of bars will vary)
No network signal
Icon Description
Push message
An alarm is set
Schedule
New message
New voice message
Normal profi le in use
Silent profi le in use
Outdoor profi le in use
Headset profi le in use
Remaining battery life
Battery empty
Calls
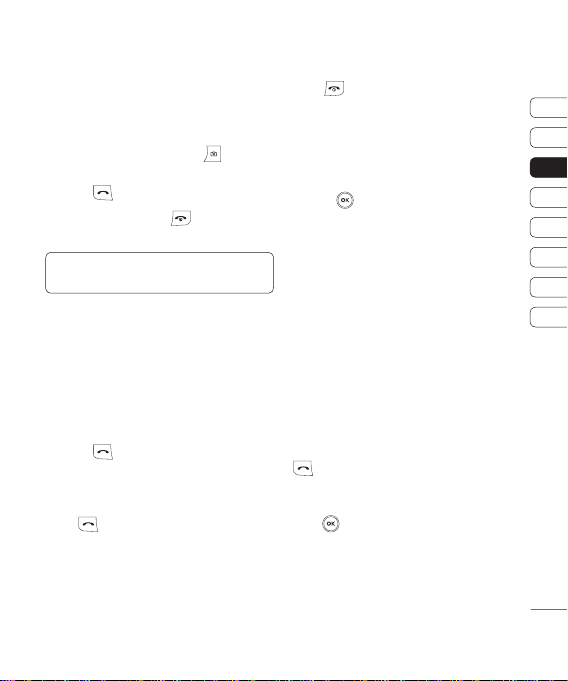
Making a call
1 Make sure your phone is on.
2
Y
ou can use the keypad after opening the
slide. To delete a digit press
back arrow.
3 Press
to begin the call.
4 To end the call, press
cover closed.
TIP! To enter + when making an international
call, press and hold 0.
or the
or slide the
Making a call from your contacts
1 Select Contacts in the menu and then
Search.
2 Using the keypad, enter the fi rst letter of
the contact you want to call and scroll to
the contact.
3 Press
to begin the call.
Answering and rejecting a call
When your phone rings, press Accept or
press
to answer the call.
While your phone is ringing you can press
Silent to mute the ringing. This is useful if
you have forgotten to change your profi le to
Silent for a meeting.
Press
or select Reject in order to reject
an incoming call.
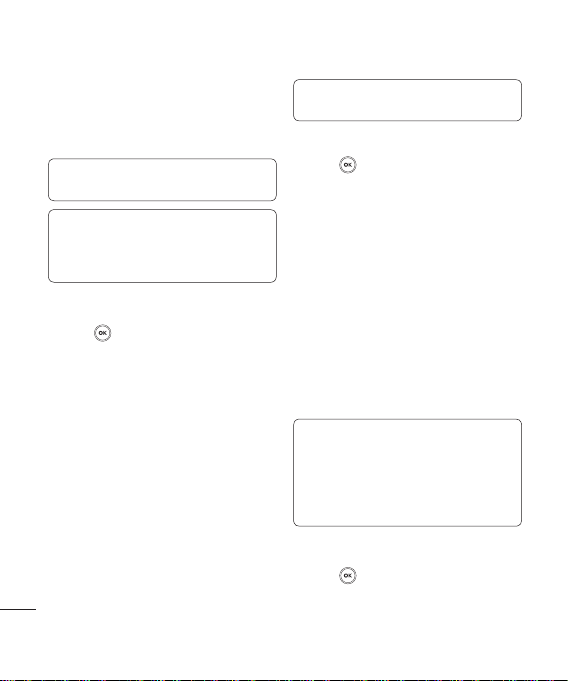
Speed dialling
You can assign a speed dial number to a
contact you call frequently.
1 Press
to open the main menu. Select
Contacts, then select Speed dials.
2 Your voicemail is preset to speed dial
1 and you cannot change this. Select
any other number either by using the
navigation keys and selecting Add or by
pressing the hard key number.
3 Your address book will open. Select the
contact you’d like to assign to that number
using the navigation keys then select OK.
To call a speed dial number, press and
hold the assigned number until the contact
appears on screen. The call will begin
automatically and there is no need to press
.
Viewing your call logs
Press and select Calling. Choose Call
logs.
All calls - View a complete list of all your
dialled, received and missed calls.
Dialled calls - View a list of all the numbers
you have called.
01
02
03
04
05
06
07
08
THE BASICS
15
Calls
Received calls - View a list of all the
numbers that have called you.
Missed calls - View a list of any calls you
have missed.
TIP! From any call log select Options and then
Delete to delete selected items.
TIP! Use the navigation keys to highlight any
single call entry in order to to view the date
and time of the call. To view the call duration
select View.
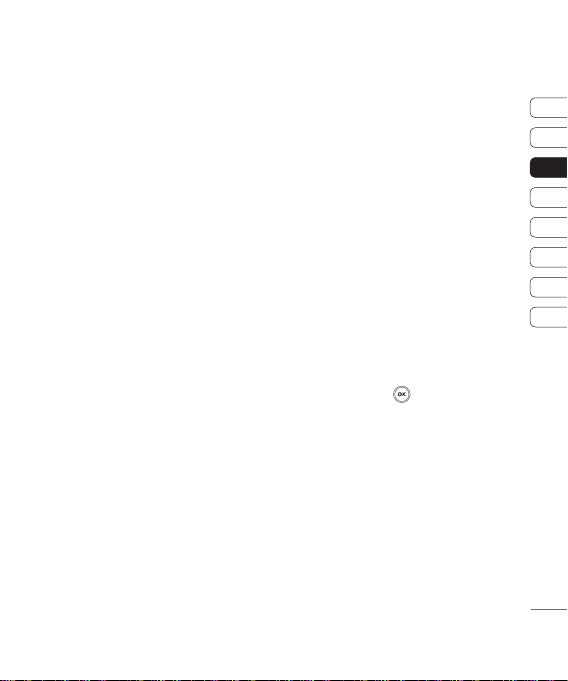
Using call divert
1 Press
, select Calling.
2 Select Call divert. Or you can choose
Deactivate all.
3 Choose whether to divert all calls, when
the line is busy, when there is no answer,
when you are out of reach.
4 Choose Activate and select whether to
divert to voice mail, or to other number.
5 Enter your divert number or select Search
to browse Contacts for your divert
THE BASICS
number.
Note: Charges are incurred for diverting
calls. Please contact your network provider
for details.
16
LG GB220 | User Guide
TIP! To turn off all call diverts, choose
Deactivate all from the Call divert menu.
Using call barring
1 Press
, select Calling.
2 Select Call barring.
3 Choose any or all of the six options:
All outgoing
Outgoing international
Outgoing international calls except
home country
All incoming
Incoming when abroad
Deactivate all
4 Select Activate and enter the call barring
password. Please check with your network
operator for this service.
TIP! Select Fixed dial numbers from the
Calling menu to turn on and compile a list of
numbers which can be called from your phone.
You’ll need your PIN2 code from your operator.
When activated, only numbers included in the
fi xed dial list can be called from your phone.
Changing the call settings
1 Press
, select Calling.
2 From here you can amend the settings for:
Call durations - View details of how long
you have spent on your calls both received
and dialled.
Data volume - View the amount of all
your received and sent data for Web, Data
or All, measured in kilobytes.
Call costs - View the charges applied to
your Last call or All calls. This service is
network dependent, some operators are
unable to support this.
Call divert - Choose whether to divert
your calls.
Call barring - Select which calls you
would like to be barred.
Fixed dial numbers - Choose a list of
numbers that can be called from your
phone.
Call waiting - Be alerted when you have
a call waiting.
Common settings
Call reject - You can set whether to reject
incoming calls.
Send my number
Set by network - Confi gures with the
default settings determined by the service
provider.
On - Your number will be sent when
making an outgoing call.
Off - Your number will be withheld when
making an outgoing call.
Auto redial - Allows you to set the auto
redial function when a call attempt has failed.
Answer mode - Allows you to set the
answering method.You can choose between
Press send key, Slide up and Press any key.
Minute minder - Determines whether to
sound a tone every 1 minute when you are
on the phone.
BT answer mode
Hands-free - You can answer a call using
a Bluetooth headset.
Handset - Press on the handset to
answer a call when using a Bluetooth
headset.
Save new number - Selecting this option
will save numbers that are not already in your
contacts upon ending the call.
Slide close setting - Set whether or not a
call is ended upon closing the slide.
01
02
03
04
05
06
07
08
THE BASICS
17

Contacts
Searching for a contact
1 Select Contacts from the main menu, and
choose Search.
2 Using the keypad enter the fi rst letter of
the name of the contact you want to call.
3
To scroll through the contacts and their
different numbers use the navigation keys.
Adding a new contact
1 Select Contacts and choose Add new.
2 Choose whether to store your new contact
on your Handset or USIM card.
3 Enter the information you want in the fi elds
provided and select Done.
Or to use a slightly quicker method…
1 Enter the number you wish to store and
press Options.
2 Choose Save number, and choose either
New contact or Update contact.
3 Enter the relevant information and select
Done.
THE BASICS
18
LG GB220 | User Guide
Contact options
There are many things you can do when
viewing a contact. Here’s how to access and
use the Options menu:
1 Select Contacts from the main menu, and
choose Search.
2 Select Options to open the list of options.
From here you can:
Send message - Send a message to
the contact. If the contact has an email
address, select whether you’d like to send
a Message or Email.
Send business card - Send the contact’s
details to another person as a business
card. Choose to send as a Text message,
Multimedia message, via Email or
Bluetooth.
Make call- Directly make voice call to a
contact you choose.
Add new contact - Add a new contact.
Edit - To Change any of the contact’s
details.
Add to group -
Mark/Unmark - Mark a contact or all.
Search by - Search a contact by Number
or Group.
Move a contact to a group.
Save to USIM - Choose to move or copy
to the SIM card or phone (depending on
where you originally saved the contact).
Delete - Delete the contact. Select Yes
only if you are sure.
Text input-You can insert symbol a
contact, change writing method or
language and add a word to dictionary.
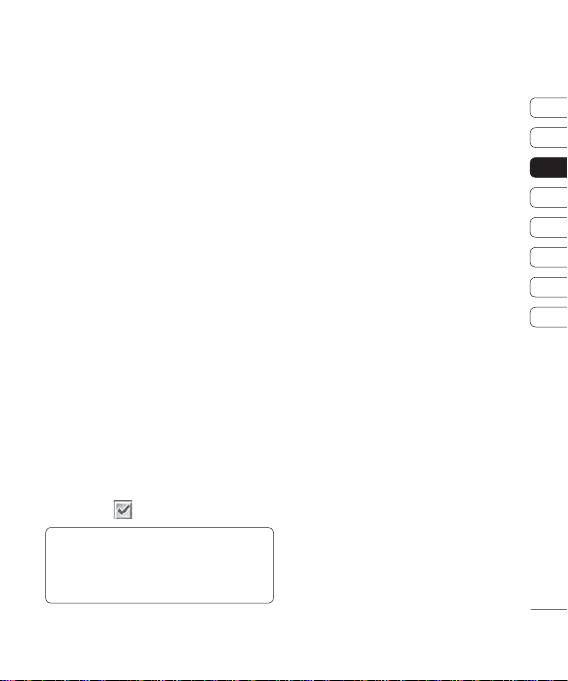
Adding a contact to a group
You can save your contacts into groups. This
is useful for keeping your work colleagues
and family separate, for example. There are a
number of groups including Family, Friends,
Colleagues, School and VIP already set up
on your phone.
1 Select Contacts and choose Groups.
2 Scroll to the group you wish to add a
contact to and select Open then select
Add.
3 Your contacts list will open. Scroll to any
contacts you would like to add to the group
and press
TIP! You can assign a ringtone to a group.
Select the group you wish to assign the ringtone
to, select Options and choose the item you
want.
, then select Done.
Renaming a group
You can rename groups you created to fi t
your lifestyle.
1 Select Contacts and choose Groups.
2 Select the group you want to rename.
3 Choose Options, select Rename and
enter your new group name.
4 Select Done.
Note: You can only assign a contact to a
group or add a picture to a contact that is
saved in your phone (not SIM) memory.
Adding a picture to a contact
You can change the appearance of your
contacts in your address book to include a
picture.
1 Select Contacts and choose Settings.
2 Select Contact list settings and choose
Show picture and select On.
Select Done.
3 Then return to the Search and select the
contact you want to add a picture to.
4 Choose Options and select Edit.
01
02
03
04
05
06
07
08
THE BASICS
19
 Loading...