

LG 563LE, FLATRON LCD 563LS, FLATRON LCD 563LE, Flatron LCD 565LE Owner's Manual

A1
Introduction
The 563LE Flat Panel Monitor has an active matrix TFT (Thin-Film
Transistor) LCD (Liquid Crystal Display).
This monitor is designed for use in small working areas or for those who need
more working space on the desk.
Features
The 563LE is a 15.0-inch (15.0 inches viewable) intelligent micropro-cessor
based monitor.
Digitally controlled auto-scanning is done with the microprocessor for horizontal
scan frequencies between 31 and 61kHz, and vertical scan frequencies
between 56 and 75Hz.
The microprocessor-based digital controls allow you to adjust conveniently a
variety of image controls by using the OSD (On Screen Display).
The monitor is shipped with 14 factory pre-programmed video modes that are
permanently resident. In addition, there are 16 user-storable modes, for a total
of 30 memory modes.
Plug and play capability if supported by your system.
This monitor has DDC 2B function.*
Compliant with the following regulated specifications :*
-
EPA ENERGY STAR
-
Swedish TCO’99
ENGLISH
*
For detailed information, please refer to the Reference Guide provided .

Connecting the Monitor
A2
On the back of the monitor are two plug-in connections; one for the AC
power cord, and the other for the signal cable from the video card.
Power off both the monitor and PC.
Connect the 15 pin VGA connector of the supplied signal cable to the output
VGA video connector on the PC and the matching input connector on the rear
of the monitor. The connectors will mate only one way. If you cannot attach
the cable easily, turn the connector upside down and try again. When mated,
tighten the thumbscrews to secure the connection.
Locate the appropriate MAC to VGA adapter block at your local computer
store. This adapter changes the high density 3 row 15 pin VGA connector to
the correct 15 pin 2 row connection to mate with your MAC. Attach the other
end of the signal cable to the side of the adapter block with 3 rows.
Connect the attached adapter block/signal cable to the video output on your
MAC.
Connect the plug from the AC-DC adapter into the connector on the display
unit. Connect one end of the AC power cord into the AC-DC adapter.
Plug the other end into a properly grounded three-prong AC outlet.
Power on the PC, then the monitor.
If you see the
NO SIGNAL
message, check the signal cable and
connectors.
After using the system, power off the monitor, then the PC.
3
2
1
Power Cord
Signal Cable
D-15P
IBM PC MACINTOSH
D-15P
Mac Adapter
* NOTE : If you see the “OUT OF
RANGE” message, check to make
sure your system is set to one of the
factory preset modes.(see page A8)
1
2
3
3
2
1
4
5
6
2'
2
2'
AC-DC adapter
A3
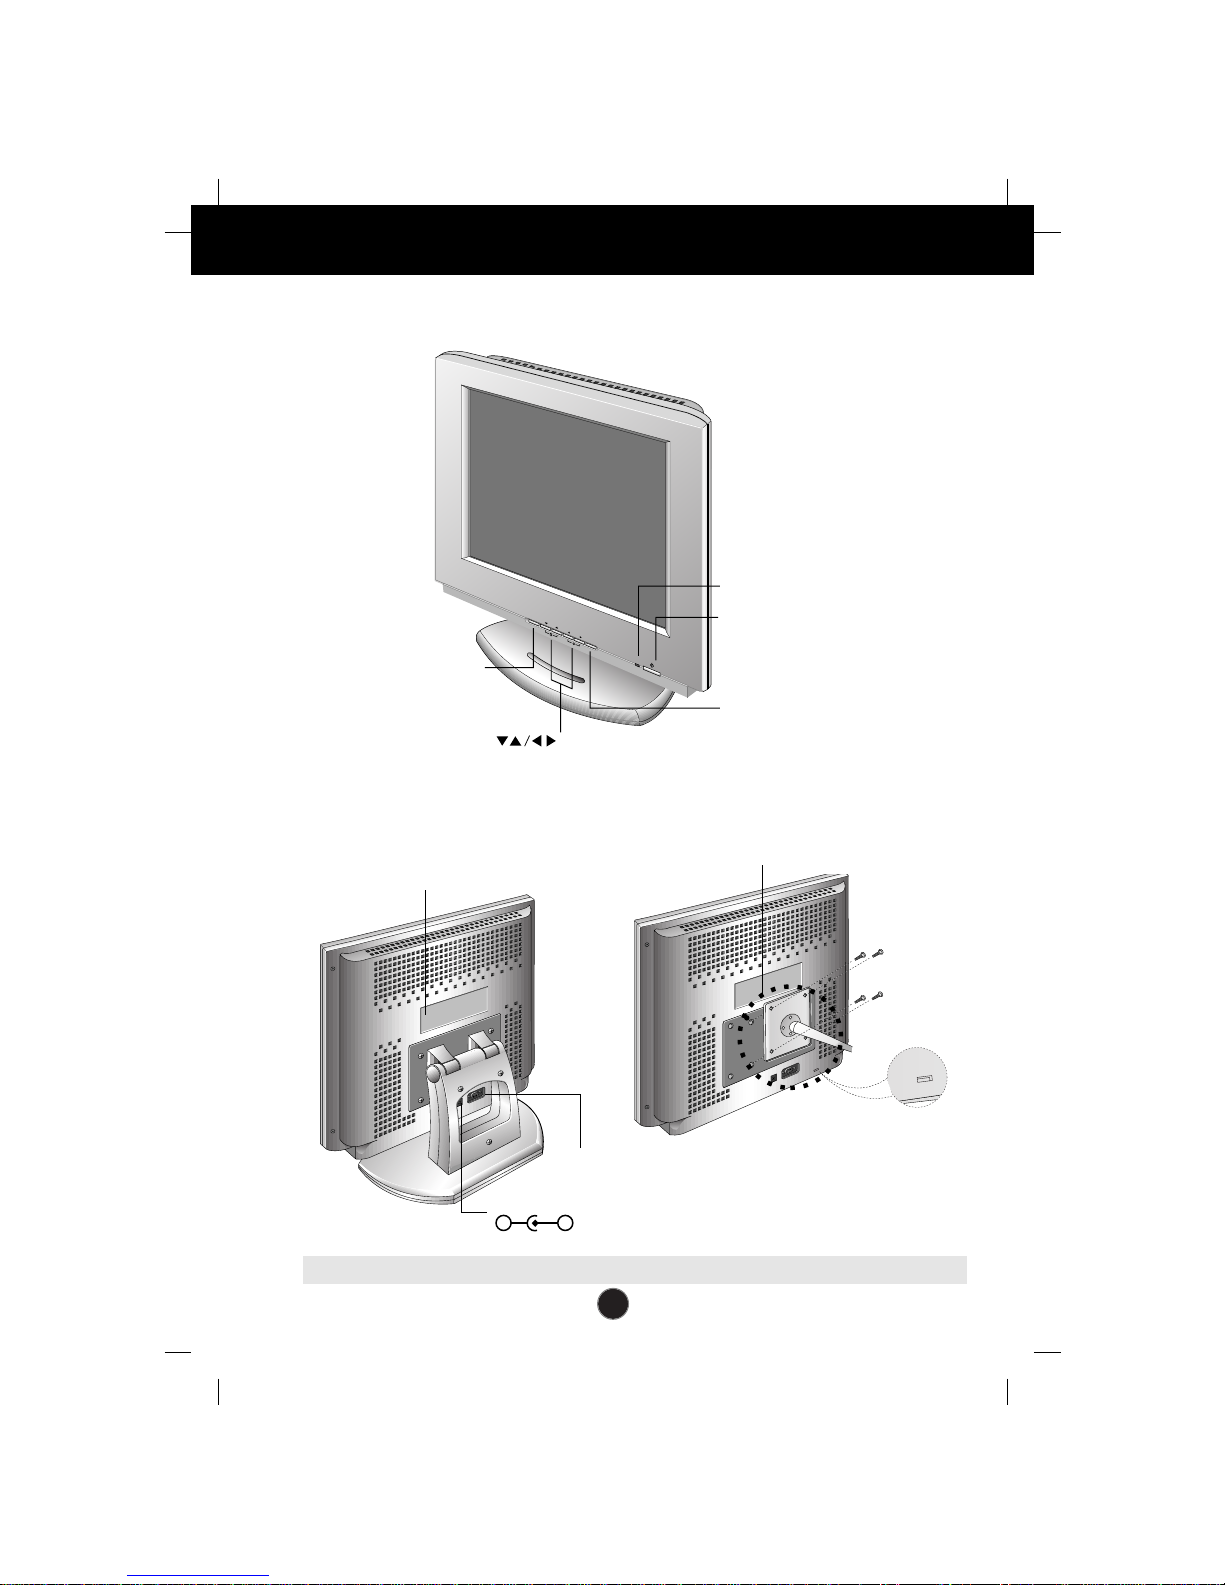
Location and Function of Controls
Rear View
Front View
VESA wall mounting
Connected to another object
(stand type and wall-mounted
type - optional)
Kensington Security Slot
Connected to a locking
cable that can be
purchased separately at
most computer stores
NOTE : This monitor accept a 75mm x 75mm VESA-compliant mounting interface pad.
D-Sub Signal Connecter
ID Label
DC Power Connecter
-
+
•
•
•
Power Indicator
Power Button
AUTO/SET Button
Buttons
OSD Button
O
S
D
A
U
T
O
/S
E
T
•
•
•
•
•
•
 Loading...