How it Works
Log In / Sign Up
Buy Points
How it Works
FAQ
Contact Us
Questions and Suggestions
Users
LG
Loading...
F
FH496TDG4
FH496TDP24
FH496TDP3
FH496TDT
2
FH496TDT24
FH4A8FDH2N
9
FH4A8FDH6N
FH4A8FDH8N
FH4A8FDHK4N
3
FH4A8FDN2
5
FH4A8FDN8
FH4A8FDNK2
FH4A8FDNK4
FH4A8JDH2N
4
FH4A8JDHK6N
FH4A8JDS
FH4A8JDS0
FH4A8JDS2
12
FH4A8JDS3
FH4A8JDS4
FH4A8JDS5
FH4A8JDS6
FH4A8JDS7
FH4A8JDS8
FH4A8JDS9
FH4A8JDSK2
2
FH4A8JDSK6
2
FH4A8TDH2N
2
FH4A8TDH4N
FH4A8TDN2
7
FH4A8TDN3
FH4A8TDN4
3
FH4A8TDS2
4
FH4A8VDSK8
FH4B8TDA
FH4B8TDA7
FH4F9BDS1H
FH4F9BDS2H
FH4F9BDS3H
FH4F9BDS4H
FH4F9BDS5H
FH4F9BDS6H
FH4F9BDS7H
FH4F9BDS8H
FH4F9BDS9H
FH4G1BCS2
7
FH4G1BCSK6
FH4G1EJS2
FH4G1JCH2N
13
FH4G1JCH6N
FH4G1JCHK6N
2
FH4G1JCHP6N
5
FH4G1JCS2
13
FH4G1JCS6
FH4G1JCSK6
FH4G1JCSP6
2
FH4G1VCN2
FH4G1VCY2
2
FH4G6QDN2
2
FH4G6QDN6
FH4G6QDY2
FH4G6QDY4
FH4G6TDG2
2
FH4G6TDG6
2
FH4G6TDGG6
2
FH4G6TDM2N
3
FH4G6TDM2R
3
FH4G6TDMP4N
FH4G6TDN2
2
FH4G6TDNK4
2
FH4G6TDY2
6
FH4G6TDY6
2
FH4G6TDYL42
FH4G6VDGG6
2
FH4G6VDY4
2
FH4G6VDY6
FH4G6VDYG6
FH4G7QDN0
FH4G7QDY0
FH4G7QDY5
FH4G7TDN0
FH4G7TDN1
4
FH4G7TDY0
2
FH4G7TDY5
2
FH4G7TDY6
2
FH4G7TDYG0
2
FH4G7TDYG5
2
FH4J3TDN0
2
FH4J5TN8
FH4J5TN8E
FH4J6QS7
FH4J6TS8
FH4J7VY1WD
2
FH4U1FCHK4N
2
FH4U1FCHK8N
2
FH4U1JBH0N
FH4U1JBH1N
FH4U1JBH2N
FH4U1JBH3N
FH4U1 T/Q BS(W)(0~9)
Loading...
Loading...
Nothing found
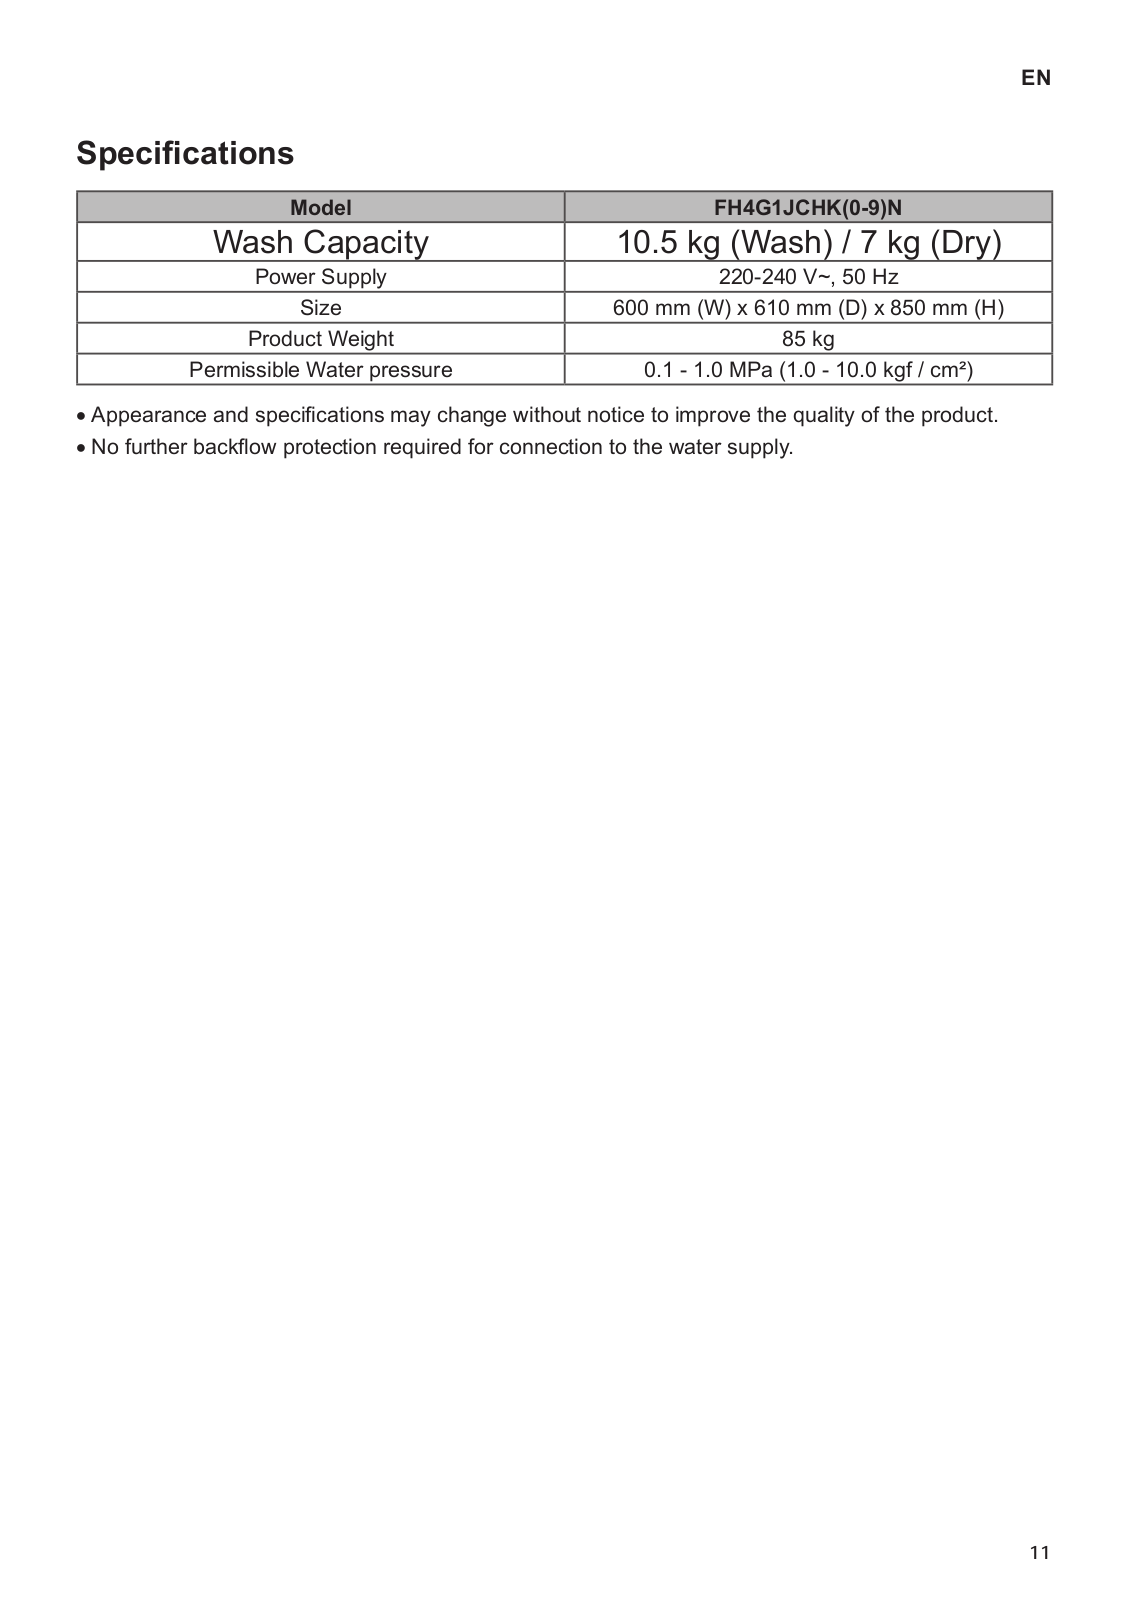
FH4G1JCHK6N
Owner’s Manual
108 pgs
15.44 Mb
0
Owner’s Manual [fr]
109 pgs
16.45 Mb
0
Table of contents
Loading...
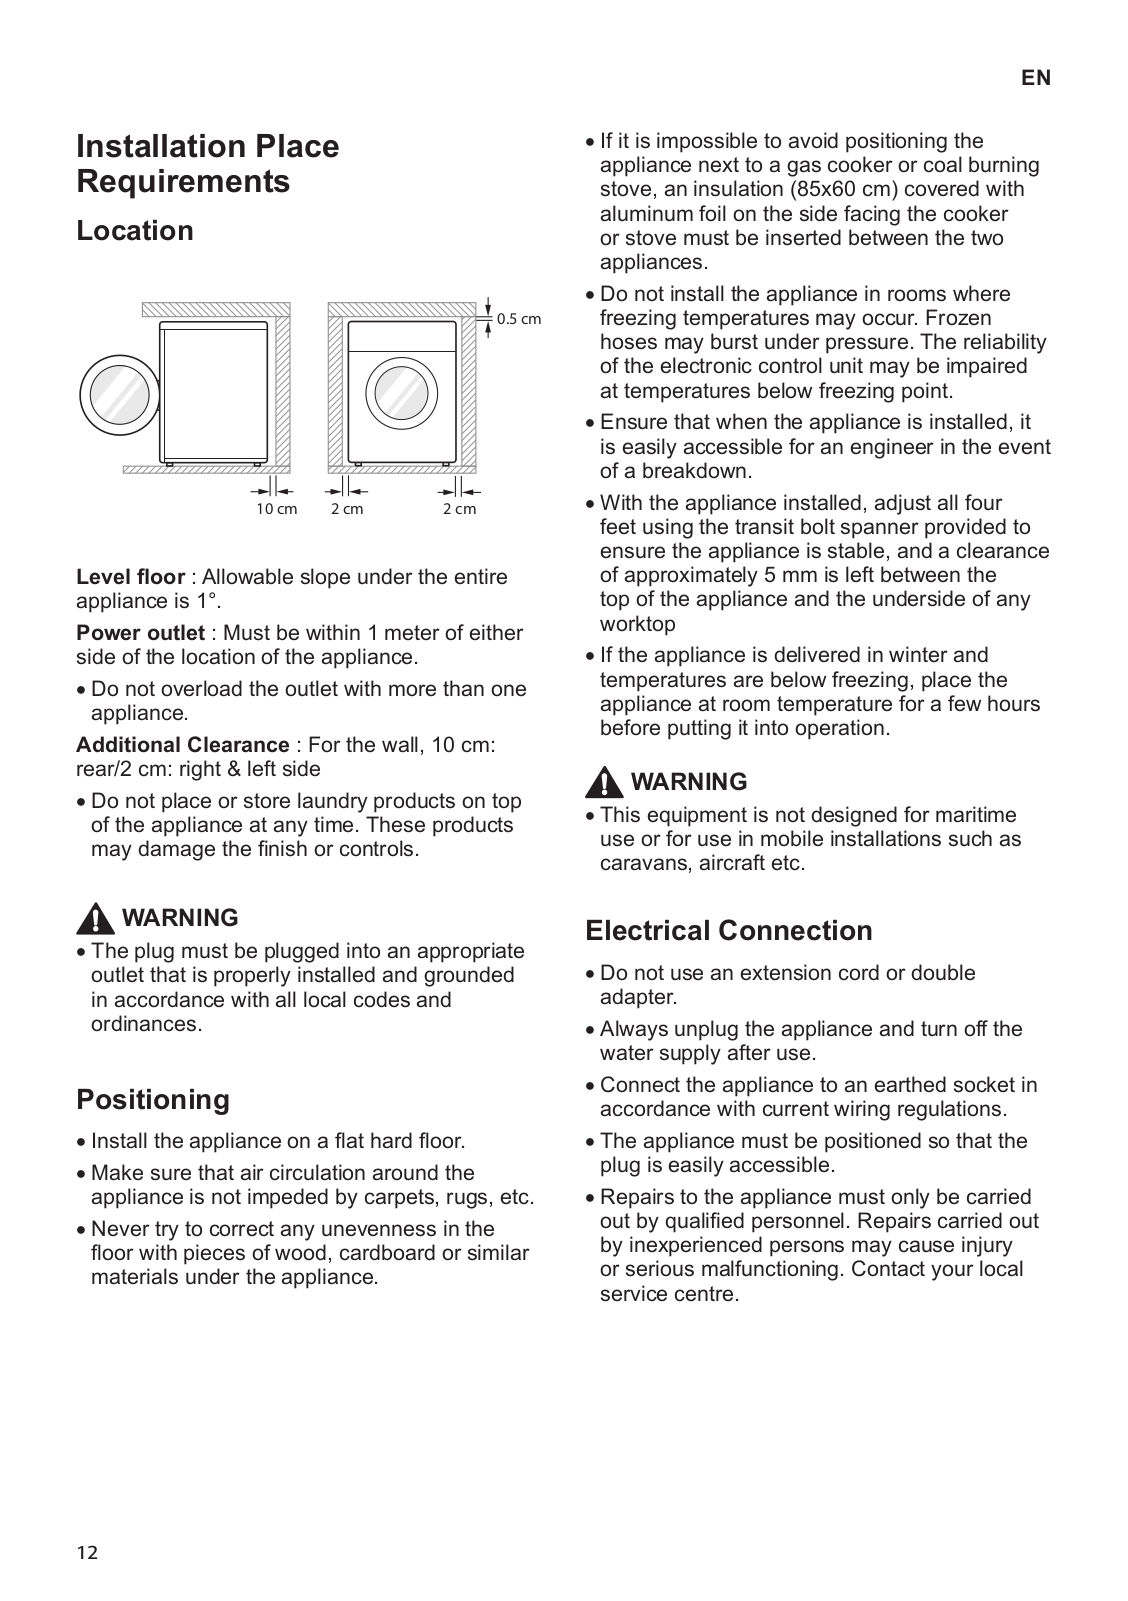
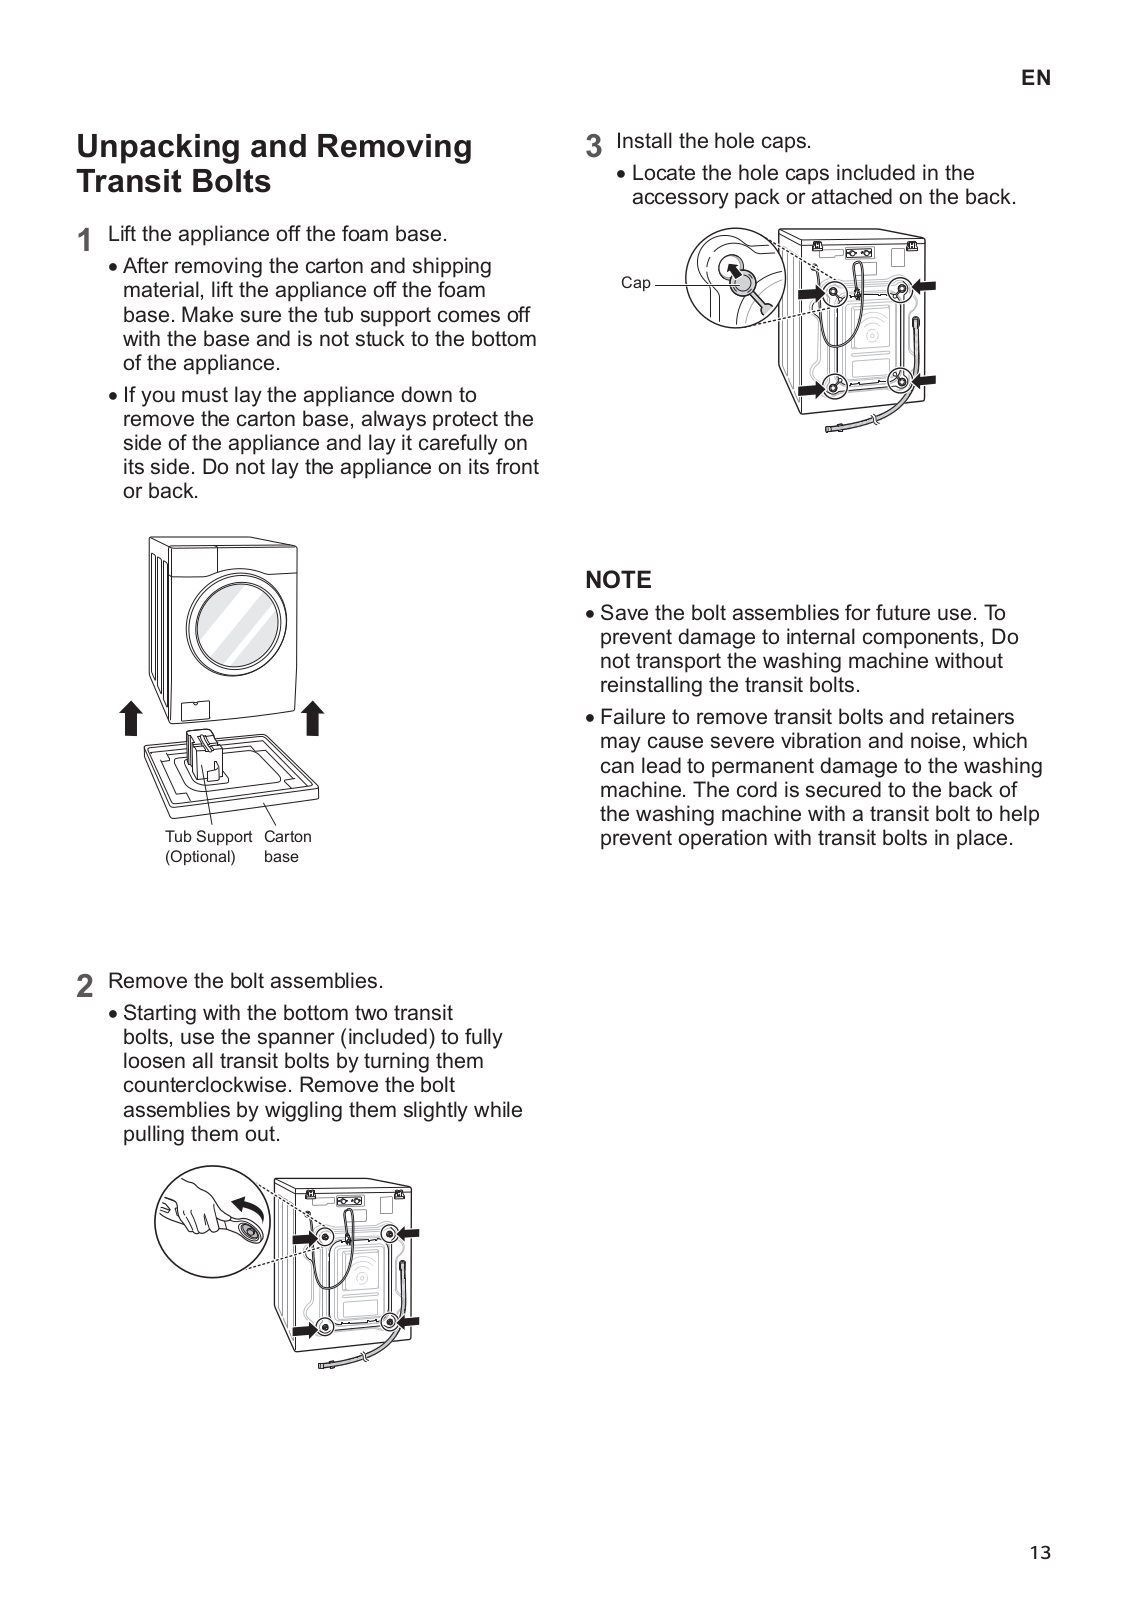
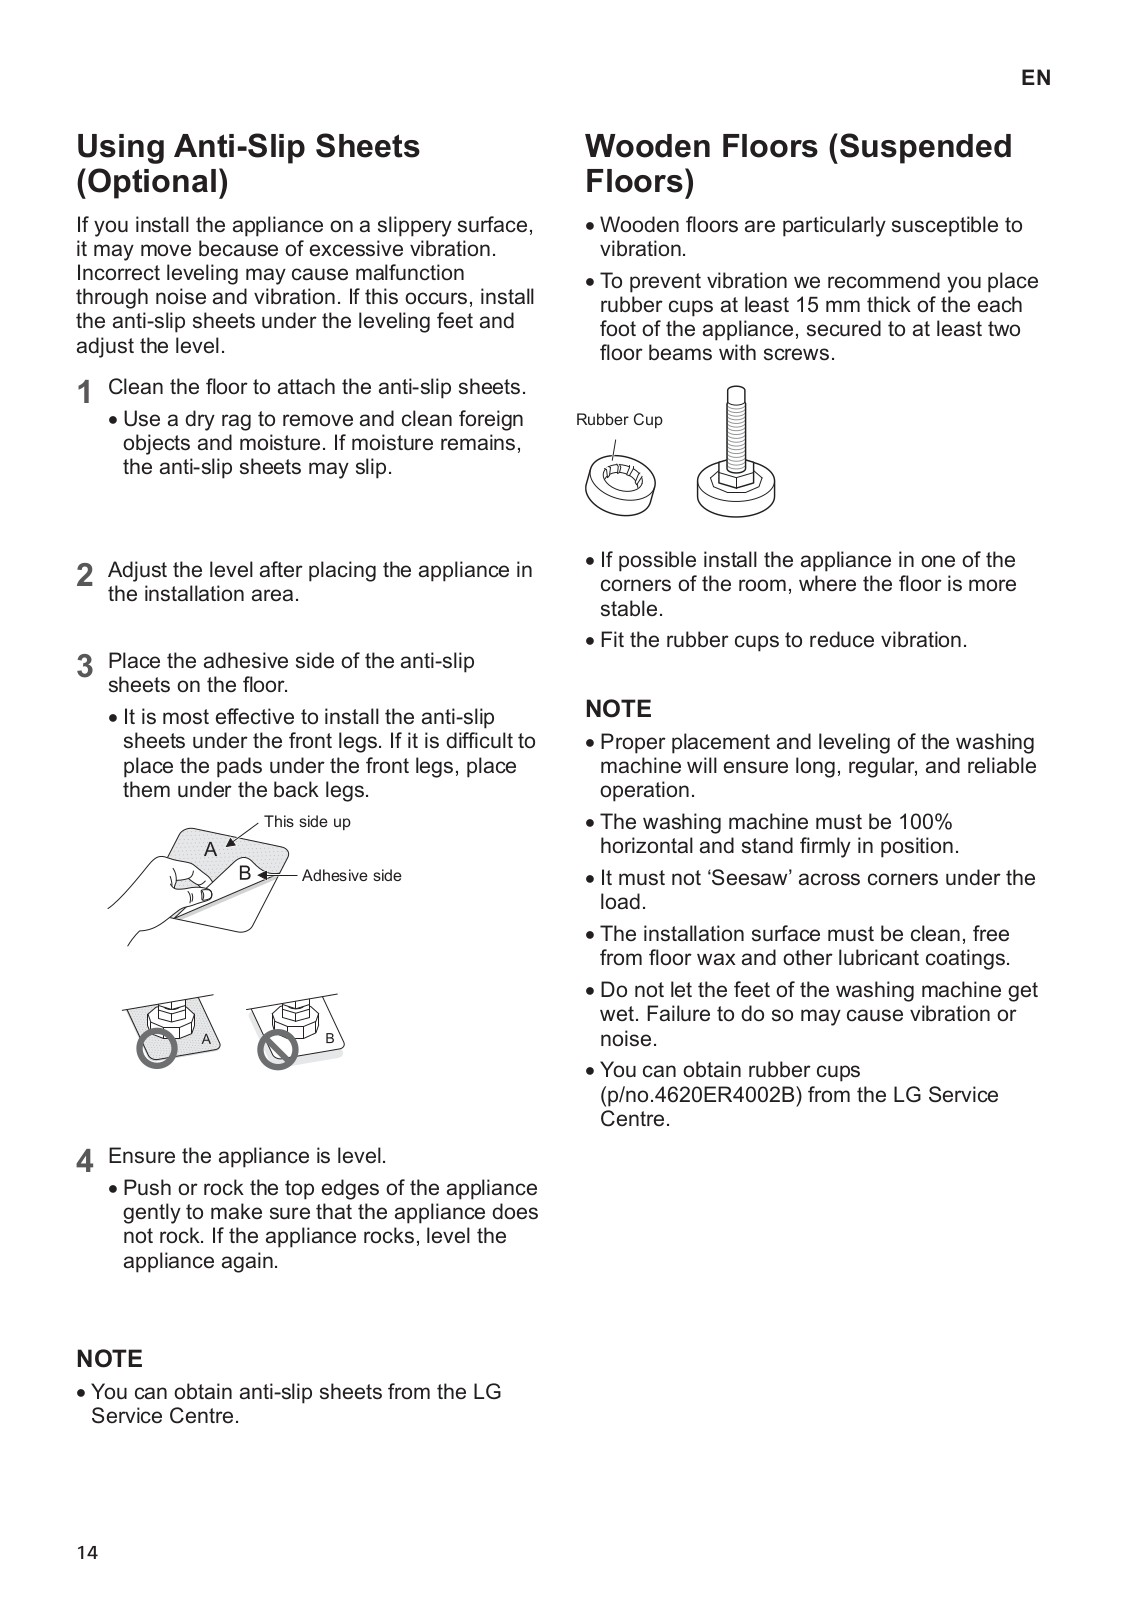
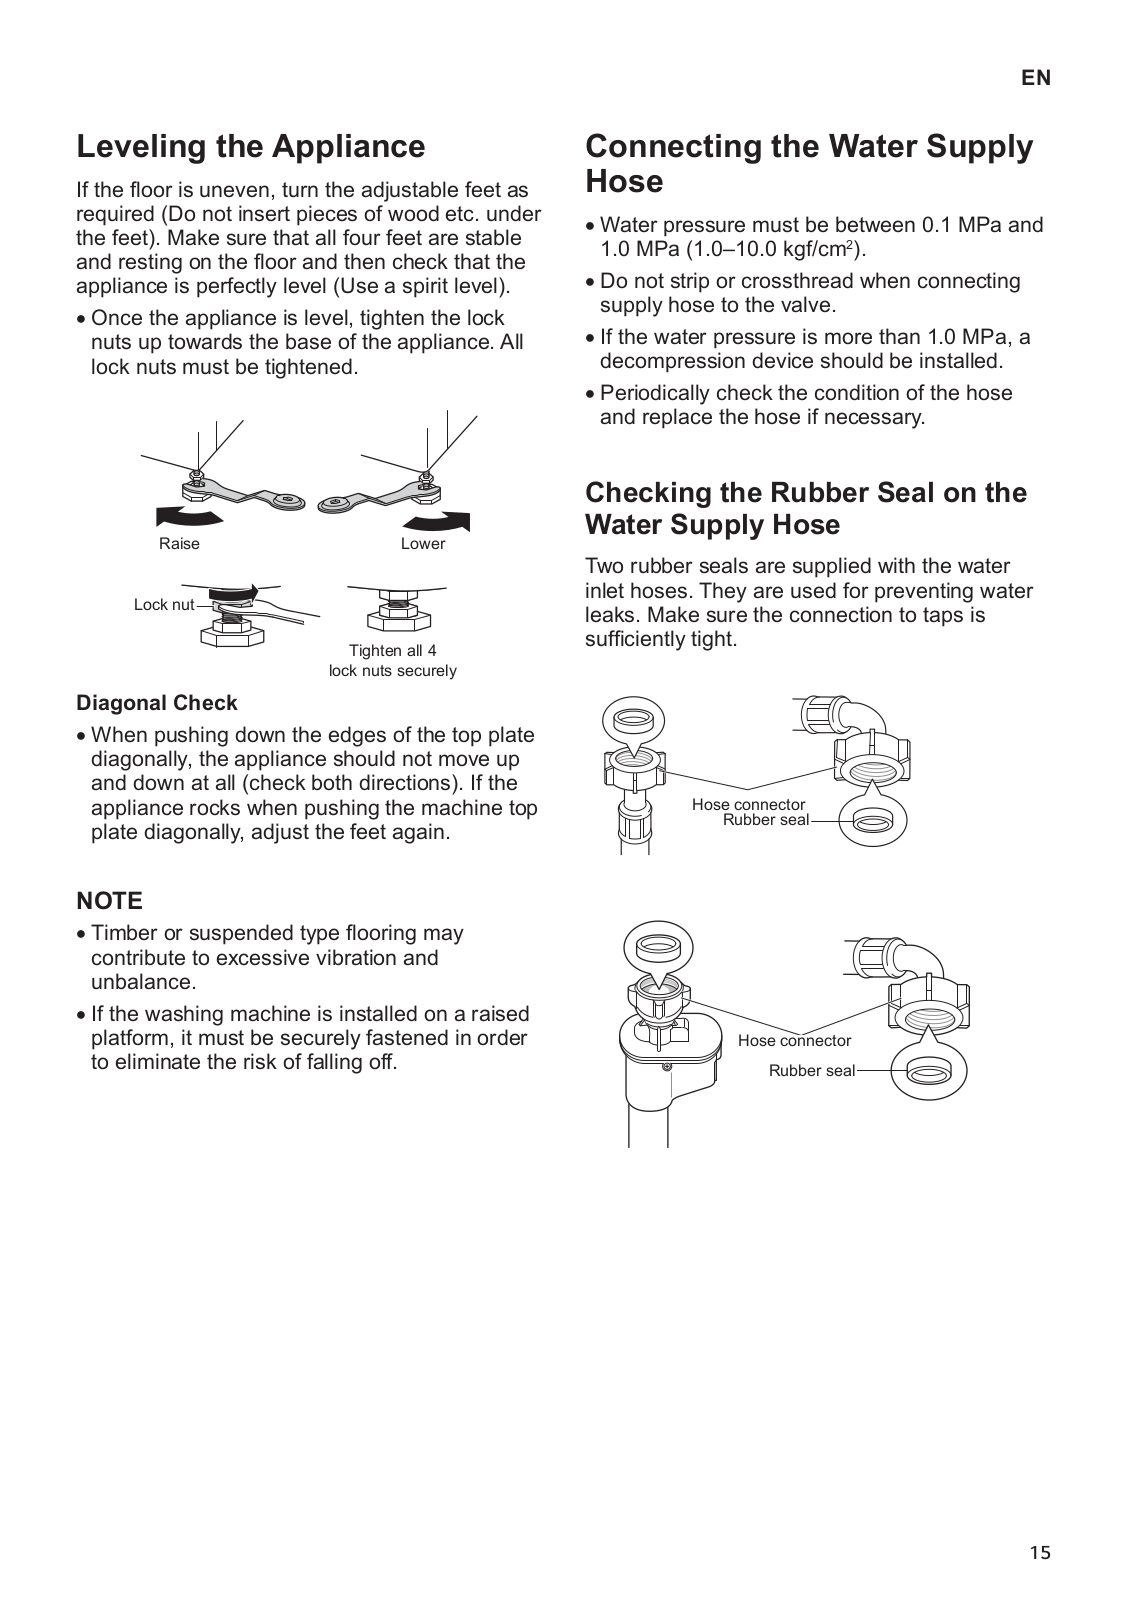
LG FH4G1JCHK6N Owner’s Manual
...
LG Owner’s Manual
Download
Specifications and Main Features
Frequently Asked Questions
User Manual
Download
Loading...
+
78
hidden pages
Unhide
You need points to download manuals.
1 point = 1 manual.
You can buy points or you can get point for every manual you upload.
Buy points
Upload your manuals
 Loading...