

Page 1

DP382
ENGLISH
P/NO : MFL56732880
DP382-P_AISRSLK_ENG_MFL56732880.1 1DP382-P_AISRSLK_ENG_MFL56732880.1 1 7/7/08 10:01:39 AM7/7/08 10:01:39 AM
Page 2
Safety Precaution
CAUTION
RISK OF ELECTRIC SHOCK
DO NOT OPEN
CAUTION: TO REDUCE THE RISK OF ELECTRIC SHOCK. DO NOT
REMOVE COVER (OR BACK). NO USER-SERVICEABLE PARTS INSIDE.
REFER SERVICING TO QUALIFIED SERVICE PERSONNEL.
This lightning flash with arrowhead symbol within an equilateral triangle
is intended to alert the user to the presence of uninsulated dangerous
voltage within the productʼs enclosure that may be of sufficient magnitude to constitute a risk of electric shock to persons.
The exclamation point within an equilateral triangle is intended to alert
the user to the presence of important operating and maintenance (servicing) instructions in the literature accompanying the product.
WARNING: TO PREVENT FIRE OR ELECTRIC SHOCK HAZARD, DO NOT
EXPOSE THIS PRODUCT TO RAIN OR MOISTURE.
WARNING: Do not install this equipment in a confined space such as a book
case or similar unit.
CAUTION: Do not block any ventilation openings. Install in accordance with the
manufacturer's instructions. Slots and openings in the cabinet are provided for
ventilation and to ensure reliable operation of the product and to protect it from
over heating. The openings should be never be blocked by placing the product
on a bed, sofa, rug or other similar surface. This product should not be placed
in a built-in installation such as a bookcase or rack unless proper ventilation is
provided or the manufacturer's instruction has been adhered to.
CAUTION: This product employs a Laser System.
To ensure proper use of this product, please read this
ownerʼs manual carefully and retain it for future reference.
Should the unit require maintenance, contact an authorized
service center.
Use of controls, adjustments or the performance of procedures other than those
specified herein may result in hazardous radiation exposure.
To prevent direct exposure to laser beam, do not try to open the enclosure.
Visible laser radiation when open. DO NOT STARE INTO BEAM.
CAUTION: The apparatus should not be exposed to water (dripping or splashing) and no objects filled with liquids, such as vases, should be placed on the
apparatus.
CAUTION
• The ventilation should not be impeded by covering the ventilation openings
with items, such as newspapers, table-cloth, curtains etc.
• No naked flame sources, such as lighted candles, should be placed on the
apparatus.
• Used batteries should be disposed of safely and not incinerated. Attention
should be shown to the environment aspects of battery disposal.
• Use the apparatus in tropical and moderate climates only.
• The excessive sound pressure from earphones and headphones can cause
hearing loss.
• The battery shall not be exposed to excessive heat such as sunshine, fire or
the like.
CAUTION concerning the Power Cord
Most appliances recommend they be placed upon a dedicated circuit;
That is, a single outlet circuit which powers only that appliance and has no
additional outlets or branch circuits. Check the specification page of this owner's
manual to be certain.Do not overload wall outlets. Overloaded wall outlets,
loose or damaged wall outlets, extension cords, frayed power cords, or damaged or cracked wire insulation are dangerous. Any of these conditions could
result in electric shock or fire. Periodically examine the cord of your appliance,
and if its appearance indicates damage or deterioration, unplug it, discontinue
use of the appliance, and have the cord replaced with an exact replacement
part by an authorized service center.
Protect the power cord from physical or mechanical abuse, such as being twisted, kinked, pinched, closed in a door, or walked upon. Pay particular attention
to plugs, wall outlets, and the point where the cord exits the appliance.
To disconnect power from the mains, pull out the mains cord plug. When installing the product, ensure that the plug is easily accessible.
2
DP382-P_AISRSLK_ENG_MFL56732880.2 2DP382-P_AISRSLK_ENG_MFL56732880.2 2 7/7/08 10:01:40 AM7/7/08 10:01:40 AM
Page 3
Types of Playable Discs ............................................................................. 3
Rechargeable battery ................................................................................. 3
Main Unit .................................................................................................... 4
Remote Control .......................................................................................... 5
Power connections ..................................................................................... 6
Hooking up the unit ................................................................................... 7
Revolving the LCD panel ........................................................................... 7
Selecting the operation mode .................................................................... 7
Adjust the settings ..................................................................................... 8
Displaying Disc Information ........................................................................ 9
Playing a Disc........................................................................................... 10
Playing a DivX movie file...........................................................................11
Listening to Music Disc or files ................................................................. 12
Contents
Viewing photo files ................................................................................... 12
Using an USB Flash Drive ....................................................................... 13
Watching an AV input ............................................................................... 13
Language Codes ...................................................................................... 14
Area Codes .............................................................................................. 14
Troubleshooting ........................................................................................ 15
Specifications ........................................................................................... 15
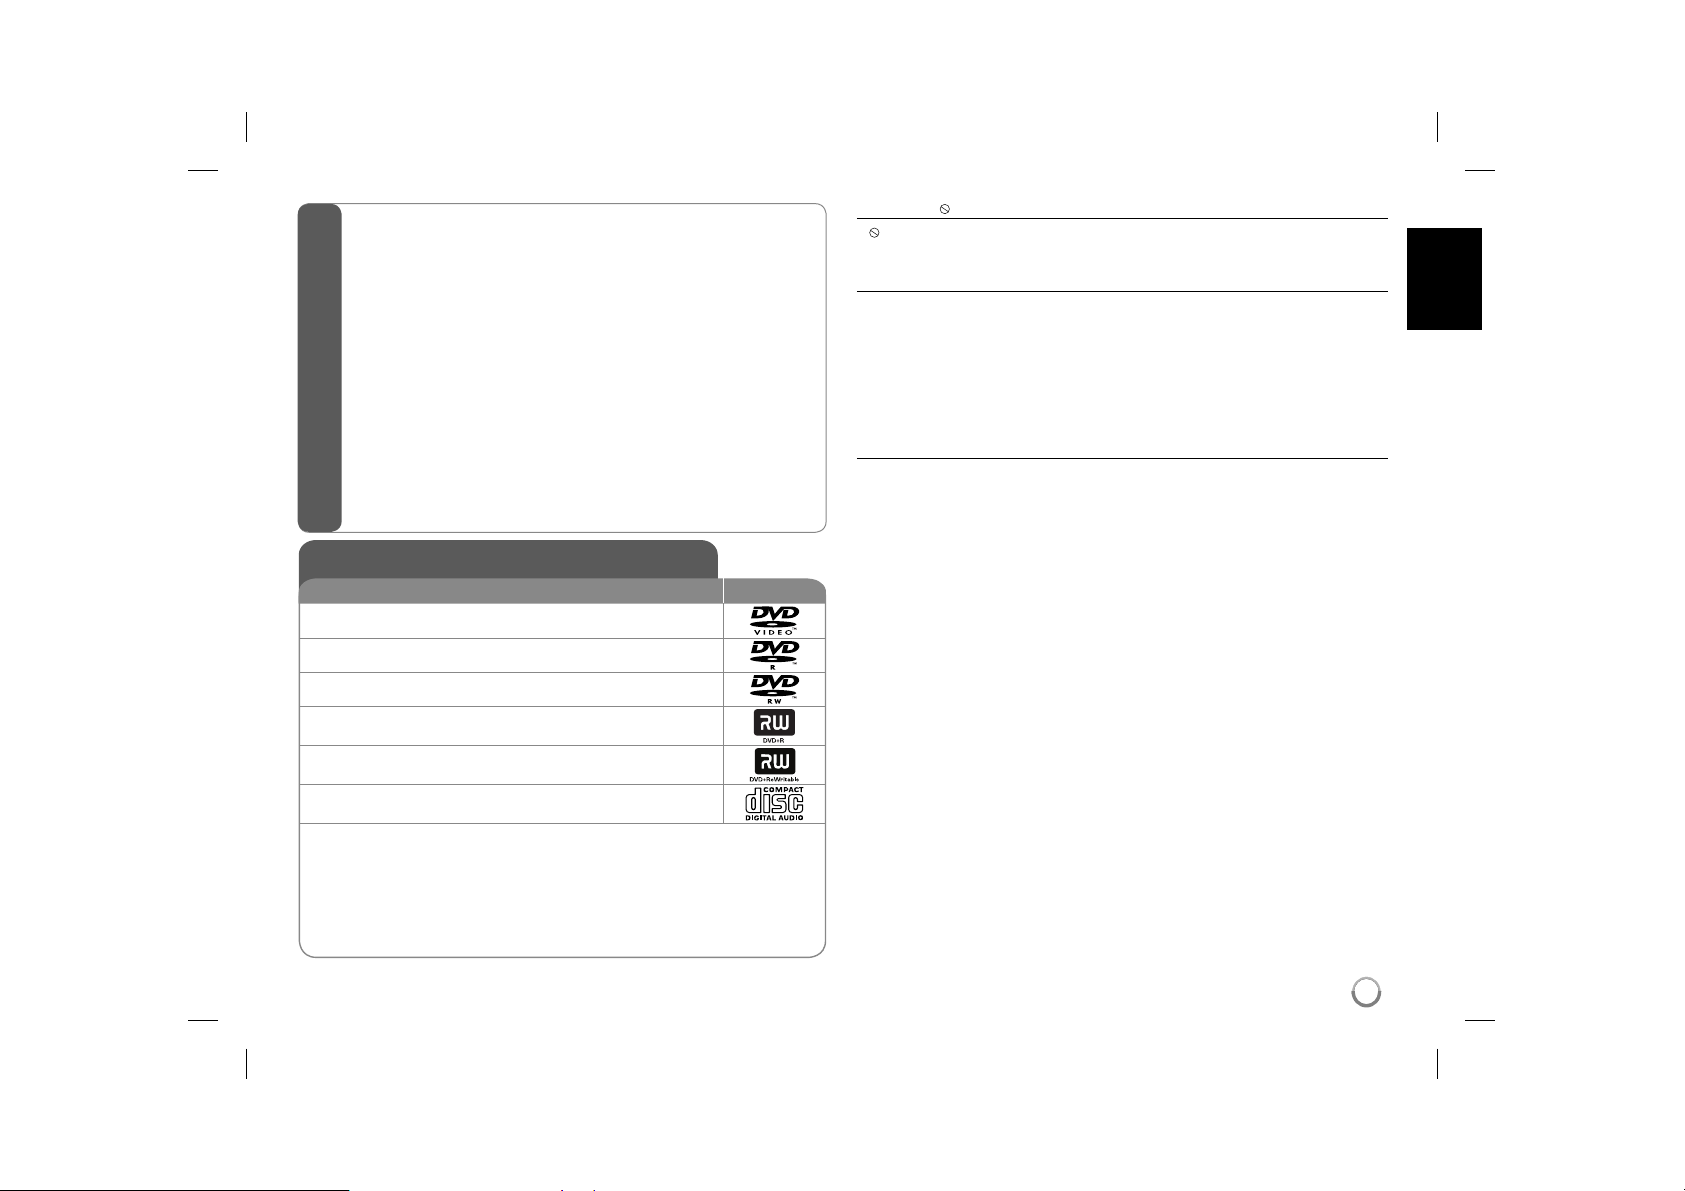
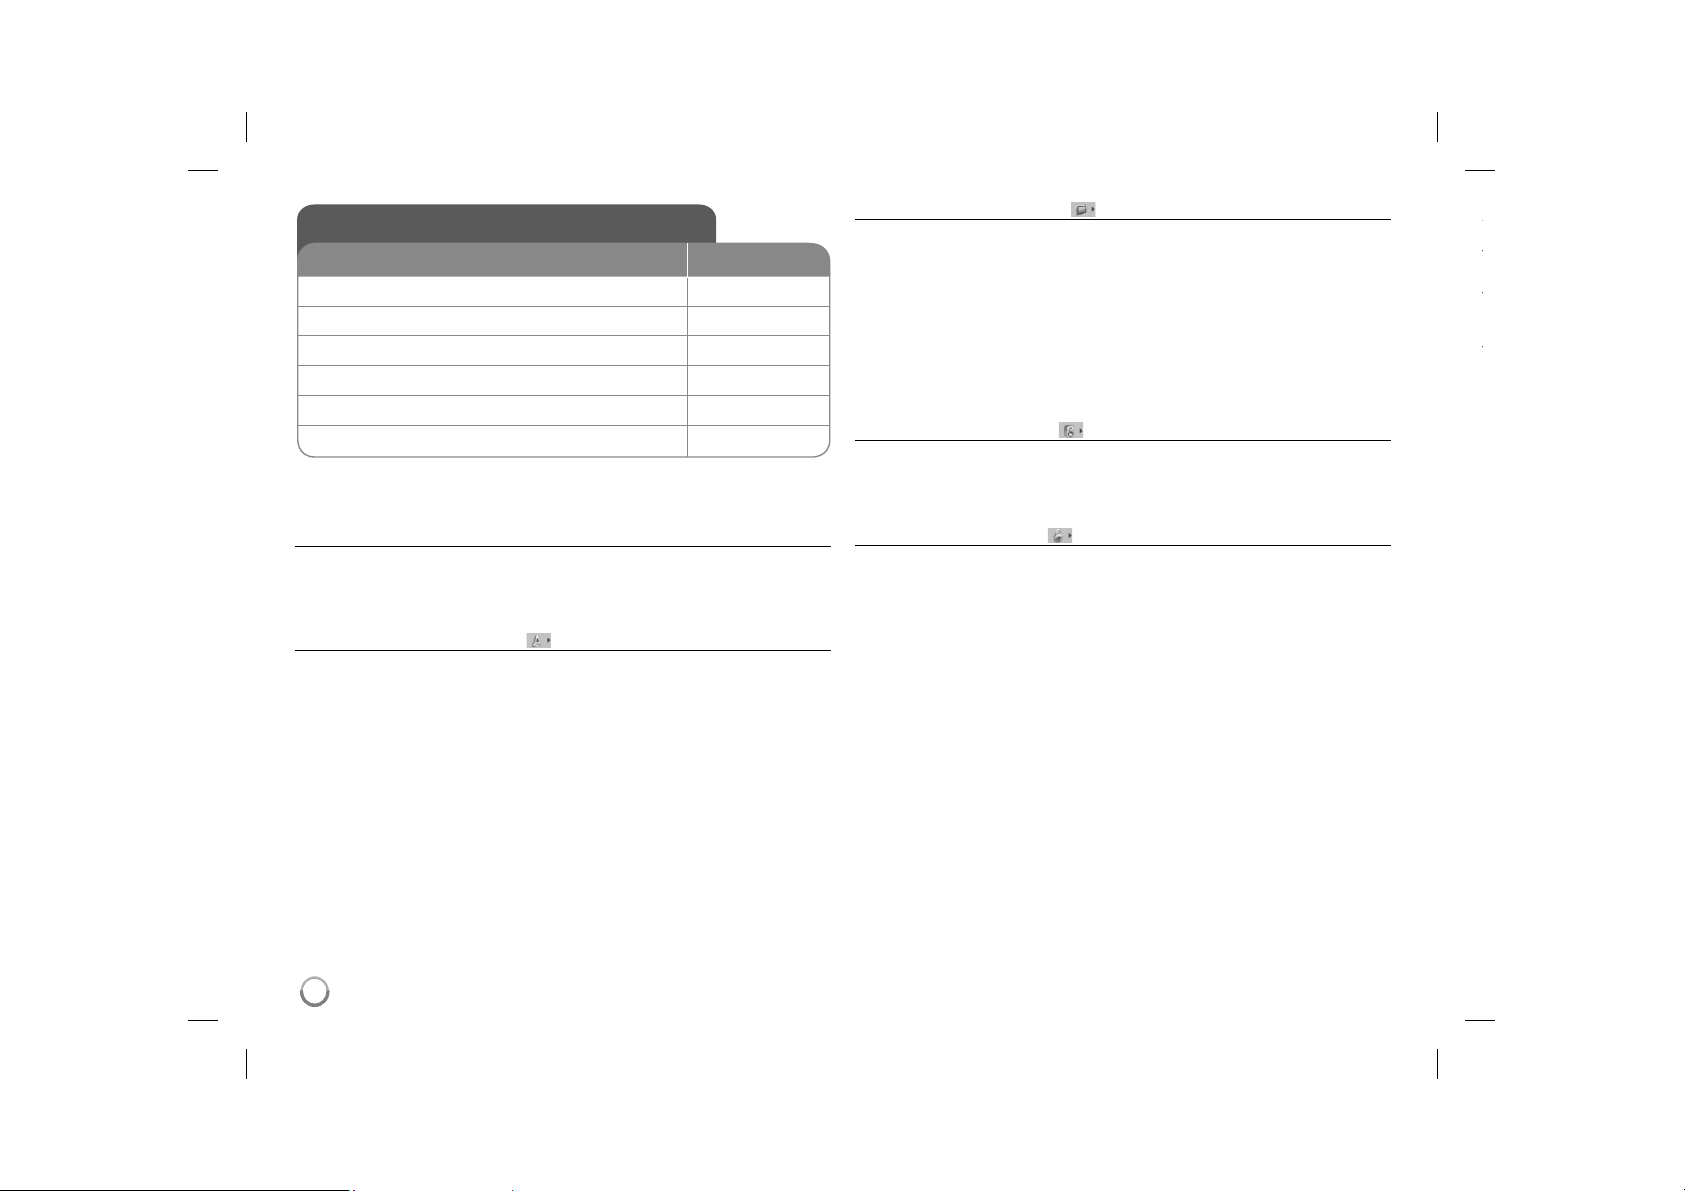
Types of Playable Discs
Type Logo
DVD-VIDEO: Discs such as movies that can be
purchased or rented.
DVD-R: Video mode and finalized only
DVD-RW: VR mode, Video mode and finalized only
DVD+R: Video mode only
DVD+RW: Video mode only
Audio CD: Music CDs or CD-R/CD-RW in music CD
format that can be purchased.
This unit plays DVD±R/RW and CD-R/RW that contains audio titles, DivX,
MP3, WMA and/or JPEG files. Some DVD±RW/DVD±R or CD-RW/CD-R cannot be played on this unit due to the recording quality or physical condition of
the disc, or the characteristics of the recording device and authoring software.
About the Symbol Display
“ ” may appear on your TV display during operation and indicates that the
function explained in this ownerʼs manual is not available on that disc.
Regional Codes
This unit has a regional code printed on the rear of the unit. This unit can play
only DVD discs labeled same as the rear of the unit or “ALL”.
• Most DVD discs have a globe with one or more numbers in it clearly visible
on the cover. This number must match your unitʼs regional code or the disc
cannot play.
• If you try to play a DVD with a different regional code from your player, the
message “Check Regional Code” appears on the TV screen.
Copyrights
It is forbidden by law to copy, broadcast, show, broadcast via cable, play in
public, or rent copyrighted material without permission. This product features
the copy protection function developed by Macrovision. Copy protection signals are recorded on some discs. When recording and playing the pictures
of these discs picture noise will appear. This product incorporates copyright
protection technology that is protected by method claims of certain U.S. patents and other intellectual property rights owned by Macrovision Corporation
and other rights owners. Use of this copyright protection technology must
be authorized by Macrovision Corporation, and is intended for home and
other limited viewing uses only unless otherwise authorized by Macrovision
Corporation. Reverse engineering or disassembly is prohibited.
Rechargeable battery
• Its internal rechargeable battery provides you with the freedom to pass it
around and play the files without the power cord.
• The internal rechargeable battery will start charging only when the unit is
turned off and the AC adapter is connected to a power outlet.
• The charging stops if you turn on the unit.
• The charging will take approximately 3 hour 30 minutes.
• Operating time on battery: approximately 3 hour 30 minutes.
The operating time on battery may vary depending on the battery status,
operational status and environment conditions.
• The battery indicator will turn red while charging. Once the charging is complete, the indicator light changes to green.
• When the remaining time of the battery power is under a few minutes,
“Check Battery Status” will appear on the screen.
3
3
DP382-P_AISRSLK_ENG_MFL56732880.3 3DP382-P_AISRSLK_ENG_MFL56732880.3 3 7/7/08 10:01:40 AM7/7/08 10:01:40 AM
Page 4
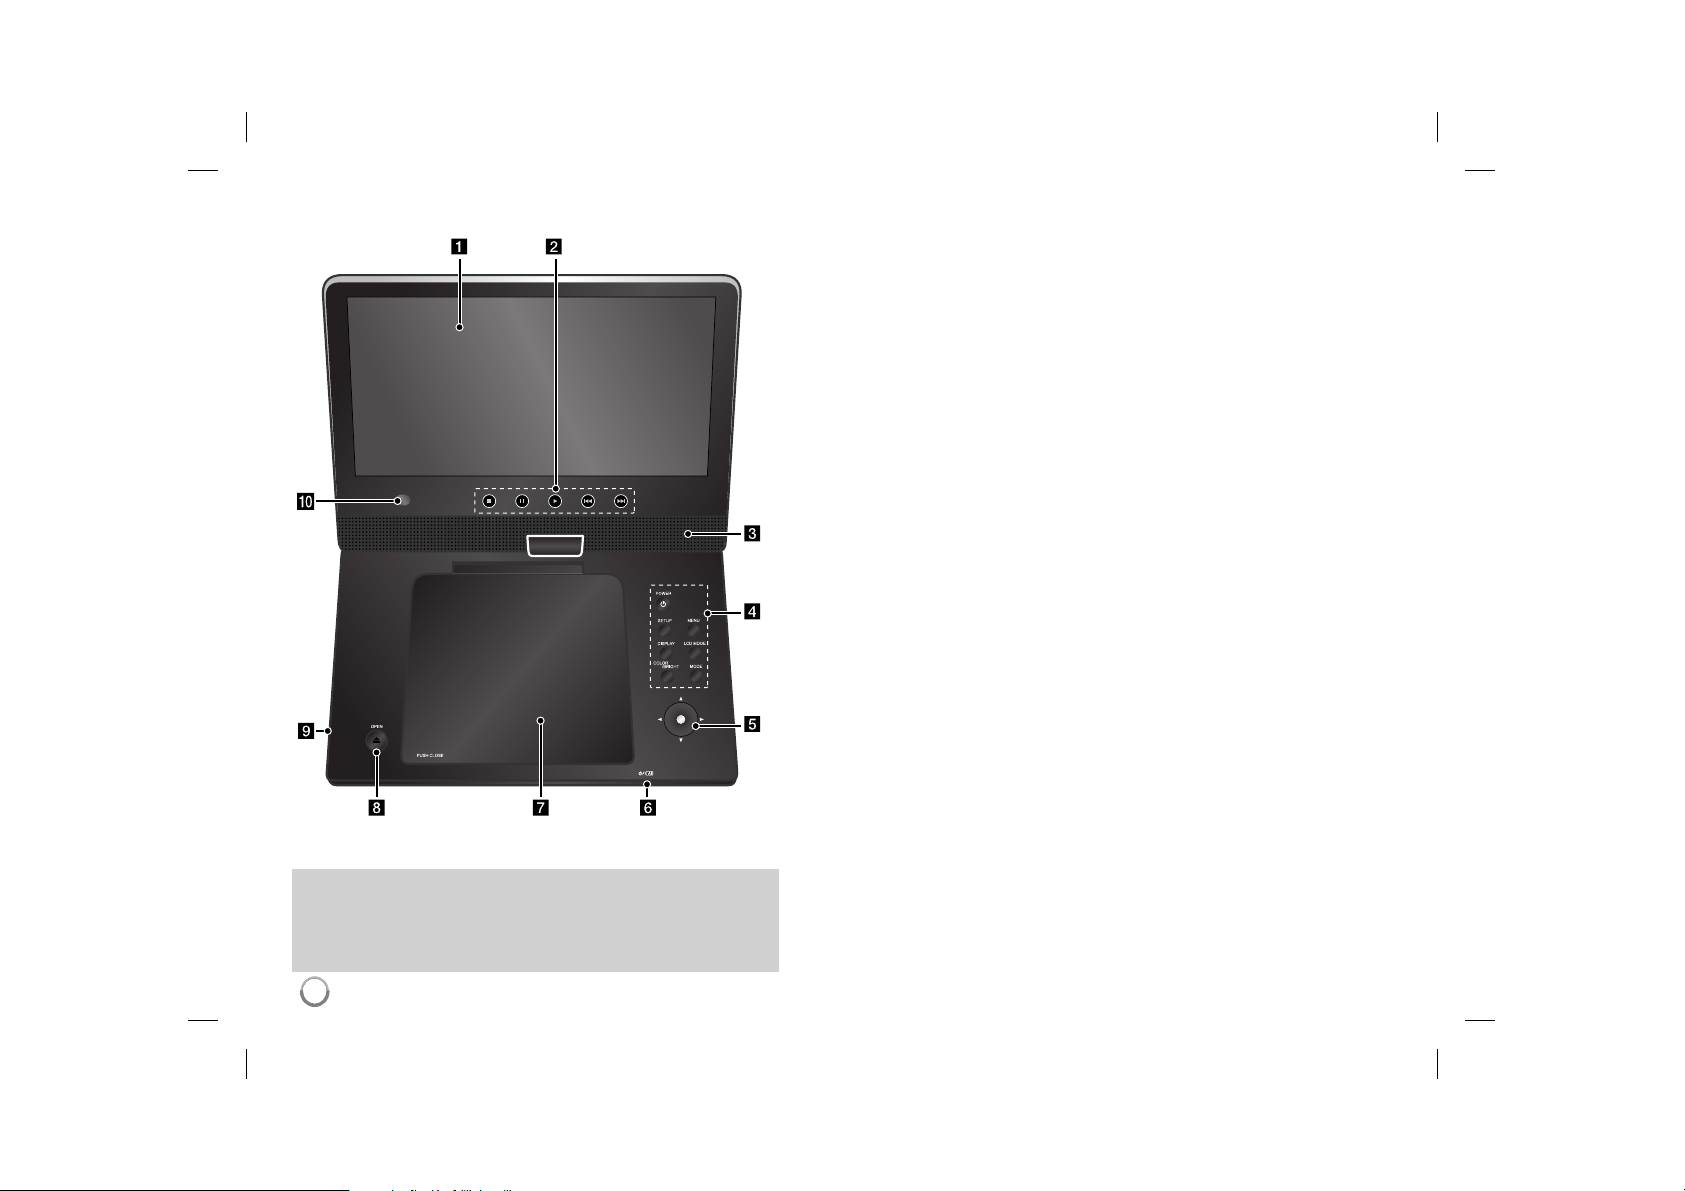
Main Unit
Volume: You can adjust the volume level using the volume controller
on the right side.
Earphones: Connect a earphones to the earphones jack on the right
side to enjoy the sound individually.
a LCD screen
b Playback Control Buttons
• N (Play): Starts playback.
• x (Stop): Stops playback.
• X (PAUSE/STEP): Pauses playback temporarily/ press repeatedly for
frame-by-frame playback.
• . (Skip): Search backward* or returns to the beginning of current chapter or
track or go to the previous chapter or track.
• > (Skip): Search forward* or Go to next chapter or track.
* Press and hold button for about two seconds.
c Speakers
d Function Buttons
• POWER (1): Turn the unit ON or OFF.
• SETUP: Accesses or exits the setup menu.
• MENU: Accesses the DVD menu.
• DISPLAY: Accesses On-Screen Display.
• LCD MODE: Selects the LCD mode. (16:9, 4:3 or Off)
• COLOR/BRIGHT*: Displays the Brightness or Color menu for LCD display.
• MODE: Selects a operation mode among [DISC], [USB] and [AV IN].
* To adjust the color or brightness of the LCD display, press COLOR/BRIGHT
repeatedly on the main unit to display the Brightness or Color menu then use
b / B to adjust the value. Press ENTER to confirm the adjustment.
e Joystick: Use the joystick to select an item in the menu. Press the joystick to con-
firm the menu selection.
f Battery charge and power indicator
• The indicator turns red in charging and changes to green color when the charging
is complete. (Refer to page 3 for details.)
• The indicator turns green for a few seconds when the unit is turned on.
g Disc Lid
h OPEN (Z): Opens the disc lid.
i USB Port: Connect an USB Flash Drive.
j Remote sensor: Point the remote control here. To control the unit using the remote
control, do not fold the LCD panel down.
4
DP382-P_AISRSLK_ENG_MFL56732880.4 4DP382-P_AISRSLK_ENG_MFL56732880.4 4 7/7/08 10:01:40 AM7/7/08 10:01:40 AM
Page 5
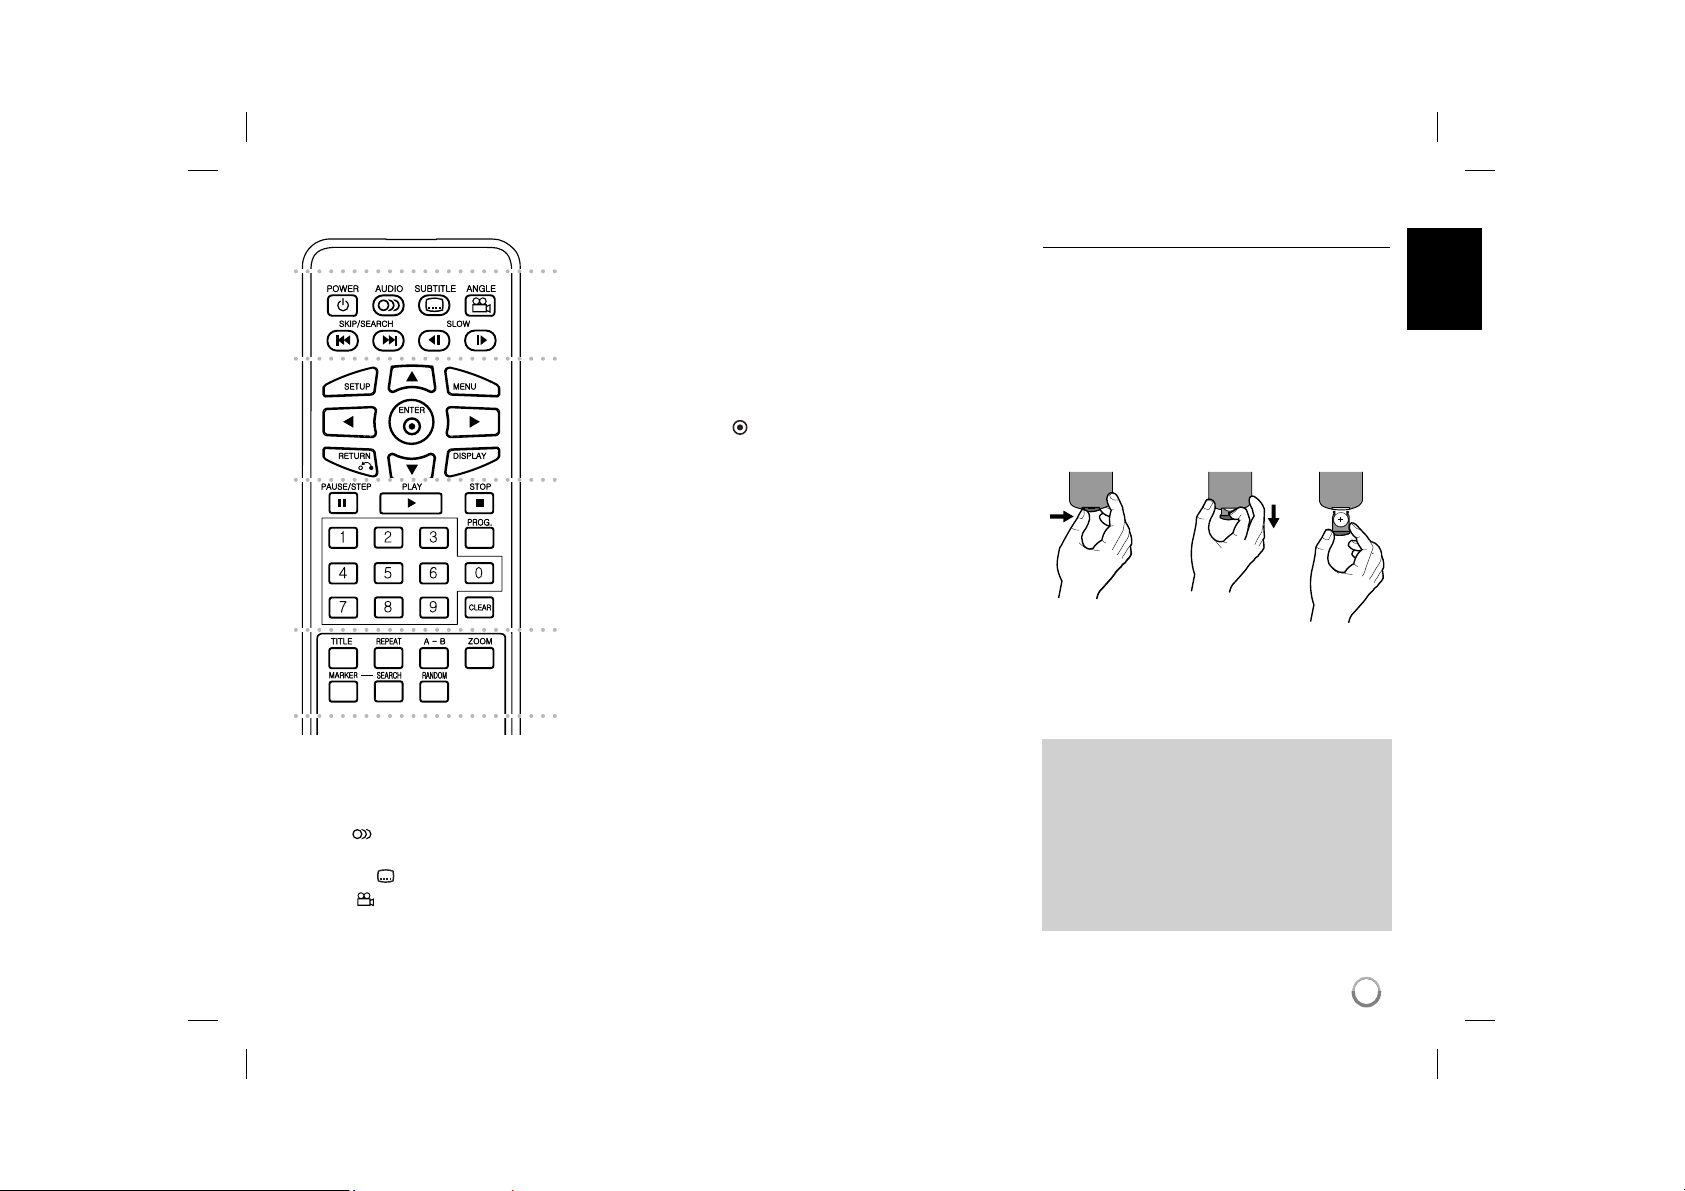
Remote Control
a
b
c
d
l l l l l l l a l l l l l l l
POWER (1): Switches the unit ON or OFF.
AUDIO ( ): Selects an audio language or audio
channel.
SUBTITLE (
ANGLE ( ): Selects a DVD camera angle, if
available.
): Selects a subtitle language.
SKIP/SEARCH (. / >): Search* backward /
forward. Go to next or previous chapter/track.
* Press and hold button for about two seconds.
SLOW (t / T): Reverse/ Forward slow playback.
l l l l l l l b l l l l l l l
SETUP: Accesses or exits the setup menu.
MENU: Accesses the DVD menu.
vV b B: Navigates the menus.
ENTER (
RETURN (O): Press to move backwards in the
menu or exit the menu.
DISPLAY: Accesses On-Screen Display.
l l l l l l l c l l l l l l l
PAUSE/STEP (X): Pauses playback temporarily/
press repeatedly for frame-by-frame playback.
PLAY (N): Starts playback.
STOP (x): Stops playback.
Numerical buttons: Selects numbered options in
a menu.
PROG.: Enters the program edit mode.
CLEAR: Removes a track number on the Program
List.
l l l l l l l d l l l l l l l
TITLE: Access the discʼs title menu.
REPEAT: Repeats a chapter, track, title or all.
A-B: Repeats a section.
ZOOM: Enlarges video image.
MARKER : Marks any point during playback.
SEARCH : Displays [Marker Search] menu.
RANDOM: Plays tracks in random order.
): Confirms menu selection.
Put the battery into the Remote Control
Pinch the battery holder clip together then pull the
tab to remove the battery holder. Insert the battery
with the + facing in the same direction as the + on
the battery holder. Replace the battery holder with
battery into the Remote Control unit making sure
that it is fully inserted.
• Replace Remote Control unit battery with 3V
micro lithium cells such as CR. 2025 or its equivalent.
• Dispose of battery safety in accordance with
local laws. Do not dispose of in fire.
Warning for replaceable lithium battery
• danger of explosion if battery incorrectly replaced.
• replace only with the same type battery.
• additional warning marking close to the battery if
intended to be replaced by users.
Warning : The battery used in this device may
present a fire or chemical burn hazard if mistreated. Do not recharge, disassemble, incinerate, or heat above 100 °C (212 °F).
Replace the battery with Matsushita Elec. Ind.
Co., Ltd. (Panasonic), part no. CR. 2025 only.
Use of another battery may present a risk of fire
or explosion. Dispose of used batteries. Keep
batteries away from children. Do not disassemble or dispose of in fire.
5
DP382-P_AISRSLK_ENG_MFL56732880.5 5DP382-P_AISRSLK_ENG_MFL56732880.5 5 7/7/08 10:01:41 AM7/7/08 10:01:41 AM
Page 6
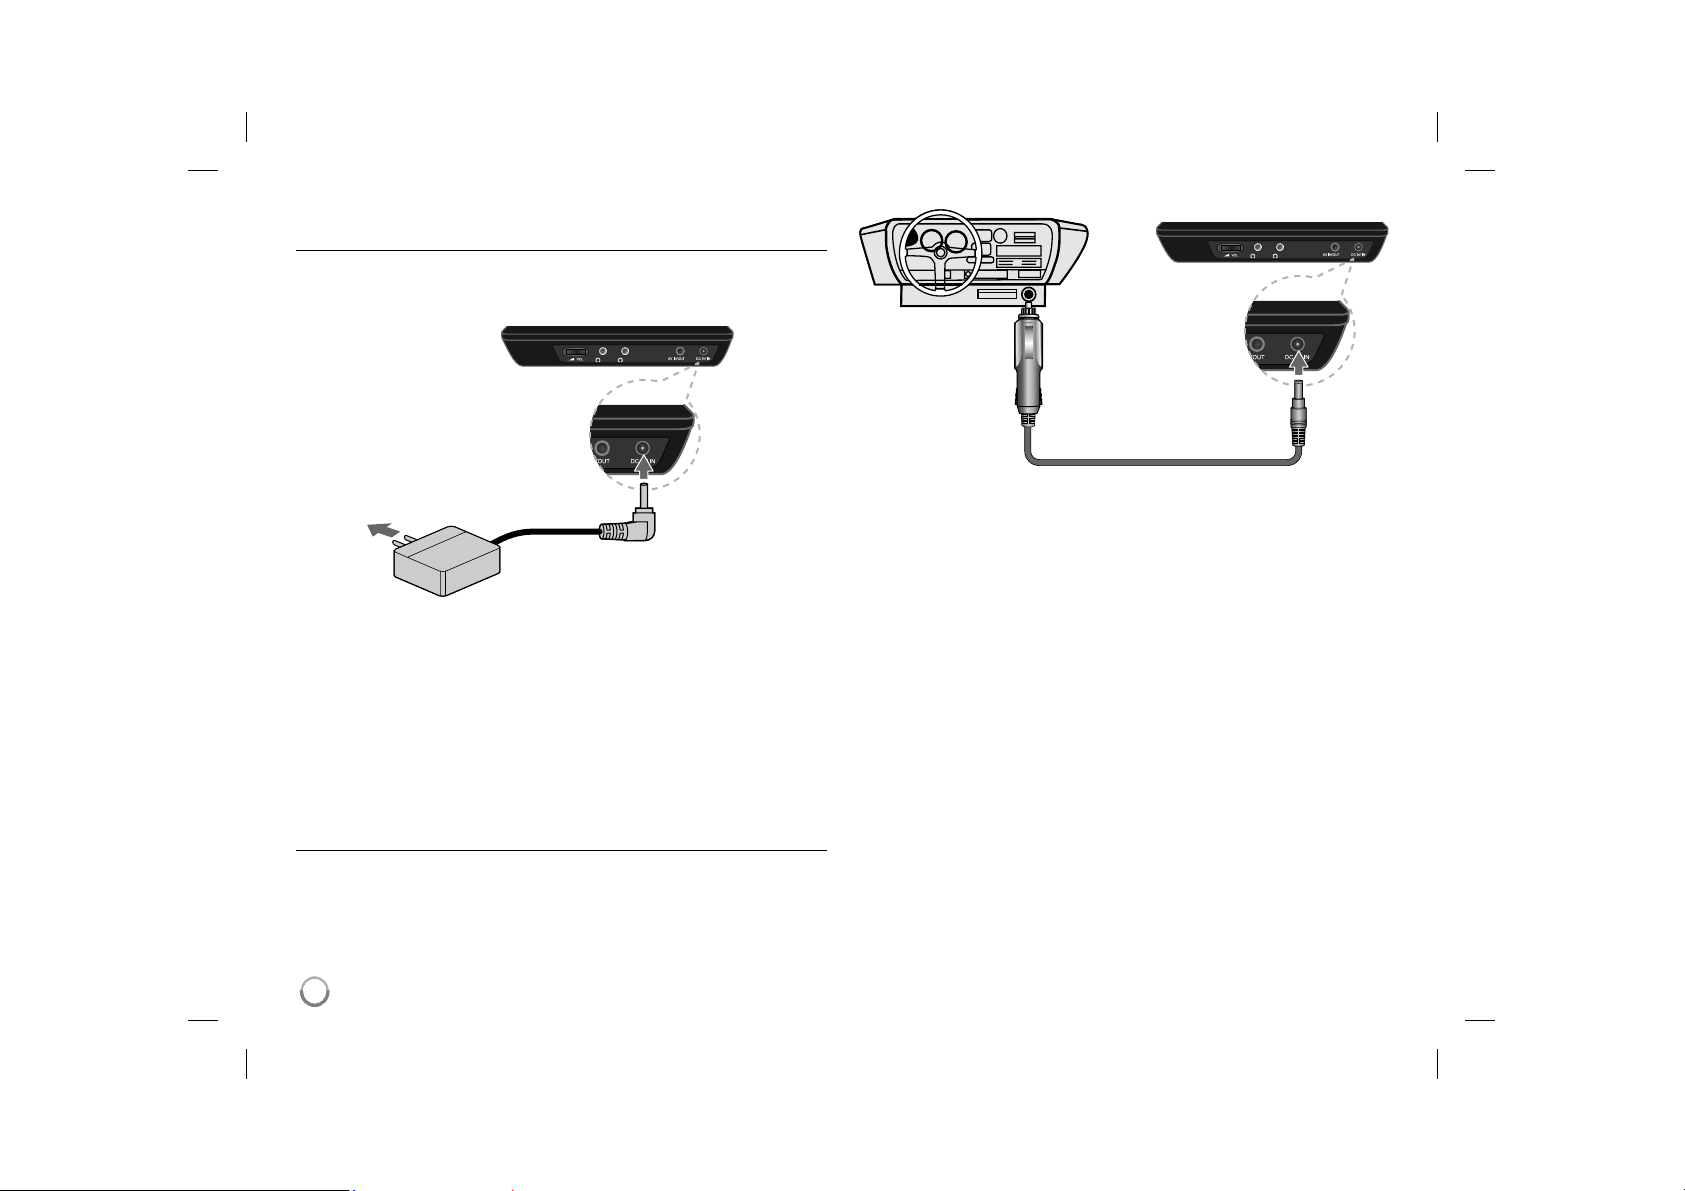
Power connections
Connecting the Power Cable
Connect the supplied power cable from the unit to a power socket.
Right side of unit
Right side of the unit
Plug into a
power source.
Plug into the “DC 9V IN” jack.
* The actual set may differ from the drawing.
AC adapter
• This AC adapter operates on 100-240V~ 0.5A 50/60Hz.
• Contact an electrical parts distributor for assistance in selecting a suitable
AC plug adapter or AC cord set.
• Manufactured by I-MAG ELECTRONICS(DONG GUAN) CO., LTD
Connect the Automotive adapter
This unit and its automotive adapter are designed for use in vehicles that
have 8.5-16 volt, negative ground electrical systems. This is standard for most
vehicles. If your vehicle has a different type of electrical system, the DC power
system cannot be used.
Plug into the carʼs
cigarette lighter
socket.
Plug into the
“DC 9V IN” jack.
Automotive adapter
• This automotive adapter operates on DC 8.5-16V.
• Contact an electrical parts distributor for assistance in selecting a suitable
automotive adapter.
• Manufactured by GRAND POWER ELECTRONIC TECHNOLOGY
(SHENZHEN) CO., LTD.
Caution
• To prevent electrical shock and possible damage to your unit or vehicle,
always unplug the automotive adapter from the cigarette lighter socket
before you remove the plug from your unit.
• A 1.5 amp. 250V fuse for protection is installed in the automotive adapter.
• While the engine is being started, disconnect the automotive adapter from
the carʼs cigarette lighter socket.
• Do not operate your unit when the car battery is discharged.
Peak current from the car generator may cause the DC fuse to blow.
• If the vehicleʼs supply voltage drops below approximately 10 volts, your unit
may not work properly.
• Do not leave your unit in a place where the temperature exceeds 70°C
(158°F), or the pick-up device may be damaged.
Examples include:
- Inside a car with the windows closed and in direct sunshine.
- Near a heating appliance.
6
DP382-P_AISRSLK_ENG_MFL56732880.6 6DP382-P_AISRSLK_ENG_MFL56732880.6 6 7/7/08 10:01:42 AM7/7/08 10:01:42 AM
Page 7
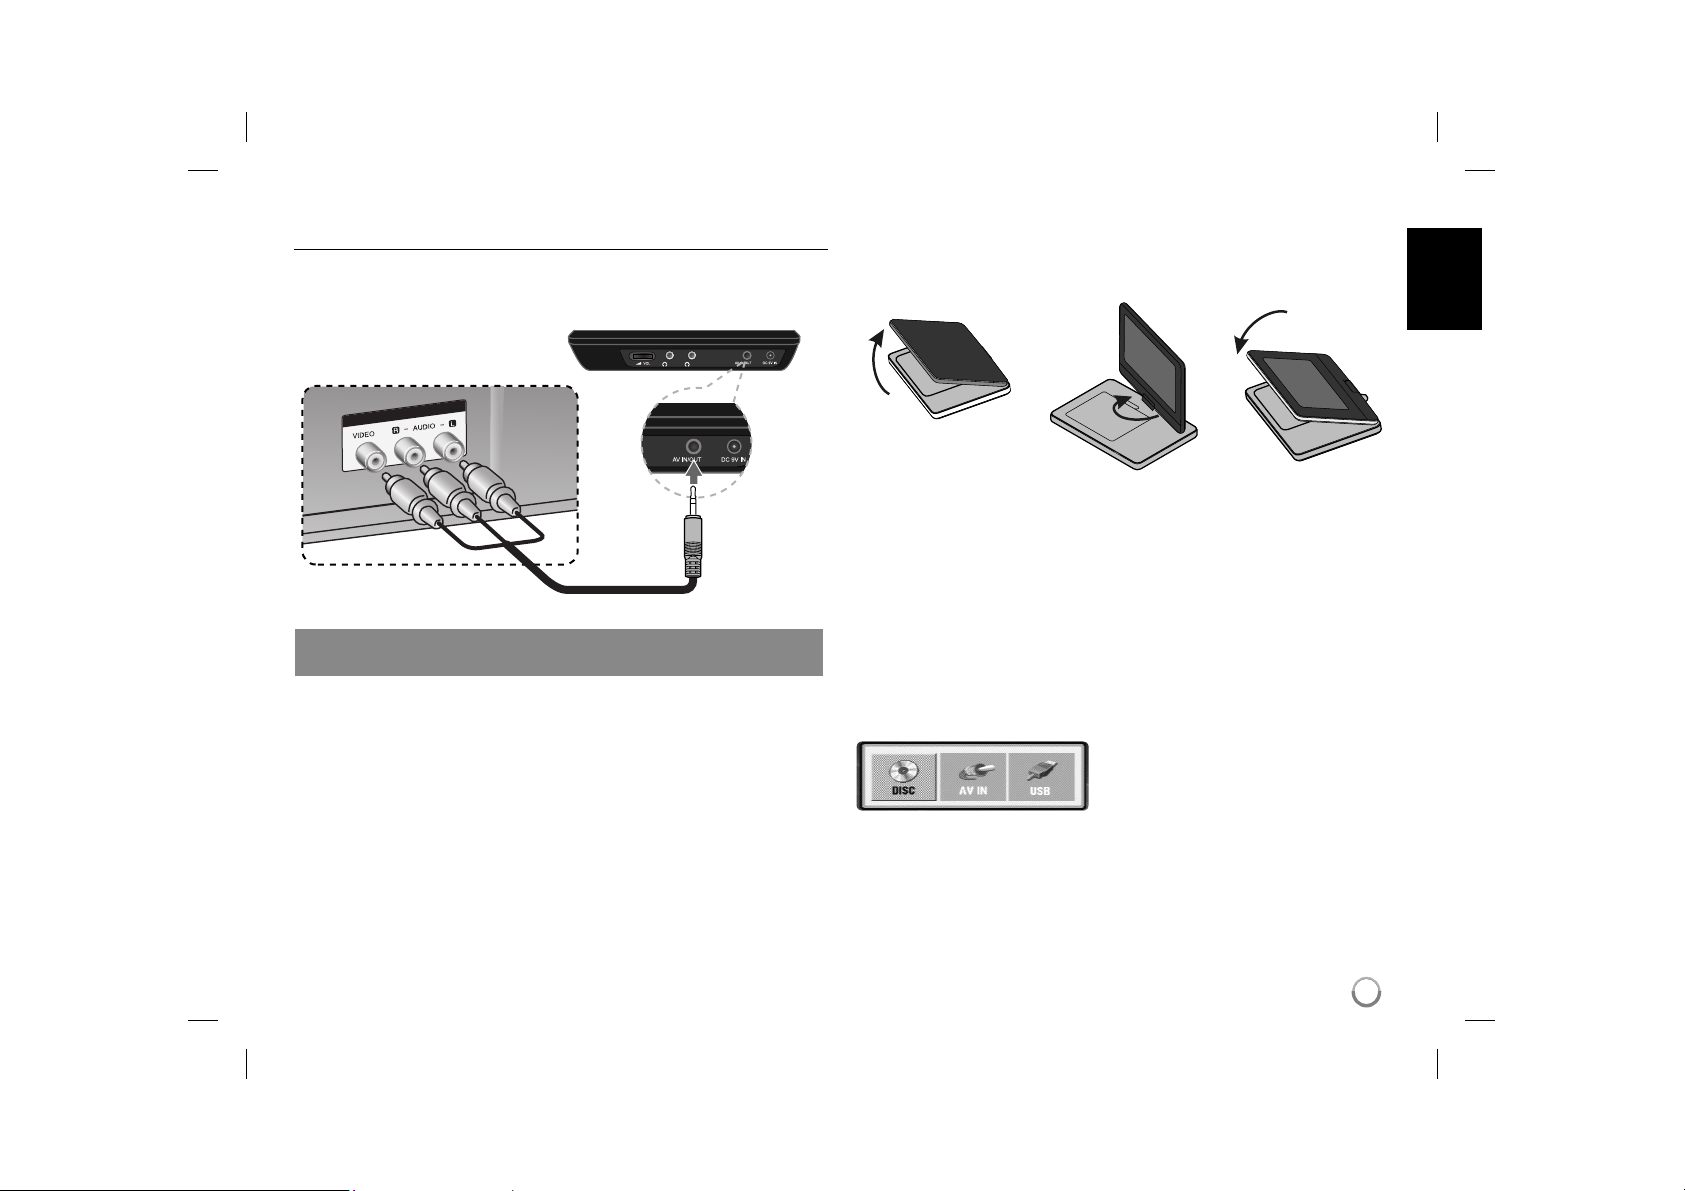
Hooking up the unit
Audio and Video Connection for AV IN or AV OUT
Connect the AV IN/OUT jack on the unit to the corresponding input or output
jacks on your TV or an external device using the supplied AV cable as shown
below.
Right side of the unit
Plug into the
“AV IN/OUT”
jack.
TV or the external device
Manufactured under license from Dolby Laboratories. “Dolby” and the
double-D symbol are trademarks of Dolby Laboratories.
Revolving the LCD panel
You can revolve the LCD panel of the unit clockwise a maximum of 180
degrees for use. You can also operate the unit after revolving the LCD panel
180 degrees and folding it back down.
To revolve the LCD panel, place the unit on a stable and even surface such
as on a table. Push the LCD panel up and then lift it into a vertical position.
Revolve the LCD panel clockwise slowly 180 degrees. If you need, fold the
LCD panel after revolving it.
To revolve the LCD panel to its original position, open the LCD panel to a vertical position. Revolve the LCD panel counter clockwise slowly 180 degrees.
• When finished using the unit, return the LCD panel to its original position.
• Do not leave the LCD panel in the face-up position, or sudden shocks may
damage it.
Selecting the operation mode
You need to select a operation mode before
using this unit. Press MODE on the unit
and the operation mode selection menu
appears. Use b / B to select a mode then
press ENTER.
• Select [DISC] to playback the inserted disc.
• Select [AV IN] to watch a video/audio signals from the external device using
this unit.
• Select [USB] to playback the file(s) in the connected USB Flash Drive.
7
DP382-P_AISRSLK_ENG_MFL56732880.7 7DP382-P_AISRSLK_ENG_MFL56732880.7 7 7/7/08 10:01:42 AM7/7/08 10:01:42 AM
Page 8
Adjust the settings
t
t
t
BUTTON
1 Display setup menu: SETUP
2 Select a desired option on the first level:
3 Move to second level:
4 Select a desired option on the second level:
5 Move to third level:
6 Change the setting:
Adjust the settings - more you can do
When you turn on for the first time
The menu for a language selection will appear when you turn on the unit for the
first time. You must select a language to use the unit. Use vV b B to select
a language then press ENTER and the confirm menu will appear. Use b B to
select [Enter] then press ENTER.
Adjust the language settings
Menu Language – Select a language for the Setup menu and on-screen dis-
play.
Disc Audio/Subtitle/Menu – Select a language for the Disc Audio/Subtitle/
Menu.
[Original]: Refers to the original language in which the disc was recorded.
[Other]: To select another language, press number buttons then ENTER to
enter the corresponding 4-digit number according to the language code list.
(see page 14) If you make a mistake while entering number, press CLEAR to
delete numbers then correct it.
[Off] (for Disc Subtitle): Turn off Subtitle.
v V
B
v V
B
v V / ENTER
Adjust the display settings
TV Aspect – Select which screen aspect to use based on the shape of your TV
screen.
[4:3]: Select when a standard 4:3 TV is connected.
[16:9]: Select when a 16:9 wide TV is connected.
Display Mode – If you selected 4:3, youʼll need to define how you would like
widescreen programs and films to be displayed on your TV screen.
[LetterBox]: This displays a widescreen picture with black bands at the top
and bottom of the screen.
[Panscan]: This fills the entire 4:3 screen, cropping the picture as necessary.
Adjust the audio settings
DRC (Dynamic Range Control) – Make the sound clear when the volume is
turned down (Dolby Digital only). Set to [On] for this effect.
Vocal – Set to [On] only when a multi-channel karaoke DVD is playing. The
karaoke channels on the disc mix into normal stereo sound.
Adjust the lock settings
You must set the [Area Code] option to use the lock options. Select [Area Code]
option then press B. Enter a 4-digit password then press ENTER. Enter it again
then press ENTER to verify. If you make a mistake while entering number, press
CLEAR then correct it.
If you forget your password you can reset it. First, remove the disc in the unit.
Display setup menu then input the 6-digit number “210499” and the password
will be cleared.
Rating – Select a rating level. The lower the level, the stricter the rating. Select
[Unlock] to deactivate the rating.
Password – Sets or changes the password for lock settings.
[New]: Enter a new 4-digits password using the numerical buttons then press
ENTER. Enter the password again to confirm.
[Change]: Enter the new password twice after entering the current password.
Area Code – Select a code for a geographic area as the playback rating level.
This determ ines which areaʼs standards are used to rate DVDs controlled by the
parental lock. (See page 14)
8
DP382-P_AISRSLK_ENG_MFL56732880.8 8DP382-P_AISRSLK_ENG_MFL56732880.8 8 7/7/08 10:01:42 AM7/7/08 10:01:42 AM
Page 9

Adjust the others settings
PBC (Playback Control) – Playback control provides special navigation fea-
tures that are available on some disc. Select [On] to use this feature.
DivX(R) VOD – We provide you with the DivX® VOD (Video On Demand) regis-
tration code that allows you to rent and purchase videos using the DivX® VOD
service. For more information, visit www.divx.com/vod.
Press ENTER when [Select] icon is highlighted and you can view the registration code of the unit.
All the downloaded videos from DivX® VOD can only be played back on this
unit.
Displaying Disc Information
BUTTON
1 Press DISPLAY during playback: DISPLAY
2 Select an item:
3 Adjust the Display menu settings:
4 Exit the menu: DISPLAY
Displaying Disc Information - more you can do
You can select an item by pressing vV and change or select the setting by
pressing b B.
Current title (or track) number/total number of titles (or tracks)
Current chapter number/total number of chapters
Elapsed playing time
Selected audio language or channel
Selected subtitle
Selected angle/total number of angles
You can check the battery charge status by pressing DISPLAY during playback
when the DC 9V IN jack is not connected.
Full Low Recharge
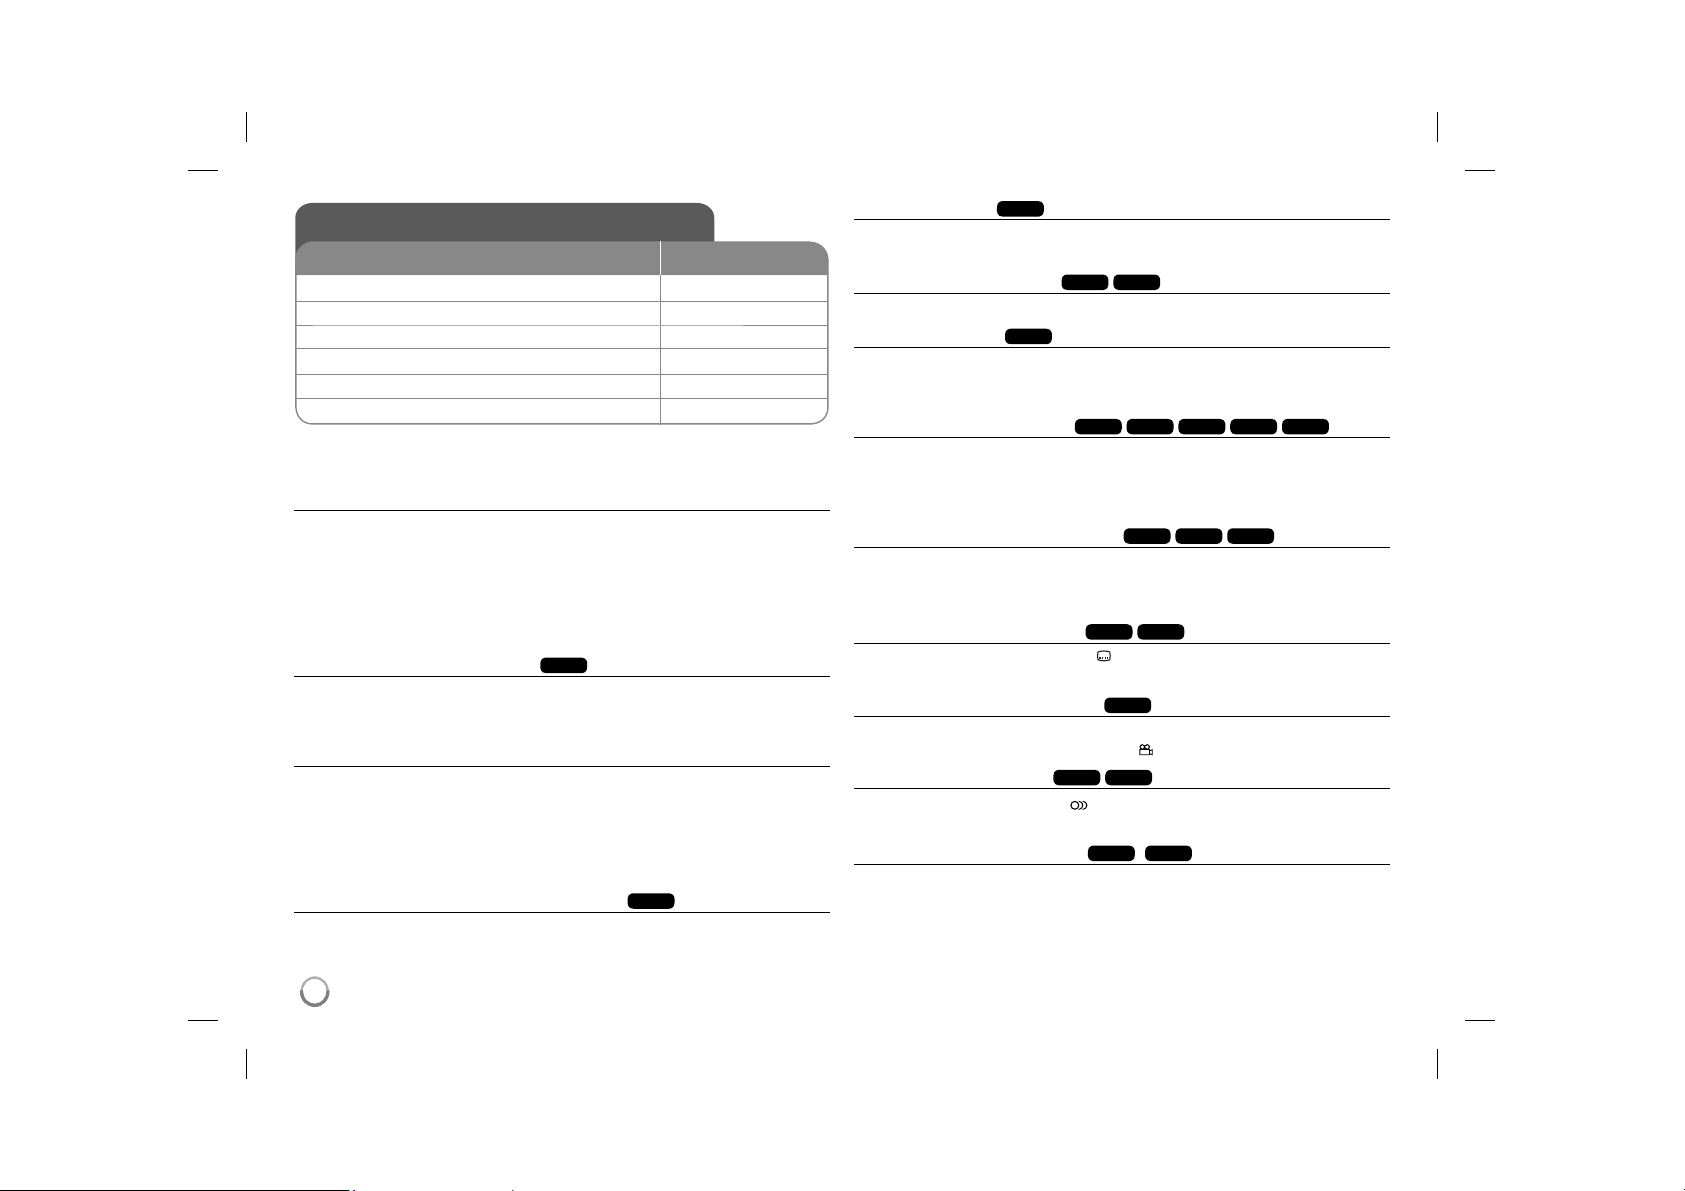
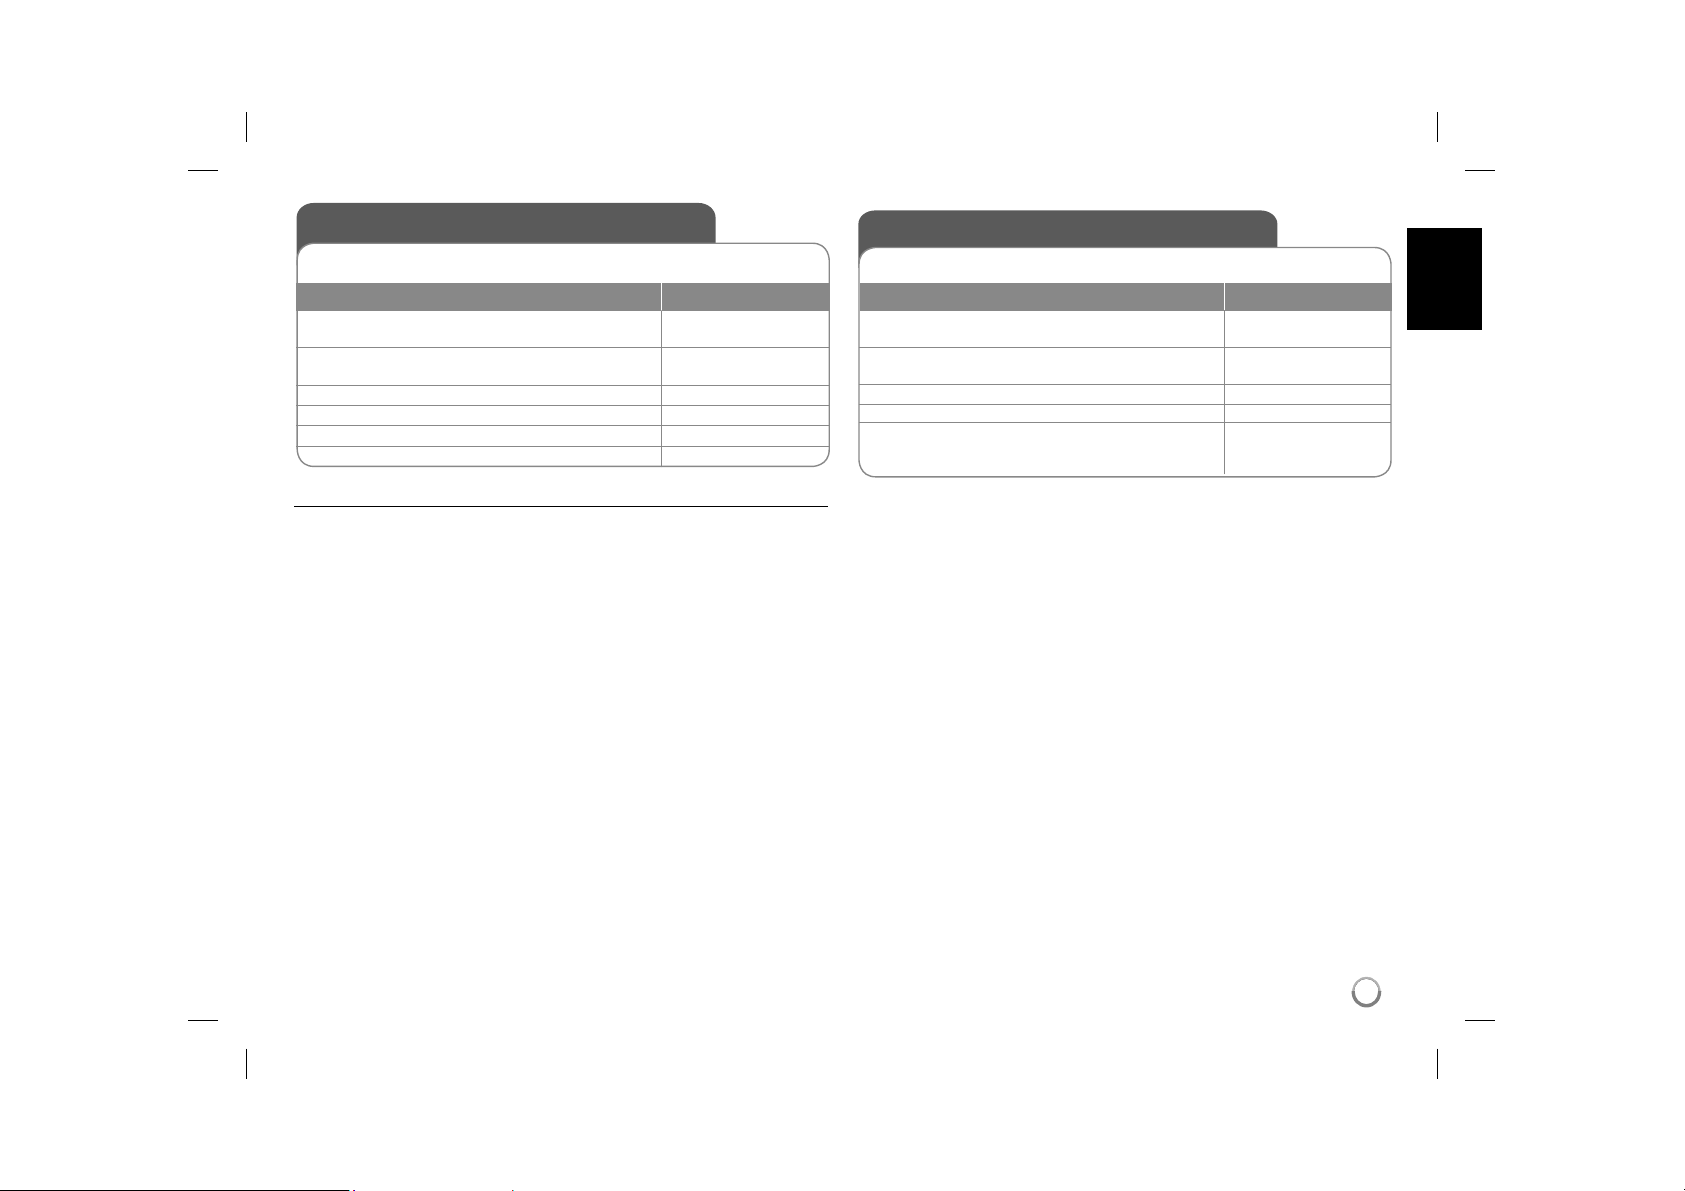
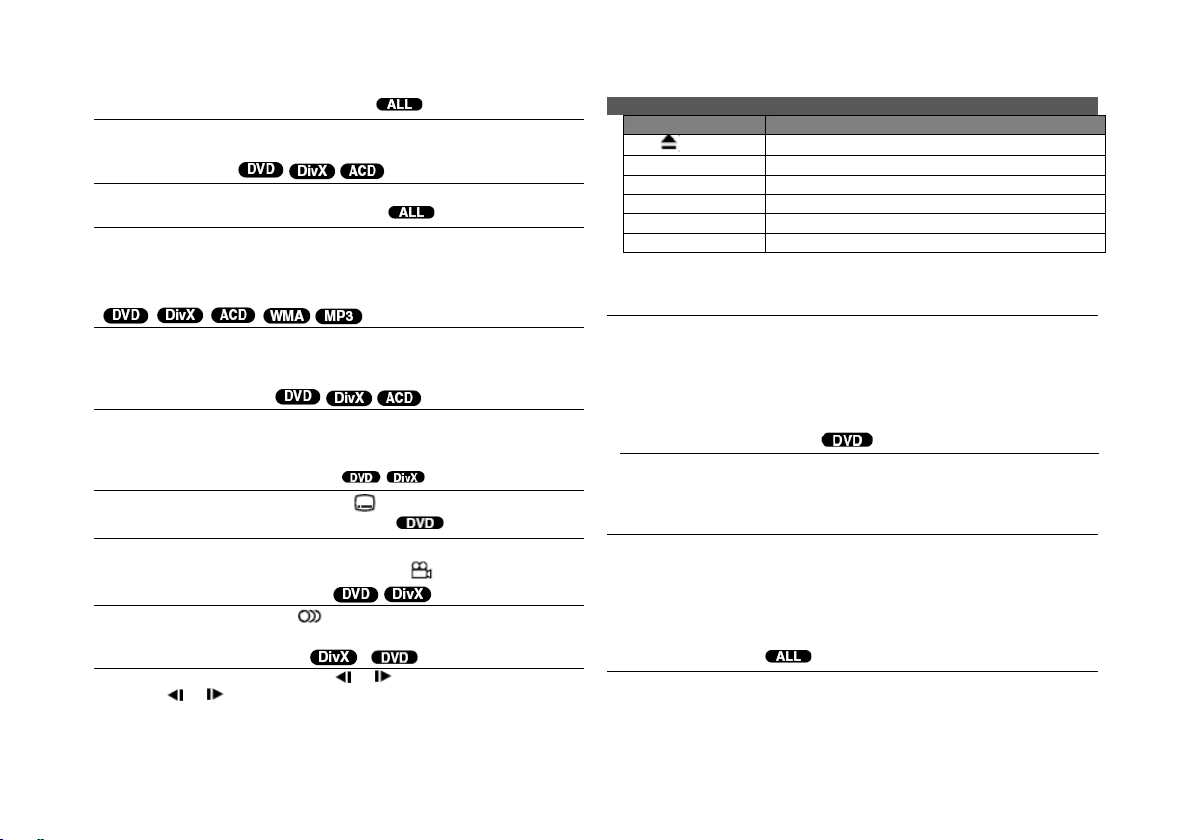
Symbol Used in this Manual
A section whose title has one of the following symbols are applicable only to the
disc or file represented by the symbol.
ALL
DVD
DivX
All discs and files
DVD and finalized DVD±R/RW
DivX files
v V
b B / ENTER
ACD
MP3
WMA
Audio CDs
MP3 files
WMA files
9
DP382-P_AISRSLK_ENG_MFL56732880.9 9DP382-P_AISRSLK_ENG_MFL56732880.9 9 7/7/08 10:01:43 AM7/7/08 10:01:43 AM
Page 10
Playing a Disc
BUTTON
1 Open the disc lid:
2 Insert a Disc: 3 Close the disc lid: 4 Start playback:
5 Adjust the volume: VOLUME
6 To stop playback:
Playing a Disc - more you can do
Stops the playback
Press STOP (x) to stop playback, the unit records the stopped point depending
on the disc. “ Xx ” appears on the screen briefly. Press PLAY ( N) to resume
playback (from the scene point). If you press STOP (x) again or unload the disc
(“ x ” appears on the screen), the unit will clear the stopped point.
(Xx =Resume Stop, x =Complete Stop)
The resume point may be cleared when a button is pressed. (for example:
POWER, OPEN, etc)
Playing a DVD that has a menu
Most DVD now have menus which load first before the film begins to play. You
can navigate these menus using vV b B or number button to highlight an
option. Press ENTER to select.
Playing a DVD VR disc
This unit will play DVD-RW disc that is recorded using the Video Recording
(VR) format. When you insert a disc DVD VR disc, the menu will appear on the
screen. Use vV to select a title then press PLAY ( N). To display DVD-VR
menu, press MENU or TITLE.
Some DVD-VR disc are made with CPRM data by DVD RECORDER. The unit
does not support these kinds of discs.
Skip to the next/previous chapter/track/file
Press SKIP (>) to move to the next chapter/track/file.
Press SKIP (.) to return to the beginning of the current chapter/track/file.
Press SKIP (.) twice briefly to step back to the previous chapter/track/file.
DVD
OPEN (Z)
N PLAY
x STOP
ALL
Pause a playback
Press PAUSE/STEP (X) to pause playback. Press PLAY ( N) to continue
playback.
Frame-by-Frame playback
Press PAUSE/STEP (X) repeatedly to play Frame-by-Frame playback.
Playing repeatedly
Press REPEAT repeatedly to select an item to be repeated. The current title,
chapter or track will be played back repeatedly. To return to normal playback,
press REPEAT repeatedly to select [Off].
Fast forward or fast reverse
Press and hold SKIP (. or >) to play fast forward or fast reverse during
playback. You can change the various playback speed by pressing and hold
SKIP (. or >) repeatedly. Press PLAY ( N) to continue play at normal
speed.
Repeating a specific portion (A-B)
Press A-B at the beginning of the portion you wish to repeat and again at the
end of the portion. Your selected portion will be repeated continually.
To return to normal playback, press A-B to select [Off].
Selecting a subtitle language
During playback, press SUBTITLE ( ) repeatedly to select a desired subtitle
language.
Watching from a different angle
If the angle indicator appears on the screen for a moment, you can select a different camera angle by pressing ANGLE ( ) repeatedly.
Hearing a different audio
During playback, press AUDIO ( ) repeatedly to switch between the available
audio languages, channels or encoding methods.
Slow down the playing speed
During playback, press SLOW (t or T) to slow down reverse or forward playback. You can change the various playback speed by pressing SLOW (t or T)
repeatedly. Press PLAY ( N) to continue play at normal speed.
ALL
ALL
DivX
DVD
ACD
DVD
DVD
DVD
DVD
DVD
DivX
DivX
DVD
DivX
(
DivX
WMA
ACD
DivX
: Forward only)
MP3
10
DP382-P_AISRSLK_ENG_MFL56732880.10 10DP382-P_AISRSLK_ENG_MFL56732880.10 10 7/7/08 10:01:44 AM7/7/08 10:01:44 AM
Page 11

DivX
Watching a enlarged video image
During playback or pause mode, press ZOOM repeatedly to select zoom
mode. You can move through the zoomed picture using vVb B buttons. Press
CLEAR to exit.
Viewing the title menu
Press TITLE to display the disc's title menu, if available.
Viewing the DVD menu
Press MENU to display the disc menu, if available.
DVD
DVD
Starting play from selected time
Searches for the starting point of entered time code.
clock icon. Enter a time then press ENTER.
hours, 10 minutes, and 20 seconds, enter "11020" and press ENTER. If you
enter the wrong number, press CLEAR to enter again.
DVD
ACD
DVD
Playing in random order
During playback or in stop mode, press RANDOM for playback in random order.
Press RANDOM again to return to normal playback.
Mark a scene on a disc
You can mark a position on a disc to return to at the place. Simply press
MARKER at the desired position. The marker icon will appear on-screen briefly.
Repeat to place up to nine markers.
Also you can recall or clear the positions. Press SEARCH and [Marker Search]
menu. Use b or B to select a desired marker on the menu, then press ENTER
to recall it or CLEAR to clear it.
Last Scene Memory
This unit memorizes last scene from the last disc that is viewed. The last scene
remains in memory even if you remove the disc from the player or switch off the
unit. If you load a disc that has the scene memorized, the scene is automatically recalled.
DVD
DivX
DVD
For example, to find a scene at 1
WMA
DivX
ACD
Press DISPLAY then select
MP3
Screen Saver
The screen saver appears when you leave the unit in Stop mode for about five
minutes. If the Screen Saver is displayed for five minutes, the unit automatically
turns itself off.
Mixed disc or USB Flash Drive – DivX, MP3/WMA and JPEG
When playing a disc or USB Flash Drive contained with DivX, MP3/WMA and
JPEG files together, you can select which menu of files you would like to play
by pressing TITLE.
Playing a DivX movie file
BUTTON
1 Open the disc lid:
2 Insert a disc: 3 Close the disc lid: 4 Select a movie file from the menu:
5 Start playback:
6 To stop playback:
Playing a DivX movie file - more you can do
Changing the character set to display DivX® subtitle correctly
Press and hold SUBTITLE for 3 seconds during playback. The language code
will appear. Press b B to select another language code until the subtitle is displayed properly and then press ENTER.
DivX file requirement
DivX file compatibility with this player is limited as follows:
• Available resolution size: 720x576 (W x H) pixel.
• The file names of DivX and subtitle are limited to 20 characters.
• DivX file extensions: “.avi”, “.mpg”, “.mpeg”
• Playable DivX subtitle: SubRip (.srt / .txt), SAMI (.smi),
SubStation Alpha (.ssa/.txt), MicroDVD (.sub/.txt), VobSub (.sub),
SubViewer 2.0 (.sub/.txt), TMPlayer (.txt), DVD Subtitle System (.txt)
• Playable Codec format: “DIVX3.xx”, “DIVX4.xx”, “DIVX5.xx”, “MP43”,
“3IVX”
• Only the playback function is supported with DivX 6.0 in the unit.
• Playable Audio format: “Dolby Digital”, “PCM”, “MP3”, “WMA”
• Sampling frequency: within 8 - 48 kHz (MP3), within 32 - 48 kHz (WMA)
• Bit rate: within 8 - 320 kbps (MP3), within 32 - 192 kbps (WMA),
less than 4Mbps (DivX file)
• CD-R/RW, DVD±R/RW Format: ISO 9660
• Maximum Files/Disc: Less than 650 (total number of files and folders)
OPEN (Z)
v V, MENU
N PLAY
x STOP
11
DP382-P_AISRSLK_ENG_MFL56732880.11 11DP382-P_AISRSLK_ENG_MFL56732880.11 11 7/7/08 10:01:45 AM7/7/08 10:01:45 AM
Page 12

Listening to Music Disc or files
BUTTON
1 Open the disc lid:
2 Insert a disc: 3 Close the disc lid: 4 Select a music from the menu:
5 Start playback:
6 To stop playback:
Listening to Music Disc or files - more you can
do
Creating your own program
You can play the contents of a disc in the order you want by arranging the order
of the musics on the disc. To add a music(s) on the program list, press PROG.
to enter the program edit mode (
Select a desired music on the [List] then press ENTER to add the music to the
program list. Select a music from the program list then press ENTER to start
programmed playback. To clear a music from the program list, select the music
you want to clear then press CLEAR in program edit mode. To clear all music
from the program list, select [Clear All] then press ENTER in program edit
mode. The program is cleared when the disc is removed or the unit is turned
off.
Displaying file information (ID3 TAG)
While playing a MP3 file containing file information, you can display the information by pressing DISPLAY repeatedly.
MP3/WMA music file requirement
MP3/WMA compatibility with this unit is limited as follows:
• File extensions: “.mp3”, “.wma”
• Sampling frequency: within 8 - 48 kHz (MP3), within 32 - 48kHz (WMA)
• Bit rate: within 8 - 320kbps (MP3), within 32 - 192kbps (WMA)
• CD-R/RW, DVD±R/RW Format: ISO 9660
• Maximum Files/Disc: Less than 650 (total number of files and folders)
12
E
mark appears on the menu).
OPEN (Z)
v V, MENU
N PLAY
x STOP
Viewing photo files
BUTTON
1 Open the disc lid:
2 Insert a disc: 3 Close the disc lid: 4 Select a photo file on the menu:
5 Display the selected file in full screen:
6 To return to the menu:
Viewing photo files - more you can do
Viewing photo files as a slide show
Use vV b B to highlight ( ) icon then press ENTER to start slide show.
You can change slide show speed using b B when ( ) icon is highlighted.
Skip to the next/previous photo
Press SKIP (. or >) to view the previous/next photo.
Rotate a photo
Use vV to rotate the photo in full screen counter clockwise or clockwise while
viewing a photo in full screen.
Pause a slide show
Press PAUSE/STEP (X) to pause a slide show. Press PLAY ( N) to continue
the slide show.
Listening to music during slide show
You can listen to music during slide show, if the disc contain music and photo
files together. Use vV b B to highlight ( ) icon then press ENTER to start
slide show.
Watching a enlarged photo image
While viewing a photo in full screen, press ZOOM repeatedly to select zoom mode. You
can move through the zoomed photo using vVb B buttons. Press CLEAR to exit.
Photo file requirement
JPEG file compatibility with this unit is limited as follows:
• File extensions: “.jpg”
• Photo size: Less than 2MB recommended
• CD-R/RW, DVD±R/RW Format: ISO 9660
• Maximum Files/Disc: Less than 650 (total number of files and folders)
OPEN (Z)
v V, MENU
N PLAY
x STOP
DP382-P_AISRSLK_ENG_MFL56732880.12 12DP382-P_AISRSLK_ENG_MFL56732880.12 12 7/7/08 10:01:45 AM7/7/08 10:01:45 AM
Page 13
Using an USB Flash Drive
You can play MP3/WMA/JPEG/DivX files in the USB Flash Drive with version
1.1.
BUTTON
Connect an USB Flash Drive to the USB
1
port on the unit:
Display the menu to select the USB
2
operation mode:
3 Select [USB]:
4 Select a file:
5 Play the file:
6 Remove the USB Flash Drive: -
Notes an USB Flash Drive
• You can switch among [DISC], [USB] and [AV IN] mode using MODE button.
• Do not extract the USB device in operating.
• We recommend that you back up your important files in the USB Flash Drive
to protect against accidental loss.
• If you use a USB extension cable or USB HUB, the USB device might not be
recognized.
• Music files (MP3/WMA), photo files (JPEG) and DivX files can be played.
For details of operations on each files, refer to relevant pages.
• Maximum Files/USB Flash Drive: Less than 650 (total number of files and
folders)
• The USB function of this unit does not support all kinds of USB devices.
• Digital camera and mobile phone are not supported.
-
MODE
b B, ENTER
v V, MENU
N PLAY
Watching an AV input
You can watch a video/audio signals from the external device using this unit.
BUTTON
Connect the external device to this unit
1
using the supplied AV cable: (Page 7)
Display the menu to select the [AV IN]
2
mode:
3 Select [AV IN]:
4 Watch a video from the external device: -
To exit [AV IN] mode, select [DISC] or
5
[USB]:
-
MODE
b B, ENTER
MODE, b B, ENTER
13
DP382-P_AISRSLK_ENG_MFL56732880.13 13DP382-P_AISRSLK_ENG_MFL56732880.13 13 7/7/08 10:01:45 AM7/7/08 10:01:45 AM
Page 14
Language Codes
Use this list to input your desired language for the following initial settings: Disc Audio, Disc Subtitle, Disc Menu.
Language Code
Afar 6565
Afrikaans 6570
Albanian 8381
Ameharic 6577
Arabic 6582
Armenian 7289
Assamese 6583
Aymara 6588
Azerbaijani 6590
Bashkir 6665
Basque 6985
Bengali, Bangla 6678
Bhutani 6890
Bihari 6672
Breton 6682
Bulgarian 6671
Burmese 7789
Byelorussian 6669
Chinese 9072
Language Code
Croatian 7282
Czech 6783
Danish 6865
Dutch 7876
English 6978
Esperanto 6979
Estonian 6984
Faroese 7079
Fiji 7074
Finnish 7073
French 7082
Frisian 7089
Galician 7176
Georgian 7565
German 6869
Greek 6976
Greenlandic 7576
Guarani 7178
Gujarati 7185
Language Code
Hausa 7265
Hebrew 7387
Hindi 7273
Hungarian 7285
Icelandic 7383
Indonesian 7378
Interlingua 7365
Irish 7165
Italian 7384
Javanese 7487
Kannada 7578
Kashmiri 7583
Kazakh 7575
Kirghiz 7589
Korean 7579
Kurdish 7585
Laothian 7679
Latin 7665
Latvian, Lettish 7686
Language Code
Lingala 7678
Lithuanian 7684
Macedonian 7775
Malagasy 7771
Malay 7783
Malayalam 7776
Maori 7773
Marathi 7782
Moldavian 7779
Mongolian 7778
Nauru 7865
Nepali 7869
Norwegian 7879
Oriya 7982
Panjabi 8065
Pashto, Pushto 8083
Persian 7065
Polish 8076
Portuguese 8084
Area Codes
Choose a area code from this list.
Area Code
Afghanistan AF
Argentina AR
Australia AU
Austria AT
Belgium BE
Bhutan BT
Bolivia BO
Brazil BR
Cambodia KH
Canada CA
Chile CL
China CN
Colombia CO
Congo CG
Area Code
Costa Rica CR
Croatia HR
Czech Republic CZ
Denmark DK
Ecuador EC
Egypt EG
El Salvador SV
Ethiopia ET
Fiji FJ
Finland FI
France FR
Germany DE
Great Britain GB
Greece GR
Area Code
Greenland GL
Hong Kong HK
Hungary HU
India IN
Indonesia ID
Israel IL
Italy IT
Jamaica JM
Japan JP
Kenya KE
Kuwait KW
Libya LY
Luxembourg LU
Malaysia MY
Area Code
Maldives MV
Mexico MX
Monaco MC
Mongolia MN
Morocco MA
Nepal NP
Netherlands NL
Netherlands Antilles AN
New Zealand NZ
Nigeria NG
Norway NO
Oman OM
Pakistan PK
Panama PA
Language Code
Quechua 8185
Rhaeto-Romance 8277
Rumanian 8279
Russian 8285
Samoan 8377
Sanskrit 8365
Scots Gaelic 7168
Serbian 8382
Serbo-Croatian 8372
Shona 8378
Sindhi 8368
Singhalese 8373
Slovak 8375
Slovenian 8376
Spanish 6983
Sudanese 8385
Swahili 8387
Swedish 8386
Tagalog 8476
Area Code
Paraguay PY
Philippines PH
Poland PL
Portugal PT
Romania RO
Russian Federation RU
Saudi Arabia SA
Senegal SN
Singapore SG
Slovak Republic SK
Slovenia SI
South Africa ZA
South Korea KR
Spain ES
Language Code
Tajik 8471
Tamil 8465
Telugu 8469
Thai 8472
Tonga 8479
Turkish 8482
Turkmen 8475
Twi 8487
Ukrainian 8575
Urdu 8582
Uzbek 8590
Vietnamese 8673
Volapük 8679
Welsh 6789
Wolof 8779
Xhosa 8872
Yiddish 7473
Yoruba 8979
Zulu 9085
Area Code
Sri Lanka LK
Sweden SE
Switzerland CH
Taiwan TW
Thailand TH
Turkey TR
Uganda UG
Ukraine UA
United States US
Uruguay UY
Uzbekistan UZ
Vietnam VN
Zimbabwe ZW
14
DP382-P_AISRSLK_ENG_MFL56732880.14 14DP382-P_AISRSLK_ENG_MFL56732880.14 14 7/7/08 10:01:46 AM7/7/08 10:01:46 AM
Page 15

Troubleshooting
Symptom Cause Correction
No power. The power cord is disconnected. Plug the power cord into the wall
The battery is discharged. Recharge the battery.
The power is on,
but the unit does
not work.
No picture. The TV is not set to receive the
No sound. The equipment connected with
The unit does
not start playback.
The remote
control does not
work properly.
No disc is inserted. Insert a disc.
The operation mode is not selected correctly.
signal from the unit.
The video cable is not connected
securely.
The LCD mode is set to [Off]. Select a LCD mode other than
the audio cable is not set to
receive the signal from the unit.
The volume is set to minimum. Use the volume controller to
The AUDIO options are set to the
wrong position.
An unplayable disc is inserted. Insert a playable disc. (Check the
The rating level is set. Change the rating level.
The remote control is not pointed
at the remote sensor on the unit.
The remote control is too far from
the unit.
outlet securely.
Use MODE button to select the
operation mode. (Page7)
Select the appropriate video input
mode on the TV.
Connect the video cable securely.
[Off].
Select the correct input mode of
the audio amplifier.
adjust the volume.
Set the AUDIO settings to the
correct position.
disc type and regional code.)
Point the remote control at the
remote sensor of the unit.
Operate the remote control closer
to the unit.
Specifications
General
Power requirements DC 9V
Power consumption 13.5W
External Dimensions 225 x 40 x 175 mm (W x H x D)
Net Weight (Approx.) 1.06kg
Operating temperature: 5 °C to 40 °C
Operating humidity 5 % to 90 %
Laser Semiconductor laser
Signal system PAL
Connectors
Audio/Video Output/Input ø3.5mm mini jack x 1
- Video: 1.0 V (p-p), 75 Ω, sync negative
- Audio: 2 Vrms (1 KHz, 0 dB)
Earphone terminal ø3.5mm stereo mini jack x 2
Liquid Crystal Display
Panel size 8.5 inches wide (diagonal)
Projection system R.G.B. stripe
Driving system TFT active matrix
Resolution 480 x 234 (WQVGA)
Accessories
• RCA Video/Audio cable
• AC Adapter (IM090WU-150B)
• Automotive Adapter (G1000233)
• Remote Control
• Battery for Remote Control (Lithium Battery)
Designs and specifications are subject to change without
prior notice.
15
DP382-P_AISRSLK_ENG_MFL56732880.15 15DP382-P_AISRSLK_ENG_MFL56732880.15 15 7/7/08 10:01:46 AM7/7/08 10:01:46 AM
Page 16

Enjoying in a car with the
Headrest Mounting Bracket
(Optional)
You can enjoy video in the back seat attaching the
unit to the back of the front seat.
Warnings
• The driver must not operate this unit while the
vehicle is moving.
Do not operate this unit where it can be viewed
by the driver.
Driver operation or viewing of this unit while the
vehicle is moving will cause distraction which
may result in serious accident and personal
injury or property damage.
• Do not attach or detach while driving, and do not
attach in the following locations, otherwise it may
result in injury or traffic accidents:
– anywhere other than the back of the seat
– in a location that interferes with the driverʼs
view or operation of the car
– in a location that interferes with the operation
of an airbag
– in a location that interferes with the driving
instruments.
• Depending on the type of headrest, you may
not be able to attach the bracket.
Headrest Mounting Bracket
a Fixing Screw
Fixes the unit on the bracket.
b Tilt Fixing Screw
Fixes a tilt angle of the bracket.
c Horizontal Fixing Screw
Fixes a horizontal angle of the bracket.
d Release knob
Press both knobs to release the bracket body
from the cradle.
e Headrest Mounting Cradle
Installation
a Separate the head-
rest. (Refer to your
carʼs user guide.)
b Install the headrest
mount cradle as
shown in the figure.
c Fit the bracket body
to the cradle.
d Put the unit on the
bracket and fix it
using the fixing
screw.
1
9 cm
or
less
DP382-P_AISRSLK_ENG_MFL56732880.16 16DP382-P_AISRSLK_ENG_MFL56732880.16 16 7/7/08 10:01:47 AM7/7/08 10:01:47 AM
e Adjust the horizon-
tal and tilt angle
of the bracket and
enjoy the unit.
Page 17

ןגנ DVD דיינ
םגד :DP382
1
P/NO : MFL56732880
Page 18

תוריהז :דבלב םיכמסומ תוריש יאנכטל תודעוימ הלא ןוקית תוארוה . ידכ
ילמשחה םלהה תנכס תא תיחפהל , דבלמ םהשלכ םינוקית ועצבת לא
הלעפהה תוארוהב םילולכה ולא ,ךכל םיכמסומ םתא םא אלא .
תוריהז : םימל רישכמה תא ףושחל ןיא(ףוטפט וא הזתה) חינהל ןיאו
םילזונב אלמ והשלכ ילכ וילע ,לטרגא ןוגכ.
תוריהז :
םינותיע ,תפמ-ןחלוש ,המודכו תונוליו .
הביבסה תוכיאל תושרה .
העימשה.
המודכו םומיח רונת.
למשחה לבכל עגונב תוריהז
דדובמ ילמשח לגעמ לע םקמל ץלמומ םירישכמה תיברמ תא;
םיפעוסמ םילגעמ וא םיפסונ םיעקש . תרבוחב ינכטה טרפמה ףדב וקדב
םיחוטב תויהל ידכ וז תוארוה .
ריקה יעקש לע הדימה לע רתי וסימעת לא . לע רתי םיסומע למשח יעקש
םינכוסמ םוגפ וא קודס לית דודיב וא . םורגל םילוכי וללה םיבצמהמ דחא לכ
הפירש וא ילמשח םלהל .רישכמה לש לבכה תא תעל תעמ וקדב , אוה םאו
קוחש וא קוזינ הארנ ,ותוא וקתנ , לבכה תא ורסמו רישכמב שמתשהל וקיספה
ההז קלחב ופילחהל ידכ השרומ תוריש זכרמל.
ןוכנ אל ינאכמ וא יזיפ שומישמ למשחה לבכ לע ונגה ,תוויע ןוגכ ,לותיפ ,הטיבצ ,
תלדב הריגס ,הכירד .םיעקתל דחוימב בל ומיש , הנממ הדוקנלו למשח יעקש
רישכמהמ רצוי לבכה .
עקשהמ למשחה לבכ תא קתנל ידכ , וכשמת לאו לבכה עקת תא הצוחה וכשמ
ומצע לבכהמ .רישכמה תא םיניקתמ רשאכ ,ןיטולחל שיגנ עקתהש ואדוו .
החשוק ןוכדע(Firmware) רחא םדא וא חוקלה ידי לע השעיש
דבלב חוקלה תוירחאב היהי , הייהת אל הזכש הרקמב תוירחאהו
םיטירפ םע םתרתסה ידי לע רורוואה יחתפ תא םוסחל ןיא , תמגודכ
םיקלוד תורנ תמגודכ תוחותפ תובהל רישכמה לע חינהל ןיא.
ידי לע תוללוסמ תורטפיה תויחנהל םאתהב תורומג תוללוסמ רטפהל שי
דבלב ןותמו יפורט םילקאב רישכמב ושמתשה.
ןדבואל םורגל תולוכי תוינזואה תועצמאב ההובג המצועב לילצל הנזאה
הרהזא:ילמשח קוש תנכס תיחפהל ידכ ,ירוחאה הסכמה תא וריסת לא . ןיא
שמתשמה ידי לע לופיטל דעוימה ביכר לכ םינפב .תורישל , תוריש יאנכטל ונפ
ןמוימו השרומ.
הרישי שמש תנירק תמגודכ הובג םוחל הללוסה תא ףושחל ןיא , וא שא
הרהזא :ילמשח קוש וא תוחקלתה תנכס תיחפהל ידכ , הז רישכמ ופשחת לא
ונייה , ול ןיאשו דבלב הז רישכמל למשח קפסמה דיחי עקש לש ילמשח לגעמ
תוחל וא םשגל.
הרהזא :רורוואה יחתפ תא ומסחת לא . תויחנהל םאתהב רישכמה תא וניקתה
ןרציה.
תוריהז : ןימא לועפת אדוול ידכו רורווא ךרוצל םימייק זראמב םיחתפו תוליסמ
הדימה ,םימוגפ וא םיררחושמ למשח יעקש ,הכראה ילבכ , םיקוחש למשח ילבכ
הטימ לע רצומה תחנה ידי לע םיחתפה תא םוסחל ןיא םלועל ,הפס , וא חיטש
רתי םומח ינפמ וילע ןגהל ידכו רישכמה לש.
המוד חטשמ . ןכ םא אלא םירפס יפדמ תינורא ןוגכ החמוגב הז רצומ ביצהל ןיא
ןרציה תויחנהל םאתהב רישכמל תואנ רורווא קפוסי.
תוריהז : ה רישכמCD/DVDרזייל תכרעמ ללוכ .
הז רישכמב םלוה שומיש חיטבהל ידכ , וארק
הבר בל תמושתב הלעפהה תוארוה תא השקבב
הרהזא!
תויושע וז תרבוחב תוטרופמש ולאמ תורחא ןוויכ וא הקוזחת תולועפ עוציב
דיתעב שומישל םתוא ורמישו . רישכמהו הדימב
הקוזחתל קוקז היהי , תורישה דקומ םע רשק ורצ
םכירוגמ םוקמל בורקה ךמסומה .(תוריש ךילהת ואר) .
תנכוסמ הנירקל הפישחל םורגל .
רזיילה ןרקל הרישי הפישח תעינמל ,רישכמה הסכמ תא חותפל וסנת לא .
תישפוח ןרקל השיגהו הלרטונ הליענה רשאכ תיארנ רזייל תנירק .
הפקת .
ןרקה ךותל טיבהל ןיא .
2
Page 19

םיניינעה ןכות
הלעפהל םינתינה םירוטילקתה יגוס
3
תונעטנ תוללוס
3
תישארה הדיחיה
4
קוחר טלש
5
חתמ רוביח
6
רישכמה רוביח
7
ה לנפ בוביסLCD 7 הלועפה בצמ תריחב
7
תורדגהה ןוויכ
8
רוטילקתה עדימ תגצה
9
רוטילקת תעמשה
10
טרס ץבוק תעמשהDivX
11
םיצבק וא הקיזומ רוטילקתל הנזאה
12
הנומת יצבקב הייפצ
12
קזבה ןנוכב שומישUSB
13
תסינכב הייפצAV
13
הפש ידוק
14
רוזא ידוק
14
תולקת ןורתפ
15
םיינכט םיטרפמ
15
גוס
וגול
DVD-VIDEO :הרכשה וא השיכרל םינתינה םיטרס ירוטילקת.
DVD-R:דבלב רמגומו ואידיו בצמ .
DVD-RW:דבלב רמגומ ואידיו בצמ .
R+DVD:דבלב ואידיו בצמ .הלופכ הבכש ירוטילקתב םג ךמות
RW+DVD:דבלב ואידיו בצמ
עמש רוטילקת
:
ירוטילקת תנגנמ וז הדיחיRW/R DVD ,R/RW-CDעמש ירתוכ םיליכמה ,DivX ,
MP3 ,WMAו / יצבק ואJPEG . ירוטילקת ןגנל ןתינ אלDVDRW/DVDR וא RW/R-
CDומצע רוטילקתה לש םייזיפ םיאנת וא הטלקהה תוכיא בקע וז הדיחי לע םימיוסמ , וא
הביתכה תנכותו הטלקהה רישכמ ינויפא .
למס תגוצת תודוא
ואידיו רוטילקתב תמייק הניא הלעפהה ךירדמב תראותמה תורשפאהשDVDםיוסמ .
למסה" " ךכב ןייצלו הלעפהה ךלהמב םכלש היזיוולטה ךסמ לע עיפוהל יושע
ירוזא דוק
הדיחיה בגב ספדומה ירוזא דוק וז הדיחיל . ירוטילקת קר ליעפהל הלוכי הדיחיהDVD
ןומיס ילעב ולאכ וא דוק ותוא ילעב"ALL."
ירוטילקת תיברמלDVDהפיטעה לע רורבב תוארנה רתוי וא תחא הרפס הנשי םלועב .
ליעפהל היהי ןתינ אל תרחא הדיחיה לש ירוזאה דוקה רפסמל םיאתהל בייח הז רפסמ
רוטילקתה תא.
ןגנה לש הזמ הנוש ירוזא דוק םע רוטילקת ליעפהל וסנת םא , העדוהה עיפות" דוק וקדב
ירוזאCheck Regional Code "היזיוולטה ךסמ לע.
םירצוי תויוכז
האשרה אלל םירצוי תויוכז ידי לע םינגומה םירמוח ריכשהל . תורשפא תא ללוכ הז רצומ
ידי לע החתופש םירצוי תויוכז תנגהMACROVISION . תמייק םימיוסמ םירוטילקתב
ילעבו םייאקירמא םיטנטפ רפסמ ידי לע תנגומה םירצוי תויוכז לע הנגה תייגולונכט בלשמ
לפכשל קוח יפ לע רוסא ,רדשל ,תוארהל ,םילבכ תועצמאב רדשל , וא רוביצל ןירקהל
הקתעה ינפב הנגה.ולאכ םירוטילקתמ תונומת םיטילקמ רשאכ ,םישער ועמשוי . הז רצומ
םירחא תויוכז . תרבח ידי לע רשואמ תויהל בייח ולא הנגה תויגולונכטב שומישה
תרבח ידי לע רחא שומיש רשואMACROVISION .רישכמה תא קרפל רוסיא לח.
MACROVISION , םא אלא םירחא םילבגומ הייפצ ישומישל וא יתיב שומישל הדעונו
הנרקהל םינתינ םירוטילקת יגוס/העמשה
תונעטנ תוללוס
חתמה לבכ אלל םיצבקה תא עימשהלו םוקמ.
למשחה עקשל רבוחמ.
הביבסה יאנתו .
םוקממ רישכמה תא ריבעהל שפוחה תא םכל תורשפאמ רישכמבש תונעטנה תוללוסה
םאתמו הבוכמ רישכמה קר ןעטיהל וליחתי רישכמה ךותב תונעטנה תוללוסהAC
רישכמה תא וליעפת רשאכ רצעית הניעטה.
תועש יצחו שולשכ ךרעב ךראית הניעטה.
תוללוס לע רעושמ הלועפ ןמז :תוקד םישולשו תועש שולשכ ךרעב .
תוללוסה בצמל םאתהב תונתשהל יושע תוללוס לע הלועפה ןמז , לועפתה סוטאטס
הניעט תעב םודאב קלדיי הללוסה יוויח .םייתסת הניעטה רשאכ , ועבצ הנשי יוויחה
קוריל .
תוקד המכל תחתמ אוה הללוסה לש רתונה ןמזה רשאכ , יוויח"Check Battery
Status"ךסמה לע עיפוי .
3
Page 20

הנומת רחא הנומת תנרקהל.
םימדוק העוצר וא קרפל רבעמ.
תגוצתLCD.
ושמתשה זאו עבצ וא תוריהב טירפת תגוצתל בושו בוש תישארה הדיחיב
ישקמב/ ךרעה תמאתהל . לע וצחלENTERהמאתהה רושיאל .
טירפתה תריחב רושיאל .
החיתפ OPEN( :)רוטילקת הסכמ תחיתפ .
קוחר טלש ןשייח :ןאכל קוחרה טלשה תא ונווכ . תועצמאב הדיחיב הטילשל
קוחרה טלשה , גצ תא ולפקת לאLCDהטמ .
1 גצ LCD
2הנרקה תרקב ישקמ /הניגנ
3םילוקמר
4תולועפ ישקמ
5ג 'קיטסיו :גב ושמתשה'טירפתב טירפ תריחבל קיטסיו .גה לע וצחל' קיטסיו
6למשח ןמסו הללוס תנעטה
7 רוטילקת הסכמ .
8
9 עקש USB : קזבה ןנוכ ורבחUSB .
10
תישאר הדיחי
(PLAY:)הנרקה תליחת /הניגנ.
(STOP:)הנרקה תריצע /הניגנ.
(PAUSE/STEP:)הנרקה לש תינמז היהשה /הניגנ / בושו בוש וצחל
(SKIP:)הרוחא שופיח * וא םייחכונ העוצר וא קרפ תליחתל הרזח וא
(SKIP:)המידק שופיח *םיאבה העוצר וא קרפל רבעמ וא .
תוינש יתשכ ךשמל שקמה תא וקיזחהו וצחל.
הלעפהPOWER( :) הקלדה ON יוביכ וא OFFהדיחיה .
הרדגהSETUP:תורדגה טירפתמ האיצי וא לא השיג .
טירפתMENU: טירפת לא השיג DVD.
הגוצתDISPLAY:ךסמה לע הגוצת לא השיג .
בצמLCD MODE: בצמ תריחב LCD( 16:9 ,4:3 וא OFF)
COLOR*/BRIGHT (עבצ/תוריהב): רובע תוריהב וא עבצ טירפת תגוצת
MODE (בצמ) : ןיבמ הלועפ בצמ תריחב[DISC[ ,]USB] ו[AV IN.]
תגוצת לש תוריהב וא עבצ תמאתהלLCD , לע וצחלCOLOR/BRIGHT
הניעטה תמלשה םע קוריל הנתשמו הניעטב םודאב קלוד ןמסה(מע ואר '3.)
הדיחיה יוביכ םע תוינש רפסמ ךשמל קוריל הנתשמ ןמסה.
לילצ תמצוע: תמצוע רקב תרזעב המצועה תמר תא םיאתהל ןתינ
ןימי דצב לילצה .
לילצהמ תיטרפ האנהל ןימי דצב תוינזואה עקשל תוינזוא ורבח .
תוינזוא:
4
Page 21

תינושלה תא וכשמ זאו הללוסה קיזחמ ספת תא וקדה
קוחרה טלשב הללוסה תסנכה
הללוסה קיזחמ תאצוהל . ןמיס םע הללוסה תא וסינכה +
ןמיס לש ןוויכב +הללוסה קיזחמב . קיזחמ תא וריזחה
סנכוה יכ ואדוו טלשה תדיחי ךותל הללוסה םע הללוסה
ואולמב המינפ.
ןוגכCR ,2025ךרע הווש וא .
םיימוקמה .שאל וכילשת לא.
הפלחהל תנתינ םויתיל תללוס תודוא הרהזא
םישמתשמה ידי לע הפלחהל.
הרהזא: תווהל הלולע הז רישכמב תשמשמה הללוסה
ןוכנ אל שומישב תימיכ הייווכ וא שא ןוכיס . וניעטת לא
שדחמ ,וקרפת , לעמ וממחת וא ופרשת100C .
תללוסב ופילחהMatsushita Elec. Ind. Co., Ltd.
ץוציפ וא שא ןוכיס תווהל לולע תרחא הללוסב שומיש .
תושמושמ תוללוסמ ורטפיה . קחרה תוללוסה תא ורמש
םידלימ .שאל וכילשת וא וקרפת לא .
קוחר טלש
תויבותכSUBTITLE( :)תויבותכ תפש תריחב .
תיווזANGLE( :) תמלצמ תיווז תריחב DVD , םא
הנימז.
גולידSKIP/ שופיחSEARCH( /:)שופיח *
הרוחא/המידק .קרפל רבעמ/םימדוקה וא םיאבה העוצר .
םויתיל ורקימ יאתב טלש תדיחי תללוס ופילחה3 טלוו
םיקוחל םאתהב יתוחיטב ןפואב הללוסה ןמ ורטפיה
* תוינש יתשכ ךשמל שקמה תא וקיזחהו וצחל .
יטיאSLOW( :)הרוחא תיטיא הנרקה /המידק .
2
הרדגהSETUP: טירפת ךותמ האיצי וא לא השיג
תורדגה.
טירפתMENU: טירפת לא השיג DVD.
:םיטירפתב טווינ .
ENTER( :)טירפת תריחב רושיא .
RETURN( :) ןמ האיציל וא הרוחא רבעמל וצחל
טירפתה .
הגוצתDISPLAY:ךסמה לע הגוצת לא השיג .
3
היוגש הפלחהב ץוציפ תנכס תמייק.
ההז גוסמ הללוסב קר ופילחה.
הנומת רחא הנומת תנרקהל בושו בוש וצחל
תדעוימ איה םא הללוסל ךומס םיפסונ הרהזא ינומיס
PAUSE/STEP( ):הנרקה לש תינמז היהשה /הניגנ /
PLAY(
:)הנרקה תליחת/הניגנ .
STOP( :)הנרקה תריצע /הניגנ.
תורפס ישקמ:טירפתב תורפסוממ תויורשפא תריחב .
PROG.:תונכת תכירע בצמל הסינכ .
CLEAR :תתנכותמ המישרב העוצר רפסמ תרסה.
4
רתוכTITLE:רוטילקתב םירתוכ טירפתל השיג .
( קינוסנפPanasonic) ,סמ קלח '2025 CRדבלב .
הרזחREPEAT:קרפ לע הרזח ,העוצר ,לוכה וא רתוכ .
A-B:עטק לע הרזח .
םוזZOOM:ואידיו תנומת תלדגה .
ןומיסMARKER:הנרקה תעב הדוקנ ןומיס /הניגנ .
שופיחSEARCH: תגוצת (ןומיס שופיח) טירפת .
יארקאRANDOM:תנרקה /יארקא רדסב תועוצר תניגנ.
1
הלעפהPOWER( :) הקלדה ON וא
יוביכOFFהדיחיה .
עמשAUDIO( :) וא תפש תריחב
עמש ץורע .
5
Page 22

הדיחיה לש ןימי דצ
עקש ךותל ורבח "DC 9V IN ."
רוקמ לא ורבח
למשח .
*ןאכ ריוצמה הזמ הנוש תויהל יושע יפוסה טסה .
הדיחיה לש ןימי דצ
תצמ עקש ךותל ורבח
בכרה לש תוירגיסה .
עקש ךותל ורבח "DC 9V IN "
(SHENZHEN) CO., LTD
הדיחיה ןמ עקתה תאצוה ינפל תוירגיסה תצמ עקשמ ענוממה םאתמה.
ךיתנ ץוציפל םורגל לולע בכרב ללוחמהDC.
קזניהל הלולע רזיילה תשדע תדיחי.
למשחה עקש לא הדיחיה ןמ קפוסמה למשחה לבכ תא ורבח .
ענוממ םאתמ
לע לעופ הז ענוממ םאתמ8.5-16טלוו .
םיאתמ ענוממ םאתמ תריחבב עויסל למשח יקלח ץיפמ לא ורשקתה.
ידי לע רצוימGRAND POWER ELECTRONIC TECHNOLOGY
תוריהז
בכרל וא הדיחיל ירשפא קזנו תולמשחתה תעינמל , תא דימת וקתנ
ךיתנ1.5 רפמא 250ענוממה םאתמה ךותב ןקתומ הנגהל טלוו .
עונמה תקלדה םע , תוירגיסה תצמ עקשמ ענוממה םאתמה תא ןקתנ
בכרב.
תנקורמ בכרה תללוס רשאכ הדיחיה תא וליעפת לא . לש אישה םרז
כל תחתמ תדרוי בכרב םרזה תקפסא םא-10טלוו , אל הלולע הדיחיה
I-MAG ELECTRONICS(DONG GUAN) CO., LTD
בטיה לועפל.
ןוגכ :
-רישי שמש רואב םירוגס תונולח םע בכר ךותב.
-םומיח ןקתמל ךומס.
תוכרעמ ילעב םיבכרב שומישל וננכות הלש ענוממה םאתמהו וז הדיחי
לע הלוע הרוטרפמטה וב םוקמב הדיחיה תא וריאשת לא70C , תרחא
רחא גוסמ למשח תכרעמ שי םכלש בכרל , תכרעמב שמתשהל ןתינ אל
6
למשח ירוביח
למשח לבכ רוביח
םאתמAC
לבכ תכרע וא םיאתמAC.
ענוממ םאתמ רוביח
תילילש למשח תקראה8.5-16טלוו .בכרה ילכ בורל ןקתה והז . םא
למשחDC.
םאתמAC לע לעופ הז 100-240 טלוו ~0.5 רפמא 50/60ץרה .
עקת םאתמ תריחבב עויסל למשח יקלח ץיפמ לא ורשקתהAC
ידי לע רצוימ-
Page 23

גצ בוביסLCD
גצ תא בבוסל ןתינLCD דע ןועשה ןוויכב הדיחיה לש 180 תולעמ
שומישל . גצ בוביס רחאל הדיחיה תא ליעפהל םג ןתינLCD 180
הטמ יפלכ הרזח לופיקו תולעמ .
AV IN/
גצ בוביסלLCD ,ןחלוש ןוגכ ביציו דיחא חטשמ לע הדיחיה תא וחינה .
גצ תא ופחדLCDתיכנא החונתל ותוא ומירה זאו הלעמ יפלכ . ובבוס
גצ תאLCD ןועשה ןוויכב תויטיאב 180תולעמ .ךרוצ שי םא , תא ולפק
גצLCDבוביסה רחאל .
גצ בוביסלLCDולש תירוקמה הדמעל , גצ תא וחתפLCD החונתל
תיכנא . גצ תא תויטיאב ובבוסLCD ןועשה ןוויכ דגנ 180תולעמ .
הדיחיב שומישה םויס םע , גצ תא וריזחהLCDתירוקמה ותדמעל .
גצ תא וריאשת לאLCDהלעמ יפלכ הנופ החונתב , םיעוזעזש ןוויכ
ול קיזהל םילולע םיימואתפ.
יבלוד תודבעממ ןוישיר תחת רצוימ" .יבלוד "“Dolby” ,“Pro
הלעפהה בצמ תריחב
הדיחיה רוביח
ואידיוו עמש רוביח
OUT
עקש תא ורבח היזיוולטב םימאות הסינכ יעקש לא הדיחיב
לבכ תרזעב םכלשAVהטמל הארנכ קפוסמה .
ךותל ורבח
."
AV IN/
עקש
הדיחיה לש ןימי דצ
OUT"
היזיוולט
Logic”ה למסו -Dיבלוד תודבעמ לש םיגתומ םנה לופכה .
שומיש ינפל הלעפה בצמ רוחבל םכילע
הז רישכמב . וצחלMODE רישכמה לע
עיפוי הלעפה בצמ תריחב טירפתו .
ישקמב ושמתשה/ וצחל זאו בצמה תריחבל ENTER .
ורחב[DISC] סנכוהש רוטילקתה תנרקהל .
ורחב[AV IN] וידוא תותואב הייפצל/ינוציח רישכממ ואדיו.
ורחב[USB] ץבוקה תנרקהל/ ה רזבאבש םיצUSBרבוחמה .
7
Page 24

שקמ
1. תורדגה טירפת תגוצת:
SETUP
2. הנושארה המרב היוצר תורשפא ורחב :
3. היינשה המרל ורבע :
4. היינשה המרב היוצר תורשפא ורחב :
5. תישילשה המרל ורבע :
6. הרדגהה תא ונש :
/ ENTER
הגוצת תורדגה תמאתה
תורדגהה תמאתה
היזיוולט סחיTV Aspect - ךסמ תרוצ לע ססבתהב שומישל ךסמ סחי ורחב
םכלש היזיוולטה.
[4:3] : היזיוולט תרבוחמ רשאכ ורחב4:3הליגר .
[16:9] : היזיוולט תרבוחמ רשאכ ורחב16:9הבחר .
הגוצת בצמDisplay Mode - םתרחב םא 4:3 , וצרת דציכ רידגהל םכילע
םכלש היזיוולטה ךסמ לע בחר ךסמ יטרסו תוינכת גיצהל .
[Letterbox] : ןותחתהו ןוילעה קלחב םירוחש םיספ םע בחר ךסמ תנומת גיצמ
ךסמה לש .
[Panscan] : ךסמ אלממ4:3 ,ךרוצה יפל הנומתה תא ךתוח .
עמש תורדגה תמאתה
DRC (תימאניד חווט תרקב)- לילצה תמצוע רשאכ יקנל לילצה תא ךפוה
תכמנומ(דבלב ילאטיגיד יבלוד) . לא ונווכ[ON] הז טקפאל .
ילוקVocal - ורחב[ON] רוטילקת לעפומ רשאכ קרDVDיקוירק . יצורע
ליגר ואירטס לילצל ובברועי יקוירקה .
הנושארה םעפב הדיחיה תקלדה םע עיפוי הפש תריחבל טירפתה . ושמתשה
הליענ תורדגה תמאתה
ירוזא דוק תורשפא רידגהל םכילע[Area Code] הליענ תויורשפאב שומישל .
תורדגה תמאתה -תושעל ולכותש םירבד דוע
הנושאר הלעפה תעב
ישקמב ושמתשה תריחבל [ENTER] לע וצחל זאוENTER.
הפש תורדגה תמאתה
טירפת תפש Menu Language - ךסמ תגוצתו תורדגה טירפתל הפש תריחב .
ירוזא דוק תורשפא ורחב[Area Code] לע וצחל זאו . תב המסיס ודילקה4
לע וצחלו תורפסENTER . לע וצחלו בוש ודילקהENTERרושיאל . םתיגש םא
רפסמה תדלקהב , לע וצחלCLEARןתוא ונקתו תורפסה תקיחמל .
התוא ספאל ולכות המסיסה תא םתחכש םא . ןמ רוטילקתה תא ואיצוה תישאר
הדיחיה . ודילקהו תורדגהה טירפת תא וגיצה'210499 'קחמית המסיסהו .
גורידRating - גוריד תמר ורחב .רתוי הכומנ המרהש לככ , רימחמ גורידה ךכ
ENTER ןב םיאתמ רפסמ תדלקהל 4 תופש ידוק תמישרל םאתהב תורפס
רתוי . ורחב[UNLOCK] גורידה לורטנל .
המסיסPassword -הליענ תורדגהל המסיס יוניש וא תרדגה .
ןתוא ונקתו .
[New] : תב השדח המסיס ודילקה4 זאו תורפסה ישקמב שומיש ךות תורפס
ישקמב לע וצחל זאו הפש תריחבל ENTERעיפוי רושיאה טירפתו .
טירפת/תויבותכ/ רוטילקת עמשDisc Audio/Subtitle/Menu - הפש תריחב
טירפתל/תויבותכ/רוטילקת עמש .
[ רוקמORIGINAL] :תירוקמה רוטילקתה תטלקה תפשל סחייתמ .
[ רחא[OTHER :תרחא הפש תריחבל , לע זאו תורפסה ישקמ לע וצחל
( דומע ואר14) .יוגש דוק םתדלקה םא , לע וצחלCLEAR תורפסה תקיחמל
[OFF]( רוטילקת תויבותכל :)תויבותכה יוביכ.
לע וצחלENTER .רושיאל המסיסה תא בוש ודילקה .
[Change] : תב השדח המסיס ודילקה4 המסיסה תדלקה רחאל םיימעפ תורפס
תיחכונה .
ירוזא דוקArea Code -הנרקה גוריד תמרכ יפרגואיג רוזאל דוק ורחב . ךכ
ירוטילקת גורידל םישמשמ רוזאה ינקת יכ עבקנDVDםירוה תליענב םירקובמה .
( דומע ואר14 .)
8
Page 25

שקמ
1. ורחבDISPLAY:
DISPLAY
2. טירפ ורחב :
3. הגוצת טירפת תורדגה ומיאתה :
/ ENTER
4. האיציל הרזחל
DISPLAY
רוטילקת עדימ תגוצת -תושעל ולכותש םירבד דוע
םימושרה םיצבקהו םירוטילקתה לכ
הטמ
עמש ירוטילקת
ירוטילקתDVDו -RW/R DVD
םירמגומ
יצבק3MP
יצבקDivX
יצבקWMA
לע הציחלב טירפ רוחבל ולכות לע הציחלב הרדגה רוחבל וא תונשלו .
רתוכ רפסמ(העוצר) םייחכונ/ םירתוכ לש ללוכ רפסמ(תועוצר וא)
יחכונ קרפ רפסמ/ ללוכ םיקרפ רפסמ
עמש ץורע וא תפש תריחב
תורחבנ תויבותכ
תרחבנ תיווז/ ללוכ תויווז רפסמ
רחבנ לילצ בצמ
הניגנ ןמז/ ףלחש הנרקה
לע הציחל ידי לע הללוסה תניעט בצמ תא רוחבל ולכותDISPLAY ךלהמב
תסינכ עקש רשאכ הנרקההDC 9רבוחמ וניא טלוו .
אלמ קיר שדחמ וניעטה
הז ךירדמב םישמשמה םילמס
גצוימה רוטילקתל קר םיאתמ םיאבה םילמסה ןמ דחא ותרתוכבש עטק
הז למס ידי לע .
רוטילקת עדימ תגוצת
תורחא תורדגה תמאתה
ואדיוו ירוטילקת רפסמב םימייקה .ב ורחב [ON] וז תורשפאב שומישל .
PBC (הנרקה תרקב) – טווינ ינייפאמ תלעפה תרשפאמ הנרקהה תרקב
DivX (R) VOD- םושיר דוק םכל םיקפסמ ונא DivX® VOD ( ואידיו
השירד יפל) שומיש ךות ואידיו יטרס תונקלו רוכשל םכל רשפאמה
תורישבDivX ® VOD .ףסונ עדימל , רתאב ורקב
www.divx.com/vod
ENTER למס רשאכ [select] דוקב תופצל ולכותו ראומ
לע וצחל
הדיחיה לש םושירה .
מ םידרומה ואידיוה יטרס לכ-DivX® VOD הדיחיב קר הנרקהל םינתינ
וז .
9
Page 26
שקמ
1. םירוטילקתה הסכמ תחיתפ:
OPEN( )
2. רוטילקת תסנכה :
-
3. םירוטילקתה הסכמ תריגס :
-
4. הנרקה תליחת/הניגנ :
PLAY
5. לילצ תמצוע תמאתה :
VOLUME
6. הנרקה תריצעל/הניגנ :
STOP
הנרקה תייהשה/ הניגנ
)
לע וצחלPAUSE/STEP( ) הנרקה תייהשהל/הניגנ . לע וצחלPLAY(
הנרקה ךשמהל/הניגנ .
תנרקה / רוטילקת תעמשה
הנומת רחא הנומת הנרקה
לע בושו בוש וצחלPAUSE/STEP( ) הנומת רחא הנומת תנרקהל .
הנרקה/ תרזוח הניגנ
לע בושו בוש וצחלREPEATהרזחל טירפ תריחבל .רתוכה , העוצרה וא קרפה
ונרקוי םייחכונה/בושו בוש ונגוני .הנרקה לא הרזחל/הליגר הניגנ , בושו בוש וצחל
לעREPEAT תריחבל [OFF] .
הרוחא וא המידק ריהמ רבעמ
רוטילקת תלעפה - תושעל ולכותש םירבד דוע
הנרקה תריצע
תא וקיזחהו וצחלSKIP( וא ) הנרקהל/ הרוחא וא המידק הריהמ הניגנ
הלעפה תעב . לע הציחלב תונוש הלעפה תויוריהמ תונשל ולכותSKIP( וא
) בושו בוש . לע וצחלPLAY( ) הנרקה ךשמהל/הליגר תוריהמב הניגנ .
םיוסמ עטק לע הרזח
רחבנה עטקה לע בושו בוש הרזח .הנרקה לא הרזחל/ לע וצחל הליגר הניגנB-A
תויבותכ תפש תריחב
לע וצחלB-Aעטקה ףוסב בושו רוזחל םיצור םתא וילע עטקה תליחתב . עצבתת
תריחבל[OFF .]
תועצמאב ולא םיטירפתב טוונל םילוכי תשגדהל תורפסה ינצחל וא
הנרקה תעב , וצחלSUBTITLE( ) היוצר תויבותכ תפש תריחבל בושו בוש .
הנוש תיווזמ הייפצ
ךסמה לע עגרל עיפומ תיווזה ןמס םא , הציחלב הנוש המלצמ תיווז רוחבל ולכות
לע בושו בושANGLE( .)
הנוש עמשל הנזאה
רוטילקת ןירקת וז הדיחיVR DVD ואידיו תטלקה טמרופב טלקוהש (VR .)
לע וצחל זאו רתוכ תריחבלPLAY( ) . טירפת תגוצתלVR-DVD , לע וצחל
רוטילקתה(ךסמה לע עיפומ ) ,הריצעה תדוקנ תא קחמת הדיחיה( . =
הריצעמ ךשמה , = האלמ הריצע) . הקיחמל תנתינ הריצעמ ךשמה תדוקנ
שקמ ץחלנ רשאכ(המגודל :POWER ,OPENוכו ') .
רוטילקת תנרקהDVD טירפת לעב
ה ירוטילקת תיברמל-DVDהנרקהה תנרקה ינפל ןעטנה טירפת שי םויכ . םתא
תויורשפאה . לע וצחלENTERהריחבל .
רוטילקת תנרקהVR DVD
רוטילקת תסנכהבVR DVD ,ךסמה לע טירפת עיפוי . ישקמב ושמתשה
הנרקה תעב , לע בושו בוש וצחלAUDIO( ) עמש תופש ןיב רבעמל , םיצורע
םינוש הנפצה תוטיש וא .
:דבלב המידק)
הנרקה תוריהמ תטאה(
RECORDER .הז גוסמ םירוטילקתב תכמות הניא וז הדיחי .
קרפה לא גוליד/םיאבה העוצר/ םימדוקה
לע וצחל הנרקה תעבSLOW( וא ) המידק וא הרוחא הנרקה תטאהל .
לע הציחלב תונוש הנרקה תויוריהמ תונשל ולכותSLOW'( וא ) בוש
בושו . לע וצחלPLAY( ) הליגר תוריהמב הנרקה ךשמהל .
לע םיימעפ הרצקב וצחלSKIP( )קרפה לא רבעמל/םימדוקה העוצר .
לע וצחלSTOPהנרקה תריצעל . הנתומ הריצעה תדוקנ תא תרכוז הדיחיה
רוטילקתב . עיפוי ךסמה לע רצק ןמזל . לע וצחלPLAY( ) ךשמהל
הנרקה(הנצסב הריצעה תדוקנמ) . לע בוש וצחלת םאSTOP( ) תא ואיצות וא
MENU וא TITLE .
ירוטילקתVR-DVD עדימ םע םירצונ םימיוסמ CPRM לש DVD
לע וצחלSKIP( ) קרפה לא רבעמל/םיאבה העוצר .
לע וצחלSKIP( ) קרפ תליחתל הרזחל/םייחכונ העוצר .
10
Page 27

שקמ
1. םירוטילקתה הסכמ תחיתפ:
OPEN( )
2. רוטילקת תסנכה :
-
3. םירוטילקתה הסכמ תריגס -4. טירפתה ןמ טרס ץבוק תריחב :
,MENU
5. הנרקה תליחת :
PLAY
6. הנרקה תריצעל :
STOP
Playing a DivX movie file
לע הציחלב ליעפהל םכנוצרב םיצבק טירפתTITLE .
תויבותכ תגוצתל םיוותה ךרעמ יונישDivX®יוארכ
,
“Dolby Digital”
,
ברועמ רוטילקת– DivX ,3MP/WMAו -JPEG
יצבק ליכמה רוטילקת תלעפה תעבDivX ,3MP/WMAו -JPEGדחי , הזיא רוחבל ולכות
BUTTON
טרס ץבוק תנרקהDivX
ישקמ תרזעב תלדגומה הנומתה ךרד עונל ולכות. לע וצחלCLEAR
תלדגומ ואידיו תנומתב הייפצ
היהשה בצמב וא הנרקה תעב , לע בושו בוש וצחלZOOMםוז בצמ תריחבל .
האיציל .
םירתוכ טירפתה הייפצ
לע וצחלTITLEרוטילקתה לש םירתוכה טירפת תגוצתל ,םייק םא .
טירפתב הייפצDVD
לע וצחלMENUרוטילקתה טירפת תגוצתל ,םייק םא .
טרס ץבוק תנרקהDivX - תושעל ולכותש םירבד דוע
רדגוהש ןמז דוק לש הלחתה תדוקנ שופיח . לע וצחלDISPLAY תא ורחב זאו
שקמ תא וקיזחהו וצחלSUBTITLEכ -3הנרקה תעב תוינש .עיפוי הפשה דוק . לע וצחל
ישקמ לע וצחל זאו יוארכ הנגצות תויבותכהש דע רחא הפש דוק תריחבל ENTER .
ץבוק תושירדDivX
ץבוק תומיאתDivXןלהלכ תלבגומ הז ןגנל :
היצולוזר720x576 (בחורxהבוג) םילסקיפ.
הריצע בצמב וא הנרקה תעב , לע וצחלRANDOM הנרקהל / רדסב הניגנ
הנרקה תליחת/ רדגומ ןמזמ הניגנ
ןועשה למס . לע וצחלו ןמז ודילקהENTER .המגודל ,ב הנצס תאיצמל -1העש ,
לש ץבוקה םשDivXב ןימז תויבותכו -20םיוות .
ץבוקב יוטיבל ןתינ וניאש דוק םייק םאDivX , ןמיסכ גצוי יכ ןכתי"_ "הגוצתב.
תונומת בצק :מ תוחפ-30היינשל תונומת .
םיקיר םיפד בוליש ליכמ וניא םיטלקומ םיצבק לש עמשהו ואידיוה הנבמ םא , וקפוי
רוזחל ןתינ וילא רוטילקתב םוקמ ןמסל ולכות . לע וצחל טושפMARKER םוקמב
רוטילקת לע הנצס ןומיס
עמשה וא ואידיוה.
יצבוק לש תומויסDixV :“.avi”, “.mpg”, “.mpeg”,
תומוקמה תא קוחמל וא ריזחהל םג ןתינ . לע וצחלSEARCH טירפת לעו
תויבותכDivXהנרקהל תונתינ :SubRip (.srt/.txt) ,SAMI(.smi) ,SubStation
Alpha(*ssa/*txt) ,MicroDVD(*.sub/*.txt) ,VobSub(*.sub) ,SubViewer
2.0(*.sub/*.txt) ,TMPlayer (.txt) ,DVD Subtitle System (.txt).
טמרופCodecהנרקהל ןתינ :“DIVX4.xx”, “DIVX5.xx”, “MP43”, “3IVX” ,
"DIVX3.xx."
םע תכמתנ הנרקהה תלועפ קרDivX 6.0וז הדיחיב .
הניגנל ןתינ עמש טמרופ :ילאטיגיד יבלוד ,“PCM”, MP3”, WMA”
הפצנש ןורחאה רוטילקתה ןמ הנורחאה הנצסה תא תננשמ וז הדיחי . הנצסה
ןגנה ןמ רוטילקתה תא םתאצוה םא םג ןורכיזב תרתונ הנורחאה . תא םתיביכ םא
הנורחא הנצס ןורכיז
םוגיד רדת : ןיב8-48 ץרהוליק (3MP) , ןיב32-48 ץרהוליק (W MA.)
טיב רועיש : ןיב8-320 kbps( 3MP ,)32-192 kbps( WMA) ,מ תוחפ-4 Mbps ( ץבוק
DivX.)
טמרופRW/R-CD ,RW/R DVD :9660 ISO.
שמחכ ךשמל רוצע בצמב הדיחיה תא םיריאשמ םתא רשאכ עיפומ ךסמה רמוש
ךסמ רמוש
יברמ םיצבק רפסמ/רוטילקת :מ תוחפ -650 (ללוכ םיצבקו תויקית רפסמ).
10ו תוקד -20תוינש , ודילקה"11020 " לע וצחלוENTER . תורפס םתדלקה םא
תויוגש , לע וצחלCLEARשדחמ ןתסנכהל .
הנרקה/ יארקא רדסב הניגנ
יארקא . לע בוש וצחלRANDOMהנרקה לא הרזחל /הליגר הניגנ .
יוצרה .ךסמה לע ףרהל עיפוי ןומיסה למס .םינומיס העשת םוקימל ורזח .
[Marker Search] . ישקמב ושמתשה וא טירפתב יוצר ןומיס תריחבל , זאו
לע וצחלENTER לע וא ותבשהל CLEARותקיחמל .
הדיחיה .ןורכיזב הנסחואש הנצסה תאצמנ וב רוטילקת וניעטת םא , רזחות איה
תיטמוטוא .
תוקד .תוקד שמח ךשמל גצומ ךסמה רמוש םא ,תיטמוטוא הבכת הדיחיה .
11
Page 28

שקמ
1. םירוטילקת הסכמ תחיתפ:
OPEN( )
2. רוטילקת תסנכה :
-
3. םירוטילקת הסכמ תריגס :
-
4. טירפתה ןמ הקיזומ תריחב :
,MENU
5. הניגנ תליחת :
PLAY
6. הניגנ תריצעל :
STOP
תונומת יצבוקב הייפצ
שקמ
1. םירוטילקת הסכמ תחיתפ:
OPEN( )
2. רוטילקת תסנכה :
-
3. םירוטילקת הסכמ תריגס :
-
4. טירפתה ןמ תונומת ץבוק תריחב :
,MENU
5. אלמ ךסמ לע רחבנה ץבוקה תגוצת :
PLAY
6. טירפתל הרזח :
STOP
םיצבק וא םירוטילקתב הקיזומל הנזאה
תונומת יצבוקב הייפצ - תושעל ולכותש םירבד דוע
תויפוקש תגוצתכ תונומת יצבוקב הייפצ
ישקמב ושמתשה למס תראהל() לע וצחל זאוENTER תליחתל
תויפוקש תגוצת .
תרזעב תויפוקשה תגוצת תוריהמ תא תונשל ולכות למס רשאכ () ראומ .
האבה הנומתל גוליד/תמדוקה
הנומת בוביס
ישקמב ושמתשה ןועשה ןוויכב א ןועשה ןוויכ דגנ אלמ ךסמב הנומת בוביסל
אלמה ךסמ לע הנומתב הייפצ תעב .
תויפוקש תגוצת תייהשה
תויפוקש תגוצת ןמזב הקיזומל הנזאה
תויפוקש תגוצת ןמזב הקיזומל ןיזאהל ולכות , הקיזומ יצבק ליכמ רוטילקתה םא
דחי תונומתו .ב ושמתשה ישקמ למס תראהל לע וצחלו ENTER
תויפוקש תגוצת תליחתל .
תלדגומ הנומתב הייפצ
עמש יצבוקל הנזאהCD ,3MP וא WMA - ולכותש םירבד דוע
םכלשמ תינכת תריצי
הקיזומה רדס ןוגרא ידי לע םכל יוצרה רדסב רוטילקת ןכות ןגנל ולכות
לע וצחלSKIP( וא ) האבה הנומתב הייפצל/תמדוקה .
תונכת תכירע בצמ( ןמיסךסמה לע עיפוי ) . המישרב היוצר הקיזומ ורחב
תינכת תמישרמ הקיזומ , לע וצחלו קוחמל םכנוצרבש הקיזומב ורחבCLEAR
תונכת תכירע בצמב .תינכת תמישרמ הקיזומה לכ תקיחמל , ורחב[Clear All ]
לע וצחל זאוENTERתונכת תכירע בצמב . רוטילקתה תאצוה םע תקחמנ תינכת
לע וצחלPAUSE/STEP( ) תויפוקש תגוצת תייהשהל . לע וצחלPLAY
() תויפוקש תגוצת ךשמהל .
הדיחיה יוביכ וא .
ץבוק עדימ תגוצת(TAG 3ID)
ץבוק תניגנ תעב3MPץבוק עדימ ליכמה , לע הציחלב עדימה תא גיצהל ולכות
DISPLAYבושו בוש .
הקיזומ יצבוק תושירד3MP/WMA
רוטילקת תומיאת3MP/WMAןלהלכ תלבגומ הז ןגנל :
אלמ ךסמ לע הנומתב הייפצ תעב , לע בושו בוש וצחלZOOM בצמ תריחבל
םוז . תרזעב תלדגומה הנומתה ךרד עונל ולכות ישקמ . לע וצחל
CLEARהאיציל .
תונומת ץבוק תושירד
יצבוק תומיאתJPEGןלהלכ תלבגומ הז ןגנל :
ץבוק תמויס :.jpg
הנומת לדוג :מ תוחפ ץלמומ-2טייבגמ .
טמרופRW/R-CD ,RW/R DVD :9660 ISO.
יברמ םיצבק רפסמ/רוטילקת :מ תוחפ-650 (ללוכ םיצבקו תויקית רפסמ).
תושעל
רוטילקתב .תתנכותמה המישרל הקיזומ תפסוהל , לע וצחלPROG. לא הסינכל
[LIST] לע וצחלו זאוENTERתינכתה תמישרל הקיזומה תפסוהל . תקיחמל
ץבוק תמויס :.mp3 וא .wma
םוגיד רדת : ןיב8-48 ץרהוליק (3MP )32-48 ץרהוליק (WMA)
טיב רועיש : ןיב8-320 kbps( 3MP ,)32-192 kbps( WMA)
טמרופRW/R-CD ,RW/R DVD :9660 ISO.
יברמ םיצבק רפסמ/רוטילקת :מ תוחפ-650 (ללוכ םיצבקו תויקית רפסמ).
12
Page 29

שקמ
1ה ןקתה תא ורבח -USBה עקשל -USB ןגנה לש
-
2הריצע בצמב טירפתה תא וגיצה :
MODE
3 ורחב [USB :]
,ENTER
4ץבוק ורחב :
, MENU
5ץבוקה תא ונירקה :
PLAY
6ה ןקתה תא ואיצוה -USB
-
תסינכב הייפצAV
שקמ
1 הז רישכמל ינוציחה רישכמה תא ורבח
-
2 בצמ תריחבל טירפתה תא וגיצה [AV IN :]
MODE
3 ורחב [AV IN :]
,ENTER
4ינוציח רישכממ ואידיוב ופצ :
,ENTER
5 בצממ האיציל [AV IN] , ורחב[DISC] וא
[USB :]
MODE, , ENTER
תופצל םילוכי םתא /ואדיו תותואל בישקהל/ ךות ינוציח רישכממ וידוא
הז רישכמב שומיש .
יצבוק ןירקהלו עימשהל םילוכי םתאMP3/WMA/JPEG/DivX ןקתהב
ינקתהב שומישUSB
USB תסרגב 1.1 .
ינקתה יבגל תורעהUSB
יהשלכ הלקת לש הרקמב םנדבוא ינפמ ןגהל.
גוס לכ לש הלעפהה תוארוה יבגל ,םיאתמה דומעב וארק .
בצמ ןיב רובעל ןתינ[DISC [ ,]USB] ו[AV IN] שקמ לע הציחל ידי לע
MODE .
ה ןקתה תא ואיצות לא-USBהלעפהה ךלהמב .
ה קזבה ןנוכב םכלש םיבושחה םיצבקה תא תובגל םכל םיצילממ ונאUSB ידכ
ןגוע וא ךיראמ לבכב םישמתשמ םכנה םאUSB ,ההוזי אל ןקתההו ןכתיי.
הקיזומ יצבק ליעפהל ןתינ(MP3/WMA) , תונומת יצבק(JPEG) יצבוקוDivX .
יברמ םיצבק רפסמ / קזבה ןנוכUSB : מ תוחפ650 ( םיצבק לש ללוכ רפסמ
תויקיתו).
ה תלועפ-USBה ינקתה יגוס לכב תכמות הניא הז ןגנ לש -USB .
םידיינ םינופלטבו תוילאטיגיד תומלצמב הכימת ןיא .
13
Page 30

הפש ידוק
תואבה תוינושארה תורדגהל היוצרה הפשה תא סינכהל ידכ וז המישרב ושמתשה :עמש רוטילקת ,רוטילקת תויבותכ ,רוטילקת טירפת .
וז המישרמ רוזא דוק ורחב .
14
הפש דוק הפש דוק הפש דוק הפש דוק הפש דוק הפש דוק
רוזא ידוק
רוזא דוק רוזא דוק רוזא דוק רוזא דוק רוזא דוק רוזא דוק
Page 31

ןמיס
הביס
ןוקית
למשח
למשח ןיא.
קתונמ למשחה לבכ.
למשחה לבכ תא ורבח
ריקה עקשל בטיה.
תנקורמ הללוסה .
הללוב תא וניעטה .
ךא רבוחמ למשחה
תלעופ אל הדיחיה .
רוטילקת סנכוה אל .
רוטילקת וסינכה .
הנומת ןיא.
תרדגומ הניא היזיוולטה
הדיחיה ןמ תוא תטילקל .
םיאתמ ואידיו בצמ ורחב
היזיוולטב .
רבוחמ וניא ואידיוה לבכ
בטיה .
לבכ תא בטיה ורבח
ואידיוה .
בצמLCD לא ןווכמ וניא
[OFF .]
בצמ ורחבLCDמ הנוש -
[OFF .]
לילצ ןיא .
לבכל רבוחמה דויצה
רדגומ וניא עמשה
הדיחיה ןמ תוא תטילקל
לש םיאתמ טלק בצמ ורחב
עמשה רבגמ .
תנווכמ לילצה תמצוע
םומינימל .
תמצוע רקבב ושמתשה
המצועה תמאתהל לילצה .
תויורשפאAUDIO
היוגש הדמעל תורדגומ .
תויורשפא תא ורידגה
AUDIOהנוכנה הדמעל .
הניא הדיחיה
הליחתמ
הנרקה/ הניגנ
וניאש רוטילקת סנכוה
הלעפהל ןתינ .
ןתינה רוטילקת וסינכה
הלעפהל( גוס תא וקדב
ירוזאה דוקהו רוטילקתה .
תרדגומ גורידה תמר .
גורידה תמר תא ונש .
לעופ וניא טלשה
בטיה.
ןשייחל ןווכמ וניא טלשה
הדיחיב קוחרה .
ןשייחל טלשה תא ונווכ
הדיחיב קוחרה .
ןמ ידמ קוחר טלשה
הדיחיה ..
קוחרה טלשה תא וליעפה
הדיחיל רתוי בורק .
ינכט טרפמ
יללכ
למשח תושירד
DC 9טלוו
למשח תכירצ
13.5 טאוו
תוינוציח תודימ
225 x 40 x 175מ " מ(בחורxהבוגxקמוע)
וטנ לקשמ(רעושמ)
1.06ק " ג
הלעפה תרוטרפמט
5C דע 40C
הלעפה תוחל :
5% דע 90%
רזייל
תוא תטיש
הצחמל ךילומ רזייל
PAL
םירבחמ
עמש תאיצי/ ואידיו
ינימ עקש 3.5מ " מX 1
-ואידיו :1.0 טלוו (p-p ,)75 ,תילילש היצזינורכניס .
-עמש :2 Vms( 1ץרהוליק ,0לביצד )
תוינזוא ףוסמ :
ינימ עקש 3.5מ " מX 2
ילזונ שיבג תגוצתLCD
גצ לדוג
בחור8.5צניא ' םי(ינוסכלא)
הנרקה תטיש
R.G.B. םיספ
הענה תכרעמ
TFT Active Matrix
היצולוזר
480 x 234( WQVGA )
םירזיבא
ואידיו לבכ/ עמשRCA
םאתמAC( IM090WU-150B)
ענוממ םאתמ(G100233)
קוחר טלש
קוחר טלשל הללוס(םויתיל תללוס)
תויעב ןורתפ
תמדקומ העדוה אלל יונישל םיפופכ ינכטה טרפמהו בוציעה .
15
Page 32

הנקתה
19ס " מ
תוחפ וא
שארה .( ךירדמב ואר
בכרה לש שומישה
םכלש)
שאר תנעשמל רוביחה
רויאב גצומכ .
הסירעל תרגסמה .
ךות ומיאתהו תרגסמה
עוביקה יגרובב שומיש .
לש דודיצה תיווזו
םכל ונהיתו תרגסמה
רישכמהמ .
שאר תנעשמ רוביח תרגסמ
(1) תנעשמ תא ודירפה
(2) תסירע תא וניקתה
(1) עוביק גרוב
תרגסמה לע רישכמה תא קזחמ.
(3) ףוג תא ומיאתה
תרגסמה לש דודיצ תיווז עוביק
תרגסמה לש תיקפוא תיווז עוביק
(4) לע רישכמה תא וחינה
(2) דודיצ תיווז עוביק גרוב
(3) יקפוא עוביק גרוב
(4) רורחש רותפכ
רורחשל םירותפכה ינש לע וצחל
הסירעהמ תרגסמה ףוג .
(5) תיקפואה תיווזה תא ונווכ
(5) שאר תנעשמ רוביח תסירע
תרגסמ תבכרה םע תינוכמב האנה
שאר תנעשמל(היצפוא)
רוביח ידי לע ירוחאה בשומב ואידיומ תונהיל ולכות
ימדקה בשומה בגל רישכמה .
תורהזא :
העונתב.
לוכי גהנה אובש םוקמב רישכמה תא ליעפהל ןיא
וב תופצל. הז רישכמב הייפצ וא גהנה לועפת
ותעד תחסהל םורגל ולע העיסנב בכרהש תעב
תוומל ףאו הרומח העיצפל ליבוהל יושעש המ
ו הנואתמ האצותכ/שוכרל קזנ וא .
םיאבה םימוקימב , הנואת םרגיהל הלולע תרחא
הרומח העיצפ וא .
ימדק.
תינוכמה לועפת וא גהנה לש .
הנואת לש הרקמב ריוואה.
הגיהנה .
תרגסמה תא רבחל םילגוסמ תויהל.
בכרהש תעב רישכמה תא ליעפהל גהנל רוסא
הגיהנ ידכ ךות וקתנת וא ורבחת לא , ורבחת לאו
- בשומה לש ירוחאה וקלחמ רחא םוקמ לכב
- היארה הדשל עירפהל לולע רשא םוקמ לכב
- תירכ לש לועפתל עירפהל לולעש םוקמ לכב
- רושכמ לש הלועפל עירפהל לוכיש םוקימב
שארה תנעשמ גוסל םאתהב , אלש םילולע םתא
16
Page 33

 Loading...