

MFL69782402
Specification
Language
Material
Color
Size (W x H)
Page
Revision
Model apply
PRINTING A-ALL SJ, SK / SB Standard Manual for Indonesia
English + Indonesian
White bond paper 70g
Black&White (monochrome)
148.5 mm X 210 mm (A5)
76 pages
Rev.00 (01T17)
Indonesia model
Spec.
WORKING SPECIFICATIONS
1. Printed contents should be satisfied with the film provided by LGE Design Dept.
2. Overall printing condition and appearance satisfied with standard sample provided by LGE for approval.
3. The number behind "S" followed by folding method means the number of staple work.
4. Drawing of Folding Method : Continous lined page means the first page, when the manual is opened.
ECO-DESIGN SPECIFICATIONS
1. The part should not contain prohibited substances (Pb,Cd,Hg,Cr+6,PBBs,PBDEs) and details should
be complied with LG(65)-B-3514.
Chalermphorn Khamyan23-01-2017
Manual,Owner
MFL69782402
OWNER'S MANUAL
AIR
CONDITIONER
Read this owner's manual thoroughly before operating the appliance and keep it
handy for reference at all times.
TYPE : WALL MOUNTED
EN English ID Bahasa Indonesia
MODEL :
S10DMV T13EMV T19EMV D10SMV D13SMV D18SMV
E13SIV E19SIV D10RIV3 D13RIV3 D19RIV3
*MFL69782402*
MFL69782402
Rev.00 (01T17)
www.lg.com

TABLE OF CONTENTS
SAFETY INSTRUCTIONS ................................................... 3
IMPORTANT SAFETY INSTRUCTIONS ................................................ 3
OPERATION ....................................................................... 11
Notes for Operation .............................................................................. 11
Parts and Functions .............................................................................. 11
Wireless Remote Control ...................................................................... 12
Restarting the Air Conditioner Automatically ........................................17
Using the Mode Function ...................................................................... 17
Using the Jet Mode Function ................................................................ 19
Using the Fan Speed Function ............................................................. 20
Using the Air Flow Direction Function ...................................................20
Setting the On/Off Timer ....................................................................... 21
Using the Sleep Function (Optional) ..................................................... 22
Using the Simple Timer Function (Optional) .........................................22
Using the Energy Display Function (Optional) ...................................... 23
Using the Light Off Function (Optional) ................................................23
Using the Comfort Air Function (Optional) ............................................23
Using the Energy Saving Function (Optional) ......................................24
Using the Energy Control Function (Optional) ...................................... 24
Using Special Functions ....................................................................... 25
This manual may contain images or content
different from the model you purchased.
This manual is subject to revision by the
manufacturer.
SMART FUNCTIONS ......................................................... 28
Using Smart ThinQ Application .............................................................28
MAINTENANCE .................................................................. 30
Clean the Air Filter ................................................................................32
Clean the 3M and Triple Filter (Optional) ..............................................33
TROUBLESHOOTING ....................................................... 34
SAFETY INSTRUCTIONS
EN
The following safety guidelines are intended to prevent
unforeseen risks or damage from unsafe or incorrect operation
of the appliance.
The guidelines are separated into ‘WARNING’ and ‘CAUTION’
as described below.
This symbol is displayed to indicate matters and
operations that can cause risk. Read the part with this
symbol carefully and follow the instructions in order to
avoid risk.
WARNING
This indicates that the failure to follow the instructions can
cause serious injury or death.
CAUTION
This indicates that the failure to follow the instructions can
cause the minor injury or damage to the product.
IMPORTANT SAFETY INSTRUCTIONS
WARNING
To reduce the risk of explosion, fire, death, electric shock,
injury or scalding to persons when using this product, follow
basic precautions, including the following:
Children in the Household
This appliance is not intended for use by persons (including children)
with reduced physical, sensory or mental capabilities, or lack of
experience and knowledge, unless they have been given supervision
or instruction concerning use of the appliance by a person
responsible for their safety. Children should be supervised to ensure
that they do not play with the appliance.
3
Installation
•Do not install the air conditioner on an unstable surface or in a
place where there is danger of it falling.
•Contact an authorized service center when installing or relocating
the air conditioner.
•Install the panel and the cover of the control box safely.
•Do not install the air conditioner in a place where flammable liquids
or gases such as gasoline, propane, paint thinner, etc., are stored.
•Make sure that the pipe and the power cable connecting the indoor
and outdoor units are not pulled too tight when installing the air
conditioner.
•Use standard circuit breaker and fuse that conform to the rating of
the air conditioner.
•Do not input air or gas into the system except with the specific
refrigerant.
•Use non-flammable gas (nitrogen) to check for leak and to purge
air; using compressed air or flammable gas may cause fire or
explosion.
•The indoor/outdoor wiring connections must be secured tightly,
and the cable should be routed properly so that there is no force
pulling the cable from the connection terminals. Improper or loose
connections can cause heat generation or fire.
EN
4
EN
•Install dedicated electric outlet and circuit breaker before using the
air conditioner.
•Do not connect the ground wire to a gas pipe, a lightning rod, or a
telephone ground wire.
Operation
•Be sure to use only those parts listed in the service parts list. Never
attempt to modify the equipment.
•Make sure that children do not climb on or hit the outdoor unit.
•Dispose of the batteries in a place where there is no danger of fire.
•Use only the refrigerant specified on the air conditioner label.
•Cut off the power supply if there is any noise, smell, or smoke
coming from the air conditioner.
•Do not leave flammable substances such as gasoline, benzene, or
thinner near the air conditioner.
•Contact an authorized service center when the air conditioner is
submerged by flood waters.
•Do not use the air conditioner for an extended period time in a
small place without proper ventilation.
•In the event of a gas leak (such as Freon, propane gas, LP gas,
etc.) ventilate sufficiently before using the air conditioner again.
•To clean the interior, contact an authorized service center or dealer.
Using harsh detergents may cause corrosion or damage to the unit.
•Be sure to ventilate sufficiently when the air conditioner and a
heating appliance such as a heater are used simultaneously.
5
EN
•Do not block the inlet or outlet of air flow.
•Do not insert hands or other objects through the air inlet or outlet
while the air conditioner is operating.
•Make sure that the power cable is neither dirty, loose, nor broken.
•Never touch, operate, or repair the air conditioner with wet hands.
•Do not place any objects on the power cable.
•Do not place a heater or other heating appliances near the power
cable.
•Do not modify or extend the power cable. Scratches or peeling
insulation on the power cables may result in fire or electric shock,
and should be replaced.
•Cut off the power supply immediately in the event of a blackout or a
thunderstorm.
•Take care to ensure that power cable could not be pulled out or
damaged during operation.
•Do not touch refrigerant pipe or water pipe or any internal parts
while the unit is operation or immediately after operation.
Maintenance
•Do not clean the appliance by spraying water directly onto the
product.
•Before cleaning or performing maintenance, disconnect the power
supply and wait until the fan stops.
6
Technical Safety
•Installation or repairs made by unauthorized persons can pose
hazards to you and others.
•The information contained in the manual is intended for use
by a qualified service technician who is familiar with the safety
procedures and equipped with the proper tools and test
instruments.
•Failure to read and follow all instructions in this manual can result
in equipment malfunction, property damage, personal injury and/or
death.
•The appliance shall be installed in accordance with national wiring
regulations.
•When the power cord is to be replaced, the replacement work
shall be performed by authorized personnel using only genuine
replacement parts.
•This appliance must be properly grounded to minimize risk of
electric shock.
•Do not cut or remove the grounding prong from the power plug.
•Attaching the adapter ground terminal to the wall receptacle cover
screw does not ground the appliance unless the cover screw is
metal, uninsulated, and the wall receptacle is grounded through
house wiring.
•If you have any doubt whether the air conditioner is properly
grounded, have the wall receptacle and circuit checked by a
qualified electrician.
•The refrigerant and insulation blowing gas used in the appliance
require special disposal procedures. Consult a service agent or a
similarly qualified person before disposing of them.
•If the supply cord is damaged, it must be replaced by the
manufacturer or its service agents or similarly qualified person in
order to avoid a hazard.
EN
7
CAUTION
To reduce the risk of minor injury to persons, malfunction, or
damage to the product or property when using this product,
follow basic precautions, including the following:
Installation
•Do not install the air conditioner in an area where it is directly
exposed to sea wind (salt spray).
•Install the drain hose properly for the smooth drainage of water
condensation.
•Exercise caution when unpacking or installing the air conditioner.
•Do not touch the leaking refrigerant during installation or repair.
•Transport the air conditioner with two or more people or use a
forklift.
•Install the outdoor unit such that it is protected from direct sunlight.
Do not place the indoor unit in a place where it is directly exposed
to sunlight via the windows.
•Safely dispose of packing materials such as screws, nails or
batteries using proper packaging after installation or repair.
•Install the air conditioner in a place where the noise from the
outdoor unit or the exhaust fumes will not inconvenience the
neighbors. Failure to do so may result in conflict with the neighbors.
EN
8
Operation
•Remove the batteries if the remote control is not to be used for an
extended period of time.
•Make sure that the filter is installed before operating the air
conditioner.
•Be sure to check if there is a refrigerant leak after installing or
repairing the air conditioner.
•Do not place any object on the air conditioner.
•Never mix different types of batteries, or old and new batteries for
the remote control.
•Do not let the air conditioner run for a long time when humidity is
very high or when a door or a window has been left open.
•Stop using the remote control if there is a fluid leak in the battery. If
your clothes or skin are exposed to the leaking battery fluid, wash
off with clean water.
•Do not expose people, animals, or plants to the cold or hot wind
from the air conditioner for extended periods of time.
•If the leaking battery fluid has been swallowed, wash off the inside
of the mouth thoroughly and consult a doctor.
•Do not drink the water drained from the air conditioner.
•Do not use the product for special purposes, such as preserving
foods, works of art, and etc. It is an air conditioner for consumer
purposes, not a precision refrigeration system. There is risk of
damage or loss of property.
•Do not recharge or disassemble the batteries.
EN
9
EN
Maintenance
•Never touch the metal parts of the air conditioner when removing
the air filter.
•Use a sturdy stool or ladder when cleaning, maintaining, or
repairing the air conditioner at a height.
•Never use strong cleaning agents or solvents when cleaning the air
conditioner or spray water. Use a smooth cloth.
10
OPERATION
4
5
6
7
Notes for Operation
Suggestion for Energy Saving
• Do not cool excessively indoors. This may be harmful for your health and may consume more
electricity.
• Block sunlight with blinds or curtains while you are operating the air conditioner.
• Keep doors or windows closed tightly while you are operating the air conditioner.
• Adjust the direction of the air flow vertically or horizontally to circulate indoor air.
• Speed up the fan to cool or warm indoor air quickly, within a short period of time.
• Open windows regularly for ventilation. The indoor air quality may deteriorate if the air conditioner is
used for long durations.
• Clean the air filter once every 2 weeks. Dust and impurities collected in the air filter may block the air
flow or weaken the cooling / dehumidifying functions.
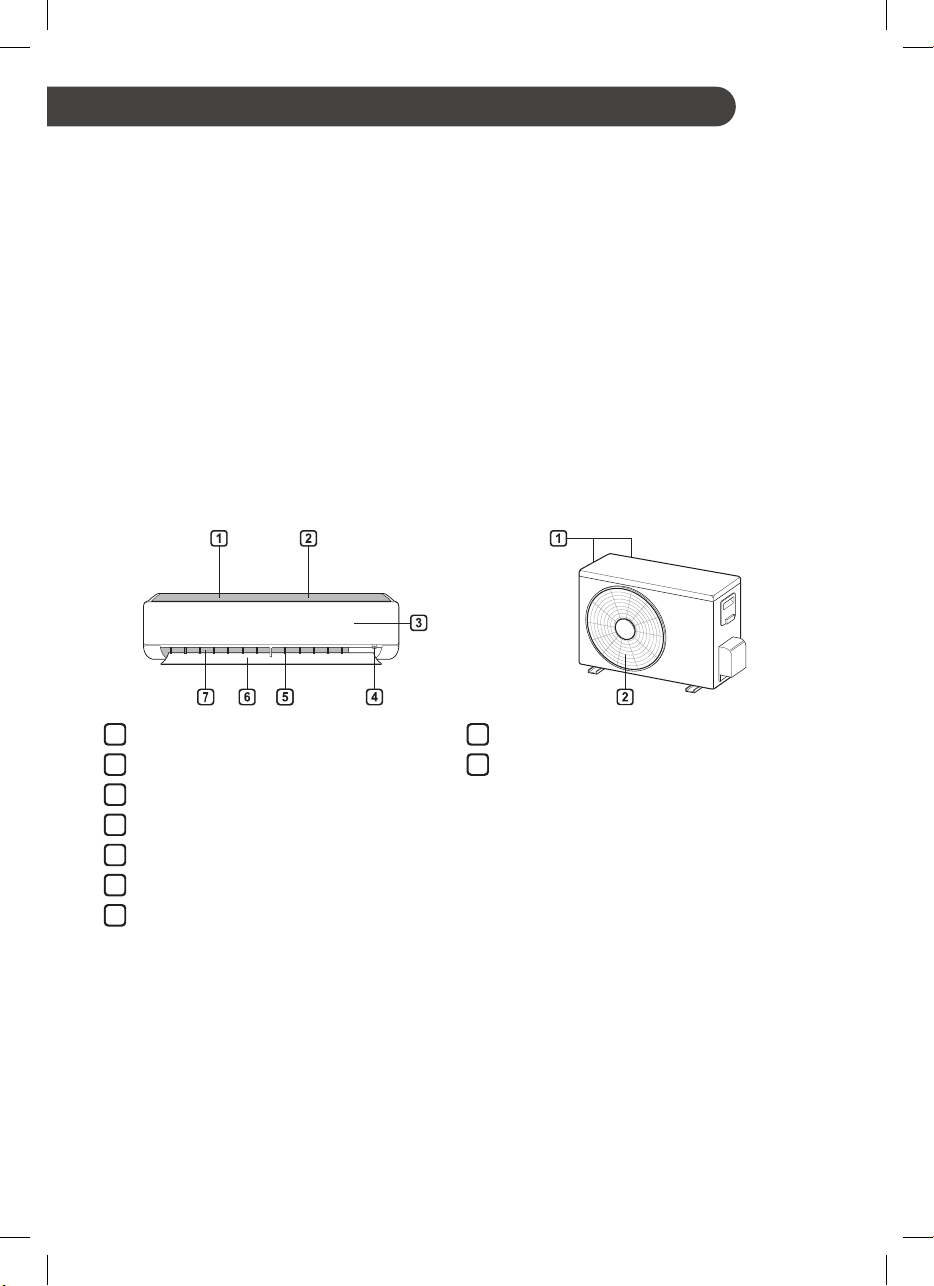
Parts and Functions
Indoor Unit Outdoor Unit
EN
1
Air Filter
2
Air Intake
3
Front Cover
On/Off Button
Air Deflector (Vertical Louver)
Air Deflector (Horizontal Vane)
Air Outlet
1
Air Intake Vents
2
Air Outlet Vents
NOTE
• The number and location of operation lamps may vary according to the model of the air conditioner.
• The feature may be changed according to the type of model.
11
EN
SWING
kW [3 s]
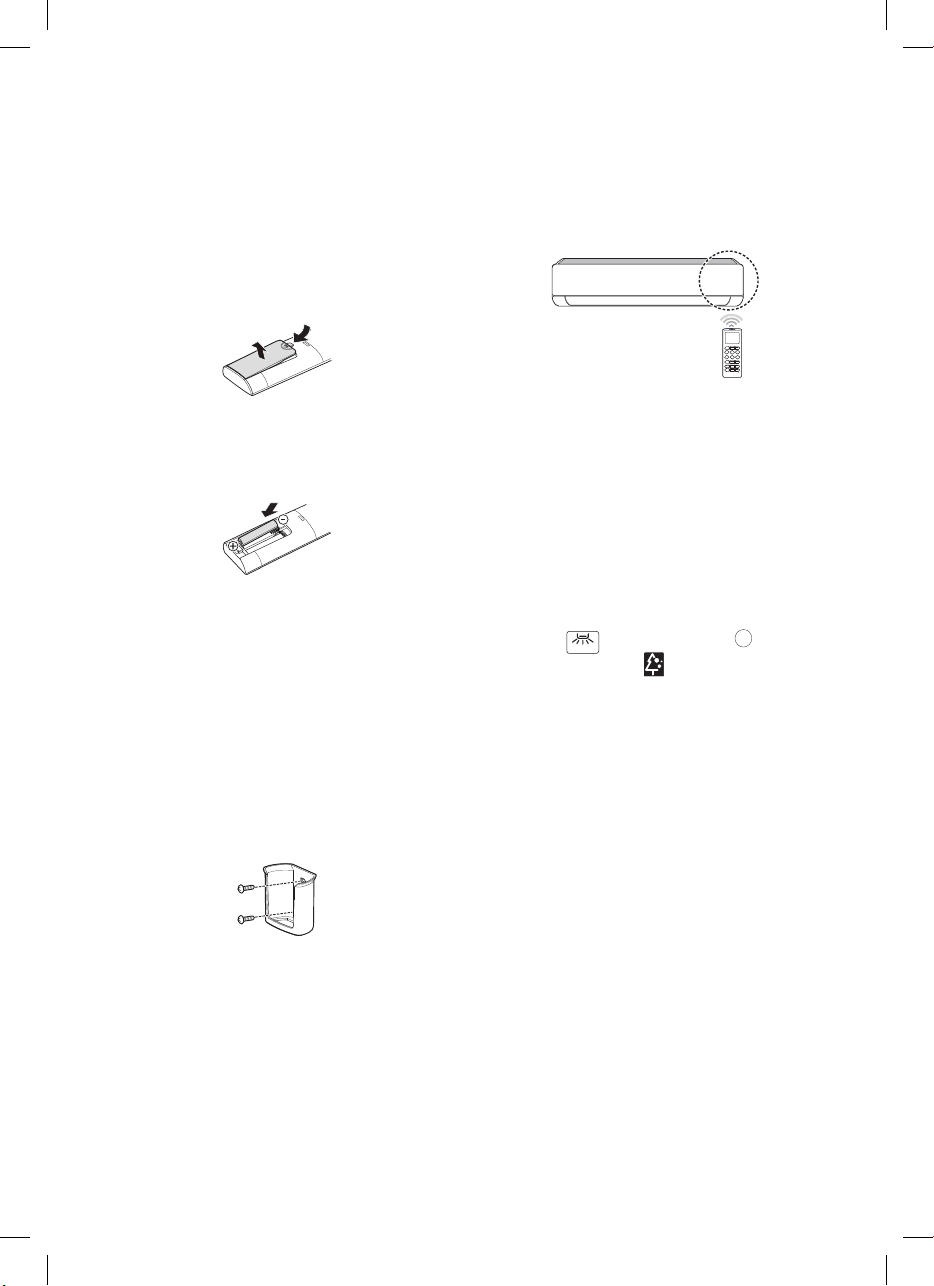
Wireless Remote Control
Inserting Batteries
If the display screen of the remote control begins
to fade, replace the batteries. Insert AAA (1.5 V)
batteries before using the remote control.
Remove the battery cover.
1
Insert the new batteries and make sure that
2
the + and - terminals of the batteries are
installed correctly.
Installing the Remote Control
Holder
To protect the remote control, install the holder
where there is no direct sunlight.
Choose a safe and easily accessible
1
location.
Operating Method
Point the remote control towards the signal
receiver at the right side of the air conditioner to
operate it.
NOTE
• The remote control may operate other
electronic devices if it is directed towards them.
Make sure to point the remote control towards
the air conditioner signal receiver.
• For proper operation, use a soft cloth to clean
the signal transmitter and receiver.
• In case of a function not provided in the
product, no buzzer sound occurs from the
product when a button for such function on the
remote control is pressed except for Air Flow
Direction (
Purification function (
), Energy Display (
).
), Air
Fix the holder by fastening 2 screws firmly
2
with a screwdriver.
12
EN
℃↔℉ [5 s]
SWING
ON/OFF
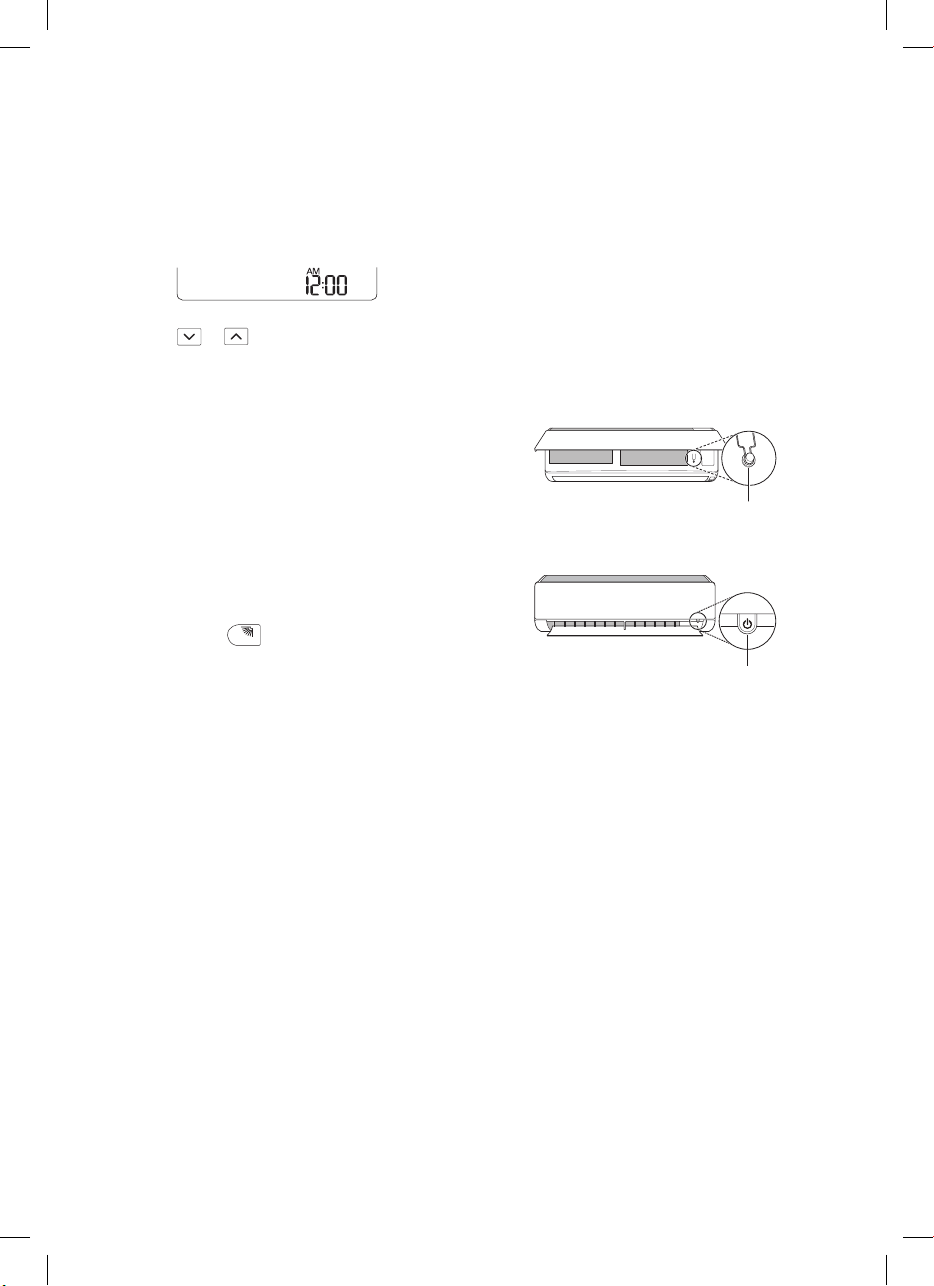
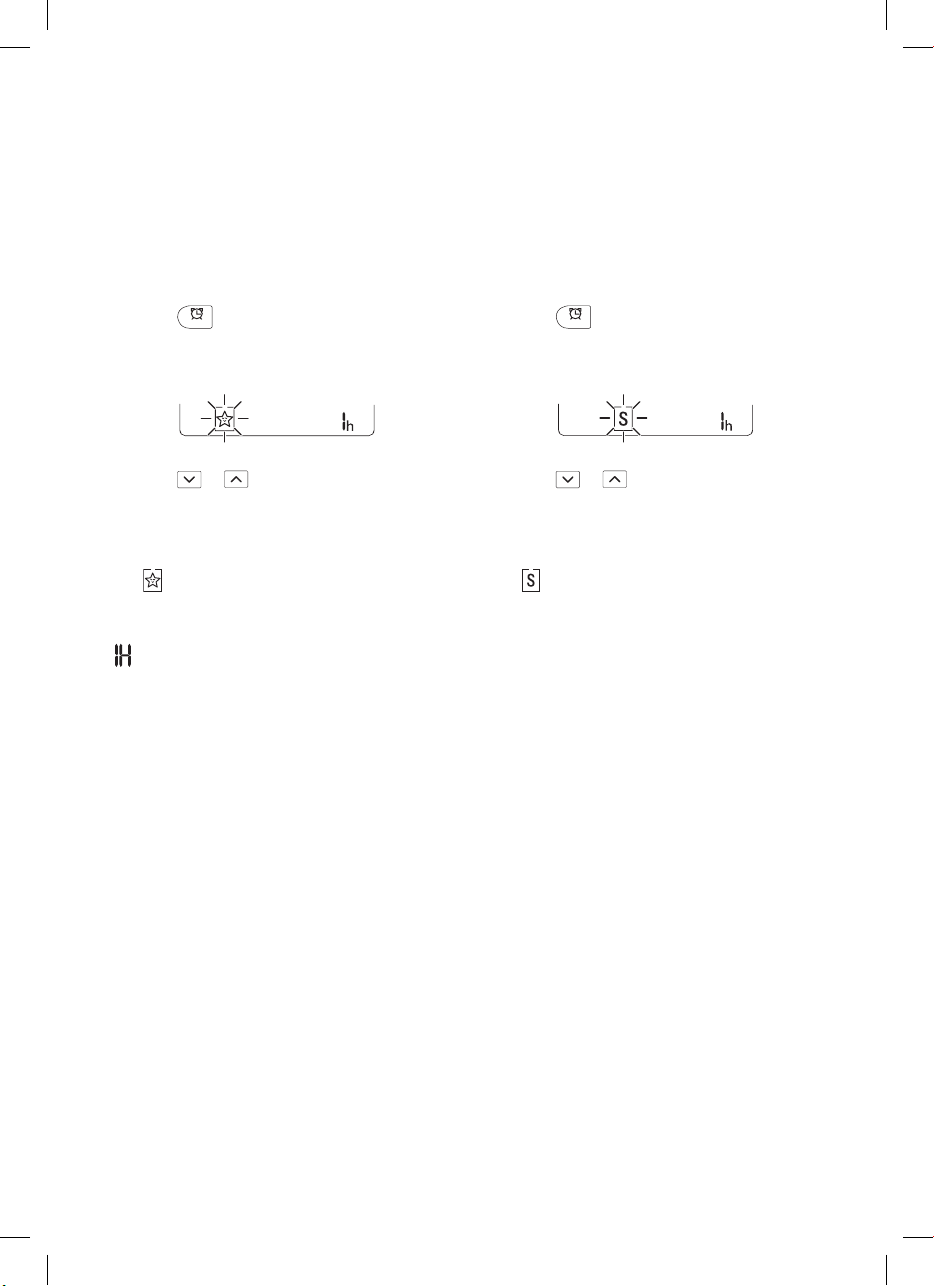
Setting the Current Time
Insert batteries.
1
• The icon below blinks at the bottom of the
display screen.
Press or button to select the
2
minutes.
Press SET/CANCEL button to finish.
3
NOTE
• The On/Off Timer is available after setting the
current time.
Using the °C/°F Conversion
Function (Optional)
This function changes unit between °C and °F.
• Press and hold
button about 5 seconds.
Operating the Air Conditioner
without the Remote Control
You can use the ON/OFF button of the indoor
unit to operate the air conditioner when the
remote control is unavailable.
Open the front cover (Type1) or horizontal
1
vane (Type2).
Press the ON/OFF button.
2
Type1
Type2
ON/OFF
NOTE
• The stepping motor may be broken, if the
horizontal vane opens rapidly.
• The fan speed is set to high.
• The feature may be changed according to the
type of model.
• The temperature cannot be altered when using
this emergency On/Off button.
• For cooling-only models, the temperature is set
to 22 °C
• For cooling & heating models, the temperature
is set from 22 °C to 24 °C
13

Using Wireless Remote Control
RESET
SWING
SWING
You can operate the air conditioner more conveniently with the remote control.
EN
*
MODE
TEMP
*
kW [3 s]
SWING
SWING
℃↔℉ [5 s]
SET UP
FUNC.
TIMER CANCEL
FAN
SPEED
JET
MODE
ROOM
TEMP
DIAGNOSIS [5 s]
SET
CANCEL
Button
2
Display
Screen
- To turn on/off the air conditioner.
To adjust the desired room temperature
in cooling, heating or auto changeover
mode.
*
To select the cooling mode.
To select the heating mode.
MODE
1
To select the dehumidification mode.
To select the fan mode.
To select the auto changeover/auto
operation mode.
JET
MODE
FAN
SPEED
To change room temperature quickly.
To adjust the fan speed.
To adjust the air flow direction vertically
or horizontally.
NOTE
• * buttons may be changed according to the type of model.
Description
14
EN
TIMER
CANCEL
*
MODE
TEMP
*
kW [3 s]
SWING
SWING
℃↔℉ [5 s]
SET UP
FUNC.
TIMER CANCEL
FAN
SPEED
JET
MODE
ROOM
TEMP
DIAGNOSIS [5 s]
SET
CANCEL
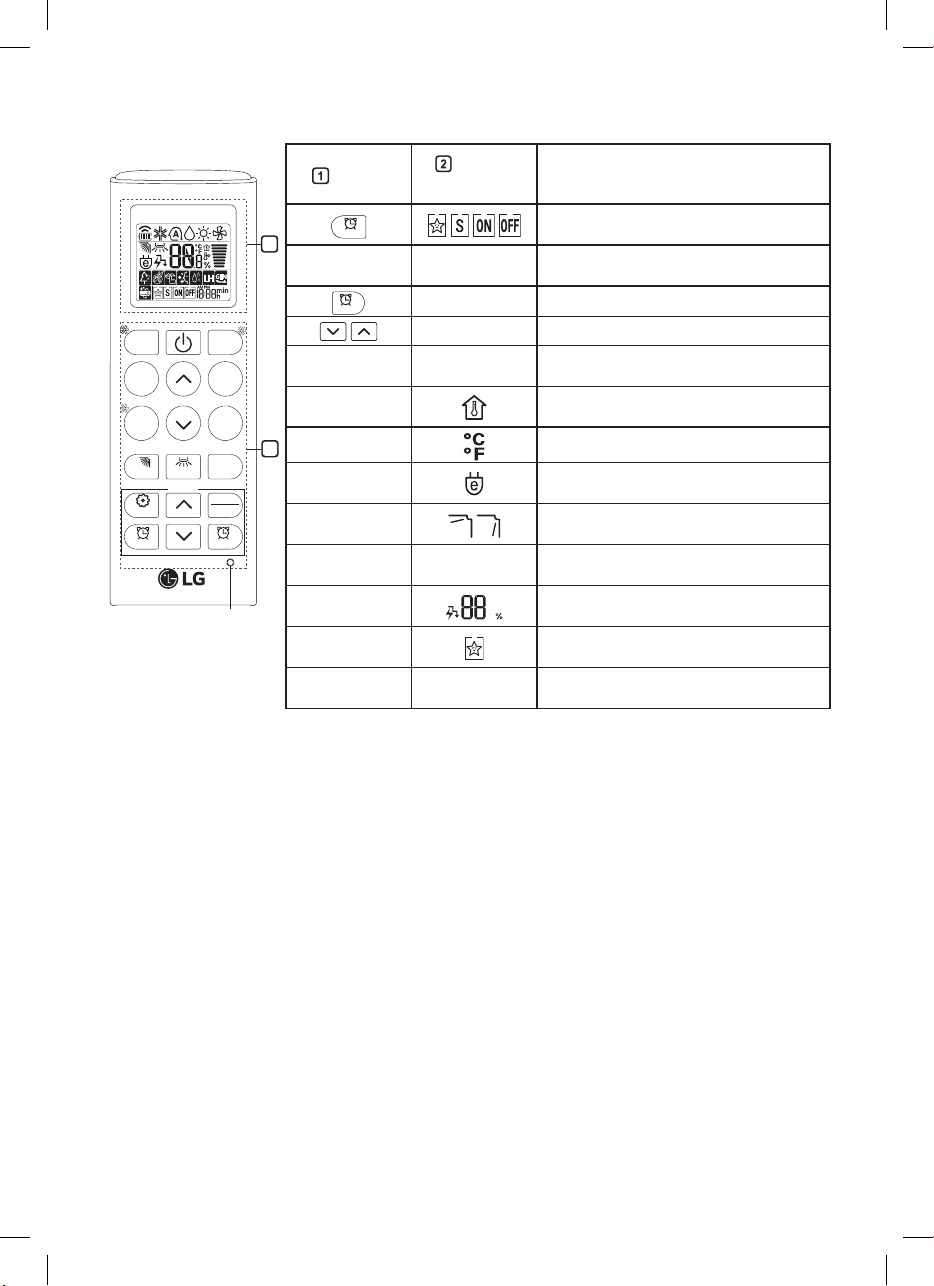
RESET
2
Button
SET/
CANCEL
Display
Screen
-
To turn on/off air conditioner
automatically at desired time.
To set/cancel the special functions and
timer.
Description
- To cancel the timer settings.
*
*LIGHT
OFF
ROOM
TEMP
°C↔°F [5 s] To change unit between °C and °F.
1
*ENERGY
SAVING
*COMFORT
AIR
kW [3 s] -
*ENERGY
CTRL
*COMFORT
SLEEP
DIAGNOSIS
[5 s]
- To adjust time.
-
To set the brightness of the display on
the indoor unit.
To display the room temperature.
To minimize power consumption.
To adjust the air flow to deflect wind.
To set whether or not to display
information regarding energy.
To bring the effect of the power saving.
To make the comfortable sleep
environment.
-
To conveniently check maintenance
information of a product.
15
EN
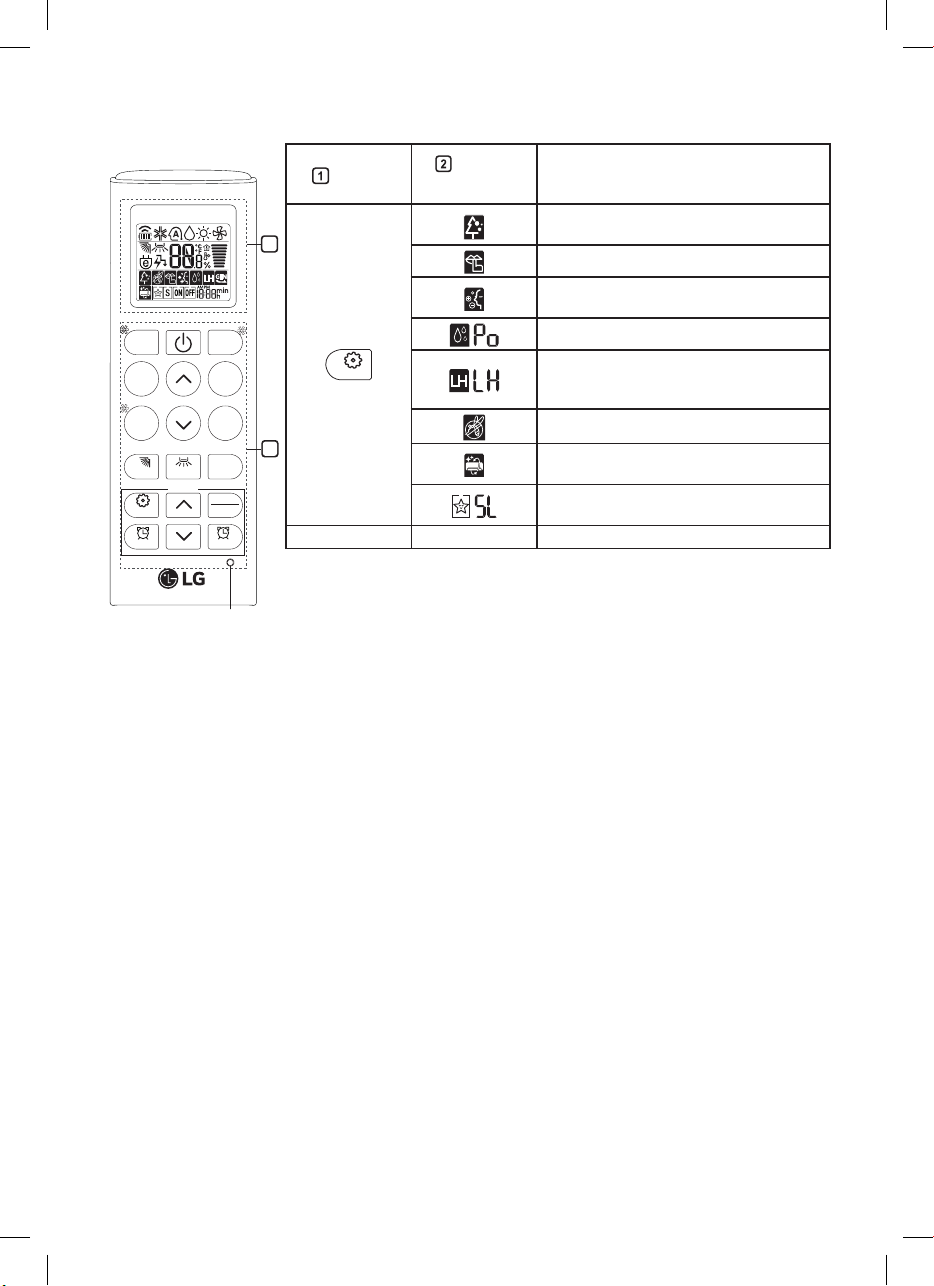
FUNC.
*
MODE
TEMP
*
kW [3 s]
SWING
SWING
℃↔℉ [5 s]
SET UP
FUNC.
TIMER CANCEL
FAN
SPEED
JET
MODE
ROOM
TEMP
DIAGNOSIS [5 s]
SET
CANCEL
RESET
Button
Display
Screen
To purify the air by removing particles
2
that enters the indoor unit.
To reduce noise from outdoor units.
To keep your skin moisturized by
generating ion clusters.
*
To lower indoor humidity quickly.
To maintain a minimum room
temperature and prevent objects in the
room from freezing.
To fan away a mosquito.
1
To remove moisture generated inside
the indoor unit.
To make the comfortable sleep
environment.
RESET - To Initialize the remote control settings.
NOTE
• Some functions may not be supported, depending on the model.
• * buttons may be changed according to the type of model.
• Press the SET/CANCEL button to operate the selected FUNC.
Description
16
EN
ON/OFF
Restarting the Air Conditioner Automatically
When the air conditioner is turned on again
after a power failure, this function restores the
previous settings.
Disabling Auto Restart
Open the front cover (Type1) or horizontal
1
vane (Type2).
Press the ON/OFF button and hold it for 6
2
seconds, then the unit will beep twice and
the lamp will blink twice 4 times.
• To re-enable the function, press the ON/
OFF button and hold it for 6 seconds. The
unit will beep twice and the lamp will blink
4 times.
Type1
Type2
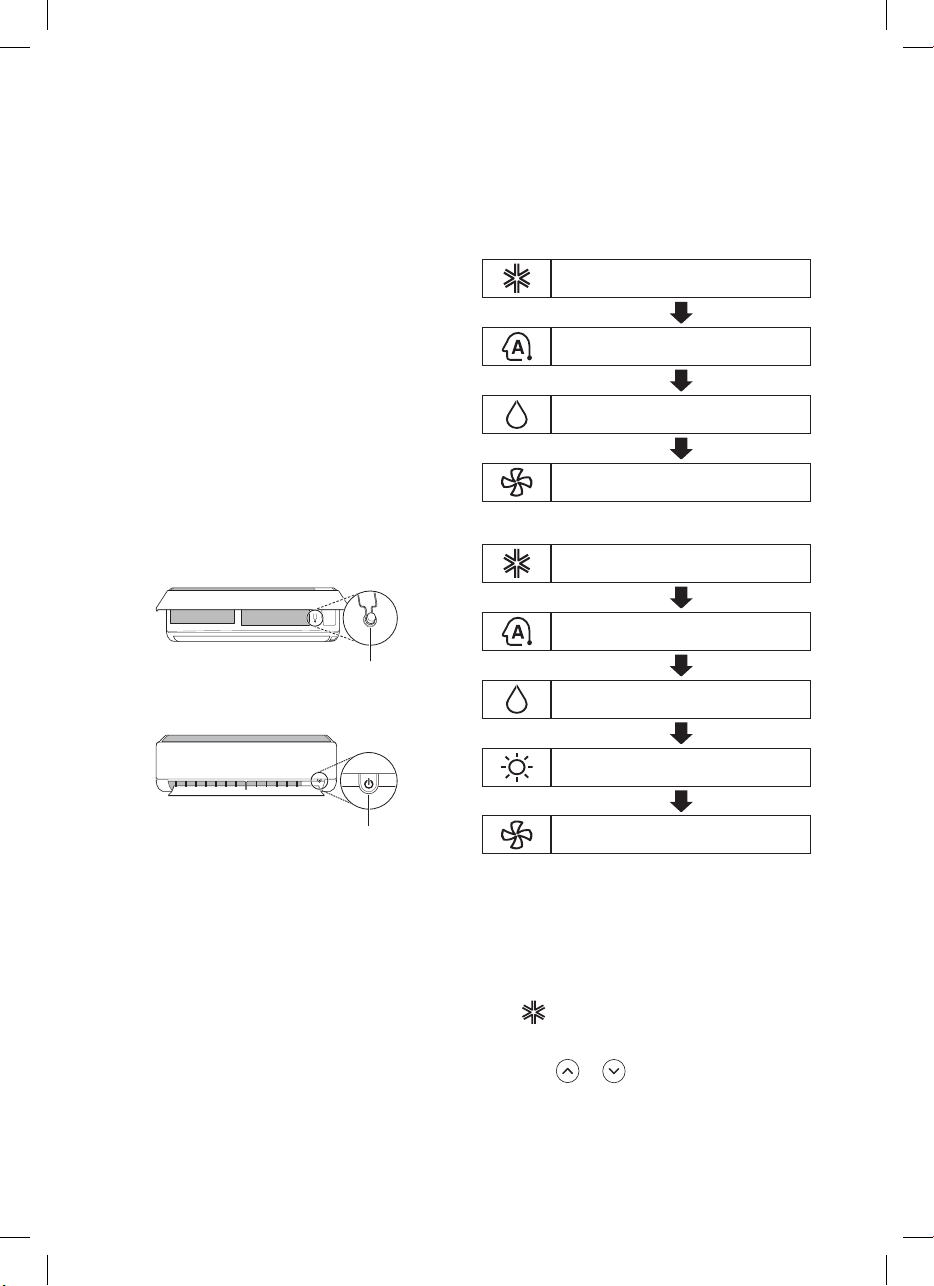
Using the Mode Function
This function allows you to select the desired
function.
Cooling Only Model
Cooling Mode
Auto Operation(AI) Mode
Dehumidification Mode
Fan Mode
Cooling & Heating Model
Cooling Mode
Auto Changeover Mode
Dehumidification Mode
ON/OFF
NOTE
• The feature may be changed according to the
type of model.
• If you press and hold the ON/OFF button for
3 – 5 seconds, instead of 6 seconds, the unit
will switch to the test operation. In the test
operation, the unit blows out strong cooling
air for 18 minutes and then returns to factory
default settings.
Heating Mode
Fan Mode
Cooling Mode
Turn the appliance on.
1
Press MODE button repeatedly to select the
2
Cooling Mode.
is displayed on the display screen.
•
3
Press or button to set the desired
temperature.
17
EN
Heating Mode
Turn the appliance on.
1
Press MODE button repeatedly to select the
2
Heating Mode.
is displayed on the display screen.
•
3
Press or button to set the desired
temperature.
Dehumidification Mode
This mode removes excess moisture from a
highly humid environment or during the rainy
season, in order to prevent molding from setting
in. This mode adjusts the room temperature
and the fan speed automatically to maintain the
optimal level of humidity.
Turn the appliance on.
1
Press MODE button repeatedly to select the
2
Dehumidification Mode.
is displayed on the display screen.
•
Fan Mode
This mode only circulates the indoor air without
changing the room temperature.
Turn the appliance on.
1
Press MODE button repeatedly to select the
2
Fan Mode.
is displayed on the display screen.
•
Press FAN SPEED button to adjust the fan
3
speed.
Auto Changeover Mode
Cooling & Heating Model
This mode changes the mode automatically to
maintain the set temperature at ±2 °C
Turn the appliance on.
1
Press MODE button repeatedly to select the
2
Auto Changeover Mode.
•
is displayed on the display screen.
NOTE
• In this mode you cannot adjust the room
temperature, it is adjusted automatically.
• The room temperature is not displayed on the
display screen.
18
3
Press or button to set the desired
temperature.
Press FAN SPEED button to adjust the fan
4
speed.
EN
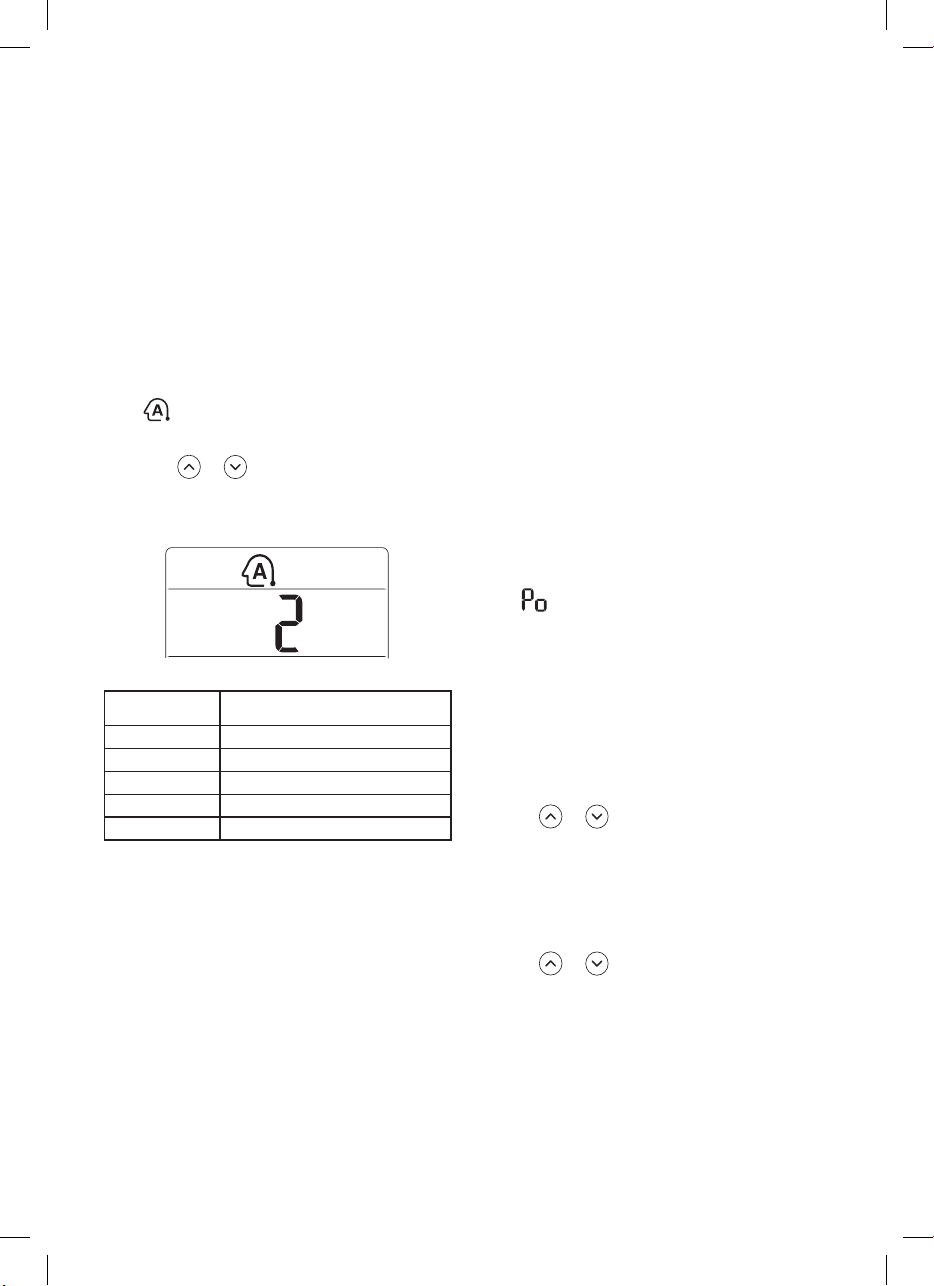
Auto Operation (Artificial
Intelligence)
Cooling Only Model
This mode automatically sets the fan speed
and temperature depending on the room
temperature.
Turn the appliance on.
1
Press MODE button repeatedly to select the
2
Auto Operation.
•
is displayed on the display screen.
3
Press or button to select the desired
operation code if the temperature is higher
or lower than the desired temperature.
Code Description
2 Cool
1 Cool slightly
0 Maintain room temperature
-1 Heat slightly
-2 Heat
NOTE
• In this mode, you cannot adjust the fan speed,
but you can set the air deflector to rotate
automatically.
Using the Jet Mode Function
Changing Room Temperature
Quickly
This function allows you to cool indoor air quickly
during the summer or warm it quickly during
winter.
• Cooling & Heating model : The Jet Mode
function is available with Cooling, Heating and
Dehumidification Mode.
• Cooling Only model : The Jet Mode function
is available with Cooling, Dehumidification,
Fan, Auto Operation Mode and Air Purification
function.
Turn the appliance on.
1
Press MODE button repeatedly to select the
2
desired mode.
Press JET MODE button.
3
is displayed on the display screen.
•
NOTE
• Jet Heating Mode is not available on some
models.
• In Jet Cooling Mode, strong air blows out at
temperature of 18 °C for 30 minutes.
• After 30 minutes later, setting temperature is
maintaining 18 °C
If you want to change the temperature,
Press
temperature.
• In Jet Heating Mode, strong air blows out at
temperature of 30 °C for 30 minutes.
• After 30 minutes later, setting temperature is
maintaining 30 °C
If you want to change the temperature,
Press
temperature.
• This function may operate differently from the
remote control display.
or button to set the desired
or button to set the desired
19
EN
→ →
→ → → →
SWING
SWING
SWING
SWING
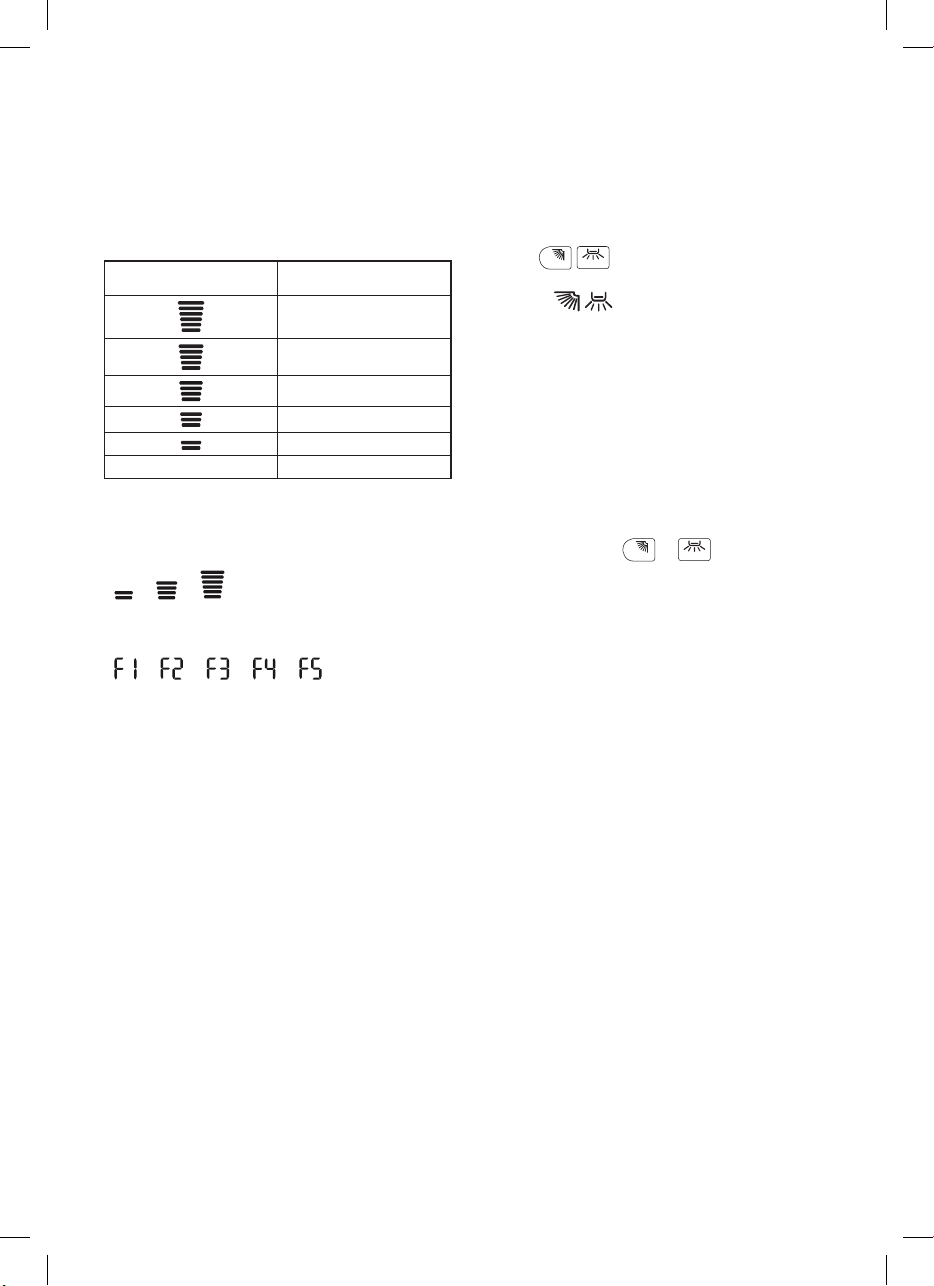
Using the Fan Speed Function
Adjusting the Fan Speed
• Press FAN SPEED button repeatedly to adjust
the fan speed.
Display Screen Speed
High
Medium - High
Medium
Medium - Low
Low
- Natural Wind
NOTE
• The fan speed of natural air adjusts
automatically.
• The fan speed icons are displayed on some
indoor units.
• Indoor unit display is displayed only 5 seconds
and return to the setting temperature on some
models.
Using the Air Flow Direction Function
This function adjusts the direction of the air flow
vertically (horizontally).
(
• Press
the desired direction.
− Select
air flow automatically.
NOTE
• Adjusting the air flow direction horizontally may
not be supported, depending on the model.
• Adjusting the air deflector arbitrarily may cause
product failure.
• If you restart the air conditioner, it starts to
operate with the previously set direction of air
flow, so the air deflector may not match the
icon displayed on the remote control. When
this occurs, press
the direction of the air flow again.
• This function may operate differently from the
remote control display.
) button repeatedly and select
( ) to adjust the direction of the
or
button to adjust
20
EN
TIMER
TIMER
TIMER
TIMER
CANCEL
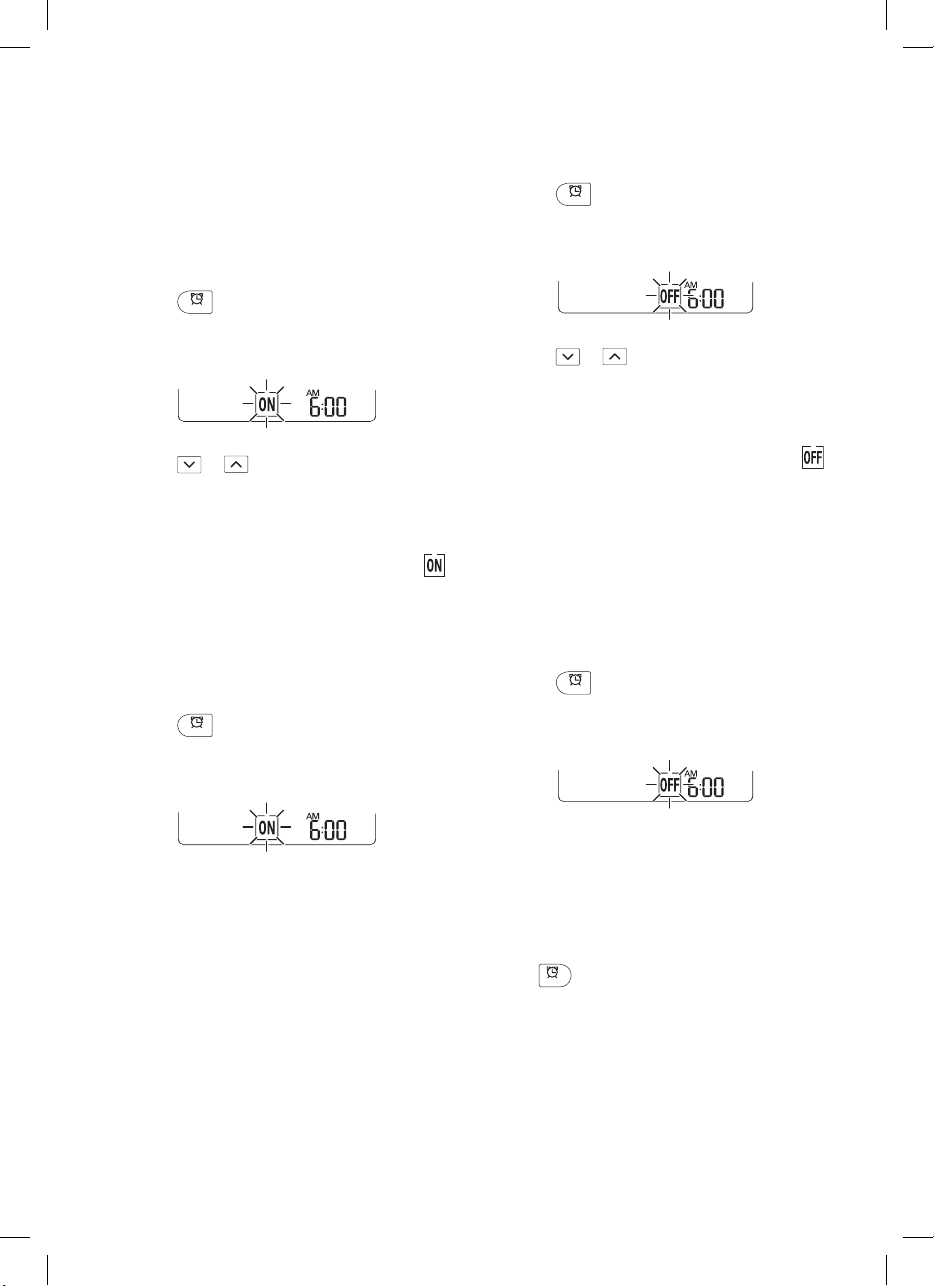
Setting the On/Off Timer
This function sets the air conditioner to turn on/
off automatically at desired time.
Setting the On Timer
Press
1
• The icon below blinks at the bottom of the
display screen.
Press or button to select the
2
minutes.
Press SET/CANCEL button to finish.
3
• After setting the timer, current time and
icon are displayed on the display screen
indicating that the desired time is set.
Canceling the On Timer
Press
1
• The icon below blinks at the bottom of the
display screen.
button repeatedly.
button repeatedly.
Setting the Off Timer
Press
1
• The icon below blinks at the bottom of the
display screen.
Press or button to select the
2
minutes.
Press SET/CANCEL button to finish.
3
• After setting the timer, current time and
icon are displayed on the display screen
indicating that the desired time is set.
NOTE
• This function is disabled when you set Simple
Timer.
button repeatedly.
Canceling the Off Timer
Press
1
• The icon below blinks at the bottom of the
display screen.
button repeatedly.
Press SET/CANCEL button to cancel the
2
setting.
Press SET/CANCEL button to cancel the
2
setting.
Canceling the Timer Setting
• Press
button to cancel all timer settings.
21
EN
TIMER
TIMER
Using the Sleep Function (Optional)
This function turns off the air conditioner
automatically when you go to sleep.
Turn the appliance on.
1
Press
2
• The icon below blinks at the bottom of the
display screen.
Press or button to select the hour
3
(up to 7 hours).
Press SET/CANCEL button to finish.
4
•
NOTE
• is displayed on some indoor units.
• Indoor unit display is displayed from 1H to 7H,
which is displayed only 5 seconds and then
return to the setting temperature.
• In the Cooling and Dehumidification Mode, the
temperature increases by 1 °C after 30 minutes
and additional 1 °C after another 30 minutes
for a more comfortable sleep.
• The temperature increases up to 2 °C from the
preset temperature.
• Although the remark for fan speed on the
display screen may be changed, the fan speed
is adjusted automatically.
button repeatedly.
is displayed on the display screen.
Using the Simple Timer Function (Optional)
This function turns off the air conditioner
automatically when you go to sleep.
Turn the appliance on.
1
Press
2
• The icon below blinks at the bottom of the
display screen.
Press or button to select the hour
3
(up to 7 hours).
Press SET/CANCEL button to finish.
4
•
NOTE
• This function is disabled when you set Off
Timer.
button repeatedly.
is displayed on the display screen.
22
EN
kW [3 s]
kW
kWh
kW [3 s]
kW
kWh
℃↔℉ [5 s]
SWING
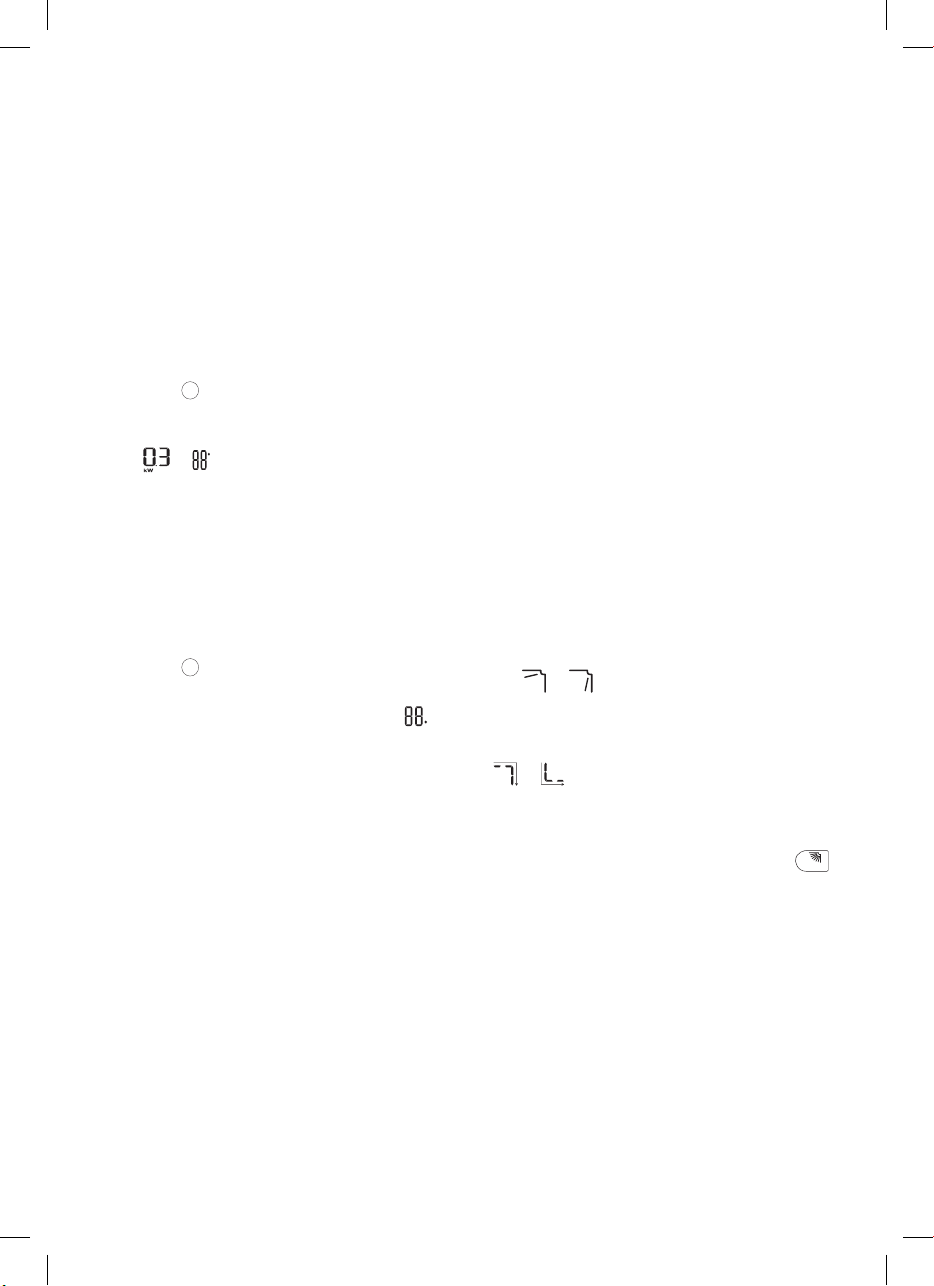
Using the Energy Display Function (Optional)
This function displays the amount of electricity
generated on the indoor display as the product
operates.
Display the Current Energy Usage
Turn the appliance on.
1
Press
2
seconds.
• The instantaneous power consumption (
Display the Cumulative Energy
Usage (Optional)
Turn the appliance on.
1
Press
2
seconds twice.
• The cumulative power consumption (
NOTE
• It is not displayed on the wireless remote
control.
• kW refers to instantaneous power
consumption.
• kWh refers to cumulative power consumption.
• If it is more than 99 kWh, which is the range of
expression, maintain it as 99 kWh.
• Power off resets its value.
• Display wattage under 10 kW with 0.1 kW(h)
unit, and display one over 10 kW with 1 kW(h)
unit.
• The actual power may differ from the power
displayed.
button and hold it about 3
or
some indoor units.
) is displayed for a while on some indoor
units.
) is displayed for a while on
button and hold it about 3
Using the Light Off Function (Optional)
Display Screen Brightness
You can set the brightness of the indoor unit
display screen.
• Press LIGHT OFF button.
NOTE
• Turn on/off the Display screen.
Using the Comfort Air Function (Optional)
Comfort Vane Operation
This function conveniently sets the vane to a
preset position to deflect the supply air away
from blowing directly onto the occupants in the
room.
Turn the appliance on.
1
Press COMFORT AIR button repeatedly and
2
select the desired direction.
•
or is displayed on the display
screen.
NOTE
• or is displayed on some indoor units.
• This function is disabled when you press
MODE or JET MODE button.
• This function is disabled and auto swing of
vertical direction is set up when you press
button.
• When this function is off, the horizontal vane
operates automatically depending on the set
mode.
23

EN
Using the Energy Saving Function (Optional)
This function minimizes power consumption
during Cooling and increases the set
temperature to the optimal level for a more
comfortable environment. The temperature
automatically settles at 22 °C if room ambient
temperature is below 22 °C The temperature
remains constant if it is above 22 °C
Turn the appliance on.
1
Press MODE button repeatedly to select the
2
Cooling Mode.
Press ENERGY SAVING button.
3
•
is displayed on the display screen.
Using the Energy Control Function (Optional)
Turn the appliance on.
1
Press ENERGY CTRL button.
2
• Press ENERGY CTRL button repeatedly to
select each step.
NOTE
• 1 step : The power Input is decreased by 20 %
compared to rated power input.
is displayed on the display screen.
−
• 2 step : The power Input is decreased by 40 %
compared to rated power input.
−
is displayed on the display screen.
• 3 step (Optional) : The power Input is
decreased by 60 % compared to rated power
input.
−
is displayed on the display screen.
•
(1 step), (2 step) is displayed on some
indoor units.
• This function is available with Cooling Mode.
• Capacity may decrease when Energy Control
mode is selected.
• Desired temperature is displayed about 5
seconds if you press FAN SPEED,
button.
• Room temperature is displayed about 5
seconds if you press ROOM TEMP button.
or
24

EN
Using Special Functions
Turn the appliance on.
1
Press FUNC button repeatedly to select the
2
desired function.
Press SET/CANCEL button to finish.
3
Display
Screen
To purify the air by removing
particles that enters the indoor
unit.
To reduce noise from outdoor
units.
To keep your skin moisturized
by generating ion clusters.
To lower indoor humidity quickly.
To maintain a minimum room
temperature and prevent objects
in the room from freezing.
To fan away a mosquito.
To remove moisture generated
inside the indoor unit.
To make the comfortable sleep
environment.
Description
NOTE
• Some functions may not be supported,
depending on the model.
• Some functions may operate differently from
the remote control display.
25

EN
Canceling Special Functions
Press FUNC button repeatedly to select the
1
desired function.
Press SET/CANCEL button to cancel the
2
function.
Using the Air Purification Function
These functions supply clean and fresh air by
ion particles and filter.
Function Display Description
Ion particles from
Ionizer sterilize
Ionizer
Plasma
NOTE
• You can use this function without turning the air
conditioner on.
• Both the plasma lamp and the cooling lamp
light up while Smoke Away/Plasma is in
operation on some models.
• Do not touch ionizer during operation.
• This function may operate differently from the
remote control display.
the aerial
bacteria and
other harmful
substances.
It removes
microscopic
contaminants
from the intake
air completely to
supply clean and
fresh air.
Using the Silent Function
This function prevents potential claims by
neighbors, reducing noise from outdoor units.
is displayed on the display screen.
•
NOTE
• This function is disabled when you press
MODE or ENERGY CTRL or JET MODE
button.
• This function is available with Cooling, Heating,
Auto Changeover, Auto Operation Mode.
Using the Ion Care Function
This function keeps your skin moisturized by
generating ion clusters which is absorbed into
the surface of skin.
•
is displayed on the display screen about 3
seconds.
NOTE
• This function is available with Cooling, Fan
Mode and Air Purification function.
Using the Jet Dry Function
This function maximizes the performance of
dehumidification.
, are displayed on the display screen.
•
NOTE
• This function is available with Cooling,
Dehumidification, Auto Operation, Fan Mode
and Air Purification function.
• This function is not available with Sleep
function.
• This function is disabled when you press
MODE button.
26

EN
SWING
Using the Low Heating Function
This function operates the heating system to
maintain a minimum room temperature and
prevent objects in the room from freezing where
there is no permanent resident, such as a
vacation.
, are displayed on the display screen.
•
NOTE
• This function is available with Heating Mode.
• During LH operation, when you press buttons
such as
then return to Heating Mode, 30 °C high speed.
• If JET MODE button is pressed during LH
operation, this function is disabled and Power
Heating Mode is operated immediately. (only
for power heating model)
• In case an error occurred, operation can be
interrupted for the protection of the product.
• COMFORT AIR and
used while the LH function is in operation.
, , MODE, FAN SPEED, and
button cannot be
Using the Mosquito Away
Function
This function fans away mosquitos by generating
a high-frequency wave.
is displayed on the display screen.
•
Using the Auto Clean Function
In the Cooling and Dehumidification Mode,
moisture is generated inside the indoor unit. This
function removes such moisture.
is displayed on the display screen.
•
NOTE
• Some functions cannot be used while the Auto
Clean function is in operation.
• If you turn off the power, the fan operates for
30 minutes and cleans the inside of the indoor
unit.
Using the Comfort Sleep Function
This function operates the air conditioner
automatically to make the comfortable sleep
environment.
, are displayed on the display screen.
•
NOTE
• This function is available with Cooling Mode.
• The vane stops swing and sets indirect airflow
angle, after 30 minutes from start even though
the room temperature doesn’t decrease to
optimal temperature to sleep.
• It is possible that a comfortable sleep
environment is different according to the
people.
NOTE
• You can use this function without turning the air
conditioner on.
27

SMART FUNCTIONS
EN
Using Smart ThinQ Application
Installing Smart ThinQ
Search for the LG Smart ThinQ application from
the Google Play Store or Apple App Store on a
smart phone. Follow instructions to download
and install the application.
Product Registration
Run the LG Smart ThinQ application on a
1
smart phone.
Create an account and sign in.
2
Select Register.
3
Select Air conditioner.
4
Follow the instruction on the smart phone.
5
Wi-Fi Function
• For appliances with the logo
Communicate with the appliance from a smart
phone using the convenient smart features.
Using the Application
Select the appliance in the application and
1
connect it to a Wi-Fi network.
Firmware Update
Keep the appliance performance updated.
Smart Diagnosis™
If you use the Smart Diagnosis function, you will
be provided with the useful information such as
a correct way of using the appliance based on
the pattern of use.
Settings
Allows you to set various options on the
appliance and in the application.
NOTE
• To verify the Wi-Fi connection, check that Wi-Fi
icon on the control panel is lit.
• LG Smart ThinQ is not responsible for any
network connection problems or any faults,
malfunctions, or errors caused by network
connection.
• The machine supports 2.4 GHz Wi-Fi networks
only.
• If the appliance is having trouble connecting
to the Wi-Fi network, it may be too far from
the router. Purchase a Wi-Fi repeater (range
extender) to improve the Wi-Fi signal strength.
• The Wi-Fi connection may not connect or may
be interrupted because of the home network
environment.
• The network connection may not work properly
depending on the internet service provider.
• The surrounding wireless environment can
make the wireless network service run slowly.
• The application is subject to change for
appliance improvement purposes without
notice to users.
• Functions may vary by model.
Select the menu on the upper right side to
2
access settings and features.
28

EN
Open Source Software Notice
Information
To obtain the source code under GPL, LGPL,
MPL, and other open source licenses, that is
contained in this product, please visit http://
opensource.lge.com.
In addition to the source code, all referred
license terms, warranty disclaimers and
copyright notices are available for download.
LG Electronics will also provide open source
code to you on CD-ROM for a charge covering
the cost of performing such distribution (such as
the cost of media, shipping, and handling) upon
email request to opensource@lge.com. This
offer is valid for three (3) years from the date on
which you purchased the product.
Smart Diagnosis™ Using a Smart
Phone
• For appliances with the or logo
Use this function if you need an accurate
diagnosis by an LG Electronics customer
information centre when the appliance
malfunctions or fails.
Smart Diagnosis™ can not be activated
unless the appliance is connected to power.
If the appliance is unable to turn on, then
troubleshooting must be done without using
Smart Diagnosis™.
Open the LG Smart ThinQ application on
1
the smart phone.
Select the air conditioner in dashboard.
2
Press Start Smart Diagnosis button.
3
Follow the instructions on the smart phone.
4
NOTE
• The Smart Diagnosis™ function depends on
the local call quality.
• If the Smart Diagnosis™ data transfer is poor
due to poor call quality, you may not receive
the best Smart Diagnosis™ service.
• Be sure to keep ambient noise to a minimum or
the phone may not correctly receive the buzzer
beeps from the indoor unit.
29

MAINTENANCE
EN
WARNING
• Before cleaning or performing maintenance, disconnect the power supply and wait until the fan
stops.
If the air conditioner will not be used for an extended period of time, dry the air conditioner to maintain
it in best condition. Clean the product regularly to maintain optimal performance and to prevent
possible breakdown.
• Dry the air conditioner in Fan mode for 3 to 4 hours and disconnect the power. There may be internal
damage if moisture is left in its components.
• Before using the air conditioner again, dry the inner components of the air conditioner in Fan mode
for 3 to 4 hours. This will help to remove the odor generated from moisture.
Air Filter
• The feature may be changed according to the type of model.
30

Type Description Interval
Air filter Clean with a vacuum or hand wash. 2 weeks
Triple filter Clean with a vaccum or brush. Every 3 months
3M filter Clean with a vaccum or brush. Every 6 months
Ionizer (Optional) Use dry cotton bud to remove any dust Every 6 months
Clean the Indoor unit surface by using a soft, dry cloth. Regularly
Indoor unit
Outdoor unit
Have a professional clean the condensate drain pan. Once a year
Have a professional clean the condensate drain pipe. Every 4 months
Replace the remote control batteries. Once a year
Have a professional clean the heat exchanger coils and the
panel vents. (Consult with technician.)
Have a professional clean the fan. Once a year
Have a professional clean the condensate drain pan. Once a year
Have a professional verify that all the fan assembly is firmly
tightened.
Clean the electric components with air. Once a year
Once a year
Once a year
NOTE
• Never use water that is higher than 40 °C when you clean the filters. It may cause deformation or
discoloration.
• Never use volatile substances when you clean the filters. They may damage the surface of the
product.
• Do not wash the 3M filter with water, because the filter can be damaged (Optional).
• Do not wash the Triple filter with water, because the filter can be damaged (Optional).
EN
31

EN
Clean the Air Filter
Clean the air filters once every 2 weeks, or
more, if necessary.
NOTE
• The air filter can be broken when it is bended.
• When the air filter is not assembled correctly,
dust and other substance come into the indoor
unit.
Type1
Turn off the power and unplug the power
1
cord.
Open the front cover.
2
• Lift up both sides of the cover slightly.
Hold the knobs of the air filters, pull them
3
down slightly and remove them from the
indoor unit.
Clean the filters with a vacuum cleaner or
4
with lukewarm water with neutral detergent.
Type2
If you look at the indoor unit from above it, can
assemble the top filter easily.
Turn off the power and unplug the power
1
cord.
Hold the knob of air filter, lift it up slightly.
2
Remove it from the indoor unit.
3
Clean the filter with a vacuum cleaner or with
4
lukewarm water with neutral detergent.
Dry the filter in the shade.
5
Insert the hooks of the air filter into the front
6
cover.
Dry the filters in the shade.
5
Insert the hooks of the air filters into the front
6
cover.
Check the side of the front cover for correct
7
assembly of the air filters.
32
Push down hooks to assemble the air filter.
7
Check the side of the front cover for correct
8
assembly of the air filter.

EN
Clean the 3M and Triple Filter (Optional)
Turn off the power and unplug the power
1
cord.
Remove the air filters from the indoor unit.
2
Remove the 3M and Triple filters from the
3
indoor unit.
Type1
Type2
Clean the filters with a vacuum cleaner.
4
Insert the 3M and Triple filters.
5
Type1
Type2
Assemble the air filters.
6
Check the side of the front cover for correct
7
assembly of the air filters.
NOTE
• The feature and location of 3M and Triple filter
may vary according to the type of model.
33

TROUBLESHOOTING
EN
Self-diagnosis Function
This product has a built-in self-diagnosis function. If an error occurs, the lamp of the indoor unit will
blink in 2 second intervals. If this occurs, contact your local dealer or service center.
Before Calling for Service
Please check the following before you contact the service center. If the problem persists, contact your
local service center.
Problem Possible Causes Corrective Action
Burning smell and strange
sounds are coming from the
unit.
Water leaks from the indoor
unit even when the humidity
The air conditioner
does not work
normally.
The air conditioner
does not work.
level is low.
The power cable is damaged or
it is generating excessive heat.
A switch, a circuit breaker
(safety, ground), or a fuse is
not operated properly.
The unit generates an error
code from its self-diagnosis.
The air conditioner is
unplugged.
A fuse exploded, or the power
supply is blocked.
A power failure has occurred.
The voltage is too high or too
low.
The air conditioner was turned
off automatically at a preset
time.
The battery setting in the
remote controller is incorrect.
• Turn off the air conditioner, unplug the
power cable or disconnect the power
supply, and contact the service center.
• Check whether the power cord is
plugged into the outlet or the power
isolators are switched on.
• Replace the fuse or check if the circuit
breaker has tripped.
• Turn off the air conditioner when a
power failure occurs.
• When the power is restored, wait
3 minutes, and then turn on the air
conditioner.
• Check if the circuit breaker has tripped.
• Turn the air conditioner on.
• Make sure that the batteries are
inserted correctly in your remote
controller.
• If the batteries are placed correctly,
but the air conditioner still does not
operate, replace the batteries and try
again.
34

Problem Possible Causes Corrective Action
• Make sure that there are no curtains,
blinds, or pieces of furniture blocking
the front of the air conditioner.
• Clean the air filter once every 2 weeks.
• See “Cleaning Air Filter” for more
information.
• In summer, cooling the indoor air fully
may take some time. In this case,
select the Jet Mode to cool the indoor
air quickly.
• Make sure that no cold air is escaping
through the ventilation points in the
room.
• Set the desired temperature to a level
lower than the current temperature.
• Avoid using heat generators like
electric ovens or gas burners while the
air conditioner is in operation.
• During Fan Mode, air blows from
the air conditioner without cooling or
heating the indoor air.
• Switch the operation mode to cooling
operation.
• The cooling effect may not be
sufficient.
• In some operation modes, you
cannot adjust the fan speed. Select
an operation mode in which you can
adjust the fan speed.
• In some operation modes, you cannot
adjust the temperature. Select an
operation mode in which you can
adjust the temperature.
• The Timer Function may have timed
out, which turns the unit off. Check the
timer settings.
• Wait for the power to come back. If
you have the Auto Restart function
enabled, your unit will resume its last
operation several minutes after power
is restored.
The air conditioner
does not emit cool
air.
The fan speed
cannot be adjusted.
The temperature
cannot be adjusted.
The air conditioner
stops during
operation.
Air is not circulating properly.
The air filter is dirty.
The room temperature is too
high.
Cold air is escaping from the
room.
The desired temperature
is higher than the set
temperature.
There is a heating source
nearby.
Fan Mode is selected.
Outside temperature is too
high.
The Jet Mode, or Auto
Operation Mode is selected.
The Fan Mode or Jet Mode is
selected.
The air conditioner is suddenly
turned off.
A power failure has occurred
during operation.
EN
35

Problem Possible Causes Corrective Action
The indoor unit is
still operating even
when power has
been turned off.
The air outlet on
the indoor unit is
discharging mist.
Water leaks from the
outdoor unit.
There is noise or
vibration.
The indoor unit gives
off an odor.
The air conditioner
does not emit warm
air.
The Auto Clean function is
being operated.
The cooled air from the air
conditioner makes mist.
In the heating operations,
condensed water drops from
the heat exchanger.
A clicking sound can be
heard when the unit starts or
stops due to movement of the
reversing valve.
Creaking sound: The plastic
parts of the indoor unit creak
when they shrink or expand
due to sudden temperature
changes.
Flowing or Blowing sound:
This is the flow of refrigerant
through the air conditioner.
Odors (such as cigarette
smoke) may be absorbed into
the indoor unit and discharged
with airflow.
When Heating Mode starts, the
vane is almost closed, and no
air comes out, even though the
outdoor unit is operating.
The outdoor unit is in
Defrosting Mode.
Outside temperature is too low.
• Allow the Auto Clean function to
continue since it removes any
remaining moisture inside the indoor
unit. If you do not want this feature,
you can turn the unit off.
• When the room temperature
decreases, this phenomenon will
disappear.
• This symptom requires installing
a drain hose under the base pan.
Contact the installer.
• These are normal symptoms. The
noise will stop.
• If the smell does not disappear, you
need to wash the filter. If this does not
work, contact the service center to
clean your heat exchanger.
• This symptom is normal. Please wait
until the unit has generated enough
warm air to blow through the indoor
unit.
• In Heating Mode, ice/frost is built up on
the coils when the outside temperature
falls. This function removes a layer of
frost on the coil, and it should finish in
approximately 15 minutes.
• The heating effect may not be
sufficient.
EN
NOTE
• Some functions may not be supported, depending on the model.
36

BUKU PANDUAN PEMILIK
PENDINGIN
RUANGAN (AC)
Baca buku panduan pemilik ini secara menyeluruh sebelum mengoperasikan alat dan
simpan dengan baik untuk digunakan sebagai referensi setiap saat.
TYPE: WALL MOUNTED
MODEL :
S10DMV T13EMV T19EMV D10SMV D13SMV D18SMV
E13SIV E19SIV D10RIV3 D13RIV3 D19RIV3
www.lg.com

DAFTAR ISI
Panduan ini dapat berisi gambar atau isi
yang berbeda dari model yang Anda beli.
Buku panduan ini dapat diubah oleh pabrik.
PETUNJUK KESELAMATAN .............................................. 3
PETUNJUK KESELAMATAN PENTING .................................................3
PENGOPERASIAN ............................................................ 11
Catatan untuk pengoperasian .............................................................. 11
Komponen dan Fungsinya .................................................................... 11
Remote Control Jarak Jauh .................................................................. 12
Memulai ulang AC Secara Otomatis .....................................................17
Menggunakan Fungsi Mode ................................................................. 17
Menggunakan Fungsi Mode Jet ...........................................................19
Menggunakan Fungsi Kecepatan Kipas ............................................... 20
Menggunakan Fungsi Arah Aliran Udara ..............................................20
Menyetel Pewaktu Hidup/Mati .............................................................. 21
Menggunakan Fungsi Tidur (Opsional) ................................................22
Menggunakan Fungsi Pewaktu Sederhana (Opsional) ........................ 22
Menggunakan Fungsi Tampilan Energi (Opsional) ............................... 23
Menggunakan Fungsi Lampu Mati (Opsional) ...................................... 23
Menggunakan Fungsi Udara Nyaman (Opsional) ................................ 23
Menggunakan Fungsi Penghematan Energi (Opsional) .......................24
Menggunakan Fungsi Kontrol Energi (Opsional) ..................................24
Menggunakan Fungsi Khusus .............................................................. 25
FUNGSI CERDAS .............................................................. 28
Menggunakan Aplikasi Smart ThinQ ....................................................28
PEMELIHARAAN ............................................................... 30
Membersihkan Filter Udara ..................................................................32
Membersihkan Filter 3M dan Tiga Lapis (Opsional) .............................33
PEMECAHAN MASALAH ................................................. 34

PETUNJUK KESELAMATAN
ID
Panduan keselamatan berikut ditujukan untuk mencegah risiko
tak terduga atau kerusakan akibat pengoperasian produk yang
salah atau tidak aman.
Panduan ini dibagi menjadi 'PERINGATAN' dan 'PERHATIAN'
seperti yang dijelaskan di bawah.
Simbol yang ditampilkan menunjukkan masalah dan
pengoperasian yang berisiko. Baca bagian dengan
simbol ini dengan cermat dan ikuti petunjuk guna
menghindari risiko.
PERINGATAN
Ini menunjukkan bahwa kegagalan mengikuti petunjuk dapat
mengakibatkan cedera serius bahkan kematian.
PERHATIAN
Ini menunjukkan bahwa kegagalan mengikuti petunjuk dapat
mengakibatkan cedera ringan atau kerusakan produk.
PETUNJUK KESELAMATAN PENTING
PERINGATAN
Guna mengurangi risiko ledakan, kebakaran, kematian,
sengatan listrik, cedera, atau melepuh akibat panas bagi
orang yang menggunakan produk ini, ikuti tindakan
pencegahan dasar, termasuk yang berikut:
Anak-anak di dalam Rumah
Alat ini tidak ditujukan untuk digunakan oleh orang (termasuk anakanak) yang memiliki keterbatasan fisik, pancaindra, atau mental,
atau orang yang kurang pengalaman serta pengetahuan, kecuali jika
orang tersebut mendapat pengawasan atau petunjuk penggunaan
alat dari orang yang bertanggung jawab atas keselamatan mereka.
Anak-anak harus diawasi guna memastikan bahwa mereka tidak
bermain dengan alat.
3
ID
Pemasangan
•Jangan memasang AC pada permukaan yang tidak stabil atau di
tempat yang berisiko alat jatuh.
•Hubungi pusat servis resmi saat memasang maupun memindahkan
AC.
•Pasang dan rapatkan panel serta penutup kotak kontrol.
•Jangan memasang AC di sekitar tempat penyimpanan cairan yang
mudah terbakar atau gas seperti bensin, propana, tiner, dll.
•Pastikan bahwa pipa dan kabel daya yang tersambung ke
unit dalam dan luar ruangan tidak ditarik terlalu kencang saat
memasang AC.
•Gunakan pemutus arus standar dan sekring yang sesuai dengan
nilai yang tercantum di AC.
•Jangan memasukkan udara atau gas ke dalam sistem kecuali
dengan zat pendingin tertentu.
•Gunakan gas yang tidak mudah terbakar (nitrogen) untuk
memeriksa kebocoran dan untuk membersihkan udara; jika
menggunakan gas yang mudah terbakar atau kompresor udara
dapat mengakibatkan kebakaran bahkan ledakan.
•Pengabelan dalam/luar ruangan harus tersambung dengan rapat,
dan kabel harus ditata dengan benar sehingga kabel tidak akan
tertarik secara paksa dari terminal sambungan. Sambungan yang
longgar atau kusut dapat mengakibatkan panas bahkan kebakaran.
4

•Pasang stopkontak listrik tunggal dan pemutus arus sebelum
menggunakan AC.
•Jangan menyambungkan kabel arde ke pipa gas, penangkal petir,
atau kabel arde telepon.
Pengoperasian
•Pastikan selalu menggunakan komponen yang terdaftar dalam
daftar suku cadang. Jangan pernah mencoba memodifikasi
peralatan.
•Pastikan anak-anak tidak memanjat atau memukul unit luar ruang.
•Buang baterai di tempat yang tidak rentan terbakar.
•Hanya gunakan zat pendingin yang tercantum di label AC.
•Cabut catu daya jika terdapat suara bising, bau, atau asap yang
berasal dari AC.
•Jangan meletakkan zat yang mudah terbakar seperti bensin,
bensol, atau tiner di dekat AC.
•Hubungi pusat servis resmi jika AC terendam banjir.
•Jangan menggunakan AC terlalu lama di dalam tempat sempit
tanpa ada ventilasi yang memadai.
•Saat terjadi kebocoran gas (seperti Freon, gas propana, gas LP,
dll.) alirkan udara untuk mengeluarkan bau gas sebelum kembali
menggunakan AC.
•Untuk membersihkan bagian dalam, hubungi pusat servis atau
penjual resmi. Menggunakan detergen dapat menyebabkan korosi
atau kerusakan pada unit.
•Pastikan mengalirkan udara dengan cukup jika AC dan alat
pemanas seperti pemanas digunakan secara bersamaan.
ID
5

•Jangan menghalangi saluran masuk atau keluar udara.
•Jangan memasukkan tangan atau benda lainnya melalui saluran
masuk atau keluar udara saat AC beroperasi.
•Pastikan bahwa kabel daya tidak kotor, longgar, atau rusak.
•Jangan pernah menyentuh, mengoperasikan, atau memperbaiki AC
jika tangan basah.
•Jangan meletakkan benda apa pun di atas kabel daya.
•Jangan meletakkan pemanas atau alat pemanas lainnya di dekat
kabel daya.
•Jangan memodifikasi atau memperpanjang kabel daya. Menggores
atau mengelupas kabel daya dapat menyebabkan kebakaran atau
sengatan listrik, dan harus diganti.
•Segera cabut catu daya saat terjadi listrik padam atau badai petir.
•Berhati-hatilah jangan sampai kabel listrik tertarik atau rusak
selama pengoperasian.
•Jangan menyentuh pipa refrigeran atau komponen internal saat
unit sedang beroperasi atau segera setelah pengoperasian.
Pemeliharaan
•Jangan membersihkan alat dengan menyemprotkan air secara
langsung pada produk.
•Sebelum membersihkan atau melakukan perawatan, cabut catu
daya dan tunggu hingga kipas berhenti.
ID
6

Keselamatan Teknis
•Pemasangan atau perbaikan yang dilakukan oleh selain petugas
resmi dapat membahayakan Anda dan orang lain.
•Informasi yang ada dalam buku panduan ini ditujukan untuk
penggunaan oleh teknisi servis resmi yang memahami prosedur
keselamatan dan dilengkapi alat yang memadai serta instrumen
pengujian.
•Jika tidak membaca dan mengikuti petunjuk dalam buku panduan
ini dapat menyebabkan kegagalan peralatan, kerusakan properti,
cedera dan/atau kematian.
•Pemasangan alat harus sesuai dengan peraturan pengabelan
nasional.
•Jika kabel daya perlu diganti, penggantian harus dilakukan oleh
petugas resmi dengan menggunakan suku cadang yang asli saja.
•Alat ini harus dipasang kabel arde dengan benar guna
meminimalisir risiko sengatan listrik.
•Jangan memotong atau mencabut tangkai arde dari colokan daya.
•Memasang terminal arde adaptor ke sekrup stopkontak berpenutup
tidak akan mengardekan alat kecuali jika sekrup penutup terbuat
dari logam, tidak terisolasi, dan penutup stopkontak diardekan
melalui pengabelan rumah.
•Jika Anda ragu apakah AC telah diardekan dengan benar, mintalah
teknisi listrik yang berkualifikasi untuk memeriksa rangkaian dan
stopkontak berpenutup tersebut.
•Gas yang keluar dari isolator dan zat pendingin yang digunakan
dalam alat memerlukan prosedur pembuangan khusus.
Konsultasikan dengan agen servis atau orang yang berkualifikasi
sebelum membuangnya.
•Jika kabel daya rusak, kabel harus diganti oleh pabrik atau agen
servis atau orang yang berkualifikasi guna menghindari bahaya.
ID
7
PERHATIAN
Guna mengurangi risiko cedera ringan pada pengguna,
malfungsi, atau kerusakan pada produk atau properti saat
menggunakan produk ini, ikuti tindakan pencegahan dasar,
termasuk yang berikut:
Pemasangan
•Jangan memasang AC di tempat yang terkena angin laut
(semprotan garam).
•Pasang pipa kuras dengan benar agar kondensasi air dapat
terkuras dengan lancar.
•Hati-hatilah saat membuka atau memasang AC.
•Jangan menyentuh zat pendingin yang bocor selama pemasangan
atau perbaikan.
•Pindahkan AC dengan dua orang atau lebih atau gunakan forklift.
•Pasang unit luar ruang di tempat yang terlindungi dari sinar
matahari langsung. Jangan letakkan unit dalam ruang di tempat
yang terkena sinar matahari secara langsung.
•Sisihkan material seperti sekrup, paku, atau baterai dengan aman
menggunakan wadah yang sesuai setelah pemasangan maupun
perbaikan.
•Pasang AC di tempat suara bising dari unit luar ruang atau asap
buang tidak akan mengganggu tetangga. Apabila tidak dilakukan
dapat menimbulkan konflik dengan tetangga.
ID
8

Pengoperasian
•Lepas baterai jika remote control tidak digunakan dalam jangka
waktu lama.
•Pastikan bahwa filter dipasang sebelum mengoperasikan AC.
•Pastikan Anda memeriksa apakah terdapat kebocoran bahan
pendingin setelah memasang atau memperbaiki AC.
•Jangan meletakkan benda apa pun di atas AC.
•Jangan pernah mencampur jenis baterai yang berbeda, atau
baterai lama dengan baterai baru untuk remote control.
•Jangan biarkan AC bekerja dalam waktu yang lama jika udara
sangat lembap atau jika pintu maupun jendela dibiarkan terbuka.
•Hentikan penggunaan remote control jika ada kebocoran cairan
pada baterai. Jika pakaian atau kulit Anda terkena cairan baterai
yang bocor, bilas dengan air bersih.
•Jangan memapar orang, hewan, atau pun tanaman pada udara
panas atau dingin dari AC dalam jangka waktu yang terlalu lama.
•Jika cairan baterai yang bocor tertelan, bilas bagian dalam mulut
secara menyeluruh dan hubungi dokter.
•Jangan minum air yang keluar dari AC.
•Jangan menggunakan produk untuk tujuan khusus, seperti
menyimpan makanan, karya seni, dll. AC ini khusus untuk
pendingin ruangan, bukan sebagai sistem pendinginan presisi.
Terdapat risiko kerusakan atau kehilangan properti.
•Jangan mengisi ulang atau membongkar baterai.
ID
9

Pemeliharaan
•Jangan menyentuh bagian logam AC saat melepas filter udara.
•Gunakan bangku atau tangga yang kokoh saat membersihkan,
merawat, atau memperbaiki AC di ketinggian.
•Jangan menggunakan cairan atau bahan pembersih yang bersifat
keras atau semprotan air. Gunakan kain lembut.
ID
10

PENGOPERASIAN
4
5
6
7
Catatan untuk pengoperasian
Saran untuk Penghematan Energi
• Jangan gunakan pengaturan yang terlalu dingin dalam ruangan. Hal ini dapat berbahaya bagi
kesehatan dan dapat menguras energi listrik.
• Halangi sinar matahari dengan tirai atau gorden saat Anda mengoperasikan AC.
• Tetap tutup rapat pintu atau jendela saat Anda mengoperasikan AC.
• Sesuaikan arah aliran udara baik secara vertikal maupun horizontal untuk mengalirkan udara dalam
ruangan.
• Percepat kipas untuk mendinginkan atau menghangatkan bagian dalam ruangan dengan cepat dan
singkat.
• Buka jendela secara teratur karena kualitas ventilasi udara dalam ruangan dapat memburuk jika AC
digunakan dalam durasi yang lama.
• Bersihkan filter udara 2 minggu sekali. Debu dan kotoran yang terkumpul di dalam filter dapat
menghalangi aliran udara atau melemahkan fungsi dehumidifikasi / pendinginan.
Komponen dan Fungsinya
Unit Dalam Ruang Unit Luar Ruang
ID
1
Filter Udara
2
Pipa Udara Masuk
3
Penutup Depan
Tombol Hidup/Mati
Deflektor Udara (Kisi vertikal)
Deflektor udara (Baling-baling horizontal)
Saluran Keluar Udara
1
Ventilasi Udara Masuk
2
Ventilasi Udara Keluar
CATATAN
• Jumlah dan lokasi lampu pengoperasian dapat bervariasi sesuai dengan model AC.
• Fitur mungkin berubah sesuai dengan jenis model.
11

ID
SWING
kW [3 s]
Remote Control Jarak Jauh
Memasukkan Baterai
Jika layar tampilan remote control mulai
memudar, ganti baterainya. Masukkan baterai
AAA (1.5 V) sebelum menggunakan remote
control.
Lepas penutup baterai.
1
Masukkan baterai baru dan pastikan
2
terminal + dan - baterai terpasang pada
posisi yang benar.
Memasang Wadah Remote Control
Untuk melindungi remote control, pasang wadah
remote control di tempat yang tidak terkena
cahaya matahari secara langsung.
Pilih lokasi yang mudah diakses dan aman.
1
Metode pengoperasian
Arahkan remote control ke penerima sinyal di
bagian kanan AC untuk mengoperasikannya.
CATATAN
• Remote Control dapat mengoperasikan
perangkat elektronik jika remote diarahkan
ke perangkat elektronik tersebut. Pastikan
mengarahkan remote control ke penerima
sinyal AC.
• Agar pengoperasian lancar, gunakan kain
lembut untuk membersihkan pengirim dan
penerima sinyal.
• Jika fungsi tidak tersedia di produk, tidak akan
ada suara indikator dari dalam produk saat
tombol untuk fungsi tersebut ditekan di kontrol
jarak jauh, kecuali untuk fungsi Arah Aliran
Udara (
Penjernihan Udara (
), Tampilan Energi (
).
), dan
Kencangkan wadah remote control dengan
2
memasang 2 sekrup menggunakan obeng.
12

ID
℃↔℉ [5 s]
SWING
ON/OFF
Menyetel Waktu Saat Ini
Masukkan Baterai
1
• Ikon di bawah berkedip pada bagian
bawah layar tampilan.
Tekan tombol atau untuk memilih
2
menit.
Tekan tombol SET/CANCEL untuk
3
menyelesaikan.
CATATAN
• Pewaktu Hidup/Mati tersedia setelah menyetel
waktu saat ini.
Menggunakan Fungsi Konversi
°C/°F (Opsional)
Fungsi ini mengubah satuan antara °C dan °F.
• Tekan dan tahan tombol
5 detik.
selama sekitar
Mengoperasikan AC Tanpa
Remote Control
Anda dapat menggunakan tombol unit dalam
ruang ON/OFF untuk mengoperasikan AC saat
remote control tidak tersedia.
Buka penutup depan (Jenis1) atau baling-
1
baling horizontal (Jenis2).
Tekan tombol ON/OFF.
2
Jenis1
Jenis2
ON/OFF
CATATAN
• Motor yang bergerak mungkin rusak, jika
baling-baling horizontal terbuka dengan cepat.
• Kecepatan kipas disetel pada kecepatan tinggi.
• Fitur mungkin berubah sesuai dengan jenis
model.
• Suhu tidak dapat diubah bila menggunakan
tombol darurat Hidup/Mati.
• Untuk model khusus pendingin, suhu disetel
pada 22 °C
• Untik model pendingin & pemanas, suhu
disetel pada 22 °C sampai 24 °C
13

Menggunakan Remote Control Jarak Jauh
RESET
SWING
SWING
Anda dapat mengoperasikan AC dengan lebih nyaman menggunakan remote control.
ID
*
MODE
TEMP
*
kW [3 s]
SWING
SWING
℃↔℉ [5 s]
SET UP
FUNC.
TIMER CANCEL
FAN
SPEED
JET
MODE
ROOM
TEMP
DIAGNOSIS [5 s]
SET
CANCEL
Tombol
2
Layar
Tampilan
- Untuk menghidupkan/mematikan AC.
Untuk menyesuaikan suhu ruangan
yang diinginkan dalam mode
mendinginkan, memanaskan, atau
*
peralihan otomatis.
Untuk memilih mode pendinginan.
Untuk memilih mode pemanas.
MODE
1
Untuk memilih mode dehumidifikasi.
Untuk memilih mode kipas.
Untuk memilih mode pengoperasian/
peralihan otomatis.
JET
MODE
FAN
SPEED
Untuk mengubah suhu ruangan dengan
cepat.
Untuk menyesuaikan kecepatan kipas.
Untuk menyesuaikan arah aliran udara
secara vertikal atau horizontal.
CATATAN
• * tombol mungkin berubah sesuai dengan jenis model.
Deskripsi
14

ID
TIMER
CANCEL
*
MODE
TEMP
*
kW [3 s]
SWING
SWING
℃↔℉ [5 s]
SET UP
FUNC.
TIMER CANCEL
FAN
SPEED
JET
MODE
ROOM
TEMP
DIAGNOSIS [5 s]
SET
CANCEL
RESET
2
Tombol
SET/
CANCEL
Layar
Tampilan
-
Untuk menghidupkan/mematikan AC
secara otomatis kapan pun.
Untuk menyetel/membatalkan fungsi
khusus serta pewaktu.
Deskripsi
- Untuk membatalkan setelan pewaktu.
*
*LIGHT
OFF
ROOM
TEMP
1
°C↔°F [5 s]
*ENERGY
SAVING
*COMFORT
AIR
- Untuk menyesuaikan waktu.
-
Untuk menyetel kecerahan tampilan
pada unit dalam ruang.
Untuk menampilkan suhu ruangan.
Untuk mengubah satuan antara °C
dan °F.
Untuk menghemat daya.
Untuk menyesuaikan aliran udara guna
mengarahkan aliran angin.
Untuk menyetel apakah ingin
kW [3 s] -
menampilkan informasi terkait energi
atau tidak.
*ENERGY
CTRL
*COMFORT
SLEEP
DIAGNOSIS
[5 s]
-
Untuk mengaktifkan penghematan
daya.
Untuk menciptakan suasana tidur yang
nyaman.
Untuk memeriksa informasi perawatan
produk dengan nyaman.
15

ID
FUNC.
*
MODE
TEMP
*
kW [3 s]
SWING
SWING
℃↔℉ [5 s]
SET UP
FUNC.
TIMER CANCEL
FAN
SPEED
JET
MODE
ROOM
TEMP
DIAGNOSIS [5 s]
SET
CANCEL
RESET
Tombol
Layar
Tampilan
Deskripsi
Untuk membersihkan udara dengan
2
membuang partikel yang masuk ke unit
dalam ruang.
Untuk mengurangi suara bising dari
unit luar ruang.
Untuk menjaga kelembapan kulit
*
dengan menghasilkan cluster ion.
Untuk mengurangi kelembapan dalam
ruangan dengan cepat.
Untuk mempertahankan suhu ruang
1
minimum dan mencegah objek di
dalam ruangan membeku.
Untuk mengusir nyamuk.
Untuk menghilangkan kelembapan
yang dihasilkan di dalam unit dalam
ruang.
RESET -
Untuk menciptakan suasana tidur yang
nyaman.
Untuk menginisiasi setelan remote
control.
CATATAN
• Beberapa fungsi mungkin tidak didukung, bergantung modelnya.
• * tombol mungkin berubah sesuai dengan jenis model.
• Tekan tombol SET/CANCEL untuk menjalankan FUNC yang dipilih.
16

ID
ON/OFF
Memulai ulang AC Secara Otomatis
Saat AC dihidupkan kembali setelah terjadi listrik
padam, fungsi ini akan memulihkan setelan
sebelumnya.
Menonaktifkan Mulai Ulang
Otomatis
Buka penutup depan (Jenis1) atau baling-
1
baling horizontal (Jenis2).
Tekan tombol ON/OFF dan tahan selama 6
2
detik, lalu Unit akan berbunyi bip sebanyak
dua kali kemudian lampu berkedip sebanyak
4 kali.
• Untuk kembali mengaktifkan fungsi
tersebut, tekan tombol ON/OFF dan
tahan hingga 6 detik. Unit akan berbunyi
sebanyak dua kali dan lampu akan
berkedip sebanyak 4 kali.
Jenis1
Menggunakan Fungsi Mode
Fungsi ini memungkinkan Anda memilih fungsi
yang diinginkan.
Model Khusus Pendingin
Mode Pendingin
Mode Pengoperasian Otomatis
(AI)
Mode Dehumidifikasi
Mode Kipas
Model Pendingin & Pemanas
Mode Pendingin
Mode Peralihan Otomatis
Mode Dehumidifikasi
Jenis2
ON/OFF
CATATAN
• Fitur mungkin berubah sesuai dengan jenis
model.
• Jika Anda menekan dan menahan tombol ON/
OFF selama 3 – 5 detik, bukan 6 detik, unit
akan beralih ke pengoperasian uji. Dalam
pengoperasian uji, unit mengeluarkan udara
dingin yang kuat selama 18 menit kemudian
kembali ke setelan bawaan pabrik.
Mode Pemanas
Mode Kipas
Mode Pendingin
Menghidupkan alat.
1
Tekan tombol MODE berulang-ulang untuk
2
memilih Mode Pendingin.
ditampilkan di layar tampilan.
•
3
Tekan tombol atau untuk menyetel
suhu yang diinginkan.
17

ID
Mode Pemanas
Menghidupkan alat.
1
Tekan tombol MODE berulang-ulang untuk
2
memilih Mode Pemanas.
ditampilkan di layar tampilan.
•
3
Tekan tombol atau untuk menyetel
suhu yang diinginkan.
Mode Dehumidifikasi
Mode ini menghilangkan kelembapan yang
berlebihan dari lingkungan yang sangat lembap
atau selama musim hujan, guna mencegah
munculnya jamur. Mode ini menyesuaikan
suhu ruangan dan kecepatan kipas secara
otomatis untuk mempertahankan tingkat optimal
kelembapan.
Menghidupkan alat.
1
Tekan tombol MODE berulang-ulang untuk
2
memilih Mode Dehumidifikasi.
ditampilkan di layar tampilan.
•
Mode Kipas
Mode ini hanya membuat udara dalam ruangan
bersirkulasi tanpa mengubah suhu ruangan.
Menghidupkan alat.
1
Tekan tombol MODE berulang-ulang untuk
2
memilih Mode Kipas.
ditampilkan di layar tampilan.
•
Tekan tombol FAN SPEED untuk
3
menyesuaikan kecepatan kipas.
Mode Peralihan Otomatis
Model Pendingin & Pemanas
Mode ini mengubah mode secara otomatis untuk
mempertahankan suhu yang disetel pada ±2 °C
Menghidupkan alat.
1
Tekan tombol MODE berulang-ulang untuk
2
memilih Mode Peralihan Otomatis.
•
ditampilkan di layar tampilan.
CATATAN
• Dalam mode ini Anda tidak dapat
menyesuaikan suhu ruangan, suhu
disesuaikan secara otomatis.
• Suhu ruangan tidak ditampilkan di layar
tampilan.
18
3
Tekan tombol atau untuk menyetel
suhu yang diinginkan.
Tekan tombol FAN SPEED untuk
4
menyesuaikan kecepatan kipas.
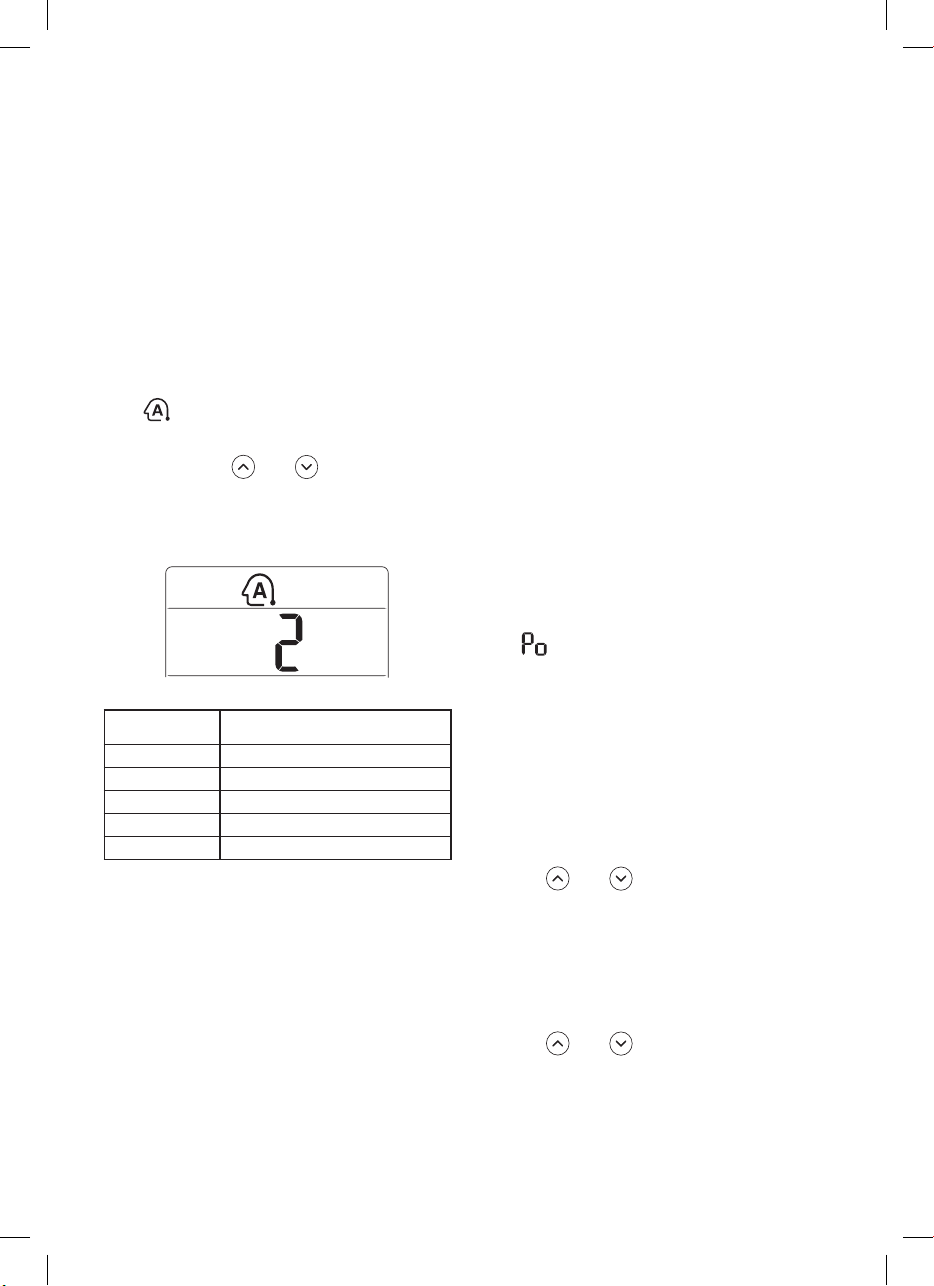
ID
Pengoperasian Otomatis
(Kecerdasan Buatan)
Model Khusus Pendingin
Pada mode ini, kecepatan kipas dan suhu
udara otomatis disesuaikan, berdasarkan suhu
ruangan.
Menghidupkan alat.
1
Tekan tombol MODE berulang-ulang untuk
2
memilih Pengoperasian Otomatis.
•
ditampilkan di layar tampilan.
3
Tekan tombol atau untuk memilih
kode pengoperasian yang diinginkan jika
suhu lebih tinggi atau lebih rendah dari suhu
yang diinginkan.
Kode Deskripsi
2 Dingin
1 Dinginkan sedikit
0 Pertahankan suhu ruang
-1 Panaskan sedikit
-2 Panas
CATATAN
• Pada mode ini, Anda tidak dapat
menyesuaikan kecepatan kipas, namun Anda
dapat menyetel deflektor udara agar berotasi
secara otomatis.
Menggunakan Fungsi Mode Jet
Mengubah Suhu Ruangan dengan
Cepat.
Fungsi ini memungkinkan Anda mendinginkan
udara dalam ruangan dengan cepat selama
musim panas atau menghangatkannya dengan
cepat selama musim dingin.
• Model Pendingin & Pemanas : Fungsi
Mode Jet tersedia dengan Mode Pendingin,
Pemanas, dan Dehumidifikasi.
• Model Hanya Mendinginkan : Fungsi Mode Jet
tersedia dengan Pendinginan, Dehumidifikasi,
Kipas Angin, Mode Operasi Otomatis, dan
fungsi Penjernih Udara.
Menghidupkan alat.
1
Tekan tombol MODE berulang-ulang untuk
2
memilih mode yang diinginkan.
Tekan tombol JET MODE.
3
ditampilkan di layar tampilan.
•
CATATAN
• Mode Pemanasan Jet tidak tersedia pada
sebagian model.
• Pada Mode Pendingin Jet, aliran udara yang
kuat dihembuskan pada suhu 18 °C selama 30
menit.
• Setelah 30 menit, suhu pengaturan akan
mempertahankan 18 °C
Jika Anda ingin mengubah suhu, Tekan
tombol
diinginkan.
• Pada Mode Pemanas Jet, aliran udara yang
kuat dihenbuskan pada suhu 30 °C selama 30
menit.
• Setelah 30 menit, suhu pengaturan akan
mempertahankan 30 °C
Jika Anda ingin mengubah suhu, Tekan
tombol
diinginkan.
• Fungsi ini mungkin berbeda pengoperasiannya
dengan tampilan remote control.
atau untuk menyetel suhu yang
atau untuk menyetel suhu yang
19

ID
→ →
→ → → →
SWING
SWING
SWING
SWING
Menggunakan Fungsi Kecepatan Kipas
Menyesuaikan Kecepatan Kipas.
• Tekan tombol FAN SPEED berulang-ulang
untuk menyesuaikan kecepatan kipas.
Layar Tampilan Kecepatan
Tinggi
Sedang - Tinggi
Sedang
Sedang - Rendah
Rendah
- Angin Alami
CATATAN
• Kecepatan kipas dari udara alami disesuaikan
secara otomatis.
• Ikon kecepatan kipas ditampilkan di beberapa
unit dalam ruang.
• Tampilan unit dalam ruang ditampilkan hanya
5 detik dan kembali ke suhu setelan pada
beberapa model.
Menggunakan Fungsi Arah Aliran Udara
Fungsi ini menyesuaikan arah aliran udara
secara vertikal (horizontal).
(
• Tekan tombol
ulang dan pilih arah yang diinginkan.
− Pilih
aliran udara secara otomatis.
( ) untuk menyesuaikan arah
CATATAN
• Menyesuaikan arah aliran udara secara
horizontal mungkin tidak didukung, bergantung
modelnya.
• Menyesuaikan deflektor udara secara
sembarangan dapat menyebabkan kegagalan
produk.
• Jika Anda memulai ulang AC, AC mulai
beroperasi dengan arah aliran udara yang
disetel sebelumnya, sehingga deflektor
udara mungkin tidak cocok dengan ikon yang
ditampilkan di remote control. Jika ini terjadi,
tekan tombol
menyesuaikan arah aliran udara.
• Fungsi ini mungkin berbeda pengoperasiannya
dengan tampilan remote control.
) secara berulang-
atau
untuk kembali
20

ID
TIMER
TIMER
TIMER
TIMER
CANCEL
Menyetel Pewaktu Hidup/Mati
Fungsi ini menyetel AC agar hidup/mati secara
otomatis di waktu yang diinginkan.
Menyetel Pengaturan Waktu Hidup
Tekan tombol
1
• Ikon di bawah berkedip pada bagian
bawah layar tampilan.
Tekan tombol atau untuk memilih
2
menit.
Tekan tombol SET/CANCEL untuk
3
menyelesaikan.
• Setelah menyetel pewaktu, waktu saat
ini, dan ikon
tampilan menunjukkan bahwa waktu yang
diinginkan telah disetel.
Membatalkan Pengaturan Waktu
Hidup
Tekan tombol
1
• Ikon di bawah berkedip pada bagian
bawah layar tampilan.
secara berulang-ulang.
yang ditampilkan di layar
secara berulang-ulang.
Menyetel Pengaturan Waktu Mati
Tekan tombol
1
• Ikon di bawah berkedip pada bagian
bawah layar tampilan.
Tekan tombol atau untuk memilih
2
menit.
Tekan tombol SET/CANCEL untuk
3
menyelesaikan.
• Setelah menyetel pewaktu, waktu saat
ini, dan ikon
tampilan menunjukkan bahwa waktu yang
diinginkan telah disetel.
CATATAN
• Fungsi ini diaktifkan saat Anda menyetel
Pewaktu Sederhana.
secara berulang-ulang.
ditampilkan di layar
Membatalkan Pengaturan Waktu
Mati
Tekan tombol
1
• Ikon di bawah berkedip pada bagian
bawah layar tampilan.
secara berulang-ulang.
Tekan tombol SET/CANCEL untuk
2
membatalkan setelan.
Tekan tombol SET/CANCEL untuk
2
membatalkan setelan.
Membatalkan Setelan Pewaktu
• Tekan tombol
setelan waktu.
untuk membatalkan semua
21

ID
TIMER
TIMER
Menggunakan Fungsi Tidur (Opsional)
Fungsi ini secara otomatis mematikan AC saat
Anda tidur.
Menghidupkan alat.
1
Tekan tombol
2
• Ikon di bawah berkedip pada bagian
bawah layar tampilan.
Tekan tombol atau untuk memilih
3
jam (hingga 7 jam).
Tekan tombol SET/CANCEL untuk
4
menyelesaikan.
ditampilkan di layar tampilan.
•
CATATAN
• ditampilkan di beberapa unit dalam ruang.
• Tampilan unit dalam ruang ditampilkan dari
1 Jam hingga 7 Jam yang hanya ditampilkan
selama 5 detik lalu kembali ke suhu setelan.
• Pada Mode Dehumidifikasi dan Pendingin,
suhu meningkat ke 1 °C setelah 30 menit dan
tambahan 1 °C setelah 30 menit berikutnya
agar tidur lebih nyaman.
• Suhu meningkat sampai 2 °C dari suhu yang
disetel sebelumnya.
• Meskipun tanda untuk kecepatan kipas di
layar tampilan dapat berubah, kecepatan kipas
disesuaikan secara otomatis.
secara berulang-ulang.
Menggunakan Fungsi Pewaktu Sederhana (Opsional)
Fungsi ini secara otomatis mematikan AC saat
Anda tidur.
Menghidupkan alat.
1
Tekan tombol
2
• Ikon di bawah berkedip pada bagian
bawah layar tampilan.
Tekan tombol atau untuk memilih
3
jam (hingga 7 jam).
Tekan tombol SET/CANCEL untuk
4
menyelesaikan.
ditampilkan di layar tampilan.
•
CATATAN
• Fungsi ini dinonaktifkan saat Anda menyetel
Pengaturan Waktu Mati.
secara berulang-ulang.
22

ID
kW [3 s]
kW
kWh
kW [3 s]
kW
kWh
℃↔℉ [5 s]
SWING
Menggunakan Fungsi Tampilan Energi (Opsional)
Fungsi ini menampilkan jumlah listrik yang
dihasilkan pada tampilan dalam ruang selama
produk beroperasi.
Tampilkan Penggunaan Energi
Saat Ini
Menghidupkan alat.
1
Tekan tombol
2
3 detik.
• Konsumsi daya seketika (
) ditampilkan sesaat pada beberapa unit
dalam ruang.
Tampilkan Penggunaan Energi
Kumulatif (Opsional)
Menghidupkan alat.
1
Tekan tombol
2
3 detik sebanyak dua kali.
• Konsumsi daya kumulatif (
ditampilkan sesaat pada beberapa unit
dalam ruang.
CATATAN
• Konsumsi daya kumulatif tidak ditampilkan di
remote control nirkabel.
• kW mengacu pada konsumsi daya seketika.
• kWh mengacu pada konsumsi daya kumulatif.
• Jika lebih dari 99 kWj, tampilan akan tetap di
99 kWj.
• Saat daya mati akan menyetel ulang nilainya.
• Tampilan jumlah watt di bawah 10 kW
ditampilkan sebagai 0,1 kW(j), dan tampilan
jumlah watt di atas 10 kW ditampilkan sebagai
1 kW(j).
• Daya yang sebenarnya mungkin berbeda
dengan daya yang ditampilkan.
dan tahan selama sekitar
atau
dan tahan selama sekitar
)
Menggunakan Fungsi Lampu Mati (Opsional)
Menampilkan Kecerahan Layar
Anda dapat menyetel kecerahan layar tampilan
unit dalam ruang.
• Tekan tombol LIGHT OFF.
CATATAN
• Aktifkan/nonaktifkan layar Tampilan.
Menggunakan Fungsi Udara Nyaman (Opsional)
Pengoperasian Baling-baling
Nyaman
Fungsi ini dengan menyesuaikan baling-baling
ke posisi prasetel untuk membelokkan udara
agar tidak secara langsung berhembus ke
penghuni ruangan.
Menghidupkan alat.
1
Tekan tombol COMFORT AIR berulang-
2
ulang untuk memilih mode yang diinginkan.
•
atau ditampilkan di layar tampilan.
CATATAN
• atau ditampilkan di beberapa unit
dalam ruang.
• Fungsi ini dinonaktifkan saat Anda menekan
tombol MODE atau JET MODE.
• Fungsi ini dinonaktifkan dan ayunan (swing)
otomatis arah vertikal disiapkan saat Anda
menekan tombol
• Saat fungsi ini dimatikan, baling-baling
horizontal beroperasi secara otomatis
bergantung pada mode setelan.
.
23

ID
Menggunakan Fungsi Penghematan Energi (Opsional)
Fungsi ini meminimalkan konsumsi daya selama
Pendinginan dan menaikkan suhu yang disetel
ke tingkat optimal untuk lingkungan yang lebih
nyaman. Suhu secara otomatis ditetapkan pada
22 °C jika suhu di sekitar ruangan di bawah 22
°C Suhu tetap konstan jika suhu di sekitar di
atas 22 °C
Menghidupkan alat.
1
Tekan tombol MODE berulang-ulang untuk
2
memilih Mode Pendingin.
Tekan tombol ENERGY SAVING.
3
•
ditampilkan di layar tampilan.
Menggunakan Fungsi Kontrol Energi (Opsional)
Menghidupkan alat.
1
Tekan tombol ENERGY CTRL.
2
• Tekan tombol ENERGY CTRL berulang-
ulang untuk memilih setiap langkah.
CATATAN
• 1 langkah : Masukan daya berkurang 20 %
dibandingkan dengan masukan daya yang
dinilai.
ditampilkan di layar.
−
• 2 langkah : Masukan daya berkurang 40 %
dibandingkan dengan masukan daya yang
dinilai.
−
ditampilkan di layar
• 3 langkah (Opsional) : Masukan daya
berkurang 60 % dibandingkan dengan
masukan daya yang dinilai.
−
ditampilkan di layar.
•
(langkah 1), (langkah 2) ditampilkan di
beberapa unit dalam ruang.
• Fungsi ini tersedia dalam Mode Pendingin.
• Kapasitas dapat berkurang saat mode Kontrol
Energi dipilih.
• Suhu yang diinginkan ditampilkan selama
sekitar 5 detik jika Anda menekan tombol FAN
SPEED,
• Suhu ruangan ditampilkan selama sekitar 5
detik jika Anda menekan tombol ROOM TEMP.
atau .
24

ID
Menggunakan Fungsi Khusus
Menghidupkan alat.
1
Tekan tombol FUNC berulang-ulang untuk
2
memilih fungsi yang diinginkan.
Tekan tombol SET/CANCEL untuk
3
menyelesaikan.
Layar
Tampilan
Untuk membersihkan udara
dengan membuang partikel
yang masuk ke unit dalam
ruang.
Untuk mengurangi suara bising
dari unit luar ruang.
Untuk menjaga kelembapan
kulit dengan menghasilkan
cluster ion.
Untuk mengurangi kelembapan
dalam ruangan dengan cepat.
Untuk mempertahankan suhu
ruang minimum dan mencegah
objek di dalam ruangan
membeku.
Untuk mengusir nyamuk.
Untuk menghilangkan
kelembapan yang dihasilkan di
dalam unit dalam ruang.
Untuk menciptakan suasana
tidur yang nyaman.
Deskripsi
CATATAN
• Beberapa fungsi mungkin tidak didukung,
bergantung modelnya.
• Beberapa fungsi dapat beroperasi secara
berbeda dari layar remote control.
25

ID
Membatalkan Fungsi Khusus
Tekan tombol FUNC berulang-ulang untuk
1
memilih fungsi yang diinginkan.
Tekan tombol SET/CANCEL untuk
2
membatalkan fungsi.
Menggunakan Fungsi Pembersih
Udara
Fungsi berikut memberikan udara yang segar
dan bersih dengan partikel ion dan filter.
Fungsi Layar Deskripsi
Partikel ion
dari Ionizer
Ionizer
Plasma
CATATAN
• Anda dapat menggunakan fungsi ini tanpa
menghidupkan AC.
• Kedua lampu plasma dan lampu pendingin
menyala saat Smoke Away/Plasma sedang
beroperasi dalam beberapa model.
• Jangan sentuh ionizer selama pengoperasian.
• Fungsi ini mungkin berbeda pengoperasiannya
dengan tampilan remote control.
mensterilkan
bakteri di
udara dan zat
berbahaya
lainnya.
Mengusir zat
pencemar
mikroskopis
dari udara yang
masuk secara
menyeluruh
guna
memberikan
udara yang
segar dan
bersih.
Menggunakan Fungsi Diam
Fungsi ini mencegah kemungkinan adanya
keluhan dari tetangga dengan mengurangi suara
bising dari unit luar ruang.
ditampilkan di layar tampilan.
•
CATATAN
• Fungsi ini dinonaktifkan saat Anda menekan
tombol MODE atau ENERGY CTRL atau JET
MODE.
• Fungsi ini tersedia dengan Pendingin,
Pemanas, Peralihan Otomatis, Mode
Pengoperasian Otomatis.
Menggunakan Fungsi Perawatan
Ion
Fungsi ini menjaga kelembapan kulit dengan
menghasilkan cluster ion yang diserap oleh
permukaan kulit.
•
ditampilkan di layar tampilan selama sekitar
3 detik.
CATATAN
• Fungsi ini tersedia dengan Pendinginan, Mode
Kipas Angin, dan fungsi Penjernih Udara.
Menggunakan Fungsi Jet Dry
Fungsi ini memaksimalkan performa
dehumidifikasi.
, ditampilkan di layar tampilan.
•
CATATAN
• Fungsi ini tersedia dengan Pendinginan,
Dehumidifikasi, Operasi Otomatis, Mode Kipas
Angin, dan fungsi Penjernih Udara.
• Fungsi ini tersedia dalam Mode Tidur.
• Fungsi ini dinonaktifkan saat Anda menekan
tombol MODE.
26
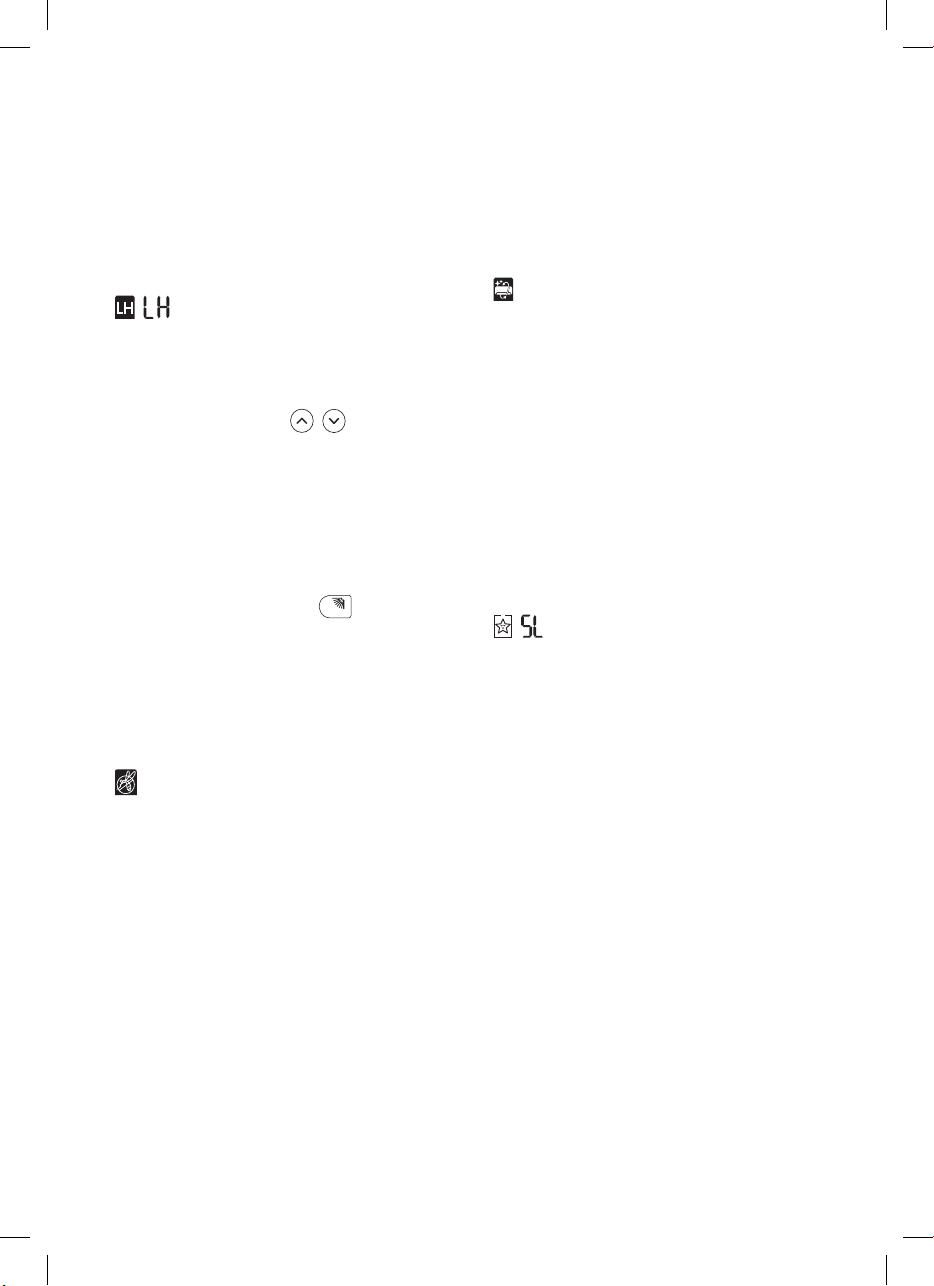
ID
SWING
Menggunakan Fungsi Pemanas
Rendah
Fungsi ini mengoperasikan sistem pemanasan
untuk mempertahankan suhu ruang minimum
dan mencegah objek di dalam ruangan
membeku saat tidak ada orang di dalamnya,
misalnya saat liburan.
, ditampilkan di layar tampilan.
•
CATATAN
• Fungsi ini tersedia dalam Mode Pemanas.
• Selama pengoperasian LH, saat Anda
menekan tombol seperti
SPEED, kemudian kembali ke Mode Pemanas,
30 °C kecepatan tinggi.
• Jika tombol JET MODE ditekan selama
pengoperasian LH, fungsi ini dinonaktifkan dan
Mode Pemanas Daya segera dioperasikan.
(hanya untuk model pemanas daya)
• Jika terjadi kesalahan, pengoperasian dapat
terganggu untuk perlindungan produk.
• Tombol COMFORT AIR dan
digunakan saat fungsi LH sedang beroperasi.
, , MODE, FAN
tidak dapat
Menggunakan Fungsi AntiNyamuk
Fungsi ini mengusir nyamuk dengan
menghasilkan gelombang berfrekuensi tinggi.
ditampilkan di layar.
•
CATATAN
• Anda dapat menggunakan fungsi ini tanpa
menghidupkan AC.
Menggunakan Fungsi
Pembersihan Otomatis
Pada Mode Dehumidifikasi dan Pendingin,
kelembapan dihasilkan di dalam unit dalam
ruang. Fungsi ini menyingkirkan kelembapan
tersebut.
ditampilkan di layar.
•
CATATAN
• Beberapa fungsi tidak dapat digunakan
saat fungsi Pembersihan Otomatis sedang
beroperasi.
• Jika Anda mematikan daya, kipas beroperasi
selama 30 menit dan membersihkan bagian
dalam unit dalam ruang.
Menggunakan Fungsi Tidur
Nyaman
Fungsi ini mengoperasikan AC secara otomatis
guna menciptakan lingkungan tidur yang
nyaman.
, ditampilkan di layar tampilan.
•
CATATAN
• Fungsi ini tersedia dalam Mode Pendingin.
• Baling-baling berhenti berputar dan
menetapkan sudut aliran udara tidak langsung,
setelah 30 menit dari awal pengoperasian
meskipun suhu ruangan tidak turun ke suhu
optimal untuk mode tidur.
• Lingkungan tidur yang nyaman bisa saja
berbeda untuk tiap orang.
27

FUNGSI CERDAS
ID
Menggunakan Aplikasi Smart ThinQ
Memasang Smart ThinQ
Cari aplikasi LG Smart ThinQ dari Google Play
Store & Apple App Store pada ponsel cerdas.
Ikuti petunjuk untuk mengunduh dan memasang
aplikasi.
Pendaftaran Produk
Jalankan aplikasi LG Smart ThinQ pada
1
ponsel cerdas.
Buat akun lalu masuk.
2
Pilih Daftar.
3
Pilih Pendingin ruangan.
4
Ikuti petunjuk pada ponsel cerdas
5
Fungsi Wi-Fi
• Untuk alat dengan logo
Berkomunikasi dengan alat dari ponsel cerdas
dengan menggunakan fitur cerdas yang mudah
digunakan.
Menggunakan Aplikasi
Pilih alat pada aplikasi dan sambungkan alat
1
ke jaringan Wi-Fi.
Pilih menu di sisi kanan atas untuk
2
mengakses pengaturan dan fitur.
Pembaruan Firmware
Memastikan kinerja alat terus diperbarui.
Smart Diagnosis™
Jika Anda menggunakan fungsi Smart
Diagnosis, Anda akan diberi informasi yang
berguna seperti cara menggunakan alat dengan
benar berdasarkan pola penggunaan.
Pengaturan
Memungkinkan Anda untuk mengatur berbagai
pilihan pada alat dan dalam aplikasi.
CATATAN
• Untuk memverifikasi sambungan Wi-Fi, periksa
apakah ikon Wi-Fi pada panel kontrol
menyala.
• LG Smart ThinQ tidak bertanggung jawab
untuk setiap masalah sambungan jaringan
atau setiap kekeliruan, kerusakan fungsi, atau
kesalahan yang disebabkan oleh sambungan
jaringan.
• Mesin hanya mendukung jaringan Wi-Fi 2,4
GHz.
• Jika alat mengalami masalah untuk
tersambung ke jaringan Wi-Fi, mungkin lokasi
alat terlalu jauh dari router. Belilah repeater
Wi-Fi (range extender) untuk meningkatkan
kekuatan sinyal Wi-Fi.
• Sambungan Wi-Fi mungkin tidak tersambung
atau dapat terganggu karena lingkungan
jaringan rumah.
• Sambungan jaringan mungkin tidak bekerja
dengan baik tergantung pada penyedia
layanan internet.
• Lingkungan nirkabel di sekitarnya dapat
menyebabkan layanan jaringan nirkabel
berjalan dengan lambat.
• Aplikasi ini dapat berubah untuk tujuan
peningkatan alat tanpa pemberitahuan kepada
pengguna.
• Fitur mungkin berbeda tergantung model.
28

ID
Informasi Pemberitahuan Perangkat
Lunak Sumber Terbuka
Untuk mendapatkan kode sumber dengan lisensi
GPL, LGPL, MPL, dan lisensi sumber terbuka
lainnya, yang terdapat dalam produk ini, silakan
kunjungi http://opensource.lge.com.
Selain kode sumber, semua ketentuan
lisensi yang dimaksud, penafian garansi dan
pemberitahuan hak cipta tersedia untuk diunduh.
LG Electronics juga akan menyediakan kode
sumber terbuka bagi Anda dalam bentuk CDROM dengan penggantian biaya untuk biaya
melakukan distribusi tersebut (seperti biaya
media, pengiriman, dan penanganan) atas
permintaan email ke opensource@lge.com.
Penawaran ini berlaku selama tiga (3) tahun
sejak tanggal Anda membeli produk.
Smart Diagnosis™ Menggunakan
Ponsel Cerdas
• Untuk alat dengan logo atau
Gunakan fungsi ini jika Anda membutuhkan
diagnosis yang akurat oleh pusat informasi
pelanggan LG Electronics saat terjadi kegagalan
fungsi atau kerusakan alat.
Smart Diagnosis™ tidak dapat diaktifkan bila
alat tidak tersambung ke listrik. Jika alat tidak
dapat menyala, maka penyelesaian masalah
harus dilakukan tanpa menggunakan Smart
Diagnosis™.
Buka aplikasi LG Smart ThinQ pada ponsel
1
cerdas.
Pilih Pendingin ruangan pada dashboard.
2
Tekan tombol Mulai Smart Diagnosis.
3
Ikuti petunjuk pada ponsel cerdas.
4
CATATAN
• Fungsi Smart Diagnosis™ tergantung pada
kualitas panggilan lokal.
• Jika transfer data Smart Diagnosis™ jelek
akibat kualitas panggilan yang buruk, Anda
mungkin tidak menerima layanan Smart
Diagnosis™ yang terbaik.
• Pastikan untuk tetap meminimalkan suara
bising di sekitar atau ponsel tidak dapat
menerima bunyi buzzer dari unit dalam ruang.
29

PEMELIHARAAN
PERINGATAN
• Sebelum membersihkan atau melakukan perawatan, cabut catu daya dan tunggu hingga kipas
berhenti.
Jika AC tidak akan digunakan dalam jangka waktu yang lama, keringkan AC untuk mempertahankan
kondisi terbaiknya. Bersihkan produk secara teratur untuk mempertahankan performa optimal dan
untuk mencegah kerusakan yang mungkin terjadi.
• Keringkan AC dalam mode Kipas selama 3 sampai 4 jam dan cabut sambungan daya. Kerusakan
internal dapat terjadi jika terdapat kelembapan di dalam komponen.
• Sebelum kembali menggunakan AC, keringkan komponen bagian dalam AC dalam mode Kipas
selama 3 sampai 4 jam. Hal ini akan membantu menghilangkan bau tak sedap akibat kelembapan.
Filter Udara
• Fitur mungkin berubah sesuai dengan jenis model.
ID
30

Jenis Deskripsi Interval
Filter Udara Bersihkan dengan penyedot debu atau pembersih tangan. 2 minggu
Multi Protection
Filter
Filter 3M Bersihkan dengan penyedot debu atau sikat. Setiap 6 bulan
Ionizer
(Opsional)
Unit Dalam
Ruang
Unit Luar Ruang
Bersihkan dengan penyedot debu atau sikat. Setiap 3 bulan
Gunakan cotton bud kering untuk membersihkan debu Setiap 6 bulan
Bersihkan permukaan unit Dalam Ruang menggunakan
kain yang kering dan lembut.
Minta bantuan profesional untuk membersihkan celah
saluran yang berkondensasi.
Minta bantuan profesional untuk membersihkan celah pipa
yang berkondensasi.
Ganti baterai remote control. Setahun sekali
Minta bantuan profesional untuk membersihkan kumparan
pengganti panas dan lubang panel (Konsultasikan dengan
teknisi).
Minta bantuan profesional untuk membersihkan kipas. Setahun sekali
Minta bantuan profesional untuk membersihkan celah
saluran yang berkondensasi.
Minta bantuan profesional untuk memastikan semua rakitan
kipas telah dikencangkan.
Bersihkan komponen listrik tersebut dengan udara. Setahun sekali
Rutin
Setahun sekali
Setiap 4 bulan
Setahun sekali
Setahun sekali
Setahun sekali
CATATAN
• Jangan menggunakan air bersuhu di atas 40 °C saat membersihkan filter. Hal tersebut dapat
menyebabkan perubahan bentuk atau warna.
• Jangan pernah menggunakan zat yang mudah menguap saat membersihkan filter. Zat tersebut
dapat merusak permukaan produk.
• Jangan membersihkan filter 3M dengan air, karena filter dapat rusak (Opsional).
• Jangan membersihkan Multi Protection Filter dengan air, karena filter dapat rusak (Opsional).
ID
31

ID
Membersihkan Filter Udara
Bersihkan filter udara 2 minggu sekali, atau
lebih, jika diperlukan.
CATATAN
• Filter udara dapat rusak bila tertekuk.
• Saat filter udara tidak tersusun dengan benar,
debu dan substansi lainnya dapat masuk ke
unit dalam ruang.
Jenis1
Matikan daya dan cabut kabel daya.
1
Buka penutup depan.
2
• Naikkan kedua sisi penutup secara
perlahan.
Pegang kenop filter udara, tarik ke bawah
3
dan lepaskan dari unit dalam ruang.
Bersihkan filter dengan penyedot debu atau
4
dengan air hangat yang dicampur detergen
netral.
Jenis2
Jika Anda melihat di unit dalam ruang dari atas,
Anda dapat menyusun filter atas dengan mudah.
Matikan daya dan cabut kabel daya.
1
Pegang kenop filter udara dan naikkan
2
secara perlahan.
Lepaskan kenop tersebut dari unit dalam
3
ruang.
Bersihkan filter dengan penyedot debu atau
4
dengan air hangat yang dicampur detergen
netral.
Keringkan filter di bawah tempat teduh.
5
Masukkan kait filter udara ke dalam penutup
6
depan.
Keringkan filter di bawah tempat teduh.
5
Masukkan kait filter udara ke dalam penutup
6
depan.
Periksa bagian samping penutup depan
7
untuk penyusunan filter udara yang benar.
32
Dorong kait ke bawah untuk merakit filter
7
udara.
Periksa bagian samping penutup depan
8
untuk memastikan pemasangan filter udara
yang benar.

ID
Membersihkan Filter 3M dan Tiga Lapis (Opsional)
Matikan daya dan cabut kabel daya.
1
Lepaskan filter udara dari unit dalam ruang.
2
Lepaskan filter 3M dan Tiga Lapis dari unit
3
dalam ruang.
Jenis1
Jenis2
Bersihkan filter menggunakan penghisap
4
debu.
Masukkan filter 3M dan Tiga Lapis.
5
Jenis1
Jenis2
Pasang filter udara.
6
Periksa bagian samping penutup depan
7
untuk penyusunan filter udara yang benar.
CATATAN
• Fitur dan lokasi filter 3M dan Tiga Lapis dapat
bervariasi sesuai dengan jenis model.
33
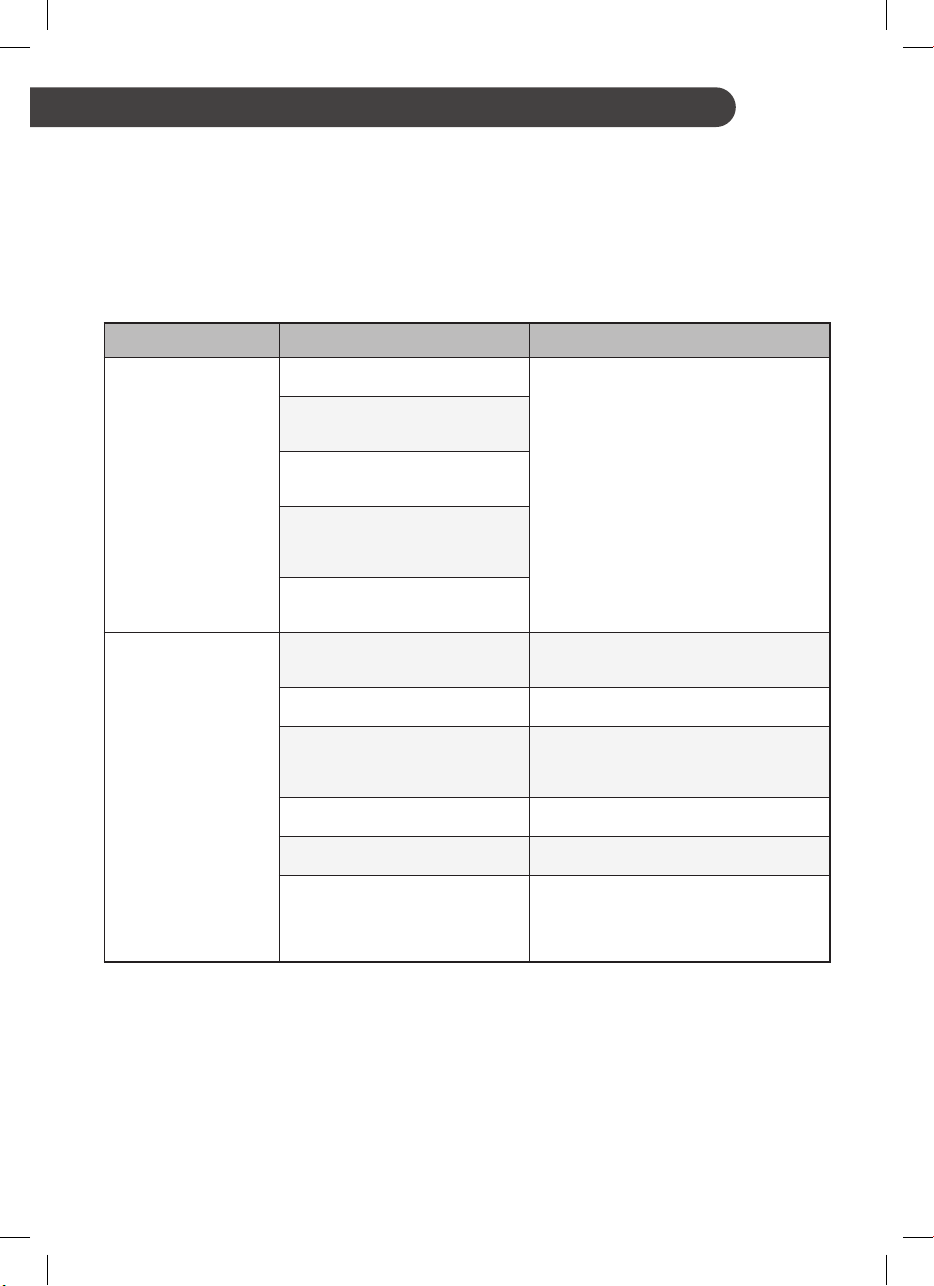
PEMECAHAN MASALAH
Fungsi Diagnosis Mandiri
Produk ini memiliki fungsi diagnosis mandiri bawaan. Jika terjadi kesalahan, lampu unit dalam ruang
akan berkedip dalam interval 2 detik. Jika hal ini terjadi, hubungi penjual atau pusat servis lokal Anda.
Sebelum Menghubungi Bagian Servis
Periksa hal berikut sebelum menghubungi pusat servis. Jika terjadi masalah, hubungi pusat servis
lokal.
Masalah Kemungkinan Penyebab Tindakan Perbaikan
Terdapat bau terbakar dan
bunyi-bunyi aneh dari unit.
Kebocoran air dari unit dalam
ruang walaupun tingkat
kelembapan rendah.
AC tidak berfungsi
dengan normal.
AC tidak berfungsi.
Kabel daya rusak atau
menghasilkan panas yang
berlebihan.
Sakelar, pemutus arus
(keselamatan, tanah), atau
sekring tidak beroperasi
dengan semestinya.
Unit menghasilkan kode
kesalahan dari diagnosis
mandiri.
Kabel Tenaga Terlepas.
Sekring meledak, atau catu
daya terhalangi.
Terjadi pemadaman listrik.
Tegangan terlalu tinggi atau
terlalu rendah.
AC dimatikan secara otomatis
di waktu prasetel.
Setelan baterai dalam remote
control salah.
• Matikan AC, cabut kabel daya atau
lepas sambungan catu daya, dan
hubungi pusat servis.
• Periksa apakah kabel daya
ditancapkan ke stopkontak atau
isolator daya dihidupkan.
• Ganti sekring atau periksa apakah ada
yang salah pada pemutus arus.
• Matikan AC saat terjadi pemadaman
listrik.
• Saat listrik telah kembali normal,
tunggu 3 detik, lalu hidupkan AC.
• Periksa apakah ada yang salah pada
pemutus arus.
• Hidupkan AC.
• Pastikan baterai dimasukkan ke dalam
remote control dengan benar.
• Jika baterai diletakkan dengan benar,
namun AC tidak dapat beroperasi,
ganti baterai dan coba lagi.
ID
34

Masalah Kemungkinan Penyebab Tindakan Perbaikan
• Pastikan bahwa tidak ada gorden, tirai,
atau bagian furnitur yang menghalangi
bagian depan AC.
• Bersihkan filter udara 2 minggu sekali.
• Lihat "Membersihkan Filter Udara"
untuk informasi selengkapnya.
• Saat musim panas, mendinginkan
udara bagian dalam secara
menyeluruh dapat memerlukan waktu
beberapa saat. Dalam kasus ini, pilih
Mode Jet untuk mendinginkan udara
dalam ruangan dengan cepat.
• Pastikan bahwa tidak ada udara dingin
yang keluar melalui titik ventilasi dalam
ruangan.
• Setel suhu yang diinginkan pada level
yang lebih rendah dari suhu saat ini.
• Hindari penggunaan penghasil panas
seperti oven listrik atau pembakar gas
saat AC sedang beroperasi.
• Selama Mode Kipas, udara berhembus
dari AC tanpa mendinginkan maupun
memanaskan udara dalam ruangan.
• Ganti mode pengoperasian ke
pengoperasian pendinginan.
• Efek pendinginan mungkin tidak
cukup.
• Dalam beberapa mode pengoperasian,
Anda tidak dapat menyesuaikan
kecepatan kipas. Pilih mode
pengoperasian yang kecepatan
kipasnya ingin Anda sesuaikan.
• Dalam beberapa mode pengoperasian,
Anda tidak dapat menyesuaikan
suhu. Pilih mode pengoperasian yang
suhunya ingin Anda sesuaikan.
• Waktu pada Fungsi Pewaktu mungkin
telah habis, sehingga unit mati.
Periksa setelan pewaktu.
• Tunggu hingga daya kembali. Jika
Anda mengaktifkan fungsi Mulai
Ulang Otomatis, unit akan kembali
beroperasi beberapa menit setelah
daya dipulihkan.
AC tidak
mengeluarkan udara
dingin.
Kecepatan kipas
tidak dapat
disesuaikan.
Suhu tidak dapat
disesuaikan.
AC berhenti selama
pengoperasian.
Udara tidak bersirkulasi
dengan benar.
Filter udara kotor.
Suhu ruangan terlalu tinggi.
Udara dingin keluar dari
ruangan.
Suhu yang diinginkan lebih
tinggi dari suhu yang disetel.
Terdapat sumber panas di
sekitar.
Mode Kipas dipilih.
Suhu luar terlalu tinggi.
Mode Jet atau Mode Operasi
Otomatis dipilih.
Mode Kipas atau Mode Jet
dipilih.
AC berhenti secara tiba-tiba.
Kegagalan daya telah terjadi
selama pengoperasian.
ID
35

Masalah Kemungkinan Penyebab Tindakan Perbaikan
Unit dalam ruang
masih beroperasi
bahkan saat daya
dimatikan.
Stopkontak udara di
unit dalam ruang
mengeluarkan kabut.
Air bocor dari
unit luar ruang.
Terdapat suara
bising atau getaran.
Unit dalam ruang
mengeluarkan bau.
AC tidak
mengeluarkan
udara hangat.
Fungsi Pembersihan Otomatis
sedang dioperasikan.
Air dingin dari AC
mengeluarkan kabut.
Dalam pengoperasian
pemanas, air yang
berkondensasi jatuh dari Heat
Exchanger Outdoor.
Suara klik dapat terdengar saat
unit mulai atau berhenti akibat
pergerakan dari katup yang
terbalik.
Suara berderit: Bagian plastik
dari unit dalam ruang berderit
saat bagian tersebut menyusut
atau membesar karena
perubahan suhu yang terjadi
secara tiba-tiba.
Suara Tiupan atau Aliran: Ini
adalah suara aliran pendingin
melalui AC.
Bau (seperti bau asap rokok)
dapat terserap ke dalam unit
dalam ruang dan dikeluarkan
melalui aliran udara.
Saat Mode Pemanas
dijalankan, baling-baling
hampir tertutup, dan tidak ada
udara yang keluar, meskipun
unit luar ruang sedang
beroperasi.
Unit luar ruang sedang
dalam Mode Defrosting
(Penghilangan Bunga Es).
Suhu luar terlalu rendah. • Efek pemanasan mungkin tidak cukup.
• Memungkinkan fungsi Pembersihan
Otomatis melanjutkan pengoperasian
karena fungsi ini menghilangkan
kelembapan yang tersisa di dalam unit
dalam ruang. Anda dapat mematikan
unit jika tidak menginginkan fitur ini.
• Saat suhu ruangan berkurang,
fenomena ini akan menghilang.
• Gejala ini memerlukan pemasangan
pipa saluran di bawah celah pokok.
Hubungi pemasang.
• Berikut adalah beberapa gejala
normal. Suara bising akan berhenti.
• Jika baunya tidak menghilang, Anda
perlu membersihkan filter. Jika hal
ini tidak membuahkan hasil, hubungi
pusat servis untuk membersihkan
pengganti panas.
• Gejala tersebut normal. Tunggu hingga
unit menghasilkan cukup udara hangat
untuk dihembuskan melalui unit dalam
ruang.
• Pada Mode Pemanas, es/embun
beku terbentuk di kumparan saat
suhu di luar menurun. Fungsi ini
menghilangkan lapisan embun beku
di kumparan, dan harus selesai dalam
waktu sekitar 15 menit.
ID
CATATAN
• Beberapa fungsi mungkin tidak didukung, bergantung modelnya.
36

Memo

Memo

Memo

PT. LG ELECTRONICS INDONESIA
GANDARIA 8 OFFICE TOWER, LT. 29 BC & 31 ABCD
JL. SULTAN ISKANDAR MUDA
KEBAYORAN LAMA, JAKARTA SELATAN 12240
DKI JAKARTA RAYA, INDONESIA
 Loading...