How it Works
Log In / Sign Up
Buy Points
How it Works
FAQ
Contact Us
Questions and Suggestions
Users
LG
Loading...
A
AS101DSS0
AS101DWH0
AS101DWS0
AS105M
AS10GDPB0
AS10GDWB0
AS10GDWH0
2
AS110
AS110I
AS110P
AS11II
AS12
AS1410E
AS1600
AS18
AS18H
AS323
2
AS330
AS3500
AS375
AS401VEV1
AS401VSA0
4
AS401VWV1
AS401WWA1
3
AS401WWF1
AS401WWJ1
AS401WWK1
AS401WWK2
AS401WWL2
AS40GVGG0
2
AS40GVGL2
2
AS40GVSL2
AS40GWWK0
AS551DWG0
AS551DWS0
AS55GDWL2
AS55GDWU0
4
AS560DWR0
2
AS601DPT0
AS60GDGP2
AS60GDPV0
4
AS60GDPV0.AERU
AS60GDWT0
AS60GDWV0
5
AS651DSS0
AS651DWH0
AS651DWS0
AS65GDPB0
AS65GDSH0
2
AS65GDWB0
AS65GDWH0
3
AS680
4
AS695
5
AS700
AS700-BK
AS70GPWF1
3
AS730
AS740
AS780
2
AS855
2
AS85GDWL2
AS870
5
AS876
2
AS951DPT0
AS957DWV
AS95GDGP2
AS95GDPV0
2
AS95GDPV0.AERU
AS95GDWT0
AS95GDWV0
5
AS990
2
AS992
AS993
ASC05
Asn0914dh0
2
ASNC0914DH0
Asnc0914dh1
Asnc091f2g0
Asnc121e1h0
2
Asnc121f2g0
ASNC1835DB0
2
Asnc1835dm0
2
Asnc1835sm1
Asnc2435dm0
2
Asnh091e1h0
ASNH091F2G0
Asnh091f2g1
ASNH0964DM1
2
ASNH0966KA2
Asnh121e1h0
2
Asnh121f2g0
Asnh121f2g1
ASNH1264DM0
ASNH126PDL3
ASNH126URD0
Asnh12gb1u0
Asnh1835dm0
2
Asnh1835sm1
ASNH1865DM0
ASNH186VML1
Loading...
Loading...
Nothing found
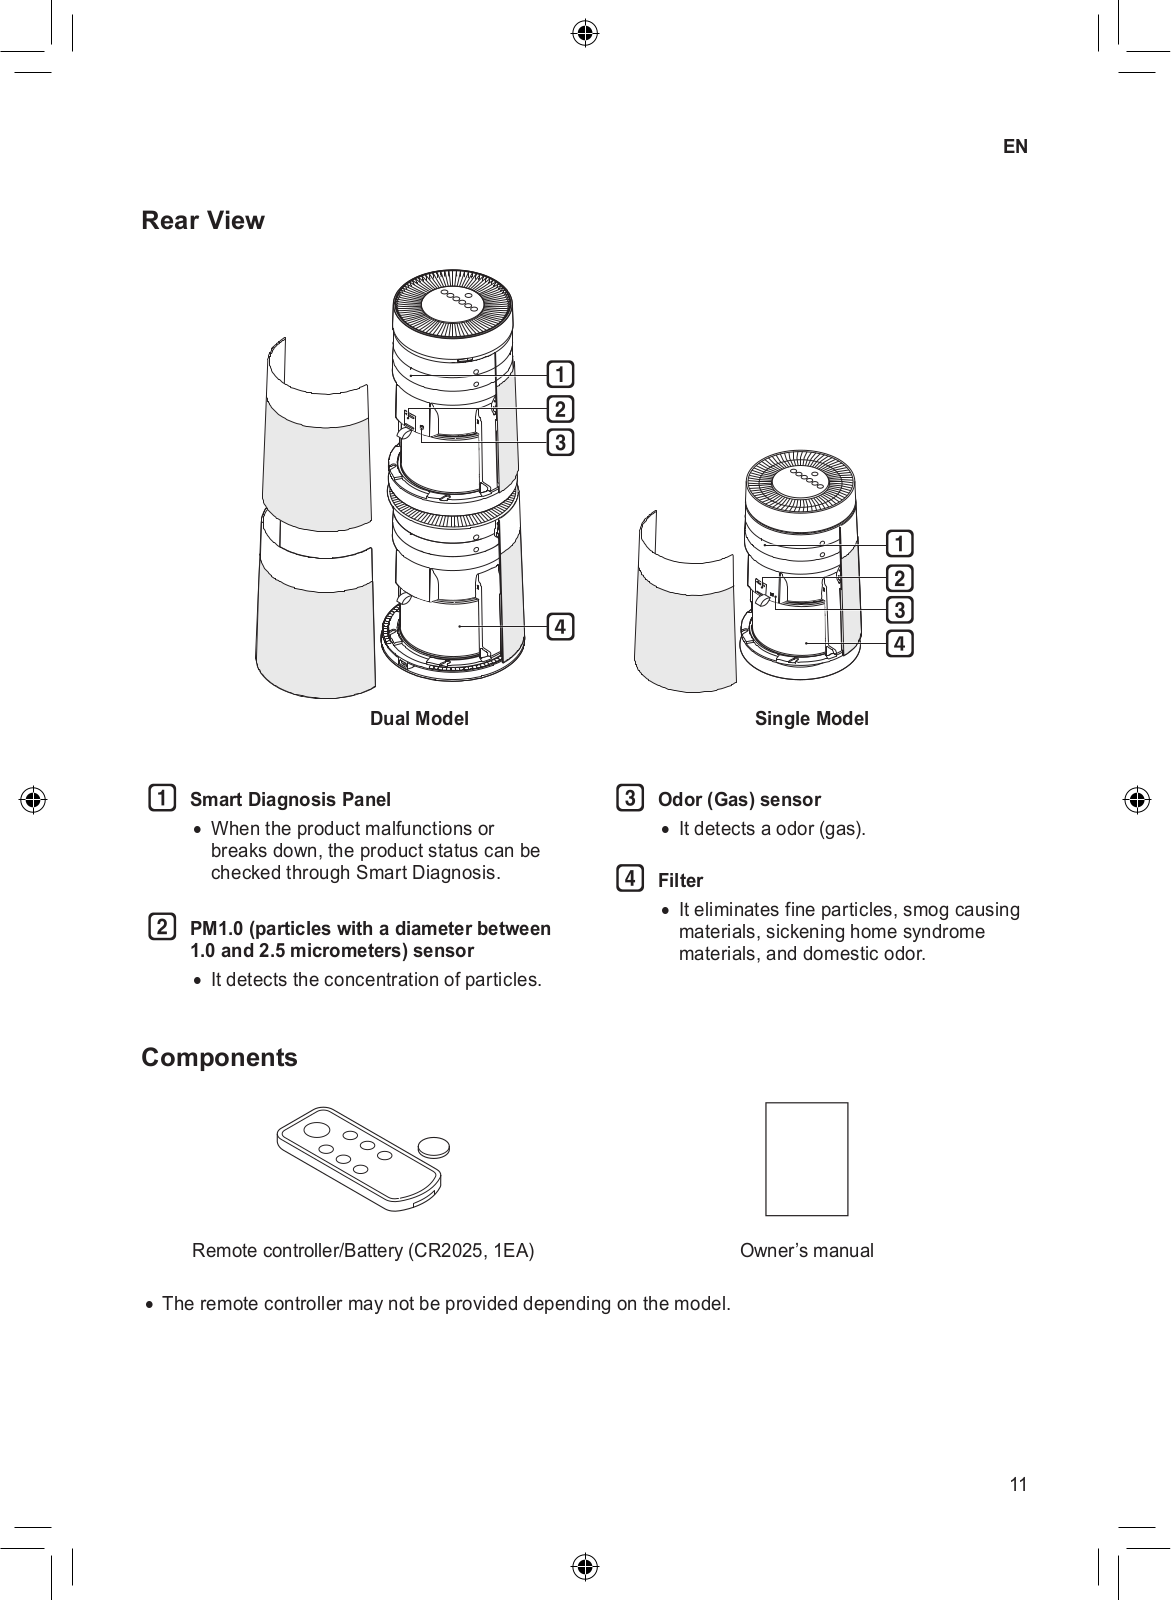
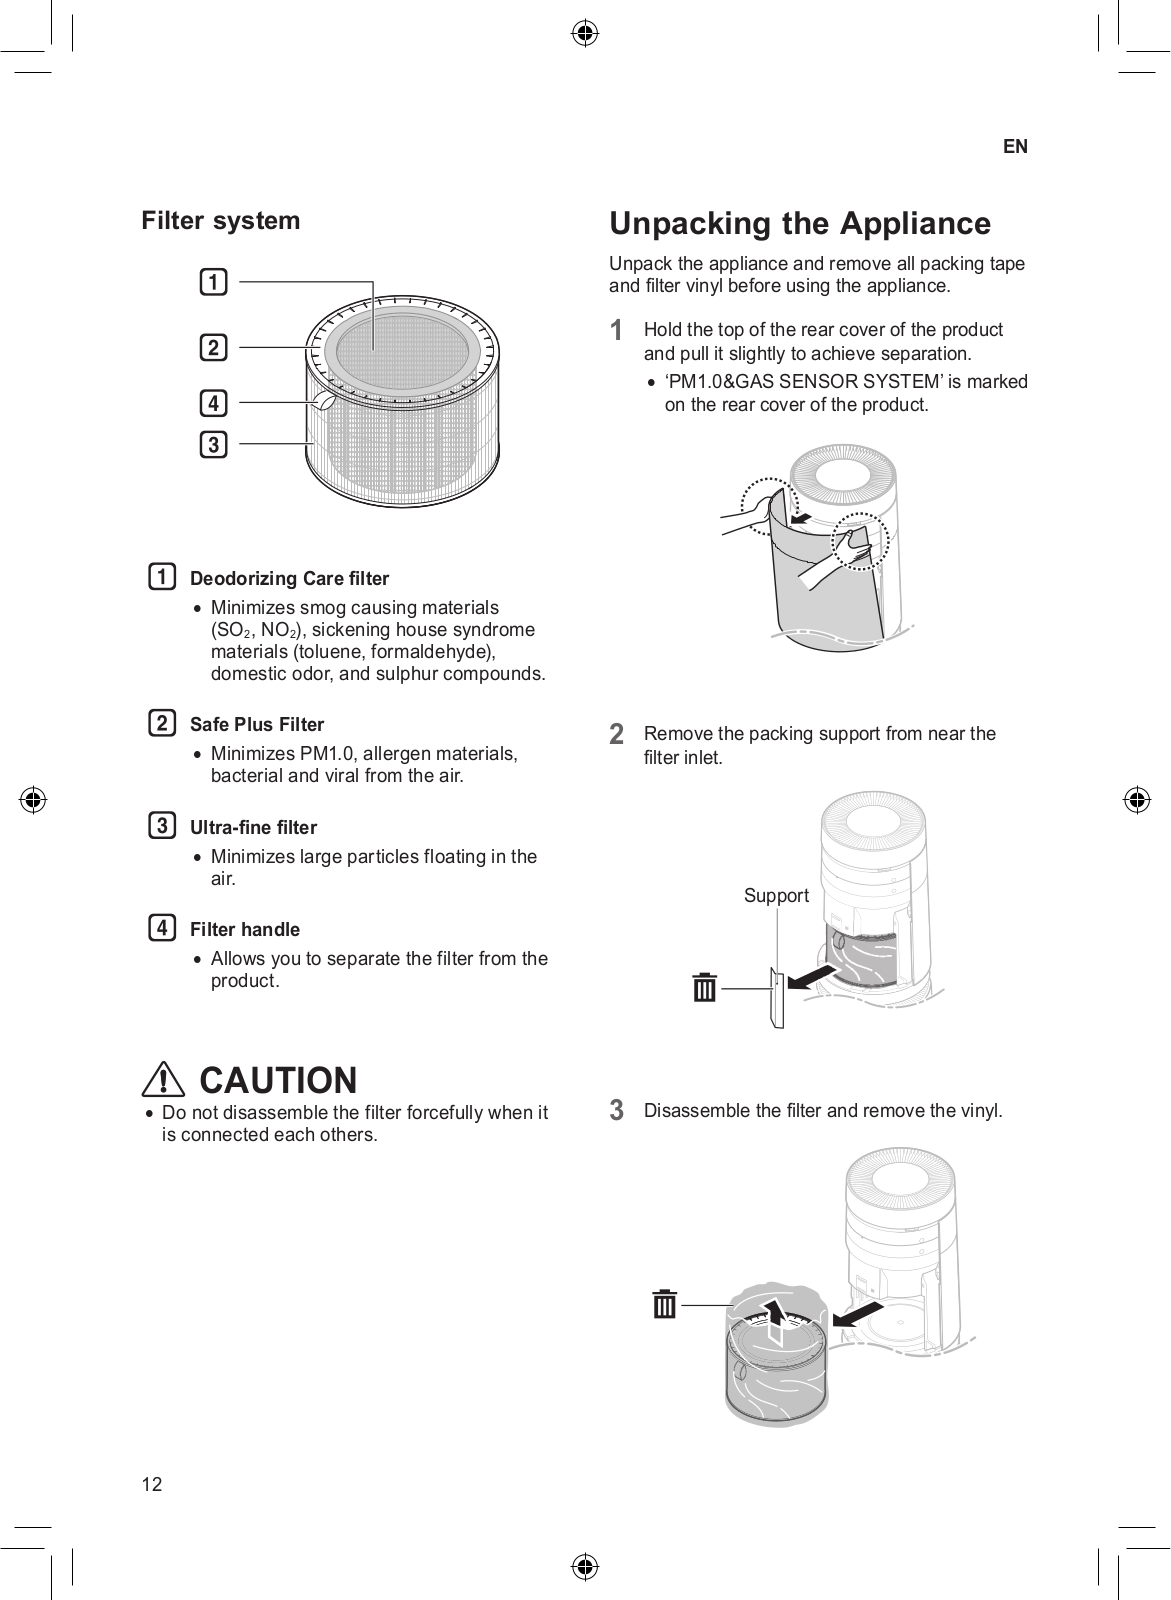
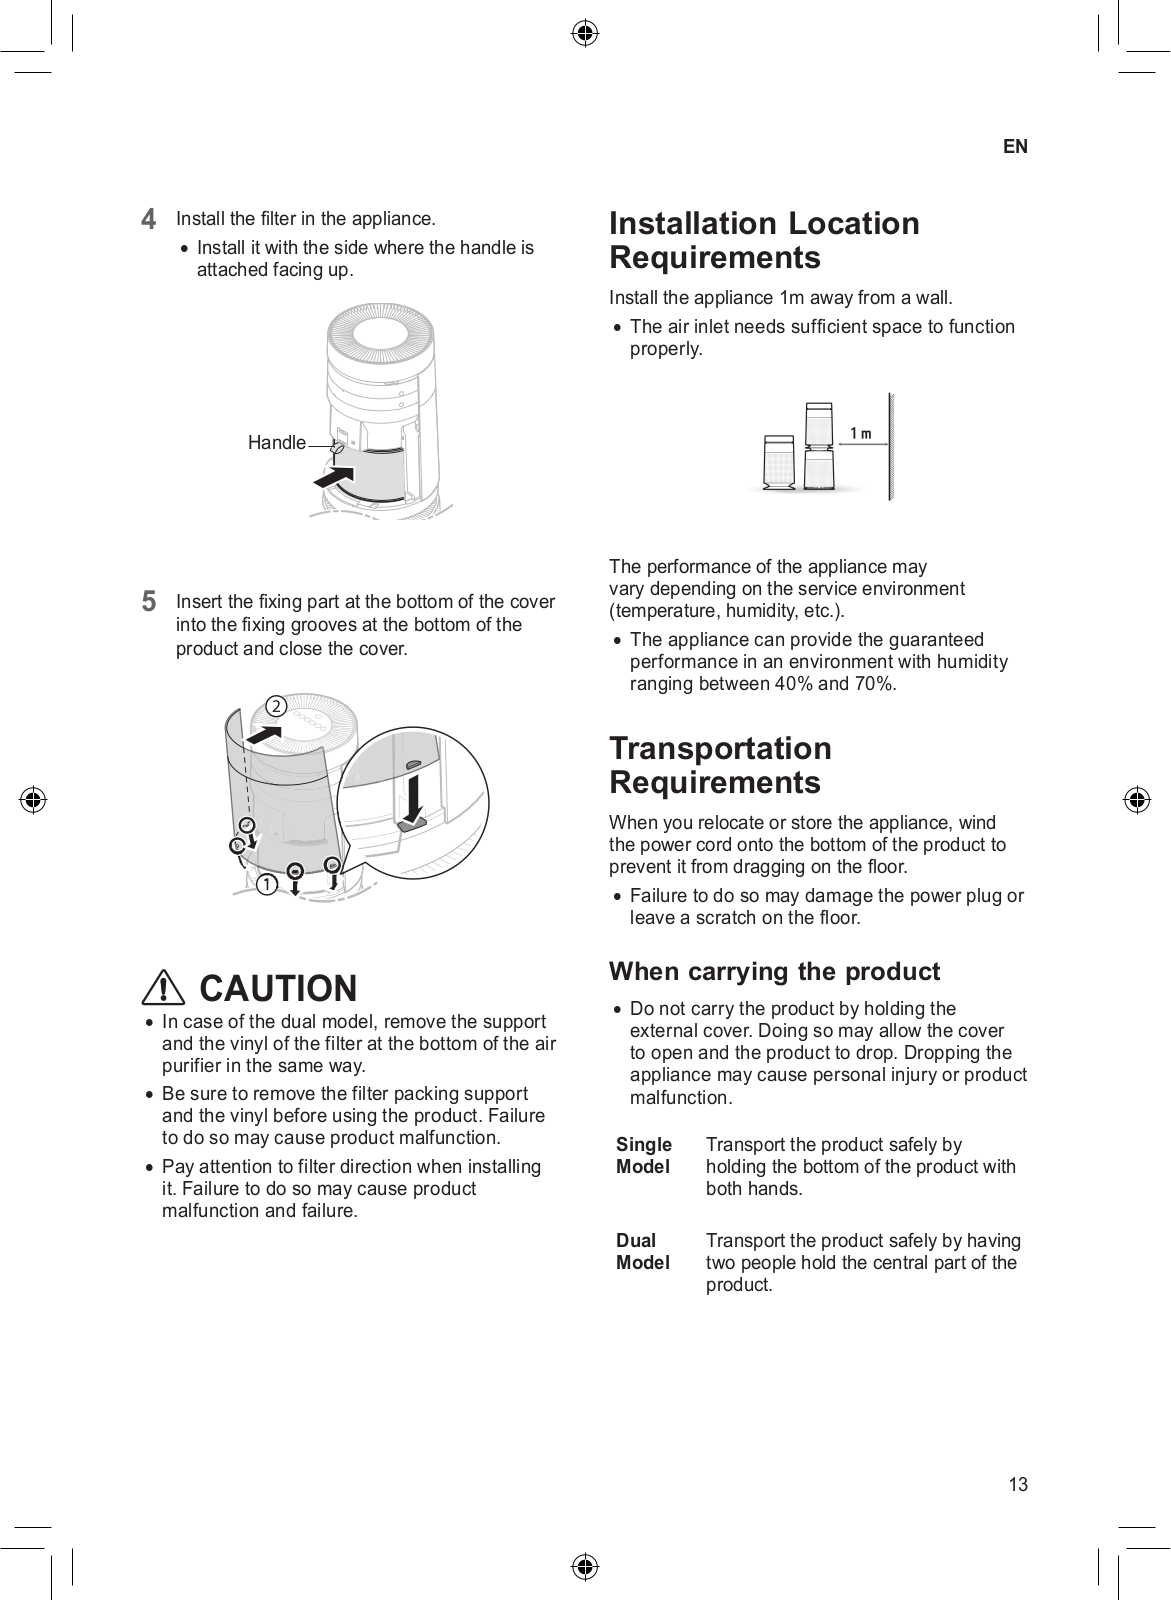
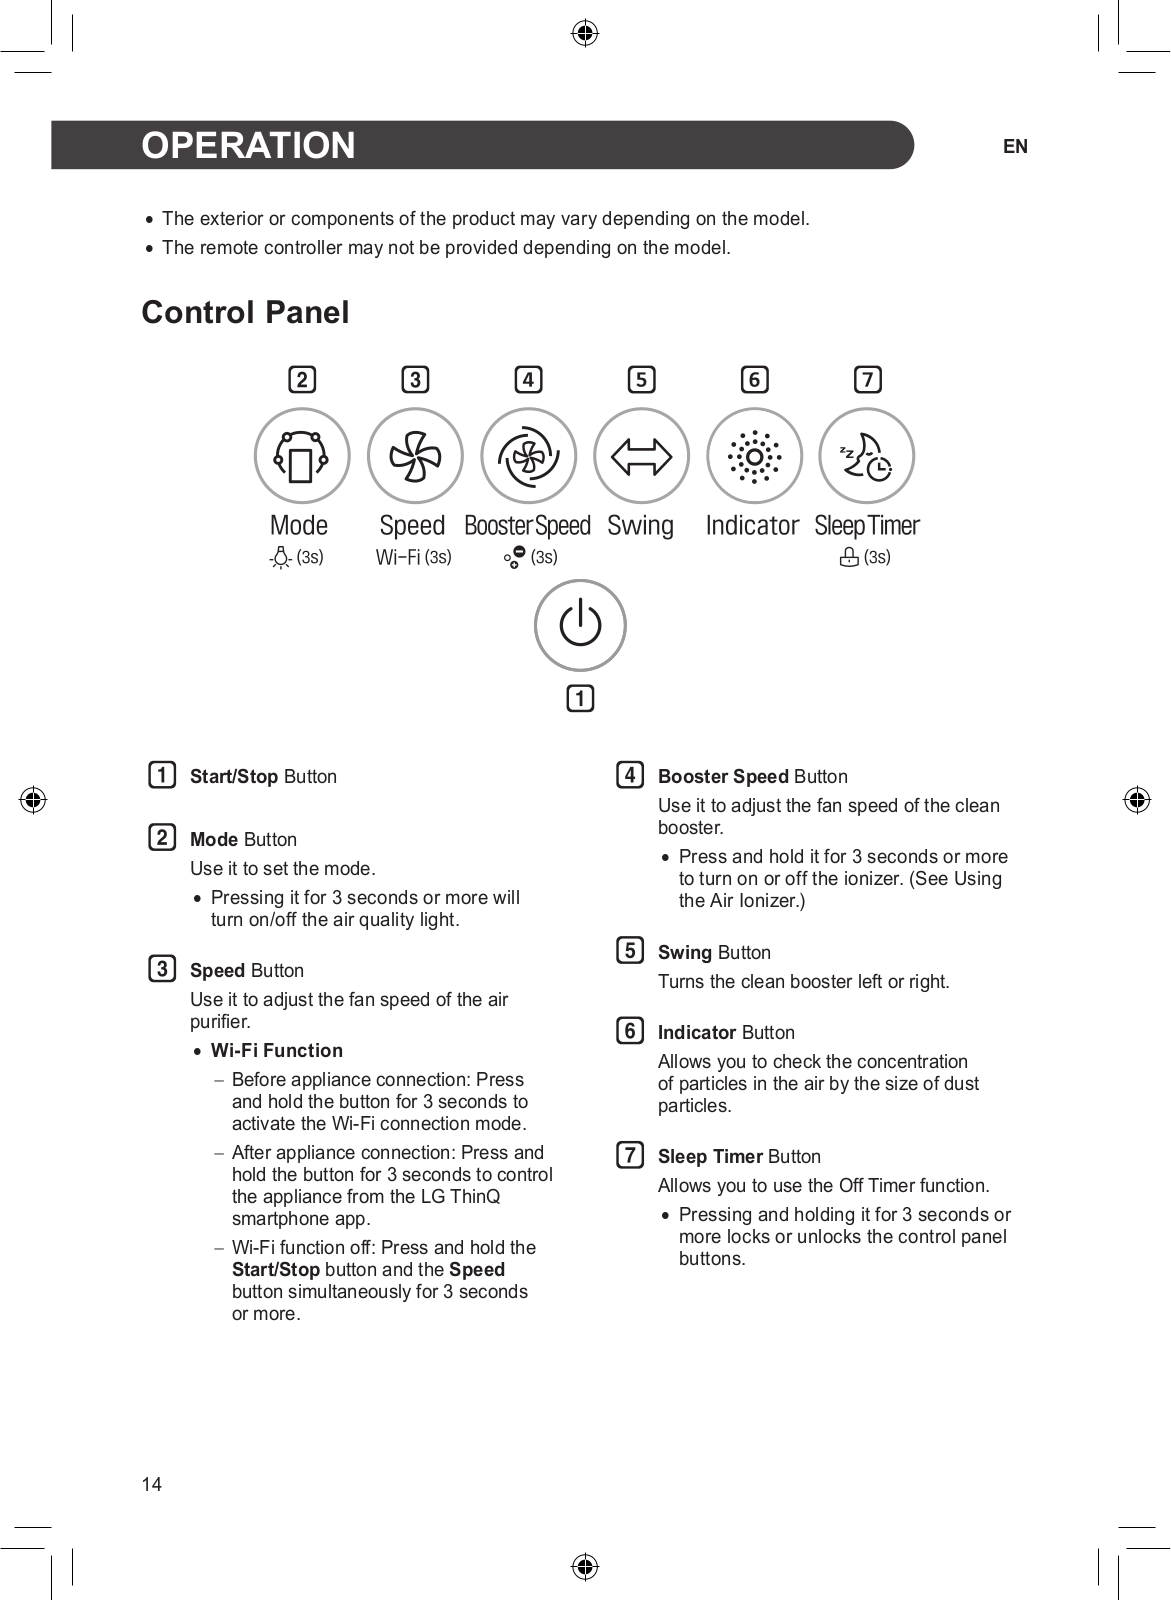
AS65GDWH0
Owner’s Manual [zh]
72 pgs
11.47 Mb
0
Manual book [id]
35 pgs
6.31 Mb
0
Manual book
35 pgs
4.79 Mb
0
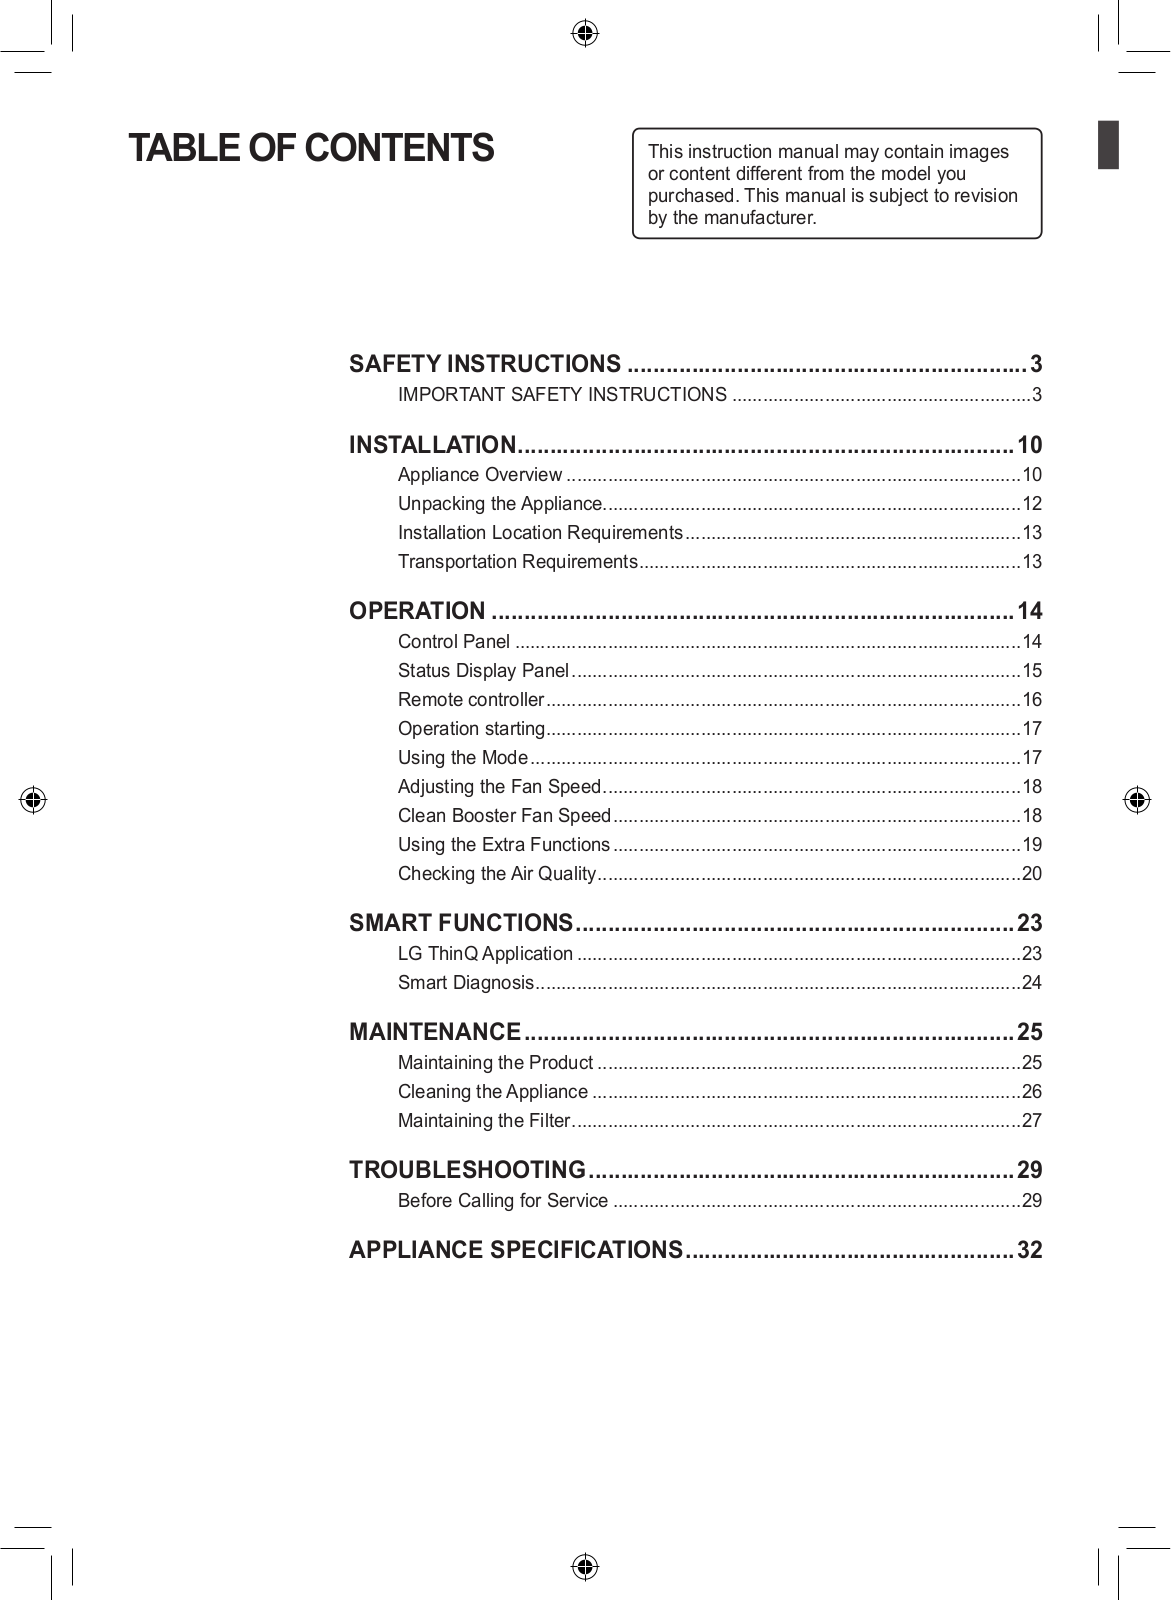
Table of contents
Loading...
LG AS65GDWH0 Owner’s Manual [zh]
...
LG Owner’s Manual [zh]
Download
Specifications and Main Features
Frequently Asked Questions
User Manual
Download
Loading...
+
50
hidden pages
Unhide
You need points to download manuals.
1 point = 1 manual.
You can buy points or you can get point for every manual you upload.
Buy points
Upload your manuals
 Loading...