

LG AS110 Users manual

USER GUIDE
LG-AS110
ENGLISH
MFL69920201 (1.0)
www.lg.com

ENGLISH
About this user guide
Thank you for choosing this LG product. Please carefully read this
user guide before using the device for the first time to ensure safe
and proper use.
ŢAlways use genuine LG accessories. The supplied items are
designed only for this device and may not be compatible with
other devices.
ŢThis device is not suitable for people who have a visual impairment
due to the touchscreen keyboard.
ŢDescriptions are based on the device default settings.
ŢDefault apps on the device are subject to updates, and support for
these apps may be withdrawn without prior notice. If you have any
questions about an app provided with the device, please contact
an LG Service Center. For user-installed apps, please contact the
relevant service provider.
ŢModifying the device’s operating system or installing software
from unofficial sources may damage the device and lead to data
corruption or data loss. Such actions will violate your LG licence
agreement and void your warranty.
ŢSome content and illustrations may differ from your device,
depending on the area, service provider, software version, or OS
version, and are subject to change without prior notice.
ŢSoftware, audio, wallpaper, images, and other media supplied with
your device are licenced for limited use. If you extract and use
these materials for commercial or other purposes, you may be
infringing copyright laws. As a user, you are fully responsible for
the illegal use of media.
ŢAdditional charges may incur for data services, such as messaging,
uploading,downloading, auto-syncing and location services. To
void additional charges, select a data plan suitable to your needs.
Contact your service provider to obtain additional details.
1
Instructional notices
WARNING: Situations that could cause injury to the user and third
CAUTION: Situations that may cause minor injury or damage to the
NOTE: Notices or additional information.
parties.
device.
2

Table of contents
01
Custom-designed
Features
6 quick share
7 QuickMemo+
9 KnockON
9 Knock Code
10 Do not disturb
02
Basic Functions
12 Product components and
accessories
13 Parts overview
15 Turning the power on or off
16 Installing the SIM card
17 Inserting the memory card
19 Removing the memory card
19 Battery
23 Touch screen
27 Home screen
35 Screen lock
37 Memory card encryption
39 Entering text
3

03
04
Useful Apps
45 Installing and uninstalling
apps
46 Uninstalled apps
47 Phone
51 Messaging
52 Camera
58 Gallery
60 Calendar
62 Calculator
62 Downloads
63 File Manager
63 FM Radio
63 Voice Recorder
64 Contacts
66 Tasks
66 LG Backup
67 Google apps
Phone Settings
70 Settings
70 Networks
78 Sound & notification
79 Display
80 General
05
Appendix
88 Phone software update
90 FAQ
93 Anti-Theft Guide
94 More information
06
For Your Safety
07
LIMITED WARRANTY
STATEMENT
4

01
Custom-designed
Features

quick share
You can share a photo or video to the app you want immediately
after taking them.
Tap , then take a photo or record a video.
1
Tap the app icon that appears on the screen to share it using that
2
app.
You can also swipe the icon towards the opposite direction to see
what other apps you can use to share your photos and videos.
ŢThe app displayed by the quick share icon may vary, depending
on the type and frequency of access of the apps installed on the
device.
Custom-designed Features 6
QuickMemo+
QuickMemo+ overview
You can make creative notes by using a variety options on this
advanced feature of notepad, such as image management and
screenshots, which are not supported by the conventional notepad.
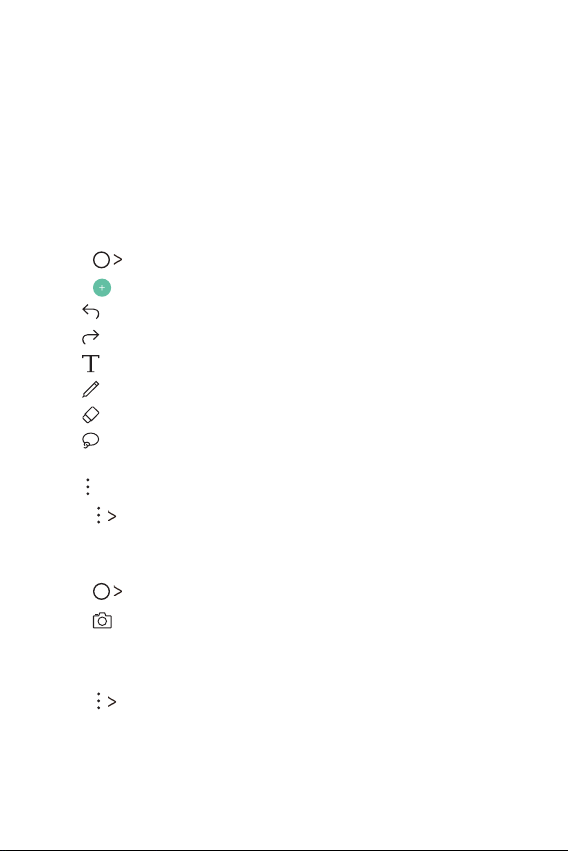
Creating a note
Tap QuickMemo+.
1
Tap to create a note.
2
: Undo the last action.
Ţ
: Redo the last action you undid.
Ţ
: Enter a note by using the keypad.
Ţ
: Write notes by hand.
Ţ
: Erase handwritten notes.
Ţ
: Zoom in or out, rotate or erase the parts of a handwritten
Ţ
note.
: Access additional options.
Ţ
Tap Done to save the note.
3
Writing notes on a photo
Tap QuickMemo+.
1
Tap to take a photo, then tap OK.
2
Ţ The photo is automatically attached into the notepad.
Freely write notes on the photo.
3
Tap Done to save the note.
4
Custom-designed Features 7
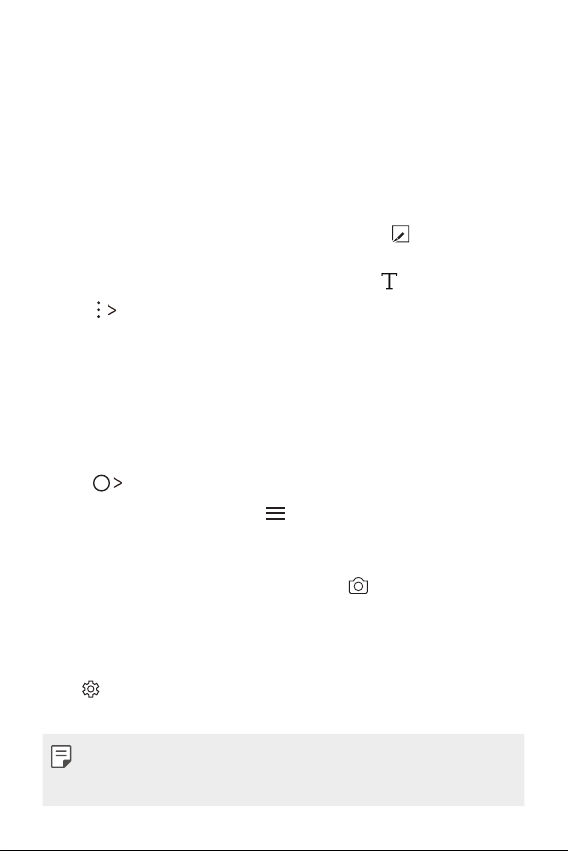
Writing notes on a screenshot
While viewing the screen you want to capture, drag the status bar
1
downwards and then tap Capture+.
ŢThe screenshot appears as the notepad background theme.
Memo tools appear at the top of the screen.
Take notes on the captured screen.
2
ŢWrite notes by hand on the photo.
ŢTo crop and save a portion of the screen, tap
portion with the crop tool.
ŢTo attach a screenshot to the notepad, tap
Tap Done and save the notes to the location you want.
3
Ţ Saved notes can be viewed in either QuickMemo+ or Gallery.
Ţ To save notes in the same location all the time, select the Use
as default app checkbox and select an app.
and specify a
.
Managing folders
You can view notes grouped by the type of the notes.
Tap QuickMemo+.
1
At the top of the screen, tap and select a menu item:
2
Ţ All memos: View all notes saved in QuickMemo+.
ŢMy memos: View notes created by QuickMemo+.
ŢPhoto memos: View notes created by
ŢCapture+: View notes created by Capture+.
ŢTrash: View deleted notes.
ŢNew category: Add categories.
: Rearrange, add or delete categories. To change the name of
Ţ
a category, tap the category.
.
ŢSome folders do not appear when launching QuickMemo+ for
the first time. Disabled folders are enabled and appear when they
contain at least one related note.
Custom-designed Features 8
KnockON
The KnockON feature allows you to double-tap the screen to easily
turn it on or off.
Turning the screen on
Double-tap the middle of the screen to turn the screen on.
1
Unlock the screen or access any of the available shortcuts or
2
widgets.
Turning the screen off
Double-tap an empty area of the Home screen or the Status Bar.
1
The screen will turn off.
2
ŢFor better recognition performance, tap on the center of the
screen, but not on the bottom or on the top of the screen.
Knock Code
The Knock Code feature allows you to create your own unlock code
using a combination of knocks on the screen. You can access the
Home screen directly when the screen is off by tapping the same
sequence on the screen.
ŢIf you enter the wrong Knock Code 6 times, you will be required to
enter to backup PIN.
ŢUse your fingertip instead of your fingernail to tap the screen to
turn it on or off.
Setting up the Knock Code feature
Tap Settings Display Lock screen Select screen lock
1
Knock Code.
Custom-designed Features 9
Tap the squares in a pattern to set your Knock Code. Your Knock
2
Code pattern can be 6 to 8 taps.
Unlocking the screen using the Knock Code
When the screen turns off, you can unlock the screen by tapping the
Knock Code pattern you already set.
Do not disturb
You can limit or mute notifications to avoid disturbances for a specific
period of time.
Tap Settings Sound & notification Do not disturb and
1
then drag to activate it.
Tap Sounds and vibrations and select the mode you want:
2
ŢPriority only: Receive sound or vibrate notifications for the
selected apps. Even when Priority only is turned on, alarms still
sound.
ŢTotal silence: Disable both the sound and vibration.
Custom-designed Features 10

02
Basic Functions
Product components and
accessories
The following items are included with your device.
ŢDevice
ŢBattery
ŢUSB cable
ŢThe items supplied with the device and any available accessories
may vary depending on the area and service provider.
ŢAlways use genuine LG Electronics accessories. Using accessories
made by other manufacturers may affect your device's call
performance or cause malfunctions. This may not be covered by
LG's repair service.
ŢIf any of these basic items are missing, contact the dealer from
which you purchased your device.
ŢTo purchase additional basic items, contact an LG Customer Service
Center.
ŢTo purchase optional items, contact an LG Customer Service Center
for available dealers.
ŢSome items in the product box are subject to change without
notice.
ŢThe appearance and specifications of your device are subject to
change without notice.
ŢDevice specifications may vary depending on the area or service
provider.
ŢBe sure to use authentic accessories provided by LG Electronics.
Using third-party accessories may damage the device or cause
malfunctions.
ŢRemove the protective film on the camera lens if necessary.
ŢCharger
ŢQuick Start Guide
Basic Functions 12
Ţ
Proximity/Ambient light sensor
- Proximity sensor: During a call, the proximity sensor turns off
the screen and disables touch functionality when the device is
in close proximity to the human body. It turns the screen back
on and enables touch functionality when the device is outside a
specific range.
- Ambient light sensor: The ambient light sensor analyzes the
ambient light intensity when the auto-brightness control mode
is turned on.
ŢVolume keys
- Adjust the volume for ringtones, calls or notifications.
- While using the Camera, gently press a Volume key to take a
photo. To take continuous shots of photos, press and hold the
Volume key.
- Press the Volume Down (-) key twice to launch the Camera app
when the screen is locked or turned off. Press the Volume Up (+)
key twice to launch Capture+.
ŢPower/Lock key
- Briefly press the key when you want to turn the screen on or off.
- Press and hold the key when you want to select a power control
option.
ŢSome functions may be restricted for access, depending on the
device specifications.
ŢDo not put heavy objects on the device or sit on it. Doing so may
damage the touch screen.
ŢScreen-protective film or accessories may interfere with the
proximity sensor.
ŢIf your device is wet or is being used in a humid place, the touch
screen or buttons may not function properly.
Basic Functions 14

Turning the power on or off
Turning the power on
When the power is turned off, press and hold the Power/Lock key.
ŢWhen the device is turned on for the first time, initial configuration
takes place. The first booting time for the smart phone may be
longer than usual.
Turning the power off
Press and hold the Power/Lock key, then select Power off.
Power control options
Press and hold the Power/Lock key, then select an option.
ŢPower off: Turn off the device.
ŢPower off and restart: Restart the device.
ŢTurn on Airplane mode: Block telecommunication-related
functions, including making phone calls, messaging and browsing
the Internet. Other functions remain available.
Basic Functions 15

Installing the SIM card
Insert the SIM (Subscriber Identity Module) card provided by your
service provider to start using your device.
To remove the back cover, hold the phone firmly in one hand. With
1
your other hand, lift off the back cover with your thumbnail as
shown in the figure below.
Slide the SIM card into the SIM card slot with the gold-colored
2
contacts facing downwards.
Basic Functions 16

ŢThis device supports only Nano SIM cards.
Nano Micro Standard
ŢFor problem-free performance, it is recommended to use the phone
with the correct type of SIM card. Always use a factory-made SIM
card supplied by the service provider.
Precautions when using the SIM card
ŢDo not lose your SIM card. LG is not responsible for damage and
other issues caused by loss or transfer of a SIM card.
ŢBe careful not to damage the SIM card when you insert or remove
it.
Inserting the memory card
The device can support up to a 32 GB microSD card. Depending on
the memory card manufacturer and type, some memory card may
not be compatible with your device.
To remove the back cover, hold the phone firmly in one hand. With
1
your other hand, lift off the back cover with your thumbnail as
shown in the figure below.
Basic Functions 17
Insert the memory card into the memory card slot.
2
ŢSome memory cards may not be fully compatible with the device.
If you use an incompatible card, it may damage the device or the
memory card, or corrupt the data stored in it.
ŢFrequent writing and erasing of data may shorten the memory card
lifespan.
Basic Functions 18
Removing the memory card
Unmount the memory card before removing it for safety.
Tap Settings General Storage & USB .
1
Remove the back cover and pull out the memory card.
2
ŢDo not remove the memory card while the device is transferring
or accessing information. This may cause data to be lost or
corrupted, or may damage the memory card or the device. LG is not
responsible for losses that result from the abuse or improper use of
memory cards, including the loss of data.
Battery
Installing the battery
To remove the back cover, hold the phone firmly in one hand. With
1
your other hand, lift off the back cover with your thumbnail as
shown in the figure below.
Basic Functions 19

Insert the battery.
2
To replace the cover onto the device, align the back cover over the
3
battery compartment and press it down until it clicks into place.
ŢFollow the instructions in this user guide cautiously when handling
the device. Failure to do so may damage the device or cause injury
to yourself or others.
Basic Functions 20

Removing the battery
Open the back cover and pull out the battery.
ŢTurn off the device before removing the battery. Failure to do so
may damage the device.
Charging the battery
Before using the device, fully charge the battery.
Basic Functions 21
ŢMake sure to use the USB cable provided with your device.
ŢMake sure to use an LG-approved charger, battery and charging
cable. Charging the battery with a third-party charger may cause
the battery to explode or may damage the device.
ŢUsing the device when it is charging may cause electric shock. To
use the device, stop charging it.
ŢRemove the charger from the power socket after the device is fully
charged. This prevents unnecessary power consumption.
ŢAnother way to charge the battery is by connecting a USB cable
between the device and a desktop or laptop computer. This may
take a longer time than charging the battery in the common way.
ŢDo not charge the battery by using a USB hub that is unable to
maintain the rated voltage. Charging may fail or unintentionally
stop.
Precautions when using the device
ŢWhen replacing the battery, take extra care to ensure that no
foreign substances or water enter the device.
ŢEnsure that the inside of the device does not make contact with a
metallic object or water.
ŢMake sure to use the USB cable provided; do not use third party
USB cables or chargers with your device. The LG limited warranty
does not cover the use of third party accessories.
ŢFailure to follow the instructions in this guide and improper use
may damage the device.
Basic Functions 22
Using the battery efficiently
Battery lifespan may decrease if you keep many apps and functions
running simultaneously and continuously.
Stop apps and functions from running in the background to increase
battery life.
To minimize battery consumption, follow these tips:
ŢTurn off the Bluetooth®
.
them
ŢSet the screen timeout to as short a time as possible.
ŢMinimize the screen brightness.
ŢSet a screen lock when the device is not used.
ŢCheck the battery usage details and close any downloaded apps
that are draining the battery.
or Wi-Fi network function when not using
Touch screen
You can familiarize yourself with how to control your device by using
touch screen gestures.
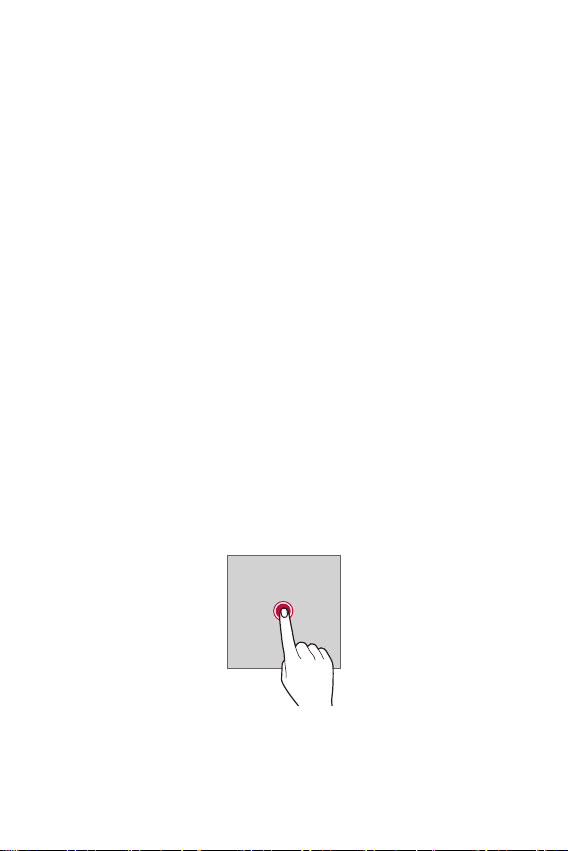
Tapping
Lightly tap with your fingertip to select or run an app or option.
Basic Functions 23

Touching and holding
Touch and hold for several seconds to display a menu with available
options.
Double-tapping
Tap twice quickly to zoom in or out on a web page or map.
Dragging
Touch an item, such as an app or widget, then move your finger to
another location in a controlled motion. You can use this gesture to
move an item.
Basic Functions 24
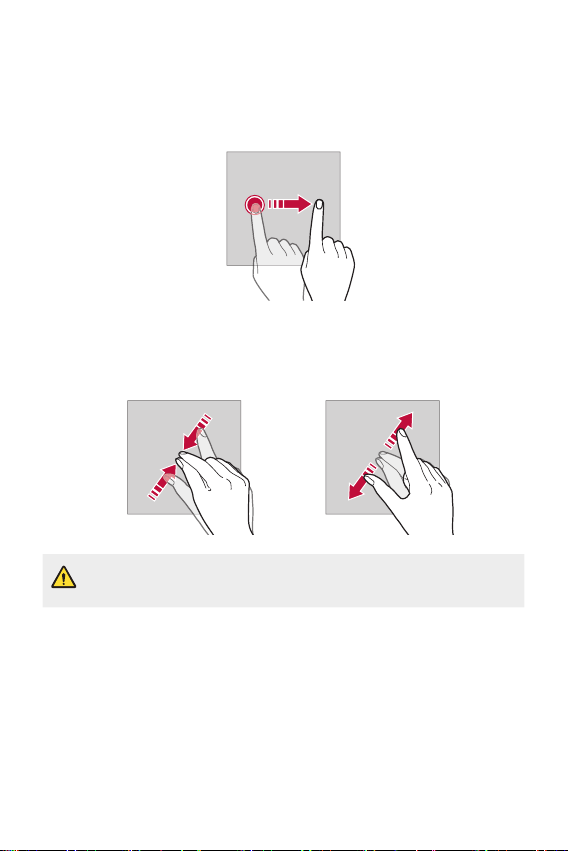
Swiping
Touch the screen with your finger and move it quickly without
pausing. You can use this gesture to scroll through a list, a web page,
photos, screens, and more.
Pinching and spreading
Pinch two fingers to zoom out such as on a photo or map. To zoom in,
spread your fingers apart.
Ţ Do not expose the touch screen to excessive physical shock. You
might damage the touch sensor.
Basic Functions 25

ŢA touch screen failure may occur if you use the device near a
magnetic, metallic or conductive material.
ŢIf you use the device under bright lights, such as direct sunlight,
the screen may not be visible, depending on your position. Use the
device in a shady location or a location with an ambient light that is
not too bright and bright enough to read books.
ŢDo not press the screen with excessive force.
ŢGently tap with your fingertip on the option you want.
ŢThe touch control may not work properly if you tap while wearing a
glove or by using the tip of your fingernail.
ŢTouch control may not work properly if the screen is moist or wet.
ŢThe touch screen may not function properly if a screen-protective
film or accessory purchased from a third party store is attached to
the device.
Basic Functions 26
Home screen
Home screen overview
The Home screen is the starting point for accessing various functions
and apps on your device. Tap
Home screen.
You can manage all apps and widgets on the Home screen. Swipe the
screen left or right to view all installed apps at a glance.
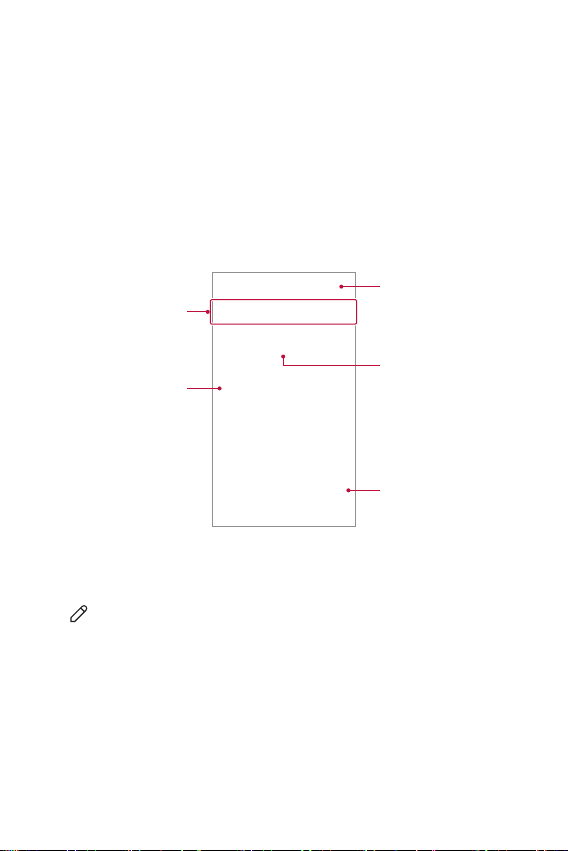
Home screen layout
You can view all apps and organize widgets and folders on the Home
screen.
Status bar
Weather widget
Folder
Home touch
buttons
on any screen to directly go to the
Google search widget
Page icon
Quick access area
ŢThe Home screen may vary, depending on the service provider or
software version.
ŢStatus bar: View status icons, the time and the battery level.
ŢWeather widget: View the weather information and time for a
specific area.
Basic Functions 27
Ţ
Google search widget: Perform a Google search by inputting
spoken or written keywords.
ŢFolder: Create folders to group apps by your preferences.
Ţ Page icon: Display the total number of Home screen canvases.
Tap the desired page icon to go to the page you selected. The icon
reflecting the current canvas will be highlighted.
ŢQuick access area: Fix main apps at the bottom of the screen so
that they can be accessed from any Home screen canvas.
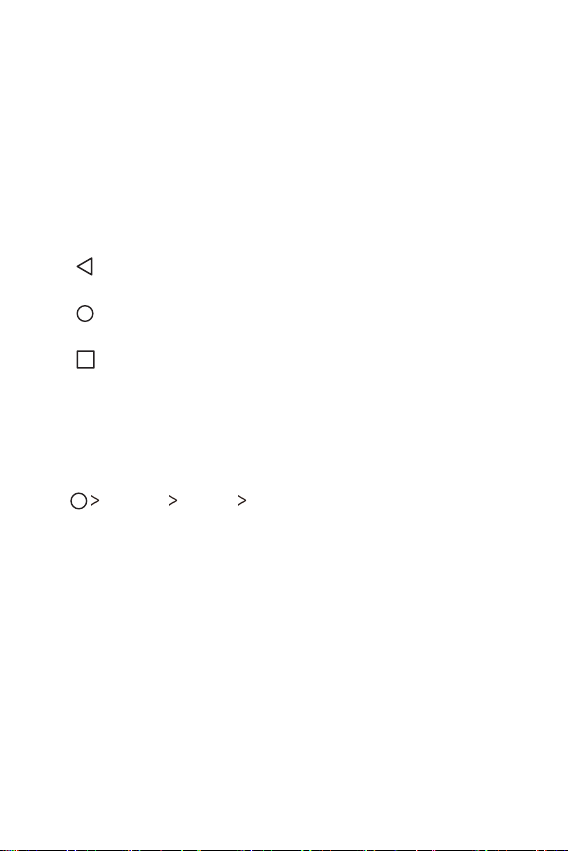
Ţ Home touch buttons
: Return to the previous screen. Close the keypad or pop-up
-
windows.
: Tap to go to the Home screen. To launch Google search,
-
touch and hold.
: Tap to view a list of recently used apps or run an app from
the list. To delete all the recently used apps, tap Clear all.
Editing the Home touch buttons
You can rearrange the Home touch buttons or add frequently used
functions to the Home touch buttons area.
Settings Display Home touch button combination and
Tap
customize the settings.
ŢThe Notification panel and Capture+ options are provided.
A maximum of two items can be added.
Basic Functions 28
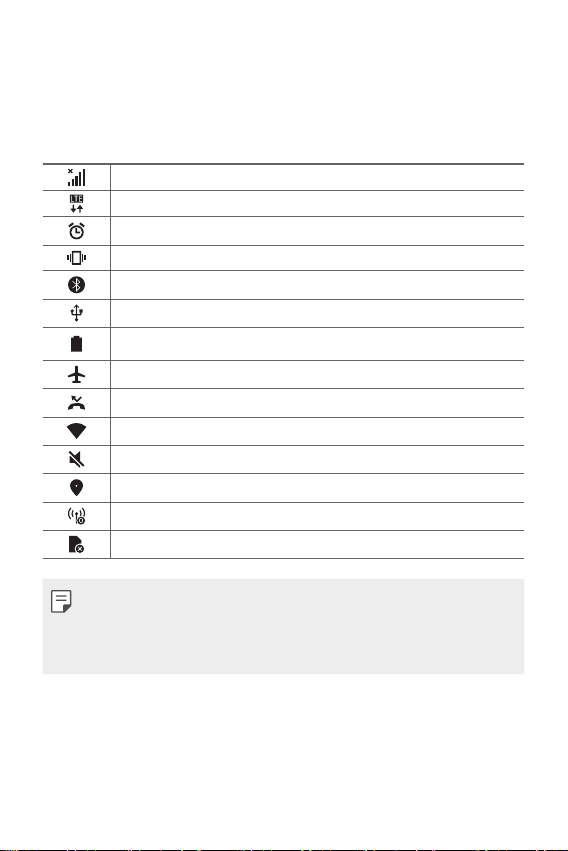
Status icons
When there is a notification for an unread message, calendar event
or alarm, the status bar displays the corresponding notification icon.
Check your device's status by viewing notification icons displayed on
the status bar.
No signal
Data is being transmitted over the network
Alarm is set
Vibrate mode is on
Bluetooth is on
Connected to a computer via USB
Battery level
Airplane mode is on
Missed calls
Wi-Fi is connected
Mute mode is on
GPS is on
Hotspot is on
No SIM card
ŢSome of these icons may appear differently or may not appear at
all, depending on the device's status. Refer to the icons according to
the actual environment in which you are using the device.
ŢDisplayed icons may vary, depending on the area or service provider.
Basic Functions 29
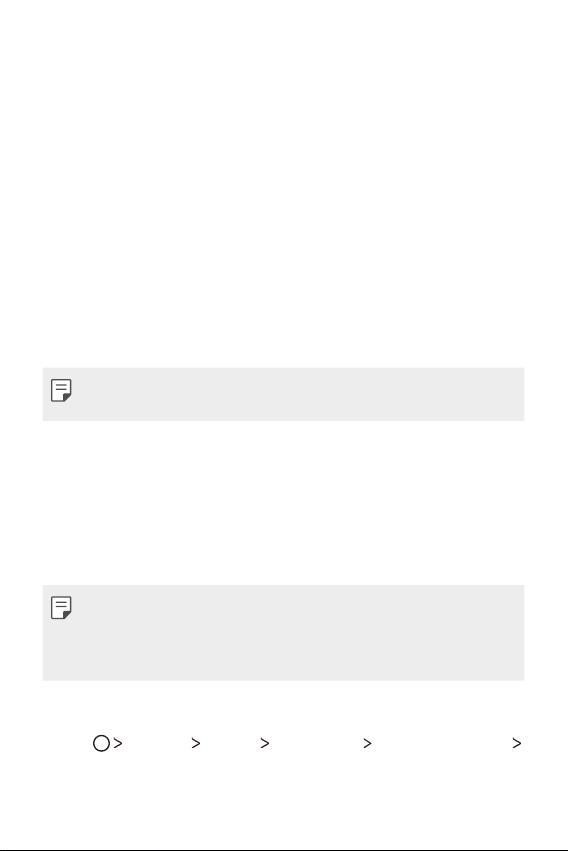
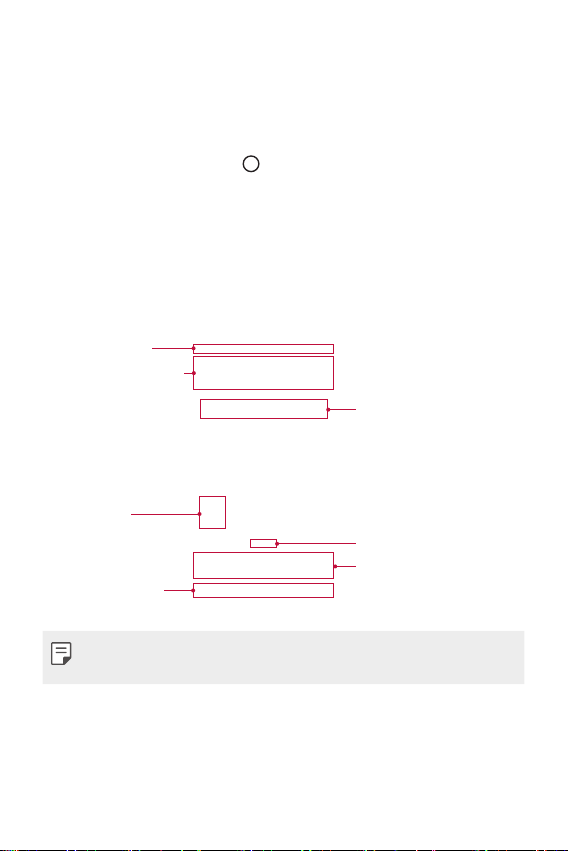
Notifications panel
You can open the notifications panel by dragging the status bar
downwards.
Use quick access icons in the notifications panel to easily and quickly
turn a function on or off.
Drag left or right on the list of quick access icons to select the
function icon you want.
ŢIf you tap and hold the icon, the settings screen for the
corresponding function appears.
Access the Settings app.
View quick access icons.
Adjust the brightness.
View notifications.
Delete notifications.
Notification panel settings
You can select items to display on the notification panel.
on the notification panel.
Tap
ŢTo rearrange quick access icons, tap and hold an icon, then drag it
to another position.
ŢSelect icons you want to display on the list.
Basic Functions 30
 Loading...