

Page 1
AJ-LDX6
AJ-LDX6
AJ-LAH2
AJ-LAH2
LAMP OWNER’S MANUAL
P/N : 3828VA0584J(0902_REV01)
Page 2
* Contact your dealer for replacing a new lamp.
The change interval of lamp may depend on the use environment of Projector. You
can see the used lamp time in the CHECKING LAMP TIME section of the Menu.
You must replace the lamp when:
●
The projected image gets darker or starts to deteriorate.
●
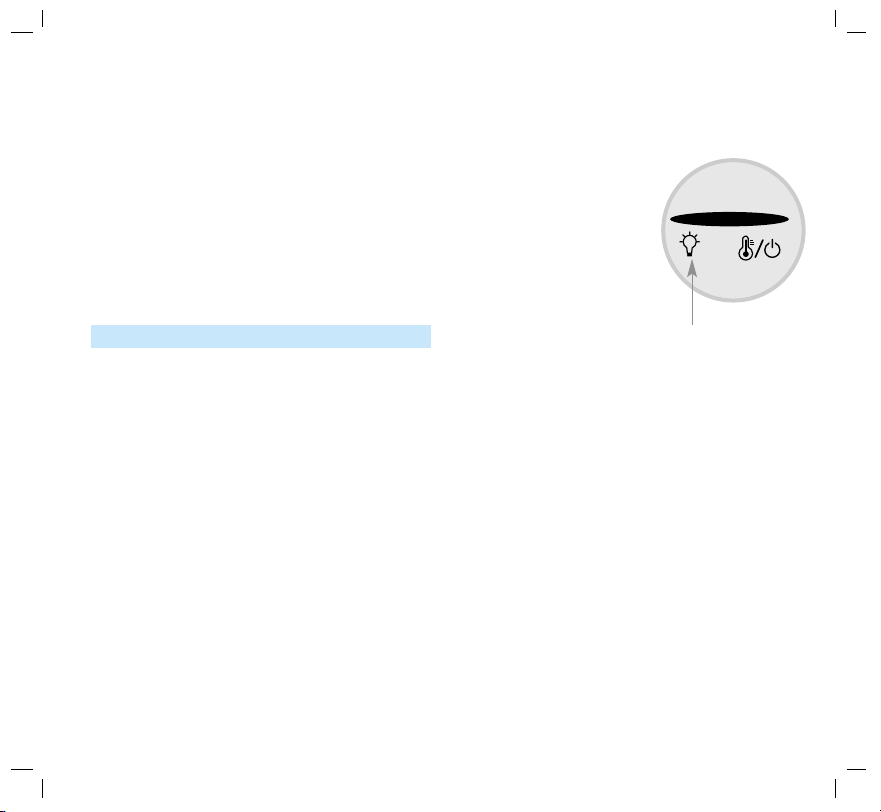
The lamp indicator is red.
●
The message “Replace the lamp” appears on the screen when turning the projector on.
<Front panel of the Projector>
Be careful when replacing lamp
- Press the POWER button on the control panel or remote control to turn off power.
- If the operation indicator LED is orange and blinking, do not disconnect the main supply until the operation
indicator LED is lit up constantly (orange).
- Allow the lamp to cool for 1 hour before replacing it.
- Replace only with the same type lamp from an LG Electronics Service Center. Using another manufacturers
lamp may cause damage to the Projector and lamp.
- Pull out the lamp only when replacing the lamp.
- Keep the lamp unit out of reach of children. Keep the Lamp away from heat sources such as radiators, stoves
etc.
- To reduce the risk of fire do not expose the lamp to liquids or foreign materials.
- Do not place the lamp near any heat source.
- Make sure the new lamp is securely tightened with screws. If not, the image may be dark or there could be an
increased risk of fire.
- Never touch the lamp unit glass otherwise image quality may be compromised or lamp life maybe reduced.
Lamp indicator
Page 3
Replacing the Lamp
Replacing the Lamp
Turn off the projector and unplug the power cable.
Carefully place on a cushioned surface.
1
(Allow the lamp to cool for 1 hour before
removing the used lamp from the projector.)
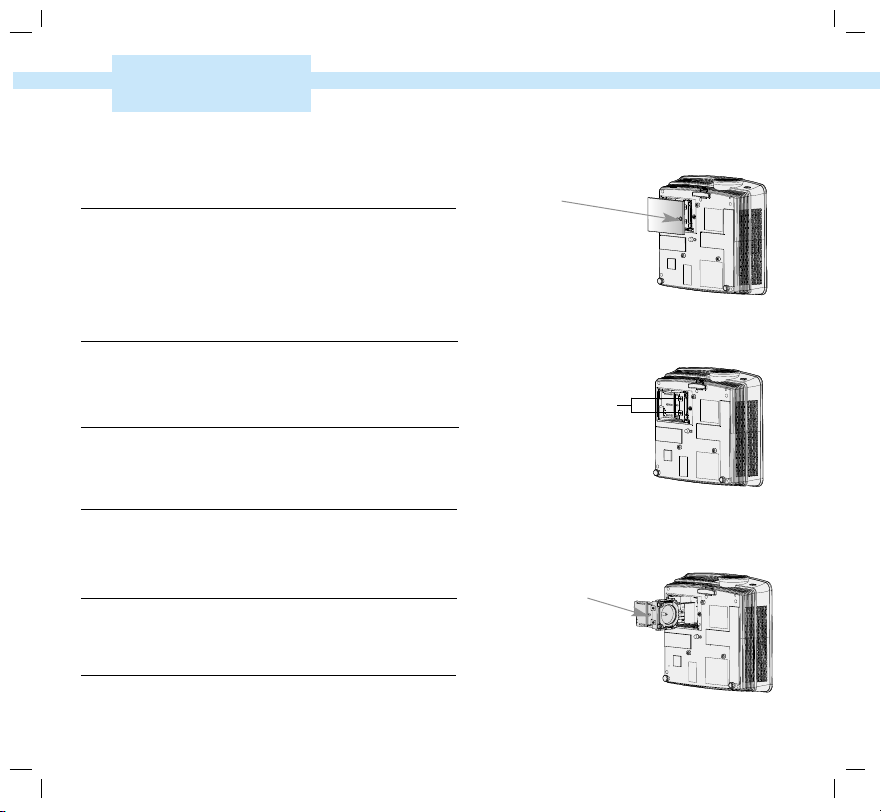
Unscrew the screw from the lamp cover using a
screwdriver.
2
Lamp case screw
After lifting the lamp cover off, remove the two
retaining screws on the lamp case with a screwdriver.
3
Lift up the fixed wire knob on the lamp.
4
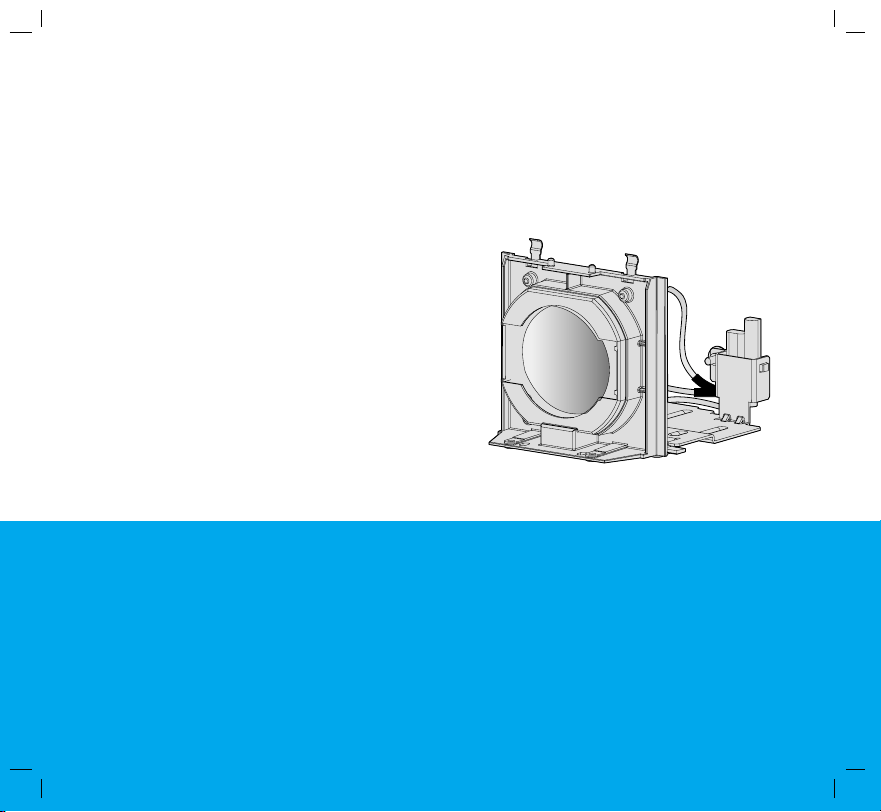
Pull out the handle slowly and remove the lamp case.
5
Insert the new lamp gently into the correct position.
Make sure it is inserted correctly.
6
Screws
Knob
Page 4

Tighten the screws you removed in step 3.
7
(Make sure it is fixed hardly.)
Close the lamp cover and install the screws from step 2 to install the cover.
8
(If the lamp cover is not installed correctly the unit will not power on.)
Using another manufacturers lamp may cause damage to the projector or lamp.
Make sure the lamp cover is securely fastened. If the lamp cover is not installed correctly the unit will not power on.
If this fault persists contact an LG Authorized Service Center.
Reset Lamp Time
Reset Lamp Time
* You must reset lamp time on the menu after replacing the lamp.
Press the
simultaneously (About 5 seconds).
1
LLaammpp UUssee TTiimmee 2211 hhrr..
TToottaall LLaammpp UUssee TTiimmee 2211 hhrr..
LLaammpp RReesseett CCoouunntteerr 00
LLaammpp UUssee TTiimmee RReesseett PPrreessss RRiigghhtt ttoo RReesseett
RReesseett [[RRiigghhtt KKeeyy]] EExxiitt [[MMEENNUU KKeeyy]]
Press the button on the projector or button on the remote control.
Lamp time will be reset.
2
OK
button on the projector and
◉
Exit [Menu Key]
OK
button on the remote control
◉
Page 5

AJ-LDX6
AJ-LDX6
AJ-LAH2
AJ-LAH2
램프 사용설명서
Page 6

램프
교체
교체
방법
방법
램프
프로젝터 램프의 교체 주기는 프로젝터의 사용환경에 따라서 달라질 수 있습니다.
기능 메뉴에서 프로젝터 램프의 수명이 어느 정도 경과되었는지를 알 수 있습니다.
다음 상황이 발생했을 경우에는 반드시 램프를 교체하세요.
● 투영된 영상이 점점 더 어두워지거나 영상의 열화가 시작되는 경우
● 램프 경고 표시등이 적색인 경우
● 프로젝터 램프를 켤 때“램프를 교체해 주세요”라는 메시지가 나타나는 경우
투사되는 영상의 밝기 및 품질을 최적의 상태로 유지하기 위해 램프를 아래 기간 동안
사용하면 램프 교체 메세시가 나타나도록 설정되어 있습니다.
<프로젝터 상단>
● 고휘도 모드로 연속해서 사용할 때 : 약 2000시간
● 절전 모드로 연속해서 사용할 때 : 약 2500시간
램프경고 표시등
램프 교체시 주의하세요
● 리모컨의 전원 또는 조절판의 POWER 버튼을 눌러 전원을 차단하세요.
● 동작 표시등이 주홍색이 점멸되어 있는 동안 즉 팬이 동작중인 경우(약 10초 정도)는 전원 코드를 제거하지 마시고,
동작 표시등이 주홍색으로 점등되면 전원 코드를 제거하세요.
● 램프는 뜨거우므로 1시간 정도 식힌 후 램프를 교체하세요.
● 램프 교체시에는 판매점 또는 LG전자 서비스 센터에 문의하여 동일한 모델의 램프(소모품)를 사용하세요.
다른제품을 사용하면 프로젝터 고장의 원인이 됩니다.
● 램프 교체 이외의 목적으로 램프를 꺼내지 마세요.
● 제거한 램프를 화기 및 난로와 같은 뜨거운 물건 가까이 놓거나 어린이의 손이 닿는 곳에 방치하지 마세요. 화재,
화상의 위험이 있습니다.
● 제거한 램프에 물을 엎지르거나 램프 속에 이물질을 넣지 마세요. 램프가 파열될 수 있습니다.
● 램프를 제거한 후 프로젝터의 램프 장착 부분에 가연물질, 금속물체 등 램프 이외의 물질을 넣지 마세요. 감전, 화상,
고장의 원인이 됩니다.
● 새 램프는 나사로 단단히 고정하세요. 단단히 고정시키지 않으면 화면이 어둡거나 화재의 원인이 될 수 있습니다.
● 새 램프의 앞면 유리 또는 램프 용기의 유리를 만지지 마세요. 화질이 저하되거나 램프 수명이 감소될 수 있습니다.
Page 7

램프
램프
교체
교체
방법
방법
프로젝터의 전원을 끄고 전원케이블을 콘센트에서
뽑습니다. 설치된 프로젝터를 분리하여 테이블 위나 바닥
이 평평한 곳에 놓으세요.
1
(램프 표면은 뜨거우므로 1시간 이상 경과 후 램프를
교체하세요.)
드라이버 또는 이와 유사한 물체를 이용하여 램프
덮개의 고정 볼트를 풀어주세요. 볼트를 뺀 후,
램프 덮개를 빼내세요.
2
램프 덮개를 푼 후, 드라이버 또는 이와 유사한
물체를 이용하여 램프를 고정시키는 두 개의 나사를
풀어주세요.
3
고정된 램프 손잡이를 걸림턱으로부터 빼내세요.
4
램프 손잡이를 잡고 천천히 당기면 램프 케이스가
5
빠집니다.
새 램프 케이스를 조심스럽게 정위치로 넣습니다.
정확하게 끼워졌는지 확인하세요.
6
램프 덮개 고정 볼트
나사
램프 손잡이
Page 8

3번에서 풀어 놓은 나사들을 고정시키세요.
7
(램프가 견고하게 고정되었는지 확인하세요)
램프 덮개를 닫고 2번에서 풀어낸 볼트로 고정시킵니다.
8
(램프커버가 열려있는 상태에서 전원을 켜면 램프 경고 표시등이
램프 교체시 반드시 동일한 기종의 램프로 교체하세요.
램프 교체 후 램프 덮개를 정확히 닫지 않으면 프로젝터가 켜지지 않을 수 있습니다. 이 경우 램프가 정상적으로
고정되었는지 확인 후 서비스 센터로 연락 바랍니다.
녹색으로 점멸되고 프로젝터가 켜지지 않습니다.)
램프 사용시간 초기화
* 램프를 교체한 후에는 반드시 램프사용시간을 초기화시켜 주세요.
◉
프로젝터 조절판의
1
LLaammpp UUssee TTiimmee 2211 hhrr..
TToottaall LLaammpp UUssee TTiimmee 2211 hhrr..
LLaammpp RReesseett CCoouunntteerr 00
LLaammpp UUssee TTiimmee RReesseett PPrreessss RRiigghhtt ttoo RReesseett
RReesseett [[RRiigghhtt KKeeyy]] EExxiitt [[MMEENNUU KKeeyy]]
조절판의 버튼이나 리모컨의 버튼을 누르세요.
램프 사용시간이 초기화 됩니다.
2
OK
버튼과 리모컨의
◉
확인
버튼을 동시에 누르세요.( 5초 정도 )
 Loading...