

Page 1
OWNER’S MANUAL
Please read this manual carefully before operating your set and retain it
for future reference.
EC93**
EC97**
EC98**
www.lg.com
*MFL68488302*
P/NO : MFL68488302 (1407-REV00)
Printed in Korea
Page 2

A-2
TABLE OF CONTENTS
TABLE OF CONTENTS
A-3 SETTING UP THE TV
A-3 Detaching the stand
A-4 Assembling the AV cover
A-4 Tidying cables
A-6 MAKING CONNETIONS
A-6 Antenna Connection
A-8 Satellite dish Connection
A-8 HDMI Connection
A-14 - ARC (Audio Return Channel)
A-15 DVI to HDMI Connection
A-17 MHL Connection
A-20 Component Connection
A-21 Composite Connection
A-22 Headphone Connection
A-24 Audio Connection
A-24 - Digital optical audio connection
A-27 USB Connection
A-30 CI module Connection
A-32 Euro Scart Connection
COMMON
LANGUAGE LIST
English
Deutsch
Français
Italiano
Español
Português
Nederlands
Ελληνικά
Slovenščina
B-1 SPECIFICATIONS
LANGUAGE
COMMON
Page 3
SETTING UP THE TV
A-3
SETTING UP THE TV
Image shown may differ from your TV.
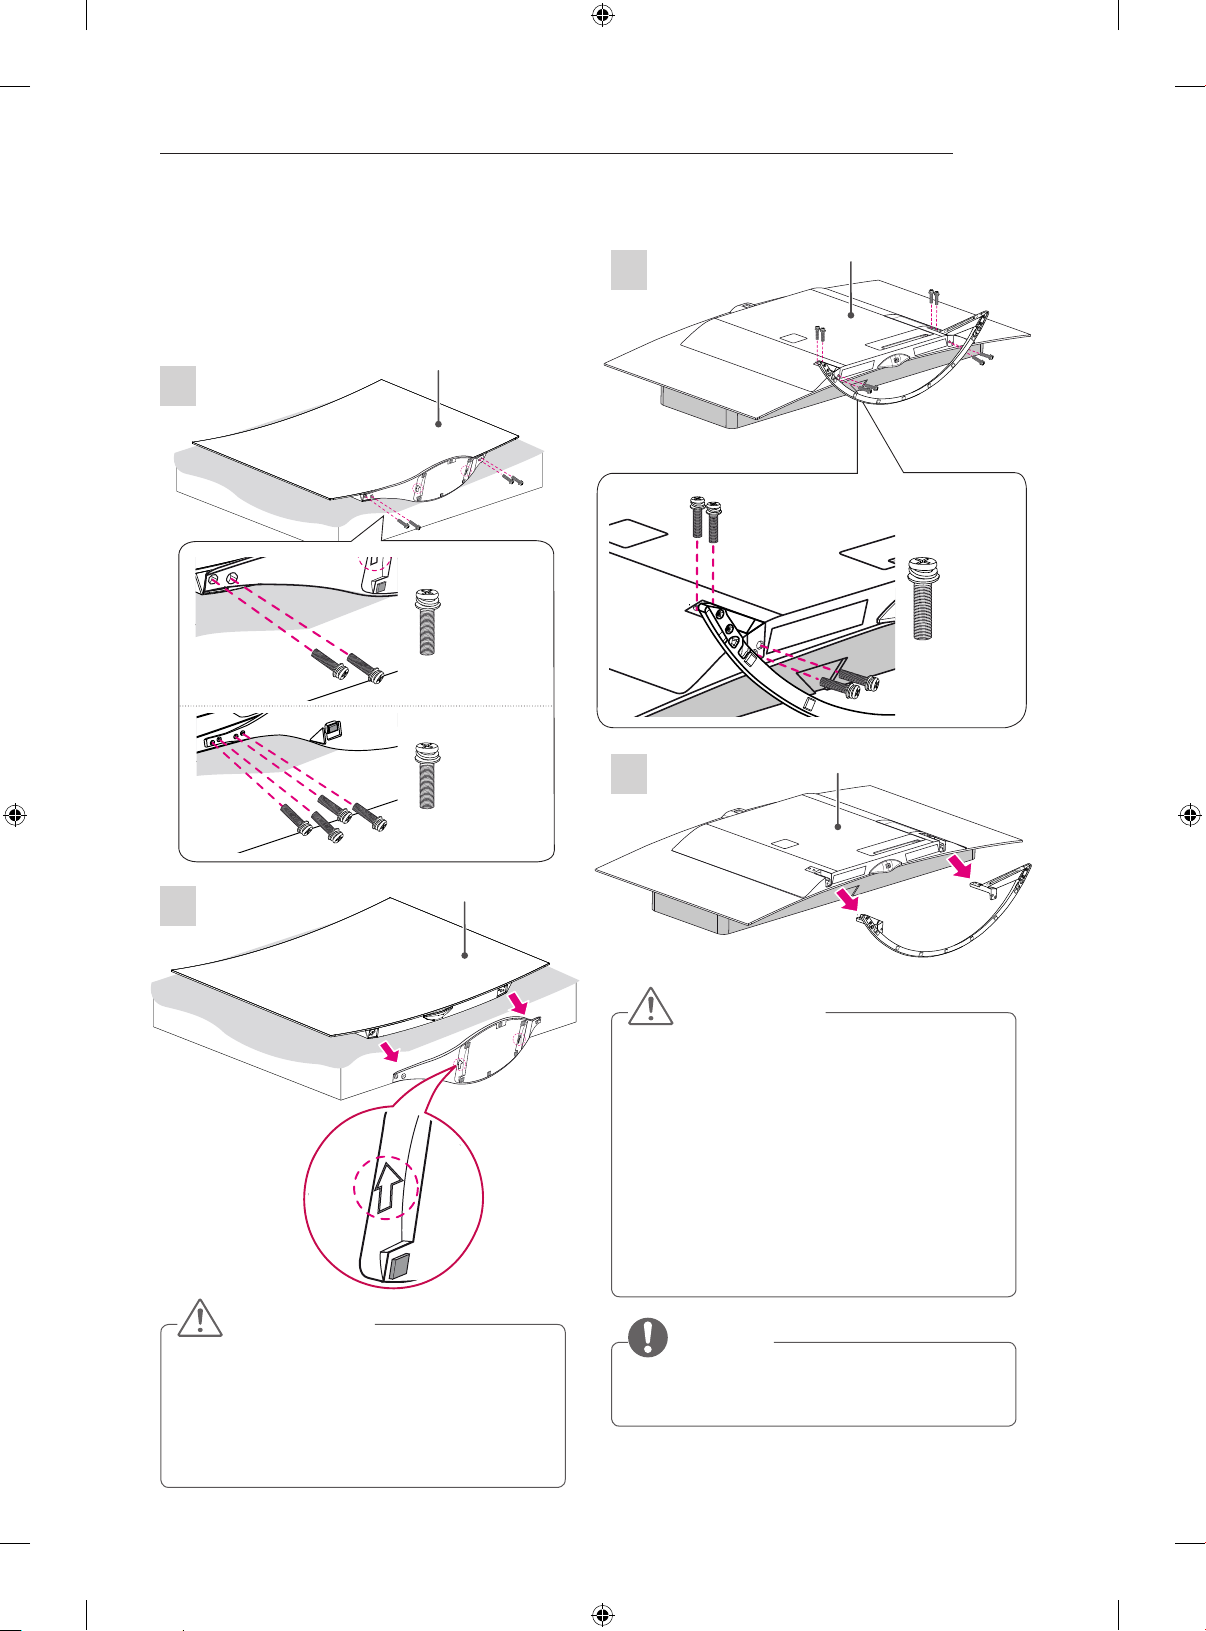
Detaching the stand
(Only EC93**, EC98**)
Screen
1
(Only EC93**)
4 EA
M4 x L20
(Only EC98**)
8EA
M4 x L20
(Only EC97**)
1
2
Back cover
8 EA
M4 x L20
Back cover
2
Screen
CAUTION
y When detaching the stand, make sure to hold it
firmly while removing the screws to stop it from
falling.
y When you assemble the stand again, have the
arrows on the bottom of the stand base looking
toward same direction to screen.
CAUTION
y When detaching the stand to the TV set,
place the screen(or back) facing down on a
cushioned table or flat surface to protect the
screen(or back) from scratches.
y Make sure that the screws are inserted cor-
rectly and fastened securely. (If they are not
fastened securely enough, the TV may tilt
forward after being installed.)
Do not use too much force and over tighten
the screws; otherwise screw may be damaged and not tighten correctly.
NOTE
y When you assemble the stand again,
performing the stand detaching in reverse.
Page 4
A-4
SETTING UP THE TV
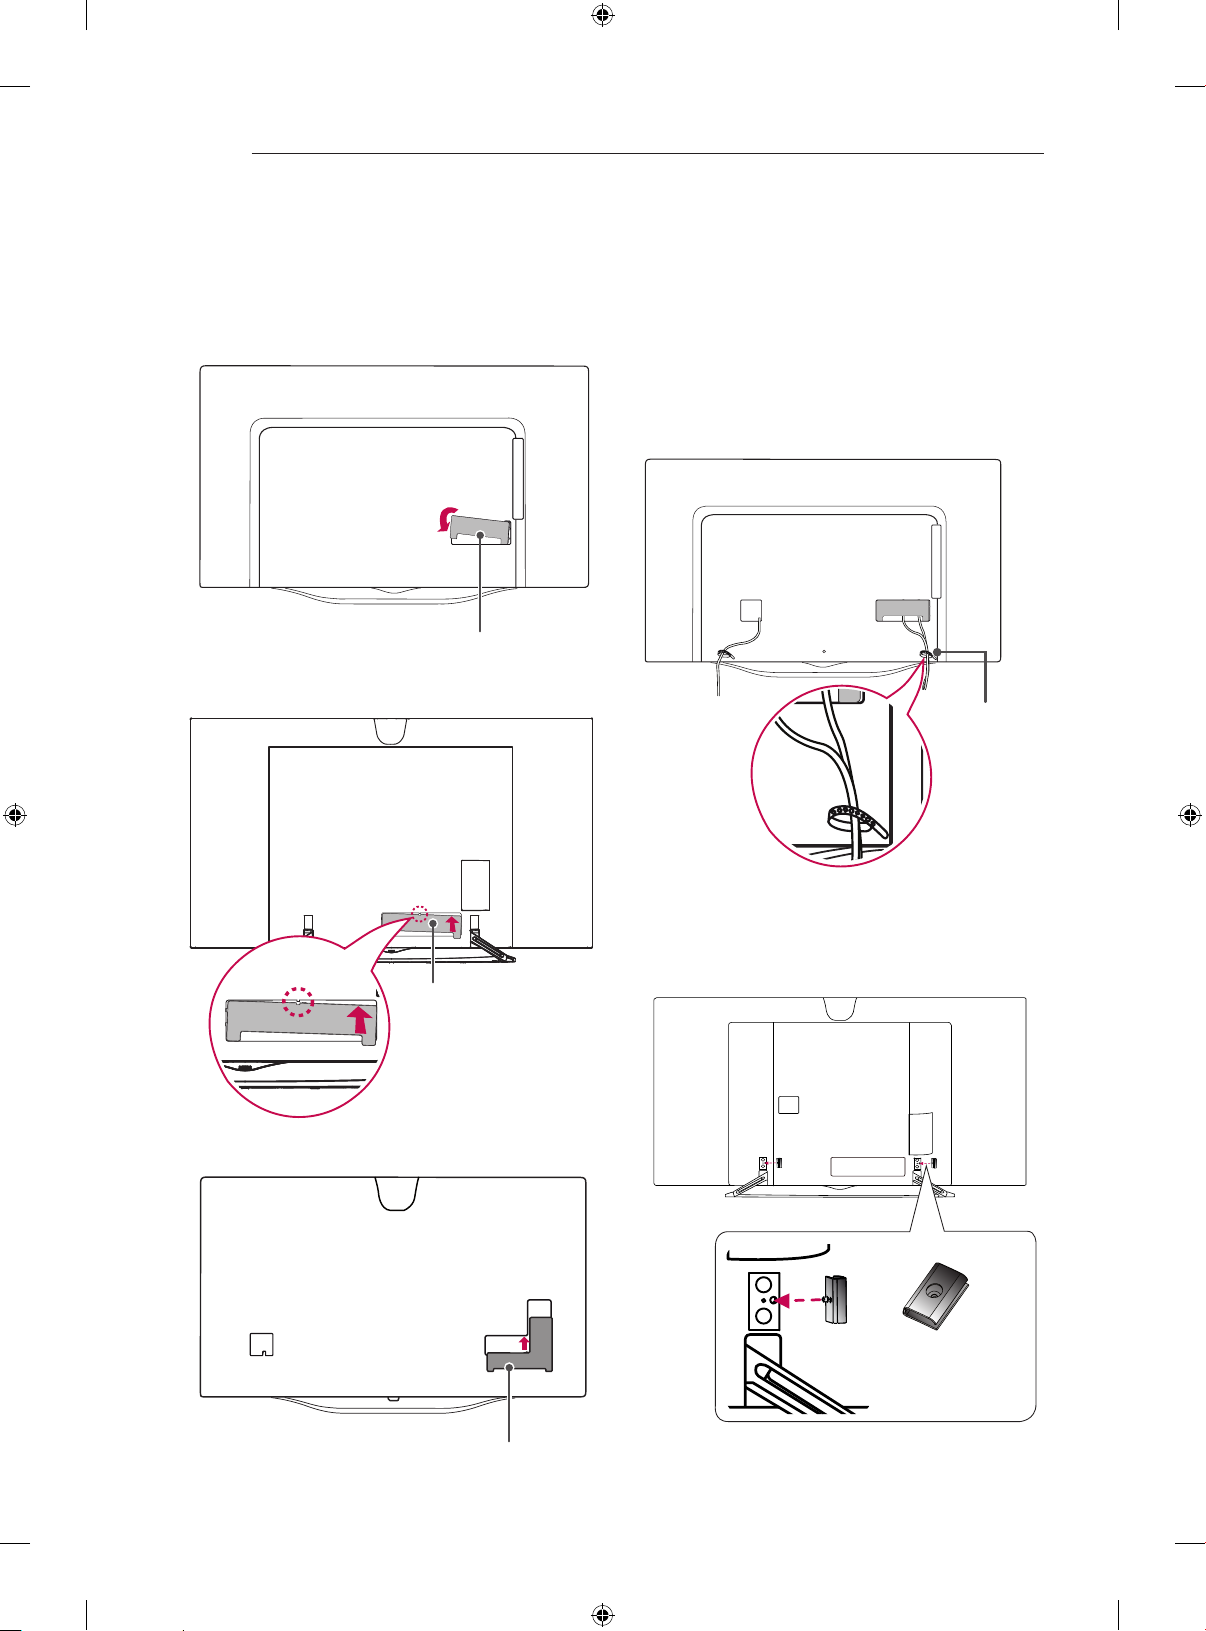
Assembling the AV cover
Assemble the AV Cover as shown.
(Only EC93**)
AV cover
(Only EC97**)
Tidying cables
Image shown may differ from your TV.
** Stand Type **
(Only EC93**)
Gather and bind the cables with the cable holder.
Cable Holder
(Only EC98**)
(Only EC97**)
1 Put the cable management in the hole of TV
back cover.
AV cover
Cable
Management
2 EA
AV cover
Page 5
SETTING UP THE TV
A-5
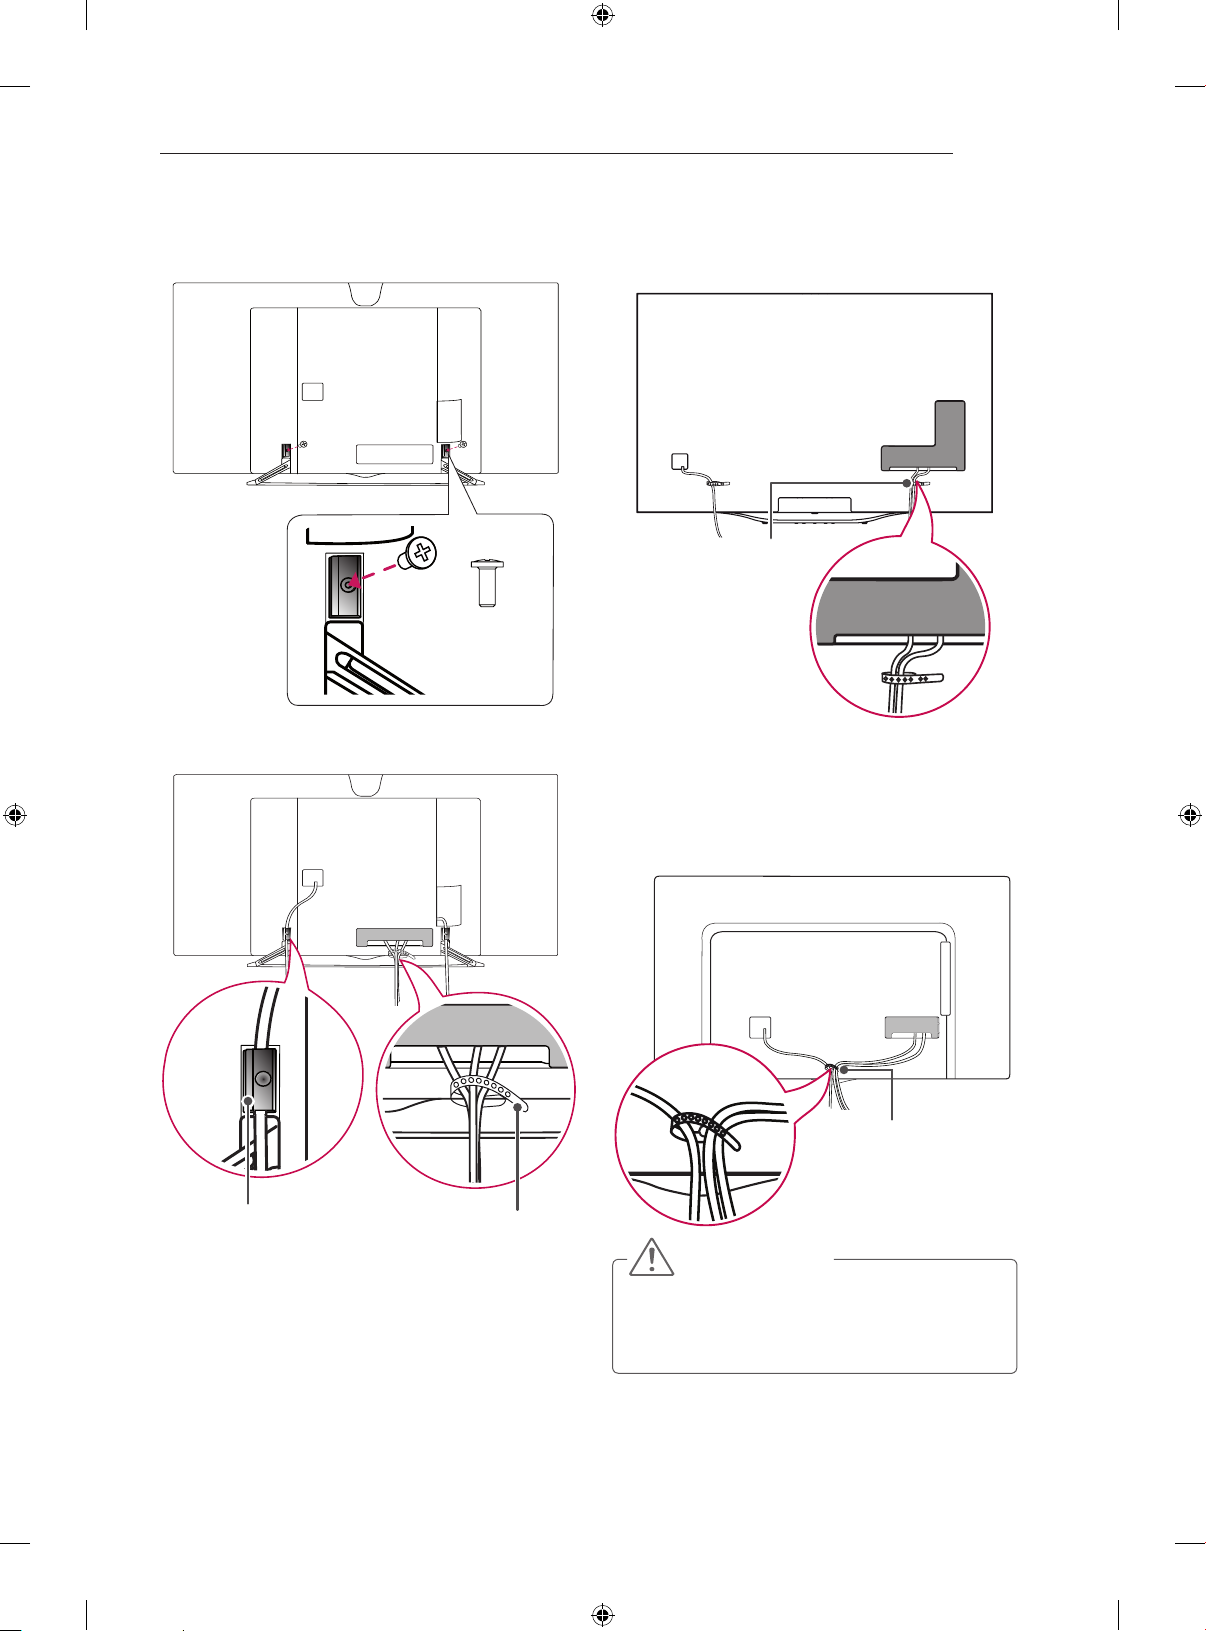
2 Fix the cable management with cable management
Screw.
M4 x L10
2 EA
3 Gather and bind the cables with the cable holder.
Arrange the cable in the cable mangement.
(Only EC98**)
Gather and bind the cables with the cable holder.
Cable Holder
** Wall Mount Type **
(Only EC93**)
Cable Management
Cable Holder
Cable Holder
CAUTION
y Do not move the TV by holding the cable
holder, as the cable holder may break, and
injuries and damage to the TV may occur.
Page 6
13/18V
700
x
S
e
A-6
MAKING CONNECTIONS
MAKING
CONNECTIONS
This section on MAKING CONNECTIONS mainly
uses diagrams for the EC93** models.
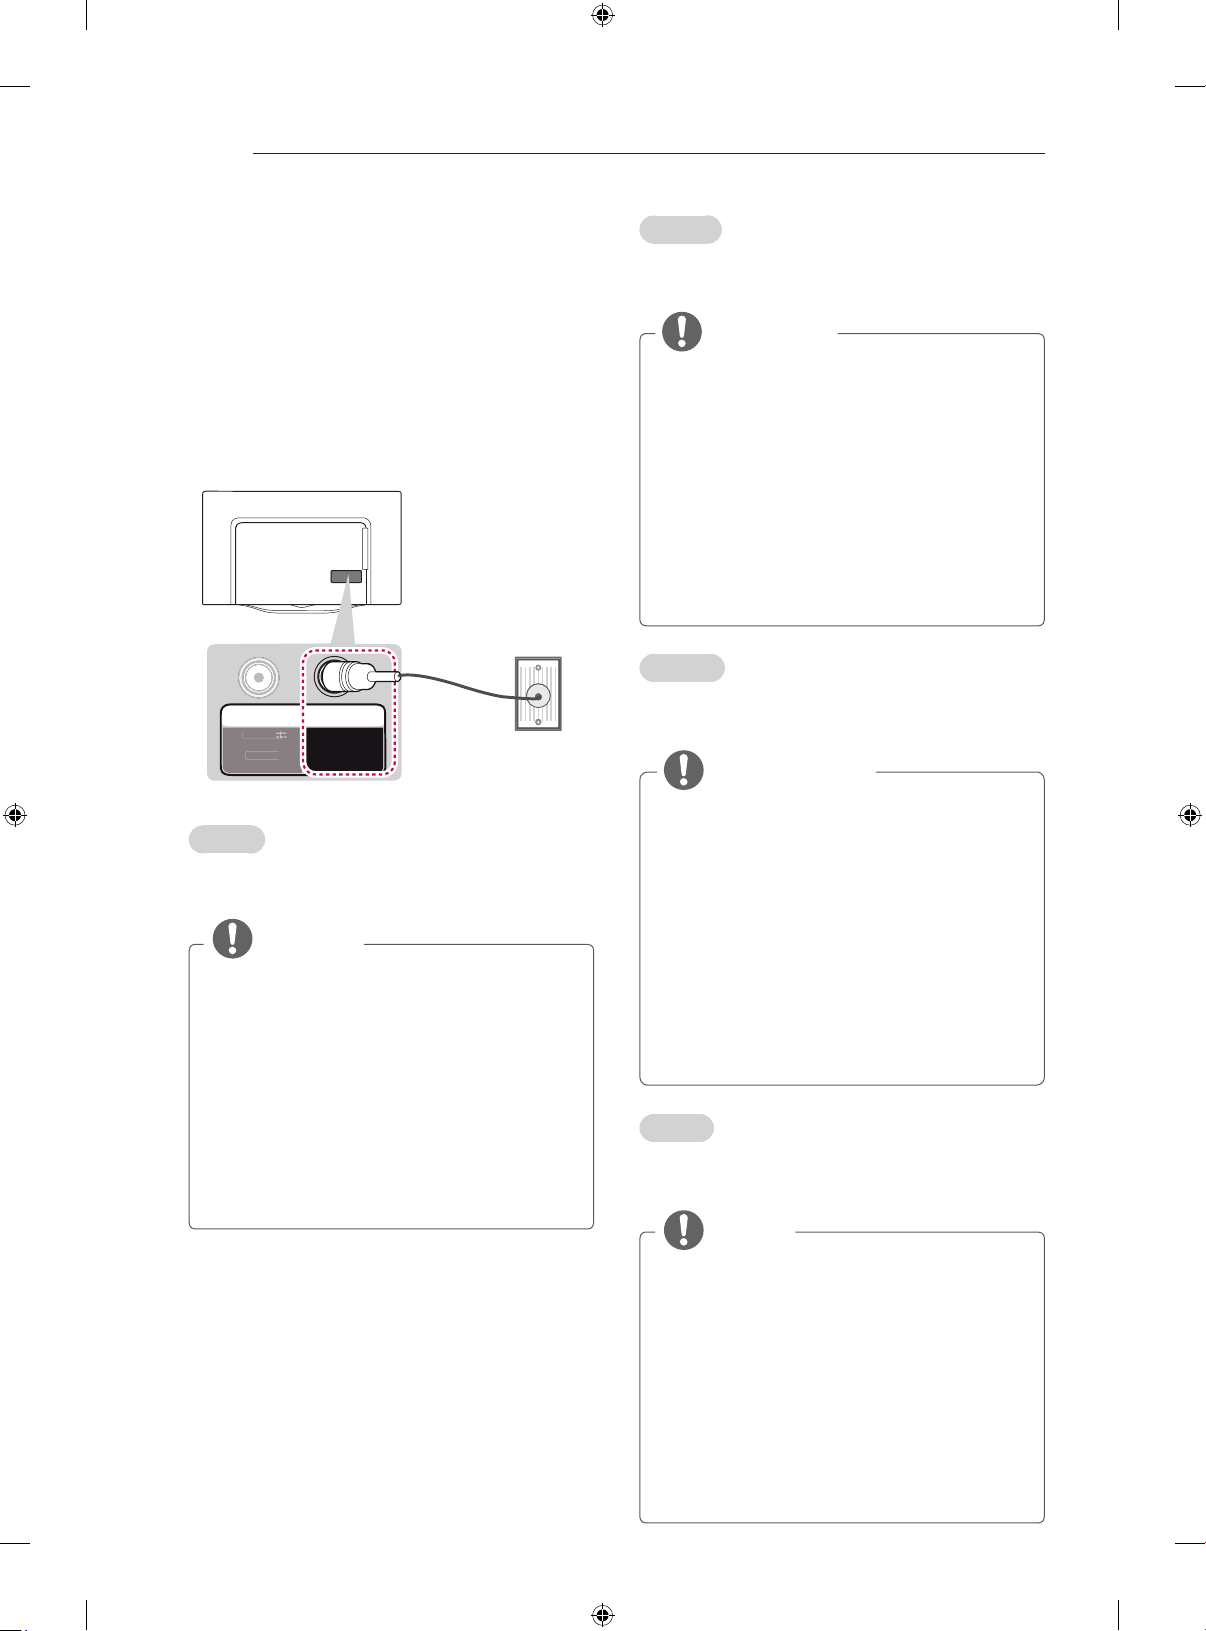
Antenna Connection
Wall Antenna
Socket
IN
LNB IN
atellit
English
Connect the TV to a wall antenna socket with an
RFcable(75Ω).
CABLE
ANTENNA/
mA Ma
NOTE
Use a signal splitter to use more than 2 TVs.
y
If the image quality is poor, install a signal
y
amplifier properly to improve the image
quality.
If the image quality is poor with an antenna
y
connected, try to realign the antenna in the
correct direction.
An antenna cable and converter are not
y
provided.
Supported DTV Audio: MPEG, Dolby Digital,
y
Dolby Digital Plus, HE-AAC
(*Not
Provided)
Deutsch
Schließen Sie das TV-Gerät mit einem HF-Kabel
(75Ω)aneineWandantennenbuchsean.
HINWEIS
Bei Verwendung von mehr als 2 TV-Geräten
y
verwenden Sie einen Signalsplitter.
Ist das Bild schlecht, installieren Sie einen
y
Signalverstärker, um die Bildqualität zu
verbessern.
Wenn die Bildqualität bei angeschlossener
y
Antenne schlecht ist, richten Sie die Antenne
richtig aus.
Antennenkabel und Verstärker sind nicht im
y
Lieferumfang enthalten.
Unterstützter DTV-Ton: MPEG, Dolby Digital,
y
Dolby Digital Plus, HE-AAC
Français
Connectez la TV à une prise d’antenne murale
avecuncâbleRF(75Ω).
REMARQUE
Utilisez un séparateur de signaux pour
y
utiliser plus de deux téléviseurs.
Si la qualité d’image est mauvaise, installez
y
correctement un amplificateur de signaux
pour l’améliorer.
Si vous utilisez une antenne et que la qualité
y
d’image est mauvaise, essayez de réaligner
l’antenne dans la bonne direction.
Le câble et le convertisseur d’antenne ne
y
sont pas fournis.
Technologies audio TNT prises en charge :
y
MPEG, Dolby Digital, Dolby Digital Plus, HEAAC
Italiano
Collegare il televisore all’antenna centralizzata con
uncavoRF(75Ω).
NOTA
Utilizzare uno sdoppiatore del segnale per
y
usare più di 2 televisori.
Se la qualità dell’immagine è scarsa,
y
installare correttamente un amplificatore del
segnale per migliorarla.
Se la qualità dell’immagine è scarsa con
y
un’antenna collegata, provare a riallineare
l’antenna nella direzione corretta.
Il cavo e il convertitore dell’antenna non sono
y
in dotazione.
Audio DTV supportato: MPEG, Dolby Digital,
y
Dolby Digital Plus, HE-AAC
Page 7
MAKING CONNECTIONS
A-7
Español
Conecte la TV a una toma de pared de antena con
uncableRF(75Ω).
NOTA
Emplee un divisor de señal cuando desee
y
utilizar más de dos TV.
Si la imagen es de poca calidad, instale un
y
amplificador de señal correctamente para
mejorar la calidad de imagen.
Si la imagen es de poca calidad con una
y
antena conectada, intente volver a orientar la
antena en la dirección adecuada.
No se suministran el cable de antena ni el
y
conversor.
Audio DTV admitido: MPEG, Dolby Digital,
y
Dolby Digital Plus, HE-AAC
Português
Ligue a TV a uma tomada de antena de parede
comumcaboRF(75Ω).
NOTA
Utilize um separador de sinal se quiser
y
utilizar mais de 2 TVs.
Se a qualidade de imagem for fraca, instale
y
um amplificador de sinal para melhorar a
qualidade de imagem.
Se a qualidade de imagem for fraca mesmo
y
que tenha uma antena ligada, tente orientar
a antena para a direcção correcta.
O cabo da antena e o conversor não são
y
fornecidos.
Áudio DTV suportado: MPEG, Dolby Digital,
y
Dolby Digital Plus, HE-AAC
Ελληνικά
Συνδέστετηντηλεόρασησεμιαυποδοχήκεραίας
στοντοίχομεένακαλώδιοRF(75Ω).
ΣΗΜΕΙΩΣΗ
Χρησιμοποιήστεέναδιαχωριστήσήματοςγια
y
τηνχρήσηπερισσότερωναπό2τηλεοράσεων.
Ανηποιότητατηςεικόναςδενείναικαλή,
y
εγκαταστήστεένανενισχυτήσήματοςγιατη
βελτίωσητηςποιότηταςεικόνας.
Ανηποιότητατηςεικόναςδενείναικαλή
y
μετάτησύνδεσητηςκεραίας,δοκιμάστενα
αλλάξετετονπροσανατολισμότηςκεραίας
στησωστήκατεύθυνση.
Δενπαρέχεταικαλώδιοκεραίαςκαι
y
μετατροπέας.
ΥποστηριζόμενοςήχοςDTV:MPEG,Dolby
y
Digital, Dolby Digital Plus, HE-AAC
Slovenščina
Televizorpriključitevstenskoantenskovtičnicos
kablomRF(75Ω).
OPOMBA
Čeželiteuporabljativečkot2televizorja,
y
uporabite razcepnik za signal.
Čejekakovostslikeslaba,joizboljšajtetako,
y
daustreznonamestiteojačevalniksignala.
Čejekakovostslikeslabainuporabljate
y
anteno, usmerite anteno v ustrezno smer.
Kabelanteneinpretvorniknistapriložena.
y
Podprte oblike zvoka za DTV: MPEG, Dolby
y
Digital, Dolby Digital Plus, HE-AAC
Nederlands
SluitdeTVmetbehulpvaneenRF-kabel(75Ω)
aan op een antenneaansluiting op de muur.
OPMERKING
Gebruik een signaalsplitter om meer dan
y
twee TV’s te gebruiken.
Als de beeldkwaliteit slecht is, installeert u
y
een signaalversterker om de beeldkwaliteit te
verbeteren.
Als de beeldkwaliteit slecht is terwijl een
y
antenne is aangesloten, probeert u de
antenne in de juiste richting te draaien.
Antennekabel en converter worden niet
y
meegeleverd.
Ondersteunde DTV-audio: MPEG, Dolby
y
Digital, Dolby Digital Plus, HE-AAC
Page 8
A
C
E
A-8
MAKING CONNECTIONS
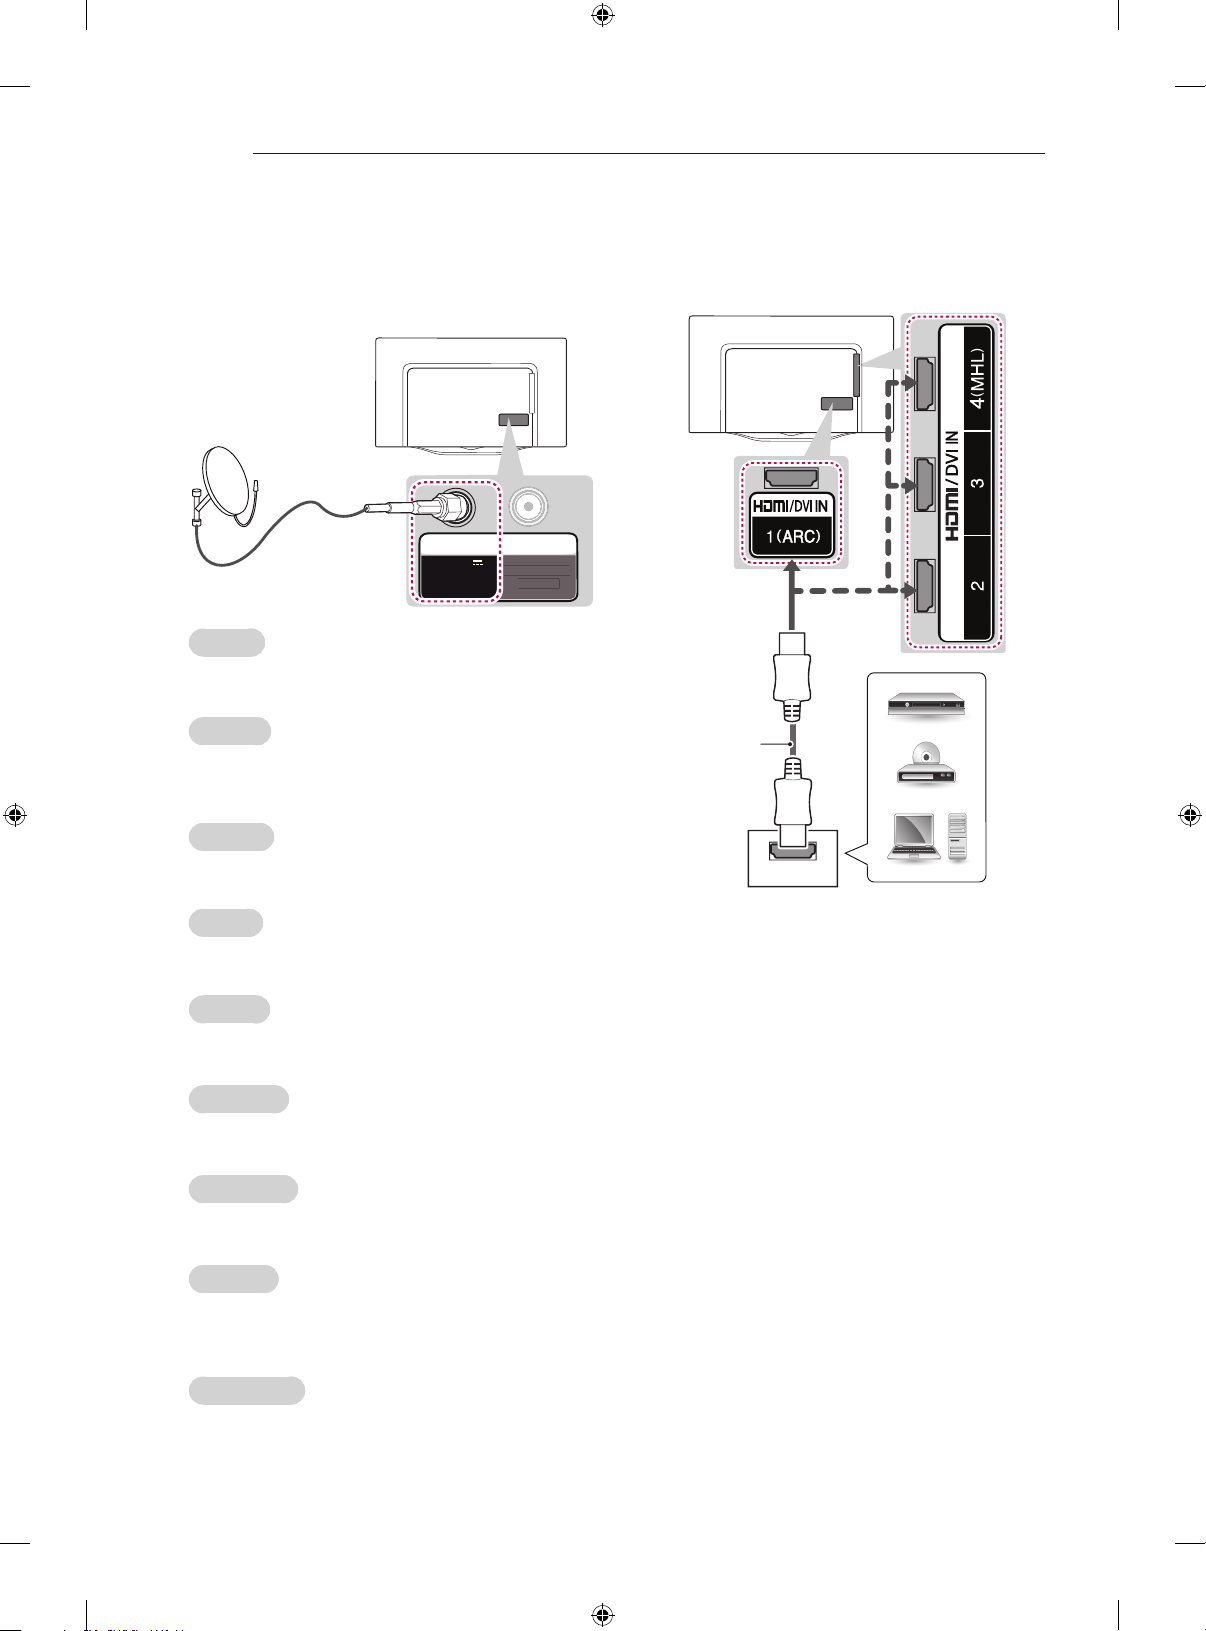
Satellite dish Connection
(Only satellite models)
Satellite
Dish
(*Not
Provided)
English
Connect the TV to a satellite dish to a satellite
socketwithasatelliteRFcable(75Ω).
Deutsch
Schließen Sie das TV-Gerät mit einem Satelliten-
HF-Kabel(75Ω)aneineSatellitenschüsseloder
an eine Satellitenbuchse an.
13/18V
700mA Max
LNB IN
Satellite
IN
NTENNA/
ABL
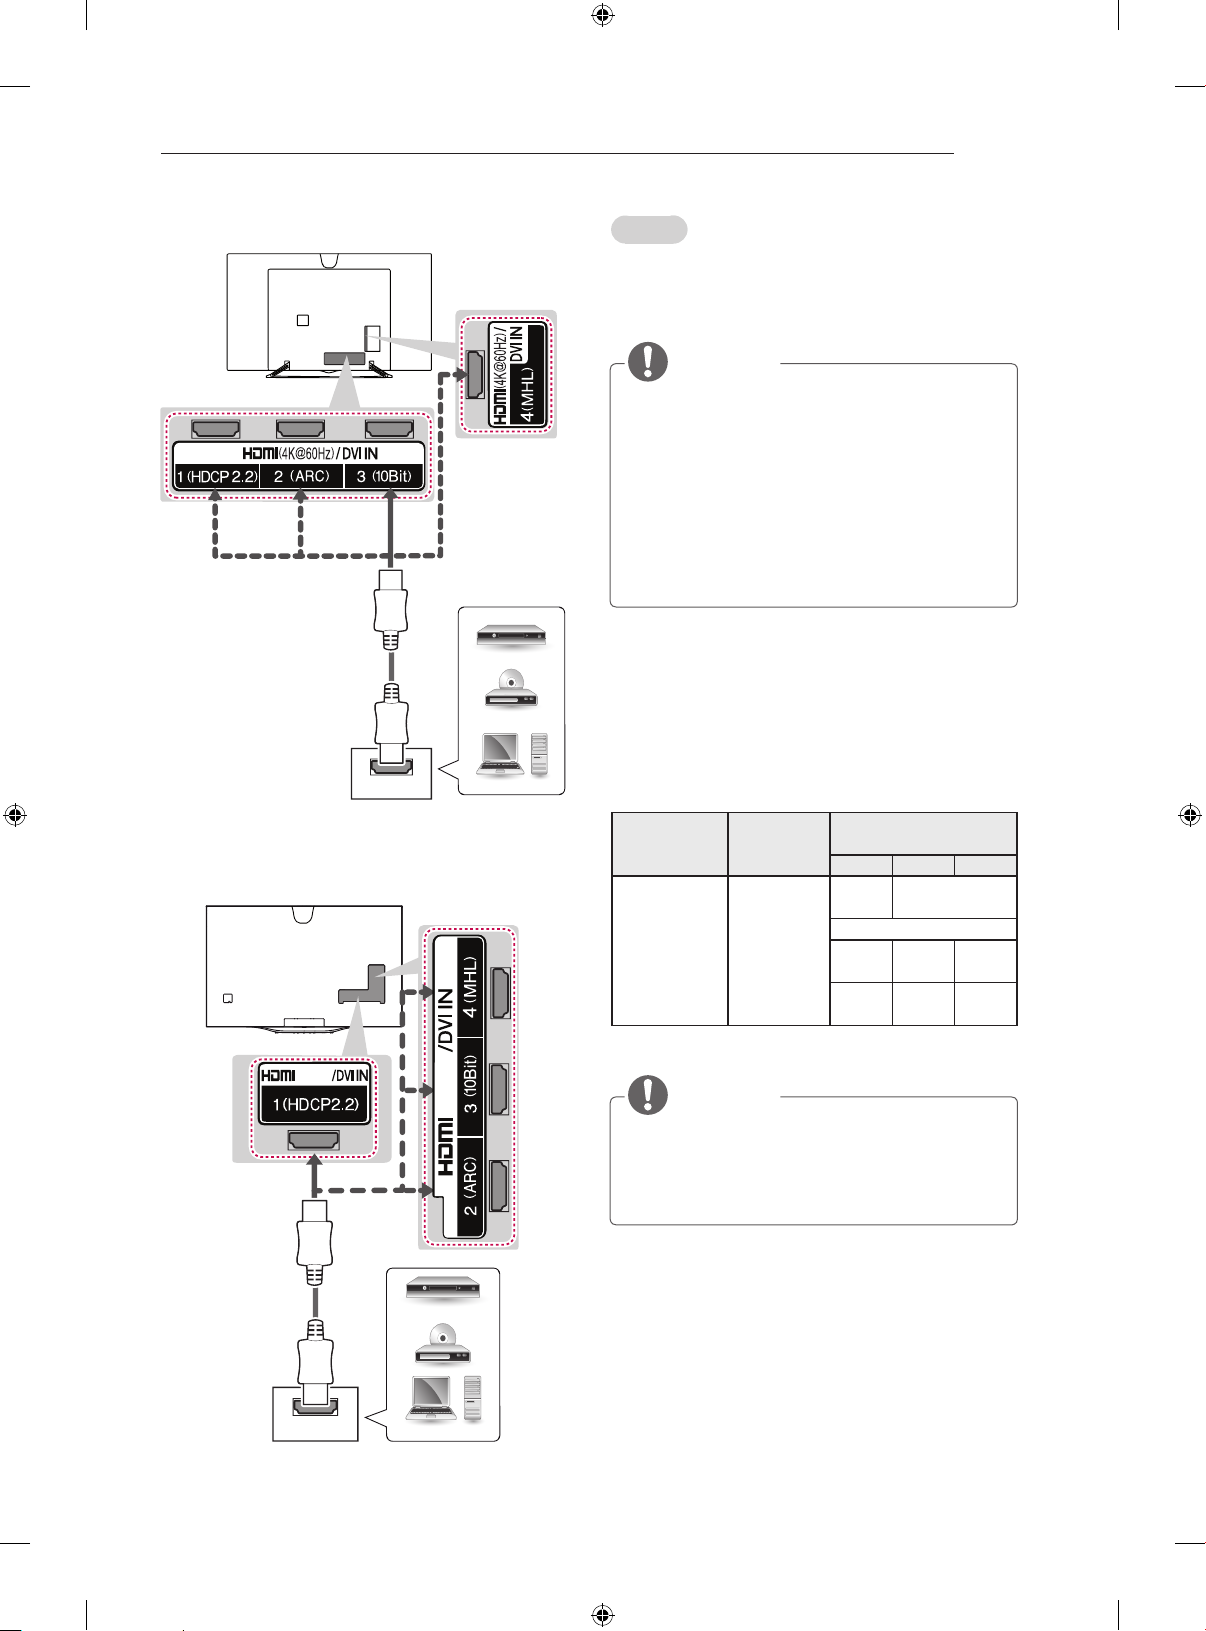
HDMI Connection
(Only EC93**)
(*Not
Provided)
Français
Connectez la TV à une parabole satellite ou à une
prisesatelliteàl’aided’uncâblesatelliteRF(75Ω).
Italiano
Collegare la TV a un’antenna satellitare e a una
presasatellitareconuncavoRFsatellitare(75Ω).
Español
Para conectar la TV a una antena parabólica, enchufe un
cabledeRFdesatéliteaunatomadesatélite(75Ω).
Português
Ligue a TV a uma antena parabólica a uma tomada
desatélitecomumcaboRFparasatélite(75Ω).
Nederlands
Sluit de TV met behulp van een RF-satellietkabel
(75Ω)aanopeensatellietschotel.
Ελληνικά
Συνδέστετηντηλεόρασησεμιαδορυφορικήκεραία,μέσωμιαςδορυφορικήςυποδοχήςμεδορυφορικόκαλώδιο(75Ω).
Slovenščina
SkablomRFzasatelitpovežitetelevizorssatelitskimkrožnikomprekvtičnicezasatelit(75Ω).
HDMI
DVD / Blu-Ray / PC /
HD Cable Box / HD STB
Page 9
MAKING CONNECTIONS
A-9
(Only EC97**)
(Only EC98**)
(4K@60Hz)
HDMI
DVD / Blu-Ray / PC /
HD Cable Box / HD STB
(4K@60Hz)
English
Transmits the digital video and audio signals from
an external device to the TV. Connect the external
device and the TV with the HDMI cable as shown.
NOTE
It is recommended to use the TV with the
y
HDMI connection for the best image quality.
Use the latest High Speed HDMI™ Cable with
y
CEC (Customer Electronics Control) function.
High Speed HDMI™ Cables are tested to
y
carry an HD signal up to 1080p and higher.
Supported HDMI Audio format : Dolby Dig-
y
ital (32Khz, 44.1Khz, 48Khz), DTS(44.1Khz,
48Khz), PCM
(32Khz, 44.1Khz, 48Khz, 96Khz,
192Khz)
(Only EC97**, EC98**)
1) HDMI specifications may be different for each
input port, so make sure to check the device
specifications before connecting.
2) Contact customer service for more information
on the HDMI specifications of each input port.
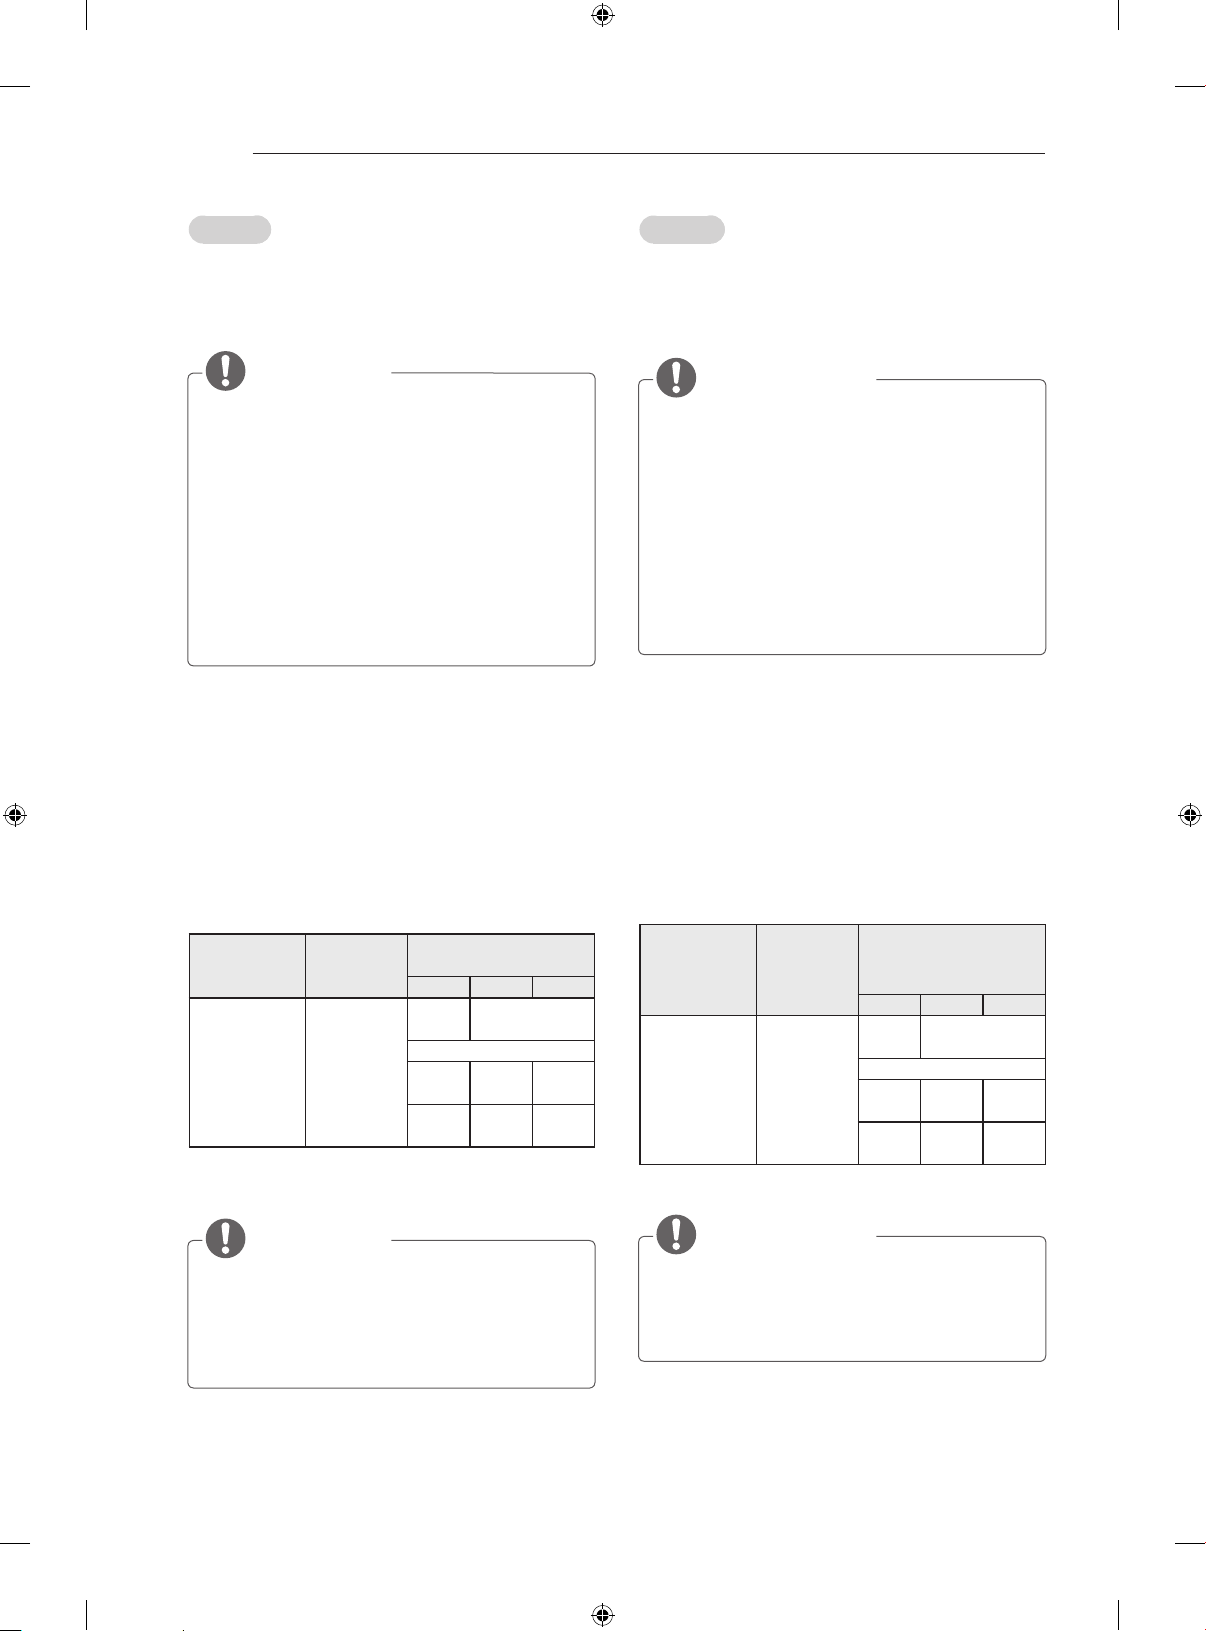
4K @ 50/60 Hz Support Format
Colour Depth /
Chroma Sampling
8 bit 10 bit 12 bit
YCbCr
YCbCr
4:4:4
4:4:4
YCbCr 4:2:0
4:2:0
YCbCr 4:2:2
1
RGB
1
1
- -
- -
Resolution
3840 x 2160p
4096 x 2160p
Frame
rate (Hz)
50.00
59.94
60.00
1: Only Supported at HDMI IN 3 Port
NOTE
When you use HDMI port 3, it is recommended
y
that you use the cable provided.
use a regular HDMI cable, use one that is a
highspeed HDMI cable (3m or less).
If you want to
1
HDMI
DVD / Blu-Ray / PC /
HD Cable Box / HD STB
Page 10
A-10
MAKING CONNECTIONS
Deutsch
Überträgt digitale Video- und Audiosignale von einem
externen Gerät an das TV-Gerät. Verbinden Sie
das externe Gerät, wie in der folgenden Abbildung
gezeigt, mithilfe des HDMI-Kabels mit dem TV-Gerät.
HINWEIS
Für optimale Bildqualität wird empfohlen, den
y
HDMI-Anschluss des TV-Gerätes zu verwenden.
Verwenden Sie das neueste Hochgeschwindigkeits-
y
HDMI™-Kabel mit CEC-Funktion
Electronics Control).
High-Speed-HDMI™-Kabel sind für die Übertra-
y
gung von HD-Signalen bis zu 1080p und höher
getestet.
Unterstütztes HDMI-Audioformat: Dolby
y
Digital(32Khz, 44.1Khz, 48Khz), DTS(44.1Khz,
48Khz), PCM(32Khz, 44.1Khz, 48Khz, 96Khz,
192Khz)
(Nur EC97**, EC98**)
1) Die HDMI-Spezifikationen können für jeden
Eingangsanschluss unterschiedlich sein.
Überprüfen Sie deshalb die Spezifikationen des
Geräts, bevor Sie es anschließen.
2) Für mehr Informationen zu den HDMI Spezifikationen für jeden Eingang wenden Sie
sich an den Kundenservice.
Unterstütztes Format: 4K bei 50/60 Hz
Auflösung
3840 x 2160p
4096 x 2160p
Bildrate
(Hz)
50.00
59.94
60.00
1: Wird nur bei einem HDMI IN 3-Anschluss unterstützt
(Customer
Farbtiefe/Chroma-
Abtastrate
8 bit 10 bit 12 bit
YCbCr
YCbCr
4:4:4
4:4:4
YCbCr 4:2:0
4:2:0
YCbCr 4:2:2
1
RGB
1
1
- -
- -
Français
Permet de transmettre les signaux vidéo et audio
numériques d’un périphérique externe vers la TV.
Connectez le périphérique externe et la TV avec le
câble HDMI comme indiqué sur l’illustration suivante.
REMARQUE
Pour obtenir une meilleure qualité d’image, il est
y
recommandé d’utiliser la TV avec une connexion
HDMI.
Utilisez le tout nouveau câble haut débit HDMI™
y
avec la fonction CEC (contrôles électroniques
client).
Les câbles HDMI™ haut débit sont testés pour
y
transporter un signal HD de 1080p ou supérieur.
Formats audio HDMI pris en charge : Dolby Digital
y
(32Khz, 44.1Khz, 48Khz), DTS(44.1Khz, 48Khz),
PCM(32Khz, 44.1Khz, 48Khz, 96Khz, 192Khz)
(Uniquement EC97**, EC98**)
1) les caractéristiques HDMI pouvant être différentes
pour chaque port de source d’entrée, nous vous
conseillons de consulter les caractéristiques du
périphérique avant d’effectuer la connexion.
2) Contactez le service clientèle pour obtenir plus
d’informations concernant les caractéristiques
HDMI de chaque port d’entrée.
Format de prise en charge 4K @ 50/60 Hz
Résolution
d’image
(Hz)
Fréquence
1
3840 x 2160p
4096 x 2160p
50.00
59.94
60.00
1: Pris en charge uniquement par le port HDMI IN 3
Profondeur de
couleur / Taux
d’échantillonnage
8 bit 10 bit 12 bit
YCbCr
4:2:0
YCbCr 4:2:2
YCbCr
1
4:4:4
RGB
1
4:4:4
YCbCr 4:2:0
1
- -
- -
1
HINWEIS
Es wird empfohlen, das mitgelieferte HDMI-
y
Kabel (HDMI-Anschluss 3) zu verwenden. Wenn
Sie sich für ein handelsübliches HDMI-Kabel entscheiden, verwenden Sie ein High-Speed-HDMIKabel (3 m oder kürzer).
REMARQUE
Lors de l’utilisation d’un câble HDMI (port HDMI
y
3), il est recommandé d’utiliser le câble fourni.
Si vous utilisez un câble HDMI conventionnel,
utilisez un câble HDMI haut débit (max. 3 m).
Page 11
MAKING CONNECTIONS
A-11
Italiano
Il segnale digitale audio e video viene trasmesso
da un dispositivo esterno al televisore. Collegare il
dispositivo esterno e il televisore mediante il cavo
HDMI come mostrato nell’illustrazione di seguito.
NOTA
Si consiglia di utilizzare il televisore con il col-
y
legamento HDMI per ottenere la migliore qualità
delle immagini.
Utilizzare un cavo HDMI™ ad alta velocità dotato
y
dei requisiti più recenti con funzione CEC (Customer Electronics Control).
I cavi HDMI™ ad alta velocità sono testati per tras-
y
mettere un segnale HD fino a 1080p e superiore.
Formato audio HDMI supportato: Dolby Digital
y
(32Khz, 44.1Khz, 48Khz), DTS(44.1Khz, 48Khz),
PCM(32Khz, 44.1Khz, 48Khz, 96Khz, 192Khz)
(Solo EC97**, EC98**)
1) Le specifiche HDMI potrebbero differire per ogni
porta d’ingresso; pertanto, controllare le specifiche
del dispositivo prima del collegamento.
2) Contattare il servizio clienti per ulteriori informazioni
sulle specifiche HDMI di ciascuna porta d’ingresso.
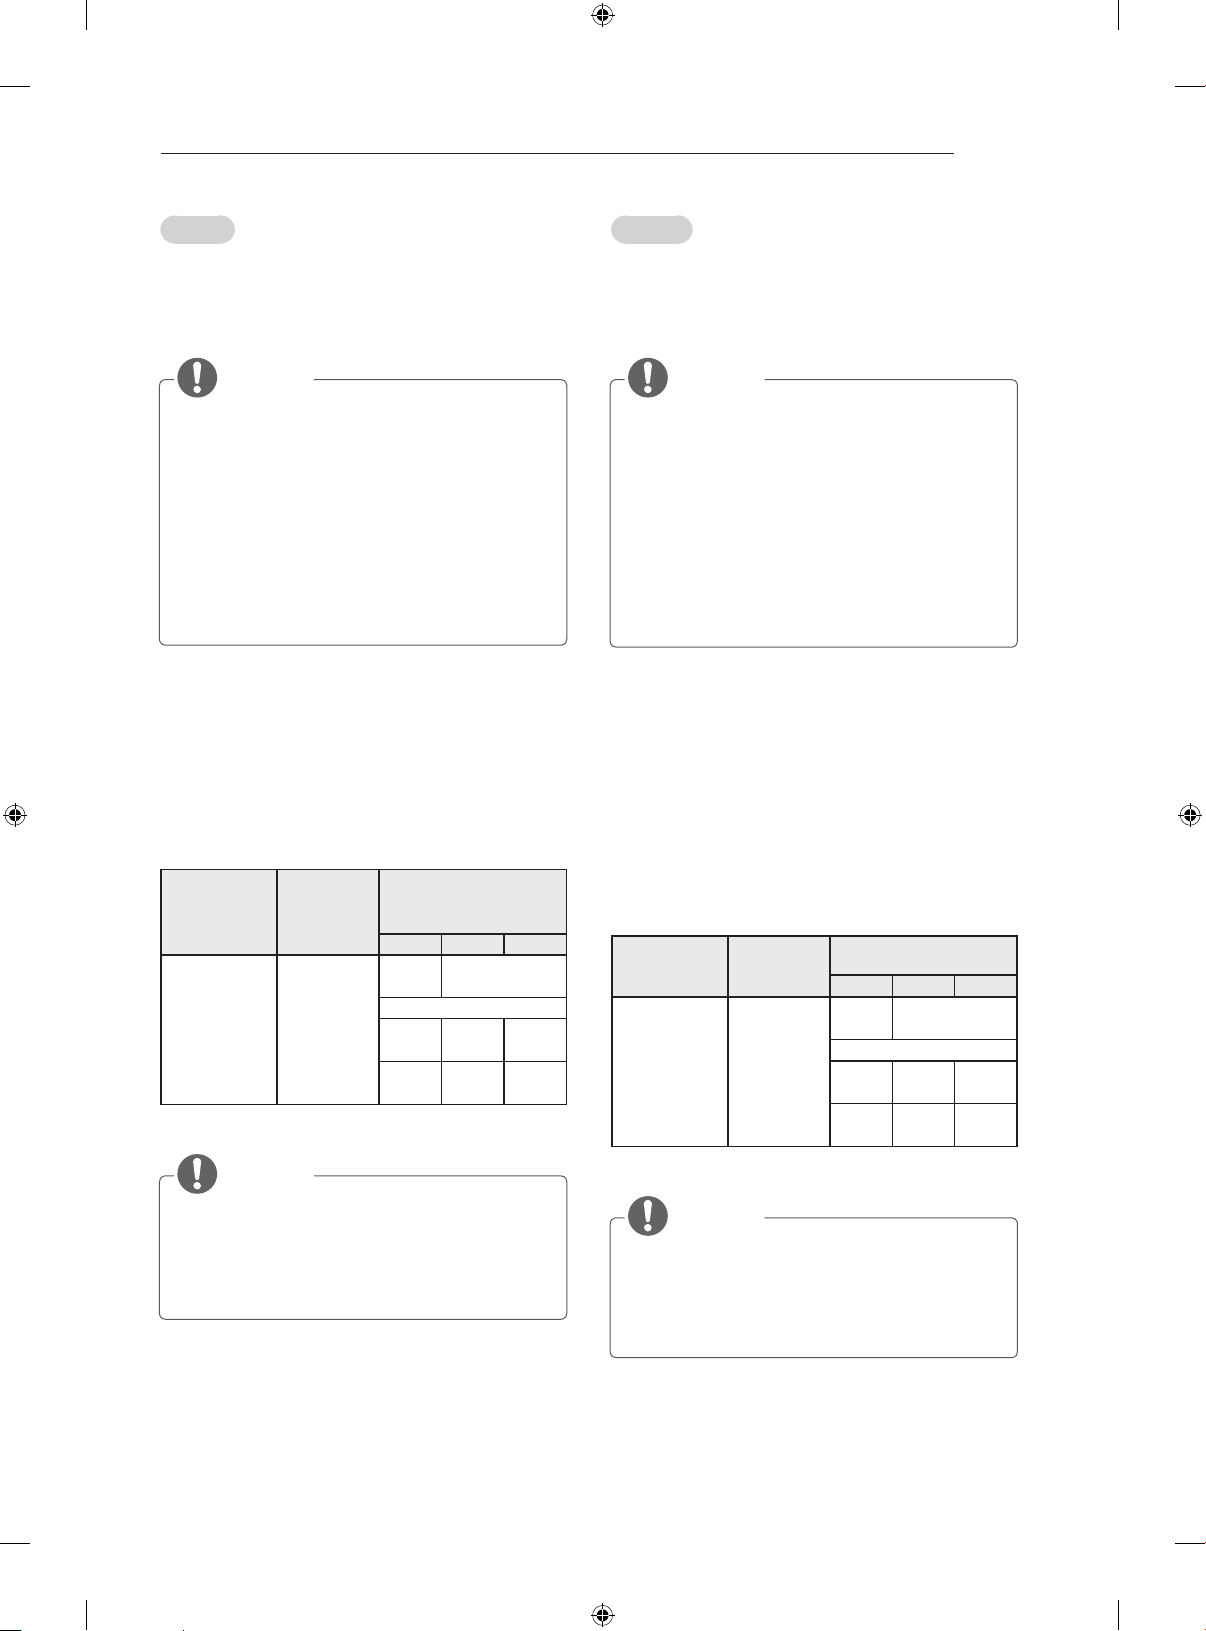
Formato supportato: 4K a 50/60 Hz
Intensità di colore/
Campionamento dei
colori
8 bit 10 bit 12 bit
YCbCr
YCbCr
4:4:4
4:4:4
YCbCr 4:2:0
4:2:0
YCbCr 4:2:2
1
RGB
1
1
- -
- -
1
Risoluzione
3840 x 2160p
4096 x 2160p
Frequenza
fotogram-
mi (Hz)
50.00
59.94
60.00
1: Supportato solo sulla porta HDMI IN 3
NOTA
Se si utilizza un cavo HDMI (HDMI 3 porte), si
y
consiglia di utilizzare il cavo fornito. Se si utilizza
un normale cavo HDMI, utilizzare un cavo HDMI
ad alta velocità (lunghezza uguale o inferiore a 3
m) a seconda del modello.
Español
Transmite las señales de audio y vídeo digital de
un dispositivo externo a la TV. Use el cable HDMI
para conectar el dispositivo externo a la TV, tal y
como se muestra en la siguiente ilustración.
NOTA
Se recomienda usar la conexión HDMI de la TV
y
para obtener la mejor calidad de imagen.
Utilice el cable HDMI™ de alta velocidad más re-
y
ciente con la función CEC (control de electrónica
de consumo).
Los cables HDMI™ de alta velocidad están
y
preparados para transportar una señal HD de
1080p o superior.
Formato de audio HDMI admitido: Dolby Digital
y
(32Khz, 44.1Khz, 48Khz), DTS(44.1Khz, 48Khz),
PCM(32Khz, 44.1Khz, 48Khz, 96Khz, 192Khz)
(Solo EC97**, EC98**)
Las especificaciones de HDMI pueden ser
1)
diferentes para cada puerto de entrada, por lo que
debe asegurarse de comprobar las especificaciones
del dispositivo antes de conectarlo.
2) Póngase en contacto con el servicio de atención
al cliente para obtener más información sobre
las especificaciones de HDMI de cada puerto de
entrada.
Formato compatible con 4K a 50/60 Hz
Resolución
3840 x 2160p
4096 x 2160p
Velocidad de
fotogramas
(Hz)
50.00
59.94
60.00
Profundidad de color /
Muestreo de color
8 bit 10 bit 12bit
YCbCr
YCbCr
4:4:4
4:4:4
YCbCr 4:2:0
4:2:0
YCbCr 4:2:2
1
RGB
1
1
- -
- -
1: Solo compatible en el puerto HDMI IN 3
NOTA
Cuando use un cable HDMI (puerto HDMI3), se
y
recomienda que use el cable proporcionado. Si
utiliza un cable HDMI convencional, asegúrese
de que se trata de un cable de alta velocidad (3
m o menos).
1
Page 12
A-12
MAKING CONNECTIONS
Português
Transmite os sinais digitais de vídeo e áudio
de um dispositivo externo para a TV. Ligue o
dispositivo externo à TV com o cabo HDMI,
conforme demonstrado na ilustração.
NOTA
Recomenda-se a utilização da TV com a ligação
y
HDMI para uma melhor qualidade de imagem.
Utilize o mais recente cabo HDMI™ de alta ve-
y
locidade com função CEC (Customer Electronics
Control).
Os cabos HDMI™ de alta velocidade foram
y
testados para executar um sinal HD até 1080p e
superior.
Formato de áudio HDMI suportado: Dolby Digital
y
(32Khz, 44.1Khz, 48Khz), DTS(44.1Khz, 48Khz),
PCM(32Khz, 44.1Khz, 48Khz, 96Khz, 192Khz)
(Apenas EC97**, EC98**)
1) As especificações de HDMI poderão variar entre
as portas de entrada, pelo que deve verificar as
especificações do dispositivo antes de estabelecer
a ligação.
2) Contacte o apoio ao cliente para obter mais
informações sobre as especificações de HDMI
de cada porta de entrada.
Nederlands
U kunt de digitale video- en audiosignalen vanaf
een extern apparaat naar de TV zenden. Sluit
het externe apparaat en de TV op elkaar aan met
behulp van de HDMI-kabel, zoals aangegeven in
de volgende afbeelding.
OPMERKING
Wij raden u aan de TV aan te sluiten door mid-
y
del van een HDMI-verbinding voor de hoogste
beeldkwaliteit.
Gebruik de nieuwste High Speed HDMI™-kabel
y
met CEC-functie (Customer Electronics Control).
HDMI™-kabels van het type High Speed zijn
y
getest op het verzenden van HD-signalen tot
1080p en hoger.
Ondersteunde HDMI-audio-indeling: Dolby Digital
y
(32Khz, 44.1Khz, 48Khz), DTS(44.1Khz, 48Khz),
PCM(32Khz, 44.1Khz, 48Khz, 96Khz, 192Khz)
(Alleen EC97**, EC98**)
1) HDMI-specificaties kunnen per ingangspoort
verschillen, controleer dus de apparaatspecificaties
voordat u het aansluit
2) Neem contact op met de klantenservice voor meer
informatie over de HDMI-specificaties van iedere
ingangspoort.
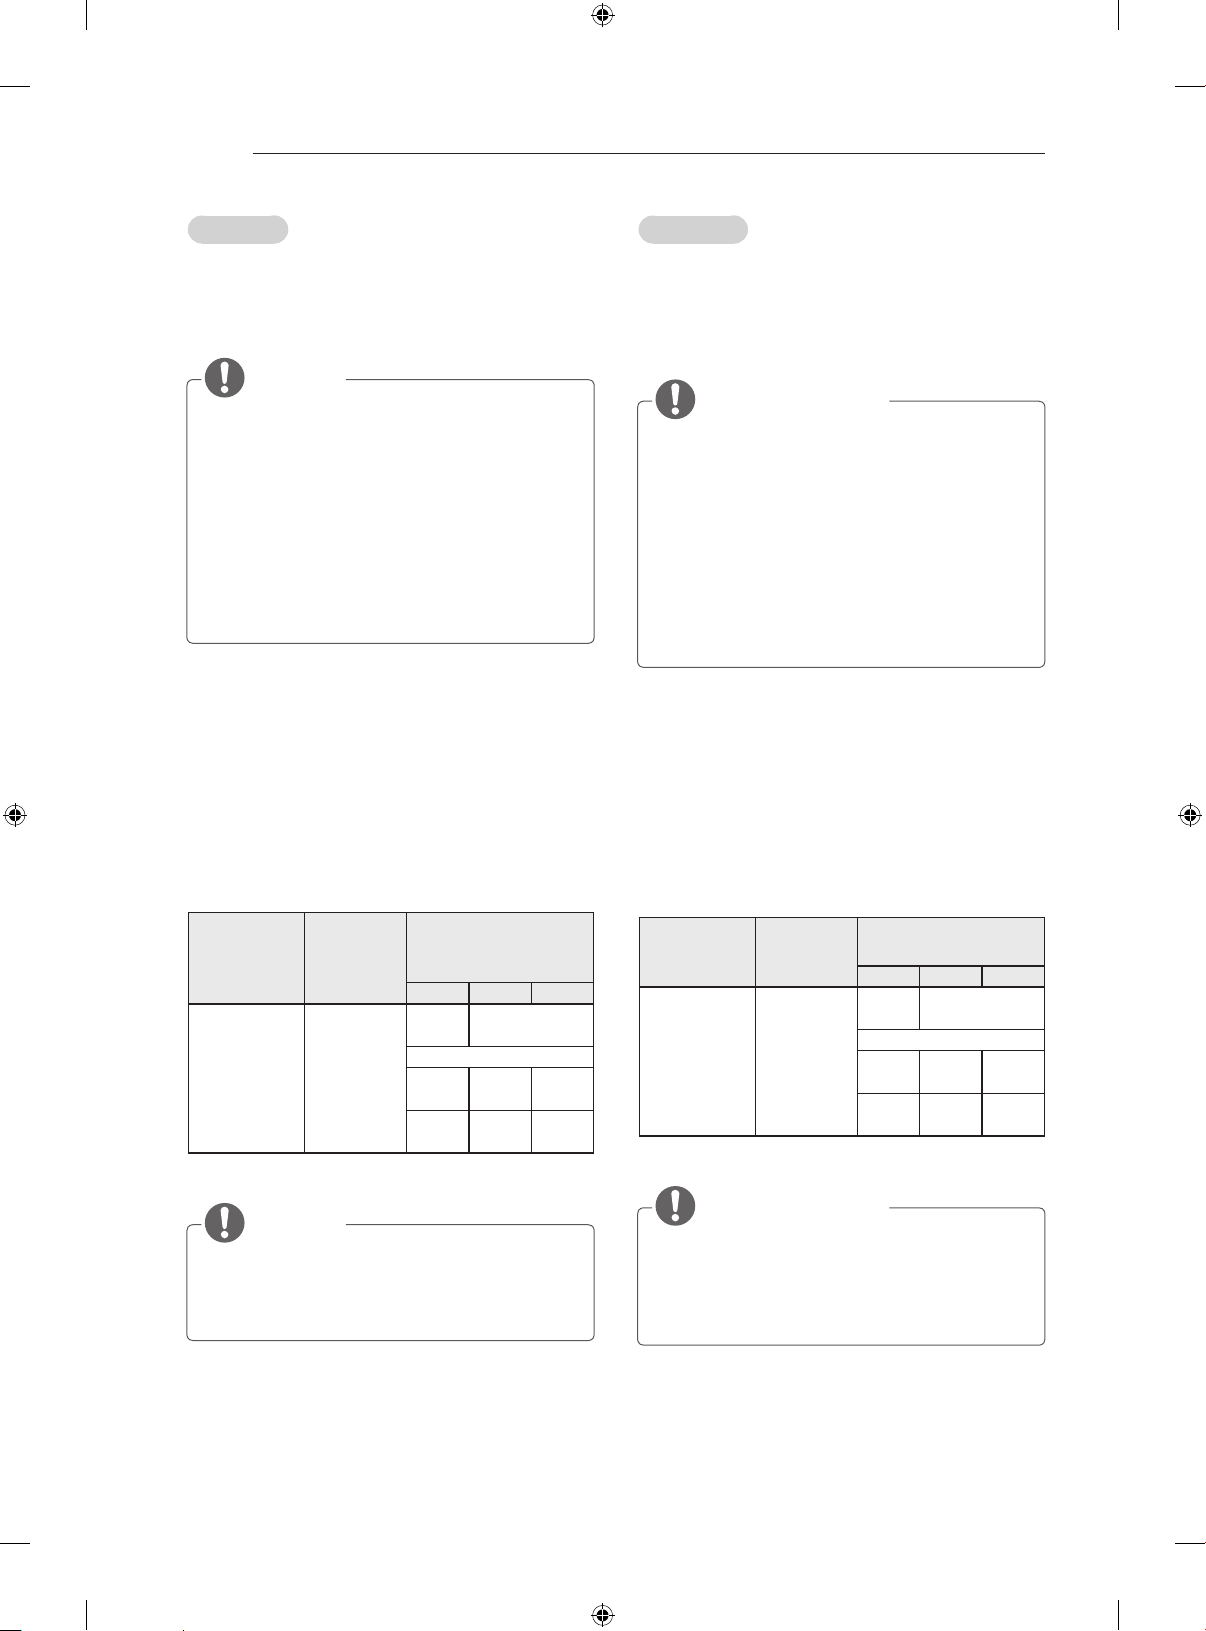
Formato suportado: 4K a 50/60 Hz
Profundidade de
Resolução
Velocidade
de frames
(Hz)
cores / amostragem
de cores
8 bit 10 bit 12 bit
3840 x 2160p
4096 x 2160p
50.00
59.94
60.00
YCbCr
YCbCr
4:4:4
4:4:4
YCbCr 4:2:0
4:2:0
YCbCr 4:2:2
1
RGB
1
- -
- -
1: Suportado apenas na porta HDMI IN 3
NOTA
Se utilizar um cabo HDMI (porta HDMI 3),
y
recomenda-se a utilização do cabo fornecido. Se
utilizar um cabo HDMI comum, utilize um cabo
HDMI de alta velocidade (3 m ou menos).
Ondersteuning voor 4K bij 50/60 Hz
Resolutie
heid
(Hz)
1
Framesnel-
1
3840 x 2160p
4096 x 2160p
50.00
59.94
60.00
Kleurdiepte /
kleurbemonstering
8 bit 10 bit 12 bit
YCbCr
YCbCr
4:4:4
4:4:4
YCbCr 4:2:0
4:2:0
YCbCr 4:2:2
1
RGB
1
1
- -
- -
1
1: Alleen ondersteund met HDMI IN 3-poort
OPMERKING
Als u een HDMI-kabel (HDMI 3-poorts) gebruikt,
y
raden we u aan om de meegeleverde kabel te
gebruiken. Als u een normale HDMI-kabel gebruikt, dan dient u een High Speed HDMIkabel
(niet langer dan 3 meter) te gebruiken.
Page 13
MAKING CONNECTIONS
A-13
Ελληνικά
Μεταδίδειταψηφιακάσήματαεικόναςκαιήχου
απόμιαεξωτερικήσυσκευήστηντηλεόραση.Συνδέστετηνεξωτερικήσυσκευήκαιτηντηλεόραση
μετοκαλώδιοHDMI,όπωςφαίνεταιστηνπαρακάτωεικόνα.
ΣΗΜΕΙΩΣΗ
Γιατηβέλτιστηποιότηταεικόνας,χρησιμοποιήστε
y
τηντηλεόρασημεσύνδεσηHDMI.
ΧρησιμοποιήστετοκαλώδιοHDMI™υψηλής
y
ταχύτηταςμελειτουργίαCEC(CustomerElectronics Control).
ΤακαλώδιαHDMI™υψηλήςταχύτηταςέχουν
y
ελεγχθείγιατημετάδοσησήματοςHDανάλυσης
έως1080pήυψηλότερης.
ΥποστηριζόμενημορφήήχουHDMI:DolbyDigital
y
(32Khz, 44.1Khz, 48Khz), DTS(44.1Khz, 48Khz),
PCM(32Khz, 44.1Khz, 48Khz, 96Khz, 192Khz)
(ΜόνογιαταμοντέλαEC97**,EC98**)
1)ΟιπροδιαγραφέςHDMIμπορείναδιαφέρουνγια
κάθεθύραεισόδου,οπότεφροντίστεναελέγχετε
τιςπροδιαγραφέςτηςσυσκευήςπριναπότησύνδεση.
2)Επικοινωνήστεμετηνεξυπηρέτησηπελατών
γιαπερισσότερεςπληροφορίεςσχετικάμετις
προδιαγραφέςHDMIκάθεθύραςεισόδου.
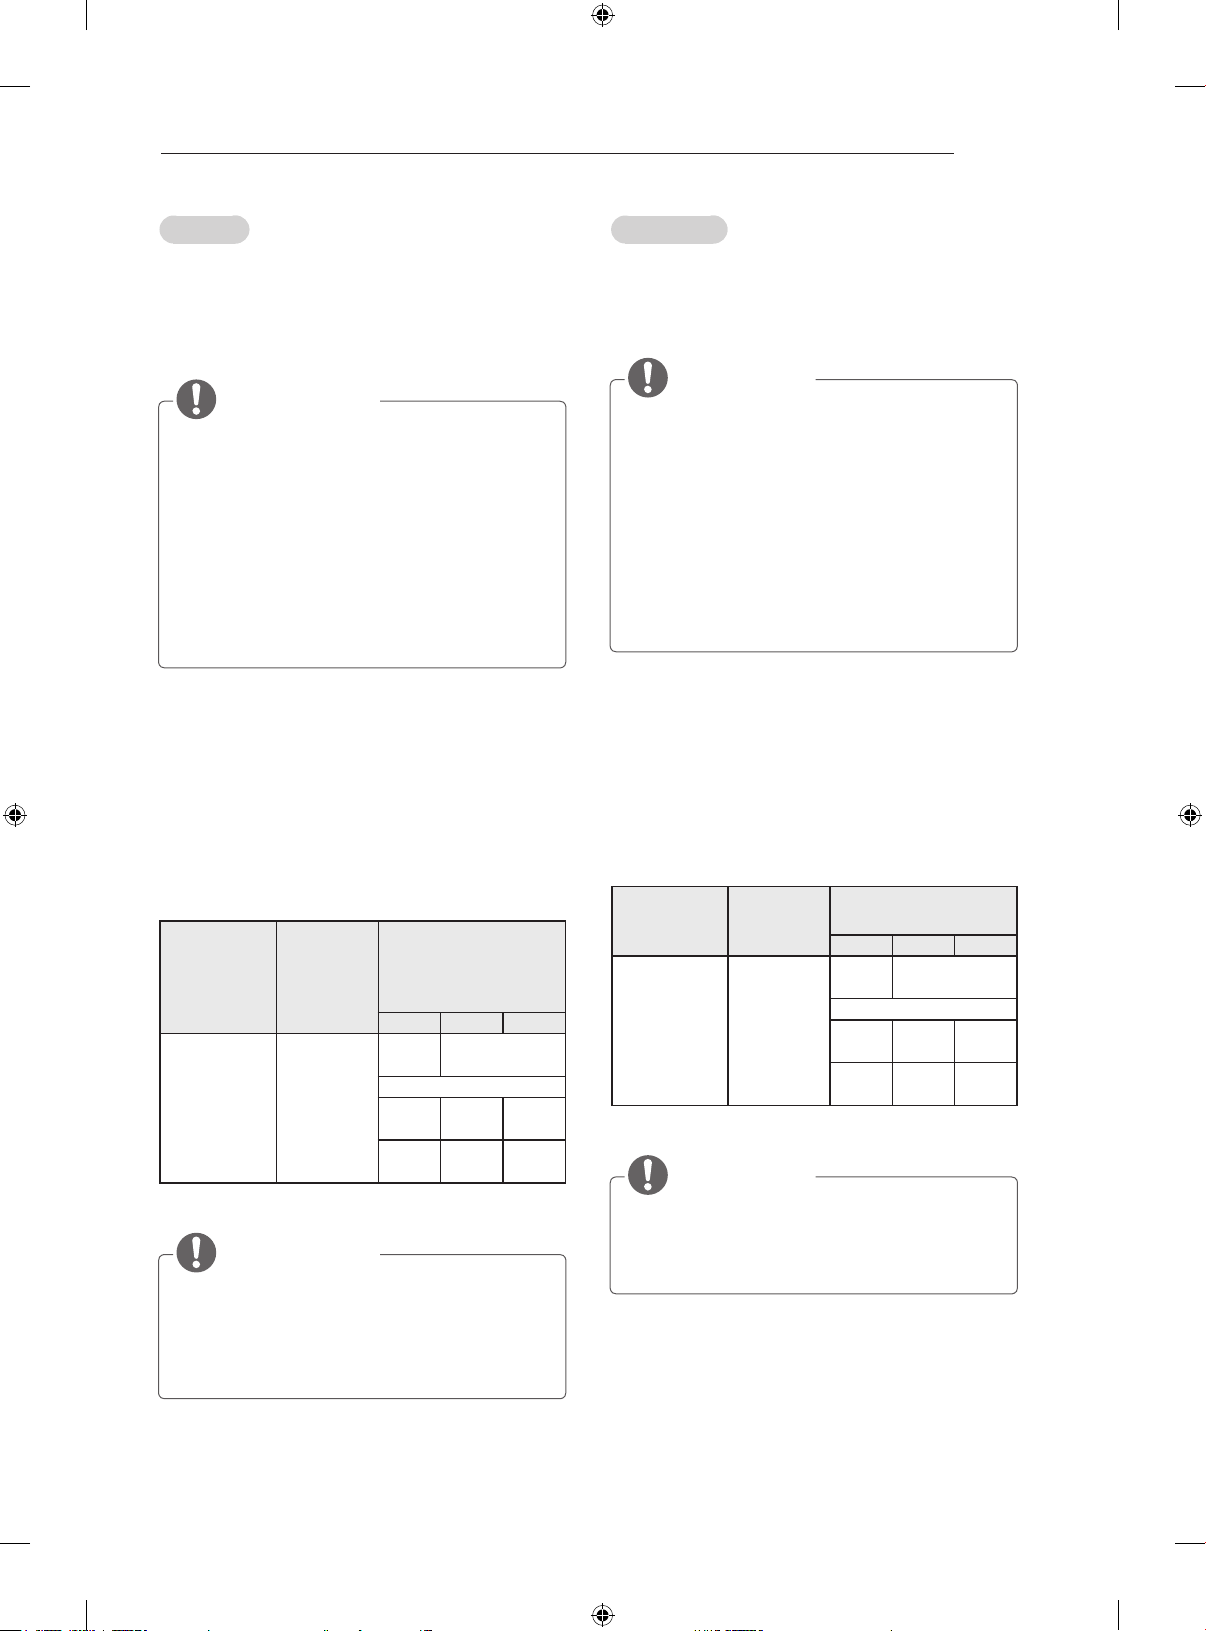
Υποστήριξημορφής4Kστα50/60Hz
Βάθος χρώματος
/ Δειγματοληψία
χρωματικής
διαφοράς
Ανάλυση
Ρυθμός
καρέ (Hz)
8 bit 10 bit 12 bit
3840 x 2160p
4096 x 2160p
50.00
59.94
60.00
YCbCr
YCbCr
4:4:4
4:4:4
YCbCr 4:2:0
4:2:0
YCbCr 4:2:2
1
RGB
1
1
- -
- -
1:ΥποστηρίζεταιμόνοστηθύραHDMI IN 3
ΣΗΜΕΙΩΣΗ
ΓιαχρήσηκαλωδίουHDMI(HDMIport3),
y
συνιστάταιηχρήσητουπαρεχόμενουκαλωδίου.
ΑνχρησιμοποιείτεένακανονικόκαλώδιοHDMI,
χρησιμοποιήστεένακαλώδιοHDMIυψηλής
ταχύτητας(μέχρι3μέτρα).
Slovenščina
Prenašadigitalnevideoinzvočnesignaleizzunanje
napravenatelevizor.Povežitezunanjonapravo
in televizor s HDMI-kablom, kot je prikazano na
naslednji sliki.
OPOMBA
Zanajboljšokakovostslikepriporočamouporabo
y
televizorja s HDMI-povezavo.
Uporabite najnovejši kabel HDMI™ za hitri
y
prenos s funkcijo CEC (Customer Electronics
Control).
Kabli HDMI™ za hitri prenos so preizkušeni, tako
y
dalahkoprenašajosignalvisokeločljivostido
1080pinveč.
Podprte oblike zvoka za HDMI: Dolby Digital
y
(32Khz, 44.1Khz, 48Khz), DTS(44.1Khz, 48Khz),
PCM(32Khz, 44.1Khz, 48Khz, 96Khz, 192Khz)
(Samo modeli EC97**, EC98**)
1) Specifikacije HDMI posameznih vhodnih vrat se
lahkorazlikujejo,zatojihpreveritepredpriključitvijo.
2)
ZavečinformacijospecifikacijahHDMI
posameznih vhodnih vrat se obrnite na oddelek
zapomočuporabnikom.
Podprteoblikeločljivosti4Kpri50in60Hz
Barvna globina /
vzorčenje krominance
8 bit 10 bit 12 bit
Ločljivost
Hitrost
sličic (Hz)
YCbCr
4:2:0
3840 x 2160p
1
4096 x 2160p
50.00
59.94
60.00
YCbCr 4:2:2
YCbCr
1
4:4:4
RGB
1
4:4:4
1: Podprto samo na vratih HDMI IN 3
OPOMBA
ČenameravateuporabitikabelHDMI(vrata
y
HDMI3),priporočamo,dauporabitepriloženi
kabel.ČebosteuporabilinavadenkabelHDMI,
uporabitetakegazahitriprenos(dolžinedo3m).
YCbCr 4:2:0
1
- -
- -
1
Page 14

A-14
MAKING CONNECTIONS
ARC (Audio Return Channel)
English
An external audio device that supports
y
SIMPLINK and ARC must be connected
using HDMI/DVI IN 1 (ARC) or HDMI(4K @
60 Hz)/DVI IN 2 (ARC) port.
When connected with a high-speed HDMI
y
cable, the external audio device that
supports ARC outputs optical SPDIF without
additional optical audio cable and supports
the SIMPLINK function.
Deutsch
Ein externes Audiogerät, das SIMPLINK und
y
ARC unterstützt, muss über den HDMI/DVI
IN 1 (ARC)- oder HDMI(4K @ 60 Hz)/DVI IN
2 (ARC)-Anschluss verbunden werden.
Wenn der Anschluss mit einem High-
y
Speed HDMI-Kabel erfolgt, gibt das externe
Audiogerät, das ARC unterstützt, SPDIF
ohne zusätzliches optisches Audiokabel aus
und unterstützt die SIMPLINKFunktion.
Français
Un périphérique audio externe prenant en
y
charge SIMPLINK et ARC doit être connecté
à l’aide du port HDMI/DVI IN 1 (ARC) ou
HDMI(4K @ 60 Hz)/DVI IN 2 (ARC).
Si vous reliez un câble HDMI haut débit,
y
le périphérique audio externe qui prend en
charge les sorties ARC, prend également en
charge la sortie optique SPDIF sans câble
audio optique supplémentaire, ainsi que la
fonction SIMPLINK.
Italiano
Un dispositivo audio esterno che supporta
y
SIMPLINK e ARC deve essere collegato
tramite la porta HDMI/DVI IN 1 (ARC) o
HDMI(4K @ 60 Hz)/DVI IN 2 (ARC).
Se si effettua il collegamento con un cavo
y
HDMI ad alta velocità, il dispositivo audio
esterno che supporta ARC trasmette il segnale SPDIF senza il cavo ottico aggiuntivo e
supporta la funzione SIMPLINK.
Español
Hay que conectar un dispositivo de audio
y
externo que admita SIMPLINK y ARC
utilizando el puerto HDMI/DVI IN 1 (ARC) o
HDMI(4K @ 60 Hz)/DVI IN 2 (ARC).
Cuando esté conectado mediante un cable
y
HDMI de alta velocidad, el dispositivo de audio
externo que admite ARC emite el SPDIF óptico
sin necesidad de un cable óptico de audio
adicional y admite la función SIMPLINK.
Português
É necessário ligar um dispositivo de áudio
y
externo que suporte SIMPLINK e ARC
utilizando as portas HDMI/DVI IN 1 (ARC) ou
HDMI(4K @ 60 Hz)/DVI IN 2 (ARC).
Quando ligado a um cabo HDMI de alta
y
velocidade, o aparelho de áudio externo que
suporta ARC transmite SPDIF óptica sem
um cabo de áudio óptico adicional e suporta
a função SIMPLINK.
Nederlands
Een extern audioapparaat dat ondersteuning
y
biedt voor SIMPLINK en ARC moet met
behulp van de HDMI/DVI IN 1 (ARC)- of
HDMI(4K @ 60 Hz)/DVI IN 2 (ARC)-poort
worden aangesloten.
Bij aansluiting met een High Speed HDMIkabel
y
zorgt het externe audioapparaat met ARCondersteuning ervoor dat optische SPDIF wordt
uitgevoerd zonder extra optische audiokabel, en
ondersteunt dit apparaat de SIMPLINK-functie.
Ελληνικά
Μιαεξωτερικήσυσκευήήχουηοποία
y
υποστηρίζειτιςλειτουργίεςSIMPLINKκαι
ARCπρέπεινασυνδεθείμέσωτηςθύρας
HDMI/DVI IN 1 (ARC)ήHDMI(4K @ 60 Hz)/
DVI IN 2 (ARC).
ΚατάτησύνδεσημεκαλώδιοHDMIυψηλής
y
ταχύτητας,ηεξωτερικήσυσκευήήχουπου
υποστηρίζειτοARCπαρέχειοπτικόσήμα
SPDIFχωρίςπρόσθετοοπτικόκαλώδιοήχου
καιυποστηρίζειτηνλειτουργίαSIMPLINK.
Slovenščina
Zunanjozvočnonapravo,kipodpira
y
SIMPLINKinARC,priključitevvrataHDMI/
DVI IN 1 (ARC) ali HDMI(4K @ 60 Hz)/DVI
IN 2 (ARC).
ČejopovežeteskablomHDMIzahitri
y
prenos,zunanjazvočnanaprava,kipodpira
funkcijoARC,oddajaoptičnizapisSPDIF
brezdodatnegaoptičnegazvočnegakablain
podpira funkcijo SIMPLINK.
Page 15
MAKING CONNECTIONS
IN
AV2
( Audio in)
IN
AV2
( Audio in)
E
AV2
( Audio in)
CO
2
( )
A-15
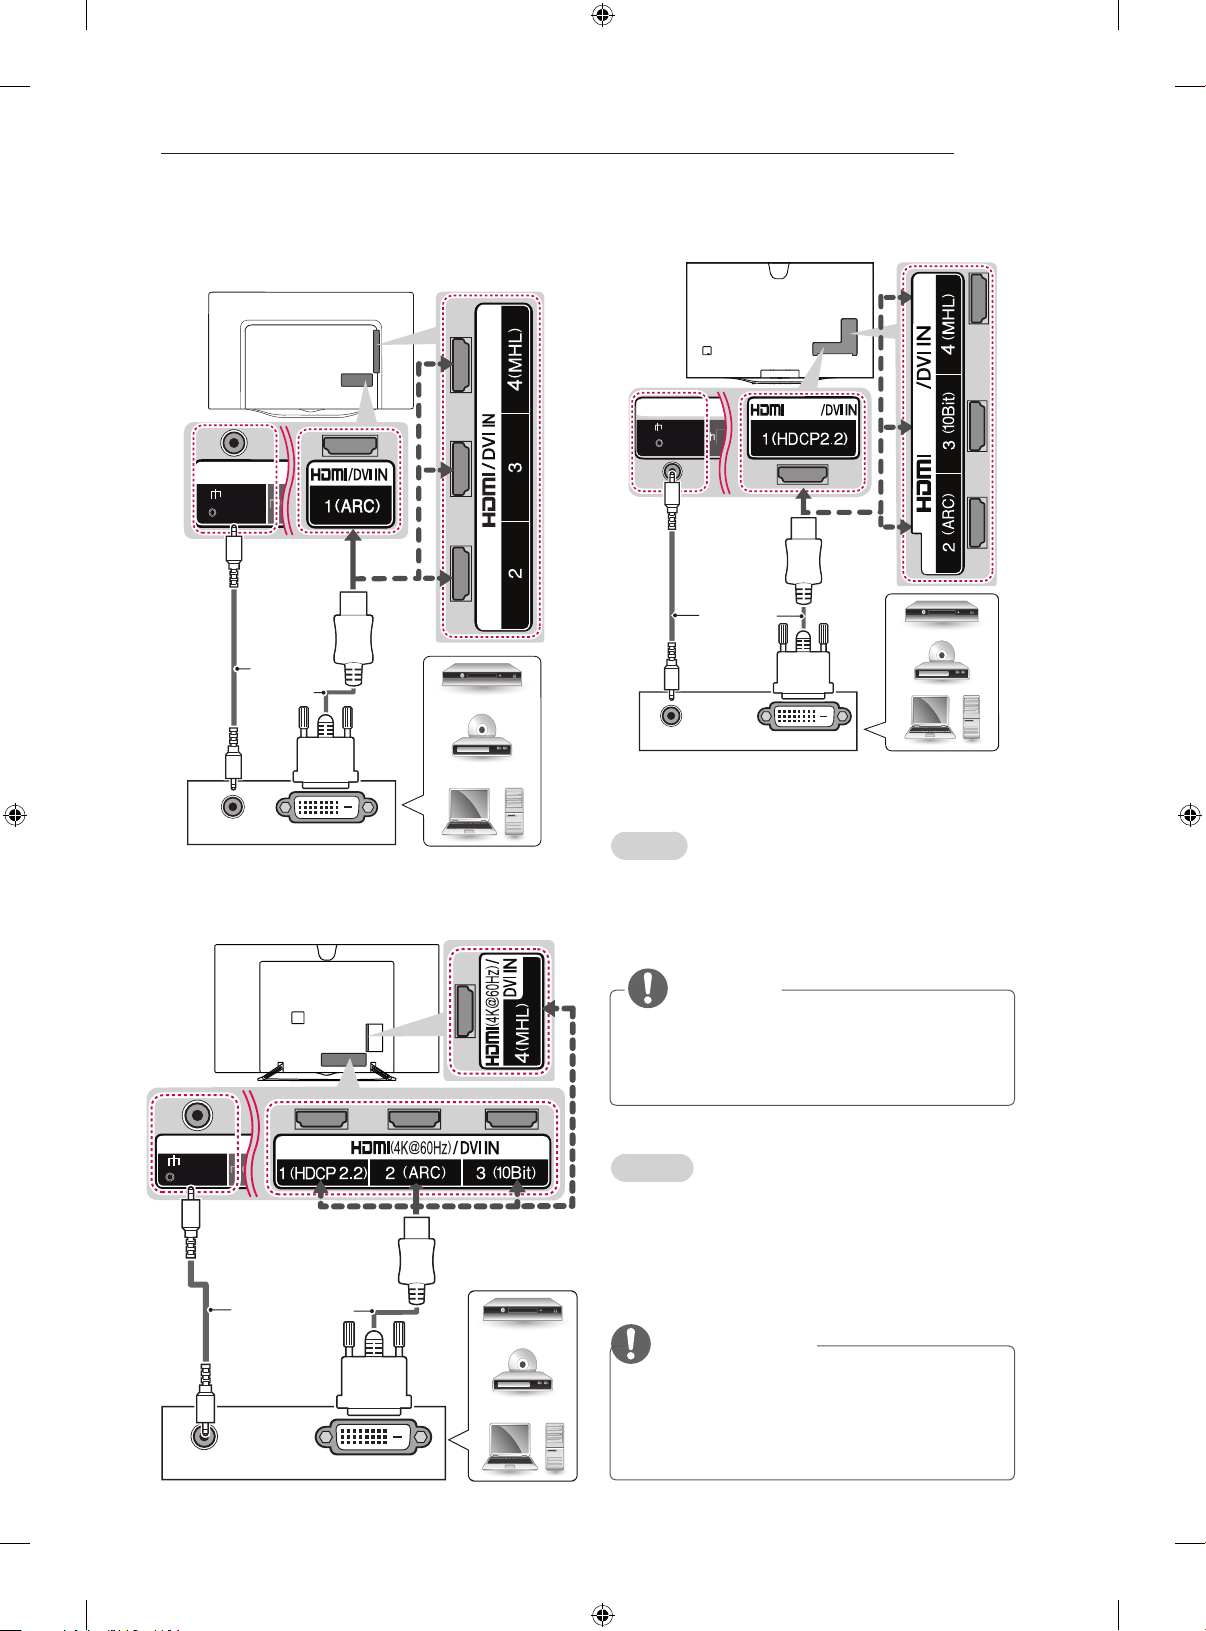
DVI to HDMI Connection
(Only EC93**)
(*Not
Provided)
(Only EC98**)
Provided)
AUDIO OUT
(4K@60Hz)
(4K@60Hz)
(*Not
DVI OUT
DVD / Blu-Ray / PC /
HD Cable Box / HD STB
AUDIO OUT
(Only EC97**)
(*Not Provided)
AUDIO OUT
DVI OUT
DVD / Blu-Ray / PC /
HD Cable Box / HD STB
DVI OUT
DVD / Blu-Ray / PC /
HD Cable Box / HD STB
English
Transmits the digital video signal from an external
device to the TV. Connect the external device and
the TV with the DVI-HDMI cable as shown. To
transmit an audio signal, connect an audio cable.
NOTE
Depending on the graphics card, DOS mode
y
may not work if a HDMI to DVI Cable is in use.
When using the HDMI / DVI cable, Single
y
link is only supported.
Deutsch
Überträgt digitale Videosignale von einem externen
Gerät an das TV-Gerät. Verbinden Sie das externe
Gerät, wie in der folgenden Abbildung gezeigt, mithilfe
des DVI-HDMI-Kabels mit dem TV-Gerät. Schließen Sie
ein Audiokabel an, um ein Audiosignal zu übertragen.
HINWEIS
Abhängig von der Grafikkarte funktioniert
y
der DOS-Modus bei Einsatz eines HDMI-zuDVI-Kabels möglicherweise nicht.
Bei Verwendung des HDMI/DVI-Kabels wird
y
nur eine einfache Verbindung unterstützt.
Page 16
A-16
MAKING CONNECTIONS
Français
Permet de transmettre les signaux vidéo d’un
périphérique externe vers la TV. Connectez le
périphérique externe et la TV avec le câble DVIHDMI comme indiqué sur l’illustration suivante. Pour
émettre un signal audio, raccordez un câble audio.
REMARQUE
Selon la carte graphique, le mode DOS peut
y
ne pas fonctionner si vous utilisez un câble
pour établir la connexion HDMI-DVI.
Lors de l’utilisation du câble HDMI/DVI, seule
y
une liaison unique peut être prise en charge.
Italiano
Il segnale digitale video viene trasmesso da un
dispositivo esterno al televisore. Collegare il dispositivo
esterno e il televisore mediante il cavo DVI-HDMI come
mostrato nell’illustrazione di seguito. Per trasmettere
un segnale audio, collegare un cavo audio.
NOTA
A seconda della scheda grafica in uso, la
y
modalità DOS potrebbe non funzionare se
si utilizza un cavo da HDMI a DVI.
Quando si utilizza il cavo HDMI/DVI, è sup-
y
portata solo l’interfaccia Single link.
Nederlands
U kunt het digitale videosignaal vanaf een extern apparaat
naar de TV zenden. Sluit het externe apparaat en de TV
op elkaar aan met behulp van de DVI-HDMIkabel, zoals
aangegeven in de volgende afbeelding.
OPMERKING
Afhankelijk van de grafische kaart werkt de
y
DOSmodus mogelijk niet bij het gebruik van een
HDMI/DVI-kabel.
Bij gebruik van de HDMI/DVI-kabel wordt alleen
y
single link ondersteund.
Ελληνικά
Μεταδίδειτοψηφιακόσήμαεικόναςαπόμια
εξωτερικήσυσκευήστηντηλεόραση.Συνδέστε
τηνεξωτερικήσυσκευήκαιτηντηλεόρασημετο
καλώδιοDVI-HDMI,όπωςφαίνεταιστηνπαρακάτω
εικόνα.Γιατηνμετάδοσησήματοςήχου,συνδέστε
ένακαλώδιοήχου.
ΣΗΜΕΙΩΣΗ
Ανάλογαμετηνκάρταγραφικών,ηλειτουργία
y
DOSενδέχεταιναμηνλειτουργεί,εάν
χρησιμοποιείταικαλώδιοHDMIσεDVI.
ΌτανχρησιμοποιείτετοκαλώδιοHDMI/DVI,
y
υποστηρίζεταιαποκλειστικάημονήσύνδεση.
Español
Transmite la señal de vídeo digital de un dispositivo
externo a la TV. Use el cable DVI-HDMI para conectar
el dispositivo externo a la TV, tal y como se muestra
en la siguiente ilustración. Para transmitir una señal
de audio, conecte un cable de audio.
NOTA
En función de la tarjeta gráfica, puede que no
y
funcione el modo DOS si se está utilizando un
cable de HDMI a DVI.
Si se utiliza un cable HDMI/DVI, solo se admite
y
un enlace.
Português
Transmite o sinal digital de vídeo de um dispositivo
externo para a TV. Ligue o dispositivo externo à
TV com o cabo DVI-HDMI, conforme demonstrado
na seguinte ilustração. Para transmitir um sinal de
áudio, ligue um cabo de áudio.
NOTA
Dependendo da placa gráfica, o modo DOS
y
poderá não funcionar se utilizar um cabo
HDMI para DVI.
Ao utilizar o cabo HDMI/DVI, apenas a Ligação
y
única é suportada.
Slovenščina
Prenaša digitalni video signal iz zunanje naprave
natelevizor.Povežitezunanjonapravointelevizor
s kablom DVI-HDMI, kot je prikazano na naslednji
sliki.Zaprenosavdiosignalapriključiteavdiokabel.
OPOMBA
OdvisnoodgrafičnekarticenačinDOSmorda
y
nebodeloval,čeuporabljatekabelHDMI-DVI.
Ko uporabljate kabel HDMI/DVI, je podprta le
y
ena povezava.
Page 17
MAKING CONNECTIONS
A-17
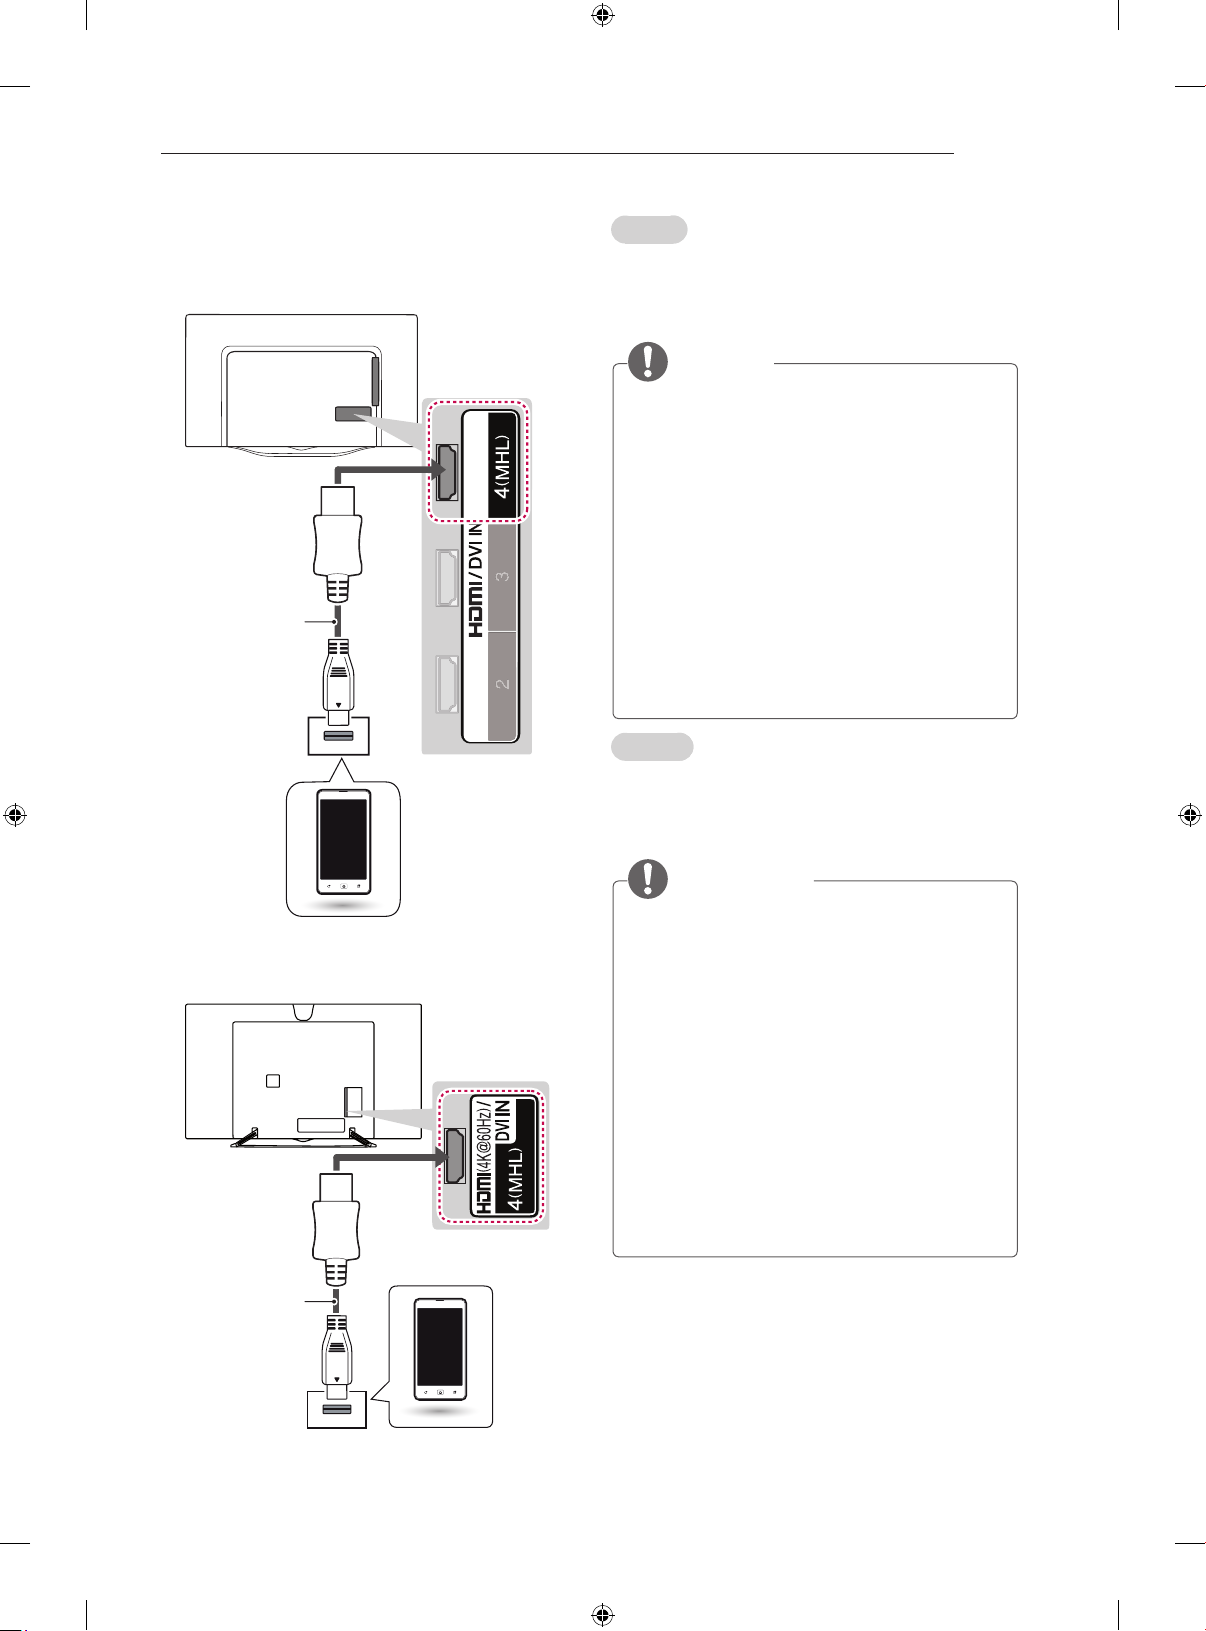
MHL Connection
(Only EC93**)
MHL passive
cable
(*Not Provided)
English
Mobile High-definition Link (MHL) is an interface
for transmitting digital audiovisual signals from
mobile phones to television sets.
NOTE
Connect the mobile phone to the HDMI/DVI IN
y
4 (MHL) or HDMI(4K @ 60 Hz)/DVI IN 4 (MHL)
port to view the phone screen on the TV.
The MHL passive cable is needed to
y
connect the TV and a mobile phone.
This only works for the MHL-enabled phone.
y
Some applications can be operated by the
y
remote control.
For some mobile phones supporting MHL,
y
you can control with the magic remote control.
Remove the MHL passive cable from the TV
y
when:
- The MHL function is disabled
- Your mobile device is fully charged in
standby mode
Deutsch
Mobile High-definition Link (MHL) ist eine digitale
Schnittstelle, welche audiovisuelle Signale vom
Mobiltelefon an ein TV-Gerät überträgt.
Mobile phone
(Only EC97**, EC98**)
MHL passive
cable
(*Not Provided)
Mobile phone
HINWEIS
Verbinden Sie das Mobiltelefon mit dem HDMI/
y
DVI IN 4 (MHL)- oder HDMI(4K @ 60 Hz)/DVI
IN 4 (MHL)-Anschluss, um den Bildschirm des
Telefons auf dem Fernsehgerät anzuzeigen
Das passive MHL-Kabel dient dazu, das TV-
y
Gerät mit einem Mobiltelefon zu verbinden.
Dies ist nur bei MHL-fähigen Telefonen möglich.
y
Einige Anwendungen können über die
y
Fernbedienung gesteuert werden.
Einige MHL-fähige Mobiltelefone können mit
y
der Magic-Fernbedienung bedient werden.
Entfernen Sie das passive MHL-Kabel vom
y
TV-Gerät, wenn:
- die MHL-Funktion deaktiviert ist
- Ihr Mobilfunkgerät im Standby-Modus
vollständig geladen ist
.
Page 18
A-18
MAKING CONNECTIONS
Français
Mobile High-definition Link (MHL) est une interface
qui permet de transmettre des signaux audiovisuels numériques depuis des téléphones portables
vers des téléviseurs.
REMARQUE
Connectez le téléphone portable au port
y
HDMI/DVI IN 4 (MHL) ou HDMI(4K @ 60
Hz)/DVI IN 4 (MHL) pour afficher l’écran du
téléphone sur le téléviseur.
Le câble passif MHL sert à connecter la TV
y
à un téléphone portable.
Cette fonctionnalité est uniquement
y
disponible sur les téléphones prenant en
charge la connexion MHL.
Certaines applications peuvent être utilisées
y
depuis la télécommande.
Vous pouvez utiliser la télécommande Magic
y
sur certains téléphones portables prenant
en charge la connexion MHL.
Retirez le câble passif MHL du téléviseur
y
uniquement si :
- la fonction MHL est désactivée,
- votre périphérique mobile est complètement
chargé et en mode veille oustandby mode
Español
El enlace de alta definición móvil o MHL (del inglés
“Mobile High-definition Link”) es una interfaz que se
utiliza para transmitir señales audiovisuales digitales
de teléfonos móviles a equipos de televisión.
NOTA
Conecte el teléfono móvil al puerto HDMI/DVI
y
IN 4 (MHL) o HDMI(4K @ 60 Hz)/DVI IN 4 (MHL)
para ver la pantalla del teléfono en la TV.
Se necesita un cable pasivo MHL para
y
conectar el televisor y el teléfono móvil.
Esta función solo está disponible en
y
teléfonos compatibles con MHL.
Algunas aplicaciones se pueden utilizar a
y
través del mando a distancia.
Desde algunos teléfonos móviles compatibles
y
con MHL, se puede controlar el dispositivo
por medio del mando a distancia Mágico.
Extraiga el cable pasivo MHL de la TV cuando:
y
- la función MHL esté deshabilitada
- su dispositivo móvil esté completamente
cargado y en modo de espera
Italiano
Mobile High-definition Link (MHL) è un’interfaccia
per la trasmissione di segnali audiovisivi digitali dai
cellulari ai TV.
NOTA
Collegare il telefono cellulare alla porta HDMI/DVI
y
IN 4 (MHL) o HDMI(4K @ 60 Hz)/DVI IN 4 (MHL)
per visualizzare lo schermo del telefono sul TV.
È necessario un cavo passivo MHL per
y
collegare il TV a un cellulare.
Questa funzione è disponibile soltanto sui
y
telefoni che supportano l’interfaccia MHL.
È possibile utilizzare alcune applicazioni
y
tramite il telecomando.
Per alcuni cellulari che supportano la
y
tecnologia MHL, è possibile utilizzare il
telecomando magico.
Rimuovere il cavo passivo MHL dal TV quando:
y
- La funzione MHL è disattivata
- Il dispositivo mobile è completamente
carico in modalità standby
Português
A Ligação de Alta Definição Móvel (MHL) é uma
interface para transmissão de sinais audiovisuais
digitais do telemóvel para a televisão.
NOTA
Ligue o telemóvel à porta HDMI/DVI IN 4
y
(MHL) ou HDMI(4K @ 60 Hz)/DVI IN 4 (MHL)
para visualizar o ecrã do telemóvel na TV.
O cabo passivo MHL é necessário para ligar
y
a TV a um telemóvel.
Funciona apenas no telemóvel compatível
y
com MHL.
É possível utilizar algumas aplicações
y
através do controlo remoto.
Em alguns telemóveis que suportam MHL,
y
é possível controlar com o Comando Magic.
Remova o cabo passivo MHL da TV quando:
y
- a função MHL está desactivada
- o seu dispositivo móvel está totalmente
carregado no modo de espera
Page 19
MAKING CONNECTIONS
A-19
Nederlands
MHL (Mobile High-definition Link) is een interface
voor het verzenden van digitale audiovisuele signalen van mobiele telefoons naar televisies.
OPMERKING
Verbind de mobiele telefoon met de HDMI/
y
DVI IN 4 (MHL)- of HDMI(4K @ 60 Hz)/DVI
IN 4 (MHL)-poort om het telefoonscherm op
de TV weer te geven.
De MHL passieve kabel is nodig om de TV en
y
een mobiele telefoon met elkaar te verbinden.
Dit kan alleen met een MHL-telefoon.
y
Sommige toepassingen kunnen met de
y
afstandsbediening worden bediend.
Bij sommige mobiele telefoons met MHL
y
kunt u de Magic-afstandsbediening
gebruiken.
Koppel de MHL-passieve kabel los van de
y
TV wanneer:
- de MHL-functie is uitgeschakeld
- uw mobiele apparaat volledig is opgeladen
in standby-modus
Slovenščina
Povezava MHL (Mobile High-definition Link) je
vmesnikzaoddajanjedigitalnihzvočnihinvizualnih signalov iz mobilnih telefonov v televizorje.
OPOMBA
Čeželitezaslonmobilnegatelefonaprikazatina
y
televizorju,telefonpriključitevvrataHDMI IN 4
(MHL) ali HDMI(4K @ 60 Hz)/DVI IN 4 (MHL).
Pasivni kabel MHL potrebujete za povezavo
y
televizorja in mobilnega telefona.
To deluje samo pri telefonih s podporo za MHL.
y
Nekatere aplikacije lahko upravljate z
y
daljinskim upravljalnikom.
Pri nekaterih telefonih, ki podpirajo MHL,
y
lahko predvajanje upravljate z daljinskim
upravljalnikom Magic.
Pasivni kabel MHL odstranite s televizorja, ko:
y
- jefunkcijaMHLonemogočena
- je mobilna naprava popolnoma napolnjena
vnačinupripravljenosti
Ελληνικά
ΤοMHL(MobileHigh-definitionLink)είναι
μιαδιασύνδεσηγιατημετάδοσηψηφιακών
οπτικοακουστικώνσημάτωναπόκινητάτηλέφωνα
προςτηλεοράσεις.
ΣΗΜΕΙΩΣΗ
Συνδέστετοκινητότηλέφωνοστηθύρα
y
HDMI/DVI IN 4 (MHL)ήHDMI(4K @ 60 Hz)/
DVI IN 4 (MHL),γιαπροβολήτηςοθόνηςτου
τηλεφώνουστηντηλεόραση.
ΤοπαθητικόκαλώδιοMHLείναιαπαραίτητο
y
γιατησύνδεσητηςτηλεόρασηςμεκινητό
τηλέφωνο.
Ηλειτουργίααυτήυποστηρίζεταιμόνογια
y
τηλέφωναμεδυνατότηταMHL.
Ορισμένεςεφαρμογέςμπορούννα
y
χρησιμοποιηθούνμέσωτουτηλεχειριστηρίου.
Γιαορισμένακινητάτηλέφωναπου
y
υποστηρίζουνMHL,οχειρισμόςείναι
δυνατόςμέσωτουMagicRemoteControl
(μαγικούτηλεχειριστηρίου).
Πρέπεινααφαιρείτετοπαθητικόκαλώδιο
y
MHLαπότηντηλεόρασηόταν:
- ηλειτουργίαMHLείναιαπενεργοποιημένη
- ηκινητήσυσκευήείναιπλήρωςφορτισμένη
καιβρίσκεταισεκατάστασηαναμονής
Page 20
IN
AV2
( Audio in)
IN
COMPONENT
YP
B
AUDIO
AV2
P
R
VIDEO
VIDEO
AUDIO
L R
A-20
MAKING CONNECTIONS
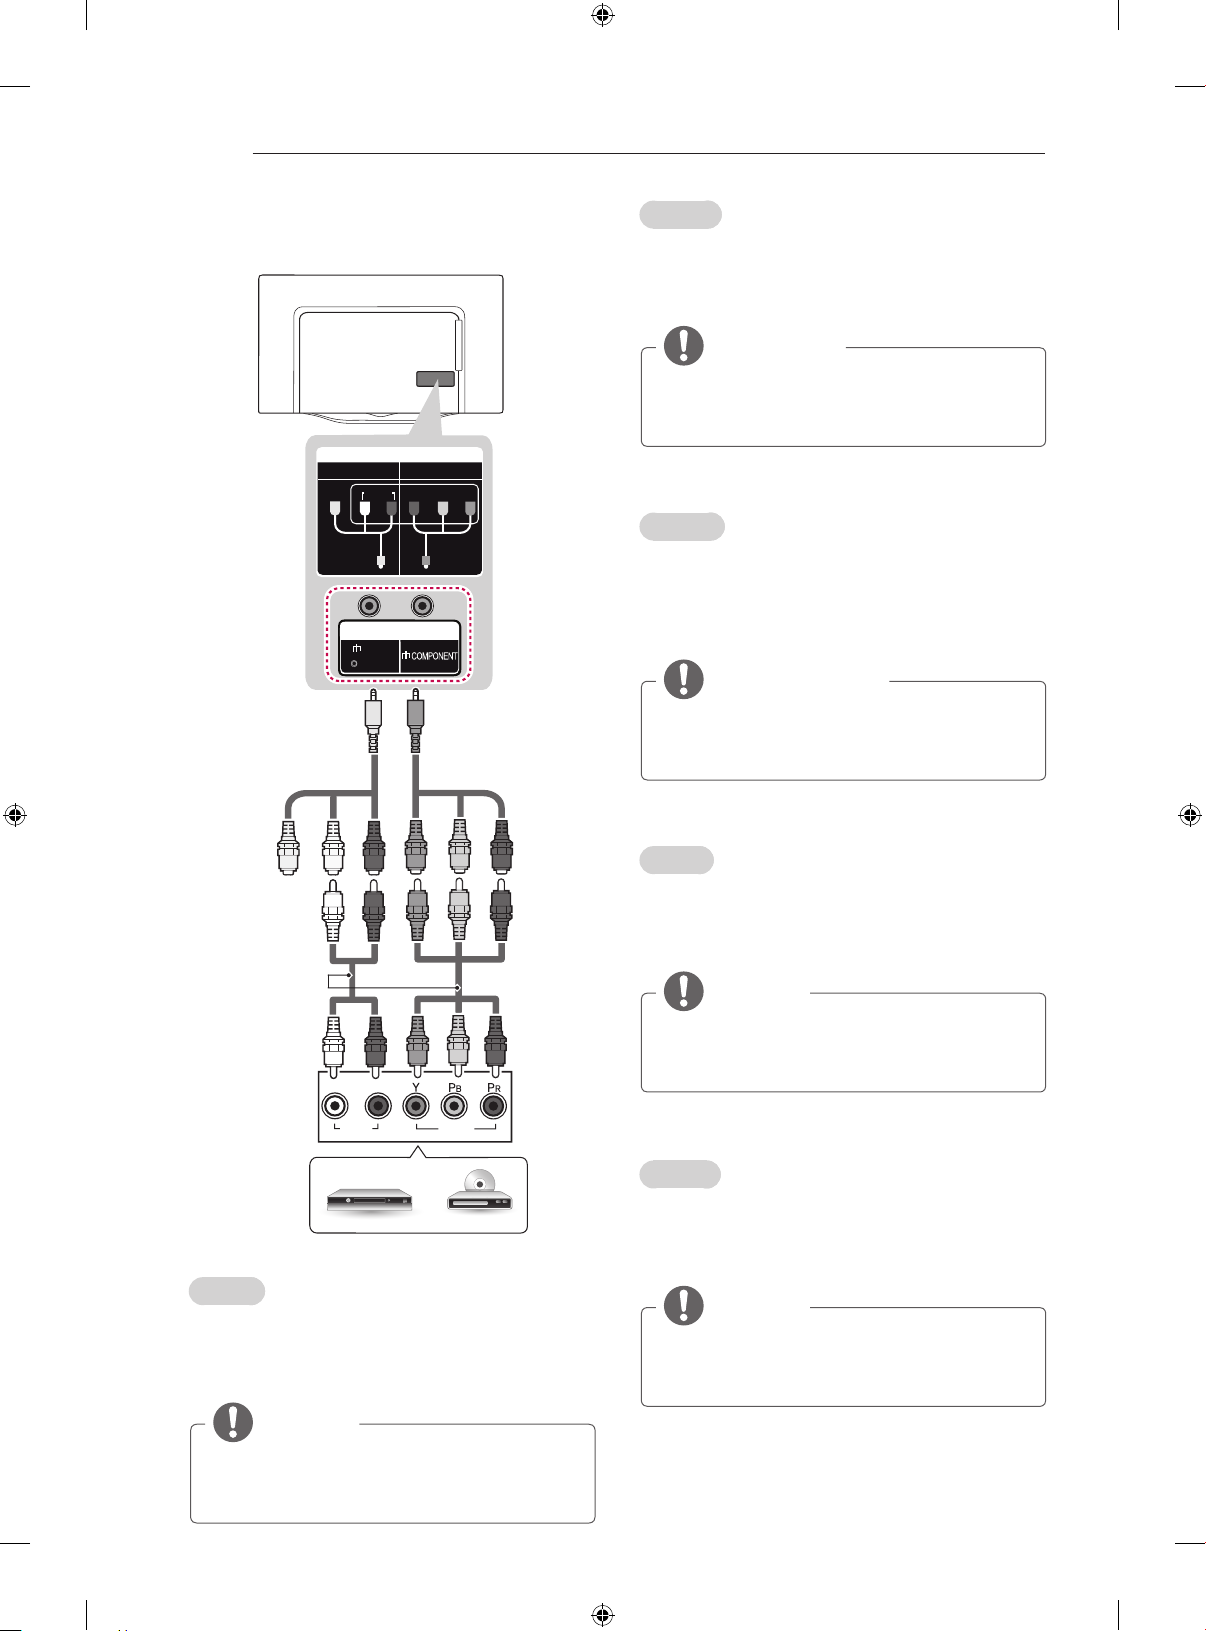
Component Connection
YELLOW
(Use the
composite gender
cable provided.)
YELLOW
WHITE WHITE
GREEN
(Use the
component gender
cable provided.)
RED
BLUE
GREEN GREEN GREEN
Deutsch
Überträgt analoge Video- und Audiosignale von
einem externen Gerät an das TV-Gerät. Verbinden
Sie das externe Gerät wie in der Abbildung gezeigt
über ein Komponentenkabel mit dem TV-Gerät.
HINWEIS
y Wenn Kabel falsch angeschlossen werden, kann
dies dazu führen, dass ein Bild in Schwarz-Weiß
oder in verzerrten Farben erscheint.
Français
Permet de transmettre les signaux audio et vidéo
analogiques d’un périphérique externe vers la TV.
Connectez le périphérique externe et le téléviseur
avec un câble composant (ou un câble mâle
composant) comme indiqué.
REMARQUE
y Si les câbles sont mal installés, l’image peut
s’afficher en noir et blanc ou avec des couleurs de mauvaise qualité.
RED
RED
(*Not Provided)
WHITE
RED
DVD / Blu-Ray / HD Cable Box
English
Transmits analogue video and audio signals from
an external device to the TV. Connect the external
device and the TV with a component gender cable
as shown.
BLUE
BLUE
RED
RED
Italiano
Il segnale audio e video analogico viene trasmesso
da un dispositivo esterno al televisore. Collegare il
dispositivo esterno e il TV con un cavo Component
(o un cavo generico Component) come mostrato.
NOTA
y L’errato collegamento dei cavi può far sì che
le immagini vengano visualizzate in bianco e
nero o con colori distorti.
Español
Transmite las señales de audio y vídeo analógico
de un dispositivo externo a la TV. Use un cable de
componentes (o de género compuesto) para conectar
el dispositivo externo a la TV como se indica.
NOTA
y Si los cables no se instalan correctamente,
puede que la imagen se visualice en blanco
y negro o con los colores distorsionados.
NOTE
y If cables are not installed correctly, it could
cause this image to display in black and
white or with distorted colours.
Page 21
MAKING CONNECTIONS
A-21
Português
Transmite sinais analógicos de vídeo e áudio de um
dispositivo externo para a TV. Ligue o dispositivo
externo à TV com um cabo de componente (ou cabo
de componente macho), conforme demonstrado.
NOTA
y Se os cabos não forem devidamente instalados,
poderão causar uma exibição de imagem a
preto e branco ou com cor distorcida.
Nederlands
U kunt analoge video- en audiosignalen vanaf
een extern apparaat naar de TV zenden. Sluit
het externe apparaat en de TV op elkaar aan
met behulp van een componentkabel (mannetje/
vrouwtje), zoals in de afbeelding.
OPMERKING
y Als kabels onjuist zijn geïnstalleerd, kan het
beeld worden weergegeven in zwart-wit of
met vervormde kleuren.
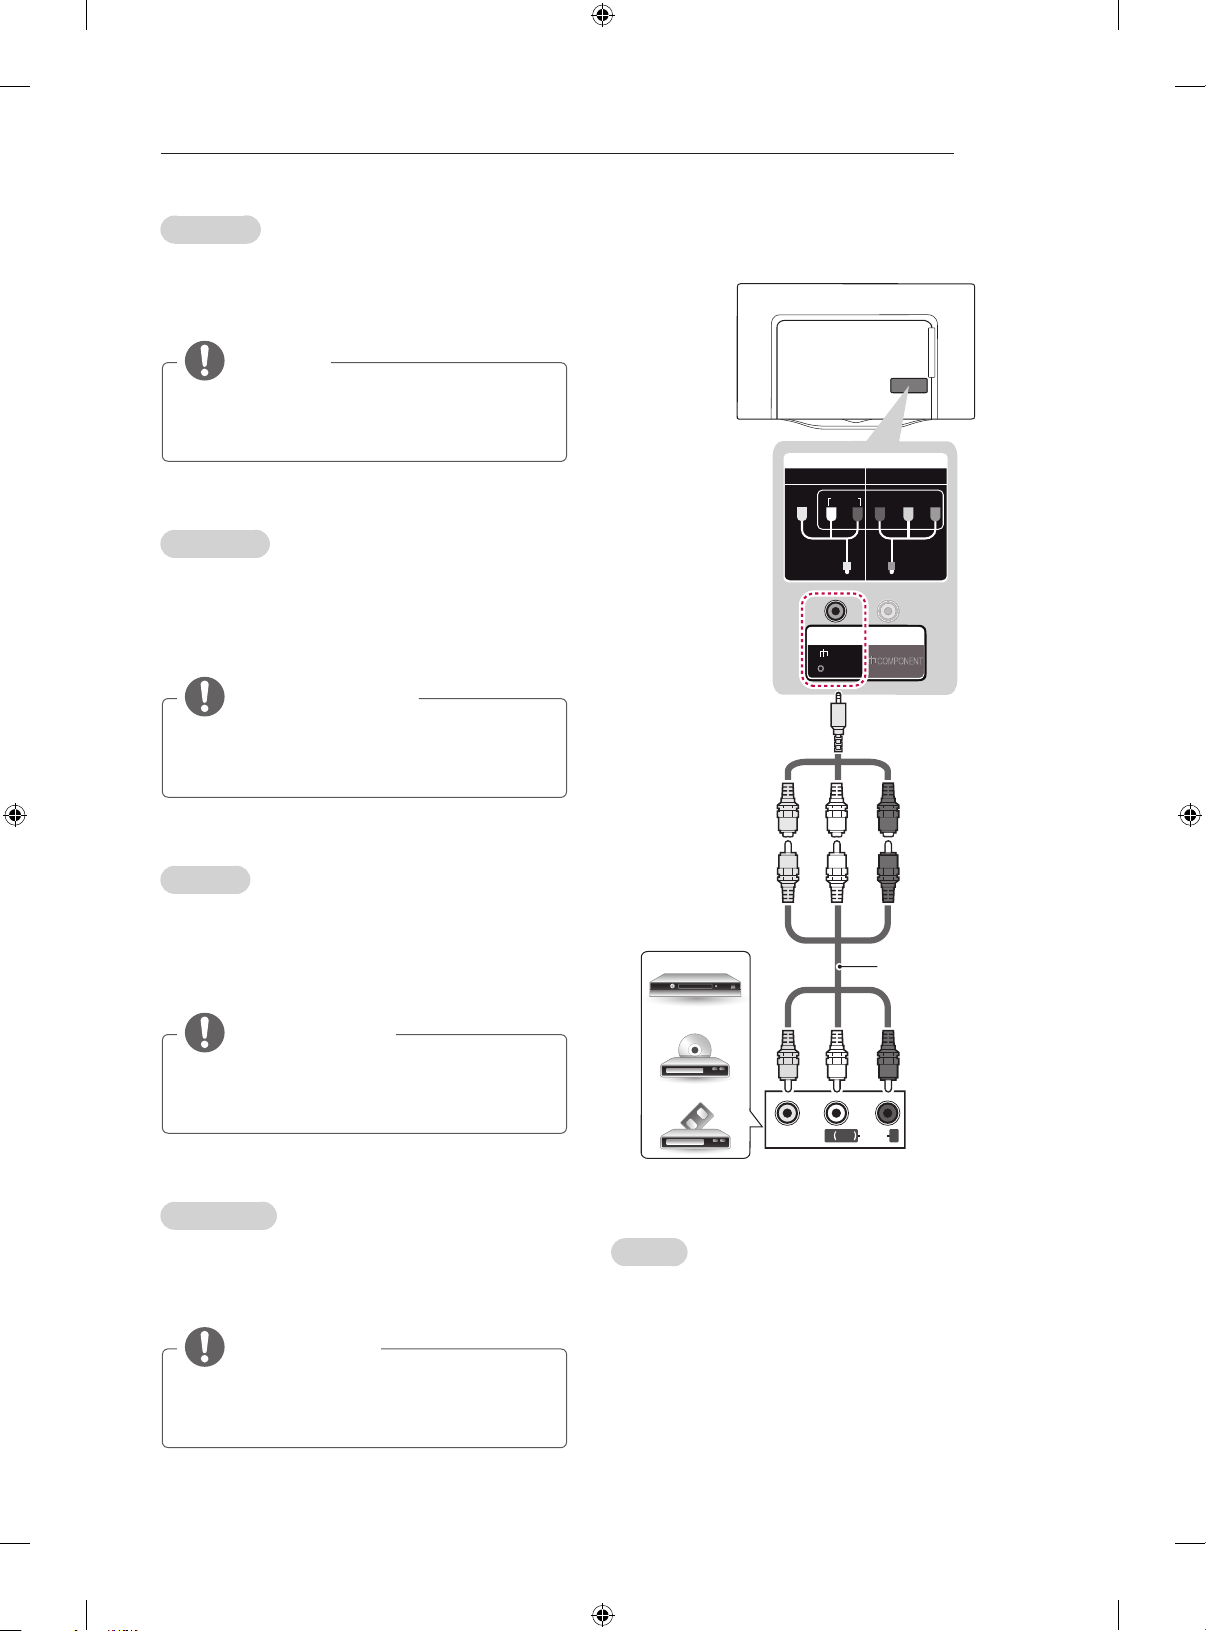
Composite Connection
IN
COMPONENT
AV2
VIDEO
YELLOW
(Use the composite
gender cable provided.)
YELLOW YELLOW
AUDIO
AV2
( Audio in)
P
R
IN
WHITE WHITE
B
RED RED
YP
Ελληνικά
Μεταδίδειτααναλογικάσήματαεικόναςκαιήχου
απόμιαεξωτερικήσυσκευήστηντηλεόραση.
Συνδέστετηνεξωτερικήσυσκευήκαιτηντηλεόραση
μεένακαλώδιοcomponent(ήκαλώδιοcomponent
αρσενικό-θηλυκό)όπωςφαίνεταιστηνεικόνα.
ΣΗΜΕΙΩΣΗ
y Αντακαλώδιαδενέχουνσυνδεθείσωστά,η
εικόναενδέχεταιναεμφανίζεταιασπρόμαυρη
ήμεαλλοιωμέναχρώματα.
Slovenščina
Prenašaanalognevideoinzvočnesignaleizzunanje
napravenatelevizor.Povežitezunanjonapravoin
televizor s komponentnim kablom (ali pretvorniškim
komponentnim kablom), kot je prikazano.
OPOMBA
y Česokablinepravilnonameščeni,selahko
slikaprikažekotčrnobelaalispopačeno
barvo.
(*Not Provided)
RED
WHITE
YELLOW
( )
VIDEO
MONO
L R
AUDIO
DVD / Blu-Ray / HD Cable Box / VCR
English
Transmits analogue video and audio signals from
an external device to the TV. Connect the external
device and the TV with a composite gender cable
as shown.
Page 22
A-22
MAKING CONNECTIONS
Deutsch
Überträgt analoge Video- und Audiosignale von
einem externen Gerät an das TV-Gerät. Verbinden
Sie das externe Gerät wie in der Abbildung gezeigt
über ein Komponentenkabel mit dem TV-Gerät.
Français
Permet de transmettre les signaux audio et vidéo
analogiques d’un périphérique externe vers la TV.
Connectez le périphérique externe et le téléviseur
avec un câble mâle composant comme indiqué.
Italiano
Il segnale audio e video analogico viene trasmesso
da un dispositivo esterno al televisore. Collegare
il dispositivo esterno e il TV con un cavo generico
Component come mostrato.
Español
Transmite las señales de audio y vídeo analógico
de un dispositivo externo a la TV. Use un cable
de género compuesto para conectar el dispositivo
externo a la TV como se indica.
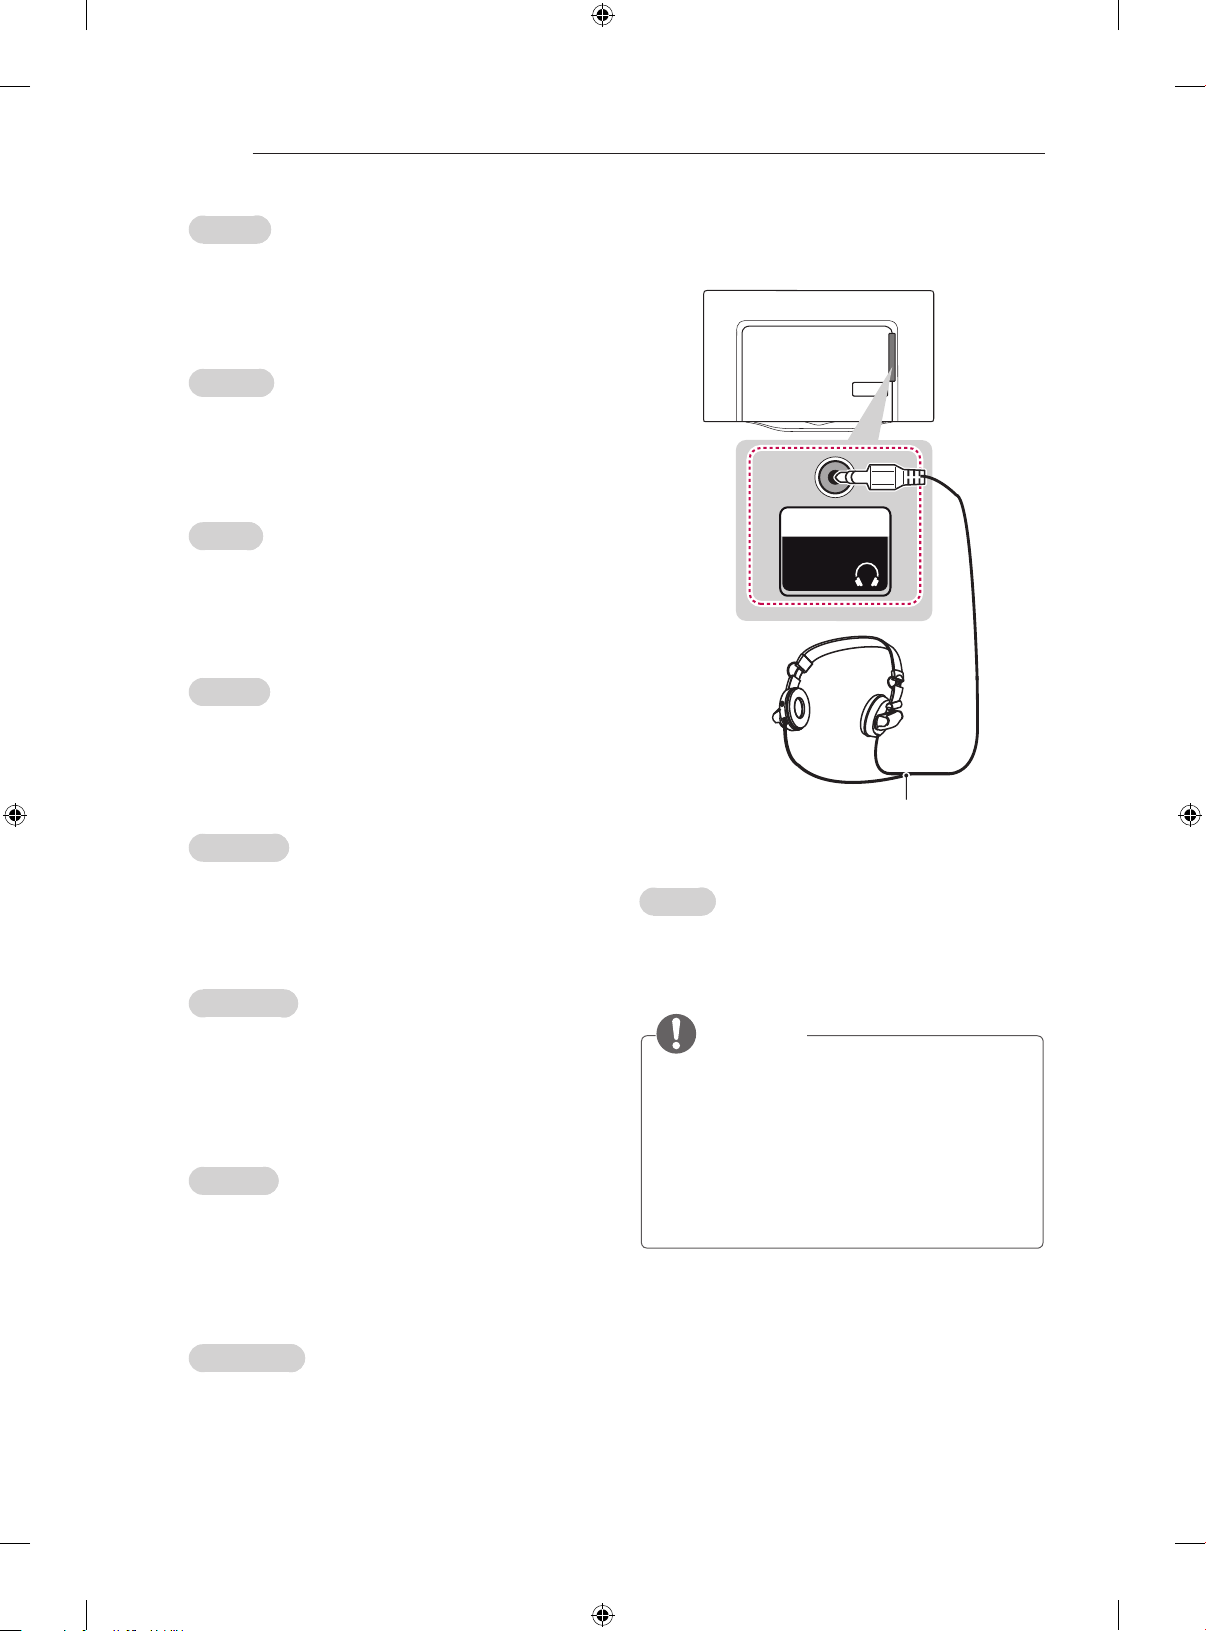
Headphone Connection
OUT
Ext.Speaker
/ H/P
(*Not Provided)
Português
Transmite sinais analógicos de vídeo e áudio de um
dispositivo externo para a TV. Ligue o dispositivo
externo à TV com um cabo de componente macho,
conforme demonstrado.
Nederlands
U kunt analoge video- en audiosignalen vanaf
een extern apparaat naar de TV zenden. Sluit
het externe apparaat en de TV op elkaar aan
met behulp van een componentkabel, zoals in de
afbeelding.
Ελληνικά
Μεταδίδειτααναλογικάσήματαεικόναςκαιήχου
απόμιαεξωτερικήσυσκευήστηντηλεόραση.
Συνδέστετηνεξωτερικήσυσκευήκαιτηντηλεόραση
μεένακαλώδιοcomponentαρσενικό-θηλυκόόπως
φαίνεταιστηνεικόνα.
Slovenščina
Prenašaanalognevideoinzvočnesignaleizzunanje
napravenatelevizor.Povežitezunanjonapravoin
televizor s pretvorniškim komponentnim kablom, kot
je prikazano.
English
Transmits the headphone signal from the TV to
an external device. Connect the external device
and the TV with the headphone as shown.
NOTE
y AUDIO menu items are disabled when con-
necting a headphone.
y Optical Digital Audio Out is not available
when connecting a headphone.
y Headphone impedance: 16 Ω
y Max audio output of headphone: 0.627 mW
to 1.334 mW
y Headphone jack size: 0.35 cm
Page 23
MAKING CONNECTIONS
A-23
Deutsch
Überträgt das Kopfhörersignal vom TV-Gerät an
ein externes Gerät. Verbinden Sie die Kopfhörer,
wie in der folgenden Abbildung gezeigt, mit dem
TV-Gerät.
HINWEIS
y Bei angeschlossenem Kopfhörer sind die
AUDIO-Menüpunkte deaktiviert.
y Der optische digitale Audioausgang ist nicht
verfügbar, solange Kopfhörer angeschlossen sind.
y Kopfhörerimpedanz:16Ω
y Max. Ausgangsleistung am Kopfhöreran-
schluss: 0,627 mW bis 1,334 mW
y Kopfhörerbuchsen: 0,35 cm
Français
Transmet le signal du casque de la TV au
périphérique externe. Connectez le périphérique
externe et la TV avec le casque comme indiqué
sur l’illustration suivante.
REMARQUE
y Les éléments du menu AUDIO sont désac-
tivés lorsque vous branchez un casque.
y La sortie audio numérique optique n’est pas
disponible lorsque vous branchez un casque.
y Impédanceducasque:16Ω
y Sortie audio max. du casque : 0,627 mW à
1,334 mW
y Taille de la prise casque : 0,35 cm
Español
Transmite la señal de auriculares de la TV a un
dispositivo externo. Use el cable de los auriculares
para conectar el dispositivo externo a la TV, tal y
como se muestra en la siguiente ilustración.
NOTA
y Al conectar los auriculares se desactivarán
las opciones del menú AUDIO.
y La salida óptica de audio digital no estará
disponible al conectar unos auriculares.
y Impedanciadelauricular:16Ω
y Salida de audio máxima de los auriculares:
de 0,627 mW a 1,334 mW.
y Tamaño de la clavija de los auriculares: 0,35 cm.
Português
Transmite o sinal dos auscultadores da TV
para um dispositivo externo. Ligue o dispositivo
externo à TV com os auscultadores, conforme
demonstrado na ilustração.
NOTA
y Os itens do menu ÁUDIO ficam inactivos
quando liga os auscultadores.
y A saída digital áudio óptico não está dis-
ponível quando liga auscultadores.
y Impedânciadosauscultadores:16Ω
y Saída de áudio máx. dos auscultadores:
0,627 a 1,334 mW
y Tamanho da tomada para auscultadores: 0,35 cm
Italiano
Consente la trasmissione del segnale delle cuffie
dalla TV a un dispositivo esterno. Collegare il
dispositivo esterno e la TV con le cuffie come
mostrato nell’illustrazione di seguito.
NOTA
y Le voci del menu AUDIO sono disabilitate
se sono collegate le cuffie.
y L’uscita audio ottica digitale non è disponi-
bile se sono collegate le cuffie.
y Impedenzacuffie:16Ω
y Uscita audio max delle cuffie: da 0,627 mW
a 1,334 mW
y Dimensioni jack per cuffia: 0,35 cm
Nederlands
U kunt het hoofdtelefoonsignaal vanaf de TV naar
een extern apparaat zenden. Sluit het externe
apparaat en de TV aan op de hoofdtelefoon,
zoals aangegeven in de volgende afbeelding.
OPMERKING
y Onderdelen in het menu GELUID worden
uitgeschakeld wanneer u een hoofdtelefoon
aansluit.
y Optische Digitale Audio Uit is niet beschik-
baar bij het aansluiten van een hoofdtelefoon.
y Impedantievanhoofdtelefoon:16Ω
y Maximale audio-uitvoer van hoofdtelefoon:
0,627 mW tot 1,334 mW
y Grootte van hoofdtelefoonaansluiting: 0,35 cm
Page 24
A-24
MAKING CONNECTIONS
Ελληνικά
Μεταδίδειτοσήμαακουστικώναπότην
τηλεόρασησεμιαεξωτερικήσυσκευή.Συνδέστε
τηνεξωτερικήσυσκευήκαιτηντηλεόρασημετα
ακουστικά,όπωςφαίνεταιστηνπαρακάτωεικόνα.
ΣΗΜΕΙΩΣΗ
y ΤαστοιχείατουμενούΗΧΟΣαπενεργοποιούνται,
ότανσυνδέετεακουστικά.
y Ηοπτικήψηφιακήέξοδοςήχουδενείναι
διαθέσιμη,ότανσυνδέετεακουστικά.
y Σύνθετηαντίστασηακουστικών:16Ω
y Μέγιστηέξοδοςήχουακουστικών:0,627
mWέως1,334mW
y Μέγεθοςυποδοχήςακουστικών:0,35cm
Slovenščina
Prenaša signal za slušalke iz televizorja na zunanjo
napravo.Povežitezunanjonapravointelevizors
kablom za slušalke, kot je prikazano na naslednji sliki.
OPOMBA
y Kosopriključeneslušalke,nimogočeupo-
rabljatimožnostiizAVDIO menija.
y Obpriključenihslušalkahoptičnidigitalni
avdio izhod ni na razpolago.
y Impedancaslušalk:16Ω
y Največjiavdioizhodslušalke:0,627–1,334mW
y Velikostvtičaslušalk:0,35cm
Audio Connection
OUT
OPTICAL
DIGITAL
AUDIO
(*Not
Provided)
OPTICAL
AUDIO IN
Digital Audio System
English
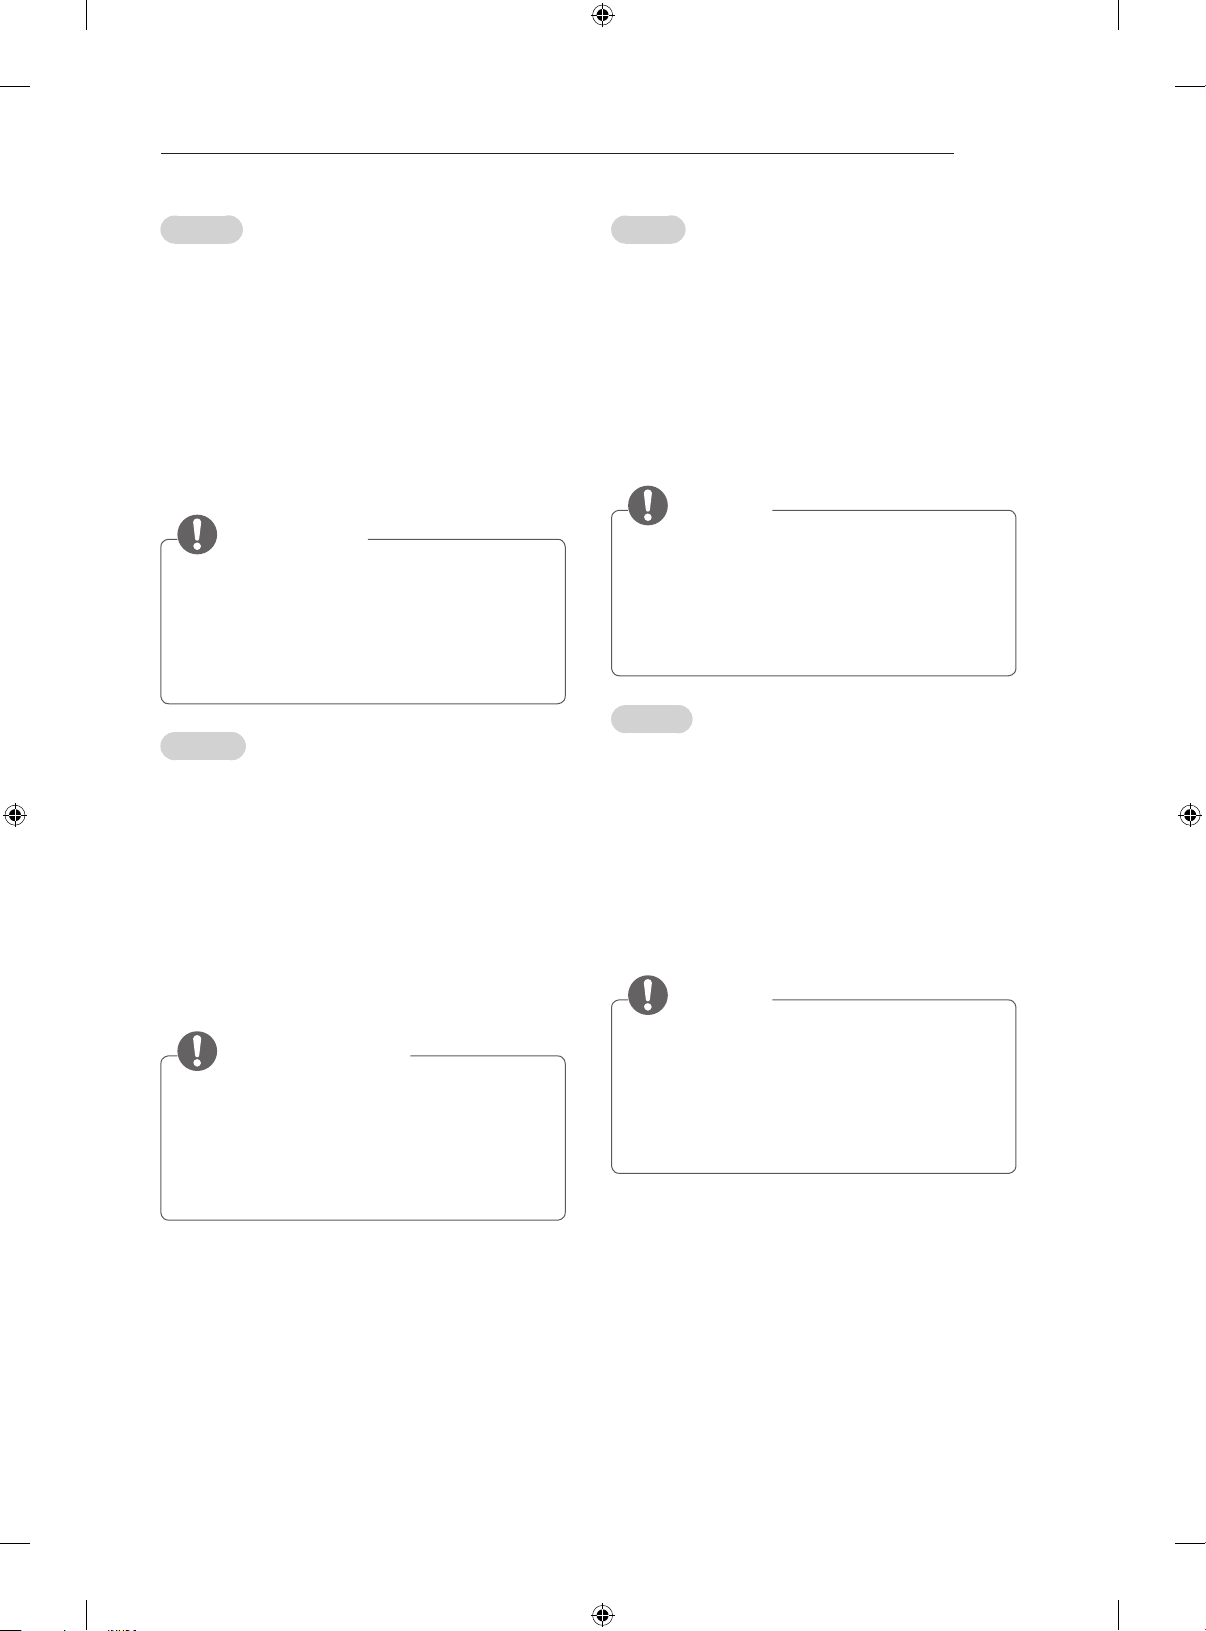
You may use an external audio system instead of
the built-in speaker.
Digital optical audio connection
Transmits a digital audio signal from the TV to an
external device. Connect the external device and
the TV with the optical audio cable as shown.
NOTE
y Do not look into the optical output port.
Looking at the laser beam may damage
your vision.
y Audio with ACP (Audio Copy Protection)
function may block digital audio output.
Page 25
MAKING CONNECTIONS
A-25
Deutsch
Sie können anstelle der integrierten Lautsprecher
ein optionales externes Audiosystem verwenden.
Anschluss über ein digitales
optisches Audiokabel
Überträgt ein digitales Audiosignal vom TV-Gerät an
ein externes Gerät. Verbinden Sie das externe Gerät,
wie in der folgenden Abbildung gezeigt, mithilfe des
optischen Audiokabels mit dem TV-Gerät.
HINWEIS
y Blicken Sie nicht in den optischen Ausgangs-
anschluss. Der Laserstrahl könnte Ihren
Augen schaden.
y Die Funktion Audio mit ACP (Audio-Ko-
pierschutz) blockiert möglicherweise den
digitalen Audioausgang.
Français
Vous pouvez utiliser un système audio externe en
option à la place d’un haut-parleur intégré.
Connexion audio optique
numérique
Permet de transmettre un signal audio numérique
de la TV au périphérique externe. Connectez le
périphérique externe et la TV avec le câble audio
optique comme indiqué sur l’illustration suivante.
Italiano
È possibile utilizzare un sistema audio esterno
opzionale al posto dell’altoparlante integrato.
Collegamento audio ottico digitale
Il segnale audio digitale viene trasmesso dal
televisore su un dispositivo esterno. Collegare il
dispositivo esterno e il televisore con il cavo audio
ottico come mostrato nell’illustrazione di seguito.
NOTA
y Non guardare nella porta dell’uscita ottica.
Guardare il raggio laser potrebbe provocare
danni alla vista.
y Contenuti audio con funzione anticopia
(ACP, Audio Copy Protection) possono bloccare l’uscita audio digitale.
Español
Puede emplear un sistema de audio externo
opcional en vez de los altavoces integrados.
Conexión óptica de audio digital
Transmite una señal de audio digital de la TV a un
dispositivo externo. Use el cable de audio óptico
para conectar el dispositivo externo a la TV, tal y
como se muestra en la siguiente ilustración.
NOTA
REMARQUE
y Ne regardez pas dans le port de sortie
optique. Le rayon laser risquerait de vous
abîmer la vue.
y La fonction Audio avec ACP (protection
copie audio) peut bloquer la sortie audio
numérique.
y No mire directamente el puerto de salida
óptica. El haz de luz del láser puede dañar
la vista.
y El audio con función ACP (protección de
copia de audio) puede bloquear la salida de
audio digital.
Page 26
A-26
MAKING CONNECTIONS
Português
Pode utilizar um sistema de áudio externo opcional
em vez das colunas incorporadas.
Ligação de áudio óptica digital
Transmite um sinal áudio digital da TV para um
dispositivo externo. Ligue o dispositivo externo
à TV com o cabo de áudio óptico, conforme
demonstrado na ilustração.
NOTA
y Não olhe para a porta de saída óptica. Se
olhar para o feixe laser, poderá prejudicar
a visão.
y O áudio com a função ACP (protecção
áudio anti-cópia) poderá bloquear a saída
áudio digital.
Nederlands
U kunt een optioneel extern audiosysteem
gebruiken in plaats van de ingebouwde speaker.
Digitale, optische audioverbinding
Ελληνικά
Αντίγιατοενσωματωμένοηχείο,μπορείτενα
χρησιμοποιήσετεέναπροαιρετικόεξωτερικό
ηχοσύστημα.
Ψηφιακή οπτική σύνδεση ήχου
Μεταδίδειέναψηφιακόσήμαήχουαπότην
τηλεόρασησεμιαεξωτερικήσυσκευή.Συνδέστε
τηνεξωτερικήσυσκευήκαιτηντηλεόρασημε
τοοπτικόκαλώδιοήχου,όπωςφαίνεταιστην
παρακάτωεικόνα.
ΣΗΜΕΙΩΣΗ
y Μηνκοιτάτεμέσαστηνοπτικήέξοδο.Αν
κοιτάξετετηδέσμηλέιζερ,υπάρχεικίνδυνος
βλάβηςστηνόρασήσας.
y ΗλειτουργίαAudiowithACP(AudioCopy
Protection)ενδέχεταιναεμποδίζειτην
ψηφιακήέξοδοήχου.
Slovenščina
Namestovgrajenihzvočnikovuporabiteizbirni
zunanjizvočnisistem.
U kunt een digitaal audiosignaal vanaf de TV naar
een extern apparaat zenden. Sluit het externe
apparaat en de TV op elkaar aan met behulp van
de optische audiokabel, zoals aangegeven in de
volgende afbeelding.
OPMERKING
y Kijk niet in de optische uitgangspoort. De
laserstraal kan schadelijk zijn voor uw ogen.
y Audio met de ACP-functie (analoge kop-
ieerbeveiliging) kan digitale audio-uitvoer
blokkeren.
Digitalni optični avdio priključek
Prenašadigitalnizvočnisignaliztelevizorjana
zunanjonapravo.Povežitezunanjonapravo
intelevizorzoptičnimzvočnimkablom,kotje
prikazano na naslednji sliki.
OPOMBA
y Neglejtevoptičnaizhodnavrata.Čepogle-
datevlaserskižarek,silahkopoškodujete
vid.
y ZvoksfunkcijoACP(zaščitazvočnekopije)
lahko blokira izhodni digitalni zvok.
Page 27
MAKING CONNECTIONS
A-27
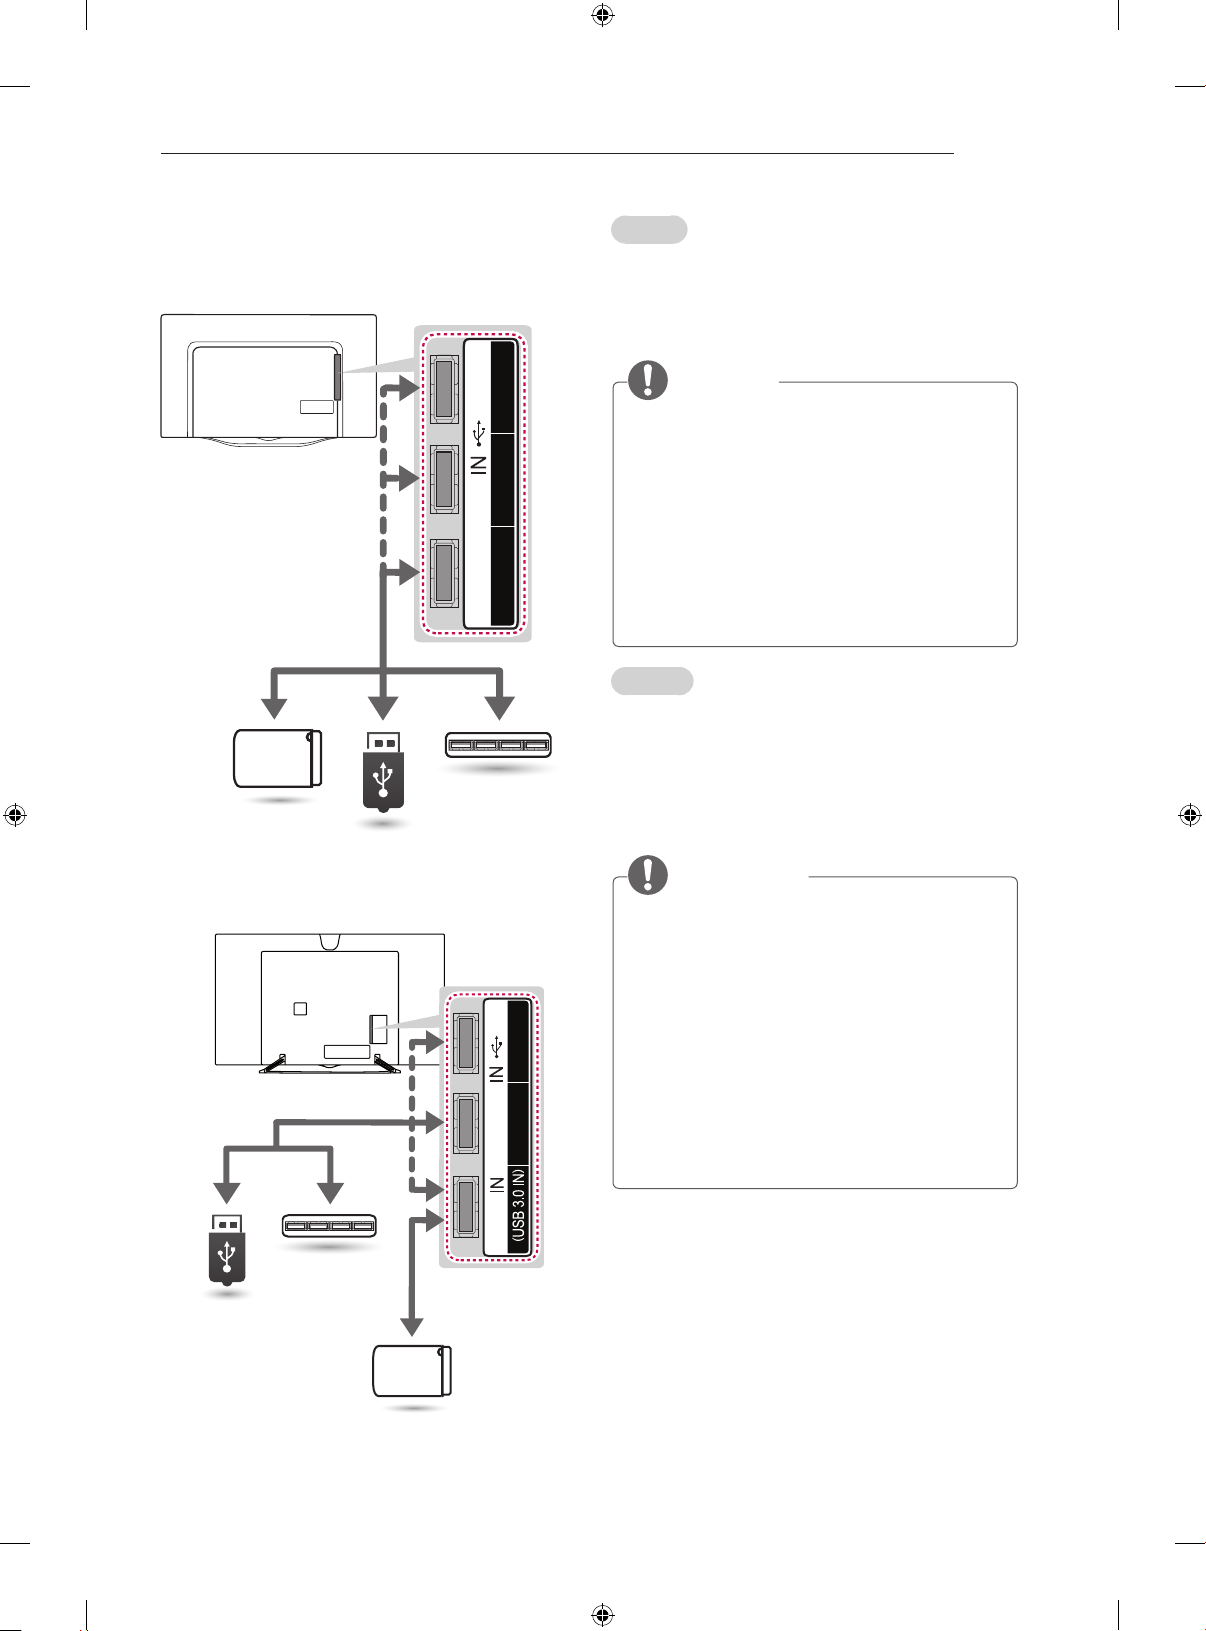
USB Connection
(Only EC93**)
USB
(*Not Provided) (*Not Provided)
HDD
(Only EC97**, EC98**)
USB HUB
(*Not Provided)
3
2
1
USB
English
Connect a USB storage device such as a USB
flash memory, external hard drive or a USB
memory card reader to the TV and access the
Smart Share menu to use various multimedia files.
NOTE
Some USB Hubs may not work. If a USB
y
device connected using a USB Hub is not
detected, connect it to the USB IN port on
the TV directly.
Connect the external power source if your
y
USB is needed.
Connecting via USB 3.0:
y
Some USB device may not work if it dose not
meet USB 3.0 standard. In case, connect it
to USB IN 2 or USB IN 3 port. (Only EC97**,
EC98**)
Deutsch
Verbinden Sie ein USB-Speichergerät, z. B.
USB-Flash-Speicher, eine externe Festplatte oder
einen USB-Kartenleser für Speicherkarten mit dem
TV-Gerät, und greifen Sie auf das Menü „Smart
Share“ zu, um verschiedene Multimediadateien zu
verwenden.
HINWEIS
Einige USB-Hubs funktionieren vielleicht
y
nicht. Falls ein über einen USB-Hub
verbundenes USB-Gerät nicht gefunden
wird, verbinden Sie es direkt mit dem USB
IN-Anschluss am TV-Gerät.
Schließen Sie eine externe Stromquelle an,
y
3
2
wenn eine USB-Verbindung erforderlich ist.
Verbindungsanleitung für USB 3.0 :
y
Einige USB-Geräte, die dem USB
3.0-Standard nicht entsprechen, funktionieren
möglicherweise nicht. Schließen Sie Ihr Gerät
in diesem Fall an einen USB IN 2- oder USB
IN 3-Anschluss an. (
Nur
EC97**, EC98**)
USB HUB
(*Not
Provided)
Provided)
HDD
1
(*Not
HDD
(*Not Provided)
Page 28
A-28
MAKING CONNECTIONS
Français
Connectez un périphérique de stockage USB
comme une clé USB, un disque dur externe ou
une carte mémoire USB à la TV et accédez au
menu Smart Share pour utiliser divers fichiers
multimédia.
REMARQUE
Certains ports USB peuvent ne pas
y
fonctionner. Si un appareil USB branché
sur un port USB IN n’est pas détecté alors
connectez-le directement au téléviseur.
Connectez la source d’alimentation externe
y
si une connexion USB est nécessaire.
Guide de connexion pour USB 3.0 :
y
Certains appareils USB peuvent ne pas
fonctionner s’ils ne prennent pas en charge
la norme USB 3.0. Connectez l’appareil aux
ports USB IN 2 ou USB IN 3. (Uniquement
EC97**, EC98**)
Italiano
Collegare una periferica di archiviazione USB, ad
esempio una memoria flash USB, un hard disk
esterno, o un lettore di schede di memoria USB
al televisore e accedere al menu Smart Share per
utilizzare diversi file multimediali.
NOTA
Alcuni hub USB potrebbero non funzionare.
y
Se una periferica USB collegata tramite
un hub USB non viene rilevata, collegarla
direttamente alla porta USB IN della TV.
Collegarsi all’alimentazione esterna se il
y
dispositivo USB lo richiede.
Guida alla connessione per USB 3.0 :
y
È possibile che alcune periferiche USB non
funzionino se non soddisfano lo standard USB
3.0. In tal caso, collegare la periferica alla
porta USB IN 2 o USB IN 3. (Solo EC97**,
EC98**)
Español
Conecte un dispositivo de almacenamiento USB,
comouna memoria flash USB, un disco duro
externo o un lector de tarjetas de memoria USB a
la TV y acceda al menú Smart Share para manejar
diversos archivos multimedia.
NOTA
Es posible que algunos concentradores USB
y
no funcionen. Si no se detecta un dispositivo
USB conectado mediante un concentrador
USB, conéctelo directamente al puerto USB
IN de la TV.
Conecte la fuente de alimentación externa si
y
necesita el USB.
Guía de conexión para USB 3.0 :
y
Es posible que algunos dispositivos USB no
funcionen si no cumplen con el estándar USB
3.0. En ese caso, conéctelo al puerto USB IN
2 o USB IN 3. (
Português
Ligue um dispositivo de armazenamento USB,
como por exemplo uma memória flash USB, uma
unidade de disco rígido externa ou um leitor de
cartões de memória USB, à TV e aceda ao menu
Smart Share para utilizar vários tipos de ficheiros
multimédia.
Solo
EC97**, EC98**)
NOTA
Alguns hubs USB poderão não funcionar. Se
y
não for detectado um dispositivo USB ligado
através de um hub USB, ligue o dispositivo
directamente à porta USB IN na TV.
Ligue a fonte de alimentação externa do seu
y
equipamento USB se for necessário.
Guia de ligação para USB 3.0 :
y
Alguns dispositivos USB poderão não
funcionar se não forem compatíveis com
o padrão USB 3.0. Se for o caso, ligue o
dispositivo em questão à porta USB IN 2 ou
USB IN 3. (
Apenas
EC97**, EC98**)
Page 29
MAKING CONNECTIONS
A-29
Nederlands
Sluit een USB-opslagapparaat, zoals een USBflashgeheugen, externe harde schijf of een
USB-geheugenkaartlezer, aan op de TV en open
het menu Smart Share om diverse multimediabestanden te kunnen gebruiken.
OPMERKING
Sommige USB-hubs werken mogelijk niet.
y
Als een USB-apparaat dat via een USB-hub
is aangesloten niet wordt gedetecteerd, sluit
u het apparaat direct aan op de USB INpoort van de TV.
Sluit het USB-apparaat, indien van
y
toepassing, op een stopcontact aan.
Informatie met betrekking tot USB 3.0:
y
Sommige USB-apparaten werken mogelijk
niet wanneer ze niet voldoen aan de USB
3.0-standaard. In dat geval sluit u het
apparaat aan op de USB IN 2- of USB IN
3-poort. (Alleen EC97**, EC98**)
Ελληνικά
ΣυνδέστεμιασυσκευήαποθήκευσηςUSB,όπως
μιαμνήμηflashUSB,ένανεξωτερικόσκληρό
δίσκοήμιασυσκευήανάγνωσηςκαρτώνμνήμης
USB,στηντηλεόρασηκαιμεταβείτεστομενού
SmartShareγιατηχρήσηδιάφορωναρχείων
πολυμέσων.
Slovenščina
Natelevizorpriključitepomnilniškonapravo
USB, kot je pomnilnik USB Flash, zunanji
trdi disk ali bralnik pomnilniških kartic USB in
odpritemeniSmartShare,dauporabiterazlične
večpredstavnostnedatoteke.
OPOMBA
NekaterazvezdiščaUSBmordanebodo
y
delovala.ČenapravaUSB,povezanaprek
zvezdiščaUSB,nizaznana,jopriključite
neposredno na vrata USB IN na televizorju.
Priklopitevirzunanjeganapajanja,čega
y
naprava USB zahteva.
NavodilazapriključitevUSB3.0:
y
Naprave USB, ki ne podpirajo standarda
USB 3.0, ne bodo delovale. V tem primeru
napravopriključitenavrataUSB IN 2 ali USB
IN 3. (
Samo modeli
EC97**, EC98**)
ΣΗΜΕΙΩΣΗ
ΟρισμένοιδιανομείςUSBενδέχεταινα
y
μηνλειτουργούν.Εάνδενείναιδυνατήη
ανίχνευσημιαςσυσκευήςUSBπουέχει
συνδεθείμέσωδιανομέαUSB,συνδέστε
τηναπευθείαςστηνυποδοχήUSBINτης
τηλεόρασης.
Συνδέστετηνεξωτερικήπηγήτροφοδοσίας
y
ανηεξωτερικήσυσκευήδιαθέτειδικότης
καλώδιο.
ΟδηγόςσύνδεσηςγιαUSB3.0:
y
ΟρισμένεςσυσκευέςUSBενδέχεταιναμην
λειτουργούνανδενπληρούντοπρότυπο
USB3.0.Σεαυτήντηνπερίπτωσησυνδέστε
σεθύραUSB IN 2ήUSB IN 3.(Μόνογιατα
μοντέλαEC97**,EC98**)
Page 30
A-30
MAKING CONNECTIONS
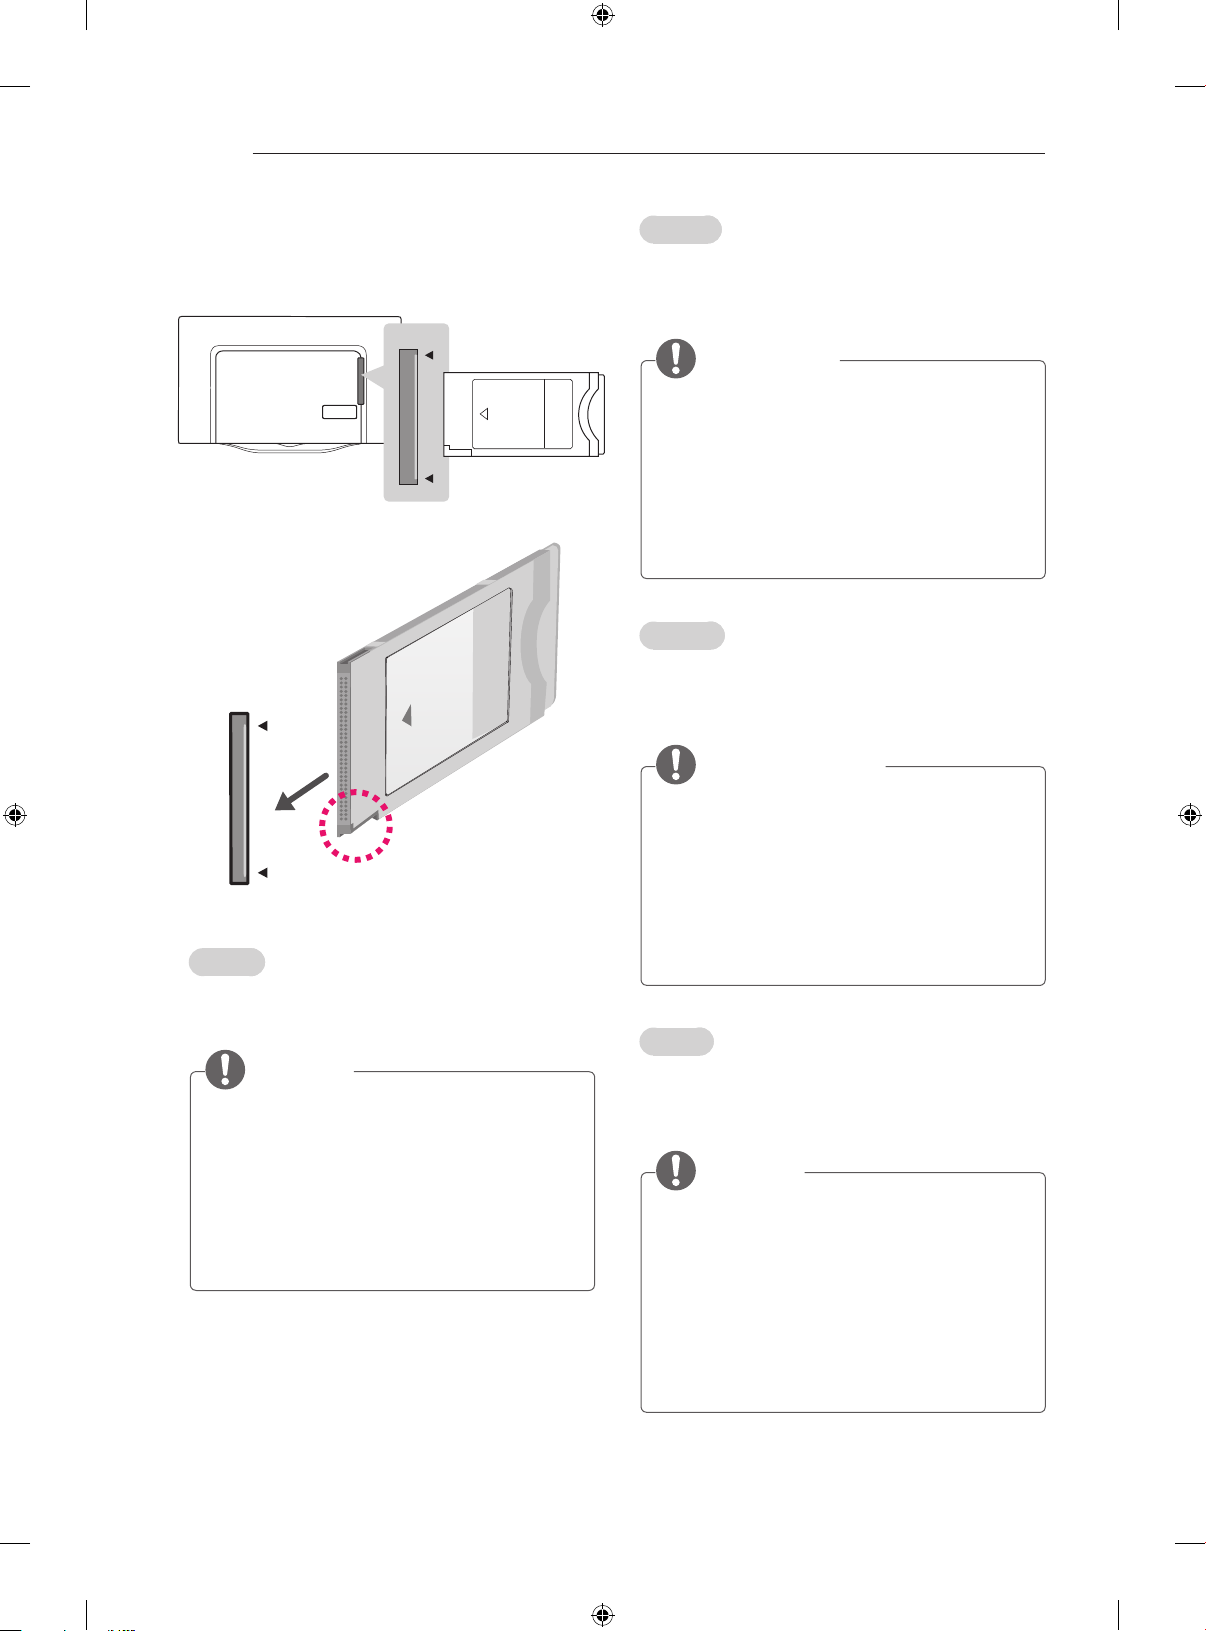
CI module Connection
PCMCIA CARD SLOT
(*Not Provided)
PCMCIA CARD SLOT
English
View the encrypted (pay) services in digital TV
mode. This feature is not available in all countries.
NOTE
Check if the CI module is inserted into the
y
PCMCIA CARD SLOT in the right direction.
If the module is not inserted properly, this
can cause damage to the TV and the
PCMCIA CARD SLOT.
If the TV does not display any video and
y
audio when CI+ CAM is connected, please
contact to the Antenna/Cable/Satellite Service Operator.
Deutsch
Zeigen Sie verschlüsselte Dienste (Bezahldienste)
im digitalen TV-Modus an. Diese Funktion ist in
einigen Ländern nicht verfügbar.
HINWEIS
Überprüfen Sie, ob das CI-Modul richtig
y
herum in den PCMCIA-Kartensteckplatz
gesteckt wurde. Falls das Modul nicht korrekt
eingesetzt wurde, können TV-Gerät und PCMCIA-Kartensteckplatz beschädigt werden.
Wenn das Fernsehgerät keine Videos oder
y
Audio-Dateien abspielt, während es mit der CI+
CAM verbunden ist, wenden Sie sich an den
Serviceanbieter für Antenne / Kabel / Satellit.
Français
Affichez les services cryptés (payants) en mode
TV numérique. Cette fonction n’est pas disponible
dans tous les pays.
REMARQUE
Vérifiez si le module CI est inséré dans le
y
bon sens dans la fente de la carte PCMCIA.
Si le module est mal inséré, la TV pourrait
subir des dommages ainsi que la fente de la
carte PCMCIA.
Si le téléviseur n’affiche aucune vidéo et
y
n’émet aucun son lorsque l’entrée CI+ CAM
est connectée, contactez votre opérateur de
service antenne/satellite/câble.
Italiano
Consente la visione dei servizi codificati (a pagamento) in modalità TV digitale. Questa funzione
non è disponibile in tutti i paesi.
NOTA
Verificare che il modulo CI sia inserito nello slot
y
della scheda PCMCIA nel verso corretto. Se il
modulo non è inserito nel modo corretto, possono verificarsi danni alla TV e allo slot stesso.
Se il TV non visualizza o riproduce alcun
y
contenuto video e audio quando è collegata la funzione CAM (modulo di accesso
condizionale) con CI+ (Interfaccia comune
plus), contattare l’operatore del servizio
antenna/via cavo/satellitare.
Page 31
MAKING CONNECTIONS
A-31
Español
Puede visualizar los servicios de abono (de pago)
en el modo de DTV. Esta función no está disponible en todos los países.
NOTA
Compruebe si el módulo CI se ha insertado
y
en la ranura para tarjeta PCMCIA en la dirección correcta. Si el módulo no se ha insertado correctamente, podría causar daños en
la TV y en la ranura para tarjeta PCMCIA.
Si la TV no reproduce vídeo ni audio cuando
y
se conecta CI+ CAM, póngase en contracto
con el operador del servicio por antena/cable/digital terrestre.
Português
Visualizar os serviços encriptados (pagos) no
modo de TV digital. Esta função não está disponível em todos os países.
NOTA
Verifique se o módulo CI está inserido na
y
ranhura de cartão PCMCIA no sentido correcto. Se o módulo não estiver inserido correctamente, pode danificar a TV e a ranhura
de cartões PCMCIA.
Se a TV não exibir qualquer vídeo e áudio
y
com o CAM CI+ ligado, contacte o Operador
de Serviços de antena/por cabo/ terrestres.
Ελληνικά
Παρακολουθήστεκρυπτογραφημένες
(συνδρομητικές)υπηρεσίεςστηλειτουργία
ψηφιακήςτηλεόρασης.Αυτήηλειτουργίαδενείναι
διαθέσιμησεόλεςτιςχώρες.
ΣΗΜΕΙΩΣΗ
ΕλέγξτεανημονάδαCIέχειτοποθετηθεί
y
στηνεσοχήκάρταςPCMCIAμετησωστή
κατεύθυνση.Ανδενέχειτοποθετηθείσωστά,
μπορείναπροκαλέσειζημιάστηντηλεόραση
καιστηνυποδοχήκάρταςPCMCIA.
Ανητηλεόρασηδενυποστηρίζειεικόνα
y
καιήχοκατάτησύνδεσηCI+CAM,
επικοινωνήστεμετονπάροχοκεραίας/
καλωδιακών/δορυφορικώνυπηρεσιών.
Slovenščina
Zaogledkodiranih(plačljivih)storitevvdigitalnem
televizijskemnačinu.
OPOMBA
Prepričajtese,dajeCImodulpravilno
y
vstavljenvrežozaPCMCIAkartice.Če
modul ni obrnjen pravilno, lahko pride do
poškodbeTVaparatainPCMCIAreže.
Česenatelevizorjunepredvajavideoali
y
zvok, ko je priklopljen modul CI+ CAM, se
obrnite na ponudnika anteno/kabelskih/
satelitskih storitev.
Nederlands
Bekijk gescrambelde services (betaalservices) in
de digitale TV-modus. Deze functie is niet in alle
landen beschikbaar.
OPMERKING
Controleer of de CI-module in de juiste richt-
y
ing is geplaatst in de PCMCIA-kaartsleuf.
Indien de module niet goed is geplaatst, kan
dit schade veroorzaken aan de TV en de
PCMCIAkaartsleuf.
Als de TV geen audio en video afspeelt
y
terwijl CI+ CAM is aangesloten, neem dan
contact op met de antenne-/kabel-/satellietexploitant.
Page 32
A-32
MAKING CONNECTIONS
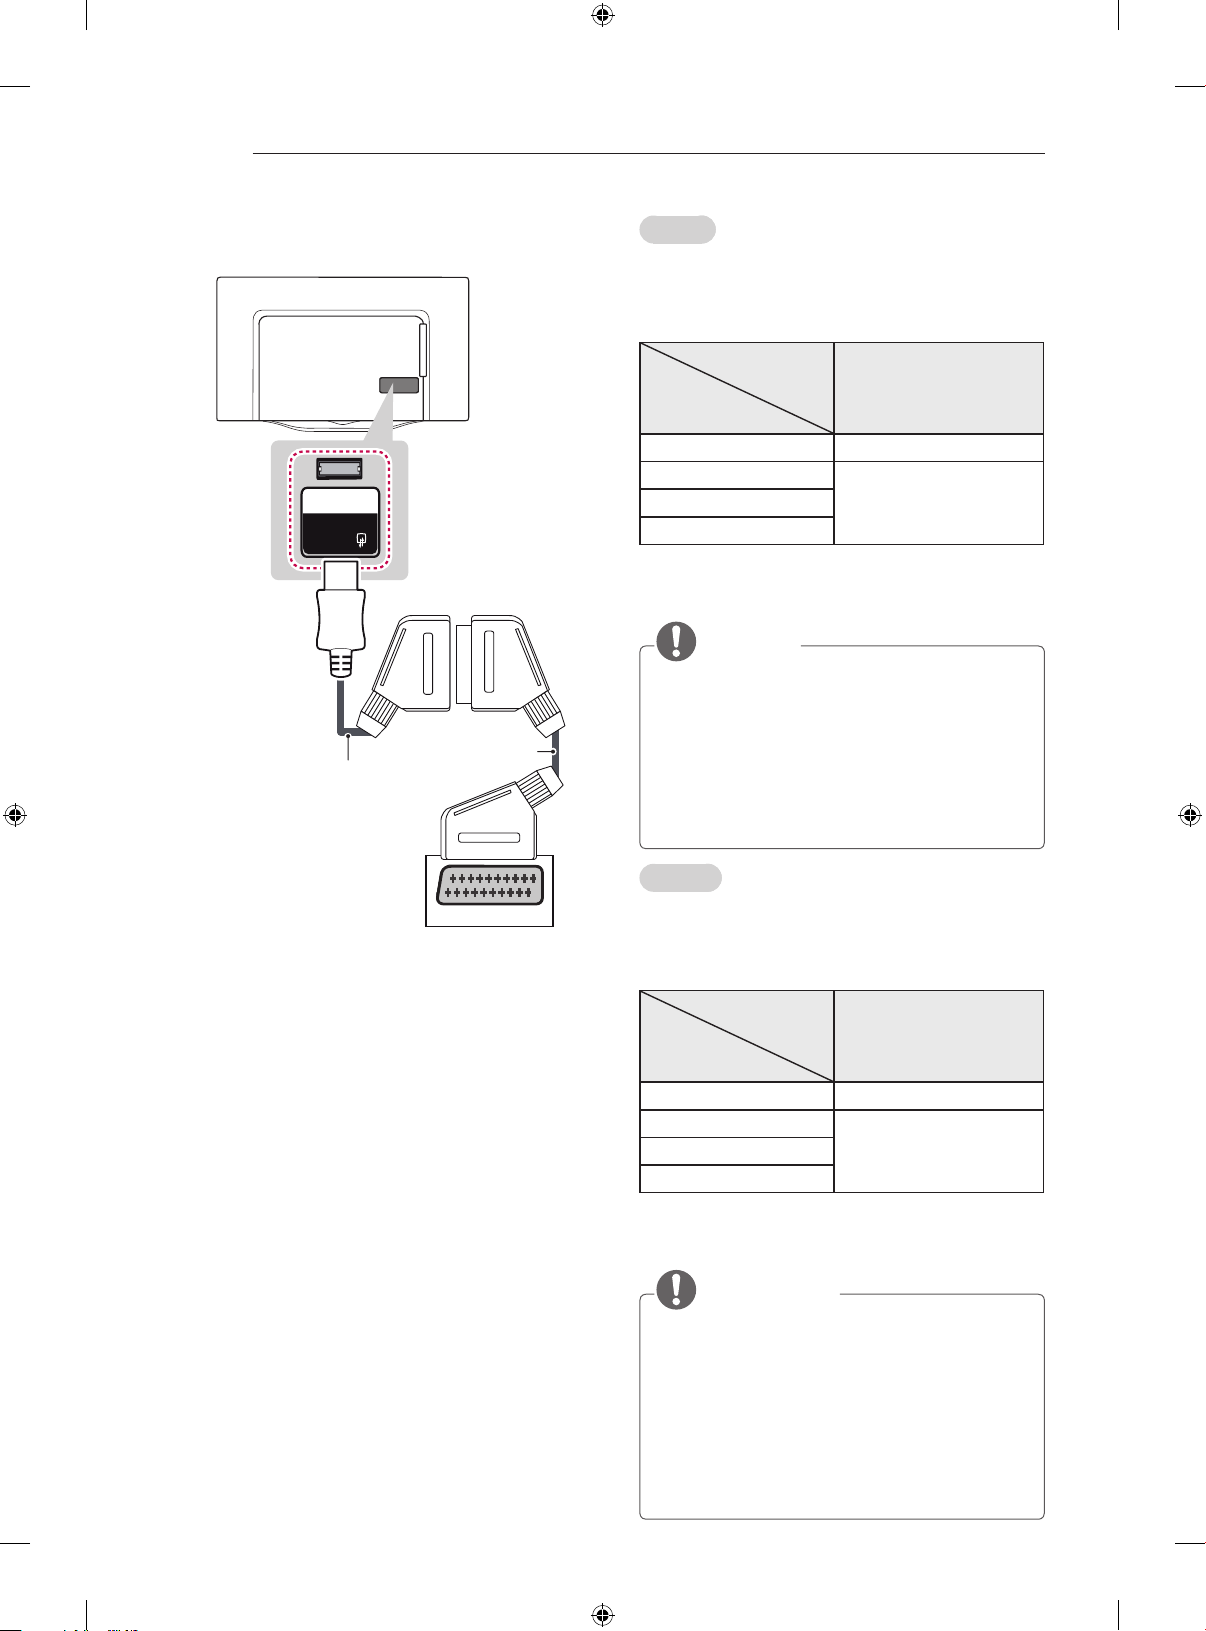
Euro Scart Connection
IN/OUT
(RGB)
AV 1
(*Not
(Use the Scart gender
cable provided.)
Provided)
English
Transmits the video and audio signals from an
external device to the TV set. Connect the external
device and the TV set with the Scart gender cable
as shown.
Output
Type
Current
input mode
Digital TV
Analogue TV, AV
Component
HDMI
1 TV Out : Outputs Analogue TV or Digital TV
signals.
AV1
(TV Out1)
Digital TV
Analogue TV
NOTE
Any Euro scart cable used must be signal
y
shielded.
When watching digital TV in 3D imaging
y
mode, only 2D out signals cannot be output
through the SCART cable.
If you use the Time Machine function on
y
digital TV, monitor out signals cannot be
output through the SCART cable.
AUDIO / VIDEO
Deutsch
Überträgt Video- und Audiosignale von einem externen Gerät an das TV-Gerät. Verbinden Sie das
externe Gerät wie in der Abbildung gezeigt über
ein anderes Scart-Kabel mit dem TV-Gerät.
Ausgangstyp
AV1
Aktueller
Eingangsmodus
Digital-TV
Analog-TV, AV
Component
HDMI
1 TV-Ausgang : Ausgang für analoge und digitale
Fernsehsignale.
(TV-Ausgang1)
Digital-TV
Analog-TV
HINWEIS
Das Euro-Scart-Kabel muss signaltechnisch
y
abgeschirmt sein.
Bei digitalem Fernsehen im 3D-Modus
y
können nur 2D-Ausgangssignale über ein
SCART-Kabel ausgegeben werden.
Wenn Sie die Funktion „Time Machine“
y
des Digital-TVs nutzen, können keine TVAusgangssignale über das SCART-Kabel
ausgegeben werden.
Page 33
MAKING CONNECTIONS
A-33
Français
Transmet les signaux audio et vidéo d’un appareil
externe au téléviseur. Connectez le périphérique
externe et le téléviseur avec le câble Péritel mâle
comme indiqué.
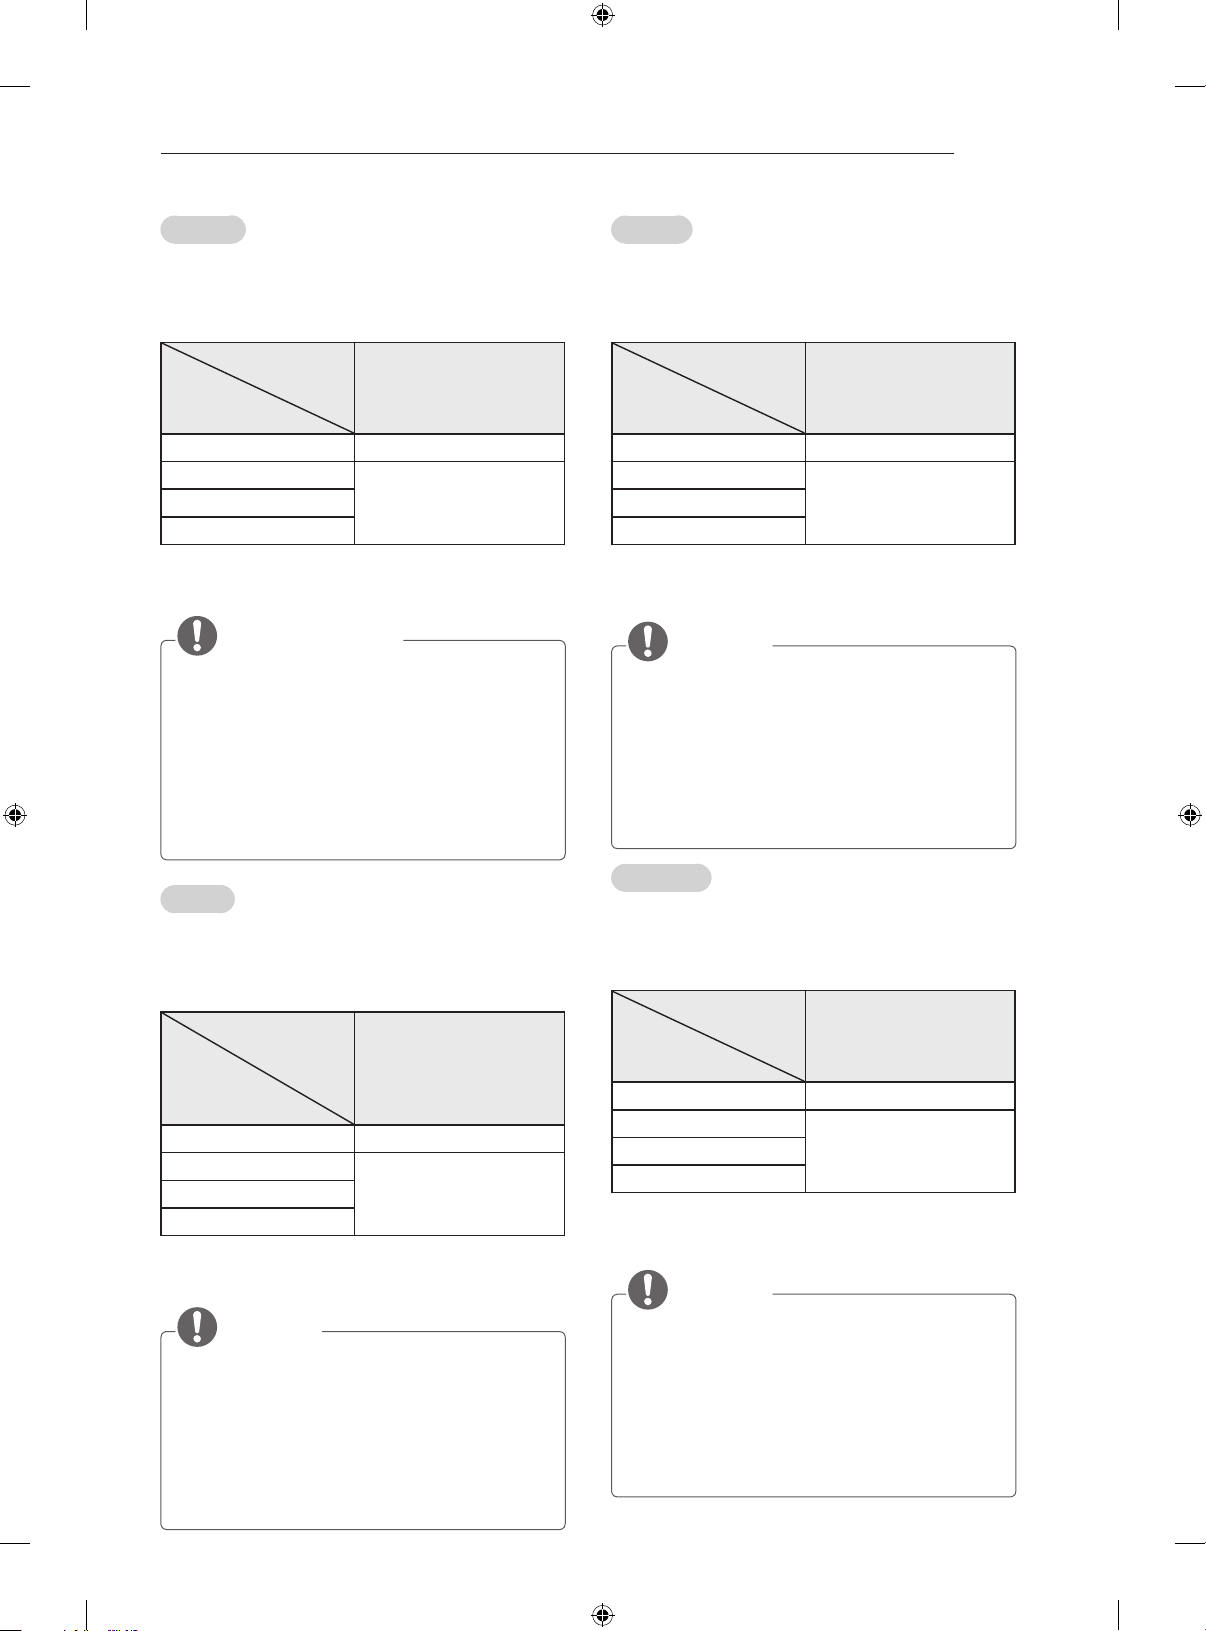
Type de sortie
AV1
Mode
d’entrée actuel
TV numérique
TV analogique, AV
Composant
HDMI
1 Sortie TV : sortie de signaux en mode TV
analogique ou en mode TV numérique.
(Sortie TV1)
TV numérique
TV analogique
REMARQUE
Tous les câbles Euro scart utilisés doivent
y
être des câbles de signal blindés.
Quand le mode 3D est sélectionné sur la TV
y
numérique, seuls les signaux de sortie 2D
peuvent être émis via le câble péritel.
Si vous utilisez la fonction Time Machine
y
sur le téléviseur numérique, les signaux de
sortie du téléviseur ne peuvent être traités
via le câble SCART.
Español
Transmite las señales de audio y vídeo de un dipositivo externo a la TV. Use el de género SCART
para conectar el dispositivo externo a la TV como
se muestra.
Tipo de salida
AV1
Modo de
entrada
TV digital
TV analógica, AV
Component
HDMI
1 Salida de TV : salida de señales de TV analógica
o digital.
(Salida de TV1)
TV digital
TV analógica
NOTA
Todo cable euroconector que se emplee
y
deberá estar blindado.
Cuando visualice la TV digital en modo
y
de imagen 3D, sólo podrá utilizar el
euroconector para las señales de salida 2D.
Si usa la función Time Machine en la TV
y
digital, no podrá utilizar el SCART para las
señales de salida de la TV.
Italiano
Consente la trasmissione dei segnali audio e video
da un dispositivo esterno al televisore. Collegare
il dispositivo esterno e il TV con un cavo generico
Euro Scart come mostrato.
Tipo di uscita
Modalità
di ingresso
corrente
TV digitale
TV analogica, AV
Component
HDMI
1 Uscita TV : uscite segnali TV analogica o TV
digitale.
AV1
(Uscita TV
TV digitale
TV analogica
1
)
NOTA
I cavi Euro Scart devono essere schermati.
y
Quando si guarda il TV digitale in modalità
y
immagini 3D, solo i segnali di uscita 2D
possono passare attraverso il cavo SCART.
Se si utilizza la funzione Time Machine sul
y
TV digitale, i segnali di uscita del TV non
potranno essere trasmessi tramite il cavo
SCART.
Português
Transmite os sinais de vídeo e áudio de um
dispositivo externo para a TV. Ligue o dispositivo
externo ao televisor com o cabo Scart macho,
conforme demonstrado.
Tipo de saída
AV1
Modo de
entrada actual
TV Digital
TV Analógica, AV
Componentes
HDMI
1 Saída TV : Sinais de Saída de TV Analógica ou
Digital.
(Saída TV1)
TV Digital
TV Analógica
NOTA
Qualquer cabo Euro scart utilizado terá de
y
ser blindado.
Quando estiver a ver TV digital no modo de
y
imagem em 3D, apenas os sinais de saída 2D
poderão ser emitidos através do cabo SCART.
Se utilizar a função Time Machine numa TV
y
digital, não é possível enviar os sinais de
saída da TV através do cabo SCART.
Page 34
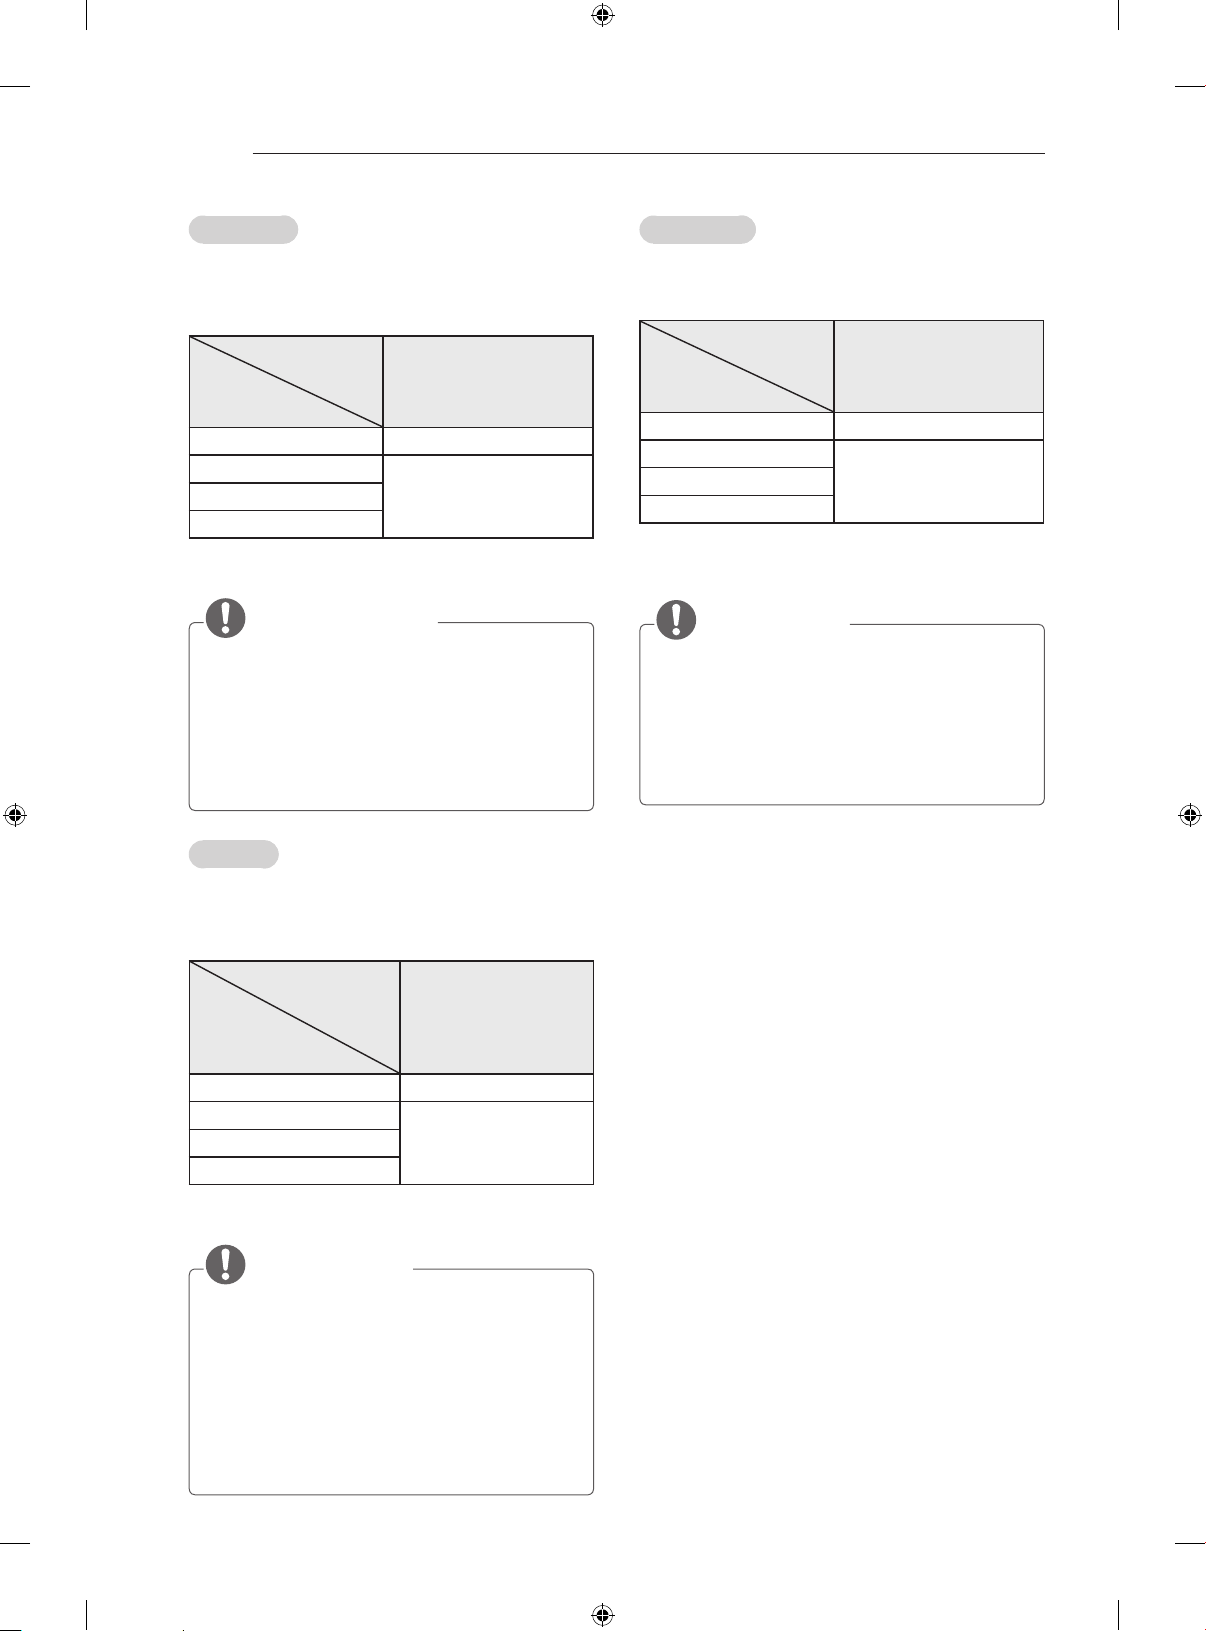
A-34
MAKING CONNECTIONS
Nederlands
U kunt de video- en audiosignalen vanaf een etern apparaat naar de TV zenden. Sluit het externe apparaat
en de TV op elkaar aan met behulp van de Scart-kabel
(mannetje/vrouwtje), zoals in de afbeelding.
Uitvoertype
AV1
Huidige
invoermodus
Digitale TV
Analoge TV, AV
Component
HDMI
1 TV Uit : voert analoge TV-signalen of Digitale
TVsignalen uit.
(TV Uit1)
Digitale TV
Analoge TV
OPMERKING
Voor elke Scart-kabel moet het signaal zijn
y
afgeschermd.
Tijdens het kijken naar digitale TV in de modus
y
voor 3D-beelden kunnen alleen 2D-uitsignalen
worden uitgevoerd via de SCART-kabel.
Als u de functie Time Machine op digitale
y
TV gebruikt, kunnen TV uit-signalen niet
worden uitgevoerd via de SCART-kabel.
Slovenščina
Prenaša video in avdio signale iz zunanje naprave
natelevizor.Povežitezunanjonapravointelevizors
pretvorniškim kablom Euro Scart, kot je prikazano.
Vrsta izhoda
AV1
Trenutni
način vhoda
Digitalna TV
Analogna TV, AV
Komponentni
HDMI
1 TV-izhod : Izhod za analogne in digitalne
televizijske signale.
(TV-izhod1)
Digitalna TV
Analogna TV
OPOMBA
KabelEuroScartmorabitisignalnozaščiten.
y
Prigledanjudigitalnetelevizijev3D-načinu
y
jemogočepokabluSCARToddajatile
2D-izhodne signale.
Pri uporabi funkcije Time Machine pri
y
digitalni televiziji izhodnih signalov monitorja
nimogočeoddajatipokabluSCART.
Ελληνικά
Μεταδίδειτασήματαεικόναςκαιήχουαπόμιαεξωτερική
συσκευήστηντηλεόραση.Συνδέστετηνεξωτερική
συσκευήκαιτηντηλεόρασημεένακαλώδιοEuroScart
αρσενικό-θηλυκόόπωςφαίνεταιστηνεικόνα.
Τύπος εξόδου
Τρέχουσα
λειτουργία
εισόδου
Ψηφιακήτηλεόραση
Αναλογικήτηλεόραση,AV
Component
HDMI
1 ΈξοδοςTV:Έξοδοιαναλογικούσήματος
τηλεόρασηςήψηφιακούσήματοςτηλεόρασης.
Ψηφιακήτηλεόραση
Αναλογικήτηλεόραση
AV1
(Έξοδος TV1)
ΣΗΜΕΙΩΣΗ
ΚάθεκαλώδιοEuroscartπουχρησιμοποιείται
y
πρέπειναδιαθέτειθωράκισησήματος.
Ότανπαρακολουθείτεψηφιακήτηλεόραση
y
στηλειτουργίααπεικόνισης3D,μόνοτα
σήματαεξόδου2Dμεταδίδονταιμέσωτου
καλωδίουSCART.
ΑνχρησιμοποιείτετηλειτουργίαTime
y
Machineσεψηφιακήτηλεόραση,τασήματα
εξόδουτηςτηλεόρασηςδενμπορούννα
μεταδοθούνμέσωκαλωδίουSCART.
Page 35
MAKING CONNECTIONS
A-35
English
Connect various external devices to the TV and
switch input modes to select an external device. For
more information on external device’s connection,
refer to the manual provided with each device.
Available external devices are: HD receivers, DVD
players, VCRs, audio systems, USB storage devices, PC, gaming devices, and other external devices.
NOTE
The external device connection may differ
y
from the model.
Connect external devices to the TV regardless
y
of the order of the TV port.
If you record a TV program on a DVD recorder
y
or VCR, make sure to connect the TV signal
input cable to the TV through a DVD recorder or
VCR. For more information of recording, refer to
the manual provided with the connected device.
Refer to the external equipment’s manual for
y
operating instructions.
If you connect a gaming device to the TV, use
y
the cable supplied with the gaming device.
In PC mode, there may be noise associated
y
with the resolution, vertical pattern, contrast
or brightness. If noise is present, change
the PC output to another resolution, change
the refresh rate to another rate or adjust the
brightness and contrast on the PICTURE
menu until the picture is clear.
In PC mode, some resolution settings may
y
not work properly depending on the graphics
card.
If Ultra HD content is played via PC, the video
y
or audio may have disruptions intermittently
depending on your PC’s performance.
Deutsch
Verbinden Sie mehrere externe Geräte mit dem TVGerät, und wechseln Sie die Eingangsmodi, um ein
externes Gerät auszuwählen. Weitere Informationen
zum Anschluss von externen Geräten entnehmen
Sie bitte dem Handbuch des jeweiligen Gerätes.
Verfügbare externe Geräte sind : HD-Receiver,
DVD-Player, Videorekorder, Audiosysteme, USBSpeichergeräte, PCs, Spielkonsolen und weitere
externe Geräte.
HINWEIS
Der Anschluss für externe Geräte kann von
y
Modell zu Modell unterschiedlich sein.
Verbinden Sie externe Geräte unabhängig
y
von der Reihenfolge der Anschlüsse mit
dem TVGerät.
Wenn Sie eine Fernsehsendung über
y
DVD-oder Videorekorder aufnehmen,
vergewissern Sie sich, dass das TVGerät über das Eingangskabel für das TVSignal mit dem DVD-oder Videorekorder
verbunden ist.
Weitere Informationen zu Aufnahmen
entnehmen Sie bitte dem Handbuch des
verbundenen Gerätes.
Anweisungen zum Betrieb finden Sie im
y
Handbuch des externen Gerätes.
Wenn Sie eine Spielekonsole mit dem TV-
y
Gerät verbinden, verwenden Sie das mit der
Konsole mitgelieferte Kabel.
Im PC-Modus kann es hinsichtlich
y
Auflösung, vertikalem Muster, Kontrast
oder Helligkeit zu Rauschen kommen.
Wenn Rauschen auftritt, stellen Sie den
PC auf eine andere Auflösung ein, ändern
Sie die Bildwiederholrate, oder passen Sie
Helligkeit und Kontrast im Menü „BILD“ an,
bis das Bild optimal ist.
Abhängig von der Grafikkarte
y
funktionieren im PC-Modus einige
Auflösungseinstellungen möglicherweise
nicht ordnungsgemäß.
Falls Sie Ultra-HD-Inhalte über einen PC
y
zuspielen, ist dessen Leistungsfähigkeit
entscheidend für ein störungsfreies
Abspielverhalten von Bild & Ton.
Page 36
A-36
MAKING CONNECTIONS
Français
Connectez divers périphériques externes à la TV et
changez de mode de source d’entrée pour sélectionner un périphérique externe. Pour en savoir
plus sur le raccordement d’un périphérique externe,
reportez-vous au manuel fourni avec ce dernier.
Les périphériques externes disponibles sont les
suivants : récepteurs HD, lecteurs DVD, VCR, systèmes audio, périphériques de stockage USB, PC,
consoles de jeu et autres périphériques externes.
REMARQUE
Le raccordement du périphérique externe
y
peut différer du modèle.
Connectez des périphériques externes à la
y
TV sans tenir compte de l’ordre du port TV.
Si vous enregistrez un programme
y
TV sur un enregistreur de DVD ou un
magnétoscope, veillez à raccorder le câble
de source d’entrée du signal de la TV à
la TV via un enregistreur de DVD ou un
magnétoscope. Pour en savoir plus sur
l’enregistrement, reportez-vous au manuel
fourni avec le périphérique connecté.
Veuillez consulter le manuel de l’équipement
y
externe contenant les instructions d’utilisation.
Si vous connectez une console de jeu à la TV,
y
utilisez le câble fourni avec la console de jeu.
En mode PC, un bruit peut être associé à la
y
résolution, au modèle vertical, au contraste ou
à la luminosité. En présence de bruit, changez
la résolution de la sortie PC, changez le
niveau du taux de rafraîchissement ou réglez
la luminosité et le contraste dans le menu
IMAGE jusqu’à ce que l’image soit nette.
En mode PC, certains réglages de la résolution
y
peuvent ne pas fonctionner correctement en
fonction de la carte graphique utilisée.
Lors de la lecture de contenu Ultra HD sur
y
votre PC, il se peut, selon les performances
de votre PC, que la lecture de contenus vidéo
ou audio soit altérée.
Italiano
Collegare diversi dispositivi esterni al televisore e
modicarelamodalitàdiingressoperselezionare
un dispositivo esterno. Per ulteriori informazioni sul
collegamento di un dispositivo esterno, consultare il
manuale fornito in dotazione con ciascun dispositivo.
È possibile collegare i seguenti dispositivi esterni
: ricevitori HD, lettori DVD, VCR, sistemi audio,
periferiche di archiviazione USB, PC, console per
videogiochi e altri dispositivi esterni.
NOTA
Il collegamento del dispositivo esterno può
y
variare in base al modello.
Collegare i dispositivi esterni al televisore a
y
prescindere dall’ordine della porta del televisore.
Se si registra un programma TV su un
y
registratore DVD o VCR, accertarsi di
collegare il cavo di ingresso del segnale al
televisore attraverso un registratore DVD
o VCR. Per ulteriori informazioni sulla
registrazione, consultare il manuale fornito in
dotazione con il dispositivo collegato.
Consultare il manuale dell’apparecchiatura
y
esterna per le istruzioni operative.
Se si collega una console per videogiochi alla
y
TV, utilizzare il cavo fornito con il dispositivo.
In modalità PC, possono essere presenti
y
interferenze relative alla risoluzione, schemi
verticali, contrasto o luminosità. In caso
di interferenze, modificare la modalità PC
impostando un’altra risoluzione o modificando
la frequenza di aggiornamento oppure regolare
luminosità e contrasto sul menu IMMAGINE
finché non si ottiene un’immagine nitida.
A seconda della scheda grafica utilizzata,
y
alcune impostazioni di risoluzione potrebbero
non essere adatte alla modalità PC.
Se i contenuti Ultra HD vengono riprodotti
y
sul PC, il video o l’audio potrebbero
interrompersi a seconda delle prestazioni
del PC in uso.
Page 37
MAKING CONNECTIONS
A-37
Español
Puede conectar varios dispositivos externos a la
TV y cambiar entre los modos de entrada para
seleccionar un dispositivo externo. Para obtener
más información sobre la conexión de dispositivos
externos, consulte el manual que se incluye con
cada dispositivo.
Los dispositivos externos disponibles son : receptores HD, reproductores de DVD, vídeos, sistemas
de audio, dispositivos de almacenamiento USB,
PC, consolas de juegos, etc.
NOTA
La conexión de dispositivos externos puede
y
variar entre distintos modelos.
Conecte los dispositivos externos a la
y
TV independientemente del orden de los
puertos de la TV.
Si graba un programa de TV en un grabador
y
de DVD o un vídeo, asegúrese de conectar
el cable de entrada de señal de TV a la TV a
través del grabador de DVD o del vídeo. Para
obtener más información sobre la grabación,
consulte el manual que se incluye con el
dispositivo que se conecte.
Consulte el manual del equipo externo para
y
obtener las instrucciones de funcionamiento.
Si conecta una consola de juegos a la
y
TV, emplee el cable proporcionado con el
dispositivo en cuestión.
En el modo PC, puede que se genere ruido
y
asociado a la resolución, al patrón vertical, al
contraste o a la luminosidad. Si se produce
ruido, cambie la salida PC a otra resolución,
cambie la frecuencia de actualización o ajuste
la luminosidad y el contraste del menú IMAGEN
hasta que la imagen se muestre más clara.
En el modo PC, puede que algunos ajustes de
y
la resolución no funcionen correctamente en
función de la tarjeta gráfica.
Si se reproduce contenido Ultra HD en el PC,
y
la imagen o el sonido puede interrumpirse
de forma intermitente, dependiendo del
rendimiento del PC.
Português
Ligue vários dispositivos externos à TV e mude os
modos de entrada para seleccionar um dispositivo
externo. Para mais informações sobre a ligação de
dispositivos externos, consulte o manual fornecido
com cada dispositivo.
Os dispositivos externos disponíveis são : receptores HD, leitores de DVD, videogravadores, sistemas de áudio, dispositivos de armazenamento
USB, PC, dispositivos de jogos e outros dispositivos
externos.
NOTA
A ligação do dispositivo externo pode ser
y
diferente da do modelo.
Ligue dispositivos externos à TV
y
independentemente da ordem da porta da TV.
Se gravar um programa de televisão num
y
gravador de DVD ou num videogravador, não
se esqueça de ligar o cabo do de entrada do
sinal de TV à TV através do gravador de DVD
ou do videogravador. Para mais informações
sobre a gravação, consulte o manual fornecido
com o dispositivo ligado.
Consulte o manual do equipamento externo
y
sobre instruções de funcionamento.
Se ligar um dispositivo de jogos à TV, utilize o
y
cabo fornecido com o dispositivo de jogos.
No modo PC, poderá ser produzido um ruído
y
associado à resolução, padrão vertical, contraste
ou luminosidade. Se se verificar ruído, altere
a saída do PC para outra resolução, altere a
frequência de actualização para outra frequência
ou ajuste a luminosidade e o contraste no menu
IMAGEM até a imagem ficar nítida.
No modo PC, algumas definições de resolução
y
podem não funcionar correctamente,
dependendo da placa gráfica.
Se reproduzir conteúdo em Ultra HD no seu
y
PC, poderá haver interrupções no vídeo ou no
áudio, dependendo do desempenho do PC.
Page 38
A-38
MAKING CONNECTIONS
Nederlands
U kunt diverse externe apparaten aansluiten op de
TV en de invoerbron wijzigen om het externe apparaat te kiezen. Zie voor meer informatie over het
aansluiten van externe apparaten de handleiding
die bij elk extern apparaat is geleverd.
De mogelijke externe apparaten zijn : HD-ontvangers,
DVD-spelers, videorecorders, audiosystemen, USBopslagapparaten, PC‘s, game-apparaten en andere
externe apparaten.
OPMERKING
De aansluiting van externe apparaten kan per
y
model verschillen.
Sluit externe apparaten aan op de TV,
y
ongeacht de volgorde van de TV-poort.
Als u een TV-programma opneemt op een
y
DVD-recorder of videorecorder, moet u
ervoor zorgen dat de TV-signaalinvoerkabel
via de DVD-recorder of videorecorder op de
TV is aangesloten. Zie voor meer informatie
over het opnemen de handleiding die bij het
aangesloten apparaat is geleverd.
Raadpleeg de handleiding bij het externe
y
apparaat voor bedieningsinstructies.
Als u een game-apparaat aansluit op de
y
TV, gebruik dan de kabel die bij het gameapparaat is geleverd.
Het is mogelijk dat in de PC-modus ruis aan de
y
resolutie, het verticale patroon, het contrast of de
helderheid is gekoppeld. Wijzig in dat geval de
PC-uitvoer in een andere resolutie, verander de
vernieuwingsfrequentie in een andere frequentie
of pas de helderheid en het contrast in het menu
AFBEELDING aan tot het beeld duidelijk is.
Afhankelijk van de grafische kaart werken
y
bepaalde resolutie-instellingen in de PCmodus mogelijk niet juist.
Als er Ultra HD-inhoud op uw PC wordt
y
afgespeeld, kan de video of audio mogelijk
worden verstoord, afhankelijk van de prestaties
van uw PC.
Ελληνικά
Γιαναεπιλέξετεμιαεξωτερικήσυσκευή,συνδέστε
διάφορεςεξωτερικέςσυσκευέςστηντηλεόραση
καιαλλάξτελειτουργίεςεισόδου.Γιαπερισσότερες
πληροφορίεςσχετικάμετησύνδεσηεξωτερικών
συσκευών,ανατρέξτεστοεγχειρίδιοπουπαρέχεται
μεκάθεσυσκευή.
Οιδιαθέσιμεςεξωτερικέςσυσκευέςπεριλαμβάνουν
δέκτεςHD,συσκευέςαναπαραγωγήςDVD,VCR,
ηχοσυστήματα,συσκευέςαποθήκευσηςUSB,
υπολογιστές,παιχνιδομηχανέςκαιάλλεςεξωτερικές
συσκευές.
ΣΗΜΕΙΩΣΗ
Ησύνδεσηεξωτερικώνσυσκευώνενδέχεται
y
ναδιαφέρειανάλογαμετομοντέλο.
Μπορείτενασυνδέσετεεξωτερικέςσυσκευές
y
στηντηλεόραση,ανεξάρτητααπότησειράτης
θύραςτηςτηλεόρασης.
Γιαναεγγράψετεένατηλεοπτικόπρόγραμμα
y
σεμιασυσκευήεγγραφήςDVDήVCR,
βεβαιωθείτεότιέχετεσυνδέσειτοκαλώδιο
εισόδουτηλεοπτικούσήματοςστησυσκευή
εγγραφήςDVDήVCR.Γιαπερισσότερες
πληροφορίεςσχετικάμετηνεγγραφή,
ανατρέξτεστοεγχειρίδιοπουπαρέχεταιμετη
συνδεδεμένησυσκευή.
Γιαοδηγίεςλειτουργίας,ανατρέξτεστο
y
εγχειρίδιοτουεξωτερικούεξοπλισμού.
Γιανασυνδέσετεμιαπαιχνιδομηχανήστην
y
τηλεόραση,χρησιμοποιήστετοκαλώδιοπου
παρέχεταιμετηνπαιχνιδομηχανή.
ΣτηλειτουργίαPC,ενδέχεταιναυπάρχει
y
θόρυβοςλόγωτηςανάλυσης,τουκάθετου
πλέγματος,τηςαντίθεσηςήτηςφωτεινότητας.
Εάνυπάρχειθόρυβος,αλλάξτετηνανάλυση
στηλειτουργίαPCήτορυθμόανανέωσηςή
ρυθμίστετηφωτεινότητακαιτηναντίθεσηστο
μενούΕΙΚΟΝΑ,μέχριναείναικαθαρήηεικόνα.
ΣελειτουργίαPC,ορισμένεςρυθμίσεις
y
ανάλυσηςενδεχομένωςναμηνλειτουργούν
σωστά,ανάλογαμετηνκάρταγραφικών.
ΑνγίνεταιαναπαραγωγήπεριεχομένουUltra
y
HDστοPCσας,τοβίντεοήοήχοςμπορεί
ναδιακόπτονταιανάδιαστήματα,ανάλογα
μετηναπόδοσητουPC.
Page 39
Slovenščina
Priključiterazličnezunanjenapravenatelevizorin
vklopitevhodnenačine,daizberetezunanjonapravo.Zadodatneinformacijeopriključitvizunanje
napraveglejtenavodilazauporabo,kisopriložena
posamezninapravi.
Zunanje naprave, ki so na voljo, so : HD-sprejemni-
ki,DVD-predvajalniki,videorekorderji,zvočnisistemi,pomnilnikiUSB,računalniki,igralnekonzolein
druge zunanje naprave.
OPOMBA
Povezava z zunanjo napravo je lahko odvisna
y
od modela.
Zunanjenapravepriključitenapriključke
y
televizorja v poljubnem zaporedju.
ČetelevizijskiprogramsnematenaDVDsnemalnik
y
ali videorekorder, morate DVDsnemalnik ali
videorekorderpriključitinatelevizorssignalnim
vhodnim kablom za televizor. Za dodatne
informacije o snemanju glejte navodila za
uporabo,kisopriloženapriključeninapravi.
Navodilazauporabosioglejtevpriročniku
y
zunanje opreme.
Čeželitenatelevizorpriključitiigralnokonzolo,
y
uporabitekabel,kijebilpriloženigralnikonzoli.
Vnačinuračunalnikaselahkopojavišum,ki
y
jepovezanzločljivostjo,navpičnimvzorcem,
kontrastomalisvetlostjo.Česepojavi
šum,spremeniteizhodnoločljivostračunalnika,
spremenitehitrostosveževanjealivmeniju
FOTOGRAFIJA prilagodite svetlost in kontrast,
dokler slika ni jasna.
Vnačinuračunalnikanekaterenastavitve
y
ločljivostimordanebododelovalepravilno
(odvisnoodgrafičnekartice).
Čevračunalnikupredvajajtevsebinoultra
y
visokeločljivosti,stalahkoslikainzvok
prekinjena,odvisnoodzmogljivostiračunalnika.
MAKING CONNECTIONS
A-39
Page 40

Page 41

OWNER’S MANUAL
OLED TV
Please read this manual carefully before operating your set and retain it
for future reference.
www.lg.com
Page 42
ENGLISH
ENGLISH
ENG
ENG
2
TABLE OF CONTENTS
TABLE OF CONTENTS
3 LICENSES
3 OPEN SOURCE SOFTWARE
NOTICE
3 EXTERNAL CONTROL DEVICE
SETUP
4 SAFETY INSTRUCTIONS
10 - Viewing 3D Imaging
12 INSTALLATION PROCEDURE
12 ASSEMBLING AND
PREPARING
12 Unpacking
14 Separate purchase
15 Parts and buttons
17 - Using the joystick button
18 Lifting and moving the TV
19 Mounting on a table
20 Mounting on a wall
21 Wall Type Set-up Guide
21 - How to detach the stand
23 Using Built-in Camera
23 - Preparing Built-in Camera
24 - Name of Parts of Built-in camera
24 - Checking the Camera’s Shooting Range
25 REMOTE CONTROL
27 MAGIC REMOTE FUNCTIONS
28 Registering Magic Remote
28 How to use magic remote
29 Precautions to Take when Using the Magic
Remote
29 USING THE USER GUIDE
30 MAINTENANCE
30 Cleaning your TV
30 - Screen, frame, cabinet and stand
30 - Power cord
31 TROUBLESHOOTING
32 SPECIFICATIONS
WARNING
yIf you ignore the warning message, you
may be seriously injured or there is a
possibility of accident or death.
CAUTION
y If you ignore the caution message, you may
be slightly injured or the product may be
damaged.
NOTE
y The note helps you understand and use
the product safely. Please read the note
carefully before using the product.
Page 43

LICENSES / OPEN SOURCE SOFTWARE NOTICE / EXTERNAL CONTROL DEVICE SETUP
3
LICENSES
Supported licenses may differ by model. For more information about licenses, visit www.lg.com.
OPEN SOURCE SOFTWARE NOTICE
To obtain the source code under GPL, LGPL, MPL and other open source licenses, that is contained in this
product, please visit http://opensource.lge.com.
In addition to the source code, all referred license terms, warranty disclaimers and copyright notices are
available for download.
LG Electronics will also provide open source code to you on CD-ROM for a charge covering the cost of performing such distribution (such as the cost of media, shipping and handling) upon email request to open[email protected]. This offer is valid for three (3) years from the date on which you purchased the product.
ENGLISH
ENG
ENGENGLISH
EXTERNAL CONTROL DEVICE SETUP
To obtain the external control device setup information, please visit www.lg.com.
Page 44
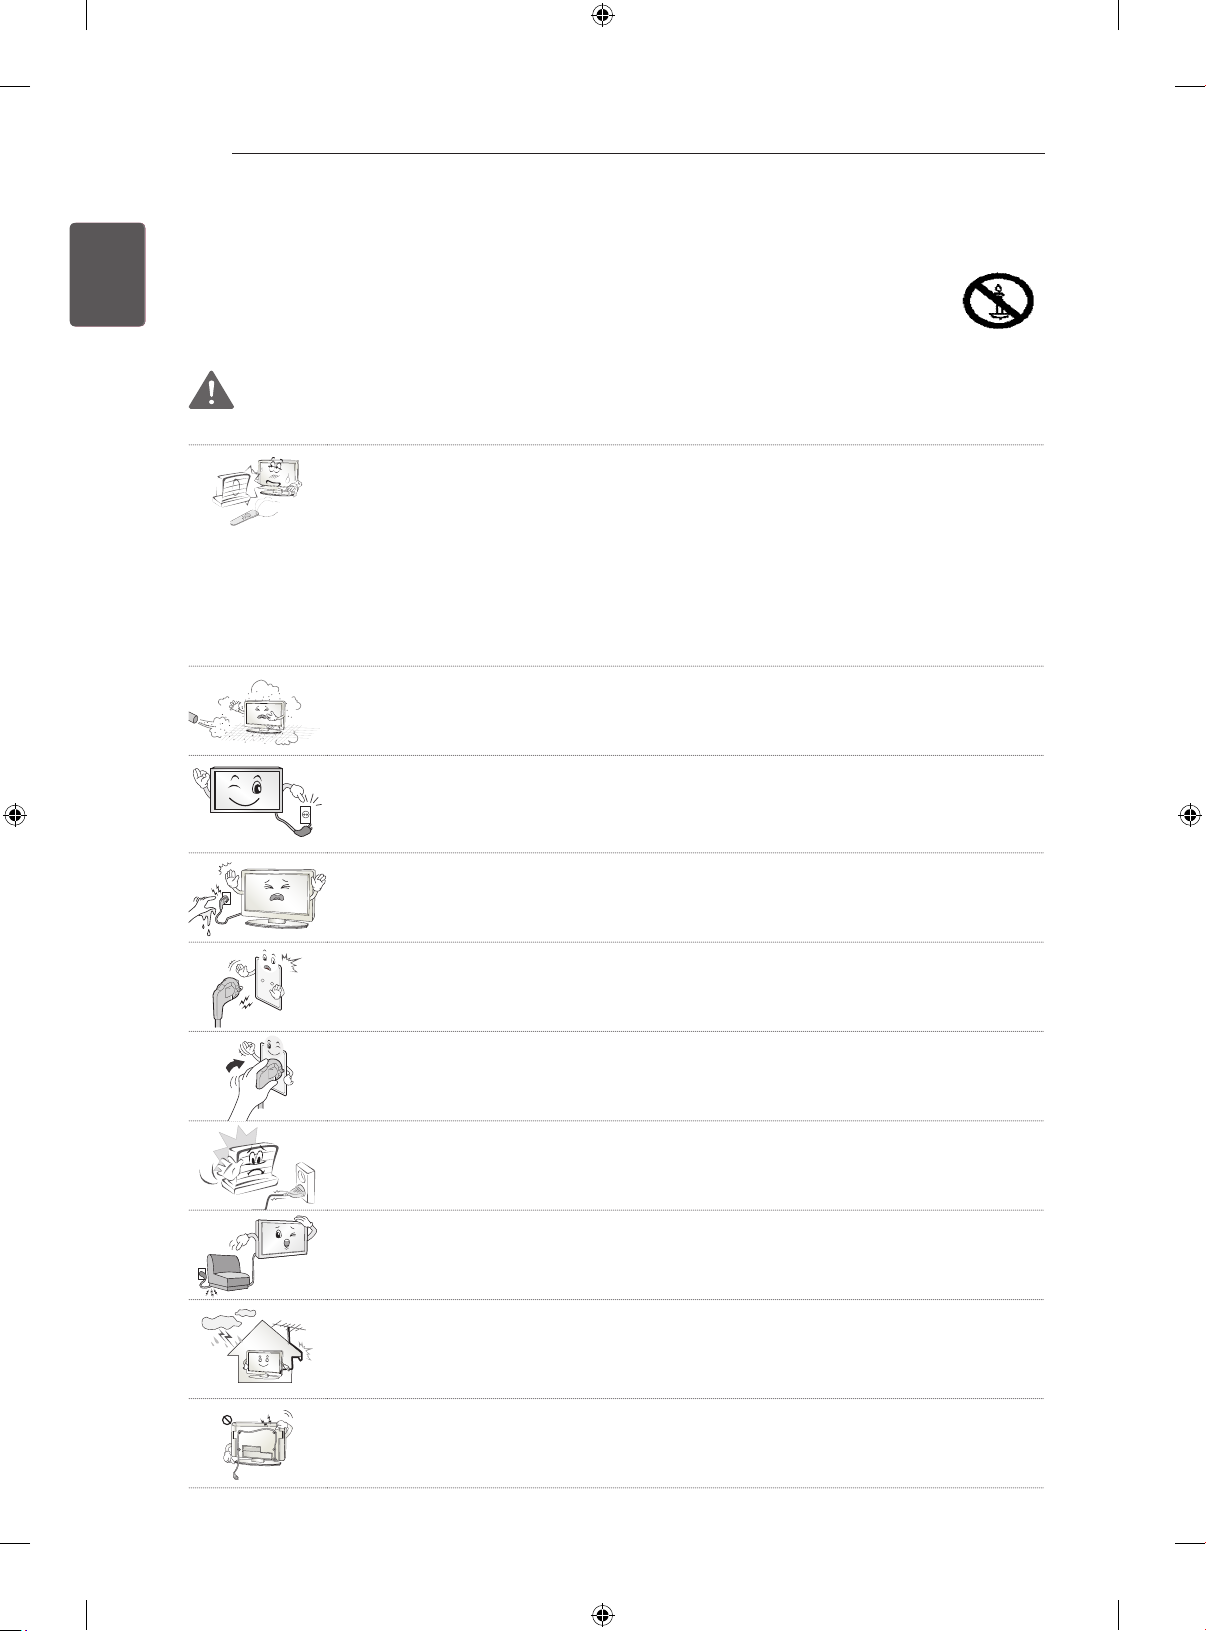
ENGLISH
ENGLISH
ENG
ENG
4
SAFETY INSTRUCTIONS
SAFETY INSTRUCTIONS
Please read these safety precautions carefully before using the product.
WARNING
y Do not place the TV and/or remote control in the following environments:
- A location exposed to direct sunlight
- An area with high humidity such as a bathroom
- Near any heat source such as stoves and other devices that produce heat
- Near kitchen counters or humidifiers where they can easily be exposed to steam
or oil
- An area exposed to rain or wind
- Near containers of water such as vases
Otherwise, this may result in fire, electric shock, malfunction or product deformation.
y Do not place the product where it might be exposed to dust.
This may cause a fire hazard.
y Mains Plug is the TV connecting/disconnecting device to AC mains electric supply.
This plug must remain readily attached and operable when TV is in use.
Do not touch the power plug with wet hands. Additionally, if the cord pin is wet or
y
covered with dust, dry the power plug completely or wipe dust off.
You may be electrocuted due to excess moisture.
y Make sure to connect Mains cable to compliant AC mains socket with Grounded
earth pin. (Except for devices which are not grounded on earth.)
Otherwise possibility you may be electrocuted or injured.
y Insert power cable plug completely into wall socket otherwise if not secured com-
pletely into socket, fire ignition may break out.
y Ensure the power cord does not come into contact with hot objects such as a
heater.
This may cause a fire or an electric shock hazard.
y Do not place a heavy object, or the product itself, on power cables.
Otherwise, this may result in fire or electric shock.
y Bend antenna cable between inside and outside building to prevent rain from flow-
ing in.
This may cause water damaged inside the Product and could give an electric
shock.
When mounting TV onto wall make sure to neatly install and isolate cabling from
y
rear of TV as to not create possibility of electric shock/fire hazard.
Page 45
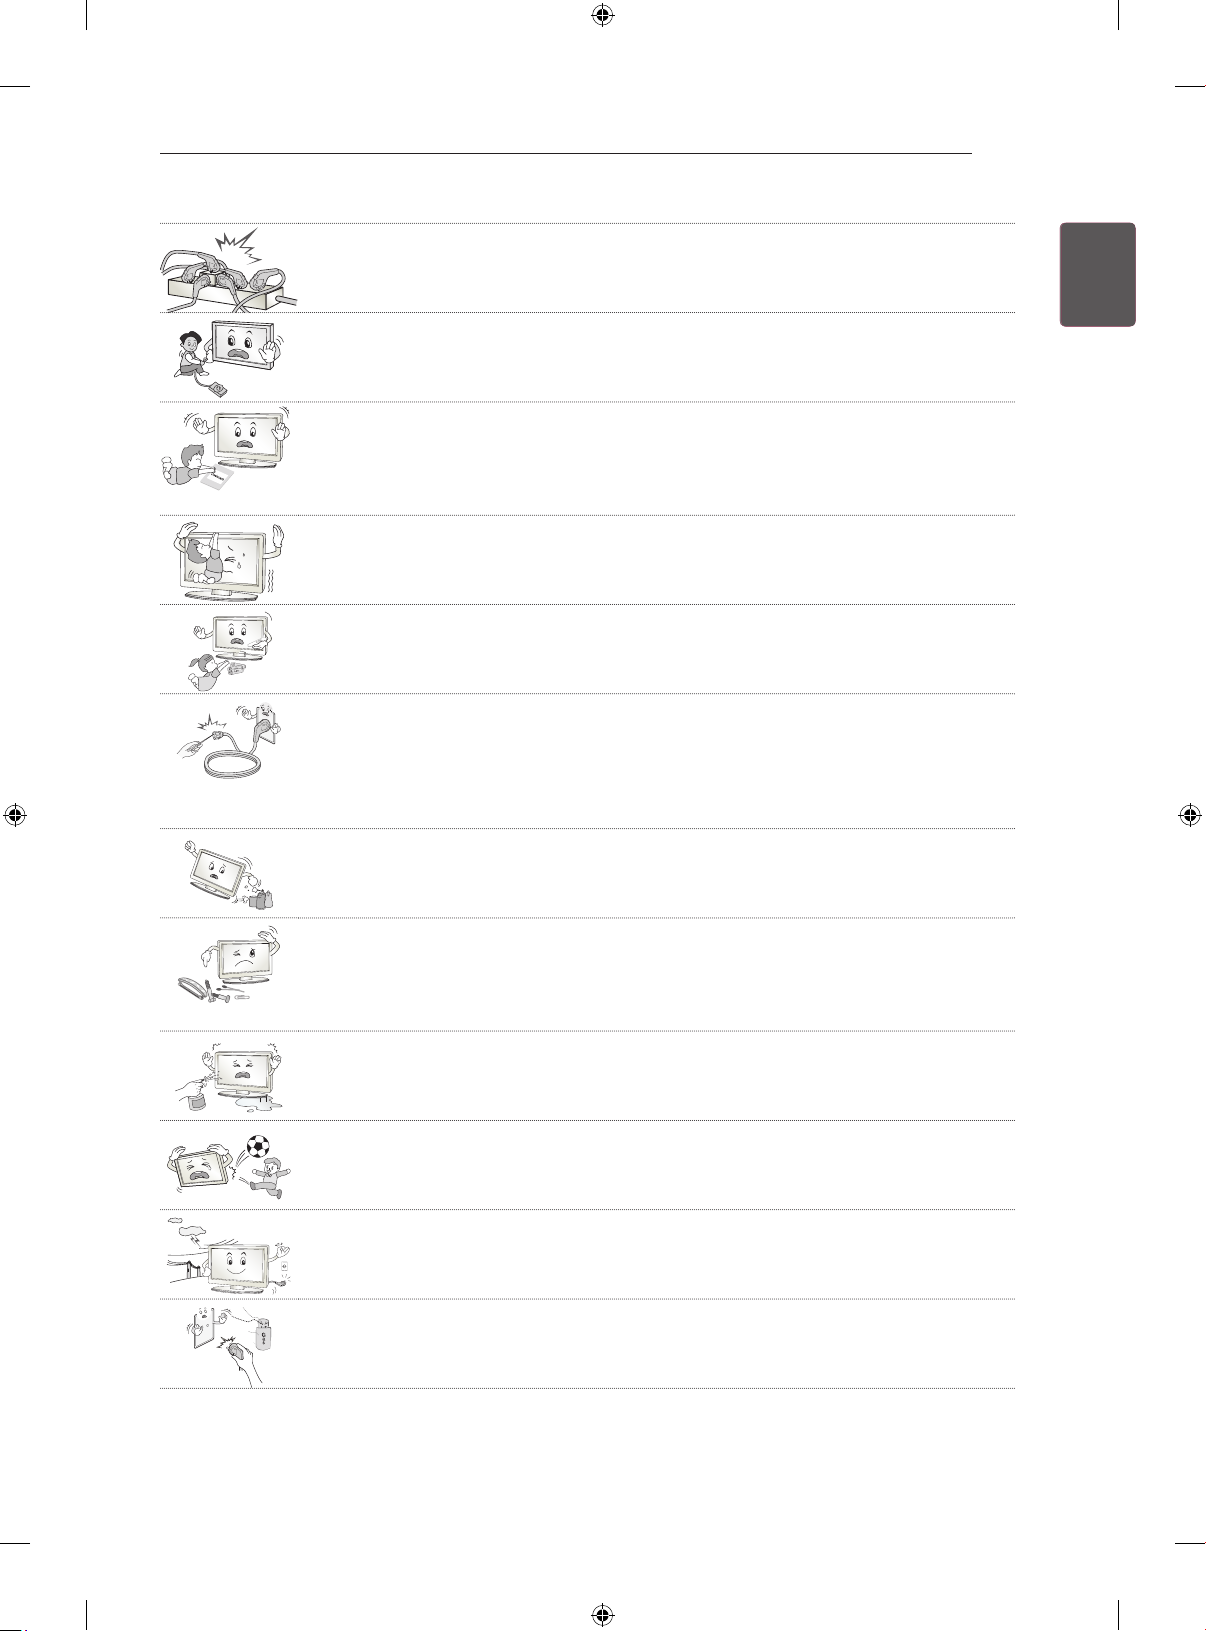
SAFETY INSTRUCTIONS
5
y Do not plug too many electrical devices into a single multiple electrical outlet.
Otherwise, this may result in fire due to over-heating.
y Do not drop the product or let it fall over when connecting external devices.
Otherwise, this may result in injury or damage to the product.
y Keep the anti-moisture packing material or vinyl packing out of the reach of chil-
dren.
Anti-moisture material is harmful if swallowed. If swallowed by mistake, force the
patient to vomit and visit the nearest hospital. Additionally, vinyl packing can cause
suffocation. Keep it out of the reach of children.
y Do not let your children climb or cling onto the TV.
Otherwise, the TV may fall over, which may cause serious injury.
y Dispose of used batteries carefully to ensure that a small child does not consume
them.
Please seek Doctor- Medical Attention immediately if child consumes batteries.
y Do not insert any metal objects/conductors (like a metal chopstick/cutlery/screw-
driver) between power cable plug and input Wall Socket while it is connected to
the input terminal on the wall. Additionally, do not touch the power cable right after
plugging into the wall input terminal.
You may be electrocuted.
(Depending on model)
y Do not put or store inflammable substances near the product.
There is a danger of combustion/explosion or fire due to careless handling of the
inflammable substances.
ENGLISH
ENGENGLISH
ENG
y Do not drop metallic objects such as coins, hair pins, chopsticks or wire into the
product, or inflammable objects such as paper and matches. Children must pay
particular attention.
Electrical shock, fire or injury can occur. If a foreign object is dropped into the product, unplug the power cord and contact the service centre.
y Do not spray water on the product or scrub with an inflammable substance (thinner
or benzene). Fire or electric shock accident can occur.
y Do not allow any impact, shock or any objects to fall into the unit, and do not drop
anything onto the screen.
You may be injured or the product can be damaged.
y Never touch this product or antenna during a thunder or lighting storm.
You may be electrocuted.
y Never touch the wall outlet when there is leakage of gas, open the windows and
ventilate.
It may cause a fire or a burn by a spark.
Page 46
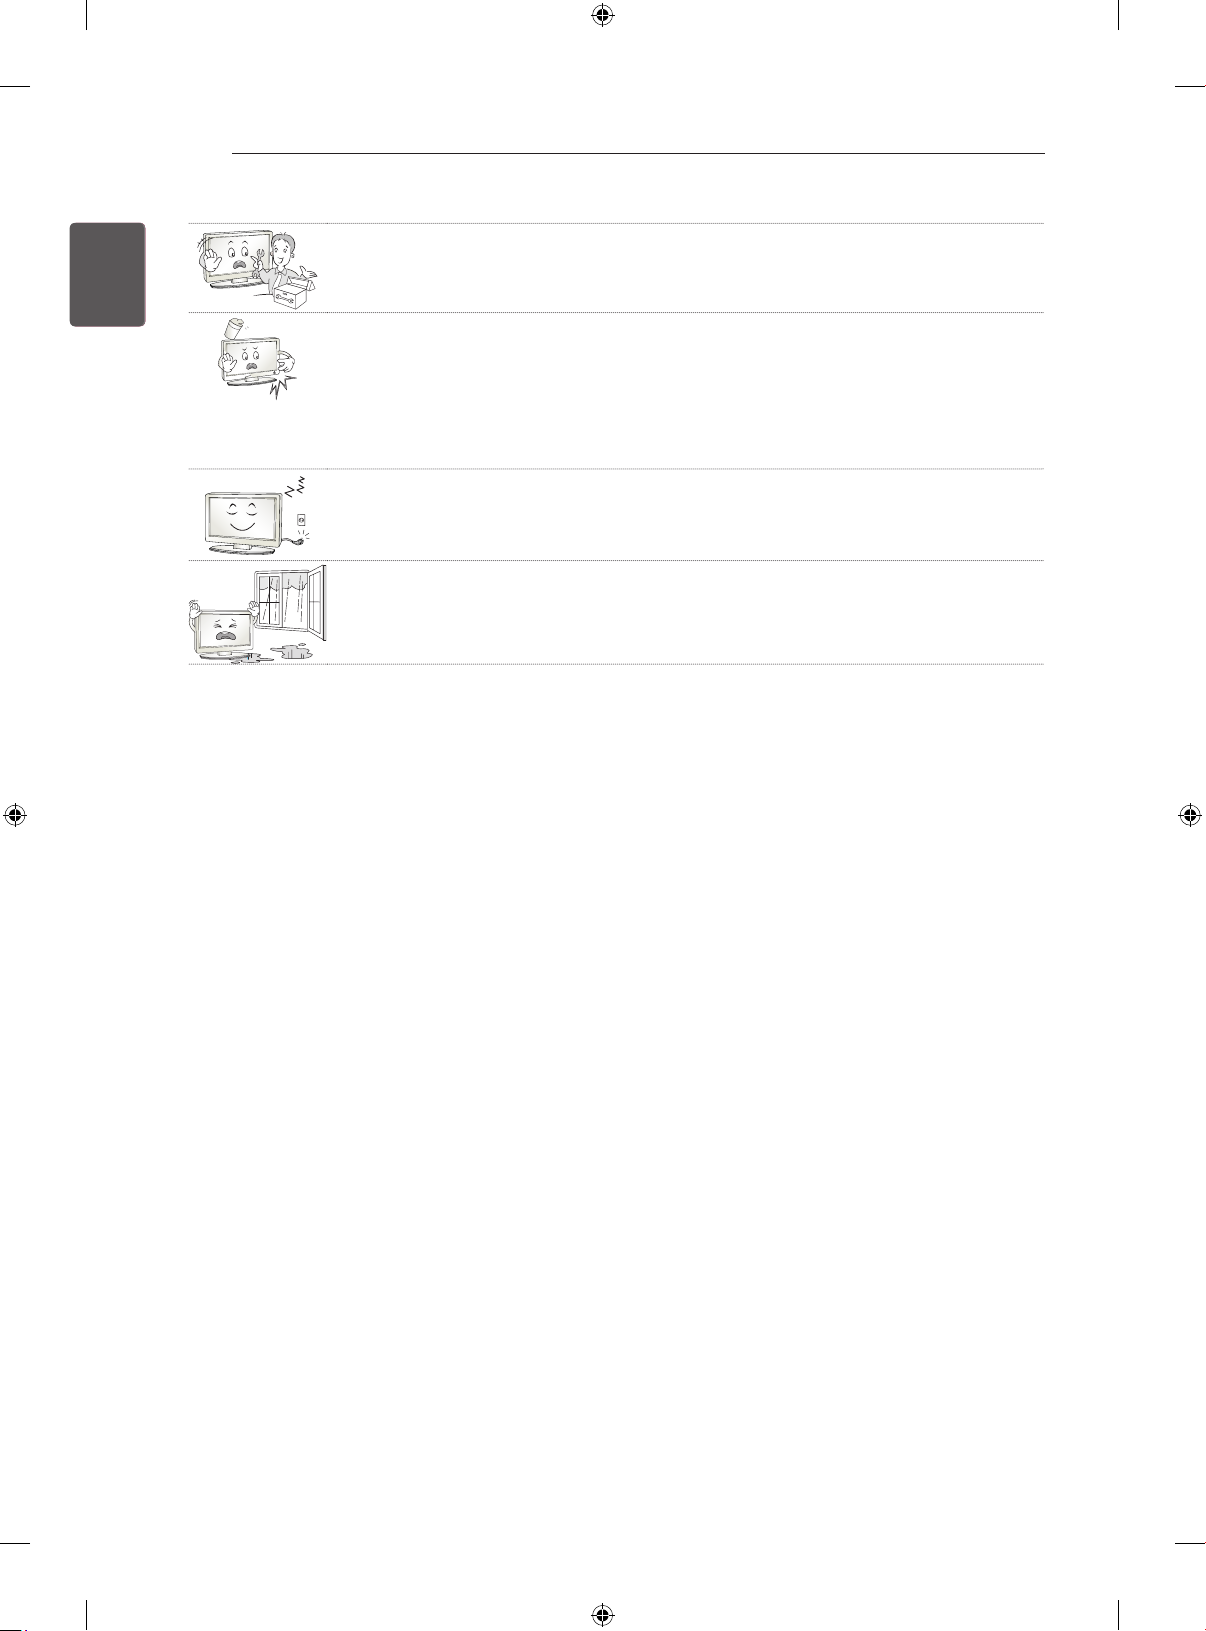
ENGLISH
ENGLISH
ENG
ENG
6
SAFETY INSTRUCTIONS
y Do not disassemble, repair or modify the product at your own discretion.
Fire or electric shock accident can occur.
Contact the service centre for check, calibration or repair.
y If any of the following occur, unplug the product immediately and contact your local
service centre.
- The product has been impacted by shock
- The product has been damaged
- Foreign objects have entered the product
- The product produced smoke or a strange smell
This may result in fire or electric shock.
y Unplug the TV from AC mains wall socket if you do not intend to use the TV for a
long period of time.
Accumulated dust can cause fire hazard and insulation deterioration can cause
electric leakage/shock/fire.
y Apparatus shall not be exposed to dripping or splashing and no objects filled with
liquids, such as vases, shall be placed on the apparatus.
Page 47
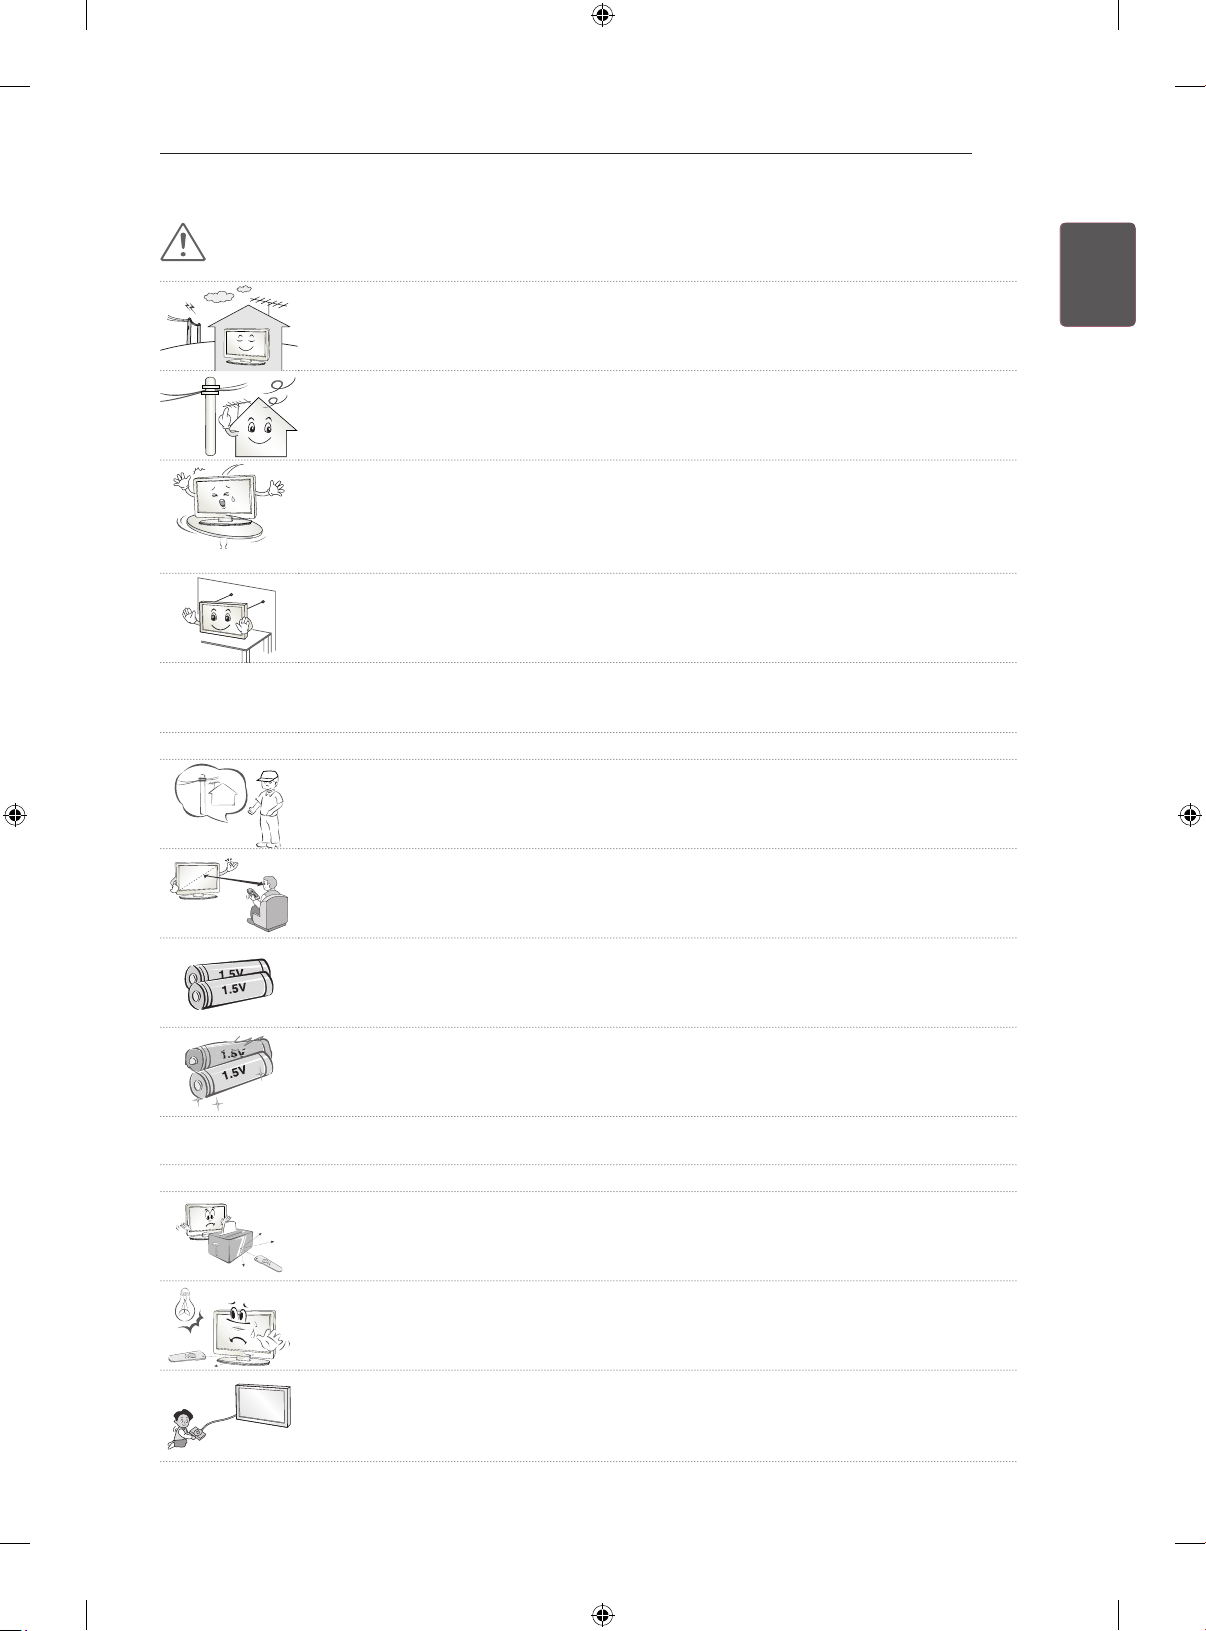
SAFETY INSTRUCTIONS
7
CAUTION
y Install the product where no radio wave occurs.
y There should be enough distance between an outside antenna and power lines to
keep the former from touching the latter even when the antenna falls.
This may cause an electric shock.
y Do not install the product on places such as unstable shelves or inclined surfaces.
Also avoid places where there is vibration or where the product cannot be fully
supported.
Otherwise, the product may fall or flip over, which may cause injury or damage to
the product.
y If you install the TV on a stand, you need to take actions to prevent the product
from overturning. Otherwise, the product may fall over, which may cause injury.
y If you intend to mount the product to a wall, attach VESA standard mounting interface (optional
parts) to the back of the product. When you install the set to use the wall mounting bracket (optional
parts), fix it carefully so as not to drop.
y Only use the attachments / accessories specified by the manufacturer.
y When installing the antenna, consult with a qualified service technician. If not
installed by a qualified technician, this may create a fire hazard or an electric shock
hazard.
ENGLISH
ENGENGLISH
ENG
y We recommend that you maintain a distance of at least 2 to 7 times the diagonal
screen size when watching TV.
If you watch TV for a long period of time, this may cause blurred vision.
y Only use the specified type of battery.
This could cause damage to the remote control.
y Do not mix new batteries with old batteries.
This may cause the batteries to overheat and leak.
y Batteries should not be exposed to excessive heat. For example, keep away from direct sunlight,
open fireplace and electric heaters .
y Do not place non-rechargeable batteries in charging device.
y Make sure there are no objects between the remote control and its sensor.
y Signal from Remote Control can be interrupted due to external/internal lighting eg
Sunlight, fluorescent lighting.
If this occurs turn off lighting or darken viewing area.
y When connecting external devices such as video game consoles, make sure the
connecting cables are long enough.
Otherwise, the product may fall over, which may cause injury or damage the product.
Page 48
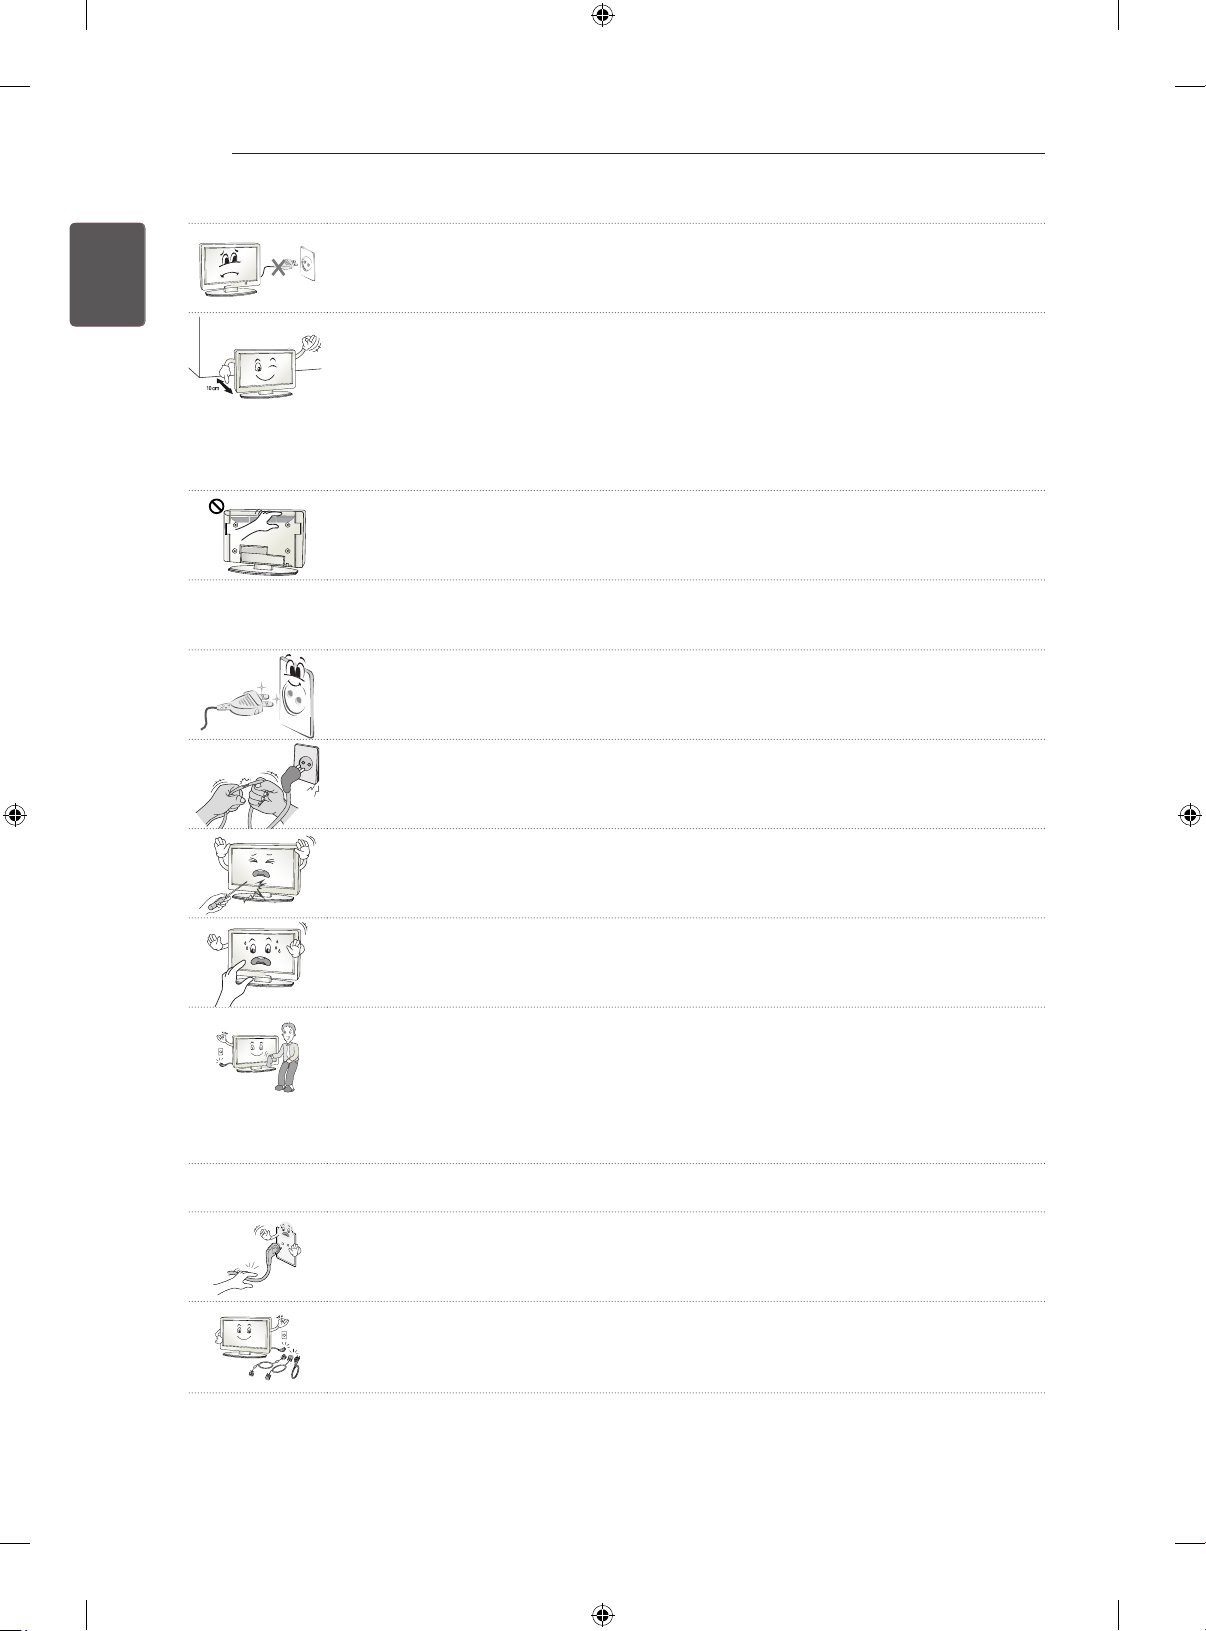
ENGLISH
ENGLISH
ENG
ENG
8
SAFETY INSTRUCTIONS
y Do not turn the product On/Off by plugging-in or unplugging the power plug to the
wall outlet. (Do not use the power plug for switch.)
It may cause mechanical failure or could give an electric shock.
y Please follow the installation instructions below to prevent the product from over-
heating.
- The distance between the product and the wall should be more than 10 cm.
- Do not install the product in a place with no ventilation (e.g., on a bookshelf or in
a cupboard).
- Do not install the product on a carpet or cushion.
- Make sure the air vent is not blocked by a tablecloth or curtain.
Otherwise, this may result in fire.
y Take care not to touch the ventilation openings when watching the TV for long peri-
ods as the ventilation openings may become hot. This does not affect the operation or performance of the product.
y Periodically examine the cord of your appliance, and if its appearance indicates damage or deterio-
ration, unplug it, discontinue use of the appliance, and have the cord replaced with an exact replacement part by an authorized servicer.
y Prevent dust collecting on the power plug pins or outlet.
This may cause a fire hazard.
y Protect the power cord from physical or mechanical abuse, such as being twisted,
kinked, pinched, closed in a door, or walked upon. Pay particular attention to plugs,
wall outlets, and the point where the cord exits the appliance.
y Do not press strongly upon the panel with a hand or sharp object such as nail,
pencil or pen, or make a scratch on it, as it may cause damage to screen.
y Avoid touching the screen or holding your finger(s) against it for long periods of
time. Doing so may produce some temporary or permanent distortion/damage to
screen.
y When cleaning the product and its components, unplug the power first and wipe it
with a soft cloth. Applying excessive force may cause scratches or discolouration.
Do not spray with water or wipe with a wet cloth. Never use glass cleaner, car or
industrial shiner, abrasives or wax, benzene, alcohol etc., which can damage the
product and its panel.
Otherwise, this may result in fire, electric shock or product damage (deformation,
corrosion or breakage).
y As long as this unit is connected to the AC wall outlet, it is not disconnected from the AC power
source even if you turn off this unit by SWITCH.
y When unplugging the cable, grab the plug and unplug it, by pulling at the plug.
Don’t pull at the cord to unplug the power cord from the power board, as this could
be hazardous.
y When moving the product, make sure you turn the power off first. Then, unplug the
power cables, antenna cables and all connecting cables.
The TV set or power cord may be damaged, which may create a fire hazard or
cause electric shock.
Page 49
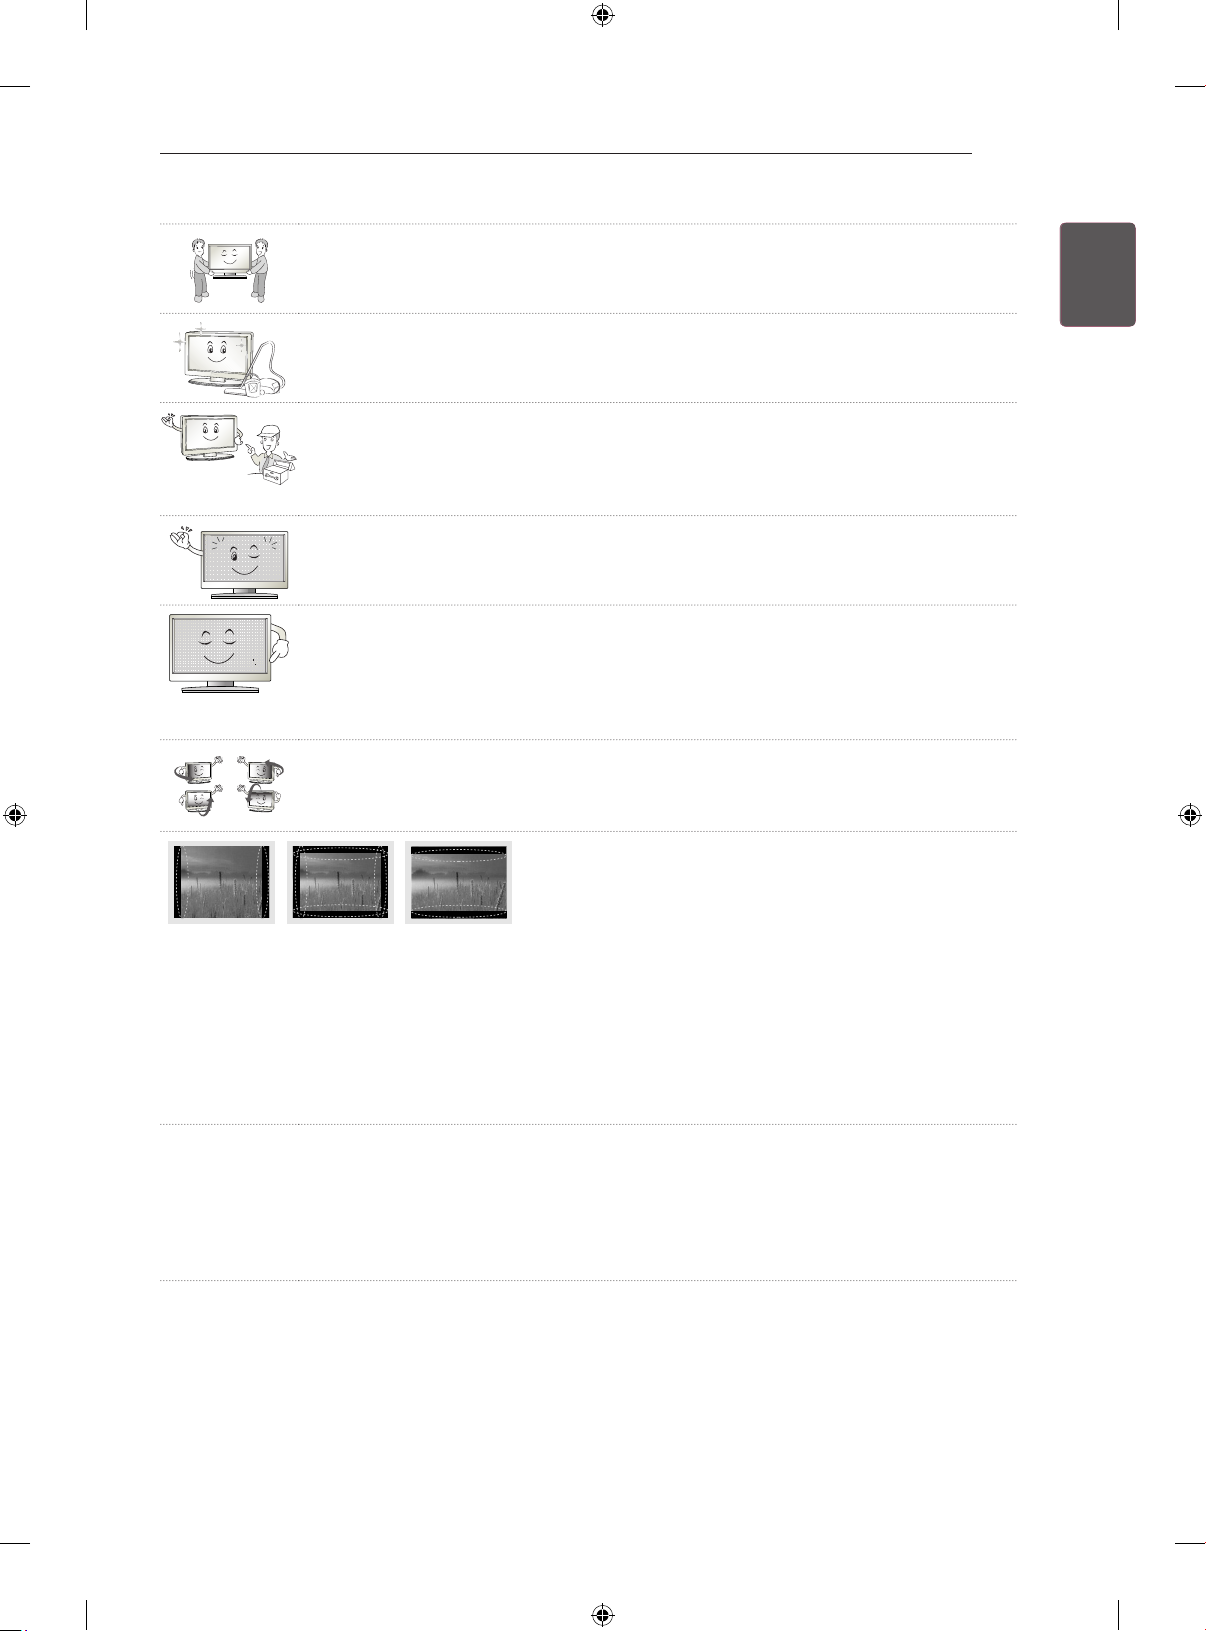
SAFETY INSTRUCTIONS
9
y When moving or unpacking the product, work in pairs because the product is
heavy.
Otherwise, this may result in injury.
y Contact the service centre once a year to clean the internal parts of the product.
Accumulated dust can cause mechanical failure.
y Refer all servicing to qualified service personnel. Servicing is required when the
apparatus has been damaged in any way, such as power supply cord or plug is
damaged, liquid has been spilled or objects have fallen into the apparatus, the
apparatus has been exposed to rain or moisture, does not operate normally, or has
been dropped.
y If the product feels cold to the touch, there may be a small “flicker” when it is
turned on. This is normal, there is nothing wrong with product.
y The panel is a high technology display product with resolution of two million to six
million pixels. You may see tiny black dots and/or brightly coloured dots (red, blue
or green) at a size of 1 ppm on the panel. This does not indicate a malfunction and
does not affect the performance and reliability of the product.
This phenomenon also occurs in third-party products and is not subject to exchange or refund.
y You may find different brightness and colour of the panel depending on your view-
ing position(left/right/top/down).
This phenomenon occurs due to the characteristic of the panel. It is not related
with the product performance, and it is not malfunction.
ENGLISH
ENGENGLISH
ENG
y Displaying a still image (e.g., broadcasting channel logo, on-screen menu, scene from a video game
or computer screen) for a prolonged time may cause damage to the screen, resulting in retention
of the image, which is known as image sticking. It can remain for long time or never disappear.
The warranty does not cover the product for image sticking. Avoid displaying a fixed image on your
television’s screen for a prolonged period (1 or more hours for OLED).
Also, if you watch the TV at a ratio of 4:3 for a long time, image sticking may occur on the borders of
the panel.
This phenomenon also occurs in third-party products and is not subject to exchange or refund.
y Generated Sound
“Cracking” noise: A cracking noise that occurs when watching or turning off the TV is generated by
plastic thermal contraction due to tempera-ture and humidity. This noise is common for products
where thermal deformation is required. Electrical circuit humming/panel buzzing: A low level noise is
generated from a high-speed switching circuit, which supplies a large amount of current to operate a
product. It varies depending on the product.
This generated sound does not affect the performance and reliability of the product.
Page 50

ENGLISH
ENGLISH
ENG
ENG
10
SAFETY INSTRUCTIONS
Viewing 3D Imaging
WARNING
Viewing Environment
yViewing Time
- When watching 3D contents, take 5 - 15 minute breaks every hour. Viewing 3D contents for a long
period of time may cause headache, dizziness, fatigue or eye strain.
Those that have a photosensitive seizure or chronic illness
ySome users may experience a seizure or other abnormal symptoms when they are exposed to a
ashing light or particular pattern from 3D contents.
yDo not watch 3D videos if you feel nausea, are pregnant and/ or have a chronic illness such as epilepsy,
cardiac disorder, or blood pressure disease, etc.
y3D Contents are not recommended to those who suffer from stereo blindness or stereo anomaly. Double
images or discomfort in viewing may be experienced.
yIf you have strabismus (cross-eyed), amblyopia (weak eyesight) or astigmatism, you may have trouble
sensing depth and easily feel fatigue due to double images. It is advised to take frequent breaks than
the average adult.
yIf your eyesight varies between your right and left eye, revise your eyesight prior to watching 3D
contents.
Symptoms which require discontinuation or refraining from watching 3D contents
yDo not watch 3D contents when you feel fatigue from lack of sleep, overwork or drinking.
yWhen these symptoms are experienced, stop using/watching 3D contents and get enough rest until the
symptom subsides.
- Consult your doctor when the symptoms persist. Symptoms may include headache, eyeball pain,
dizziness, nausea, palpitation, blurriness, discomfort, double image, visual inconvenience or fatigue.
Page 51
SAFETY INSTRUCTIONS
11
CAUTION
Viewing Environment
yViewing Distance
- Maintain a distance of at least twice the screen diagonal length when watching 3D contents. If you
feel discomfort in viewing 3D contents, move further away from the TV.
Viewing Age
yInfants/Children
- Usage/ Viewing 3D contents for children under the age of 6 are prohibited.
- Children under the age of 10 may overreact and become overly excited because their vision is in
development (for example: trying to touch the screen or trying to jump into it. Special monitoring
and extra attention is required for children watching 3D contents.
- Children have greater binocular disparity of 3D presentations than adults because the distance
between the eyes is shorter than one of adults. Therefore they will perceive more stereoscopic
depth compared to adults for the same 3D image.
yTeenagers
- Teenagers under the age of 19 may react with sensitivity due to stimulation from light in 3D
contents. Advise them to refrain from watching 3D contens for a long time when they are tired.
yElderly
- The elderly may perceive less 3D effect compared to the youth. Do not sit closer to the TV than the
recommended distance.
ENGLISH
ENG
ENGENGLISH
Cautions when using the 3D glasses
yMake sure to use LG 3D glasses. Otherwise, you may not be able to view 3D videos properly.
yDo not use 3D glasses instead of your normal glasses, sunglasses or protective goggles.
yUsing modied 3D glasses may cause eye strain or image distortion.
yDo not keep your 3D glasses in extremely high or low temperatures. It will cause deformation.
yThe 3D glasses are fragile and are easily scratched. Always use a soft, clean piece of cloth when wiping
the lenses. Do not scratch the lenses of the 3D glasses with sharp objects or clean/wipe them with
chemicals.
Page 52
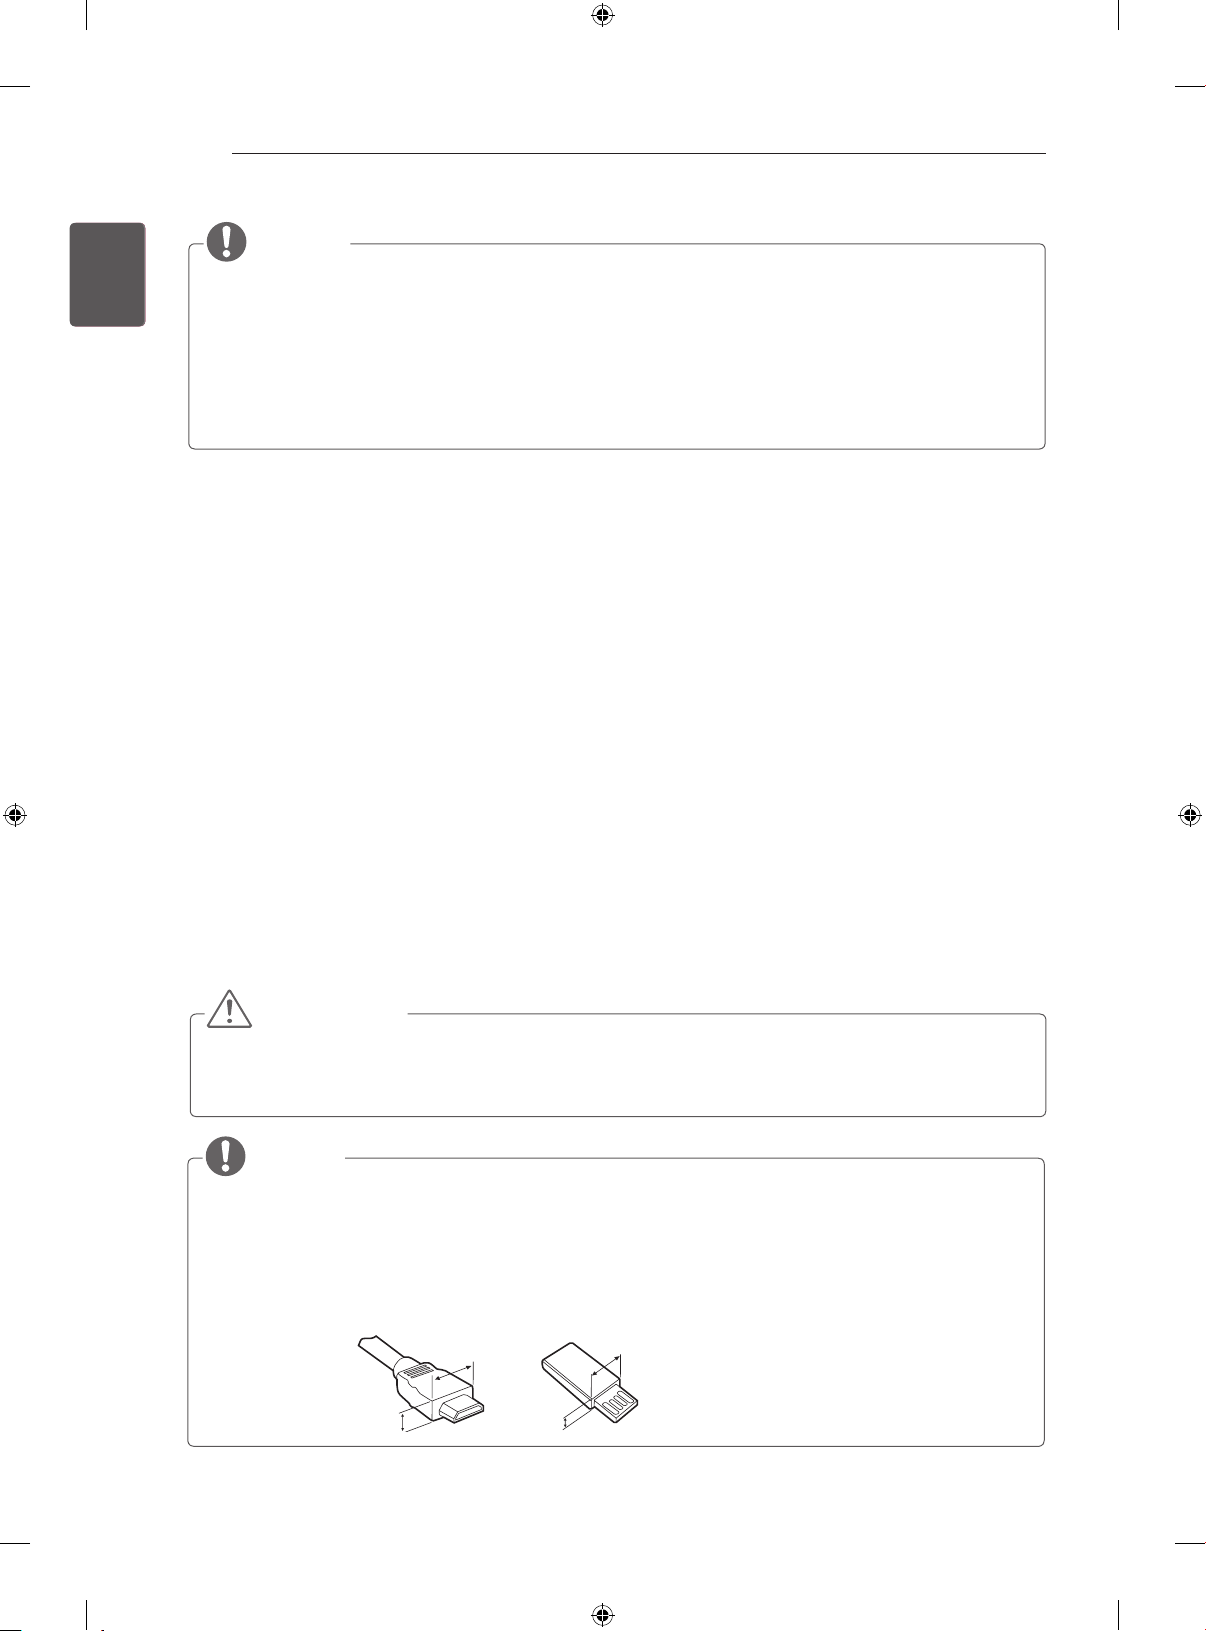
ENGLISH
A
A
<
<
ENGLISH
ENG
ENG
12
INSTALLATION PROCEDURE / ASSEMBLING AND PREPARING
NOTE
Image shown may differ from your TV.
y
Your TV’s OSD (On Screen Display) may differ slightly from that shown in this manual.
y
The available menus and options may differ from the input source or product model that you are using.
y
New features may be added to this TV in the future.
y
The TV can be placed in standby mode in order to reduce the power consumption. And the TV should
y
be turned off if it will not be watched for some time, as this will reduce energy consumption.
The energy consumed during use can be significantly reduced if the level of brightness of the picture
y
is reduced, and this will reduce the overall running cost.
INSTALLATION PROCEDURE
1 Open the package and make sure all the accessories are included.
2 Connect an external device to the TV set.
3 Make sure the network connection is available.
You can use the TV network functions only when the network connection is made.
* If the TV is turned on for the first time after it was shipped from the factory, initialization of the TV may take a few
minutes.
ASSEMBLING AND PREPARING
Unpacking
Check your product box for the following items. If there are any missing accessories, contact the local
dealer where you purchased your product.
The illustrations in this manual may differ from the actual product and item.
CAUTION
Do not use any unapproved items to ensure the safety and product life span.
y
Any damages or injuries by using unapproved items are not covered by the warranty.
y
Some models have a thin film attached on to the screen and this must not be removed.
y
NOTE
The items supplied with your product may vary depending on the model.
y
Product specifications or contents of this manual may be changed without prior notice due to upgrade
y
of product functions.
For an optimal connection, HDMI cables and USB devices should have bezels less than 10 mm thick
y
and 18 mm width. Use an extension cable that supports USB 2.0 if the USB cable or USB memory
stick does not fit into your TV’s USB port.
B
B
A
B
10 mm
=
18 mm
=
Page 53
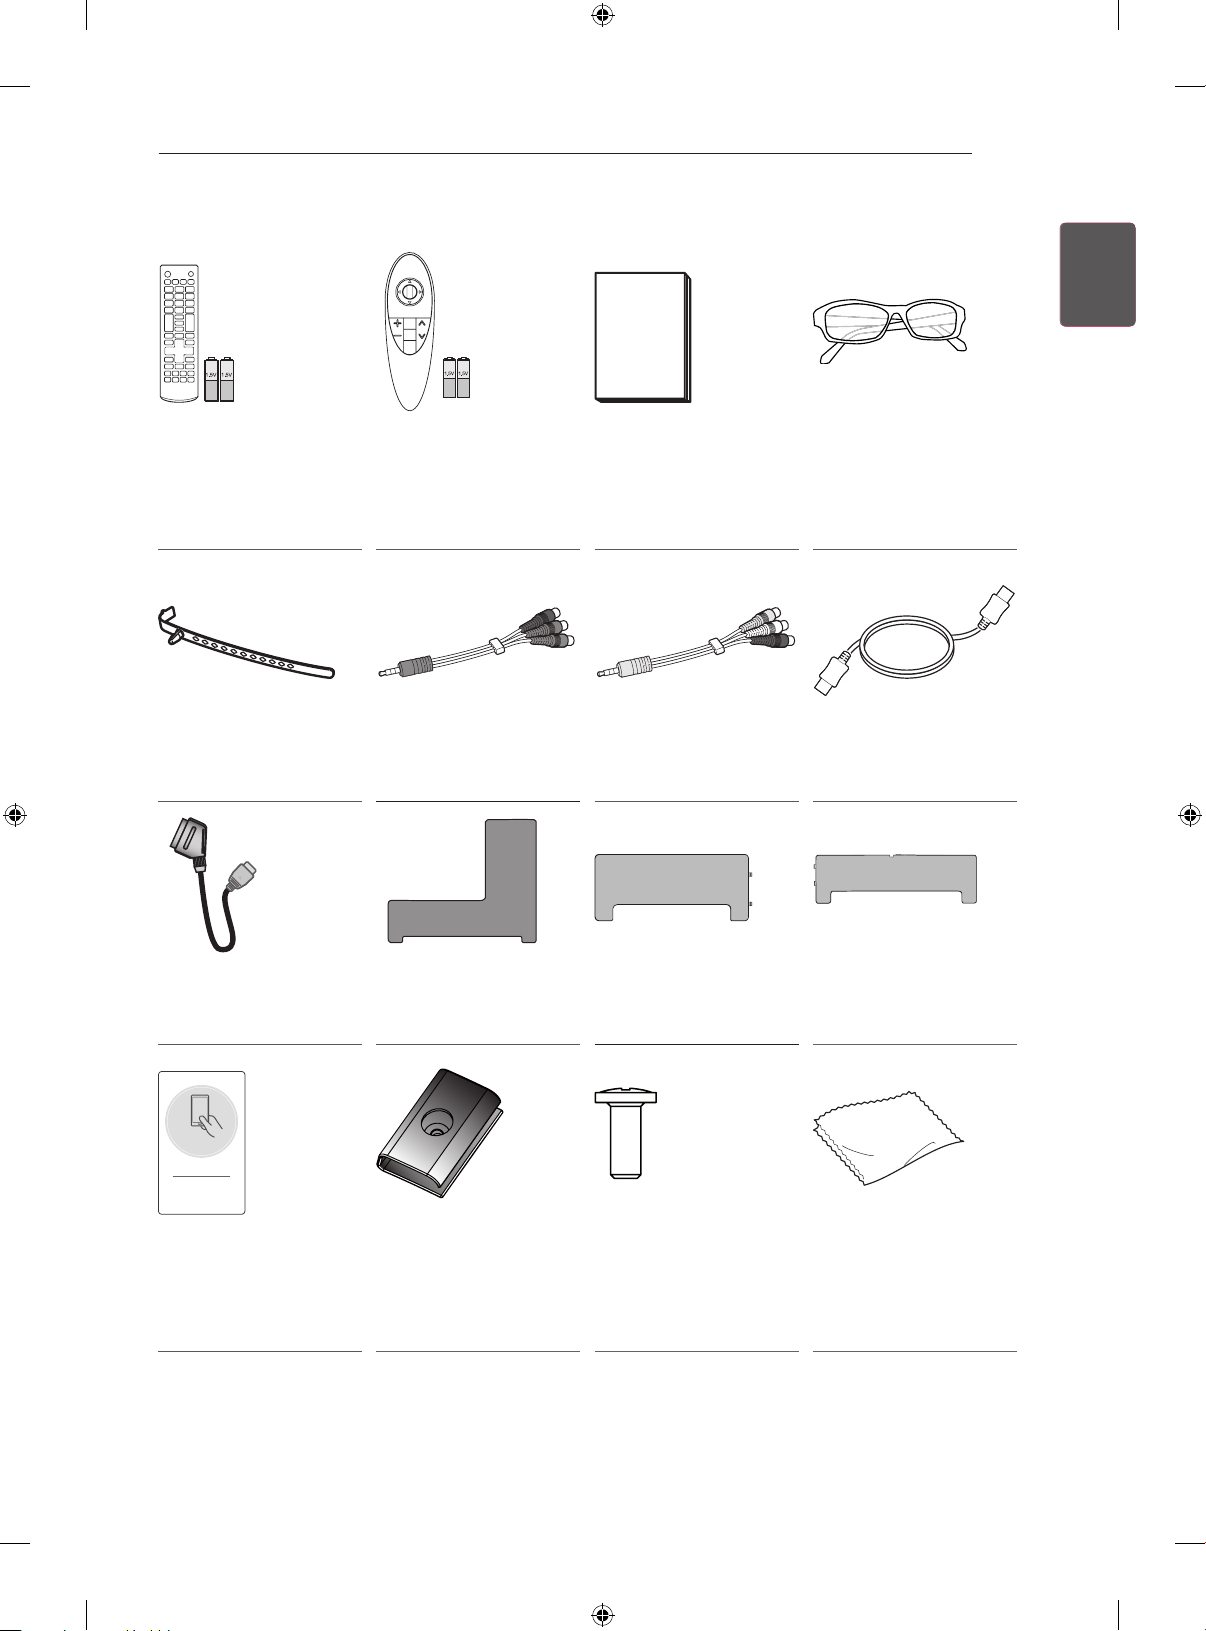
ASSEMBLING AND PREPARING
13
ENGLISH
ENG
ENGENGLISH
Remote control,
Batteries (AAA)
(Depending on model)
(See p. 25, 26)
Cable Holder
(See p. A-4, A-5)
Scart gender cable
(See p. A-32)
Magic remote,
Batteries (AA)
(See p. 27)
Component gender
cable
(See p. A-20)
AV Cover
(Only EC98**)
(See p. A-4)
Owner’s manual Cinema 3D glasses
The number of 3D
glasses may differ
depending on the model
or country.
Composite gender
cable
(See p. A-20, A-21)
AV Cover
(Only EC93**)
(See p. A-4)
HDMI Cable
(Only EC97**, EC98**)
(See p. A-8, A-9)
AV Cover
(Only EC97**)
(See p. A-4)
Tag On
Tag on
(Depending on model)
Cable Managements
2 EA
(Only EC97**)
(See p. A-4, A-5)
Cable Management
Screws
2 EA, M4 x L10
(Only EC97**)
(See p. A-5)
Cleaning Cloth
(Depending on model)
Page 54
ENGLISH
ENGLISH
ENG
ENG
14
ASSEMBLING AND PREPARING
Separate purchase
Separate purchase items can be changed or modified for quality improvement without any notification.
Contact your dealer to buy these items.
These devices only work with certain models.
AG-F***
Cinema 3D Glasses
LG Audio Device Tag on
Compatibility
AG-F***
Cinema 3D Glasses
AN-MR500
Magic Remote
AN-VC5**
Video call camera
AG-F***DP
Dual Play Glasses
LG Audio Device • • •
Tag on • • •
AN-MR500
Magic Remote
AN-VC5**
Video call camera
EC93** EC97** EC98**
• • •
• • •
•
• • •
AG-F***DP
Dual Play Glasses
The model name or design may be changed depending on the upgrade of product functions, manufacturer’s circumstances or policies.
Page 55
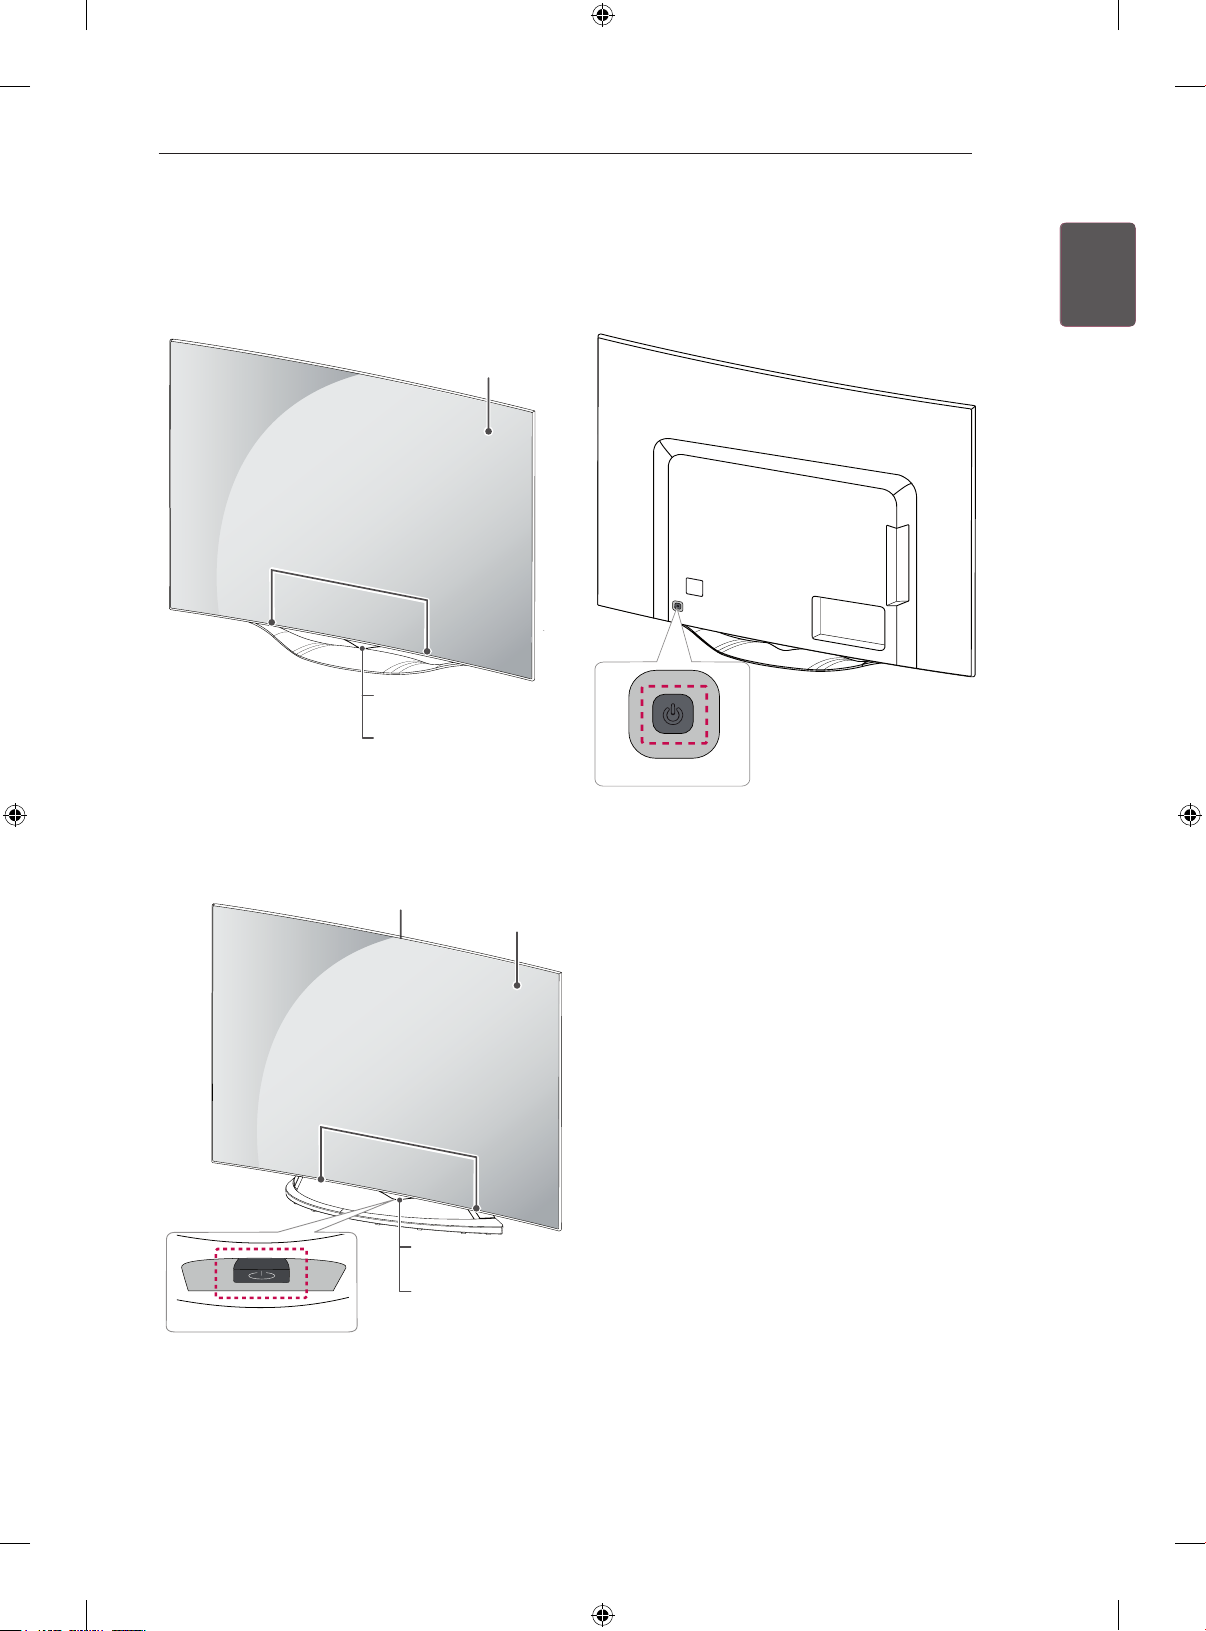
ASSEMBLING AND PREPARING
15
Parts and buttons
A type: EC93**
<Front>
Speakers
Remote Control Sensor
and Intelligent Sensor
LG Logo Light
Screen
1
Joystick button
2
<Rear>
ENGLISH
ENG
ENGENGLISH
B type: EC97**
Joystick button
Joystick button
Built-In Camera
Speakers
3
3
Screen
Remote Control Sensor
and Intelligent Sensor
1
LG Logo Light
Page 56
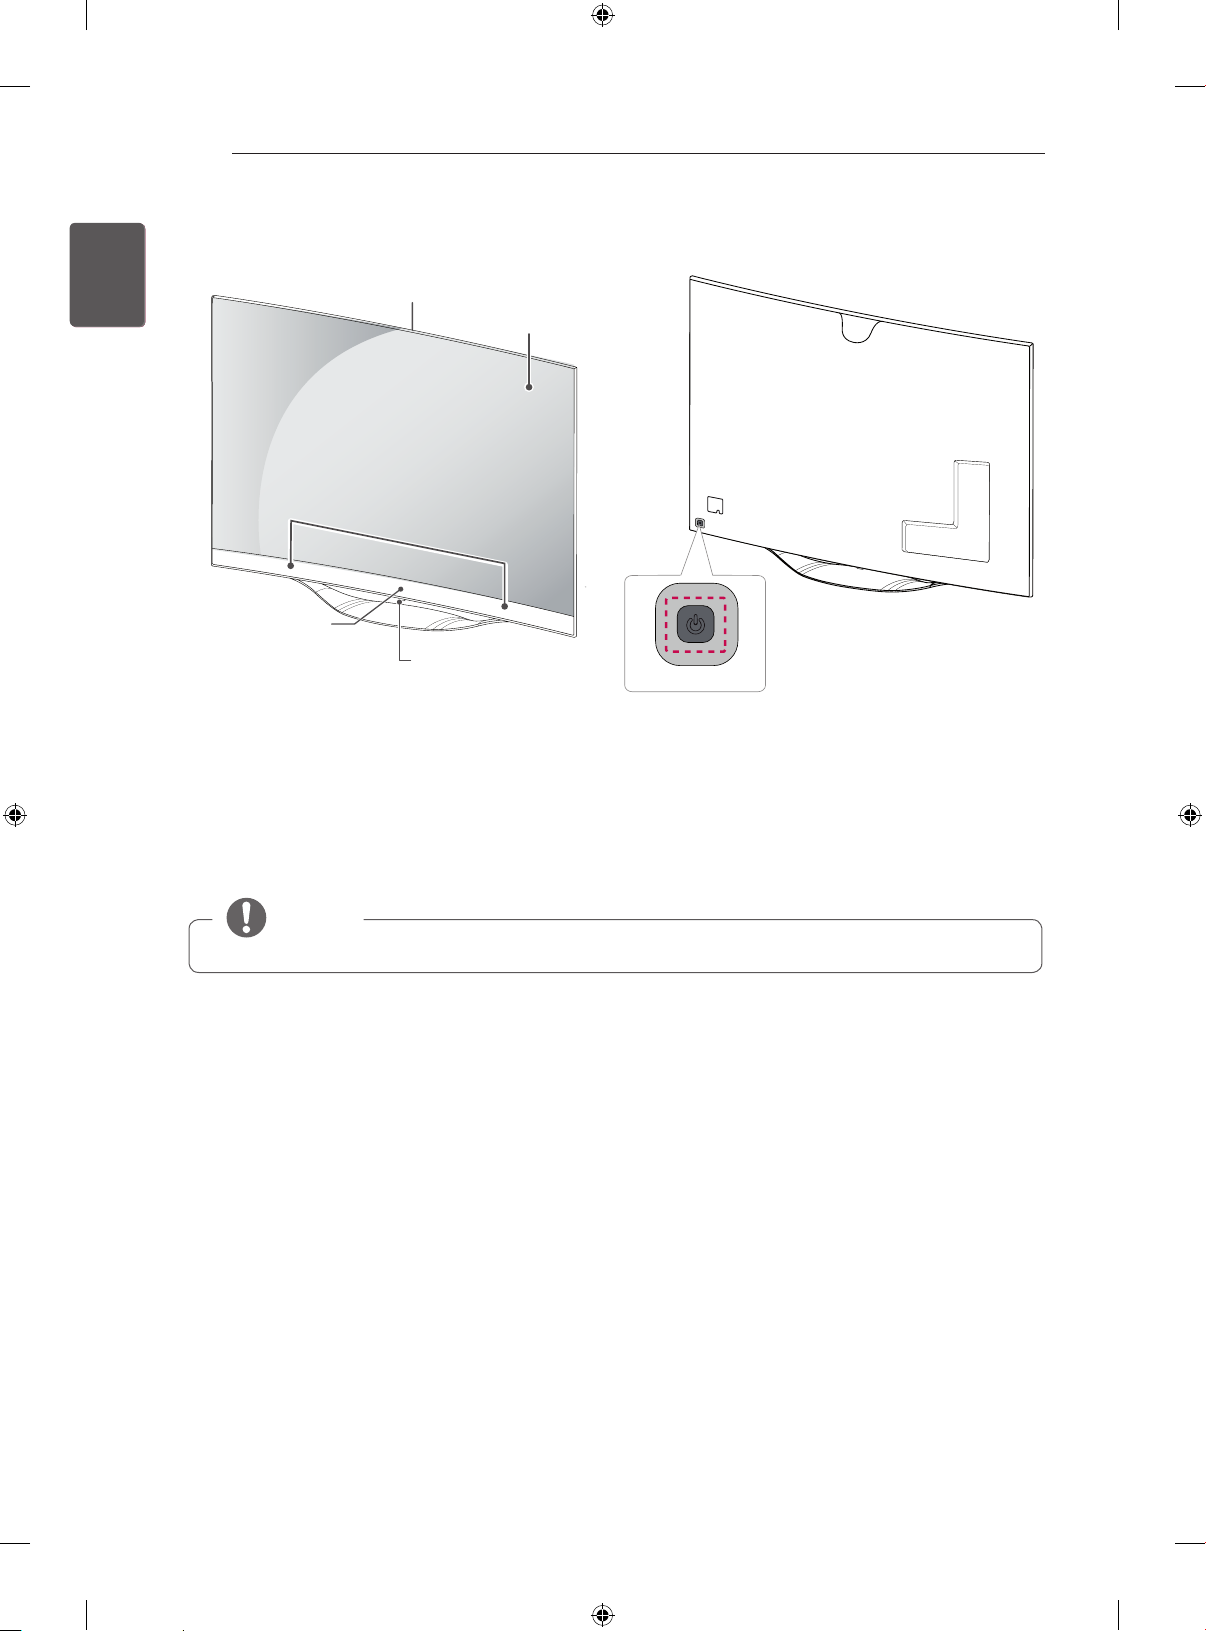
ENGLISH
ENGLISH
ENG
ENG
16
ASSEMBLING AND PREPARING
C type: EC98**
<Front>
Built-In Camera
Speakers
LG Logo Light
<Rear>
Screen
Remote Control Sensor
and Intelligent Sensor
1
Joystick button
2
1 Intelligent sensor - Adjusts the image quality and brightness based on the surrounding environment.
2 Joystick Button - This button is located behind the TV screen.
3 Joystick Button - This button is located below the TV screen.
NOTE
You can set the LG Logo Light to on or off by selecting GENERAL in the main menus.
y
Page 57
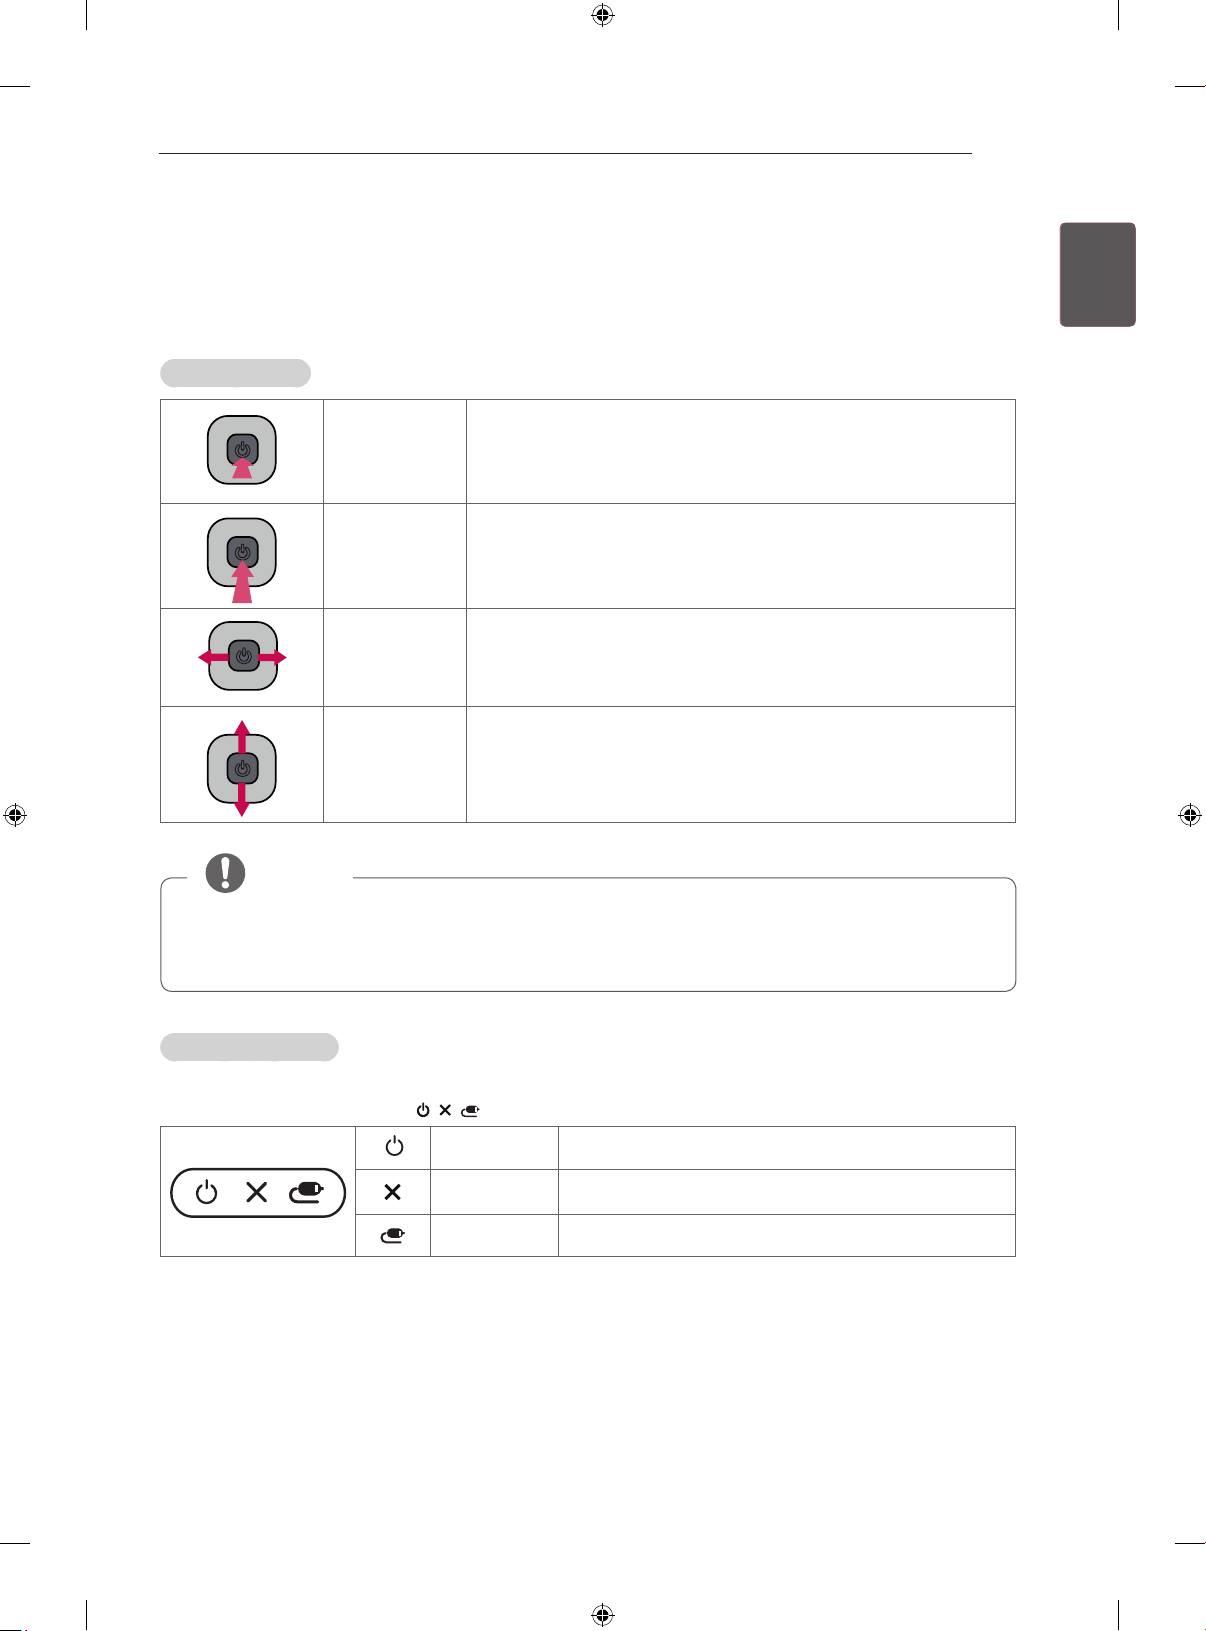
ASSEMBLING AND PREPARING
17
Using the joystick button
You can operate the TV by pressing the button or moving the joystick left, right, up, or down.
Basic Functions
Power On
Power Off
Volume
Control
Programmes
Control
When the TV is turned off, place your finger on the joystick button
and press it once and release it.
When the TV is turned on, place your finger on the joystick button
and press it once for a few seconds and release it.
If you place your finger over the joystick button and move it left or
right, you can adjust the volume level you want.
If you place your finger over the joystick button and move it up or
down, you can scrolls through the saved programmes you want.
ENGLISH
ENG
ENGENGLISH
NOTE
y When your finger over the joystick button and push it to the up, down, left or right, be careful not
to press the joystick button. If you press the joystick button first, you may not be able to adjust the
volume level and saved programmes.
Adjusting the Menu
When the TV is turned on, press the joystick button one time.
You can adjust the Menu items (
, , ) moving the joystick button left or right.
TV OFF Turns the power off.
CLOSE Clears on-screen displays and returns to TV viewing.
INPUT Changes the input source.
Page 58
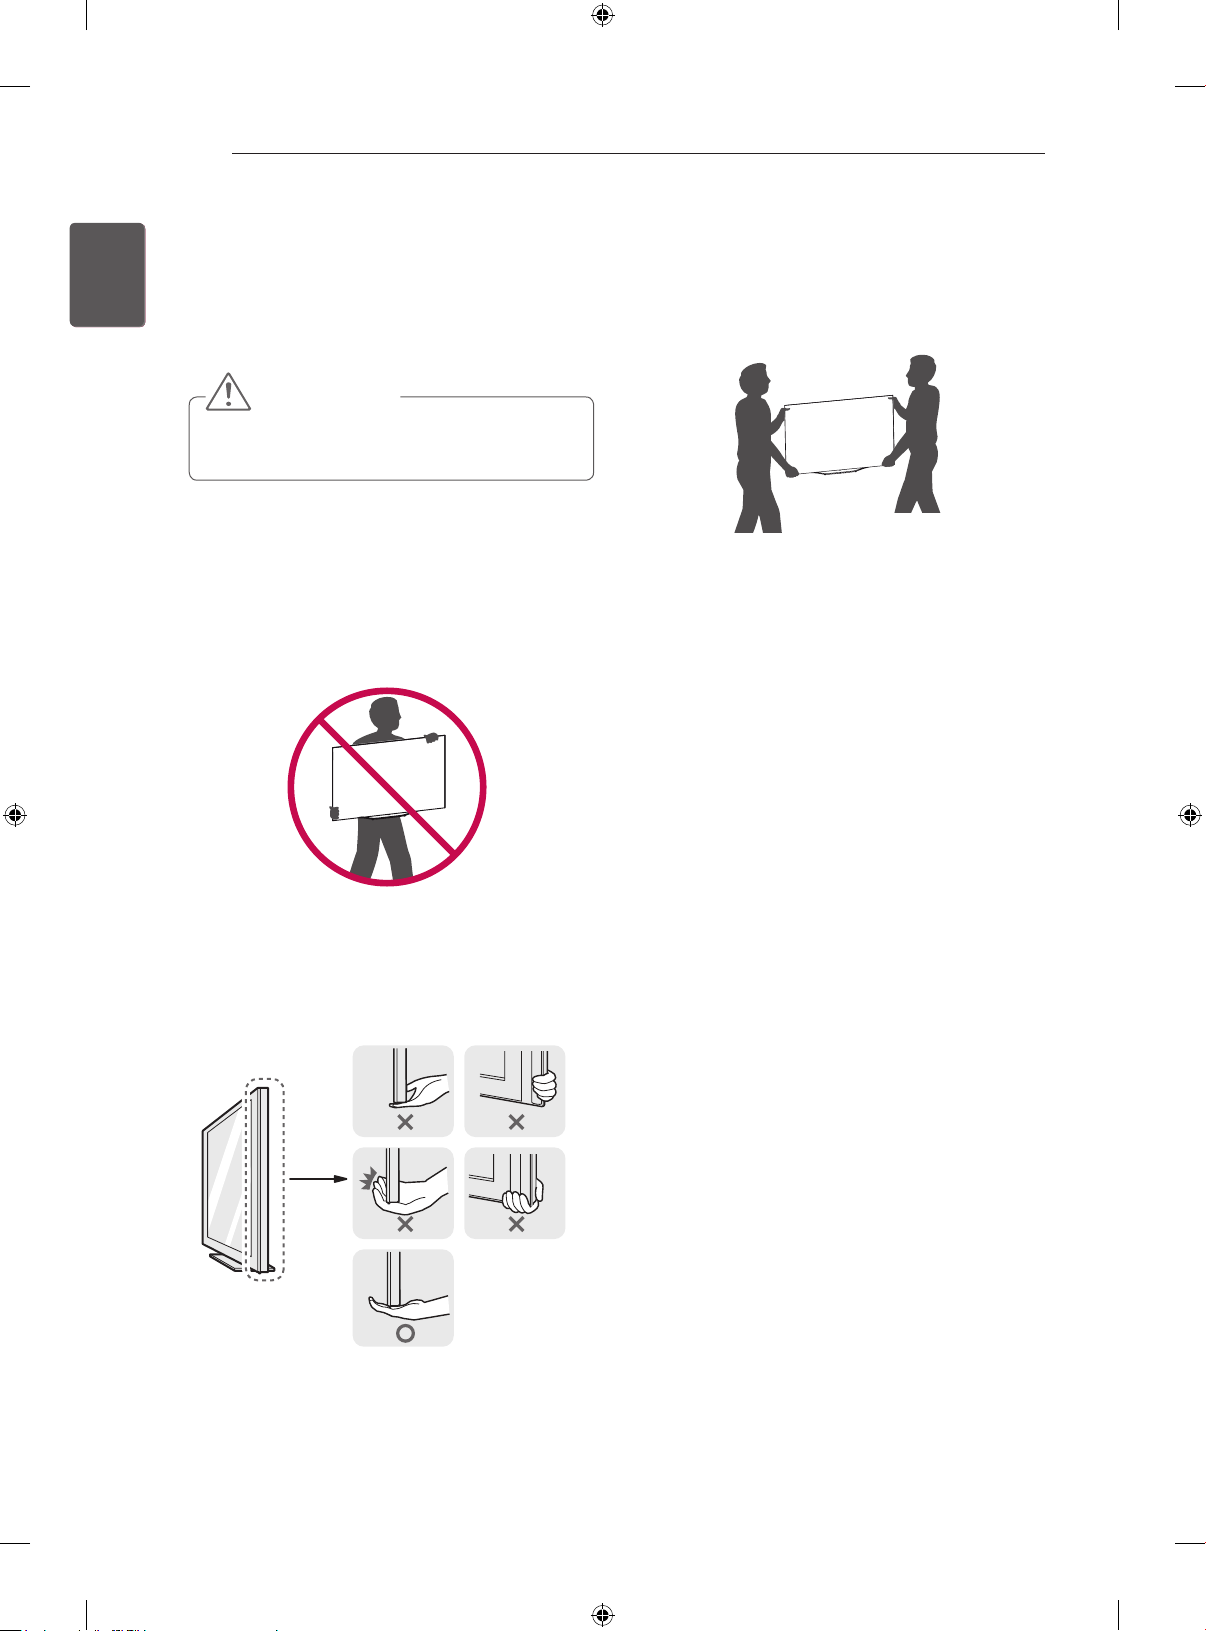
ENGLISH
ENGLISH
ENG
ENG
18
ASSEMBLING AND PREPARING
Lifting and moving the TV
Please note the following advice to prevent the
TV from being scratched or damaged and for safe
transportation regardless of its type and size.
CAUTION
y Avoid touching the screen at all times, as this
may result in damage to the screen.
It is recommended to move the TV in the box
y
or packing material that the TV originally came
in.
Before moving or lifting the TV, disconnect the
y
power cord and all cables.
When holding the TV, the screen should face
y
away from you to avoid damage.
When transporting a large TV, there should be
y
at least 2 people.
When transporting the TV by hand, hold the
y
TV as shown in the following illustration.
When transporting the TV, do not expose the
y
TV to jolts or excessive vibration.
When transporting the TV, keep the TV
y
upright, never turn the TV on its side or tilt
towards the left or right.
Do not apply excessive pressure to cause
y
flexing/bending of frame chassis as it may
damage screen.
Be sure to keep your TV upright instead of
y
laying or tilting it while moving the TV.
When handling the TV, be careful not to
y
damage the protruding joystick button.
y Hold the top and bottom of the TV frame rmly.
Make sure not to hold the transparent part,
speaker, or speaker grill area.
Page 59
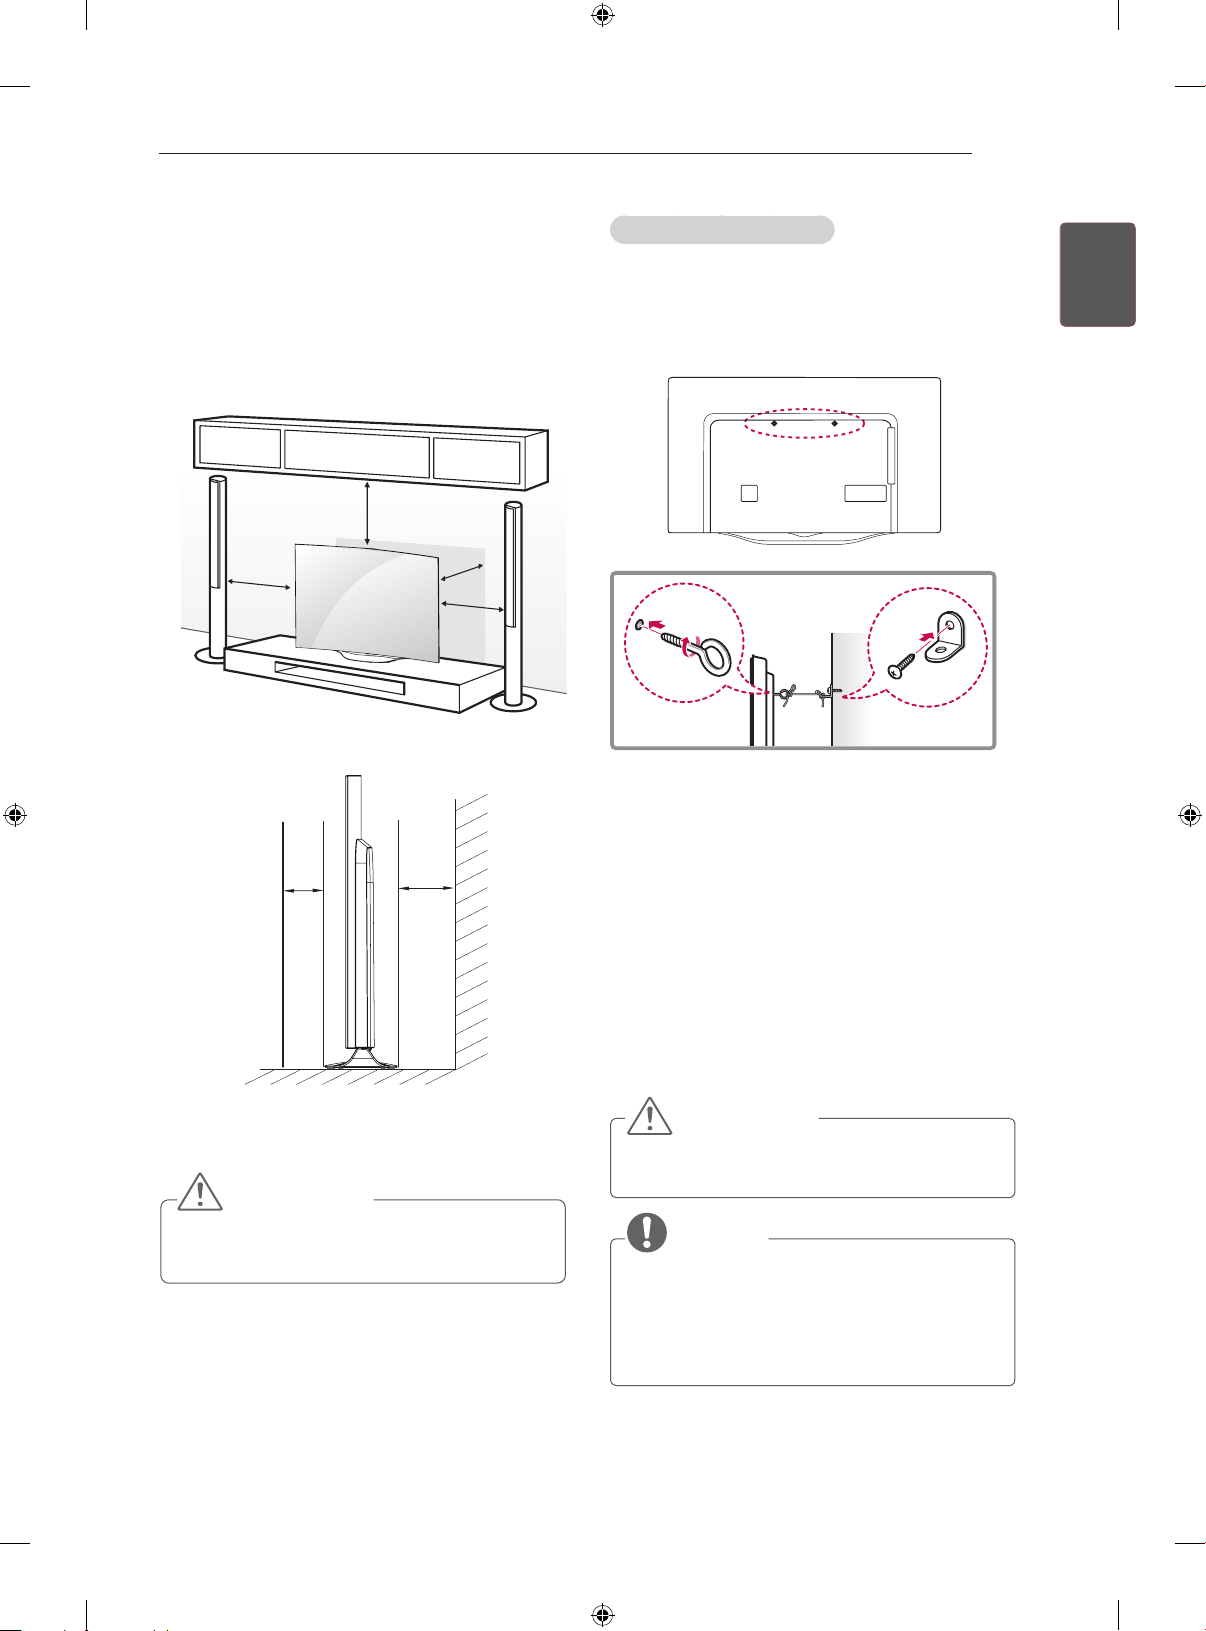
ASSEMBLING AND PREPARING
10 cm
10 cm
10 cm
10 cm
19
Mounting on a table
1 Lift and tilt the TV into its upright position on a
table.
- Leave a 10 cm (minimum) space from the wall
for proper ventilation.
10 cm
10 cm
5 cm
10 cm
10 cm
10 cm
Securing the TV to a wall
(This feature is not available for all models.)
To use the desk-type stand safely, make sure to
securely attach it to a wall.
1 Insert and tighten the eye-bolts, or TV brackets
and bolts on the back of the TV.
- If there are bolts inserted at the eye-bolts
position, remove the bolts first.
2 Mount the wall brackets with the bolts to the
wall.
Match the location of the wall bracket and the
eye-bolts on the rear of the TV.
3 Connect the eye-bolts and wall brackets tightly
with a sturdy rope.
Make sure to keep the rope horizontal with the
at surface.
ENGLISH
ENG
ENGENGLISH
2 Connect the power cord to a wall outlet.
CAUTION
y Do not place the TV near or on sources of
heat, as this may result in fire or other damage.
CAUTION
y Make sure that children do not climb on or
hang on the TV.
NOTE
y Use a platform or cabinet that is strong and
large enough to support the TV securely.
y Brackets, bolts and ropes are not provided.
You can obtain additional accessories from
your local dealer.
Page 60
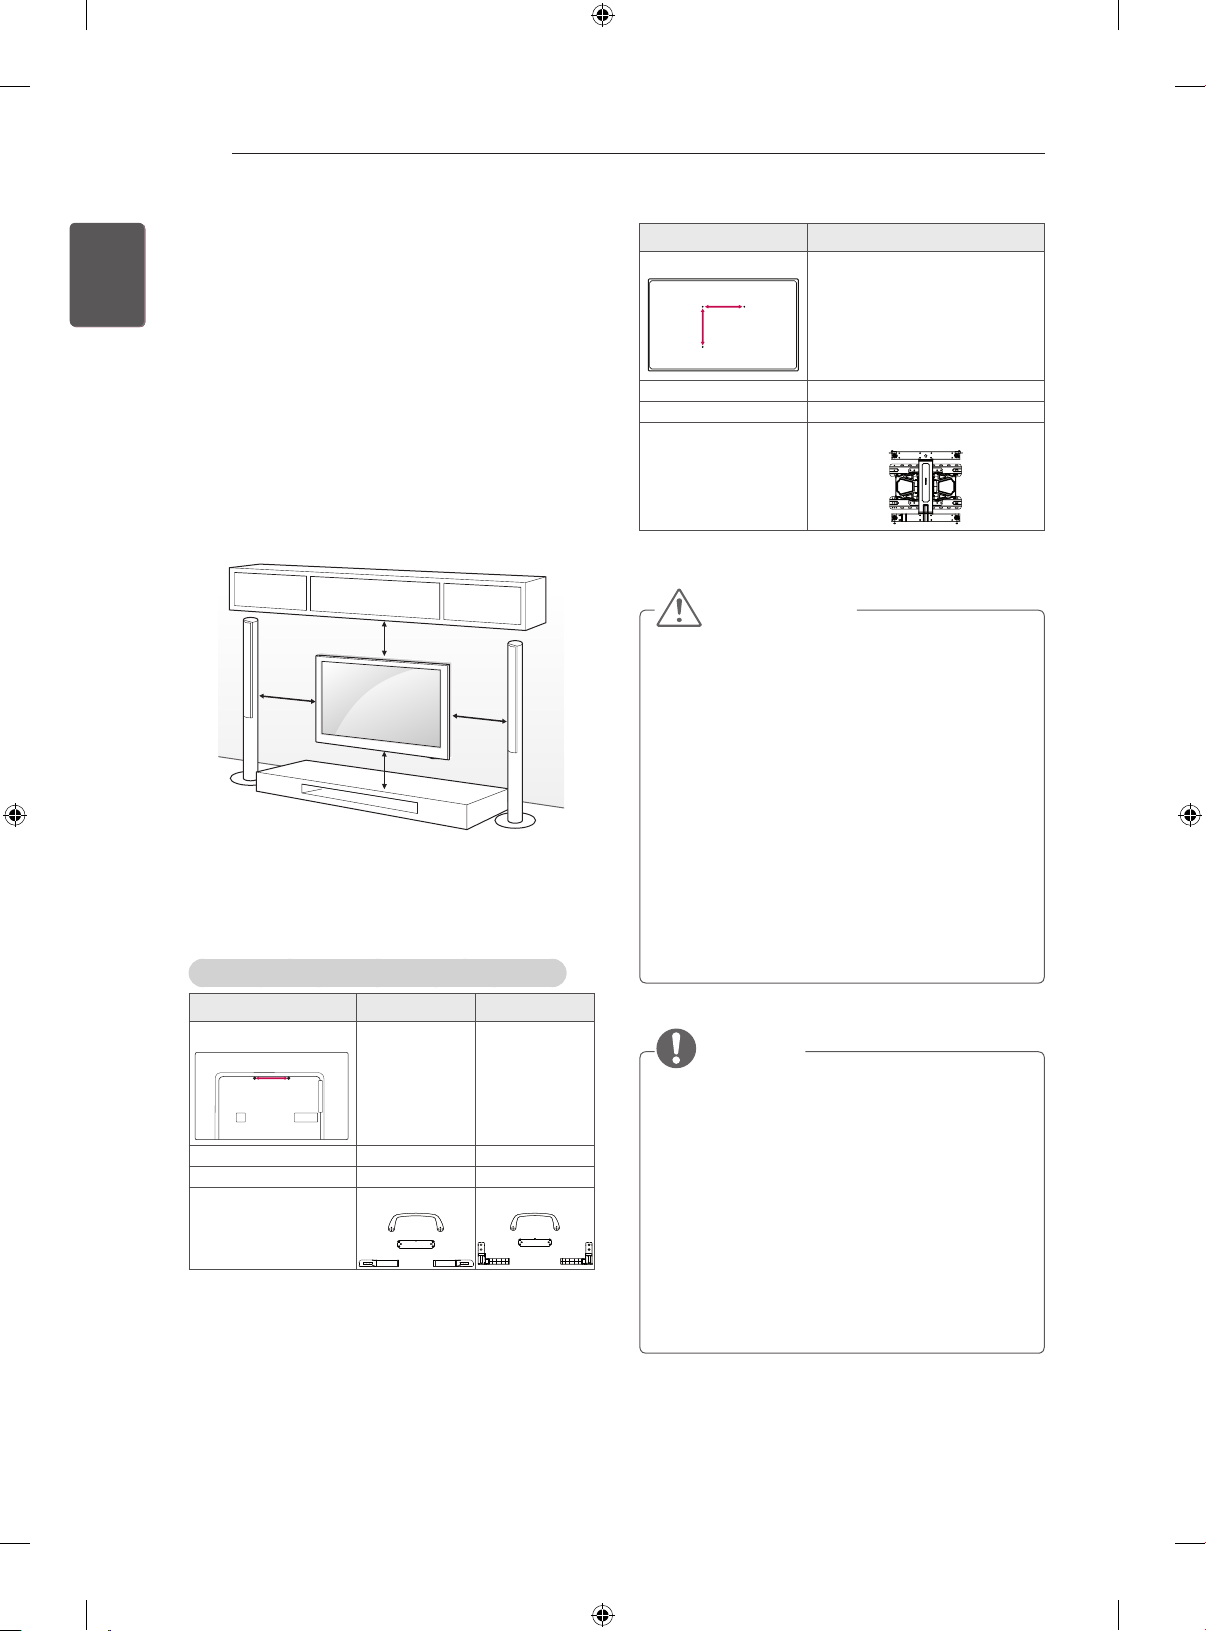
A
B
ENGLISH
ENGLISH
ENG
ENG
20
ASSEMBLING AND PREPARING
Mounting on a wall
Attach an optional wall mount bracket at the rear
of the TV carefully and install the wall mount
bracket on a solid wall perpendicular to the floor.
When you attach the TV to other building materials, please contact qualified personnel.
LG recommends that wall mounting be performed
by a qualified professional installer.
We recommend the use of LG’s wall mount bracket.
When you do not use LG’s wall mount bracket,
please use a wall mount bracket where the device
is adequately secured to the wall with enough
space to allow connectivity to external devices.
10 cm
10 cm
10 cm
10 cm
Make sure to use screws and wall mount bracket
that meet the VESA standard. Standard dimensions for the wall mount kits are described in the
following table.
Separate purchase(Wall Mounting Bracket)
Model 77EC98**
VESA (A x B)
400 x 400
Standard screw M6
Number of screws 4
LSW420BX
Wall mount
bracket
CAUTION
y Disconnect the power first, and then move
or install the TV. Otherwise electric shock
may occur.
y If you install the TV on a ceiling or slanted
wall, it may fall and result in severe injury.
Use an authorized LG wall mount and
contact the local dealer or qualified
personnel.
y Do not over tighten the screws as this may
cause damage to the TV and void your
warranty.
y Use the screws and wall mounts that
meet the VESA standard. Any damages
or injuries by misuse or using an improper
accessory are not covered by the warranty.
Model 55EC93** 65EC97**
(A)
A
Standard screw M6 M6
Number of screws 2 2
Wall mount
bracket
210 210
OSW100 OSW200
NOTE
y Use the screws that are listed on the VESA
standard screw specifications.
y The wall mount kit includes an installation
manual and necessary parts.
y The wall mount bracket is not provided. You
can obtain additional accessories from your
local dealer.
y The length of screws may differ depending
on the wall mount. Make sure to use the
proper length.
y For more information, refer to the manual
supplied with the wall mount.
Page 61
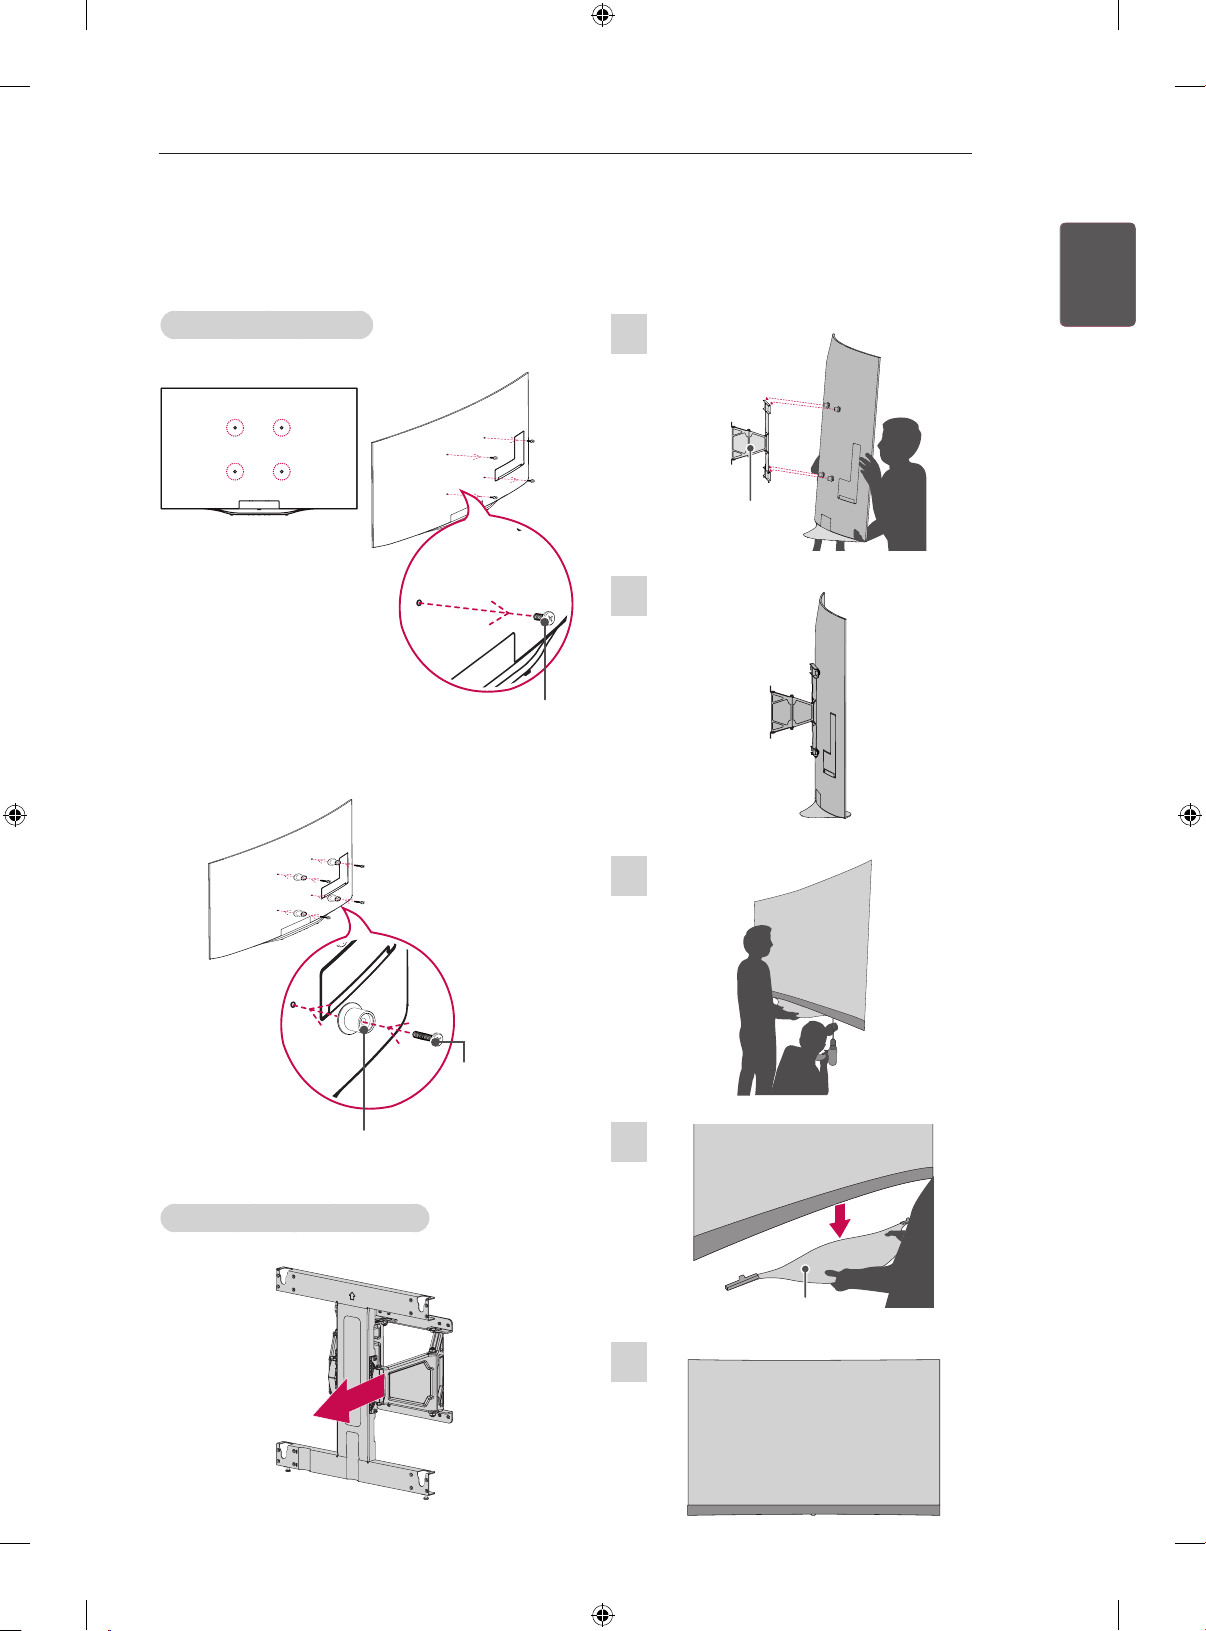
ASSEMBLING AND PREPARING
21
Wall Type Set-up Guide
(Only EC98** - Seperate purchase)
Guide spacer assembly
1 Remove the VESA screws (4EA).
VESA screw
2 Assemble Guide spacer (4EA) and Guide
spacer screws (4EA).
How to detach the stand
Type 1. Hanging the TV on the wall before
removing a stand.
1
Wall mount
bracket
2
ENGLISH
ENG
ENGENGLISH
Guide
spacer
screw
Guide spacer
Wall mount bracket installation
1 After installation, move the bracket forward.
3
4
Stand
5
Page 62
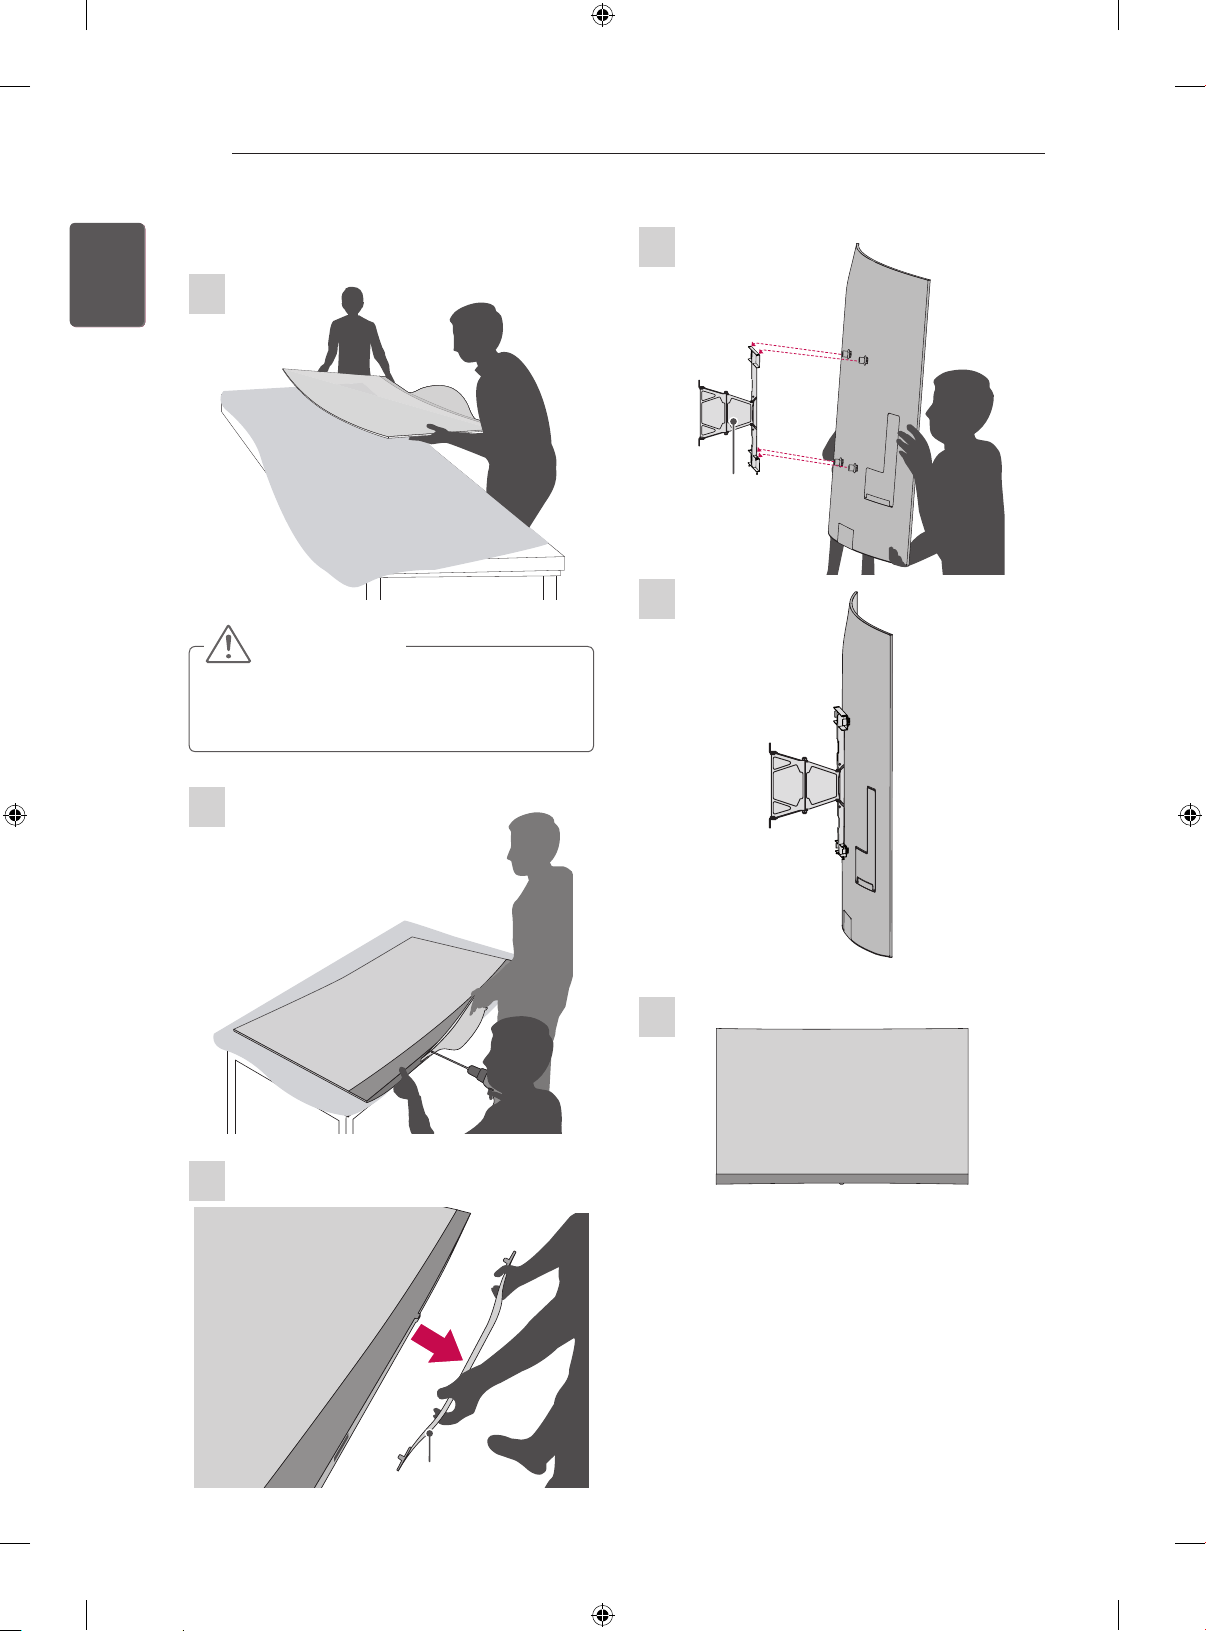
ENGLISH
ENGLISH
ENG
ENG
22
ASSEMBLING AND PREPARING
Type 2. Hanging the TV on the wall after removing a
stand.
1
CAUTION
y When laying the TV on its back on a padded
table or surface, be careful to prevent the
TV from being damaged.
4
Wall mount
bracket
5
2
6
3
Stand
Page 63
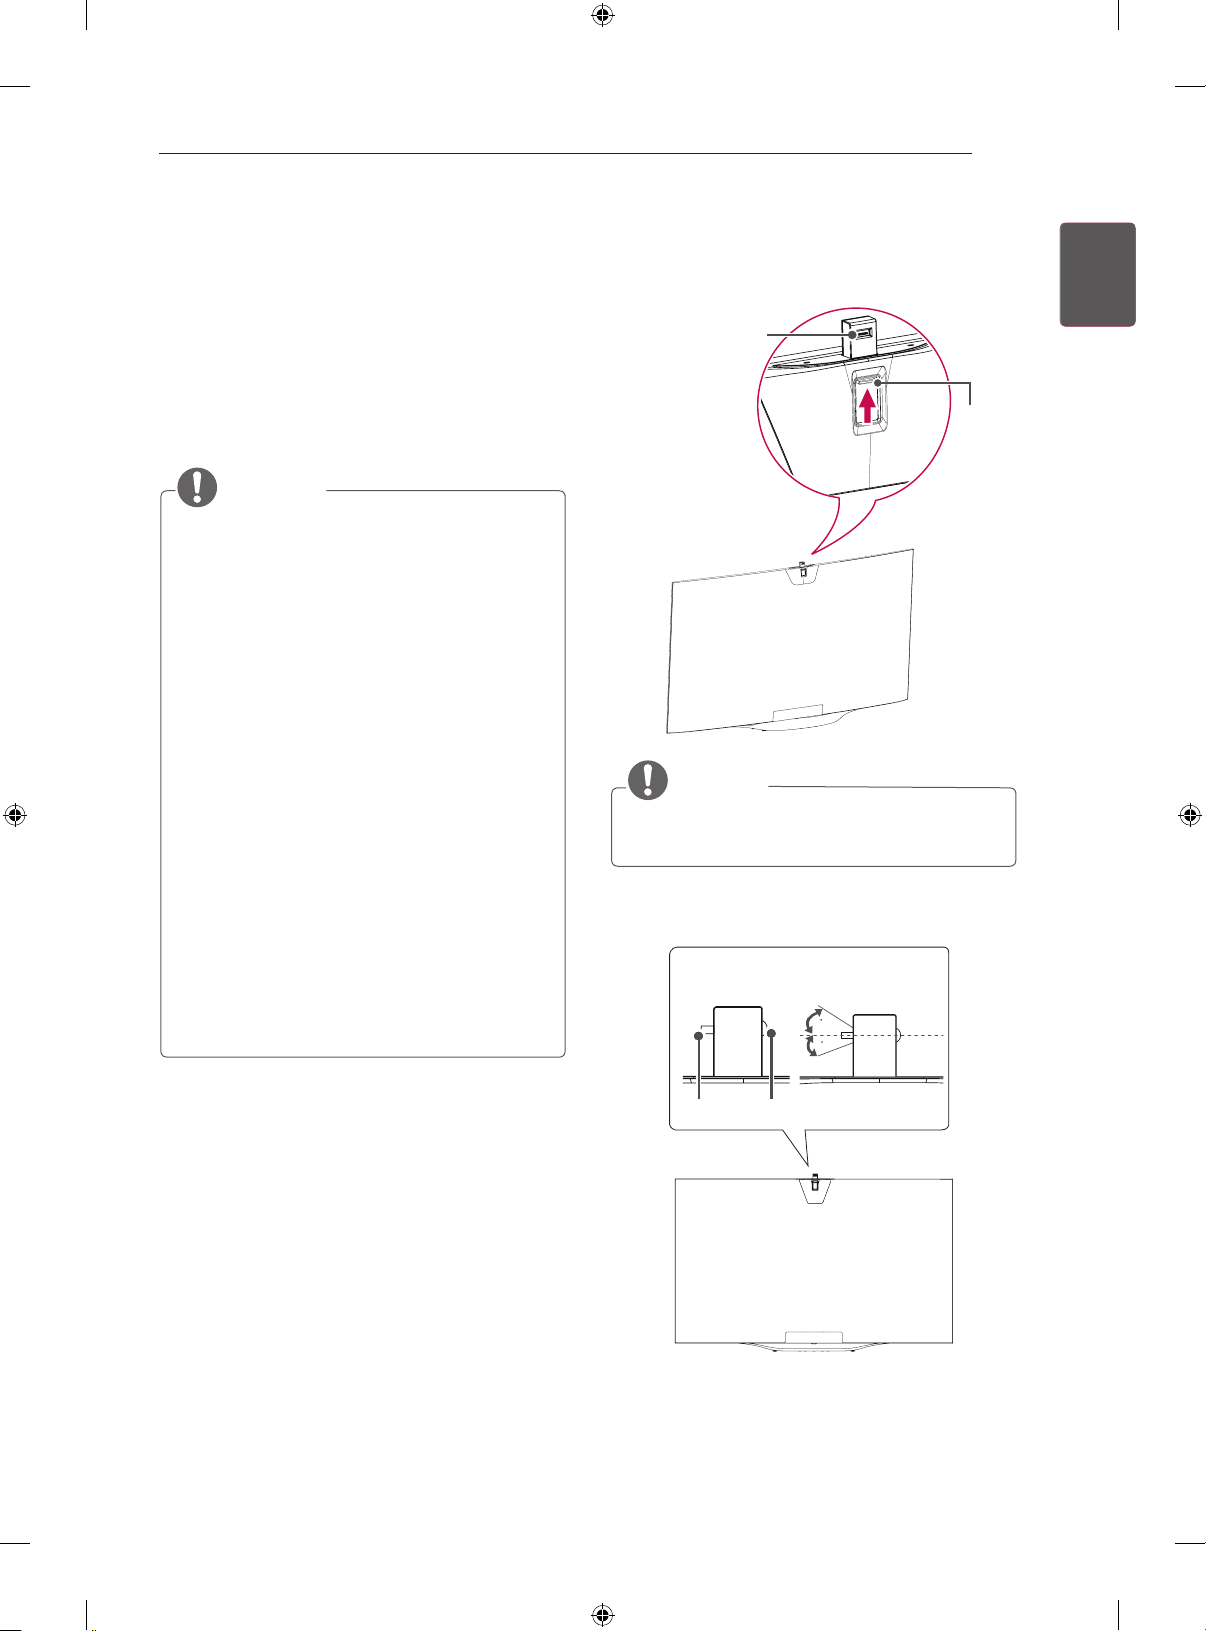
ASSEMBLING AND PREPARING
23
Using Built-in Camera
(Only EC97**, EC98**)
You can make a Skype video call or use the motion
recognition function using the built-in camera of
the TV. This TV does not support the use of an
external camera.
NOTE
Before using the built-in camera, you must
y
recognize the fact that you are legally
responsible for the use or misuse of the
camera by the relevant national laws including
the criminal law.
The relevant laws include the Personal
y
Information Protection law which regulates
the processing and transferring of personal
information and the law which regulates the
monitoring by camera in a workplace and
other places.
When using the built-in camera, avoid
y
questionable, illegal, or immoral situations.
Other than at public places or events, consent
to be photographed may be required. We
suggest avoiding the following situations :
(1) Using the camera in areas where the use
of camera is generally prohibited such as
restroom, locker room, fitting room and security
area.
(2) Using the camera while causing the
infringement of privacy.
(3) Using the camera while causing the
violation of the relevant regulations or laws.
Preparing Built-in Camera
1 Pull up the built-in camera at the back of the TV.
Angle Adjustment
Lever
Slide
NOTE
Remove the protective film before using the
y
built-in camera.
2 You can adjust the angle of the camera with
the angle adjustment lever on the back on the
back of the built-in camera.
[Side View]
7
5
ENGLISH
ENG
ENGENGLISH
Lever
Lens
Page 64
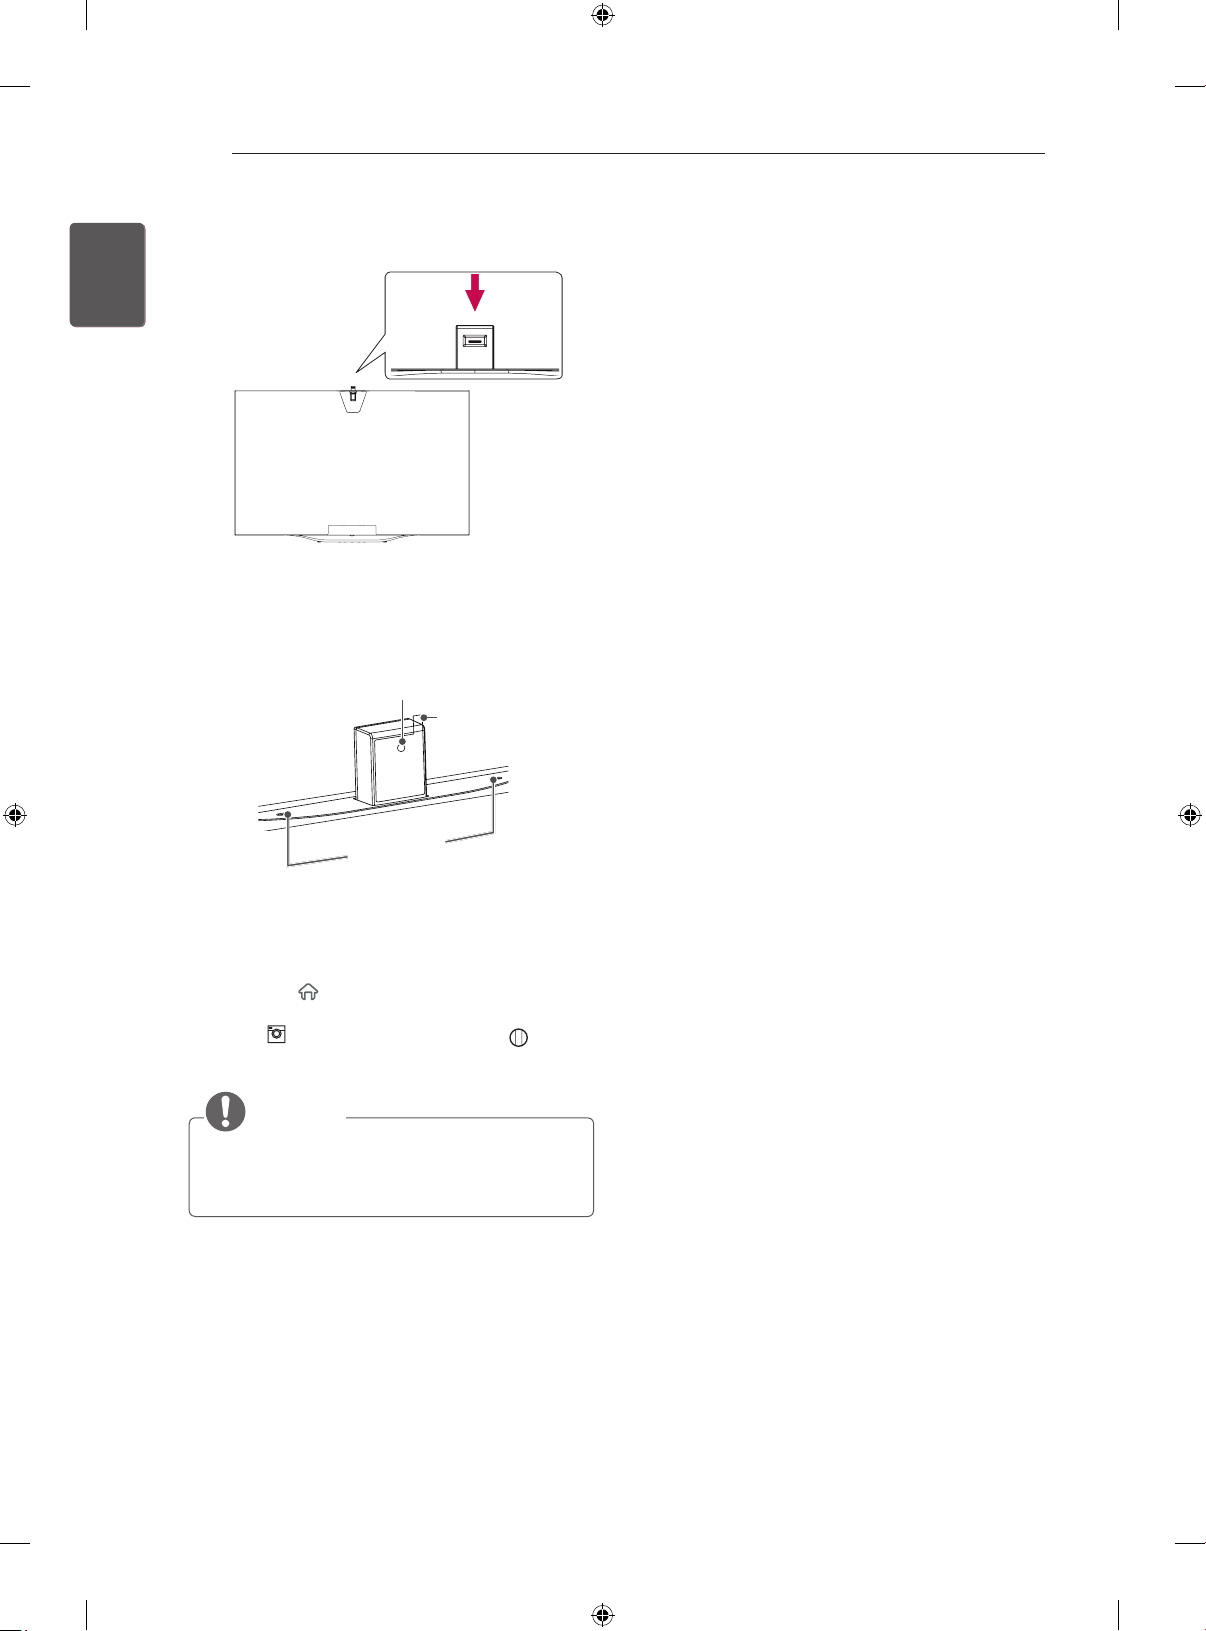
ENGLISH
ENGLISH
ENG
ENG
24
ASSEMBLING AND PREPARING
3 Push down the built-in camera when you are
not using it.
Name of Parts of Built-in
camera
Camera Lens
Protective
Film
Microphone
Checking the Camera’s
Shooting Range
1 Press the (Home) button on the remote
control to display the HOME menu.
2 Select CAMERA and then press the
Wheel(OK) button.
NOTE
The optimal distance from the camera to use
y
the motion recgnition function is between 1.5
m and 4.5 m.
Page 65
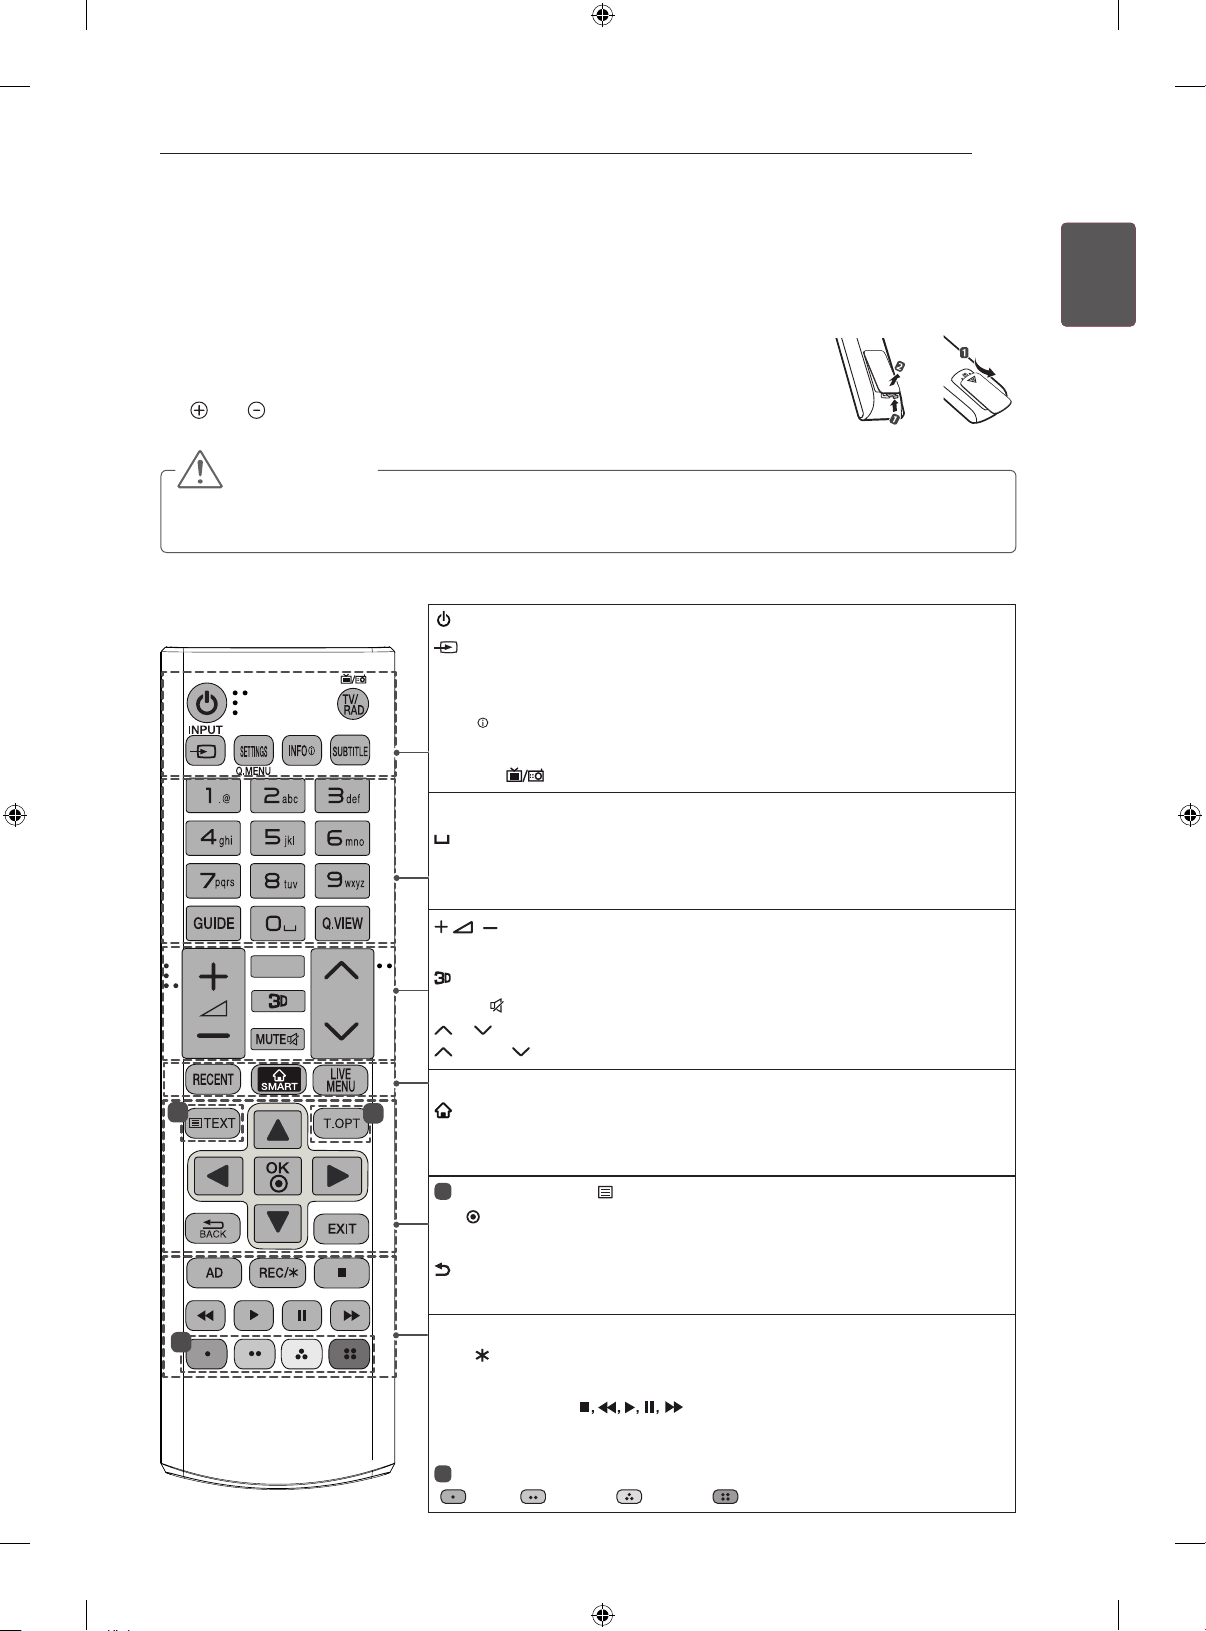
REMOTE CONTROL
25
REMOTE CONTROL
(Depending on model)
The descriptions in this manual are based on the buttons on the remote control.
Please read this manual carefully and use the TV correctly.
To replace batteries, open the battery cover, replace batteries (1.5 V AAA) matching
the and ends to the label inside the compartment, and close the battery cover.
To remove the batteries, perform the installation actions in reverse.
CAUTION
y Do not mix old and new batteries, as this may damage the remote control.
y The remote control will not be included for all sales market.
Make sure to point the remote control toward the remote control sensor on the TV.
(POWER) Turns the TV on or off.
INPUT Changes the input source.
SETTINGS Accesses the main menus.
Q. MENU Accesses the quick menus.
INFO
SUBTITLE Recalls your preferred subtitle in digital mode.
TV/RAD Selects Radio, TV and DTV programme.
Number buttons Enters numbers.
GUIDE Shows programme guide.
Q.VIEW Returns to the previously viewed programme.
FAV
P
PAGE
FAV Accesses your favourite programme list.
MUTE
RECENT Shows the previous history.
1
1
LIVE MENU Shows the list of Recommended, Programmes, Search
and Recorded.
1
OK Selects menus or options and confirms your input.
Navigation buttons (up/down/left/right) Scrolls through menus or options.
EXIT Clears all on-screen displays and returns to TV viewing.
2
AD By Pressing AD button, audio descriptions function will be enabled.
REC/ Starts to record and displays record menu. (only Time Machine
support model)
Control buttons ( ) Controls the Premium contents, Time
Machine
(USB or SIMPLINK or Time Machine
2
( : Red, : Green, : Yellow, : Blue)
Views the information of the current programme and screen.
(Space) Opens an empty space on the screen keyboard.
Adjusts the volume level.
Used for viewing 3D video.
Mutes all sounds.
P
Scrolls through the saved programmes.
PAGE Moves to the previous or next screen.
SMART Accesses the Home menus.
Teletext buttons( TEXT / T.OPT) These buttons are used for teletext.
BACK Returns to the previous level.
Ready
or SmartShare menus or the SIMPLINK compatible devices
Ready
).
Coloured buttons These access special functions in some menus.
or
Ready
ENGLISH
ENG
ENGENGLISH
Page 66
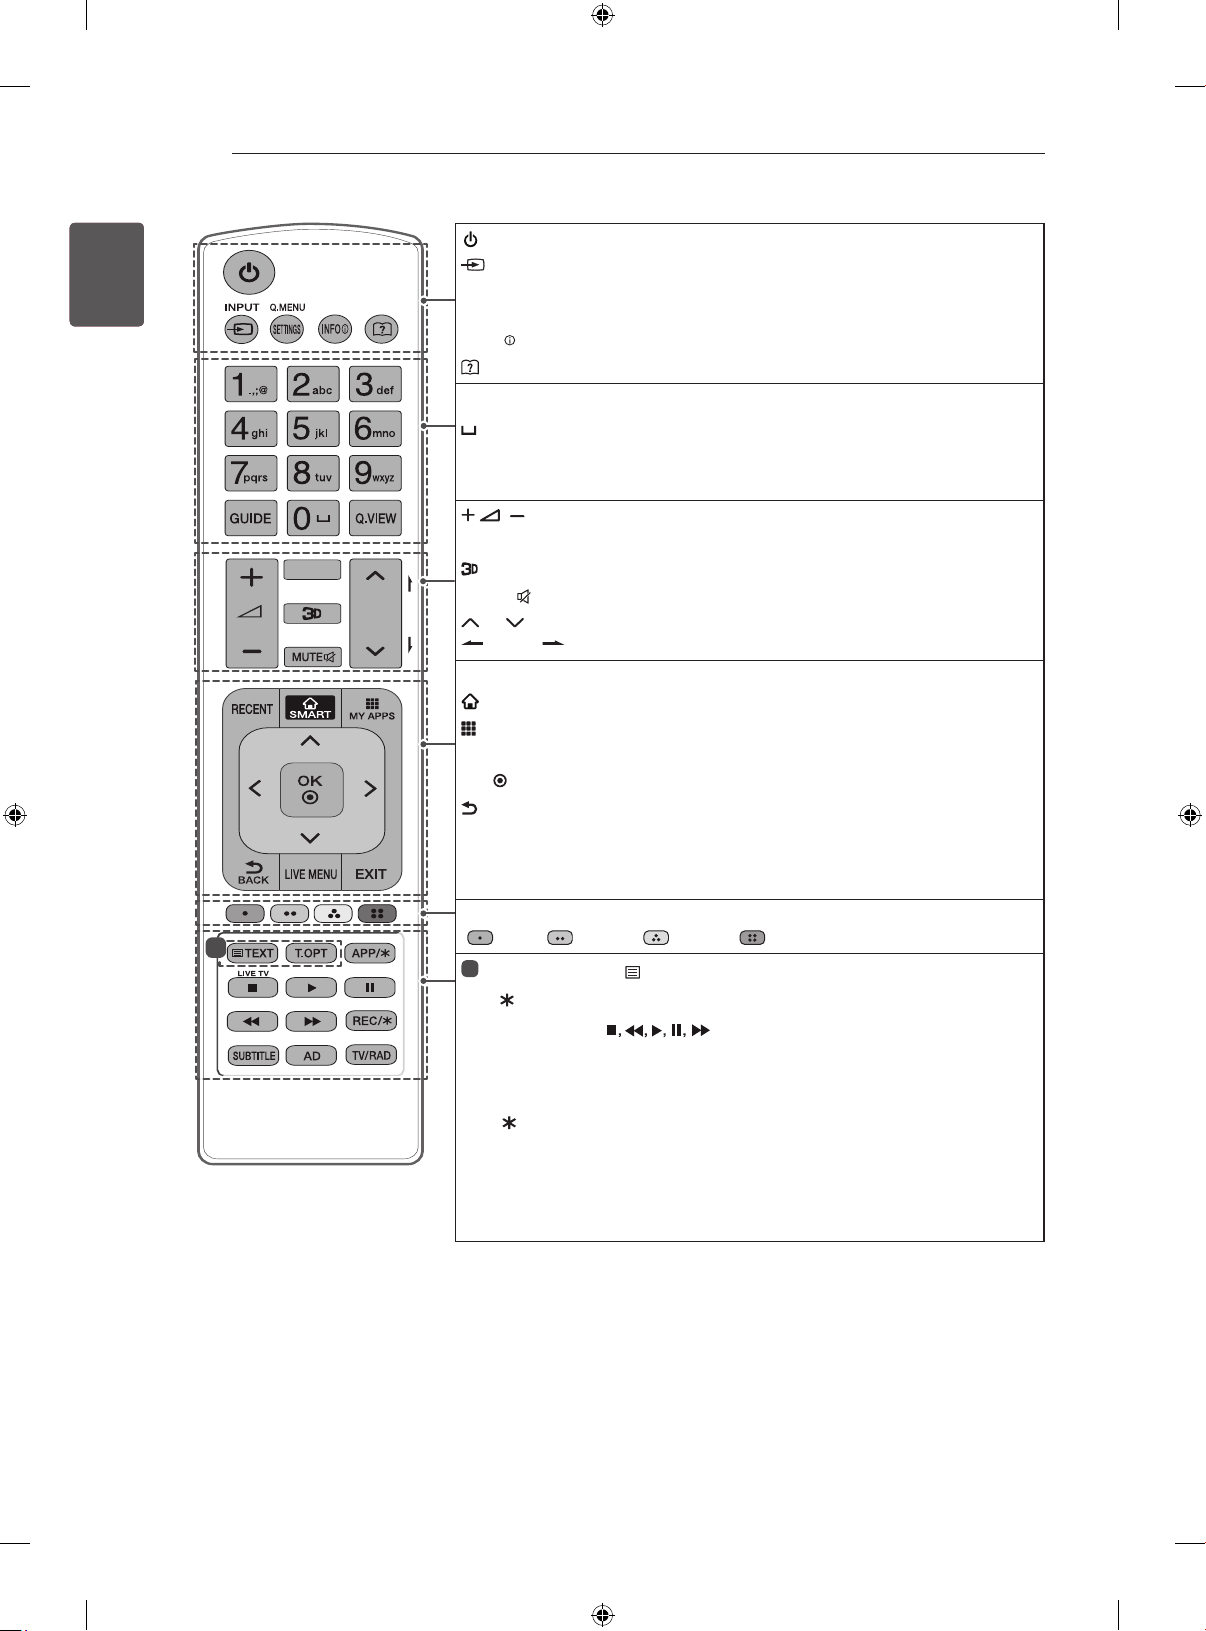
ENGLISH
FAV
P
P
A
G
E
Time Machine
SUBTITLE
ENGLISH
ENG
ENG
26
REMOTE CONTROL
•
1
(POWER) Turns the TV on or off.
INPUT Changes the input source.
SETTINGS Accesses the main menus.
Q. MENU Accesses the quick menus.
INFO
Views the information of the current programme and screen.
(User Guide) Sees user-guide.
Number buttons Enters numbers.
(Space) Opens an empty space on the screen keyboard.
GUIDE Shows programme guide.
Q.VIEW Returns to the previously viewed programme.
Adjusts the volume level.
FAV Accesses your favourite programme list.
Used for viewing 3D video.
MUTE Mutes all sounds.
P Scrolls through the saved programmes.
PAGE Moves to the previous or next screen.
RECENT Shows the previous history.
SMART Accesses the Home menus.
MY APPS Shows the list of Apps.
Navigation buttons (up/down/left/right) Scrolls through menus or options.
OK Selects menus or options and confirms your input.
BACK Returns to the previous level.
LIVE MENU Shows the list of Recommended, Programmes, Search
and Recorded.
EXIT Clears all on-screen displays and returns to TV viewing.
Coloured buttons These access special functions in some menus.
(
: Red, : Green, : Yellow, : Blue)
1
Teletext buttons( TEXT / T.OPT) These buttons are used for teletext.
APP/ Selects the MHP TV menu source. (Only Italy.) (Depending on model)
Control buttons ( ) Controls the Premium contents, Time
Machine
(USB or SIMPLINK or Time Machine
Ready
or SmartShare menus or the SIMPLINK compatible devices
Ready
).
LIVE TV Returns to LIVE TV.
REC/ Starts to record and displays record menu. (only Time Machine
Ready
support model)
SUBTITLE Recalls your preferred subtitle in digital mode.
AD By Pressing AD button, audio descriptions function will be enabled.
TV/RAD Selects Radio, TV and DTV programme.
Page 67
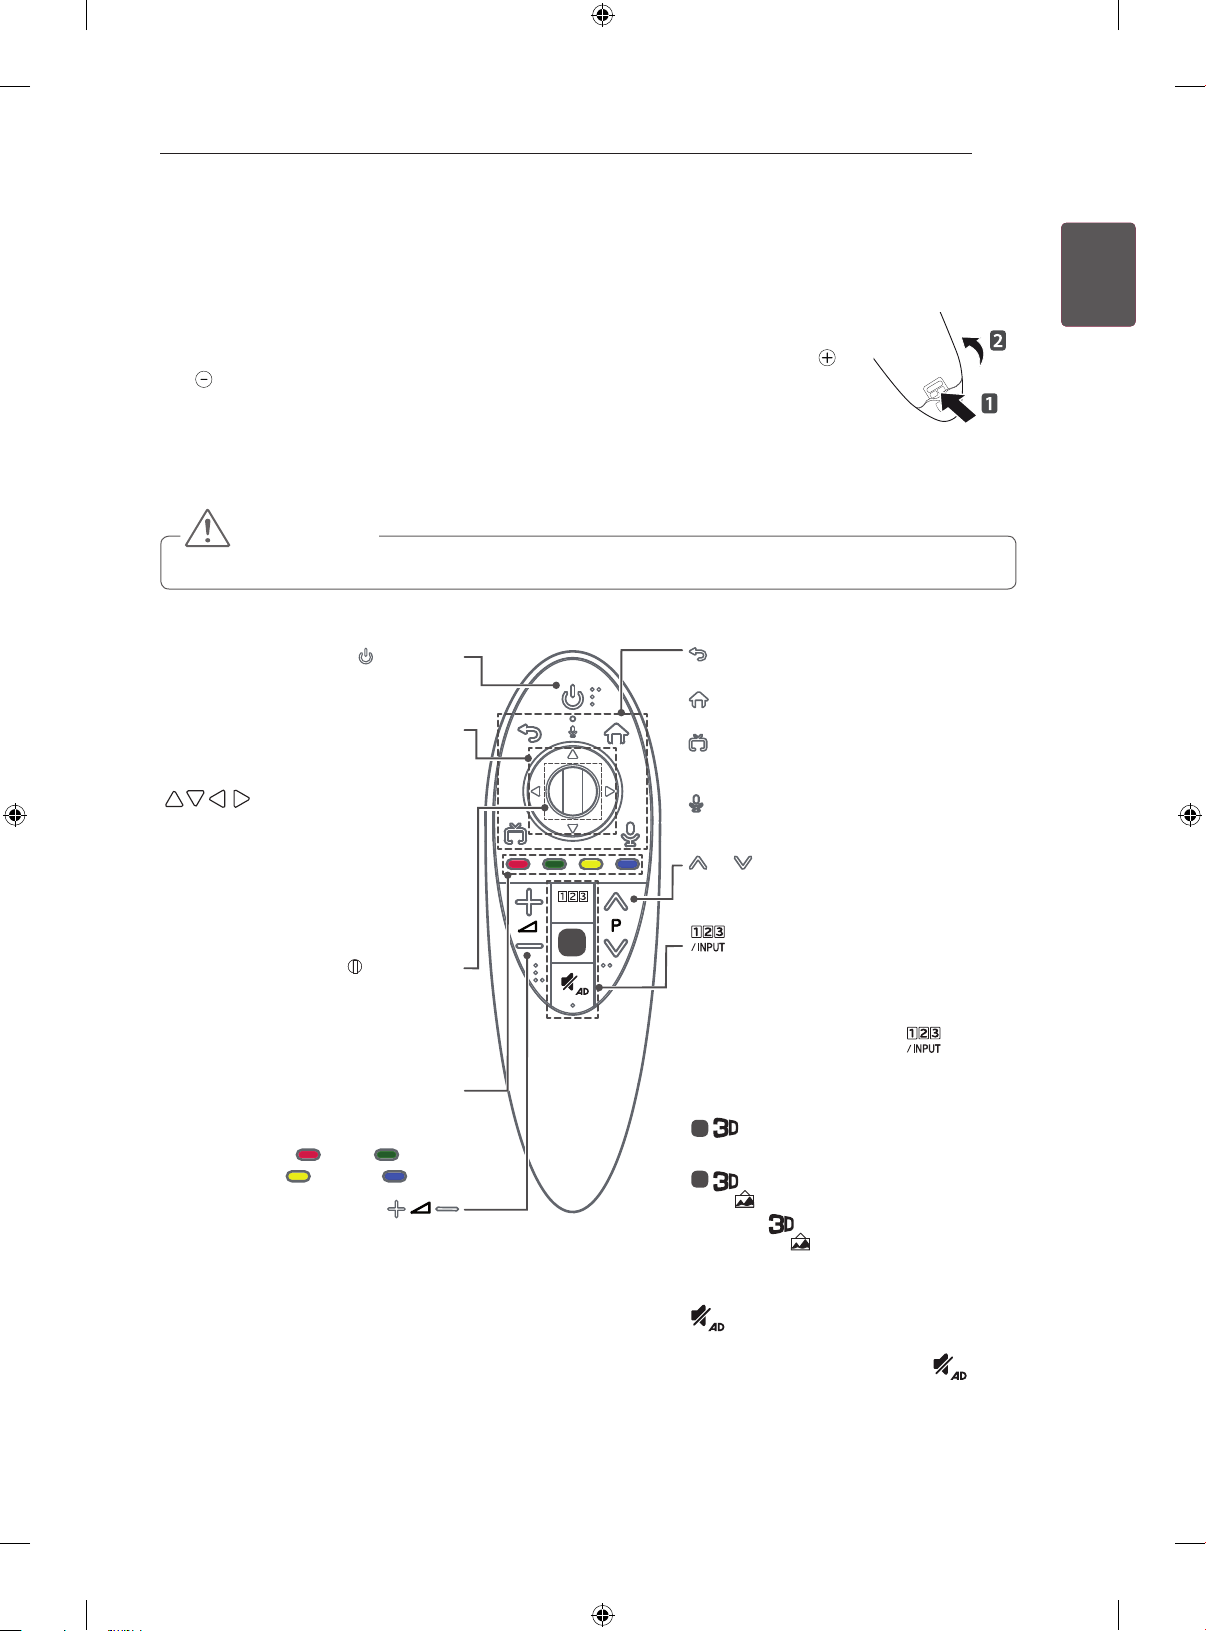
MAGIC REMOTE FUNCTIONS
HOME
MAGIC REMOTE FUNCTIONS
When the message “Magic Remote battery is low. Change the battery.” is displayed,
replace the battery.
To replace batteries, open the battery cover, replace batteries (1.5 V AA) matching
and ends to the label inside the compartment, and close the battery cover. Be sure to
point the remote control toward the remote control sensor on the TV.
To remove the batteries, perform the installation actions in reverse.
CAUTION
y Do not mix old and new batteries, as this may damage the remote control.
27
ENGLISH
ENG
ENGENGLISH
(POWER)
Turns the TV on or off.
Navigation buttons (up/down/left/right)
Press the up, down, left or right but-
ton to scroll the menu. If you press
buttons while the pointer
is in use, the pointer will disappear
from the screen and Magic Remote
will operate like a general remote
control. To display the pointer on the
screen again, shake Magic Remote
to the left and right.
Wheel(OK)
Press the center of the Wheel button
to select a menu.
You can change programmes by
using the wheel button.
Coloured buttons
These access special functions in
some menus.
( : Red : Green
: Yellow : Blue)
Adjusts the volume level.
/INPUT
1
(BACK)
Returns to the previous screen.
(Home)
Accesses the Home menu.
(EXIT to LIVE)
Switches among broadcast (antenna) and various inputs.
(Voice recognition)
P
Scrolls through the saved programmes.
Displays the Screen Remote.
* Accesses the Universal Control Menu.
(Depending on model)
* Pressing and holding the button
will display a menu to select an external
device that is connected to the TV.
1
(Depending on model)
Used for viewing 3D video.
1
(Depending on model)
Press the button for a second to use
the eGallery service that you can enjoy the
famous paintings and iconic photographs.
(MUTE)
Mutes all sounds.
* By Pressing and holding the
button, audio descriptions function will
be enabled.
Page 68
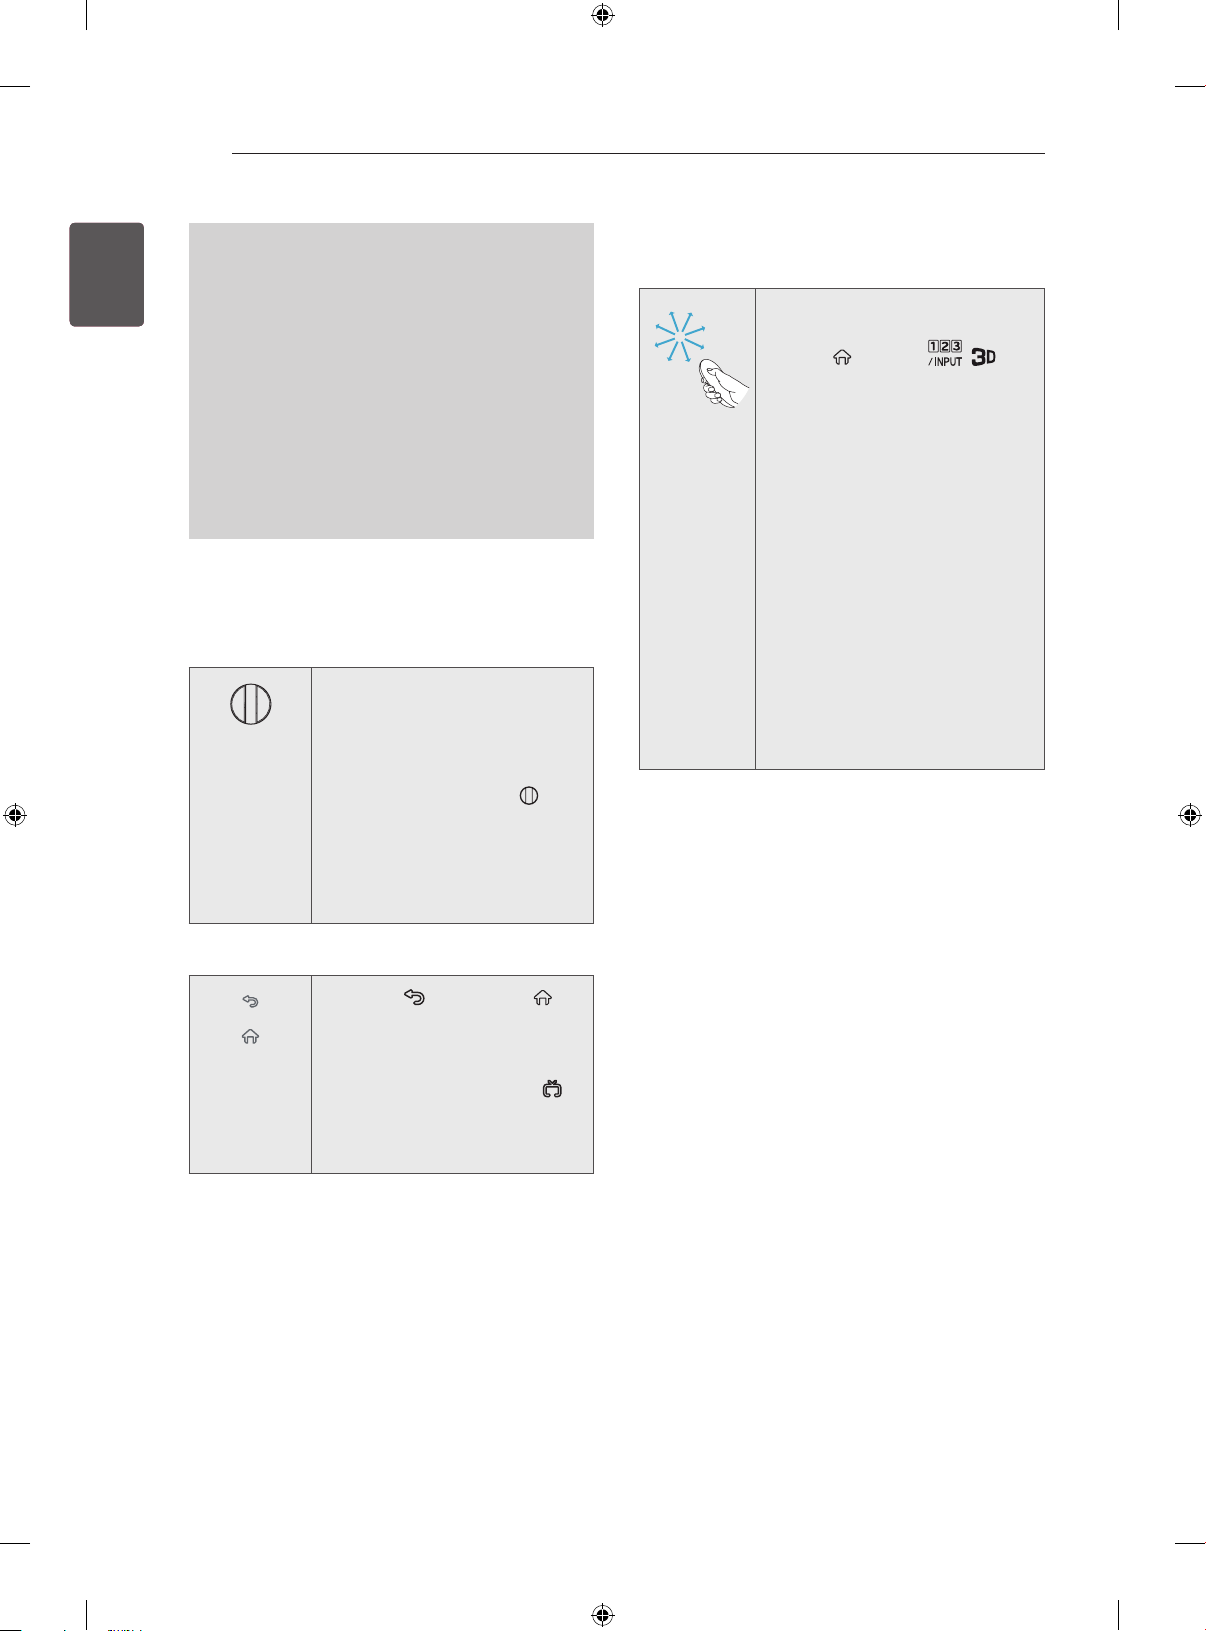
ENGLISH
HOME
ENGLISH
ENG
ENG
28
MAGIC REMOTE FUNCTIONS
Voice recognition
Network connection is required to use the voice
recognition function.
1. Press the Voice recognition button.
2. Speak when the voice display window appears on the left of the TV screen.
• The voice recognition may fail when you
speak too fast or too slow.
• Use the Magic remote control no further
than 10 cm from your face.
• The recognition rate may vary depending
on the user’s characteristics (voice,
pronunciation, intonation and speed) and
the environment (noise and TV volume).
Registering Magic Remote
How to register the Magic Remote
To use the Magic Remote, rst
pair it with your TV.
(Wheel)
1 Put batteries into the Magic
Remote and turn the TV on.
2 Point the Magic Remote at
your TV and press the
Wheel (OK) on the remote
control.
* If the TV fails to register the
Magic Remote, try again after
turning the TV off and back on.
How to use magic remote
Shake the Magic Remote
y
slightly to the right and left or
press (Home), ,
buttons to make the pointer
appear on the screen.
(In some TV models, the
pointer will appear when you
turn the Wheel button.)
If the pointer has not been
y
used for a certain period
of time or Magic Remote is
placed on a flat surface, then
the pointer will disappear.
If the pointer is not
y
responding smoothly, you can
reset the pointer by moving it
to the edge of the screen.
The Magic Remote depletes
y
batteries faster than a normal
remote due to the additional
features.
How to deregister the Magic Remote
Press the (BACK) and
(BACK)
(Home)
(Home) buttons at the same
time, for ve seconds, to unpair
the Magic Remote with your TV.
* Pressing and holding the
(EXIT to LIVE) button will let
you cancel and re-register
Magic Remote at once.
Page 69
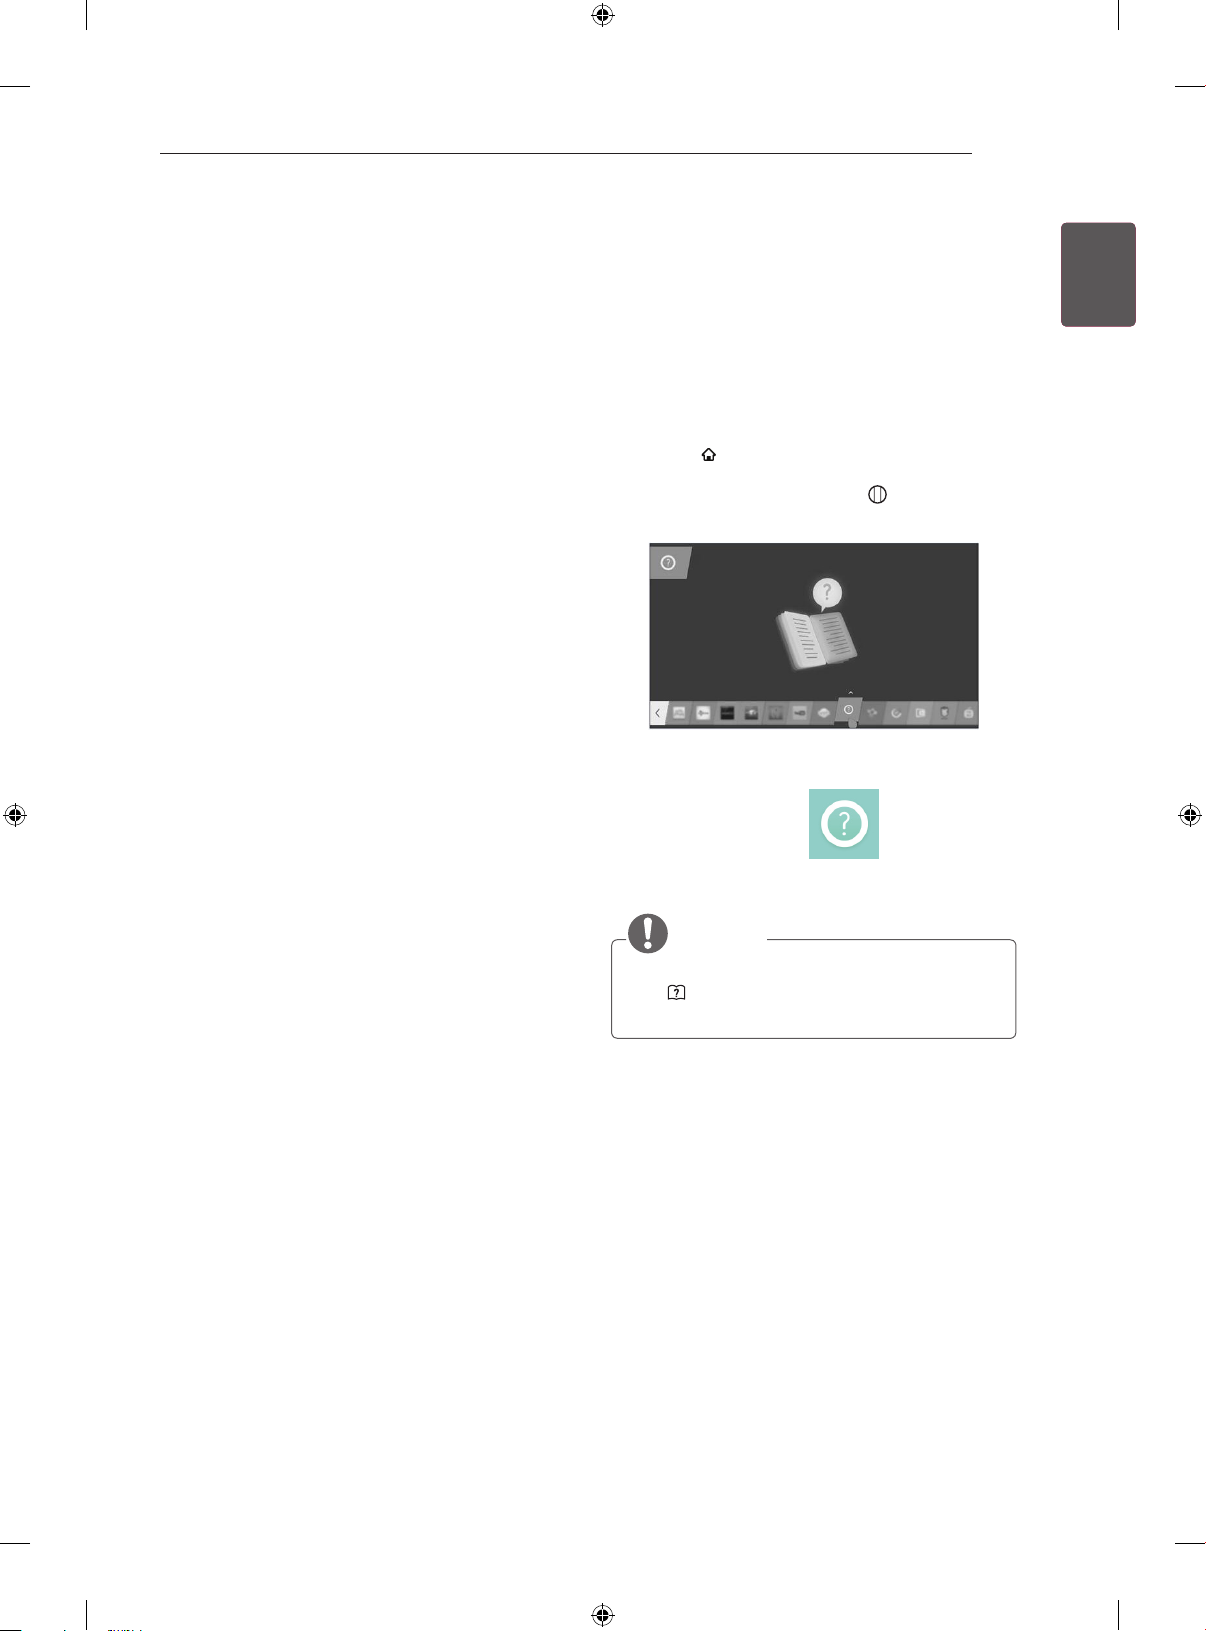
MAGIC REMOTE FUNCTIONS / USING THE USER GUIDE
29
Precautions to Take when
Using the Magic Remote
Use the Magic Remote within the maximum
y
communication distance (10 m). Using the
Magic Remote beyond this distance, or
with an object obstructing it, may cause a
communication failure.
A communication failure may occur due to
y
nearby devices. Electrical devices such as
a microwave oven or wireless LAN product
may cause interference, as these use the
same bandwidth (2.4 GHz) as the Magic
Remote.
The Magic Remote may be damaged or may
y
malfunction if it is dropped or receives a
heavy impact.
Take care not to bump into nearby furniture
y
or other people when using the Magic
Remote.
Manufacturer and installer cannot provide
y
service related to human safety as the
applicable wireless device has possibility of
electric wave interference.
It is recommended that an Access Point (AP)
y
be located more than 1 m away from the
TV. If the AP is installed closer than 1 m, the
Magic Remote may not perform as expected
due to frequency interference.
USING THE USER
GUIDE
User Guide allows you to more easily access the
detailed TV information.
1 Press the (Home) button to access the Home menu.
2 Select User Guide and press the Wheel(OK)
button.
ENGLISH
ENG
ENGENGLISH
NOTE
You can also access the User Guide by press-
y
ing (User Guide) in the remote control.
(Depending on model)
Page 70
ENGLISH
ENGLISH
ENG
ENG
30
MAINTENANCE
MAINTENANCE
Cleaning your TV
Clean your TV regularly to keep the best performance and to extend the product lifespan.
CAUTION
y Make sure to turn the power off and disconnect the power cord and all other cables first.
y When the TV is left unattended and unused for a long time, disconnect the power cord from the wall
outlet to prevent possible damage from lightning or power surges.
Screen, frame, cabinet and stand
y To remove dust or light dirt, wipe the surface with a dry, clean, and soft cloth.
y To remove major dirt, wipe the surface with a soft cloth dampened in clean water or a diluted mild
detergent. Then wipe immediately with a dry cloth.
CAUTION
y Avoid touching the screen at all times, as this may result in damage to the screen.
y Do not push, rub, or hit the screen surface with your fingernail or a sharp object, as this may result in
scratches and image distortions.
y Do not use any chemicals as this may damage the product.
y Do not spray liquid onto the surface. If water enters the TV, it may result in fire, electric shock, or
malfunction.
Power cord
Remove the accumulated dust or dirt on the power cord regularly.
Page 71
TROUBLESHOOTING
Problem Solution
TROUBLESHOOTING
31
ENGLISH
ENG
ENGENGLISH
Cannot control the
TV with the remote
control.
No image display
and no sound is
produced.
The TV turns off
suddenly.
When connecting
to the PC (HDMI/
DVI), ‘No signal’ or
‘Invalid Format’ is
displayed.
y Check the remote control sensor on the product and try again.
y Check if there is any obstacle between the product and the remote control.
y Check if the batteries are still working and properly installed ( to , to ).
y Check if the product is turned on.
y Check if the power cord is connected to a wall outlet.
y Check if there is a problem in the wall outlet by connecting other products.
y Check the power control settings. The power supply may be interrupted.
y Check if the Automatic Standby (Depending on model) / Sleep Timer / Timer
Power off feature is activated in the TIMERS settings.
y If there is no signal while the TV is on, the TV will turn off automatically after 15
minutes of inactivity.
y Turn the TV off/on using the remote control.
y Reconnect the HDMI cable.
y Restart the PC with the TV on.
Page 72
0197
0197
ENGLISH
ENGLISH
ENG
ENG
32
SPECIFICATIONS
SPECIFICATIONS
(Only EC93**)
Wireless module(LGSBW41)Specifications
Wireless LAN Bluetooth
Standard IEEE 802.11a/b/g/n Standard Bluetooth Version 3.0
2400 to 2483.5 MHz
Frequency Range
Output Power (Max.)
y Because band channel used by the country could be different, the user can not change or adjust the
operating frequency and this product is set for the regional frequency table.
y This device should be installed and operated with minimum distance 20 cm between the device and your
body. And this phrase is for the general statement for consideration of user environment.
5150 to 5250 MHz
5725 to 5850 MHz (for Non EU)
802.11a: 13 dBm
802.11b: 15 dBm
802.11g: 14 dBm
802.11n - 2.4GHz: 16 dBm
802.11n - 5GHz: 16 dBm
Frequency Range 2400 to 2483.5 MHz
Output Power (Max.) 10dBm or Lower
(Only EC97**, EC98**)
Wireless module(LGSWF41)Specifications
Standard IEEE 802.11a/b/g/n/ac
2400 to 2483.5 MHz
Frequency Range
Output Power (Max.)
Bluetooth module(BM-LDS401)Specifications
Standard Bluetooth Version 3.0
Frequency Range 2400 ~ 2483.5 MHz
Output Power (Max.) 10 dBm or lower
y Because band channel used by the country could be different, the user can not change or adjust the
operating frequency and this product is set for the regional frequency table.
y This device should be installed and operated with minimum distance 20 cm between the device and your
body. And this phrase is for the general statement for consideration of user environment.
5150 to 5250 MHz
5725 to 5850 MHz (for Non EU)
802.11a: 14.5 dBm
802.11b: 16 dBm
802.11g: 13.5 dBm
802.11n - 2.4GHz: 14 dBm
802.11n - 5GHz: 15.5 dBm
802.11ac - 5GHz : 16 dBm
Page 73

BENUTZERHANDBUCH
OLED TV
Bitte lesen Sie dieses Handbuch aufmerksam durch, bevor Sie Ihr
Gerät zum ersten Mal verwenden und bewahren Sie es zur späteren
Verwendung auf.
www.lg.com
Page 74
2
INHALTSVERZEICHNIS
INHALTSVERZEICHNIS
DEUTSCH
3 LIZENZEN
3 ANMERKUNG ZU OPEN
3 EINRICHTUNG DER
4 SICHERHEITSHINWEISE
10 - Wiedergabe von 3D-Material
12 INSTALLATIONSVERFAHREN
12 MONTAGE UND
12 Auspacken
14 Separat erhältlich
15 Gehäuse und Bedienelemente
17 - Verwendung der Joystick-Taste
18 Anheben und Bewegen des TV-Gerätes
19 Montage auf einem Tisch
20 Wandmontage
21 Wandmontage: Installationsanleitung
21 - Abnehmen des Standfußes
23 Verwendung der integrierten Kamera
23 - Vorbereitung der integrierten Kamera
24 - Bezeichnungen der Teile der integrierten
24 - Überprüfung des Aufnahmebereichs der
25 FERNBEDIENUNG
SOURCE-SOFTWARE
EXTERNEN STEUERUNG
VORBEREITUNG
Kamera
Kamera
29 DAS BENUTZERHANDBUCH
VERWENDEN
30 WARTUNG
30 Reinigung des TV-Gerätes
30 - Bildschirm, Rahmen, Gehäuse und
Standfuß
30 - Netzkabel
31 FEHLERBEHEBUNG
32 TECHNISCHE DATEN
WARNUNG
Bei Nichtbeachtung drohen schwere
y
Verletzungen, Unfälle und Tod.
27 TASTENFUNKTIONEN DER
MAGIC-FERNBEDIENUNG
28 Registrieren der Magic- Fernbedienung
28 So wird die Magic- Fernbedienung
verwendet
29 Vorsichtsmaßnahmen bei der Verwendung
der Magic- Fernbedienung
VORSICHT
y Bei Nichtbeachtung drohen leichte
Verletzungen oder eine Beschädigung des
Produkts.
HINWEIS
y Der Hinweis hilft Ihnen dabei, das Produkt zu
verstehen und sicher zu benutzen. Bevor Sie
das Produkt zum ersten Mal verwenden, lesen
Sie den Hinweis bitte aufmerksam durch.
Page 75
LIZENZEN / ANMERKUNG ZU OPEN SOURCE-SOFTWARE / EINRICHTUNG DER EXTERNEN STEUERUNG
LIZENZEN
Die unterstützten Lizenzen sind von Modell zu Modell verschieden. Weitere Informationen zu den Lizenzen
erhalten Sie unter www.lg.com.
ANMERKUNG ZU OPEN SOURCE-SOFTWARE
Den Quellcode unter GPL, LGPL, MPL sowie weitere Open-Source-Lizenzen, der in diesem Produkt enthalten ist, können Sie unter http://opensource.lge.com herunterladen.
Neben dem Quellcode stehen dort noch alle Lizenzbedingungen, auf die verwiesen wird, Garantieausschlüsse sowie Urheberrechtshinweise zum Download bereit.
LG Electronics stellt Ihnen gegen eine Gebühr (für Distribution, Medien, Versand und Verwaltung) auch
den Quellcode auf CD-ROM bereit. Wenden Sie sich per E-Mail an LG Electronics: [email protected].
Dieses Angebot ist drei (3) Jahre ab Kaufdatum des Produkts gültig.
3
DEUTSCH
EINRICHTUNG DER EXTERNEN STEUERUNG
Informationen zur Einrichtung der externen Steuerung erhalten Sie unter www.lg.com.
Page 76
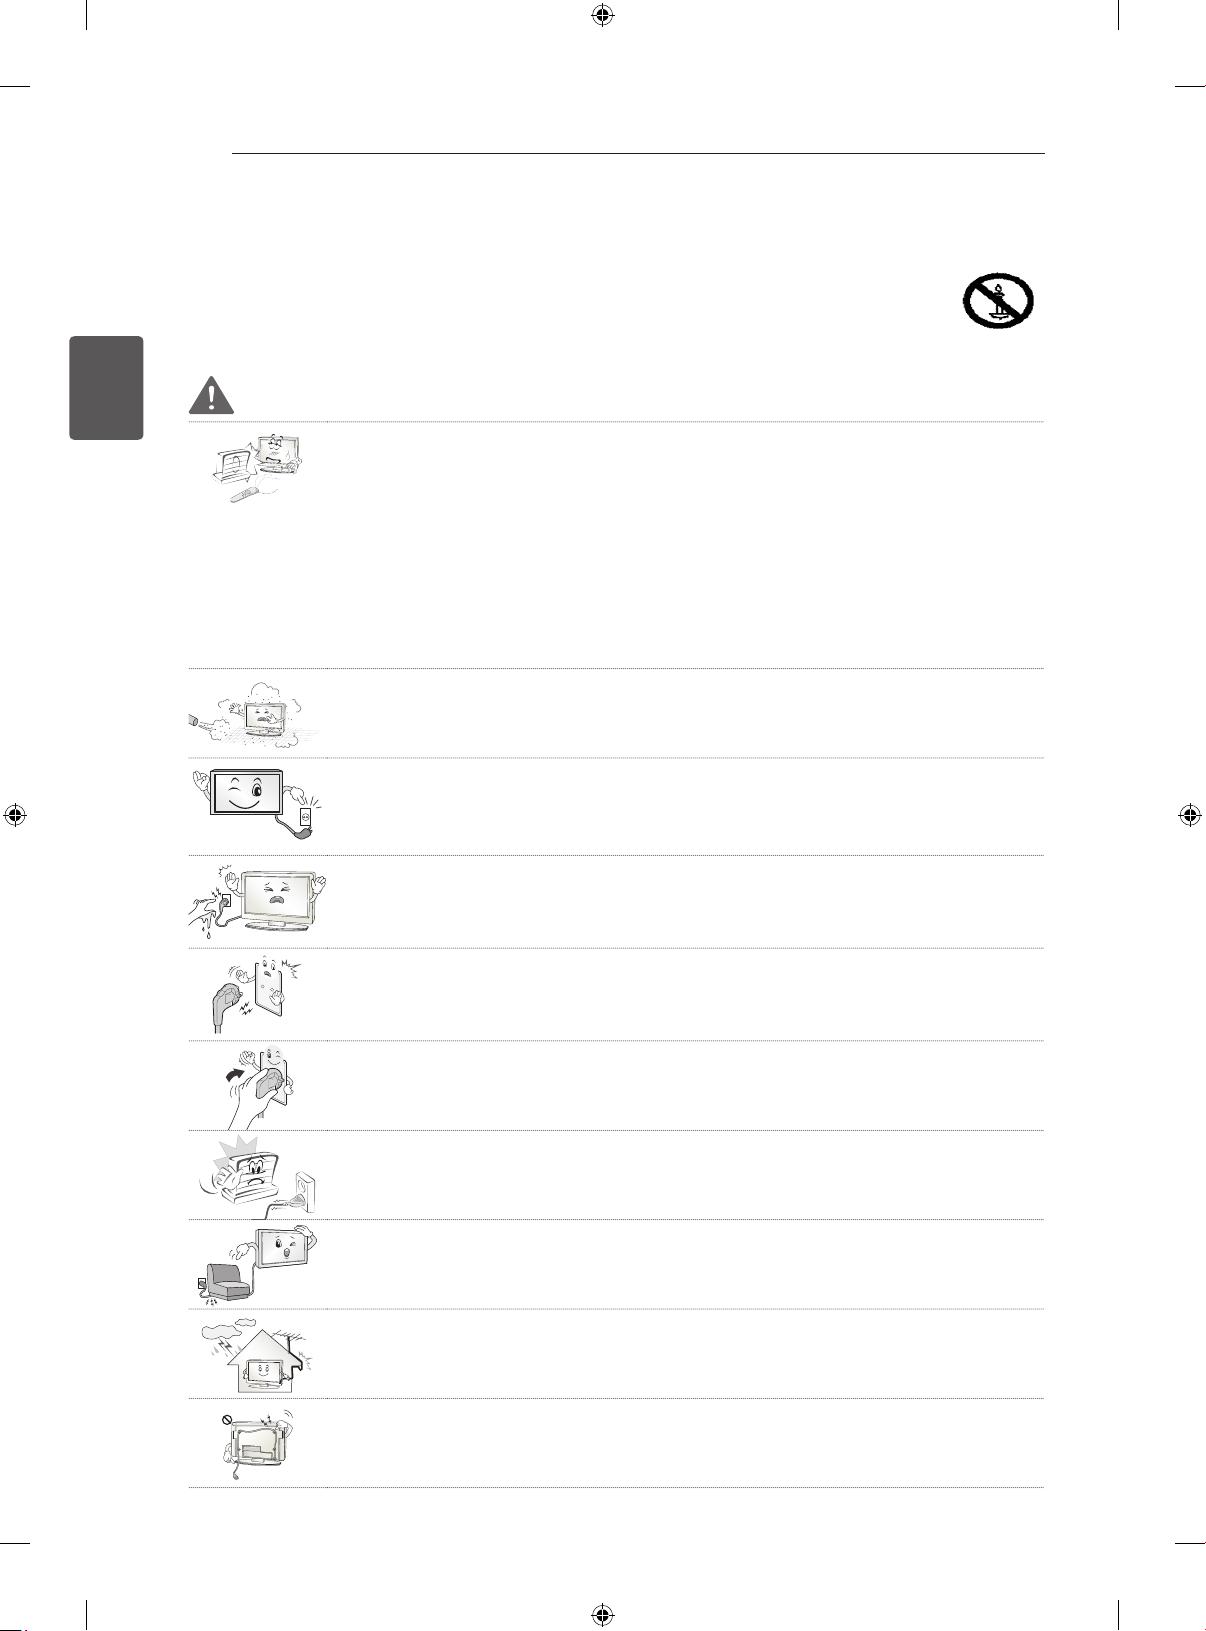
4
SICHERHEITSHINWEISE
SICHERHEITSHINWEISE
DEUTSCH
Bevor Sie das Produkt zum ersten Mal verwenden, lesen Sie diese Sicherheitshinweise bitte
aufmerksam durch.
WARNUNG
y Stellen Sie das TV-Gerät mit Fernsteuerung nicht in folgenden Umgebungen auf:
- Unter direkter Sonneneinstrahlung
- In Bereichen mit hoher Luftfeuchtigkeit, wie z. B. einem Badezimmer
- In der Nähe von Hitzequellen, wie z. B. Öfen und anderen hitzeerzeugenden
Geräten
- In der Nähe von Küchenzeilen oder Befeuchtern, wo das Gerät leicht Dampf
oder Öl ausgesetzt sein kann
- In Bereichen, die Regen oder Wind ausgesetzt sind
- In der Nähe von Behältern mit Wasser, wie z. B. Vasen
Andernfalls kann es zu Bränden, Stromschlägen, Fehlfunktionen oder Produktverformungen
kommen.
y Schützen Sie das Gerät vor Staub.
Es besteht Brandgefahr.
y Wenn Sie das Gerät vom Stromnetz trennen möchten, müssen Sie den Netz-
stecker aus der Steckdose ziehen. Dieser Stecker muss jederzeit gut zugänglich
sein.
y Berühren Sie den Netzstecker nicht mit nassen Händen. Wenn die Kontaktstifte
nass oder verstaubt sind, trocknen Sie den Netzstecker vollständig ab, bzw. befreien Sie ihn von Staub.
Feuchtigkeit erhöht die Gefahr eines tödlichen Stromschlags.
y Stellen Sie sicher, dass das Stromkabel geerdet ist. (Außer bei Geräten, die nicht
geerdet sind.)
Bei Nichtbeachtung besteht die Gefahr von Verletzungen oder eines tödlichen
Stromschlags.
y Das Stromkabel muss vollständig in die Steckdose eingesteckt werden.
Ist das Stromkabel nicht fest in die Steckdose eingesteckt, besteht Brandgefahr.
y Das Stromkabel darf nicht mit heißen Gegenständen wie einem Heizkörper in
Berührung kommen.
Andernfalls bestehen Brandgefahr und die Gefahr von Stromschlägen.
y Stellen Sie keinen schweren Gegenstand oder das Gerät Selbst, oder auf das
Stromkabel.
Andernfalls kann es zu Bränden und Stromschlägen kommen.
y Platzieren Sie das Antennenkabel zwischen dem Innen- und Außenbereich des
Gebäudes so, dass kein Regen hereinfließen kann.
Etwaiger Wassereintritt kann zu Schäden am Gerät und Stromschlag führen.
y Falls das TV-Gerät an der Wand montiert wird, darf es nicht an den Strom- und
Signalkabeln auf der Rückseite des TV-Gerätes aufgehängt werden.
Anderenfalls besteht die Gefahr von Bränden oder Stromschlägen.
Page 77
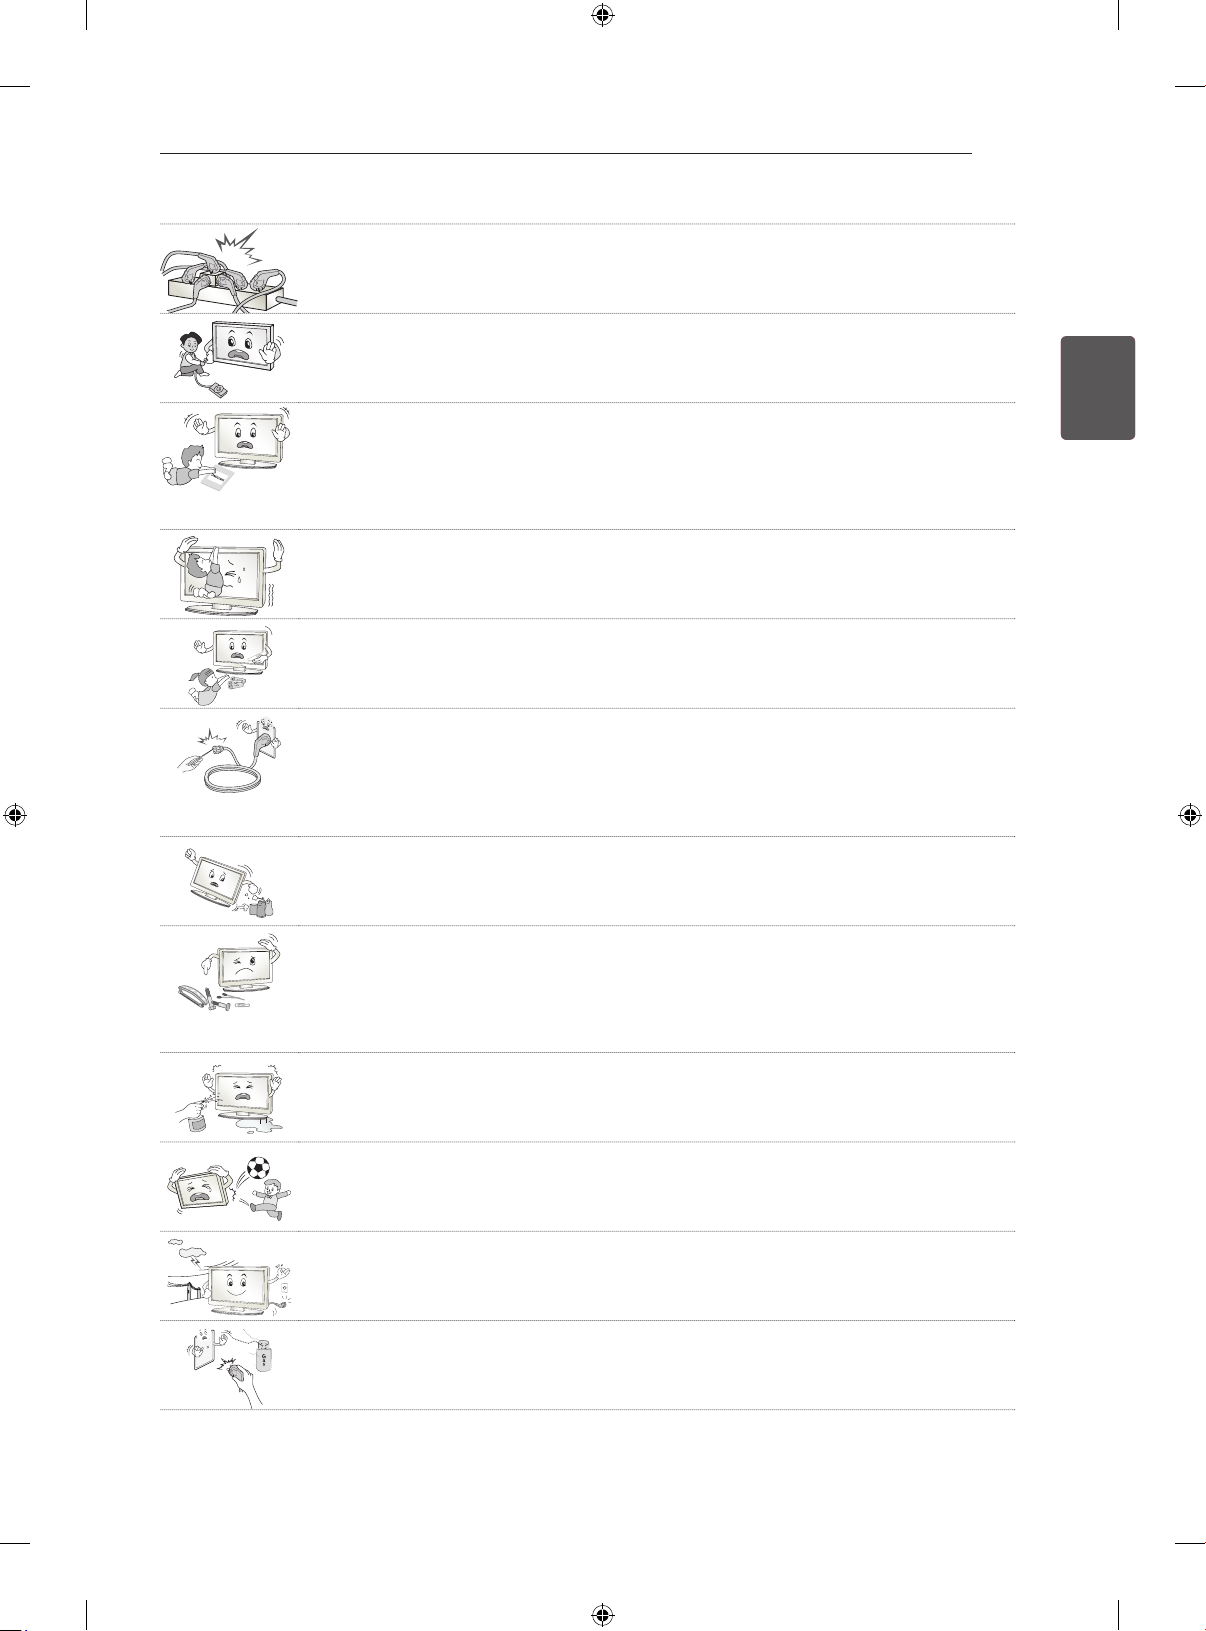
SICHERHEITSHINWEISE
y Schließen Sie nicht zu viele Elektrogeräte an einer einzelnen Steckdose an.
Andernfalls kann es aufgrund von Überhitzung zu Bränden kommen.
5
y Lassen Sie das Gerät beim Anschluss eines externen Gerätes nicht fallen.
Andernfalls können Verletzungen verursacht oder das Gerät beschädigt werden.
y Bewahren Sie das Trockengranulat und die Vinyl-Verpackung außerhalb der
Reichweite von Kindern auf.
Trockengranulat ist bei Verschlucken gesundheitsschädlich. Falls es verschluckt
wurde, Erbrechen herbeiführen und die Person ins nächste Krankenhaus bringen.
Außerdem besteht Erstickungsgefahr durch die Vinyl-Verpackung. Bewahren Sie
sie außerhalb der Reichweite von Kindern auf.
y Achten Sie darauf, dass sich Kinder nicht an das TV-Gerät hängen oder daran
hochklettern.
Andernfalls kann das Gerät umfallen, wodurch schwere Verletzungen hervorgerufen werden können.
y Leere Batterien müssen sicher entsorgt werden, um zu verhindern, dass Kinder
sie verschlucken.
Wenn ein Kind eine Batterie verschluckt hat, sofort einen Arzt aufsuchen.
y Berühren Sie das Ende des Netzkabels nicht mit einem leitenden Gegenstand (wie
einer Gabel), während das Netzkabel mit der Steckdose verbunden ist. Berühren Sie das Netzkabel nicht, kurz nachdem Sie es mit der Steckdose verbunden
haben.
Es besteht die Gefahr eines tödlichen Stromschlags.
(Abhängig vom Modell)
y Bringen Sie keine entflammbaren Stoffe in die Nähe des Gerätes.
Bei unsachgemäßem Umgang mit entflammbaren Stoffen besteht Explosionsgefahr.
DEUTSCH
y Es dürfen keine Metallgegenstände wie Münzen, Haarnadeln, Besteck oder Draht
bzw. entzündliche Gegenstände wie Papier oder Streichhölzer in das Gerät gelangen. Achten Sie insbesondere auf Kinder.
Es besteht die Gefahr von Stromschlag, Brand oder Verletzung. Wenn ein Gegenstand in das Gerät gelangt, ziehen Sie das Stromkabel, und wenden Sie sich an
den Kundendienst.
y Sprühen Sie kein Wasser auf das Produkt, und bringen Sie es nicht mit entzünd-
lichen Stoffen (Verdünnungsmittel oder Benzol) in Verbindung. Es besteht Stromschlag- und Brandgefahr.
y Setzen Sie das Produkt keinen Schlägen und Stößen aus. Sorgen Sie dafür, dass
keine Gegenstände auf das Gerät oder den Bildschirm fallen.
Es besteht Verletzungsgefahr. Außerdem kann das Produkt beschädigt werden.
y Berühren Sie das Produkt oder die Antenne nicht während eines Gewitters.
Es besteht die Gefahr eines tödlichen Stromschlags.
y Im Falle eines Gasaustritts berühren Sie keinesfalls die Steckdose. Öffnen Sie
zum Lüften die Fenster.
Durch Funken können ein Brand oder Verbrennungen hervorgerufen werden.
Page 78
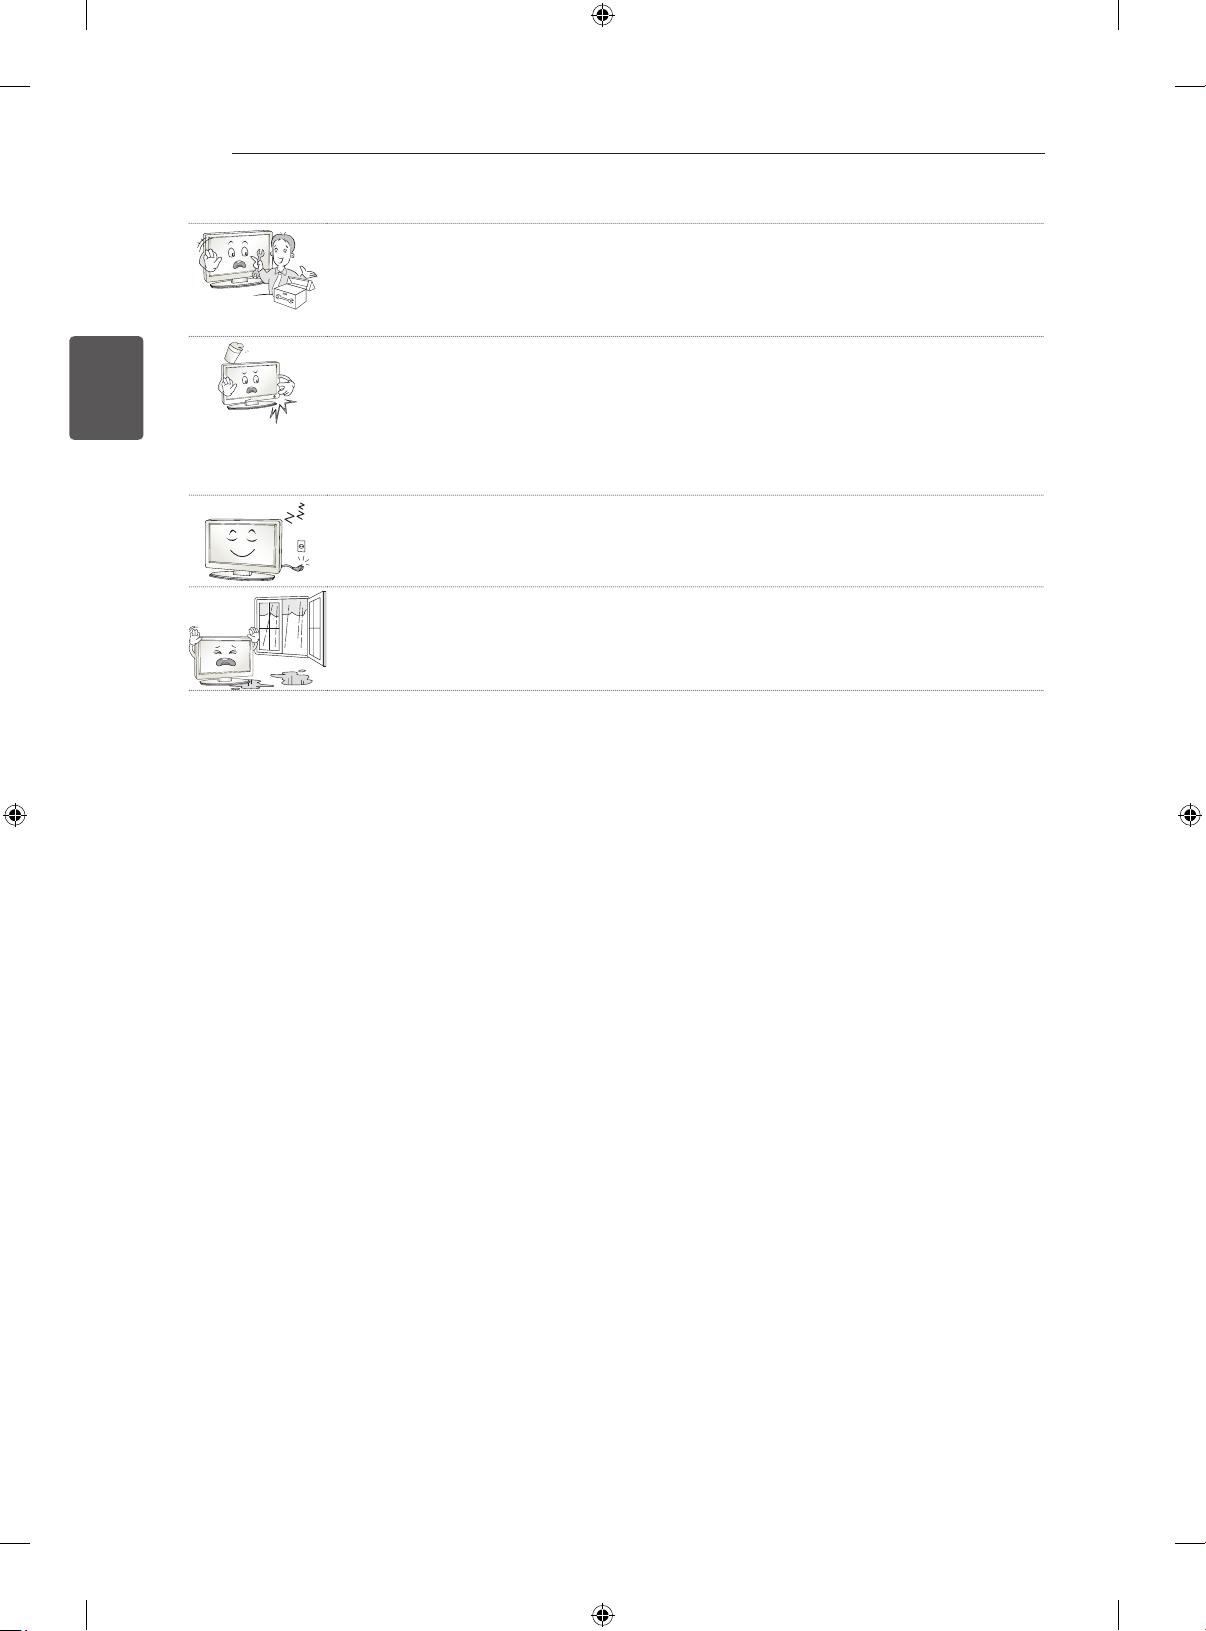
6
DEUTSCH
SICHERHEITSHINWEISE
y Sie dürfen das Gerät nicht eigenmächtig auseinanderbauen, reparieren oder
verändern.
Es besteht Stromschlag- und Brandgefahr.
Wenden Sie sich zur Überprüfung, Kalibrierung oder Reparatur an den Kundendienst.
y Ziehen Sie in jedem der folgenden Fälle sofort den Netzstecker, und setzen Sie
sich mit Ihrem Kundendienst vor Ort in Verbindung.
- Das Gerät wurde einer Erschütterung ausgesetzt
- Das Gerät wurde beschädigt
- Fremdkörper sind in das Gerät gelangt
- Vom Gerät sind Rauch oder ungewöhnliche Gerüche ausgegangen
Dies kann Brand oder Stromschlag verursachen.
y Ziehen Sie das Stromkabel aus der Steckdose, wenn das Gerät für längere Zeit
nicht verwendet wird.
Wenn das Gerät eingestaubt ist, besteht Brandgefahr. Ein Verschleiß der Isolation
kann zu Kriechverlust, Stromschlag oder Brand führen.
y Achten Sie darauf, dass keine Flüssigkeit auf das Gerät spritzt oder tropft. Stellen
Sie keine Gegenstände, die Flüssigkeiten enthalten (z. B. Vasen), auf dem Gerät
ab.
Page 79
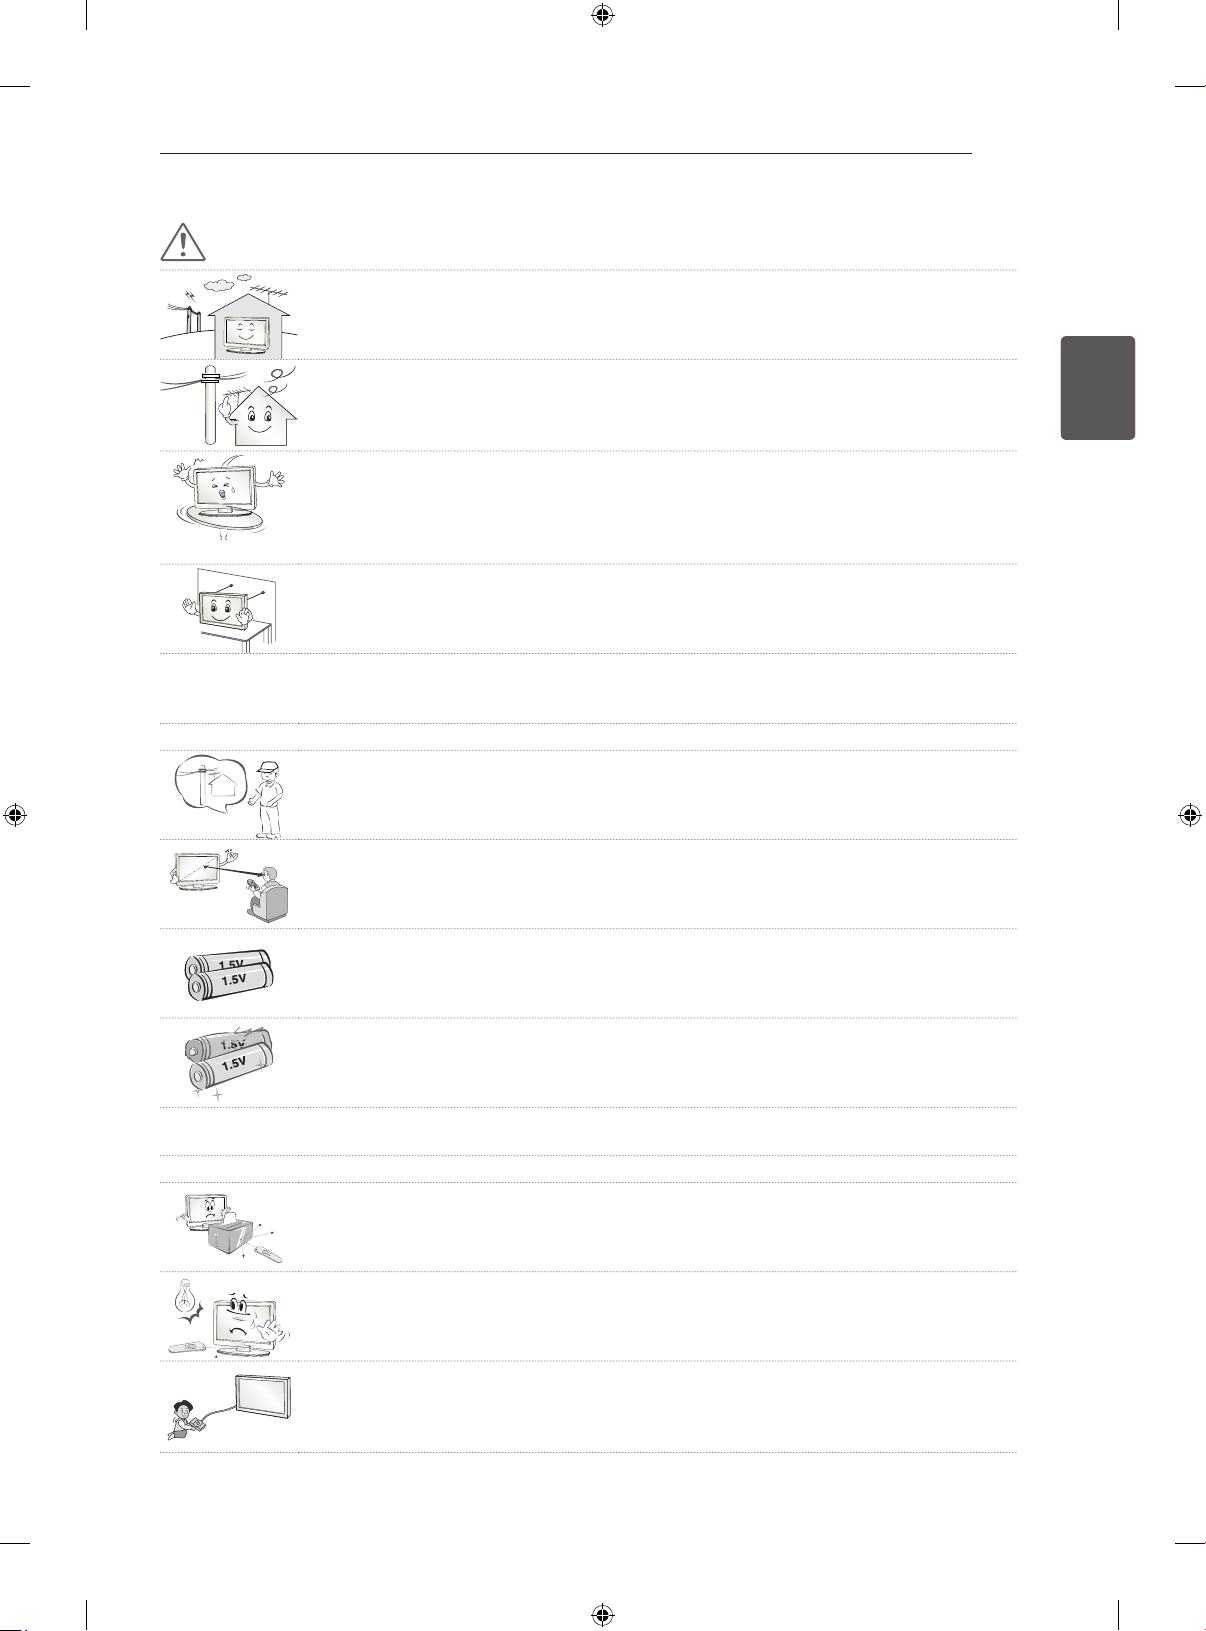
SICHERHEITSHINWEISE
VORSICHT
y Stellen Sie das Gerät nicht in der Nähe von Funkwellen auf.
y Der Abstand zwischen einer Außenantenne und Stromleitungen muss groß genug
sein, um eine Berührung der beiden zu verhindern, selbst wenn die Antenne herunterfällt.
Andernfalls besteht die Gefahr von Stromschlägen.
y Stellen Sie das Produkt nicht auf unstabilen Regalen oder geneigten Oberflächen
auf. Vermeiden Sie außerdem Stellplätze, die vibrieren oder auf denen das Produkt keinen sicheren Halt hat.
Andernfalls kann das Gerät herunter- oder umfallen, wodurch Verletzungen oder
Beschädigungen am Gerät verursacht werden können.
y Wenn Sie das TV-Gerät auf einem Standfuß aufstellen, müssen Sie durch vor-
beugende Maßnahmen ein Umkippen verhindern. Andernfalls kann das TV-Gerät
umfallen, wodurch Verletzungen hervorgerufen werden können.
y Wenn Sie das TV-Gerät an der Wand montieren, befestigen Sie eine VESA-Standardwandhalterung
(optional) an der Rückseite des Gerätes. Wenn Sie das TV-Gerät mit der optionalen Wandhalterung
montieren möchten, befestigen Sie diese sorgfältig, um ein Herunterfallen zu vermeiden.
y Verwenden Sie nur vom Hersteller empfohlenes Zubehör.
y Konsultieren Sie bei der Installation der Antenne eine qualifizierte Fachkraft.
Andernfalls besteht Brandgefahr bzw. die Gefahr von Stromschlägen.
7
DEUTSCH
y Wir empfehlen einen Abstand vom Gerät, der mindestens dem 2- bis 7-Fachen der
Bildschirmdiagonale entspricht.
Das Fernsehen über einen langen Zeitraum hinweg kann zu Seheintrübung führen.
y Verwenden Sie nur den angegebenen Batterietyp.
Andernfalls könnte die Fernbedienung beschädigt werden.
y Alte und neue Batterien dürfen nicht zusammen verwendet werden.
Andernfalls könnten die Batterien überhitzen und auslaufen.
y Batterien dürfen keiner extremen Hitze, etwa durch Sonneneinstrahlung, offenes Feuer oder Heiz-
strahler, ausgesetzt werden.
y Laden Sie nicht wiederaufladbare Batterien NICHT mit einem Ladegerät auf.
y Es dürfen sich keine Gegenstände zwischen der Fernbedienung und dem Sensor
befinden.
y Das Signal von der Fernbedienung kann durch Sonnenlicht oder andere starke
Lichteinstrahlung gestört werden. Verdunkeln Sie in diesem Fall den Raum.
y Achten Sie beim Anschluss von externen Geräten, wie z. B. Videospielkonsolen,
darauf, dass die Anschlusskabel lang genug sind.
Ansonsten kann das Gerät umfallen, wodurch Verletzungen oder Beschädigungen
am Gerät verursacht werden können.
Page 80
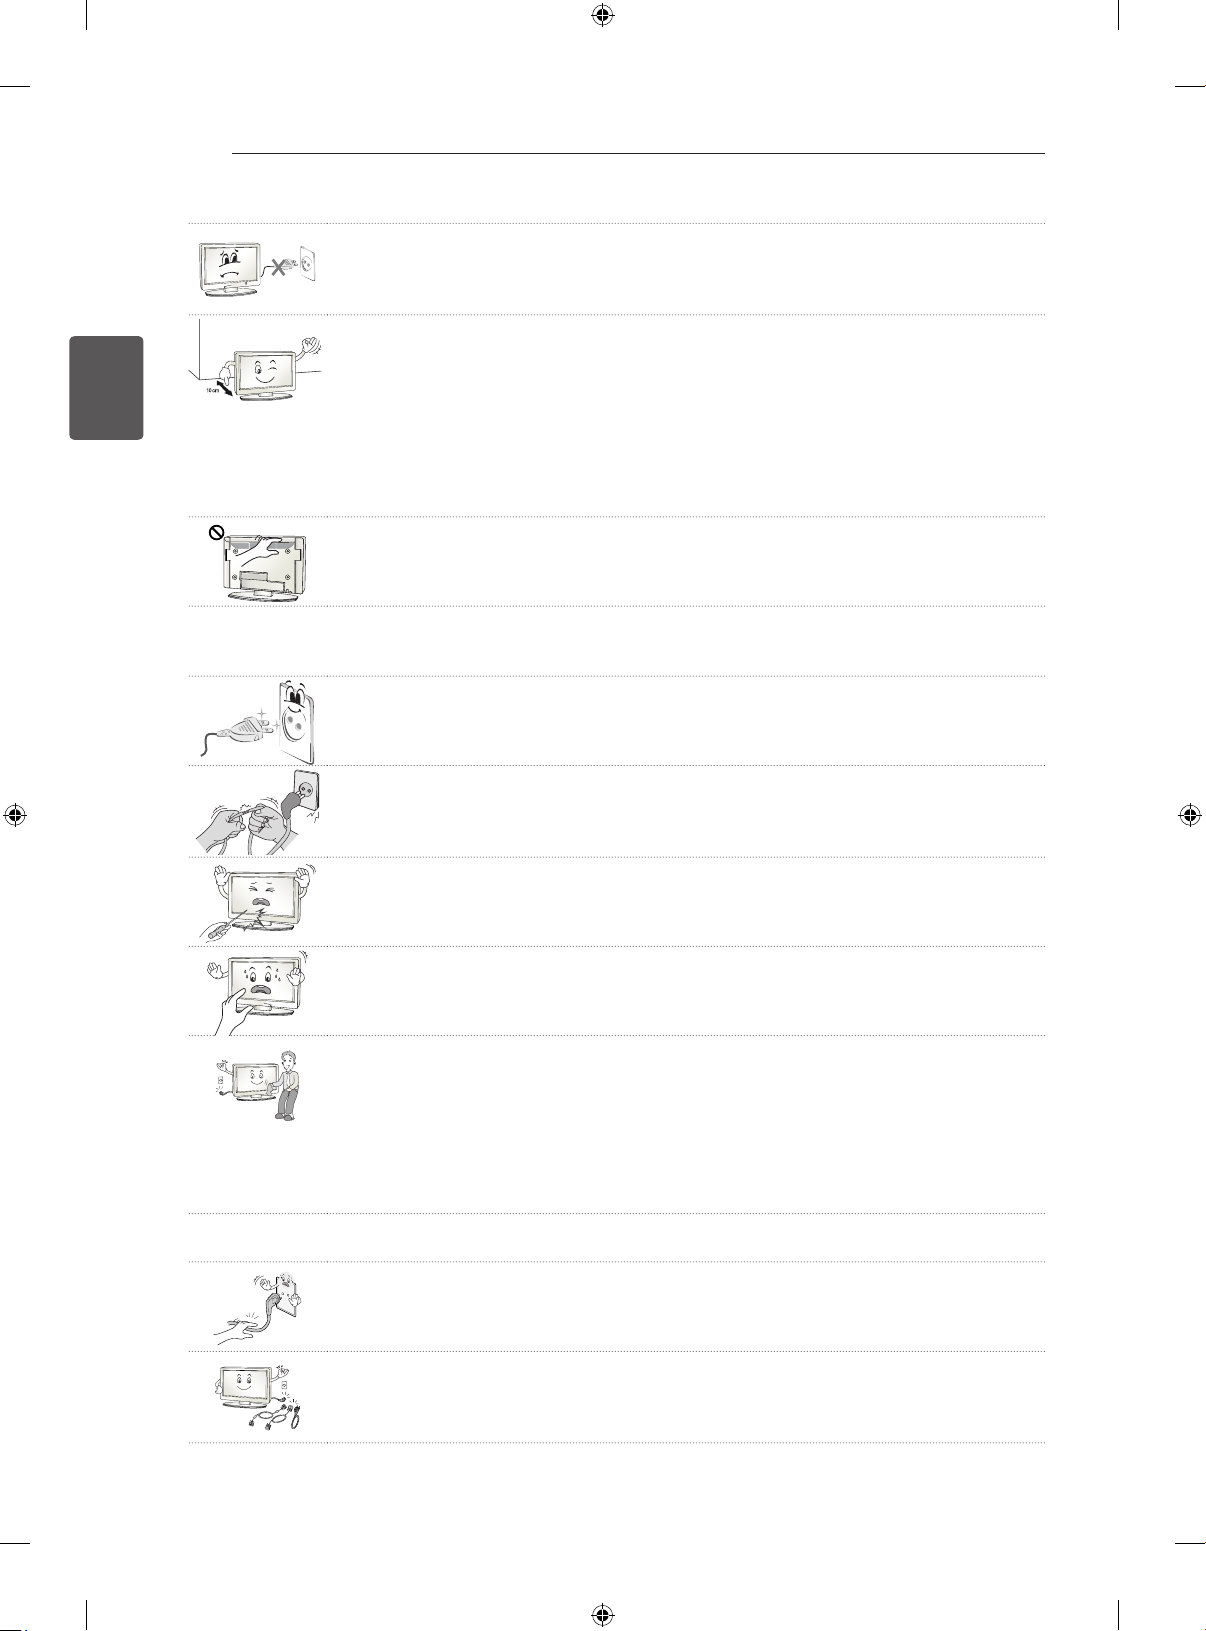
8
DEUTSCH
SICHERHEITSHINWEISE
y Schalten Sie das Gerät niemals ein oder aus, indem Sie den Stecker aus der
Steckdose ziehen. (Verwenden Sie das Stromkabel nicht als Ein- und Aus-Schalter.)
Ein mechanischer Defekt oder Stromschlag können die Folge sein.
y Folgen Sie den unten stehenden Installationsanweisungen, um ein Überhitzen des
Gerätes zu verhindern.
- Der Abstand des Gerätes zur Wand sollte mindestens 10 cm betragen.
- Montieren Sie das Gerät nur an Orten mit ausreichender Belüftung (d. h. weder
in einem Regal oder Schrank).
- Stellen Sie es nicht auf Kissen oder Teppichen ab.
- Achten Sie darauf, dass die Belüftungsschlitze nicht durch eine Tischdecke oder
einen Vorhang verdeckt werden.
Andernfalls kann es zu einem Brand kommen.
y Berühren Sie nicht die Lüftungsöffnungen, wenn das TV-Gerät über längere Zeit
läuft, da die Lüftungsöffnungen heiß werden können. Dies hat keinen Einfluss auf
den Betrieb oder die Leistung des Produkts.
y Überprüfen Sie das Kabel an Ihrem Gerät regelmäßig. Weist es Anzeichen von Beschädigung oder
Abnutzung auf, trennen Sie das Stromkabel vom Netz, und verwenden Sie das Gerät nicht weiter.
Lassen Sie das Kabel durch einen autorisierten Servicepartner ersetzen.
y Sorgen Sie dafür, dass die Kontaktstifte und die Steckdose frei von Staub sind.
Es besteht Brandgefahr.
y Schützen Sie das Netzkabel vor mechanischen Beschädigungen, wie z. B. Verdre-
hen, Knicken, Eindrücken, Einklemmen in einer Tür oder Drauftreten. Achten Sie
besonders auf die Stecker, Steckdosen und den Bereich, an dem das Kabel aus
dem Gerät tritt.
y Üben Sie keinen starken Druck mit der Hand oder einem spitzen Gegenstand wie
einem Nagel, Bleistift oder Kugelschreiber auf das Gerät aus. Verkratzen Sie das
Gerät nicht.
y Vermeiden Sie es, den Bildschirm zu berühren oder mit den Fingern längere Zeit
auf den Bildschirm zu drücken. Dadurch kann es zu vorübergehenden Verzerrungseffekten auf dem Bildschirm kommen.
y Ziehen Sie vor der Reinigung des Gerätes den Netzstecker, und reinigen Sie das
Gerät mit einem weichen Tuch. Übermäßiger Druck kann Kratzer oder Verfärbungen verursachen. Benutzen Sie weder Sprühflaschen noch nasse Tücher. Verwenden Sie vor allem keine Glasreiniger oder für Autos oder in der Industrie verwendete Reinigungsmittel, aggressive Mittel oder Wachs, Benzol, Alkohol usw. Diese
Mittel können das Gerät und seinen Bildschirm beschädigen.
Andernfalls kann es zu Bränden, Stromschlägen, Beschädigungen am Gerät (Verformung, Korrosion und Schäden) kommen.
y Solange das Gerät an eine Wechselstrom-Steckdose angeschlossen ist, bleibt es auch dann mit der
Wechselstromquelle verbunden, wenn Sie es mit dem Schalter ausschalten.
y Ziehen Sie das Netzkabel immer am Stecker aus der Steckdose.
Wenn die Kabel im Inneren des Netzkabels vom Stecker getrennt werden, kann
dies einen Brand verursachen.
y Schalten Sie das Gerät aus, bevor Sie es bewegen. Ziehen Sie dann das Stromka-
bel, Antennenkabel und alle anderen Anschlusskabel.
Andernfalls kann das TV-Gerät oder das Stromkabel beschädigt werden, wodurch
es zu einem Brand oder Stromschlag kommen kann.
Page 81
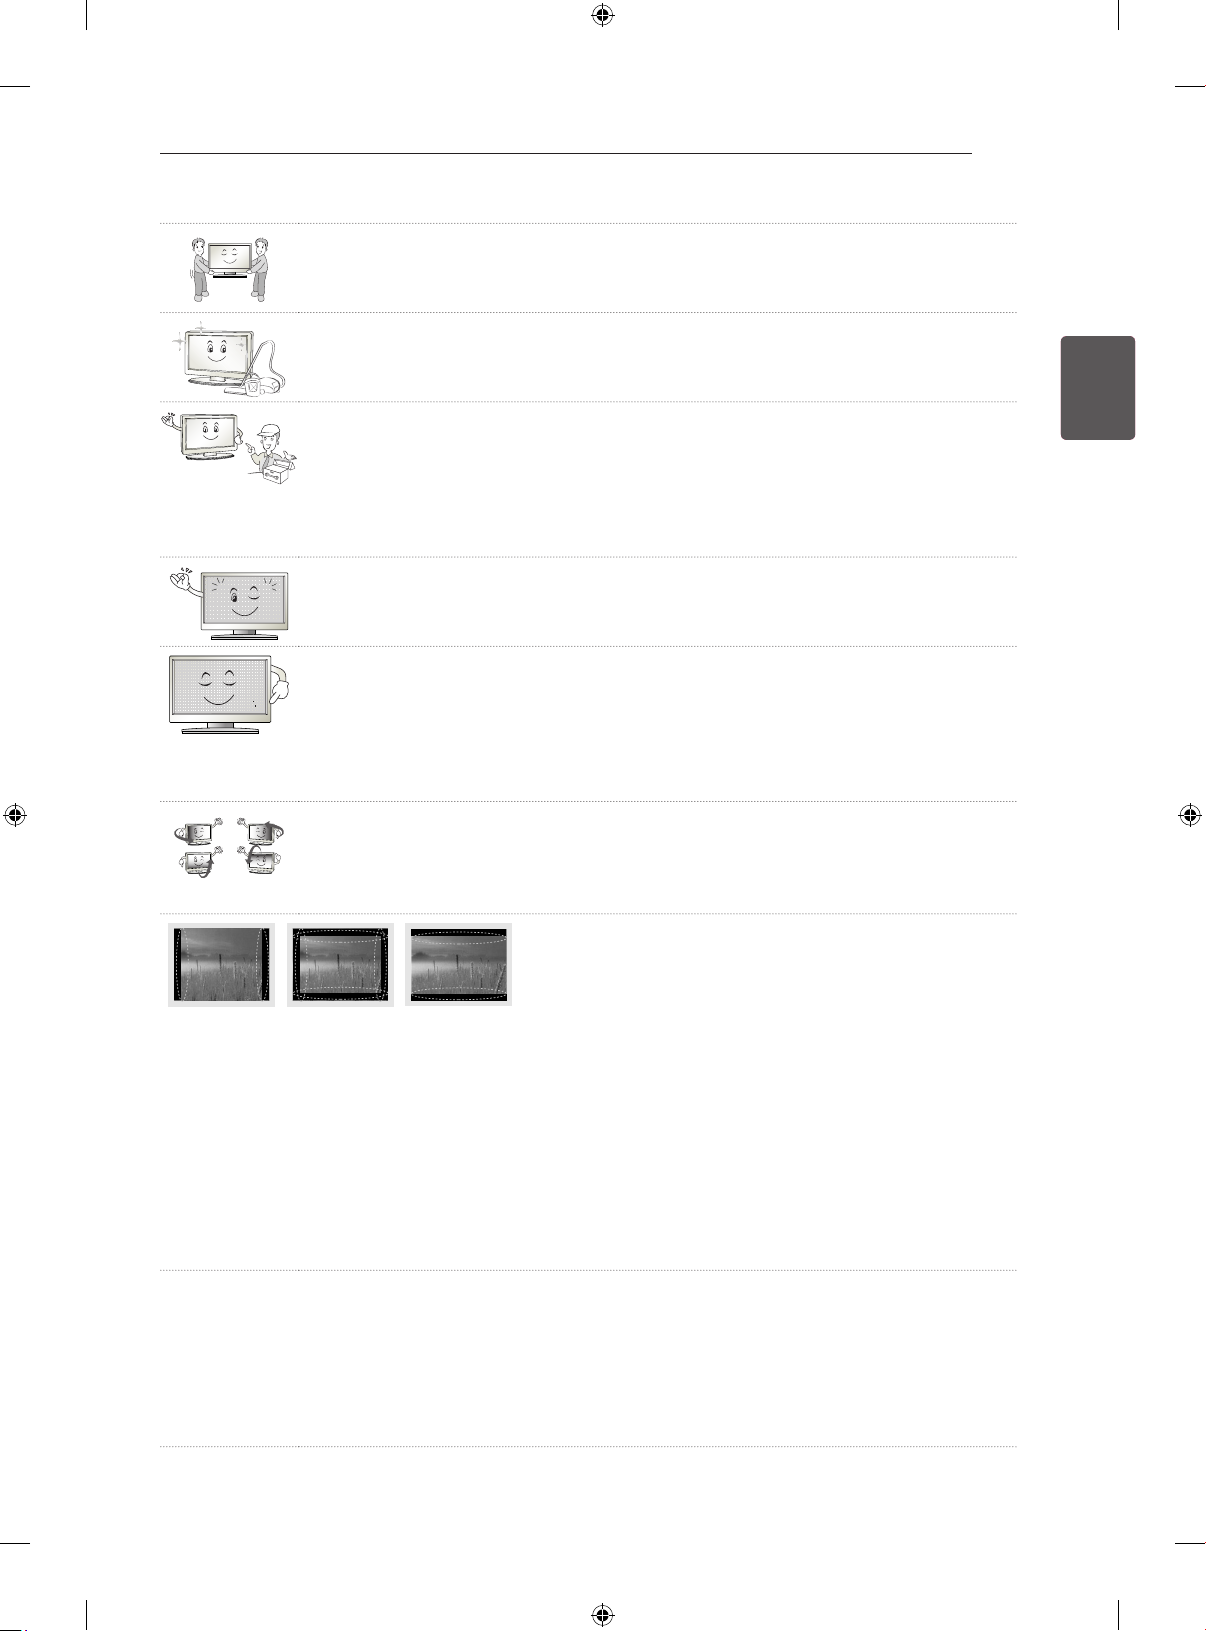
SICHERHEITSHINWEISE
y Das Gerät ist schwer und sollte stets mit zwei Personen bewegt oder ausgepackt
werden.
Andernfalls kann es zu Verletzungen kommen.
9
y Wenden Sie sich einmal im Jahr an den Kundendienst, damit die innenliegenden
Bauteile des Produkts fachgerecht gereinigt werden.
Angesammelter Staub kann mechanische Fehler verursachen.
y Wenden Sie sich bei Problemen an einen qualifizierten Kundendienstmitarbeiter.
Bitte setzen Sie sich mit dem Kundendienst in Verbindung, wenn das Gerät in
irgendeiner Weise beschädigt wurde, z. B. wenn das Stromkabel oder der Stecker
defekt sind, wenn Flüssigkeit über das Gerät gegossen wurde oder Gegenstände
in das Gerät gelangt sind, wenn das Gerät Regen oder Feuchtigkeit ausgesetzt
wurde, wenn das Gerät nicht ordnungsgemäß funktioniert oder wenn das Gerät
fallen gelassen wurde.
y Wenn sich das Gerät kalt anfühlt, kann es beim Einschalten zu einem kurzen Flim-
mern kommen. Das ist normal und kein Fehler des Gerätes.
y Der Bildschirm ist ein hochentwickeltes Gerät mit einer Auflösung von zwei bis
sechs Millionen Pixel. Unter Umständen sind winzige schwarze Punkte und/oder
bunte Punkte (rot, blau oder grün) von 1 ppm Größe auf dem Bildschirm zu sehen.
Dies deutet nicht auf eine Fehlfunktion hin und beeinträchtigt nicht die Leistung
und Zuverlässigkeit des Gerätes.
Diese Erscheinung tritt auch bei Geräten von Fremdanbietern auf und wird nicht
als Grund für Umtausch oder Rückerstattung anerkannt.
y Je nach Ihrer Betrachtungsposition (von rechts, links, oben, unten) sind Helligkeit
und Farben auf dem Bildschirm möglicherweise unterschiedlich.
Diese Erscheinung ist auf die besonderen Eigenschaften des Bildschirms zurückzuführen. Es steht in keinem Zusammenhang mit der Leistung des Gerätes, und
es handelt sich hierbei nicht um eine Fehlfunktion.
DEUTSCH
y Durch das Anzeigen eines Standbilds (z. B. ein Programmlogo, Bildschirmmenü, Szene eines Vi-
deospiels oder Computerbildschirm) über einen längeren Zeitraum kann der Bildschirm beschädigt
werden, und das Bild wird eingebrannt. Dies kann für einen längeren Zeitraum anhalten oder nicht
mehr verschwinden. Das Einbrennen von Bildern wird bei diesem Gerät nicht von der Garantie
gedeckt.
Vermeiden Sie die Anzeige von Standbildern auf dem Fernsehbildschirm über einen längeren Zeit-
(1 oder mehr Stunden für die organische Leuchtdiode).
raum
Wird das Format über einen längeren Zeitraum auf 4:3 eingestellt, kann es an den Rändern des
Bildschirms zum Einbrennen kommen.
Diese Erscheinung tritt auch bei Geräten von Fremdanbietern auf und wird nicht als Grund für Umtausch oder Rückerstattung anerkannt.
y Erzeugtes Geräusch
„Knacken“: Das beim Fernsehen oder Ausschalten des Gerätes zu hörende Knacken wird durch
Wärmeschrumpfung von Kunststoffen aufgrund von Temperatur und Feuchtigkeit verursacht. Dieses
Geräusch ist normal bei Geräten, bei denen die thermische Verformung erforderlich ist. Stromkreisbrummen/Bildschirmsummen: Der Hochgeschwindigkeitsschaltkreis, der eine große Menge Strom
für den Betrieb des Gerätes bereitstellt, gibt ein leises Geräusch ab. Dieses Geräusch ist je nach
Gerät anders.
Es hat keinen Einfluss auf die Leistung und Zuverlässigkeit des Gerätes.
Page 82
10
SICHERHEITSHINWEISE
Wiedergabe von 3D-Material
DEUTSCH
WARNUNG
Betrachtungsumgebung
y Betrachtungszeit
- Unterbrechen Sie die Betrachtung von 3D-Inhalten jede Stunde für 5 bis 15 Minuten. Das Betrachten von 3D-Inhalten über einen längeren Zeitraum kann Kopfschmerzen, Schwindelgefühle,
Müdigkeit oder Augenbelastungen verursachen.
Personen mit dem Risiko eines photosensiblen Anfalls oder einer chronischen Erkrankung
y Einige Benutzer erleben Anfälle oder andere unnormale Symptome, wenn sie Blitzlicht oder bestimmten
Mustern von 3D-Inhalten ausgesetzt werden.
y Betrachten Sie keine 3D-Videos, wenn Sie Übelkeit verspüren, schwanger sind oder an einer
chronischen Krankheit, wie Epilepsie, Herzstörungen, blutdruckbedingten Krankheiten usw., leiden.
y Außerdem sollten 3D-Inhalte von Personen mit Stereoblindheit oder Störungen des räumlichen Sehens
gemieden werden. Diese Personen sehen 3D-Bilder häug als Doppelbilder oder fühlen ein Unbehagen
beim Betrachten.
y Wenn Sie an Strabismus (Schielen), Amblyopie (Schwachsichtigkeit) oder Astigmatismus
(Hornhautverkrümmung) leiden, haben Sie unter Umständen Probleme bei der Tiefenerkennung und
fühlen aufgrund der Doppelbilder eine schnellere Ermüdung. In diesen Fällen wird empfohlen, häugere
Pausen als durchschnittliche Erwachsene einzulegen.
y Wenn Ihre Sehstärke auf beiden Augen unterschiedlich ist, korrigieren Sie diese vor dem Betrachten
von 3D-Inhalten.
Symptome, bei denen Sie das Betrachten von 3D-Inhalten abbrechen bzw. von ihrer Betrachtung
absehen sollten
y Betrachten Sie keine 3D-Inhalte, wenn Sie aufgrund von Schlafmangel, Überlastung oder
Alkoholkonsum müde sind.
y Wenn die folgenden Symptome auftreten, stellen Sie die Betrachtung von 3D-Inhalten ein, und erholen
Sie sich so lange, bis die Symptome verklungen sind.
- Sprechen Sie mit Ihrem Hausarzt, falls die Symptome nicht nachlassen. Zu den Symptomen gehören Kopfschmerzen, schmerzende Augen, Schwindel, Übelkeit, Herzklopfen, verschwommene
Wahrnehmung, Benommenheit, Unbehagen, Sehen von Doppelbildern, Sehmüdigkeit.
Page 83
SICHERHEITSHINWEISE
VORSICHT
Betrachtungsumgebung
y Betrachtungsabstand
- Wenn Sie die 3D-Funktion nutzen, halten Sie stets einen Betrachtungsabstand ein, der mindestens
dem 2-Fachen der Bildschirmdiagonalen entspricht. Wenn das Betrachten von 3D-Inhalten Unwohlsein verursacht, vergrößern Sie Ihren Abstand zum TV-Gerät.
Betrachtungsalter
y Kleinkinder/Kinder
- Die Verwendung bzw. das Betrachten von 3D-Inhalten ist für Kinder unter 6 Jahren verboten.
- Kinder unter 10 Jahren können überreagieren und übermäßig angeregt werden, da sich ihre Sehkraft noch in der Entwicklung befindet (sie versuchen z. B. den Bildschirm zu berühren oder in den
Bildschirm hineinzuspringen). Kinder sollten 3D-Inhalte daher nur unter Aufsicht und unter Anwendung besonderer Vorsicht betrachten.
- Kinder haben im Zusammenhang mit 3D-Darstellungen eine größere binokulare Disparität als Erwachsene, da der Abstand zwischen ihren Augen kleiner ist. Daher ist ihre Fähigkeit zur stereoskopischen Tiefenerkennung bei der Betrachtung eines 3D-Bildes ausgeprägter als bei Erwachsenen.
y Jugendliche
- Jugendliche unter 19 Jahren reagieren möglicherweise sensibel gegenüber der Lichtstimulation bei
3D-Inhalten. Raten Sie ihnen, bei Müdigkeit nicht über längere Zeiträume 3D-Inhalte zu betrachten.
y Ältere Personen
- Ältere Personen erkennen möglicherweise einen geringeren 3D-Effekt als jüngere Personen. Sie
halten zudem in der Regel den empfohlenen Mindestabstand zum TV-Gerät ein.
11
DEUTSCH
Vorsicht bei der Verwendung der 3D-Brille
y Verwenden Sie auf jeden Fall eine geeignete LG 3D-Brille. Andernfalls können Sie die 3D-Videos
möglicherweise nicht richtig sehen.
y Verwenden Sie die 3D-Brille nicht anstelle Ihrer normalen Brille, Sonnenbrille oder Schutzbrille.
y Die Verwendung abgeänderter 3D-Brillen kann die Augen überlasten oder eine Bildverzerrung zur Folge
haben.
y Bewahren Sie die 3D-Brille nicht bei extrem hohen oder niedrigen Temperaturen auf. Dadurch kann es
zu Verformungen kommen.
y Die 3D-Brille ist zerbrechlich und kann leicht zerkratzen. Verwenden Sie immer ein weiches, sauberes
Tuch, wenn Sie die Gläser säubern. Zerkratzen Sie die Oberäche der 3D-Brille nicht mit scharfen
Objekten, und verwenden Sie zum Reinigen keine Chemikalien.
Page 84
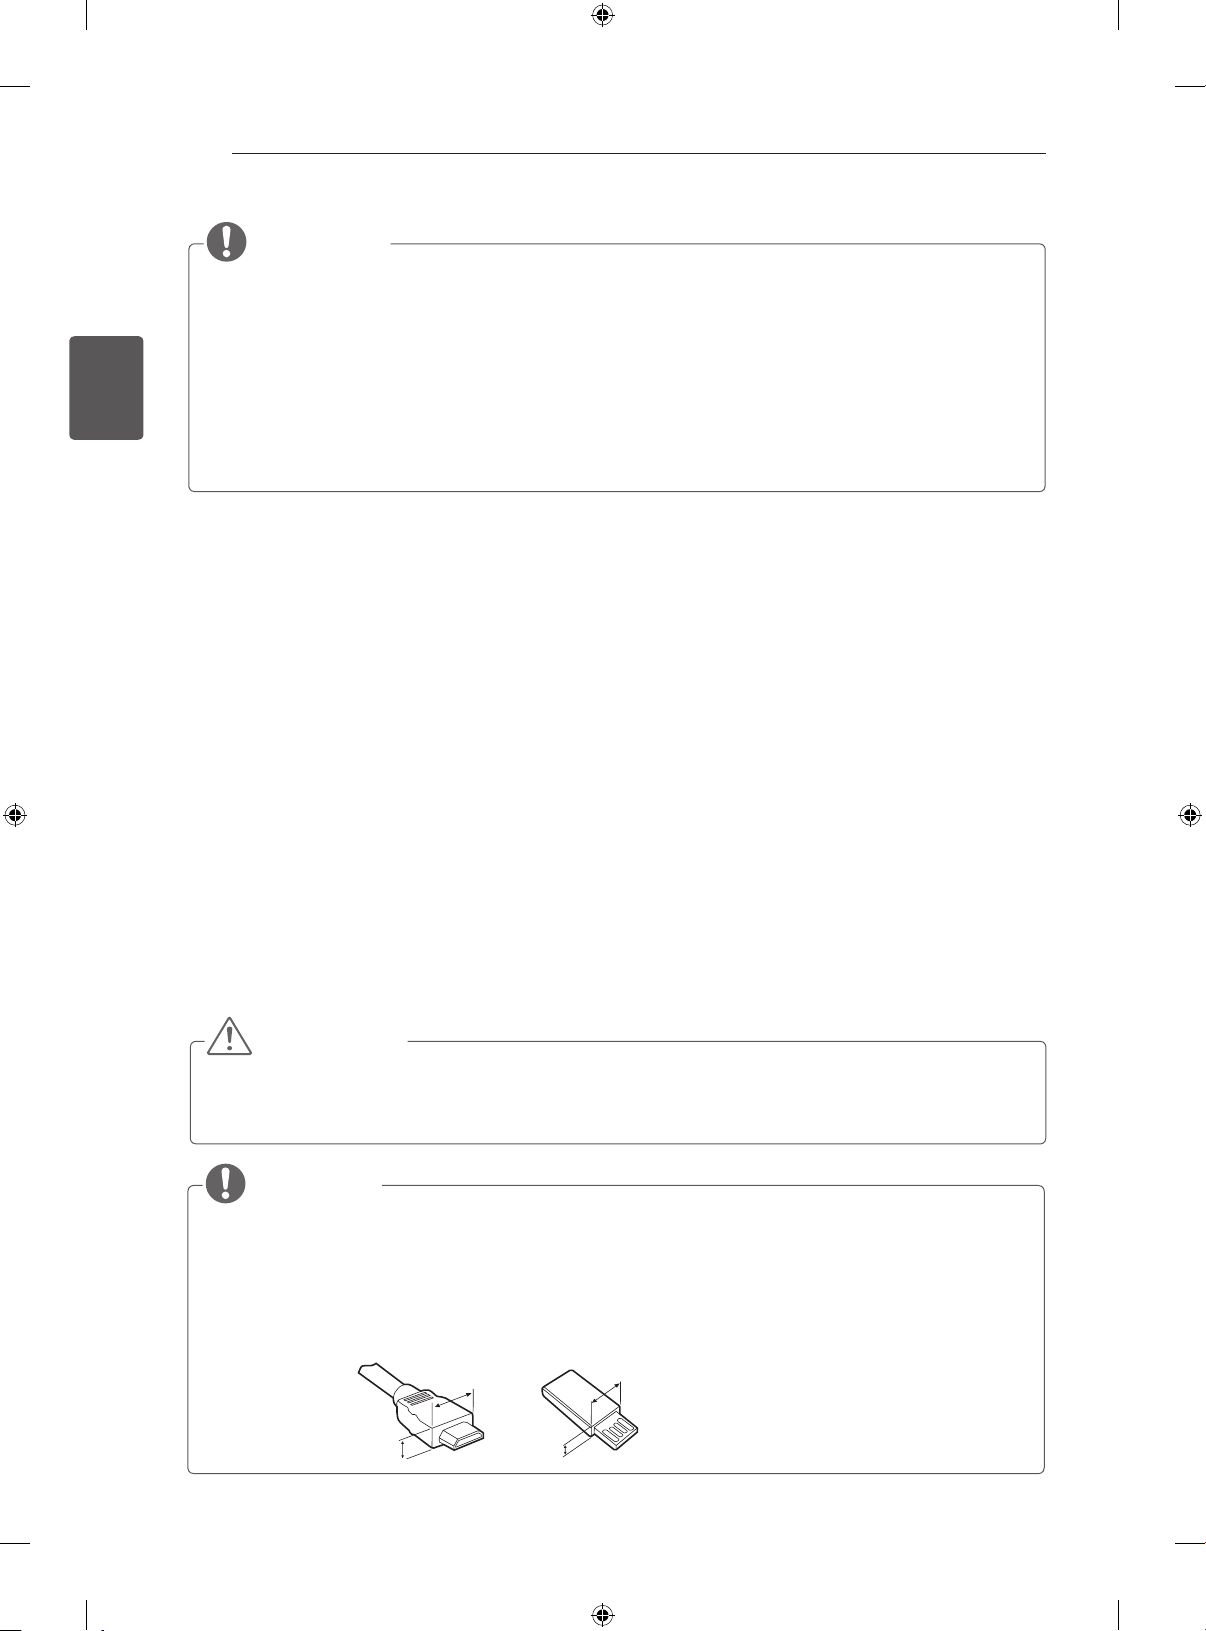
A
A
<
<
12
DEUTSCH
INSTALLATIONSVERFAHREN
1 Öffnen Sie die Packung, und stellen Sie sicher, dass alle Zubehörteile im Lieferumfang enthalten sind.
2 Verbinden Sie gegebenenfalls externe Zuspielgeräte mit dem TV-Gerät
3 Stellen Sie sicher, dass eine Netzwerkverbindung vorhanden ist.
INSTALLATIONSVERFAHREN / MONTAGE UND VORBEREITUNG
HINWEIS
Ihr TV-Gerät kann von der Abbildung möglicherweise leicht abweichen.
y
Das OSD-Menü (am Bildschirm angezeigtes Menü) Ihres TV-Gerätes kann sich leicht von dem in
y
diesem Handbuch unterscheiden.
Die verfügbaren Menüs und Optionen können sich je nach verwendeter Eingangsquelle bzw. je nach
y
Modell unterscheiden.
Künftig können diesem TV-Gerät neue Funktionen hinzugefügt werden.
y
Das TV-Gerät kann in den Standby-Modus gesetzt werden, um den Stromverbrauch zu verringern.
y
Wenn längere Zeit nicht ferngesehen wird, sollte das Gerät ausgeschaltet werden, um Strom zu sparen.
Der Stromverbrauch des eingeschalteten TV-Gerätes kann erheblich verringert werden, wenn die
y
Helligkeit des Bildes vermindert wird.
Sie können die Netzwerkfunktionen des Fernsehgeräts nur dann nutzen, wenn eine Netzwerkverbindung
hergestellt wurde.
* Wenn das Fernsehgerät nach der Auslieferung das erste Mal eingeschaltet wird, kann die Initialisierung einige
Minuten dauern.
MONTAGE UND VORBEREITUNG
Auspacken
Prüfen Sie, ob folgende Artikel in der Verpackung enthalten sind. Falls Zubehör fehlt, wenden Sie sich bitte
an den Händler, bei dem Sie das Gerät erworben haben. Die Abbildungen im Handbuch unterscheiden sich
möglicherweise von Ihrem Gerät.
VORSICHT
Um die Sicherheit und Lebensdauer des Produkts sicherzustellen, verwenden Sie keine Fälschungen.
y
Durch Fälschungen verursachte Beschädigungen sind nicht von der Garantie abgedeckt.
y
Bei einigen Modellen befindet sich ein dünner Film auf dem Bildschirm, der nicht entfernt werden darf.
y
HINWEIS
Die im Lieferumfang enthaltenen Artikel sind modellabhängig.
y
Änderungen an den Produktspezifikationen oder am Inhalt dieses Handbuchs sind im Zuge von
y
Aktualisierungen der Produktfunktionen vorbehalten.
Für eine optimale Verbindung sollte die Einfassung von HDMI-Kabeln und USB-Geräten höchstens
y
10 mm dick und 18 mm breit sein. Verwenden Sie ein Verlängerungskabel, das USB 2.0 unterstützt,
wenn das USB-Kabel oder der USB-Speicherstick nicht in den USB-Anschluss Ihres TV-Geräts passt.
B
B
A
B
10 mm
=
18 mm
=
Page 85
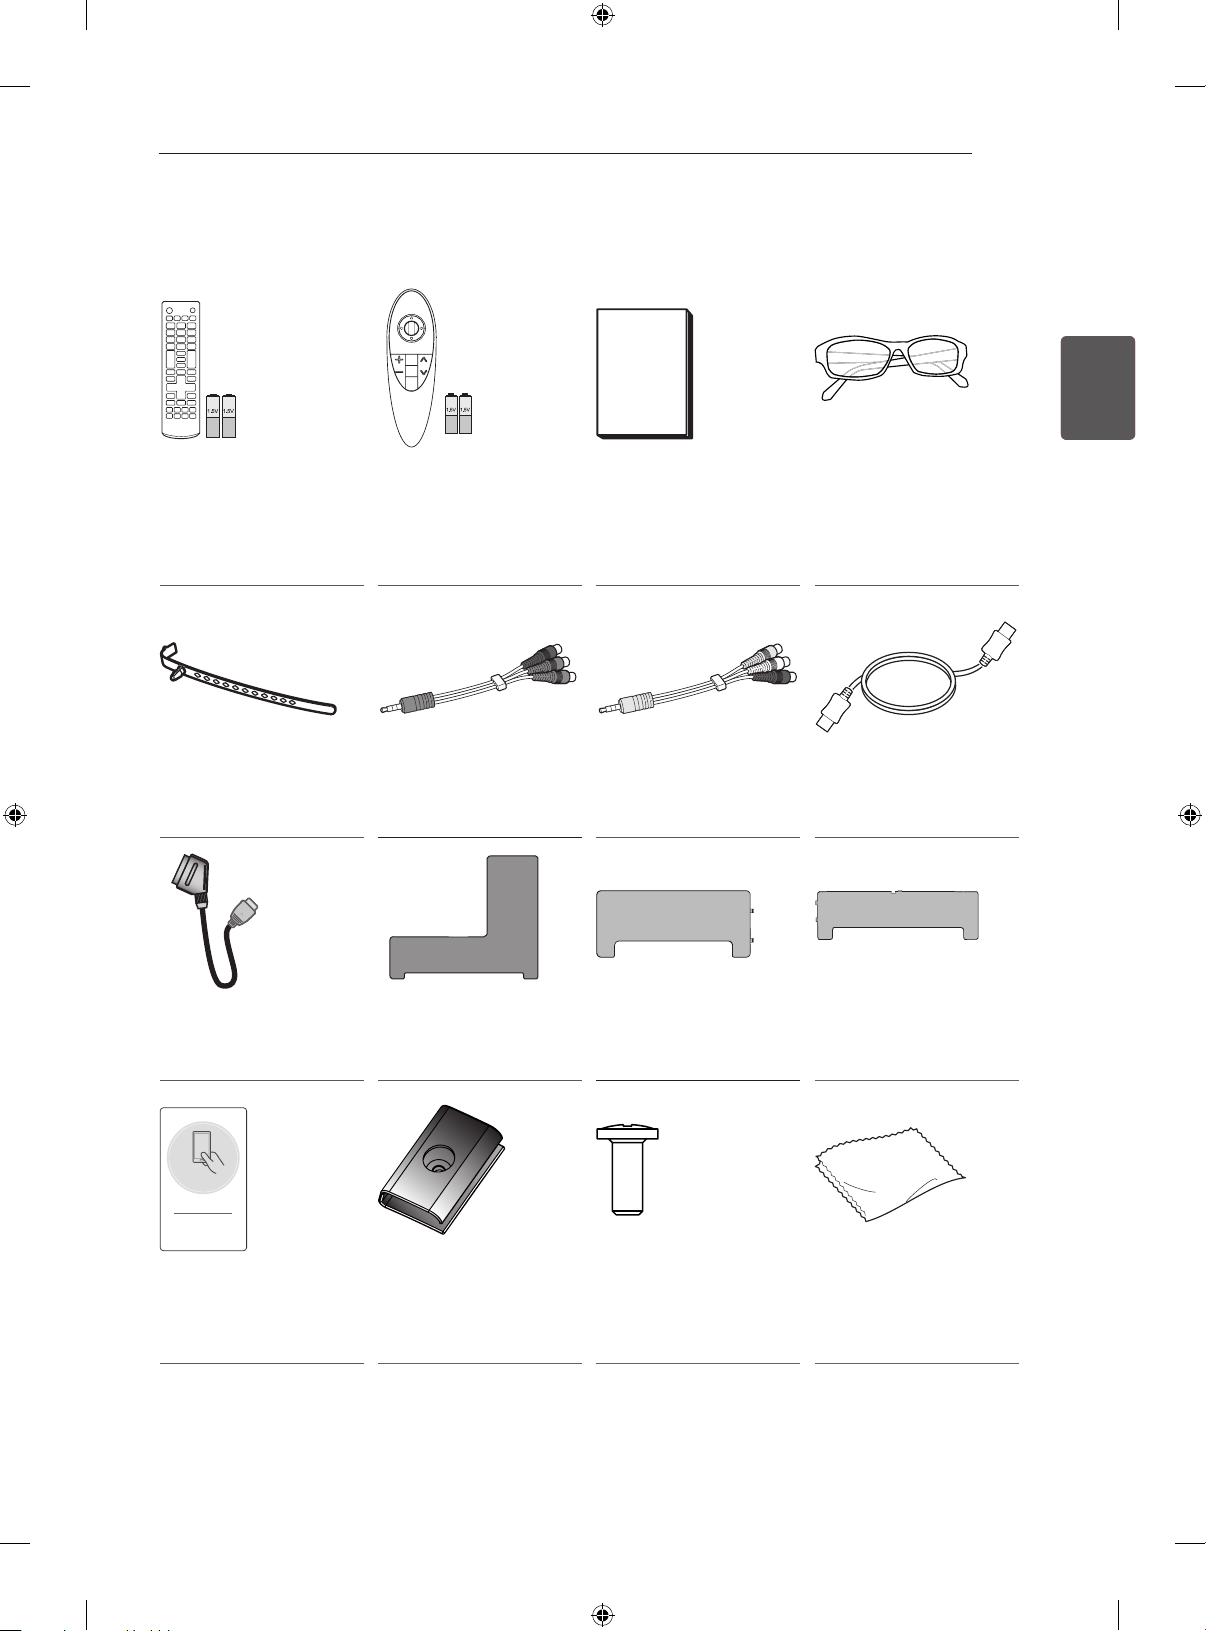
MONTAGE UND VORBEREITUNG
13
DEUTSCH
Fernbedienung und
Batterien (AAA)
(Abhängig vom Modell)
(Siehe S. 25, 26)
Kabelhalter
(Siehe S. A-4, A-5)
SCART-Kabel
(Siehe S. A-32)
Magic-Fernbedienung,
Batterien (AA)
(Siehe S. 27)
KomponentenVideokabel
(Siehe S. A-20)
AV Abdeckung
(Nur EC98**)
(Siehe S. A-4)
Benutzerhandbuch Cinema-3D-Brille
Je nach Modell oder
Land kann die Anzahl
der 3DBrillen abweichen.
Composite-Videokabel
(Siehe S. A-20, A-21)
HDMI-Kabel
(Nur EC97**, EC98**)
(Siehe S. A-8, A-9)
AV Abdeckung
(Nur EC93**)
(Siehe S. A-4)
AV Abdeckung
(Nur EC97**)
(Siehe S. A-4)
Tag On
Tag on
(Abhängig vom Modell)
Kabelclip
2 Stk
(Nur EC97**)
(Siehe S. A-4, A-5)
Kabelclip-Schraube
2 Stk, M4 x L10
(Nur EC97**)
(Siehe S. A-5)
Reinigungstuch
(Abhängig vom Modell)
Page 86
14
Separat erhältlich
Separat zu erwerbende Artikel können zur Qualitätsverbesserung geändert werden, ohne dass dies explizit
mitgeteilt wird.
DEUTSCH
Diese Artikel können Sie über Ihren Fachhändler beziehen.
Diese Geräte sind nur mit bestimmten Modellen kompatibel.
MONTAGE UND VORBEREITUNG
AG-F***
Cinema-3D-Brille
LG Audiogerät Tag on
Kompatibilität
AG-F***
Cinema-3D-Brille
AN-MR500
Magic-Fernbedienung
AN-VC5**
Kamera für Videogespräche
AG-F***DP
Dual Play-Brille
LG Audiogerät • • •
AN-MR500
Magic-Fernbedienung
AN-VC5**
Kamera für
Videogespräche
EC93** EC97** EC98**
• • •
• • •
•
• • •
AG-F***DP
Dual Play-Brille
Tag on • • •
Produktbezeichnungen, Funktionalität und/oder Designs können im Zuge einer Qualitätsverbesserung durch den Hersteller geändert werden, ohne dass dies explizit mitgeteilt wird.
Page 87
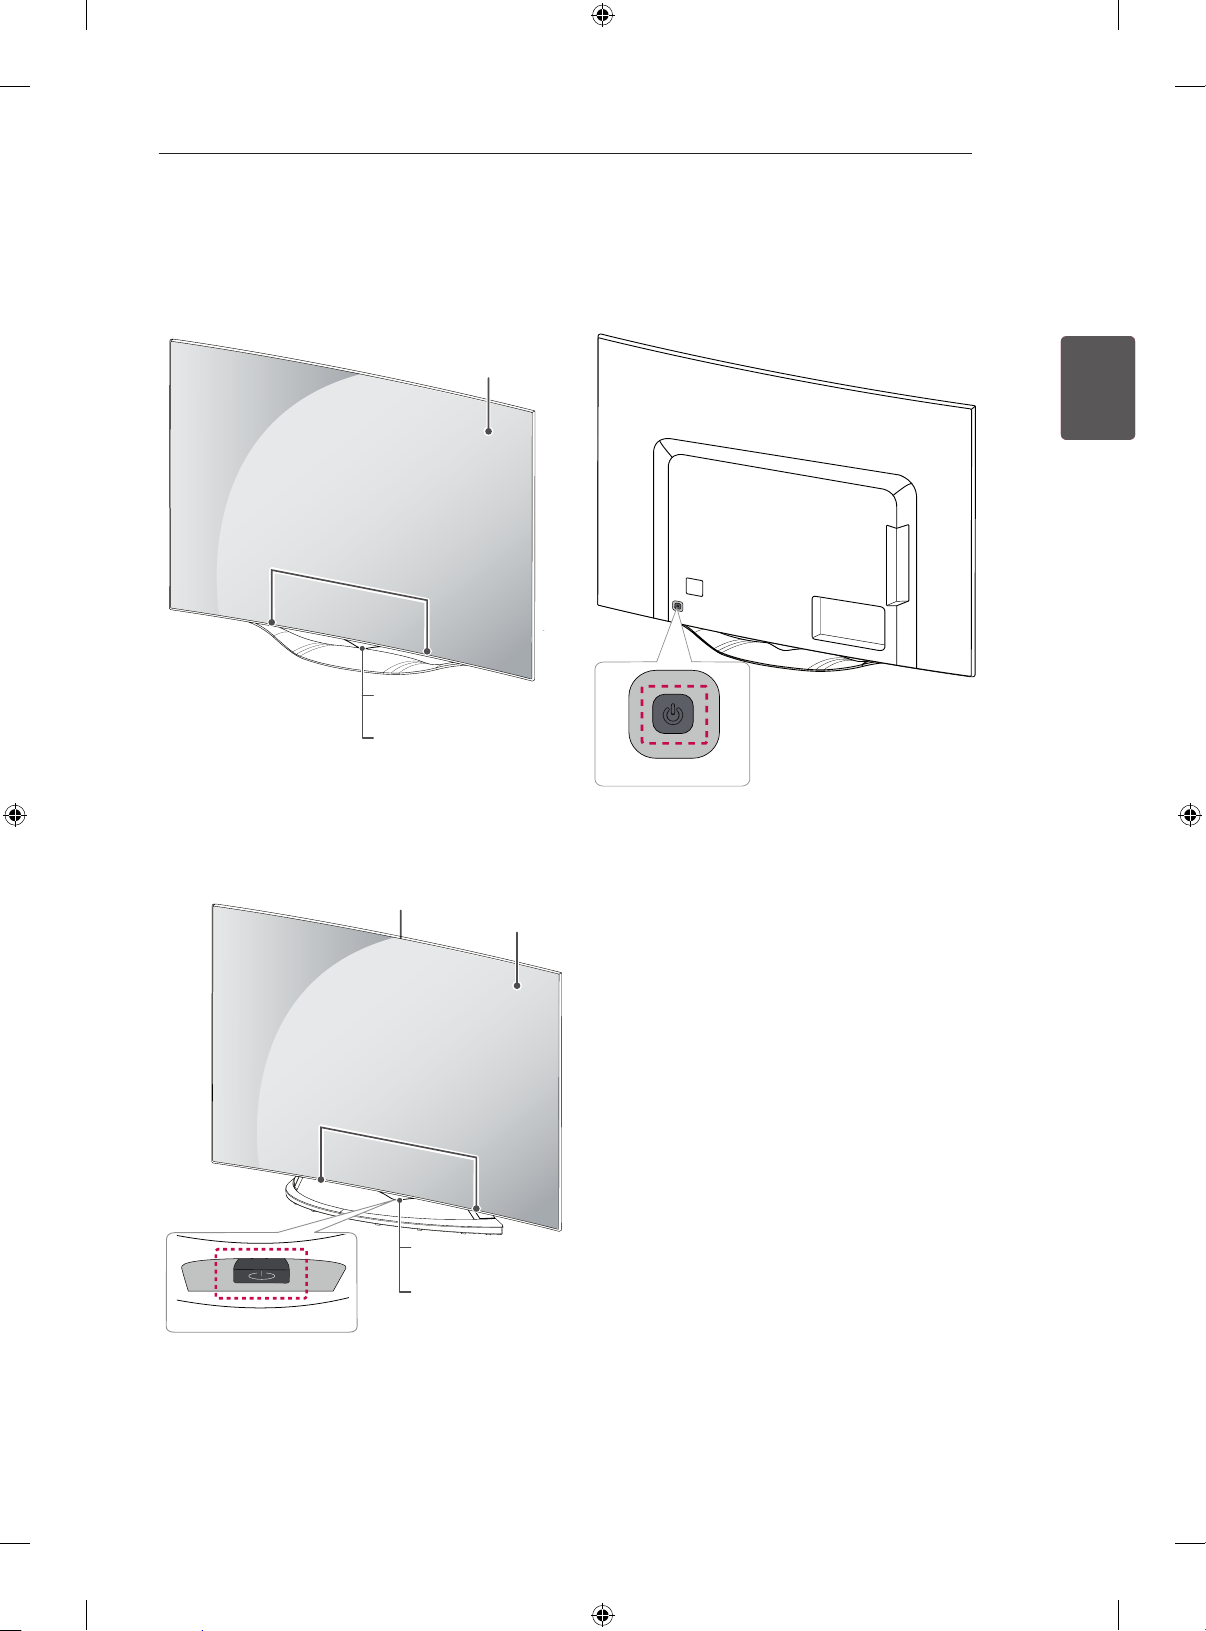
Gehäuse und Bedienelemente
Option A: EC93**
<Vorderansicht>
Bildschirm
Lautsprecher
MONTAGE UND VORBEREITUNG
<Rückansicht>
15
DEUTSCH
Option B: EC97**
Joystick-Taste
Fernbedienung Sensoren
und intelligente Sensoren
LG Leuchtlogo
integrierte Kamera
Lautsprecher
Fernbedienung Sensoren
und intelligente Sensoren
LG Leuchtlogo
3
Bildschirm
1
Joystick-Taste
1
2
Page 88
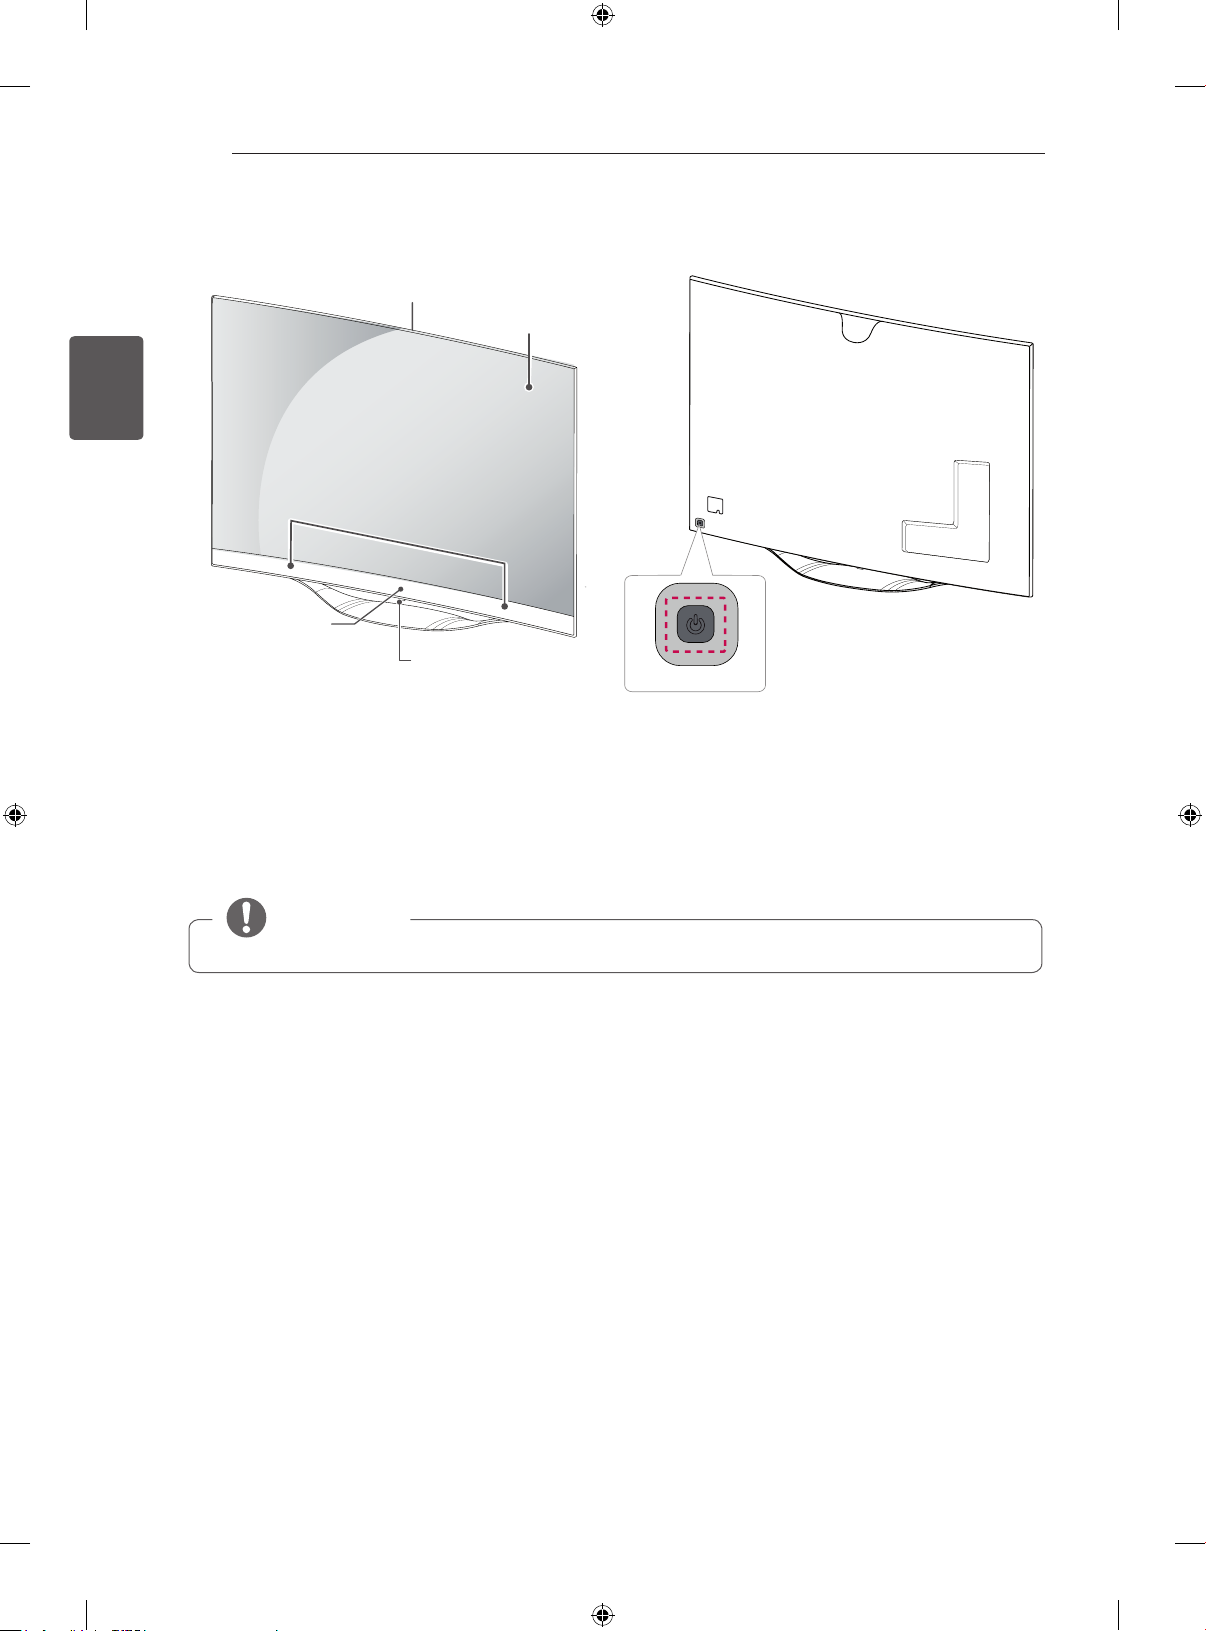
16
Option C: EC98**
DEUTSCH
MONTAGE UND VORBEREITUNG
<Vorderansicht>
integrierte Kamera
Lautsprecher
LG Leuchtlogo
<Rückansicht>
Bildschirm
Fernbedienung Sensoren
und intelligente Sensoren
1
Joystick-Taste
2
1 Intelligente Sensoren - Einstellung der Bildqualität und Helligkeit entsprechend der Umgebungsbedingungen.
2 Joystick-Taste - Diese Taste bendet sich hinter dem Bildschirm.
3 Joystick-Taste - Diese Taste bendet sich unten am Bildschirm.
HINWEIS
Sie können das LG Leuchtlogo über ALLGEMEIN in den Hauptmenüs ein- und ausschalten.
y
Page 89
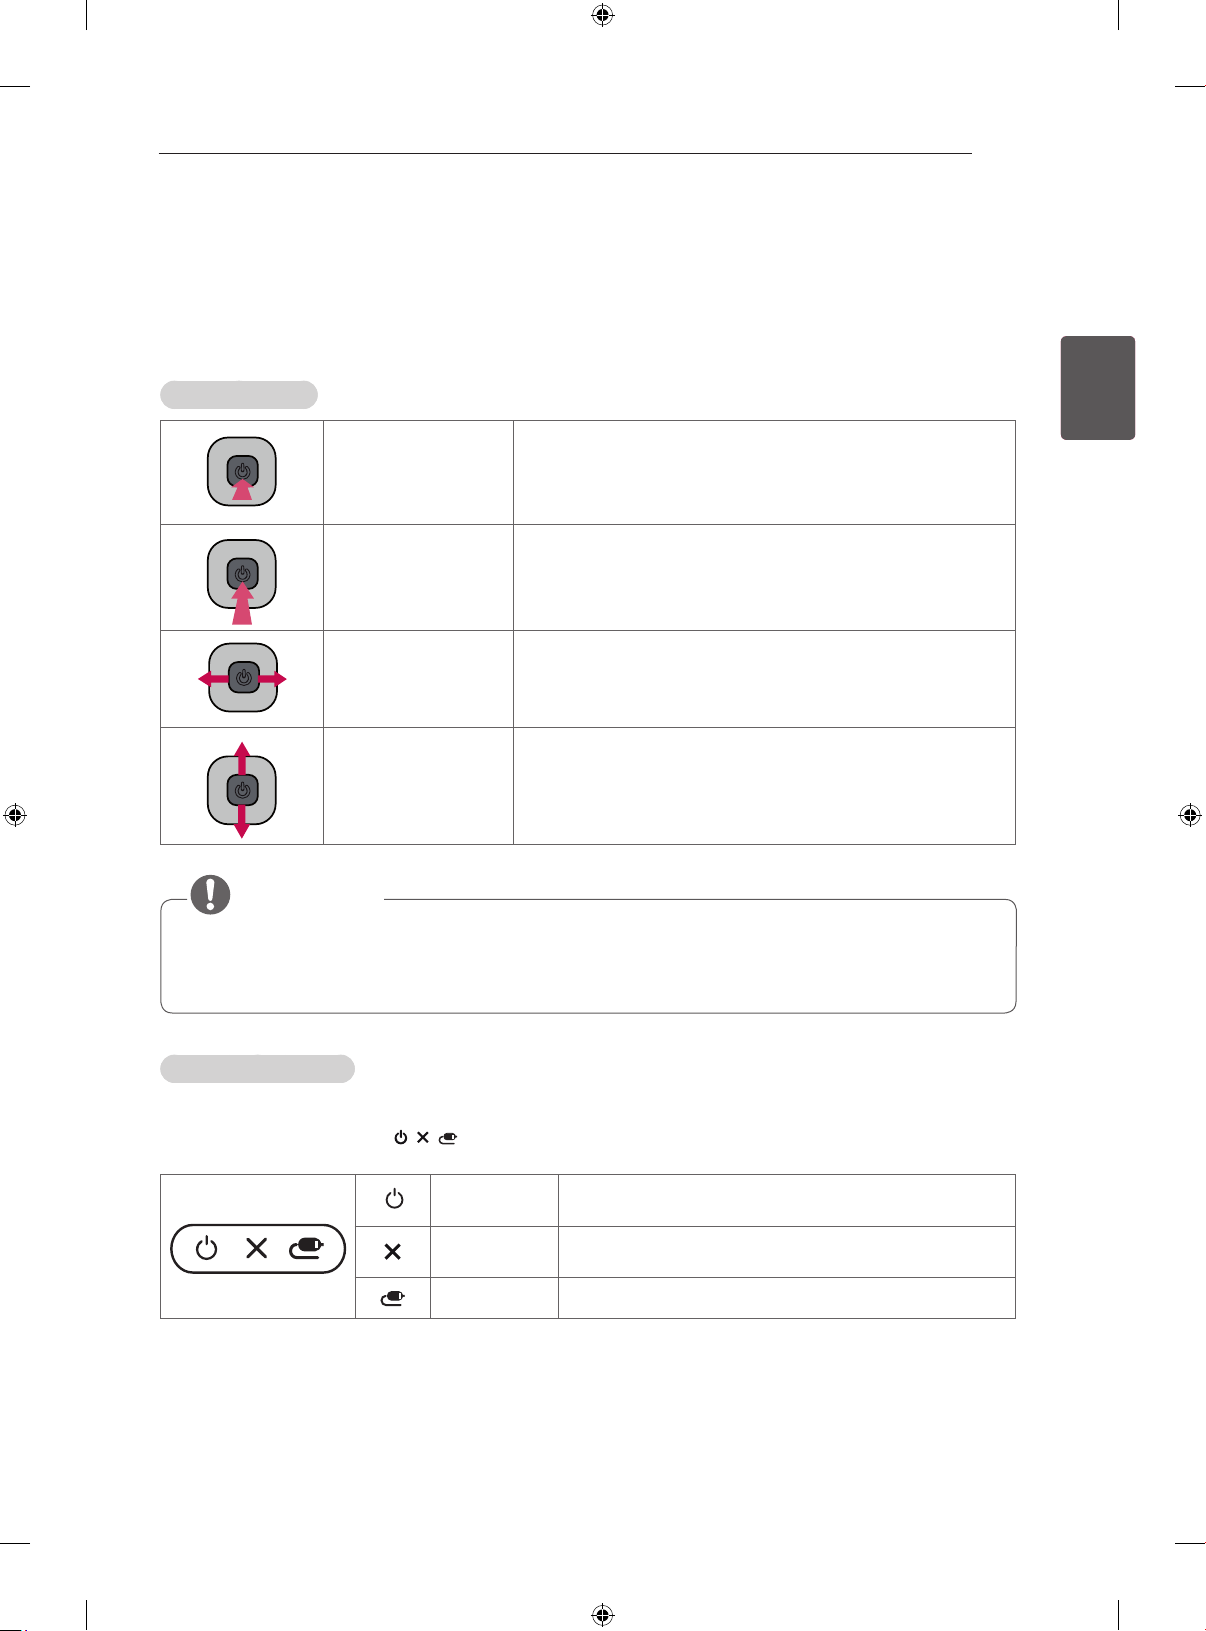
MONTAGE UND VORBEREITUNG
Verwendung der Joystick-Taste
Sie können das Fernsehgerät bedienen, indem Sie die entsprechende Taste drücken oder den Joystick
nach rechts, links, oben oder unten bewegen.
Grundfunktionen
17
DEUTSCH
Einschalten
Ausschalten
Lautstärkesteuerung
Programmauswahl
Drücken Sie bei ausgeschaltetem Fernsehgerät einmal kurz
auf die Taste Joystick, und lassen Sie sie dann wieder los.
Drücken Sie bei eingeschaltetem Fernsehgerät für ein paar
Sekunden einmal auf die Taste Joystick, und lassen Sie sie
dann wieder los.
Sie können die Lautstärke regeln, indem Sie die Taste
Joystick nach links oder rechts bewegen.
Sie können durch die gespeicherten Programme navigieren,
indem Sie die Joystick-Taste nach oben oder unten bewegen.
HINWEIS
y Achten Sie darauf, die Joystick-Taste nicht zu drücken, wenn Sie diese nach oben, unten, links
oder rechts bewegen. Wenn Sie die Joystick-Taste zuerst drücken, können Sie die Lautstärke und
die gespeicherten Programme nicht mehr anpassen.
Einstellen des Menüs
Drücken Sie bei eingeschaltetem Fernsehgerät die Joystick-Taste einmal.
Sie können die Menüpunkte (
oder links bewegen.
, , ) einstellen, indem Sie die Joystick-Taste nach oben, unten, rechts
TV AUSSCHALTEN
SCHLIESSEN
EINGANG Ändert die Eingangsquelle.
Schaltet das Gerät aus.
Blendet die Bildschirmmenüs aus und kehren zum TVBild zurück.
Page 90
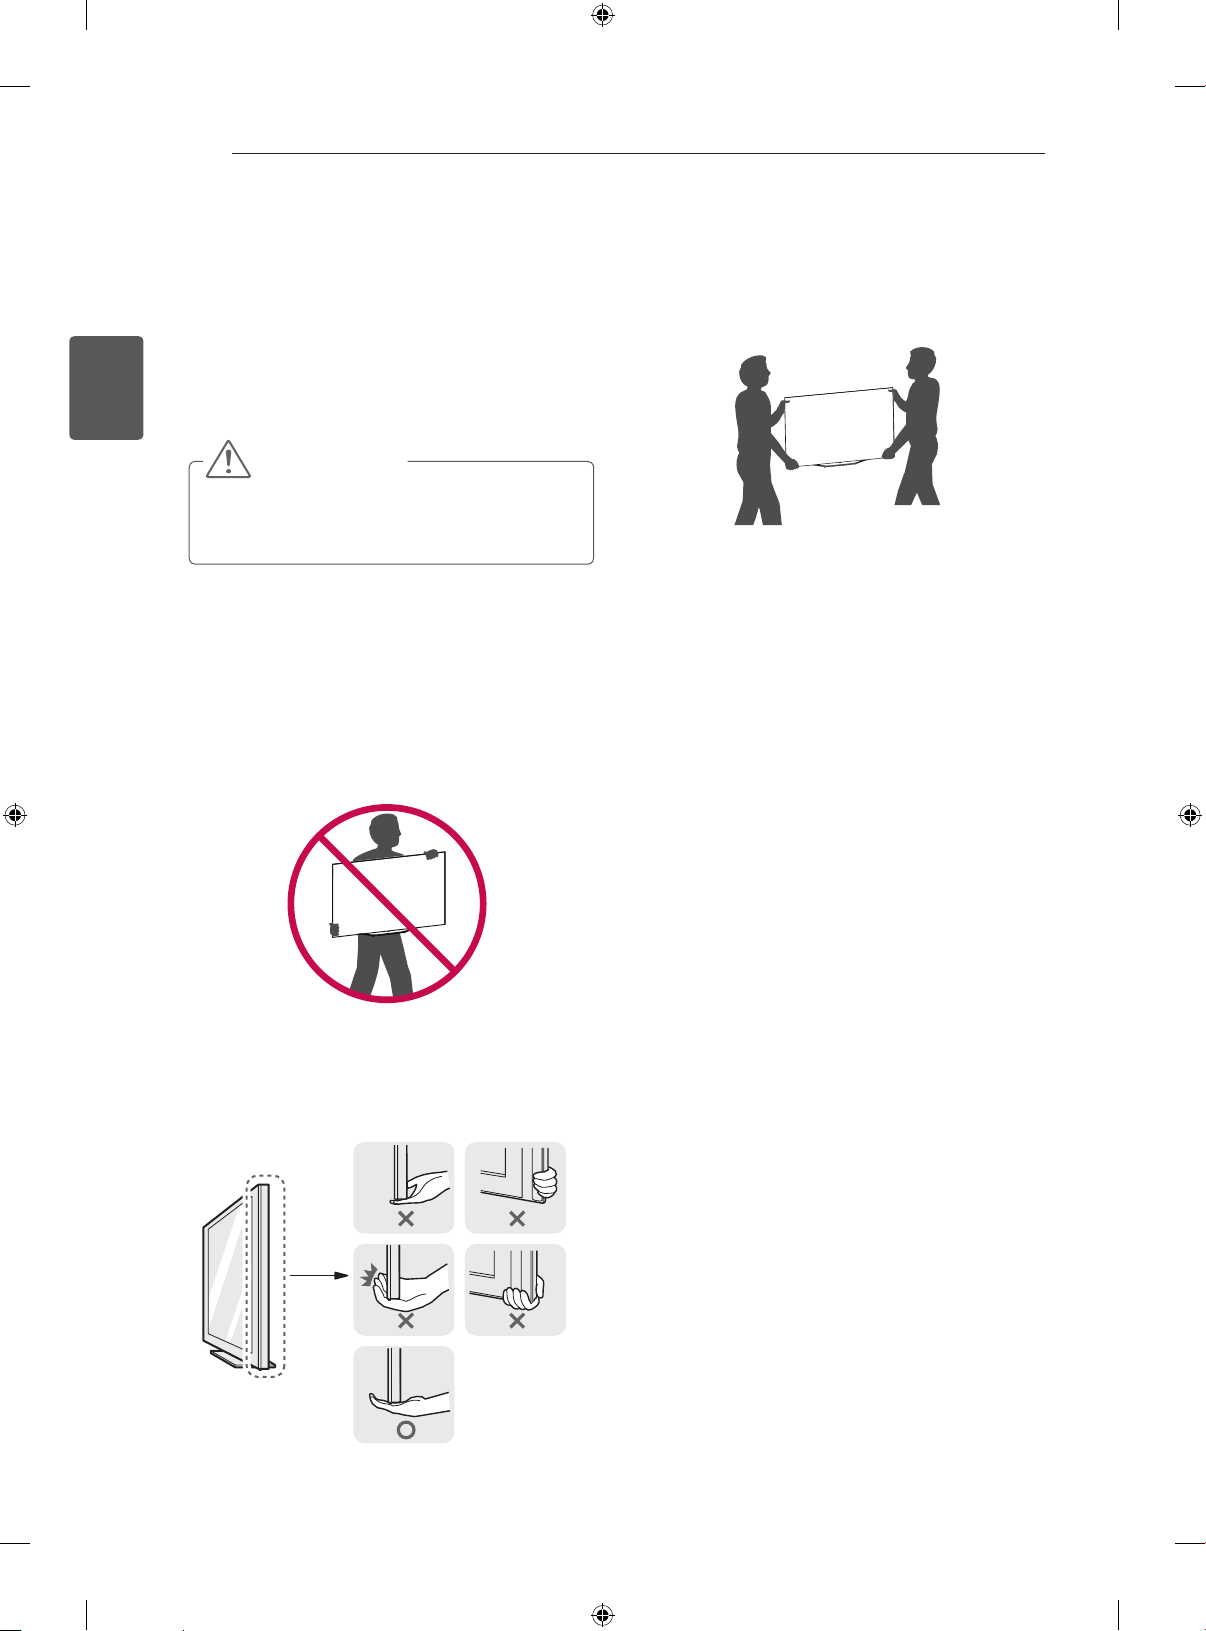
18
MONTAGE UND VORBEREITUNG
Anheben und Bewegen des
TV-Gerätes
DEUTSCH
Lesen Sie folgende Hinweise, bevor Sie das TV-
Gerät bewegen oder anheben, um Kratzer oder
Beschädigungen am TV-Gerät zu verhindern und
um einen reibungslosen Transport unabhängig von
Typ und Größe zu gewährleisten.
VORSICHT
y Berühren Sie nach Möglichkeit nicht den
Bildschirm, da er dadurch beschädigt
werden könnte.
y Es wird empfohlen, das TV-Gerät im
Originalkarton oder in der Originalverpackung
zu bewegen bzw. zu transportieren.
y Trennen Sie das Netzkabel und alle weiteren
Kabel, bevor Sie das TV-Gerät bewegen oder
anheben.
y Halten Sie das TV-Gerät so, dass sein
Bildschirm von Ihnen abgewendet ist, um
Beschädigungen zu vermeiden.
y Große TV-Geräte sollten stets von mindestens
2 Personen transportiert werden.
y Wenn das TV-Gerät von Hand transportiert
wird, halten Sie es wie in der folgenden
Abbildung gezeigt.
y Setzen Sie das TV-Gerät während des
Transports keinen ruckartigen Bewegungen
oder starken Erschütterungen aus.
y Halten Sie das TV-Gerät beim Transport
aufrecht, drehen Sie es niemals auf die Seite,
und kippen Sie es nicht nach links oder rechts.
y Üben Sie keinen übermäßigen Druck auf
den Gehäuserahmen aus, da dies zur
Beschädigung des Bildschirms führen kann.
y Halten Sie das Fernsehgerät beim Bewegen
aufrecht, und drehen Sie es nicht auf die Seite,
und kippen Sie es nicht.
y Achten Sie beim Bewegen und Bedienen des
TV-Geräts darauf, dass die hervorstehende
Joysticktaste nicht beschädigt wird.
y Halten Sie das TV-Gerät oben und unten am
Rahmen gut fest. Halten Sie ihn nicht am
transparenten Teil, am Lautsprecher oder am
Lautsprechergrill fest.
Page 91
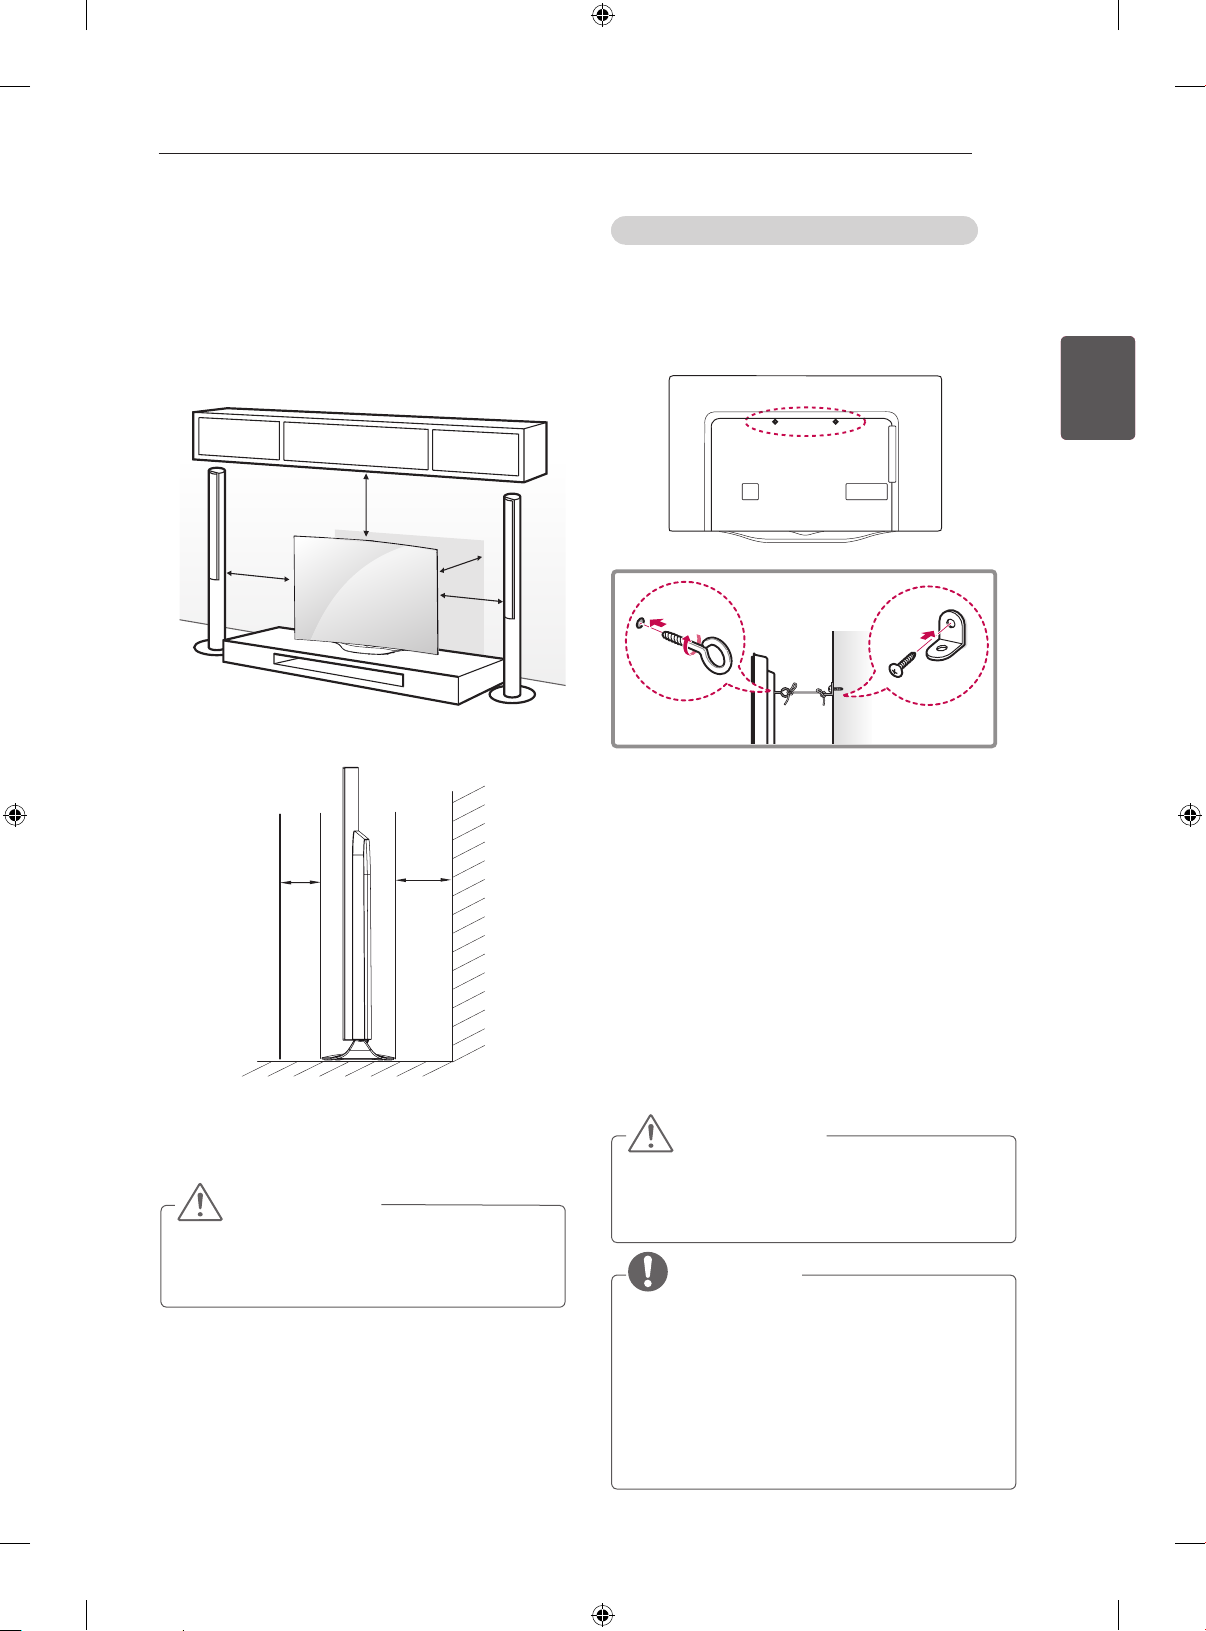
MONTAGE UND VORBEREITUNG
10 cm
10 cm
10 cm
10 cm
19
Montage auf einem Tisch
1 Heben Sie das TV-Gerät an, und kippen Sie es
auf einem Tisch in die aufrechte Position.
- Lassen Sie (mindestens) 10 cm Platz zur
Wand, um eine gute Belüftung zu gewährleisten.
10 cm
10 cm
5 cm
10 cm
10 cm
10 cm
Befestigen des TV-Gerätes an einer Wand
(Diese Funktion der Kippsicherung steht nicht bei
allen Modellen zur Verfügung.)
Für optimale Sicherheit befestigen Sie die
Standhalterung fest an einer Wand.
1 Setzen Sie die Ringschrauben oder TV-
Halterungen und Schrauben an der Rückseite
des TV-Gerätes ein, und befestigen Sie sie.
- Wenn an den Ringschraubenpositionen
Schrauben eingesetzt sind, entfernen Sie
zunächst die Schrauben.
2 Montieren Sie die Wandhalterungen mit den
Schrauben an der Wand.
Stimmen Sie die Position der Wandhalterung
auf die Ringschrauben an der Rückseite des
TV-Gerätes ab.
3 Verbinden Sie die Ringschrauben und
Wandhalterungen fest mit einem stabilen Seil.
Achten Sie darauf, dass das Seil horizontal
verläuft.
DEUTSCH
2 Schließen Sie das Stromkabel an eine
Steckdose an.
VORSICHT
y Stellen Sie das TV-Gerät nicht in die Nähe
von Wärmequellen, da dies einen Brand
oder Beschädigungen verursachen könnte.
VORSICHT
y Achten Sie darauf, dass Kinder nicht auf
das TV-Gerät klettern oder sich daran
hängen.
HINWEIS
y Verwenden Sie eine Haltevorrichtung oder
einen Schrank, der stabil und groß genug
ist, um das TV-Gerät sicher abzustützen.
y Halterungen, Seile und anderes
Befestigungsmaterial gehören nicht zum
Lieferumfang des Gerätes. Bitte wenden Sie
sich zum Erwerb von geeignetem Zubehör
an Ihren Fachhändler.
Page 92
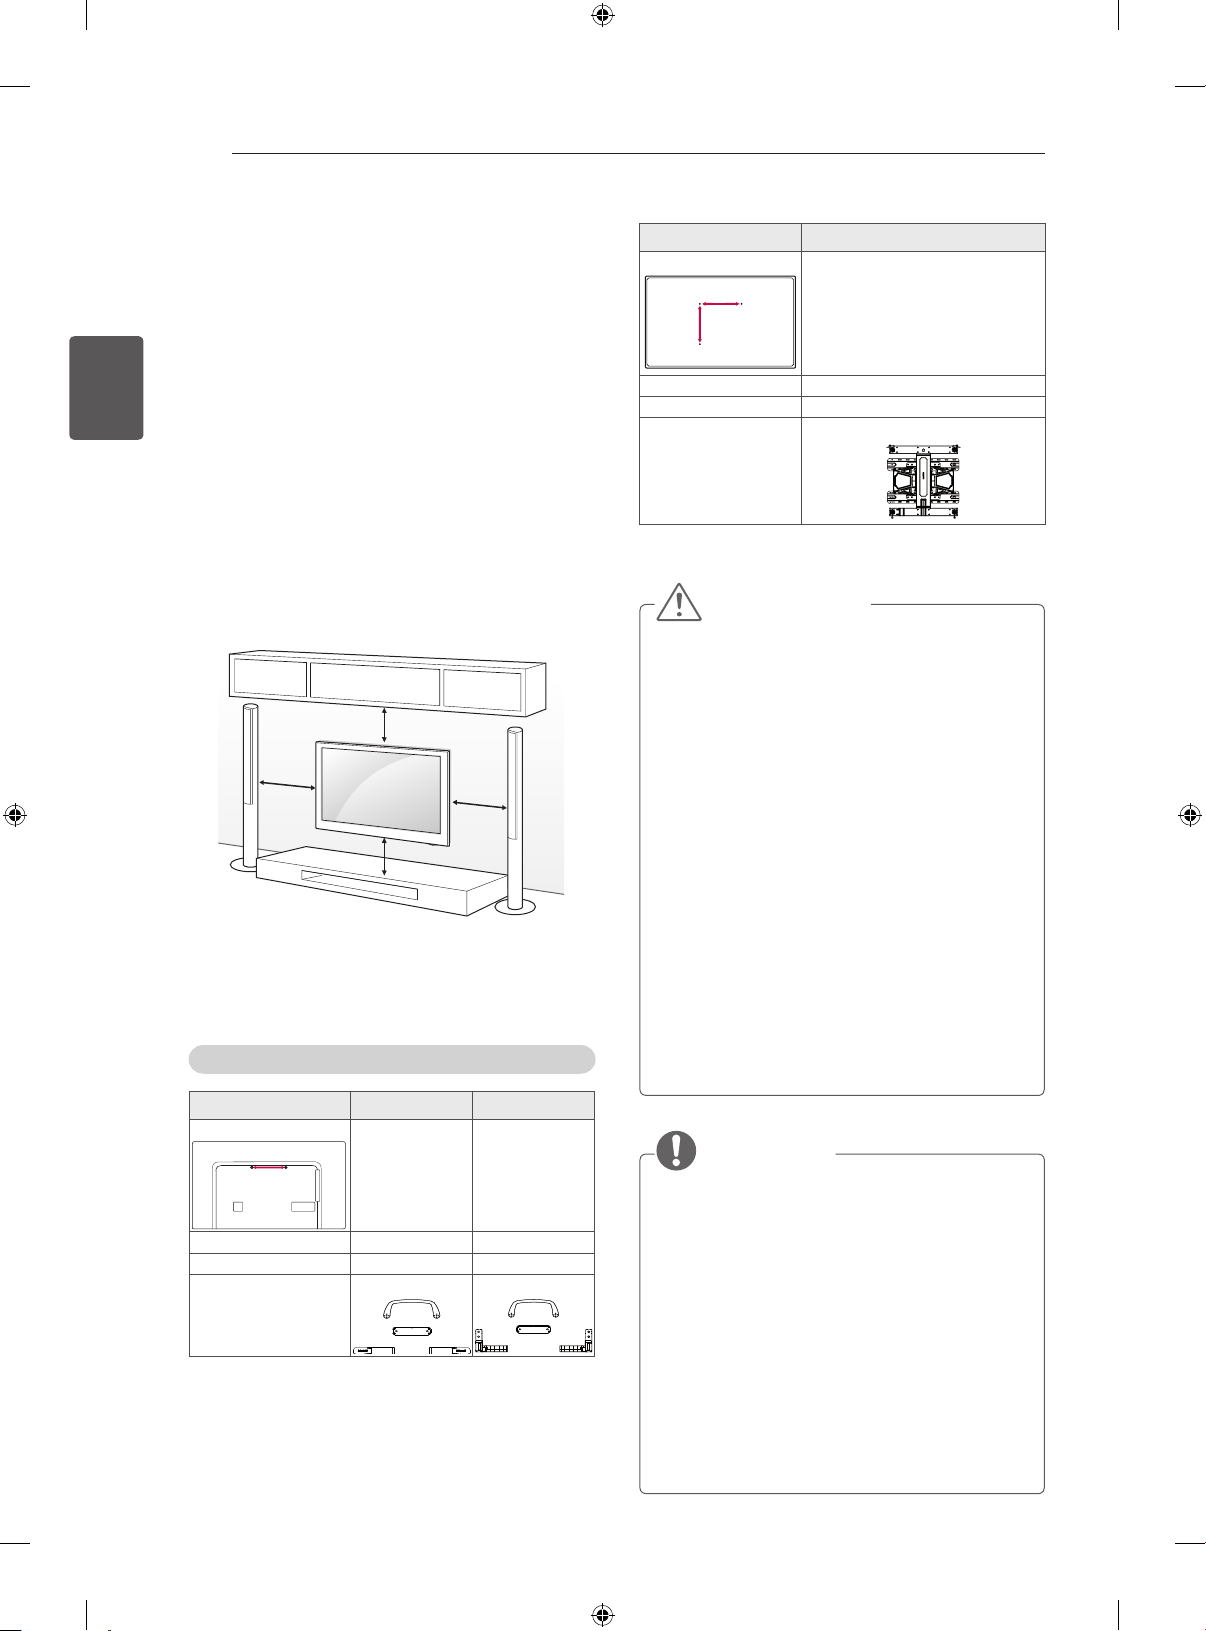
A
B
20
MONTAGE UND VORBEREITUNG
Wandmontage
Befestigen Sie an der Rückseite des TV-Gerätes
sorgfältig eine optionale Wandhalterung, und
DEUTSCH
montieren Sie die Wandhalterung an einer stabilen
Wand, die senkrecht zum Fußboden steht. Wenn
Sie das TV-Gerät an anderen Baustoffen befestigen möchten, fragen Sie zunächst bei einer qualizierten Fachkraft nach.
LG empehlt, dass die Wandmontage von einem
qualizierten Techniker durchgeführt wird.
Es wird empfohlen, eine Wandmontagehalterung
von LG zu verwenden.
Falls Sie eine andere Wandmontagehalterung als
die von LG verwenden, stellen Sie sicher, dass Ihr
Gerät ordnungsgemäß an der Wand befestigt ist
und genügend Abstand besteht, um externe Geräte anzuschließen.
Verwenden Sie unbedingt Schrauben und Wandhalterungen, die der VESA-Norm entsprechen. Die
Standardmaße der Wandmontagesätze können
der folgenden Tabelle entnommen werden.
(A)
Standardschraube M6 M6
Anzahl Schrauben 2 2
Wandmontagehalterung
10 cm
10 cm
10 cm
10 cm
Separat zu beziehen (Wandmontagehalterung)
Modell 55EC93** 65EC97**
A
210 210
OSW100
OSW200
Model 77EC98**
VESA (A x B)
400 x 400
Standardschraube M6
Anzahl Schrauben 4
LSW420BX
Wandmontagehalterung
VORSICHT
y Trennen Sie erst das Netzkabel, bevor Sie
das TV-Gerät bewegen oder installieren.
Ansonsten besteht Stromschlaggefahr.
y Wenn Sie das TV-Gerät an einer Decke
oder Wandschräge montieren, kann
es herunterfallen und zu schweren
Verletzungen führen. Verwenden Sie eine
zugelassene Wandhalterung von LG, und
wenden Sie sich an Ihren Händler vor Ort
oder an qualifiziertes Fachpersonal.
y Ziehen Sie die Schrauben nicht zu fest
an, da dies Beschädigungen am TV-Gerät
hervorrufen und zum Erlöschen Ihrer
Garantie führen könnte.
y Verwenden Sie die Schrauben und
Wandhalterungen, die der VESA-Norm
entsprechen. Schäden oder Verletzungen,
die durch unsachgemäße Nutzung oder die
Verwendung von ungeeignetem Zubehör
verursacht werden, fallen nicht unter die
Garantie.
HINWEIS
y Verwenden Sie die Schrauben, die unter
den Spezifikationen der VESA-Norm
aufgeführt sind.
y Der Wandmontagesatz beinhaltet eine
Installationsanleitung und die notwendigen Teile.
y Die Wandhalterung ist optional.
Zusätzliches Zubehör erhalten Sie bei Ihrem
Elektrohändler.
y Die Schraubenlänge hängt von der
Wandbefestigung ab. Verwenden Sie unbedingt
Schrauben der richtigen Länge.
y Weitere Informationen können Sie dem
im Lieferumfang der Wandhalterung
enthaltenen Handbuch entnehmen.
Page 93
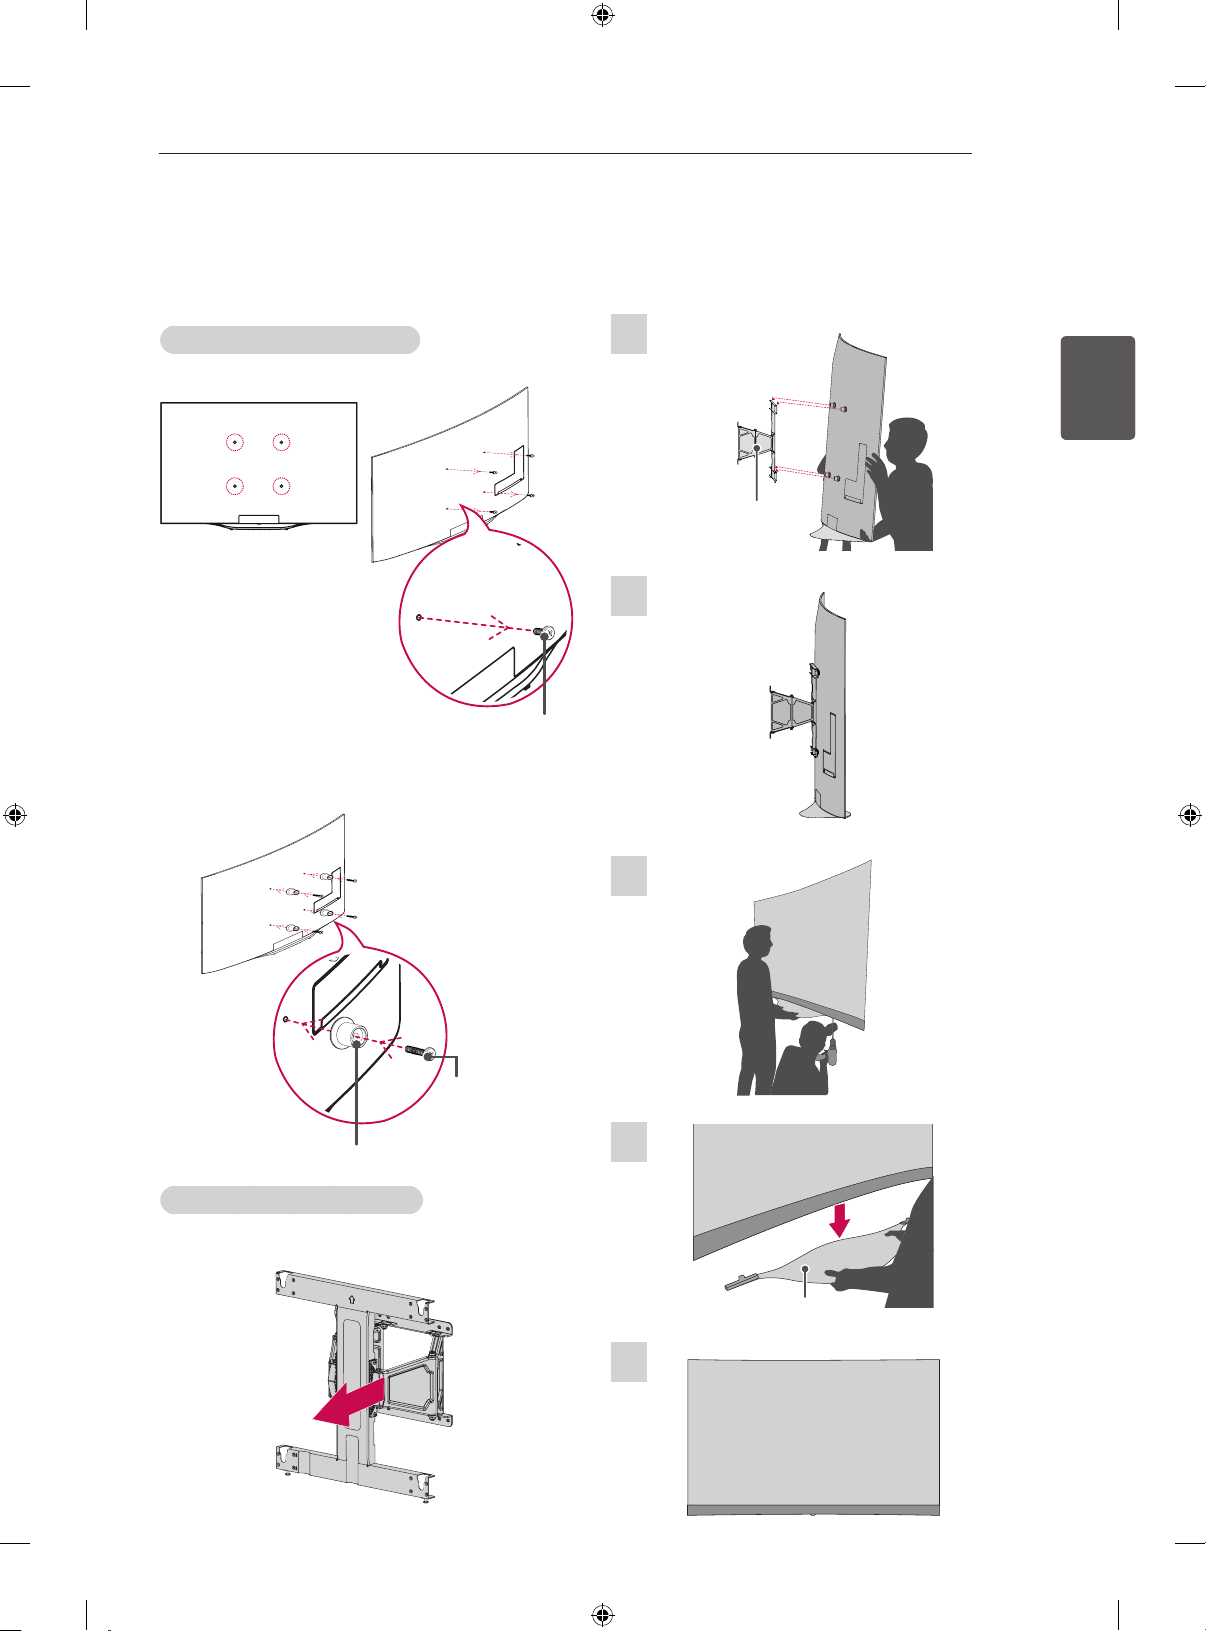
MONTAGE UND VORBEREITUNG
21
Wandmontage:
Installationsanleitung
(Nur EC98** - Separat erhältlich)
Anbringen der Abstandhalter
1 Entfernen Sie die VESA-Schrauben (4 Stk).
VESA-Schraube
2 Bringen Sie die Abstandhalter (4 Stk) und die
Schrauben für die Abstandhalter (4 Stk) an.
Abnehmen des Standfußes
Typ 1: Anbringen des Fernsehers an der Wand vor
Entfernen des Standfußes
1
Wandmontagehalterung
2
DEUTSCH
Distanzstückschraube
Distanzstück
Anbringen der Wandhalterung
1 Bewegen Sie die Halterung nach dem Anbringen
nach vorne
3
4
Standfuß
5
Page 94
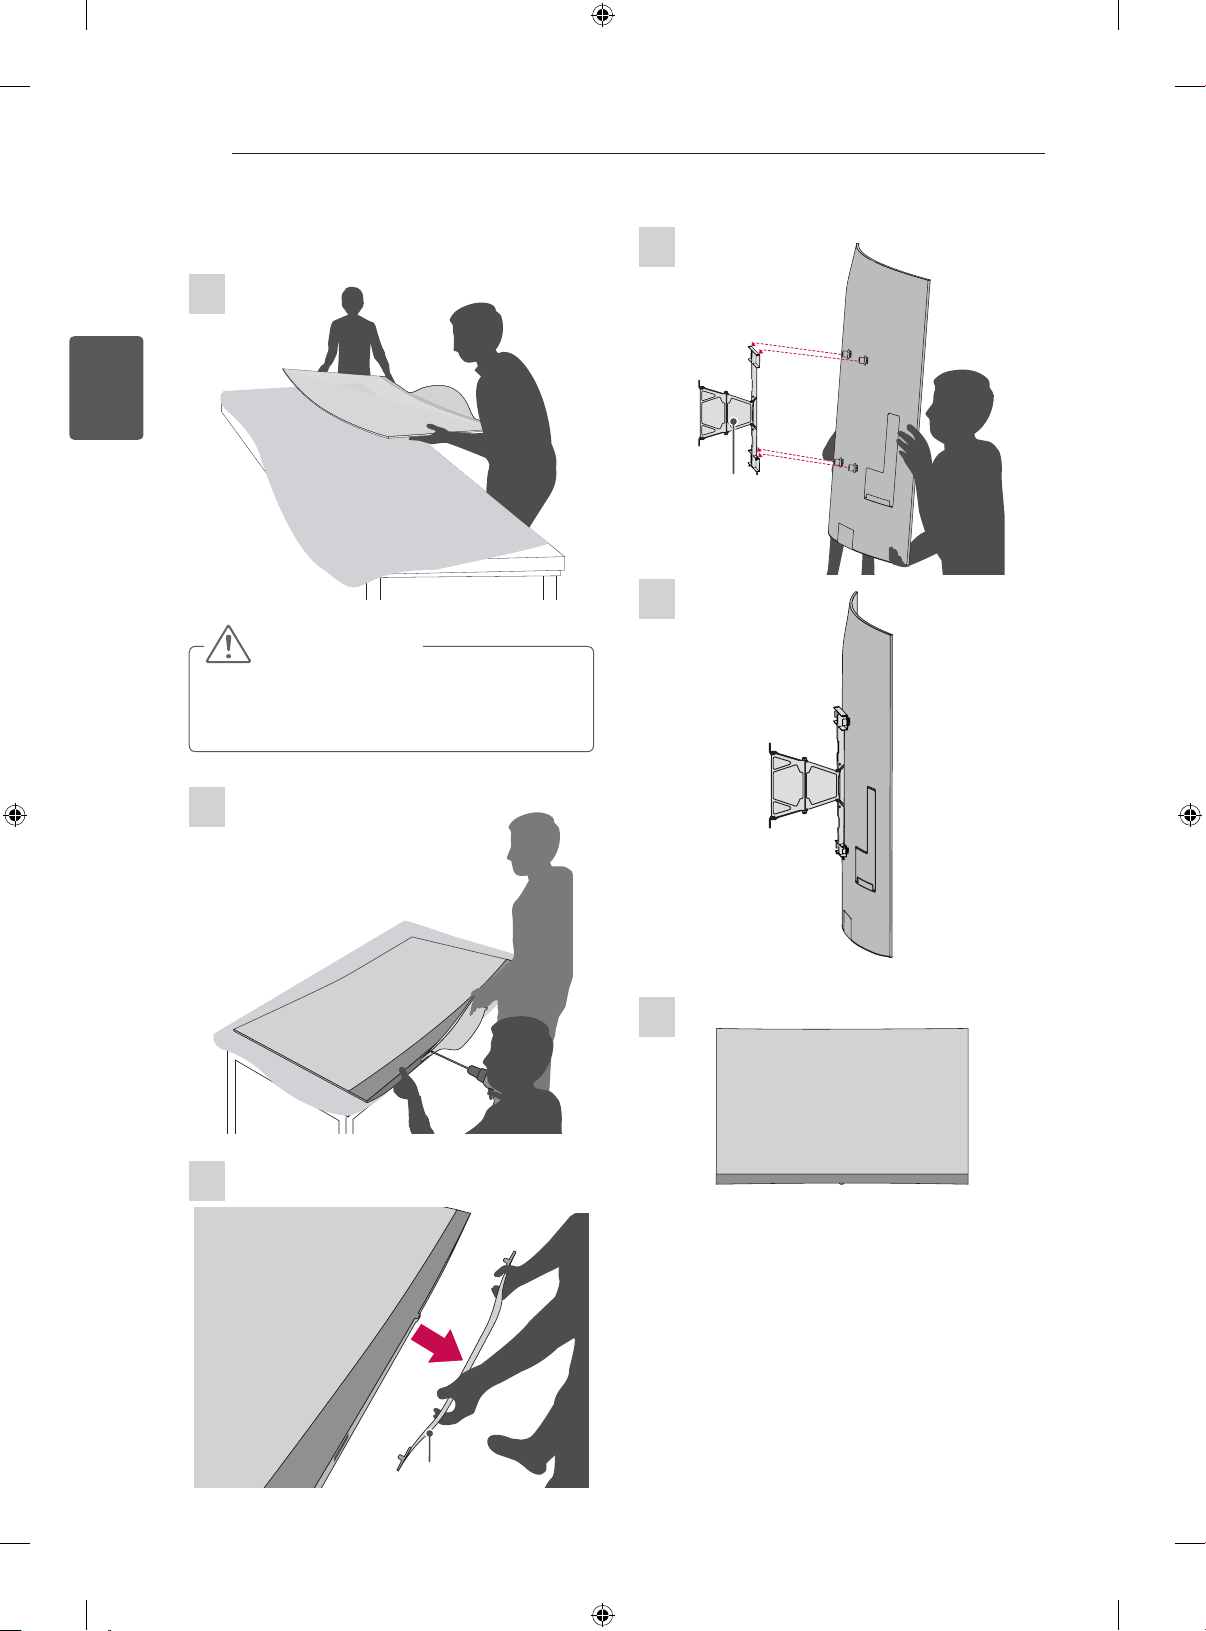
22
MONTAGE UND VORBEREITUNG
Typ 2: Anbringen des Fernsehers an der Wand nach
Entfernen des Standfußes
DEUTSCH
4
1
Wandmontagehalterung
5
VORSICHT
y Wenn Sie den Fernseher mit seiner Rückseite
auf eine gepolsterte Oberfläche legen, achten
Sie darauf, ihn nicht zu beschädigen.
2
6
3
Standfuß
Page 95
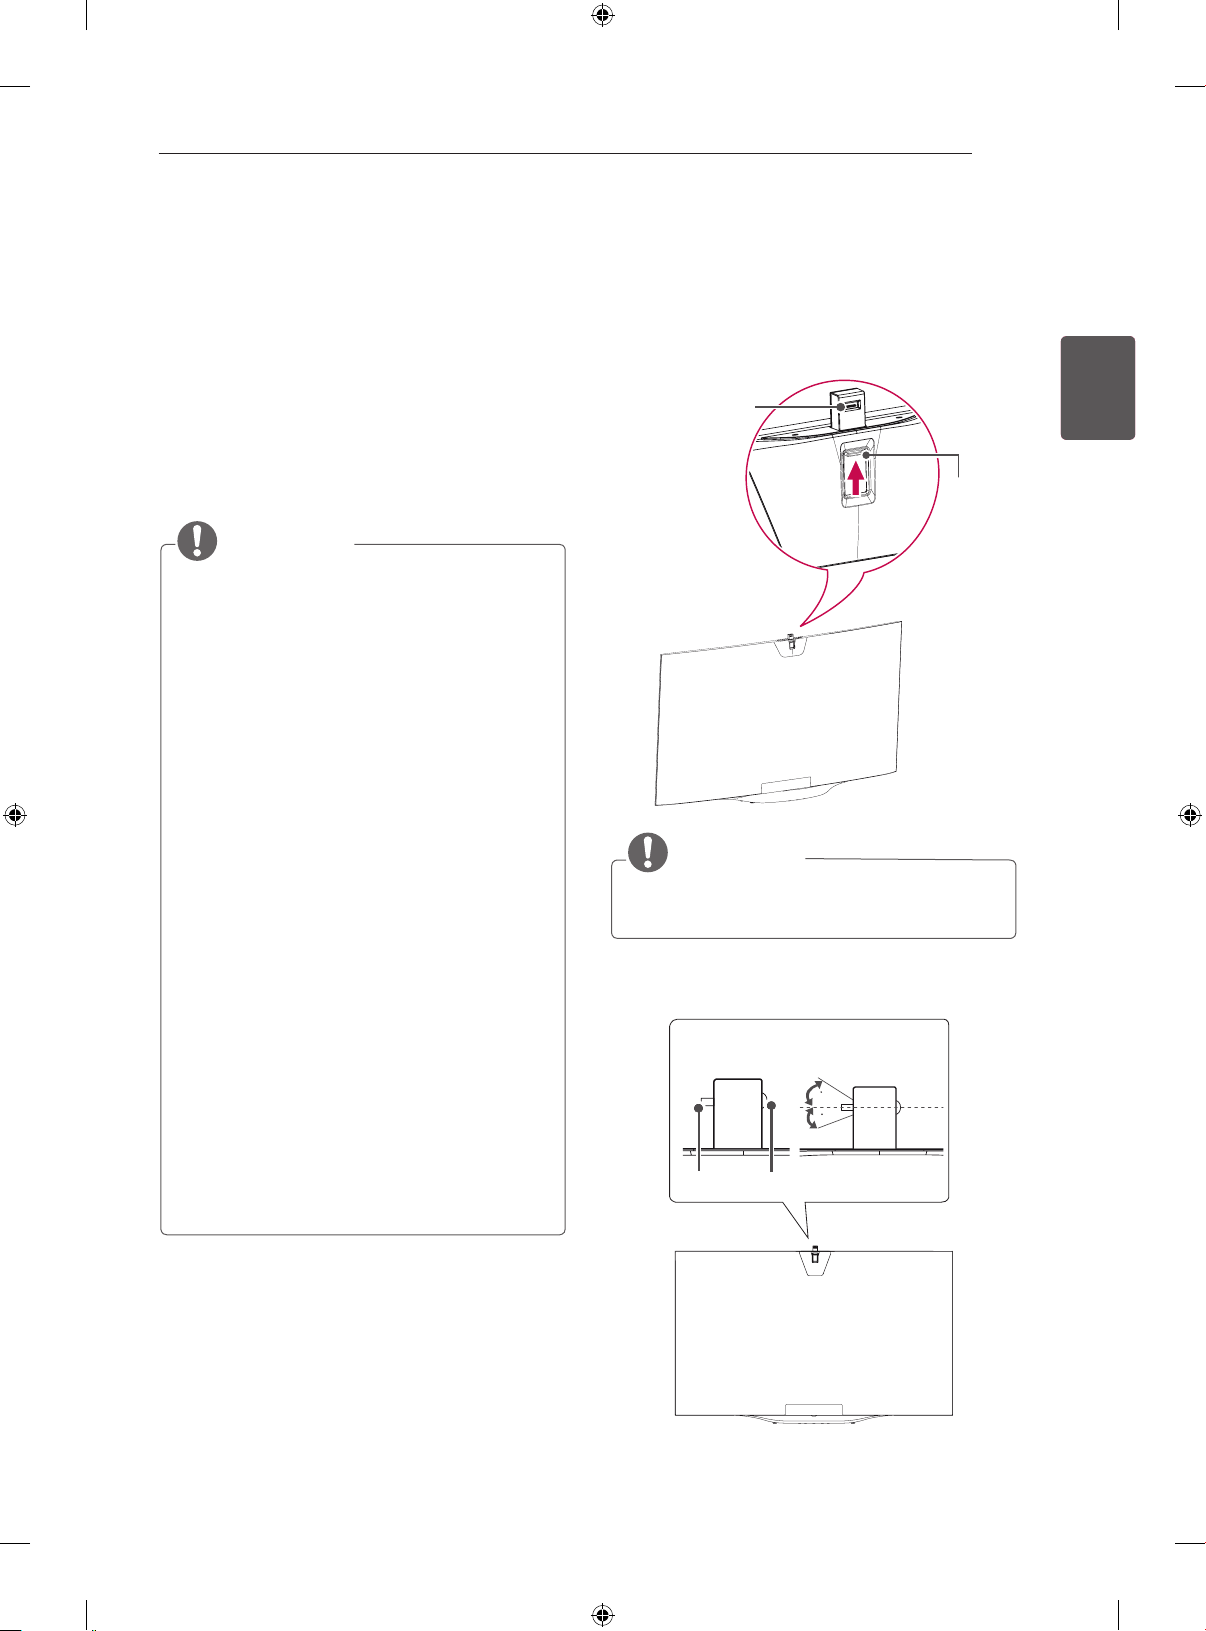
MONTAGE UND VORBEREITUNG
23
Verwendung der integrierten
Kamera
(Nur EC97**, EC98**)
Sie können über Skype Videogespräche führen
oder mithilfe der integrierten Kamera des Fernsehgeräts die Bewegungserkennung nutzen.
Dieses Fernsehgerät unterstützt nicht die Verwendung einer externen Kamera.
HINWEIS
y Vor der Verwendung der integrierten
Kamera müssen Sie sich bewusst sein,
dass Sie nach den einschlägigen nationalen
Gesetzen, einschließlich des Strafrechts,
gesetzlich für die Nutzung oder den
Missbrauch der Kamera verantwortlich sind.
y Die einschlägigen nationalen Gesetze
umfassen das Gesetz über den
Schutz personenbezogener Daten,
das die Verarbeitung und Weitergabe
von persönlichen Daten regelt, und
das esetz über die Regulierung der
Kameraüberwachung am Arbeitsplatz und
an anderen Orten.
y Verwenden Sie die integrierte Kamera
auf keinen Fall für bedenkliche, rechtsoder sittenwidrige Aufnahmen. Mit
Ausnahme von öffentlichen Orten oder
Veranstaltungen muss gegebenenfalls eine
Einverständniserklärung für Fotoaufnahmen
eingeholt werden. Wir raten Ihnen von
Aufnahmen folgender Szenen ab:
(1) Filmen Sie nicht an Orten, an denen
dies generell verboten ist, z. B. Toiletten,
Umkleiden, Umkleidekabinen und
Sicherheitsbereiche.
(2) Verletzen Sie nicht die Privatsphäre
anderer Personen.
(3) Verletzen Sie nicht die einschlägigen
Vorschriften oder Gesetze.
Vorbereitung der integrierten
Kamera
1 Bewegen Sie den Schieberegler an der
Rückseite des Fernsehgeräts nach oben, wenn
Sie die Kamera verwenden möchten.
Hebel zur Anpas-
sungdes Winkels
Schieberegler
HINWEIS
Entfernen Sie die Schutzfolie bevor Sie die
y
integrierte Kamera verwenden.
2 Sie können den Kamerawinkel mit dem Hebel
zur Anpassung des Winkels an der Rückseite
der integrierten Kamera einstellen.
[Seitenansicht]
7
5
Hebel
Objektiv
DEUTSCH
Page 96
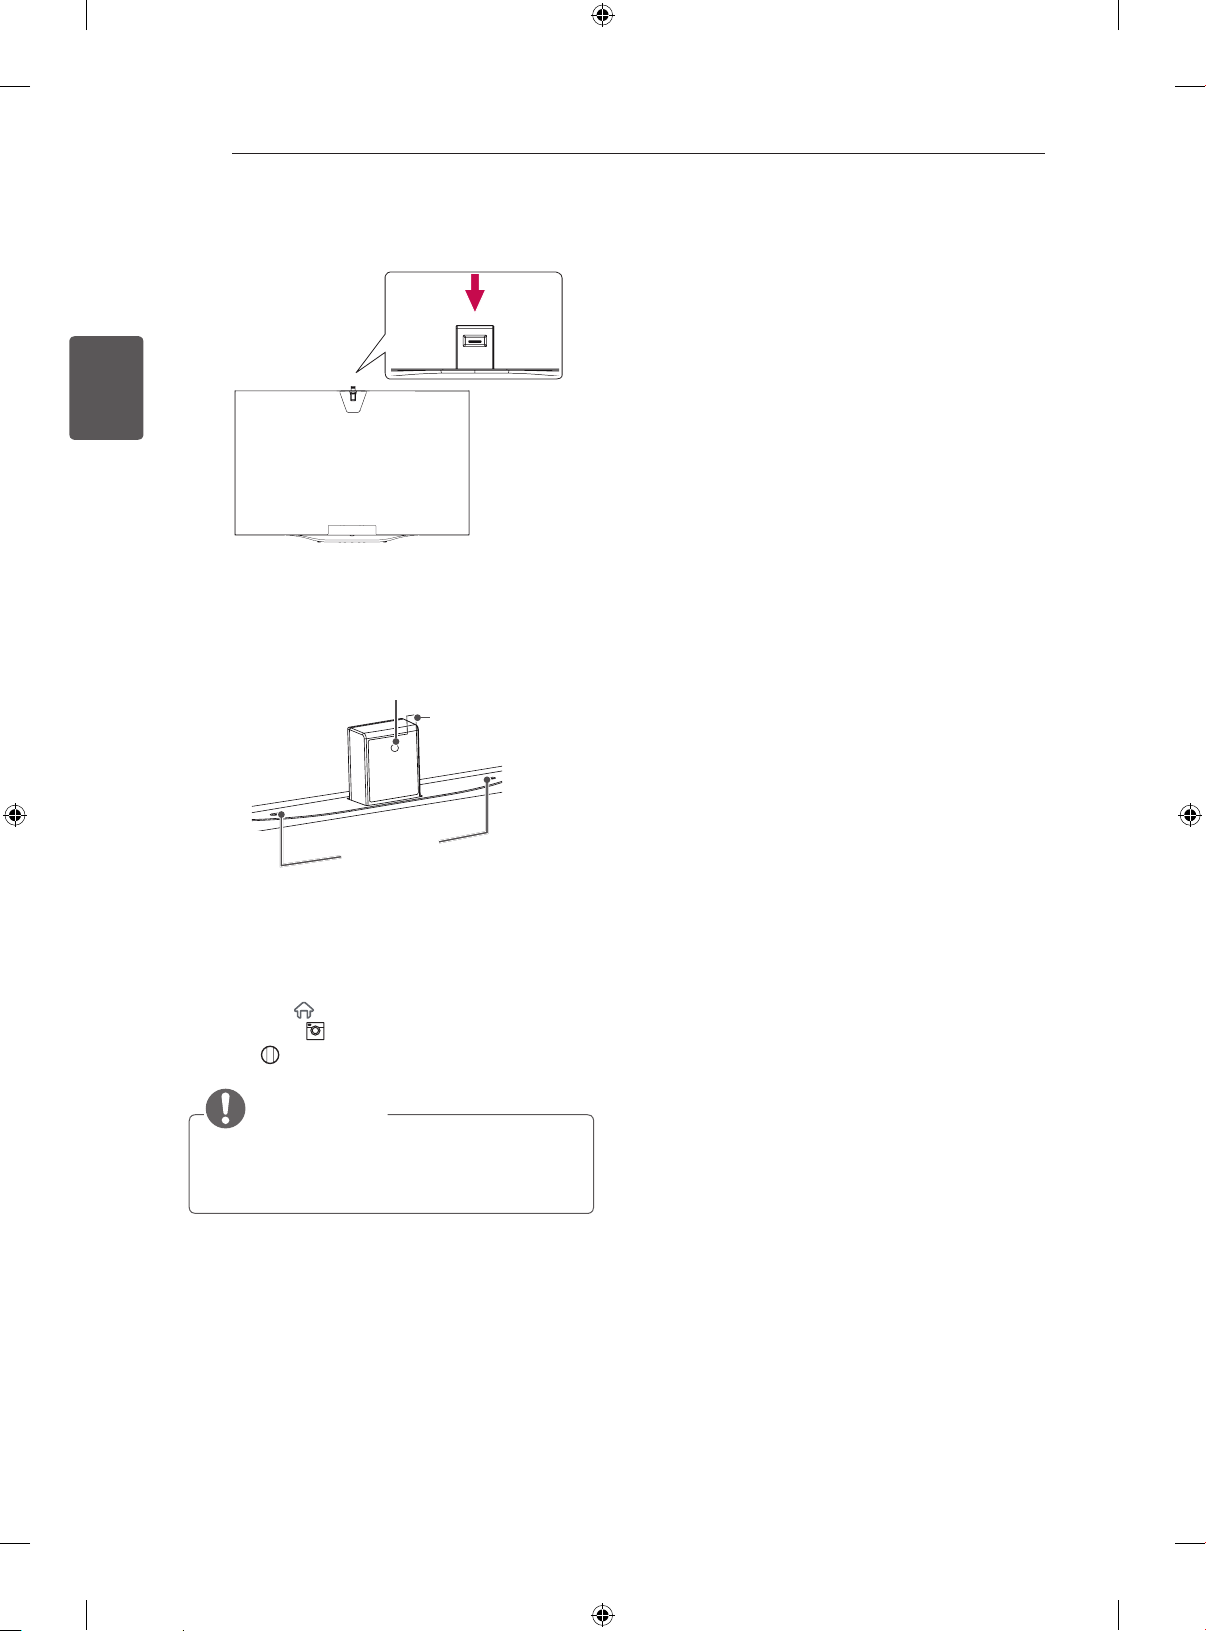
24
3 Drücken Sie die integrierte Kamera nach unten,
DEUTSCH
Bezeichnungen der Teile der
integrierten Kamera
MONTAGE UND VORBEREITUNG
wenn Sie sie nicht verwenden.
Kameraobjektiv
Schutzfolie
Mikrofon
Überprüfung des
Aufnahmebereichs der Kamera
1 Drücken Sie zur Anzeige des Menüs “Home”
die Taste (Home) auf der Fernbedienung.
aus, und drücken Sie dann die
2 Wählen Sie Kamera
Rad (OK).
Taste
HINWEIS
Der optimale Abstand zur Kamera beträgt bei
y
der Verwendung der Bewegungserkennung
zwischen 1,5 und 4,5 m.
Page 97
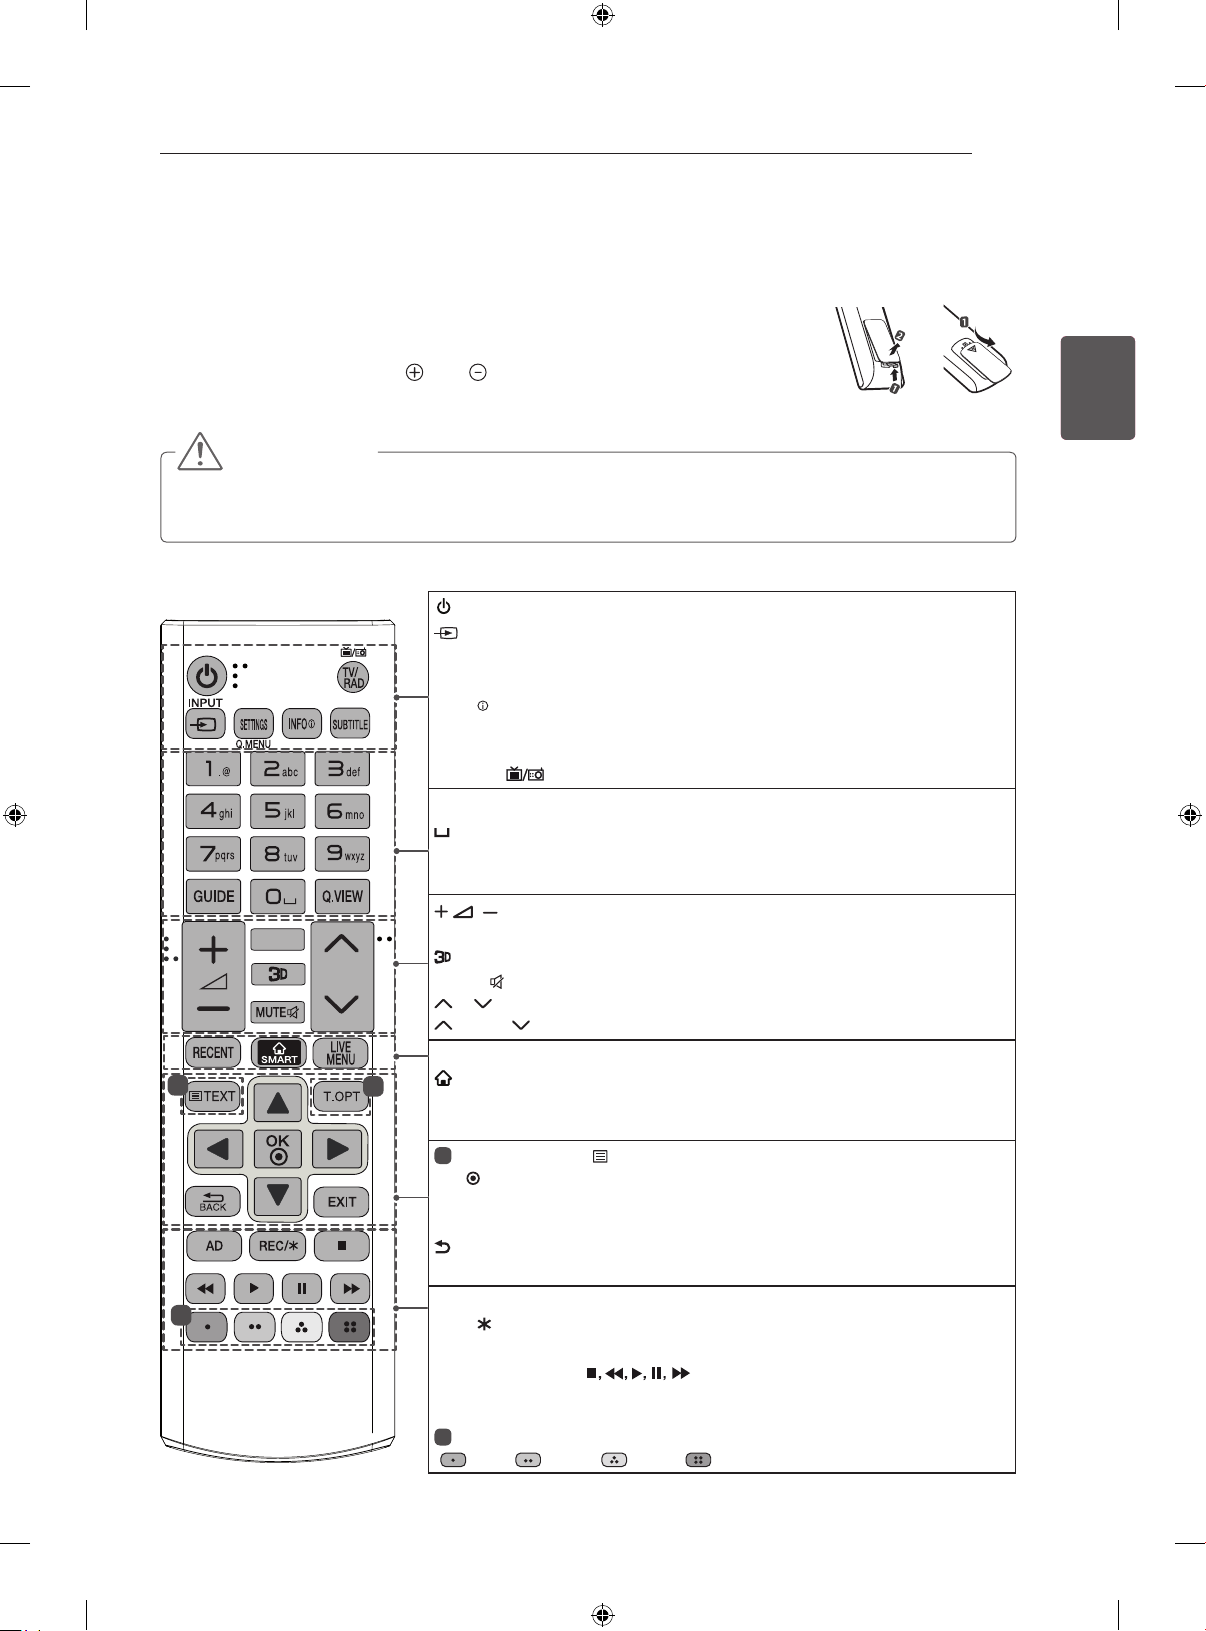
FERNBEDIENUNG
FERNBEDIENUNG
(Abhängig vom Modell)
Die Beschreibungen in diesem Handbuch beziehen sich auf die Tasten der Fernbedienung.
Lesen Sie dieses Handbuch bitte aufmerksam durch, und verwenden Sie das TVGerät bestimmungsgemäß.
Um die Batterien zu wechseln, öffnen Sie das Batteriefach, wechseln Sie die Batterien (1,5 V, AAA), legen Sie die - und -Enden entsprechend der Kennzeichnung
im Fach ein, und schließen Sie das Batteriefach.
Gehen Sie zum Herausnehmen der Batterien in umgekehrter Reihenfolge vor.
VORSICHT
y Verwenden Sie niemals alte zusammen mit neuen Batterien, da dies Schäden an der Fernbedienung
hervorrufen kann.
y Abhängig vom Absatzmarkt ist die Fernbedienung möglicherweise nicht enthalten.
Stellen Sie sicher, dass die Fernbedienung auf den Sensor am TV-Gerät gerichtet ist.
(EIN/AUS) Ein- oder Ausschalten des TV-Geräts.
INPUT Ändert die Eingangsquelle.
SETTINGS Öffnen der Hauptmenüs.
Q. MENU Öffnet die Schnellmenü
INFO
Bildschirm.
SUBTITLE Ruft den bevorzugten Untertitel im digitalen Modus auf.
TV/RAD
Zifferntasten Zur Eingabe von Nummern.
GUIDE Öffnet den Programmführer.
Q.VIEW Kehrt zurück zum vorherigen Programm.
FAV
P
PAGE
FAV Zugriff auf die Liste der Lieblingskanäle.
MUTE
RECENT Zeigt den aktuellen Verlauf an.
1
1
LIVE MENU Zeigt die Listen „Empfohlen“, „Programm“, „Suchen“ und
„Aufgezeichnet“ an.
1
OK Wählt Menüs oder Einstellungen und speichert Ihre Eingabe.
Navigationstasten (nach oben/nach unten/nach links/nach rechts)
Navigiert durch Menüs und Einstellungen.
EXIT Blendet alle Bildschirmmenüs aus und kehrt zum TV-Bild zurück.
2
AD Durch Drücken der AD-Taste wird die Audiobeschreibung aktiviert.
REC/
Aufnahmemenü anzeigen. (nur Time Machine
Steuerungstaten (
Time Machine
kompatiblen Geräte (USB oder SIMPLINK oder Time Machine
2
( : Rot, : Grün, : Gelb, : Blau)
Anzeige von Informationen zum aktuellen Programm und
Wählt Radio-, TV- und DTV-Programme.
(Space) Gibt ein Leerzeichen auf der Bildschirmtastatur wieder.
Regelt die Lautstärke.
Wird zur Ansicht von 3D-Videos verwendet.
Stellt den Ton aus.
P
Navigiert durch die gespeicherten Programme.
PAGE Wechselt zum vorherigen oder nächsten Bildschirm.
SMART Öffnet das Home-Menü.
TELETEXT-Tasten( TEXT / T.OPT) Diese Tasten werden für Teletext verwendet.
BACK Zurück zur vorherigen Ebene.
Beginnen Sie mit dem Aufnehmen, und lassen Sie das
Ready
- oder SmartShare-Menüs oder der SIMPLINK-
) Steuerung von Premium-Inhalten,
Ready
Geräte)
Farbtasten Öffnen Sonderfunktionen in manchen Menüs.
oder
Ready
25
DEUTSCH
).
Page 98
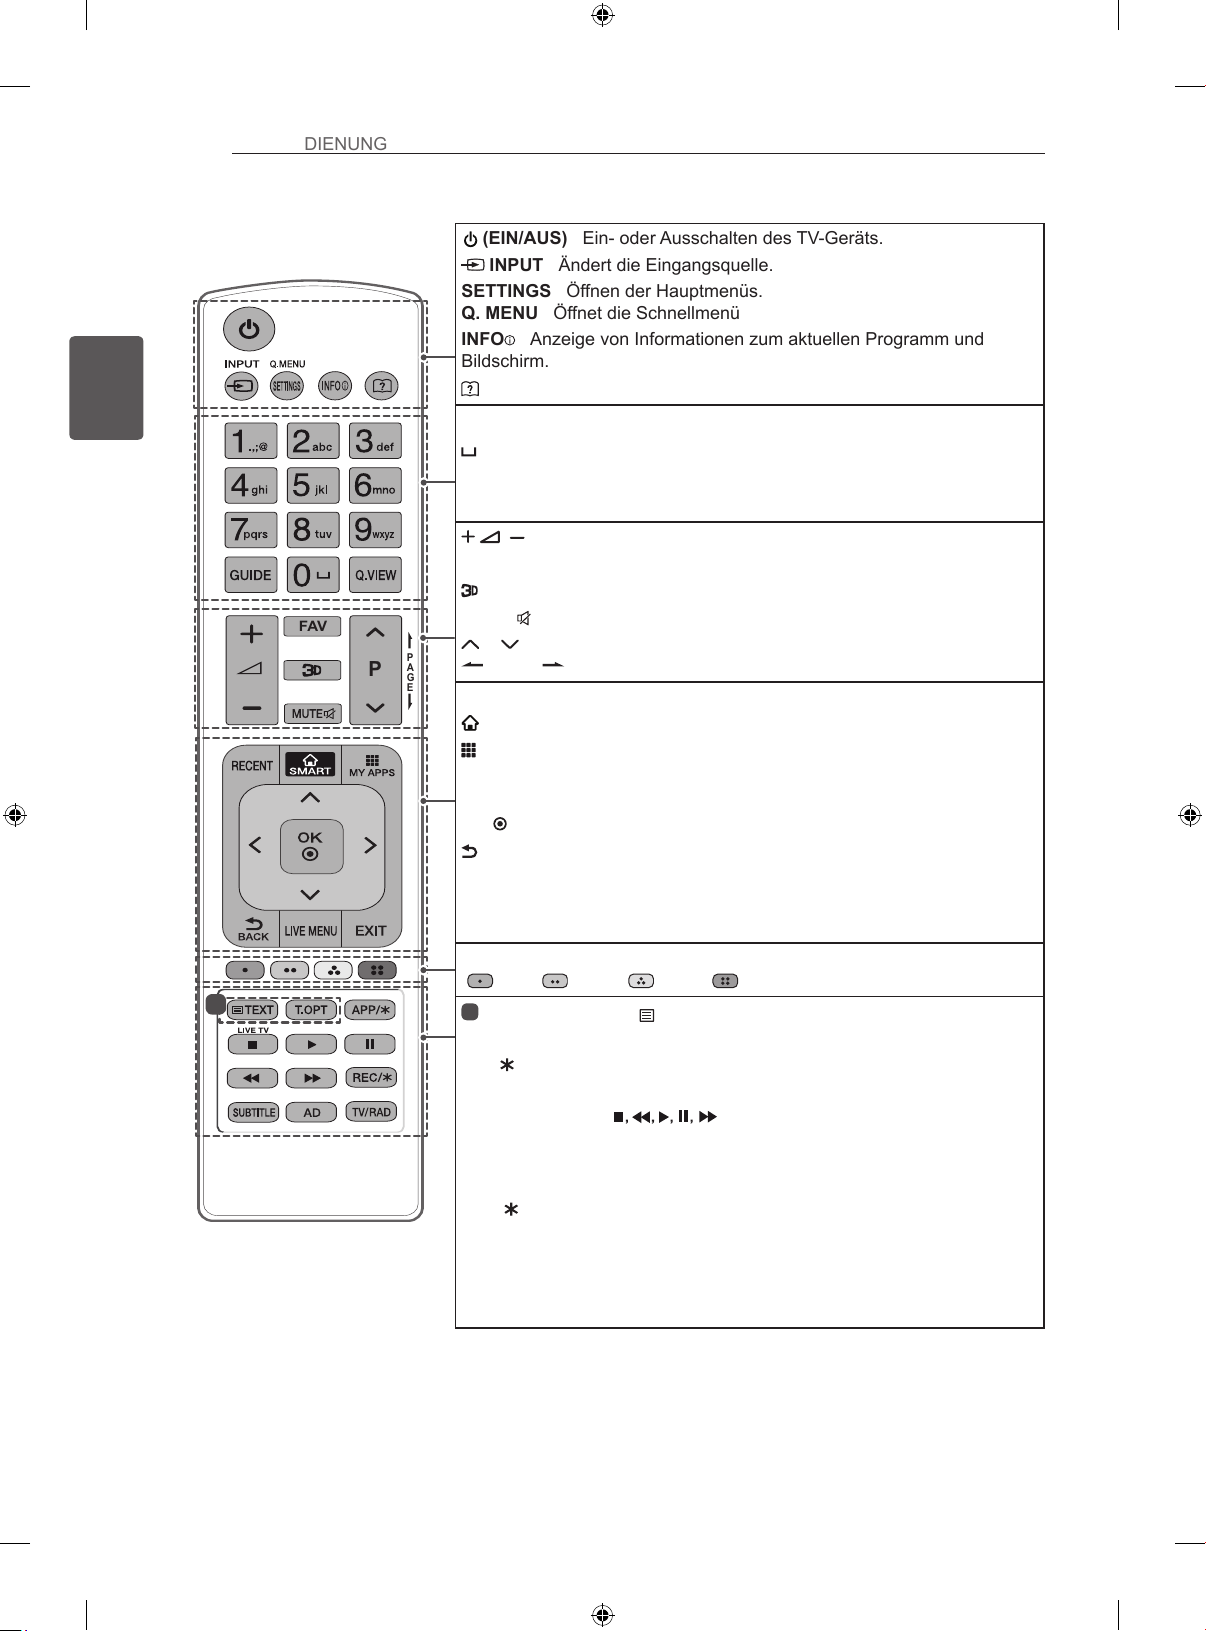
FAV
P
P
A
G
E
Time Machine
SUBTITLE
DEUTSCH
26
FERNBEDIENUNG
1
(EIN/AUS) Ein- oder Ausschalten des TV-Geräts.
INPUT Ändert die Eingangsquelle.
SETTINGS Öffnen der Hauptmenüs.
Q. MENU Öffnet die Schnellmenü
INFO
Anzeige von Informationen zum aktuellen Programm und
Bildschirm.
(Benutzeranleitung) Ruft das Benutzerhandbuch auf.
Zifferntasten Zur Eingabe von Nummern.
(Space) Gibt ein Leerzeichen auf der Bildschirmtastatur wieder.
GUIDE Öffnet den Programmführer.
Q.VIEW Kehrt zurück zum vorherigen Programm.
Regelt die Lautstärke.
FAV Zugriff auf die Liste der Lieblingskanäle.
Wird zur Ansicht von 3D-Videos verwendet.
MUTE Stellt den Ton aus.
P Navigiert durch die gespeicherten Programme.
PAGE Wechselt zum vorherigen oder nächsten Bildschirm.
RECENT Zeigt den aktuellen Verlauf an.
SMART Öffnet das Home-Menü.
MY APPS Zeigt die Liste der Apps an.
Navigationstasten (nach oben/nach unten/nach links/nach rechts)
Navigiert durch Menüs und Einstellungen.
OK Wählt Menüs oder Einstellungen und speichert Ihre Eingabe.
BACK Zurück zur vorherigen Ebene.
LIVE MENU Zeigt die Listen „Empfohlen“, „Programm“, „Suchen“ und
„Aufgezeichnet“ an.
EXIT Blendet alle Bildschirmmenüs aus und kehrt zum TV-Bild zurück.
Farbtasten Öffnen Sonderfunktionen in manchen Menüs.
(
: Rot, : Grün, : Gelb, : Blau)
1
TELETEXT-Tasten( TEXT / T.OPT) Diese Tasten werden für Teletext
verwendet.
APP/
Wählen Sie die Menüquelle für MHP TV. (Nur Italien) (abhängig
vom Modell)
Steuerungstaten (
Time Machine
Ready
- oder SmartShare-Menüs oder der SIMPLINK-
kompatiblen Geräte (USB oder SIMPLINK oder Time Machine
) Steuerung von Premium-Inhalten,
Ready
).
LIVE TV Rückkehr zum LIVE-TV.
REC/
Beginnen Sie mit dem Aufnehmen, und lassen Sie das
Aufnahmemenü anzeigen. (nur Time Machine
Ready
Geräte)
SUBTITLE Ruft den bevorzugten Untertitel im digitalen Modus auf.
AD Durch Drücken der AD-Taste wird die Audiobeschreibung aktiviert.
TV/RAD Wählt Radio-, TV- und DTV-Programme.
Page 99
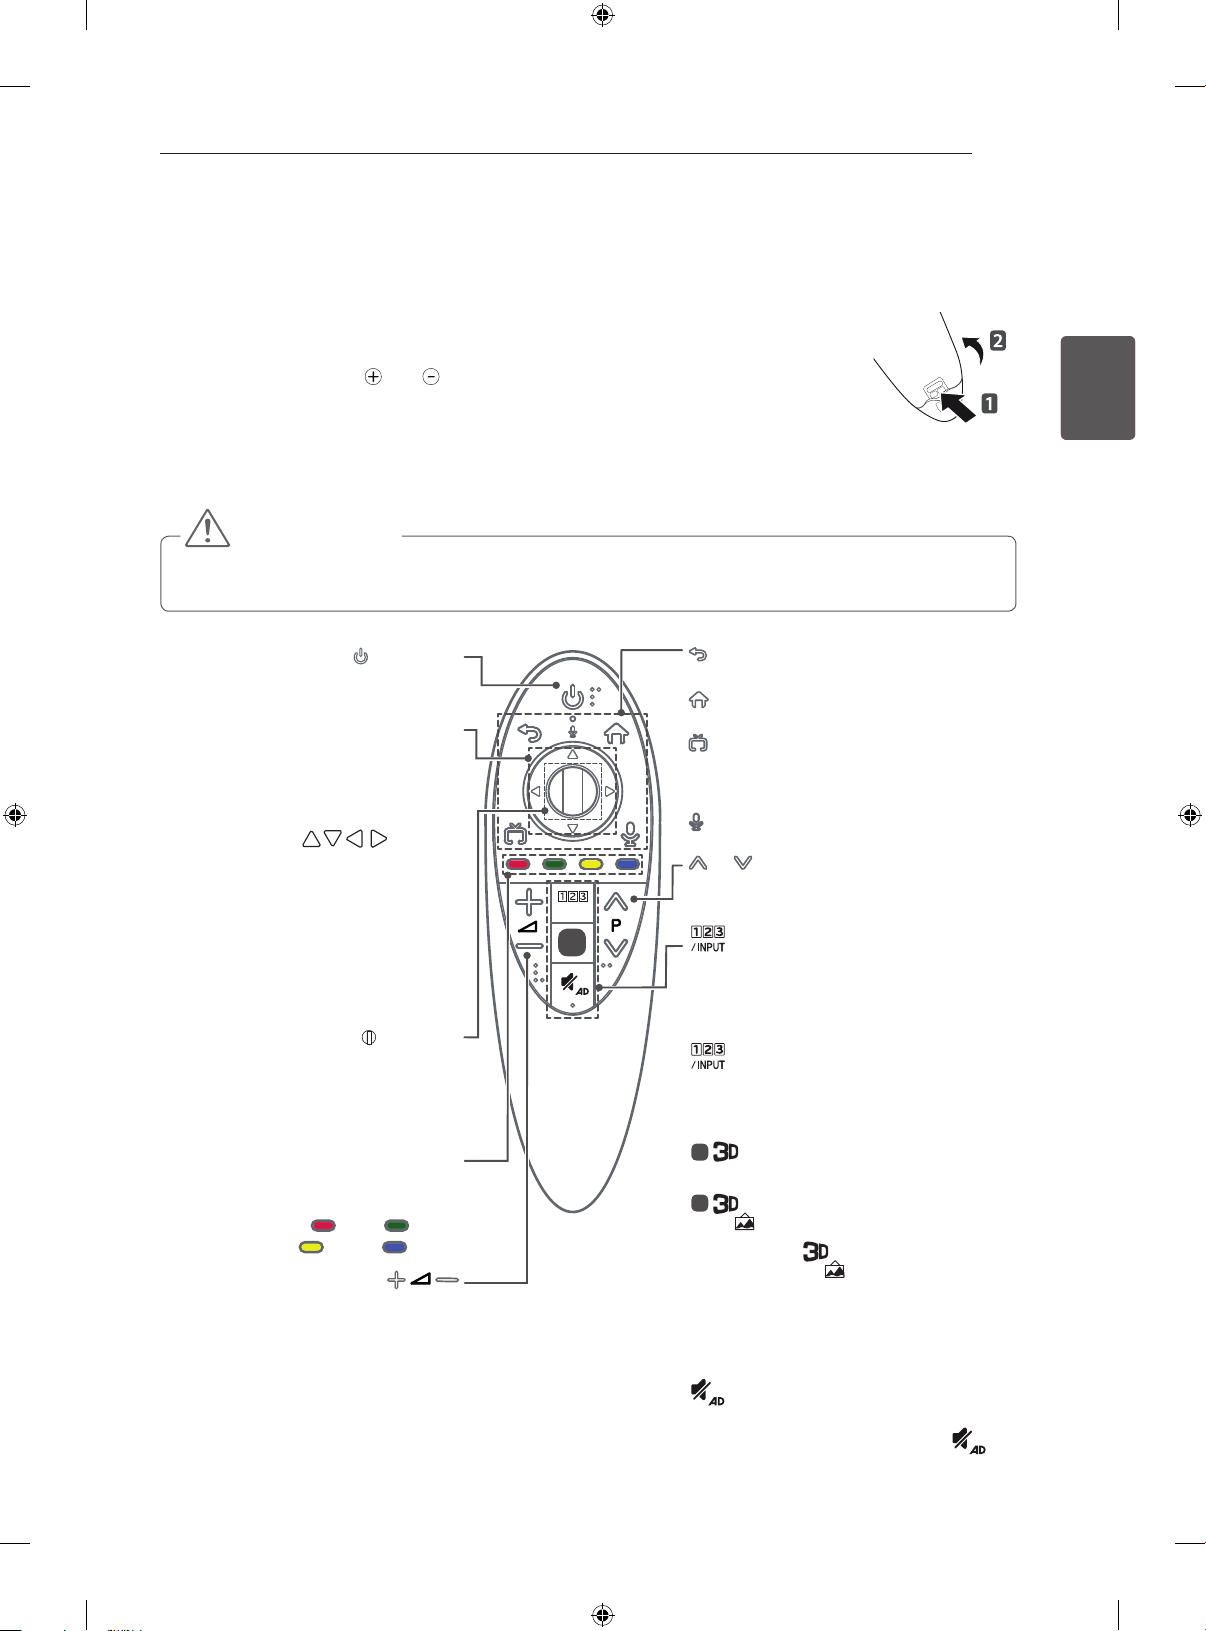
TASTENFUNKTIONEN DER MAGIC-FERNBEDIENUNG
HOME
27
TASTENFUNKTIONEN DER MAGIC-FERNBEDIENUNG
Wenn die Meldung „Die Batterie der Magic-Fernbedienung ist schwach. Bitte Batterie
wechseln.“ angezeigt wird, wechseln Sie die Batterie.
Um die Batterien zu wechseln, öffnen Sie das Batteriefach, wechseln Sie die Batterien
(1,5 V, AA), legen Sie die -und -Enden entsprechend der Kennzeichnung im
Fach ein, und schließen Sie das Batteriefach. Richten Sie die Fernbedienung auf den
Fernbedienungssensor am TV-Gerät aus. Gehen Sie zum Herausnehmen der Batterien
in umgekehrter Reihenfolge vor.
VORSICHT
y Verwenden Sie niemals alte zusammen mit neuen Batterien, da dies Schäden an der Fernbedienung
hervorrufen kann.
DEUTSCH
(EIN/AUS)
Ein- oder Ausschalten des TV-Gerätes.
Navigationstasten (nach oben/nach
unten/nach links/nach rechts)
Drücken Sie die Tasten Nach oben/
Nach unten/Nach links/Nach rechts,
um im Menü zu navigieren. Wenn
Sie die Tasten drücken,
während der Zeiger verwendet
wird, verschwindet der Zeiger
vom Bildschirm, und die Magic-
Fernbedienung funktioniert wie eine
herkömmliche Fernbedienung. Um
den Zeiger erneut auf dem Bildschirm
anzuzeigen, schütteln Sie die Magic-
Fernbedienung nach links und rechts.
Rad (OK)
Drücken Sie auf die Mitte der Rad-
Taste, um ein Menü auszuwählen.
Sie können mithilfe der Radtaste das
Programm wechseln.
Farbtasten
Öffnen Sonderfunktionen in man-
chen Menüs.
( : Rot : Grün
: Gelb : Blau)
Regelt die Lautstärke.
/INPUT
1
(ZURÜCK)
Zurück zum vorherigen Bildschirm.
(Home)
Öffnet das Home-Menü.
(AUSGANG zu LIVE)
Wechselt zwischen Sendung
(Antenne) und verschiedenen
Eingängen.
(Spracherkennung)
P
Navigiert durch die gespeicherten Programme oder Kanäle.
Zeigt den Remote-Bildschirm an.
* Öffnet das Universalsteuerungs-Menü.
(Abhängig vom Modell)
* Durch Drücken und Halten der Taste
wird ein Menü zur Auswahl eines
externen Gerätes, das mit dem TV-Gerät
verbunden ist, angezeigt.
1
(Abhängig vom Modell)
Ansicht von 3D-Video.
1
(Abhängig vom Modell)
Halten Sie die -Taste für eine
Sekunde gedrückt, um den Dienst „eGallery“ zu nutzen, mit dem Sie berühmte
Gemälde und ikonische Fotograen
genießen können.
(STUMM)
Stellt den Ton aus.
* Durch Drücken und Halten der
-Taste, wird die Audiobeschreibung
aktiviert.
Page 100
HOME
28
TASTENFUNKTIONEN DER MAGIC-FERNBEDIENUNG
DEUTSCH
Registrieren der MagicFernbedienung
So wird die Magic-Fernbedienung registriert
Spracherkennung
Um die Spracherkennungs-Funktion zu nutzen,
ist eine Netzwerkverbindung erforderlich.
1. Drücken Sie die Taste „Spracherkennung“.
2. Beginnen Sie zu sprechen, wenn das Fenster
zur Spracherkennung auf der linken Seite des
Fernsehbildschirms erscheint.
• Wenn Sie zu schnell oder zu langsam
sprechen, kann die Spracherkennung
fehlschlagen.
• Halten Sie die Magic-Fernbedienung maxi-
mal 10 cm von Ihrem Gesicht entfernt.
• Die Erkennungsrate kann je nach den
Merkmalen des Anwenders (Stimme,
Aussprache, Betonung, Sprechgeschwindigkeit) und der Umgebung (Geräusche und
Lautstärke des Fernsehers) variieren.
Um die Magic-Fernbedienung
zu verwenden, koppeln Sie
(Wheel)
diese zuerst mit Ihrem TV-Gerät.
1 Legen Sie Batterien in die
Magic- Fernbedienung ein,
und schalten Sie das Fernsehgerät ein.
2 Richten Sie die Magic-
Fernbedienung auf das
Fernsehgerät, und drücken
Sie auf das Rad (OK).
* Sollte die Registrierung
der Magic- Fernbedienung
fehlgeschlagen sein, schalten
Sie das Fernsehgerät aus, und
versuchen Sie es erneut.
So wird die Magic- Fernbedienung verwendet
Bewegen Sie die Magic-
y
Fernbedienung leicht hin
und her, oder drücken Sie
die Tasten
, damit der Zeiger auf
dem Bildschirm erscheint.
(Bei manchen TV-Modellen
erscheint der Zeiger, wenn Sie
an der Rad-Taste drehen.)
Wenn der Zeiger für bestimmte
y
Zeit nicht genutzt wurde oder
die Magic-Fernbedienung auf
einer flachen Oberfläche liegt,
verschwindet der Zeiger.
Falls der Zeiger nicht richtig
y
reagiert, können Sie ihn
zurücksetzen, indem Sie ihn
an den Rand des Bildschirms
bewegen.
Bei der Magic-Fernbedienung
y
werden Batterien aufgrund
der zusätzlichen Funktionen
schneller entladen als bei einer
normalen Fernbedienung.
(Home),
So können Sie die Magic-Fernbedienung abmelden
Halten Sie zum Trennen der
(ZURÜCK)
(Home)
Verbindung zwischen der
Magic- Fernbedienung und dem
Fernsehgerät gleichzeitig
(ZURÜCK) und (Home) für
fünf Sekunden gedrückt.
* Durch Drücken und Halten von
(AUSGANG zu LIVE) können
Sie die Magic-Fernbedienung
zugleich zurücksetzen und
erneut registrieren.
 Loading...