

Page 1
Page 2

. . . . . . . . . . . . . . . . . . . . . . . . . . . . . . . . . . . . . . . . . . . . . . . . . . . . . . . . . . . . . . . . . . . . . . . . . . . . . . . . . . . . . . . . . . . . . . . . . . . . . . . . . . . . . . . . . . . . . . . . . . . . . . . . . . . . . . . . . . . . . . . . . . . . . . . . . . . . . . . . . . . . . . . . . . . . . . . . . . . . . . . . . . . . . . . . . . . . . . . .5
. . . . . . . . . . . . . . . . . . . . . . . . . . . . . . . . . . . . . . . . . . . . . . . . . . . . . . . . . . . . . . . . . . . . . . . . . . . . . . . . . . . . . . . . . . . . . . . . . . . . . . . . . . . . . . . . . . . . . . . . . . . . . . . . . . . . . . . . . . . . . . . . . . . . . . . . . . . . . . . . . . . . . . . . . . . . . . . . . . . . . . . . . . . . . . . . . . . . . . . .6
. . . . . . . . . . . . . . . . . . . . . . . . . . . . . . . . . . . . . . . . . . . . . . . . . . . . . . . . . . . . . . . . . . . . . . . . . . . . . . . . . . . . . . . . . . . . . . . . . . . . . . . . . . . . . . . . . . . . . . . . . . . . . . . . . . . . . . . . . . . . . . . . . . . . . . . . . . . . . . . . . . . . . . . . . . . . . . . . . . . . . . . . . . . . . . . . . . . . . . . .7
. . . . . . . . . . . . . . . . . . . . . . . . . . . . . . . . . . . . . . . . . . . . . . . . . . . . . . . . . . . . . . . . . . . . . . . . . . . . . . . . . . . . . . . . . . . . . . . . . . . . . . . . . . . . . . . . . . . . . . . . . . . . . . . . . . . . . . . . . . . . . . . . . . . . . . . . . . . . . . . . . . . . . . . . . . . . . . . . . . . . . . . . . . . . . . . . . . . . . . . .7
. . . . . . . . . . . . . . . . . . . . . . . . . . . . . . . . . . . . . . . . . . . . . . . . . . . . . . . . . . . . . . . . . . . . . . . . . . . . . . . . . . . . . . . . . . . . . . . . . . . . . . . . . . . . . . . . . . . . . . . . . . . . . . . . . . . . . . . . . . . . . . . . . . . . . . . . . . . . . . . . . . . . . . . . . . . . . . . . . . . . . . . . . . . . . . . . . . . . . . . .10
. . . . . . . . . . . . . . . . . . . . . . . . . . . . . . . . . . . . . . . . . . . . . . . . . . . . . . . . . . . . . . . . . . . . . . . . . . . . . . . . . . . . . . . . . . . . . . . . . . . . . . . . . . . . . . . . . . . . . . . . . . . . . . . . . . . . . . . . . . . . . . . . . . . . . . . . . . . . . . . . . . . . . . . . . . . . . . . . . . . . . . . . . . . . . . . . . . . . . . . .11
. . . . . . . . . . . . . . . . . . . . . . . . . . . . . . . . . . . . . . . . . . . . . . . . . . . . . . . . . . . . . . . . . . . . . . . . . . . . . . . . . . . . . . . . . . . . . . . . . . . . . . . . . . . . . . . . . . . . . . . . . . . . . . . . . . . . . . . . . . . . . . . . . . . . . . . . . . . . . . . . . . . . . . . . . . . . . . . . . . . . . . . . . . . . . . . . . . . . . . . .11
. . . . . . . . . . . . . . . . . . . . . . . . . . . . . . . . . . . . . . . . . . . . . . . . . . . . . . . . . . . . . . . . . . . . . . . . . . . . . . . . . . . . . . . . . . . . . . . . . . . . . . . . . . . . . . . . . . . . . . . . . . . . . . . . . . . . . . . . . . . . . . . . . . . . . . . . . . . . . . . . . . . . . . . . . . . . . . . . . . . . . . . . . . . . . . . . . . . . . . . .12
. . . . . . . . . . . . . . . . . . . . . . . . . . . . . . . . . . . . . . . . . . . . . . . . . . . . . . . . . . . . . . . . . . . . . . . . . . . . . . . . . . . . . . . . . . . . . . . . . . . . . . . . . . . . . . . . . . . . . . . . . . . . . . . . . . . . . . . . . . . . . . . . . . . . . . . . . . . . . . . . . . . . . . . . . . . . . . . . . . . . . . . . . . . . . . . . . . . . . . . .16
. . . . . . . . . . . . . . . . . . . . . . . . . . . . . . . . . . . . . . . . . . . . . . . . . . . . . . . . . . . . . . . . . . . . . . . . . . . . . . . . . . . . . . . . . . . . . . . . . . . . . . . . . . . . . . . . . . . . . . . . . . . . . . . . . . . . . . . . . . . . . . . . . . . . . . . . . . . . . . . . . . . . . . . . . . . . . . . . . . . . . . . . . . . . . . . . . . . . . . . .18
. . . . . . . . . . . . . . . . . . . . . . . . . . . . . . . . . . . . . . . . . . . . . . . . . . . . . . . . . . . . . . . . . . . . . . . . . . . . . . . . . . . . . . . . . . . . . . . . . . . . . . . . . . . . . . . . . . . . . . . . . . . . . . . . . . . . . . . . . . . . . . . . . . . . . . . . . . . . . . . . . . . . . . . . . . . . . . . . . . . . . . . . . . . . . . . . . . . . . . . .20
. . . . . . . . . . . . . . . . . . . . . . . . . . . . . . . . . . . . . . . . . . . . . . . . . . . . . . . . . . . . . . . . . . . . . . . . . . . . . . . . . . . . . . . . . . . . . . . . . . . . . . . . . . . . . . . . . . . . . . . . . . . . . . . . . . . . . . . . . . . . . . . . . . . . . . . . . . . . . . . . . . . . . . . . . . . . . . . . . . . . . . . . . . . . . . . . . . . . . . . .20
. . . . . . . . . . . . . . . . . . . . . . . . . . . . . . . . . . . . . . . . . . . . . . . . . . . . . . . . . . . . . . . . . . . . . . . . . . . . . . . . . . . . . . . . . . . . . . . . . . . . . . . . . . . . . . . . . . . . . . . . . . . . . . . . . . . . . . . . . . . . . . . . . . . . . . . . . . . . . . . . . . . . . . . . . . . . . . . . . . . . . . . . . . . . . . . . . . . . . . . .21
. . . . . . . . . . . . . . . . . . . . . . . . . . . . . . . . . . . . . . . . . . . . . . . . . . . . . . . . . . . . . . . . . . . . . . . . . . . . . . . . . . . . . . . . . . . . . . . . . . . . . . . . . . . . . . . . . . . . . . . . . . . . . . . . . . . . . . . . . . . . . . . . . . . . . . . . . . . . . . . . . . . . . . . . . . . . . . . . . . . . . . . . . . . . . . . . . . . . . . . .22
. . . . . . . . . . . . . . . . . . . . . . . . . . . . . . . . . . . . . . . . . . . . . . . . . . . . . . . . . . . . . . . . . . . . . . . . . . . . . . . . . . . . . . . . . . . . . . . . . . . . . . . . . . . . . . . . . . . . . . . . . . . . . . . . . . . . . . . . . . . . . . . . . . . . . . . . . . . . . . . . . . . . . . . . . . . . . . . . . . . . . . . . . . . . . . . . . . . . . . . .23
. . . . . . . . . . . . . . . . . . . . . . . . . . . . . . . . . . . . . . . . . . . . . . . . . . . . . . . . . . . . . . . . . . . . . . . . . . . . . . . . . . . . . . . . . . . . . . . . . . . . . . . . . . . . . . . . . . . . . . . . . . . . . . . . . . . . . . . . . . . . . . . . . . . . . . . . . . . . . . . . . . . . . . . . . . . . . . . . . . . . . . . . . . . . . . . . . . . . . . . .24
. . . . . . . . . . . . . . . . . . . . . . . . . . . . . . . . . . . . . . . . . . . . . . . . . . . . . . . . . . . . . . . . . . . . . . . . . . . . . . . . . . . . . . . . . . . . . . . . . . . . . . . . . . . . . . . . . . . . . . . . . . . . . . . . . . . . . . . . . . . . . . . . . . . . . . . . . . . . . . . . . . . . . . . . . . . . . . . . . . . . . . . . . . . . . . . . . . . . . . . .25
. . . . . . . . . . . . . . . . . . . . . . . . . . . . . . . . . . . . . . . . . . . . . . . . . . . . . . . . . . . . . . . . . . . . . . . . . . . . . . . . . . . . . . . . . . . . . . . . . . . . . . . . . . . . . . . . . . . . . . . . . . . . . . . . . . . . . . . . . . . . . . . . . . . . . . . . . . . . . . . . . . . . . . . . . . . . . . . . . . . . . . . . . . . . . . . . . . . . . . . .26
. . . . . . . . . . . . . . . . . . . . . . . . . . . . . . . . . . . . . . . . . . . . . . . . . . . . . . . . . . . . . . . . . . . . . . . . . . . . . . . . . . . . . . . . . . . . . . . . . . . . . . . . . . . . . . . . . . . . . . . . . . . . . . . . . . . . . . . . . . . . . . . . . . . . . . . . . . . . . . . . . . . . . . . . . . . . . . . . . . . . . . . . . . . . . . . . . . . . . . . .27
. . . . . . . . . . . . . . . . . . . . . . . . . . . . . . . . . . . . . . . . . . . . . . . . . . . . . . . . . . . . . . . . . . . . . . . . . . . . . . . . . . . . . . . . . . . . . . . . . . . . . . . . . . . . . . . . . . . . . . . . . . . . . . . . . . . . . . . . . . . . . . . . . . . . . . . . . . . . . . . . . . . . . . . . . . . . . . . . . . . . . . . . . . . . . . . . . . . . . . . .28
. . . . . . . . . . . . . . . . . . . . . . . . . . . . . . . . . . . . . . . . . . . . . . . . . . . . . . . . . . . . . . . . . . . . . . . . . . . . . . . . . . . . . . . . . . . . . . . . . . . . . . . . . . . . . . . . . . . . . . . . . . . . . . . . . . . . . . . . . . . . . . . . . . . . . . . . . . . . . . . . . . . . . . . . . . . . . . . . . . . . . . . . . . . . . . . . . . . . . . . .29
. . . . . . . . . . . . . . . . . . . . . . . . . . . . . . . . . . . . . . . . . . . . . . . . . . . . . . . . . . . . . . . . . . . . . . . . . . . . . . . . . . . . . . . . . . . . . . . . . . . . . . . . . . . . . . . . . . . . . . . . . . . . . . . . . . . . . . . . . . . . . . . . . . . . . . . . . . . . . . . . . . . . . . . . . . . . . . . . . . . . . . . . . . . . . . . . . . . . . . . .30
. . . . . . . . . . . . . . . . . . . . . . . . . . . . . . . . . . . . . . . . . . . . . . . . . . . . . . . . . . . . . . . . . . . . . . . . . . . . . . . . . . . . . . . . . . . . . . . . . . . . . . . . . . . . . . . . . . . . . . . . . . . . . . . . . . . . . . . . . . . . . . . . . . . . . . . . . . . . . . . . . . . . . . . . . . . . . . . . . . . . . . . . . . . . . . . . . . . . . . . .32
. . . . . . . . . . . . . . . . . . . . . . . . . . . . . . . . . . . . . . . . . . . . . . . . . . . . . . . . . . . . . . . . . . . . . . . . . . . . . . . . . . . . . . . . . . . . . . . . . . . . . . . . . . . . . . . . . . . . . . . . . . . . . . . . . . . . . . . . . . . . . . . . . . . . . . . . . . . . . . . . . . . . . . . . . . . . . . . . . . . . . . . . . . . . . . . . . . . . . . . .34
. . . . . . . . . . . . . . . . . . . . . . . . . . . . . . . . . . . . . . . . . . . . . . . . . . . . . . . . . . . . . . . . . . . . . . . . . . . . . . . . . . . . . . . . . . . . . . . . . . . . . . . . . . . . . . . . . . . . . . . . . . . . . . . . . . . . . . . . . . . . . . . . . . . . . . . . . . . . . . . . . . . . . . . . . . . . . . . . . . . . . . . . . . . . . . . . . . . . . . . .35
. . . . . . . . . . . . . . . . . . . . . . . . . . . . . . . . . . . . . . . . . . . . . . . . . . . . . . . . . . . . . . . . . . . . . . . . . . . . . . . . . . . . . . . . . . . . . . . . . . . . . . . . . . . . . . . . . . . . . . . . . . . . . . . . . . . . . . . . . . . . . . . . . . . . . . . . . . . . . . . . . . . . . . . . . . . . . . . . . . . . . . . . . . . . . . . . . . . . . . . .38
. . . . . . . . . . . . . . . . . . . . . . . . . . . . . . . . . . . . . . . . . . . . . . . . . . . . . . . . . . . . . . . . . . . . . . . . . . . . . . . . . . . . . . . . . . . . . . . . . . . . . . . . . . . . . . . . . . . . . . . . . . . . . . . . . . . . . . . . . . . . . . . . . . . . . . . . . . . . . . . . . . . . . . . . . . . . . . . . . . . . . . . . . . . . . . . . . . . . . . . .39
. . . . . . . . . . . . . . . . . . . . . . . . . . . . . . . . . . . . . . . . . . . . . . . . . . . . . . . . . . . . . . . . . . . . . . . . . . . . . . . . . . . . . . . . . . . . . . . . . . . . . . . . . . . . . . . . . . . . . . . . . . . . . . . . . . . . . . . . . . . . . . . . . . . . . . . . . . . . . . . . . . . . . . . . . . . . . . . . . . . . . . . . . . . . . . . . . . . . . . . .40
. . . . . . . . . . . . . . . . . . . . . . . . . . . . . . . . . . . . . . . . . . . . . . . . . . . . . . . . . . . . . . . . . . . . . . . . . . . . . . . . . . . . . . . . . . . . . . . . . . . . . . . . . . . . . . . . . . . . . . . . . . . . . . . . . . . . . . . . . . . . . . . . . . . . . . . . . . . . . . . . . . . . . . . . . . . . . . . . . . . . . . . . . . . . . . . . . . . . . . . .42
. . . . . . . . . . . . . . . . . . . . . . . . . . . . . . . . . . . . . . . . . . . . . . . . . . . . . . . . . . . . . . . . . . . . . . . . . . . . . . . . . . . . . . . . . . . . . . . . . . . . . . . . . . . . . . . . . . . . . . . . . . . . . . . . . . . . . . . . . . . . . . . . . . . . . . . . . . . . . . . . . . . . . . . . . . . . . . . . . . . . . . . . . . . . . . . . . . . . . . . .43
. . . . . . . . . . . . . . . . . . . . . . . . . . . . . . . . . . . . . . . . . . . . . . . . . . . . . . . . . . . . . . . . . . . . . . . . . . . . . . . . . . . . . . . . . . . . . . . . . . . . . . . . . . . . . . . . . . . . . . . . . . . . . . . . . . . . . . . . . . . . . . . . . . . . . . . . . . . . . . . . . . . . . . . . . . . . . . . . . . . . . . . . . . . . . . . . . . . . . . . .44
Contents
Getting Started with LG webOS TV
Home Tutorial
Manage Home
Live TV Preparation
Connecting to the Network
Managing Your LG Account
About User Guide
How to Operate TV
Pairing the Magic Remote
Using the Magic Remote
Using TV Functions through Speech
Speech to Text
Control your TV with your voice with Google Assistant
Access Voice Recognition Using Amazon Alexa
To View More Features of the Remote Control
Setting Universal Control
Launching Apps through Quick Access
Connecting to SIMPLINK (HDMI-CEC)
Shortcuts to Accessibility
Connecting an Input Device to USB
Enjoy Live TV
Making the Most of Live Menu
Viewing Guide
Checking Programme Info
Who.Where.What?
Live Playback
Recording
Using TV Scheduler
Playing Recorded TV Programs
Watching Internet Channel (LG Channels)
TELETEXT
HbbTV
CI Information
Apps and Content
Installing Apps
2
Page 3

. . . . . . . . . . . . . . . . . . . . . . . . . . . . . . . . . . . . . . . . . . . . . . . . . . . . . . . . . . . . . . . . . . . . . . . . . . . . . . . . . . . . . . . . . . . . . . . . . . . . . . . . . . . . . . . . . . . . . . . . . . . . . . . . . . . . . . . . . . . . . . . . . . . . . . . . . . . . . . . . . . . . . . . . . . . . . . . . . . . . . . . . . . . . . . . . . . . . . . . .45
. . . . . . . . . . . . . . . . . . . . . . . . . . . . . . . . . . . . . . . . . . . . . . . . . . . . . . . . . . . . . . . . . . . . . . . . . . . . . . . . . . . . . . . . . . . . . . . . . . . . . . . . . . . . . . . . . . . . . . . . . . . . . . . . . . . . . . . . . . . . . . . . . . . . . . . . . . . . . . . . . . . . . . . . . . . . . . . . . . . . . . . . . . . . . . . . . . . . . . . .46
. . . . . . . . . . . . . . . . . . . . . . . . . . . . . . . . . . . . . . . . . . . . . . . . . . . . . . . . . . . . . . . . . . . . . . . . . . . . . . . . . . . . . . . . . . . . . . . . . . . . . . . . . . . . . . . . . . . . . . . . . . . . . . . . . . . . . . . . . . . . . . . . . . . . . . . . . . . . . . . . . . . . . . . . . . . . . . . . . . . . . . . . . . . . . . . . . . . . . . . .47
. . . . . . . . . . . . . . . . . . . . . . . . . . . . . . . . . . . . . . . . . . . . . . . . . . . . . . . . . . . . . . . . . . . . . . . . . . . . . . . . . . . . . . . . . . . . . . . . . . . . . . . . . . . . . . . . . . . . . . . . . . . . . . . . . . . . . . . . . . . . . . . . . . . . . . . . . . . . . . . . . . . . . . . . . . . . . . . . . . . . . . . . . . . . . . . . . . . . . . . .49
. . . . . . . . . . . . . . . . . . . . . . . . . . . . . . . . . . . . . . . . . . . . . . . . . . . . . . . . . . . . . . . . . . . . . . . . . . . . . . . . . . . . . . . . . . . . . . . . . . . . . . . . . . . . . . . . . . . . . . . . . . . . . . . . . . . . . . . . . . . . . . . . . . . . . . . . . . . . . . . . . . . . . . . . . . . . . . . . . . . . . . . . . . . . . . . . . . . . . . . .50
. . . . . . . . . . . . . . . . . . . . . . . . . . . . . . . . . . . . . . . . . . . . . . . . . . . . . . . . . . . . . . . . . . . . . . . . . . . . . . . . . . . . . . . . . . . . . . . . . . . . . . . . . . . . . . . . . . . . . . . . . . . . . . . . . . . . . . . . . . . . . . . . . . . . . . . . . . . . . . . . . . . . . . . . . . . . . . . . . . . . . . . . . . . . . . . . . . . . . . . .52
. . . . . . . . . . . . . . . . . . . . . . . . . . . . . . . . . . . . . . . . . . . . . . . . . . . . . . . . . . . . . . . . . . . . . . . . . . . . . . . . . . . . . . . . . . . . . . . . . . . . . . . . . . . . . . . . . . . . . . . . . . . . . . . . . . . . . . . . . . . . . . . . . . . . . . . . . . . . . . . . . . . . . . . . . . . . . . . . . . . . . . . . . . . . . . . . . . . . . . . .53
. . . . . . . . . . . . . . . . . . . . . . . . . . . . . . . . . . . . . . . . . . . . . . . . . . . . . . . . . . . . . . . . . . . . . . . . . . . . . . . . . . . . . . . . . . . . . . . . . . . . . . . . . . . . . . . . . . . . . . . . . . . . . . . . . . . . . . . . . . . . . . . . . . . . . . . . . . . . . . . . . . . . . . . . . . . . . . . . . . . . . . . . . . . . . . . . . . . . . . . .54
. . . . . . . . . . . . . . . . . . . . . . . . . . . . . . . . . . . . . . . . . . . . . . . . . . . . . . . . . . . . . . . . . . . . . . . . . . . . . . . . . . . . . . . . . . . . . . . . . . . . . . . . . . . . . . . . . . . . . . . . . . . . . . . . . . . . . . . . . . . . . . . . . . . . . . . . . . . . . . . . . . . . . . . . . . . . . . . . . . . . . . . . . . . . . . . . . . . . . . . .55
. . . . . . . . . . . . . . . . . . . . . . . . . . . . . . . . . . . . . . . . . . . . . . . . . . . . . . . . . . . . . . . . . . . . . . . . . . . . . . . . . . . . . . . . . . . . . . . . . . . . . . . . . . . . . . . . . . . . . . . . . . . . . . . . . . . . . . . . . . . . . . . . . . . . . . . . . . . . . . . . . . . . . . . . . . . . . . . . . . . . . . . . . . . . . . . . . . . . . . . .56
. . . . . . . . . . . . . . . . . . . . . . . . . . . . . . . . . . . . . . . . . . . . . . . . . . . . . . . . . . . . . . . . . . . . . . . . . . . . . . . . . . . . . . . . . . . . . . . . . . . . . . . . . . . . . . . . . . . . . . . . . . . . . . . . . . . . . . . . . . . . . . . . . . . . . . . . . . . . . . . . . . . . . . . . . . . . . . . . . . . . . . . . . . . . . . . . . . . . . . . .57
. . . . . . . . . . . . . . . . . . . . . . . . . . . . . . . . . . . . . . . . . . . . . . . . . . . . . . . . . . . . . . . . . . . . . . . . . . . . . . . . . . . . . . . . . . . . . . . . . . . . . . . . . . . . . . . . . . . . . . . . . . . . . . . . . . . . . . . . . . . . . . . . . . . . . . . . . . . . . . . . . . . . . . . . . . . . . . . . . . . . . . . . . . . . . . . . . . . . . . . .58
. . . . . . . . . . . . . . . . . . . . . . . . . . . . . . . . . . . . . . . . . . . . . . . . . . . . . . . . . . . . . . . . . . . . . . . . . . . . . . . . . . . . . . . . . . . . . . . . . . . . . . . . . . . . . . . . . . . . . . . . . . . . . . . . . . . . . . . . . . . . . . . . . . . . . . . . . . . . . . . . . . . . . . . . . . . . . . . . . . . . . . . . . . . . . . . . . . . . . . . .59
. . . . . . . . . . . . . . . . . . . . . . . . . . . . . . . . . . . . . . . . . . . . . . . . . . . . . . . . . . . . . . . . . . . . . . . . . . . . . . . . . . . . . . . . . . . . . . . . . . . . . . . . . . . . . . . . . . . . . . . . . . . . . . . . . . . . . . . . . . . . . . . . . . . . . . . . . . . . . . . . . . . . . . . . . . . . . . . . . . . . . . . . . . . . . . . . . . . . . . . .60
. . . . . . . . . . . . . . . . . . . . . . . . . . . . . . . . . . . . . . . . . . . . . . . . . . . . . . . . . . . . . . . . . . . . . . . . . . . . . . . . . . . . . . . . . . . . . . . . . . . . . . . . . . . . . . . . . . . . . . . . . . . . . . . . . . . . . . . . . . . . . . . . . . . . . . . . . . . . . . . . . . . . . . . . . . . . . . . . . . . . . . . . . . . . . . . . . . . . . . . .61
. . . . . . . . . . . . . . . . . . . . . . . . . . . . . . . . . . . . . . . . . . . . . . . . . . . . . . . . . . . . . . . . . . . . . . . . . . . . . . . . . . . . . . . . . . . . . . . . . . . . . . . . . . . . . . . . . . . . . . . . . . . . . . . . . . . . . . . . . . . . . . . . . . . . . . . . . . . . . . . . . . . . . . . . . . . . . . . . . . . . . . . . . . . . . . . . . . . . . . . .63
. . . . . . . . . . . . . . . . . . . . . . . . . . . . . . . . . . . . . . . . . . . . . . . . . . . . . . . . . . . . . . . . . . . . . . . . . . . . . . . . . . . . . . . . . . . . . . . . . . . . . . . . . . . . . . . . . . . . . . . . . . . . . . . . . . . . . . . . . . . . . . . . . . . . . . . . . . . . . . . . . . . . . . . . . . . . . . . . . . . . . . . . . . . . . . . . . . . . . . . .64
. . . . . . . . . . . . . . . . . . . . . . . . . . . . . . . . . . . . . . . . . . . . . . . . . . . . . . . . . . . . . . . . . . . . . . . . . . . . . . . . . . . . . . . . . . . . . . . . . . . . . . . . . . . . . . . . . . . . . . . . . . . . . . . . . . . . . . . . . . . . . . . . . . . . . . . . . . . . . . . . . . . . . . . . . . . . . . . . . . . . . . . . . . . . . . . . . . . . . . . .64
. . . . . . . . . . . . . . . . . . . . . . . . . . . . . . . . . . . . . . . . . . . . . . . . . . . . . . . . . . . . . . . . . . . . . . . . . . . . . . . . . . . . . . . . . . . . . . . . . . . . . . . . . . . . . . . . . . . . . . . . . . . . . . . . . . . . . . . . . . . . . . . . . . . . . . . . . . . . . . . . . . . . . . . . . . . . . . . . . . . . . . . . . . . . . . . . . . . . . . . .68
. . . . . . . . . . . . . . . . . . . . . . . . . . . . . . . . . . . . . . . . . . . . . . . . . . . . . . . . . . . . . . . . . . . . . . . . . . . . . . . . . . . . . . . . . . . . . . . . . . . . . . . . . . . . . . . . . . . . . . . . . . . . . . . . . . . . . . . . . . . . . . . . . . . . . . . . . . . . . . . . . . . . . . . . . . . . . . . . . . . . . . . . . . . . . . . . . . . . . . . .69
. . . . . . . . . . . . . . . . . . . . . . . . . . . . . . . . . . . . . . . . . . . . . . . . . . . . . . . . . . . . . . . . . . . . . . . . . . . . . . . . . . . . . . . . . . . . . . . . . . . . . . . . . . . . . . . . . . . . . . . . . . . . . . . . . . . . . . . . . . . . . . . . . . . . . . . . . . . . . . . . . . . . . . . . . . . . . . . . . . . . . . . . . . . . . . . . . . . . . . . .69
. . . . . . . . . . . . . . . . . . . . . . . . . . . . . . . . . . . . . . . . . . . . . . . . . . . . . . . . . . . . . . . . . . . . . . . . . . . . . . . . . . . . . . . . . . . . . . . . . . . . . . . . . . . . . . . . . . . . . . . . . . . . . . . . . . . . . . . . . . . . . . . . . . . . . . . . . . . . . . . . . . . . . . . . . . . . . . . . . . . . . . . . . . . . . . . . . . . . . . . .70
. . . . . . . . . . . . . . . . . . . . . . . . . . . . . . . . . . . . . . . . . . . . . . . . . . . . . . . . . . . . . . . . . . . . . . . . . . . . . . . . . . . . . . . . . . . . . . . . . . . . . . . . . . . . . . . . . . . . . . . . . . . . . . . . . . . . . . . . . . . . . . . . . . . . . . . . . . . . . . . . . . . . . . . . . . . . . . . . . . . . . . . . . . . . . . . . . . . . . . . .72
. . . . . . . . . . . . . . . . . . . . . . . . . . . . . . . . . . . . . . . . . . . . . . . . . . . . . . . . . . . . . . . . . . . . . . . . . . . . . . . . . . . . . . . . . . . . . . . . . . . . . . . . . . . . . . . . . . . . . . . . . . . . . . . . . . . . . . . . . . . . . . . . . . . . . . . . . . . . . . . . . . . . . . . . . . . . . . . . . . . . . . . . . . . . . . . . . . . . . . . .82
. . . . . . . . . . . . . . . . . . . . . . . . . . . . . . . . . . . . . . . . . . . . . . . . . . . . . . . . . . . . . . . . . . . . . . . . . . . . . . . . . . . . . . . . . . . . . . . . . . . . . . . . . . . . . . . . . . . . . . . . . . . . . . . . . . . . . . . . . . . . . . . . . . . . . . . . . . . . . . . . . . . . . . . . . . . . . . . . . . . . . . . . . . . . . . . . . . . . . . . .90
. . . . . . . . . . . . . . . . . . . . . . . . . . . . . . . . . . . . . . . . . . . . . . . . . . . . . . . . . . . . . . . . . . . . . . . . . . . . . . . . . . . . . . . . . . . . . . . . . . . . . . . . . . . . . . . . . . . . . . . . . . . . . . . . . . . . . . . . . . . . . . . . . . . . . . . . . . . . . . . . . . . . . . . . . . . . . . . . . . . . . . . . . . . . . . . . . . . . . . . .93
. . . . . . . . . . . . . . . . . . . . . . . . . . . . . . . . . . . . . . . . . . . . . . . . . . . . . . . . . . . . . . . . . . . . . . . . . . . . . . . . . . . . . . . . . . . . . . . . . . . . . . . . . . . . . . . . . . . . . . . . . . . . . . . . . . . . . . . . . . . . . . . . . . . . . . . . . . . . . . . . . . . . . . . . . . . . . . . . . . . . . . . . . . . . . . . . . . . . . . . .96
. . . . . . . . . . . . . . . . . . . . . . . . . . . . . . . . . . . . . . . . . . . . . . . . . . . . . . . . . . . . . . . . . . . . . . . . . . . . . . . . . . . . . . . . . . . . . . . . . . . . . . . . . . . . . . . . . . . . . . . . . . . . . . . . . . . . . . . . . . . . . . . . . . . . . . . . . . . . . . . . . . . . . . . . . . . . . . . . . . . . . . . . . . . . . . . . . . . . . . . .97
. . . . . . . . . . . . . . . . . . . . . . . . . . . . . . . . . . . . . . . . . . . . . . . . . . . . . . . . . . . . . . . . . . . . . . . . . . . . . . . . . . . . . . . . . . . . . . . . . . . . . . . . . . . . . . . . . . . . . . . . . . . . . . . . . . . . . . . . . . . . . . . . . . . . . . . . . . . . . . . . . . . . . . . . . . . . . . . . . . . . . . . . . . . . . . . . . . . . . . . .104
. . . . . . . . . . . . . . . . . . . . . . . . . . . . . . . . . . . . . . . . . . . . . . . . . . . . . . . . . . . . . . . . . . . . . . . . . . . . . . . . . . . . . . . . . . . . . . . . . . . . . . . . . . . . . . . . . . . . . . . . . . . . . . . . . . . . . . . . . . . . . . . . . . . . . . . . . . . . . . . . . . . . . . . . . . . . . . . . . . . . . . . . . . . . . . . . . . . . . . . .105
. . . . . . . . . . . . . . . . . . . . . . . . . . . . . . . . . . . . . . . . . . . . . . . . . . . . . . . . . . . . . . . . . . . . . . . . . . . . . . . . . . . . . . . . . . . . . . . . . . . . . . . . . . . . . . . . . . . . . . . . . . . . . . . . . . . . . . . . . . . . . . . . . . . . . . . . . . . . . . . . . . . . . . . . . . . . . . . . . . . . . . . . . . . . . . . . . . . . . . . .109
. . . . . . . . . . . . . . . . . . . . . . . . . . . . . . . . . . . . . . . . . . . . . . . . . . . . . . . . . . . . . . . . . . . . . . . . . . . . . . . . . . . . . . . . . . . . . . . . . . . . . . . . . . . . . . . . . . . . . . . . . . . . . . . . . . . . . . . . . . . . . . . . . . . . . . . . . . . . . . . . . . . . . . . . . . . . . . . . . . . . . . . . . . . . . . . . . . . . . . . .117
. . . . . . . . . . . . . . . . . . . . . . . . . . . . . . . . . . . . . . . . . . . . . . . . . . . . . . . . . . . . . . . . . . . . . . . . . . . . . . . . . . . . . . . . . . . . . . . . . . . . . . . . . . . . . . . . . . . . . . . . . . . . . . . . . . . . . . . . . . . . . . . . . . . . . . . . . . . . . . . . . . . . . . . . . . . . . . . . . . . . . . . . . . . . . . . . . . . . . . . .117
. . . . . . . . . . . . . . . . . . . . . . . . . . . . . . . . . . . . . . . . . . . . . . . . . . . . . . . . . . . . . . . . . . . . . . . . . . . . . . . . . . . . . . . . . . . . . . . . . . . . . . . . . . . . . . . . . . . . . . . . . . . . . . . . . . . . . . . . . . . . . . . . . . . . . . . . . . . . . . . . . . . . . . . . . . . . . . . . . . . . . . . . . . . . . . . . . . . . . . . .120
Content Recommendation
Content Search
Connecting External Devices
Using Home Dashboard
Connecting Home IoT Devices
Connecting Smart Devices
Connecting Smart Devices using NFC Tagging
Watching Smart Device Screen on TV
Playing Sound from a Smart Device through the TV’s Speakers
Connecting USB
Using the Media Player
Viewing Photos
Playing Videos
Listening to Music
PC Remote Operation
Sharing PC Content
Watching PC Screen on TV
Making the Most of Smart TV
To Use Magic Explorer
Surfing the Internet on TV
Connecting a Camera to the TV
Using Sports Alert
Live Plus
Settings
Quick Settings
Picture
Sound
AI Service
Game Optimiser
Family Settings
Programmes
Network
Devices
System
Energy Saving
Accessibility
Support
3
Page 4

. . . . . . . . . . . . . . . . . . . . . . . . . . . . . . . . . . . . . . . . . . . . . . . . . . . . . . . . . . . . . . . . . . . . . . . . . . . . . . . . . . . . . . . . . . . . . . . . . . . . . . . . . . . . . . . . . . . . . . . . . . . . . . . . . . . . . . . . . . . . . . . . . . . . . . . . . . . . . . . . . . . . . . . . . . . . . . . . . . . . . . . . . . . . . . . . . . . . . . . .122
. . . . . . . . . . . . . . . . . . . . . . . . . . . . . . . . . . . . . . . . . . . . . . . . . . . . . . . . . . . . . . . . . . . . . . . . . . . . . . . . . . . . . . . . . . . . . . . . . . . . . . . . . . . . . . . . . . . . . . . . . . . . . . . . . . . . . . . . . . . . . . . . . . . . . . . . . . . . . . . . . . . . . . . . . . . . . . . . . . . . . . . . . . . . . . . . . . . . . . . .123
. . . . . . . . . . . . . . . . . . . . . . . . . . . . . . . . . . . . . . . . . . . . . . . . . . . . . . . . . . . . . . . . . . . . . . . . . . . . . . . . . . . . . . . . . . . . . . . . . . . . . . . . . . . . . . . . . . . . . . . . . . . . . . . . . . . . . . . . . . . . . . . . . . . . . . . . . . . . . . . . . . . . . . . . . . . . . . . . . . . . . . . . . . . . . . . . . . . . . . . .124
. . . . . . . . . . . . . . . . . . . . . . . . . . . . . . . . . . . . . . . . . . . . . . . . . . . . . . . . . . . . . . . . . . . . . . . . . . . . . . . . . . . . . . . . . . . . . . . . . . . . . . . . . . . . . . . . . . . . . . . . . . . . . . . . . . . . . . . . . . . . . . . . . . . . . . . . . . . . . . . . . . . . . . . . . . . . . . . . . . . . . . . . . . . . . . . . . . . . . . . .127
. . . . . . . . . . . . . . . . . . . . . . . . . . . . . . . . . . . . . . . . . . . . . . . . . . . . . . . . . . . . . . . . . . . . . . . . . . . . . . . . . . . . . . . . . . . . . . . . . . . . . . . . . . . . . . . . . . . . . . . . . . . . . . . . . . . . . . . . . . . . . . . . . . . . . . . . . . . . . . . . . . . . . . . . . . . . . . . . . . . . . . . . . . . . . . . . . . . . . . . .129
. . . . . . . . . . . . . . . . . . . . . . . . . . . . . . . . . . . . . . . . . . . . . . . . . . . . . . . . . . . . . . . . . . . . . . . . . . . . . . . . . . . . . . . . . . . . . . . . . . . . . . . . . . . . . . . . . . . . . . . . . . . . . . . . . . . . . . . . . . . . . . . . . . . . . . . . . . . . . . . . . . . . . . . . . . . . . . . . . . . . . . . . . . . . . . . . . . . . . . . .130
. . . . . . . . . . . . . . . . . . . . . . . . . . . . . . . . . . . . . . . . . . . . . . . . . . . . . . . . . . . . . . . . . . . . . . . . . . . . . . . . . . . . . . . . . . . . . . . . . . . . . . . . . . . . . . . . . . . . . . . . . . . . . . . . . . . . . . . . . . . . . . . . . . . . . . . . . . . . . . . . . . . . . . . . . . . . . . . . . . . . . . . . . . . . . . . . . . . . . . . .131
. . . . . . . . . . . . . . . . . . . . . . . . . . . . . . . . . . . . . . . . . . . . . . . . . . . . . . . . . . . . . . . . . . . . . . . . . . . . . . . . . . . . . . . . . . . . . . . . . . . . . . . . . . . . . . . . . . . . . . . . . . . . . . . . . . . . . . . . . . . . . . . . . . . . . . . . . . . . . . . . . . . . . . . . . . . . . . . . . . . . . . . . . . . . . . . . . . . . . . . .132
. . . . . . . . . . . . . . . . . . . . . . . . . . . . . . . . . . . . . . . . . . . . . . . . . . . . . . . . . . . . . . . . . . . . . . . . . . . . . . . . . . . . . . . . . . . . . . . . . . . . . . . . . . . . . . . . . . . . . . . . . . . . . . . . . . . . . . . . . . . . . . . . . . . . . . . . . . . . . . . . . . . . . . . . . . . . . . . . . . . . . . . . . . . . . . . . . . . . . . . .134
. . . . . . . . . . . . . . . . . . . . . . . . . . . . . . . . . . . . . . . . . . . . . . . . . . . . . . . . . . . . . . . . . . . . . . . . . . . . . . . . . . . . . . . . . . . . . . . . . . . . . . . . . . . . . . . . . . . . . . . . . . . . . . . . . . . . . . . . . . . . . . . . . . . . . . . . . . . . . . . . . . . . . . . . . . . . . . . . . . . . . . . . . . . . . . . . . . . . . . . .135
. . . . . . . . . . . . . . . . . . . . . . . . . . . . . . . . . . . . . . . . . . . . . . . . . . . . . . . . . . . . . . . . . . . . . . . . . . . . . . . . . . . . . . . . . . . . . . . . . . . . . . . . . . . . . . . . . . . . . . . . . . . . . . . . . . . . . . . . . . . . . . . . . . . . . . . . . . . . . . . . . . . . . . . . . . . . . . . . . . . . . . . . . . . . . . . . . . . . . . . .136
. . . . . . . . . . . . . . . . . . . . . . . . . . . . . . . . . . . . . . . . . . . . . . . . . . . . . . . . . . . . . . . . . . . . . . . . . . . . . . . . . . . . . . . . . . . . . . . . . . . . . . . . . . . . . . . . . . . . . . . . . . . . . . . . . . . . . . . . . . . . . . . . . . . . . . . . . . . . . . . . . . . . . . . . . . . . . . . . . . . . . . . . . . . . . . . . . . . . . . . .137
. . . . . . . . . . . . . . . . . . . . . . . . . . . . . . . . . . . . . . . . . . . . . . . . . . . . . . . . . . . . . . . . . . . . . . . . . . . . . . . . . . . . . . . . . . . . . . . . . . . . . . . . . . . . . . . . . . . . . . . . . . . . . . . . . . . . . . . . . . . . . . . . . . . . . . . . . . . . . . . . . . . . . . . . . . . . . . . . . . . . . . . . . . . . . . . . . . . . . . . .138
. . . . . . . . . . . . . . . . . . . . . . . . . . . . . . . . . . . . . . . . . . . . . . . . . . . . . . . . . . . . . . . . . . . . . . . . . . . . . . . . . . . . . . . . . . . . . . . . . . . . . . . . . . . . . . . . . . . . . . . . . . . . . . . . . . . . . . . . . . . . . . . . . . . . . . . . . . . . . . . . . . . . . . . . . . . . . . . . . . . . . . . . . . . . . . . . . . . . . . . .140
. . . . . . . . . . . . . . . . . . . . . . . . . . . . . . . . . . . . . . . . . . . . . . . . . . . . . . . . . . . . . . . . . . . . . . . . . . . . . . . . . . . . . . . . . . . . . . . . . . . . . . . . . . . . . . . . . . . . . . . . . . . . . . . . . . . . . . . . . . . . . . . . . . . . . . . . . . . . . . . . . . . . . . . . . . . . . . . . . . . . . . . . . . . . . . . . . . . . . . . .142
. . . . . . . . . . . . . . . . . . . . . . . . . . . . . . . . . . . . . . . . . . . . . . . . . . . . . . . . . . . . . . . . . . . . . . . . . . . . . . . . . . . . . . . . . . . . . . . . . . . . . . . . . . . . . . . . . . . . . . . . . . . . . . . . . . . . . . . . . . . . . . . . . . . . . . . . . . . . . . . . . . . . . . . . . . . . . . . . . . . . . . . . . . . . . . . . . . . . . . . .145
. . . . . . . . . . . . . . . . . . . . . . . . . . . . . . . . . . . . . . . . . . . . . . . . . . . . . . . . . . . . . . . . . . . . . . . . . . . . . . . . . . . . . . . . . . . . . . . . . . . . . . . . . . . . . . . . . . . . . . . . . . . . . . . . . . . . . . . . . . . . . . . . . . . . . . . . . . . . . . . . . . . . . . . . . . . . . . . . . . . . . . . . . . . . . . . . . . . . . . . .148
. . . . . . . . . . . . . . . . . . . . . . . . . . . . . . . . . . . . . . . . . . . . . . . . . . . . . . . . . . . . . . . . . . . . . . . . . . . . . . . . . . . . . . . . . . . . . . . . . . . . . . . . . . . . . . . . . . . . . . . . . . . . . . . . . . . . . . . . . . . . . . . . . . . . . . . . . . . . . . . . . . . . . . . . . . . . . . . . . . . . . . . . . . . . . . . . . . . . . . . .149
Troubleshooting
Perform Check-up with the Quick Help
Troubleshooting Power/Remote Control Issues
Troubleshooting Screen Issues
Troubleshooting Sound Issues
Troubleshooting PC Connection Issues
Troubleshooting Movie Playback Issues
Troubleshooting Recording Issues
Troubleshooting Network Connection Issues
Troubleshooting LG Account Issues
Troubleshooting Contents Issues
Troubleshooting Internet Browser Issues
Being Aware of the Information
Supported Photo File Formats
Supported Video File Formats
Supported Music File Formats
Supported Resolution : HDMI-DTV
Supported Resolution : HDMI-PC
License Information
LG TV Content Policy
4
Page 5

Getting Started with LG webOS TV
Home Tutorial
Using the Home Feature of the LG webOS TV
You can open the Home screen by pressing the button on your remote control.
Roll the Wheel (OK) button on the Magic Remote to scroll through the menu. You can
open apps and content or use various features of the smart TV.
Standard remote control allows you to scroll through the menu with the / buttons.
Launch Guide.
To see the details, click the Enjoy Live TV Viewing Guide in User Guide.
Launch Search.
To see the details, click the Apps and Content Content Search in User Guide.
Launch Quick Settings.
To see the details, click the Settings Quick Settings To Use Setting Function
Quickly in User Guide.
Launch Notifications.
To see the details, click the Settings System Notifications in User Guide.
Launch LG Account.
For more information, see Getting Started with LG webOS TV Managing Your LG
Account in User Guide.
Returns to the most recently used TV or external input.
5
Page 6
App List and Top Picks For You are automatically shown on the screen each time the TV
is turned on. To change the Home screen display, change the setting of Home Auto
Launch in General System Additional Settings Home Settings.
The availability of and access to Contents and Services in LGE Device are subject to
change at any time without prior notice.
Available features vary depending on the region or service.
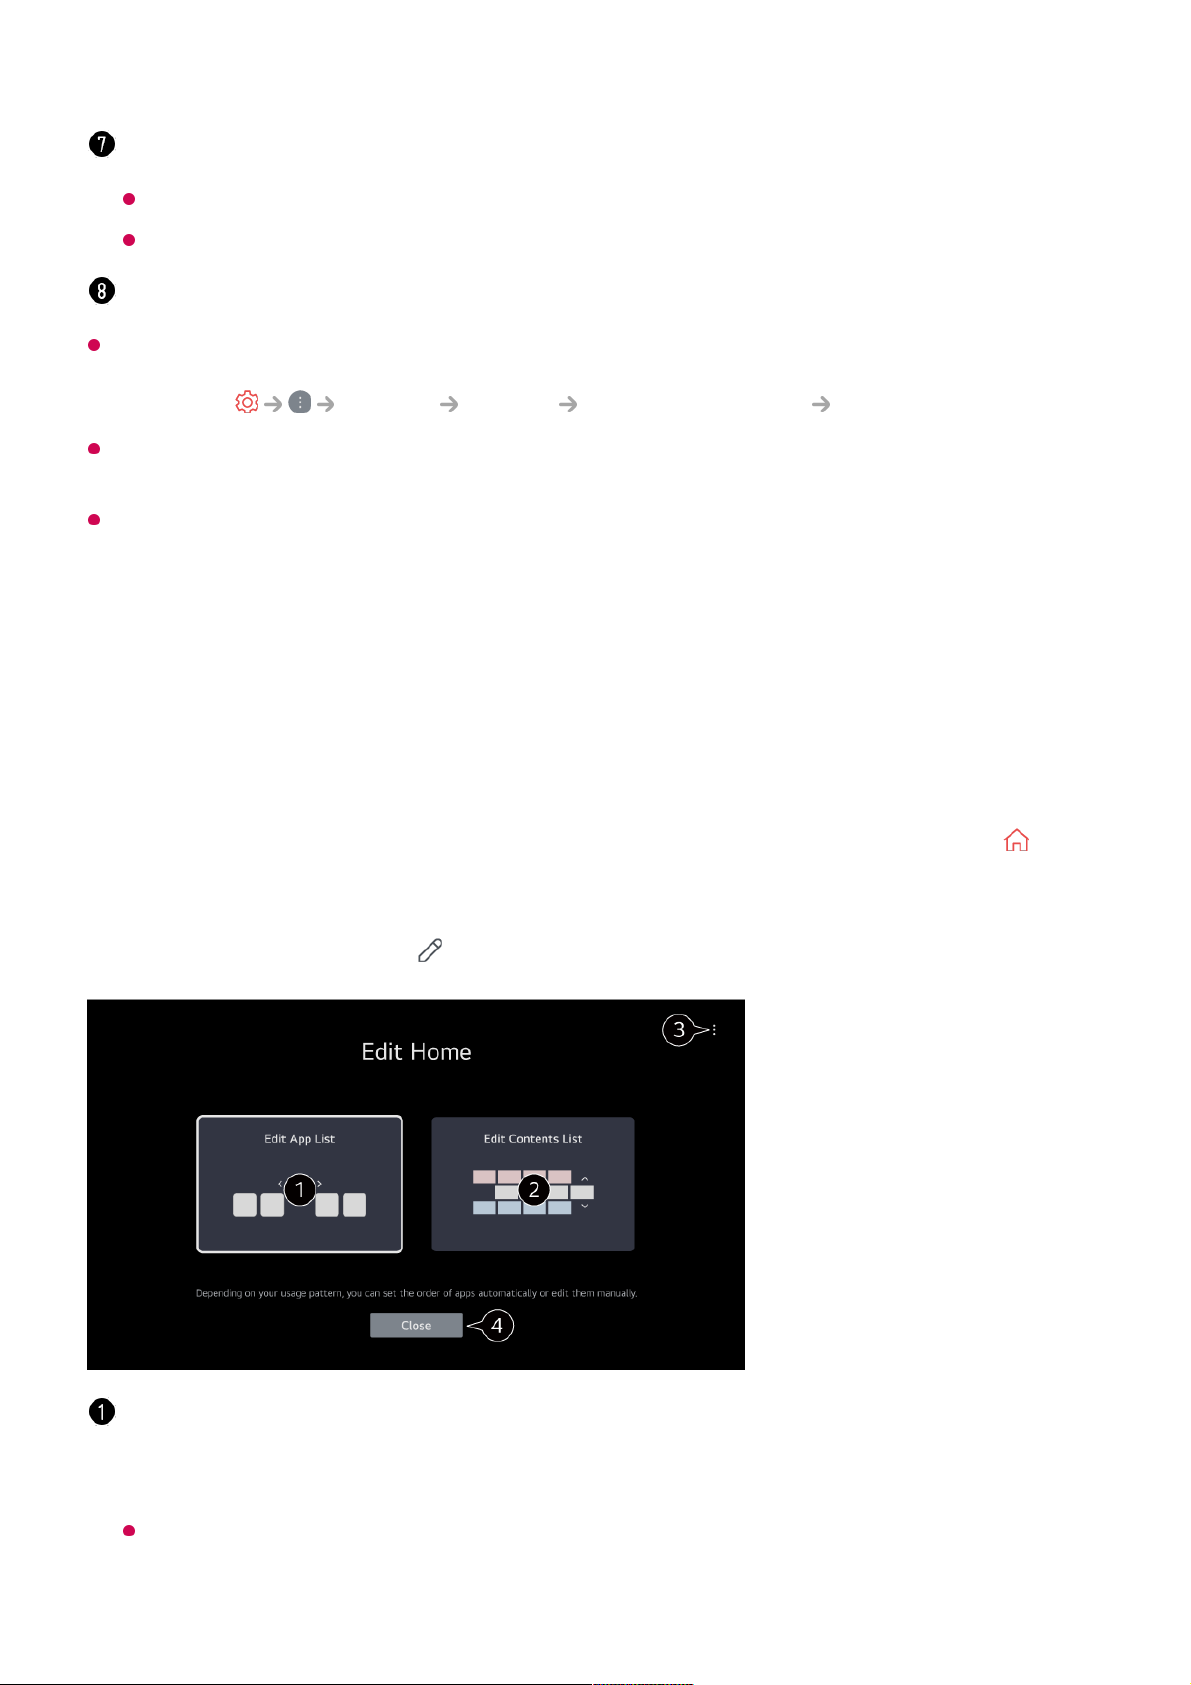
Manage Home
Manage LG webOS TV Home
You can change the order of the displayed apps or content lists by pressing the
button on the remote control.
Roll the Wheel (OK) button on the Magic Remote to scroll through the menu. You can
enter edit mode by selecting located at the bottom of the screen.
You can get recommendations from various channels and programmes.
You must log in to your LG account to get personalized content recommendations.
You must connect to the network to use the recommendation feature.
You can run, move, and delete the apps installed on your TV.
Enters the Edit App List mode.
Depending on your usage pattern, you can set the app order automatically or edit it
yourself.
After selecting the app you wish to edit from App List on the Home screen, press and
hold the Wheel (OK) button on the remote control, or select the Edit App List button
6
Page 7

Live TV Preparation
Watching Broadcast TV
You can also connect a piece of equipment that can receive broadcasting such as a set-top
box instead of the antenna.
Launch General Devices External Devices Universal Control Settings.
To solve a problem related to this function, refer to the Troubleshooting section of User
Guide.
Connecting to the Network
Connecting to the Network
If you configure settings for the network, you can use various services such as online
contents and applications.
located in the last area of App List to enter Edit App List mode.
Enters the Edit Contents List mode.
You can directly edit the order of the content list displayed in Home.
Reset App Order : Resets the order of items in the app list.
Reset Usage Data : It resets the content view history and the app usage history. If you
reset them, it takes some time to receive recommendations for contents again.
Home Settings : When turning the power on, go to the screen that sets the Home
behavior or advertising display.
User Guide : Move to the User Guide app.
Items that can be set may vary depending on the edit mode.
Exits edit mode.
Connect the broadcast antenna/cable to the TV.01
Launch General Programmes Programme Tuning (Programme
Tuning & Settings) Auto Tuning.
Finds and adds only programmes being broadcast.
02
7
Page 8

Setting a Wired Network
If the Network Is Not Automatically Connected
Some models may not be supported.
Setting a Wireless Network
Connect the LAN port of the TV and the router using a LAN cable.
The router should be connected to the Internet beforehand.
If the router supports DHCP, the TV is automatically connected to the network when
you connect the TV to the network with a LAN cable.
01
Press the button on the remote control.02
Select General Network Wired Connection (Ethernet).
To see the details, click the Settings Network Wired Connection (Ethernet)
in User Guide.
03
8
Page 9

Network Setting Warnings
Use standard LAN cable (connect to Cat7 or higher with RJ45 connector, 10 Base-T, or
100 Base TX LAN port).
Resetting the router may cause network connection problems. In this case, the router will
operate normally if you turn it off and disconnect the TV, and then reconnect and turn it on.
LG Electronics is not responsible for network connectivity or operation failure due to
problems such as equipment failure or disconnected lines.
The network connection may not work properly because of network settings or the Internet
service provider.
DSL service must use a DSL modem; and cable service must use a cable modem. Since
only a limited number of network connections may be available, TV network setting may not
be used depending on the contract with Internet service provider. (If the contract does not
allow more than one device per line, only the already-connected PC may be used.)
A wireless network can experience interference from other devices that use the 2.4 GHz
frequency (wireless phone, Bluetooth device, or microwave oven). Although interference
can also happen when using the 5 GHz frequency, it is less likely to occur.
The wireless environment can make wireless network service run slowly.
Using several wireless devices at the same time can slow your network.
The access point device must support wireless connections and wireless connection
feature must be enabled on the device to have AP (access point) connection. Contact the
service provider for availability of wireless connections on the access point.
Check SSID and security settings of the AP. Refer to the appropriate documentation for
SSID and security settings of the AP.
If the network is changed by moving the TV or changing the router, you must set up the
wireless network again. Existing wireless network connections will not be saved.
Invalid settings of network devices (wired/wireless line sharer, hub) can cause the TV to
operate slowly or not operate properly. Install the devices correctly according to the
appropriate manual and network.
Turn on the power of the router connected to the Internet.01
Press the button on the remote control.02
Select General Network Wi-Fi Connection.03
When the network search is complete, the list of networks available for connection is
shown.
04
Select a network to connect.
If your wireless LAN router is password protected, enter the password configured for
the router.
To see the details, click the Settings Network Wi-Fi Connection in User
Guide.
05
9
Page 10

The connection method may differ depending on the AP manufacturer.
To solve a problem related to this function, refer to the Troubleshooting section of User
Guide.
Managing Your LG Account
LG Membership
Logging in with LG Account enables you to use customised recommended content and
various app services.
You can sign up for LG membership and log in with your email address in LG Account.
Alternatively, you can sign up for LG membership using the ID and password of an
external service account.
This feature may not be available in some countries.
Age restrictions may apply for signing up.
To solve a problem related to this function, refer to the Troubleshooting section of User
Guide.
Managing Your LG Account
General System LG Account
When you enter LG Account, the previously logged-in account is displayed, and you
can select an account to log in or edit the account list.
Basic information about the account can be viewed by selecting Account Management
under the logged-in account. Also, you can change your password or edit your account
Select General System LG Account.01
Start signing up for LG Membership by selecting one of the suggested login
methods.
02
Agree to the User Agreements and enter the information required to sign up.
Required information may vary depending on the country.
03
A verification link will be sent to the email address you entered when you signed up.
Please complete email verification within the validity period.
04
Once your email address is verified, you can log in with your credentials.05
10
Page 11

information.
About User Guide
About User Guide
For information on each feature of the LG webOS TV, consult the User Guide available
on the TV.
You can check the description of the associated User Guide by clicking User
Guide in the upper-right corner while using the app, or by clicking during setup in
Settings.
If you click on Try Now in User Guide, you can navigate to that feature or setting.
Text colour in this User Guide is used to indicate the following:
The images and information in the User Guide may differ depending on the model and
operating environment.
Product specifications may be changed without prior notice due to upgrade of product
functions.
How to Operate TV
Pairing the Magic Remote
Learn More about Magic Remote
You can select the functions you want easily and conveniently by moving and clicking
the cursor on the TV screen, just as you would use a mouse on a computer screen.
■ Red : the names of the remote control buttons.
●
■ Yellow : the buttons and the text to be displayed on the TV screen.
●
■ Green : the names of the TV input connectors.
●
11
Page 12

You can purchase the Magic Remote separately if it is not provided.
Pairing the Magic Remote
You must pair the Magic Remote with the LG webOS TV to use it.
Pair the Magic Remote prior to use as follows:
If the Magic Remote failed to register, turn the TV off and back on, and then try to register
again.
Re-registering the Magic Remote
If the Magic Remote’s pointer does not appear on the TV, you must re-register it.
Unregistering Magic Remote
If you have multiple LG Smart TVs and want to register the Magic Remote currently in
use to another TV, you must unregister the previous one.
Using the Magic Remote
Turn on the TV. After about 20 seconds, point the remote toward the TV and then
press the Wheel (OK).
01
The remote control will automatically be registered, and the pairing completion
message is displayed on the TV screen.
02
Hold the remote control towards the TV and press the and buttons at the same
time for more than 5 seconds until instructions appear.
01
The previously registered remote control is deregistered and then registered again.02
If you press the button and the button at the same time for more than 5
seconds, the lamp on Magic Remote will blink and the registration will be canceled.
01
If you want to unregister and register for another LG Smart TV, please follow the
registration method above.
02
12
Page 13

For buttons with , please long-press (hold for more than a
second).
Using the Remote Control Button
Briefly press or press and hold remote control button to access various functions.
Using the Magic Remote
9 : Launch Quick Help.
●
GUIDE : Launch Guide.
GUIDE : Displays Programmes.
●
0 : The Quick Access edit screen appears.
●
: Display the additional buttons on the remote control.
: Audibly describes the contents of the screen.
●
: Adjust the volume level.
●
: Select to turn off the sound from the TV.
: Enter the Accessibility menu.
●
: You can change the programme.
●
: Check out the recommended contents. (Recommendation
service may not be available depending on the countries you are
in.)
You can use the voice recognition feature by holding down the
button and speaking toward the top of the remote control.
●
: Displays the Home menu.
: Launches the last used app.
●
: Selects an input source.
: Entering into the Home Dashboard.
●
: Move to the previous step.
: Closes the menu.
●
: Enters the Quick Settings menu.
: Enters the All Settings menu.
●
: Launch Record. (Some models may not be supported.)
●
If you shake the Magic Remote left and right or turn its wheel while pointing it at the
TV, a pointer will appear on the TV screen.
If you move the remote control to the direction you want, the pointer follows the
movement.
01
13
Page 14

If the pointer is not responding smoothly, you can reset the pointer by moving it to the edge
of the screen.
Use the remote control within the working distance (within 10 metres). If there is an
obstacle between the TV and the remote control, it may not operate properly.
Depending on the peripherals (wireless router, microwave oven, etc.), communication
failures may occur.
Impacts can cause the Magic Remote to malfunction.
Take care not to bump into nearby furniture, electronic equipment or other people when
using the Magic Remote.
For details on configuring the pointer of the Magic Remote, see User Guide Settings
System Pointer Options.
Using the Remote Control Button
Briefly press or press and hold remote control button to access various functions.
Move the pointer to the location you want and press the Wheel (OK) button to
execute the function.
02
If the pointer has not been used for a certain period of time, it will disappear. When
the pointer disappears from the screen, shake the Magic Remote right and left. It will
then re-appear.
The pointer will disappear if you press / / / buttons, and the remote will work
as a standard remote control.
03
You can control the TV by scrolling or pressing Wheel (OK) button in the middle of
/ / / buttons. When viewing a screen that requires scrolling, you can easily
move up and down by scrolling the Wheel (OK) button. When watching a video, you
can press the Wheel (OK) button to pause/play.
04
14
Page 15

For buttons with , please long-press (hold for more than a
second).
The marks and positions of the remote control buttons may vary depending on the model.
Using the Magic Remote
9 : Launch Quick Help.
●
GUIDE : Launch Guide.
GUIDE : Displays Programmes.
●
0 : The Quick Access edit screen appears.
●
: Display the additional buttons on the remote control.
●
: Adjust the volume level.
●
: Select to turn off the sound from the TV.
: Enter the Accessibility menu.
●
: You can change the programme.
●
: Check out the recommended contents. (Recommendation
service may not be available depending on the countries you are
in.)
You can use the voice recognition feature by holding down the
button and speaking toward the top of the remote control.
●
: Displays the Home menu.
: Launches the last used app.
●
: Selects an input source.
: Entering into the Home Dashboard.
●
: Move to the previous step.
: Closes the menu.
●
: Enters the Quick Settings menu.
: Enters the All Settings menu.
●
If you shake the Magic Remote left and right or turn its wheel while pointing it at the
TV, a pointer will appear on the TV screen.
If you move the remote control to the direction you want, the pointer follows the
movement.
01
Move the pointer to the location you want and press the Wheel (OK) button to
execute the function.
02
If the pointer has not been used for a certain period of time, it will disappear. When03
15
Page 16

If the pointer is not responding smoothly, you can reset the pointer by moving it to the edge
of the screen.
Use the remote control within the working distance (within 10 metres). If there is an
obstacle between the TV and the remote control, it may not operate properly.
Depending on the peripherals (wireless router, microwave oven, etc.), communication
failures may occur.
Impacts can cause the Magic Remote to malfunction.
Take care not to bump into nearby furniture, electronic equipment or other people when
using the Magic Remote.
For details on configuring the pointer of the Magic Remote, see User Guide Settings
System Pointer Options.
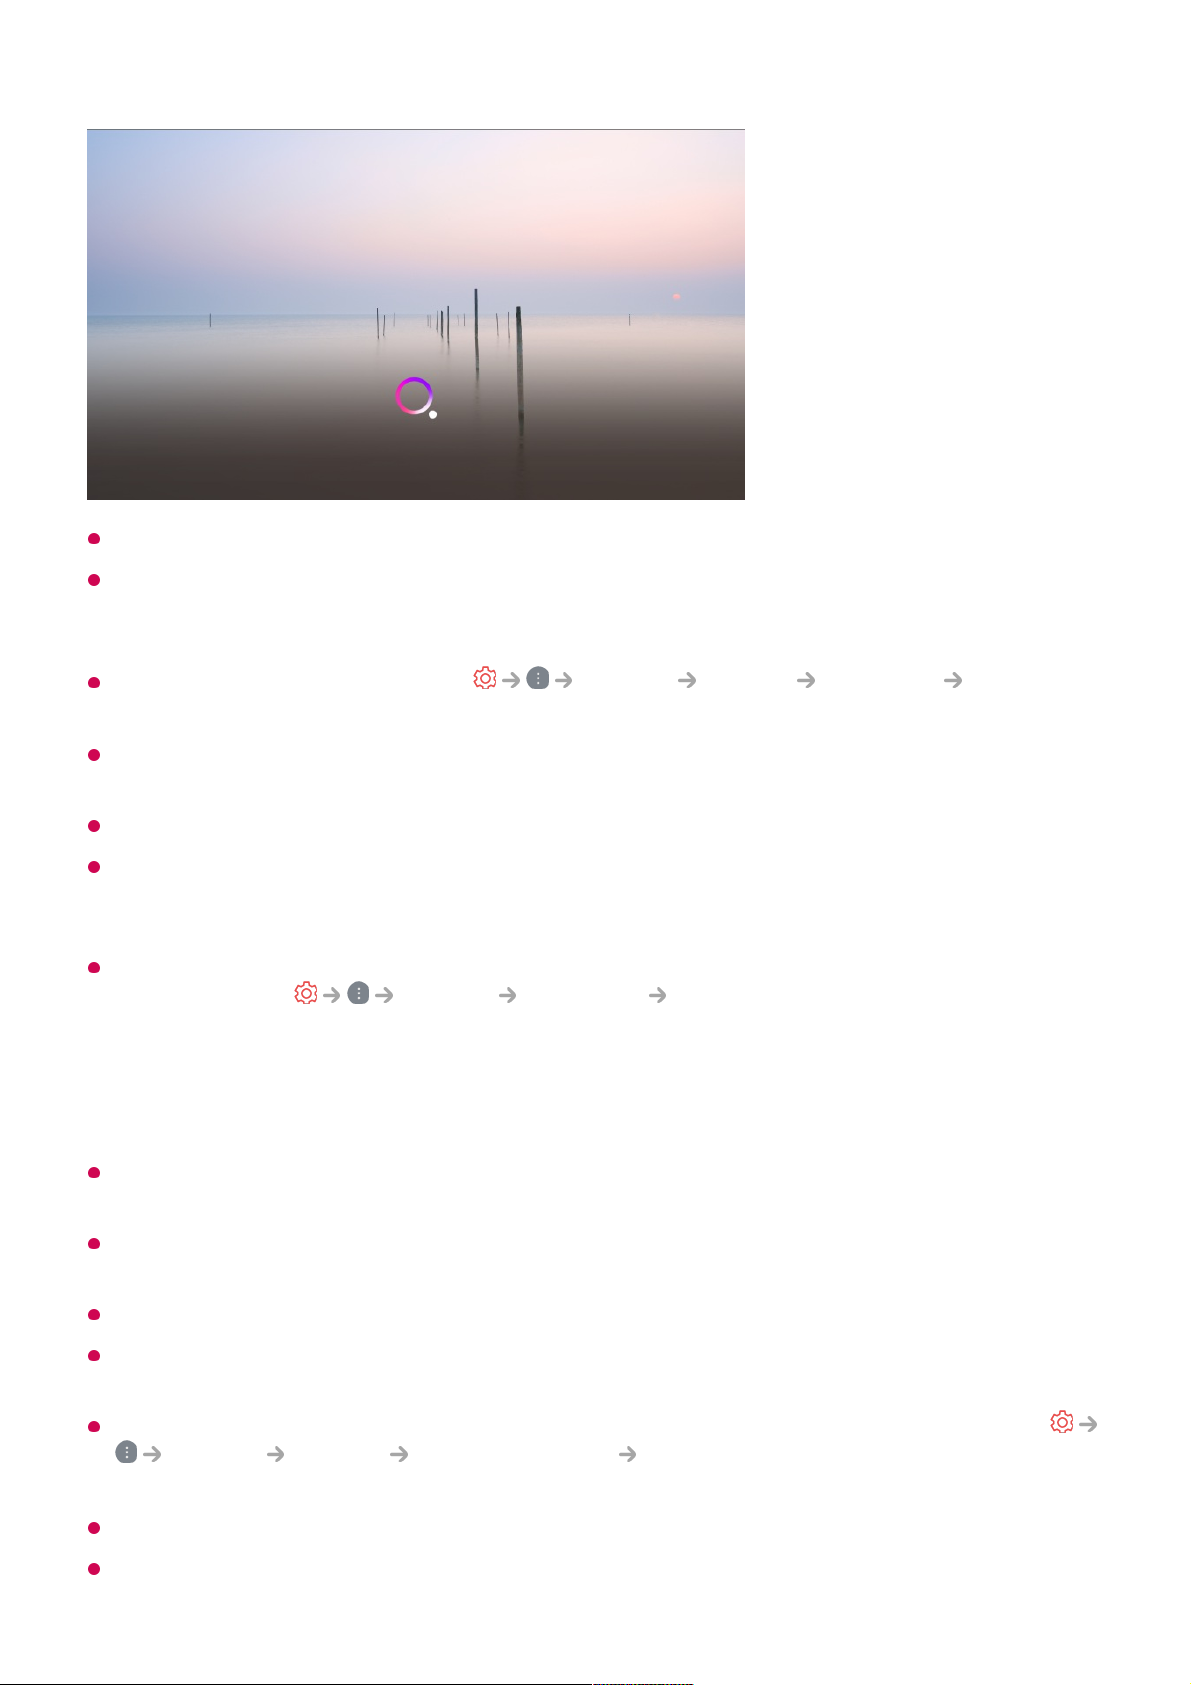
Using TV Functions through Speech
Using TV Functions through Speech
You can easily and quickly access the TV’s various functions through speech
recognition.
the pointer disappears from the screen, shake the Magic Remote right and left. It will
then re-appear.
The pointer will disappear if you press / / / buttons, and the remote will work
as a standard remote control.
You can control the TV by scrolling or pressing Wheel (OK) button in the middle of
/ / / buttons. When viewing a screen that requires scrolling, you can easily
move up and down by scrolling the Wheel (OK) button. When watching a video, you
can press the Wheel (OK) button to pause/play.
04
Press and hold the button on the remote control and speak out the function you
want to launch or the keyword you want to use for your search.
01
Once you release the button after your speech input, the corresponding function is
launched.
02
16
Page 17
Some models may not be supported.
Menu Language must be set as the official language of the country in Location to see
correct search results. If Menu Language is not set as the official language, some
functions may be limited.
You can change the language in General System Language Menu
Language.
The languages available for voice recognition features may be changed in accordance with
Service Operation Policy.
Details of service may vary by model.
Please note that the services enabling voice commands, voice recognition and other smart
features may be changed, removed or terminated, without notice, by LGE or its third party
providers.
You can change the voice-related settings or see which features are available to be used
with the voice in General AI Service Voice Recognition Settings/Voice
Recognition Help.
Cautions for Speech Recognition
Voice recognition requires a Magic Remote, which may not be supported by certain
models.
To use all speech recognition features, you need to set your programmes, region, etc.
Otherwise, you cannot use some features.
You must have a network connection to use the speech recognition feature.
If you have a network connection, you need to accept the terms and conditions to use
speech recognition.
To control the set top box connected to the TV with the voice recognition feature, go to
General Devices External Devices Universal Control Settings to set up a
universal remote control.
It is recommended to point Magic Remote toward the set top box after the voice input.
The rate of speech recognition may vary depending on the characteristics of the user (voice
17
Page 18

volume, pronunciation, accent, and talking speed) and the surroundings (noise and TV
volume).
To achieve accurate recognition of your speech, you must pronounce words in a slow and
accurate manner at an appropriate voice volume at a distance of about 10 cm away from
the Magic Remote’s microphone.
If your speech is not recognised properly, speech recognition may operate differently than
you originally intended.
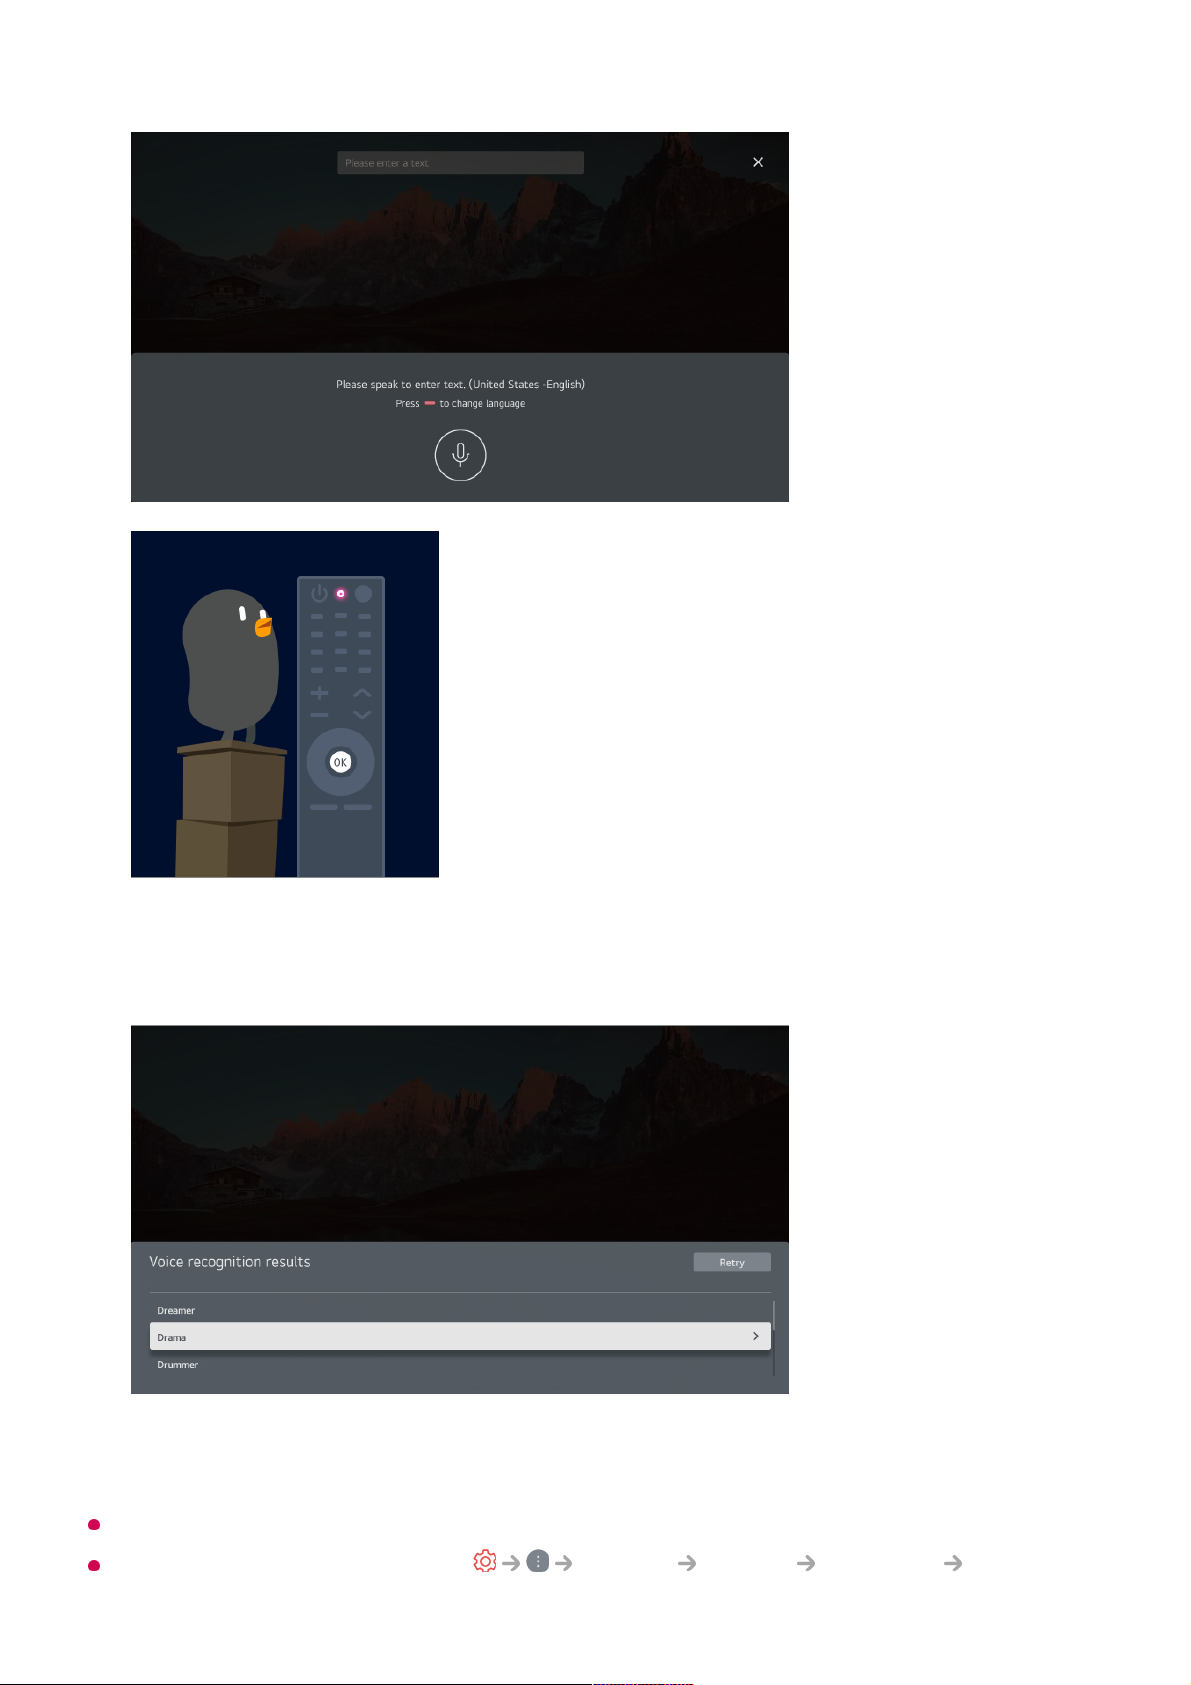
Speech to Text
Using Speech to Text
You can enter text in text fields using the speech recognition function.
Select the button on the keyboard screen to switch to speech input mode.
Some models may not be supported.
Move the Magic Remote pointer in the text box to open the virtual keyboard.01
Press the button on the virtual keyboard.02
After the voice recognition information window opens as shown below, speak into the
microphone on the remote control slowly and clearly.
03
18
Page 19
Cautions When Using Speech to Text
Check the network connection before using the Speech to Text function.
You can change the language in General System Language Menu
If there are words similar to that which you spoke out loud, you may see a list of
multiple results as shown below. If you do not get the results you want, press
RETRY to try again. Select a result and it will be displayed on the text box.
04
19
Page 20
Language. To temporarily switch to another speech recognition language, press the
button in the voice recognition information display window.
You can only use this function to agree to voice recognition terms.
The Speech to Text rate may vary depending on the user’s characteristics (voice,
pronunciation, intonation and speed) and the environment (noise and TV volume).
To improve the accuracy of Speech to Text, you must speak clearly and loudly about 10 cm
from the Magic Remote microphone.
Voice recognition is unavailable in any password input field and the address bar of your
Web Browser (excludes general search).
Control your TV with your voice with
Google Assistant
Control your TV with your voice with Google Assistant
Press and hold the (Google Assistant) button on the remote control to talk to Google.
Use your voice to easily find and play movies, shows, music and videos.
Press the (Google Assistant) button on the remote control to access the settings.
Google is a trademark of Google LLC.
Google Assistant is not available in certain languages and countries.
Service operation and supported countries may change in accordance with Google’s
policies.
Access Voice Recognition Using Amazon
Alexa
Access Voice Recognition Using Amazon Alexa
Press and hold the (Amazon Alexa) button on the remote control and speak out
the function you want to launch or the keyword you want to use for your search.
01
Once you release the (Amazon Alexa) button after your speech input, the
corresponding function is launched.
02
20
Page 21
Press the (Amazon Alexa) button on the remote control to access the settings and help
information for Amazon Alexa.
Different services may run in countries where Amazon Alexa is not supported.
Service operation and supported countries may change in accordance with Amazon’s
policies.
To View More Features of the Remote
Control
To View More Features of the Remote Control
You can control more features or external devices connected to your TV by using the
buttons displayed on your TV screen.
Press the button on the remote control.
If your remote control does not have a button, press and hold the button.
01
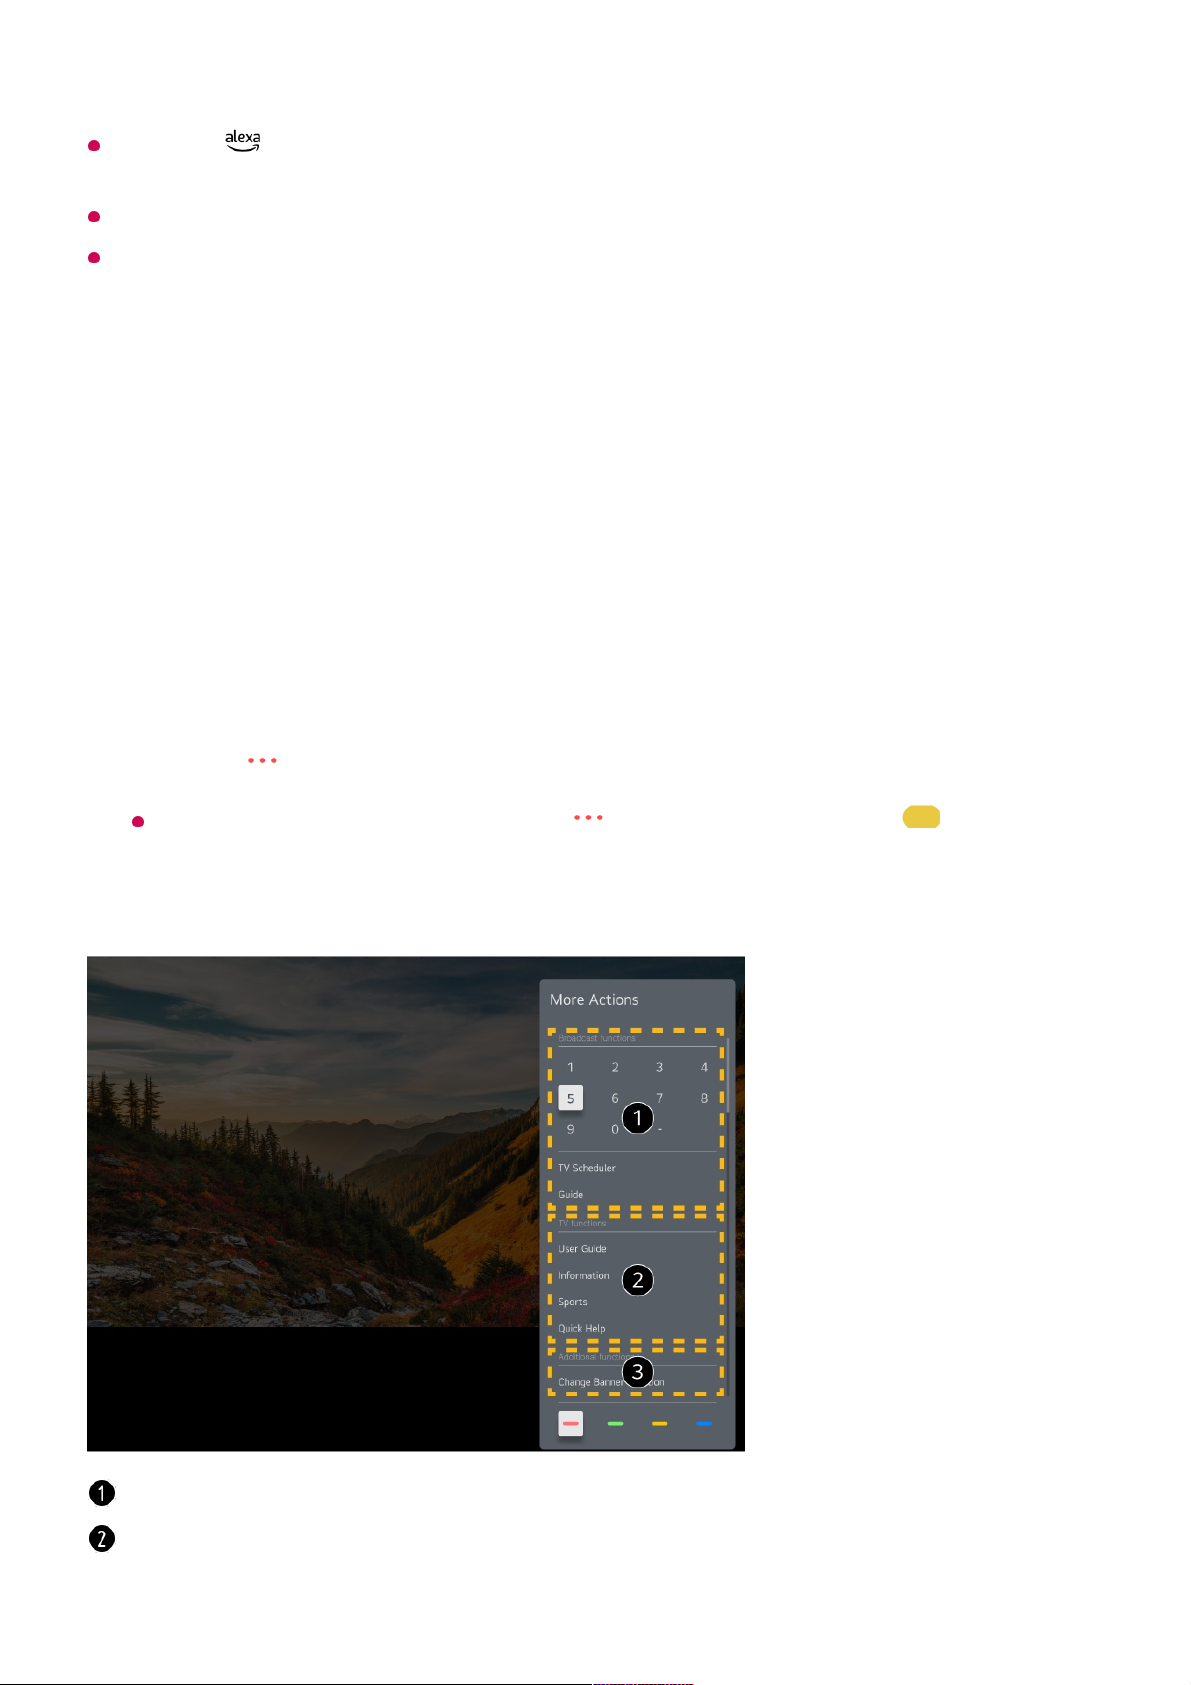
Using the remote control, select your desired button on More Actions displayed on
your TV screen.
02
These features can be used when you watch a live broadcast.
These TV features are available now.
21
Page 22

The types of buttons appearing on the More Actions vary, depending on the region and
the type of connected device.
Setting Universal Control
Automatically Setting the Universal Remote Control
When you set up the universal remote control, you can control the peripherals (Bluray/DVD player, home theater, set-top box, etc.) with the Magic Remote rather than
using their dedicated remote controls.
Connect the devices to be set to the TV's HDMI IN, and turn the power of the device on.
The TV will recognise the connected device to automatically set the universal remote
control without manual setting.
After setting the universal remote control, you may need to do some additional user
settings.
It may take several seconds to complete the settings for the universal remote control.
In some models, you can set the universal remote control only after converting to an input
of a connected device.
Depending on the connected device, the automatic setting feature for universal remote
control (automatic device connection) may not be supported.
Manually Setting the Universal Remote Control
If the universal remote control has not been set automatically, you can set it up
manually.
This feature can only be used with the Magic Remote.
Additional features can be set when you watch a live broadcast.
Available features may vary depending on the broadcast signal.
Select General Devices External Devices Universal Control
Settings.
01
Select the type of the device you want to set.02
Complete the settings for the universal remote control according to the guidance on
the screen.
You can change or cancel the universal remote control settings.
03
22
Page 23

You can purchase the Magic Remote separately if it is not provided.
Some models may not be supported.
When changing settings on a device, make sure it is powered on first.
To set up a universal remote control with the latest information, connect to the network and
accept the User Agreements.
The manual setting feature for universal remote control is not supported for a game
console.
Some buttons may not work depending on the model of the external device.
Point the Magic Remote at the device you want to control. Make sure that there are no
objects in front of the device to ensure that the remote control signal is well received.
Launching Apps through Quick Access
Using Apps Quickly and Easily with Quick Access
Press and hold a number button on the remote control to open an app or to activate an
external input registered to the button.
Setting Quick Access
If you press and hold a number button that has already been registered, the registered
function will be performed.
To see the items that can be registered, select a number that has not been registered in
the Quick Access edit mode.
If you are in a mode where Quick Access cannot run, no action will be performed.
If you delete a registered app, Quick Access will be deregistered as well.
Checking and Editing Quick Access
Press and hold the 0 button on the remote control.
The Quick Access edit screen appears.
Launch the app or select the programme or input you wish to assign.01
Press and hold the number button (1~8) you want to register.
No. 9 is fixed to Quick Help.
02
When the registration pop-up window appears, select Yes.03
23
Page 24

Connecting to SIMPLINK (HDMI-CEC)
Using SIMPLINK
With a single remote control, you can easily manage various devices such as a
soundbar or set-top box connected to a TV with HDMI.
Up to three devices can be connected and used simultaneously.
Selecting a number that has already been registered allows deregistering it.
When you select a number that has not been registered, items that can be registered will
be shown.
An item that has been registered to a different number is indicated with a check mark.
You can view a brief instruction for this function.
Connect the SIMPLINK HDMI Output port to the TV HDMI IN port with an HDMI
cable.
01
Press the button on the remote control.02
Select General Devices HDMI Settings.03
Set SIMPLINK (HDMI-CEC) to On.04
Turn on the connected device. When the TV automatically connects to the device,
the input will change.
If the device is not automatically connected to the TV, click the button and select
the device you wish to connect to.
05
24
Page 25

This feature works only with devices with the logo. Check for the SIMPLINK logo
on the external device.
Use of any product other than those specified may cause problems during operation.
To use SIMPLINK, you need to use a high-speed HDMI® cable with CEC (Consumer
Electronics Control) function. The High-Speed HDMI® cable has the pin 13 for enabling
information exchange between devices.
To output sound from an external audio device, connect the audio device to the TV's HDMI
(eARC/ARC) port with an HDMI cable. Set Sound Out to HDMI(ARC) Device and set
SIMPLINK (HDMI-CEC) to On.
Supported SIMPLINK Functions
Instant Play
When you start a multimedia device, you can immediately watch content from the
device on the TV without having to control anything.
Controlling devices with the TV remote control
Enables the user to control multimedia devices with the TV remote control to watch
content.
The menu of the multimedia device can be operated with the arrow keys on the remote
control.
Main Power Off
Turning off the TV will also turn off the devices connected through SIMPLINK.
This feature is only available in certain devices.
Main Power On
Turning on a SIMPLINK device will also turn on the TV.
Some models may not be supported.
Shortcuts to Accessibility
Shortcuts to Accessibility
You may go directly to Accessibility without entering the Advanced Settings menu.
25
Page 26

Press and hold the button on your remote control.
In Accessibility, you can set up High Contrast, Greyscale, Invert Colours, etc.
Connecting an Input Device to USB
Using a USB Wired/Wireless Mouse
Connect your mouse to the USB port. Use the mouse to move the pointer on the TV
screen and select the menu you want.
The right button and the special buttons on the mouse do not work.
When using a wireless USB mouse, the connection can be lost or slowed, depending on
the distance between the TV and mouse and the wireless environment.
Using a USB Wired/Wireless Keyboard
Connect your keyboard to the USB port. You can enter text with the connected keyboard
device.
It is not possible to enter text on some screens.
It is recommended that you use a product that has been tested for compatibility with LG
TVs.
Logitech K360, Logitech K400, Logitech K750
You can change the input language by pressing the language switch key or the right Alt
key, And also can change by pressing the Ctrl key and the Space key at same time.
When using a wireless USB keyboard, the connection can be lost or slowed, depending on
the distance between the TV and keyboard and the wireless environment.
To enter text in the text field, use the on-screen keyboard on your TV screen or a USB
keyboard.
Using a Gamepad
Connect your gamepad to the USB port on the TV if the game requires a gamepad.
It is recommended that you use a product that has been tested for compatibility with LG
TVs.
Sony DualShock 4, Sony DualShock 3, Microsoft Xbox 360 Controller, NVIDIA SHIELD
26
Page 27

Controller, Logitech F310, Logitech F710
Connecting Bluetooth Input Devices
You can connect and use devices such as a Bluetooth-enabled keyboard, mouse, or a
gamepad with your TV.
To see the details, click the Settings Devices External Devices Connect
Bluetooth Controller in User Guide.
Enjoy Live TV
Making the Most of Live Menu
Using Live Menu
You can use the relevant features with ease when watching TV broadcasts.
Press and hold the GUIDE button on the Magic Remote.
Or press the LIST button on the standard remote control.
Guide : You can view programmes and the schedule of each programmes.
To see the details, click the Enjoy Live TV Viewing Guide in User Guide.
Programmes : View a list of broadcast content that is currently being broadcast.
27
Page 28

The programmes displayed in Programme List are a configuration of programmes provided
by the broadcast service provider. Therefore, if the broadcast service provider has changed
its programme configuration without notice, the programmes displayed in Programme List
may differ from the actual TV programmes.
Because programme information displayed in programme List includes information
provided by external Electronic Programme Guide (EPG) providers, it may differ from the
actual TV programmes.
You must complete the settings of the network, region, and auto-programme to receive
normal live broadcast service.
The configurable items differ depending on model.
Viewing Guide
Viewing TV Guide
You can view programmes and the schedule of each programmes.
TV Scheduler : You can enter the time and date of a programme to schedule watching or
recording it at the set time.
To see the details, click the Enjoy Live TV Using TV Scheduler in User Guide.
Recordings : You can check the recordings stored in the storage device and play the
recordings.
To see the details, click the Enjoy Live TV Playing Recorded TV Programs in User
Guide.
The menu appears only if an external storage device is connected and the recorded
video can be viewed.
Run Live TV by pressing .01
Press the button on the remote control and select Guide.
If your remote control does not have a button, press and hold the button.
02
28
Page 29

Programme information is not displayed for programmes with no provided broadcast
information.
Some models may not be supported.
The configurable items differ depending on model.
Checking Programme Info
Viewing Programme Information
During watch the Live broadcast, press the Wheel (OK) button. The Programme Banner
Select each area to access the corresponding feature.
You can view information on the programme and broadcaster.
You can view information about the programme you are currently watching as well as the
focused programme information.
Select the button or the title of the desired programme. You can view more information
on the programme and perform Watch/Record (only available on certain models) or
Reminder/Scheduled Recording (only available on certain models), etc.
You will be taken to the programme list for the current date and time.
Programme Manager : Launch Programme Manager.
Programme Row : You can change the size of the programme list to adjust the number
of programmes displayed on the screen.
Filters : The type of channel displayed on the screen can be set.
Mini TV : The screen can be turned on or off to preview the selected channel.
User Guide : Move to the User Guide app.
Closes the app.
29
Page 30

appears.
You can move the banner's position by pressing the button on the remote control and
selecting Change Banner Location.
If your remote control does not have a button, press and hold the button.
Available features may vary depending on the broadcast signal.
Who.Where.What?
Using Who.Where.What?
Provides a variety of information related to the scene or content you are currently
It displays the information about the programme you are watching. Select a programme
banner to enter the detailed information pop-up to see the detailed programme information
or run additional features related to the banner.
You can view broadcast information about other programmes using the / buttons.
You can view broadcast information about the programme you are currently watching
using the / buttons.
The features can be controlled only within the detailed information pop-up.
Launch More Actions.
For more information, see How to Operate TV To View More Features of the Remote
Control in User Guide.
You can get recommendations for what to watch next by setting Next Picks to On.
This feature may not be available in some countries.
30
Page 31

watching.
Information may vary depending on the programme.
Some models may not be supported.
You must connect to the network and agree to User Agreements before you use it.
Entering Who.Where.What?
Method 1. Press the Wheel (OK) button on your remote control.
Press Who.Where.What? on the programme banner.
Method 2. If the information is recognised while you are watching a programme, a
notification will appear automatically. Please click on the displayed notification.
To receive automatic recommendations, you must set General AI Service AI
Recommendation Alarm Who.Where.What? to On.
Method 3. It can also be used with the speech recognition feature.
Example) Who is this person?/Where is this place?/What is this bag?
Some models may not be supported.
31
Page 32
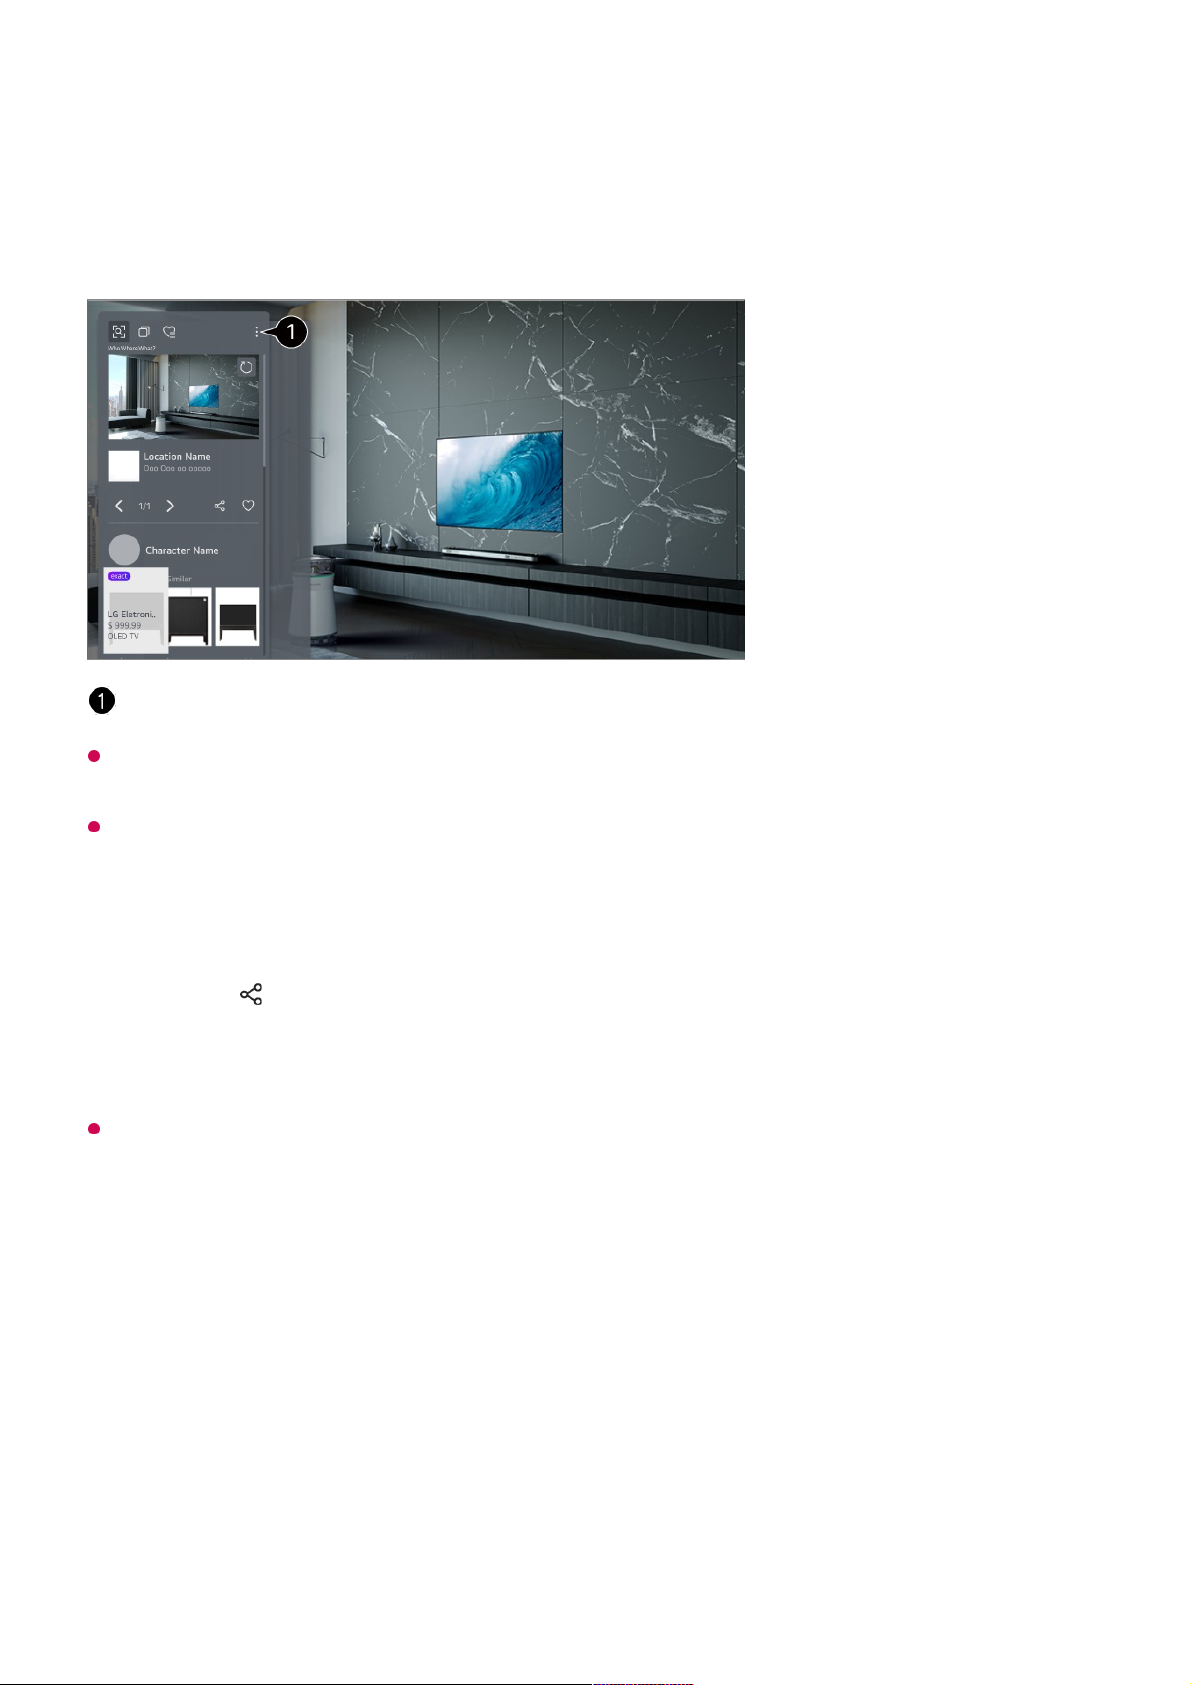
Viewing Information about the Scene with Who.Where.What?
A variety of information related to the scene you are watching appears on the screen.
Select the information you want to view the details.
Store the information in Wish List and come back anytime you want.
Available in Live TV or HDMI. However, some OTT devices with universal remote control
settings are not supported.
It is not available if you are watching an LG Channels (IP channel) or when no image is
shown on the screen.
Sharing Information with Who.Where.What?
Pressing the button allows you to share the address of the website containing the
information through a text message, QR code, or the LG ThinQ app or send it to a smart
device.
To use the sharing feature, the smart device must have the latest version of the LG ThinQ
app installed on it and must be connected to the TV.
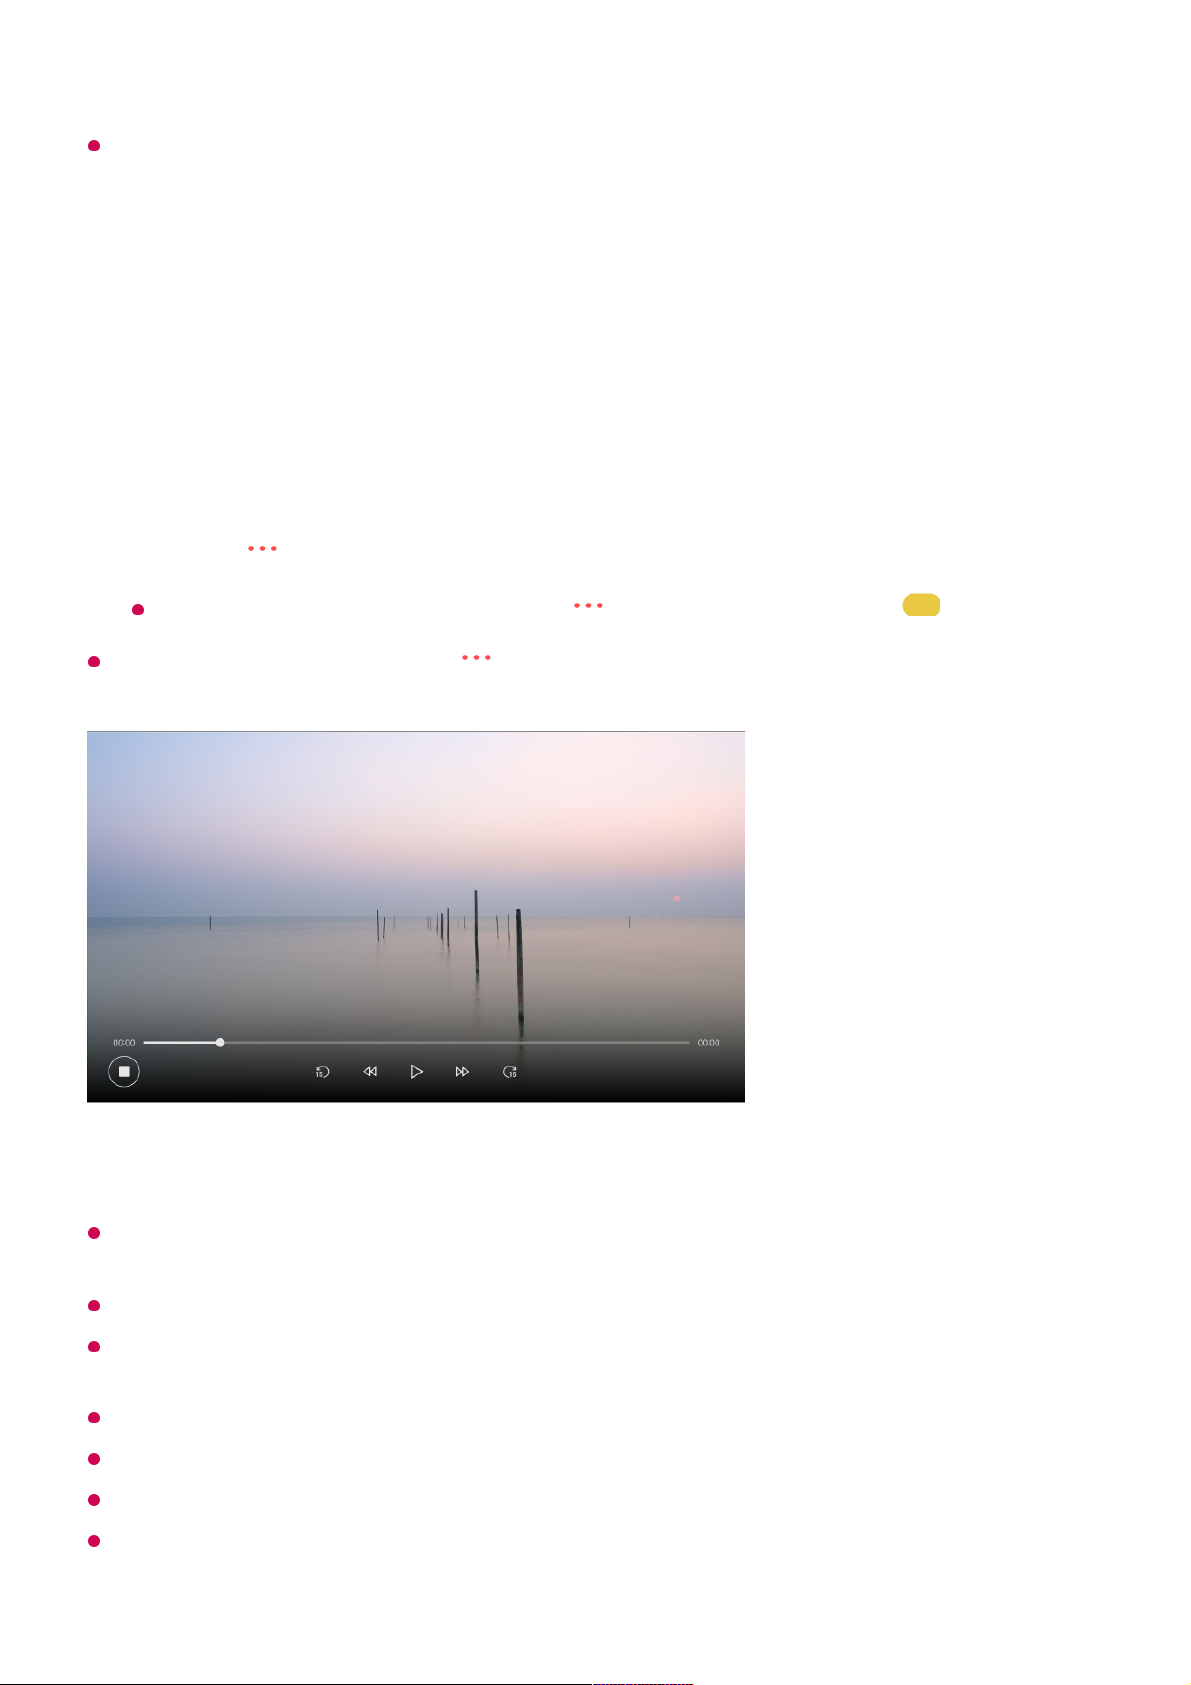
Live Playback
Using Live Playback (Real-time Playback)
It is a function you can use to temporarily save the programme you are currently
watching to a USB HDD, so you can play back any scenes you might miss while
watching TV. This function allows you to continue watching from where you were
You can use additional features such as changing the sorting options, deleting, or sharing.
32
Page 33
previously if you go out for a while.
The Live Playback function can be used only for broadcast programmes you view through
the antenna input terminal. However, you cannot use this option while listening to a radio
programme.
Select a device to be used with Live Playback when two or more USB HDDs are connected
to the TV.
You cannot use a USB stick. Connect a USB HDD with 80 GB or more of total storage.
If there is not enough remaining space in the USB HDD device, Live Playback may not
work properly. To use Live Playback function, you need the USB HDD which has at least
2.3 GB.
With the Live Playback function, you can play a programme back for up to two hours
depending on remaining USB HDD capacity. This time may vary depending on your region.
The videos saved in Live Playback mode are deleted if you turn off the TV without recording
them.
Changing between programmes during Live Playback will delete the data of the previous
programme.
Input the USB HDD in the USB port.01
Press the button on the remote control and select Live Playback.
If your remote control does not have a button, press and hold the button.
02
The Live Playback setting confirmation screen appears.
Complete the settings and press the OK button.
If only one USB storage device is connected, the settings screen may not appear and
Live Playback may run.
03
During watch the live broadcast, select a point on the progress bar which you want
by the pointer. You can also press the / buttons on your remote control to use
this feature.
Select a previous point than the current point on the progress bar.
04
33
Page 34
Some models may not be supported.
Recording
Using Instant Recording
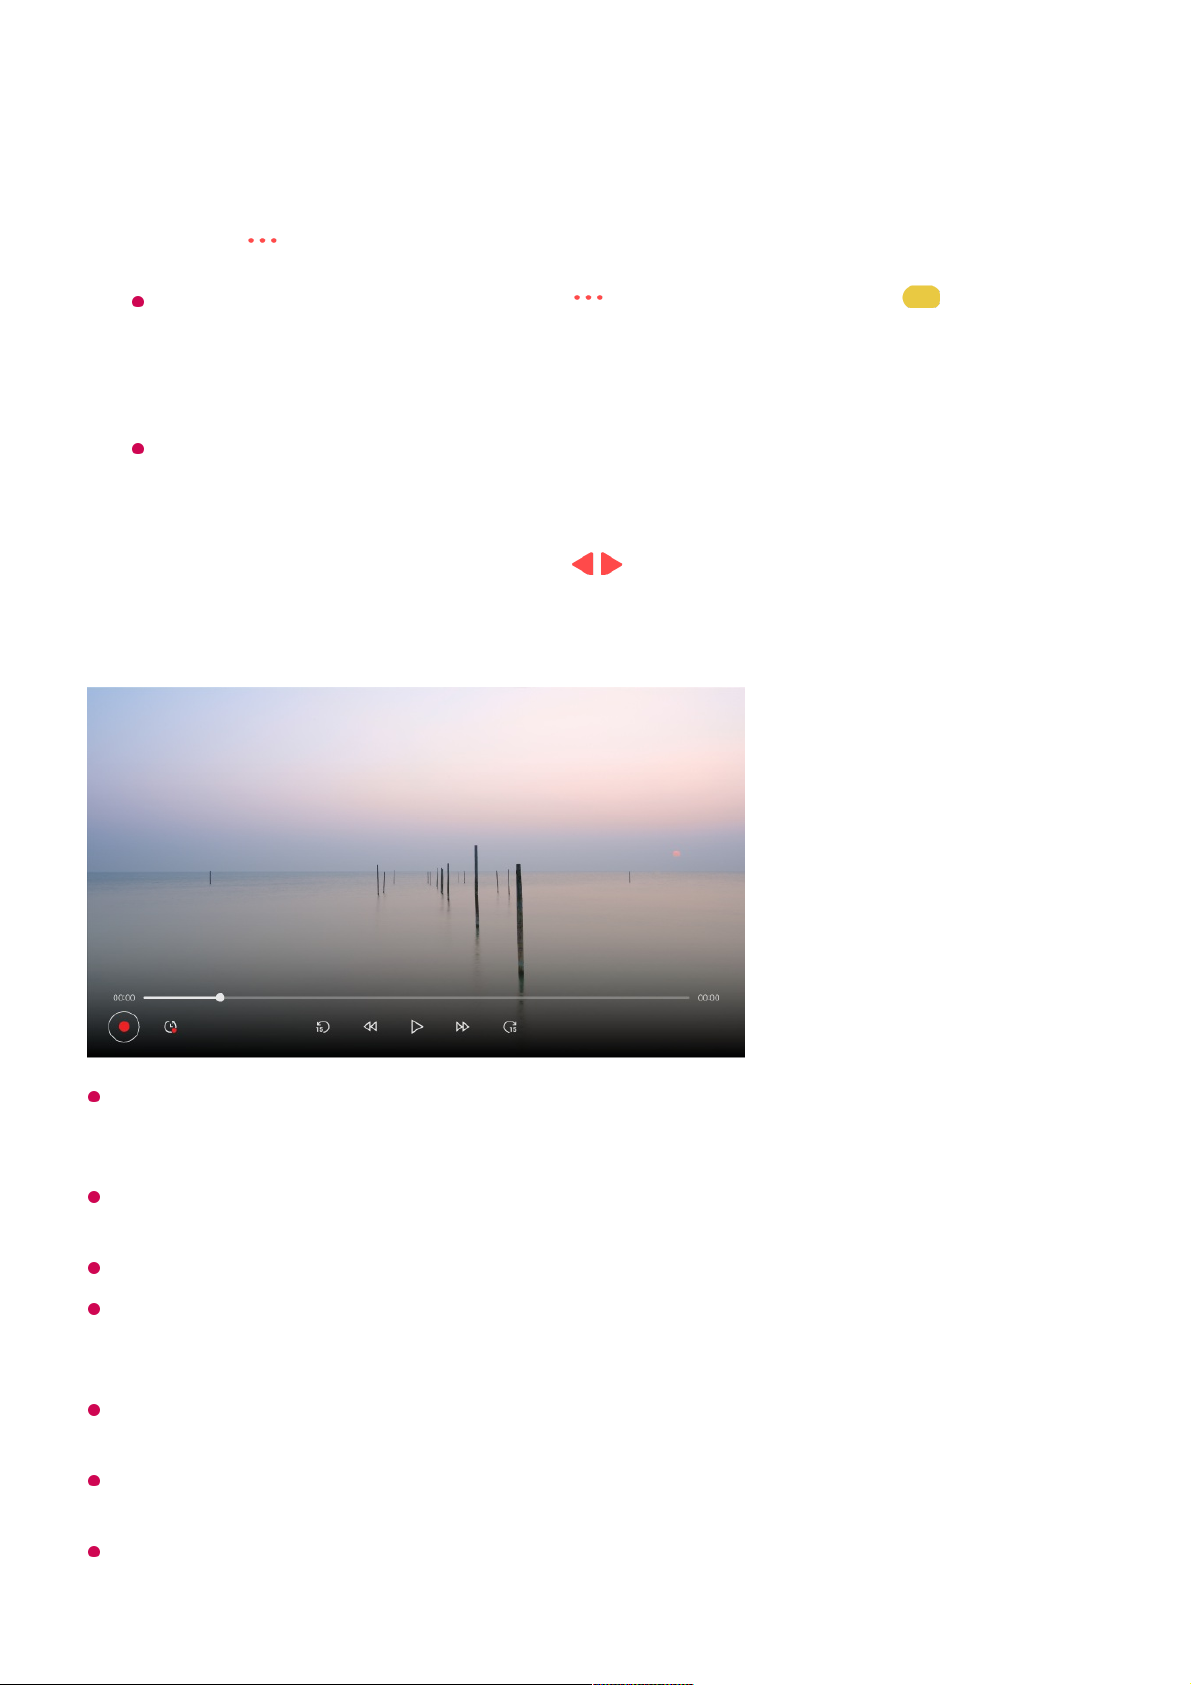
To end the recording, press the button on the remote control during recording and
select Record.
Matters That Require Attention of Recording
While recording, press the Wheel (OK) button to display information about the recording.
The Wheel (OK) button operation may vary depending on the country.
The duration of the recording can be set before the recording starts.
If multiple USB storage devices are connected, the last recorded storage device is selected
automatically.
The available capacity of the USB HDD partition must be at least 1 GB.
There must be at least 4 GB of partition size on USB stick.
The recordable time may vary depending on the capacity of your USB storage device.
Upon the initial attempt to record to the USB memory, the TV will perform a performance
test. Start recording after the test has been completed normally.
Connect a USB HDD or USB stick to a USB port.
It is recommended that you record to a USB HDD.
01
Press the button on the remote control and select Record.
If your remote control does not have a button, press and hold the button.
02
34
Page 35

Because of the content protection technology used, the recorded video cannot be played
on PCs or other TV models. Also, the video cannot be played if the TV’s video circuit is
replaced.
Do not remove the USB cable while recording.
If you force your TV to power off while recording, the recorded content may not be saved.
Ideally, you should stop the recording and check that the programme has been recorded
before turning the TV off.
Recording quality depends on the performance of the USB storage device.
If a USB storage device is faulty, recording may not be completed properly.
The USB storage device may not work or function properly when a USB hub or extension
cable is used.
Recording may be interrupted if the remaining storage capacity is insufficient. Use of a
storage device with sufficient space for recording is recommended.
During recording, you can watch the other programmes or use the other functions.
However, you can only use the programme you are recording and free programmes while
recording a scrambled programme.
(Some models may not be supported.)
The configurable items differ depending on model.
Some functions may not be available while recording is in progress.
Analog broadcast recording feature is only available to some models.
Only broadcast programmes you view through the antenna input terminal can be recorded.
Bluetooth and the USB port may not work properly when recording with a USB storage
device.
Recordings that are less than 10 seconds long will not be saved.
You can save up to 600 pieces of content on a single partition.
Some models may not be supported.
Using TV Scheduler
You cannot change programme modes while recording.
●
When connected to one satellite signal :
If you start recording a programme while watching another programme in a different
mode, the programme will change to the programme being recorded.
●
When connected to two satellite signals :
Even if you start recording a programme while watching another programme in a different
mode, the programme will not change to the programme being recorded.
●
35
Page 36
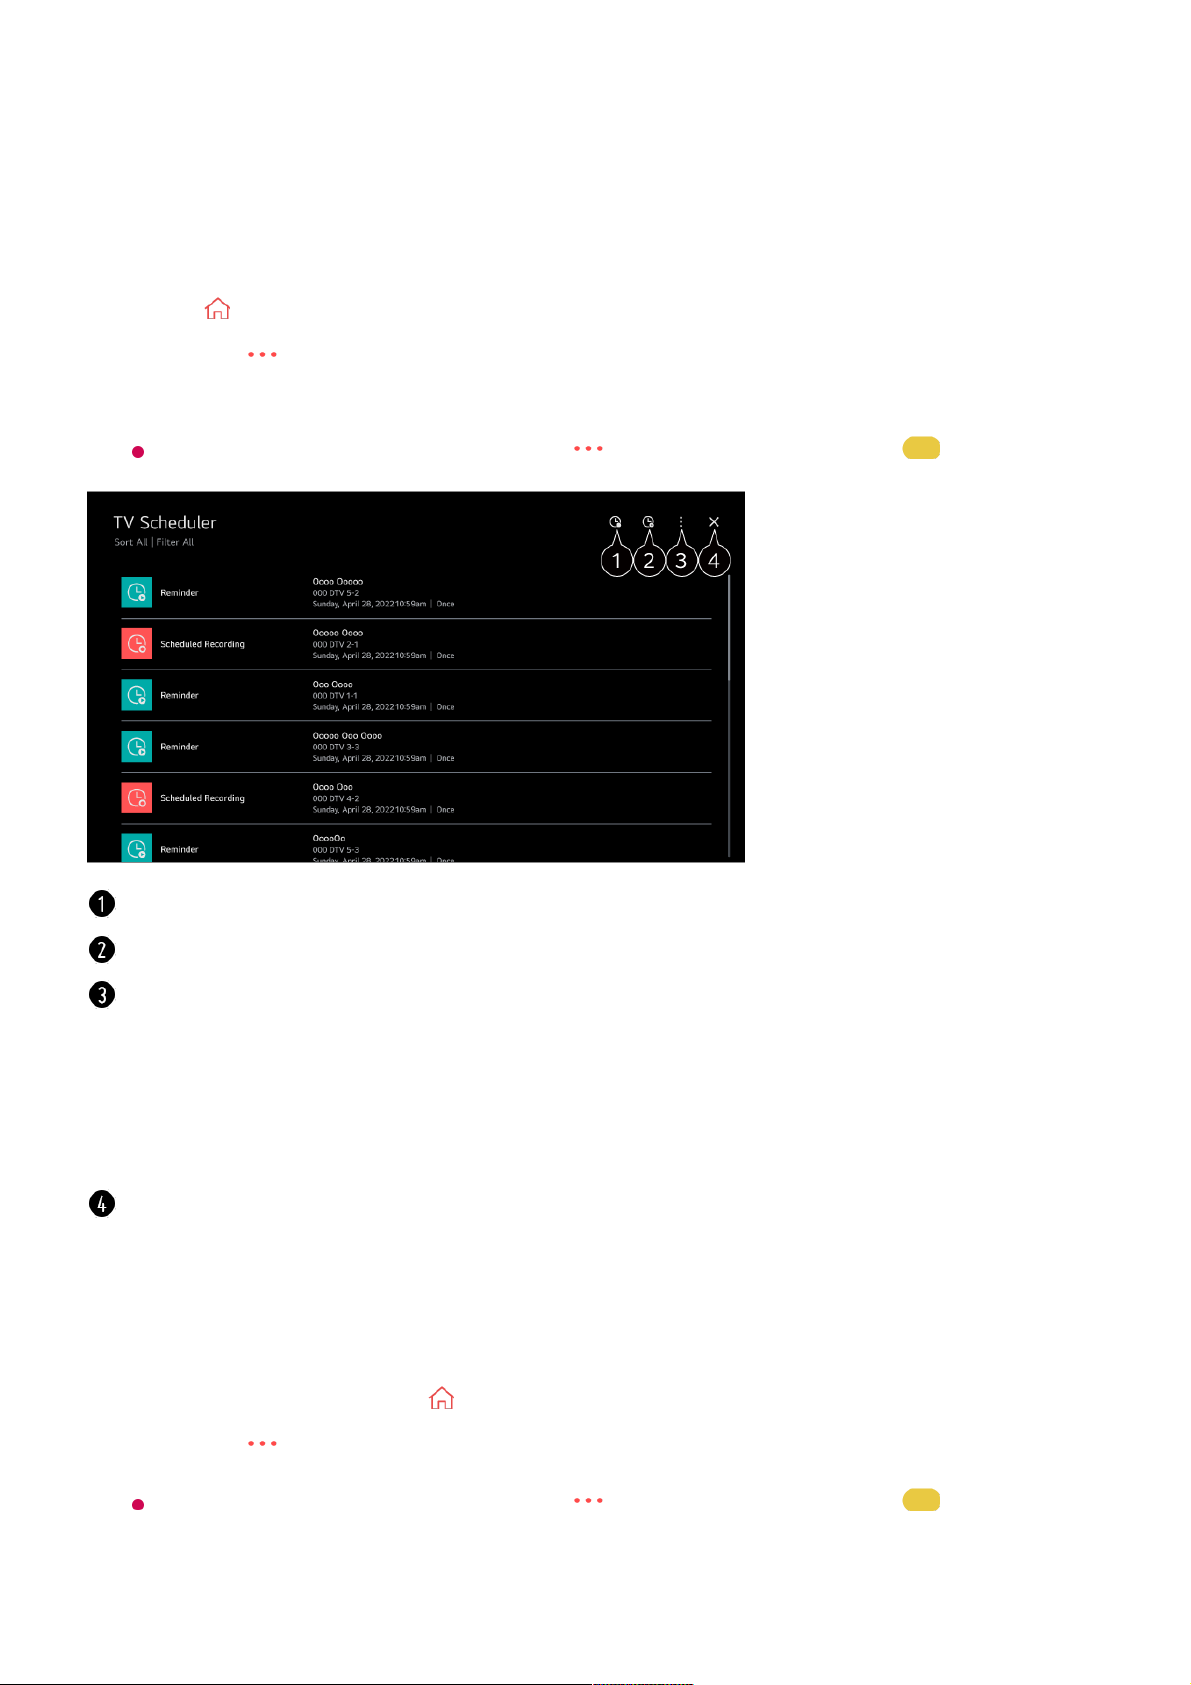
Using the TV Scheduler
You can enter the time and date of a programme to schedule watching or recording it at
the set time.
Scheduling a selected broadcast from Guide
You can select a show to schedule it for watching or recording.
Press on the remote control to select Live TV and view the live broadcast.01
Press the button on the remote control and select TV Scheduler.
The TV Scheduler screen will be displayed.
If your remote control does not have a button, press and hold the button.
02
You can set the New Scheduled Recording.
You can set the New Reminder.
Sort : You can sort the list.
Filter : Sets the filter.
Delete : You can set the Delete Mode.
Guide : Launch Guide.
User Guide : Launch User Guide.
Quit App : Turns off the app from running in the background.
Closes the app.
Run Live TV by pressing .01
Press the button on the remote control and select Guide.
If your remote control does not have a button, press and hold the button.
02
Select the programme you want. 03
36
Page 37
Scheduled recording does not guarantee exact recording time of the programme because
the programme will be record as the information of broadcaster.
Applies to Digital broadcasting.
Manual Scheduling
You can select the date, time and programme to watch or record the programmes.
The length of the scheduled recording should be at least 1 minute.
Recording a Series
The series recording function is used to automatically record every episode of the
programme that you choose.
If a programme is a series, you can record the series with Scheduled Recording in
Guide or with Record when watching TV.
You can view the recording progress of a series on the details screen in Series Recordings.
You can play series recordings in the Recordings app.
Check your region and network condition to use these functions.
If the scheduled series recording and another scheduled recording are at the same time, or
if there is a problem with the broadcast information, the series may not be recorded in the
order of episodes.
Series recording may not be available depending on the episode type of the programme
provided by the broadcaster.
The configurable items differ depending on model.
If you want to record a live broadcast, click the Record or Watch button.
In case of an upcoming programme, click the Scheduled Recording or Reminder
button.
Record/Scheduled Recording may not be supported on some models.
Run Live TV by pressing .01
Press the button on the remote control and select TV Scheduler.
If your remote control does not have a button, press and hold the button.
02
Select the or the .03
Select Create Manually.04
Set the date, time, and programme to record or watch.05
37
Page 38
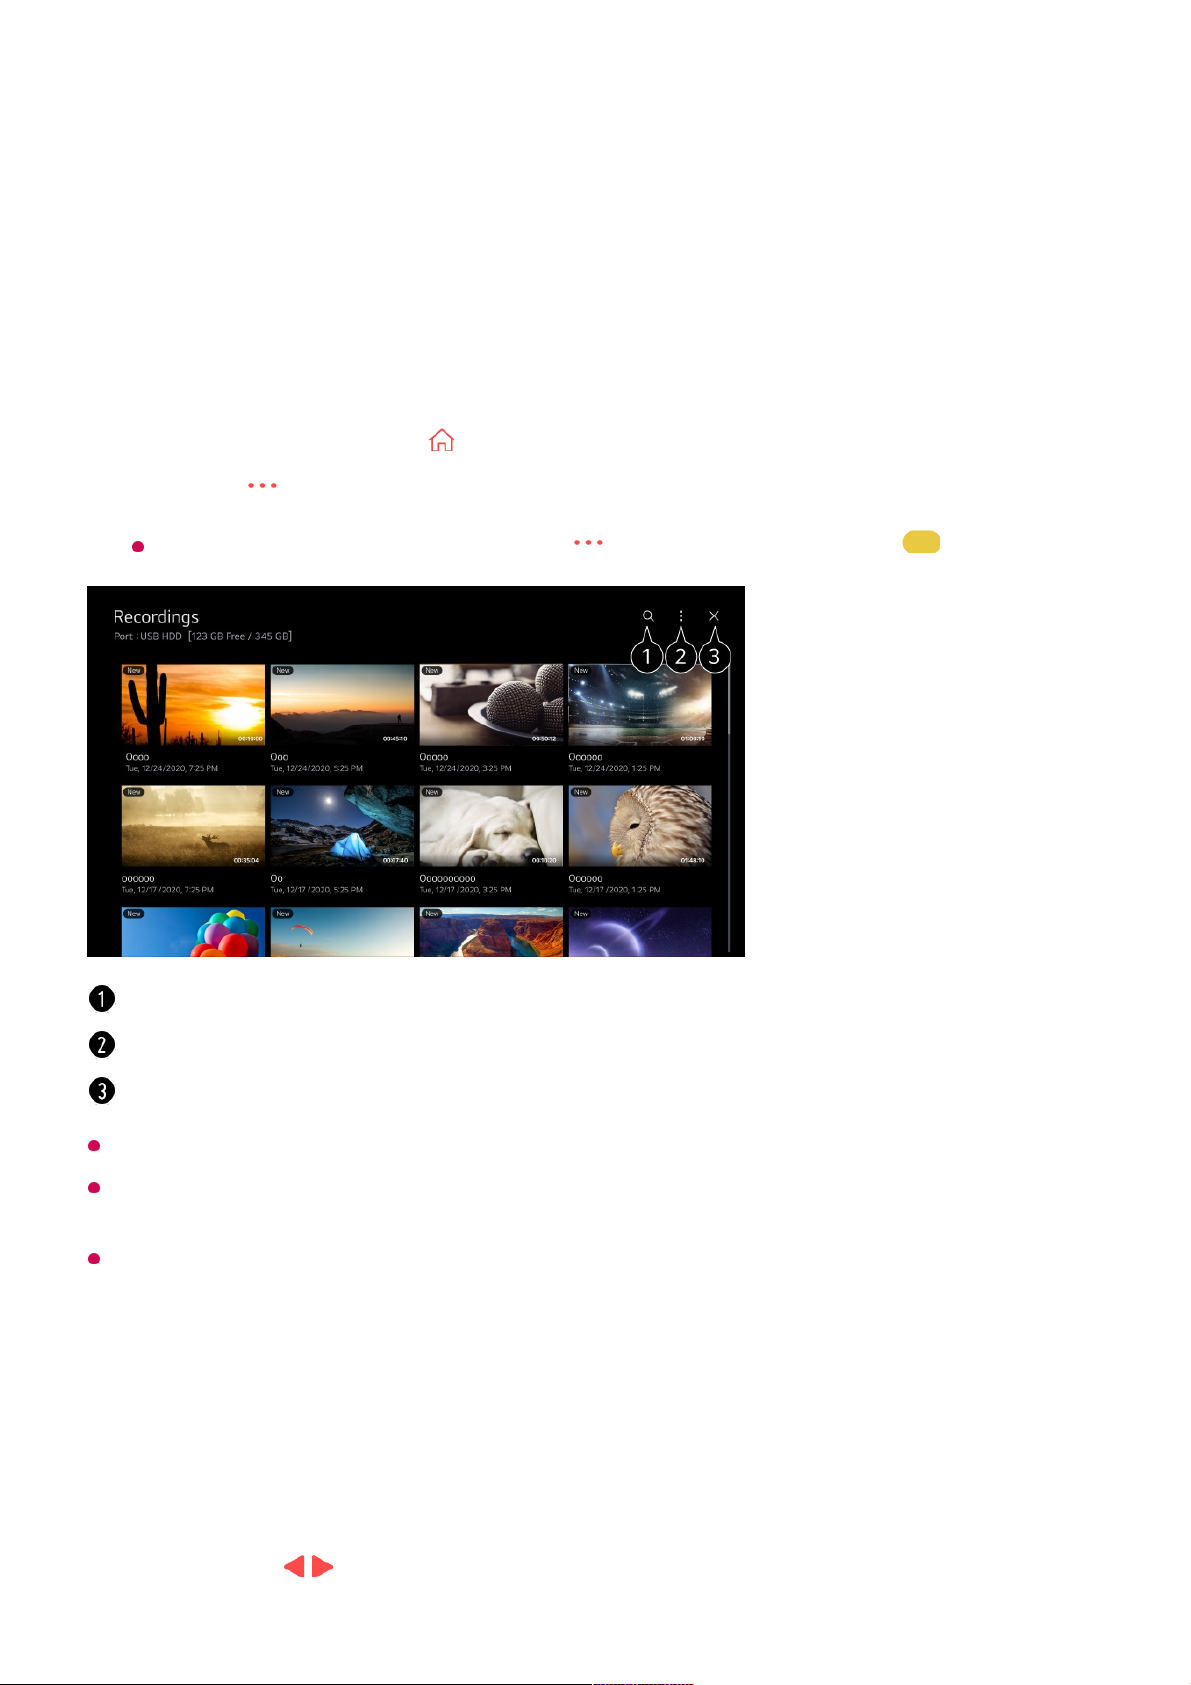
Playing Recorded TV Programs
Managing Recordings
You can view and play recordings stored on storage devices by using the Recordings
app.
You can only play recordings made on the current TV in Recordings.
When playing an HFR (High Frame Rate) recording, the motion of the screen may differ
from that of the original recording.
Some models may not be supported.
Playing Recordings
You can access and operate basic features such as playback and pause on the
playback screen.
Run Live TV by pressing .01
Press the button on the remote control and select Recordings.
If your remote control does not have a button, press and hold the button.
02
Launch Search.
You can apply settings, such as storage devices and sort options, for the content list.
Closes the app.
Select your desired recording from the Recordings app.01
Pressing the / buttons on the remote control allows you to skip backward/forward02
38
Page 39
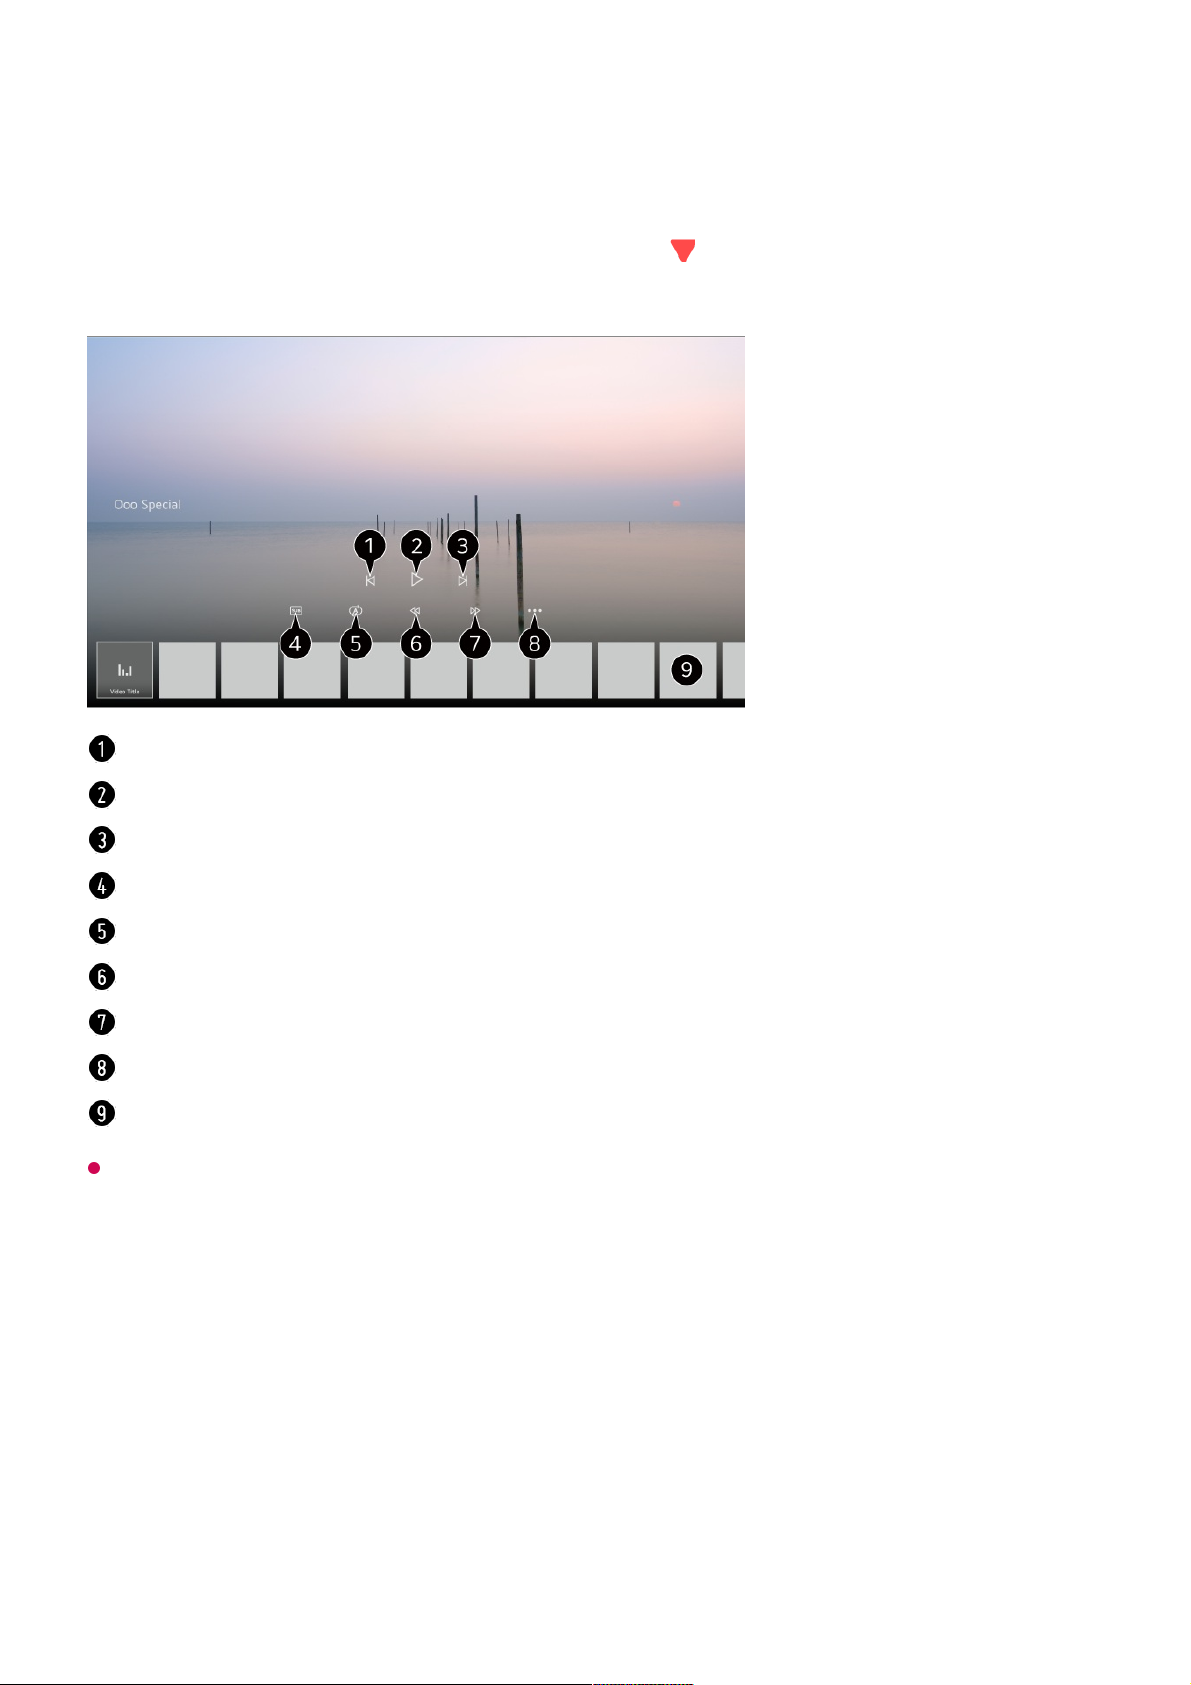
The configurable items differ depending on model.
Watching Internet Channel (LG Channels)
Watching Internet Programme
You can watch real-time broadcasts through this service over the Internet.
You can see information on new Internet Programmes or manage the programmes you
like in LG Channels.
10 seconds.
You can control the playback of your desired recording by pressing the Wheel (OK)
button during playback.
You can access more features by pressing the button on the remote control while
using the playback control.
Shows the previous recording.
Plays or pauses the recording.
Shows the next recording.
Turn subtitles on or off.
You can set continuous playback.
Fast-rewinds the video at higher speeds.
Fast-forwards the video at higher speeds.
You can set features such as Resume and the audio language that can be outputted.
A list of recordings is shown below.
39
Page 40
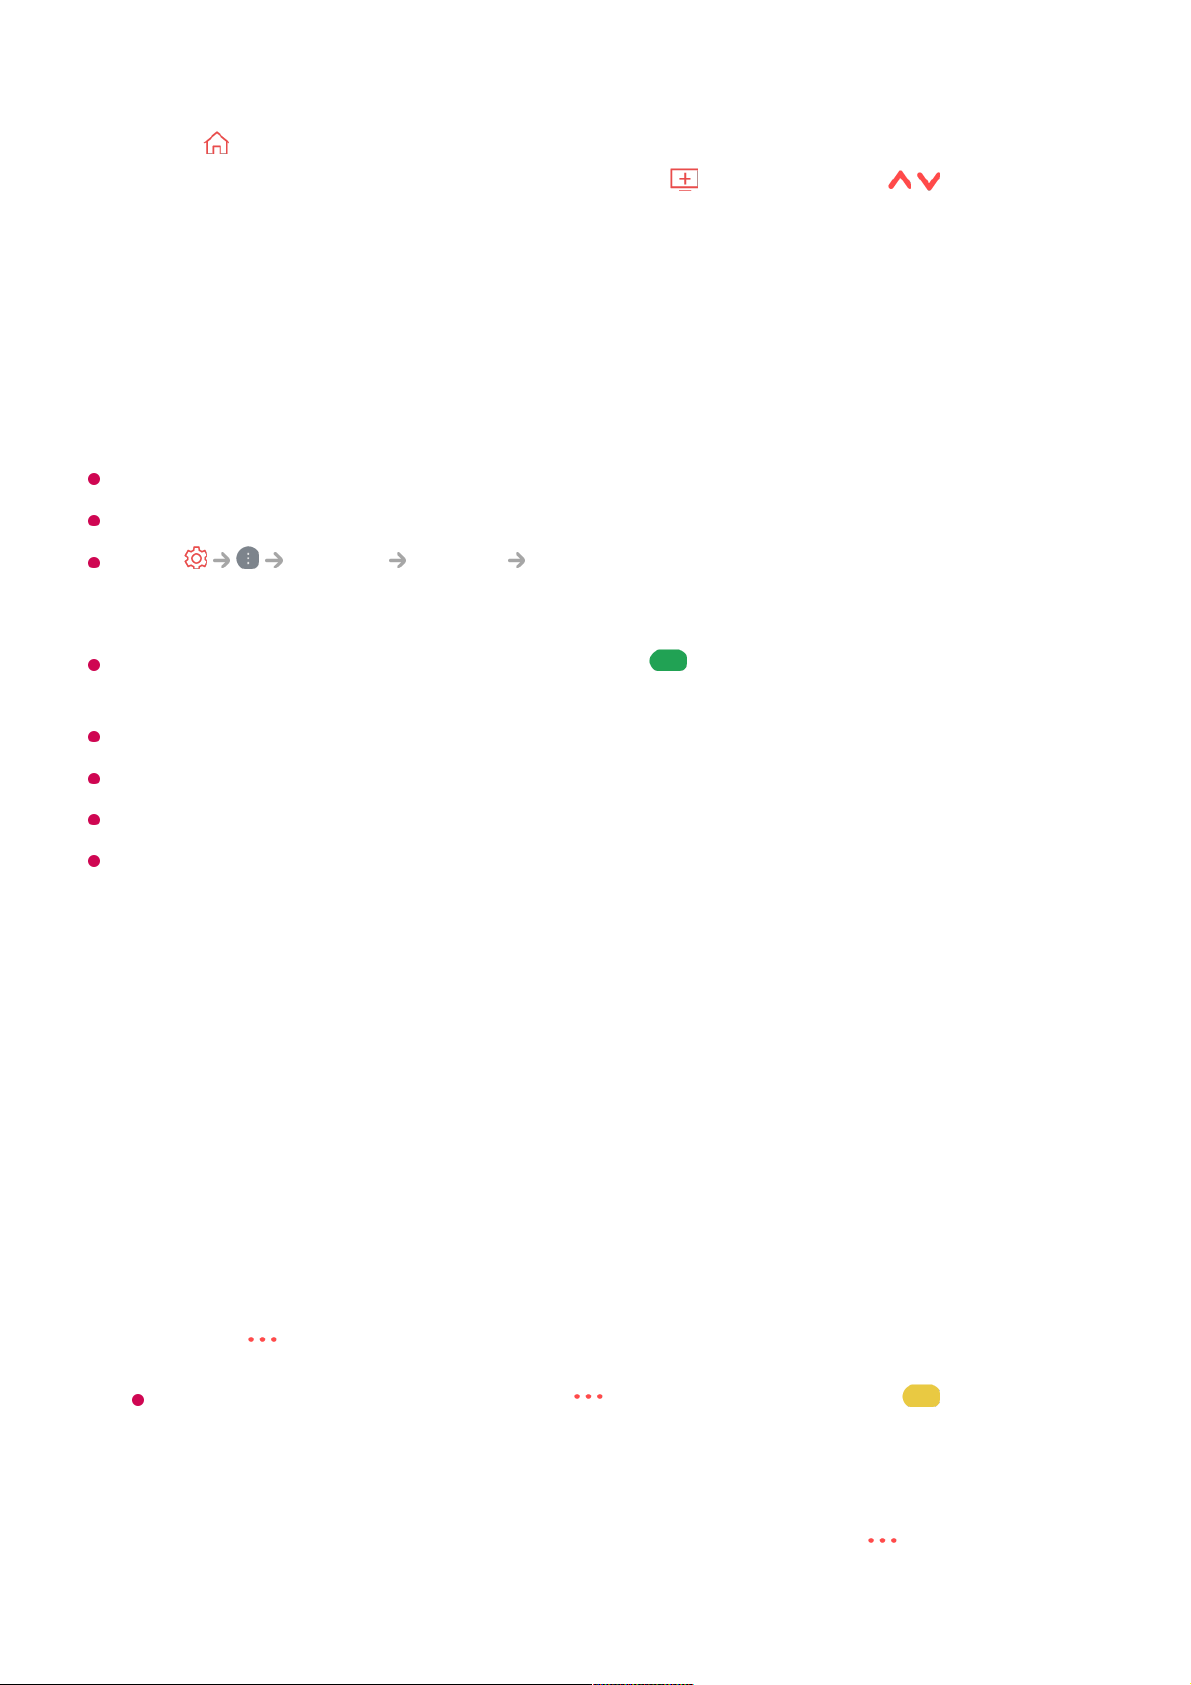
Press the button on the remote control and select LG Channels.
You can also watch LG Channels by pressing the (Programmes) / buttons on
the remote control.
You can use the ’Interactive Programme’ service that enables users to conveniently
enjoy content related to the current programme without having to switch apps.
You can use the ’Interactive Programme’ by pushing the buttons on your remote control
or clicking your screen according to the instructions that appear on the Internet
programme screen.
Some models may not be supported.
You must connect to the network and agree to User Agreements before you use it.
In the General System Location, the Broadcast Country and the LG
Services Country must be the same. If you change any of them, you cannot use the
service.
While watching an Internet Programme, click the button on the Remote control. You
can start the LG Channels.
Some content can cause a switch from Live TV app to a different app.
Some Internet programmes may not support this service.
Live Playback and recording are not available for internet programmes.
Internet Programme services may be stopped or changed without prior notice by the
broadcasting company.
TELETEXT
To Use Teletext
Teletext is a free service provided by the TV station that offers text-based information
about TV programmes, news and weather.
The teletext decoder of this TV can support the SIMPLE, TOP and FASTEXT systems.
Press the button on the remote control.
If your remote control does not have a button, press and hold the button.
01
Select Teletext.02
The Teletext window appears.03
To view TV broadcasts and Teletext at the same time, press the button on the
remote control and select Teletext.
04
40
Page 41
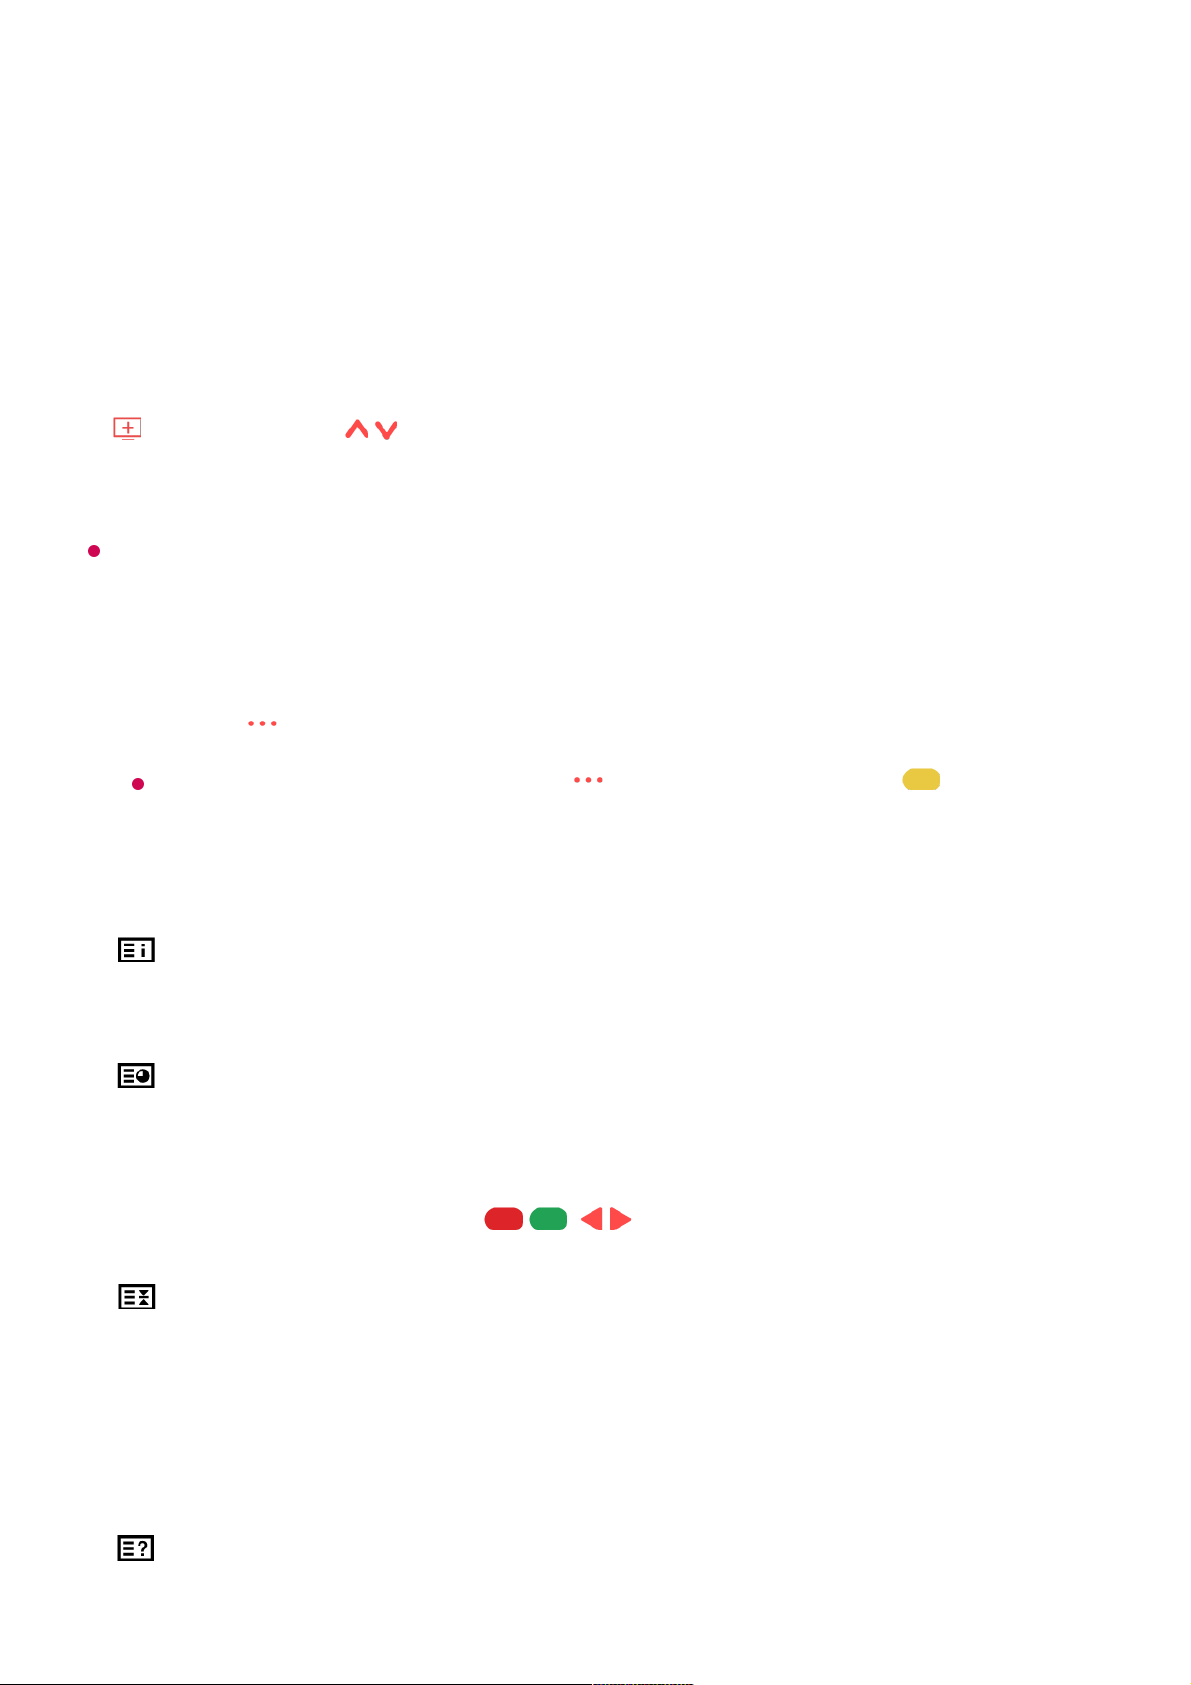
Colour button
To select the preceding or following page.
Number button
Enters the page number to move to.
(Programmes) / Button
To select the preceding or following page.
Some models may not be supported.
Special Teletext Function
Index
Select each index page.
Time
When viewing a TV programme, select this menu to display the time at the top right
hand corner of the screen. In the teletext mode, press this button to select a sub page
number. The sub page number is displayed at the bottom of the screen. To hold or
change the sub page, press the / , / or Number buttons.
Hold
Stops the automatic page change which will occur if a teletext page consists of 2 or
more sub pages. The number of sub pages and the sub page displayed is, usually,
shown on the screen below the time. When this menu is selected the stop symbol is
displayed at the top left-hand corner of the screen and the automatic page change is
inactive.
Reveal
Press the button on the remote control.
If your remote control does not have a button, press and hold the button.
01
Select Teletext Option.02
Select the Teletext menu.03
41
Page 42

Select this menu to display concealed information, such as solutions to riddles or
puzzles.
Update
Displays the TV picture on the screen while waiting for a new teletext page. The
display will appear at the top left hand corner of the screen. When the updated page
is available then display will change to the page number. Select this menu again to
view the updated teletext page.
Language
Sets Teletext language.
In Digital Mode Only
To Set Teletext Language
Use the Teletext language function when two or more Teletext languages are broadcast.
In Digital Mode Only
If Teletext data in a selected language is not broadcast, the default language will be
displayed.
If you select the wrong local country, teletext may not appear correctly on the screen and
some problems may occur during teletext operation.
HbbTV
Learn More about HbbTV
HbbTV (Hybrid Broadcast Broadband TV) is a new broadcasting standard that enables
super-teletext type services, delivered by a broadcast TV programme, to be integrated or
linked to online services delivered over broadband to a connected Smart TV.
Consumers are therefore able to access various online services such as catch-up TV,
Video on Demand (VOD), programme related applications and other rich information
Press the button on the remote control.01
Select General System Language Primary Teletext
Language/Secondary Teletext Language.
02
42
Page 43

services in addition to traditional digital teletext services, all directly on to the TV in a
seamless experience. HbbTV services can be activated in a number of ways, the most
popular being pressing the . Users typically explore services with the traditional
navigation keys (including the OK button and the , , , ). The current version
of the HbbTV specification also includes support for “adaptive streaming” of video over a
broadband connection thus guaranteeing the best possible image quality for the viewer.
For more information about HbbTV, visit www.hbbtv.org
Some models may not be supported.
To Use HbbTV
General Programmes HbbTV
Sets HbbTV to On.
Enjoy a wide variety of content from HbbTV enabled services.
Service features may be limited when the TV is not connected to the internet.
The functionality and quality of the HbbTV service may vary depending on the quality of
your broadband connection.
HbbTV services are not guaranteed to be available for all programmes – only those that
your broadcaster choses to support.
Some models may not be supported.
When Live Playback is in operation, HbbTV is disabled.
While using HbbTV service, navigation keys and the Wheel (OK) button may be disabled if
the Magic Remote’s pointer is activated on the screen. In this case, press the left, right, up
and down keys in order to deactivate the pointer. (This only applies to models that support
the Magic Remote.)
CI Information
CI Information
You can view information about the currently connected CI.
General Programmes CI Information
If you use a CI module or CAM module,
43
Page 44

Apps and Content
Installing Apps
Installing Apps
You can install apps in a variety of categories such as games, education, and news and
conveniently use them on your TV.
This function enables you to watch some encrypted services (pay services).
●
If you remove the CI Module, you cannot watch pay services.
●
CI (Common Interface) functions may not be possible depending upon the country
broadcasting circumstances.
●
When the module is inserted into the CI slot, you can access the module menu.
●
To purchase a module and smart card, contact each service provider.
●
When the TV is turned on after inserting a CI Module, you may not have any video and
audio output in scrambled programme.
●
When using a CAM (Conditional Access Module), please make sure it meets fully the
requirements of either DVB-CI or CI plus.
●
An abnormal process of CAM (Conditional Access Module) may cause a bad picture.
●
If the TV does not display any video and audio when CI+ CAM is connected, please
contact to the Antenna/Cable/Satellite Service Operator. (Some models may not be
supported.)
●
While the TV supports paid broadcasting programmes based on the European standard
DVB-CI+, some programmes might not be available for watching if some operators of the
programmes use a proprietary CAS system.
●
If both PCMCIA type and USB type modules are inserted at the same time, the PCMCIA
type module will be used.
●
If another USB type module is also inserted while a USB type module is inserted, the
module that was inserted first will be used.
●
Press the button on the remote control.01
Launch Apps.02
Select a category or press the button to search for an app.03
44
Page 45

In order to install apps, you must be logged in.
Available categories may vary depending on the country or service status.
If the storage on your TV is insufficient, you can install the apps by connecting an external
memory device.
Some USB storage devices may not be supported or may not work properly.
USB stick containing apps from other TVs may not be used.
Exercise caution when in use by children. Children may have access to inappropriate online
content through this product. You can block inappropriate online content by restricting
access to some apps.
Configure the settings in General System Safety Application Locks.
Content Recommendation
Select an app to install.04
Read the details of the app and then press Install.05
When the installation is complete, you can run the app immediately.06
Searches for content.
To see the details, click the Apps and Content Content Search in User Guide.
You can log in to your LG account.
For more information, see Getting Started with LG webOS TV Managing Your LG
Account in User Guide.
You can manage apps, such as updating or deleting installed apps.
Closes the app.
To turn off the app from running in the background, press the button on the remote
control and select Quit App.
If your remote control does not have a button, press and hold the button.
45
Page 46

Content Recommendation
You can get content recommendations based on the programme you are watching or TV
viewing patterns.
If you are watching the TV using a set-top box, you must complete the setup of the
universal remote control to use the recommendation feature normally. For more
information, see How to Operate TV Setting Universal Control in User Guide.
When using a standard remote control, press the button on it.
Some models may not be supported.
You must connect to the network to use the recommendation feature.
The supported services vary depending on countries, so the recommendations may be
provided differently.
The list of the recommendations may be less relevant or irrelevant, depending on the
information of the programme you are watching.
Content Search
Content Search
Searches for content by title, actor/actress, and genre.
Press the button on the Magic Remote. The Content Recommendation screen
appears.
01
You can view more content by pressing the icon on the screen.02
46
Page 47

You must connect to the network to use the search feature.
Search results may vary depending on the programme, region, network settings, and
whether you have agreed to the terms and conditions.
Connecting External Devices
Using Home Dashboard
Using Home Dashboard
You can select or control a device (mobile, external device, Home IoT Devices, etc.)
connected to the TV.
Run Home Dashboard by pressing the button on the remote control.
Press the button on the remote control.01
Launch .02
Search for a variety of content and information using the desired search terms.03
Enter a search term.
Shows recent searches.
You can select one from the suggested keywords and proceed to search.
You can browse content by genre.
47
Page 48
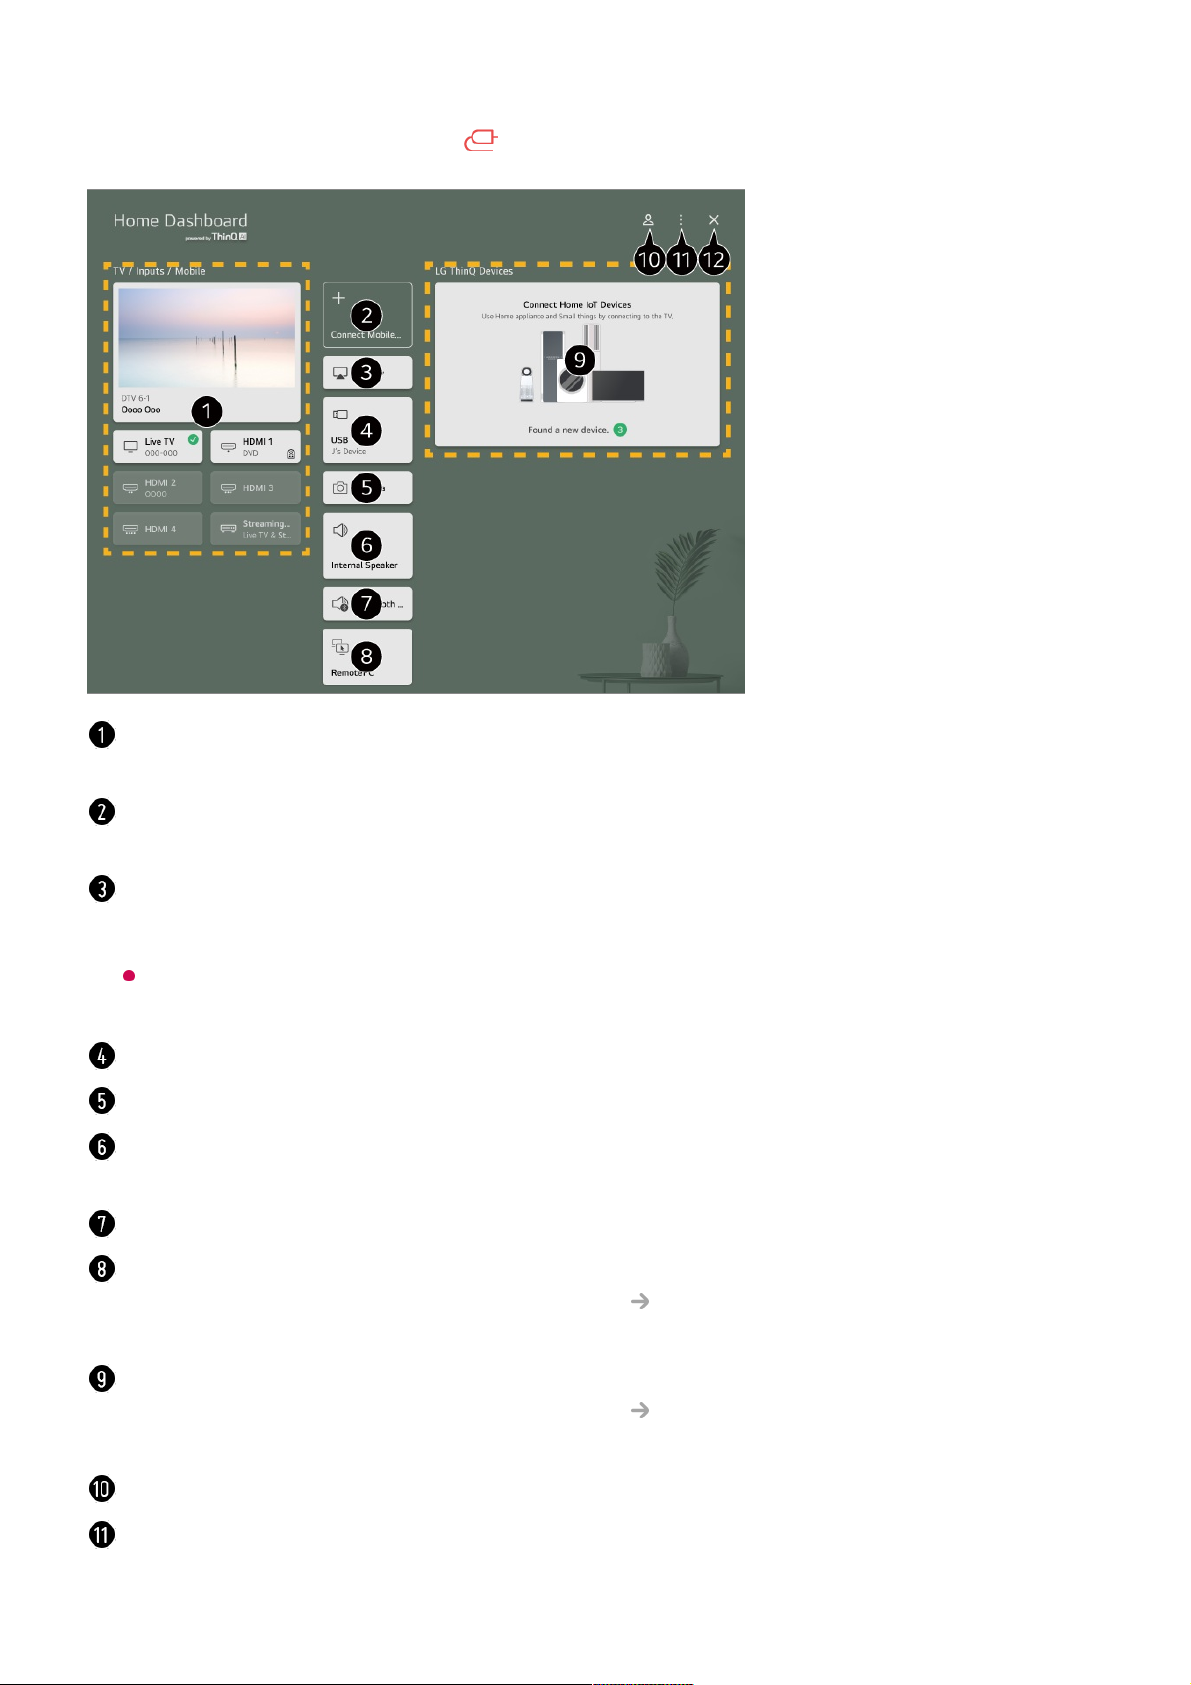
You can also press and hold the button on Magic Remote.
You can check and select the external device connected through the external input port or
network.
Connect your mobile device to TV to share the mobile screen and enjoy the stored
contents.
Use AirPlay/HomeKit to control your TV and watch content from your iPad or Mac on the
TV screen.
The availability of and access to Contents and Services in LGE Device are subject to
change at any time without prior notice.
It can only be selected if you have connected a USB storage device or a media server.
The connected camera is launched.
The currently selected output speaker is displayed, and you can navigate to the output
speaker settings screen.
You can view the list of connected Bluetooth devices and select one.
The PC can be remotely operated from the TV.
Please refer to Connecting External Devices PC Remote Operation in User Guide
for more information on the action.
You can check and control the device connected via the Home IoT.
Please refer to Connecting External Devices Connecting Home IoT Devices in User
Guide for more information on the action.
You can log in or out with your LG ThinQ account.
Edit Inputs : You can edit the name of the connected device or apply the related settings.
Edit home IoT devices : You can hide or show connected Home IoT Devices and
48
Page 49

Available settings vary depending on the model or region.
Connecting Home IoT Devices
Connecting Home IoT Devices
You can check and control the status of the connected Home IoT Devices.
If you are in an area where the LG ThinQ app is not in service, LG ThinQ device connection
will not be supported.
To register your IoT device, select Connect Home IoT Devices and follow the instructions
to apply settings.
If you are controlling the external device from your mobile app, you might not be able to
control the device from your TV. Quit the mobile app to control it from your TV.
rearrange the list.
Notification : You can turn on or off the notifications on the connected device.
Show Connectable IoT Devices : Shows devices that are available for connection on the
screen.
Universal Control Settings : Move to the Universal Control Settings app.
User Guide : Move to the User Guide app.
Quit App : Turns off the app from running in the background.
Closes the app.
Install LG ThinQ app on your smartphone.01
Log in to your LG ThinQ account, and register your own LG ThinQ device.02
Run Home Dashboard by pressing the button on the remote control.03
Select the at the top right.04
Log in to your LG ThinQ account. A list of the registered LG ThinQ devices will
appear.
05
49
Page 50
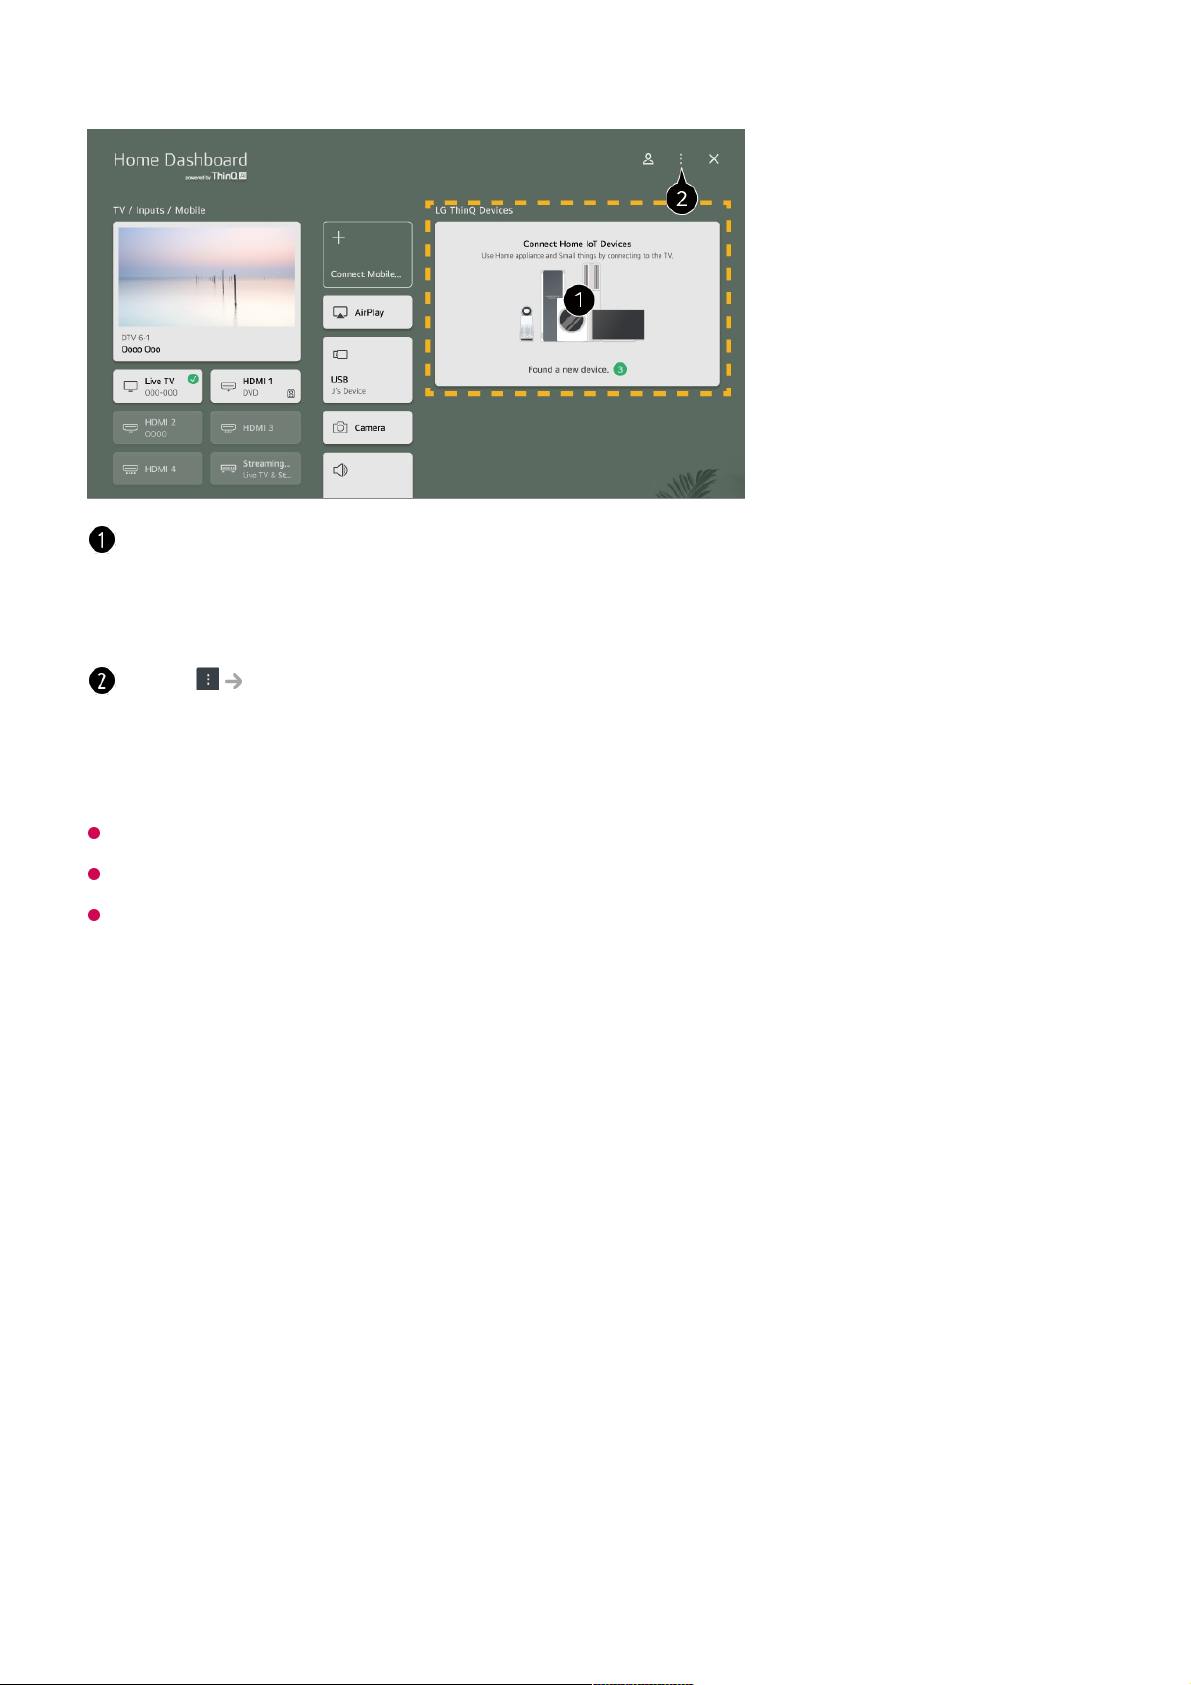
Available settings vary depending on the model or region.
IoT devices that can be connected to a TV are subject to change without notice.
Connectable LG ThinQ devices and available functions may differ between mobile and TV.
Connecting Smart Devices
Connecting Smart Devices
You can use a variety of features by connecting the TV to a smart device.
Connecting Your Smart Device to a TV Using the LG ThinQ App
You can check the connection guide for each type of Home IoT Devices. You can
connect and see devices registered with your LG ThinQ account or IoT devices.
Once the device is connected, the card will be changed to a smaller size and appear at the
bottom of the device connection list.
Select Edit home IoT devices.
Edit List : You can hide or show the connected Home IoT Devices and rearrange the list.
Delete devices : You can delete the connected device. You can only delete certain
devices from the TV.
Download the LG ThinQ app from the app store of your smart device.01
Connect the TV and smart device to the same network.02
Run the LG ThinQ app installed on your smart device.03
Follow the instructions from LG ThinQ app to connect your smart device to the TV.
When your account information of LG ThinQ is linked to the TV, you can manage
04
50
Page 51
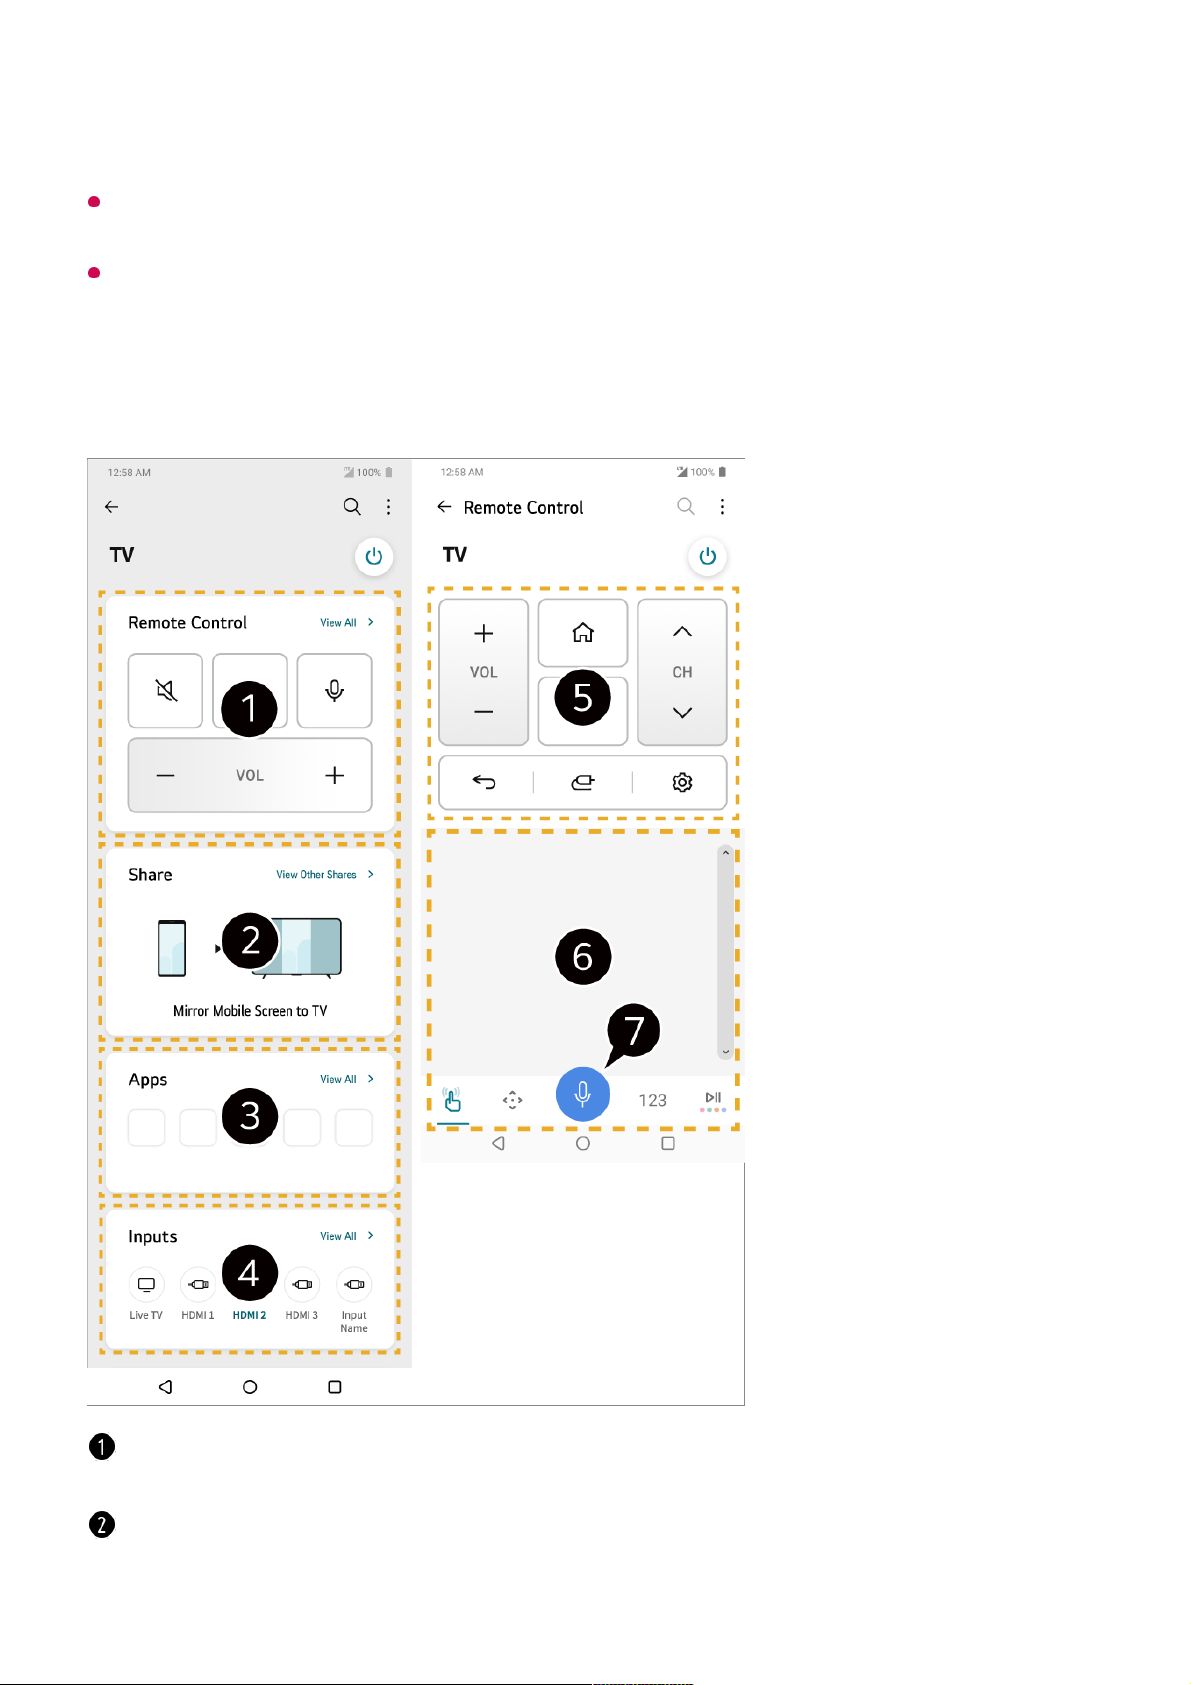
Voice commands can also be made through Smart Speaker linked to the account in the
settings of the LG ThinQ app.
The service may not offer depending on country.
Controlling Your TV with the LG ThinQ App
You can tap the buttons on your smart device’s screen to control the TV.
the IoT devices linked to your account using Home Dashboard of the TV.
Simple remote control operation is possible. Select View All and try using the remote
control in full screen.
You can share and enjoy the sound, screen, or content on the TV and smart device
interactively.
51
Page 52

Some controls may be limited in external input mode.
The app’s screen and functionality are subject to change without prior notice.
Available features may differ depending on your country and OS.
Using the Camera of a Connected Smart Device on the TV
You can use the camera of a smart device connected with LG ThinQ on the TV.
It is recommended that you always update your device to be connected to your TV to the
latest OS version for a reliable connection.
Depending on the model or manufacturer of the smart device, the camera may not be
connected.
It is recommended that you connect the device to a 5 GHz router because the performance
may be affected by your wireless environment.
The response rate may vary depending on the user’s environment.
If connection fails repeatedly, turn off the TV and the device you want to connect to, then
turn them back on and try again.
Connecting Smart Devices using NFC
Tagging
Displays a list of apps installed on the TV.
Displays a list of devices connected to the TV's external input.
When watching a broadcast, you can control the programme, volume, etc. or select the
external input with voice commands instead of using the remote control.
You can use the same functions as the Magic Remote’s pointer and arrow keys.
A speech recognition function is available.
Some models do not support this function.
Run LG ThinQ on the smart device.01
At the top right corner of the LG ThinQ app screen, select , and then select
Connect phone camera.
02
Press the button on the remote control to launch Home Dashboard.03
Select the applicable smart device from the list of connected cameras.04
52
Page 53
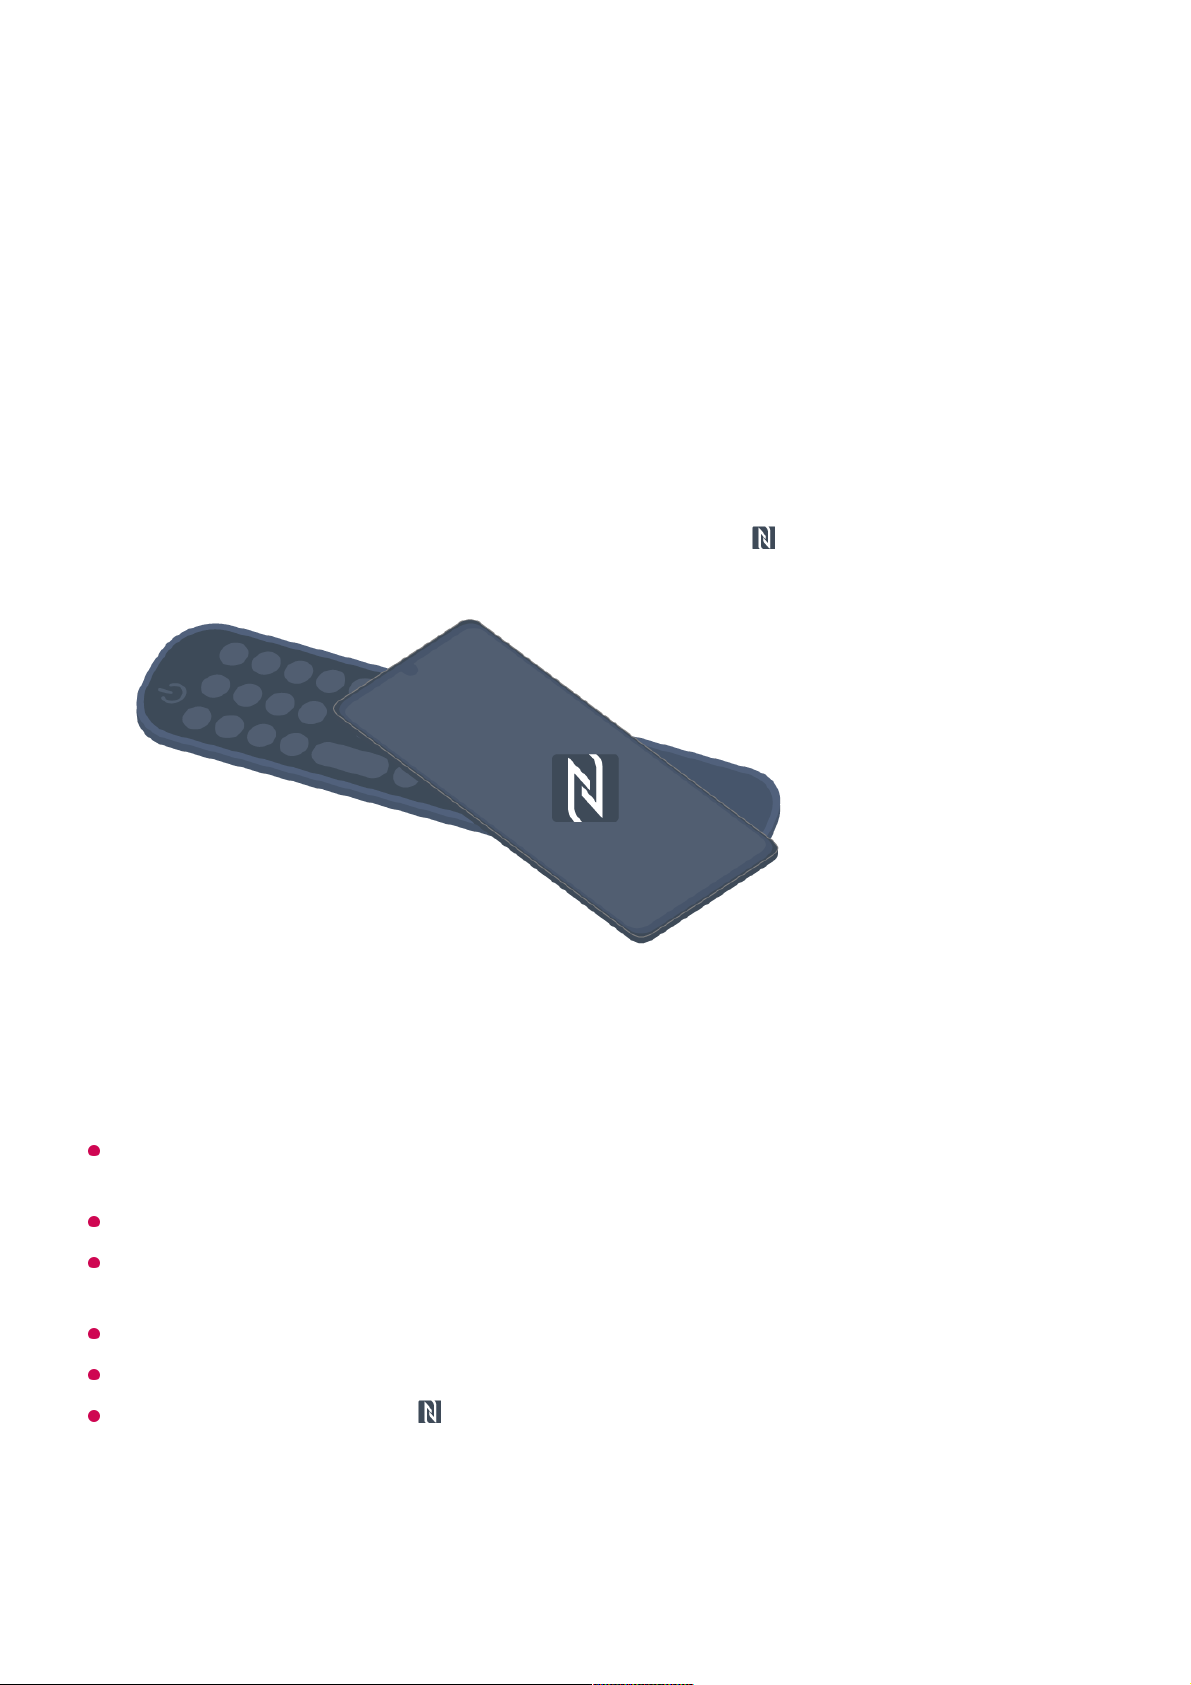
Connecting Smart Devices using NFC Tagging
Near Field Communication (NFC) is a technology that allows you to conveniently send
and receive information without any separate settings.
By bringing a smart device near the NFC-enabled remote control you can install the LG
ThinQ app and connect the device to the TV.
Some countries do not support LG ThinQ app installation with NFC tags. In this case,
download the LG ThinQ app from each app store.
This feature is available for NFC-enabled smart devices only.
Depending on the smart device, the NFC location may be different. For more information,
refer to the user manual of the device.
Features connected via NFC may differ depending on the smart device.
This feature is only available if the remote control has an NFC logo.
Some remote controls have on the back of the remote.
Watching Smart Device Screen on TV
Turn on NFC in the settings of the smart device.
To use NFC with Android devices, set the NFC option to enable read/write tags in
the settings of the smart device.
The NFC settings may vary depending on the device.
01
Turn on the smart device screen and place it near the on the remote control.
The maximum distance for NFC tagging is about 1 cm.
02
Follow the instructions to install the LG ThinQ app on your smart device.03
Tag your smart device to the remote control again. LG ThinQ allows you to connect
to the TV and watch the contents of your smart device or enjoy the screen of your
smart device.
04
53
Page 54

Watching Smart Device Screen on TV
When you connect Screen Share for the first time, a popup will appear which allows you to
select Accept, Decline or Block.
It is recommended that you always update your device to be connected to your TV to the
latest OS version for a reliable connection.
Depending on the model or manufacturer of the smart device, the Screen Share feature
may not be supported.
It is recommended that you connect the device to a 5 GHz router because the performance
may be affected by your wireless environment.
The response rate may vary depending on the user’s environment.
It’s differ form devices. For more information on the device you want to connect to, refer to
its user guide.
If connection fails repeatedly, turn off the TV and the device you want to connect to, then
turn them back on and try again.
Playing Sound from a Smart Device through
the TV’s Speakers
Playing Sound from a Smart Device through the TV’s
Enable Screen Share mode on the smart device.01
Your TV will be displayed in the list of available devices.02
Select your TV and request connection.03
Select Accept in the connection request popup window.04
After the connection is established, the TV will display the screen of the connected
device.
05
Accept : You can connect the device. No connection popup will appear from the second
time.
●
Decline : Do not connect the device. If you try to connect again, the popup will appear.
●
Block : Do not connect the device. Even if you try to connect again, the popup will not
appear and the connection will not work.
To turn off Block, go to General Devices External Devices and select
Delete Connection History.
●
54
Page 55

Speakers
Connect a smart device to the TV via Bluetooth to play sound from the smart device
through the TV’s speakers.
The TV may not be found in the list of smart devices while searching for a broadcast
programme or setting up a Bluetooth speaker.
If you connect a smart device to the TV via Bluetooth and listen to the sound of the smart
device through the TV speaker, the TV may not be connected to any other smart device.
Connecting USB
Connecting USB
Connect a USB storage device (USB HDD, USB stick) to the USB port on the TV to
enjoy the content files stored on the USB storage device on your TV.
Tips for Using a USB Storage Device
A USB storage device that has a built-in automatic recognition programme or uses its own
driver might not be recognisable.
Some USB storage devices may not be supported or may not work properly.
If you use a USB extension cable, the USB storage device may not be recognised or may
not work properly.
Please use only USB storage devices formatted with the FAT32, exFAT or NTFS file
system provided by Windows OS.
It is recommended that you use an external USB HDD with a rated voltage of 5 V or less
and a rated current of 500 mA or less. If you use a device requiring a higher voltage/current
than the rated voltage/current, it may not operate properly due to lack of current.
It is recommended that you use a USB hub or USB storage device with a power supply.
We recommend using a storage device with a capacity of 32 GB for the USB memory and
2 TB or less for the USB hard disk.
If a USB HDD with power-saving function does not work, turn the hard drive off and on
again to make it work properly. See the owner’s manual for the USB HDD for more
information.
Turn the smart device’s Bluetooth on, then select the TV from the list of devices.01
The TV will be connected to the smart device.02
55
Page 56

Data on a USB storage device may be damaged, so it is recommended that you back up
any important files. Users are responsible for data management. The manufacturer bears
no responsibility.
Press the button on the remote control. To remove the USB storage device, press the
Eject button, which appears at the top when you focus on the USB storage device you
want to remove. If you disconnect the USB storage device without selecting Eject, an error
may occur in your TV or storage device.
When you connect a USB storage device of a file system not supported by the TV to the
USB IN port, the format message appears. To use the connected USB storage device, you
should format the device first.
Formatting deletes all data stored on the USB storage device, and the device is formatted
with the FAT32, exFAT or NTFS file system.
Run Home Dashboard by pressing the button on the remote control. Select the
connected USB from Home Dashboard and select the Format button to format the USB
storage device.
When connecting a USB storage device, a random file/folder can be created to provide
Smart TV services such as the saving and retrieving of thumbnail images.
Using the Media Player
Using the Media Player
You can search and view photos or play videos and songs with the Media Player app.
Press the button on the remote control.01
Run the Media Player app.02
Select a device to use from the device list.03
Select the content to play.04
56
Page 57
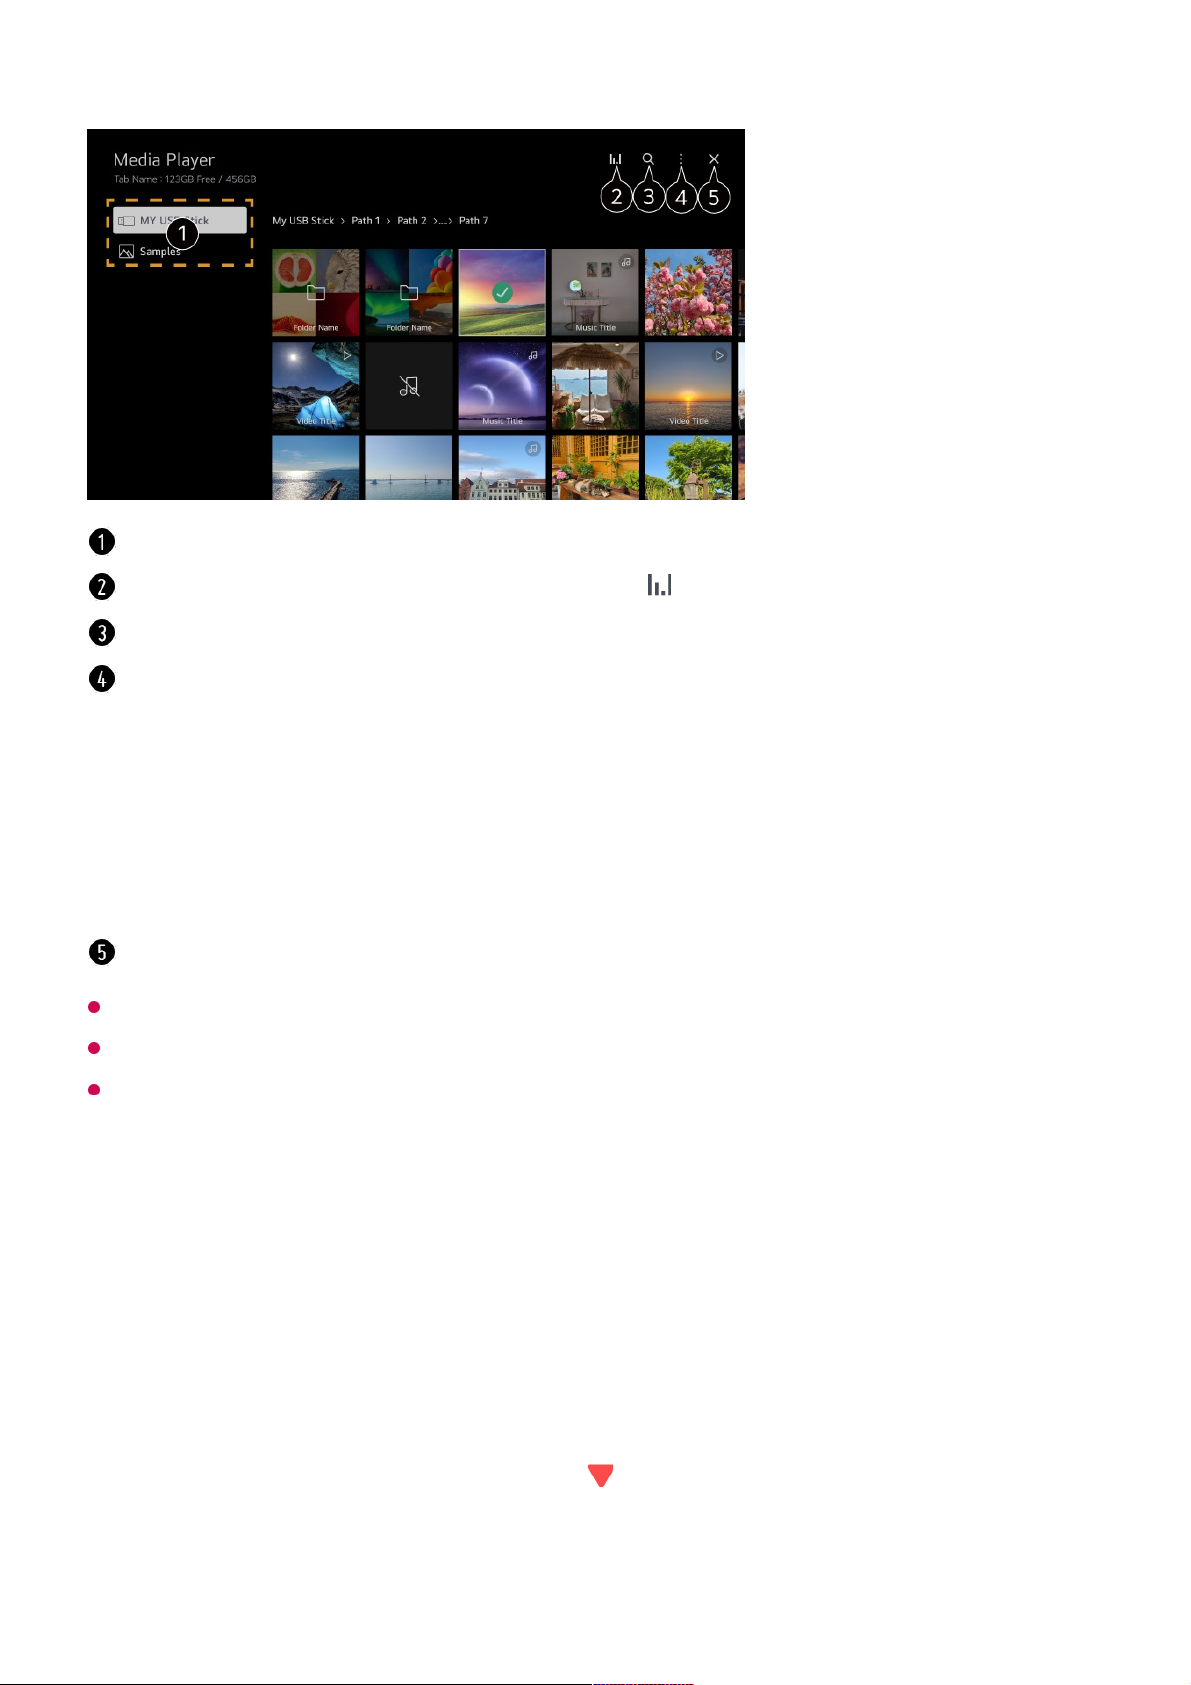
You cannot delete files that are shared from other devices.
Different settings items are available depending on the filtering or model you selected.
Certain content may not be displayed on the list if the number of all content exceeds
40,000.
Viewing Photos
Viewing Photos
You can select a photo from the Media Player app and view the photo.
You can use more features by pressing the button on the remote control while
viewing a photo.
You can select a device connected to your TV.
Displayed only when music is playing. Press the to access the Play Music screen.
Launch Search.
View Type : Selects a content display mode.
Sort : Select the option to sort content.
Group : If you filter by Music, you can group content into categories such as Artist and
Album.
Selection Play : You can select and play multiple pieces of content.
Delete : You can select and delete multiple pieces of content.
User Guide : Move to the User Guide app.
Quit App : Turns off the app from running in the background.
Closes the app.
57
Page 58

Playing Videos
Playing Videos
You can select a video from the Media Player app and play the video.
Pressing the / buttons on the remote control allows you to skip backward/forward 10
seconds.
You can access more features by pressing the button on the remote control while
playing a video.
Shows the previous content.
Starts the slide show.
Shows the next content.
Rotates photos.
Enlarges or reduces the photo.
360-degree photos can be viewed in 360 degrees.
Using the 360° VR Play on a normal photo may distort the image.
Some models may not be supported.
Plays a music file selected from the storage device as background music.
Sets the photo size or changes the speed or effects for the slideshow.
Some models may not be supported.
58
Page 59
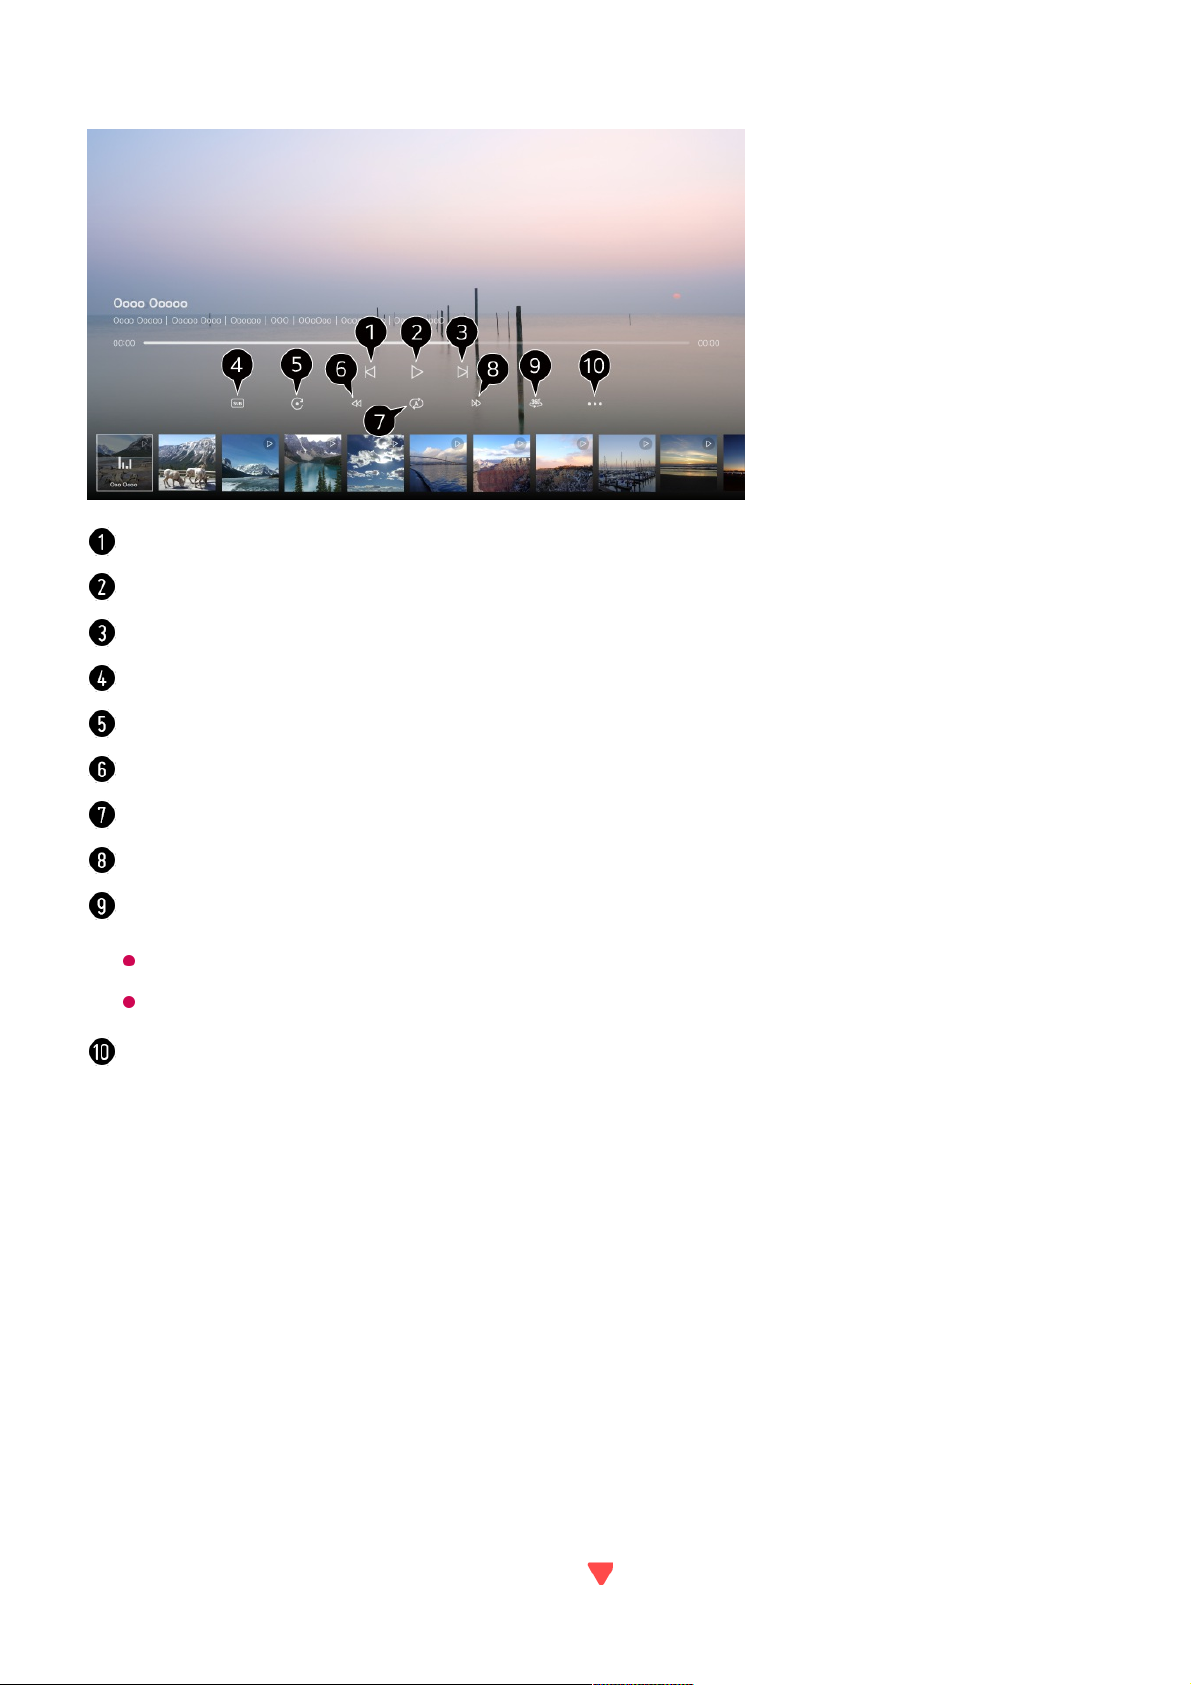
Listening to Music
Listening to Music
You can select a song from the Media Player app and play the song.
You can use more features by pressing the button on the remote control while playing
Shows the previous video.
Plays or pauses the video.
Shows the next video.
You can change subtitle settings.
Rotates videos.
Fast-rewinds the video at higher speeds.
You can do the settings related to play on repeat of the video.
Fast-forwards the video at higher speeds.
360-degree videos can be viewed in 360 degrees.
Using the 360° VR Play on a normal video may distort the image.
Some models may not be supported.
Resume Play : You can set continue watching to resume playing from the last viewed
scene.
Play Speed : Sets the playback speed.
Audio Track : You can set audio tracks.
User Guide : Move to the User Guide app.
Quit App : Turns off the app from running in the background.
59
Page 60

a song.
PC Remote Operation
PC Remote Operation
The PC can be remotely operated from the TV.
You can set the random play mode.
You can set the repeat play mode.
Lyrics are available for music files that provide them.
In some music files, you can choose a lyric section and move the playback position.
The lyrics feature is only supported on some devices.
The lyrics may not be displayed in sync depending on the lyrics data in the music file.
You can listen to music with the screen turned off.
Lyrics Sync : You can set the lyric speed.
This feature may not be supported depending on the music.
User Guide : Move to the User Guide app.
Quit App : Turns off the app from running in the background.
Turn on the power of the PC to which you wish to connect.01
Turn on "Enable Remote Desktop" in the PC settings.02
Press the button on the remote control to launch Home Dashboard.03
Run the Remote PC.04
60
Page 61

Connecting a keyboard and mouse to the TV enables smooth operation.
If the keyboard layout of the keyboard connected to the PC and the keyboard connected to
the TV are different, certain keys may not work.
Both TV and PC can be connected only after network connection and settings are set.
If the TV and PC are not connected to the same network, public IP information is required,
and port forwarding settings of the router may be required.
If the connection is restricted by the PC security policy, contact the network security
manager.
Only Windows 10 Professional or later operating systems can be connected.
A Windows user name and password must be set. Login via PIN input is not supported.
Some features or programmes of the PC cannot be used.
When the power-saving function of the PC is activated, the connection is lost and cannot
be reconnected. We recommend disabling the PC power-saving function before use.
Sharing PC Content
Watch content saved in your PC on the TV
You can enjoy videos/music/photos stored on your PC on the TV when these devices
are connected to the same network.
Browse the content on your PC to watch on TV (Windows 10)
Even when multiple TVs or devices are connected, the selected file is only played through
one device. The playback rate may vary depending on the network connection.
To play on other operating systems or devices, refer to the manual of the operating
system/device.
Enter the IP address, User Name, and Password of the PC you wish to connect to,
and select Connect to connect the PC.
The screen of the connected PC will be displayed on the TV screen and can be
operated with the TV remote control.
05
Connect your TV and PC to the same network.01
Right-click the file you want to play and select “Cast to Device”.02
Select the name of the TV you want to watch from the displayed list, and playback
will start on that TV.
03
61
Page 62

Browse and watch the content stored on the PC using the TV
(Windows 10)
To play on other operating systems or devices, refer to the manual of the operating
system/device.
Matters That Require Attention of Content Share
Check your network settings if the content share option does not work properly.
It is recommended that you connect the device to a 5 GHz router because the performance
may be affected by your wireless environment.
May not work properly depending on the network environment.
If multiple TVs are connected to one device, the content may not be played properly
depending upon server performance.
To watch a 1080p video through the content sharing function, a router using the 5 GHz
frequency is required. If you use the existing 2.4 GHz router, the video may be laggy or not
play properly.
The Content Share function may not be supported for a router that does not support multicast. For more information, refer to the user guide that came with your router or contact the
manufacturer.
Captions are only supported on some connected devices.
If you have added a caption file afterward, disable the shared folder on the PC and then
enable it again.
The DRM files in the connected device will not play.
Even for the file format supported by the TV, the supported file format may differ depending
on the connected device environment.
If there are too many folders or files in a folder, it may not work properly.
The information on the file imported from the connected device may not be displayed
correctly.
Depending on the encoding, some streams may not play in content sharing mode.
Connect your TV and PC to the same network.01
Open the “Start” menu on your PC screen, search for “media streaming options” and
then select the result that appears.
02
Select the “Turn on media streaming” button in the window that opens.03
Allow all of the “media streaming options”.04
Select “OK” to save the settings.05
Select the connected PC in the Home Dashboard app on the TV, and then select
and play the file you want.
06
62
Page 63

Watching PC Screen on TV
Watching PC Screen on TV
Connect Wireless (Windows 10)
It is recommended that you always update your device to be connected to your TV to the
latest OS version for a reliable connection.
It is recommended that you use this function at close range.
Start Screen Share faster by having your smart device or PC connected to the same
network as the TV.
Though it can be connected without a wireless router, connecting your device to a 5 GHz
router is recommended because the performance can be affected by the surrounding
wireless environment.
The response rate may vary depending on the user’s environment.
It’s differ from Windows version. For more information on the device you want to connect to,
refer to its user guide.
If connection fails repeatedly, turn off the TV and the device you want to connect to, then
turn them back on and try again.
Connect Wired
If there is a problem with your connection, refer to Troubleshooting Troubleshooting
PC Connection Issues in User Guide.
Click the Notification Centre icon on the taskbar on the PC screen and select
Connect.
01
Select the TV you want to connect to and request the connection.02
After the connection is established, the TV will display the screen of the connected
PC.
03
Connect your PC to the TV using an HDMI cable.01
Switch the current input source to the port where the HDMI cable is connected in the
Home Dashboard.
02
After the connection is established, the TV will display the screen of the connected
PC.
03
63
Page 64
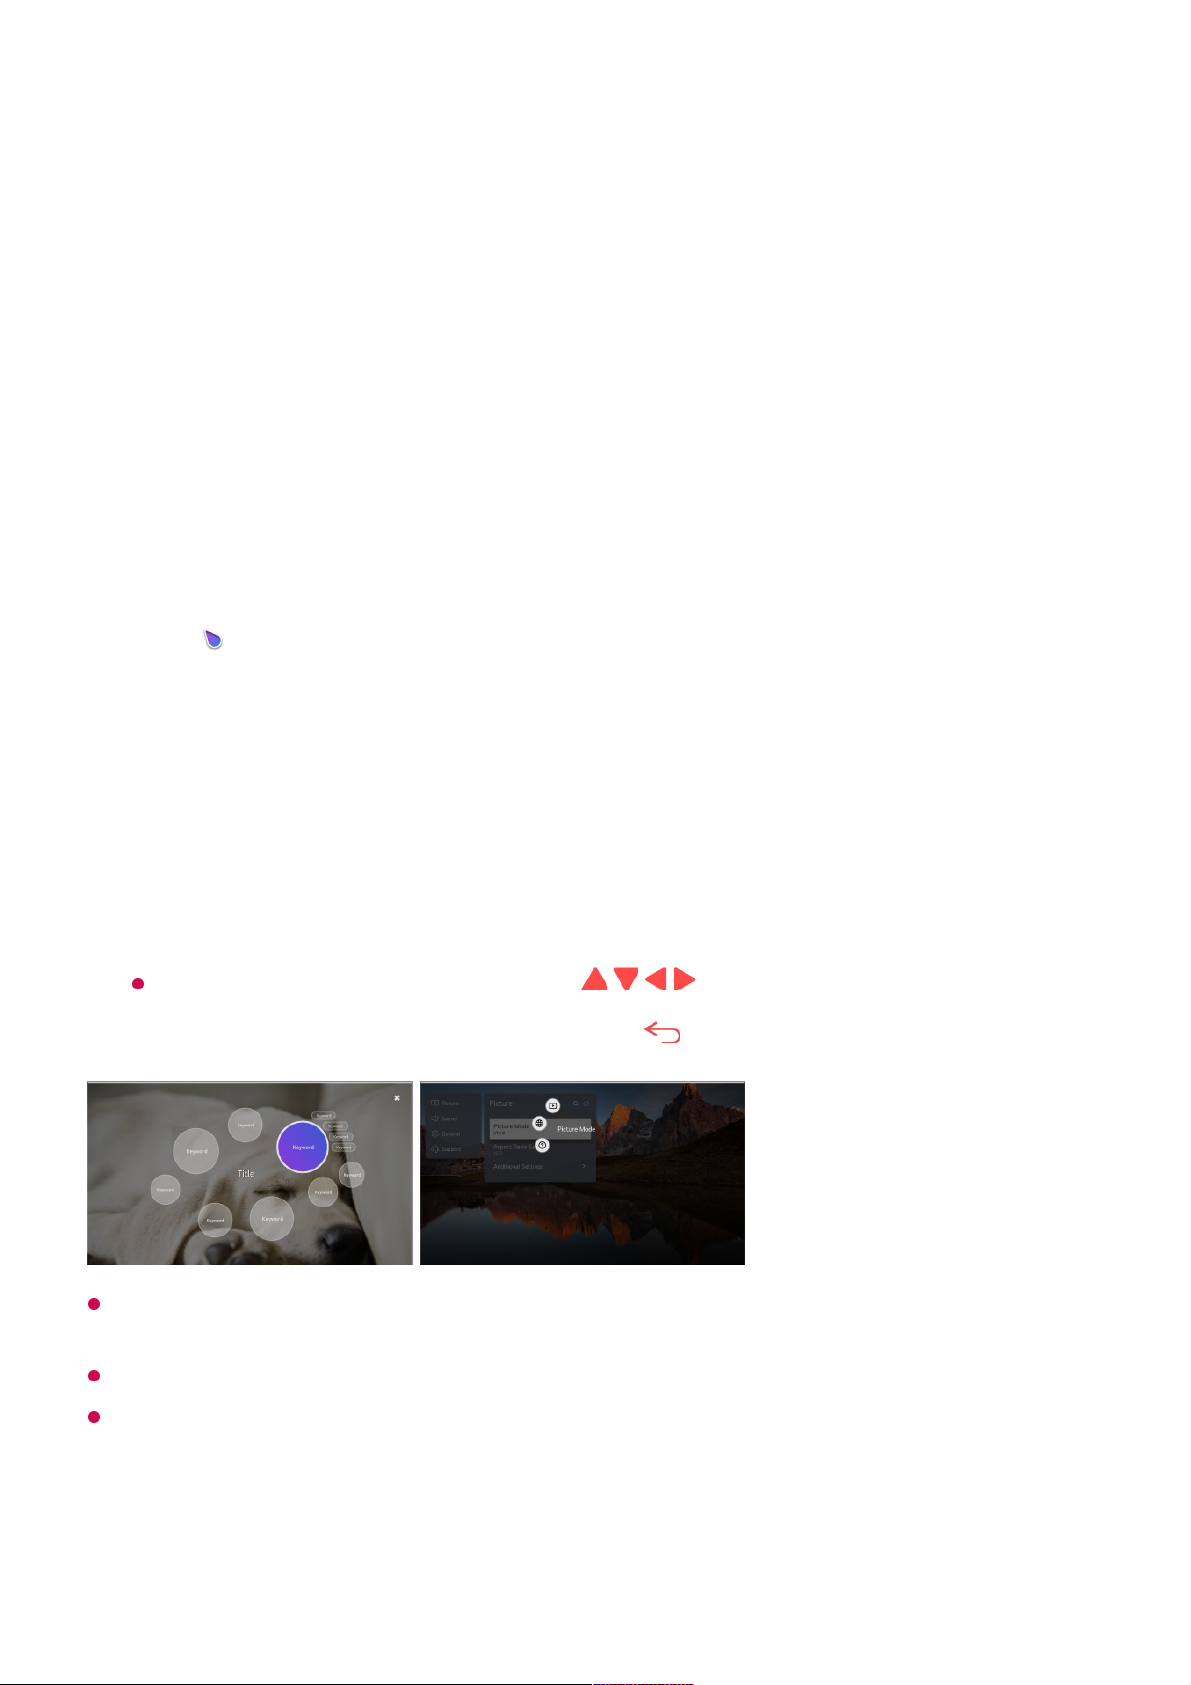
Making the Most of Smart TV
To Use Magic Explorer
To Use Magic Explorer
You can run a search conveniently through various apps based on on-screen text or
video information.
You can also use this feature by pressing and holding the OK button on the standard
remote control.
Available features vary depending on the region or service.
Some models may not be supported.
Surfing the Internet on TV
Magic Explorer can be used if the pointer colour of the Magic Remote changes (e.g.,
to the ).
01
Press and hold the Wheel (OK) button on the image if you are watching a
broadcast, or on the text if you are using Guide, Settings, Sports Alert or Art
Gallery apps.
02
On the broadcast screen, keywords associated with the programme appear.
On the text in the app, an icon appears that allows you to go to an item, such as
Web Browser or Search.
03
Choose an item to use.
You can move an item by pressing the / / / buttons on the remote control.
04
You can exit Magic Explorer by pressing the button on the remote control.05
64
Page 65
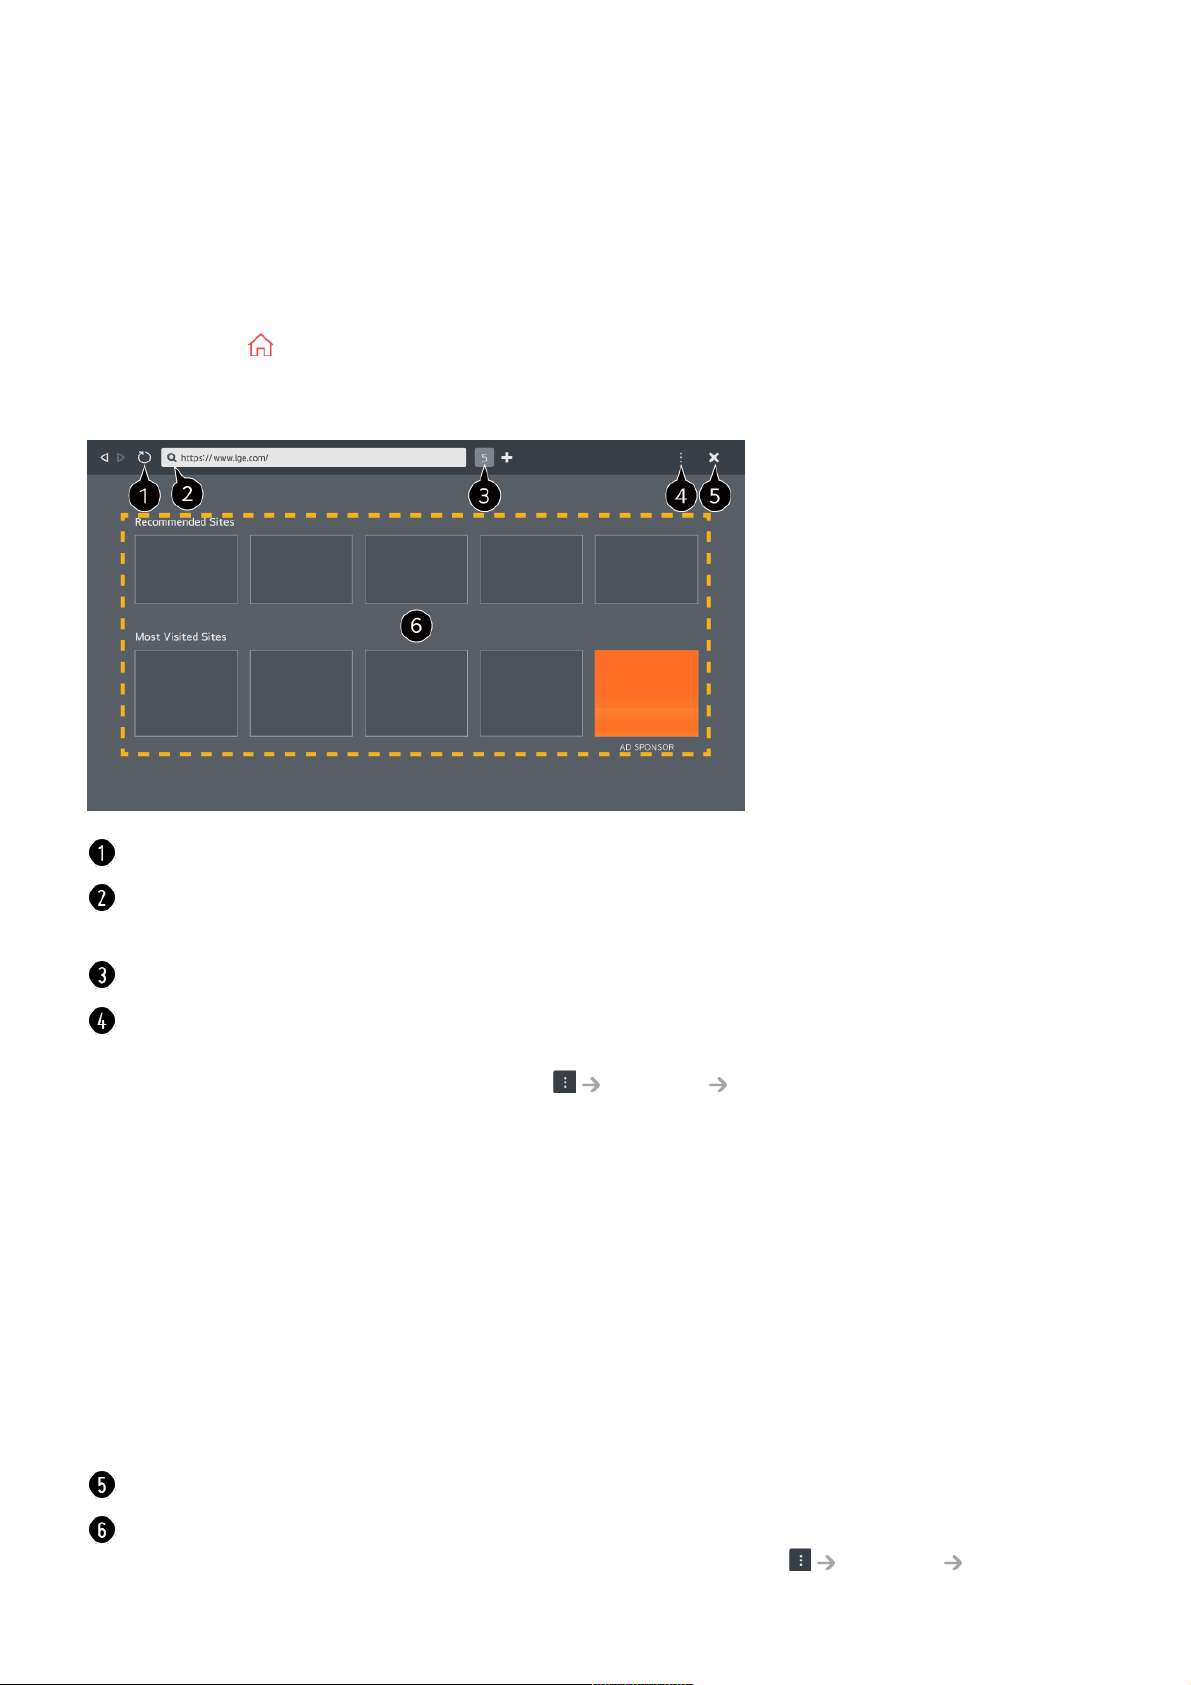
Using the Web Browser
You can enter the website when you input the web address on the URL bar.
If you input the search word, it will find the information about search word base on the
search engine.
Press the button on the remote control.01
Run the Web Browser application.02
You can refresh the web page you are viewing.
You can type in a web address to navigate to a specific website or enter a search term
directly.
You can view the tabs that are currently open.
You can zoom in or out on the screen while browsing the website.
Block Ads : You can block ads within the web page you are viewing.
However, this button is only displayed if Settings Use Block Ads feature is set to
On.
TV View : Split the screen to display the TV screen. You can browse web pages while
watching TV.
History : You can view and delete the website visit history.
Add to bookmarks : You can add the website you are currently viewing to your
Favourites.
Bookmarks : You can view and delete the list of websites you have added to your
Favourites.
Settings : You can change the web browser settings.
User Guide : Launch User Guide.
Quit App : Turns off the app from running in the background.
Closes the app.
The new tab screen shows a list of Recommended Sites and Most Visited Sites.
If you do not want Recommended Sites to be displayed, set Settings Show
65
Page 66

The Web Browser app on your TV is a browser for TV, so it may work differently than the
browser for your PC.
The website can be accessed through the TV's Web Browser app, so care needs to be
taken about children's access to harmful online contents.
You can lock the Web Browser app to prevent access to harmful online contents.
Configure the settings in General System Safety Application Locks.
If you experience problems while using Web Browser, refer to Troubleshooting in User
Guide.
Changing Web Browser Settings
Select Settings at the top of the Web Browser app.
On Startup
You can choose the page that appears when you start the Web Browser app.
Search Engines
You can select a search engine to search for when entering a keyword in the address
bar.
Search engine settings may be subject to change without notice based on the supplier’s
circumstances.
Show Recommended Sites
You can set whether or not to display a list of Recommended Sites on the new tab
Recommended Sites to Off.
Recommended Sites may vary by country and is only available in certain countries.
Some contents may not be played properly.
●
Flash Plug-in is not supported, and only HTML5 media is supported.
●
Plug-in installation is not supported.
●
Media in formats other than JPEG/PNG/GIF may not be played.
●
Apps may be forced to shut down if the TV runs out of memory.
●
The fonts provided on the TV are used. Depending on the content, characters may look
different from PC or mobile browsers.
●
File and font downloads are not supported.
●
Caution is required because malicious or phishing sites are not automatically blocked.
●
Some functions of Web Browser may not be supported temporarily due to external
factors.
●
66
Page 67

screen.
Always Show Address Bar
When set to On, the address bar and menu bar area at the top will always be
displayed.
Automatic Web Browser Issue Report
When it is set to On, if a failure (malfunction, media playback failure, page loading
failure, abnormal shutdown, delay in response due to insufficient memory, etc.) occurs
while using the web browser, the relevant information will be automatically sent to the
web browser development team at the LG Electronics headquarters (Korea). The
submitted information will only be used to improve the Web Browser performance.
Use Block Ads
When it is set to On, if you press the at the top of Web Browser, a button to turn
on or off Use Block Ads will appear on the screen. Turning on the Use Block Ads
feature speeds up page loading by blocking ads included in the website.
Site Filtering
You can register websites to block or allow.
Approved Sites : You can configure the settings to open the previously registered
web pages only.
Blocked Sites : You can configure the settings to block specific websites.
To use the Site Filtering function, you should enter the TV password.
Pop-up Blocker
Blocks pop-ups that are automatically displayed by web pages.
Private Browsing
If set to On, a history of website visits will not be stored.
Do Not Track
You can request to not leave a history of your visit on the website. The operation may
vary depending on the policy of the website.
Adaptive Streaming using JavaScript
The media streaming technology using JavaScript allows you to view video with
67
Page 68

optimised resolution.
If this is set to Off, the resolution of the videos played in Web Browser is limited to
720p.
Cookies Settings
Enables the website to store and use cookie data.
Clear Browsing Data
Clear Cookies : Deletes cookie data. When deleted, you are logged out of most sites.
Clear All Browsing Data : Deletes all browsing history, including cookies.
Connecting a Camera to the TV
Connecting a Camera to the TV
By connecting a camera to the TV, you can use it for video conferencing, etc.
For a detailed description of the camera’s functions, refer to the device's manual.
The camera must be purchased separately.
It is recommended that you use a product that has been tested for compatibility with LG
TVs.
Logitech C920/C920s/C922 Pro/C922x/C925e/C930c/C930e
Depending on the installation status of the TV, the camera may not be mounted on the TV.
The USB storage device may not work or function properly when a USB hub or extension
cable is used.
Video Conferencing
You can have a video conference using an Internet website or an app that enables video
conferences.
This function may not be available in some countries or models.
Internet connection is required to use this feature.
Depending on camera performance or the network environment, the image quality may not
Connect the camera to the USB IN port.01
Run Home Dashboard by pressing the button on the remote control.02
Select Camera.03
68
Page 69

be clear.
Making the Most of Multi View
By pressing Multi View, you can run the video screen or broadcast screen, and
camera simultaneously. For more information, see Making the Most of Smart TV
Using Multi View in User Guide.
This feature is available only on models that support the Multi View feature.
Using Sports Alert
Using Sports Alert
You must log in to your LG account to register your preferred team or player.
The match schedule or status may differ from actual ones depending on the circumstances
of the data provider.
Real-time alarm may not be available when using certain apps.
This feature is available only when the network is connected.
Some models may not be supported.
Live Plus
Using the Live Plus Function
Live Plus provides an enhanced viewing experience related to the content you're
Press the button on the remote control.01
Run the Sports Alert app.02
You can view the list of teams by league and detailed information.03
Press Add to register your preferred team or player.
By registering a team or player, you can view live scores and upcoming match
schedules. You can receive notifications while watching TV by setting a game match
alarm.
04
69
Page 70

watching including looking at additional information, participating in events, interacting
with advertisements, etc.
Some models may not be supported.
You can still access some of the Live Plus features when using external devices such as a
set-top box.
If you set up a universal remote control, you can use Live Plus even when using external
devices.
This service is provided for only select content with contracted partners.
Settings
Quick Settings
To Use Setting Function Quickly
Set of light-weight controls quickly and simply such as Picture Mode, Sound Out,
Game Optimiser and so on.
Press the button on the remote control.
Press the button on the remote control.01
Select General System Additional Settings.02
Set Live Plus to On.03
70
Page 71

Move to an item that can be set up, press the remote control's Wheel (OK) button once,
and then press and hold the Wheel (OK) button to move to the menu.
The configurable items differ depending on model.
Game Dashboard
During a game, you can quickly change the Game Genre and check the settings status
in real-time.
Press the button on the remote control.
When you connect a game console and run a game, General Game Optimiser is
changed to On, and Picture / Sound Select Mode is changed to Game Optimiser. If
Game Dashboard does not display, please check each setting.
You can set Picture Mode.
You can set Sound Mode.
You can choose Sound Out.
Directs to the Game Optimiser settings.
Launch Multi View.
Directs to the OLED Care settings.
Directs to the Network settings.
You can set more options.
You can also long-press button of the remote control to run the All settings directly.
You can add/delete the quick setting items or change their order.
You can optimise the screen depending on the genre of the game.
Real-time signals and the selected genre’s settings values are displayed.
71
Page 72

The configurable items differ depending on model.
Picture
Selecting Picture Mode
Picture Select Mode
Select the picture mode that is best suited to your viewing environment, preferences or
video type.
Select a picture mode. By adjusting and setting each item in more detail based on the
mode, your video is better optimised for its characteristics.
The configurable items differ depending on model.
When You Use Normal Signals
Vivid
Sharpens the image by increasing the contrast, brightness and sharpness.
Standard
Displays the picture with normal contrast, brightness and sharpness levels.
Eco / APS
The Energy Saver feature changes settings on the TV to reduce power consumption.
The items displayed may vary by model.
Dark Room Mode : You can adjust the brightness of the entire screen to reduce eye
strain in a dark environment or when watching for a long time to make the screen easier to
watch.
Multi View : You can split the screen and use two apps simultaneously.
Menu Colour : You can change the colour of the menu.
Game Optimiser : Directs to the Game Optimiser settings. To see the details, click the
Settings Game Optimiser in User Guide.
All Settings : You can set more options. You can also long-press button of the remote
control to run the All settings directly.
There may be restrictions on running Multi View in some contents.
Launch User Guide.
72
Page 73

The configurable items differ depending on model.
Cinema
Suitable picture for movies.
Sports / Football / Cricket
Suitable picture for sports games. Sharpens the image of rapid movements such as
kicking or throwing a ball.
The name of the sport may differ depending on region.
Game Optimiser
Suitable picture for gameplay.
FILMMAKER MODE
Provides optimized Cinema Picture quality certified by UHD Alliance, the standard
setting body for UHD-related technologies.
To auto-switch to FILMMAKER MODE when a signal that can be operated with this
mode is entered, set FILMMAKER MODE Auto Start to On.
Expert (Bright space, daytime) / Expert (Dark space, night)
This mode is suitable for movies, etc. viewed in a dark environment.
Expert (Dark space, night) has lower color temperature than Expert (Bright space,
daytime).
Select a mode that is suitable for the movie you are watching.
ISFccc : Imaging Science Foundation Certified Calibration Control
When You Use the HDR/Dolby Vision Signals
Vivid
Sharpens the image by increasing the contrast, brightness and sharpness.
Standard
In a normal viewing environment, it opens a screen that can properly show the
expressiveness and brightness of HDR.
Cinema Home
The screen appears as a bright and clear screen than the Cinema.
73
Page 74

Cinema
Suitable picture for HDR video signal.
Game Optimiser
Suitable picture for gameplay.
FILMMAKER MODE
Provides optimized Cinema Picture quality certified by UHD Alliance, the standard
setting body for UHD-related technologies.
To auto-switch to FILMMAKER MODE when a signal that can be operated with this
mode is entered, set FILMMAKER MODE Auto Start to On.
If the HDR/Dolby Vision video signal is input to the models that do not support the
HDR/Dolby Vision technology, It will be provide normal signals picture mode options.
Depending on the input signal, the available picture modes may be different.
When watching online service content, the Picture Mode may be changed to match the
content being shown.
Expert is an option that allows a picture quality expert to fine-tune the quality of the
standard picture. Thus, it may not be effective for a normal picture.
Select Mode change may modify Energy Saving and Motion Eye Care settings and it
can affect energy consumption. You can change the settings in General Energy Saving
and Picture Advanced Settings Brightness Motion Eye Care.
Setting the Screen Size
Picture Aspect Ratio User Selection
You can change the screen size according to the type of content you are watching.
16:9
Displays an aspect ratio of 16:9.
Original
The optimal screen ratio changes depending on the input image signal.
Full Wide
You can watch content across the full screen.
Please note that picture distortion can occur depending on signal type.
74
Page 75

4:3
Displays an aspect ratio of 4:3.
Vertical Zoom
You can adjust the vertical dimension of the screen and align the screen vertically by
using Adjust Zoom Ratio and Adjust Screen Position.
4-Way Zoom
You can adjust the horizontal/vertical/diagonal dimensions of the screen and align the
screen horizontally/vertically by using Adjust Zoom Ratio and Adjust Screen
Position.
The configurable items differ depending on model.
The picture may get distorted while zooming in or out.
Selecting a different screen size from the original size may cause the image to look
different.
Depending on the combination of picture format and screen size, the edges may be hidden
or shown in black, or both sides of the picture may flicker. Also, when selecting an item
shown on the broadcast screen, the outline may not be aligned correctly.
Depending on the input signal, the available screen sizes may be different.
View Screen with Just Scan
Picture Aspect Ratio Just Scan
If you turn this feature On, you can view the content in the aspect ratio that is in the
broadcast signal or content source. If the edge of the screen is not clean, please turn it
Off.
If set to Auto, the feature switches between On or Off status depending on the
information contained in the video signal.
The items that can be selected may vary depending on the current input.
Adjusting the Brightness of a Picture
Picture Advanced Settings Brightness
You can adjust the brightness of the entire screen.
Panel Brightness
Controls the level of screen brightness by adjusting the backlight. The closer to 100,
75
Page 76

the brighter the screen.
Decrease the Panel Brightness to reduce energy consumption.
Depending on the Energy Saving (Auto/Maximum), you may not be able to adjust the
Panel Brightness.
In this case, navigate to General Energy Saving Energy Saving Step
and set to Off or Minimum.
Depending on your TV model, you might not have the Panel Brightness setting.
OLED Pixel Brightness
Adjusts the display brightness by varying the brightness of the OLED panel.
Depending on the Energy Saving (Auto/Maximum), you may not be able to adjust the
OLED Pixel Brightness.
In this case, navigate to General OLED Care Device Self Care Energy
Saving Energy Saving Step and set to Off or Minimum.
Depending on your TV model, it might not have the OLED Pixel Brightness setting.
Adjust Contrast
Adjusts the contrast of the bright and dark areas of the picture. The closer to 100, the
higher the contrast.
Black Level
Adjusts the brightness of dark areas of the screen. The closer it is to 100, the lighter
the screen becomes.
Auto Dynamic Contrast
Corrects the difference between the bright and dark sides of the screen for optimal
results depending on the brightness of the picture.
Dynamic Tone Mapping
Suitable contrast settings based on image brightness of the HDR content.
Peak Brightness
Adjusts the maximum brightness of the screen.
Gamma(Adjust Brightness)
Adjusts the medium brightness of the picture.
76
Page 77

BT.1886 expresses the gradation in ITU-R BT.1886, which is an international standard.
Video Range
Adjusts the darkness of the screen in order to display a perfect black. Select Video
Range to match the colour range of the external input device.
This feature can be used while watching content through an external input.
LED Local Dimming
Maximizes the contrast ratio by making the bright side of the screen brighter and the
dark side of the screen darker.
Turning this option Off may increase energy consumption.
Motion Eye Care
Automatically adjusts brightness and reduces image blur based on image data to
reduce eyestrain.
Turning this option Off may increase energy consumption.
Depending on the input signal or the selected picture mode, the available options may
differ.
The configurable items differ depending on model.
Adjusting the Colour of an Picture
Picture Advanced Settings Colour
Colour Depth
Tones down or up the colours displayed on the screen. The closer to 100, the deeper
the colour.
Tint
Adjusts the colour balance between red and green displayed on the screen. The
closer to Red 50, the more red the colour will be. The closer to Green 50, the more
green the colour will be.
Off : Disables the LED Local Dimming function.
●
Low / Medium / High : Changes the contrast ratio.
●
77
Page 78

Colour Gamut
Selects the range of Colours to display.
Native
Displays more vivid and richer colour.
Auto Detect
It automatically sets the Colour Gamut to match the signal.
Dynamic
It expands the Colour Gamut to match the scene.
Adobe RGB
Sets the Colour Gamut to Adobe RGB standards.
Fine Tune
This is used when experts control it by using a test pattern. You can control it by
selecting areas of six colours (Red/Green/Blue/Cyan/Magenta/Yellow).
For normal images, adjustments may not result in noticeable colour changes.
Colour Adjustment
Adjusts the Colour and saturation of the picture to make the image more Colourful
and lively.
Select Colour
From Red/Green/Blue/Cyan/Magenta/Yellow, select a tone to adjust.
Adjust Saturation / Adjust Tint / Adjust Luminance
Adjust the chroma/tint/luminance of the tone in the range of -30 to +30.
White Balance
The function to adjust each colour to be reproduced more accurately based on white
allows you to adjust the overall colour tone of the screen to your preference.
Colour Temperature
You can set the colour to make the display look cooler or warmer.
78
Page 79

Method
This method is used for fine-tuning the color temperature setting. You can control
the colour temperature at two points of the bright part and dark part of the video if
you select 2 Points, at each point of 10 levels if you select 10 Points Signal
Level(%), and at each point of 22 levels of the video if you select 22 Points Signal
Level(%).
Point
Select screen brightness for color temperature adjustment.
If Method is set to 2 Points, use Low to select shadows and High to select
highlights.
If Method is set to 10 Points Signal Level(%), you can select brightness using
numbers indicating 10 levels.
When the Method is set to 22 Points Signal Level(%), you can select the
brightness with the 22 levels of brightness.
Signal Level(%)
Select screen brightness for color temperature adjustment.
If Method is set to 10 Points Signal Level(%), you can select brightness using
numbers indicating 10 levels.
When the Method is set to 22 Points Signal Level(%), you can select the
brightness with the 22 levels of brightness.
Show brightness level at the maximum signal level(%)
Adjusts the luminance of the highest 100% signal level.
Adjust brightness level at the selected signal level(%)
The brightness of the selected signal level can be adjusted.
You can do these settings only when the Picture Select Mode is the Cinema,
Expert (Bright space, daytime) or the Expert (Dark space, night) and when the
Method is set to 10 Points Signal Level(%) or 22 Points Signal Level(%).
Red / Green / Blue
Adjust the color temperature of the selected point.
Adjust the intensity of Red/Green/Blue in the range of -50 to 50.
You can adjust respective values for the brightness selected in Point.
Depending on the input signal or the selected picture mode, the available options may
differ.
The configurable items differ depending on model.
79
Page 80

Adjusting the Contrast of a Picture
Picture Advanced Settings Clarity
You can adjust the contrast of a Picture to show it more clearly.
Adjust Sharpness
Adjusts the sharpness of the image. The closer to 50, the sharper and clearer the
image.
Super Resolution
Adjusts the resolution to make dim and blurred images clearer.
Noise Reduction
Removes small dots that stand out so as to make the image clean.
MPEG Noise Reduction
Reduces the noise produced during the creation of digital video signals.
Smooth Gradation
It reduces the phenomenon that the outline of the image is rugged and in a staircase
pattern and displays a smoother screen.
Real Cinema
Optimise display for movies.
TruMotion
Suitable the image quality of fast-moving pictures.
Off : Turns off the TruMotion.
●
Cinematic Movement : Adjusts the shaking of the motion on the screen to make it
feel like you are in a movie theatre.
●
Natural : Sets images with a lot of motions to look natural and clear.
●
Smooth Movement : Softens fast-moving pictures.
●
User Selection : Sets TruMotion manually.
●
De-Judder : Adjusts juddering on the screen.
○
De-Blur : Reduces the blurring effects of motion.
○
80
Page 81

The advanced settings can be changed only in User Selection mode.
Precision Detail
Dolby Vision technology, which analyses content information to improve clarity and
contrast, expresses natural landscapes such as clouds, rocks, sand, water, and snow
in detail.
Depending on the input signal or the selected picture mode, the available options may
differ.
The configurable items differ depending on model.
Applying the Current Picture Settings to All Inputs
Picture Advanced Settings Apply to All Inputs
The settings you specify only apply to the currently selected input mode.
To apply your current picture settings to all input modes, select Apply to All Inputs.
Resetting Picture Mode
Picture Advanced Settings Reset
If you want to reset the image settings to the factory defaults after configuring the image
settings, select reset for each image mode.
FILMMAKER MODE Auto Start
Picture Advanced Settings FILMMAKER MODE Auto Start
If set to On, Picture Mode will automatically be changed to FILMMAKER MODE when
a signal that can be operated with FILMMAKER MODE is entered.
While this mode effectively conveys the creator's intention, it may appear darker than other
Picture Mode.
To Use Reduce Blue light Feature
Picture Advanced Settings Reduce Blue light
The colour temperature will be adjusted to reduce eye fatigue.
OLED Motion / OLED Motion Pro / Motion Pro / NanoCell Motion Pro : You
can make your video clearer by eliminating afterimages.
○
81
Page 82

On
The colour temperature of your TV screen is adjusted.
Off
Turns off the Reduce Blue light.
Some models may not be supported.
Sound
Select Mode
Sound Select Mode
You can select the most suitable sound mode for each genre.
AI Sound / AI Sound Pro
Depending on the content you watch, you can enjoy the optimised sound and virtual
surround in real time.
Standard
Optimises the sound for all types of content.
Cinema
Optimises the sound for cinemas.
Clear Voice / Clear Voice Pro
Boosts voice clarity.
Sports / Football / Cricket
Optimises the sound for sports games.
The name of the sport may differ depending on region.
Music
Optimises the sound for music.
82
Page 83
Game Optimiser
Optimises the sound for gameplay.
This setting only applies to the internal speakers of the TV or HDMI (eARC/ARC)
connected devices that support Sound Mode Share.
The configurable items differ depending on model.
Use TV Speaker
Sound Sound Out Use TV Speaker
Audio is played through the TV’s internal speakers.
Use Wireless Speaker
Sound Sound Out Use Wireless Speaker
Bluetooth Device
Wirelessly connect a Bluetooth audio device to enjoy TV sound more conveniently.
Refer to the user manual of the Bluetooth audio device for details on how to connect and
use the device.
Some models may not be supported.
The audio codec that can be output via Bluetooth is SBC/aptXTM.
You can control the TV or enter speech by touching LG Tone Free connected to the TV.
For the operation method, refer to the device manual or the Tone Free app installed on the
smart device. If you change the operation on the Tone Free app, it will behave accordingly.
Some models may not be supported.
If the device fails to connect, check the power of the device to connect to and check if the
audio device is working properly.
Using a Bluetooth headset is recommended when you connect two Bluetooth devices.
Press to view the connected devices or the devices that can be connected to connect
any one of them.
●
For some Bluetooth devices, the device volume can be controlled by selecting from the
connection list.
●
LG Sound Sync devices will automatically try to connect to the recently used devices
when you turn the TV on.
●
We recommend that you connect an LG audio device that supports LG Sound Sync,
using LG TV mode or LG Sound Sync mode on device.
●
83
Page 84

Depending on the type of the Bluetooth device, the device may not connect correctly or an
abnormal behavior may occur such as unsynchronized video and audio.
Sound may stutter or sound quality may be reduced if:
If the Picture Select Mode is set to Game Optimiser and Sound Out is set to
Bluetooth Device, the Picture Select Mode changes to Standard.
If you continue to experience problems, we recommend using a wired connection. ( Optical
digital, HDMI (eARC/ARC) port )
WiSA Speakers
You can wirelessly connect the TV to the WiSA Speakers to enjoy high-quality sound.
Select to adjust detailed settings for WiSA Speakers.
Some models may not be supported.
To use the WiSA speakers, you need to connect the exclusive dongle.
Connection issues between the WiSA Dongle and WiSA Speaker may occur in
environments with wireless interference. In this case, contact the speaker manufacturer.
For more information on the purchase of WiSA authorized products, check on
www.wisaassociation.org.
Mobile Device
If you install the LG ThinQ app on a smart device and connect it to your TV, you can use
the device as a speaker for the TV.
Use Wired Speaker
Sound Sound Out Use Wired Speaker
Optical Out Device
You can connect an audio device that supports Optical to the optical digital audio output
The mobile-only headsets may not work.
●
If two different Bluetooth devices are connected and used at the same time, the voice
may not match.
●
the Bluetooth device is too far from the TV;
●
there are obstacles between the Bluetooth device and the TV; or
●
used together with radio equipment such as a microwave oven or wireless LAN
●
84
Page 85

port to enjoy your TV’s sound in richer quality and greater convenience.
Only available for models with an optical digital port.
For some devices, you can adjust the volume using the TV remote control.
HDMI(ARC) Device
Sound from the TV can be output through an external audio device connected via a
HDMI (eARC/ARC) port.
Select HDMI(ARC) Device to automatically turn on SIMPLINK. Once SIMPLINK is turned
off, the output speaker settings automatically revert to the default settings for uninterrupted
audio output.
Audio Out Device / Wired Headphones
Select Wired Headphones or Audio Out Device to optimise audio output according to
the device connected.
Some models may not be supported.
If you connect the wired headphones while the TV is powered on, it automatically detects
the wired headphones and redirects audio through them.
Use External Speakers with TV Speaker
Sound Sound Out Use External Speakers with TV Speaker
Audio can be played through the multiple devices simultaneously.
Bluetooth Device + TV Speaker
Both the internal speaker of the TV and the Bluetooth speaker can be used to output the
sound at the same time or a surround sound can be used.
Up to two Bluetooth devices of the same model can be connected.
When you set Sound Out as Bluetooth Device + TV Speaker, if Picture Select Mode
is Game Optimiser, it will be changed to Standard and Dolby Atmos will be turned off.
While using Screen Share function, the video and audio may be out of sync. We
recommend using Use TV Speaker in Sound Out.
Select to connect a Bluetooth speaker.01
Run Audio Delay to synchronize the TV's internal speaker with the Bluetooth
speaker. You can adjust the sync automatically or manually.
02
85
Page 86
To adjust the volume with the volume button on your Bluetooth device, set
General Accessibility Enjoy TV Sound Together to On. For Bluetooth devices that
do not have volume buttons, you can adjust the volume of the device in the detailed
settings screen of Bluetooth Device + TV Speaker.
If General Accessibility Enjoy TV Sound Together is set to On, only one
Bluetooth device can be connected.
Depending on the type of your Bluetooth device, two devices may not be connected at the
same time.
Depending on the type of the Bluetooth device, the device may not connect correctly or an
abnormal behavior may occur such as unsynchronized video and audio.
Optical Out Device + TV Speaker
Audio is played through the TV’s built-in speakers and the audio device connected to
the digital optical audio output port simultaneously.
Wired Headphones + TV Speaker
Audio is played through the TV’s internal speakers and the Wired Headphones
simultaneously.
Some models may not be supported.
If you connect the wired headphones while the TV is powered on, it automatically detects
the wired headphones and redirects audio through them.
Balance
Sound Advanced Settings Balance
You can adjust the volume of the left and right speakers.
This setting is only available for Internal TV Speaker.
Equalizer
Sound Advanced Settings Equalizer
You can adjust the sound by increasing or decreasing the output of the specific
frequency range of the voice signal.
This option can be enabled if Sound Select Mode is set to Standard.
This setting only applies to the internal speakers of the TV or HDMI (eARC/ARC)
connected devices that support Sound Mode Share.
86
Page 87
Applying the Current Sound Settings to All Inputs
Sound Advanced Settings Apply to All Inputs
The settings you specify only apply to the currently selected input mode.
To apply your current sound settings to all input modes, select Apply to All Inputs.
Initializing Sound Settings
Sound Advanced Settings Reset
Restores the detailed effect settings for the Standard sound mode to the initial settings.
This setting only applies to the internal speakers of the TV or HDMI (eARC/ARC)
connected devices that support Sound Mode Share.
Installation Type
Sound Advanced Settings Installation Type
This mode optimises the sound based on the TV setup.
Stand
Select this if the TV is installed in stand-type.
Wall-mounted
Select this if the TV is installed in wall-mounted type.
This setting is only available for Internal TV Speaker.
Automatic Volume Adjustment
Sound Advanced Settings Automatic Volume Adjustment
If it is set to On, the volume will be automatically adjusted to a suitable level for each
content you watch to help you enjoy watching more comfortably.
This setting only applies to the internal speakers of the TV or HDMI (eARC/ARC)
connected devices that support Sound Mode Share.
DTV Audio Setting
Sound Advanced Settings DTV Audio Setting
87
Page 88
When different audio types exist in an input signal, this function allows you to select the
audio type you want.
If set to Auto the search order is AC4 → HE-AAC → Dolby Digital Plus → Dolby Digital
→ MPEG and output is produced in the first Audio Format found.
The following search order may change depending on the country : AC4 → HE-AAC →
Dolby Digital Plus → Dolby Digital → MPEG.
If the selected Audio Format is not supported, another Audio Format may be used for
output.
Some models may not be supported.
Adjusting AV Synchronization
Sound Advanced Settings Match Screen and Sound
Adjusts the synchronization of the sound from the speaker that is working.
The closer the value is set to 60, the slower the voice output speed will be than the
default speed.
If you select Bypass, Outputs the broadcast signals or the sound from external devices
without any audio delay. The audio may be output before the video because of the time
the TV takes to process the video input.
Available options vary by Sound Out setting.
Select HDMI Input Audio Format
Sound Advanced Settings Select HDMI Input Audio Format
You can set the audio format for each HDMI input.
When connected to devices or content that support the latest surround sound
technology, setting to Bitstream will enable you to listen to the intended sound quality.
When the voice delivered through the HDMI port is not synchronized, set it to PCM.
Sound Mode Share
Sound Advanced Settings Sound Mode Share
Plays the sound mode applied to the TV speakers on the soundbar, or selects the sound
mode of the soundbar on the TV to play.
Off
88
Page 89
Turns off the Sound Mode Share.
Enjoy TV Sound Mode
The Sound Select Mode set on the TV is applied to the soundbar to deliver a
variety of sounds.
Enjoy Soundbar Sound Mode
You can set the sound mode of the soundbar in Sound Select Mode on the TV.
The name of the sound mode displayed on the soundbar may differ from that of the
Sound Select Mode on the TV, depending on the model. In this case, it will be
matched with the Sound Mode with similar effects.
LG Sound Sync
Sound Advanced Settings LG Sound Sync
Connect the LG Sound Sync device to the optical digital input port and set Sound Out
to Optical Out Device.
By setting this feature to On, you can adjust the volume of the connected LG Sound
Sync device using a TV remote control.
If the auto-power feature of the sound bar that supports LG Sound Sync is set to On, the
sound bar will be turned on or off together when the TV is turned on or off.
Setting Digital Sound Output
Sound Advanced Settings Digital Sound Output
You can configure the Digital Sound Output settings.
This setting is only available when Sound Sound Out Use Wired Speaker
is set to Optical Out Device/HDMI(ARC) Device.
When Pass Through is enabled, sound effects may not be output.
The codec output with a device may differ from input signals.
Sound Input Digital Sound Output
PCM
All PCM
Auto / Pass Through
MPEG PCM
89
Page 90

Dolby Digital Dolby Digital
Dolby Digital Plus /
Atmos
(Optical) Dolby Digital
(HDMI ARC) Dolby Digital Plus / Atmos
Dolby TrueHD
(HDMI only)
(Optical) Dolby Digital
(HDMI ARC) Dolby Digital Plus / Atmos
HE-AAC / AAC (Optical) Dolby Digital
(HDMI ARC) Dolby Digital / Dolby
Digital Plus
Dolby TrueHD , HDMI eARC , Dolby Atmos : Some models may not be supported.
When connected with HDMI eARC, the output audio type will depend on the audio type
supported by the connected device.
Using eARC Supported Audio Device
Sound Advanced Settings eARC Support
eARC is a technology that can send and receive more sound information faster thanks
to its wider bandwidth than that of the conventional ARC. You can enjoy TV sound with
higher quality than ARC through a connected audio device.
AI Service
AI Brightness Settings
Depending on the device connected and input audio type, it can be output as Dolby
Metadata-Enhanced Audio Transmission PCM (Dolby MAT PCM).
●
If Digital Sound Output is set to Pass Through and HDMI input is Dolby TrueHD or
Multi-Channel PCM, audio can be output as Bypass.
●
Connect an audio device that supports eARC to the HDMI (eARC/ARC) port.01
Go to Sound Out Use Wired Speaker and choose HDMI(ARC) Device.02
Set eARC Support to On.03
90
Page 91
General AI Service AI Brightness Settings
Set to On. AI adjusts the dark areas according to the brightness around your TV and
specific contents.
AI Sound / AI Sound Pro
General AI Service AI Sound / AI Sound Pro
If set to On, the optimal sound and realistic surround effects are provided per the content
based on artificial intelligence.
This setting only applies to the internal speakers of the TV or HDMI (eARC/ARC)
connected devices that support Sound Mode Share.
When this feature is set to On, Sound Select Mode is changed to AI
Sound/AI Sound Pro.
The configurable items differ depending on model.
AI Acoustic Tuning
General AI Service AI Acoustic Tuning
With the AI Acoustic Tuning feature, you can detect the space where your TV is
installed using your Magic Remote’s microphone to optimise the audio of your TV for
your environment.
Select Start New Sound Tuning to measure the space in which the TV is installed.
When the initial detection is complete, you can select your desired audio mode.
If there is more than a library noise level (over 30 ~ 40 dBA), we recommend that you install
from within 3 metres.
This function may not work properly
Off : This option disables the use of AI Acoustic Tuning-adjusted audio.
Selecting this option outputs your TV’s default sound without making any adjustments to
it.
●
Standard : Selecting this option outputs AI Acoustic Tuning-adjusted audio in Standard
mode.
This mode provides a clean and natural sound.
●
Bass Boost : Selecting this option outputs AI Acoustic Tuning-adjusted audio with an
emphasis on bass.
●
Treble Boost : Selecting this option outputs AI Acoustic Tuning-adjusted audio with an
emphasis on treble.
●
91
Page 92

Viewing Voice Recognition Help
General AI Service Voice Recognition Help
It shows a list of voice commands the TV can perform.
Using Voice Recognition Settings
General AI Service Voice Recognition Settings
You can apply settings for voice recognition features.
AI Recommendation
General AI Service AI Recommendation
You can get content recommendation messages according to your content viewing
history and app usage history.
Alarm
Who.Where.What?
You can get recommendations for the information related to the broadcast you are
watching.
This feature may not be available in some countries.
Smart Tips
You can get an introduction to smart features you can use when watching TV or
using an app.
Next Picks
You can get recommendations based on your TV viewing patterns.
This feature may not be available in some countries.
Sports Alert
Move to the Sports Alert app. You can check information about sports events and
The background noise is too large over 40 dBA.
●
TV and Magic Remote distance 5 metres or more.
●
92
Page 93

set alarms.
For more information, see Making the Most of Smart TV Using Sports Alert in
User Guide.
Usage Data Management
Reset Usage Data
It resets the content view history and the app usage history. If you reset them, it
takes some time to receive recommendations for contents again.
The configurable items differ depending on model.
Game Optimiser
Game Optimiser
Sets up the features for an immersive experience when you play with a video game
console.
It only works with HDMI inputs.
If you set Picture Select Mode to a mode other than Game Optimiser, some
items in Game Optimiser cannot be set.
If you turn this feature On, you cannot change some video settings items.
When Game Optimiser is set to On, audio delays may occur if you set Sound Out to
Bluetooth Device/WiSA Speakers/Optical Out Device/HDMI(ARC) Device. Switch to
Use TV Speaker or change Sound Advanced Settings Select HDMI Input
Audio Format to PCM.
The configurable items differ depending on model.
Game
Game Genre
You can optimise the screen depending on the genre of the game.
Press the button on the remote control.01
Select Game Optimiser.02
Selecting On turns on all related settings.03
93
Page 94

OLED Motion / OLED Motion Pro
You can make your video clearer by eliminating afterimages.
Reduce Blue Light
You can adjust the blue light output to rest your eyes while watching the screen.
Dark Room Mode
You can adjust the brightness of the entire screen to reduce eye strain in a dark
environment or when watching for a long time to make the screen easier to watch.
Prevent input delay (input lag)
Minimize the input delay according to the image signal.
Game Dashboard
If you set this option to On, you can use the Game Dashboard feature.
Please see Settings Quick Settings Game Dashboard of User Guide for more
information about Game Dashboard.
AI Game Sound
Optimises the sound for gameplay.
When this feature is set to On, Sound Select Mode is changed to Game
Optimiser.
This setting only applies to the internal speakers of the TV or HDMI (eARC/ARC)
connected devices that support Sound Mode Share.
VRR
This reduces screen cracking and video lagging during game play.
VRR & G-Sync
NVIDIA's display adaptive sync technology adjusts frames to minimize screen tearing
and stuttering.
AMD FreeSync Premium
Set to On. AMD's display adaptive sync technology adjusts the injection rate to
minimize screen breaks and stuttering.
94
Page 95

The LED/QNED model can be set up as follows:
High
The range of supported refresh rates is 90 Hz - 120 Hz.
Wide
The range of supported refresh rates is 48 Hz - 120 Hz.
Screen flickering may occur in some gaming environments. In this case, set it to High.
Fine Tune Dark Areas
You can calibrate the brightness of the dark areas with VRR, VRR & G-Sync or AMD
FreeSync Premium set to On.
It may not operate normally depending on the features or settings of the connected PC
or game console.
Menu Colour
Menu colour of Game Optimiser and Game Dashboard can be changed.
User Guide
Move to the User Guide app.
Picture
Black Stabiliser
You can fine-tune dark areas.
White Stabiliser
You can fine-tune light areas.
Adjust Contrast
Adjusts the contrast of the bright and dark areas of the picture.
Black Level
Adjusts the overall screen brightness.
You may use the Black Level settings particularly to set the dark part of the image.
Adjust Sharpness
Adjusts the sharpness of the image.
95
Page 96

Colour Depth
Tones down or up the colours displayed on the screen.
Dynamic Tone Mapping
Suitable contrast settings based on image brightness of the HDR content.
Reset
You can reset the settings.
Wide Aspect Ratio
Supports resolutions with a screen ratio of 21:9 or 32:9.
It only works when the game or PC input supports a 21:9 or 32:9 screen ratio.
To display the screen in the selected screen ratio, the resolution must be set up as
shown below to match the desired screen ratio, even on the connected PC.
21:9 : 3840 × 1600 (60 Hz signals only), 2560 × 1080
32:9 : 3840 × 1080
Screen Position
You can change the position of the screen when you set it to a widescreen ratio.
Advanced Picture Settings
Move to the Picture Advanced Settings.
Family Settings
Usage Limits Setting
General Family Settings Usage Limits Setting
You can use the TV in the set time period only. Outside of the set time period, you must
enter your password to use the TV.
Set Enable the function to On.01
Set Start Time and End Time.
Selecting Repeat will activate this feature every day.
02
96
Page 97
For instructions on how to reset the password, refer to Settings System Safety in
User Guide.
Eye Care Mode
General Family Settings Eye Care Mode
Set Enable the function to On. A screen with lowered blue light is displayed for the
protection of your eyes.
Using Eye Care Mode sets Picture Advanced Settings Reduce Blue light
to On.
Volume Limit Mode
General Family Settings Volume Limit Mode
Set Enable the function to On. The volume cannot be raised above a certain level for
the protection of your hearing.
Volume Limit Mode may not work for audio devices connected to the optical digital/HDMI
(eARC/ARC)/headphone port.
Screen Time Reports
General Family Settings Screen Time Reports
You can check your TV usage time.
Programmes
Automatically Setting Up Programme
General Programmes Programme Tuning (Programme Tuning &
Settings) Auto Tuning
Automatically tunes the programmes.
Select Set.03
Select Country where the TV is used. Programme settings change depending on the
country you choose.
01
97
Page 98

If Input Source is not connected properly, programme registration may not work.
Auto Tuning only finds programmes that are currently broadcasting.
If Safety is turned on, a pop-up window will appear asking for password.
Set Cable Setting
When searching for programmes using FULL setting it can take a long time.
The following values are needed in order to search all available programmes quickly
and correctly. The commonly used values are provided as “default”.
The configurable items differ depending on Type.
Frequency (kHz)
Enter a user-defined frequency.
Symbol Rate (kS/s)
Speed at which a device such as modem sends symbols to a programme.
Modulation
Loading of audio or video signals onto carrier.
Network ID
Unique identifier allocated for each user.
Start Frequency (kHz)
Enter a user-defined start frequency range.
End Frequency (kHz)
Enter a user-defined end frequency range.
Set Satellite Setting
You can add/delete/set the satellite you want.
This function only works when the programme mode is satellite.
Initiate Auto Tuning.02
Select programme tuning modes.03
Set Auto Tuning following screen instructions.04
98
Page 99

Satellite
Select your desired Satellite.
LNB Frequency
Select one value from 9750/10600, 9750/10750, 9750, 10600, 10750, 11300, 5150,
MDU1, MDU2, MDU3, MDU4, MDU5. If you select 9750/10600, 9750/10750(MHz),
22kHz Tone is disabled. If you cannot find the LNB frequency value from the list,
select User and manually enter the frequency.
Some models may not be supported.
Transponder
Select the transponder you want to tune.
22kHz Tone
When using 22kHz Tone switch, select 22kHz or 0 Hz. If you use 22kHz Tone,
Unicable and Motor Type are disabled.
LNB Power
To enable the power supply for the LNB, select On. If you select Off, Motor Type is
disabled.
DiSEqC
When using DiSEqC, select one option from A~D/ToneA~B. If you use DiSEqC,
Unicable and Motor Type are disabled.
Unicable
Select On to use Unicable and set the Unicable in the Unicable Settings menu.
When Unicable is enabled, 22kHz Tone, DiSEqC, Motor Type are disabled.
Motor Type
Select Motor Type to use Motor and set the Motor in the Motor Setting menu. When
Motor is enabled, 22kHz Tone, DiSEqC, Unicable are disabled.
If you set satellite to others, you must add a transponder using Transponder Edit.
When selecting 22kHz Tone and DiSEqC, you must connect them in the same position as
displayed on the OSD.
If you delete a Satellite, all programmes stored in the Satellite are deleted.
99
Page 100

Set Motor Setting
DiSEqC 1.2 : Control motor to change satellite dish position.
Drive Direction
Select the direction in which you want to move the motor.
Drive Mode
Two modes are available : Step and Continuous.
Test Transponder
Select the test Transponder you want to tune.
Set Limit
Set the motor movement to east or west to have the motor move only within the
direction set.
Go to 0
You can move the motor to Zero.
USALS : Set your current location (Longitude/Latitude).
To Use Manual Programme Tuning
General Programmes Programme Tuning (Programme Tuning &
Settings) Manual Tuning
This function is for manually searching and saving programmes.
For digital broadcasting, signal strength and signal quality can be checked.
Editing Transponder
General Programmes Programme Tuning & Settings Transponder
Step : The motor moves based on the value you enter (from 1 to 128).
●
Continuous : The motor moves continuously until you press the Stop.
●
On : You can limit the movement to the current direction by selecting the West/East.
●
Off : You can cancel the limit you set.
●
100
 Loading...