

Page 1
55VH7E LG MFL71401601
MF SIGNAGE (REV02)
1 Color (Black) : • Inside 1 Color (Black)
Uncoated, wood-free paper 60 g/㎡ : • Inside
Uncoated, wood-free paper 60 g/㎡
Saddle stitching :5. Number of pages 32
[Country Name]
LGERS/ LGEMX : Mexico
LGEKR: Korea
Changes the Country name.
LGEMA: Poland
Printed in [Country Name]
LGEND: China
Others: Each Country name.
07/11/2019 Yeryeong.Park
12/24/2018 Gowoon Lee
Checked :
Approved :
Jongok Kim
REV07
3. Pagination sheet
REV04
REV05
REV06
:Part number
1. Model Description
:6. Language
:Model/Item Name
:Suffix
:Brand name
:Product
:1. Trim size (Format) (W X H)
2. Printing colors
: • Cover
:4. Bindery
(Revision number)
2. Printing Specification
To add images and contents
Rev. Number
MM/DD/YYYY
REV00
148 mm x 210 mm (A5)
ENG (1)
4. Origin Notification
5. Changes
3. Stock (Paper)
: • Cover
Gowoon Lee
11/20/2018
Eunhye Jeong
Printing Specification
REV03
Signature
Change Contents
ECO Number
N
O
T
E
“This part contains Eco-hazardous substances (Pb, Cd, Hg, Cr6+, PBB, PBDE, etc.) within LG standard level,
Details should be followed Eco-SCM management standard[LG(56)-A-2524].
Especially, Part should be followed and controlled the following specification.
(1) Eco-hazardous substances test report should be submitted when Part certification test and First Mass Production.
(2) Especially, Don’t use or contain lead(Pb) and cadmium(Cd) in ink.
REV01
EKMIC00390
To add the 49VH7E, 49VM5E and 55VM5E models for Pre-MP.
REV02
EKMJ700130
Front 2 3 4 5.... Back
Page 2

OWNER’S MANUAL
LG Digital
Signage
(MONITOR SIGNAGE)
Please read this manual carefully before operating your set and retain it
for future reference.
49VH7E
55VH7E
49VM5E
55VM5E
*MFL71401601*
(1907-REV02)
www.lg.com
Copyright © 2019 LG Electronics Inc. All Rights Reserved.
Page 3

ENGLISH
2
TABLE OF CONTENTS
SAFETY PRECAUTION ..................3
- Precautions In Installing the Product .....................3
- Precautions to the AC Adapter and Electrical
Power ......................................................................................5
- Precautions In Moving the Product ........................7
- Precautions In Using the Product ............................8
- Mounting on a Wall .........................................................9
LICENSES .................................... 10
ASSEMBLY AND
PREPARATION ............................ 11
- Optional Accessories ....................................................12
- Parts and Buttons .........................................................13
- To Install in a Portrait Layout ..................................14
- Remove brackets before Installation ..................14
- Storage Method for Panel Protection ................15
- Installing on a Wall ........................................................16
- IR Receiver .........................................................................17
- Tiling Displays ..................................................................17
REMOTE CONTROL .................... 20
PRODUCT SPECIFICATIONS ...... 28
TO SEE THE WEB MANUALS
(SOFTWARE USER GUIDE /
INSTALLATION MANUAL) ......... 31
MAKING CONNECTIONS ........... 22
- Connecting to a PC.......................................................22
- External Device Connection .....................................22
- Using the Input List ......................................................23
- Connecting Multiple Monitors ................................24
TROUBLESHOOTING .................. 25
Page 4
ENGLISH
WARNING - This equipment is compliant with Class A of CISPR 32. In a residential environment this equipment may
cause radio interference.
SAFETY PRECAUTION
Please read these safety precautions carefully before using the product.
WARNING
If you ignore the warning message, you may be seriously injured or there is a possibility of accident or death.
CAUTION
If you ignore the caution message, you may be slightly injured or the product may be damaged.
WARNING
• This product cannot be installed outdoors. Only use the product indoors as installed by the installer.
Precautions In Installing the Product
WARNING
• Keep away from heat sources like electrical heaters.
- Electrical shock, fire, malfunction, or deformation may occur.
• Keep the packing anti-moisture material or vinyl packing out of the reach of children.
- Anti-moisture material is harmful if swallowed. If swallowed by mistake, force the patient to vomit and visit the
nearest hospital. Additionally, vinyl packing can cause suffocation. Keep it out of the reach of children.
• Do not put heavy objects on the product or sit upon it.
- If the product collapses or is dropped, you may be injured. Children must pay particular attention.
• Do not leave the power or signal cable unattended on the pathway.
- The passerby can trip or fall, which can cause electrical shock, fire, product breakdown, or injury.
• Install the product in a neat and dry place.
- Dust or moisture can cause electrical shock, fire or product damage.
• If you can smell smoke or other odors or hear a strange sound unplug the power cord and contact the service center.
- If you continue to use without taking proper measures, electrical shock or fire can occur.
3
Page 5

ENGLISH
4
• If you dropped the product or the case is broken, turn off the product and unplug the power cord.
- If you continue to use without taking proper measures, electrical shock or fire can occur. Contact the service center.
• Do not drop an object on or apply impact to the product. Do not throw any toys or objects on the product screen.
- It can cause injury to human, problem to product and damage the display.
• Do not let the product fall or drop when connecting it with an external device.
- This may cause injury and/or damage to the product.
• When connecting it to a game device, keep a distance of four times the diagonal measurement of the screen from the
device.
- If the product falls because of the short cable, this may cause injury and/or damage to the product.
• Leaving a fixed image on the screen for a long time may cause damage to the screen and cause image retention.
To use the product for a long period of time, use a screen saver on the PC or utilize the residual image prevention
function on the product, and when the product is not used, turn off the power. Image retention and related problems
are not covered by the warranty on this product.
• Do NOT install this product on a wall where there is high risk of exposure to oil fumes or mist.
- This may damage product and cause it to fall.
CAUTION
• Make sure the product ventilation holes are not blocked. Install the product in a suitably wide place (more than
100mm from the wall).
- If you install the product too close to the wall, it may be deformed or fire can break out due to internal heat.
• Do not block the ventilation hole of the product by a tablecloth or curtain.
- The product can be deformed or fire can break out due to overheating inside the product.
• Install the product on a flat and stable place that has no risk of dropping the product.
- If the product is dropped, you may be injured or the product may be broken.
• Install the product where no EMI occurs.
• Keep the product away from direct sunlight.
- The product can be damaged.
• If you install the product in a place that does not meet the recommended conditions, this may cause serious damage
to the product’s picture quality, life cycle, and appearance. Please check with LG or a qualified installer before
installing. This caution applies to a place where there is an abundance of fine dust or oil mist, chemical substances are
used, the temperature is very high or low, the humidity is very high, or the product is likely to remain turned on for a
long period of time (airport and train station). failure to do so will invalidate the warranty.
• Do not install the product in an area with poor ventilation (e.g.on a bookshelf, in a closet) or outside and avoid placing
on cushions or carpets.
• In addition, do not install it where there are heating objects such as lighting equipment.
Page 6
ENGLISH
Precautions to the AC Adapter and Electrical Power
5
WARNING
• If water or any foreign substance goes inside the product (TV, monitor, power cord, or AC adapter), disconnect the
power cord immediately and contact the service center.
- Otherwise, this may cause a fire or electric shock due to damage to the product.
• Do not touch the power plug or AC adapter with wet hands. If the pins of the plug are wet or dusty, wipe and dry
them before use.
- Otherwise, this may cause a fire or electric shock.
• Make sure to completely insert the power cord into the AC adapter.
- If loosely connected, the poor connection may cause a fire or electric shock.
• Be sure to use power cords and AC adapters provided or approved by LG Electronics, Inc.
- The use of non-approved products may cause a fire or electric shock.
• When unplugging the power cord, always pull it by the plug. Do not bend the power cord with excessive force.
- The power line can be damaged, which may cause electric shock or fire.
• Be careful not to step or place heavy objects (electronic appliances, clothing, etc.) on the power cord or AC adapter.
Be careful not to damage the power cord or AC adapter with sharp objects.
- Damaged power cords may cause a fire or electric shock.
• Never disassemble, repair or modify the power cord or AC adapter.
- This may cause a fire or electric shock.
• Make sure to connect the power cable to the grounded current.
- You may be electrocuted or injured.
• Use the rated voltage only.
- The product can be damaged, or you may be electrocuted.
• In the presence of thunder and lightning, never touch the power cord and signal cable because it can be very
dangerous.
- It can cause electric shock.
• Do not connect several extension cords, electrical appliances, or electrical heaters to a single outlet. Use a power strip
with a grounding terminal designed for exclusive use with the computer.
- A fire can break out due to overheating.
• Do not touch the power plug with wet hands. Additionally, if the cord pin is wet or covered with dust, dry the power
plug completely or wipe dust off.
- You may be electrocuted due to excess moisture.
Page 7

ENGLISH
6
• If you don’t intend to use the product for a long time, unplug the power cable from the product.
- Covering dust can cause a fire, or insulation deterioration can cause electric leakage, electric shock or fire.
• Fix the power cable completely.
- If the power cable is not fixed completely, a fire can break out.
• Do not insert a conductor (like a metal chopstick) into one end of the power cable while the other end is connected
to the input terminal on the wall. Additionally, do not touch the power cable right after plugging into the wall input
terminal.
- You may be electrocuted.
• The appliance coupler is used as the disconnect device.
• Please make sure the device is installed near the wall outlet to which it is connected and that the outlet is easily
accessible.
• As long as this unit is connected to the AC wall outlet, it is not disconnected from the AC power source even if the
unit is turned off.
CAUTION
• Be sure to keep the outlet, AC adapter, and pins of the power plug clean from dust and etc.
- This may cause a fire.
• Do not unplug the power cord while the product is in use.
- Electrical shock can damage the product.
• Use only the power cord supplied with the unit. If you use another power cord, make sure that it is certified by the
applicable national standards when not provided by the supplier. If the power cable is faulty in any way, please contact
the manufacturer or the nearest authorized repair service provider for a replacement.
• Do not move the product at your own discretion.
- This may cause stand warping, panel damage and other types of product damage.
- Consult a professional if you wish to move the product.
Page 8

ENGLISH
Precautions In Moving the Product
7
WARNING
• Make sure to turn off the product.
- You may be electrocuted or the product can be damaged.
• Make sure to remove all cables before moving the product.
- You may be electrocuted or the product can be damaged.
• Make sure the panel faces forward and hold it with both hands to move. If you drop the product, the damaged
product can cause electric shock or fire. Contact an authorized the service center for repair.
• Make sure the product is turned off, unplugged, and all cables have been removed. It may take 2 or more people to
carry larger apparatus. Do not press against or put stress on the front panel of the apparatus.
CAUTION
• Do not shock the product when moving it.
- You may be electrocuted or the product can be damaged.
• Do not dispose the product-packing box. Use it when you move.
Page 9

ENGLISH
8
Precautions In Using the Product
WARNING
• Do not disassemble, repair or modify the product at your own discretion.
- Fire or electric shock accident can occur.
- Contact the service center for check, calibration or repair.
• When the display is to be left unattended for an extended period of time, unplug it from the wall outlet.
• Keep the product away from water.
- Fire or electric shock accident can occur.
• Do not shock or scratch the front and sides of the screen with metallic objects.
- Otherwise, it may cause damage to the screen.
• Avoid high temperatures and humidity.
CAUTION
• Do not put or store inflammable substances near the product.
- There is a danger of explosion or fire due to careless handling of the inflammable substances.
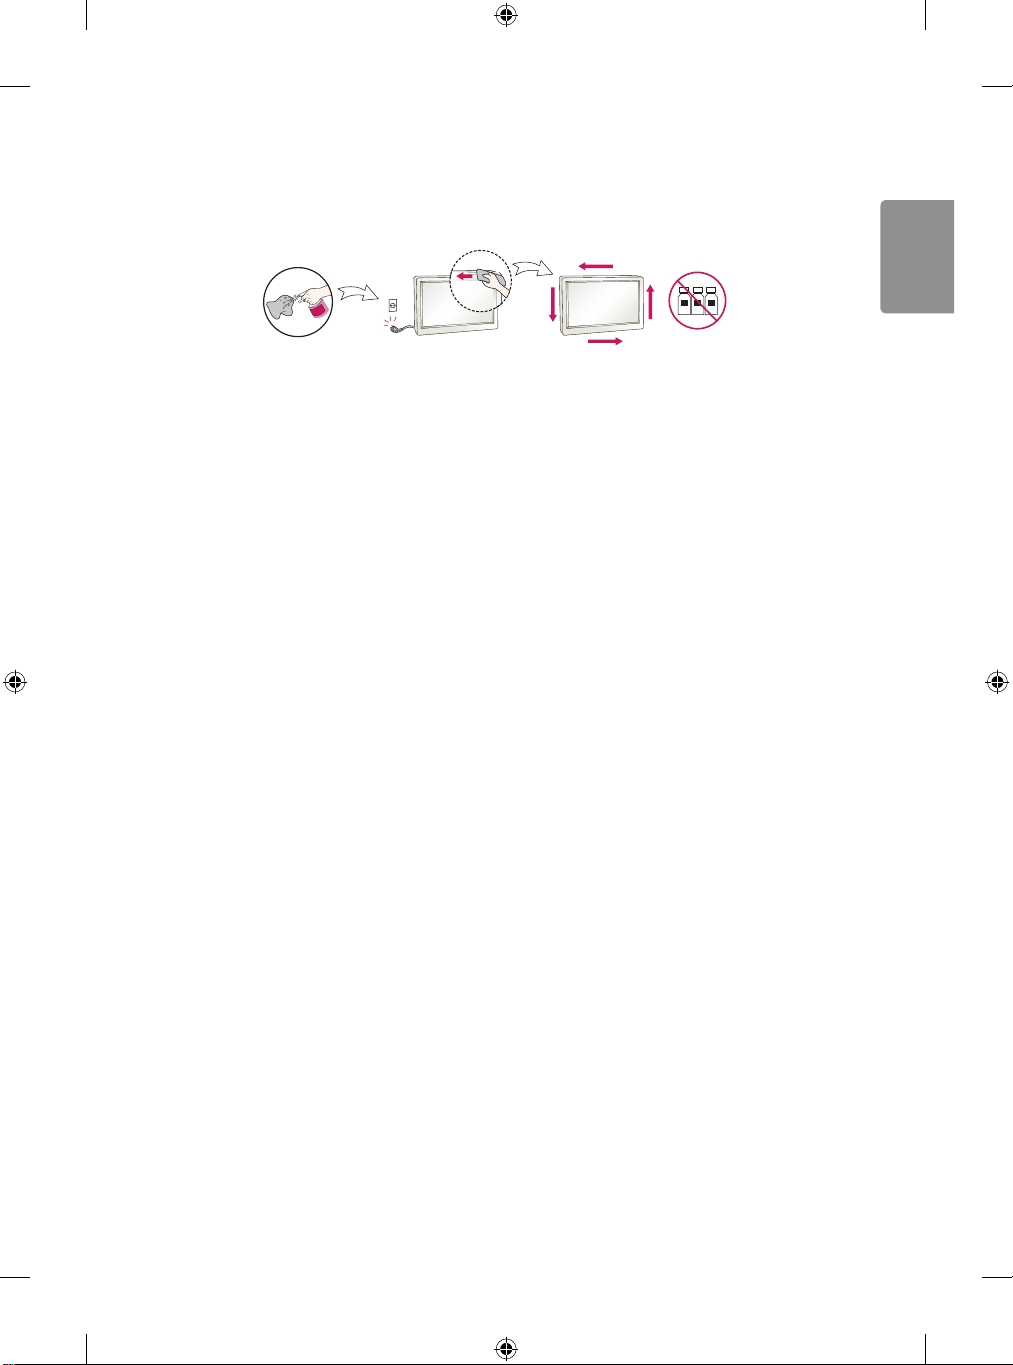
• When cleaning the product, unplug the power cord and scrub gently with a soft cloth to prevent scratching. Do not
clean with a wet cloth or spray water or other liquids directly onto the product. An electric shock may occur. (Do not
use chemicals such as benzene, paint thinners, or alcohol.)
• Take a rest from time to time to protect your vision.
• Keep the product clean at all times.
• Take a comfortable and natural position when working with a product to relax the muscles.
• Take a regular break when working with a product for a long time.
• Do not press strongly upon the panel with a hand or sharp object such as nail, pencil, or pen, or make a scratch on it.
• Keep the proper distance from the product.
- Your vision may be impaired if you look at the product too closely.
• Set the appropriate resolution and clock by referring to the User’s Guide.
- Your vision can be impaired.
• Use authorized detergent only when cleaning the product. (Do not use benzene, thinner, or alcohol.)
- Product can be deformed.
• Do not expose to dripping or splashing and do not place objects filled with liquids, such as vases, cups, etc. on or over
the apparatus (e.g. on shelves above the unit).
• Batteries should not be exposed to excessive heat. For example, keep away from direct sunlight, open fireplace, and
electric heaters.
• Do NOT place non-rechargeable batteries in charging device.
• Using headsets (earphones) for a long time or listening loudly can cause damage to your hearing.
Page 10
ENGLISH
• Spray water onto a soft cloth 2 to 4 times, and use it to clean the front frame; wipe in one direction only. Too much
moisture may cause staining.
9
WATER
• Do not use products using high voltage around the Monitor. (e.g., a bug zapper)
- Monitor may have malfunction as its electrical shock.
CHEMICALS
Mounting on a Wall
• Do NOT install this product by yourself as you may injure yourself or cause damage to product. Please contact service
personnel authorised by manufacturer.
Page 11

ENGLISH
10
LICENSES
Supported licenses may differ by model. For more information of the licenses, visit www.lg.com.
The terms HDMI and HDMI High-Definition Multimedia Interface, and the HDMI Logo are trademarks or registered
trademarks of HDMI Licensing Administrator, Inc. in the United States and other countries.
Manufactured under license from Dolby Laboratories. Dolby, Dolby Vision, Dolby Audio, Dolby Atmos, and the double-D
symbol are trademarks of Dolby Laboratories.
For DTS patents, see http://patents.dts.com. Manufactured under license from DTS Licensing Limited. DTS, the Symbol,
& DTS and the Symbol together, DTS 2.0 Channel, DTS 2.0+Digital Out, DTS-HD, and DTS Virtual:X are registered
trademarks or trademarks of DTS, Inc. in the United States and/or other countries. © DTS, Inc. All Rights Reserved.
Page 12

ENGLISH
ASSEMBLY AND PREPARATION
11
CAUTION
• Always use genuine components to ensure safety and product performance.
• The product warranty will not cover damage or injury caused by the use of counterfeit components.
• Connect the power cord to the product before you plug it into a wall outlet. Plugging the power cord into a wall
outlet first may cause an electric shock, which can also damage the product.
• The warranty will not cover any damage caused by using the product in an excessively dusty environment.
NOTE
• The accessories provided with your product may vary depending on the model or region.
• Product specifications or contents in this manual may be changed without prior notice due to upgrade of product
functions.
• SuperSign Software & Manual
- Downloading from the LG Electronics website.
- Visit the LG Electronics website http://partner.lge.com and download the latest software for your model.
Page 13

ENGLISH
12
Optional Accessories
Without prior notice, optional accessories are subject to change to improve the performance of the product, and new
accessories may be added. The illustrations in this manual may differ from the actual product and accessories.
OPS Kit
KT-OPSA
Connecting Cable Card (Easy Setup Guide) Power Cord
(Diameter 3.0mm x Length 8.0mm)
Screws
(Diameter 3.0mm x Length 8.0mm)
Screws
NOTE
• Optional accessories are available for some models. If necessary, please purchase them separately.
• You can obtain additional accessories from your local retail store.
• Before you attach the OPS kit or Media Player, connect the cable to the port.
Page 14

ENGLISH
Parts and Buttons
The image may be different according to the model.
13
Buttons
• : Changes the input source.
• : Accesses the main menus, or saves your input and exits the menus.
• : Adjust the up and down.
• : Moves left and right.
• : Displays the current signal and mode.
• : Turns the power on or off.
Page 15

ENGLISH
14
To Install in a Portrait Layout
When installing in a Portrait Layout, rotate the monitor clockwise 90 degrees (when facing the screen).
Remove brackets before Installation
Make sure that the protection pads are removed from each corner before installing the product.
NOTE
• Keep the removed protection pads and use them when moving the product later.
Page 16

ENGLISH
15
Storage Method for Panel
Protection
Correct Method
Panel
If the product needs to be set upright, hold both
sides of the product, and tilt backward carefully. Do
not let the panel touch the floor.
Panel
Cushion
Incorrect Method
Panel
If the product is tilted onto the bezel, the bottom of
the panel may be damaged.
Panel
When laying down the product, lay a cushion on a
flat floor. Put the product on it with the panel of the
product facing down.
Panel
If there is not a cushion available, ensure the floor is
clean and then lay the product down carefully with
the panel facing either upward or downward. At this
time, be careful for objects not to fall on the panel.
If the product is tilted onto the edge of the panel,
the panel may be damaged.
Page 17

ENGLISH
16
Installing on a Wall
To install the Monitor on a wall (optional), use the VESA screws provided as accessories to fasten it. Install the monitor
at least 200mm away from the wall and leave about 100mm of space at each side of the monitor to ensure sufficient
ventilation. Use the wall mount plate and screws that comply with the VESA standard.
100 mm
100 mm
100 mm
100 mm
200 mm
CAUTION
• Disconnect the power cord before moving or installing the monitor to avoid risk of electric shock.
• If you install the monitor on a ceiling or slanted wall, it may fall and result in injury. Use the screws and wall mount
brackets provided, and consult a retailer or a professional installation company near you.
• Do not over tighten the screws as this may damage the monitor and void your warranty.
• Use only screws and wall mounting brackets that meet the VESA standard. Any damage or injuries caused by misuse
or use of improper accessories are not covered by the warranty.
• To prevent injury, this apparatus must be securely attached to the wall in accordance with the installation instructions.
(This pertains only to Australia and New Zealand.)
NOTE
• Do not install the product in a place with no ventilation (e.g., on a bookshelf or in a closet) or on a carpet or cushion. If
there is no other option but to mount the product on the wall, make sure that sufficient ventilation is provided before
installation.
- Failure to do so may result in a fire due to the increase in the internal temperature.
• The illustration shows a general example of installation and may look different from the actual product.
Page 18

ENGLISH
IR Receiver
This allows a remote control sensor to be placed in a custom location.
Then that display can control other displays via an RS-232C cable.
Tiling Displays
How to Mount the Set
Example of 2 x 2 Tiling
Using the screws for attaching the VESA wall mount, mount the set to the wall mount plate or the wall.
(M6 x L14)
17
400
600
Page 19

ENGLISH
18
How to Join Sets
• Lay the protective sheet on top before installing additional sets.
1 Join other sets using screws for fixing the VESA wall mount in the same way as above.
Set 4 joined to the rest of the sets
(2 x 2 tiling)
2 Adjust the spacing between the sets using the tiling guide, and remove the protective sheet.
(M4 x L6)
3 Now the 2 x 2 tiling is complete.
You can tile in various combinations, such as 3 x 3.
Page 20

ENGLISH
CAUTION
• Failure to lay the protective sheet on top before installing additional sets may result in damage to the panel.
19
NOTE
• The load applied to each set should be supported by the wall mount plate or the wall using a VESA wall mount
(600x400).
• The load applied to each set should be supported by the wall mount plate using a VESA wall mount. (Each set must
be firmly mounted to the wall mount plate or the wall.)
• You may mount the set without using the tiling guide; this does not affect the performance of the device.
• The screws are enclosed with the other components in the box, including the tiling guides.
Page 21

ENGLISH
20
REMOTE CONTROL
The descriptions in this manual are based on the buttons on the remote control. Please read this manual carefully to
use the monitor correctly. To install batteries, open the battery cover, place batteries (1.5 V AAA) matching and
terminals to the labels inside the compartment, and close the battery cover. To remove the batteries, perform the
installation actions in reverse. The illustrations may differ from the actual accessories.
CAUTION
• Do not mix old and new batteries, as this may damage the remote control.
• Ensure the remote control is always pointed toward the monitor’s IR receiver.
• Some features of the remote control may not be supported in certain models.
(POWER) Turns the monitor on or off.
Turns the monitor on.
Turns the monitor off.
Adjusts the brightness of the picture to reduce energy
consumption.
(INPUT) Selects the input mode.
Used for viewing 3D videos.
Toggles between numerical and alphabetical.
Number and Alphabet buttons
Enters numerical or alphabetical characters depending upon the setting.
Deletes the entered numerical or alphabetical character.
Volume Up/Down Button Adjusts the volume.
Selects the Aspect Ratio mode.
Automatically adjusts picture position and minimizes image instability
(available for RGB input only).
(MUTE) Mutes all sounds.
Adjusts the brightness of the display.
function is not supported in this model.
Page 22

ENGLISH
Selects the Picture Mode.
(HOME) Activates the Launcher.
Enters the White Balance menu.
(SETTINGS) Accesses the main menus or saves your input and exit menus.
SuperSign menu key.
Navigation Buttons Scrolls through menus or options.
Selects menus or options and confirms your input.
(BACK) Allows you to move back one step in the user interaction function.
Quit all OSD tasks and applications.
Allows you to control various multimedia devices to enjoy
multimedia simply by using the remote control through the SimpLink menu.
Selects the TILE Mode.
When the Picture ID number matches the Set ID number,
you can control whichever monitor you want in multi-display format.
USB Menu Control Buttons Controls media playback.
Trick key May not be supported on some models.
21
Page 23

ENGLISH
22
MAKING CONNECTIONS
You can connect various external devices to your monitor. Change the input mode and select the external device you
want to connect. For more information about external device connections, see the user manual provided with each
device.
Connecting to a PC
Some of the cables are not provided. This monitor supports the Plug and Play* feature.
* Plug and Play: a feature that enables a PC to recognize devices attached by the user without device configuration or
user intervention when powering up.
External Device Connection
Some of the cables are not provided. Connect a HD receiver, DVD, or VCR player to the monitor and select an
appropriate input mode.
For the best picture and sound quality, connecting external devices to your monitor using HDMI cables is recommended.
Page 24

ENGLISH
23
NOTE
• For the best image quality, using the monitor with HDMI connection is recommended.
• To comply with the specifications of the product, use a shielded interface cable with ferrite core, such as a HDMI
cable.
• If you turn the monitor on when the set is cold, the screen may flicker. This is normal.
• Sometimes red, green, or blue spots may appear on the screen. This is normal.
• Use a High Speed HDMI®/TM cable (shorter than 3 meters).
• Use a certified cable with the HDMI logo attached. If you do not use a certified HDMI cable, the screen may not
display or a connection error may occur.
• Recommended HDMI Cable Types
- High-Speed HDMI®/TM Cable
- High-Speed HDMI®/TM Cable with Ethernet
• If you cannot hear any sound in HDMI mode please check your PC settings. Some PCs require you to manually change
the default audio output to HDMI.
• If you want to use HDMI-PC mode, you must set your PC/DTV to PC mode.
• You may experience compatibility issues if you use HDMI-PC mode.
• Make sure the power cable is disconnected.
• If you connect a gaming device to the monitor, use the cable provided with the gaming device.
• High Speed HDMI®/TM cables transmit a HD signal up to 1080p and higher.
• When connecting an external audio device, use a device with audio amplifier.
CAUTION
• Connect the signal input cable and tighten it by turning the screws clockwise.
• Do not press the screen with your finger for a prolonged period as this may result in temporary distortion on the
screen.
• Avoid displaying static images on the screen for a long period of time to prevent image retention. Use a screensaver
if possible.
• A wireless communication device near your monitor can affect the image.
Using the Input List
(HOME) →
• → → / →
Page 25

ENGLISH
24
Connecting Multiple Monitors
To use multiple monitors connected to each other, connect the end of the signal input cable (DP cable) to the DP OUT
connection in one monitor and connect the other end to the DP IN connection of the other monitor.
DP
DVI-D
HDMI 1
HDMI 2
RS-232C
LAN
DVI-D IN
MONITOR 1 MONITOR 2 MONITOR 3 MONITOR 4
Page 26

ENGLISH
NOTE
• If the signal cable between the product and your PC is too long, make sure to use the Booster or optical cable.
• Daisy chaining the video output may be limited depending on the performance of the input device that supports
HDCP.
TROUBLESHOOTING
No image is displayed.
Problem Action
Is the product power cord connected? • Check if the power cord is correctly plugged into the power outlet.
Does the “Invalid Format” message
appear?
Does the “No Signal” message appear? • The signal cable between PC and product is not connected. Check the
The “Unknown Product” message appears when the product is connected.
• The signal from the PC (Graphics card) is out of the vertical or
horizontal frequency range of the product. Adjust the frequency range
by referring to the Specifications in this manual.
signal cable.
• Access the input menu to check the input signal.
25
Problem Action
Did you install the driver? • Check if the Plug and Play function is supported by referring to the
graphics card user manual.
The screen image looks abnormal.
Problem Action
Is the screen position wrong? • Check if the graphics card resolution and frequency are supported by
the product. If the frequency is out of range, set to the recommended
resolution in the (Control Panel → Display → Setting) menu. (The
settings may differ depending on your operating system.)
The screen is displayed abnormally. • The proper input signal is not connected to the signal port. Connect the
signal cable that matches with the source input signal.
Page 27

ENGLISH
26
The audio function does not work.
Problem Action
No sound? • See if the audio cable is connected properly.
• See if the sound is set properly.
Sound is too dull. • Select the appropriate equalizer sound.
Sound is too low. • Adjust the volume of the external device.
Screen color is abnormal.
Problem Action
Screen has poor color resolution
(16colors).
Screen color is unstable or mono-colored. • Check the connection status of the signal cable. Or, re-insert the PC
Do black spots appear on the screen? • Several pixels (red, green, blue, white, or black color) may appear on the
The operation does not work normally.
Problem Action
The power suddenly turned off. • Is the Timer set?
• Set the number of colors to more than 24 bits (true color). Select
(Control Panel → Display → Settings → Color Table) in Windows. (The
settings may differ depending on your operating system.)
graphics card.
screen, which can be attributable to the unique characteristics of the
LCD panel. This is not a malfunction of the LCD.
• Check the power control settings. Power interrupted.
Page 28

ENGLISH
CAUTION
• Image sticking does not occur when using constantly changing images but may occur when using a fixed image for an
extended period of time. Therefore, it is recommended that you use the instructions below to decrease the likelihood
of image sticking occurring when using a fixed image. It is recommended that you change the screen at least once
every 12 hours at the very minimum; if done more frequently, the prevention of image sticking is more effective.
Recommended operating conditions
1 Change the background and the character colors using the same time interval.
27
ID: UPM 123
PW: ****
ID: UPM 123
PW: ****
When changing colors, using complementary colors helps to prevent image sticking.
Glass
BM BM BM
CF
OC
PI
LC
PI
TFT Layers
Glass
CFCFCF
ITO or MoTi Pixel Layer
2 Change the image using the same time interval.
Make sure that the characters or images before changing the image remain in the same location after changing the
image.
What is image sticking?
When the LCD panel displays a static image for an extended period of time, it can cause a voltage difference between
the electrodes that operate the liquid crystals. When the voltage difference between the electrodes builds up over
time, liquid crystals have a tendency to remain aligned in one direction. During this process, a previously displayed image
remains visible. This phenomenon is referred to as image sticking.
Page 29

ENGLISH
28
PRODUCT SPECIFICATIONS
The product specifications below may be changed without prior notice due to upgrade of product functions.
“ ” refers to alternating current (AC), and “ ” refers to direct current (DC).
LCD screen Screen type Thin Film Transistor (TFT)
Liquid Crystal Display (LCD) Screen
Video signal Maximum resolution HDMI 1, 2/ DisplayPort: 3840 x 2160 @ 30 Hz
DVI-D/ OPS: 1920 x 1080 @ 60 Hz
- This may not be supported on some OS or graphics card
types.
Recommended
resolution
Horizontal frequency 30 kHz to 83 kHz
Vertical frequency DVI-D/ OPS: 56 Hz to 60 Hz
Synchronization Separate Sync/ Digital
Input/ Output ports HDMI IN 1/2, DVI-D IN, DP IN, DP OUT, USB 2.0 IN, AUDIO IN, AUDIO OUT, LAN IN, LAN
OUT, IR IN, RS-232C IN/OUT, OPS IN
Embedded battery Applied
Environmental Conditions Operating Temperature 0 °C to 40 °C
Operating Humidity 10 % to 80 %
Storage Temperature -20 °C to 60 °C
Storage Humidity 5 % to 85 %
HDMI 1, 2/ DisplayPort/ DVI-D/ OPS: 1920 x 1080 @ 60 Hz
- This may not be supported on some OS or graphics card
types.
HDMI 1, 2/ DisplayPort: 30 Hz, 56 Hz to 60 Hz
Page 30

ENGLISH
49VH7E
LCD Panel Pixel Pitch 0.55926 mm (H) X 0.55926 mm (V)
Power Rated Voltage AC 100-240 V ~ 50/60 Hz 2.1 A
Power Consumption On Mode: 150 W (Typ.)
Sleep Mode (HDMI 1, 2/ DisplayPort/ DVI-D): ≤ 0.5 W
Off Mode: ≤ 0.5 W
Dimensions (Width x
Height x Depth) / Weight
1075.6 mm x 605.8 mm x 86.2 mm / 17.5 kg
55VH7E
LCD Panel Pixel Pitch 0.630 mm (H) X 0.630 mm (V)
Power Rated Voltage AC 100-240 V ~ 50/60 Hz 2.7 A
Power Consumption On Mode: 220 W (Typ.)
Sleep Mode (HDMI 1, 2/ DisplayPort/ DVI-D): ≤ 0.5 W
Off Mode: ≤ 0.5 W
Dimensions (Width x
Height x Depth) / Weight
1211.4 mm x 682.2 mm x 86.5 mm / 18.6 kg
49VM5E
LCD Panel Pixel Pitch 0.55926 mm (H) X 0.55926 mm (V)
Power Rated Voltage AC 100-240 V ~ 50/60 Hz 1.5 A
Power Consumption On Mode: 120 W (Typ.)
Sleep Mode (HDMI 1, 2/ DisplayPort/ DVI-D): ≤ 0.5 W
Off Mode: ≤ 0.5 W
Dimensions (Width x
Height x Depth) / Weight
1075.6 mm x 605.8 mm x 86.2 mm / 17.5 kg
29
55VM5E
LCD Panel Pixel Pitch 0.630 mm (H) X 0.630 mm (V)
Power Rated Voltage AC 100-240 V ~ 50/60 Hz 2.7 A
Power Consumption On Mode: 160 W (Typ.)
Sleep Mode (HDMI 1, 2/ DisplayPort/ DVI-D): ≤ 0.5 W
Off Mode: ≤ 0.5 W
Dimensions (Width x
Height x Depth) / Weight
1211.4 mm x 682.2 mm x 86.5 mm / 18.6 kg
Page 31

ENGLISH
30
HDMI 1, 2/ DisplayPort/ DVI-D/ OPS (PC) Support mode
Resolution Horizontal frequency (kHz) Vertical frequency (Hz) Remark
800 x 600 37.879 60.317
1024 x 768 48.363 60.0
1280 x 720 44.772 59.855
1366 x 768 47.712 59.79
1280 x 1024 63.981 60.02
1680 x 1050 65.290 59.954
1920 x 1080 67.5 60
3840 x 2160 67.5 30 HDMI 1/ 2, DisplayPort
HDMI 1, 2/ DisplayPort/ OPS (DTV) Support Mode
Resolution Horizontal frequency (kHz) Vertical frequency (Hz) Remark
480/60p 31.469 59.94
576/50p 31.25 50
720/50p 37.5 50
720/60p 45 60
1080/50i 28.1 50
1080/60i 33.75 60
1080/50p 56.25 50
1080/60p 67.432 59.94
1080/60p 67.5 60
2160/24p 54 24
2160/25p 56.25 25
2160/30p 67.5 30
HDMI 1/ 2, DisplayPort
Page 32

ENGLISH
NOTE
• When the cable is connected to the DVI-D, HDMI or the Display Port, you can select the PC/DTV mode optionally. It
is recommended that you select PC mode when connecting to a PC and select DTV mode when connecting to other
devices. The DTV mode refers to all modes excluding the PC mode.
• Vertical frequency: The product display functions by the screen image changing dozens of times every second like a
fluorescent lamp. The vertical frequency or refresh rate is the number of image displays per second. The unit is Hz.
• Horizontal frequency: The horizontal interval is the time taken to display one horizontal line. When 1 is divided by
the horizontal interval, the number of horizontal lines displayed every second can be tabulated as the horizontal
frequency. The unit is kHz.
TO SEE THE WEB MANUALS (SOFTWARE USER
GUIDE / INSTALLATION MANUAL)
You can find more information about the LG Digital Signage (Monitor Signage) in the web manuals (Software User
Guide / Installation Manual).
For more information, visit the LG website at http://partner.lge.com.
31
Page 33

Make sure to read the Safety Precautions before using the
ENERGY STAR® is a set of power-saving
S. A.,
product.
The model and serial number of the product are located on
the back and on one side of the product.
Record them below in case you ever need service.
guidelines issued by the U.S.Environmental
Protection Agency (EPA).
As an ENERGY STAR® Partner LGE U.
Inc. has determined that this product
meets the ENERGY STAR® guidelines for
energy efficiency.
Refer to ENERGYSTAR.gov for more information on the
ENERGY STAR® program.
MODEL
SERIAL
Temporary noise is normal when powering ON or OFF this
device.
 Loading...