LG 42LD421, 32LD420 User guide


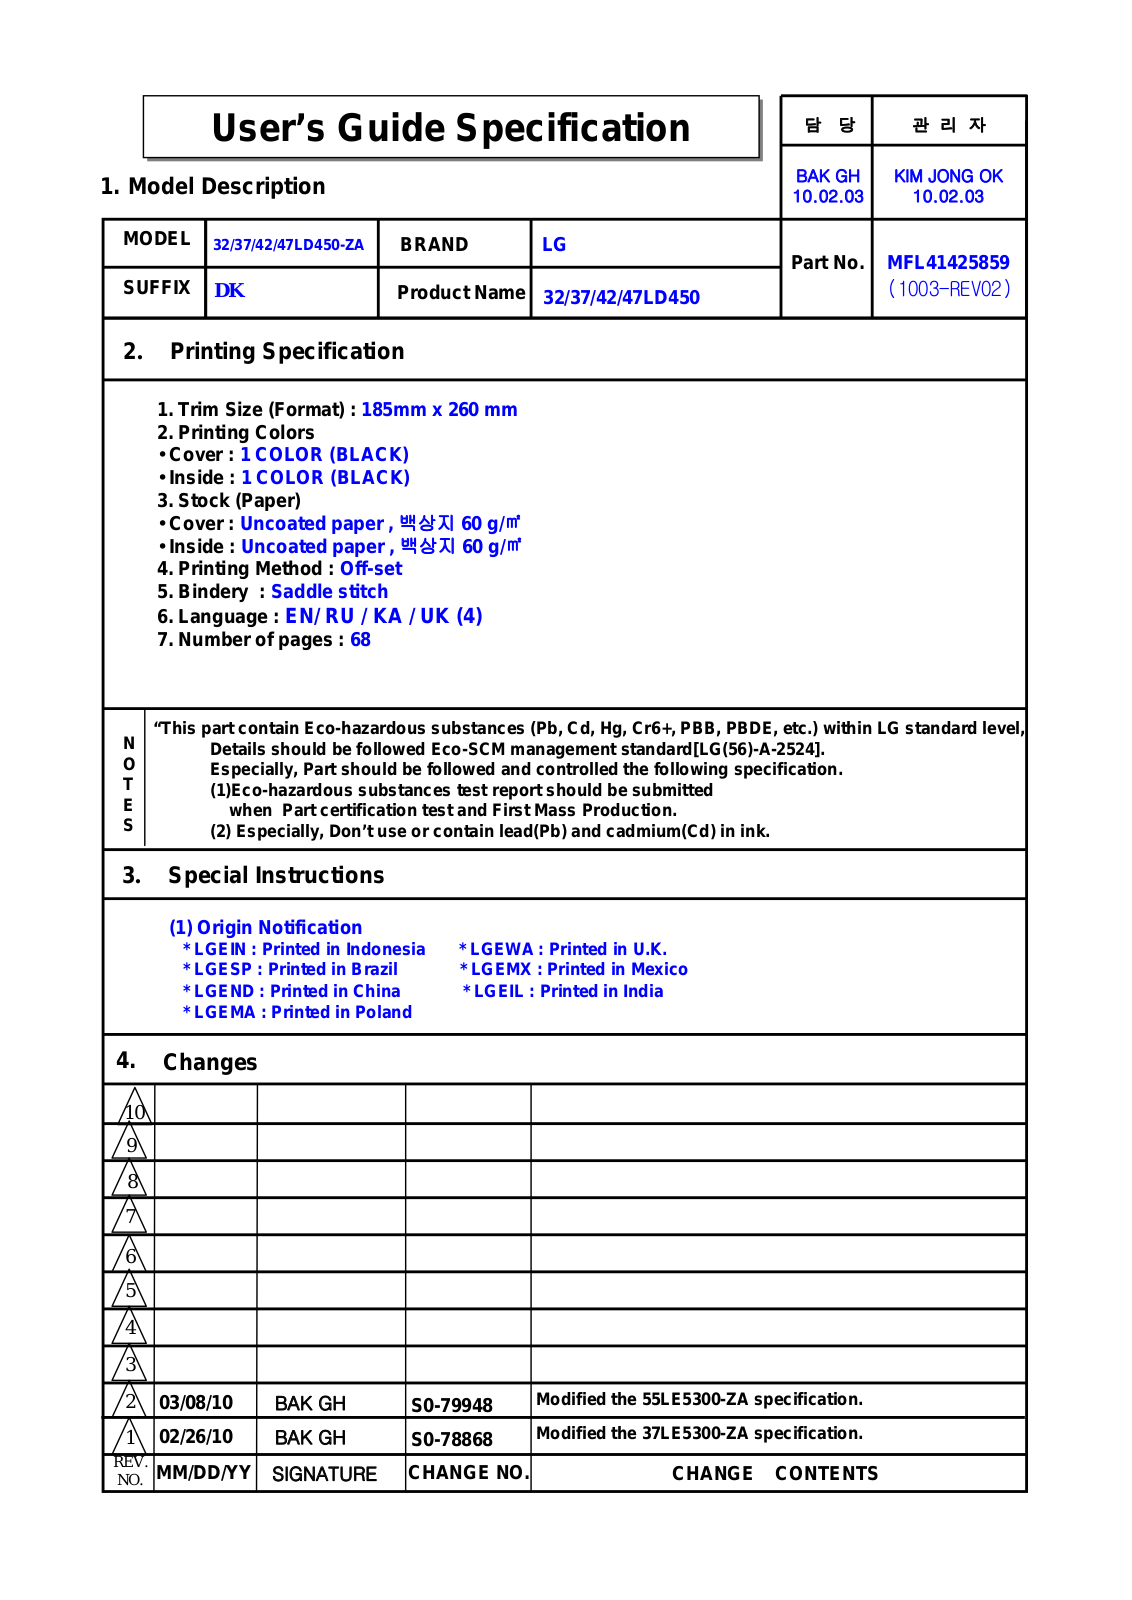
User’s’s Guidei Specificationifi ti


BAK GH

KIM JONG OK


1. Model Description


10.02.03

10.02.03


MODEL

32/37/42/47LD450-ZA

BRAND

LG

Part No.

MFL41425859


SUFFIX


DK

Product Name

32/37/42/47LD450


(1003-REV02)


2. Printing Specification

1.Trim Size (Format) : 185mm x 260 mm

2.Printing Colors

Cover : 1 COLOR (BLACK)

Inside : 1 COLOR (BLACK)

3.Stock (Paper)

Cover : Uncoated paper , 60 g/

Inside : Uncoated paper , 60 g/

4.Printing Method : Off-set

5.Bindery : Saddle stitch

6.Language : EN/ RU / KA / UK (4)

7.Number of pages : 68

“This part contain Eco-hazardous substances (Pb, Cd, Hg, Cr6+, PBB, PBDE, etc.) within LG standard level,

NDetails should be followed Eco-SCM management standard[LG(56)-A-2524].

OEspecially, Part should be followed and controlled the following specification.

T(1)Eco-hazardous substances test report should be submitted

Ewhen Part certification test and First Mass Production.

S(2) Especially, Don’t use or contain lead(Pb) and cadmium(Cd) in ink.

3.

Special Instructions


(1) Origin Notification


* LGEIN : Printed in Indonesia * LGEWA : Printed in U.K.


* LGESP : Printed in Brazil

* LGEMX : Printed in Mexico


* LGEND : Printed in China

* LGEIL : Printed in India


* LGEMA : Printed in Poland


4.

Changes


10


9


8


7


6


5


4


3


2

03/08/10

BAK GH

S0-79948

Modified the 55LE5300-ZA specification.


1

02/26/10

BAK GH

S0-78868

Modified the 37LE5300-ZA specification.

REVNO.

. MM/DD/YY

SIGNATURE

CHANGE NO.

CHANGE CONTENTS

Paginationi ti sheett

Front


Cover


(EN)


P/NO.


2

3


4


Front


Cover


(RU)


2

3


4


Front


Cover


(KA)


2

3


4


Front


Cover


(UK)


2

3


4


P/NO. MFL41425859

Total pages : 68 pages

16

16

16

Back cover

Blank Blank

OWNER’S MANUAL

LCD TV / LED LCD TV

Please read this manual carefully before operating your set and retain it for future reference.

P/NO: MFL41425859 (1003-REV02)

www.lge.com

Printed in Korea

<![if ! IE]>

<![endif]>ENGLISH

2

SafeTy inSTrUCTionS

• please read these safety precautions carefully before using the product.

In this manual, the illustration may be somewhat different from your product because it is just example to help the instruction.

WARNING

If you ignore the warning message, you may be seriously injured or there is a possibility of accident or death.

CAUTION

If you ignore the caution message, you may be slightly injured or the product may be damaged.

PreCaUTion in inSTalling THe ProdUCT

WARNING

Keep away from heat sources like electrical heaters.

- Electrical shock, fire, malfunction or deformation may occur.

Do not use the product in damp place such as

a bathroom or any place where it is likely to get

wet.

- This may cause a fire or could give an electric

shock.

If you can smell smoke or other odors or hear a strange sound unplug the power cord and contact the service center.

- If you continue to use without taking proper measures, electrical shock or fire can occur.

CAUTION

Install the product on a flat and stable place

that has no risk of dropping the product.

- If the product is dropped, you may be injured or the product may be broken.

Keep the product away from direct sunlight.

- The product can be damaged.

Do not place the product in a built-in installation such as bookcase or rack.

- Ventilation required.

eleCTriCal PoWer relaTed PreCaUTionS

WARNING

Make sure to connect the power cable to the

grounded current.

- You may be electrocuted or injured.

Do not touch the power plug with wet hands.

Additionally, it the cord pin is wet or covered

with dust, dry the power plug completely or

wipe dust off.

- You may be electrocuted due to excess moisture.

During a thunder or lightning storm, unplug the power cable or signal cable.

- You may be electrocuted or a fire can break out.

CAUTION

protect the power cord from physical or mechanical abuse, such as being twisted, kinked, pinched, closed in a door, or walked upon. pay particular attention to plugs, wall outlets, and the point where the cord exits the appliance.

As long as this unit is connected to the AC wall outlet, it is not disconnected from the AC power source even if you turn off this unit by SWITCH.

PreCaUTionS in Moving THe ProdUCT

WARNING

Make sure to turn off the product.

Make sure to remove all cables before mov- ing the product.

- You may be electrocuted or the product can be damaged.

CAUTION

Do not shock the product when moving it.

- You may be electrocuted or the product can be damaged.

Make the panel face forward and hold it with both hands to move.

- If you drop the product, the damaged product can cause electric shock or fire. Contact with the service center for repair.

PreCaUTionS in USing THe ProdUCT

WARNING

Do not disassemble, repair or modify the

product at your own discretion. - Fire or electric shock accident can occur.

- Contact the service center for check, calibration or repair.

To reduce the risk of fire or electric shock, do not expose this apparatus to rain or moisture.

Apparatus shall not be exposed to dripping or splashing and no objects filled with liquids, such as vases, shall be placed on the apparatus.

Refer all servicing to qualified service personnel. Servicing is required when the apparatus has been damaged in any way, such as power supply cord or plug is damaged, liquid has been spilled or objects have fallen into the apparatus, the apparatus has been exposed to rain or moisture, does not operate normally, or has been dropped.

iMPorTanT inforMaTion To PrevenT “iMage BUrn / BUrn-in” on yoUr TeleviSion SCreen

-When a fixed image (e.g. logos, screen menus, video game, computer display and teletext pages) is displayed on the television for an extended period it can become permanently imprinted on the screen.This phenomenon is known as “image burn” or

“burn-in”. Image burn is not covered under the manufacturer’s warranty.

-In order to prevent image burn, avoid displaying a fixed image on your television’s screen for a prolonged period (2 or more hours for LCD, 1 or more hours for plasma).

-Image burn can also occur on the letterboxed areas of your television if you use the 4:3 aspect ratio setting for an extended period.

PreParaTion

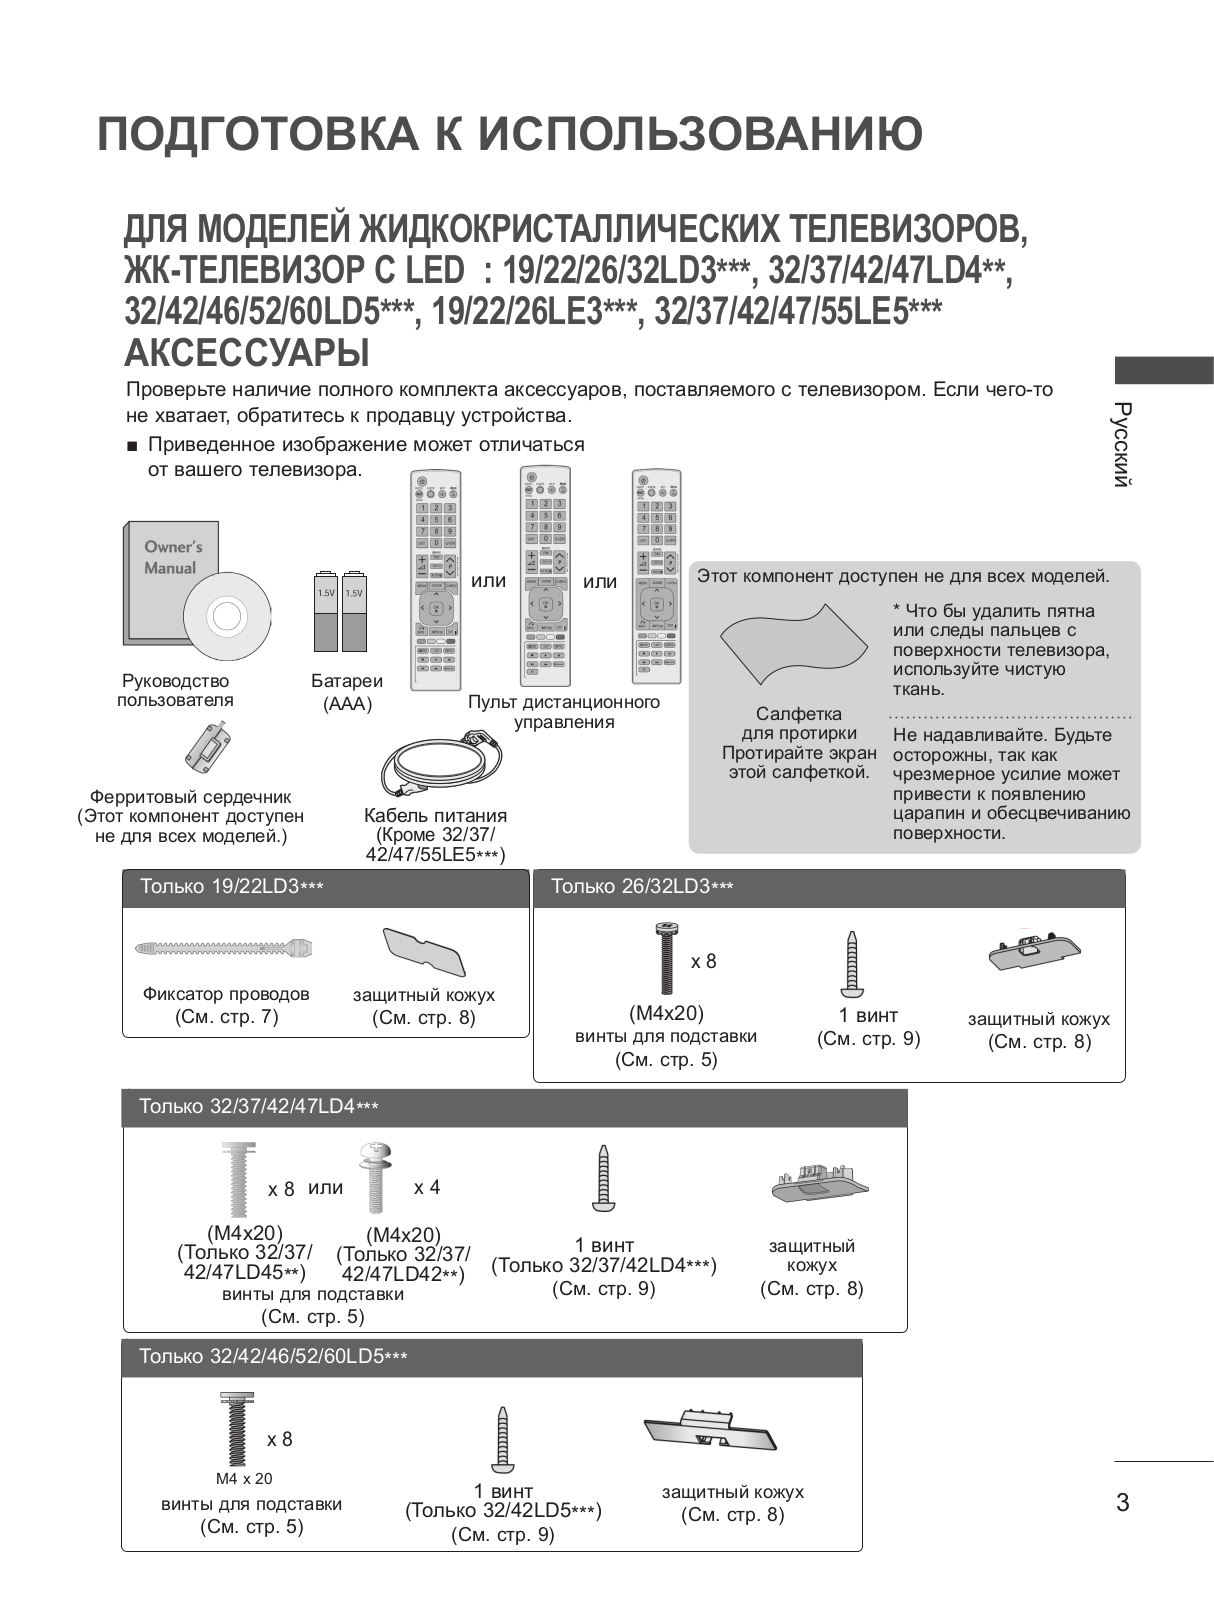
lCd Tv ModelS, led lCd Tv ModelS : 19/22/26/32ld3***, 32/37/42/47ld4**, 32/42/46/52/60ld5***, 19/22/26le3***, 32/37/42/47/55le5***

aCCeSSorieS

Ensure that the following accessories are included with your TV. If an accessory is missing, please contact the dealer where you purchased the TV.

■ Image shown may differ from your TV.

<![if ! IE]>

<![endif]>ENGLISH

or or


Owner’s Manual

Batteries

Remote Control


(AAA)

Ferrite Core

power Cord

(This item is not included for

(Except for 32/37/

all models.)

42/47/55LE5***)


This item is not included for all models.

polishing Cloth

polishing cloth for use on the screen.

* Lightly wipe any stains or fingerprints on the surface of the TV with the polishing cloth.

Do not use excessive force. This may cause scratching or discolouration.

Only 19/22LD3***


Only 26/32LD3***


x 8


Cable Holder

protection Cover


(M4x20)

1-screw


(Refer to p. 7)

(Refer to p. 8)


protection Cover


Bolts for stand assembly for stand fixing

(Refer to p. 8)


(Refer to p. 5)

(Refer to p. 9)


Only 32/37/42/47LD4***


x 8

or

x 4


(M4x20)

(M4x20)

1-screw for stand fixing

protection


(Only 32/37/

(Only 32/37/


(Only 32/37/42LD4***)

Cover


42/47LD45**)

42/47LD42**)


Bolts for stand assembly


(Refer to p. 9)

(Refer to p. 8)


(Refer to p. 5)


Only 32/42/46/52/60LD5***


x 8


M4 x 20


1-screw for stand fixing

protection Cover


3

Bolts for stand assembly

(Refer to p. 5)


(Only 32/42LD5***)

(Refer to p. 8)


(Refer to p. 9)


Preparation

<![if ! IE]>

<![endif]>ENGLISH

Only 19/22/26LE3***


x 4

x 4

Cable Holder


(M4x14)

(M4x20)

DC Adapter

4-Ring spacers

(Only 26LE3***)

(Refer to p. 7)

(Refer to p. 11)

(Only 26LE3***)

Bolts for stand assembly


(Refer to p. 13)


(Refer to p. 6)

Only 32/37/42/47/55LE5***

Cable Holder

x 4

x 4

x 4

x 4


(Refer to p. 7)


(M4x22)

(M4x24)

(M4x26)

(M4x16)

1-screw for stand

x 2

(Only

(Only

(Only

fixing


(Only 32LE5***)


32LE5***)

37/42LE5***)

47/55LE5***)


(Refer to p. 9)


Bolts for stand assembly


Component gender cable,

(Refer to p. 6)

AV gender cable


Separate purchase

Wall Mounting Bracket


Wireless Media Box

LSW100B or

LSW200B or

LSW400B or

LSW100BG

LSW200BG

LSW400BG


(32/42/46/52/60LD5***,

(19/22/26/32LD3***,

(37/42/47LD4***,

(52/60LD5***,

32/37/42/47/55LE5***)


32LD4***, 32LD5***,

42/46LD5***,

55LE5***)


19/22/26LE3***,

37/42/47LE5***)


32LE5***)


Use of ferrite core (This feature is not available for all models.)

Ferrite core can be used to reduce the electromagnetic wave when connecting the power cord.

The closer the location of the ferrite core to the power plug, the better it is.

Install the power plug closely.

4

Stand installation

■■Image shown may differ from your TV.

When assembling the desk type stand, check whether the bolt is fully tightened. (If not tightened fully, the product can tilt forward after the product installation.) If you tighten the bolt with excessive force, the bolt can deviate from abrasion of the tightening part of the bolt.

<![if ! IE]>

<![endif]>ENGLISH

Only 19/22Ld3***

1Carefully place the TV screen side down on a cushioned surface to protect the screen from damage.

Only 26/32Ld3***, 32/37/42/47LD45**,

32/42/46/52/60LD5***

1Carefully place the TV screen side down on a cushioned surface to protect the screen from damage.

2 Assemble the TV as shown.

Only 32/37/42/47LD42**

1Carefully place the TV screen side down on a cushioned surface to protect the screen from damage.

2

Assemble the parts of the Stand Body with

the Stand Base of the TV.

Stand Body

Stand Base

3Assemble the TV as shown.

2 Assemble the TV as shown.

4Fix the 4 bolts securely using the holes in the back of the TV.

3Fix the 4 bolts securely using the holes in the back of the TV.

5

LG 42LD421, 32LD420 User guide

Preparation

<![if ! IE]>

<![endif]>ENGLISH

Only 19/22Le3***

1Carefully place the TV screen side down on a cushioned surface to protect the screen from damage.

2

Assemble the parts of the Stand Body with

the Stand Base of the TV.

Stand Body

Stand Base

Only 26Le3***, 32/37/42/47/55Le5***

1Carefully place the TV screen side down on a cushioned surface to protect the screen from damage.

2

Assemble the parts of the Stand Body with

the Stand Base of the TV.

M4 X 22(Only 32Le5***)

M4 X 24(Only 37/42Le5***)

M4 X 26 (Only 47/55Le5***)

M4 X 20

(Only 26Le3***)

Stand Body

Stand Base

3

Assemble the TV as shown.

3 Assemble the TV as shown.


4Fix the 4 bolts securely using the holes in the back of the TV.

M4 X 14

4Assemble the parts of the Stand Rear Cover with the TV.

Stand Rear

Cover

5Fix the 4 bolts securely using the holes in the back of the TV.

M4 X 14

M4 X 16 (Only

(Only 26Le3***)

32/37/42/47/55Le5***)

6

Back Cover for Wire Arrangement

■■Image shown may differ from your TV.

Only 26/32Ld3***,

32/37/42/47Ld4***,

32/42/46/52/60Ld5***

1Connect the cables as necessary.

To connect additional equipment, see the

External equipment setup section.

Only 19/22Ld3***, 19/22/26Le3***

After connecting the cables as necessary, install Cable Holder as shown and bundle the cables.

2 Open the Cable Management Clip as

shown.

Cable Holder

Only 32/37/42/47/55Le5***

1Secure the power cord with the Cable Holder on the TV back cover.

It will help prevent the power cable from being removed by accident.

Cable management clip


Cable Holder

3 Fit the Cable Management Clip as shown.

2

After connecting the cables as necessary,


install Cable Holder as shown and bundle


the cables.

<![if ! IE]>

<![endif]>ENGLISH

NOTE

►Do not use the Cable Management Clip to lift the TV.

-If the TV is dropped, you may be injured or the TV may be damaged.

Cable Holder

7


Preparation


not using the


<![if ! IE]>

<![endif]>ENGLISH

When installing the wall-mounted unit,


desk-type stand


■■Image shown may differ from your TV.


use the protection cover.


Only 19/22Ld3***


1 Carefully place the TV screen side down


on a cushioned surface to protect the


screen from damage.

2 Loose the bolts from TV.

3Detach the stand from TV.

4Insert the Protection Cover into the TV. After removing the protection paper from the protection cover, adhere it to the TV as shown.

Protection Cover

Only 26/32Ld3***, 32/37/42/47Ld4***, 32/42/46/52/60Ld5***

Insert the

Protection cover

into the TV until clicking protection coveR sound.

SWIVEL STAND

(Except for 19/22Ld3***, 19/22Le3***)

■■Image shown may differ from your TV.

After installing the TV, you can adjust the TV set manually to the left or right direction by 20 degrees to suit your viewing position.

Positioning your display

(Only 19/22Ld3***)

■■Image shown may differ from your TV.

■■Adjust the position of the panel in various ways for maximum comfort.

• Tilt range

8

Attaching the TV to a

Careful installation

desk (Only 26/32LD3***, 32/37/42LD4**,

advice


32/42LD5***, 32LE5***)

■■You should purchase necessary components

■■Image shown may differ from your TV.

to fix the TV safety and secure to the wall on

the market.


The TV must be attached to desk so it cannot be

■■position the TV close to the wall to avoid the

pulled in a forward/backward direction, potentially

possibility of it falling when pushed.


causing injury or damaging the product. Use only

■■The instructions shown below are a safer way

an attached screw.

to set up the TV, by fixing it to the wall, avoid-


ing the possibility of it falling forwards if pulled.


This will prevent the TV from falling forward


and causing injury. This will also prevent the


TV from damage. Ensure that children do not


climb or hang from the TV.


1-Screw


1

1


2

(provided as parts of the product)


2


Stand


1

Use the eye-bolts or TV brackets/bolts to fix the


product to the wall as shown in the picture.


(If your TV has bolts in the eyebolts, loosen then


bolts.)


* Insert the eye-bolts or TV brackets/bolts and

Desk


tighten them securely in the upper holes.


WARNING

2

Secure the wall brackets with the bolts on the

►To prevent TV from falling over, the TV


wall. Match the height of the bracket that is


mounted on the wall.

should be securely attached to the floor/wall


per installation instructions. Tipping, shaking,


or rocking the machine may cause injury.


3


CAUTION

3


Use a sturdy rope to tie the product for align-


ment. It is safer to tie the rope so it becomes

horizontal between the wall and the product.

►►Use a product with the following thickness for optimal connection to HDMI cable (Only HDMI IN 4) / USB device.

*A10 mm

NOTE

►When moving the TV undo the cords first.

►Use a platform or cabinet strong and large enough to support the size and weight of the TV.

►To use the TV safely make sure that the height of the bracket on the wall and on the TV is the same.

<![if ! IE]>

<![endif]>ENGLISH

9

Preparation

<![if ! IE]>

<![endif]>ENGLISH

■■The TV can be installed in various ways such as on a wall, or on a desktop etc.

■■The TV is designed to be mounted horizontally.

EARTHING

Ensure that you connect the earth wire to prevent possible electric shock. If grounding methods are not possible, have a qualified electrician install a separate circuit breaker.

Do not try to earth the TV by connecting it to telephone wires, lightening rods or gas pipes.

PowerSupply

Circuitbreaker

Desktop Pedestal

InsTallation

■■Image shown may differ from your TV.

For adequate ventilation allow a clearance of 10 cm all around the TV.


10 cm


10 cm

10 cm

10 cm


NOTE

►Should Install wall mount on a solid wall perpendicular to the floor.

►Should use a special wall mount, if you want to install it to ceiling or slanted wall.

►The surface that wall mount is to be mounted on should be of sufficient strength to support the weight of TV set; e.g. concrete, natural rock, brick and hollow block.

►Installing screw type and length depends on the wall mount used. Further i nformation, refer to the instructions included with the mount.

►LG is not liable for any accidents or damage to property or TV due to incorrect installation:

-Where a non-compliant VESA wall mount is used.

-Incorrect fastening of screws to surface which may cause TV to fall and cause personal injury.

-Not following the recommended Installation method.

10 cm

10 cm

10 cm

10 cm

10 cm

Wall Mount: Horizontal installation

■■We recommend the use of a LG Brand wall mounting bracket when mounting the TV to a wall.

■■We recommend that you purchase a wall mounting bracket which supports VESA standard.

■■LG recommends that wall mounting be performed by a qualified professional installer.

Model

VESA Standard

Quantity


(A

*


B)

Screw


19/22LD3***

100


*

100

M4

4


26/32LD3***

200


*

100

M4

4


32LD4***

200


*

100

M4

4


37/42/47LD4***

200


*

200

M6

4


32LD5***

200


*

100

M4

4


42LD5***

200


*

200

M6

4


46LD5***

200


*

200

M6

4


52LD5***

400


*

400

M6

4


60LD5***

400


*

400

M6

4


19/22/26LE3***

100


*

100

M4

4


32LE5***

200


*

100

M4

4


37/42/47LE5***

200


*

200

M6

4


55LE5***

400


*

400

M6

4


10

WATCHING TV /PROGRAMME CONTROL

Connecting your Unit

■■ Image shown may differ from your TV

■■ To connect an additional equipment, see the External equipment Setup section in CD Manual.

2 DVD/STB

3 Power Cord

or


DVD/STB back


2 VCR Connection

1

Antenna


(RGB)

Connection

(RGB)

1

HDMI / DVI IN

connection of tv

(Only 19/22/26LE3***)

■■ Image shown may differ from your TV.

1

Connect the antenna cable to the antenna input


port on the TV.

2 Connect the DC adapter plug to the power input jack on the TV.

3 Connect the power cord to the DC adapter first, then plug the power cord into the wall power outlet.

DC Adapter

CAUTION

►►Please be sure to connect the TV to the DC power adapter before connecting the TV's power plug to a wall power outlet.

To view the simple manual

You can easily and effectively access the TV information by viewing the simple manual on the TV.

1

Press the GREEN button, you can check the Simple manual menu.

2

Press the EXIT button to return to normal TV viewing.

<![if ! IE]>

<![endif]>ENGLISH

11

<![if ! IE]>

<![endif]>ENGLISH

Watching TV / Programme control

Turning on the TV

When your TV is turned on, you will be able to use its features.

1Firstly, connect the power cord correctly.

At this stage, the TV switches to standby mode.

2 In standby mode to turn TV on, press the / I, INPUT or P (or P ▲▼) button on the TV or press the POWER, INPUT, P or NUMBER button on the remote control and the TV will switch on.

Initializing Setup

1If the OSD (On Screen Display) is displayed on the screen after turning on the TV, you can adjust the Language, Mode Setting, Power Indicator(When you select Home Use from

Mode Setting - Only LED LCD TV MODELS), Country or Set Password(When France is selected for Country), Auto Tuning.

Note:

a.If you close without completing the initial setting, the Initial Setting menu can be displayed again.

b.Press the BACK button to change the current OSD to the previous OSD.

c.For those countries without confirmed DTV broadcasting standards, some DTV features might not work, depending on the DTV broadcasting environment.

d."Home Use” mode is the optimal setting for home environments, and is the TV's default mode.

e."Store Demo" mode is the optimal setting for store environments. If a user modifies image quality data, “Store Demo” mode initializes the product to the image quality set by us after a certain period of time.

f.The mode (Home Use, Store Demo) can be changed by executing Mode Setting in the OPTION menu.

g.When France is selected for Country, password is not '0', '0', '0', '0' but ‘1’, ‘2’, ‘3’, ‘4’.

An extended Owner’s Manual that contains information on the advanced features of these LG TV sets is located on the CDROM provided in an electronic version.

To read these files, you will need to use a Personal Computer (PC) equipped with a CDROM drive.

To view the User's guide on the CD-ROM

To view the User's guide on the CD-ROM, Adobe Acrobat Reader must be installed on your PC. The "ACRORD" folder on the CD-ROM contains the installation program for Acrobat Reader.

If you want to installAcrobat Reader, Open "My Computer" Open the folder "LG" Open the folder "ACRORD" double-click your language.

To view the User's guide

The User's guide files are included in the supplied CD-ROM.

Load the supplied CD-ROM into the CD-ROM drive of your PC.

After a while, the web page of the CD-ROM will open automatically.(Windows users only) If the web page does not appear automatically, open the User's guide file directly.

Open "My computer" Open the folder "LG" Double click the "index.htm" file.

12

Maintenance

Early malfunctions can be prevented. Careful and regular cleaning can prolong the life of your new TV. Caution: Be sure to switch the power off and unplug the power cord before you begin any cleaning.

Cleaning the Screen

1A good way to keep the dust off your screen for a while is to wet a soft cloth in a mixture of lukewarm water and a little fabric softener or dish washing detergent. Wring the cloth until it is almost dry, and then use it to wipe the screen.

2 Ensure there is no excess water on the screen. Allow any water or dampness to evaporate before switching on.

Cleaning the Cabinet

■■To remove dirt or dust, wipe the cabinet with a soft, dry, lint-free cloth.

■■Do not to use a wet cloth.

Extended Absence

CAUTION

►If you expect to leave your TV dormant for prolonged periods (such as a holiday), unplug the power cord to protect against possible damage from lightning or power surges.

Installing Batteries

■■Open the battery compartment cover on the back and install the batteries matching correct polarity (+with +,-with -).

■■Install two 1.5 V AAA batteries. Do not mix old or used batteries with new ones.

■■Close cover.

■■To remove the batteries, perform the installation actions in reverse.

<Only 26LE3*** >

■■Image shown may differ from your TV.

4-Ring spacers

Place the ring spacers on the set before installing the wall mounting bracket so that the inclination of the backside of the set can be adjusted perpendicularly.

<![if ! IE]>

<![endif]>ENGLISH

13

AppeNDIX

<![if ! IE]>

<![endif]>ENGLISH

WEIGHT


MODELS

19Ld3***

22Ld3***

26Ld3***

32Ld3***


19Ld350-Za /

22Ld350-Za /

26Ld350-Za /

32Ld350-Za /


19Ld350N-Za

22Ld350N-Za

26Ld350N-Za

32Ld350N-Za


with stand


Weight

3.4 kg

4.3 kg

7.3 kg

9.2 kg

without stand

3.1 kg

4.0 kg

6.2 kg

8.2 kg


MODELS

32Ld4***

37Ld4***


32Ld420-Za /

32Ld450-Za /

37Ld420-Za /

37Ld450-Za /


32Ld420N-Za

32Ld450N-Za

37Ld420N-Za

37Ld450N-Za

Weight

with stand

12.1 kg

9.1 kg

14.9 kg

12.5 kg

without stand

11.0 kg

8.1 kg

13.1 kg

10.8 kg


MODELS

Weight

with stand

without stand


MODELS

Weight

with stand

without stand


MODELS

Weight

with stand

without stand


MODELS

Weight

with stand

without stand


MODELS

Weight

with stand

without stand


42Ld4***


47Ld4***

42Ld420-Za /


42Ld450-Za /


47Ld420-Za /


47Ld450-Za /

42Ld420N-Za


42Ld450N-Za


47Ld420N-Za


47Ld450N-Za

18.0 kg


15.1 kg


22.5 kg


19.5 kg


16.2 kg


13.5 kg


19.9 kg


17.5 kg


32Ld5***


42Ld5***

32Ld550-ZC /


32Ld551-Za /


42Ld550-ZC /


42Ld551-Za /

32Ld550N-ZC


32Ld551N-Za


42Ld550N-ZC


42Ld551N-Za

9.7 kg


9.7 kg


15.4 kg


15.4 kg


8.7 kg


8.7 kg


13.8 kg


13.8 kg


46Ld5***


52Ld5***

46Ld550-ZC /


46Ld551-Za /


52Ld550-ZC /


52Ld551-Za /

46Ld550N-ZC


46Ld551N-Za


52Ld550N-ZC


52Ld551N-Za

18.6 kg


18.6 kg


26.9 kg


26.9 kg


16.6 kg


16.6 kg


23.6 kg


23.6 kg


60Ld5***


32Le4***


42Le4***

60Ld550-ZC /


60Ld551-Za /


32Le4500-Za /


42Le4500-Za /

60Ld550N-ZC


60Ld551N-Za


32Le450N-Za


42Le450N-Za

40.0 kg


40.0 kg


14.0 kg


17.6 kg


35.7 kg


35.7 kg


11.2 kg


14.8 kg


47Le4***


55Le4***


19Le3***

47Le4500-Za /


55Le4500-Za /


19Le3300-Za /


19Le3310-ZB /

47Le4500N-Za


55Le450N-Za


19Le330N-Za


19Le331N-ZB

14.0 kg


17.6 kg


3.4 kg


3.4 kg


11.2 kg


14.8 kg


3.2 kg


3.2 kg


■■ The specifications shown above may be changed without prior notice for quality improvement.

14


MODELS

22LE3***

26LE3***


22LE3300-ZA /

22LE3310-ZB /

26LD350-ZA /

32LD350-ZA /


22LE330N-ZA

22LE331N-ZB

26LD350N-ZA

32LD350N-ZA


with stand


Weight

4.2 kg

4.2 kg

6.1 kg

6.1 kg

without stand

3.9 kg

3.9 kg

5.1 kg

5.1 kg


MODELS

32LE5***

37LE5***


32LE5300-ZA /

32LE5310-ZB /

37LE5300-ZA /

37LE5310-ZB /


32LE530N-ZA

32LE531N-ZB

37LE530N-ZA

37LE531N-ZB

Weight

with stand

12.65 kg

12.65 kg

15.3 kg

15.3 kg

without stand


10.5 kg

10.5 kg

12.8 kg

12.8 kg


MODELS

Weight

with stand

without stand


42LE5***


47LE5***

42LE5300-ZA /


42LE5310-ZB /


47LE5300-ZA /


47LE5310-ZB /

42LE530N-ZA


42LE531N-ZB


47LE530N-ZA


47LE531N-ZB

19.2 kg


19.2 kg


22.9 kg


22.9 kg


16.7 kg


16.7 kg


19.6 kg


19.6 kg


55LE5***


MODELS


55LE5300-ZA / 55LE530N-ZA


55LE5310-ZB / 55LE531N-ZB

Weight

with stand

34.05 kg


34.05 kg


without stand

29.35 kg


29.35 kg


■■ The specifications shown above may be changed without prior notice for quality improvement.

<![if ! IE]>

<![endif]>ENGLISH

15

<![if ! IE]>

<![endif]>ENGLISH

AppeNDIX

Troubleshooting

The TV does not operate properly.

The remote control does not work

Power is suddenly turned off

■■Check to see if there is any object between the TV and the remote control causing an obstruction. Ensure you are pointing the remote control directly at the TV.

■■Ensure that the batteries are installed with correct polarity (+ to +, - to -).

■■Ensure that the correct remote operating mode is set : TV, STB etc.

■■Install new batteries.

■■Is the sleep timer set?

■■Check the power control settings. Has the Power supply been interrupted.

■■If the TV is switched on and there is no input signal, it will switch off automatically after 15 minutes.

The video function does not work.

No picture & No sound

Picture appears slowly after switching on

No or poor colour or poor picture

Horizontal/vertical bars or picture shaking

Poor reception on some channels

Lines or streaks in pictures

No picture when connecting HDMI

■■Check whether the TV is switched on.

■■Try another channel. The problem may be with the broadcast.

■■Is the power cord inserted correctly into the mains?

■■Check your antenna direction and/or location.

■■Test the mains outlet by plugging another TV into the same outlet.

■■This is normal, the image is muted during the TV startup process. Please contact your service centre, if the picture has not appeared after five minutes.

■■Adjust Colour in menu option.

■■Allow a sufficient distance between the TV and the VCR.

■■Try another channel. The problem may be with the broadcast.

■■Are the video cables installed properly?

■■Activate any function to restore the brightness of the picture.

■■Check for local interference such as an electrical appliance or power tool.

■■Station or cable channel experiencing problems, tune to another station.

■■Station signal is weak, reposition the antenna to receive weaker stations.

■■Check for sources of possible interference.

■■Check antenna (Change the position of the antenna).

■■Check that your HDMI cable is version 1.3 or higher.

If the HDMI cables don’t support HDMI version 1.3, flickering or no screen display can result. Please use the latest cables that support at least HDMI version 1.3.

There is a problem with PICTURe settings.

When the user changes the picture settings, the TV automatically converts back to the initial settings after a certain

period of time.

■■It means that the TV is currently set to Store Demo mode. To switch to Home use mode you should do the followings:

From the TV Menu, choose OPTION -> Choose Mode Setting -> Choose Home use. Now, you have completed switching to the Home use mode.

16

РУКОВОДСТВО ПОЛЬЗОВАТЕЛЯ

Жидкокристаллическиетелевизоры/ ЖК-ТЕЛЕВИЗОРСLED

Перед использованием устройства, пожалуйста, внимательно прочитайте данное руководство.

Сохраните его для использования в будущем.

www.lge.com

<![if ! IE]>

<![endif]>Русский

2

ИНСТРУКЦИИ ПО ТЕХНИКЕ БЕЗОПАСНОСТИ

Прежде чем пользоваться устройством, внимательно прочитайте эти инструкции по технике безопасности.

Иллюстрации в этом руководстве могут немного отличаться от вашего устройства и приведены здесь только для примера.

ОПАСНО

Проигнорировав такое предупреждение, можно получить серьезную травму. Возможен несчастный

случай или смертельный исход.

ВНИМАНИЕ

Проигнорировав такое сообщение, можно получить легкую травму или повредить устройство.

МЕРЫПРЕДОСТОРОЖНОСТИПРИУСТАНОВКЕУСТРОЙСТВА

ОПАСНО

Держите устройство вдали от источников тепла, например электронагревателей.

- Несоблюдение этого правила может привести

к поражению электрическим током, пожару, неправильной работе или деформации устройства.

Не используйте устройство в местах повышенной влажности, например в ванной

комнате, или там, где оно может намокнуть.

- Иначе возможен пожар или поражение электрическим током.

При появлении запаха дыма, других запахов или необычных звуков выньте кабель питания

из розетки и обратитесь в сервисный центр.

- Использование неисправного устройства

может привести к поражению электрическим током или пожару.

ВНИМАНИЕ

Устройство должно стоять на плоской и устойчивой поверхности, откуда оно не может упасть.

- Если устройство упадет, оно может быть повреждено, а вы можете получить травму.

Защищайте устройство от прямого солнечного света.

- Иначе возможно повреждение устройства.

Не ставьте устройство в отсеки стенок и книжных шкафов.

-Вентиляция обязательна.

МЕРЫЗАЩИТЫОТПОРАЖЕНИЯЭЛЕКТРИЧЕСКИМТОКОМ

ОПАСНО

Убедитесь в том, что розетка, в которую

вставлен кабель питания, заземлена.

- Иначе возможно поражение электрическим током или травма.

Не прикасайтесь к вилке мокрыми руками.

Если контакты мокрые или пыльные, насухо

вытрите вилку или сотрите с нее пыль.

- Избыточная влага может привести к

поражению электрическим током.

Во время грозы отсоединяйте кабель питания и сигнальный кабель.

- Иначе возможно поражение электрическим током или пожар.

ВНИМАНИЕ

Защищайте кабель питания от физического или механического повреждения. Нельзя перекручивать, сгибать, пережимать кабель, наступать на него и зажимать дверью. Обращайте особое внимание на разъемы, стенные розетки и место, где кабель выходит из устройства.

Если устройство подключено к розетке переменного тока, оно не отключается от источника питания переменного тока даже при выключении с помощью переключателя питания.

МЕРЫБЕЗОПАСНОСТИПРИПЕРЕМЕЩЕНИИУСТРОЙСТВА

ОПАСНО

Убедитесьвтом,чтоустройствовыключено. Прежде чем перемещать устройство, отсоедините от него все кабели.

- Иначе возможно повреждение устройства или поражение электрическим током.

ВНИМАНИЕ

Во время перемещения не подвергайте устройство тряске и ударам.

- Иначе возможно повреждение монитора или поражение электрическим током.

При переноске держите устройство двумя руками экраном вперед.

- Если вы уроните устройство, то поврежденное устройство может стать причиной поражения электрическим током или пожара. Обратитесь в сервисный центр для ремонта.

МЕРЫБЕЗОПАСНОСТИПРИЭКСПЛУАТАЦИИУСТРОЙСТВА

ОПАСНО

Не следует самостоятельно разбирать, ремонтировать и модифицировать устройство.

- Возможно поражение электрическим током или пожар.

- Для проверки, калибровки или ремонта устройства обращайтесь в сервисный центр.

Чтобы уменьшить риск пожара или поражения электрическим током, защищайте устройство от дождя и влаги. На устройство не должны попадать капли жидкости или брызги. Нельзя также ставить на него предметы, наполненные жидкостью (например, вазы).

Устройства должно обслуживаться только специалистами. Обслуживание требуется, когда устройство было повреждено какимлибо образом (поврежден кабель питания или разъем, пролита жидкость, внутрь попал посторонний предмет, устройство пострадало от дождя или влаги, устройство не работает должным образом, или его уронили).

ВАЖНАЯ ИНФОРМАЦИЯ ПО ПРЕДОТВРАЩЕНИЮ «ВЫГОРАНИЯ» ЭKРАНА ТЕЛЕВИЗОРА В РЕЗУЛЬТАТЕ ОТОБРАЖЕНИЯ ИЗОБРАЖЕНИЙ

-Если в течение продолжительного периода времени на экране отображается статическое изображение (логотипы, экранные меню, видеоигры, экраны компьютера и страницы телетекста), на экране может остаться его «отпечаток». Это явление называется «выгоранием» экрана. Гарантия производителя не распространяется на экраны с признаками «выгорания».

-Чтобы предотвратить «выгорание» экрана, не допускайте длительного отображения статического изображения на экране телевизора (2 или более часов для ЖK-экранов, 1 или более часов для плазменных экранов).

-«Выгорание» экрана может также происходить в боковых областях экрана телевизора, если формат 4:3 используется в течение продолжительного периода времени.

ПОДГОТОВКА К ИСПОЛЬЗОВАНИЮ

ДЛЯМОДЕЛЕЙЖИДКОКРИСТАЛЛИЧЕСКИХТЕЛЕВИЗОРОВ,

ЖК-ТЕЛЕВИЗОРСLED :19/22/26/32LD3***,32/37/42/47LD4**, 32/42/46/52/60LD5***,19/22/26LE3***,32/37/42/47/55LE5***

АКСЕССУАРЫ

Проверьте наличие полного комплекта аксессуаров, поставляемого с телевизором. Если чего-то не хватает, обратитесь к продавцу устройства.

Приведенное изображение может отличаться от вашего телевизора.

<![if ! IE]>

<![endif]>Русский

или или

Руководство

Батареи

пользователя

(AAA)

Пульт дистанционного


управления

Ферритовый сердечник

Кабель питания

(Этот компонент доступен

не для всех моделей.)


(Кроме 32/37/


42/47/55LE5***)

Этот компонент доступен не для всех моделей.

Салфетка для протирки Протирайте экран этой салфеткой.

* Что бы удалить пятна или следы пальцев с поверхности телевизора, используйте чистую ткань.

Не надавливайте. Будьте осторожны, так как чрезмерное усилие может привести к появлению царапин и обесцвечиванию поверхности.

Только 19/22LD3***


Только 26/32LD3***


x 8


Фиксатор проводов

защитный кожух

(M4x20)

1 винт


(См. стр. 7)

(См. стр. 8)

защитный кожух


винты для подставки

(См. стр. 9)

(См. стр. 8)


(См. стр. 5)


Только 32/37/42/47LD4***

x 8 или

x 4

(M4x20)


(M4x20)

(Только 32/37/

(Только 32/37/

42/47LD45**)

42/47LD42**)

винты для подставки

(См. стр. 5)

Только 32/42/46/52/60LD5***

1 винт

защитный

(Только 32/37/42LD4***)

кожух

(См. стр. 9)

(См. стр. 8)

x 8

M4 x 20

1 винт

защитный кожух

3

винты для подставки

(Только 32/42LD5***)

(См. стр. 8)

(См. стр. 5)


(См. стр. 9)


Loading...
+ 49 hidden pages